
beef casserole in oven

title 1
beef casserole in oven
⏱️ cook time 2 hours 15 minutes
🍽️ servings 4
⚡ Difficulty medium

intro

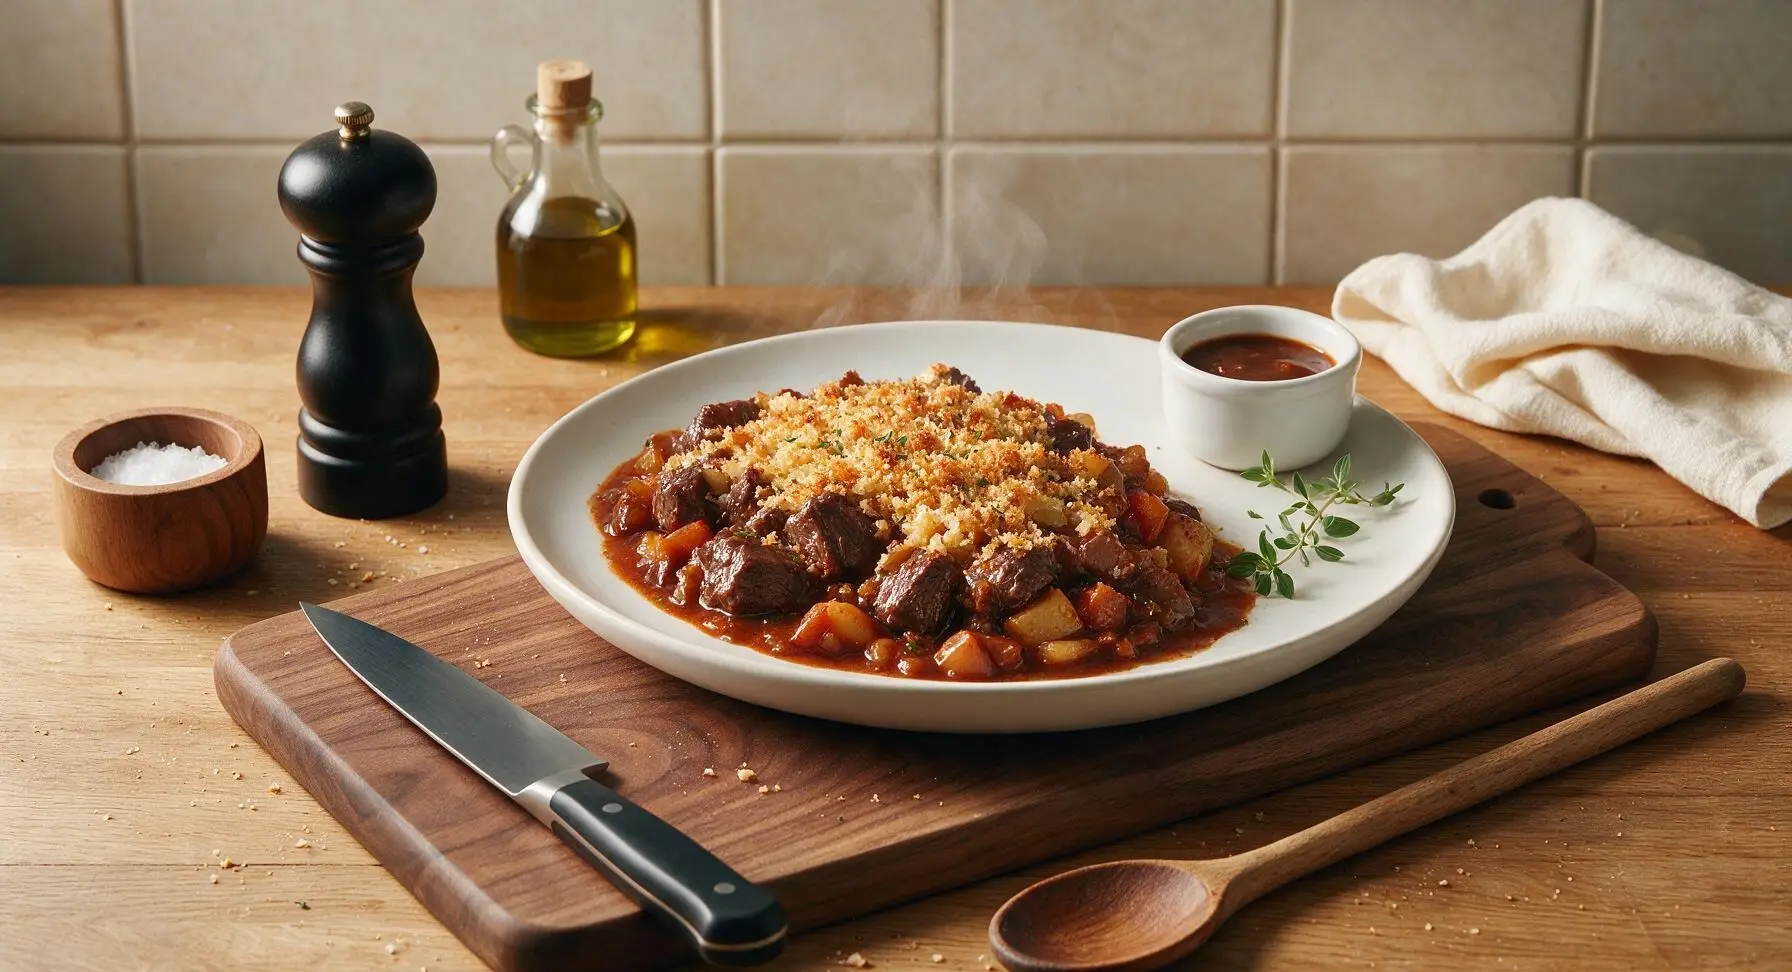
Tender slow-braised beef in rich red wine gravy with root vegetables, topped with crisp golden breadcrumbs—cozy, hearty comfort for cold winter family meals.

Ingredients
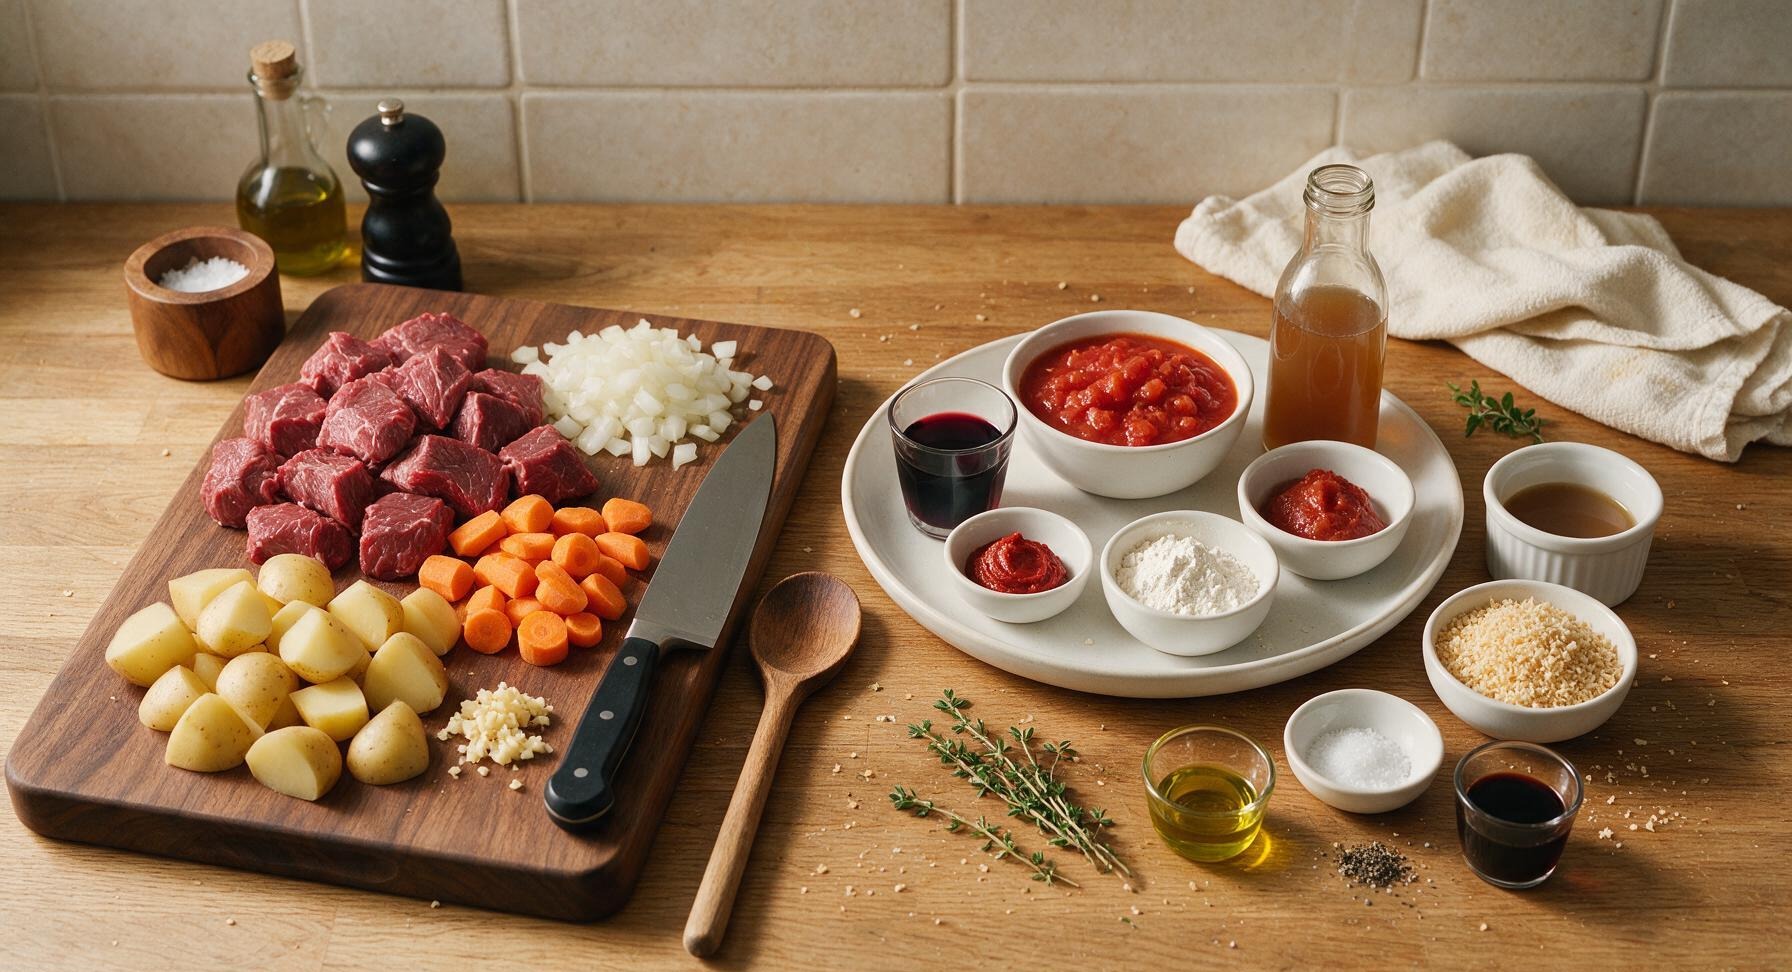
Beef chuck, cut into 4cm cubes 1kg (2.2 lbs)
Yellow onion, diced 1 large (200g)
Carrots, cut into 2cm chunks 2 medium (180g)
Yukon gold potatoes, cut into 3cm chunks 2 medium (300g)
Garlic, minced 3 cloves (10g)
Dry red wine (Cabernet Sauvignon or Merlot) 180ml (3/4 cup)
Canned crushed tomatoes, no added salt 400g (1 can)
Tomato paste 2 tbsp (30g)
All-purpose flour 2 tbsp (18g)
Low-sodium beef broth 250ml (1 cup)
Panko breadcrumbs 30g (1/4 cup)
Fresh thyme 4 sprigs
Extra-virgin olive oil 1 tbsp (15ml)
Kosher salt 1.5 tsp
Freshly ground black pepper 1 tsp
Worcestershire sauce 1 tbsp (15ml)

Steps

1

Preheat Oven, Prep Beef

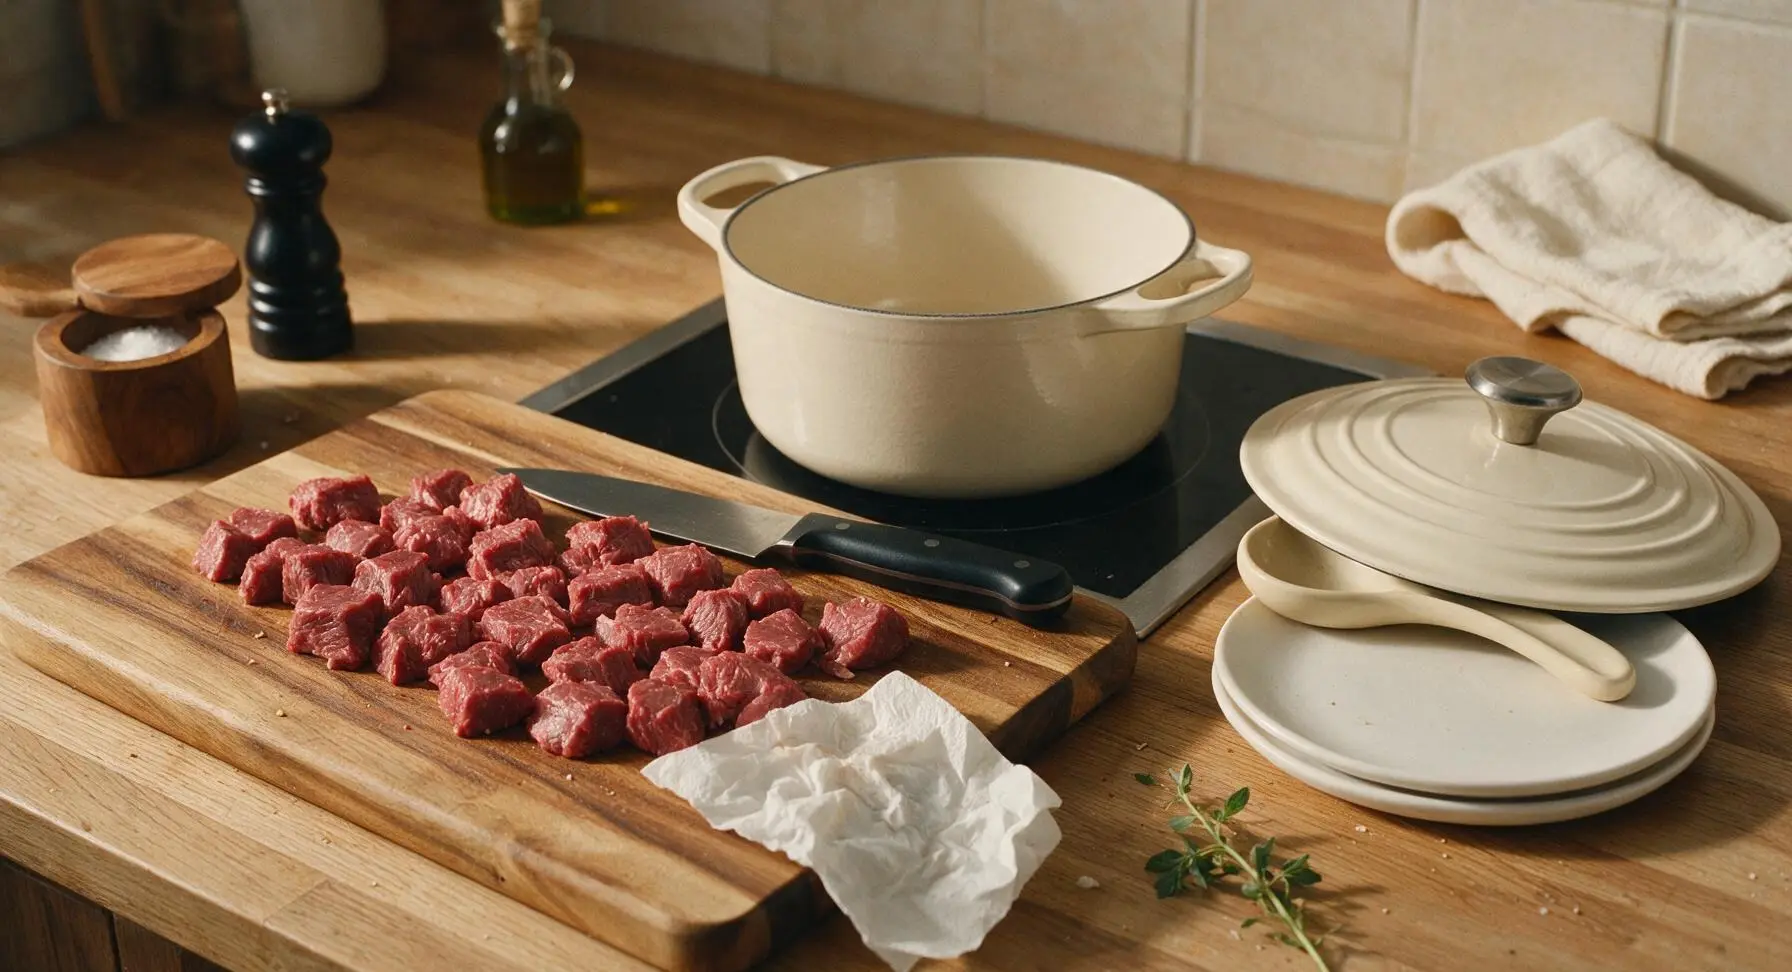
Adjust oven rack to the middle position, preheat oven to 160°C (325°F). Pat the 1kg cubed beef chuck completely dry with paper towels, then season all sides with 1 tsp kosher salt and ½ tsp freshly ground black pepper. The beef surface should be matte and dry, not damp, to ensure a deep, crisp sear during browning.
Step 1
step1:Preheat Oven, Prep Beef
2

Sear Beef Until Browned

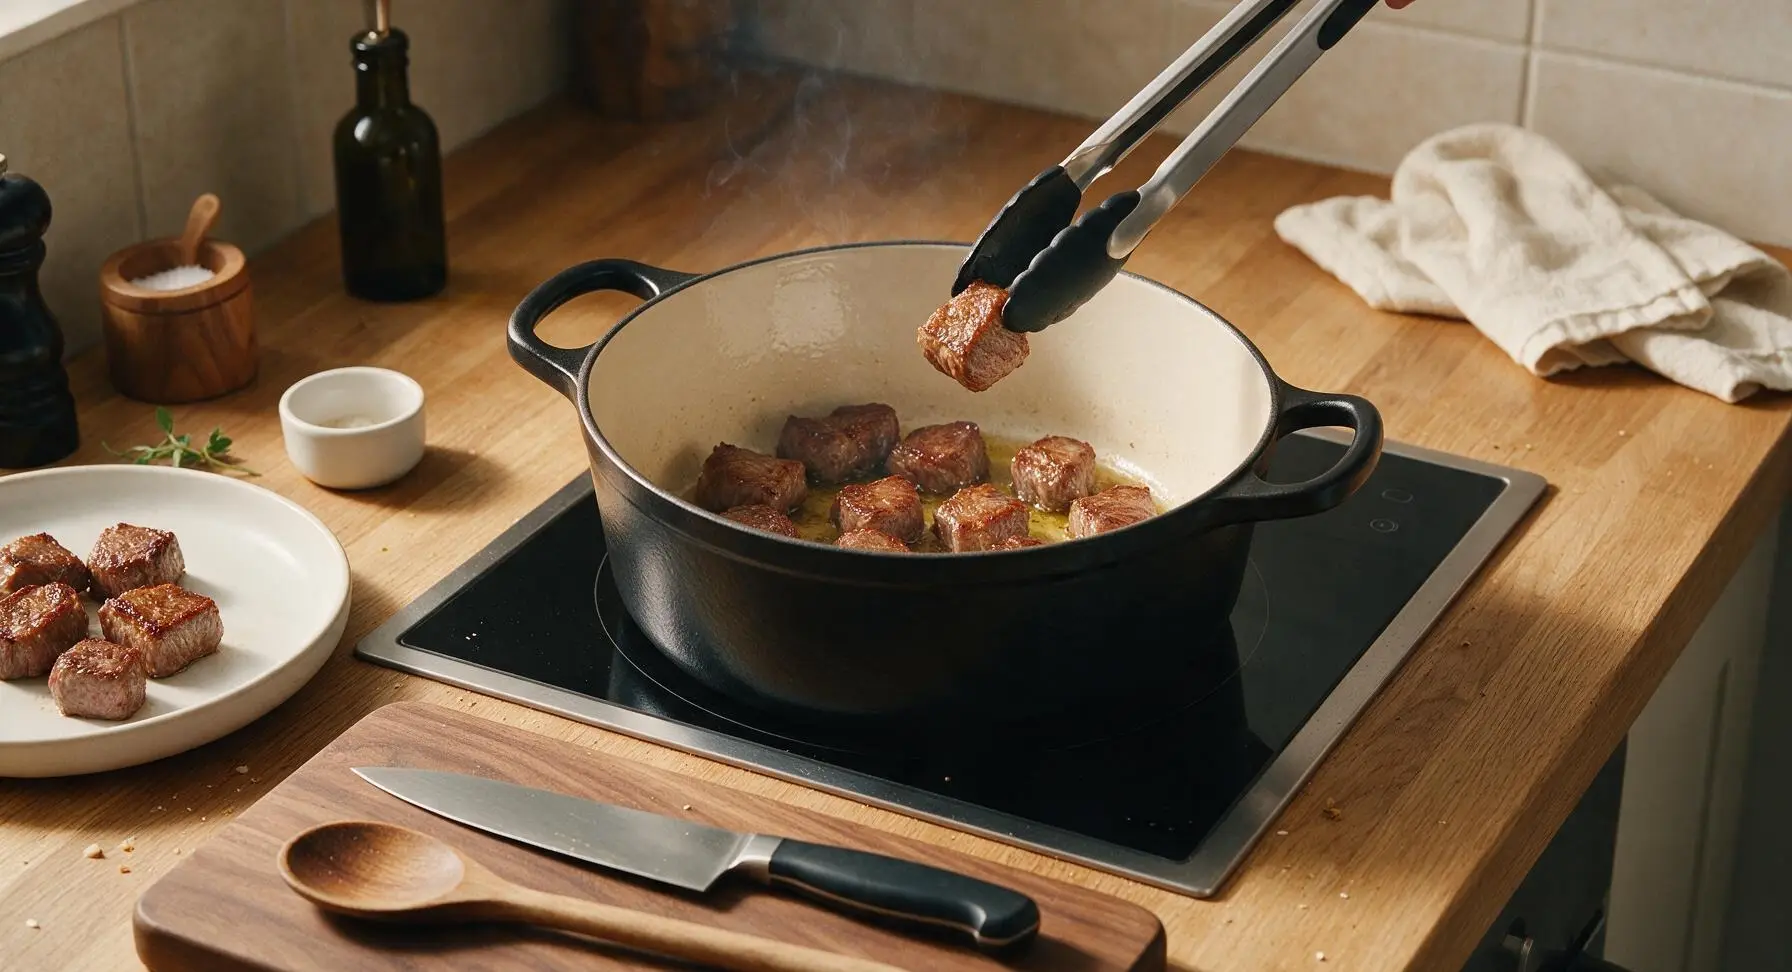
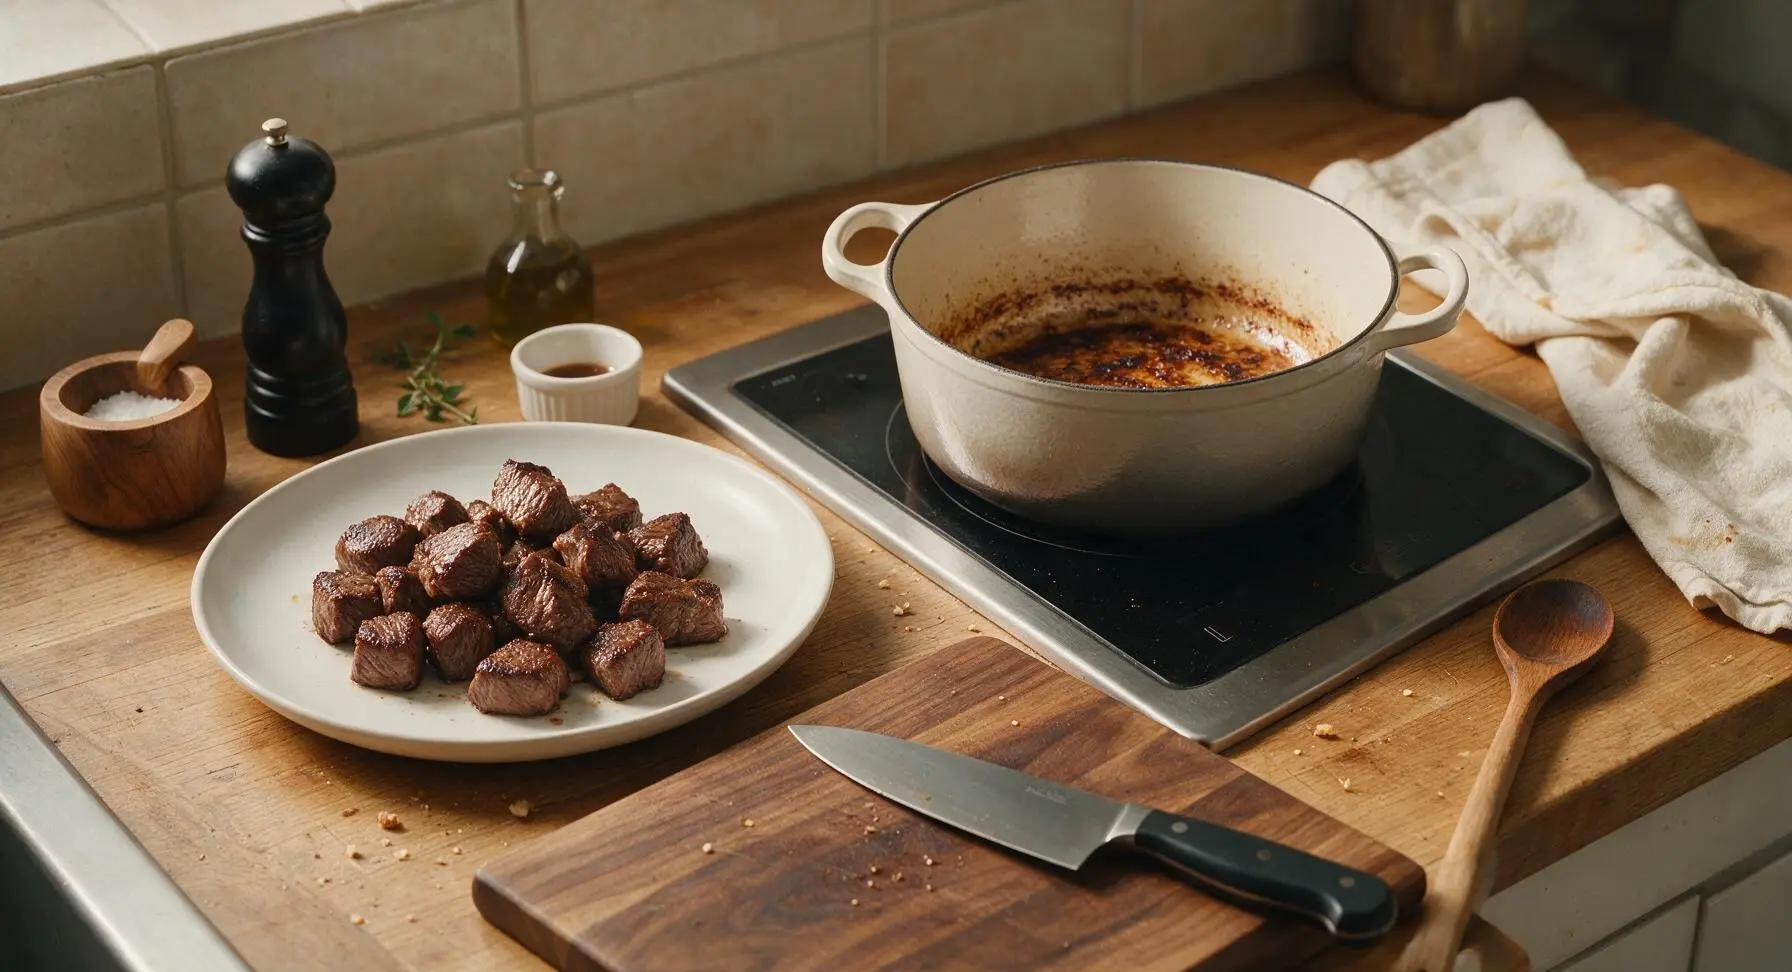
Heat 1 tbsp olive oil in the enameled cast iron Dutch oven over medium-high heat on the integrated induction burner. Working in 2 equal batches to avoid crowding the pan, sear the beef cubes for 3-4 minutes per side, until deep golden brown on all edges. Use the silicone-tipped tongs to turn the cubes; transfer seared beef to the white utility plate once browned. Dark brown fond (caramelized cooking bits) will form on the pan bottom, which builds the base of the gravy flavor.
Step 2
step2:Sear Beef Until Browned
Step 2
step2:Sear Beef Until Browned
3

Sauté Aromatic Vegetables

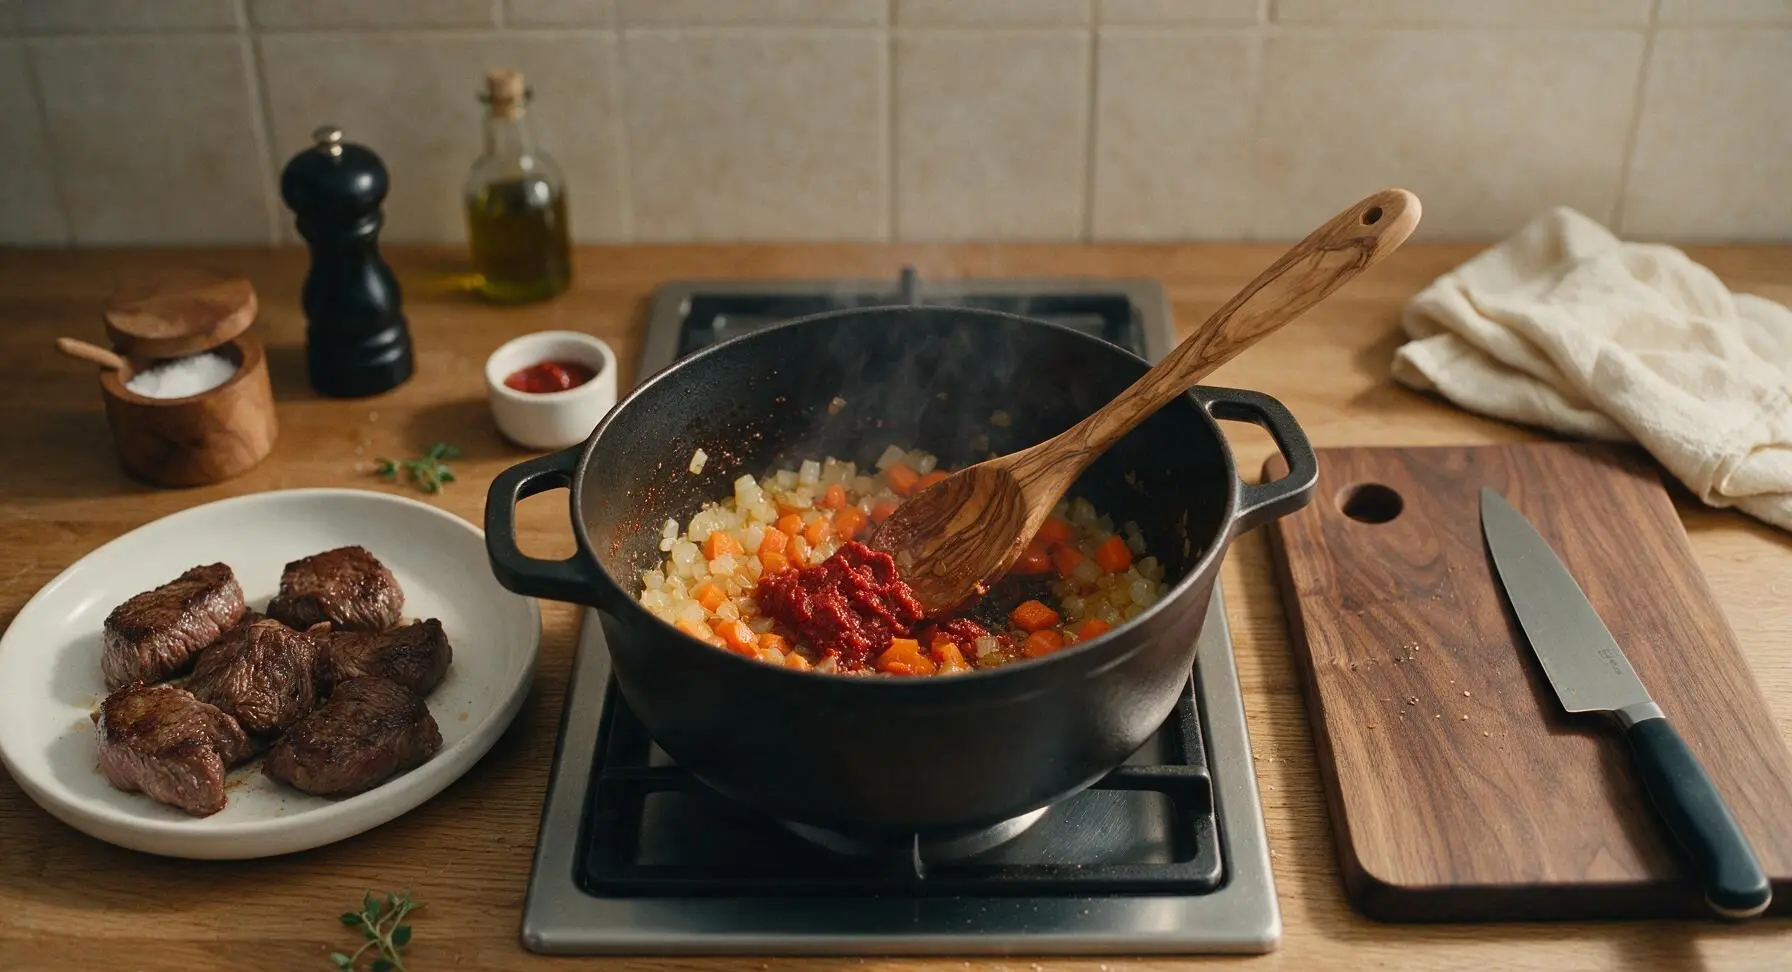
Reduce heat to medium, add the diced large yellow onion to the same Dutch oven, cooking for 3 minutes until soft and translucent. Add the 2 chunked carrots, 3 minced garlic cloves, and 2 tbsp tomato paste, stirring constantly with the olive wood spoon for 2 minutes, until the tomato paste darkens to a deep rust red and smells sweet and fragrant. Watch closely to ensure the garlic does not burn, which will make the gravy bitter.
Step 3
step3:Sauté Aromatic Vegetables
4

Deglaze and Build Gravy

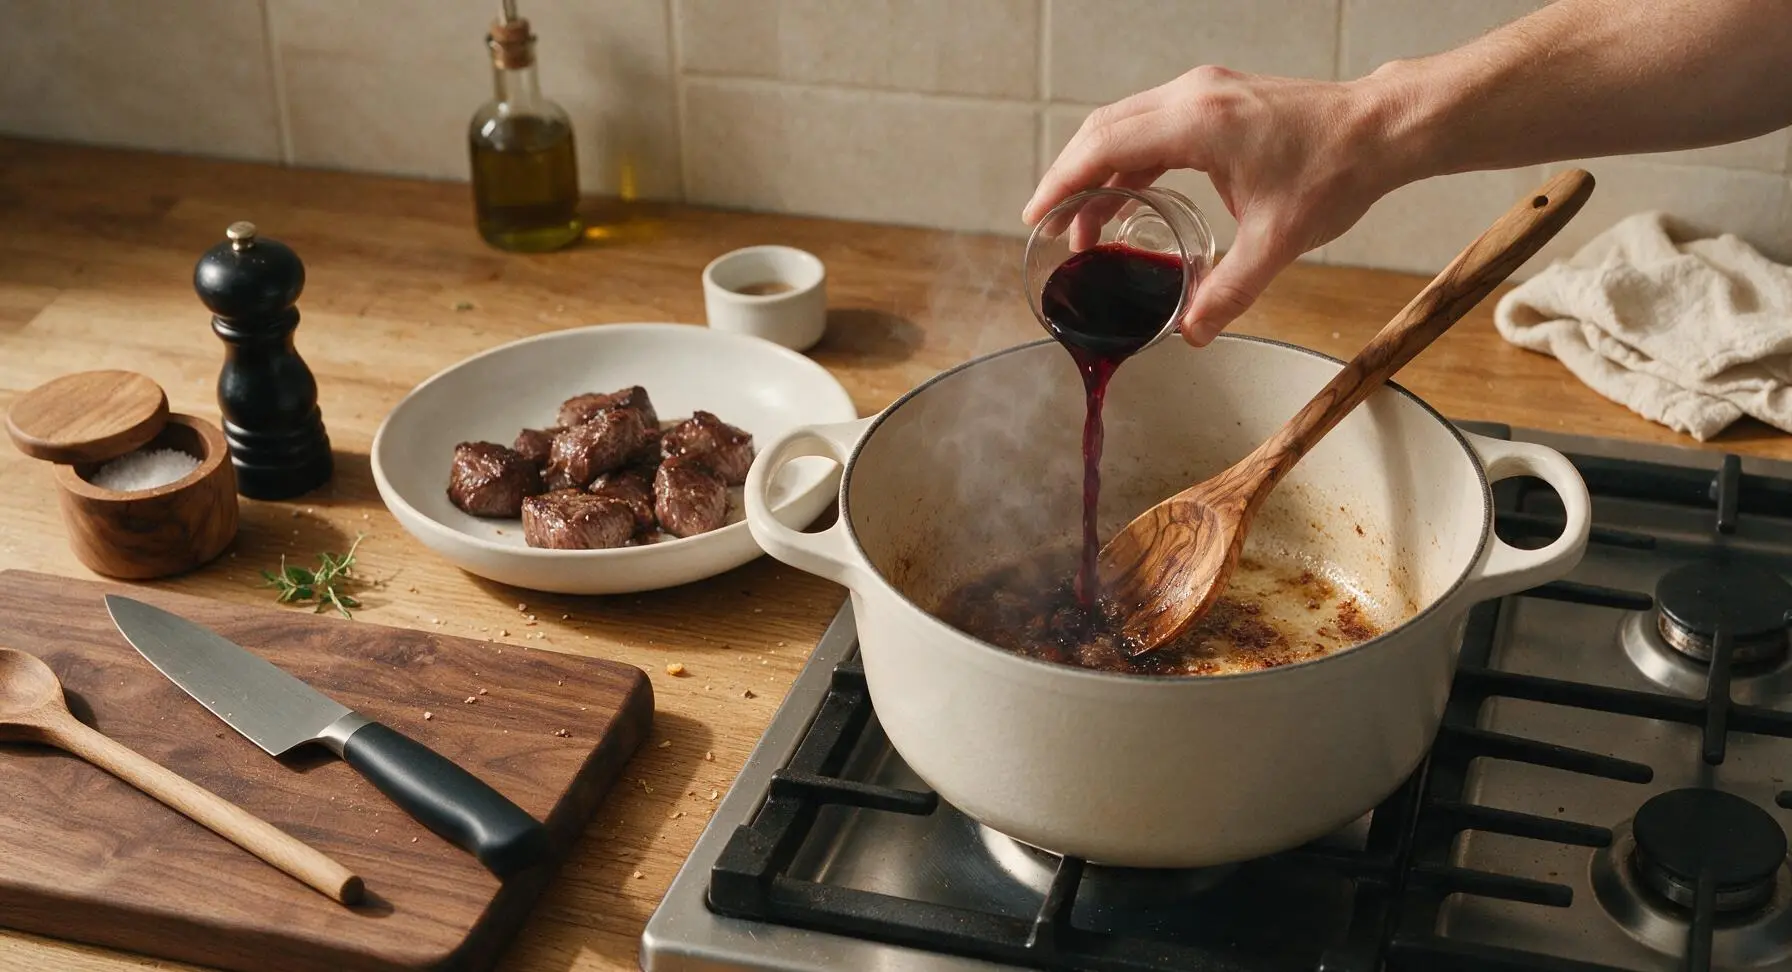
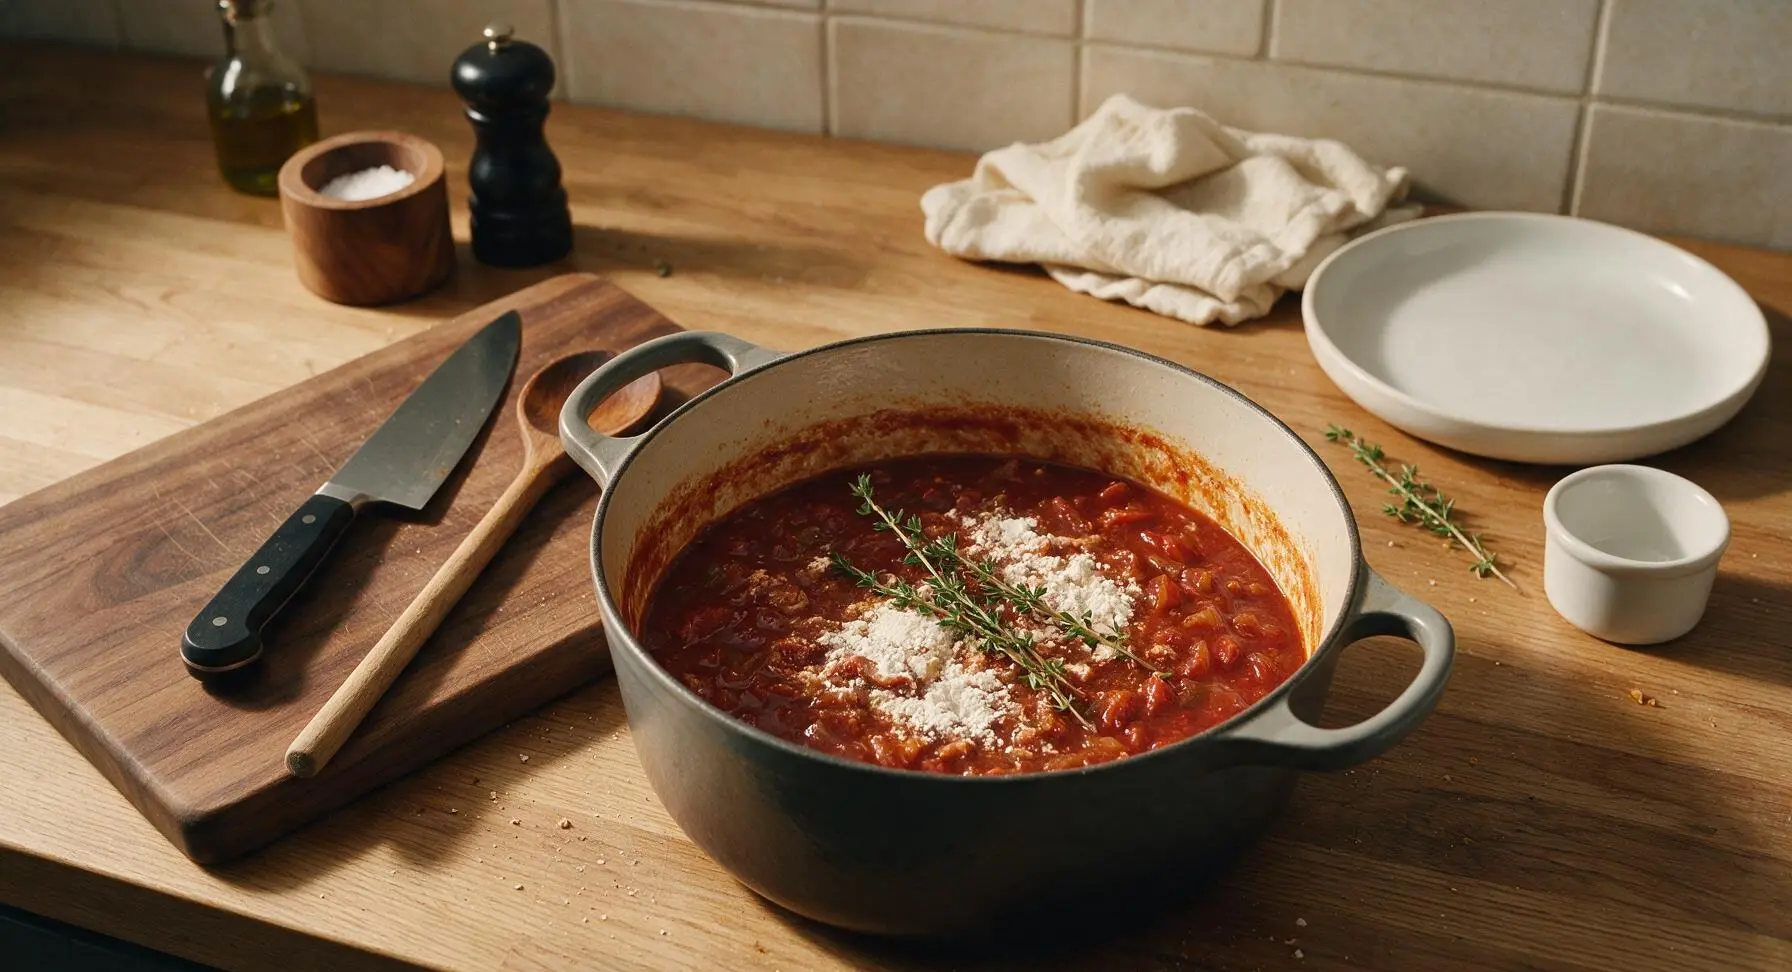
Pour 180ml dry red wine into the Dutch oven, scraping the bottom of the pan firmly with the olive wood spoon to lift all the browned fond bits. Simmer for 3 minutes until the wine is reduced by half, then stir in 2 tbsp all-purpose flour, cooking for 1 minute to remove raw flour taste. Add the 400g crushed tomatoes, 250ml low-sodium beef broth, 1 tbsp Worcestershire sauce, and 2 sprigs of fresh thyme, stirring to combine. Bring the mixture to a gentle, low simmer.
Step 4
step4:Deglaze and Build Gravy
Step 4
step4:Deglaze and Build Gravy
5

Add Beef and Slow Bake

Return all seared beef cubes and any accumulated juices from the utility plate to the Dutch oven, stirring to coat every piece of beef in the red gravy. Place the matching cream enamel lid tightly on the Dutch oven, then carefully transfer to the preheated 160°C (325°F) oven. Bake covered for 1 hour 30 minutes, until the beef is almost fork-tender when pierced.
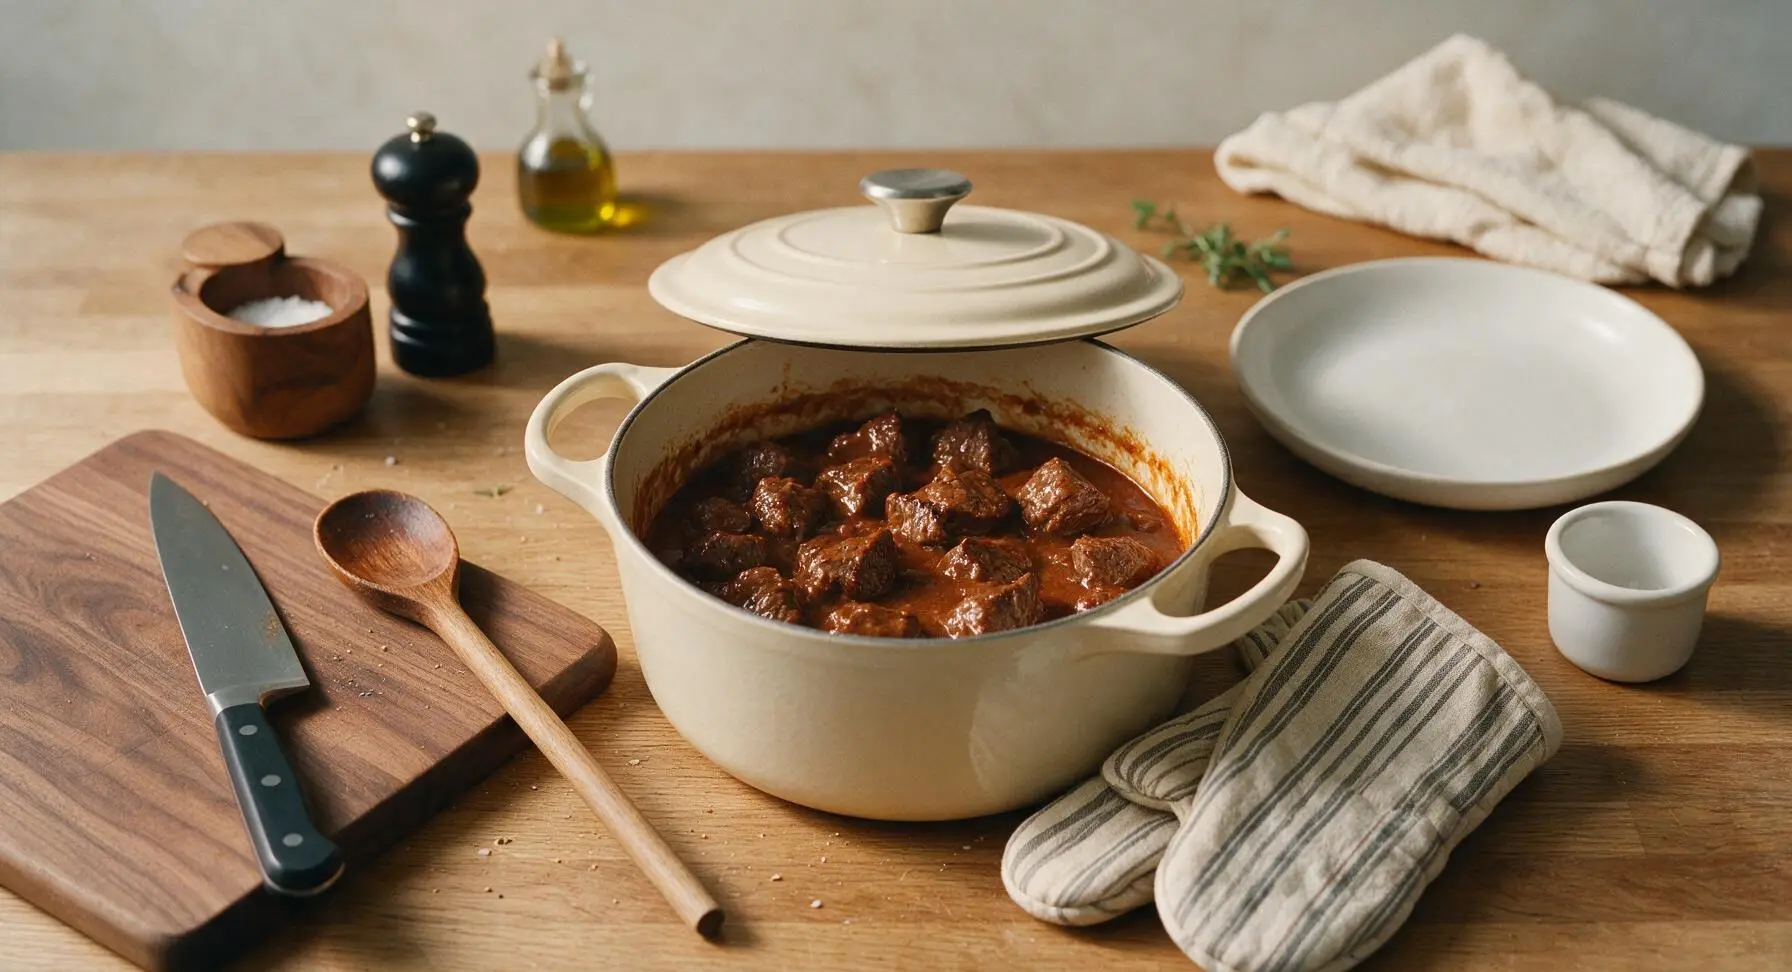
Step 5
step5:Add Beef and Slow Bake
6

Add Potatoes, Top Crumbs

Carefully remove the Dutch oven from the oven after 1 hour 30 minutes, set it on the counter, and remove the lid. Stir in the 2 cubed Yukon gold potatoes, tossing to coat fully in gravy. In the small brushed stainless steel mixing bowl, toss 30g panko breadcrumbs with ½ tsp kosher salt and ½ tsp freshly ground black pepper, then sprinkle the crumb mixture evenly over the entire top surface of the casserole. Return the uncovered Dutch oven to the oven to bake for the final 30 minutes.
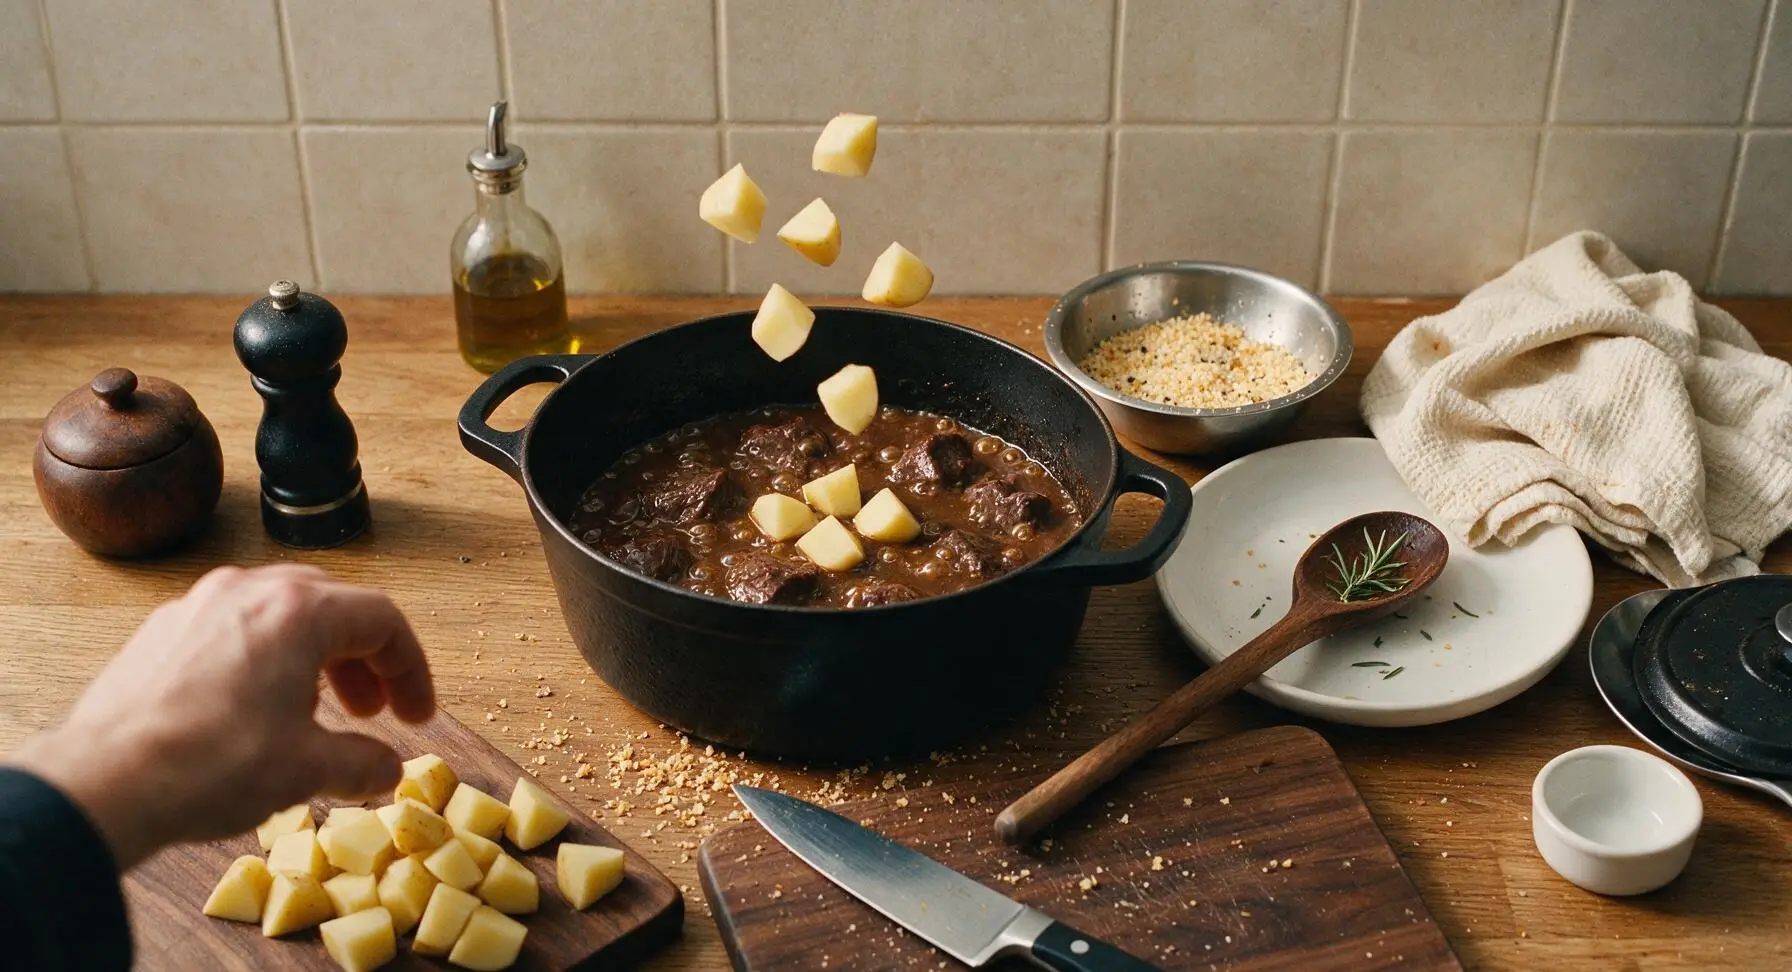
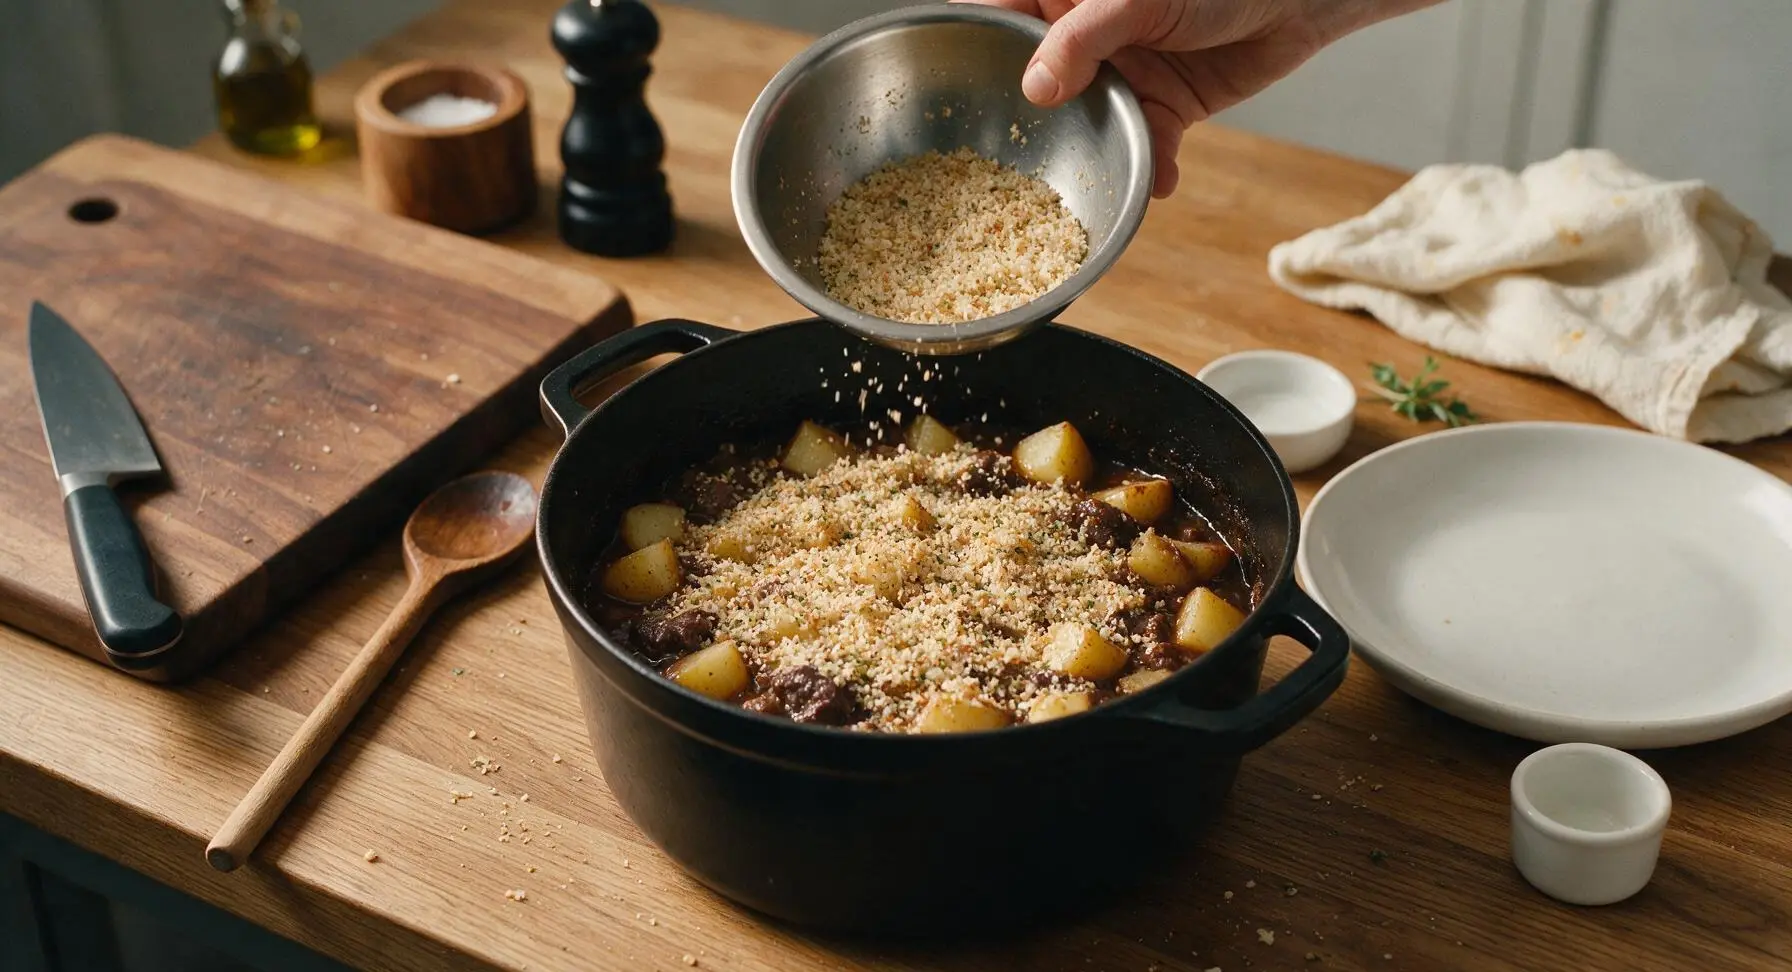
Step 6
step6:Add Potatoes, Top Crumbs
Step 6
step6:Add Potatoes, Top Crumbs
7

Rest and Finish Casserole

Once the final 30 minutes of baking is complete, remove the casserole from the oven: the beef should be pull-apart tender, the potatoes soft when pierced with a fork, and the panko topping deep golden and crisp. Let the casserole rest for 10 minutes at room temperature to allow the gravy to thicken, then fish out and discard the spent woody thyme sprigs. Garnish with fresh leaves picked from the remaining 2 thyme sprigs.
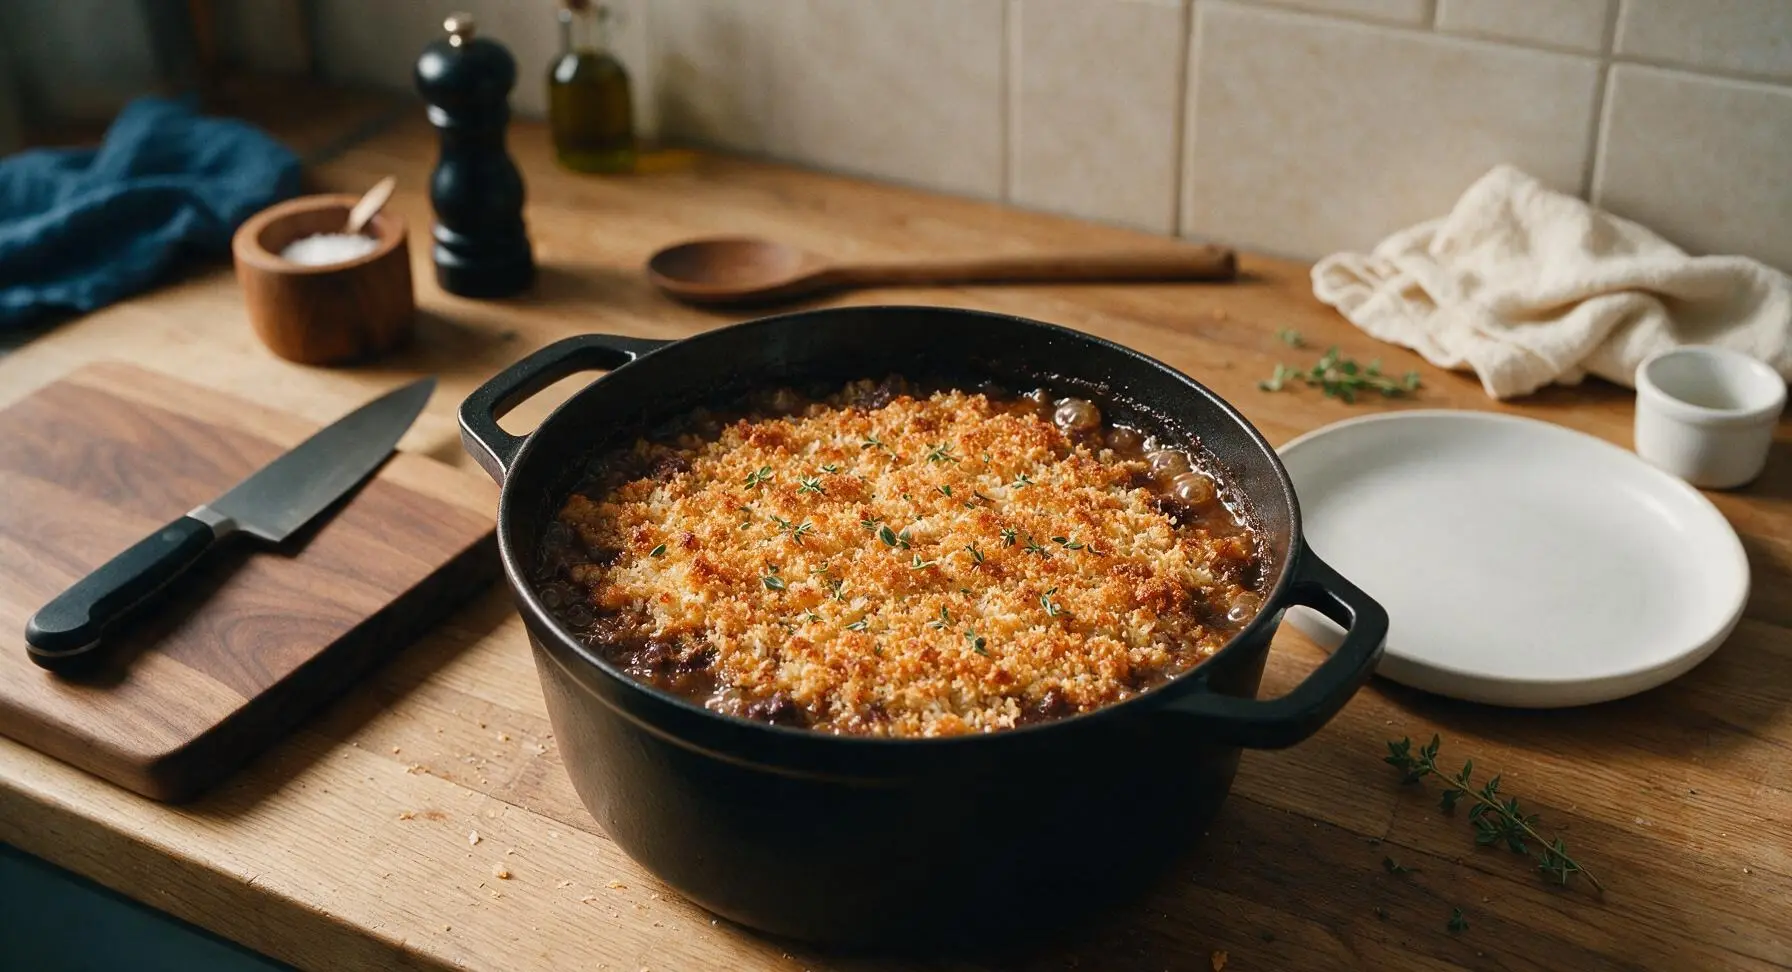
Step 7
step7:Rest and Finish Casserole

Tips

1.Never crowd the pan when searing beef: overcrowding traps moisture and causes meat to steam instead of forming a deep brown crust, which robs the gravy of its rich, savory depth. Work in two small batches if needed, even if it adds a few minutes of stovetop time.
2.Add potatoes halfway through the covered bake instead of at the start: long, slow cooking for 2 full hours will turn potatoes mushy and cause them to break down into the gravy, while adding them later keeps them tender but intact.
3.Let the casserole rest for the full 10 minutes after removing it from the oven: this pause allows the hot gravy to thicken and reabsorb into the beef and vegetables, so it does not run thin across the plate when served.


✨ You May Also Like

Main Course
🍜 United Kingdom

A showstopping classic of tender seared beef, savory mushroom duxelles, and crisp prosciutto wrapped in flaky golden puff pastry, baked to juicy perfection.

⏱️ 2 hours 1Main Course ★ 4.7
Main Course
🍜 India

Tender charred marinated chicken simmered in a rich, spiced creamy tomato sauce, this iconic Anglo-Indian curry pairs perfectly with basmati rice or warm naan.

⏱️ 50 minuteMain Course ★ 4.6
Main Course
🍜 Thailand

Classic tangy, sweet, and savory Thai stir-fried rice noodles with shrimp, tofu, and crunchy garnishes, balancing all five core Thai flavor profiles.

⏱️ 30 minuteMain Course ★ 4.5
Main Course
🍜 United Kingdom

Crispy golden beer-battered cod and fluffy double-fried chips, served with tangy tartar sauce and malt vinegar: the timeless, beloved British pub comfort classic.

⏱️ 45 minuteMain Course ★ 4.7
Main Course
🍜 Mexico

Smoky, chile-marinated pork tacos with caramelized pineapple, fresh cilantro, and lime: a beloved classic Mexican street food perfect for casual summer gatherings.

⏱️ 1 hour 45Main Course ★ 4.8
Main Course
🍜 United States

Crunchy Fritos corn chips layered with savory beef chili and melted cheddar, topped with cool, zesty fixings for a beloved, cozy Tex-Mex comfort food.

⏱️ 35 minuteMain Course ★ 4.8

beef casserole in oven:Frequently Asked Questions

1.What cut of beef works best if I don’t have beef chuck for this casserole? ▾
Beef chuck is ideal because its marbled fat and connective tissue break down during slow baking to create tender, rich meat, but boneless short ribs or brisket point cut make great substitutes. Skip very lean cuts like sirloin or eye of round—they will turn tough and dry even with long, slow cooking, no matter how much gravy you add.
2.Can I skip the red wine in the gravy, or replace it with something non-alcoholic? ▾
Absolutely! If you don’t want to use red wine, swap it for an equal amount of low-sodium beef broth mixed with 1 tablespoon of balsamic vinegar to mimic that deep, tangy depth red wine adds. You can also use 100% unsweetened cranberry juice mixed with a splash of apple cider vinegar for a similar bright, rich flavor profile.
3.Why do I need to sear the beef cubes before baking the casserole? ▾
Searing the beef over medium-high heat until deep golden on all sides builds deep, savory umami flavor through the Maillard reaction, which makes the gravy taste far richer than if you added raw beef straight to the dish. It also helps the beef hold its shape better during long baking, so you don’t end up with mushy, broken meat pieces.
4.How do I keep the breadcrumb topping from getting soggy instead of crisp? ▾
To avoid a soggy topping, don’t add the breadcrumbs until the last 20 to 25 minutes of baking. Toss the breadcrumbs with a little melted butter and a pinch of salt first, and spread them in an even, thin layer across the top. If your casserole is extra saucy, sprinkle a thin layer of grated parmesan under the crumbs to act as a moisture barrier.
5.Can I make this casserole gluten-free? ▾
Definitely! To make this fully gluten-free, use plain gluten-free panko or crushed gluten-free rice crackers for the crisp breadcrumb topping, and thicken your gravy with cornstarch instead of wheat-based all-purpose flour if needed. Double check that your beef broth is labeled gluten-free too, to avoid hidden cross-contamination.
6.What oven temperature should I use, and do I need to cover the casserole while it bakes? ▾
Bake the casserole at 325°F, covered tightly with aluminum foil, for the first 1 hour and 45 minutes to let the beef and vegetables braise gently in the gravy without drying out. Remove the foil, add the breadcrumb topping, and bake uncovered for the final 25 minutes to let the topping crisp up and the gravy thicken slightly.
7.My beef always turns tough in casseroles—what am I doing wrong? ▾
Tough beef usually comes from two common mistakes: cooking at too high a temperature, or not cooking it long enough. Bake low and slow at 325°F, and give it at least 2 full hours of total cook time for the connective tissue in chuck to break down into silky, tender meat. Don’t cut your beef cubes smaller than 4cm, or they will dry out faster.
8.Can I add extra vegetables to this casserole? ▾
Absolutely! This recipe is super flexible for add-ins. Try tossing in 2cm chunks of parsnip, turnip, or celery root along with the carrots and potatoes, or add a handful of frozen peas during the last 15 minutes of covered baking. Just avoid very watery veggies like zucchini, which will make the gravy thin and dilute the rich flavor.
9.Can I prep this casserole ahead of time to bake later? ▾
Yes, this is a perfect make-ahead meal! Assemble the beef and vegetable gravy base up to 2 days in advance, store it tightly covered in the fridge, and wait to make the breadcrumb topping until you’re ready to bake. Let the cold casserole sit on the counter for 20 minutes before baking, and add 10 to 15 minutes to the covered cook time.
10.Can I freeze this casserole for later meals? ▾
You sure can! Freeze the fully cooled, baked casserole (without the breadcrumb topping, for best texture) in an airtight, freezer-safe container for up to 3 months. Thaw it in the fridge overnight, top with fresh buttered breadcrumbs, and bake at 325°F until heated through, about 35 to 40 minutes, before serving.
11.Why are my potato and carrot chunks still hard after baking? ▾
Hard root veggies usually mean you cut them too large, or your oven temperature was running too low. Stick to 3cm chunks for potatoes and 2cm chunks for carrots so they cook at the same rate as the beef. It’s also a good idea to check your oven calibration with an oven thermometer to make sure it’s actually reaching 325°F.
12.Can I make this recipe in a slow cooker instead of the oven? ▾
Absolutely! Sear the beef and sauté the veggies as directed, then transfer everything to your slow cooker. Cook on LOW for 6 to 7 hours, until the beef is fork-tender, then transfer the mixture to a baking dish, top with buttered breadcrumbs, and broil for 2 to 3 minutes to get that crisp golden topping before serving.
13.What kind of breadcrumbs work best for the crisp topping? ▾
Panko breadcrumbs make the absolute crunchiest, lightest topping because of their coarser, airier texture, but regular dried fine breadcrumbs work too if that’s what you have. For extra flavor, toss the crumbs with a little melted butter, grated parmesan, dried thyme, and a pinch of black pepper before sprinkling them on top.
14.How long will leftover casserole keep in the refrigerator? ▾
Properly stored in a sealed, airtight container, leftover casserole will stay fresh in the fridge for 3 to 4 days. Reheat individual portions in the microwave, or reheat a full batch in the oven at 325°F, covered, for 20 to 25 minutes until heated through. Sprinkle a few extra fresh breadcrumbs on top if the old topping has gone soft.
15.My gravy is too thin—how can I thicken it up before adding the topping? ▾
If your gravy is still thin after the covered baking time, mix 1 tablespoon of cornstarch with 2 tablespoons of cold water to make a slurry, then stir it into the hot casserole. Let it bake uncovered for 5 minutes before adding the breadcrumbs, and the gravy will thicken to a perfect rich, coating consistency without getting lumpy.
16.Can I use pre-cut stew beef from the grocery store instead of cutting my own chuck? ▾
You can, but be aware that pre-cut stew beef is often a mix of random lean and tough cuts, rather than uniform chuck. If you use it, pick out any very lean, pale pieces that look like they’ll stay tough, and make sure all the cubes are roughly 4cm so they cook evenly, trimming extra large pieces down to size as needed.
17.Do I need to peel the Yukon Gold potatoes for this casserole? ▾
You don’t have to! Yukon Gold potatoes have thin, tender skin that gets soft and pleasant during baking, so leaving the skins on adds extra texture, fiber, and a subtle earthy flavor. Just give them a good scrub under cold running water to remove any dirt before cutting them into 3cm chunks, no peeling required.
18.How can I make this casserole feed a larger crowd for a family gathering? ▾
This recipe scales really easily! Simply double all the ingredients, use a larger 9x13 inch baking dish instead of a standard 2-quart casserole dish, and add 20 to 30 minutes to the initial covered baking time to make sure the beef and veggies cook all the way through. Make an extra half batch of breadcrumb topping for full, crisp coverage.
19.Should I use salted or unsalted butter for the breadcrumb topping? ▾
Either works, but unsalted butter gives you more control over the final salt level of the topping, especially if you’re using salted broth or adding parmesan to the crumbs. If you only have salted butter, skip adding extra salt to the breadcrumb mix, and give the crumbs a quick taste before sprinkling to make sure they’re not overly salty.
20.Can I add cheese to the breadcrumb topping for extra flavor? ▾
Absolutely! A quarter cup of finely grated parmesan or sharp white cheddar tossed into the buttered breadcrumbs adds a delicious salty, savory depth and helps the topping clump into extra crispy bits. Just avoid adding too much cheese, or it will make the topping greasy instead of light and crisp as it bakes.

Comments (14)

2 days ago

OMG this casserole was an absolute game changer for our Sunday family dinner! I was worried the 2+ hour cook time would be too much, but the house smelled incredible the whole time it baked. The crisp breadcrumb topping adds the perfect crunch against the tender beef and veggies — my picky 7 year old asked for seconds before I even sat down! Already added this to our weekly rotation.

yesterday

Wait did you use panko for the breadcrumbs or regular? I’m making this for a potluck this weekend and want that extra crunch!

yesterday

Great question! Panko gives the lightest, crispiest topping, but regular seasoned breadcrumbs work great too if that’s what you have on hand. Just toss them with a little melted butter before sprinkling on top for best results!

3 days ago

Really solid recipe! Cook time was spot on, though I swapped the regular ground beef for ground turkey to lighten it up a bit and it still turned out delicious. Only note is I wish the breadcrumb topping stayed crisp longer — by the time we had leftovers the next day it was a little soggy, but that’s probably to be expected. Will definitely make again, probably for my next meal prep batch!

1 week ago

Y’all, I brought this to our neighborhood block party potluck last weekend and people were hounding me for the recipe before we even finished serving. The breadcrumb topping is chef’s kiss, I added a little extra parmesan to mine and wow. 10/10, no notes.

5 days ago

Love the parmesan add-in! That salty, nutty kick pairs so well with the savory beef base — we might have to test that variation for our next update!

2 weeks ago

SO good. I’ve made so many boring beef casseroles in my life that turn into mushy messes, but this one? The layers are perfect, the beef is seasoned so well, and that crunchy topping? My kids all fought over the last corner piece. Worth every minute of cook time, even on a busy weeknight (I prepped all the veggies the night before to cut down on work!)

1 week ago

Prepping veggies the night before is such a smart hack! Did you assemble the whole casserole ahead too, or just chop the veggies? I want to make this for a friend who just had a baby and drop it off ready to bake.

1 week ago

I just chopped the veggies ahead! If I were dropping it off for a friend I’d assemble the whole thing (minus the breadcrumb topping, add that right before baking) and it would hold perfectly in the fridge for 2 days!

5 minutes ago

Tasted great, but as someone who’s still pretty new to cooking I thought the medium difficulty rating was no joke! I messed up the roux for the sauce the first time and had to restart that step, which added like 20 minutes to the total time. End result was worth it but definitely don’t try to rush this one if you’re a beginner like me.

yesterday

Made this last night for dinner and my husband said it’s the best thing I’ve cooked all month! I added a can of drained corn to the veggie mix because we had some leftover in the fridge, and it was the perfect little sweet pop against the savory beef. The breadcrumb topping was so crunchy — I could eat that stuff by the spoonful tbh.

2 hours ago

The corn addition sounds delicious! Adding extra veggies you have on hand is such a great way to customize this casserole to your family’s tastes, so glad you two loved it.

3 days ago

Solid meal prep option! Portioned this out into 6 containers for my work lunches this week, and it reheats way better than I expected. Only knock is I wish there was a little more sauce — my portions were a tiny bit dry by Wednesday, so next time I’ll make a double batch of the gravy base. Overall really tasty, way better than the sad takeout I usually get for lunch.

2 days ago

How do you reheat it? I’ve had bad luck with breadcrumb toppings getting mushy in the microwave!

2 days ago

Great tip about the extra sauce! If you’re prepping for the week, store the breadcrumb topping separate and add a quick sprinkle on top after reheating if you want to keep that crisp texture. Microwaving works, but a quick 10 minute reheat in the oven at 350F will get the topping crispy again too!

1 week ago

Hearty, filling, tastes like the casseroles my mom used to make back in the 70s, but the breadcrumb topping is a nice step up from the fried onions she always put on top. I used a mix of ground chuck and ground sausage for the meat layer and it added such great depth of flavor. Will be making this all fall and winter when the weather gets cold.

5 days ago

Brought this to my office potluck on Wednesday and every single bite was gone! People kept asking if it was from a fancy local diner, I couldn’t believe how easy it was to pull off once I got all the prep done. The crisp topping really makes it stand out from every other beef casserole people bring to these things.

3 days ago

Wait was this the casserole on the end of the table by the salad? I had two servings! No wonder it was so good, I’ve been trying to find who brought it — saving this recipe to make at home now!

2 hours ago

Really tasty! I have a gluten sensitivity so I swapped the regular breadcrumbs for gluten free panko and used a gluten free flour for the roux, and it turned out almost identical to the photos! Only reason I’m not giving 5 stars is I wish the recipe noted you can easily make GF swaps for people with dietary restrictions.

30 minutes ago

Thank you so much for sharing that GF swap! We love hearing about modifications that work for different dietary needs, and we’ll add a note about gluten free substitutions to the recipe card ASAP. So glad it turned out well for you!

30 minutes ago

Made this for my roommates and I in our tiny apartment oven and we all ate way too much lmao. I didn’t have fresh herbs so I used dried thyme and rosemary and it still slapped. Only took me one trip to the grocery store to get all the ingredients, which is a win for me. 10/10, will make again before our midterm study sessions next week.

yesterday

This is a new household staple! The depth of flavor from slow baking the beef in the sauce is unreal, and that buttery crisp breadcrumb topping? Total game changer. I served it with a side of roasted broccoli and it was the perfect cozy Sunday meal. My only regret is not making a double batch because the leftovers were gone before lunch the next day.

2 hours ago

Do you think I could make this in a slow cooker instead of the oven? My oven’s been broken for a week and I’m dying to try this!

30 minutes ago

You absolutely can adapt this for a slow cooker! Cook the beef and sauce mixture on low for 6-7 hours, then toast the breadcrumbs in a pan on the stove and sprinkle them on top right before serving to get that crisp topping. Hope your oven gets fixed soon!

2 days ago

Great flavor, but 2 hours 15 minutes is a long time for a weeknight meal for us! I ended up browning the beef and making the sauce the night before, then baking it for 45 minutes when I got home from work, and it turned out great. The breadcrumb topping was perfectly crisp even with the split cook time. Would recommend that hack for anyone short on time on weekdays.

yesterday

That split cook hack is genius! I never thought to make the base ahead, I’ve been skipping longer cook time recipes because I get home too late to start from scratch. Can’t wait to try this now!

just now

Y’all I added a layer of shredded cheddar under the breadcrumb topping and it was *chef’s kiss*. The cheese got all melty and gooey, and the crisp breadcrumbs on top kept it from getting too heavy. My whole family raved about it, even my super picky teenager who turns his nose up at every casserole I make. Will be making this for our Thanksgiving potluck this year!

just now

The cheese layer sounds absolutely incredible! Melty cheddar pairs so perfectly with savory beef and crispy breadcrumbs — we’re definitely testing that variation soon. So glad your teenager approved!



