
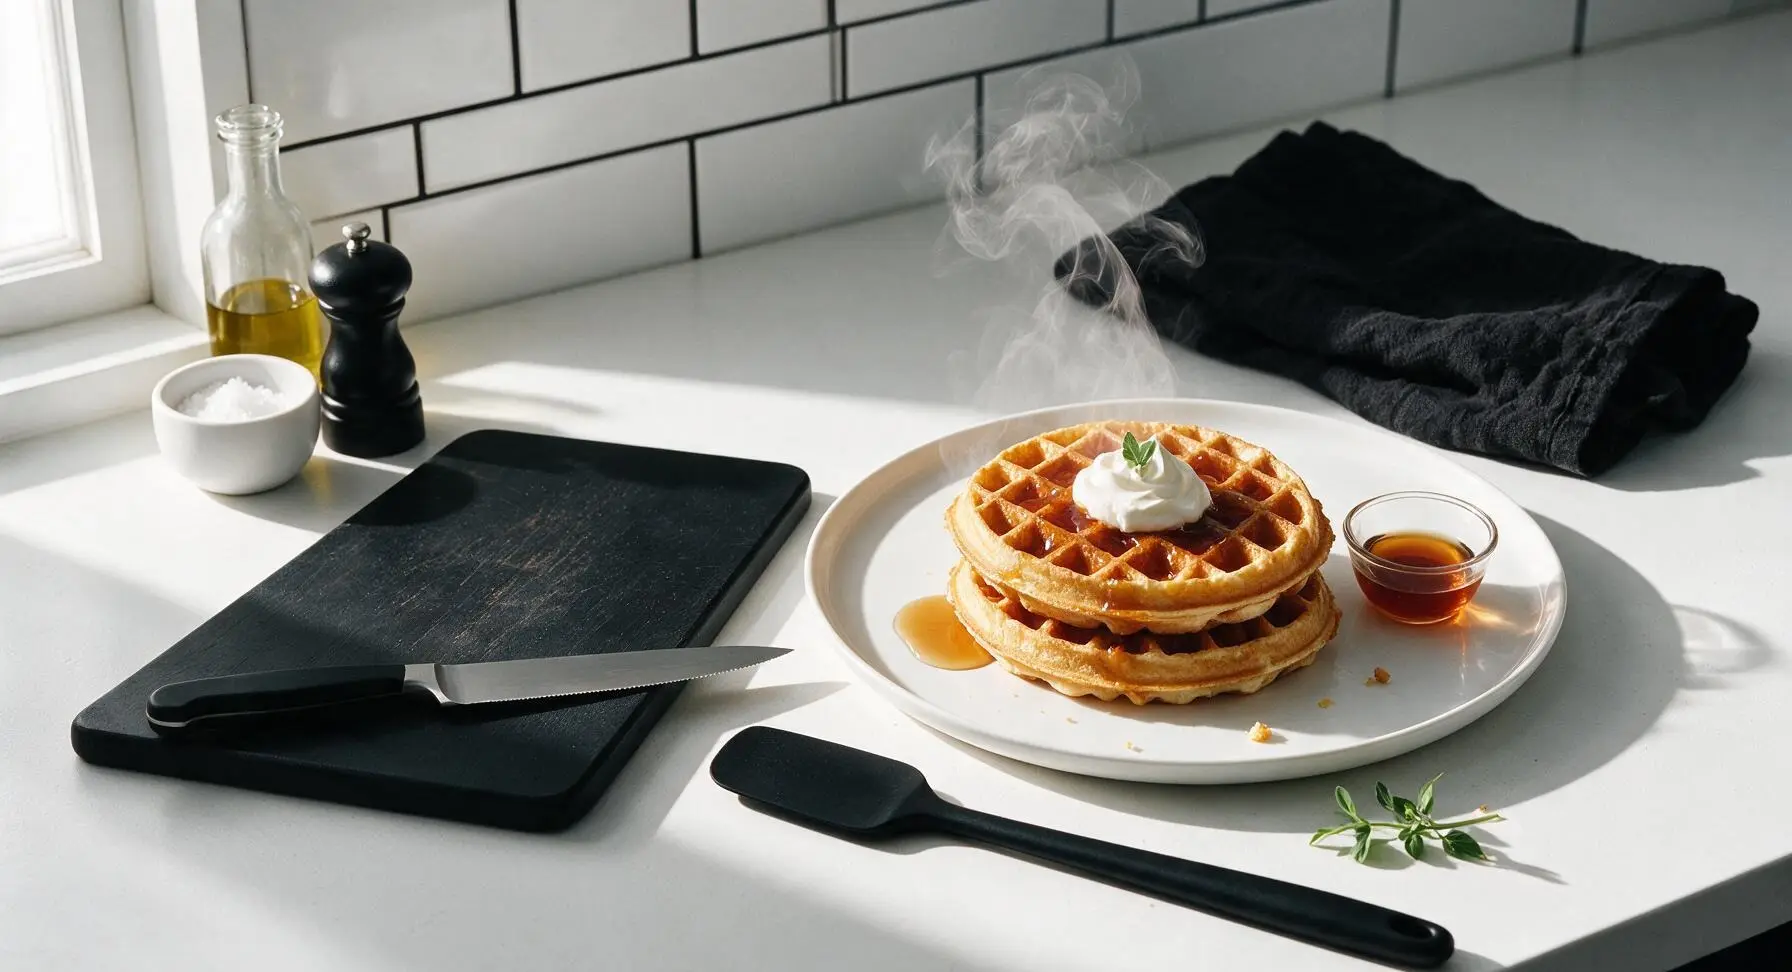
canadian waffle

title 1
canadian waffle
⏱️ cook time 15 minutes
🍽️ servings 4
⚡ Difficulty easy

intro

Crisp on the ridges, light and fluffy inside, classic Canadian waffles with pure maple syrup are a cozy, nostalgic family favorite perfect for slow weekend mornings.

Ingredients
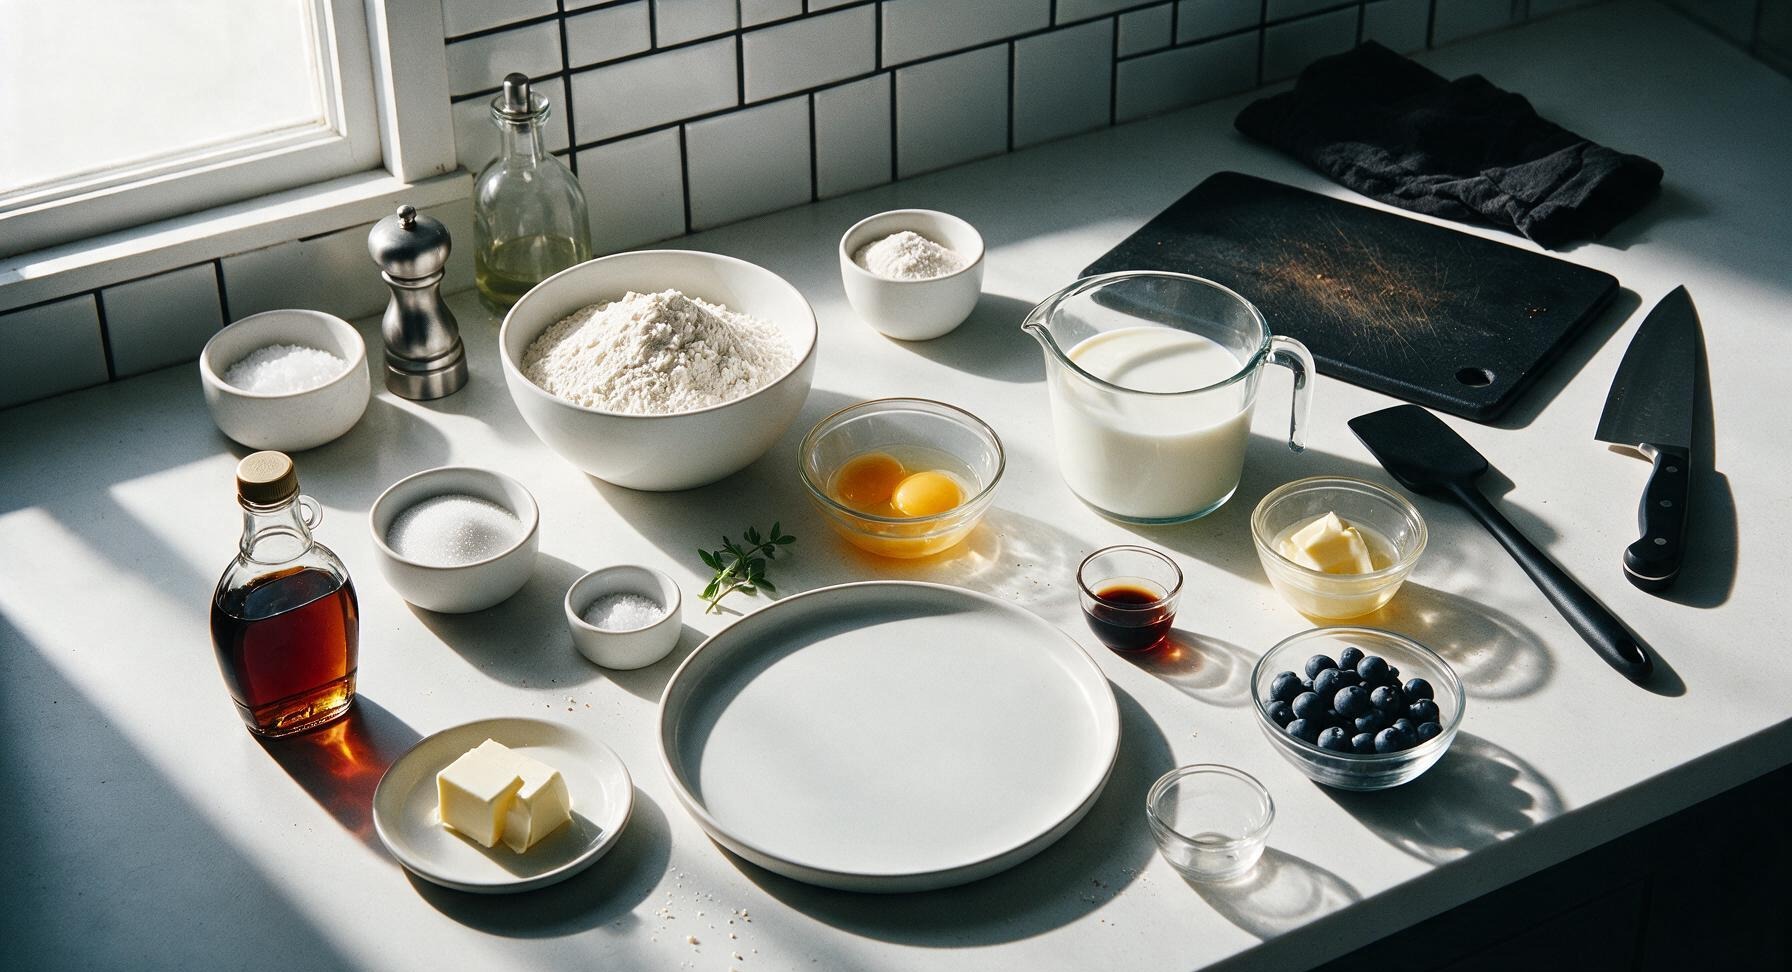
All-purpose flour 2 cups (240g)
Baking powder 1 tablespoon
Granulated sugar 1 tablespoon
Fine sea salt 1/2 teaspoon
Large eggs 2
Whole milk 1 3/4 cups (420ml)
Unsalted butter, melted and cooled 1/3 cup (76g)
Pure vanilla extract 1 teaspoon
Pure Canadian maple syrup 1/2 cup (120ml, for serving)
Salted butter 2 tablespoons (28g, cut into pats, for serving)
Fresh wild blueberries 1/2 cup (75g, for serving)

Steps

1

Preheat Waffle Iron

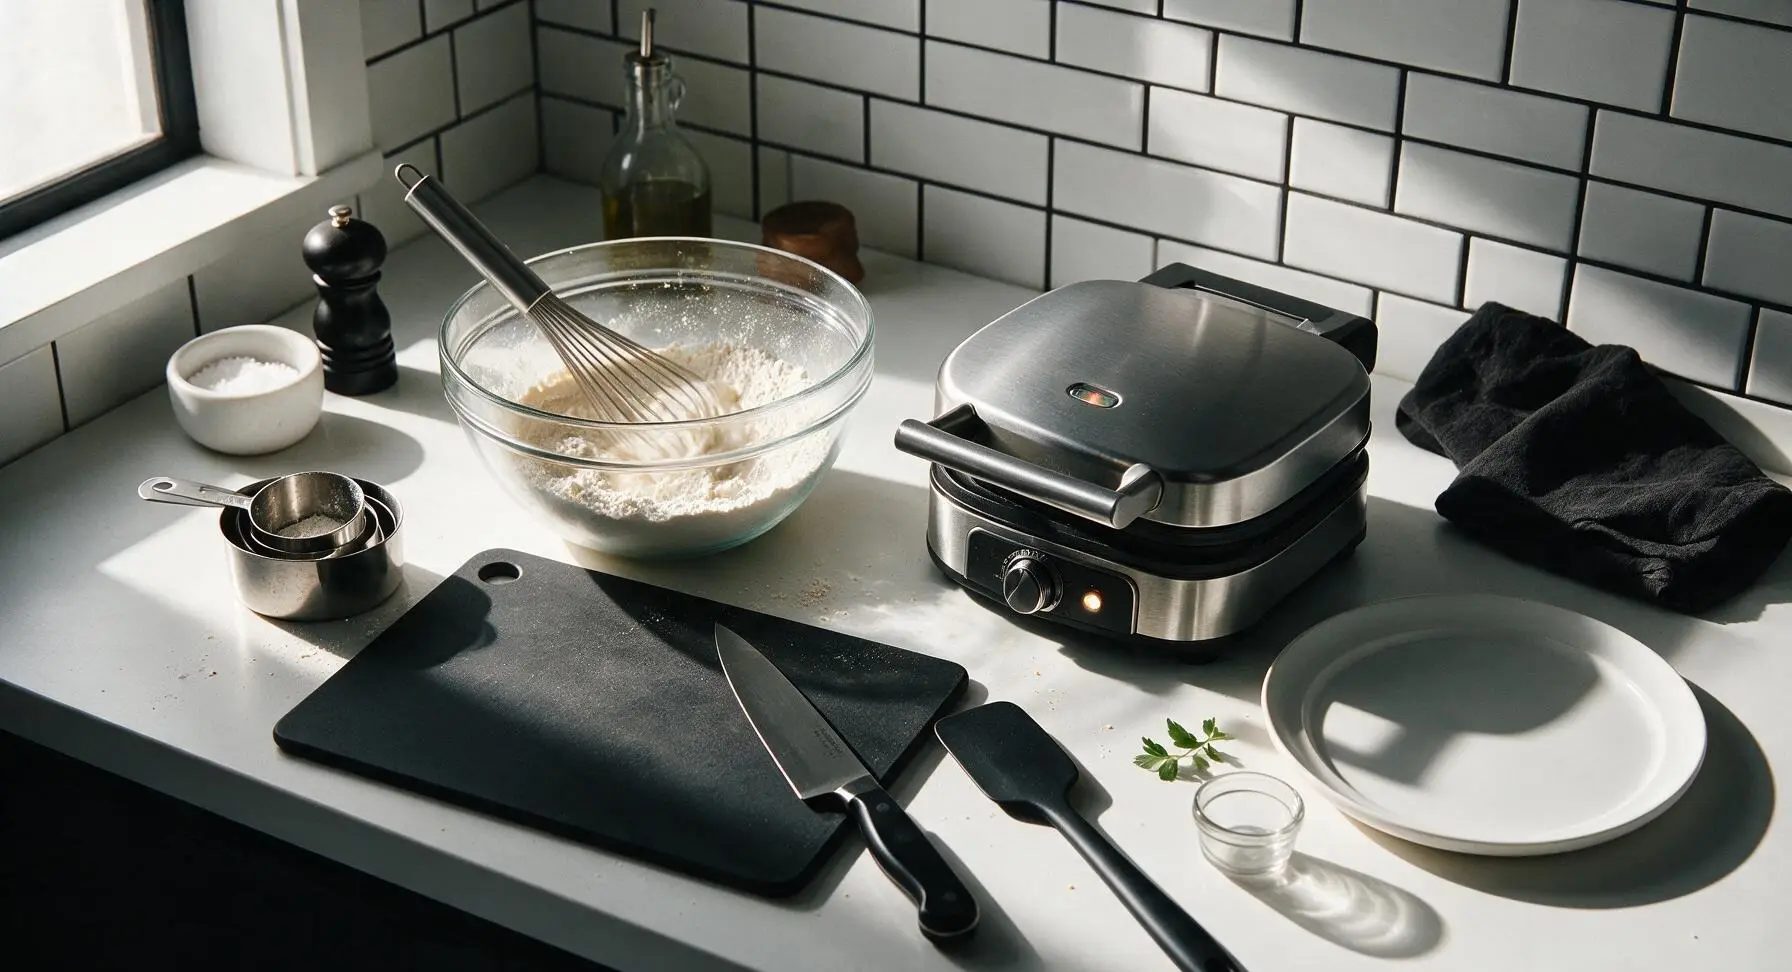
Plug in the brushed stainless steel waffle iron, adjust the browning dial to medium-high (375°F/190°C), and close the lid to preheat for 5-7 minutes until the ready indicator light illuminates. While the iron heats, add 2 cups all-purpose flour, 1 tablespoon baking powder, 1 tablespoon granulated sugar, and 1/2 teaspoon fine sea salt to the large glass mixing bowl. Use the stainless steel whisk to stir the dry ingredients for 30 seconds until fully combined, with no visible clumps of baking powder.
Step 1
step1:Preheat Waffle Iron
2

Combine Wet Ingredients

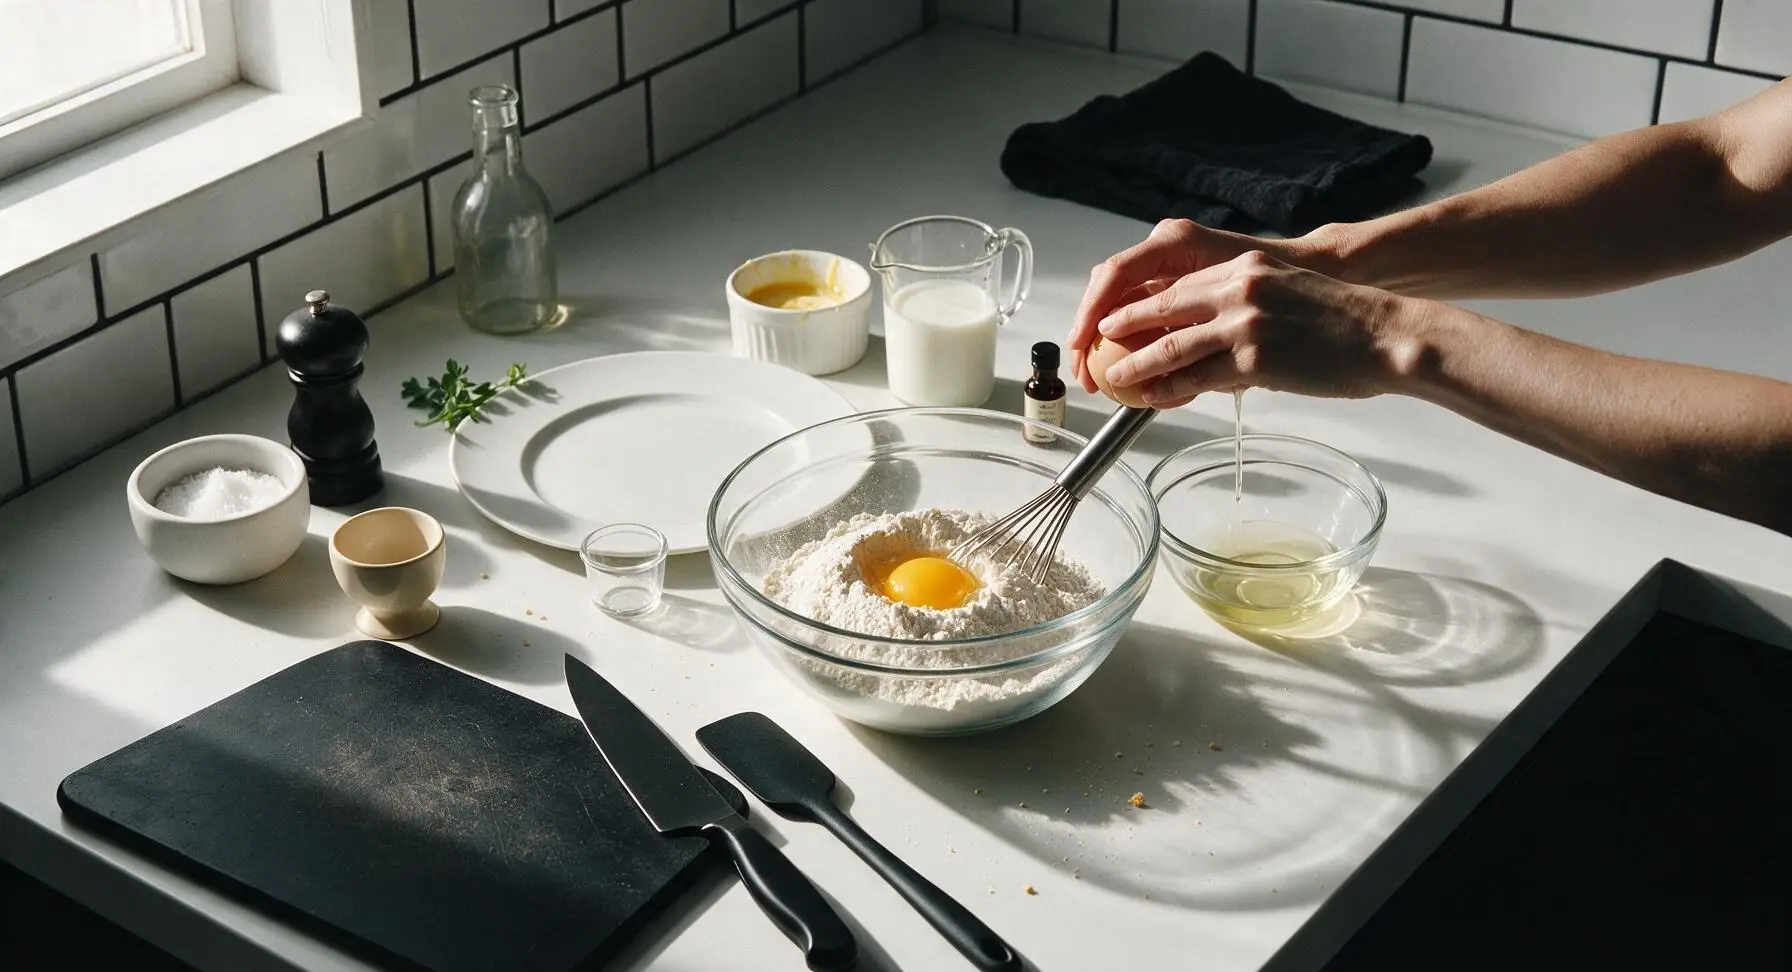
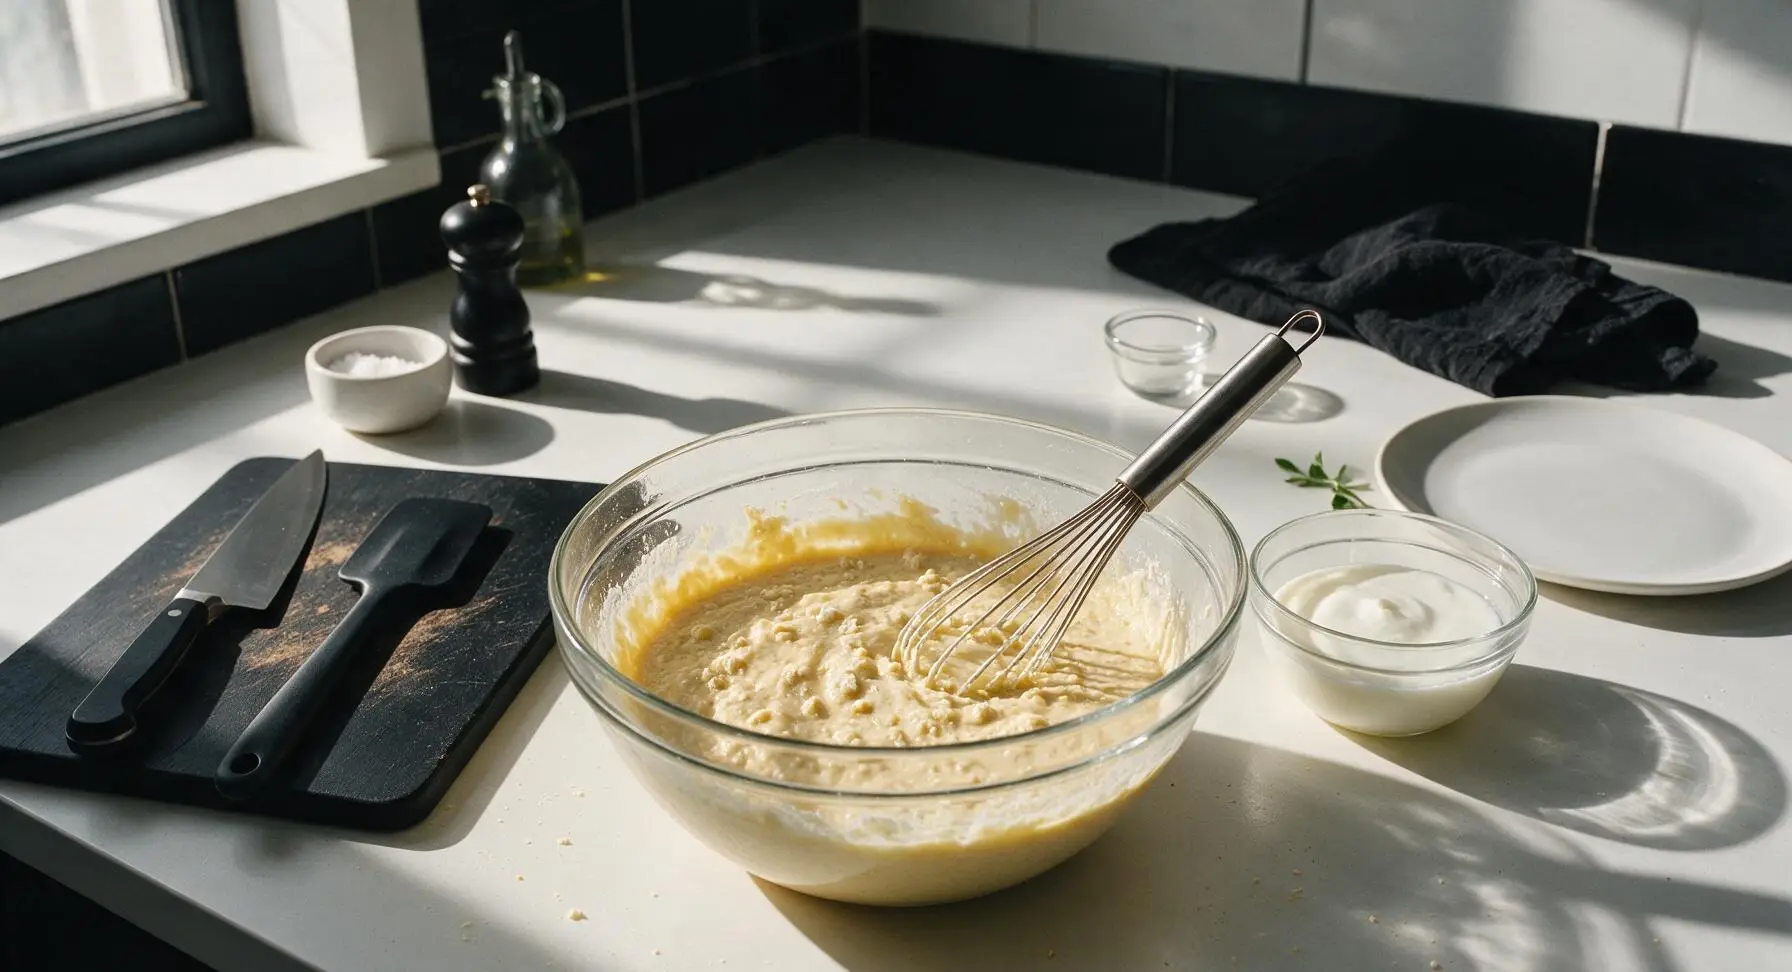
Crack 2 large eggs, carefully dropping the yolks directly into the center of the dry flour mixture in the large glass bowl, and pouring the egg whites into the small 15cm glass bowl (ensure the bowl is completely grease-free to allow proper egg white whipping). Add 1 3/4 cups whole milk, 1/3 cup cooled melted unsalted butter, and 1 teaspoon pure vanilla extract to the large bowl with the flour and egg yolks. Use the stainless steel whisk to stir the wet and dry ingredients together just until combined — do not overmix; the batter should have small, visible lumps, as overmixing develops gluten and creates tough waffles.
Step 2
step2:Combine Wet Ingredients
Step 2
step2:Combine Wet Ingredients
3

Whip Egg Whites to Peaks

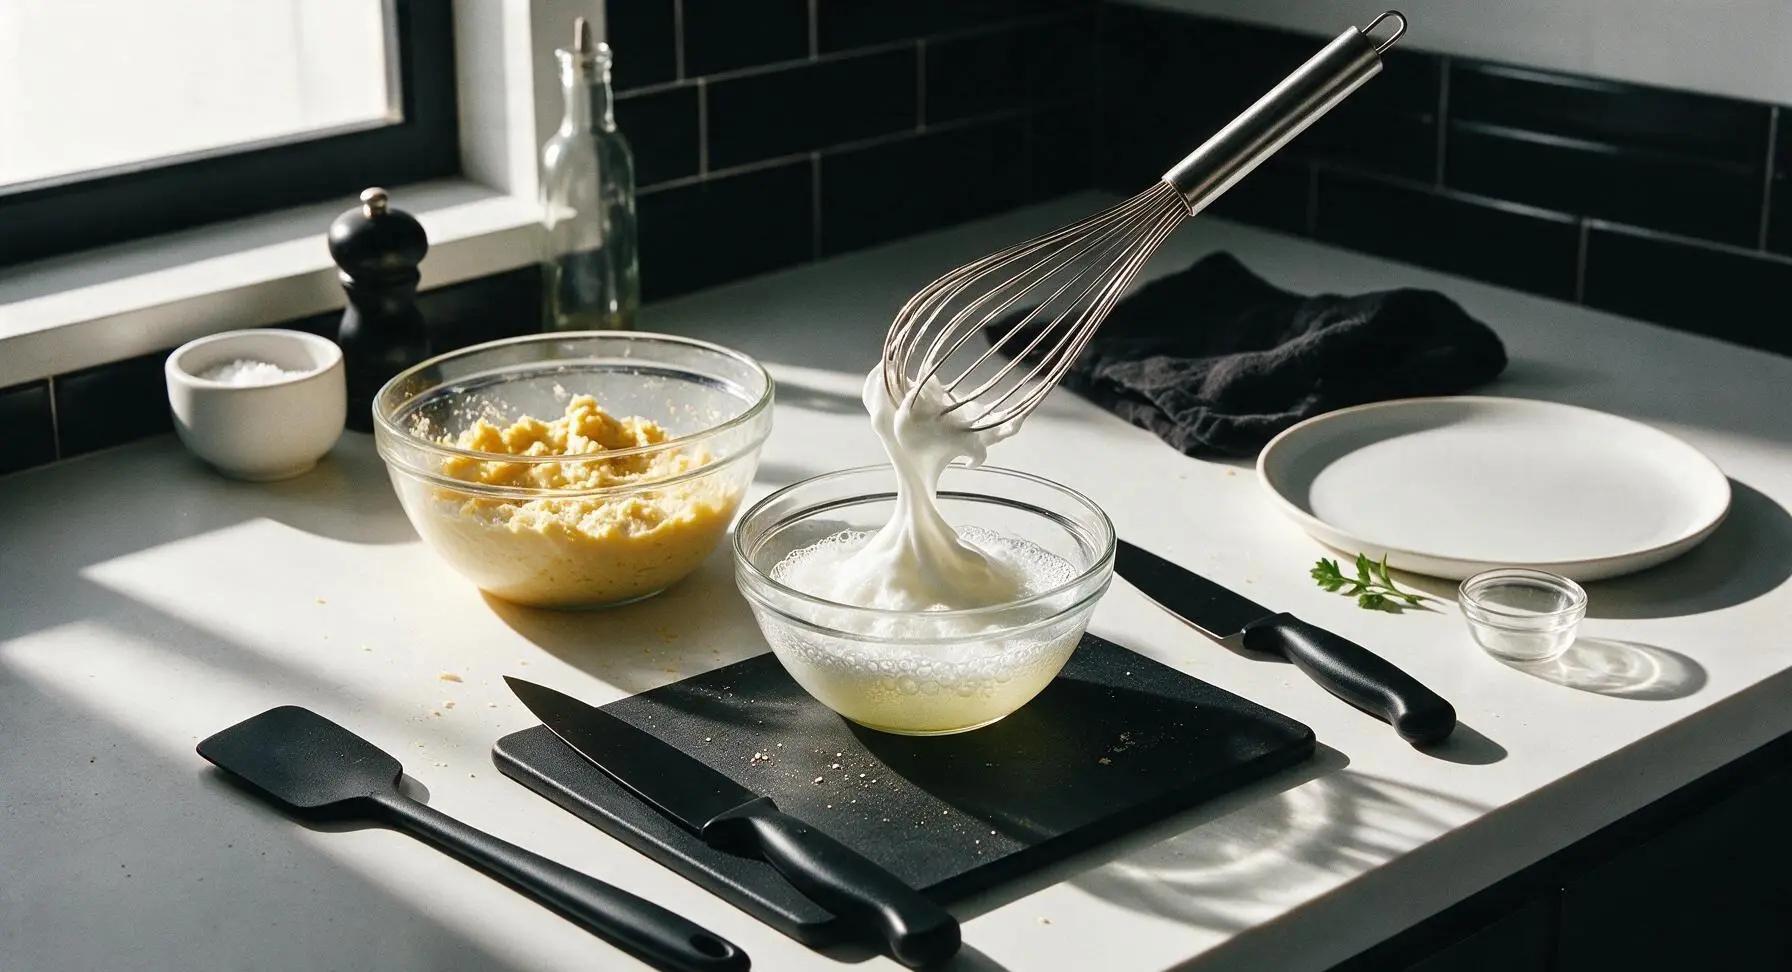
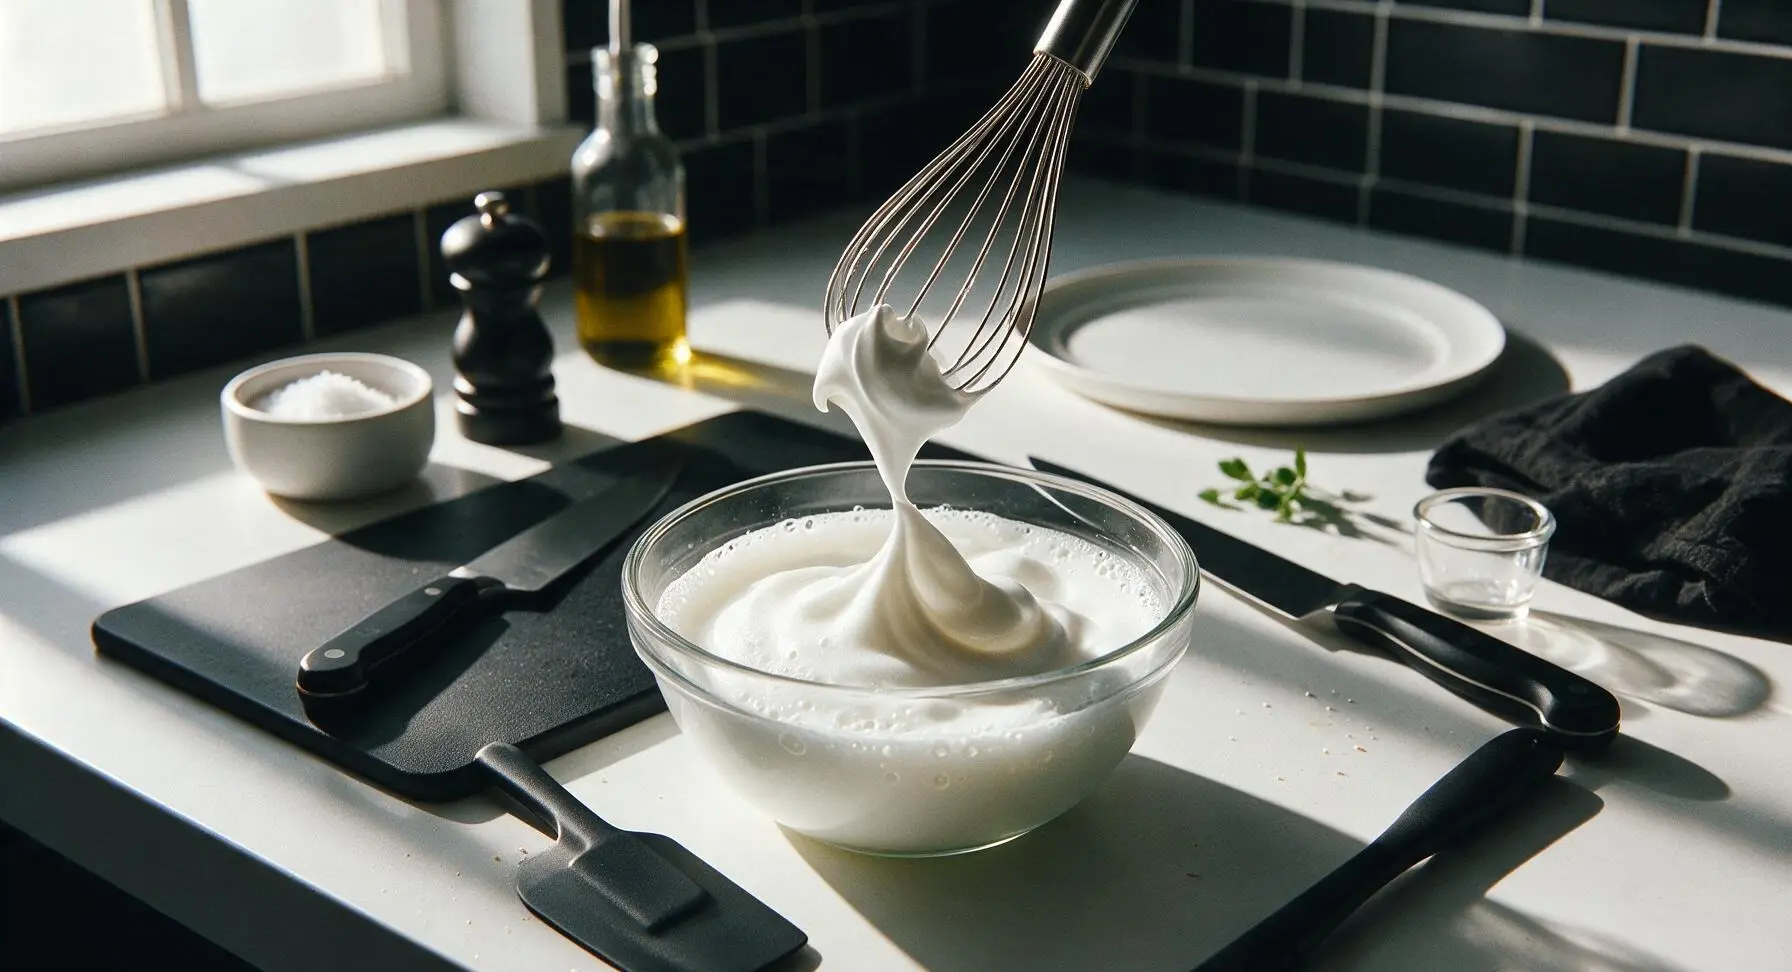
Use the clean, dry stainless steel whisk to beat the egg whites in the small glass bowl for 2-3 minutes, until they form soft, glossy peaks that curl over slightly when the whisk is lifted straight up out of the bowl. Do not whip to stiff, dry peaks, as this will create an uneven, crumbly texture in the finished waffle.
Step 3
step3:Whip Egg Whites to Peaks
Step 3
step3:Whip Egg Whites to Peaks
4

Fold Whites Into Batter

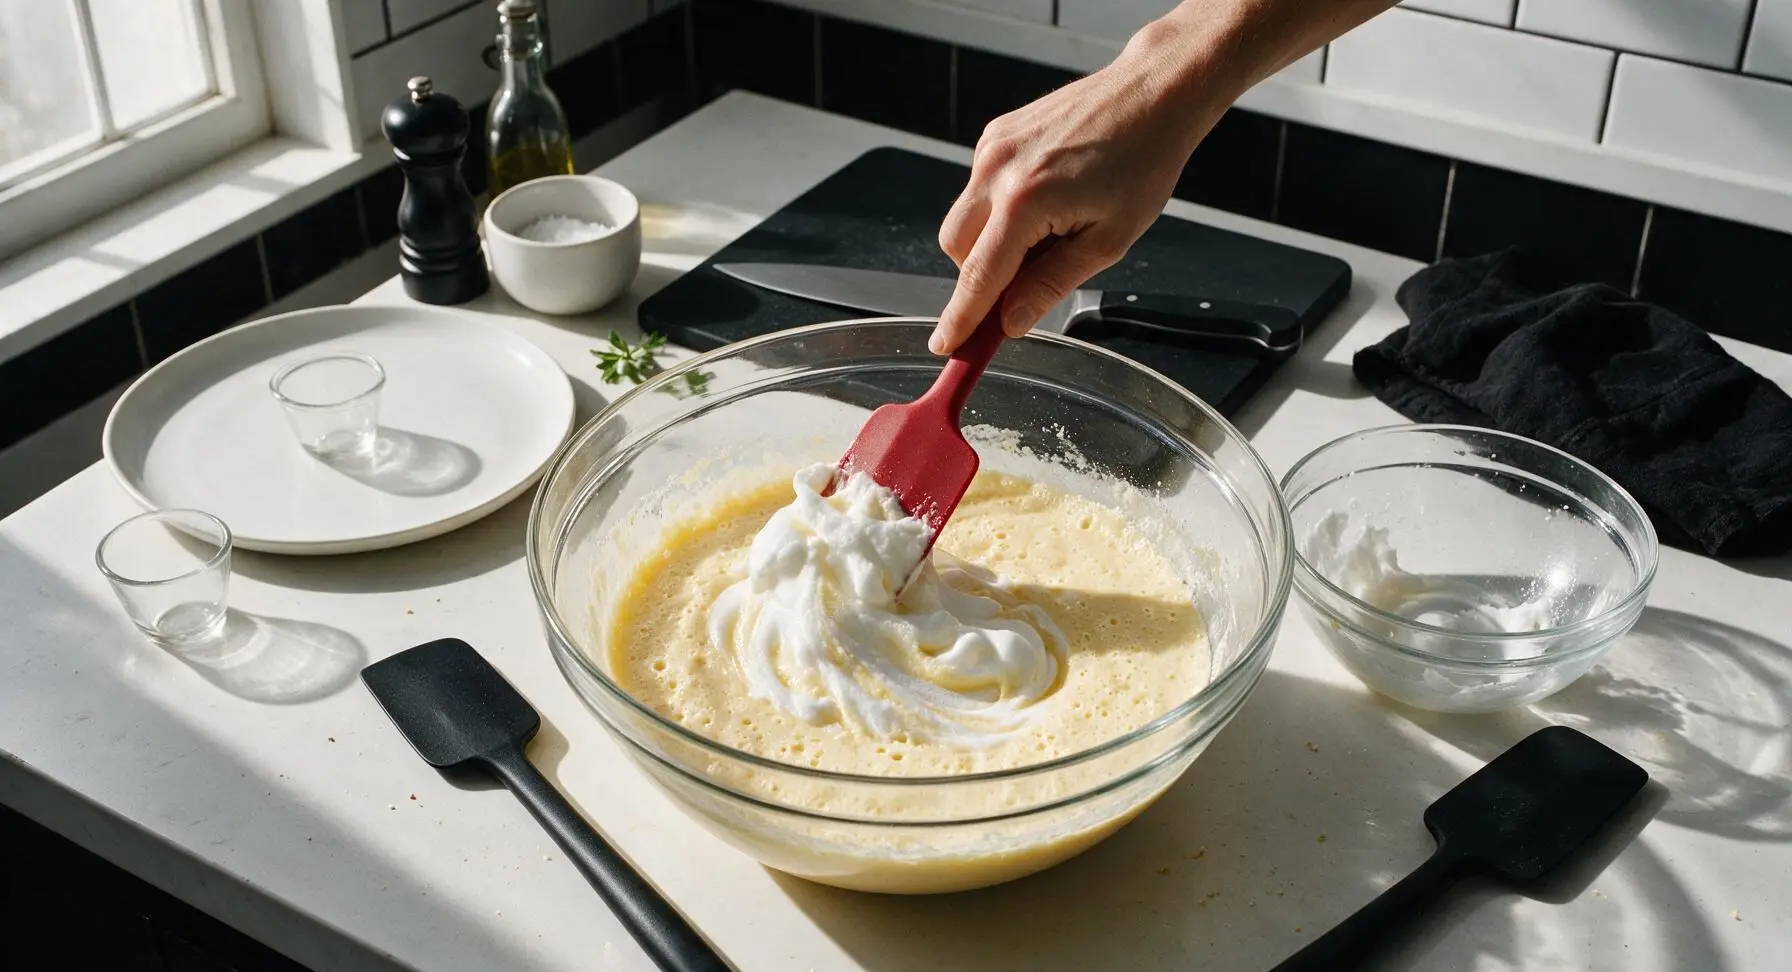
Use the matte red silicone spatula to scoop one third of the whipped egg whites into the large bowl of waffle batter, stirring gently to lighten the thick batter base. Add the remaining egg whites, folding them in with slow, cut-and-scoop motions, turning the bowl as you go, until no large streaks of white remain. Stop folding as soon as the batter is evenly combined — do not overfold, or you will deflate the air bubbles that create light, fluffy waffles. The finished batter will be light, airy, and thick, with tiny air bubbles visible across the surface.
Step 4
step4:Fold Whites Into Batter
5

Cook Waffles Until Crisp

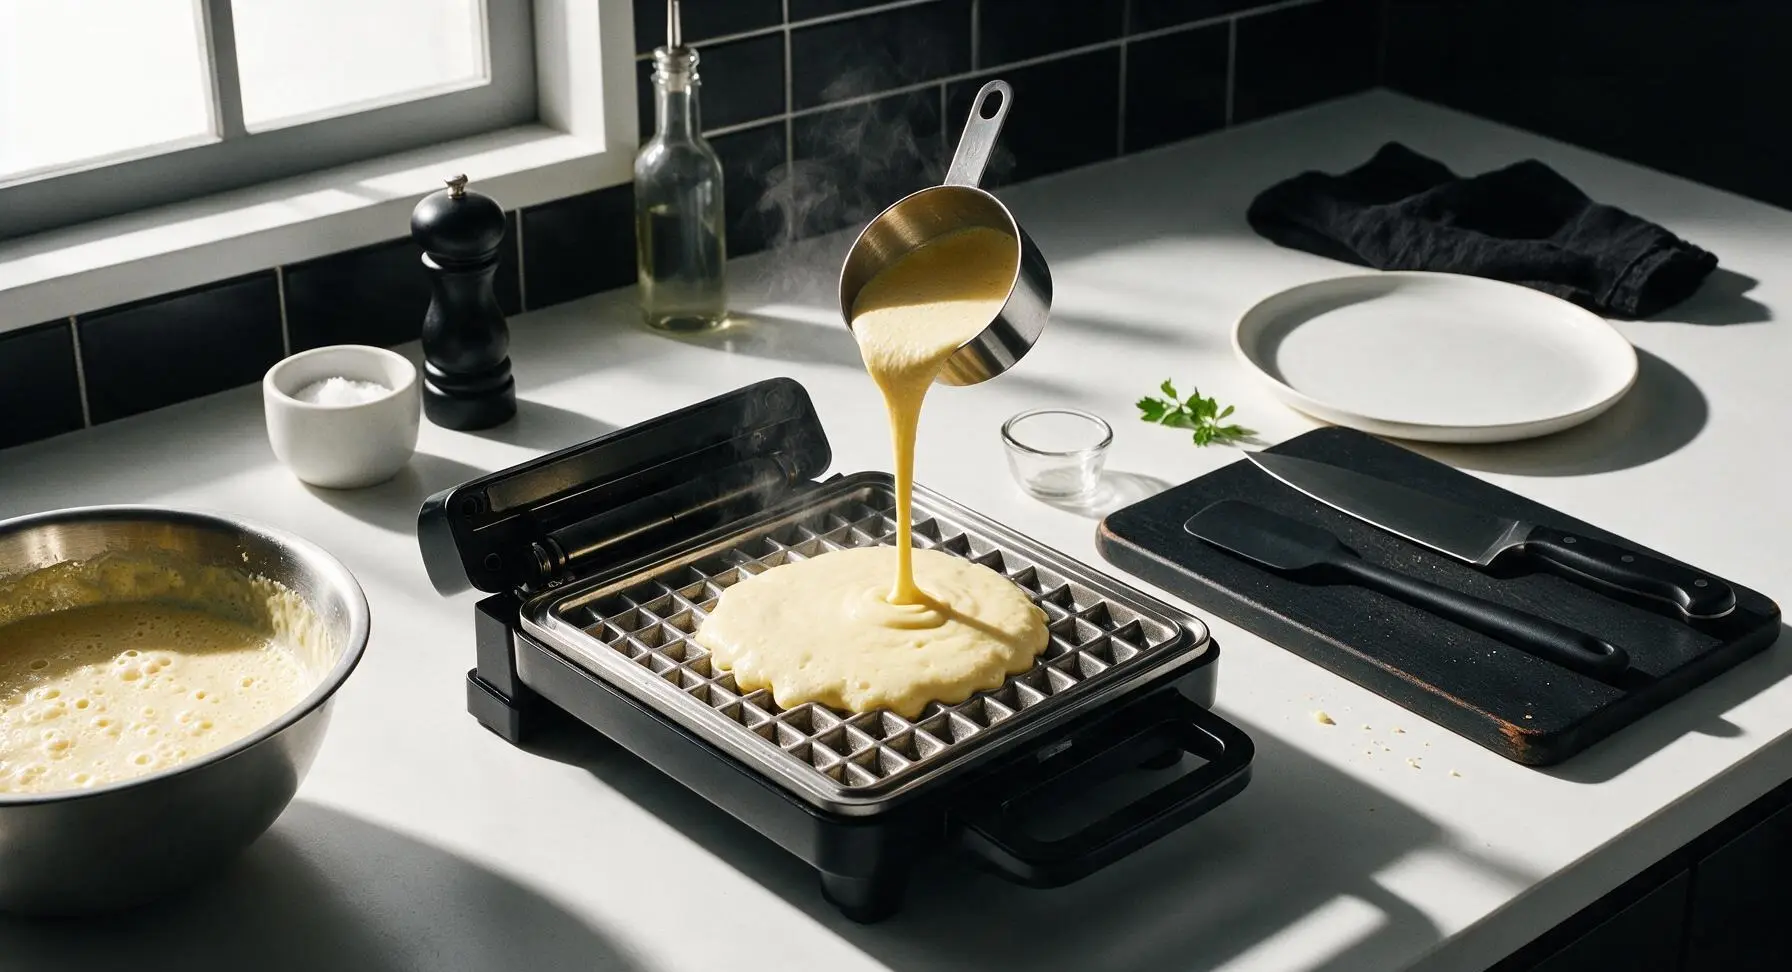
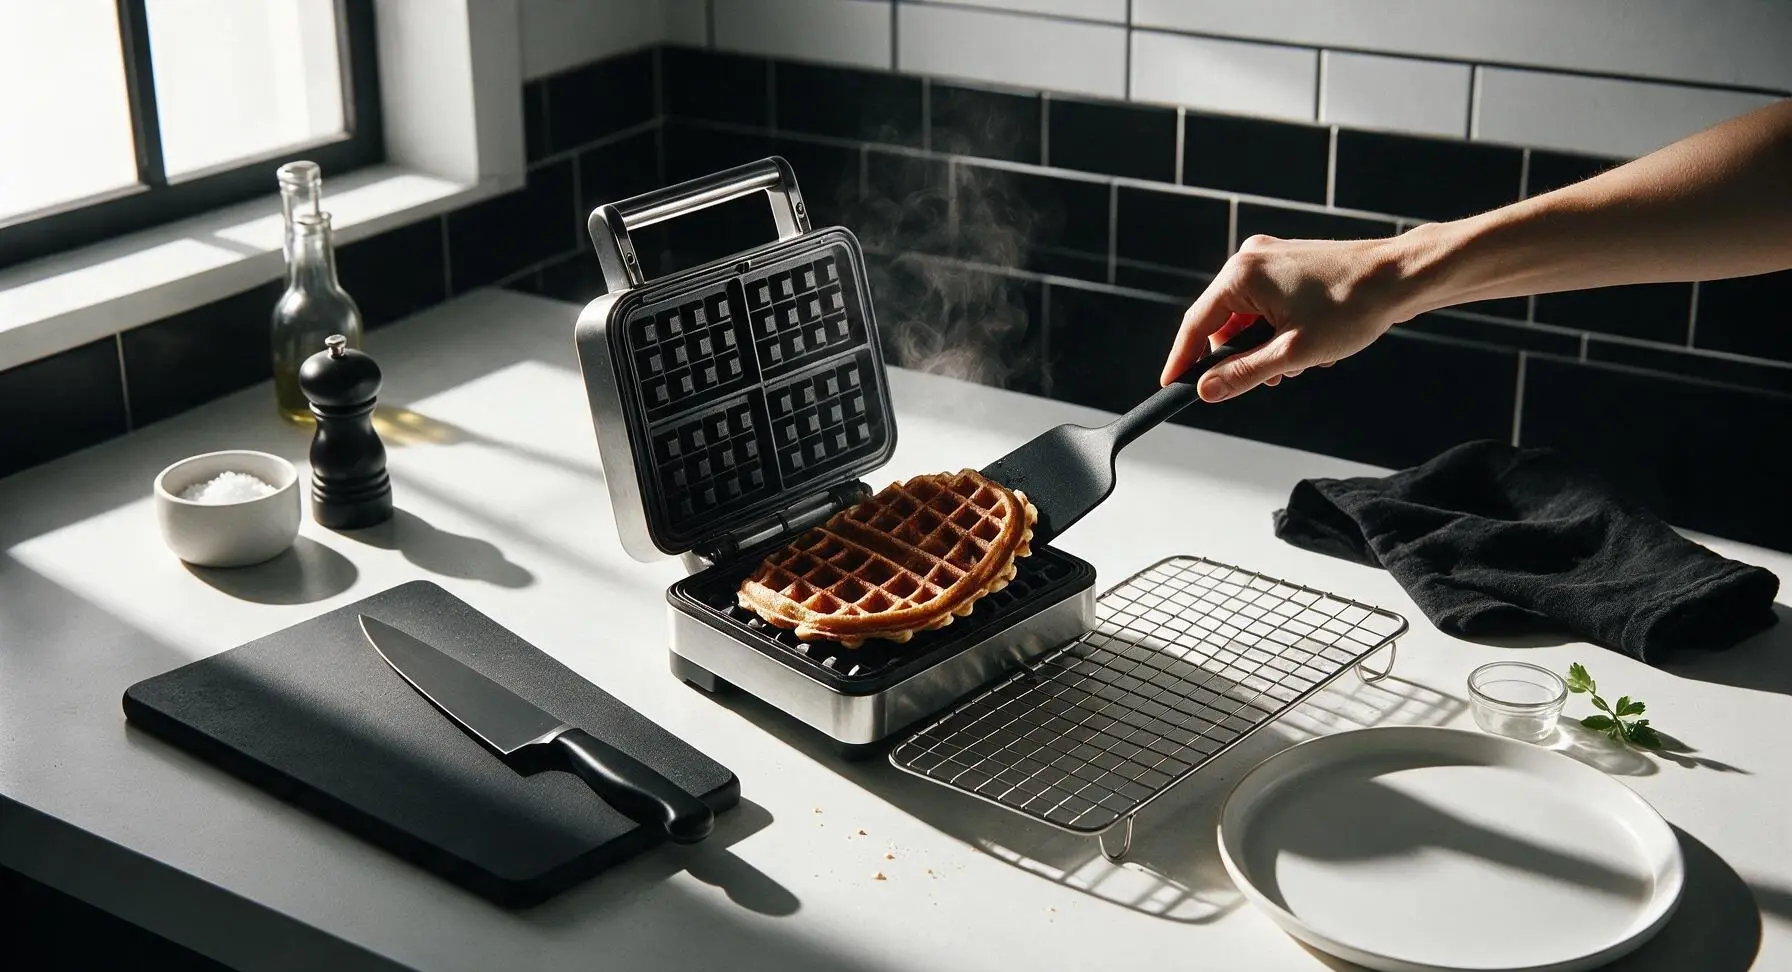
Once the waffle iron is fully preheated, open the lid and use a 1/2 cup stainless steel measuring cup to pour 3/4 cup of batter directly onto the center of the hot waffle grid. Close the lid gently (do not press down hard, as this will squeeze out batter and create flat, dense waffles) and cook for 3-4 minutes, until steam stops escaping from the edges of the iron, and the waffle is deep golden brown with crisp edges. Carefully lift the waffle out with the silicone spatula, and transfer it to the stainless steel wire cooling rack for 1 minute to keep edges crisp while you cook the remaining batter, repeating to make 4 total waffles.
Step 5
step5:Cook Waffles Until Crisp
Step 5
step5:Cook Waffles Until Crisp
6

Plate and Top Waffles

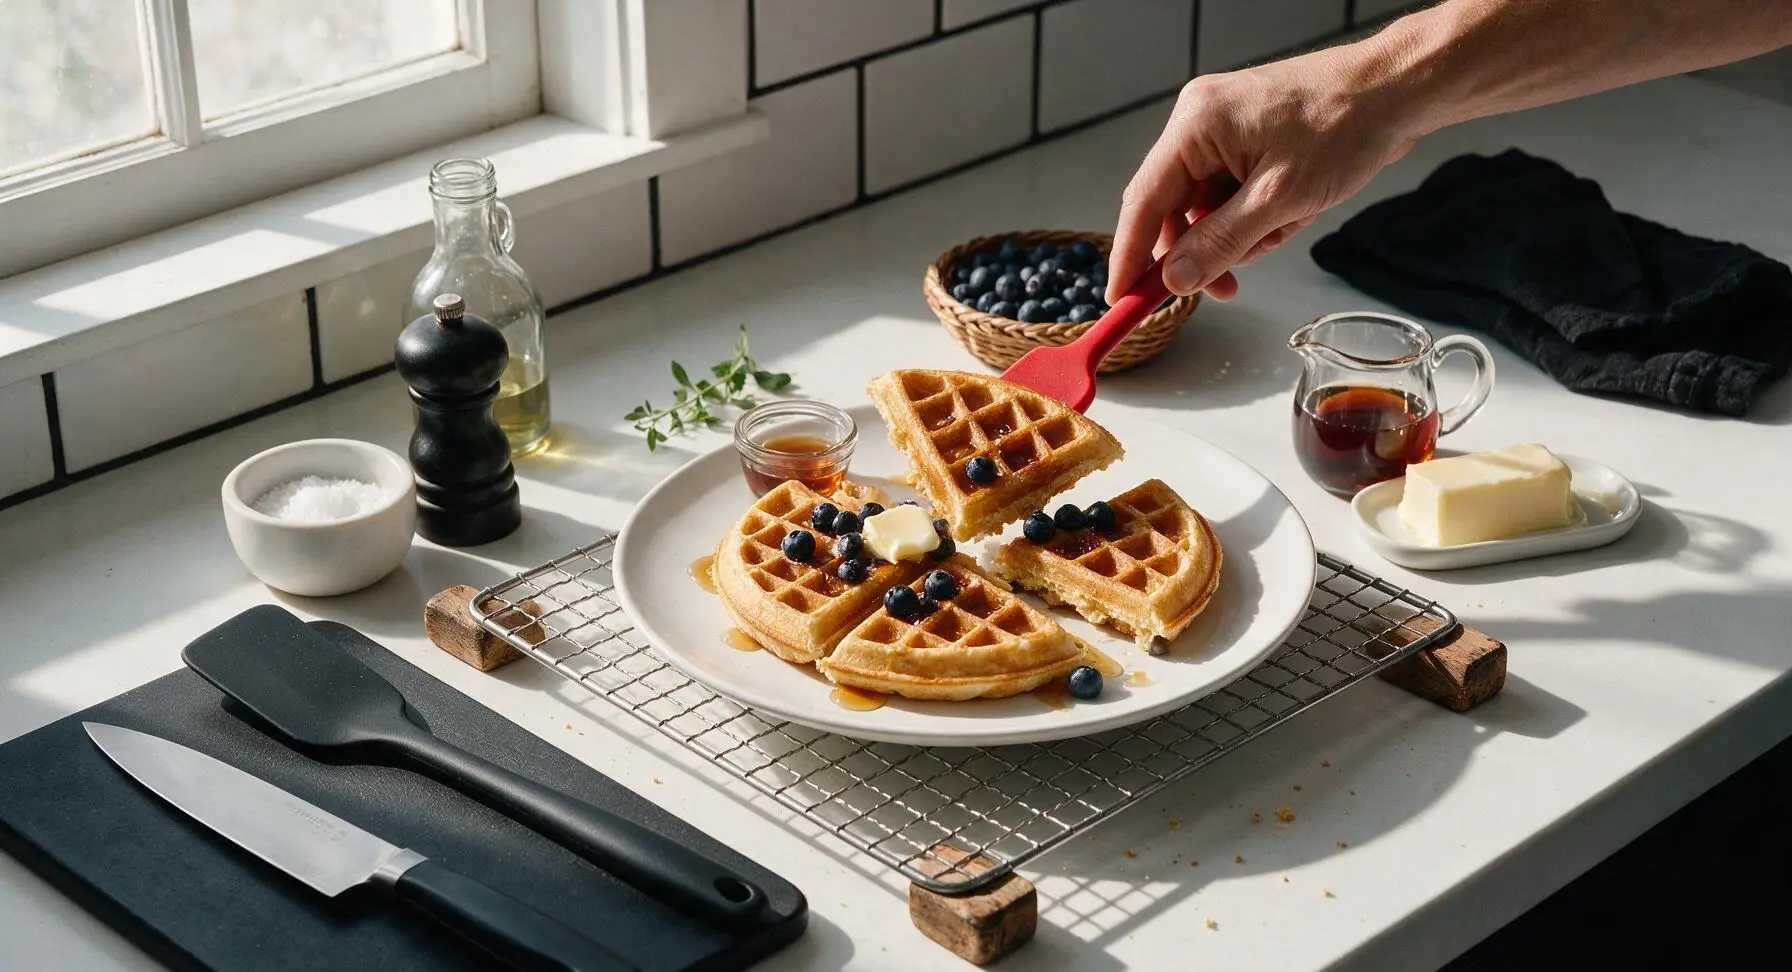
Transfer one warm waffle from the wire cooling rack to the matte cream stoneware plate. Cut the waffle into four equal triangular quarters, pulling them slightly apart to show the soft, fluffy interior. Top with a 1/2 tablespoon pat of salted butter, drizzle with 2 tablespoons of warm pure Canadian maple syrup, and scatter a small handful of fresh wild blueberries alongside. Serve immediately while hot and crisp.
Step 6
step6:Plate and Top Waffles

Tips

1.Never overmix the waffle batter: small lumps are completely desirable, as overmixing develops gluten in the flour and leads to tough, chewy waffles instead of light, fluffy ones with crisp edges.
2.Rest cooked waffles on the stainless steel wire rack instead of stacking them on a plate while you cook batches: stacking traps steam between waffles, which softens the signature crisp ridges and makes waffles soggy.
3.Skip imitation pancake syrup and use 100% pure Grade A Canadian maple syrup for serving: its deep, caramelized, slightly woody flavor is the traditional signature of Canadian waffles, and pairs perfectly with the buttery, warm waffle texture.


✨ You May Also Like

Breakfast
🍜 United States

Crisp-edged, fluffy lard griddle cakes are a nostalgic homestyle staple, with rich savoriness from rendered lard, perfect topped with maple syrup or savory gravy.

⏱️ 25 minuteBreakfast ★ 4.8
Breakfast
🍜 United States

Flaky, buttery homemade buttermilk biscuits smothered in creamy, peppery pork sausage gravy: a beloved, hearty Southern American comfort food classic.

⏱️ 35 minuteBreakfast ★ 4.8
Breakfast
🍜 United States

Golden, custardy brioche stuffed with sweet cream cheese and fresh berries, pan-fried to crisp perfection. An indulgent, cozy breakfast perfect for slow weekend mornings.

⏱️ 30 minuteBreakfast ★ 4.7
Breakfast
🍜 United States

Flaky, buttery Southern-style biscuits stuffed with savory salty country ham, a portable, satisfying classic perfect for casual on-the-go meals.

⏱️ 25 minuteBreakfast ★ 4.8
Breakfast
🍜 United States

Iconic puffy baked pancake popularized in Seattle, with crisp golden edges and soft custardy center, served warm with classic sweet toppings.

⏱️ 35 minuteBreakfast ★ 4.6
Breakfast
🍜 United States

Fluffy, golden pancakes studded with juicy peak-summer mixed berries, drizzled with maple syrup for a bright, comforting, crowd-pleasing family breakfast.

⏱️ 25 minuteBreakfast ★ 4.7

canadian waffle:Frequently Asked Questions

1.What sets classic Canadian waffles apart from other common waffle varieties? ▾
Classic Canadian waffles are engineered to have ultra-crisp, defined ridges and a light, fluffy (not dense or heavy) interior that holds up perfectly to pure maple syrup without turning soggy fast. They’re also less sweet than Belgian or thick American diner waffles, letting the rich, caramel notes of real maple syrup take center stage as the star topping.
2.Can I make these classic Canadian waffles without a dedicated waffle iron? ▾
Unfortunately, you won’t get that signature crisp ridge and fluffy interior texture without a waffle iron—pancake pans or griddles can’t replicate the even, dual-sided high heat that creates classic waffle structure. If you don’t own one, look for an affordable countertop model with adjustable heat settings; even basic models work beautifully for this recipe.
3.Why do my waffles turn out soggy instead of crisp on the ridges? ▾
Soggy waffles almost always trace back to three common issues: your waffle iron isn’t fully preheated before you pour batter, you open the iron too early to check doneness, or you stack waffles straight off the iron. Hold finished waffles on a wire rack set over a baking sheet in a 200°F oven to keep ridges crisp until serving.
4.Do I have to use pure maple syrup as a topping, or are other toppings acceptable? ▾
Pure maple syrup is the traditional, iconic pairing for classic Canadian waffles, and its bright, woody, caramelized sweetness pairs perfectly with the mild, lightly sweet batter. That said, you’re welcome to top them with butter, fresh berries, whipped cream, nut butter, or even a drizzle of chocolate sauce if that fits your taste preferences.
5.Will separating my eggs and whipping the whites make these waffles extra fluffy? ▾
Separating eggs and folding stiffly beaten egg whites into the batter will absolutely give you an even lighter, airier interior if that’s your preference! Just be sure to fold the whites in gently at the very end of mixing to keep as much trapped air as possible, rather than stirring vigorously which will deflate all that light, fluffy lift.
6.How do I know when my waffles are fully done cooking? ▾
Wait until your waffle iron stops releasing steady streams of steam before you check for doneness—this usually takes 3 to 5 minutes, depending on your iron’s heat setting. Done waffles will be deep golden brown, pull away easily from the iron plates without sticking, and have that signature crisp, dry ridge texture rather than soft, pale spots.
7.Can I make the waffle batter ahead of time for slow weekend mornings? ▾
You can mix the dry ingredients (flour, baking powder, sugar, salt) together in an airtight container up to 1 month ahead for quick prep, but I don’t recommend mixing the full wet-and-dry batter more than 30 minutes before cooking. The baking powder starts activating as soon as it hits wet ingredients, so old batter will lead to flat, dense waffles.
8.What’s the best way to reheat leftover waffles so they stay crisp? ▾
Skip the microwave, which will turn waffles rubbery and soggy. For best results, reheat leftover waffles directly on the racks of a 350°F oven for 5 to 7 minutes, or pop them back in a preheated waffle iron for 1 to 2 minutes until ridges crisp back up. They also reheat beautifully in a toaster straight from frozen.
9.Can I freeze these waffles for quick weekday breakfasts? ▾
Absolutely—these waffles freeze incredibly well for up to 3 months. Let cooked waffles cool completely on a wire rack first, then stack them between sheets of parchment paper to prevent sticking, and seal in a labeled freezer bag. There’s no need to thaw before reheating; just pop them straight in the toaster or oven for a fast breakfast.
10.Why do my waffles stick to the waffle iron even when I grease the plates? ▾
Sticking usually happens if your iron isn’t fully preheated before adding batter, if you try to remove the waffle too early before it’s fully set, or if you’re skimping on greasing. Use a light coating of neutral oil or melted butter applied with a pastry brush to both plates right before the first waffle, and reapply lightly every 2 to 3 batches.
11.Can I use gluten-free flour instead of all-purpose flour for this recipe? ▾
You can swap the all-purpose flour for a 1:1 gluten-free all-purpose baking blend that contains xanthan gum for nearly identical texture. Just note that you may need to add 1 to 2 extra tablespoons of milk if the batter feels overly thick, as gluten-free flours often absorb more liquid than standard wheat all-purpose flour.
12.How much batter should I pour onto the waffle iron to avoid messy overflow? ▾
Pour batter slowly to cover about two-thirds of the bottom waffle plate, spreading it gently with a spatula if needed to fill in gaps near the edges. Don’t fill the plate all the way to the edges—batter expands as it cooks, and overfilling will lead to messy oozing out the sides of the iron and uneven, lopsided waffles.
13.Is it okay to substitute baking soda for baking powder in this recipe? ▾
I don’t recommend swapping baking soda straight across for baking powder here, since baking soda needs an acidic ingredient to activate properly, and this base recipe doesn’t include acidic elements like buttermilk. If you’re out of baking powder, make a quick substitute by mixing 1/4 teaspoon baking soda with 1/2 teaspoon cream of tartar per teaspoon of baking powder needed.
14.Can I reduce the amount of granulated sugar in the batter for a less sweet waffle? ▾
Absolutely! The small amount of granulated sugar in this recipe is mostly there to help with gentle browning and a subtle sweet note, not to make the waffles taste like dessert. You can cut the sugar in half, or even leave it out entirely, if you prefer a more savory, neutral waffle base to pair with toppings like fried chicken or soft-scrambled eggs.
15.Why do my waffles come out dense and heavy instead of light and fluffy inside? ▾
Dense waffles are almost always caused by overmixing the batter, which develops tough gluten in the flour and deflates the lift from the baking powder. Mix the batter just until the dry ingredients are moistened—small, lumpy spots are totally fine and will disappear as the waffles cook. Overmixing is the number one culprit for tough, heavy waffles.
16.What kind of salt works best for this recipe, and can I use regular table salt? ▾
Fine sea salt is called for because it dissolves evenly into the batter without leaving gritty spots, balancing the sweetness of the waffle and maple syrup. If you only have table salt, cut the measurement in half—table salt is much denser and saltier-tasting than fine sea salt, so using the same amount will make your waffles overly salty.
17.Should I let the waffle batter rest before pouring it onto the iron? ▾
You don’t need a long rest for this batter, but a quick 5-minute rest after mixing gives the flour time to absorb the wet ingredients and the baking powder time to create small air bubbles, leading to a lighter, more even crumb. Don’t rest it longer than 10 minutes, though, or you’ll start to lose that leavening lift that makes the interior fluffy.

Comments (8)

2 days ago

OMG these are SO good! I made them for Saturday brunch last weekend and my whole family went crazy for them. Crispy on the outside, fluffy inside—exactly the waffles I grew up eating when we visited my grandma in Ontario. I topped mine with real maple syrup and a dollop of whipped cream, total game changer. 10/10 will be making these every weekend from now on!

yesterday

Wait did you add any extra vanilla? I tried them last night and felt like they were missing a little something, curious what you did!

2 hours ago

Hi Jake! A teaspoon of extra vanilla extract or a pinch of cinnamon is a great add if you want a little extra warmth and flavor, the base recipe is intentionally neutral so you can customize it to your taste! Hope that helps.

3 days ago

Super easy recipe, my 7 and 9 year old were able to help measure and mix everything without too much mess. We did a waffle bar for their sleepover with berries, chocolate chips, and sprinkles, every single kid cleaned their plate. Only note: my waffle iron runs hot, so I had to turn the temp down a little to avoid burning the edges, but that's just my appliance, not the recipe.

2 days ago

So glad the kids loved it! Great call out about waffle iron temperature variation—they're all so different, it always helps to do a quick test waffle first to adjust cook time for your specific model. Thanks for sharing your waffle bar idea, that sounds like such a fun sleepover activity!

1 week ago

These hold up so well in the freezer! I made a double batch on Sunday, popped them in the toaster all week for quick breakfasts before school and work, and they taste just as fresh as the day I made them. Way better than the frozen store-bought waffles we used to buy, and no weird preservatives. Easy enough for a week of meal prep, 10/10.

5 minutes ago

Wait, is there a substitute for buttermilk? I ran out mid-prep this morning and had to run to the corner store, which was such a hassle. The waffles turned out amazing regardless, but I'd love to know for next time so I don't have to put my pants on to run errands before coffee.

just now

I use the milk + white vinegar trick all the time! 1 tablespoon of vinegar per cup of milk, let it sit 5 minutes, works exactly like buttermilk for waffle and pancake recipes. I do it every time I don't have buttermilk on hand!

just now

Great tip from Liz! You can also use plain kefir or a mix of plain yogurt and milk thinned to the consistency of buttermilk as a swap, too. So glad the waffles turned out great even with the last minute store run!

2 weeks ago

Brought these to my neighborhood potluck brunch last weekend and people were asking me for the recipe before I even set the platter down! I cut them into quarters so they were easy finger food, served with a little side of warm maple syrup for dipping. So simple to throw together even when you're running late to an event, 15 minute cook time is no joke.

1 week ago

Wait was this the potluck over on Maple Street? I had one of those waffles and have been thinking about them ever since! So glad I found the recipe lol

5 days ago

I swapped the all-purpose flour for a 1:1 gluten free baking blend and these came out perfectly! I was worried they'd be dense or gummy like a lot of GF waffle recipes, but they were crisp and light, my husband (who eats gluten) didn't even notice the difference. Will definitely be adding this to our regular rotation.

30 minutes ago

First time ever making waffles from scratch and I didn't mess them up! The directions were so straightforward, no weird fancy ingredients, and cook time was exactly 15 minutes like the recipe said. I dumped way too many blueberries in the batter and they still cooked all the way through, no raw spots. So proud of myself lol.

5 minutes ago

That's what we love to hear! So proud of you for nailing your first homemade waffles, blueberry overload is never a bad call in our book. Keep experimenting with fun mix-ins, the base recipe works great with almost anything!

yesterday

As someone who's actually from Canada, I can confirm these are the real deal. None of that weird sweet, cakey waffle nonsense people pass off as 'classic' down here. Crisp, buttery, sturdy enough to hold a mountain of maple syrup (the real stuff, not the pancake syrup imposter) without getting soggy. My only gripe is I wish the recipe made more, my roommates ate half the batch before I even got to sit down.

yesterday

Thank goodness for this! I've been living in Texas for 4 years and every waffle recipe I've tried is too sweet and too soft. I need that crunch that can stand up to peameal bacon and maple syrup, can't wait to whip these up on Saturday.

2 hours ago

Love that this is hitting close to home for our fellow Canadian folks! For anyone asking about batter consistency: it should be thick, but still slowly pour off a spoon. If it's too runny, add a tablespoon of flour at a time until you hit that consistency, and be careful not to overmix to keep them light and fluffy.



