
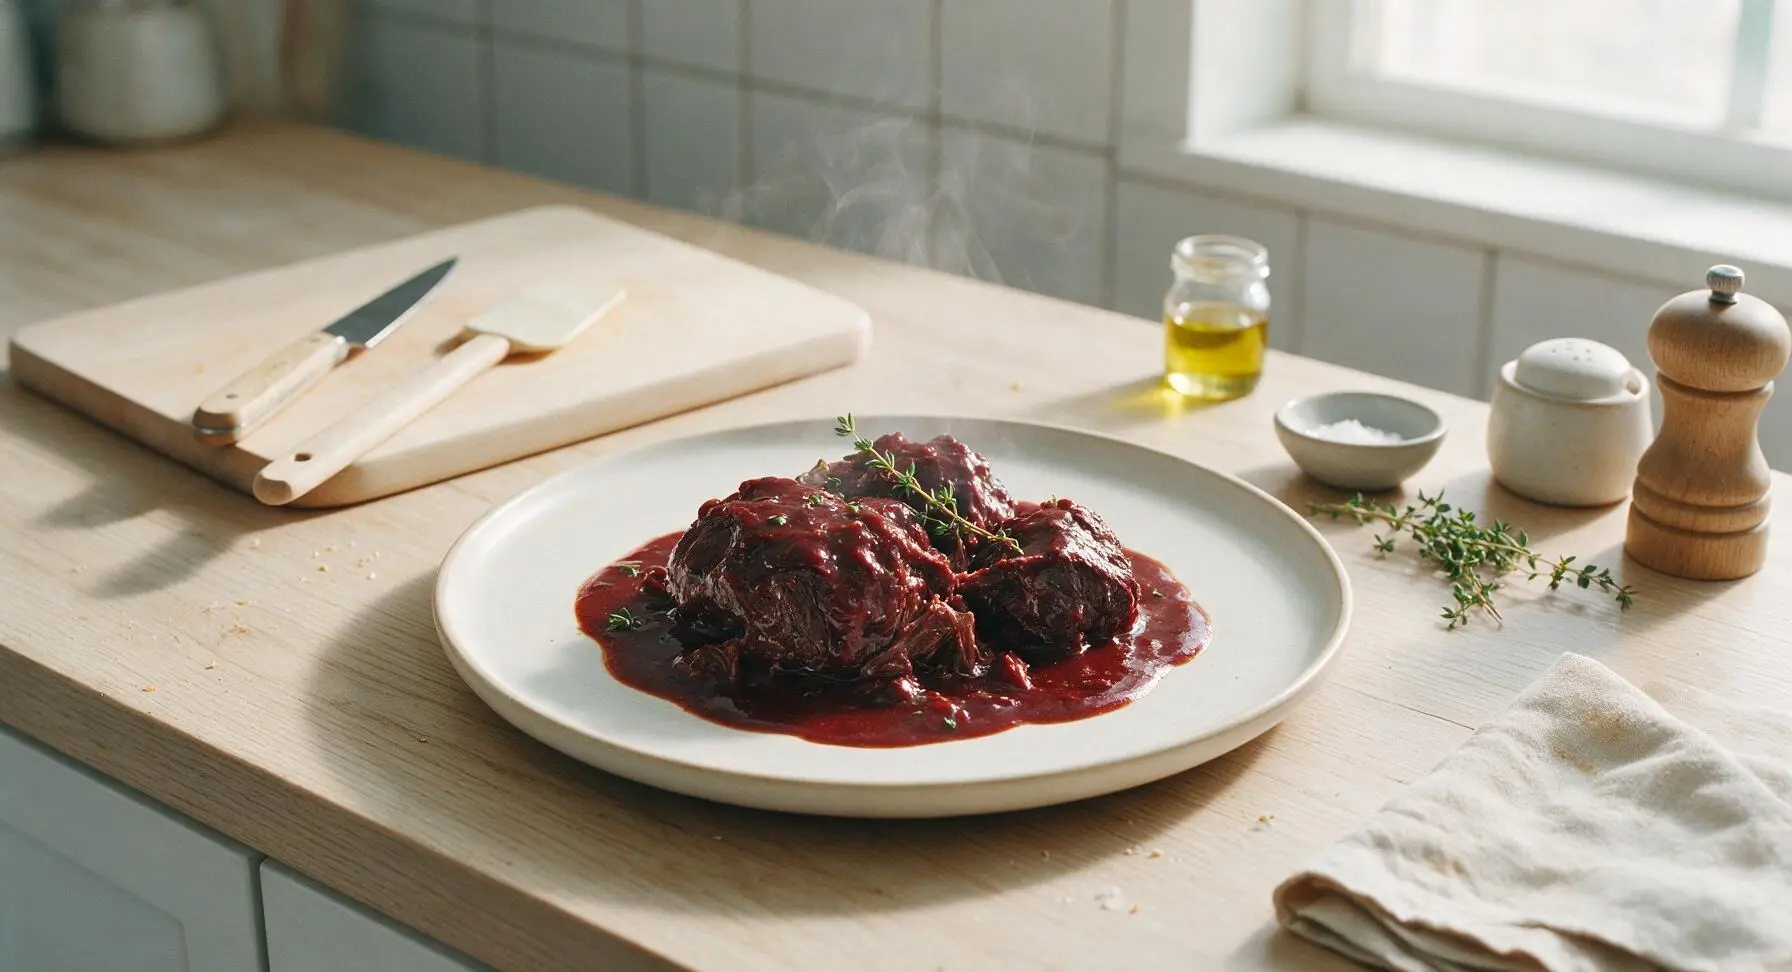
beef cheek meat

title 1
beef cheek meat
⏱️ cook time 3 hours 30 minutes
🍽️ servings 4
⚡ Difficulty medium

intro

Silky, fall-apart tender beef cheeks slow-braised in red wine and aromatics, coated in a glossy, velvety sauce—ultimate cozy comfort food for cold winter days.

Ingredients
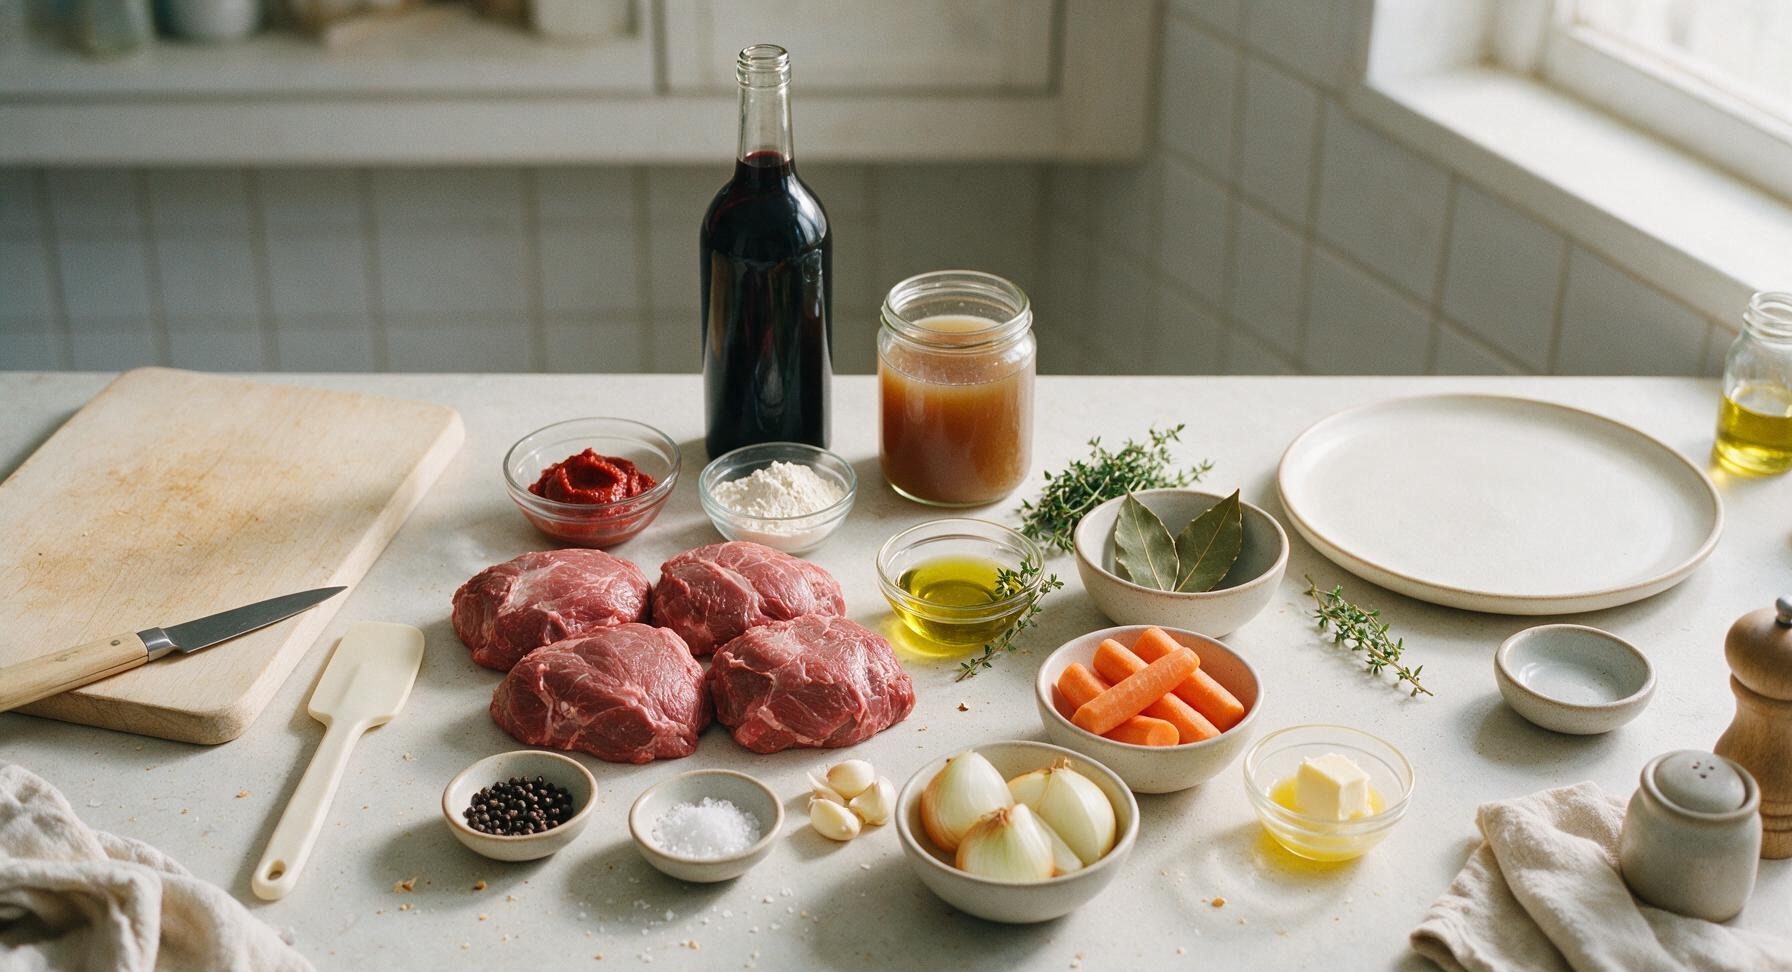
Beef cheeks (trimmed of excess silver skin) 800g (4 pieces)
Dry red wine (Burgundy or Cabernet Sauvignon) 750ml
Low-sodium beef stock 250ml
Yellow onion 2 medium (300g, cut into 5cm chunks)
Carrots 3 medium (250g, cut into 5cm chunks)
Garlic cloves 4, lightly crushed
Tomato paste 2 tablespoons
All-purpose flour 2 tablespoons
Extra-virgin olive oil 2 tablespoons
Fresh thyme 6 sprigs
Bay leaves 2 whole
Whole black peppercorns 1 teaspoon
Flaky sea salt 1.5 teaspoons
Unsalted butter 1 tablespoon

Steps

1

Season and flour beef

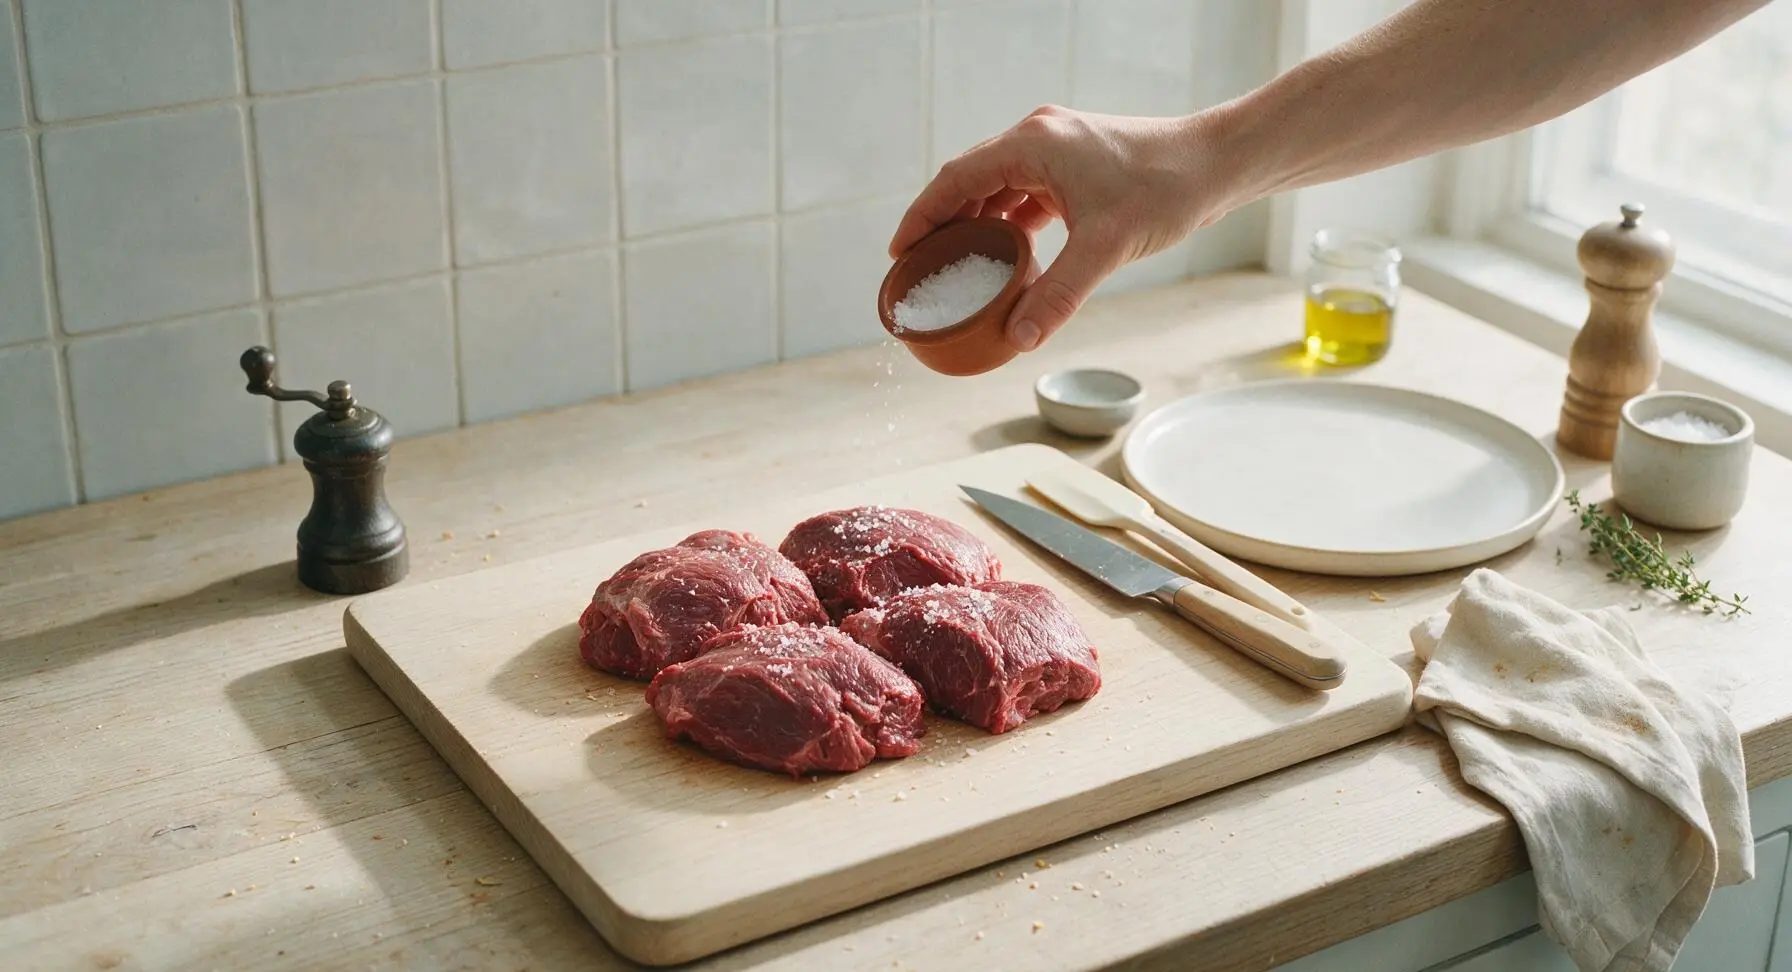
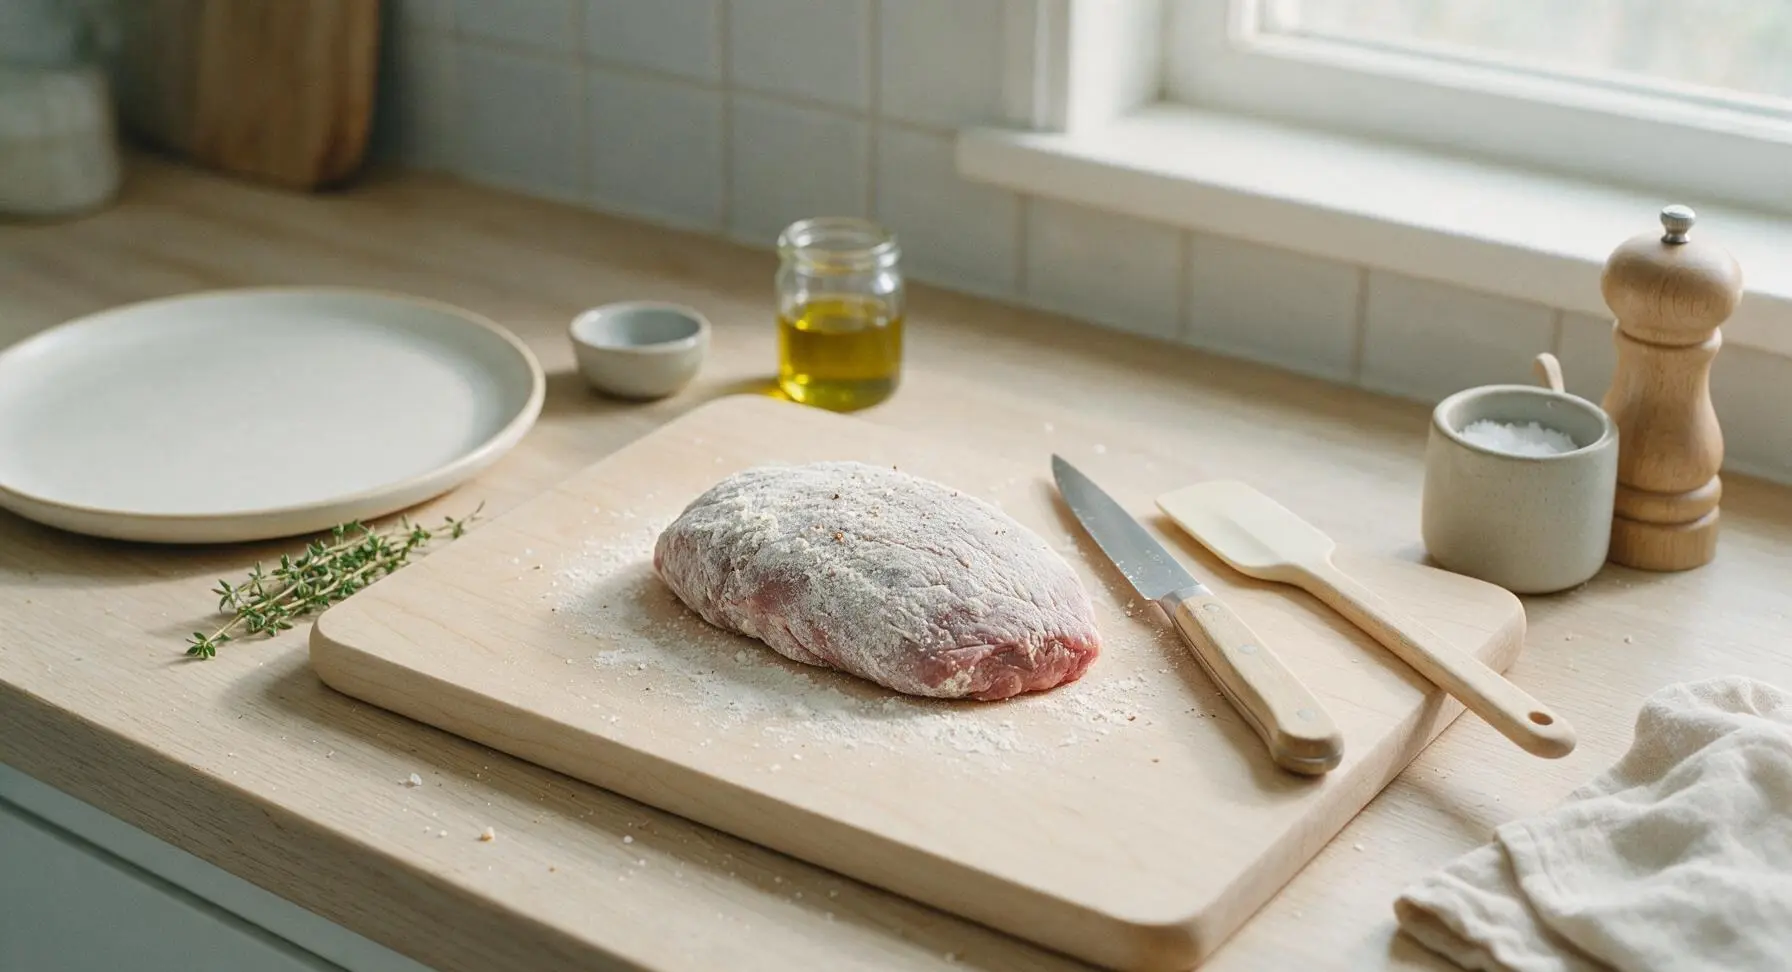
Place the trimmed beef cheeks on the center of the honey maple cutting board. Pat all surfaces completely dry with paper towels to ensure a crisp, even sear. Season every side evenly with 1 teaspoon flaky sea salt and ½ teaspoon freshly cracked black pepper, then dust lightly with 2 tablespoons all-purpose flour, shaking off any excess clumps. Let the beef rest 10 minutes at room temperature to allow the seasoning to adhere and the flour to absorb surface moisture; the meat will feel matte and dry to the touch when ready.
Step 1
step1:Season and flour beef
Step 1
step1:Season and flour beef
2

Sear until deep golden

Heat 2 tablespoons olive oil in the deep navy enameled Dutch oven over medium-high heat (180C/350F). Once the oil shimmers but does not smoke, add the beef cheeks in a single layer, working in two batches if needed to avoid crowding the pan (crowding causes steaming instead of searing). Sear for 3-4 minutes per side, until a deep, rich mahogany-golden crust forms on every surface. Transfer seared beef to the oat-white stoneware plate and set aside. A layer of dark brown, caramelized fond will coat the pan bottom—this is critical for sauce flavor.
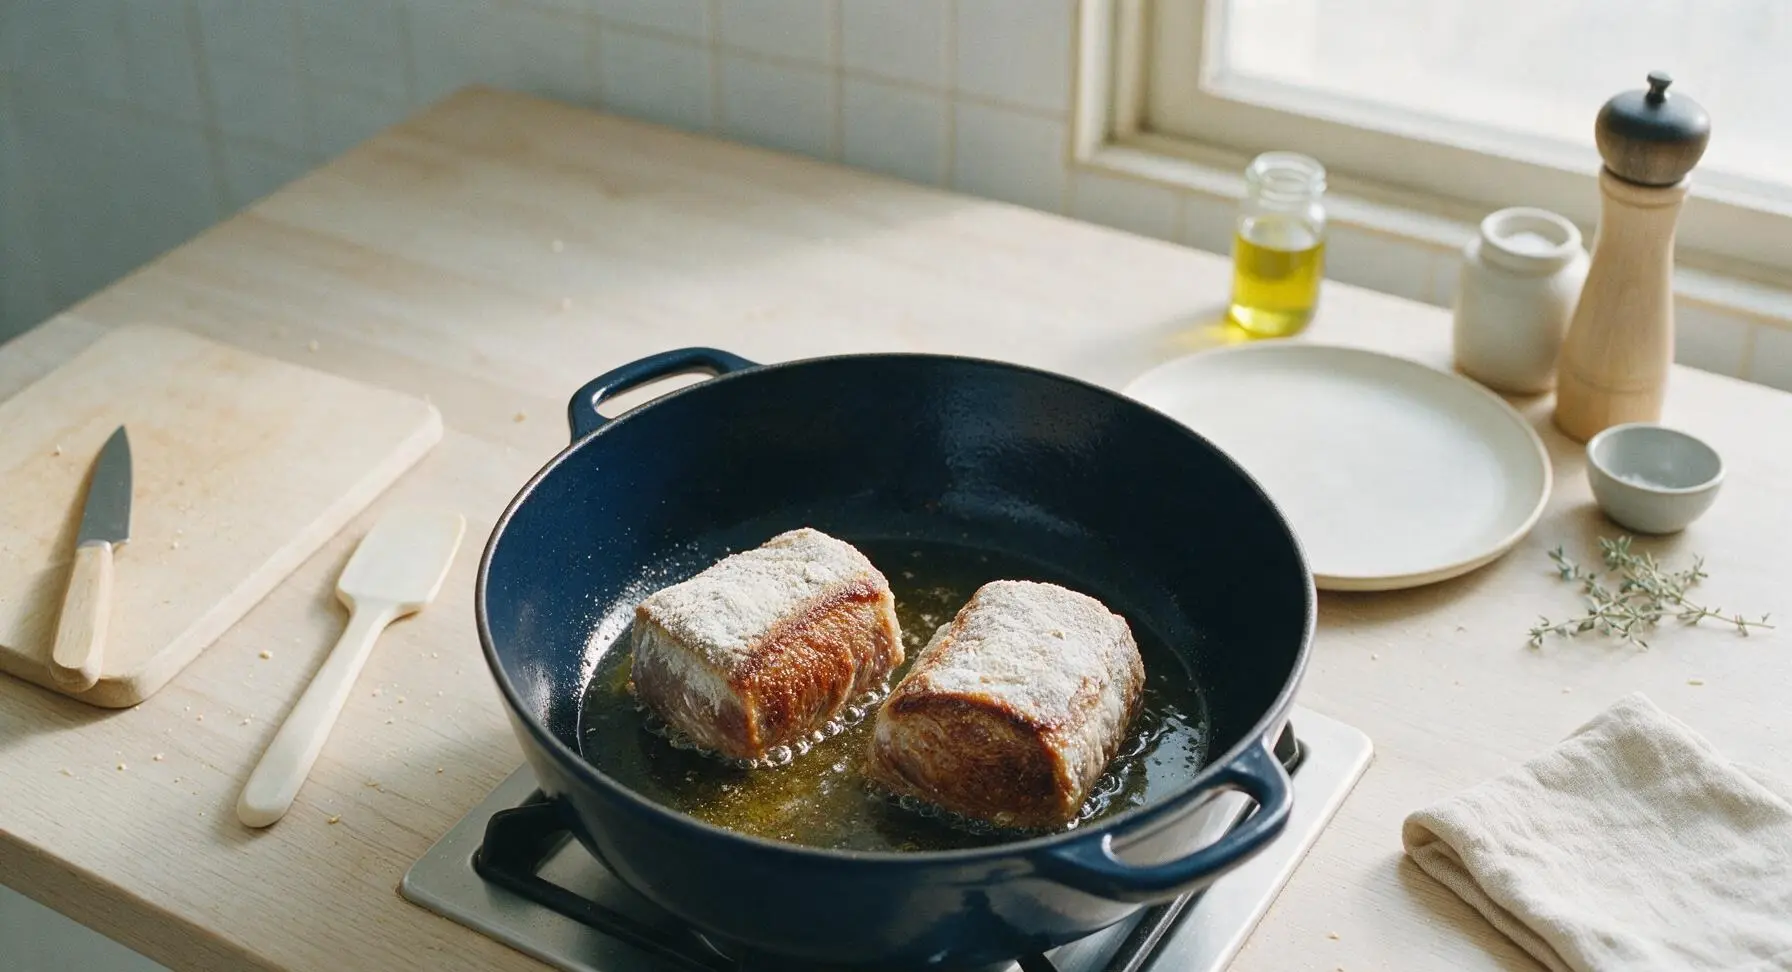
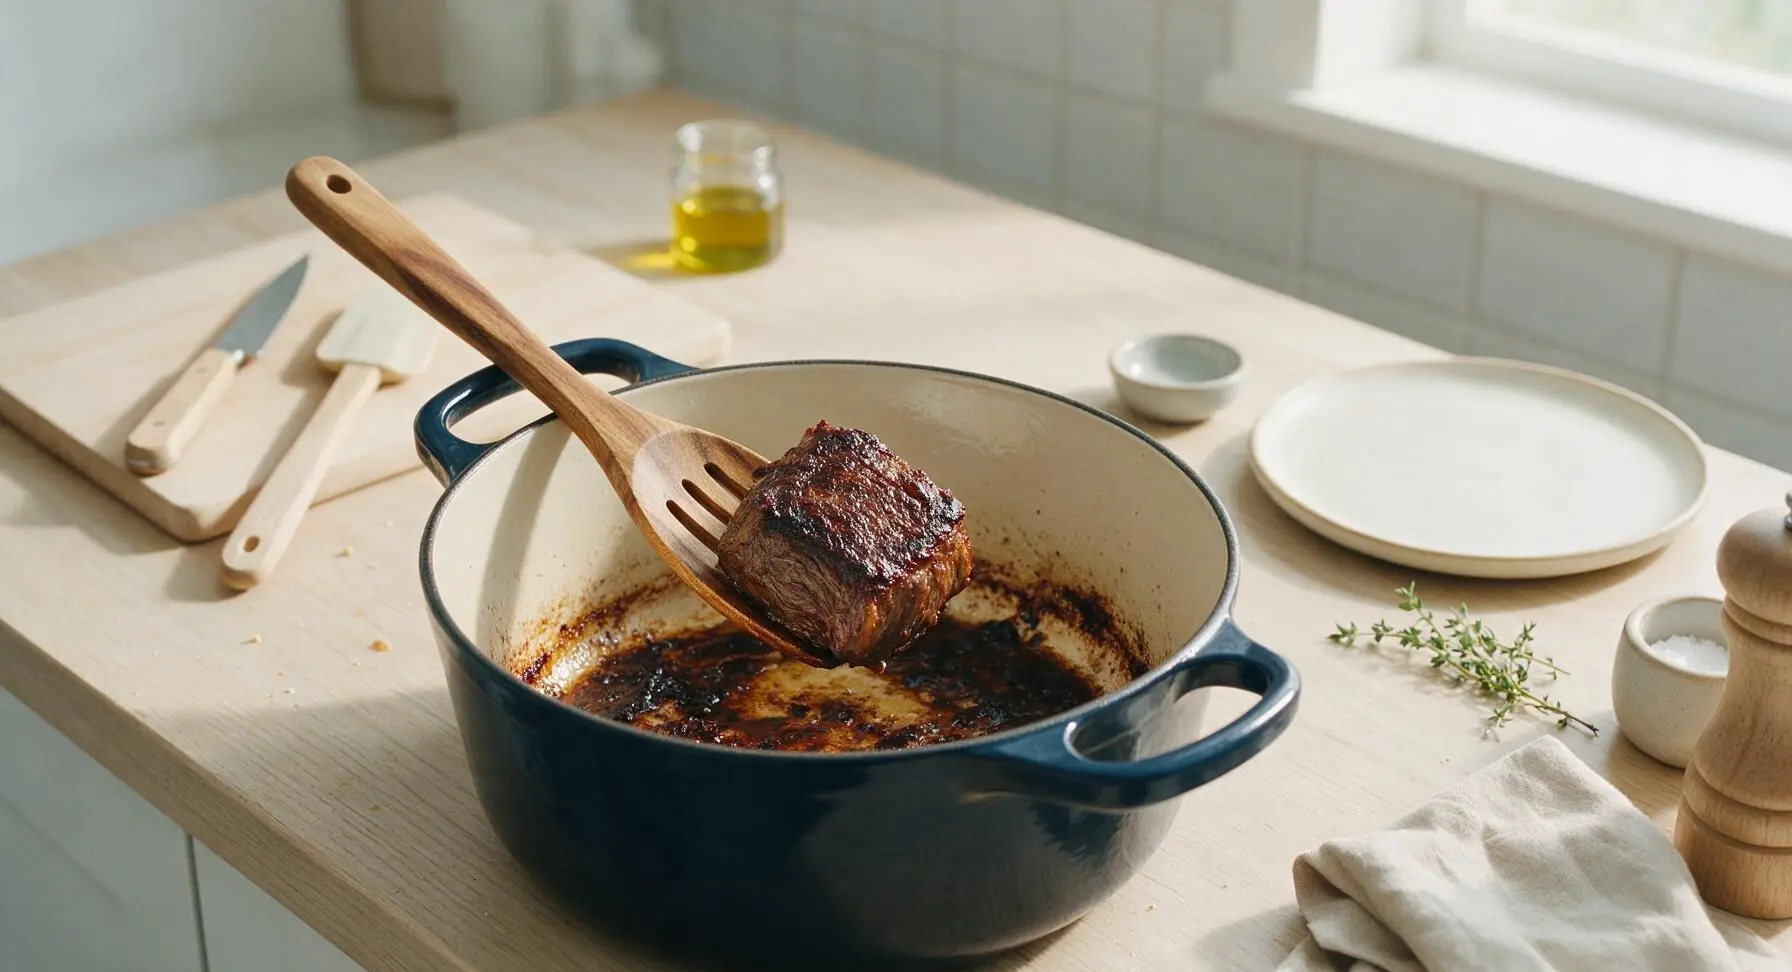
Step 2
step2:Sear until deep golden
Step 2
step2:Sear until deep golden
3

Sauté aromatic vegetables

Reduce heat to medium (160C/320F). In the same Dutch oven with the remaining fat and fond, add the chunked onion and carrot, cooking for 8 minutes, stirring occasionally with the acacia slotted spoon, until the edges of the vegetables turn golden and start to soften. Add the crushed garlic and 2 tablespoons tomato paste, stirring constantly for 1 minute, until the tomato paste darkens to a deep rust color and smells sweet and fragrant, with no raw metallic scent.
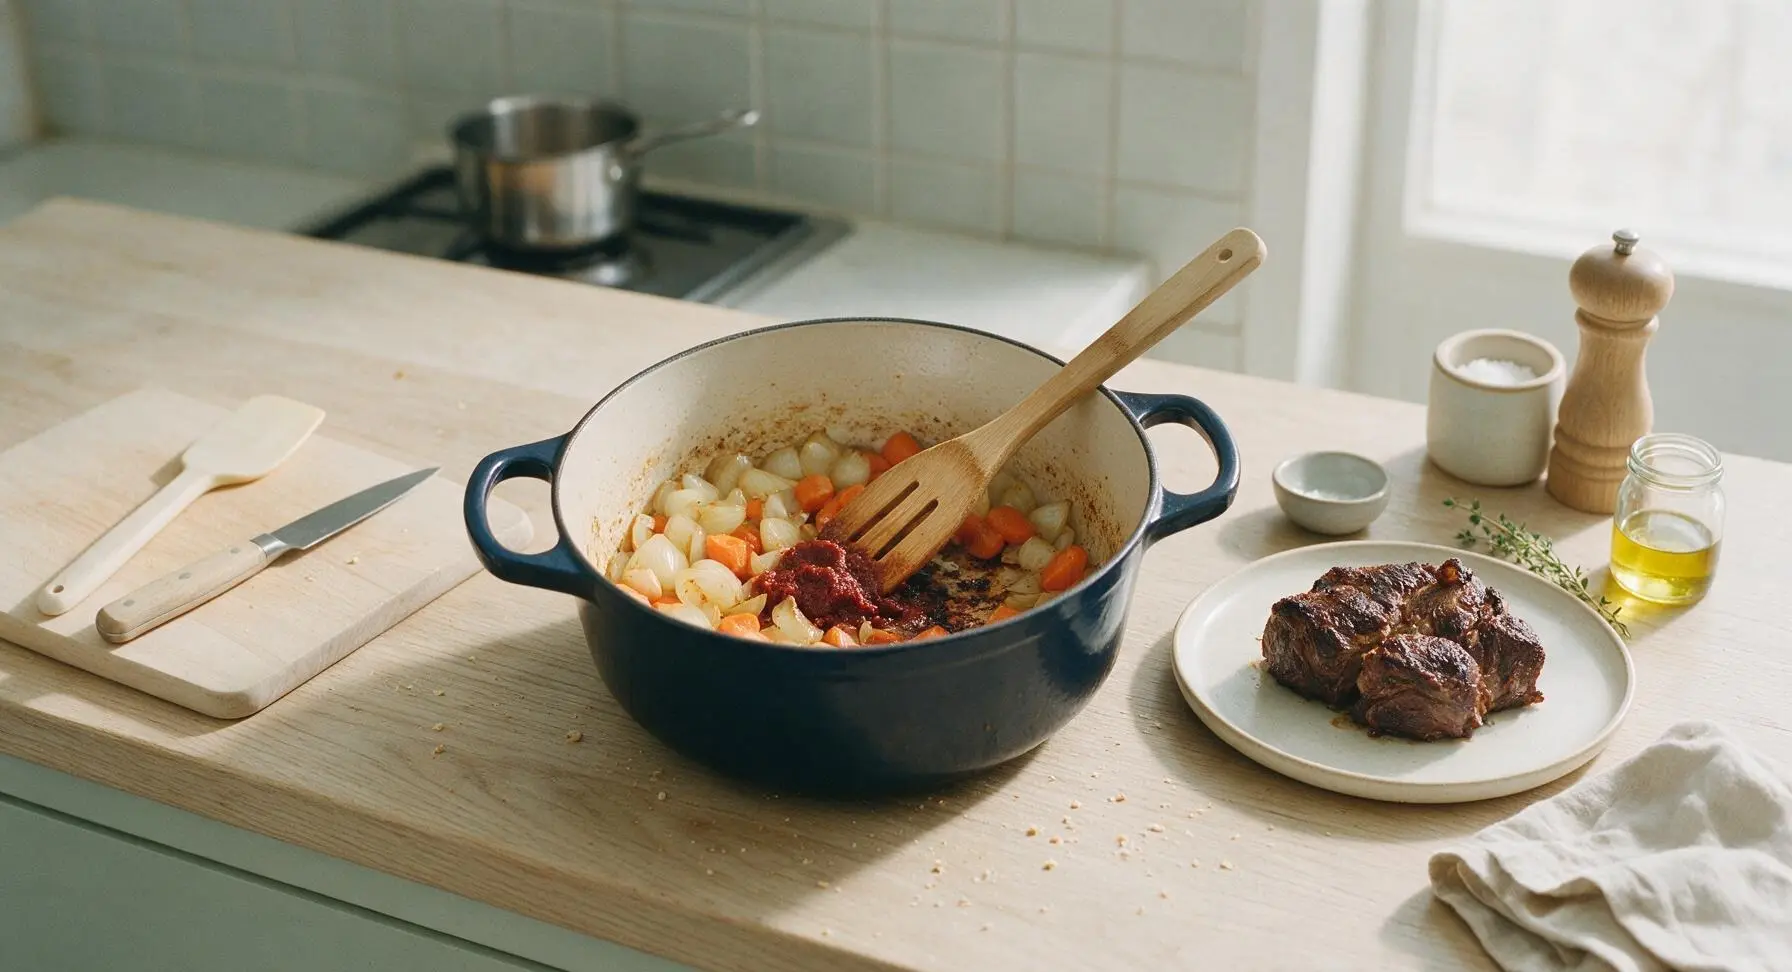
Step 3
step3:Sauté aromatic vegetables
4

Deglaze the pan

Slowly pour 750ml dry red wine into the Dutch oven, scraping the bottom of the pan firmly with the slotted spoon to lift all the browned fond bits into the liquid. Bring the wine to a gentle simmer, and cook for 10 minutes, until the wine reduces by roughly one third and the sharp, acrid alcohol smell fades to a rich, fruity aroma. No brown bits should remain stuck to the pan bottom when deglazing is complete.
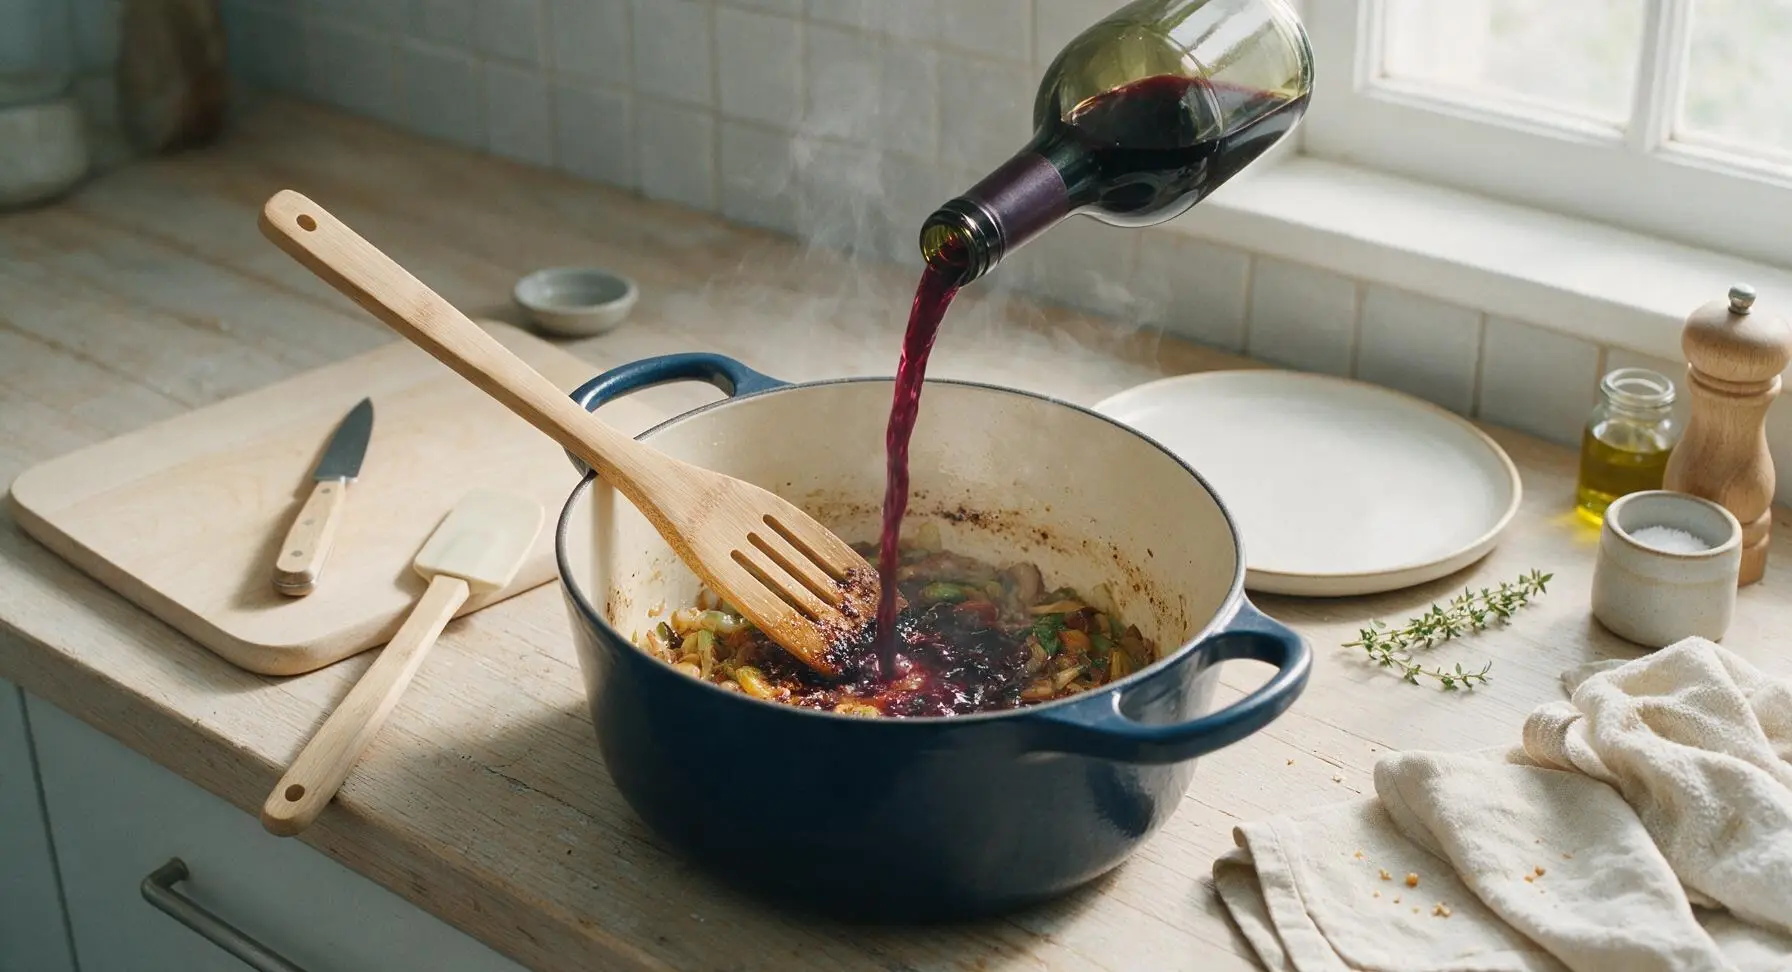
Step 4
step4:Deglaze the pan
5

Slow braise the cheeks

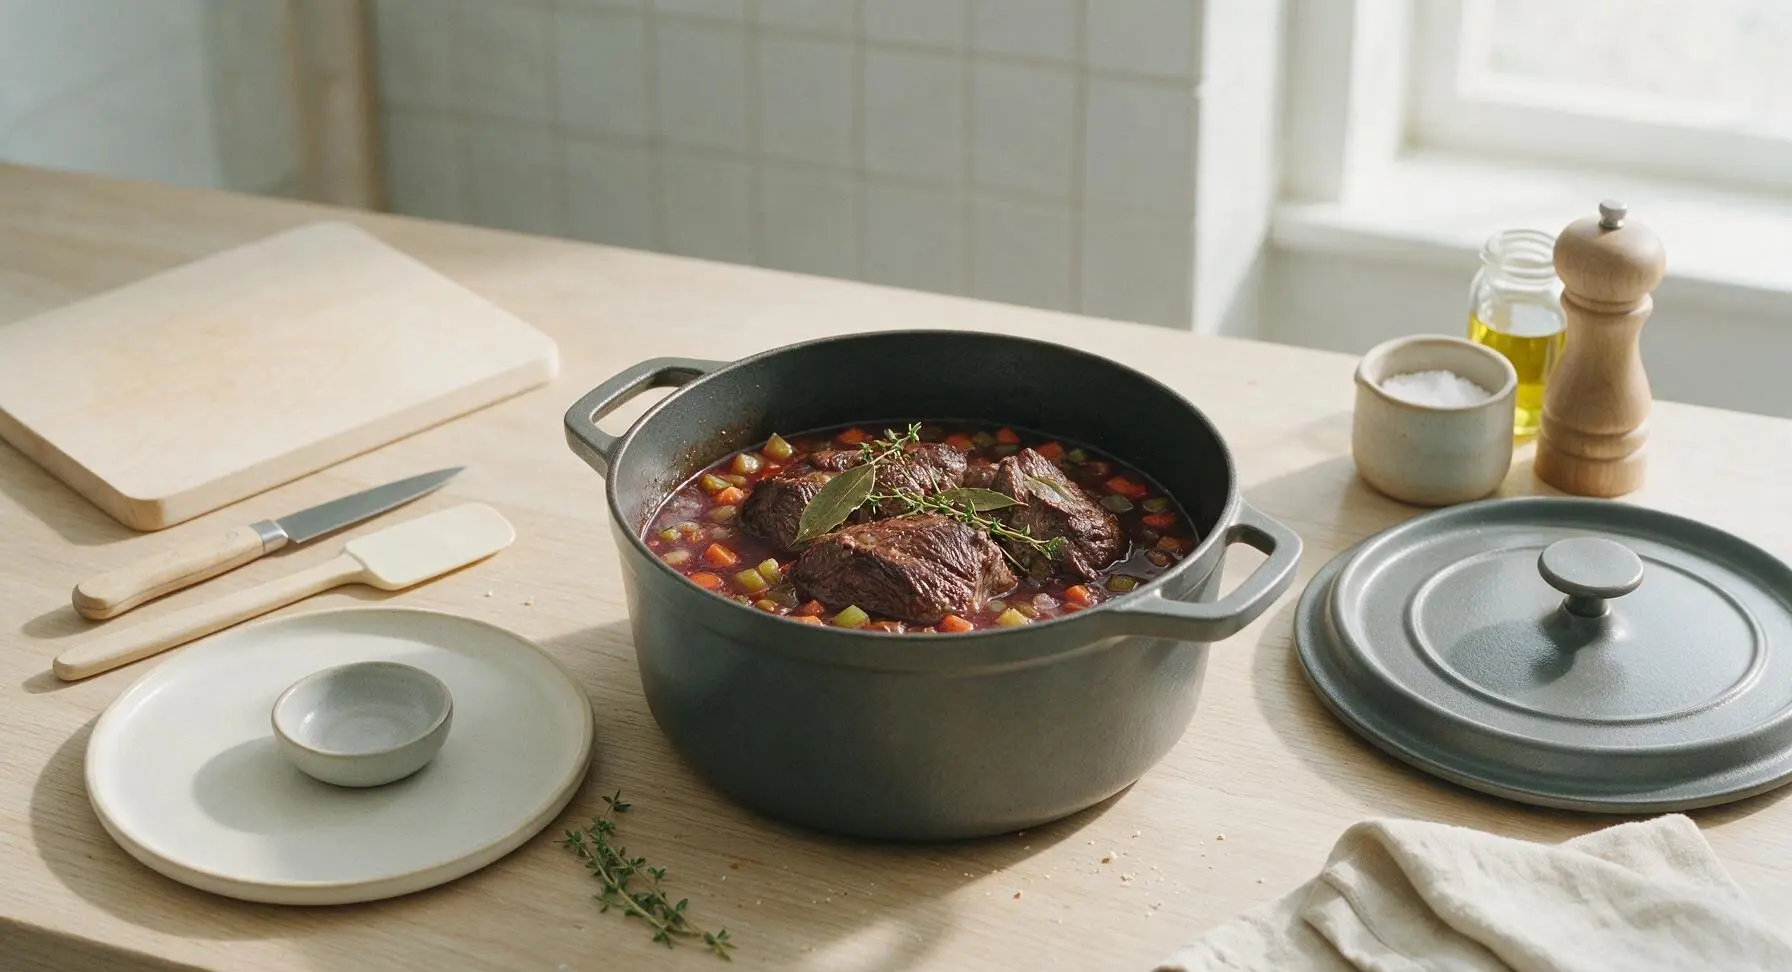
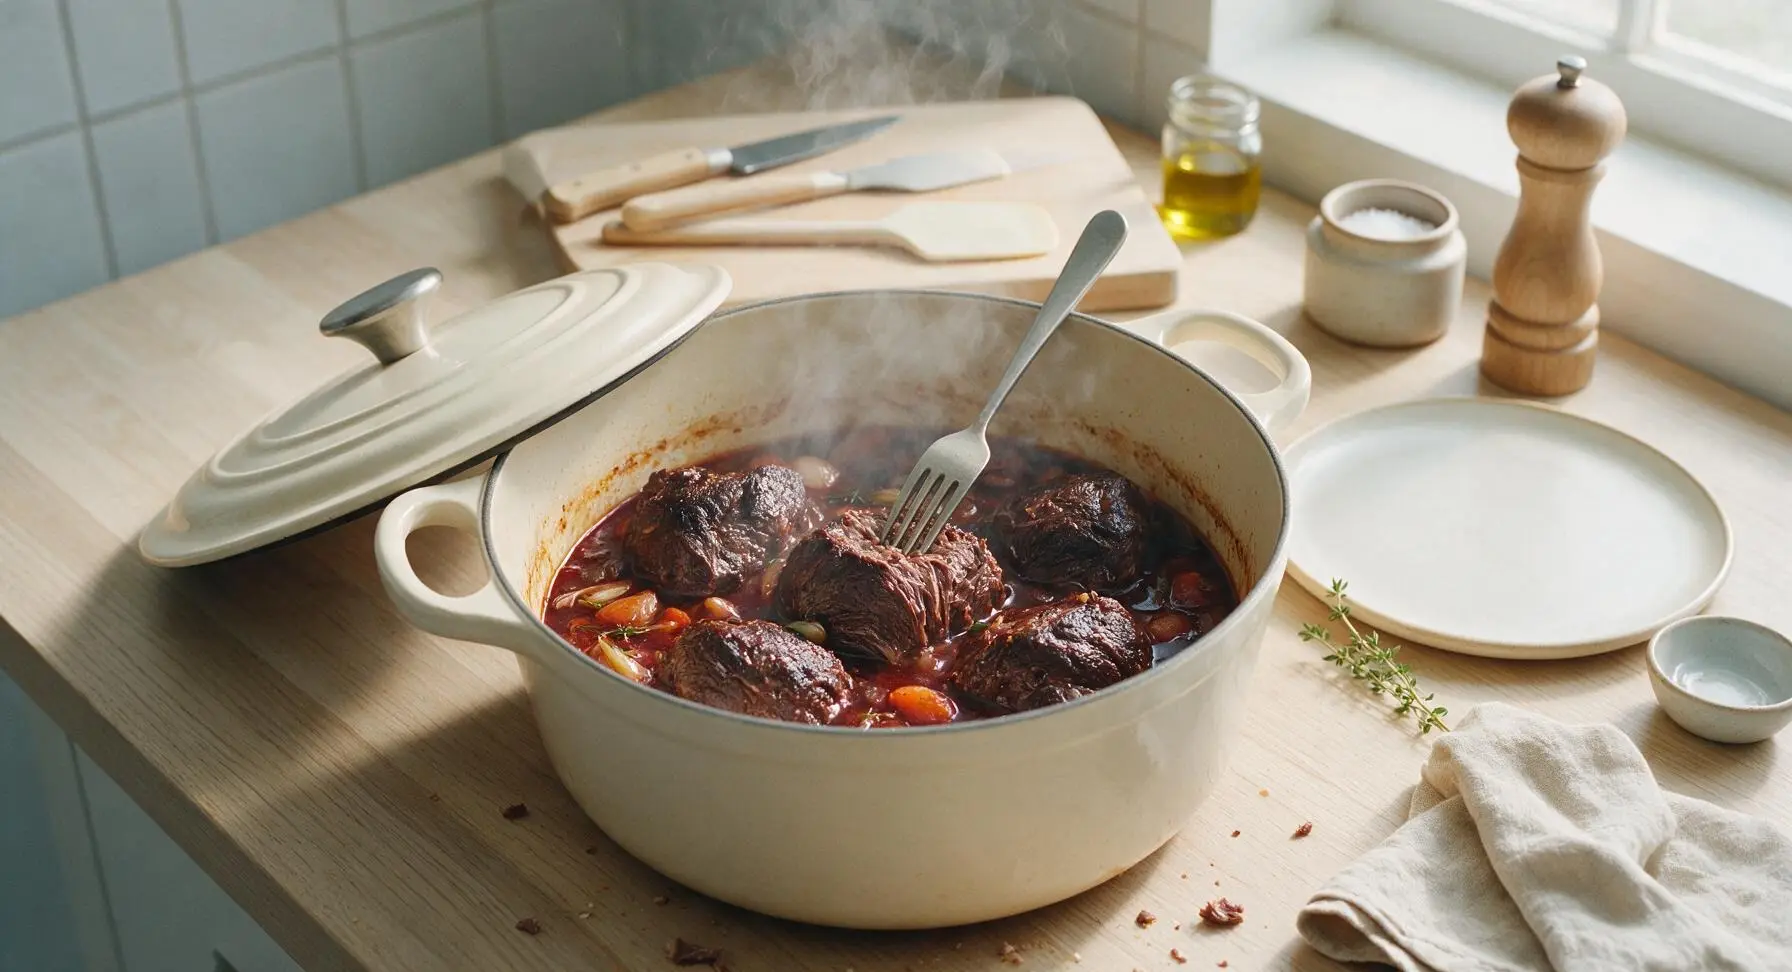
Return the seared beef cheeks to the Dutch oven, nestling them into the wine and vegetable mixture. Add 250ml beef stock, 6 thyme sprigs, 2 bay leaves, and 1 teaspoon whole black peppercorns. The liquid should cover ¾ of the beef; top up with a splash more stock if needed. Bring to a very gentle simmer, then cover with the lid, transfer to a preheated oven set to 160C/320F, and cook for 3 hours. The beef is done when a fork slides in with zero resistance, and the meat jiggles slightly when nudged, but does not fall completely apart.
Step 5
step5:Slow braise the cheeks
Step 5
step5:Slow braise the cheeks
6

Strain and finish sauce

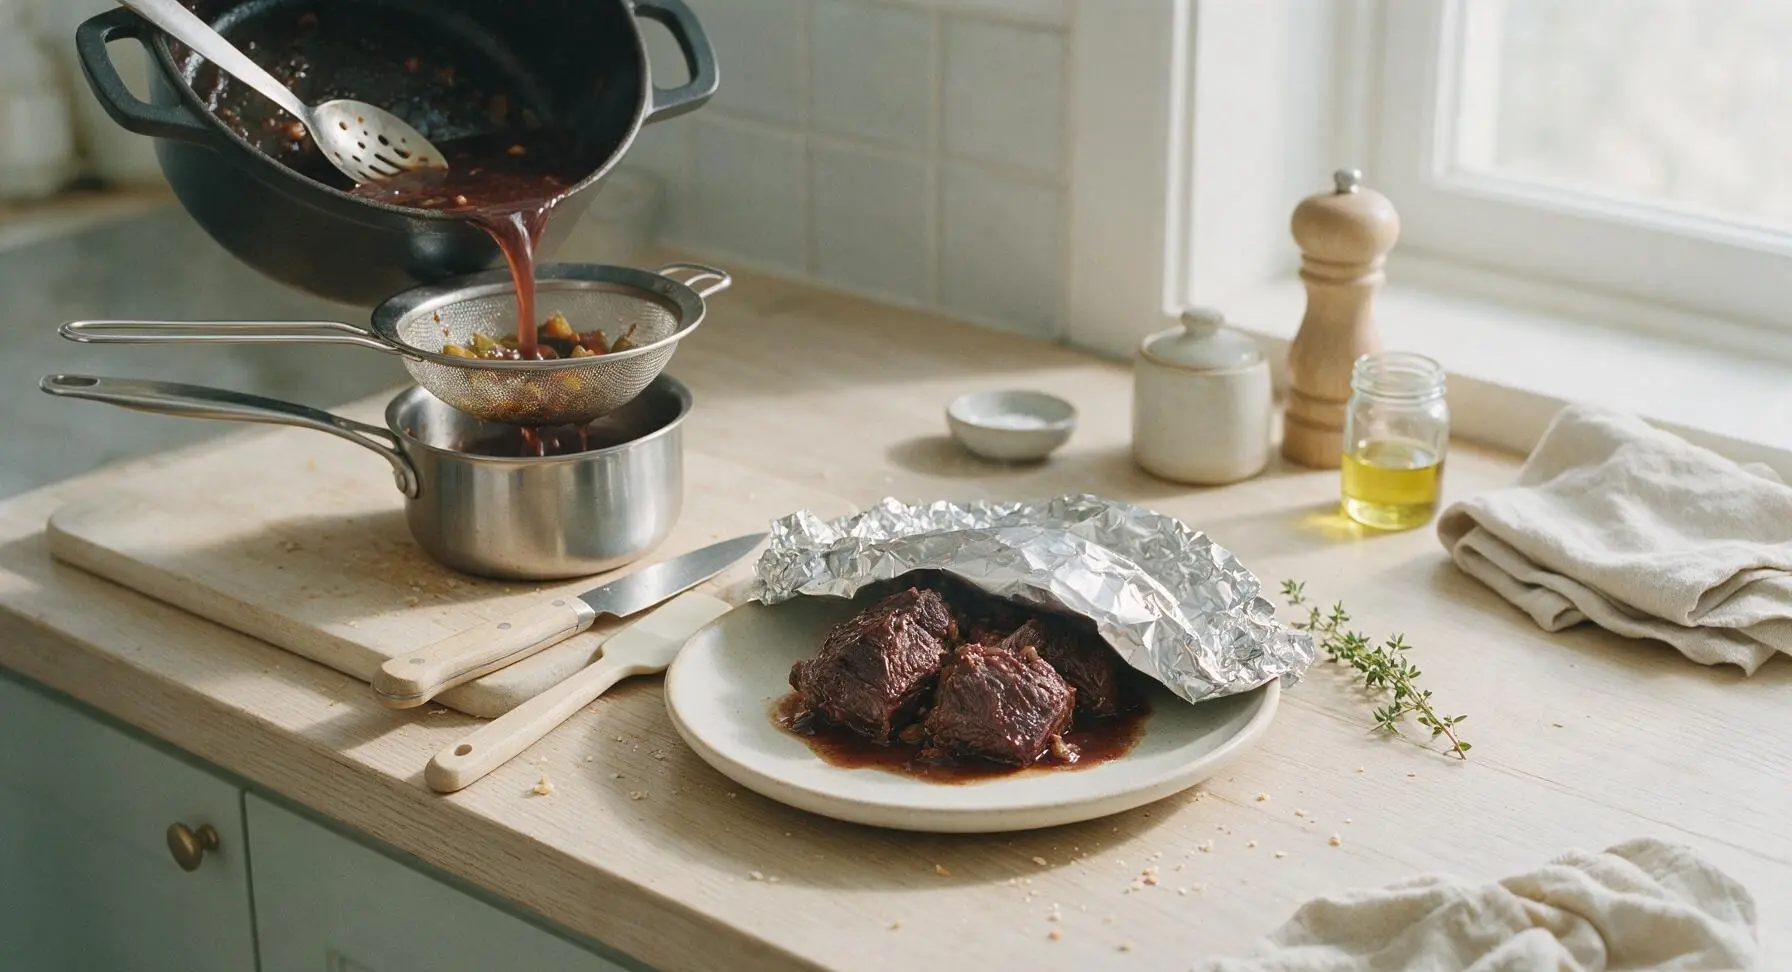
Use the slotted spoon to carefully transfer the tender beef cheeks back to the oat-white stoneware plate, cover loosely with foil, and rest for 10 minutes while you prepare the sauce. Retrieve the fine-mesh sieve and small saucepan from below the counter. Pour the remaining braising liquid and vegetables through the sieve into the small saucepan, pressing gently on the vegetables to extract all flavorful liquid, then discard the spent solids. Bring the strained liquid to a gentle simmer over medium heat, whisk in 1 tablespoon cold unsalted butter, and cook for 5-7 minutes until the sauce reaches nappe consistency: it coats the back of a spoon thickly enough that a line drawn with your finger stays intact. Taste and adjust salt if needed.
Step 6
step6:Strain and finish sauce
7

Plate and serve

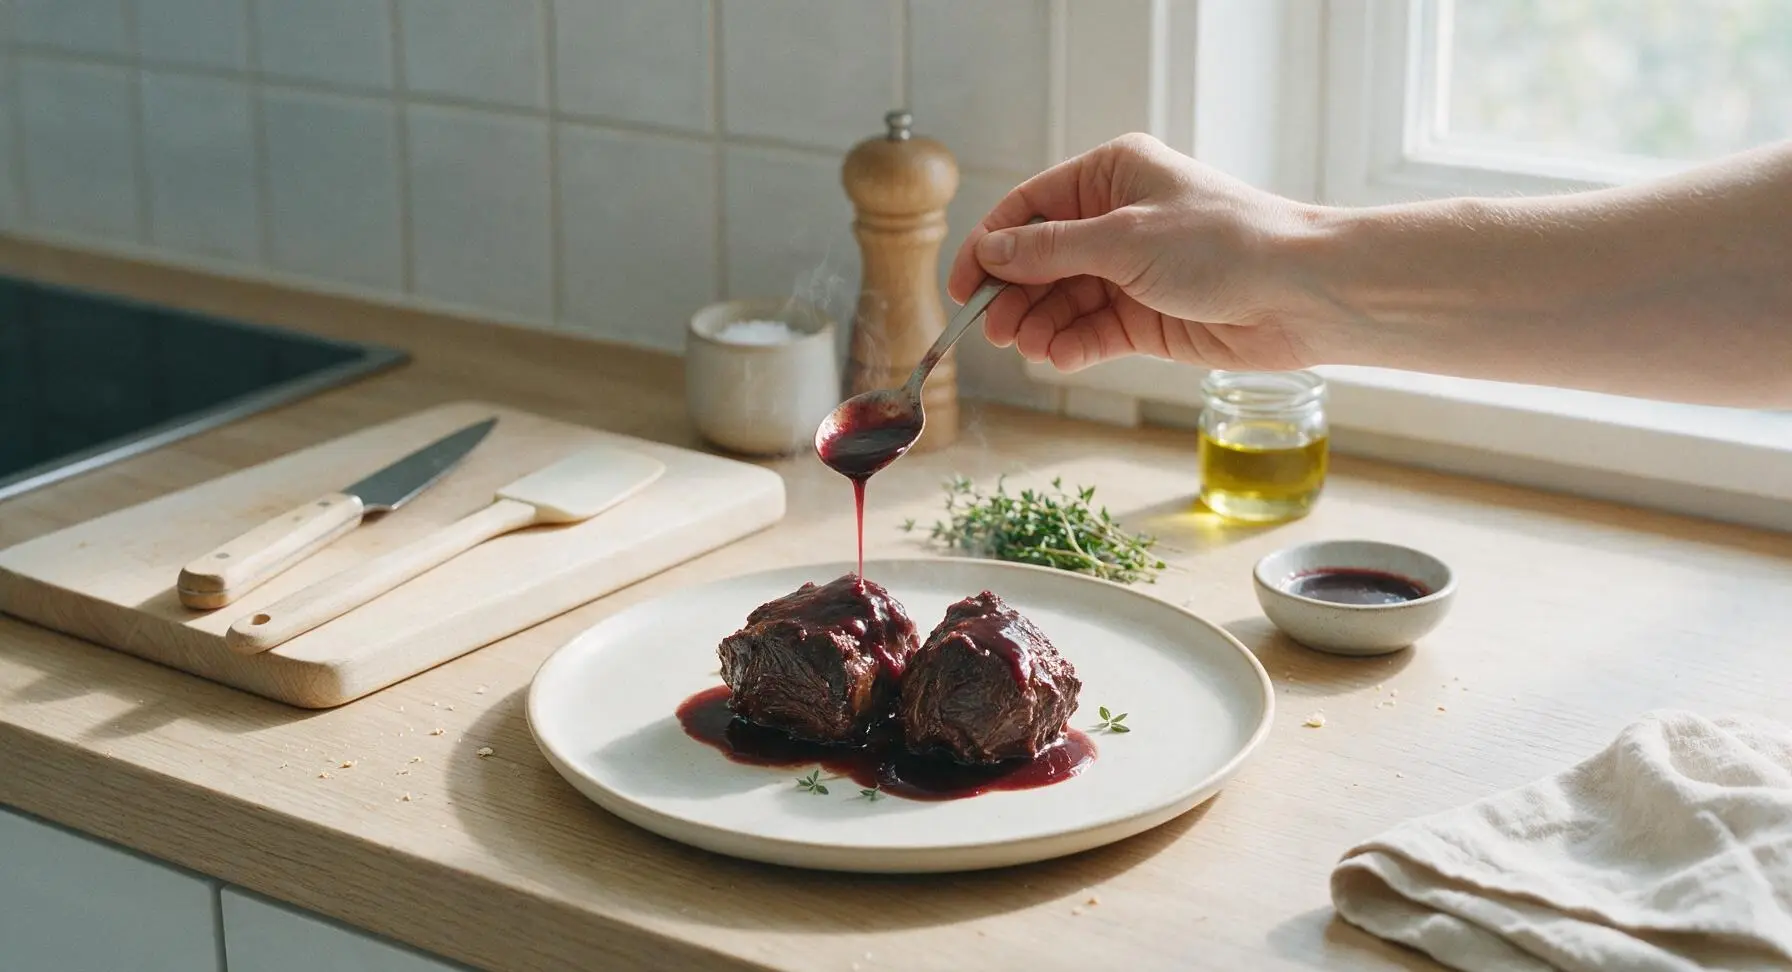
Spoon a thin 2mm layer of the finished red wine sauce onto the center of the matte oat-white stoneware dinner plate. Place two beef cheeks per serving on top of the sauce, spoon an extra 2 tablespoons of sauce over the beef to coat it generously. Garnish with a few fresh thyme leaves, and serve alongside buttery mashed potatoes or creamy polenta to soak up the extra sauce.
Step 7
step7:Plate and serve

Tips

1.Don’t skip drying the beef: Any surface moisture on the cheeks will cause oil to splatter and prevent a deep, crisp sear from forming, which is the foundation of the sauce’s rich, complex flavor. Pat until paper towels come away completely dry before seasoning.
2.Keep the braise at a gentle simmer: Rapid boiling will cause the muscle fibers in the beef cheeks to seize up and turn tough and stringy, rather than breaking down into that signature silky, pull-apart texture. If you see fast, rolling bubbles under the lid, turn the oven temperature down by 10-15C.
3.Make this dish 1-2 days ahead: Braised beef cheeks improve dramatically with rest, as the natural gelatin from the connective tissue melts into the sauce and the wine and aromatic flavors meld together. Store the beef in the strained sauce in the fridge, then skim any solidified fat from the surface before reheating gently on the stovetop.


✨ You May Also Like

Main Course
🍜 United Kingdom

A showstopping classic of tender seared beef, savory mushroom duxelles, and crisp prosciutto wrapped in flaky golden puff pastry, baked to juicy perfection.

⏱️ 2 hours 1Main Course ★ 4.7
Main Course
🍜 India

Tender charred marinated chicken simmered in a rich, spiced creamy tomato sauce, this iconic Anglo-Indian curry pairs perfectly with basmati rice or warm naan.

⏱️ 50 minuteMain Course ★ 4.6
Main Course
🍜 Thailand

Classic tangy, sweet, and savory Thai stir-fried rice noodles with shrimp, tofu, and crunchy garnishes, balancing all five core Thai flavor profiles.

⏱️ 30 minuteMain Course ★ 4.5
Main Course
🍜 United Kingdom

Crispy golden beer-battered cod and fluffy double-fried chips, served with tangy tartar sauce and malt vinegar: the timeless, beloved British pub comfort classic.

⏱️ 45 minuteMain Course ★ 4.7
Main Course
🍜 Mexico

Smoky, chile-marinated pork tacos with caramelized pineapple, fresh cilantro, and lime: a beloved classic Mexican street food perfect for casual summer gatherings.

⏱️ 1 hour 45Main Course ★ 4.8
Main Course
🍜 United States

Crunchy Fritos corn chips layered with savory beef chili and melted cheddar, topped with cool, zesty fixings for a beloved, cozy Tex-Mex comfort food.

⏱️ 35 minuteMain Course ★ 4.8

beef cheek meat:Frequently Asked Questions

1.Why do I need to trim the silver skin off beef cheeks before braising? ▾
That thin, shiny, tough connective tissue never fully breaks down, even after hours of low, slow cooking, and will leave chewy, rubbery bites in your finished dish. Use a sharp thin boning knife to slide under the silver skin, pull it taut, and slice it away in strips, leaving as much soft marbled meat intact as possible.
2.What kind of red wine works best for this recipe? ▾
Reach for a dry, full-bodied red with moderate tannins, like the recommended Burgundy or Cabernet Sauvignon. Skip sweet, fruity reds like white Zinfandel or overly light Pinot Noirs—you want a wine with bold, earthy depth that will stand up to rich beef and aromatics as it reduces into the sauce.
3.Can I make this recipe without alcohol? ▾
Yes! Swap the red wine for an equal amount of low-sodium beef stock mixed with 2 tablespoons of balsamic vinegar and 1 tablespoon of red currant jelly to mimic wine’s bright, tart depth. You won’t get the exact complex wine flavor, but you’ll still get a rich, balanced, deeply flavored braise.
4.Do I really need to sear the beef cheeks before braising? ▾
I highly recommend it! Searing over medium-high heat creates a deep, caramelized crust on the meat that adds layers of nutty, roasted flavor you can’t get from braising alone. It also leaves browned bits called fond on the pot bottom that melt into the sauce for extra, irresistible richness.
5.Can I cook this in a slow cooker instead of the oven? ▾
Absolutely! After searing the meat and sautéing the aromatics, transfer everything to your slow cooker, pour in the wine and stock, and cook on LOW for 7 to 8 hours until the beef is fall-apart tender. For a glossy sauce, strain and reduce the braising liquid on the stovetop for 10 minutes before serving.
6.How do I know when the beef cheeks are done cooking? ▾
They’re ready when you can insert a fork or paring knife into the thickest part of the cheek with zero resistance, and the meat pulls apart easily when you nudge it with the fork. If you meet any firmness when poking, give them another 20 to 30 minutes—rushing this step leads to tough meat.
7.My braising sauce is thin and watery—how do I fix that? ▾
No problem! Use tongs to gently transfer the cooked beef cheeks and veggies to a covered plate to keep warm, then set your Dutch oven on the stovetop over medium heat. Simmer the sauce for 8 to 12 minutes, stirring occasionally, until it reaches a velvety, coat-the-back-of-a-spoon consistency.
8.Why did my beef cheeks turn out tough even after hours of cooking? ▾
This almost always happens from cooking at too high a temperature, or not cooking them long enough. Braising relies on low, steady heat (around 325°F in the oven) to break down tough connective tissue into silky gelatin. Cranking the heat makes muscle fibers seize up, so turn the temp down and give them more time.
9.Can I make this dish ahead of time? ▾
Actually, it tastes even better made a day or two ahead! Let the braise cool completely, then store it covered in the fridge. The flavors meld and deepen as it chills, and fat solidifies on top for easy skimming. Gently reheat, covered, in a 300°F oven for 25 to 30 minutes until warmed through.
10.Can I freeze leftover braised beef cheeks? ▾
Yes, they freeze beautifully for up to 3 months. Store the cooled beef in an airtight container, completely covered in braising sauce to prevent freezer burn, and thaw in the fridge overnight before reheating. The texture stays silky and tender, with no grainy or mushy breakdown after freezing.
11.Do I need to use low-sodium beef stock? ▾
It’s strongly recommended, because the braising liquid reduces significantly as it cooks, which concentrates salt levels. Regular full-sodium stock can lead to an overly salty final sauce once reduced. If regular stock is all you have, cut it with ¼ cup water and taste carefully before adding extra salt.
12.What’s the best way to serve these red wine beef cheeks? ▾
Serve them over creamy mashed potatoes, buttery polenta, or buttered egg noodles to soak up that glossy sauce. They also pair beautifully with roasted root veggies, sautéed green beans, or a crisp side salad with bright vinaigrette to cut through the rich, meaty flavor.
13.Should I cut the beef cheeks into smaller pieces before braising? ▾
I recommend leaving them whole if they’re the standard 4 to 6 ounce size you’ll find at most butcher counters. They shrink a bit as they braise, and staying whole helps them hold their tender, silky texture. If you get extra-large 8+ ounce cheeks, cut them in half evenly for even cooking.
14.Can I leave the carrot and onion in the sauce instead of straining them out? ▾
Totally! A lot of classic recipes strain the aromatics for a super smooth, glossy sauce, but if you prefer a heartier, more rustic dish, you can leave the soft, braised carrot and onion chunks right in. Just mash a few gently with a fork to help thicken the sauce a little before serving.
15.Do I need to marinate the beef cheeks in wine first? ▾
It’s not required for tender, flavorful results, but marinating them in the wine and aromatics for 8 to 12 hours in the fridge adds an extra layer of deep, wine-infused flavor. If you do marinate, pat the cheeks completely dry before searing to get a nice caramelized crust, not a steamed surface.
16.Why is my sauce bitter after braising? ▾
Bitterness usually comes from using a wine that’s too high in harsh tannins, or from burning the browned fond when you sauté aromatics after searing. Fix it by stirring in a tiny pinch of sugar, a teaspoon of red currant jelly, or a small pat of cold butter at the end to balance bitter notes and round out the sauce.

Comments (17)

2 days ago

OMG these slow-braised red wine beef cheeks were a total game changer for our Sunday family dinner! I was a little intimidated by the 3.5 hour cook time but it was 100% worth every minute. The meat was so fall-apart tender I didn’t even need a knife to cut it. Served it over creamy polenta and my husband went back for thirds. SO good.

1 day ago

I served mine over polenta too! Did you use a dry red or something a little fruitier? I used a cheap Cab Sav last time and it turned out great, curious what other people use.

1 day ago

So happy this was a hit for your family dinner! A dry Cabernet Sauvignon or Merlot works beautifully here, no need for a super fancy bottle—save the good stuff for drinking with the meal!

1 week ago

Took this to my neighborhood potluck last weekend and people were asking me for the recipe before I even set the dish down! Only note is that I had to bump the braise temp up 25 degrees because my oven runs cold, so make sure you know your oven quirks before starting. The deep red wine sauce isIME, I mopped up every last bit with crusty sourdough.

6 days ago

Great tip about adjusting for your oven’s hot/cold spots! So stoked this was a potluck hit—crusty bread for mopping sauce is non-negotiable in my book.

3 days ago

Meal prepped a batch of these on Sunday and they held up perfectly all week for work lunches! I portioned them out with mashed cauliflower and roasted carrots, and even my picky coworker asked where I got the recipe. The flavor gets even better the next day, trust me. Only reason I’m not giving 5 stars is that I wish the recipe noted how much fat to trim off the cheeks ahead of time— I left a little too much on my first go.

yesterday

Full transparency, I’ve never braised anything in my life and I was convinced I was gonna mess this up. The medium difficulty rating had me nervous! But the instructions were super clear, and even though it took a little longer than 3.5 hours for me (I think I cut my cheeks too thick), the end result was restaurant quality. My 7 and 9 year old actually ate it without complaining, which is basically a miracle in my house.

18 hours ago

Oh my gosh same! I was so nervous about braising for the first time too, I kept opening the oven to check every 10 minutes. Did you end up trimming the silver skin okay? I missed a few patches and they were a little chewy.

12 hours ago

First braise win, that’s what we love to see! A good rule of thumb is to trim any thick, tough silver skin off the cheeks before searing—don’t stress about every little bit though, the long braise will break most of it down. Next time try cutting them into 4oz portions for more even cooking!

5 days ago

I made this for my anniversary dinner with my partner and it was so romantic! We paired it with the same Pinot Noir I used for the braise and some roasted garlic mashed potatoes. The only issue I ran into was my sauce didn’t thicken up as much as I wanted at the end—any tips for next time?

4 days ago

Happy anniversary! For a thicker sauce, after you remove the beef cheeks, simmer the braising liquid on the stovetop over medium heat for 5-10 minutes until it reduces by about a third—you can also mix a tiny bit of cornstarch slurry in if you want it extra glossy.

2 weeks ago

Wait, who says you can’t make this in a slow cooker? I seared the cheeks first like the recipe said, dumped everything in my crockpot on low for 8 hours, and it came out just as tender as when I make it in the Dutch oven. Perfect for days when I don’t want to heat the whole house up with the oven. 10/10, will be making this all fall and winter.

1 week ago

Wait this is a game changing tip! I hate running my oven for 3 hours in the summer when it’s 100 degrees out. Did you add the veggies right in the slow cooker too, or cook them separate?

1 week ago

Love the slow cooker hack! We’re testing a formal slow cooker variation for the recipe right now, but your method sounds spot on. Adding the veggies right in with the beef works perfectly, just make sure to cut them into hearty chunks so they don’t turn mushy during the long cook.

30 minutes ago

I was shocked how affordable beef cheeks are compared to short ribs! I was expecting this to be a super pricey special occasion meal but I got all the ingredients for under $25, and it fed me, my roommate, and we had leftovers for two days. The flavor is so rich you’d think it cost a fortune. Will be adding this to my regular rotation for sure.

2 days ago

Super easy to make this gluten free for my celiac kiddo! I swapped the regular flour for a 1:1 GF flour blend to dredge the beef, and used gluten free beef broth, and you couldn’t even tell the difference. My kid said it’s their new favorite birthday dinner request, which is saying a lot because they usually only want chicken nuggets.

1 day ago

Thanks for sharing that GF swap! We love hearing about adjustments that work for different dietary needs—so cool this is a new birthday favorite, that’s the highest compliment we can get!

1 week ago

I’ve ordered beef cheeks at fancy steakhouses that weren’t half as good as this recipe. That deep, savory red wine and shallot flavor? *Chef’s kiss.* I did add a sprig of fresh rosemary from my windowsill herb garden because I had it on hand, and it added such a nice earthy note. Don’t skip searing the cheeks super well before braising, that crust is where so much flavor is.

6 days ago

Oh adding rosemary is such a good call! I have a ton growing in my yard right now, I was trying to figure out what to do with it. Did you add it at the start of the braise, or closer to the end?

5 days ago

I tossed it in right when I added the braising liquid so it had time to infuse the whole time! Just make sure to fish the woody stem out before you serve, no one wants to bite into that.

5 minutes ago

Okay, real talk: I messed up the first step and burned the shallots while searing the beef, and it STILL turned out good. I had to scoop out the burnt bits, added a little extra broth, and the end result was still so flavorful my roommate thought I ordered takeout from that fancy French place downtown. Next time I’ll pay more attention instead of scrolling TikTok while searing, lol.

3 days ago

Made this for my parents when they came to visit last weekend, and my dad (who is the pickiest meat eater on the planet, says all slow cooked meat is “too mushy”) said it was the best beef dish he’s ever had. I served it with buttery egg noodles and roasted broccoli, and we all left the table so full we could barely move. 10/10, worth every second of cook time.

2 days ago

Buttery egg noodles are such a perfect pairing! I did mashed potatoes last time but I’m definitely doing noodles next, that sounds like it would soak up all that amazing sauce so well.

2 weeks ago

I was worried the 3.5 hour cook time would be impossible with two toddlers running around the house, but most of that is hands-off braising time! I got all my prep done during nap time, popped it in the oven, and only had to check on it a couple times while the kids played. My toddlers loved it too, they kept saying “more meat!” which is a win in my book. The only heads up is that it does make your whole house smell incredible for hours, so be prepared for neighbors to knock asking what you’re cooking.

12 days ago

Hands-off cook time for the win with little kids! We always love hearing that even the tiniest critics approve—nothing beats that “more meat” request.

11 days ago

Wait the neighbor knock is so real! I made this last month and my next door neighbor texted me half way through cooking asking if I was making something with red wine because the smell was drifting over to their porch, lol. They got a leftover portion and now they text me every time I mention making it.

1 week ago

Pro tip: save the leftover braising sauce! I strained it, froze it in ice cube trays, and now I use it to add flavor to stir fries, gravy, even quick pasta sauces. It’s so packed with flavor I’d hate to see anyone pour any of it down the drain. The beef itself freezes really well too, so it’s great for stashing away for busy nights.

6 days ago

That’s such a smart tip for saving leftover sauce! Those flavor cubes are such a great hack for quick weeknight meals, we love that idea. Thanks for sharing!

2 hours ago

I added a tiny pinch of smoked paprika and a dash of balsamic vinegar to the braising liquid because I like a little deeper, slightly smoky flavor, and it was chef’s kiss. Don’t be scared to tweak the seasonings to match what you like! The base recipe is so solid it can handle a little personalization. I will say, trim the cheeks well— I skipped trimming a big chunk of connective tissue and it was a little chewy on one piece.

just now

As someone who works in a professional kitchen, I’m really impressed with how accurate this recipe is. A lot of home braising recipes skimp on the searing step or don’t use enough aromatics, but this one nails the ratio of wine, broth, and veggies. I made this for my day off meal and it tasted exactly like the version we serve at the bistro I work at, no cap.

just now

Wow, coming from a line cook that’s the highest possible praise! We test all our recipes over and over to make sure they’re just as good as restaurant versions, so this means a lot. Hope you enjoyed your day off meal!

yesterday

I loaded mine up with extra carrots, celery, and even some parsnips because I love having lots of tender braised veggies with my meat. The veggies soak up all that red wine and beef flavor so well, they’re almost better than the beef itself! I will say, next time I’ll cut the veggies a little bigger because my parsnips got super soft after 3 hours in the oven.

5 days ago

Full disclosure, I burn almost everything I make. I can barely boil pasta without messing it up. But I followed this recipe step by step, didn’t skip anything, and it actually turned out perfect? I’m as shocked as my girlfriend is, she thought I ordered delivery when I set it on the table. 10/10, even cooking newbies like me can nail this if you take your time.

3 days ago

This gives me so much hope! I’m also a notoriously bad cook and I’ve been nervous to try this because of the medium difficulty rating. If you can pull it off, I think I can too!



