
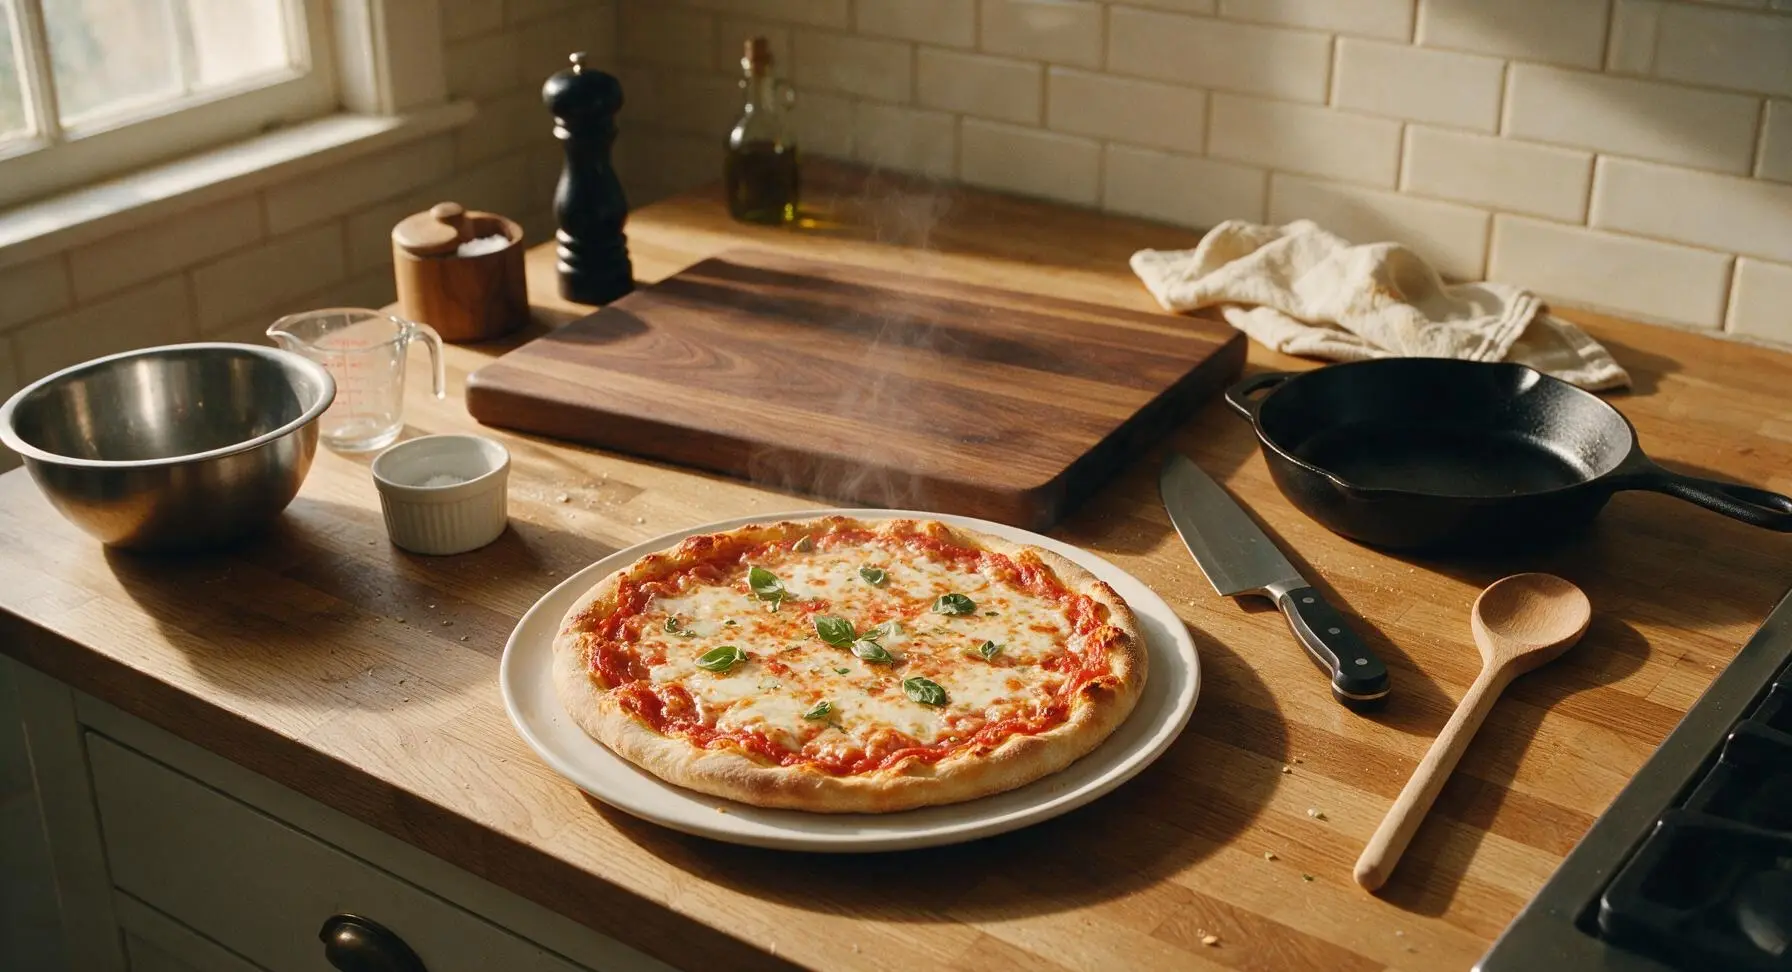
Cheese Pizza

title 1
Cheese Pizza
⏱️ cook time 12 minutes
🍽️ servings 4
⚡ Difficulty medium

intro

Crispy, chewy homemade crust slathered with bright tomato sauce, topped with stretchy melted mozzarella—this classic cheese pizza is cozy, crowd-pleasing comfort food at its simplest.

Ingredients
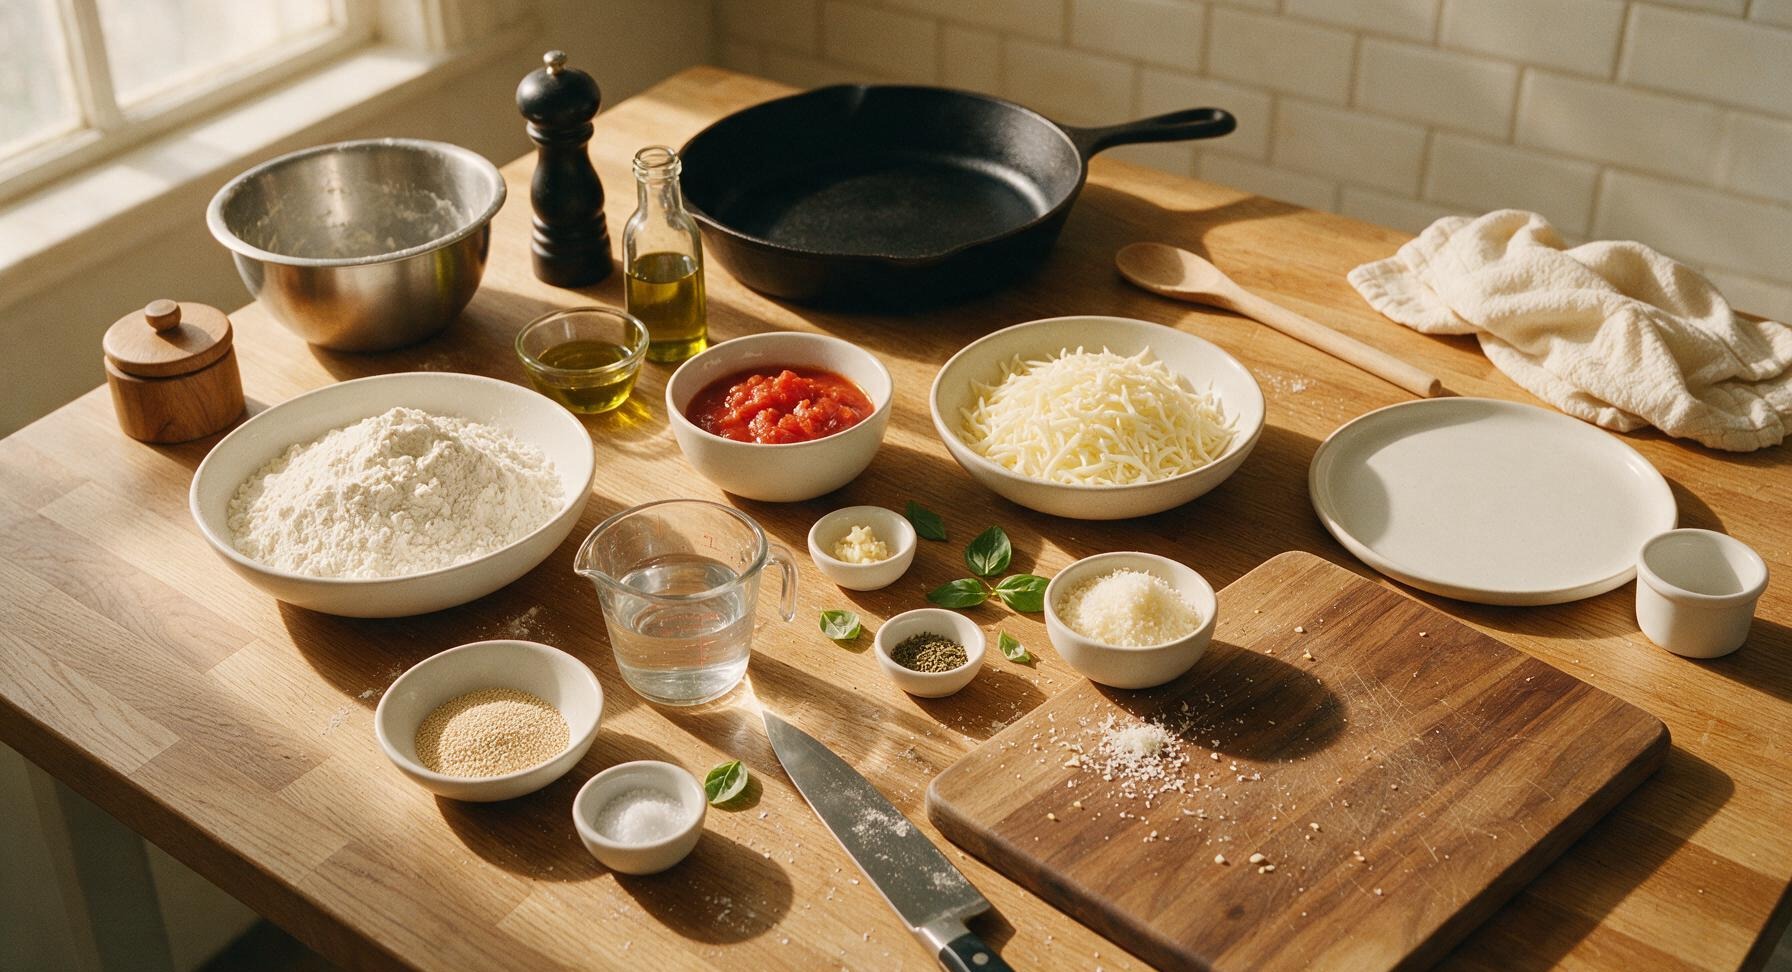
All-purpose flour 320g (2.5 cups)
Active dry yeast 7g (1 standard packet)
Warm water (105-110°F) 180ml (3/4 cup)
Fine sea salt 8g (1.5 tsp)
Extra-virgin olive oil 30ml (2 tbsp), divided
Crushed San Marzano tomatoes 160g (2/3 cup, drained of excess liquid)
Garlic clove 1, minced
Dried oregano 1g (1/2 tsp)
Low-moisture mozzarella cheese 225g (8 oz), shredded
Grated parmesan cheese 25g (1/4 cup), divided
Fresh basil leaves 5-6 leaves

Steps

1

Mix and Knead Dough

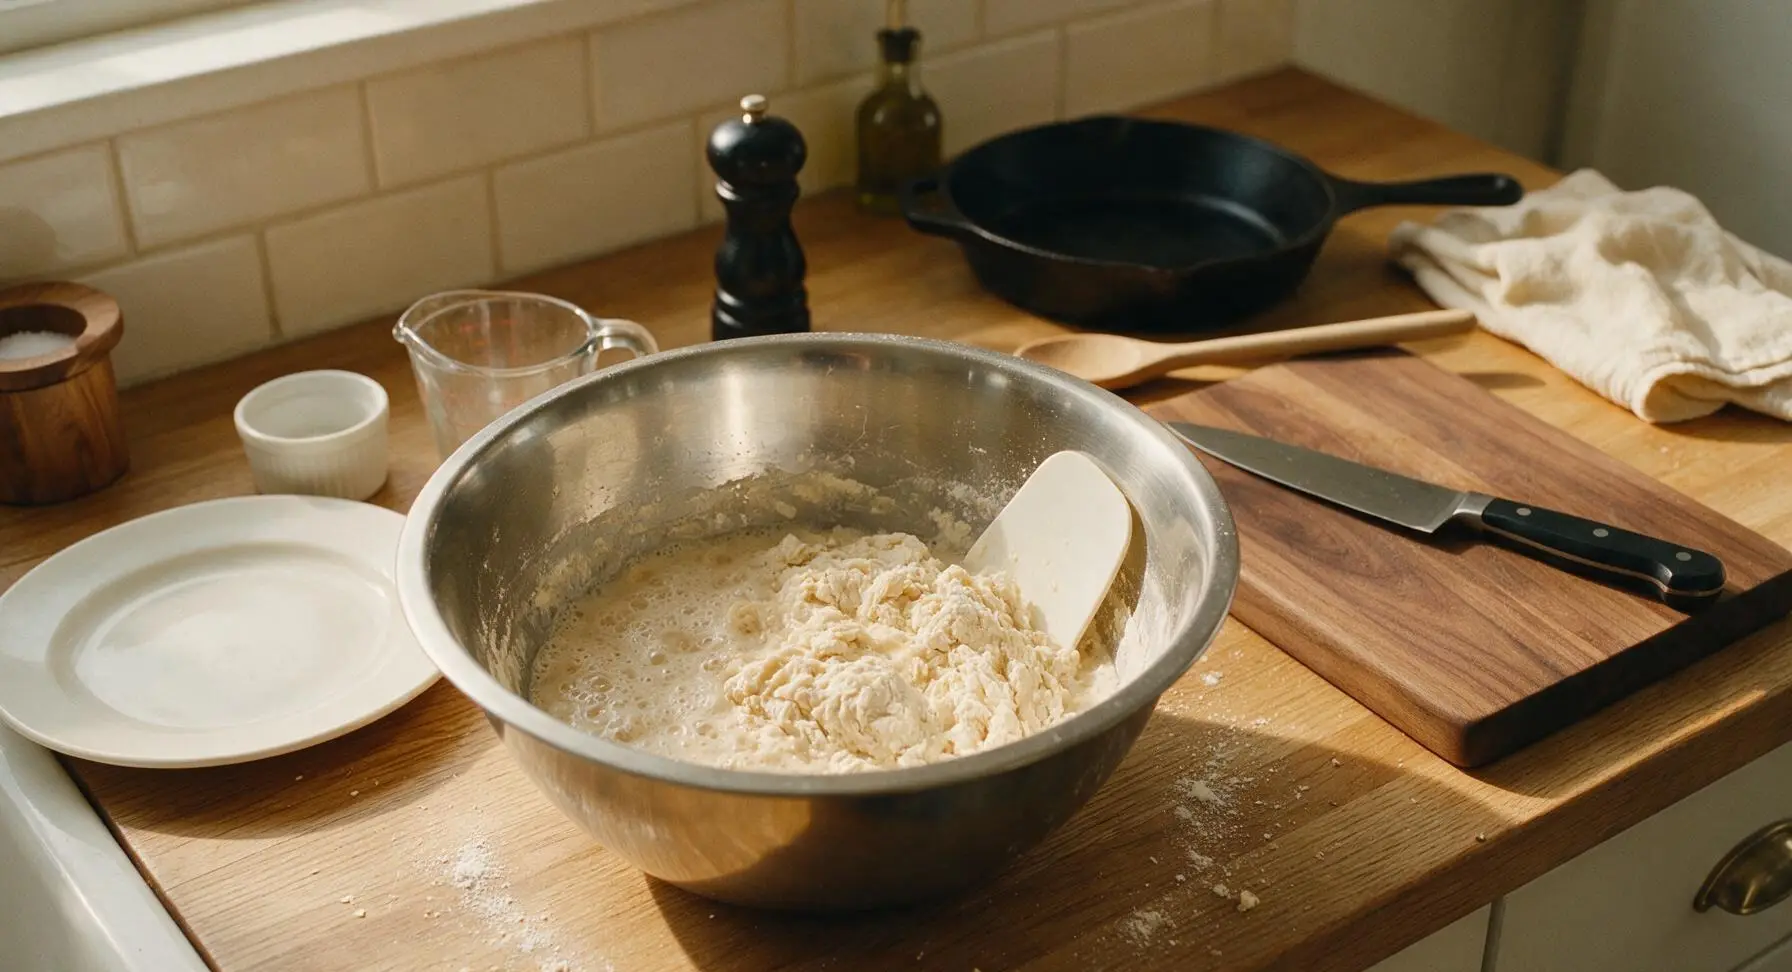
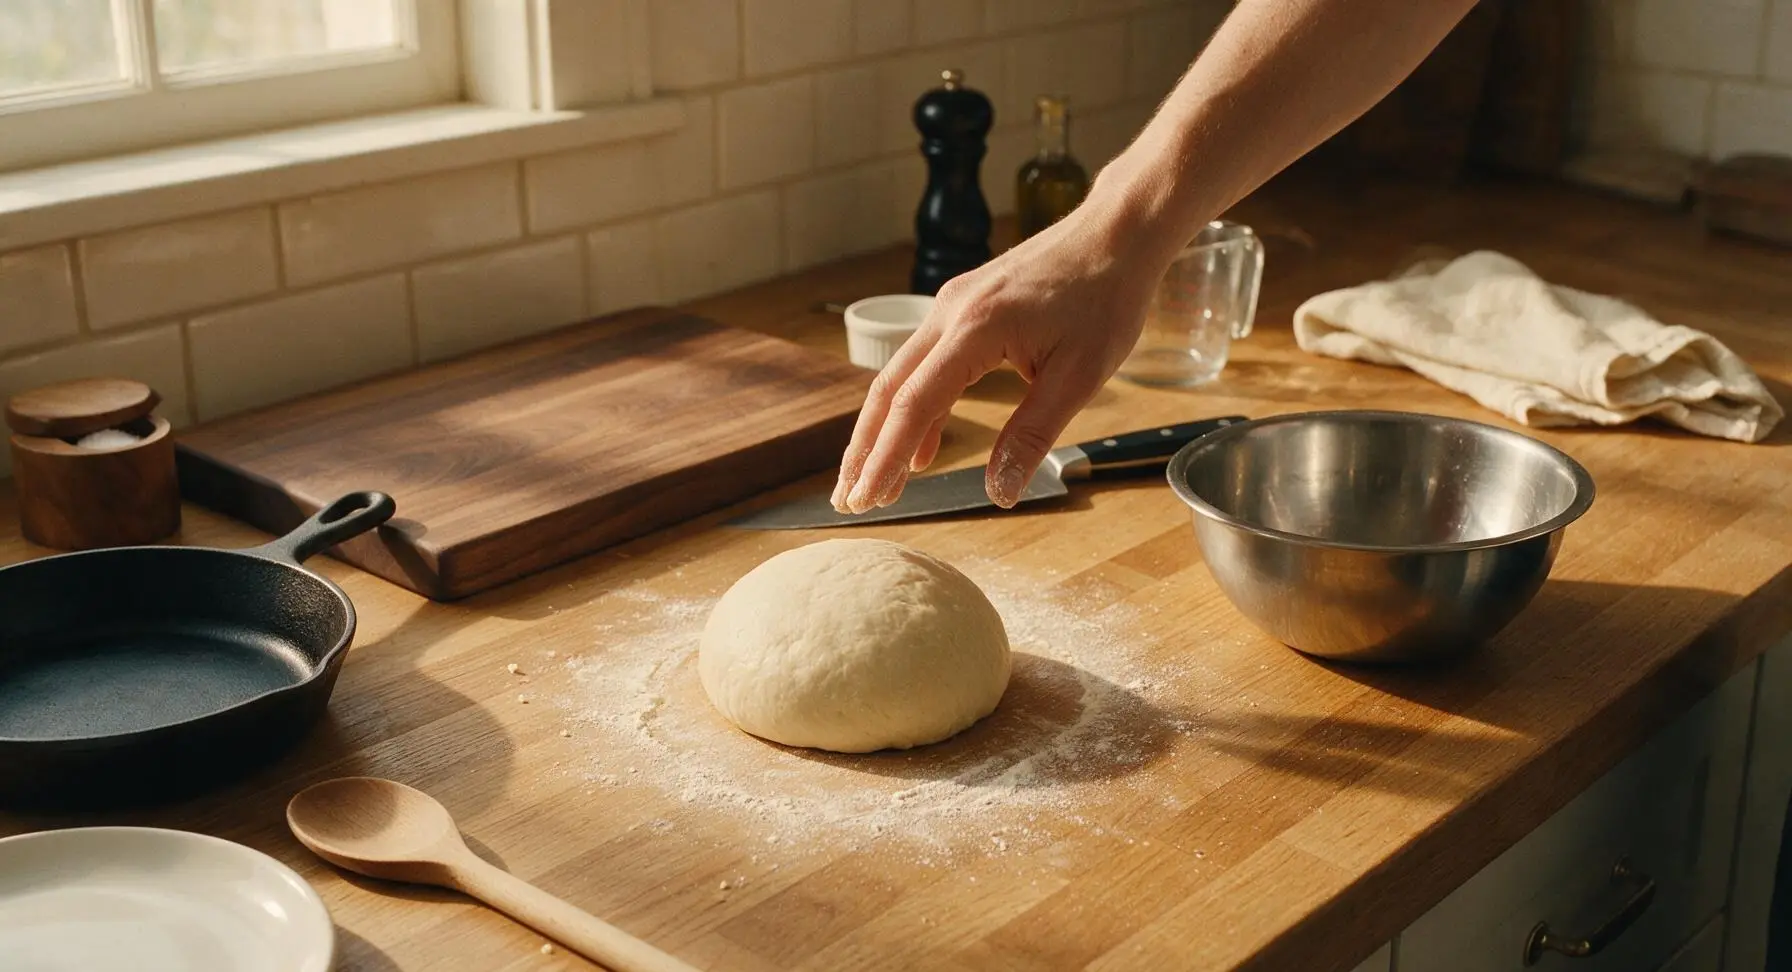
In the large stainless steel mixing bowl, combine warm water (105-110°F, feels like warm bath water) and active dry yeast, let sit 5 minutes until foamy to confirm yeast is active. Add 250g of the flour, 1 tsp salt, and 1 tbsp olive oil, stir with the silicone dough scraper until a shaggy, lumpy mass forms. Turn out onto the lightly floured counter, knead for 7-8 minutes, adding remaining flour 1 tbsp at a time as needed, until the dough is smooth, elastic, and springs back slowly when poked lightly with a finger.
Step 1
step1:Mix and Knead Dough
Step 1
step1:Mix and Knead Dough
2

Let Dough Rise

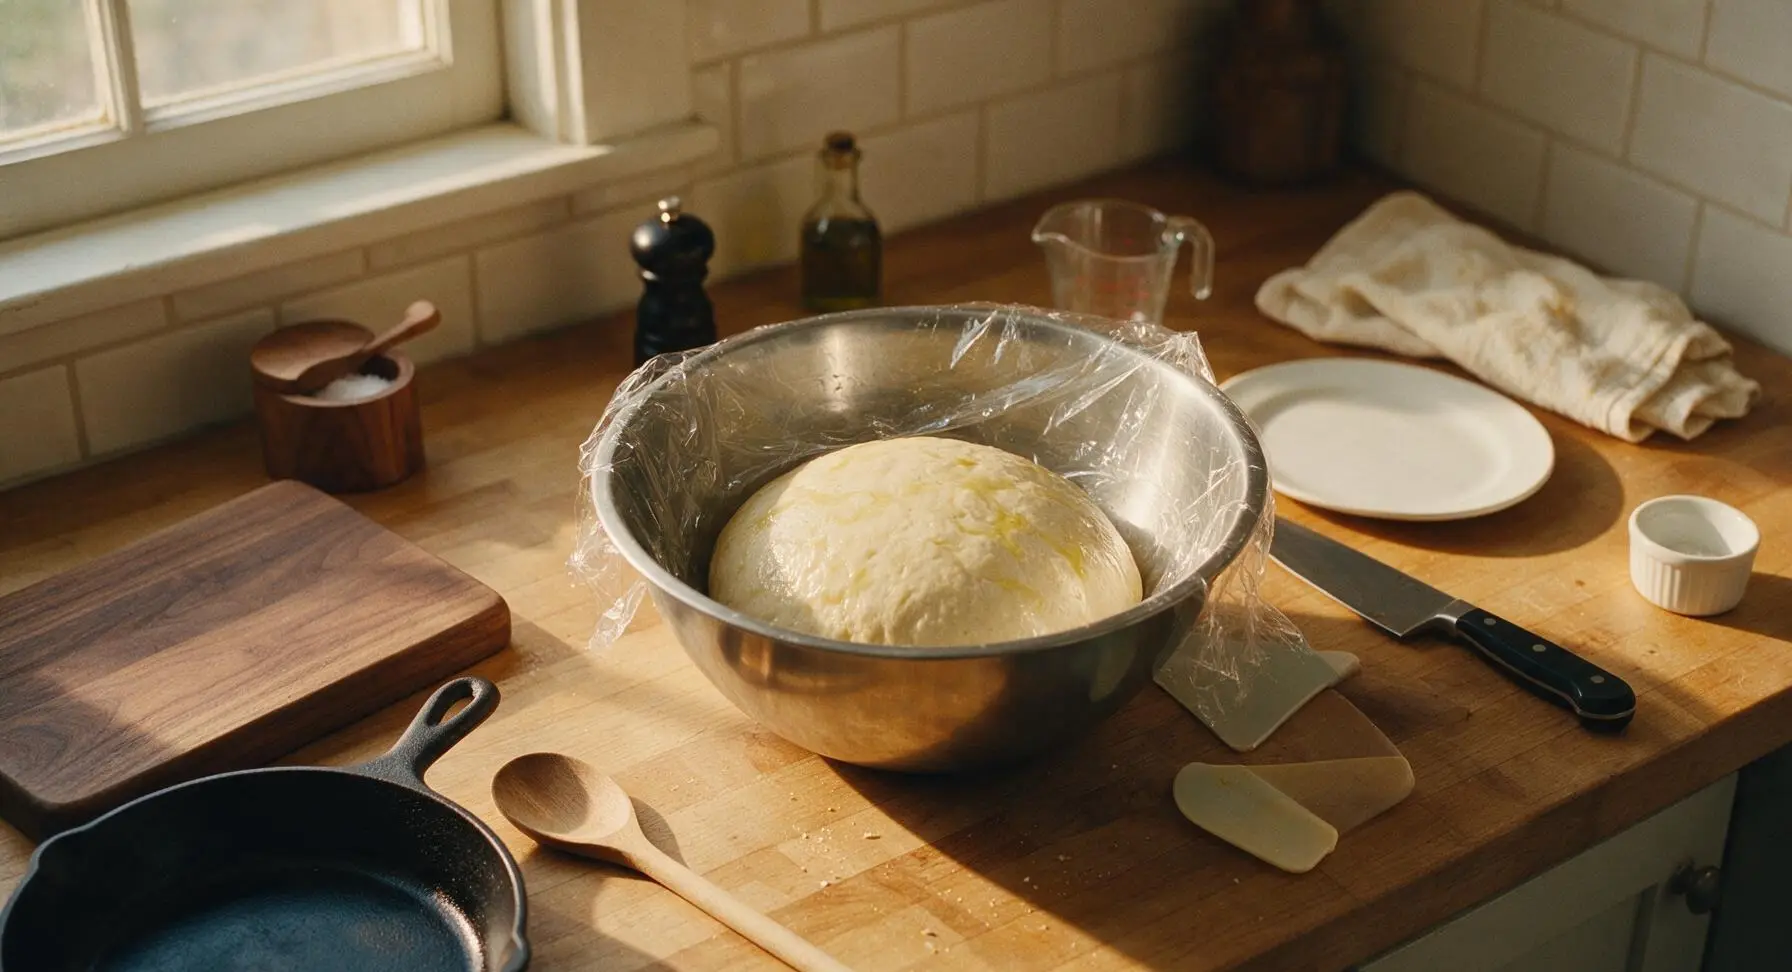
Coat the inside of the large stainless steel mixing bowl with 1 tsp olive oil, place the kneaded dough ball back in the bowl, turn to coat lightly in oil to prevent sticking. Cover the bowl tightly with plastic wrap, set in a warm draft-free spot on the counter for 1 hour, until the dough doubles in size and holds a 1/2-inch indentation when poked with a floured finger (if the indent springs back quickly, let it rise 10 more minutes).
Step 2
step2:Let Dough Rise
3

Make Simple Tomato Sauce

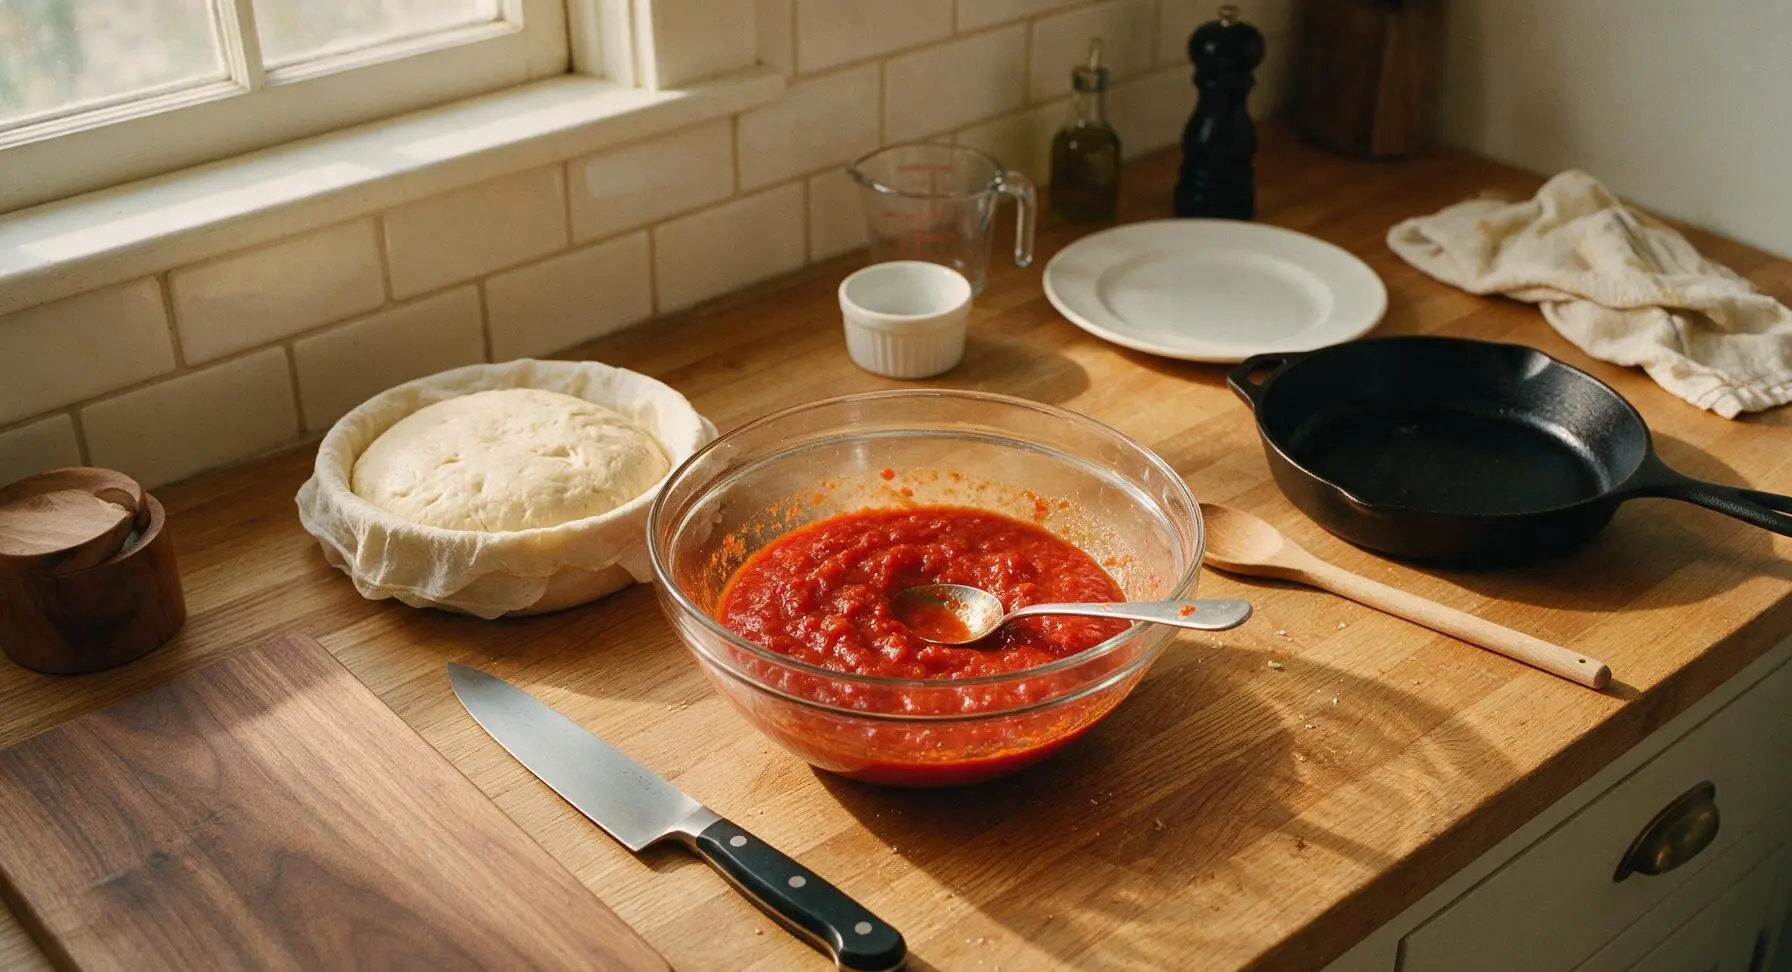
In the medium clear glass mixing bowl, combine drained crushed San Marzano tomatoes, minced garlic, 1/2 tsp dried oregano, 1/2 tsp salt, and 1 tsp olive oil. Stir with the small stainless steel mixing spoon until fully combined. Keep the sauce thick and chunky—do not add extra liquid, as this will make the pizza crust soggy.
Step 3
step3:Make Simple Tomato Sauce
4

Roll and Shape Crust

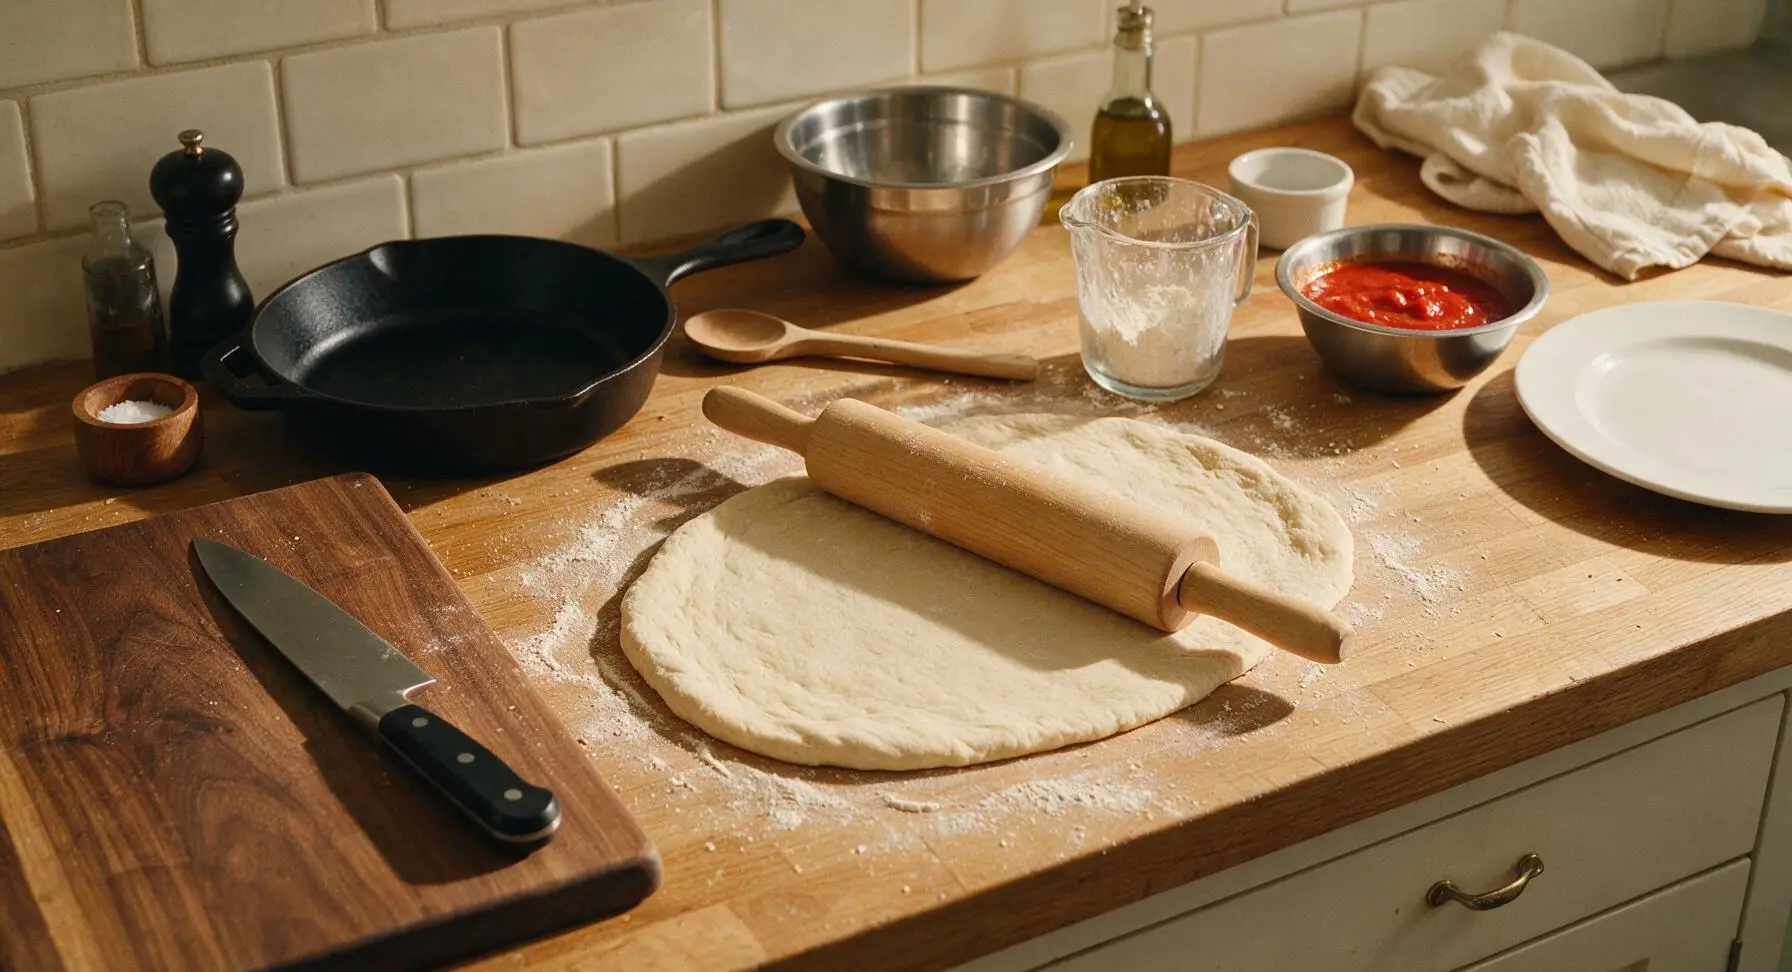
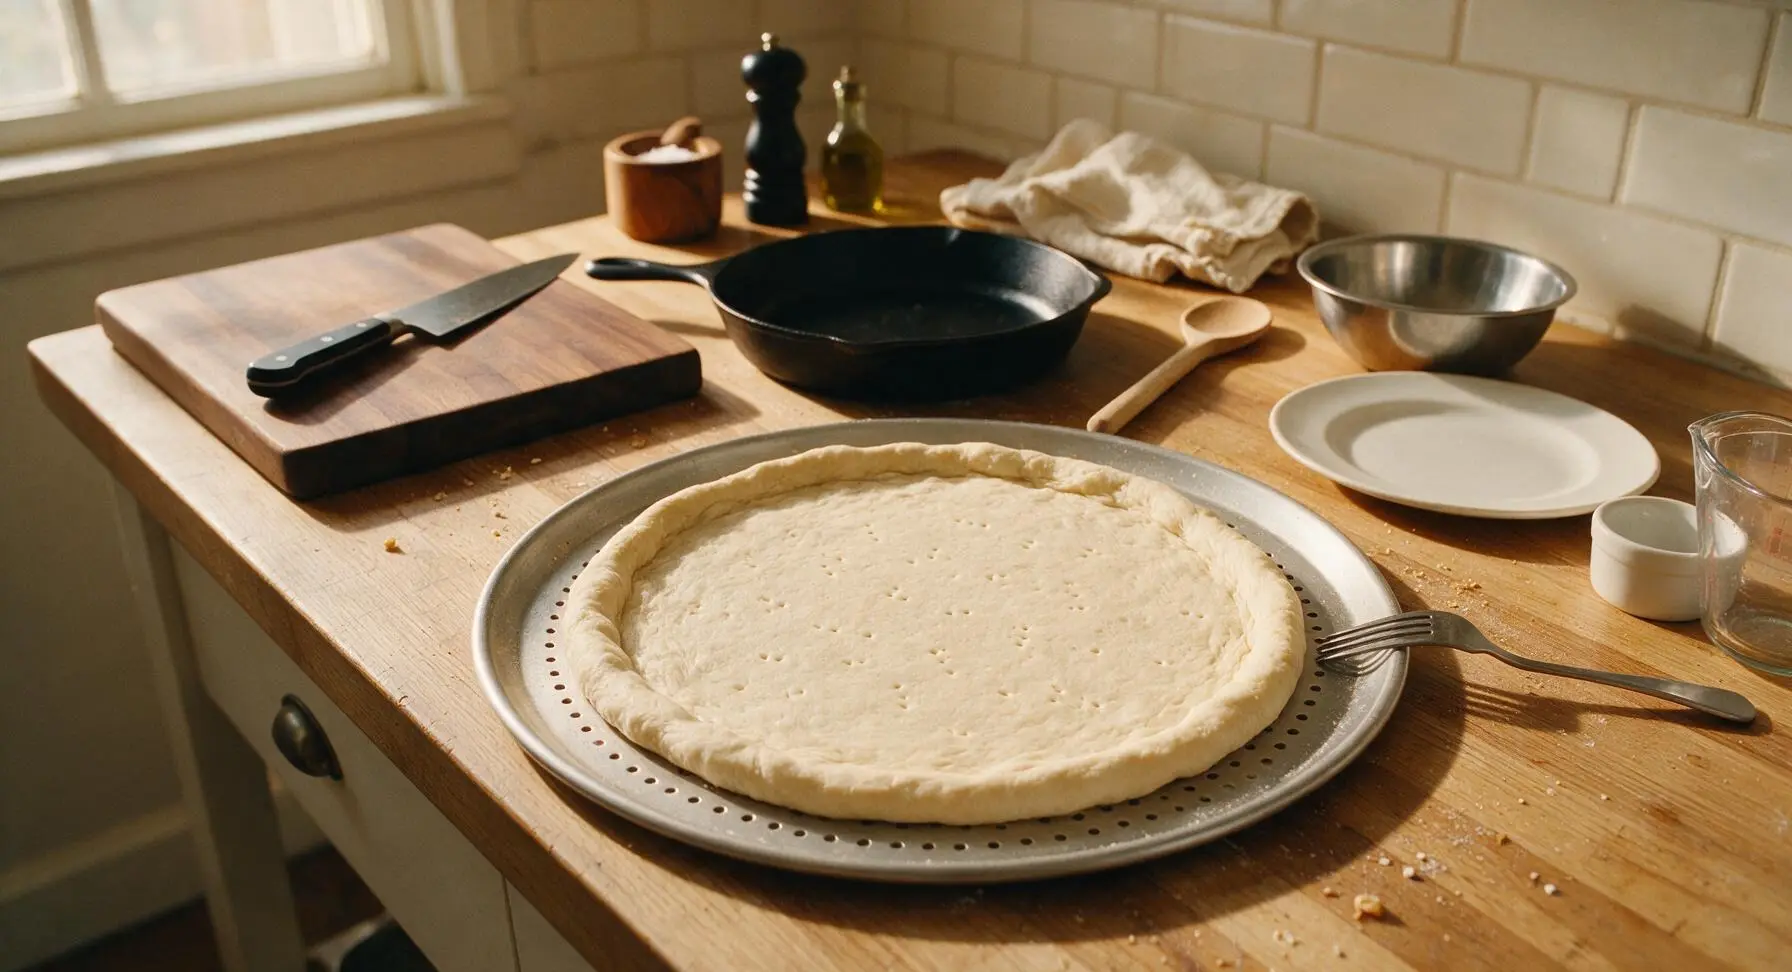
Once dough is fully risen, punch it firmly in the center to release all trapped air, transfer to a lightly floured section of the counter. Use the beech wood rolling pin to roll the dough into a 12-inch even round, about 1/4-inch thick, leaving a slightly thicker 1-inch edge for the crust rim. Carefully lift the rolled dough and lay it flat on the 12-inch perforated aluminum pizza pan, pressing it gently to fit the pan edges. Prick the center of the dough all over with a fork (every 1-2 inches) to prevent large air bubbles from puffing up during baking.
Step 4
step4:Roll and Shape Crust
Step 4
step4:Roll and Shape Crust
5

Top Sauce and Cheese

Use the pastry brush to brush 1 tsp olive oil over the exposed 1-inch crust rim, which will help it brown and crisp in the oven. Spoon the tomato sauce onto the center of the dough, spreading it in a thin even layer with the back of the small stainless steel spoon, leaving the oiled crust edge completely clean. Sprinkle shredded low-moisture mozzarella evenly over the sauce, followed by half the grated parmesan. Do not overload with sauce or cheese—too much topping will trap moisture and lead to a soggy center.
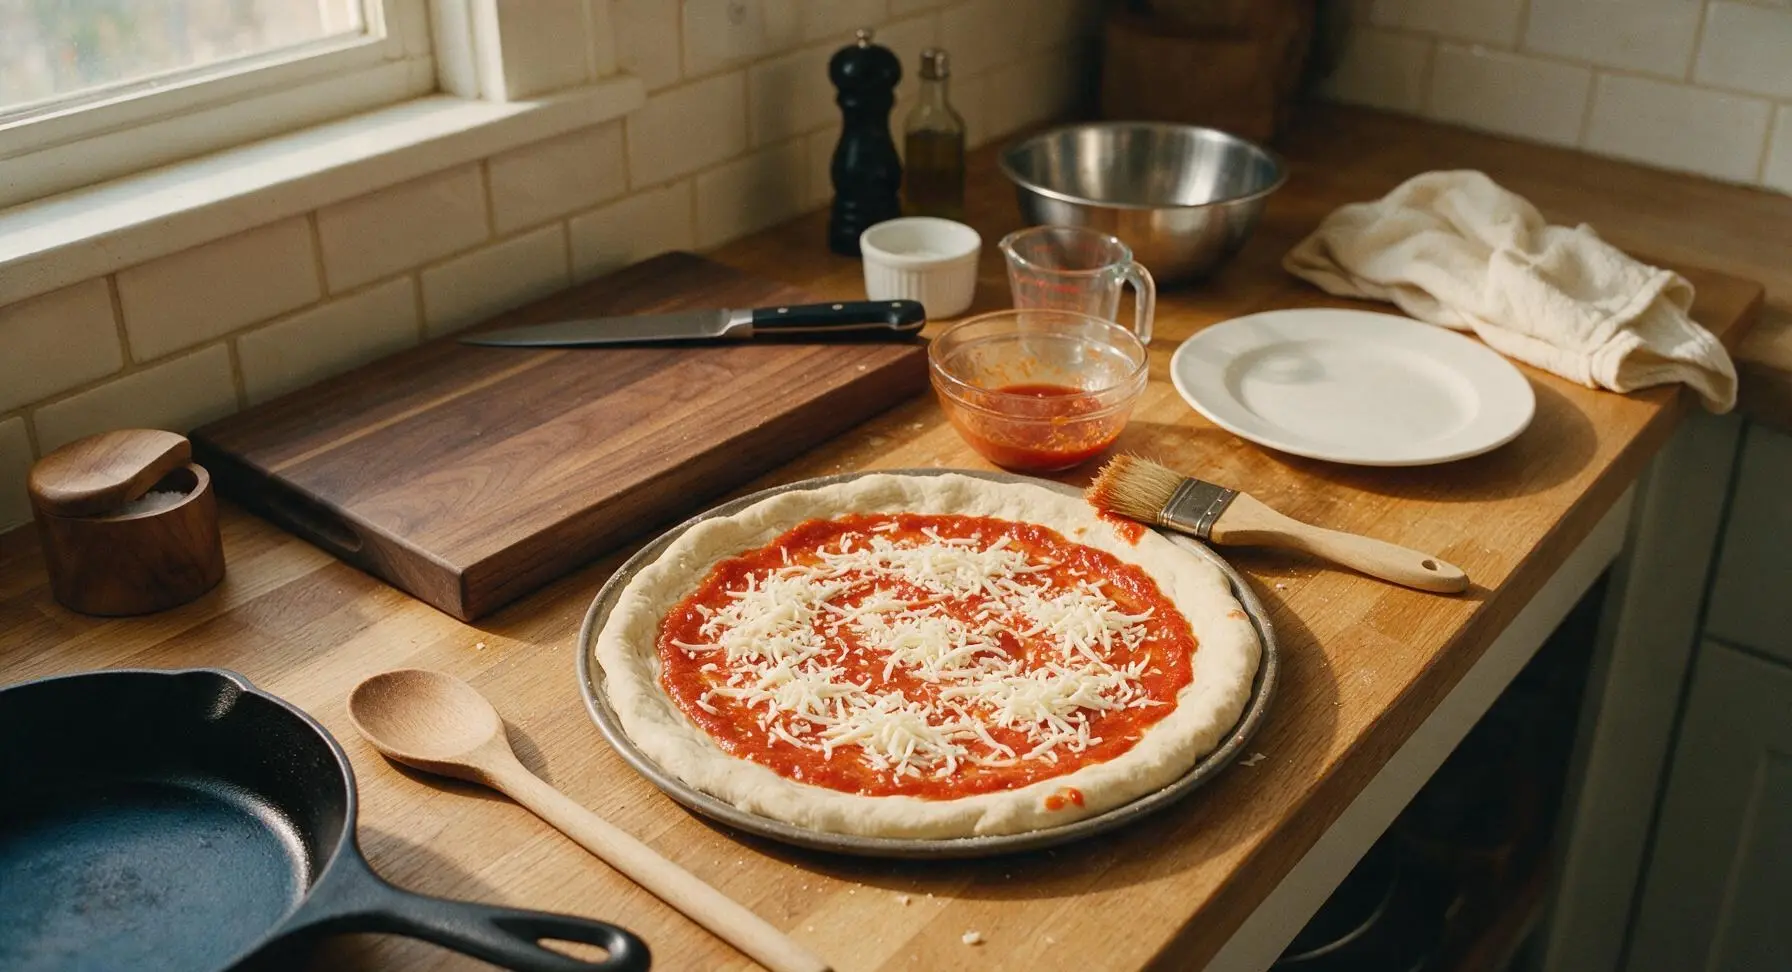
Step 5
step5:Top Sauce and Cheese
6

Bake Until Golden

Place the pizza pan on the middle rack of a preheated 475°F (245°C) oven. Bake for 10-12 minutes, until the crust edge is deep golden and crispy, the cheese is fully melted and bubbly with scattered light browned spots across the surface. Do not open the oven door for the first 8 minutes of baking to maintain consistent high temperature, which is critical for a crispy crust.
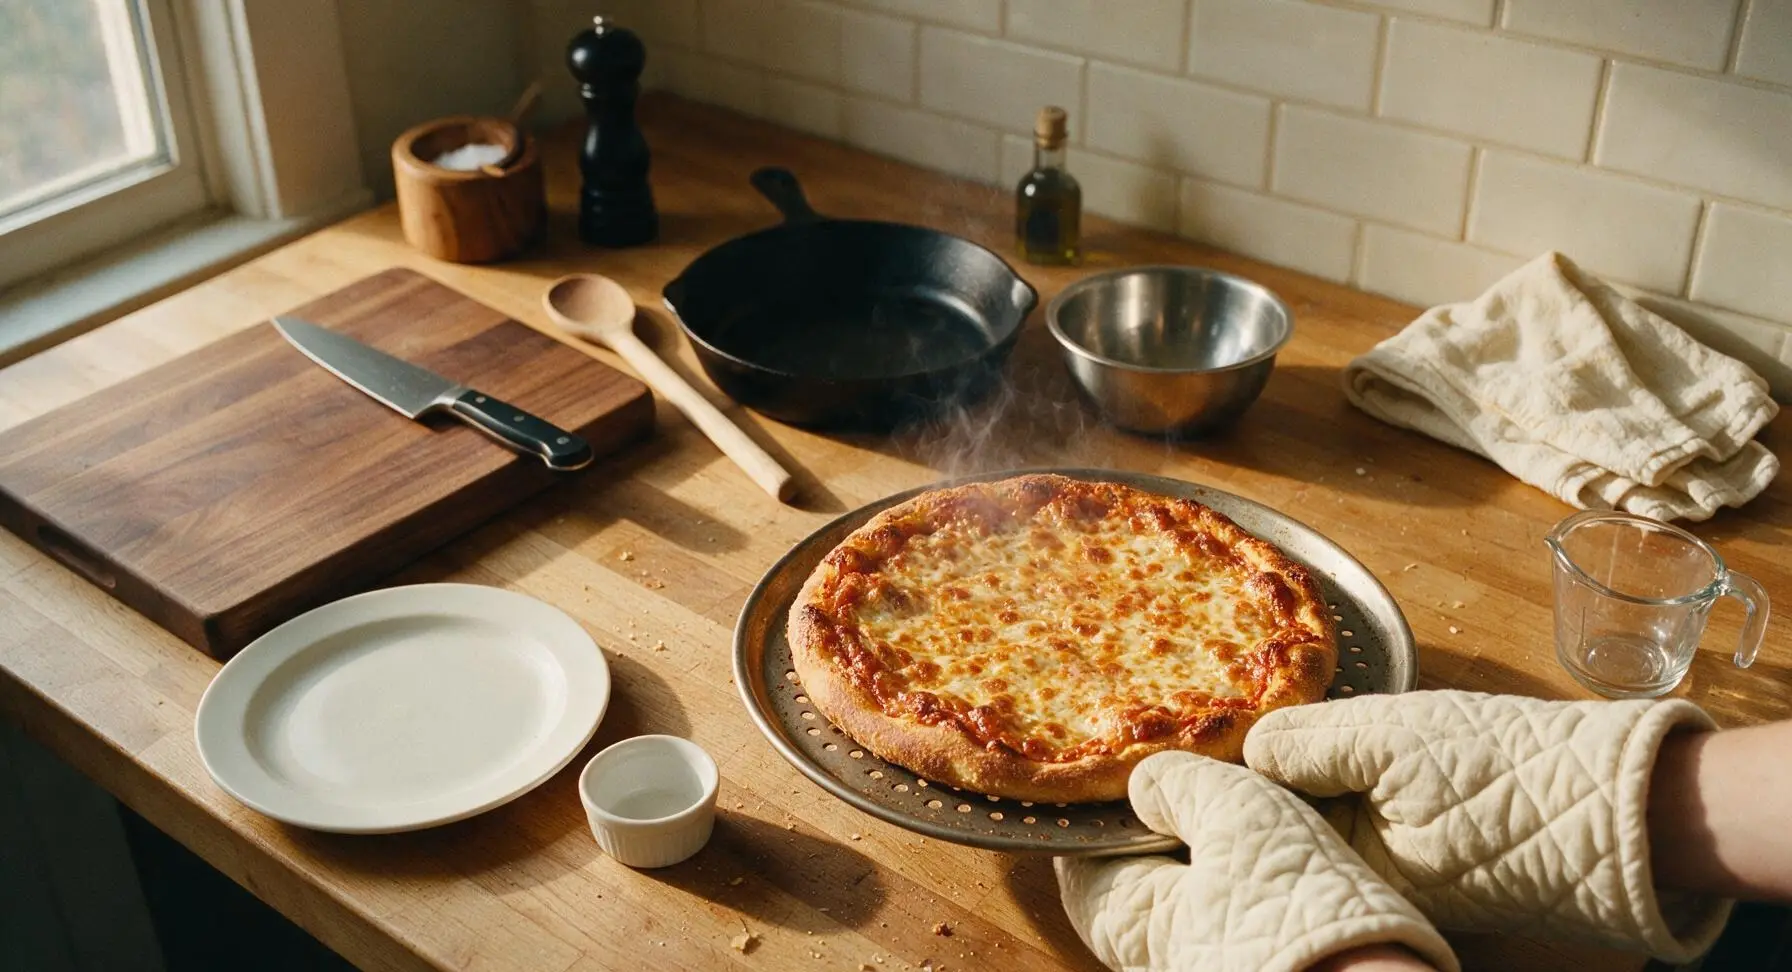
Step 6
step6:Bake Until Golden
7

Garnish and Rest Pizza

Once baked, use the oven mitts to carefully slide the hot pizza off the pan and onto the matte white ceramic serving platter. Sprinkle the remaining grated parmesan and pinch of dried oregano over the hot cheese (the heat will melt the parmesan and release the oregano's aroma), then top with fresh basil leaves. Let the pizza rest for 3 minutes before slicing to allow the cheese to set.
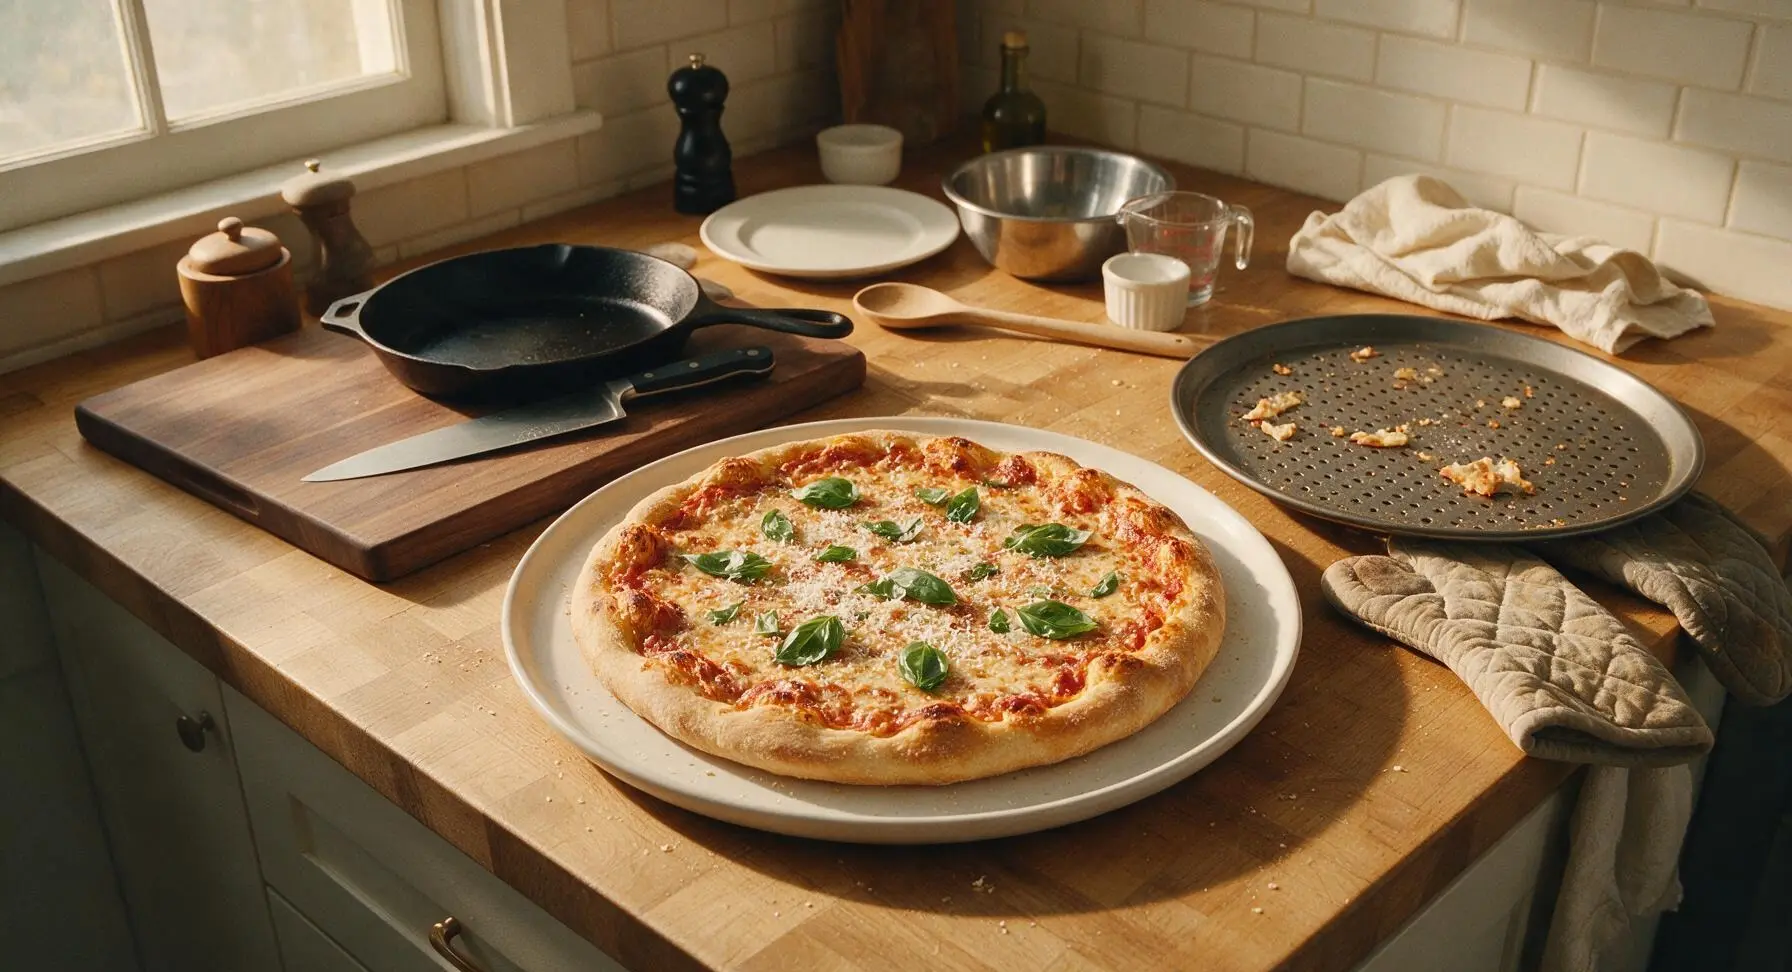
Step 7
step7:Garnish and Rest Pizza
8

Slice and Serve

After resting, use the stainless steel wheel pizza cutter to cut the pizza into 8 even slices, pressing firmly straight down through the crust (do not drag the cutter, which will pull cheese off the slices). Rotate the platter as needed to make straight, even cuts. Serve immediately.
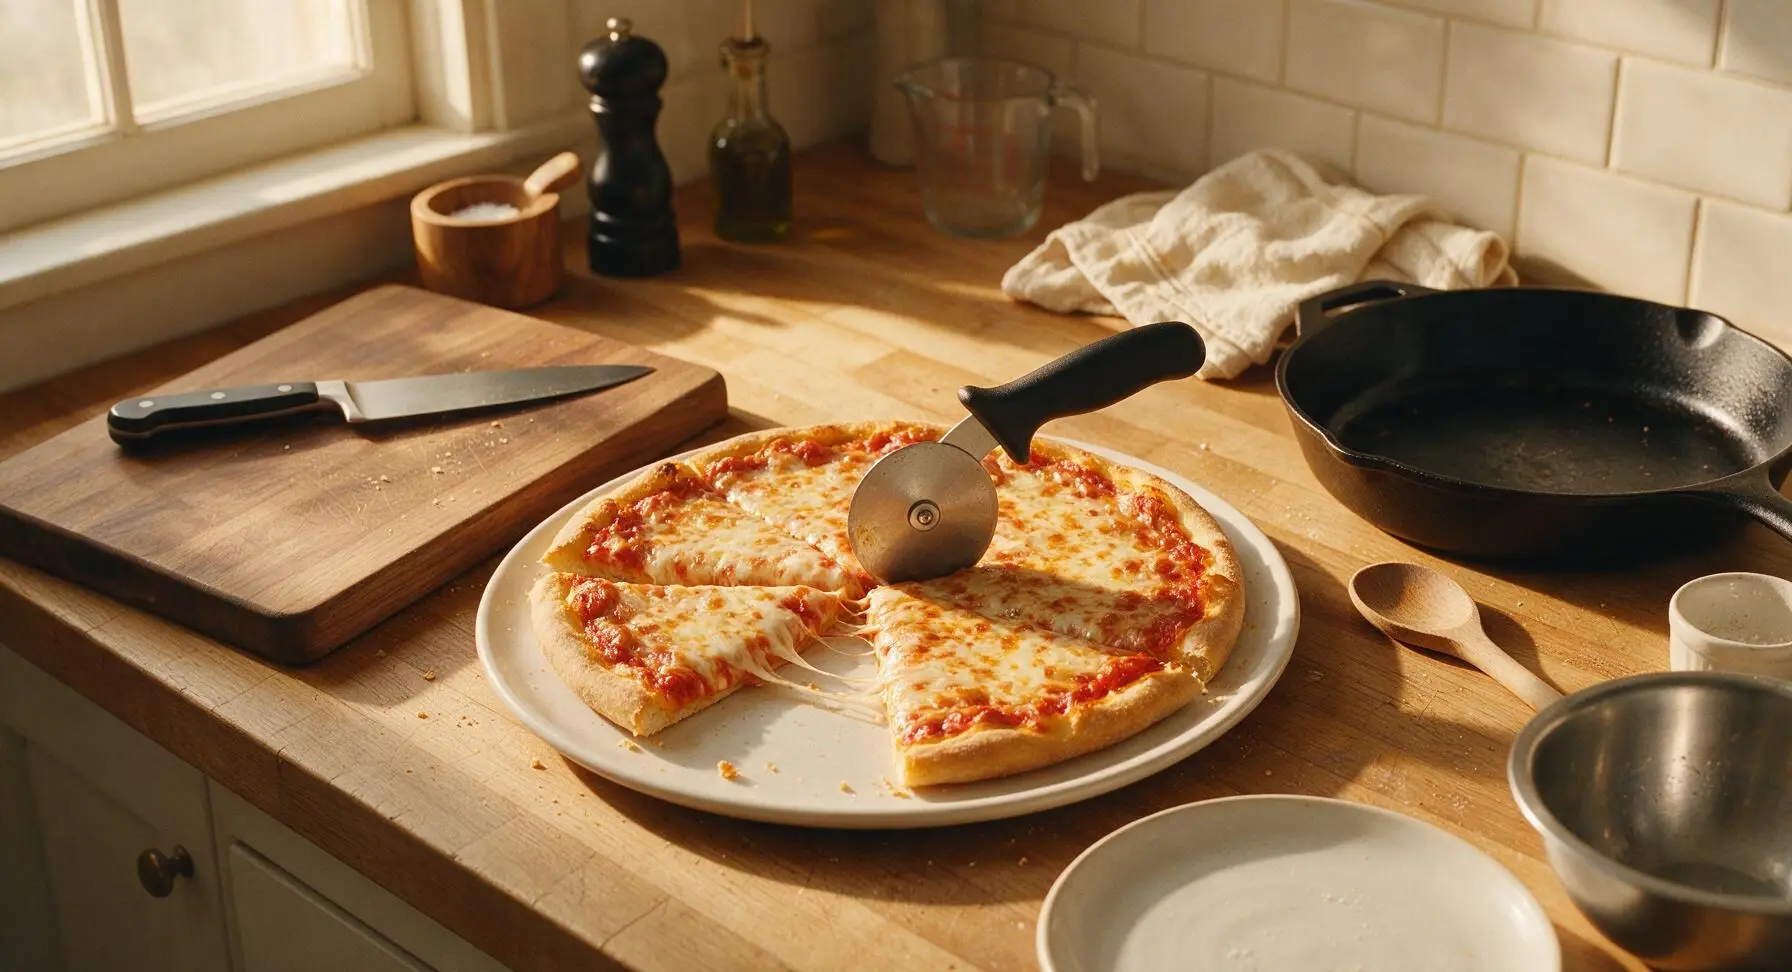
Step 8
step8:Slice and Serve

Tips

1.Always drain excess liquid from crushed tomatoes before making sauce: extra tomato juice will soak into the crust as it bakes, leading to a soggy, undercooked center even if the crust edges are crispy. For best results, let crushed tomatoes sit in a fine sieve for 5 minutes before mixing.
2.Use low-moisture mozzarella instead of fresh mozzarella for standard home ovens: fresh mozzarella has a very high water content that releases as it melts, creating soggy spots. If you prefer fresh mozzarella, pat slices very dry with paper towels and use no more than 4oz total.
3.Let the baked pizza rest for 3 full minutes before slicing: this short rest allows the melted cheese to set slightly, so it does not slide off the slices when you cut or pick them up, and gives the crust time to crisp up a little more as it cools.


✨ You May Also Like

Main Course
🍜 United Kingdom

A showstopping classic of tender seared beef, savory mushroom duxelles, and crisp prosciutto wrapped in flaky golden puff pastry, baked to juicy perfection.

⏱️ 2 hours 1Main Course ★ 4.7
Main Course
🍜 India

Tender charred marinated chicken simmered in a rich, spiced creamy tomato sauce, this iconic Anglo-Indian curry pairs perfectly with basmati rice or warm naan.

⏱️ 50 minuteMain Course ★ 4.6
Main Course
🍜 Thailand

Classic tangy, sweet, and savory Thai stir-fried rice noodles with shrimp, tofu, and crunchy garnishes, balancing all five core Thai flavor profiles.

⏱️ 30 minuteMain Course ★ 4.5
Main Course
🍜 United Kingdom

Crispy golden beer-battered cod and fluffy double-fried chips, served with tangy tartar sauce and malt vinegar: the timeless, beloved British pub comfort classic.

⏱️ 45 minuteMain Course ★ 4.7
Main Course
🍜 Mexico

Smoky, chile-marinated pork tacos with caramelized pineapple, fresh cilantro, and lime: a beloved classic Mexican street food perfect for casual summer gatherings.

⏱️ 1 hour 45Main Course ★ 4.8
Main Course
🍜 United States

Crunchy Fritos corn chips layered with savory beef chili and melted cheddar, topped with cool, zesty fixings for a beloved, cozy Tex-Mex comfort food.

⏱️ 35 minuteMain Course ★ 4.8

Cheese Pizza:Frequently Asked Questions

1.How do I know my water is the right temperature to activate active dry yeast? ▾
The ideal 105–110°F range feels like comfortably warm bath water—barely warm to the touch, not hot enough to make you pull your finger away. If you don’t have a thermometer, err on the cooler side; water over 120°F will kill yeast, leading to a flat, dense crust that won’t rise properly.
2.Can I use instant yeast instead of active dry yeast for this crust? ▾
Absolutely! Swap active dry for instant yeast at a 1:0.75 ratio—so for every 1 teaspoon of active dry, use ¾ teaspoon instant. You don’t need to proof instant yeast in warm water first; just mix it straight in with dry ingredients to cut prep time without sacrificing crust texture.
3.Why does my pizza crust turn out dense instead of chewy and crispy? ▾
Dense crust almost always traces back to inactive yeast, under-kneaded dough, or insufficient rise time. Confirm your yeast bubbles when proofed, knead until dough is smooth and elastic (7–8 minutes by hand), and let it double in size in a warm, draft-free spot before shaping.
4.Do I need a fancy pizza stone to get a crispy homemade crust? ▾
You don’t need specialty equipment for great results! A preheated heavy baking sheet, cast iron skillet, or even an upside-down rimmed baking pan works perfectly. Preheat it for 20–25 minutes at 475°F before sliding your topped pizza on for that signature golden, crispy bottom.
5.Can I make the pizza dough ahead of time? ▾
Definitely! For deeper, nuttier crust flavor, mix the dough, let it complete its first rise, then wrap it tightly and store it in the fridge for up to 3 days. When you’re ready to make pizza, pull it out 30 minutes before shaping to take the chill off so it stretches easily.
6.How much olive oil do I need to keep dough from sticking? ▾
You only need a light coating—about 1 teaspoon of extra-virgin olive oil rubbed across your proofing bowl or baking pan is plenty. Too much oil will make your crust greasy instead of crispy, and can prevent edges from puffing as it bakes. Add a light dusting of flour on your work surface for extra insurance.
7.Why does my mozzarella turn out watery and make the pizza soggy? ▾
Watery melted mozzarella usually comes from using high-moisture fresh mozzarella without prepping it first. If using fresh mozz, pat it thoroughly dry with paper towels and let it sit 15 minutes before topping, or use low-moisture shredded mozzarella for classic stretchy, non-soggy melt every time.
8.How thin should I stretch the pizza dough? ▾
Aim for ¼-inch thickness across the center, with a slightly thicker, ½-inch border for the puffy crust edge. Don’t stress if it’s not a perfect circle—rustic, uneven shapes are part of homemade pizza charm! Skip the rolling pin if you can, as it presses out all the light, airy rise bubbles.
9.What oven temperature works best for baking classic cheese pizza? ▾
Crank your oven to 475°F, and make sure it’s fully preheated for at least 20 minutes before baking. High heat cooks the crust quickly to lock in that crispy outside, chewy inside texture, melts cheese evenly, and caramelizes tomato sauce just enough to bring out its bright, sweet flavor.
10.Can I freeze leftover homemade pizza dough for later use? ▾
Absolutely! After the first rise, divide dough into individual pizza-sized balls, wrap each tightly in plastic wrap, and freeze for up to 3 months. Thaw it in the fridge overnight, then let it sit at room temperature for 30 minutes before shaping, and it will bake up exactly like fresh dough.
11.What happens if I add too much or too little salt to the dough? ▾
Stick to the recipe’s measured fine sea salt—about 1 teaspoon per 2 cups of flour—to balance yeast flavor and strengthen dough gluten. Too much salt will kill yeast and stop dough from rising, while too little will leave your crust tasting bland and flat, even with tasty toppings.
12.Why does my dough keep shrinking back when I try to stretch it? ▾
Shrinking dough means the gluten is too tight, usually because the dough is too cold or you didn’t let it rest long enough after initial handling. If it springs back, set it aside for 5–10 minutes covered with a clean kitchen towel, then try stretching again as the gluten relaxes.
13.Do I need to pre-bake my crust before adding sauce and cheese? ▾
For this classic recipe, you don’t need to pre-bake if you’re using a preheated hot pan or stone. The high, direct heat will cook the bottom crust through as the cheese melts. If you want extra-crispy crust, you can blind bake it for 3 minutes before adding toppings, but watch it closely to avoid over-hardening.
14.What kind of tomato sauce works best for this cheese pizza? ▾
Stick to a simple, lightly seasoned tomato sauce—think crushed San Marzano tomatoes with a pinch of salt and tiny splash of olive oil, no long cooking required. Skip thick, heavily spiced cooked sauces, as too much heavy sauce will make crust soggy and overpower the creamy mozzarella flavor.
15.How long does a classic homemade cheese pizza take to bake? ▾
At 475°F, it only takes 10–12 minutes to bake perfectly. You’ll know it’s done when the crust edge is deep golden and puffed, the cheese is fully melted and bubbly across the top, and the bottom of the crust is crisp and light golden when you lift the edge with a spatula to check.
16.Can I use bread flour instead of all-purpose flour for the crust? ▾
Absolutely! Bread flour has a higher protein content than all-purpose, which gives your crust an extra chewy, puffy texture very close to traditional pizzeria-style pizza. Swap it 1:1 for all-purpose flour in the recipe, no other adjustments needed, if you prefer a heartier, more structured crust.

Comments (9)

2 days ago

OMG this cheese pizza is a total game changer for our weekly Friday family dinner! I’ve tried so many homemade crust recipes that turned out either too tough or super soggy, but this one had the perfect crispy edge and chewy center. My kids devoured two slices each before I even sat down to eat! Used a blend of low-moisture mozz and a little provolone like the tip suggested, *chef’s kiss*.

yesterday

So glad this became a new family favorite, Katie! That mozz/provolone blend is such a good call — it adds just the right amount of tang without making the top greasy. Pro tip for next time: let your dough come to room temp for 30 minutes before stretching for even easier shaping!

yesterday

Seconding the room temp dough tip! I used to try stretching cold dough straight from the fridge and it kept springing back, total game changer once I started letting it warm up. This recipe is foolproof!

1 week ago

Pretty solid recipe for a beginner like me! Cook time was spot on at 12 minutes for my tiny dorm oven, though I did burn the first edge a little because I forgot to move the rack to the upper middle position. Tasted way better than the delivery pizza we usually order for study nights, will definitely make again. Only knock is I wish the instructions were a little clearer on how much flour to use when stretching the dough, I used way too much at first and it got dry.

5 days ago

Thanks for the honest feedback, Jake! I’ve updated the recipe notes to specify 1-2 tablespoons of bench flour max for stretching, so you don’t end up with that dry, floury crust next time. So glad it still beat your usual delivery order!

3 days ago

Oh I had the same flour issue my first time! I started using a little semolina flour on my pizza stone instead of all-purpose and it doesn’t dry out the dough at all, plus it adds that perfect little crunch on the bottom. Game changer for dorm cooking!

yesterday

Made this for our neighborhood potluck last weekend and people were asking me for the recipe left and right! The crust had that perfect pizzeria flavor, and the cheese pull was insane when we pulled the first slice out. I pre-baked the crust for 3 minutes like the note said and didn’t have a single soggy spot, even with all the people grabbing slices over the course of an hour.

2 hours ago

That makes me so happy to hear, Ron! Pre-baking for those 3 minutes is such a tiny step but makes such a huge difference for potlucks where the pizza might sit out a bit. Hope you get to share it again soon!

3 days ago

SO good! I made a double batch of the dough on Sunday and pre-portioned it out for quick weeknight meals, and it held up perfectly in the fridge for 4 days. Threw this cheese pizza together in 10 minutes after work last night and my roommate thought I ordered it from our favorite local spot. Will be adding this to my regular meal prep rotation for sure!

2 days ago

Wait quick question — how do you store the pre-portioned dough in the fridge? I’ve tried keeping dough around for weeknight meals before and it gets that weird sour taste after 2 days. Would love to nail this for busy school nights with my kids!

5 minutes ago

Just pulled this out of the oven and wow, I can’t believe I made this at home! First time ever making pizza from scratch and I was so nervous I’d mess it up, but the steps were super straightforward. The cheese is perfectly melty, the crust is crispy on the bottom, I’m already planning to make this again for my girlfriend when she comes over this weekend.

just now

That’s what I love to hear, Tony! Nothing beats that first bite of a homemade pizza you nailed on the first try. If you want to impress your girlfriend even more, add a little sprinkle of fresh basil on top right after it comes out of the oven — it looks and smells incredible!

30 minutes ago

Really delicious base recipe! I swapped in a gluten-free crust blend for my dietary needs and it still turned out amazing, the cheese ratio is absolutely perfect — not too skimpy, not so much that it slides off the slice when you pick it up. Only reason I’m not giving 5 stars is I wish there was a note about adjusting cook time for gluten-free crusts, mine needed an extra 3 minutes to crisp up all the way.

5 minutes ago

Thanks for the heads up about the extra cook time! I’m gluten free too and was just about to ask if anyone tested it with GF crust, this saves me from guessing when I make it tomorrow night!

2 weeks ago

I’ve been making pizza at home for 20+ years and this recipe is hands down one of the most reliable classic cheese pizza recipes out there. No fancy ingredients, no complicated techniques, just perfect, nostalgic pizza shop flavor every single time. I brought a pie to my grandson’s birthday party and all the kids were begging for seconds. 10/10.

2 hours ago

Tasted good overall, but I ran into some issues with the crust sticking to my baking sheet even though I sprayed it with nonstick spray. Ended up having to scrape half the pizza off the sheet, which was kind of a bummer for date night. Flavor was on point though, I’ll probably invest in a pizza stone before I try making it again.

5 days ago

Made this for my book club potluck and it was gone in 10 minutes flat! Everyone kept commenting on how the crust had the perfect amount of salt, and the cheese blend was so much better than just using plain mozzarella. I added a light sprinkle of parmesan on top before baking and it gave it that perfect little nutty kick. Will absolutely be making this again for future gatherings.



