
homemade canadian bacon

title 1
homemade canadian bacon
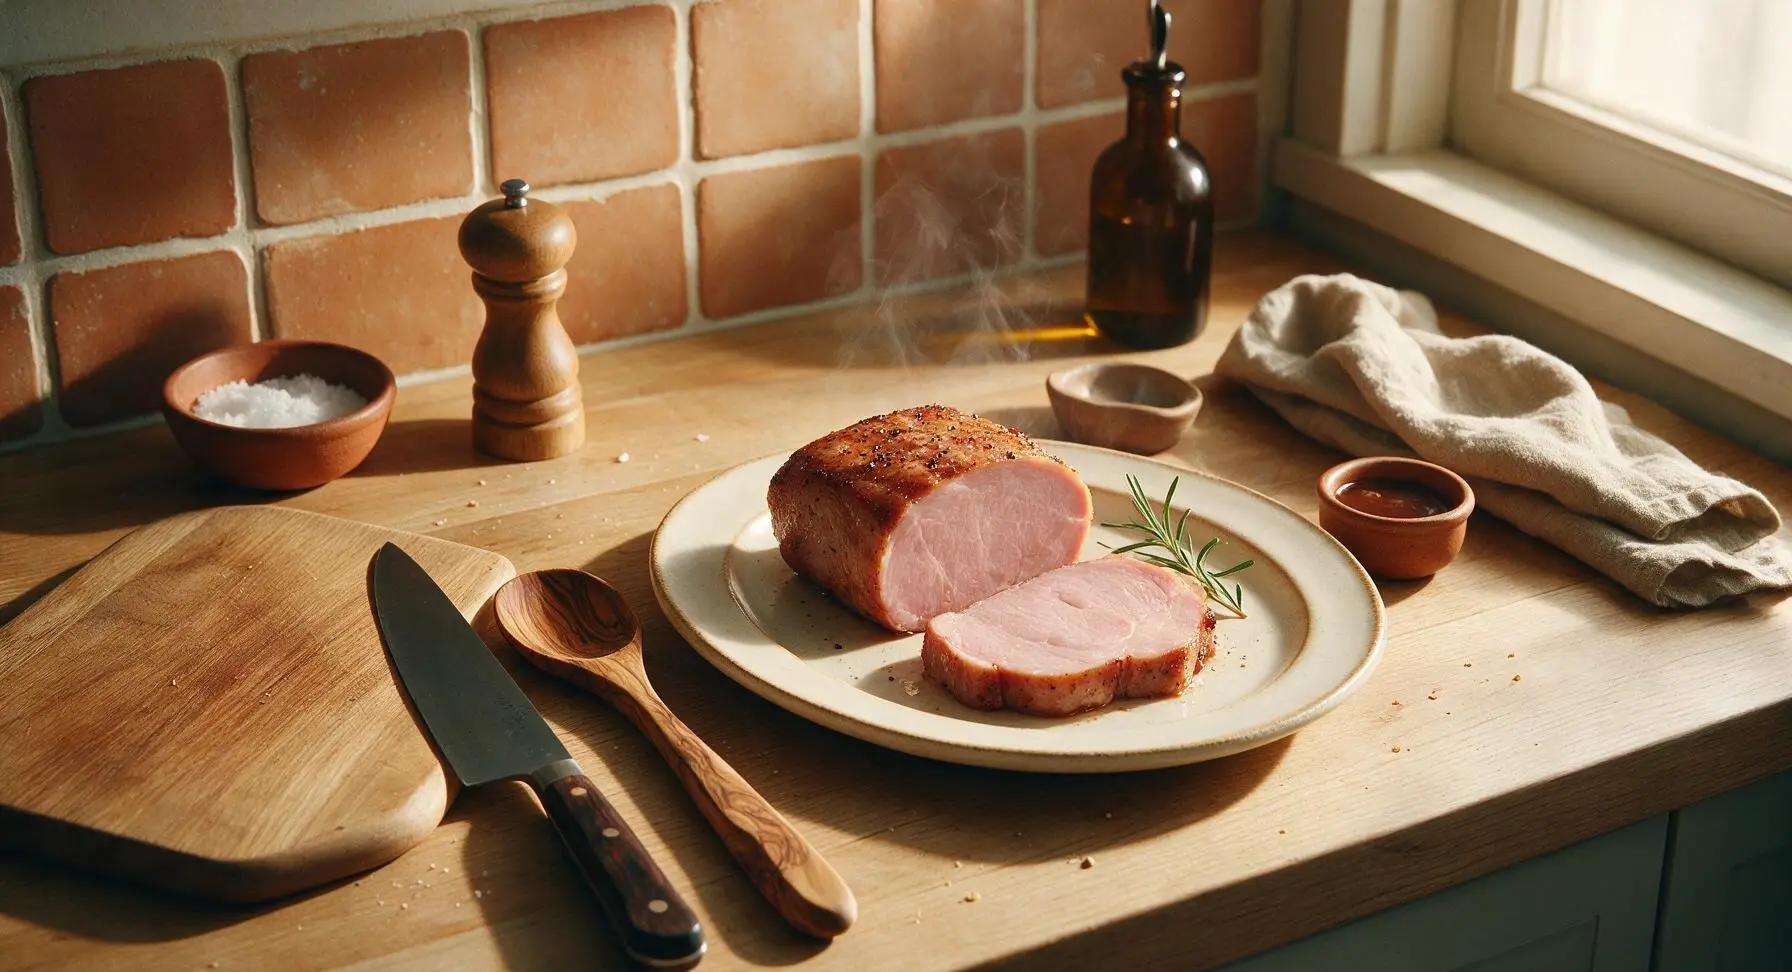
⏱️ cook time 1 hour 45 minutes
🍽️ servings 8
⚡ Difficulty medium

intro

Juicy, subtly smoky homemade Canadian bacon, cured with maple and black pepper, lean and tender, perfect for breakfast sandwiches, eggs Benedict, or quick weekday meals.

Ingredients
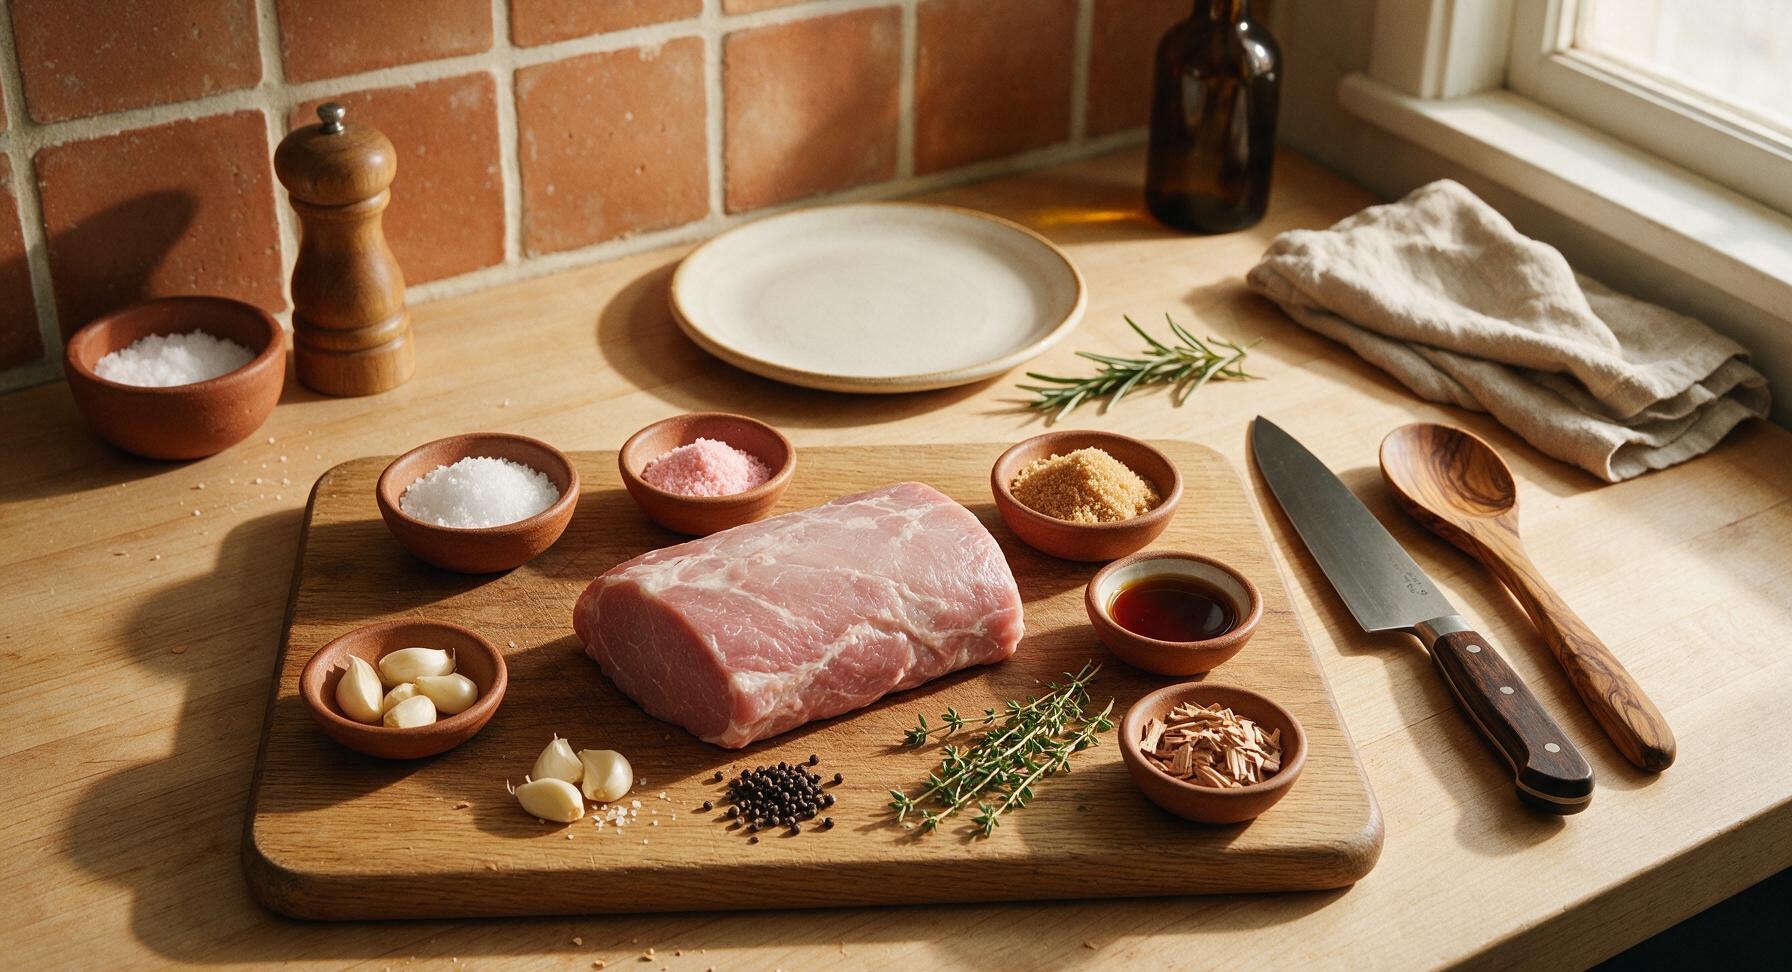
Boneless pork loin (silver skin removed) 2 lbs (900g)
Kosher salt 2 tbsp
Pink curing salt #1 (Prague powder) 1 tsp
Maple sugar 2 tbsp
Pure maple syrup 1 tbsp
Fresh garlic (crushed) 4 cloves
Whole black peppercorns (cracked) 1 tsp
Fresh thyme 6 sprigs
Apple wood chips (optional, for smoke) 2 tbsp

Steps

1

Trim Pork Loin

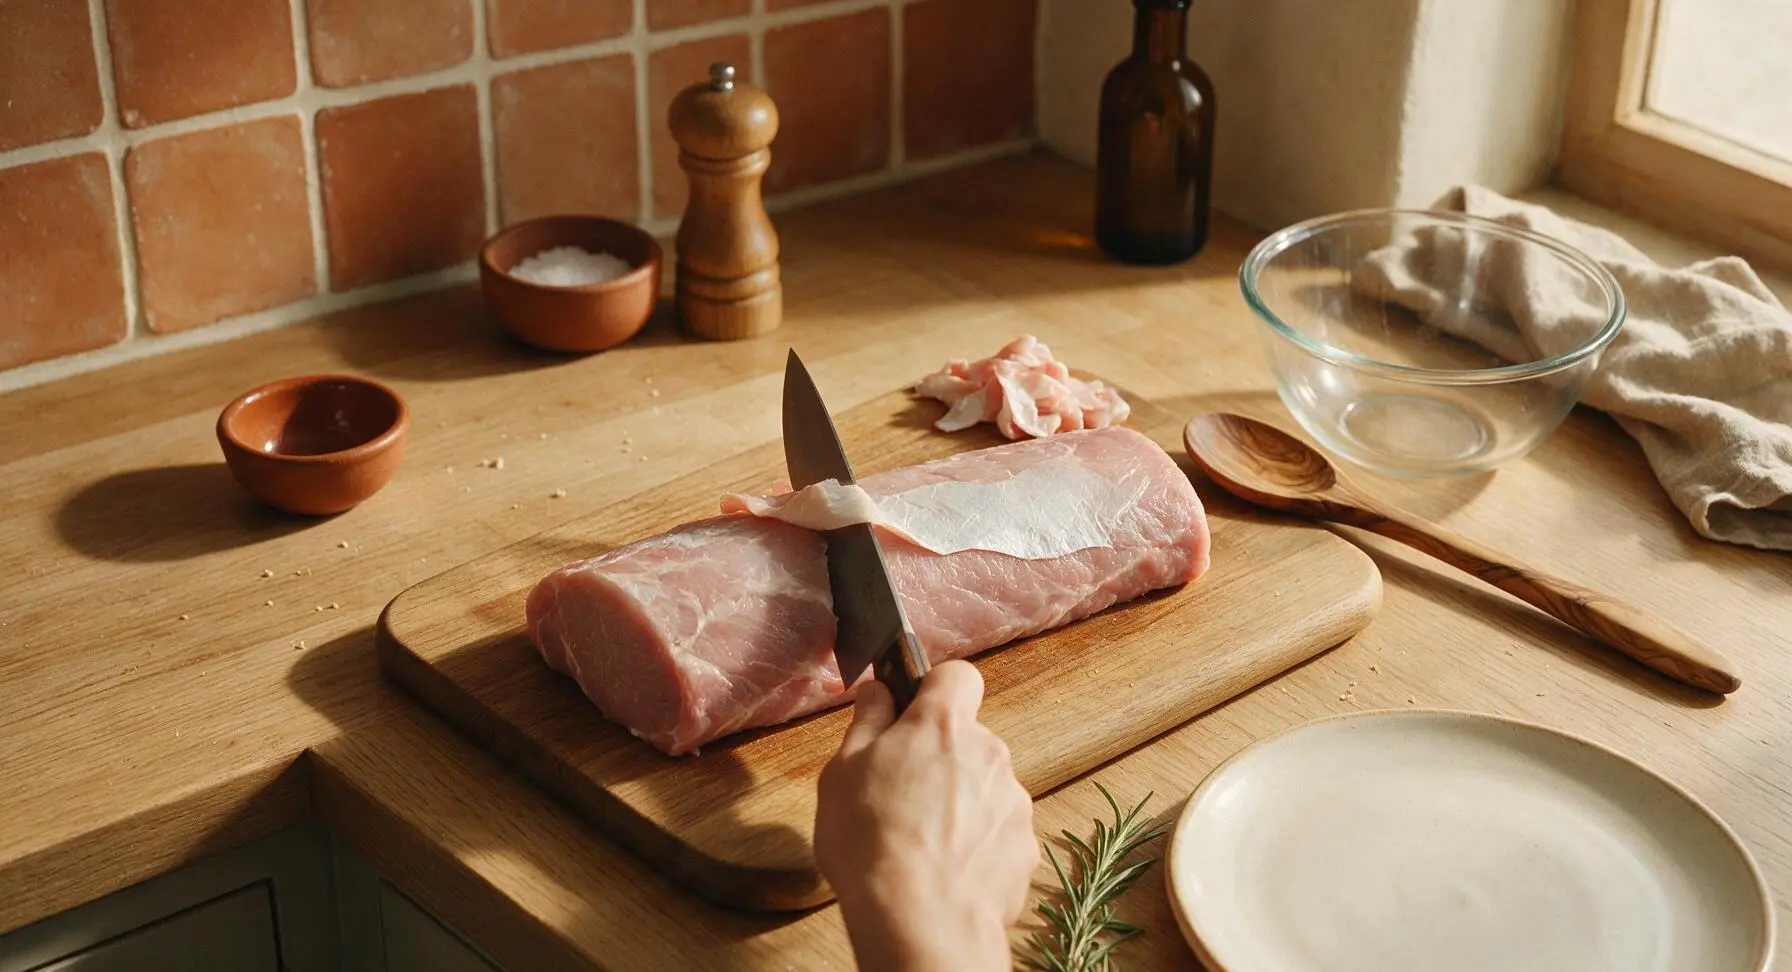
Place the 2lb boneless pork loin on the center of the maple cutting board. Use the 8-inch chef knife to trim away all thick external fat caps to a 1/8-inch thickness, and remove every trace of shiny silver skin from the meat surface, as silver skin will turn tough and chewy when cooked. The finished loin should be a smooth, even cylindrical shape, roughly 8 inches long, with no ragged edges.
Step 1
step1:Trim Pork Loin
2

Mix Curing Rub

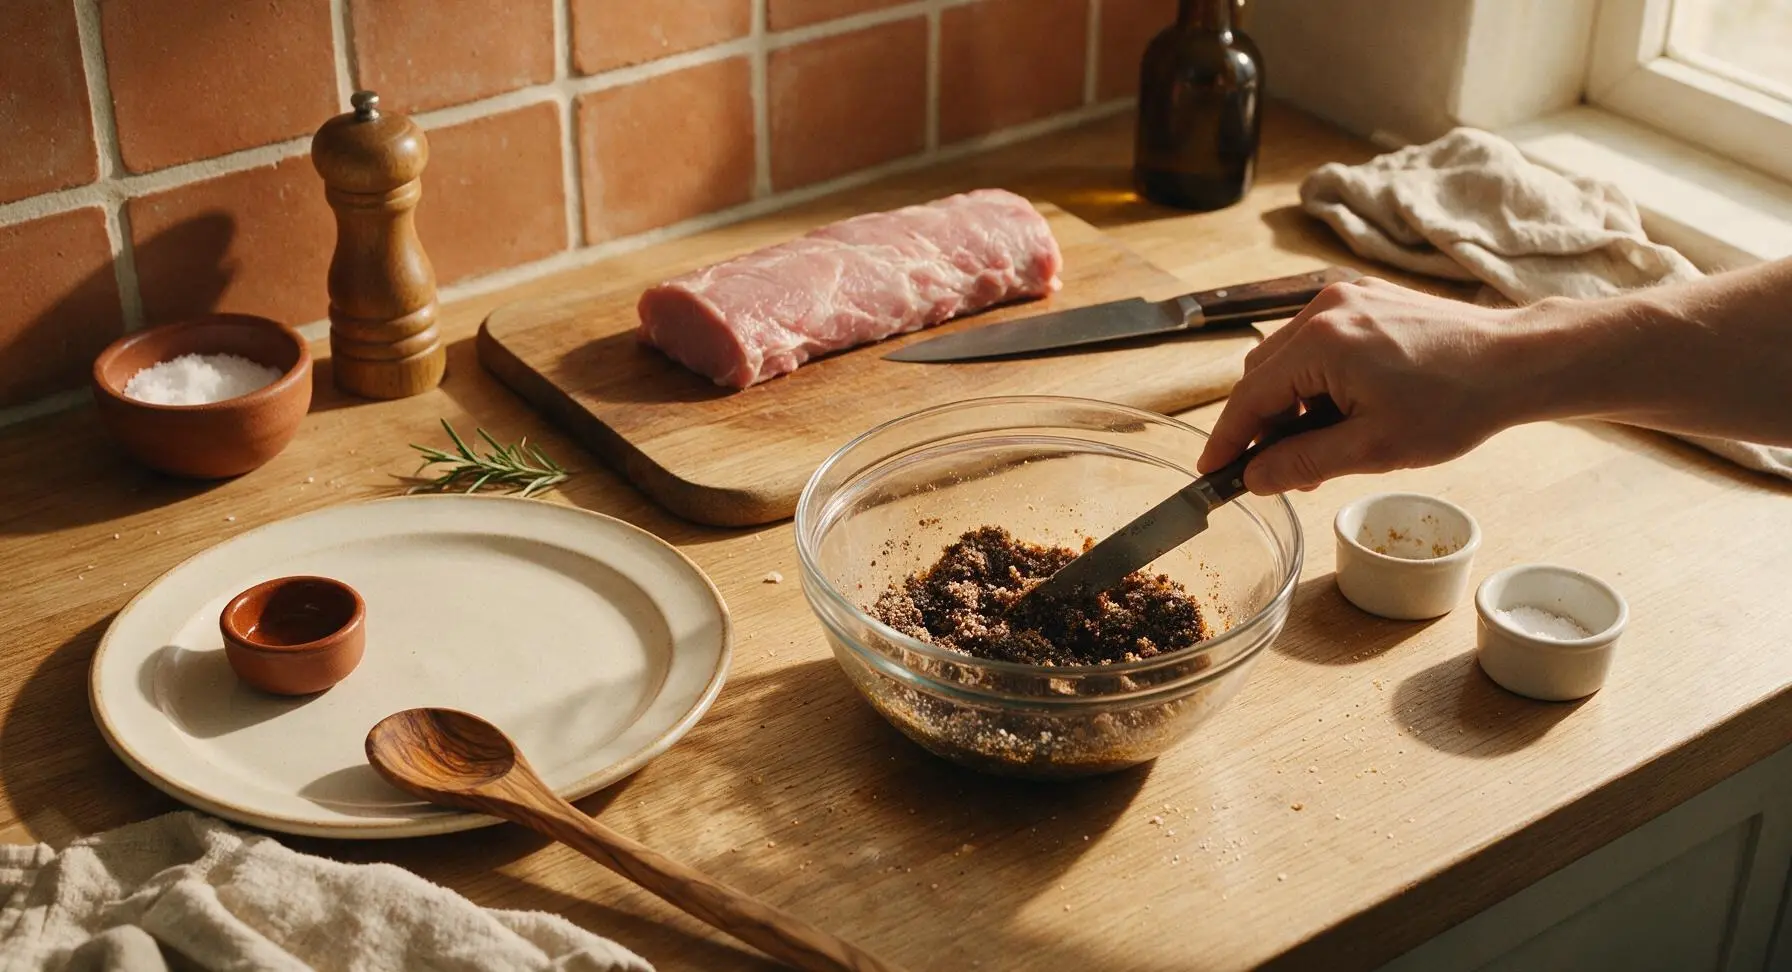
In the clear glass mixing bowl, combine 2 tbsp kosher salt, 1 tsp pink curing salt #1, 2 tbsp maple sugar, 1 tsp cracked black peppercorns, 4 crushed garlic cloves, leaves stripped from 4 thyme sprigs, and 1 tbsp pure maple syrup. Stir with the tip of the chef knife until the mixture forms a damp, evenly combined sandy paste, with no clumps of curing salt visible. It is critical to mix the curing salt evenly to avoid over-cured or under-cured spots on the meat.
Step 2
step2:Mix Curing Rub
3

Coat Loin in Cure

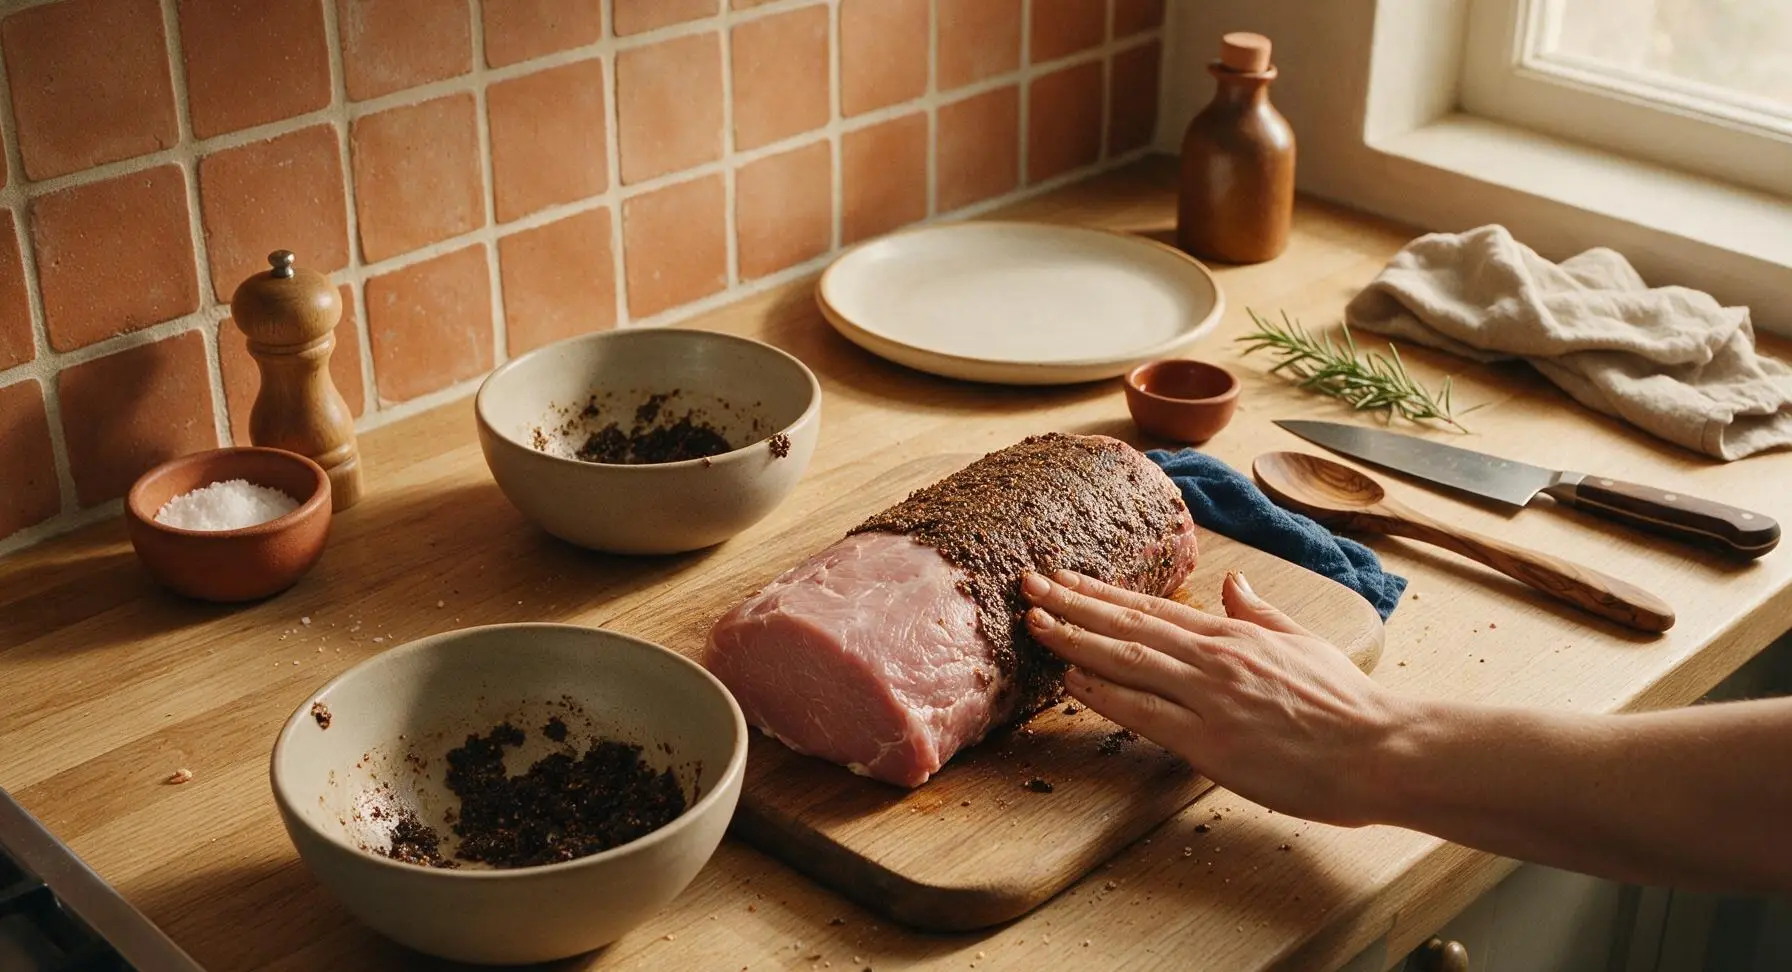
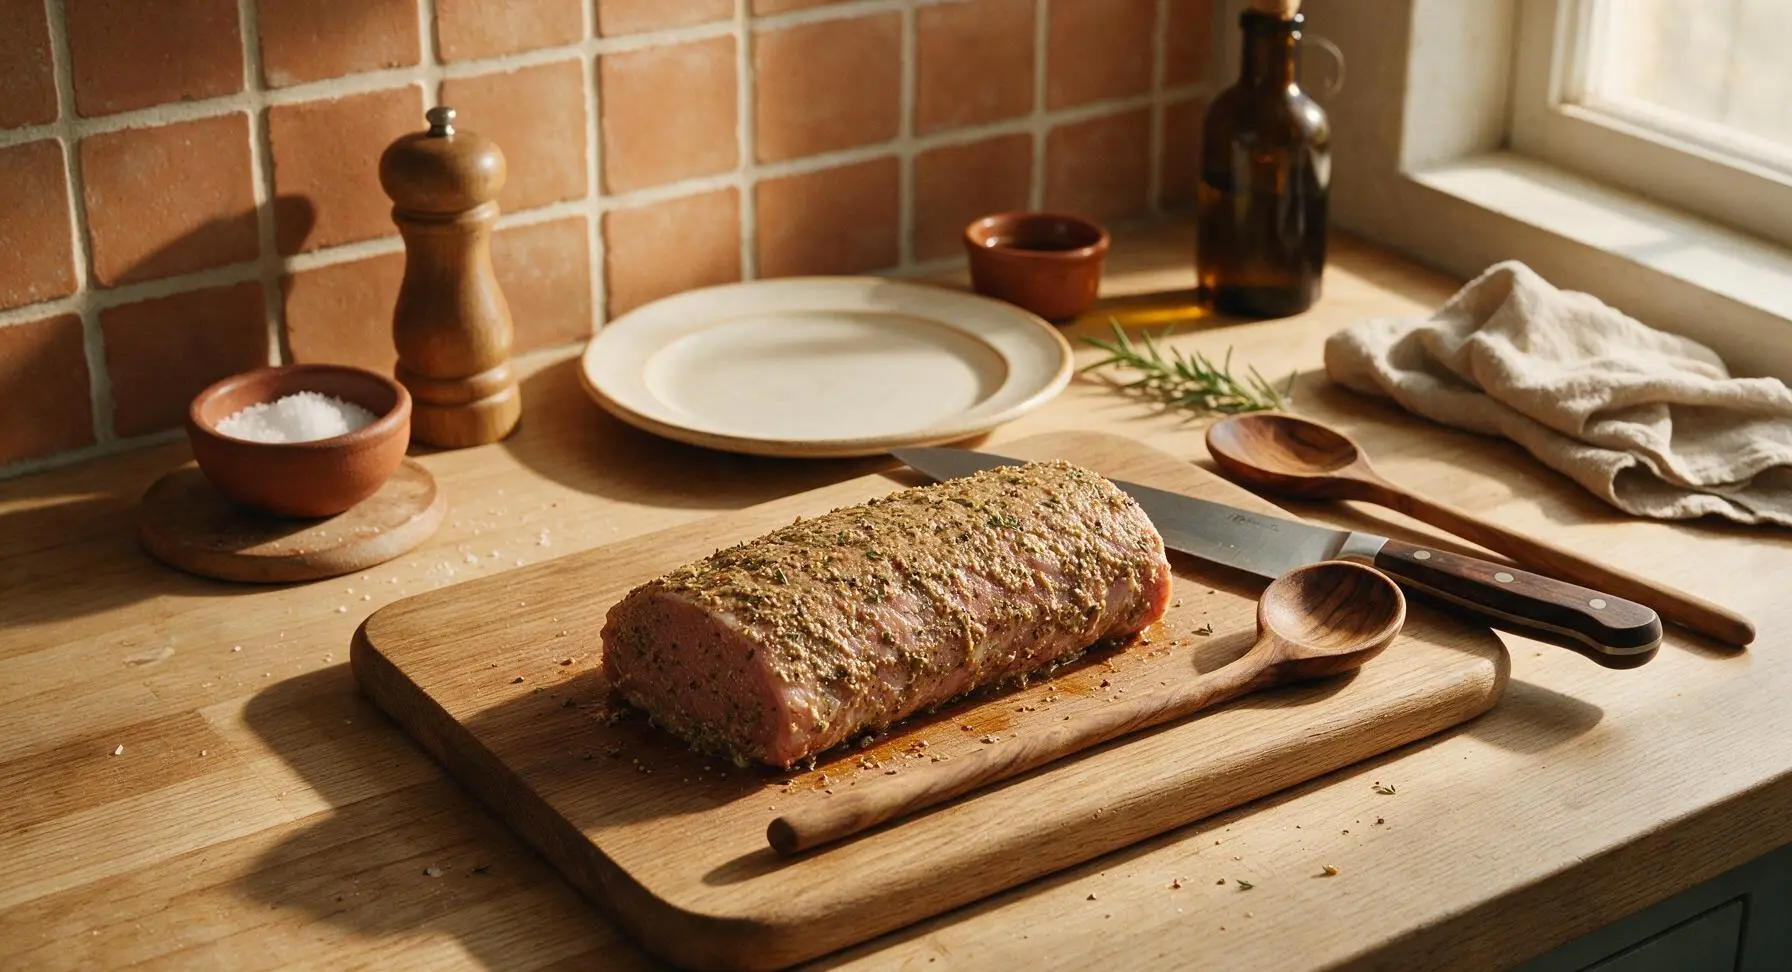
Pat the trimmed pork loin completely dry with the edge of the indigo cotton towel. Rub every surface of the loin (top, bottom, ends, and sides) with the entire batch of curing paste, pressing firmly so the paste adheres in a thin, even layer across the whole meat surface. No bare pink spots should remain visible once the cure is applied.
Step 3
step3:Coat Loin in Cure
Step 3
step3:Coat Loin in Cure
4

Cure Pork in Fridge

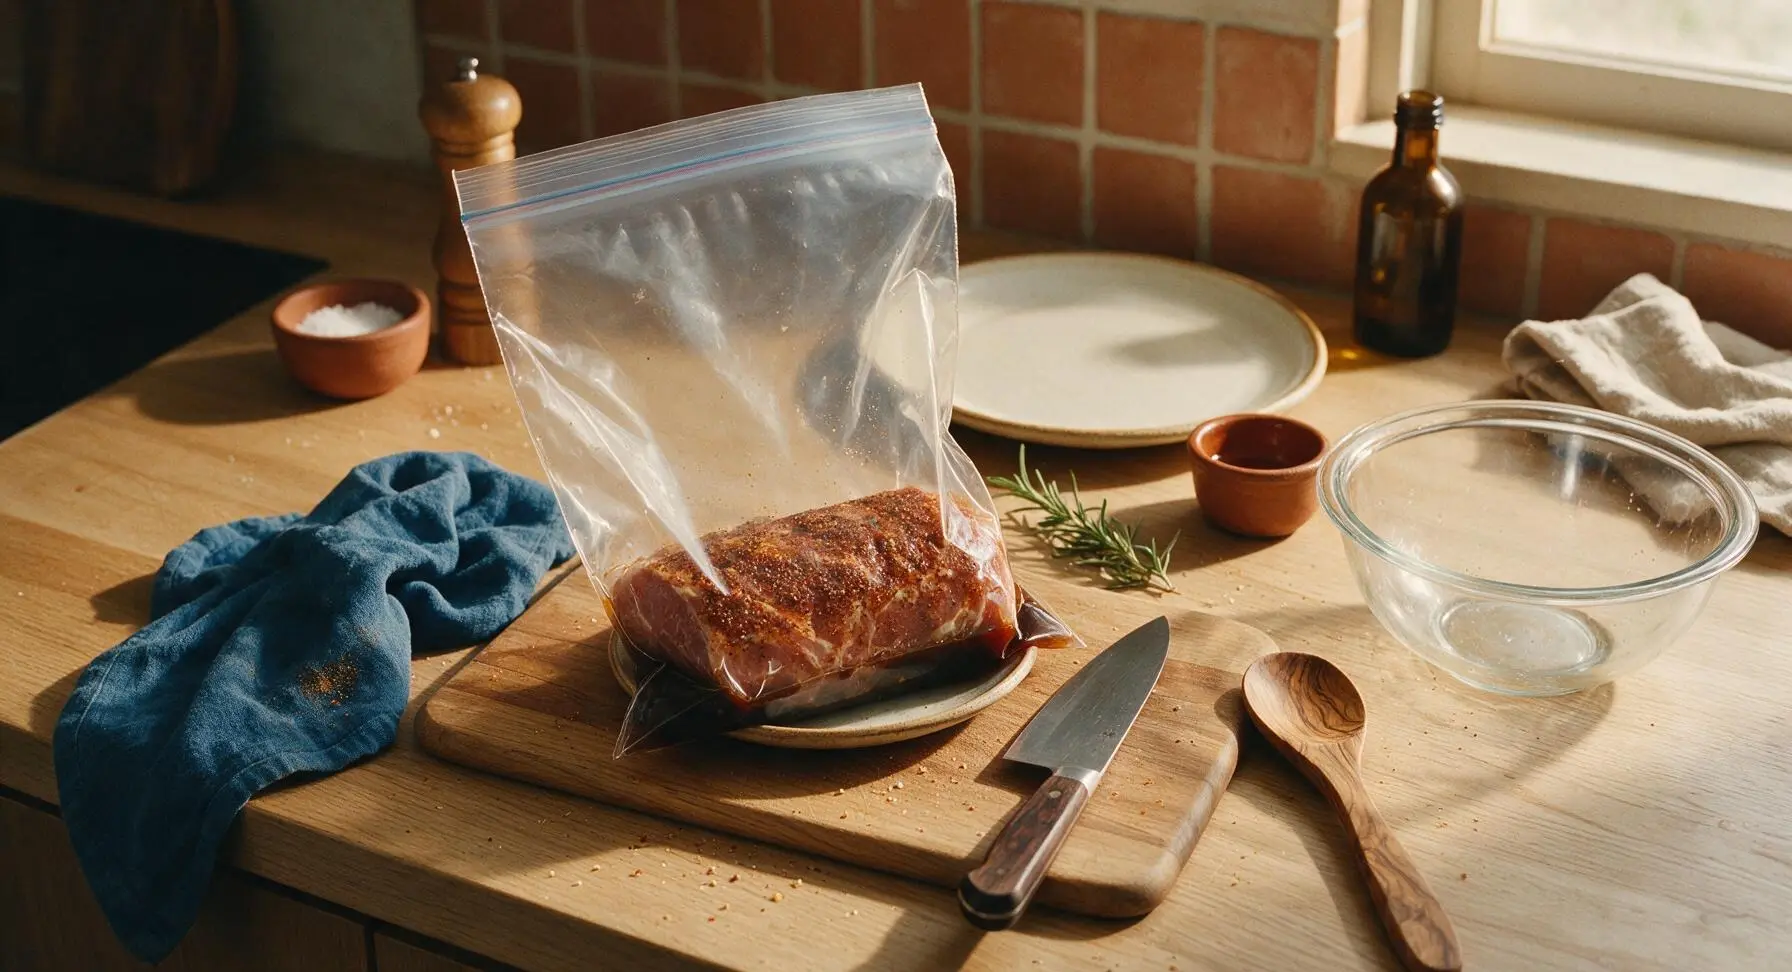
Place the cure-coated pork loin in a sealed 1-gallon zip-top bag, pressing out all excess air before sealing. Set the bag on a small rimmed plate (to catch any leaked brine) and place it in the refrigerator for 4 full days (inactive curing time, no active work needed), flipping the bag over once every 24 hours to ensure even brine distribution. The cure is complete when the pork feels firm to the touch all over, with no soft squishy spots remaining, and the meat has turned a uniform darker pink on the surface.
Step 4
step4:Cure Pork in Fridge
5

Rinse and Pat Dry

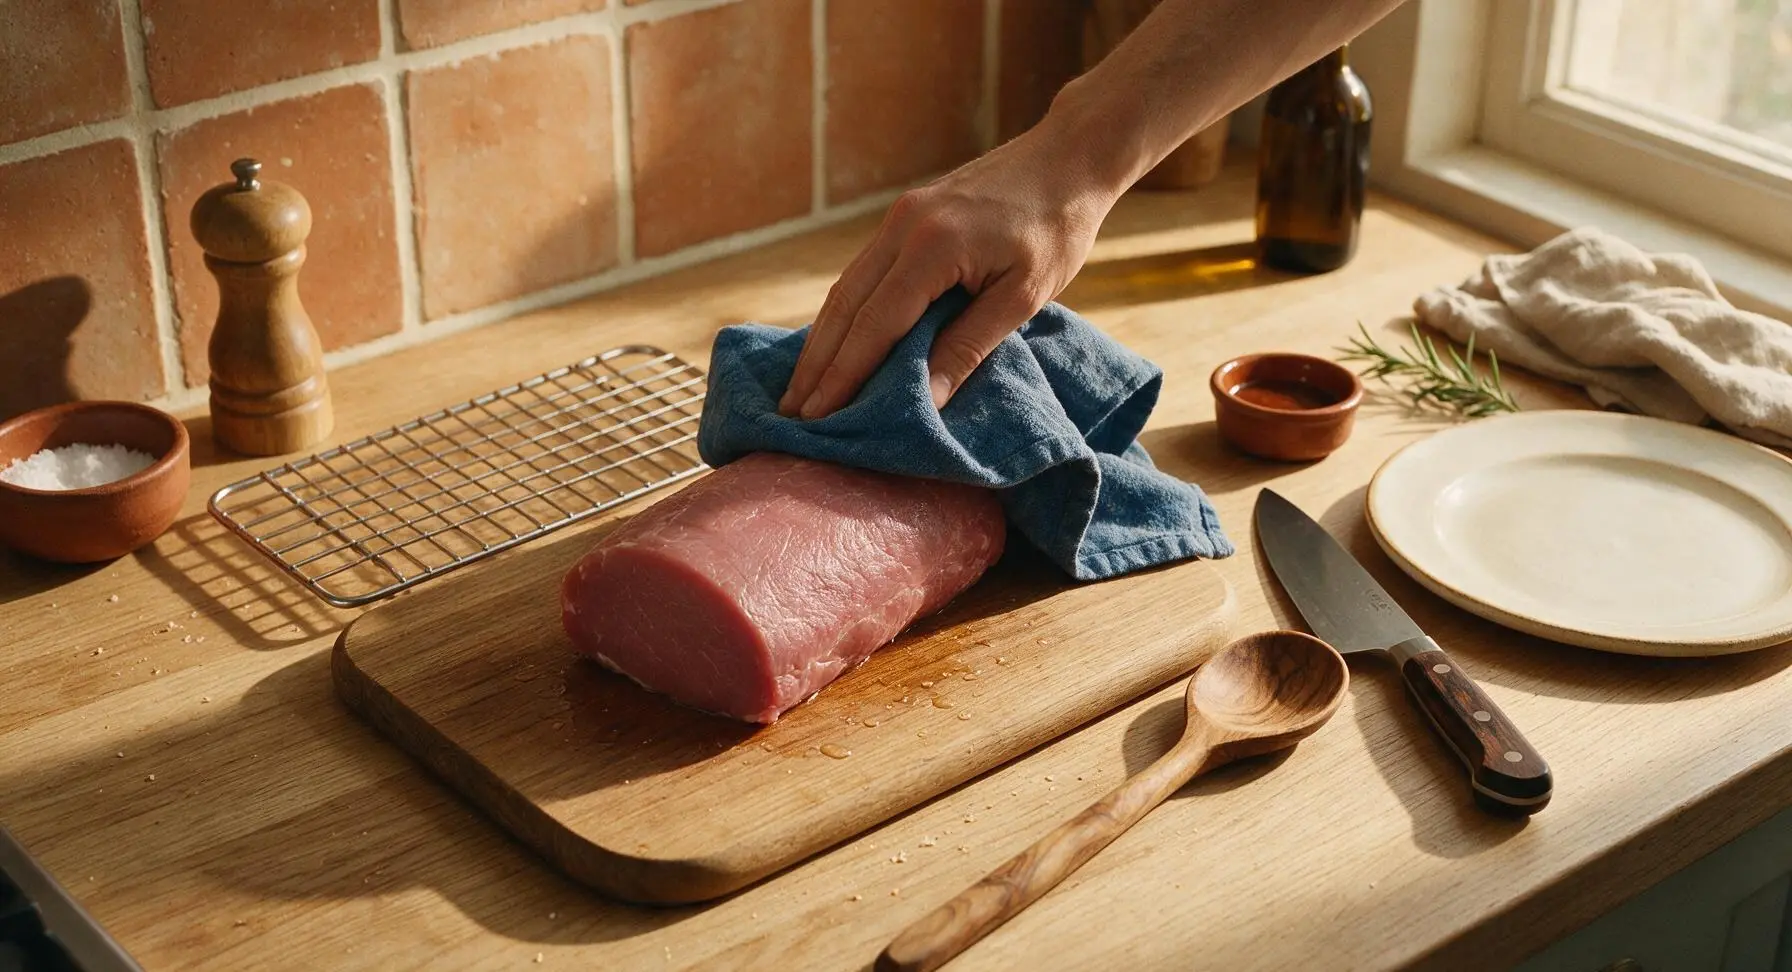
After 4 days of curing, remove the pork loin from the bag and rinse all surface cure off completely under cold running water. Pat the loin thoroughly dry with the clean indigo cotton towel until the surface is completely tacky to the touch, with no remaining surface moisture. Set the loin on the wire roasting rack set over a plate, and return it to the refrigerator uncovered for 12 hours (or overnight, inactive time) to form a dry, slightly sticky pellicle on the surface—this helps smoke flavor adhere evenly and creates a nice outer texture when cooked.
Step 5
step5:Rinse and Pat Dry
6

Prep for Slow Roasting

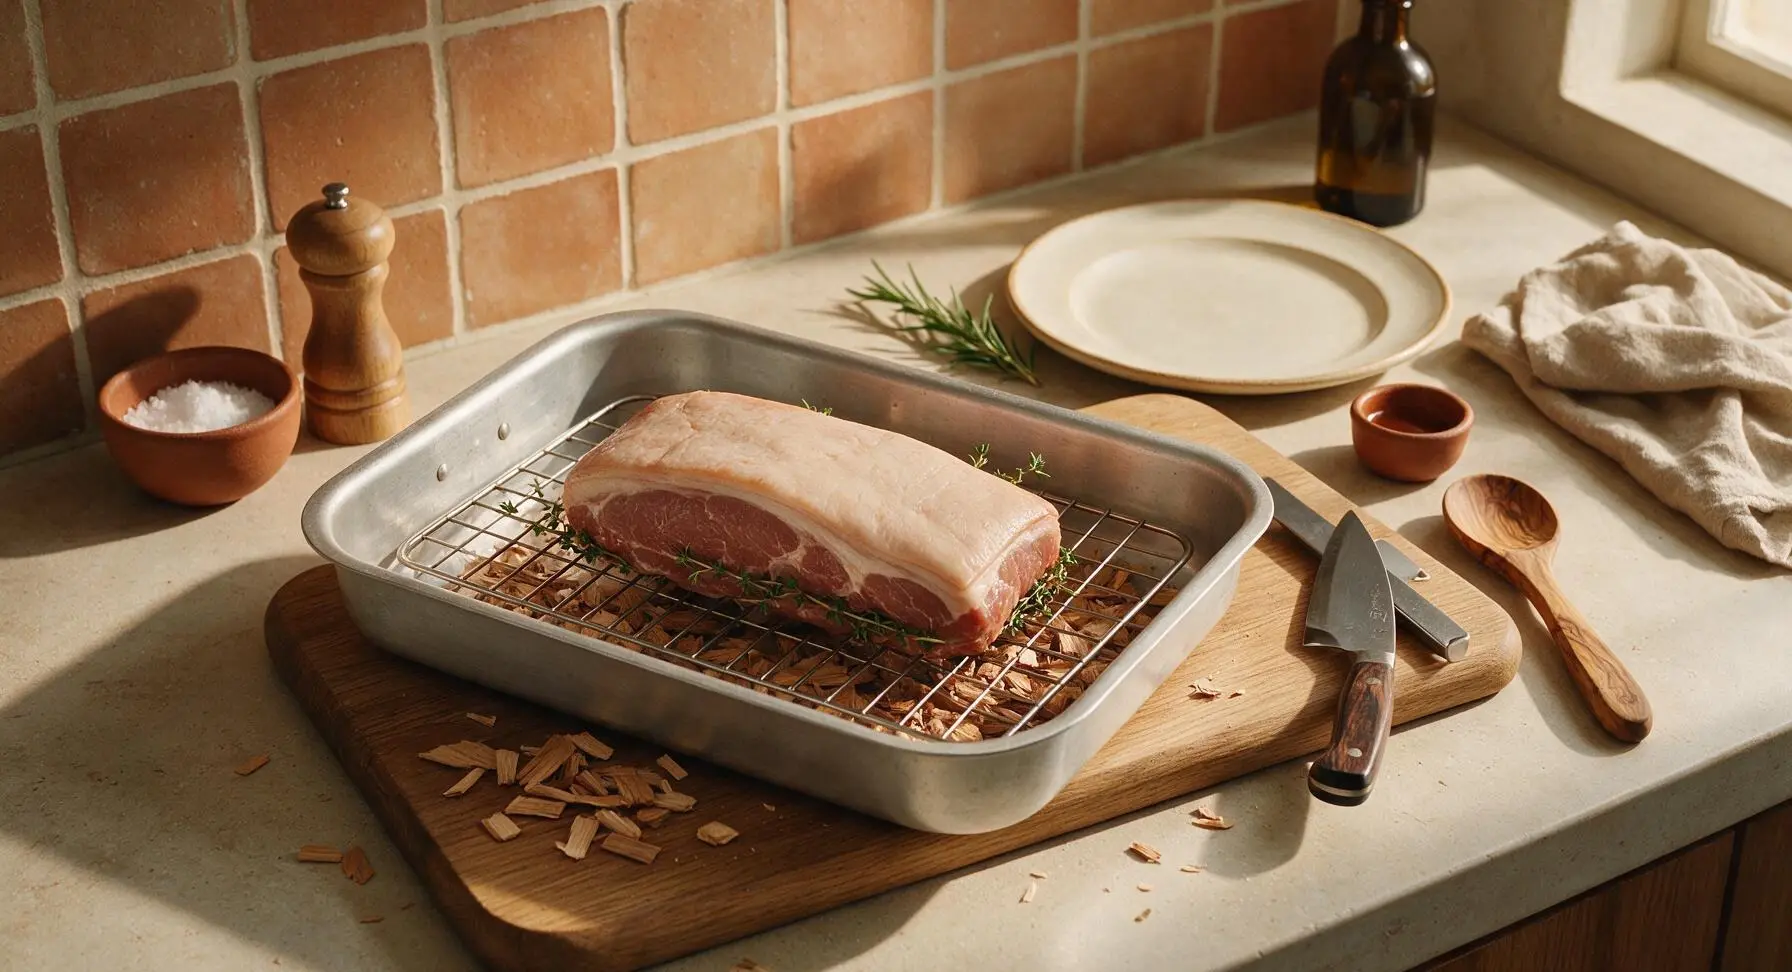
Preheat your oven to 200°F (93°C). If using a light smoke flavor, scatter 2 tbsp of apple wood chips in the bottom of the aluminum roasting pan, then set the stainless steel wire rack inside the pan. Place the dried cured pork loin directly on the rack, fat-side up, tucking the remaining 2 fresh thyme sprigs under the edges of the loin. No oil is needed, as the loin has enough natural moisture to cook evenly.
Step 6
step6:Prep for Slow Roasting
7

Slow Roast to Temp

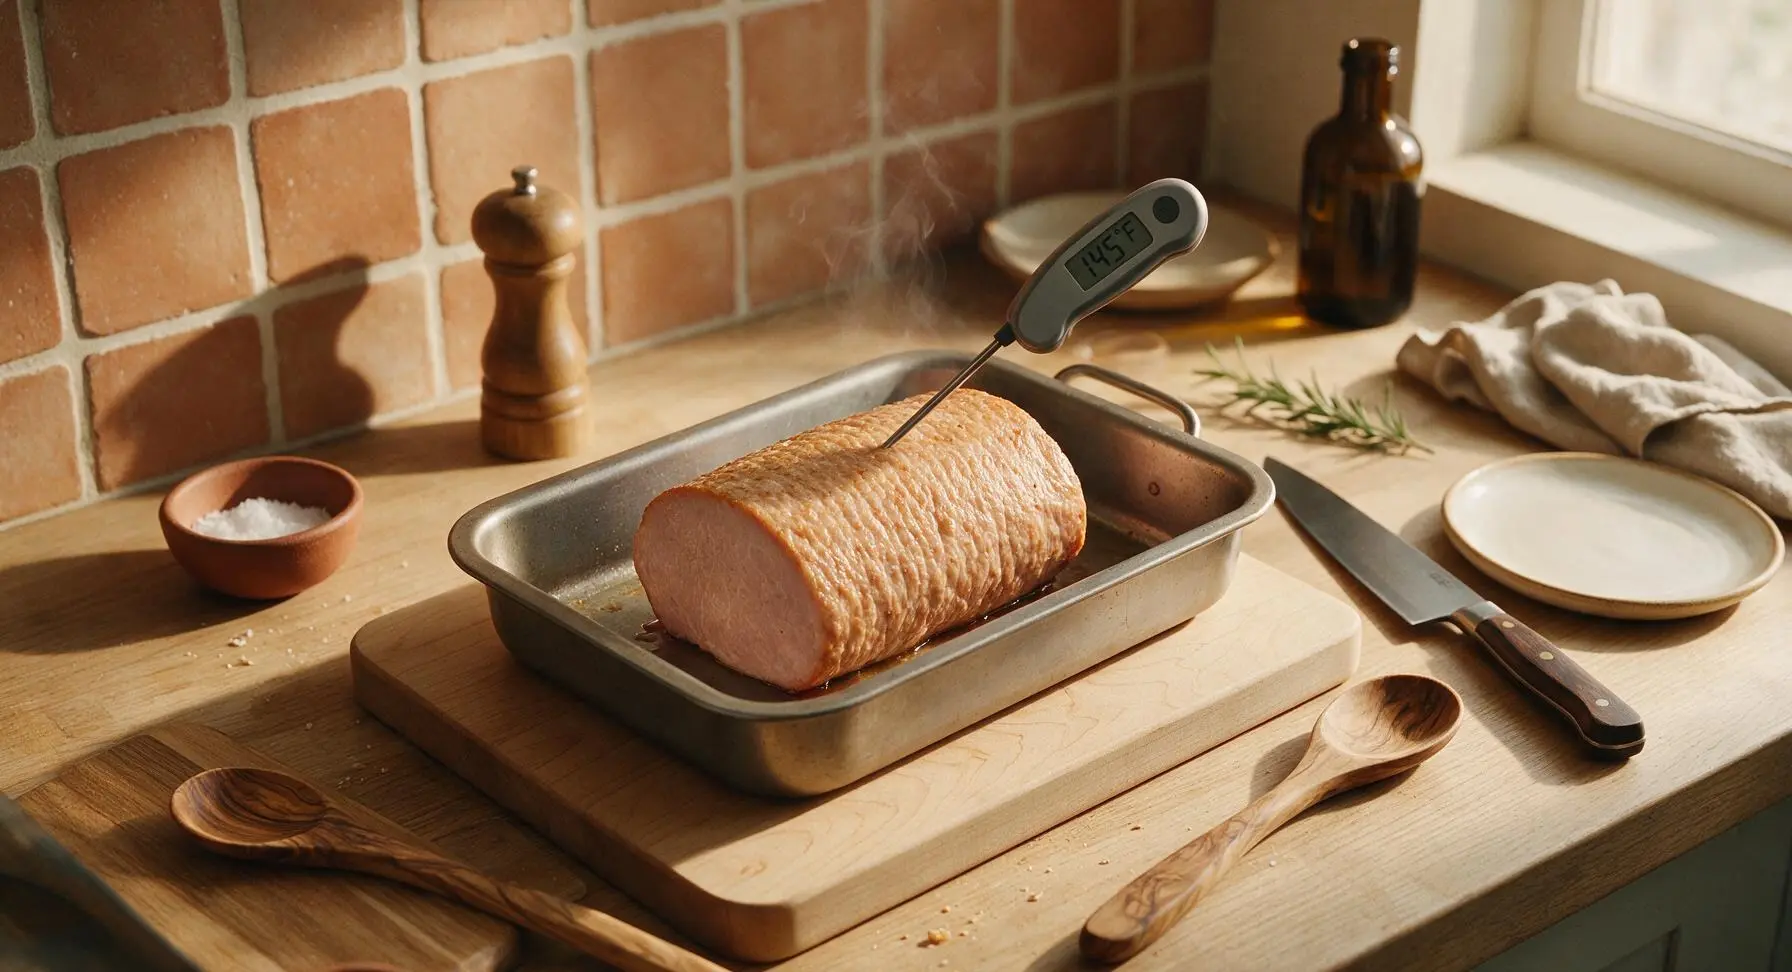
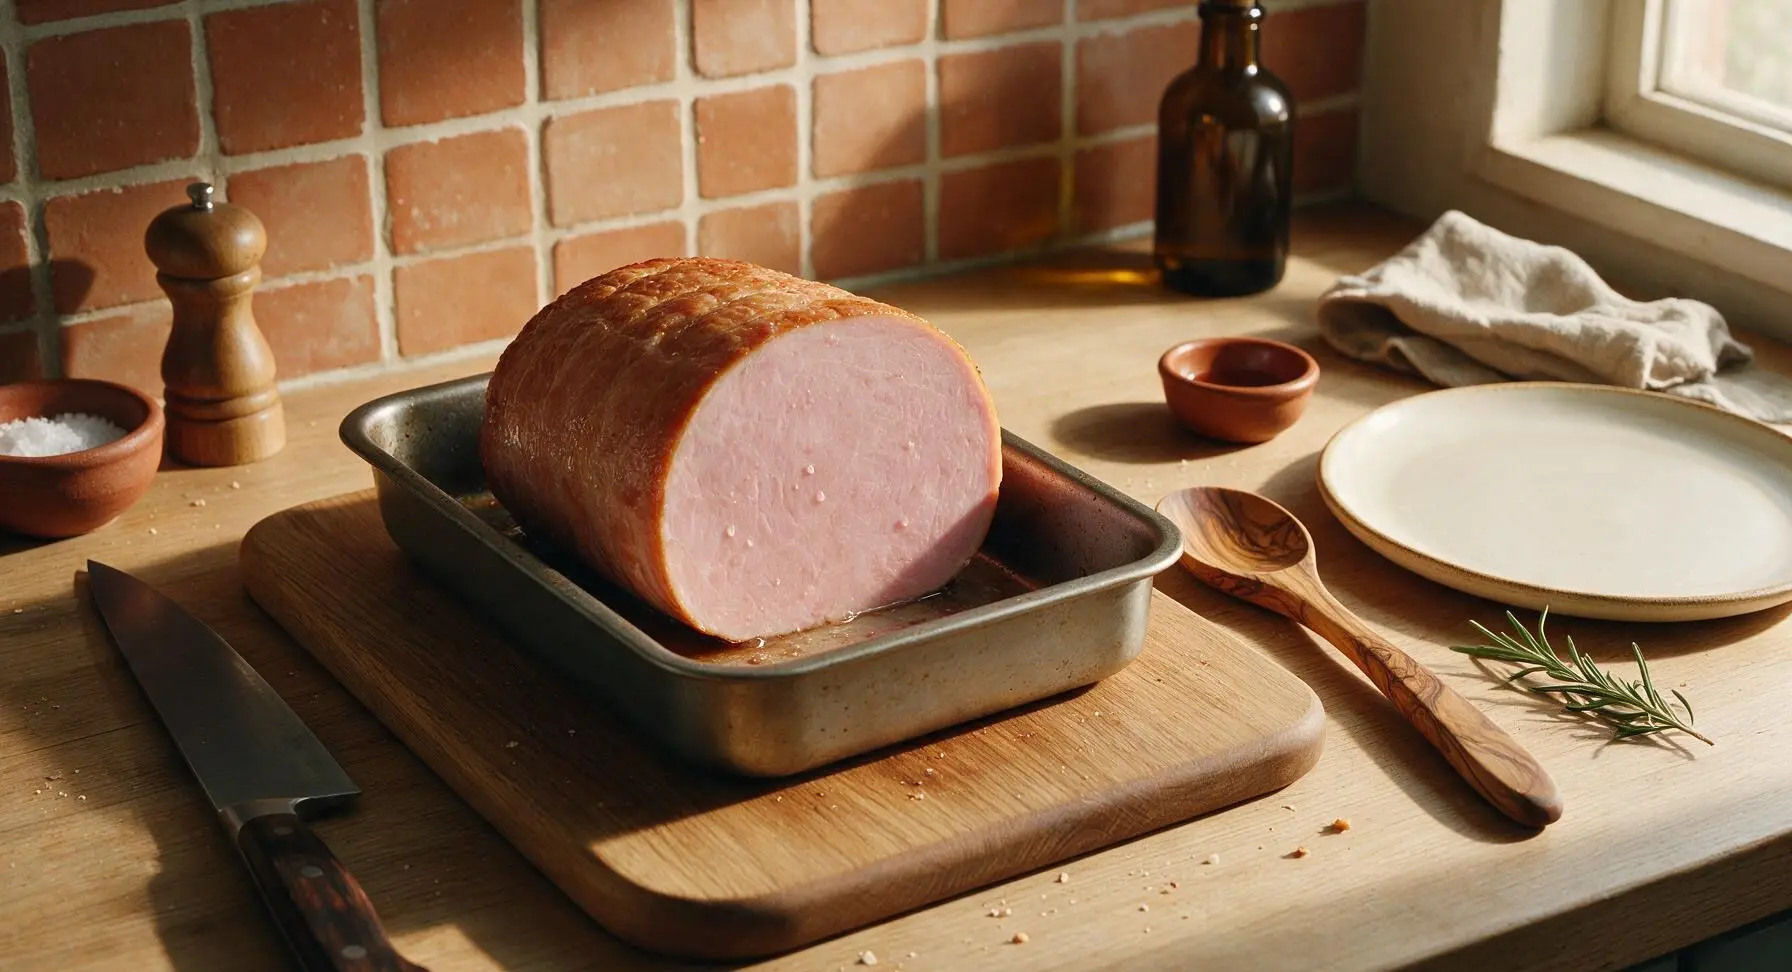
Place the roasting pan on the middle oven rack and cook for 1 hour 30 minutes to 1 hour 45 minutes, until the instant-read thermometer inserted into the thickest part of the loin reads an internal temperature of 145°F (63°C). If using wood chips, the pan will produce light wispy smoke for the first 20 minutes of cooking, venting your kitchen slightly as needed. Do not cook to a higher temperature, as this will make the Canadian bacon tough and dry.
Step 7
step7:Slow Roast to Temp
Step 7
step7:Slow Roast to Temp
8

Rest and Slice Thinly

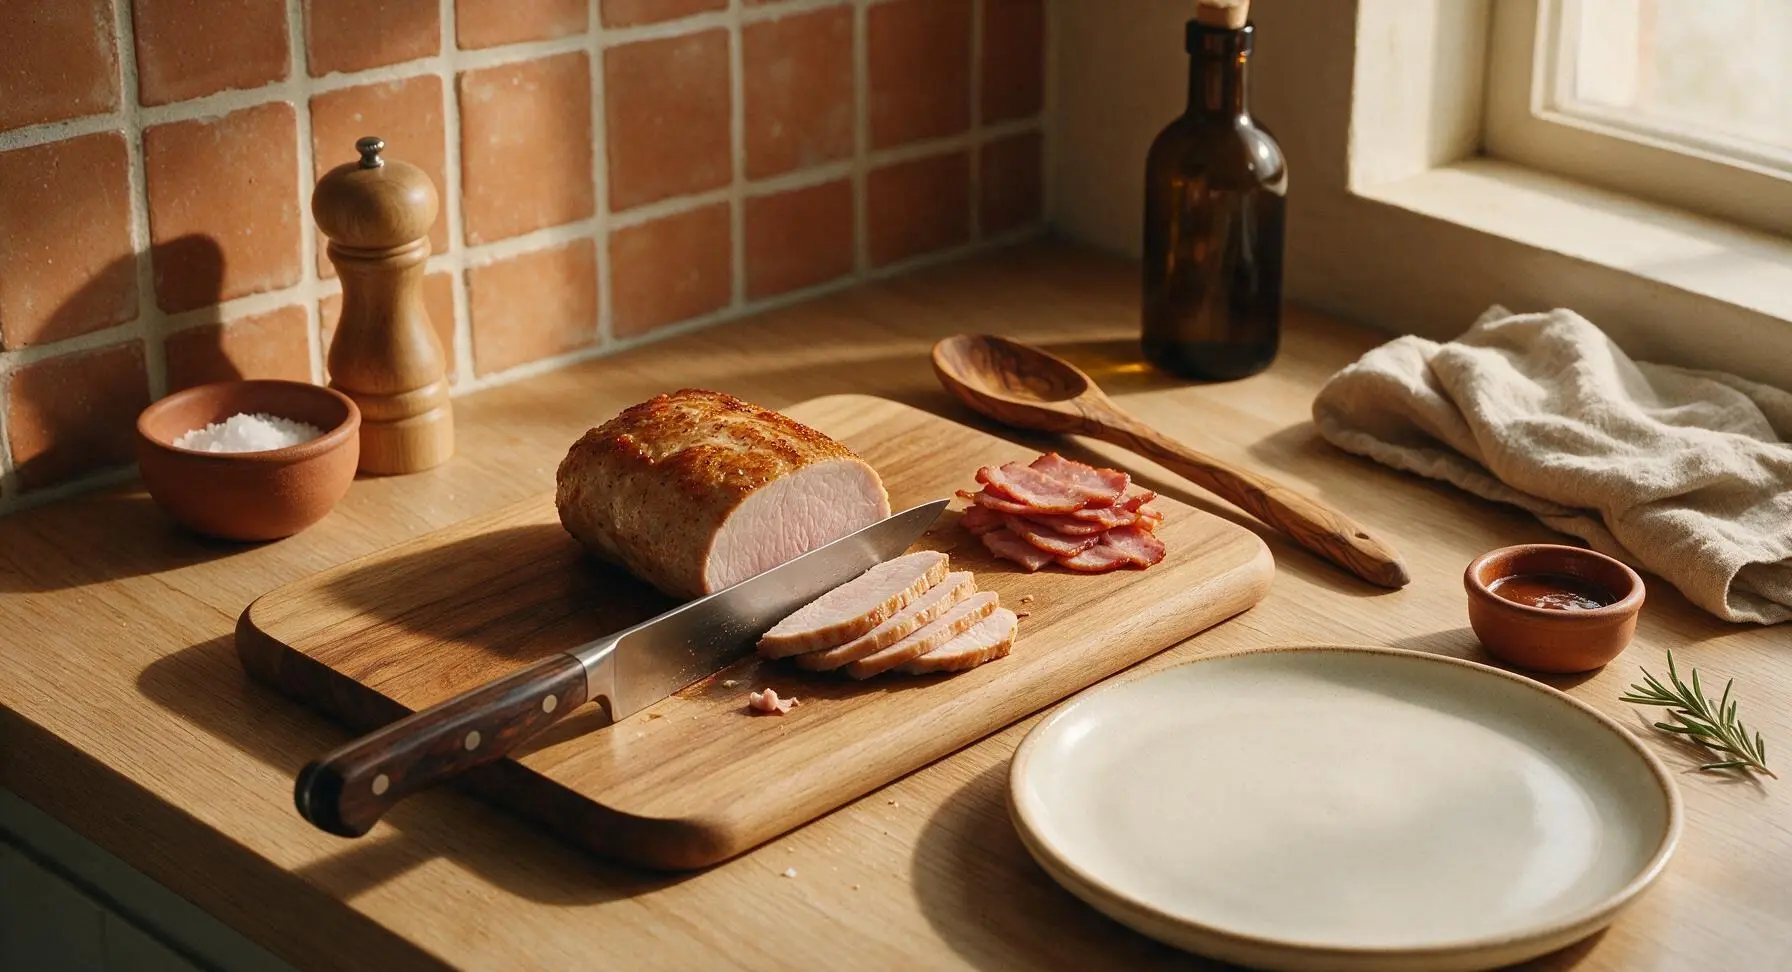
Remove the cooked loin from the oven, transfer it to the warm white stoneware plate, and let it rest for 20 minutes at room temperature to allow juices to redistribute. Once rested, use the sharp chef knife to slice the Canadian bacon against the grain into 1/8-inch thick slices, as evenly as possible. The slices will be tender, juicy, and flexible when cut correctly.
Step 8
step8:Rest and Slice Thinly

Tips

1.Do not adjust the amount of pink curing salt #1: it prevents dangerous botulism growth during the long cold cure, creates Canadian bacon’s signature pale pink color, and adds its distinct cured flavor—never substitute regular salt, as it is a concentrated, purpose-made curing product.
2.For the most tender texture, slice fully rested bacon to 1/8-inch thickness against the grain: thicker slices will be chewy, while thin slices work perfectly for eggs Benedict, breakfast sandwiches, or quick pan-frying to crisp the edges.
3.Store sliced Canadian bacon in an airtight container in the fridge for up to 10 days, or freeze for up to 3 months. It is fully cooked, so you can eat it cold straight from the container, or pan-fry for 30 seconds per side to warm and crisp it before serving.


✨ You May Also Like

Breakfast
🍜 United States

Crisp-edged, fluffy lard griddle cakes are a nostalgic homestyle staple, with rich savoriness from rendered lard, perfect topped with maple syrup or savory gravy.

⏱️ 25 minuteBreakfast ★ 4.8
Breakfast
🍜 United States

Flaky, buttery homemade buttermilk biscuits smothered in creamy, peppery pork sausage gravy: a beloved, hearty Southern American comfort food classic.

⏱️ 35 minuteBreakfast ★ 4.8
Breakfast
🍜 United States

Golden, custardy brioche stuffed with sweet cream cheese and fresh berries, pan-fried to crisp perfection. An indulgent, cozy breakfast perfect for slow weekend mornings.

⏱️ 30 minuteBreakfast ★ 4.7
Breakfast
🍜 United States

Flaky, buttery Southern-style biscuits stuffed with savory salty country ham, a portable, satisfying classic perfect for casual on-the-go meals.

⏱️ 25 minuteBreakfast ★ 4.8
Breakfast
🍜 United States

Iconic puffy baked pancake popularized in Seattle, with crisp golden edges and soft custardy center, served warm with classic sweet toppings.

⏱️ 35 minuteBreakfast ★ 4.6
Breakfast
🍜 United States

Fluffy, golden pancakes studded with juicy peak-summer mixed berries, drizzled with maple syrup for a bright, comforting, crowd-pleasing family breakfast.

⏱️ 25 minuteBreakfast ★ 4.7

homemade canadian bacon:Frequently Asked Questions

1.What cut of pork is best for homemade Canadian bacon? ▾
Boneless pork loin is the ideal, traditional cut for this recipe, as it produces that signature lean, tender bite Canadian bacon is known for. Be sure to fully trim off all tough, silvery connective tissue (silver skin) before curing, as it won’t break down during processing and will leave unpleasantly chewy spots in your finished product. Avoid fattier cuts like pork shoulder for authentic results.
2.Do I really need to use pink curing salt #1 (Prague powder) for this recipe? ▾
Yes, pink curing salt #1 is non-negotiable for safe, consistent results here. It prevents the growth of dangerous botulism bacteria during low-temperature smoking and cooking, gives Canadian bacon its signature pale pink hue, and adds that characteristic cured, savory flavor you won’t get from regular kosher or table salt alone. Never skip it or swap it for plain salt.
3.Can I substitute regular granulated sugar for the maple sugar in the cure? ▾
You can, but you’ll lose that deep, warm maple backbone that makes this recipe shine. If you don’t have maple sugar, use an equal amount of light brown sugar and add 1 extra teaspoon of pure maple syrup to the cure to amp up that maple note. Skip white granulated sugar entirely, as it tastes flat and lacks the subtle caramelized depth that pairs so well with smoky pork.
4.How long do I need to cure the pork loin before cooking it? ▾
For a standard 3 to 4 pound boneless pork loin, plan for a 3 to 5 day cure in the refrigerator, turning the loin once every 24 hours to ensure the salt, maple, and pepper distribute evenly. It’s ready when the entire loin feels firm to the touch, with no squishy raw spots in the thickest center. Adjust time up for thicker loins, down for smaller cuts.
5.Do I need a dedicated smoker to make homemade Canadian bacon? ▾
You don’t need a fancy dedicated smoker to get great results! If you don’t have one, cook the cured loin in a 200°F oven to an internal temp of 145°F, and add a tiny amount of food-grade liquid smoke to the cure if you want that classic smoky note. For best texture and flavor, even a cheap stovetop smoke box with hardwood chips works better than oven-only prep.
6.What internal temperature should I cook cured Canadian bacon to? ▾
Cook your rinsed, cured pork loin to a final internal temperature of 145°F, measured with an instant-read thermometer inserted into the thickest part of the loin, away from any fat. This temperature produces juicy, tender slices that hold their shape, rather than the dry, tough results you’ll get if you cook it to the higher temps used for regular roasted pork. Rest 10 minutes before slicing.
7.Why do I need to rinse the pork loin after it finishes curing? ▾
Rinsing the cured pork loin under cold running water after its time in the fridge removes excess surface salt that would otherwise make your finished Canadian bacon unpalatably salty. After rinsing, pat the entire surface completely dry with paper towels, then let it rest uncovered in the fridge for 1 to 2 hours to form a tacky pellicle that helps smoke stick evenly.
8.How thick should I slice finished Canadian bacon for the best texture? ▾
For most common uses like breakfast sandwiches, eggs Benedict, or quick pan-fried servings, aim for 1/8 to 1/4-inch thick slices, which cook quickly and hold their shape well. If you plan to use it for charcuterie boards, you can slice it paper thin, but always slice against the grain to get the most tender, easy-to-chew bite possible.
9.How long will homemade Canadian bacon stay fresh in the refrigerator? ▾
Once cooked and fully cooled, your unsliced homemade Canadian bacon will stay fresh for up to 10 days stored tightly wrapped in plastic or a sealed airtight container in the coldest part of your refrigerator. If you slice it ahead of time, plan to use it within 5 days, as increased surface area will cause it to dry out and lose quality faster than an intact whole loin.
10.Can I freeze homemade Canadian bacon to use later? ▾
Absolutely! Homemade Canadian bacon freezes beautifully for up to 3 months. For easiest use, slice it first, then place small stacks of slices between pieces of parchment paper before tucking them into a freezer-safe zip-top bag with all excess air squeezed out. This lets you pull out exactly the number of slices you need without thawing the entire block.
11.Is homemade Canadian bacon the same as the Canadian bacon sold at grocery store delis? ▾
Most grocery store Canadian bacon is injected with a quick brine, loaded with extra preservatives, and has a rubbery, uniform texture. This homemade version is slow dry-cured with real maple and black pepper, gently smoked, and has a juicier, more complex flavor with a firmer, less processed bite that tastes far better than pre-packaged deli options.
12.What type of wood works best for smoking this Canadian bacon? ▾
Stick to mild, sweet hardwoods to complement the maple notes in the cure, rather than strong, bold woods that will overpower the delicate pork. Apple, maple, cherry, or mild hickory are all excellent choices; skip mesquite or heavy oak, as their intense, bitter smoke will drown out the subtle sweet, peppery flavor of the cure. Keep smoke light for the first hour of cooking.
13.Can I add extra seasonings to the base cure for more flavor? ▾
Of course! The base maple and black pepper cure is a classic, but you can tweak it to match your taste. Try adding a pinch of smoked paprika, a few crushed juniper berries, a sprinkle of garlic powder, or a splash of bourbon to the cure for extra depth. Just never increase the amount of kosher salt or pink curing salt, as those ratios are calibrated for food safety.
14.Why did my finished Canadian bacon turn out too salty? ▾
Overly salty Canadian bacon almost always comes from one of two mistakes: either you didn’t rinse the surface cure off thoroughly enough after the curing period, or you left the loin in the cure for too long for its size. If you end up with slightly salty bacon, soak sliced pieces in cold water for 15 minutes before cooking to draw out excess salt for a quick fix.
15.Do I need to cook the slices before eating, since the bacon is cured? ▾
While this Canadian bacon is cured and fully cooked to a safe internal temperature during the smoking or roasting step, I always recommend giving slices a quick 1 to 2 minute sear on each side in a hot skillet before eating. This brings out the smoky, maple flavor, adds a slight crisp to the edges, and delivers a far better texture than eating it cold straight from the fridge.
16.Can I use maple-flavored pancake syrup instead of pure maple syrup in the cure? ▾
I strongly recommend sticking to 100% pure maple syrup here. Maple-flavored pancake syrup is made with corn syrup, artificial flavor, and preservatives, and it will give your cured bacon a cloying, fake maple taste that clashes with the savory pork and black pepper. If you don’t have pure maple syrup, skip it and add an extra tablespoon of maple sugar instead.
17.What are the best ways to use homemade Canadian bacon besides breakfast sandwiches? ▾
This versatile, lean bacon works for so much more than breakfast sandwiches! It’s the classic star topping for eggs Benedict, adds great protein to omelets and breakfast hashes, works as a lean swap for regular bacon on pizza, makes a quick grilled ham and cheese for weekday meals, and can even be cubed and added to pasta dishes or split pea soup for a smoky, savory kick.
18.Why did my finished Canadian bacon turn out dry and tough? ▾
Dry, tough Canadian bacon is almost always caused by cooking it to too high an internal temperature, or not letting it rest properly after cooking. Remember to pull the loin from your smoker or oven as soon as it hits 145°F in the thickest spot, let it rest 10 minutes to let juices redistribute, and slice against the grain. Over-curing can also lead to dry, tough results.

Comments (17)

5 minutes ago

OMG this homemade Canadian bacon is SO good! I made it for our Sunday family breakfast and everyone went back for seconds, even my super picky 8 year old. Way better than the store bought stuff that’s loaded with weird preservatives. Worth every minute of prep!

1 week ago

Total game changer for my weekly meal prep! I slice this up thin and toss it in egg bites, breakfast wraps, and even on homemade pizza all week. Only note: it took me a little longer to get the internal temp right than the recipe said, but that’s probably my janky old oven. Would 10/10 make again.

5 days ago

So glad this works for your meal prep! Oven temp variations are totally normal – I always recommend keeping a reliable meat thermometer handy to hit that perfect 145°F internal temp without overcooking. Hope you keep enjoying it!

3 days ago

Wait, quick question – do I *have* to use a smoker for this? I live in a tiny apartment with no outdoor space, so I don’t have access to one. Would liquid smoke work as a substitute, or will it taste off?

2 days ago

I made this last month in my apartment oven with 1 tsp of hickory liquid smoke mixed into the brine and it turned out amazing! No weird artificial aftertaste at all, just that subtle smoky flavor you want from Canadian bacon. Just don’t overdo the liquid smoke, a little goes a long way.

yesterday

Great question! You absolutely don’t need a smoker – liquid smoke works perfectly as a substitute, just like @CityCooker212 mentioned. You can also use a stovetop smoker if you have one, but the oven + liquid smoke method will give you fantastic results for apartment cooking.

1 week ago

Brought this to our neighborhood block party potluck last weekend and people were asking me for the recipe before I even set the platter down! I served it sliced up with some honey mustard dip on the side and it was gone in 15 minutes flat. Can’t wait to make a bigger batch next time.

yesterday

Tried this for the first time over the weekend and brined it for 3 days like the recipe suggested, but it came out way saltier than I expected. Did I do something wrong? I used regular table salt instead of kosher salt, could that be it?

2 hours ago

That’s almost certainly the salt swap! Table salt is much denser than kosher salt, so using the same measurement will make the brine way too salty. Next time, either use kosher salt as written, or cut the table salt amount by about half to get the right salinity. Hope you give it another try!

5 days ago

My kids loved it! I served this with scrambled eggs, hash browns, and homemade biscuits for a breakfast-for-dinner night earlier this week, and they asked if we can have it every single week. The cook time felt a little long for a weeknight, but I prepped the brine on Sunday so it was ready to cook on Wednesday, which made it way easier.

3 days ago

Oh the brine ahead trick is genius! I’ve been trying to find more make-ahead meals for our chaotic sports practice nights, this is going straight on next week’s menu. Did you notice any texture difference from brining it an extra day?

2 days ago

Love the breakfast for dinner win! Brining for 2-4 days is totally safe and won’t hurt the texture at all as long as you keep it refrigerated the whole time – it actually infuses even more flavor. So glad it was a hit with the kids!

2 weeks ago

I was nervous to try this since it’s marked medium difficulty, but the instructions were so clear and easy to follow that even a total cured meat newbie like me pulled it off! The end result was juicy, perfectly smoky, and tasted exactly like the fancy Canadian bacon they charge an arm and a leg for at the deli counter.

2 weeks ago

So excited to find a Canadian bacon recipe that doesn’t have any hidden gluten or weird fillers! I have celiac so making my own deli meats is a total game changer for quick lunches. This held up perfectly for sandwiches all week.

1 week ago

Thank you for mentioning this! My son has celiac too and I’ve been so nervous to try curing my own meats because I was worried I’d mess up the ingredients. Can’t wait to give this a shot now that I know it works!

1 week ago

Wait, has anyone tried adding a little maple syrup to the brine for a sweeter profile? I love the sweet-savory vibe on breakfast meats and was curious if that would work with this recipe, or if it would throw off the cure.

5 days ago

I did that last batch! Added 2 tbsp of pure maple syrup to the brine and it was chef’s kiss. Not too sweet, just that little hint of maple that pairs so well with eggs and pancakes. Didn’t mess up the cure at all for me!

3 days ago

Maple syrup is a fantastic add-in! I recommend sticking to 1-3 tbsp of pure maple syrup (not the pancake syrup with added corn syrup) to get that sweet-savory balance without making the brine too sweet or impacting the curing process. Love that customization!

3 days ago

This saved me so much money! The deli near my house charges $12 a pound for good Canadian bacon, and I made a 3 pound loin for under $10 total. It tastes better too, no weird rubbery texture like the pre-packaged slices. Absolute staple recipe for me now.

yesterday

That’s what I love to hear! Homemade cured meats are so much more budget friendly once you get the hang of them, plus you get to control exactly what goes into them. So glad this has become a staple for you!

2 hours ago

Quick noob question: how thick do you all slice this? I have a cheap meat slicer and I’m not sure if I should go super thin like deli slices, or a little thicker for frying up with breakfast. Don’t want to mess up the texture after putting all this work in!

30 minutes ago

I do both! I slice half the loaf super thin for cold sandwiches and lunch wraps, then slice the other half about 1/4 inch thick to pan fry for breakfast. It holds up great either way, just don’t slice it so thick that it’s chewy in the middle.

just now

Great question! There’s no wrong answer, but most folks slice it 1/8 to 1/4 inch thick for the best texture. If you’re pan frying it, a slightly thicker slice holds up better to heat, while thinner slices are perfect for cold sandwiches. Enjoy!

5 days ago

Made a double batch for our football tailgate last weekend, sliced it up, and served it on mini breakfast sliders with cheese and a little aioli. People were raving the whole time! Even the guys who usually only eat hot dogs at tailgates came back for two more sliders. 10/10, will be making this for every tailgate this fall.

30 minutes ago

Perfect for my low carb diet! Zero added sugar if you skip the optional brown sugar in the brine, high protein, and way more satisfying than the boring chicken breasts I’ve been eating for lunch every day. I’ve been eating it rolled up with cream cheese and pickles for a quick snack and it’s chef’s kiss.

5 minutes ago

Oh the cream cheese and pickle roll up idea is genius! I’ve been eating this fried up with eggs for breakfast but I need to try that for my midday work snack next week. Thanks for the tip!

yesterday

Help! I followed the recipe exactly but my Canadian bacon came out really dry on the edges. I cooked it for the full 1 hour 45 minutes at the temp listed, so I’m not sure what went wrong. Did I overcook it?

yesterday

I had the same issue my first time! Turns out my oven runs 25 degrees hot, so I was basically roasting it at too high of a temp the whole time. I started using an oven thermometer to calibrate it and the next batch came out perfectly juicy edge to edge.

2 hours ago

I’m sorry your first batch came out dry! The most common culprits are oven temp inconsistencies (like @HomeCookPro mentioned) or not letting the meat rest for 10-15 minutes after cooking to let the juices redistribute. Next time, keep a close eye on the internal temp and pull it as soon as it hits 145°F, even if that’s before the full cook time is up. You’ve got this!

1 week ago

I’m making this for our Christmas morning brunch this year! I tested a batch last week to make sure it turned out, and my husband said it’s better than the Canadian bacon we get at our favorite fancy brunch spot downtown. It’s going to be the star of the spread, I can already tell.

2 days ago

Added a pinch of cayenne and a little smoked paprika to the rub for a tiny kick, and it was insane. I was worried it would overpower the smoky brine flavor but it just added a nice little heat that hits you at the end. 10/10, will be adding that to every batch from now on.

yesterday

Love that spicy twist! A little cayenne and smoked paprika is such a great way to customize the base recipe to your taste preferences. Thanks for sharing that hack – I’m definitely going to try it on my next batch!

3 days ago

Has anyone tried freezing this after making it? I like to stock my freezer with quick breakfast options for busy school mornings, and I’m wondering if it freezes well or if the texture gets all weird when you thaw it.

2 days ago

I freeze mine all the time! I slice it first, lay the slices out on a baking sheet to flash freeze, then toss them in a freezer bag for up to 3 months. The texture is totally fine when you thaw it in the fridge overnight or reheat it straight from frozen in a pan. Perfect for quick breakfasts!



