
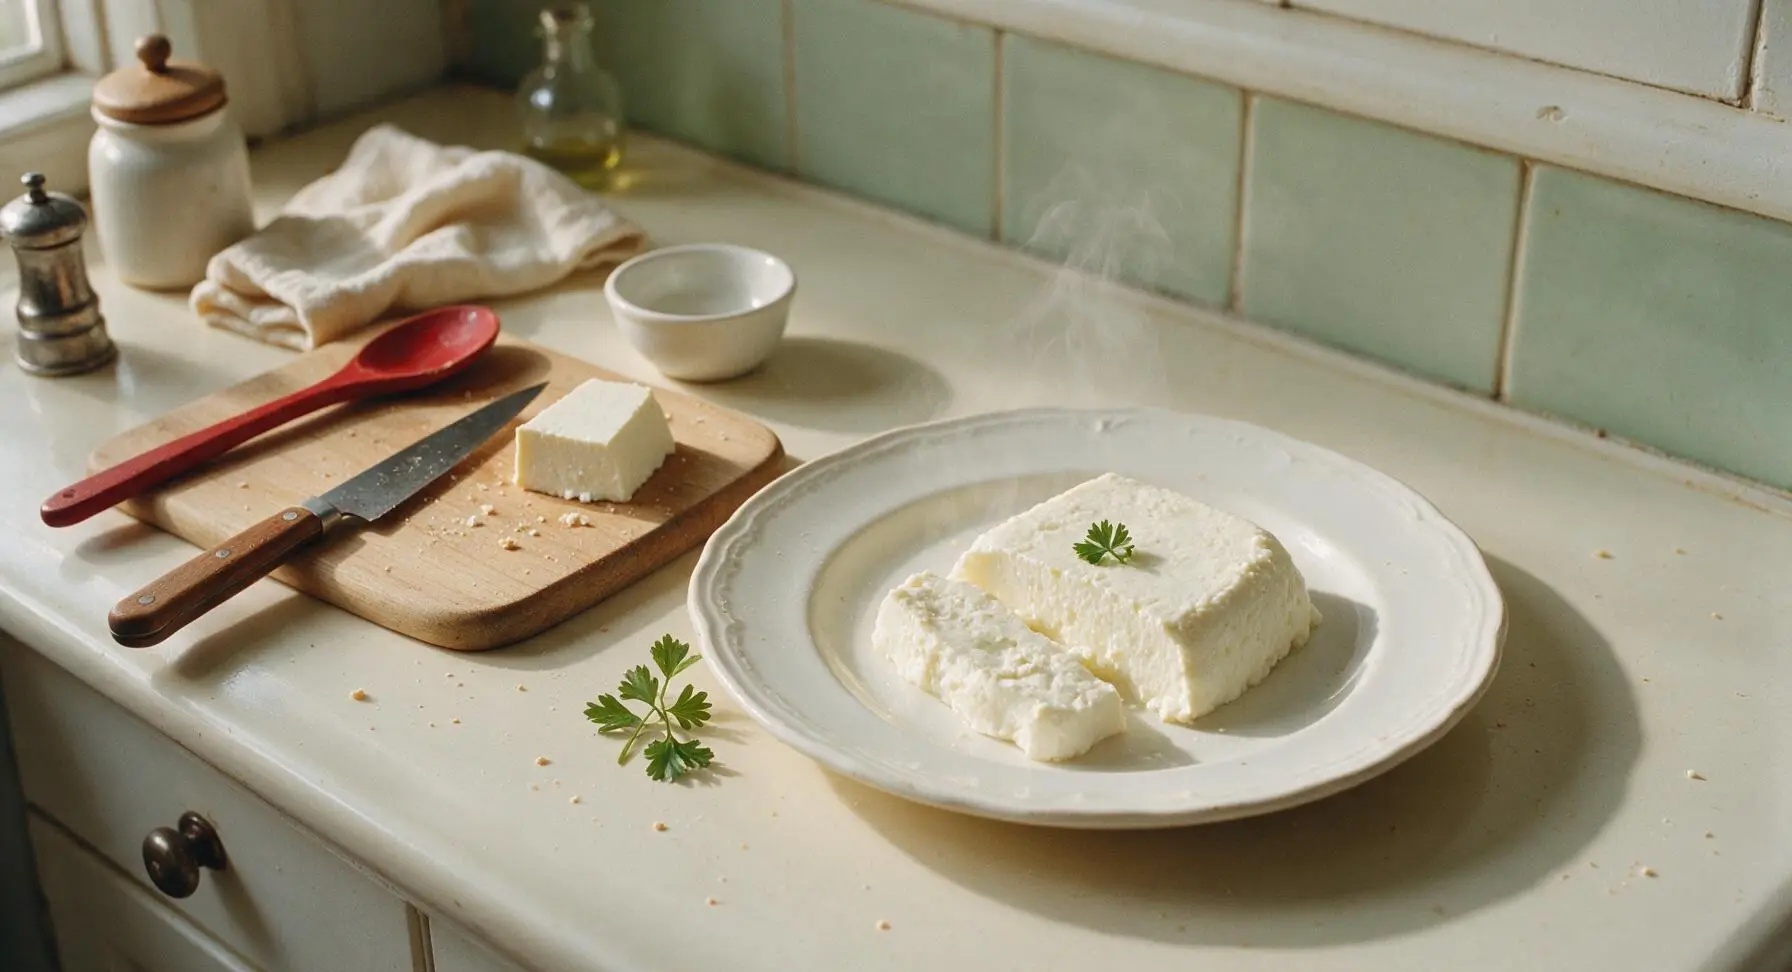
homemade paneer

title 1
homemade paneer
⏱️ cook time 20 minutes
🍽️ servings 6
⚡ Difficulty easy

intro

Creamy, soft fresh homemade paneer with bright, delicate milky flavor, far superior to store-bought, perfect for curries, skewers, or simple salted bites.

Ingredients
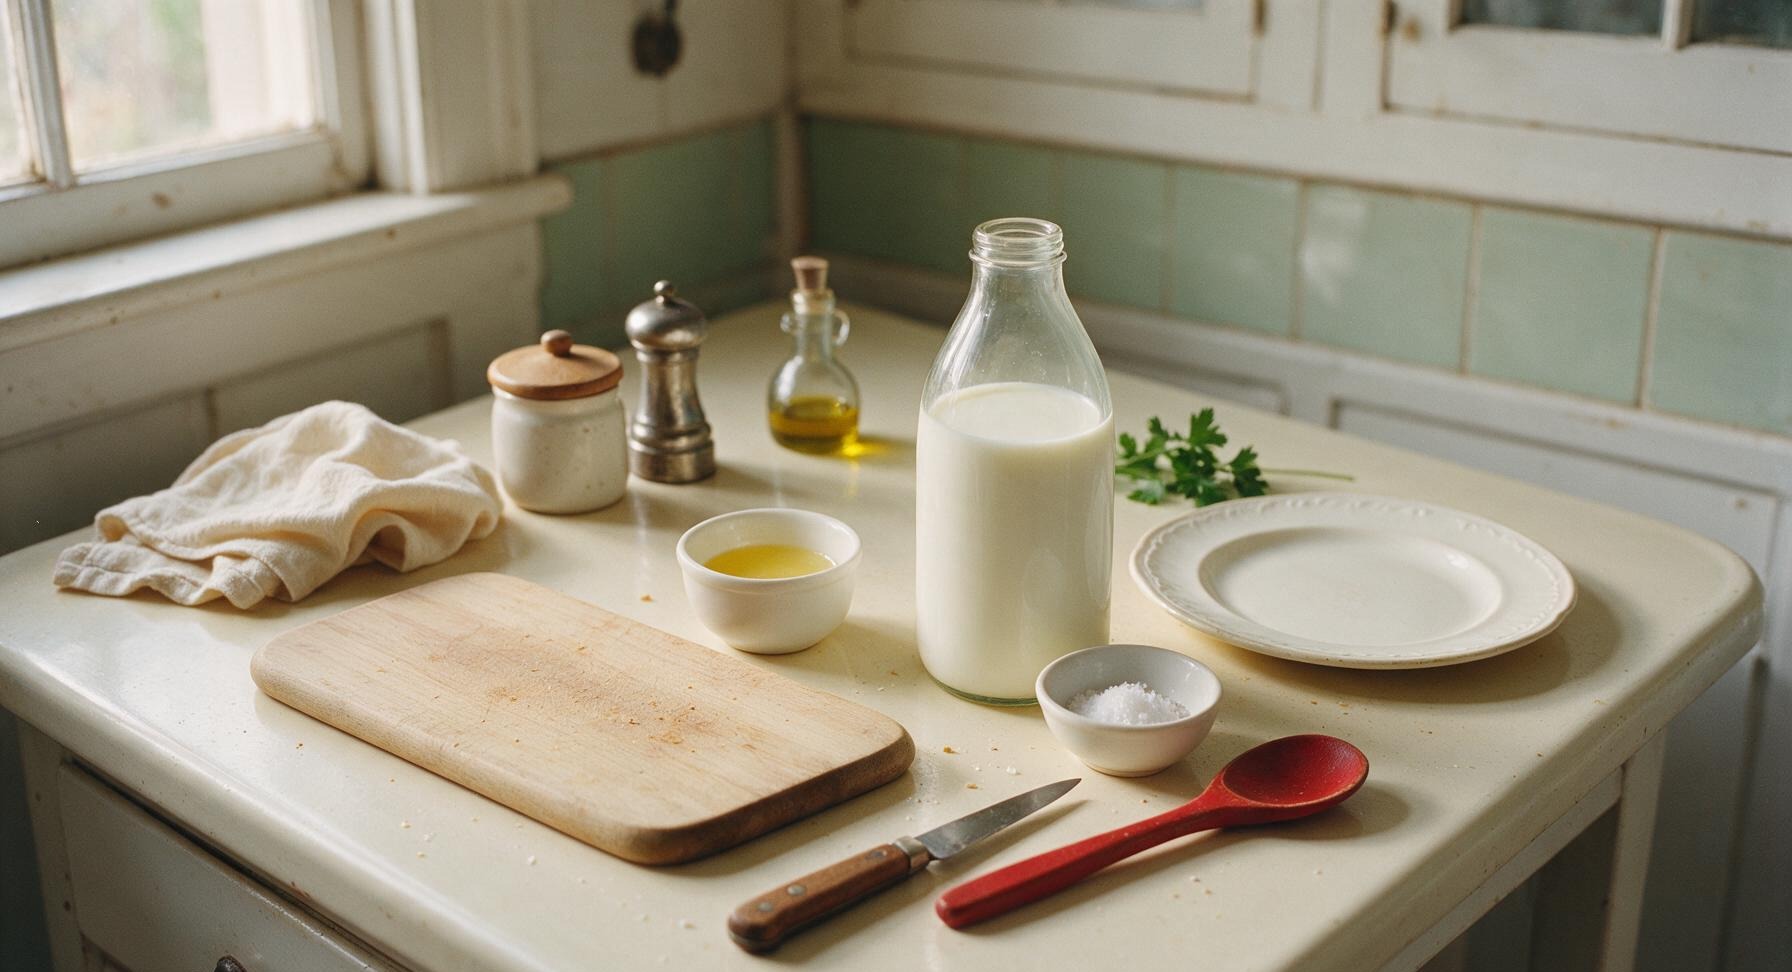
Whole cow's milk (regular pasteurized, not ultra-pasteurized) 2 liters (8 cups)
Fresh lemon juice 60ml (1/4 cup, ~2 lemons)
Flaky sea salt 1 teaspoon

Steps

1

Prep Tools and Acid

First, pull the 4-quart clear glass mixing bowl from under the counter and set it on the right work surface. Line the fine-mesh stainless steel strainer with a double layer of the unbleached cotton cheesecloth, then set the lined strainer atop the mixing bowl. Juice two whole lemons using the clear glass citrus juicer, straining out all seeds, to yield 60ml (1/4 cup) of fresh lemon juice; pour the juice into the 2-cup glass measuring cup and set aside. Leave the squeezed lemon halves on the small oak cutting board.
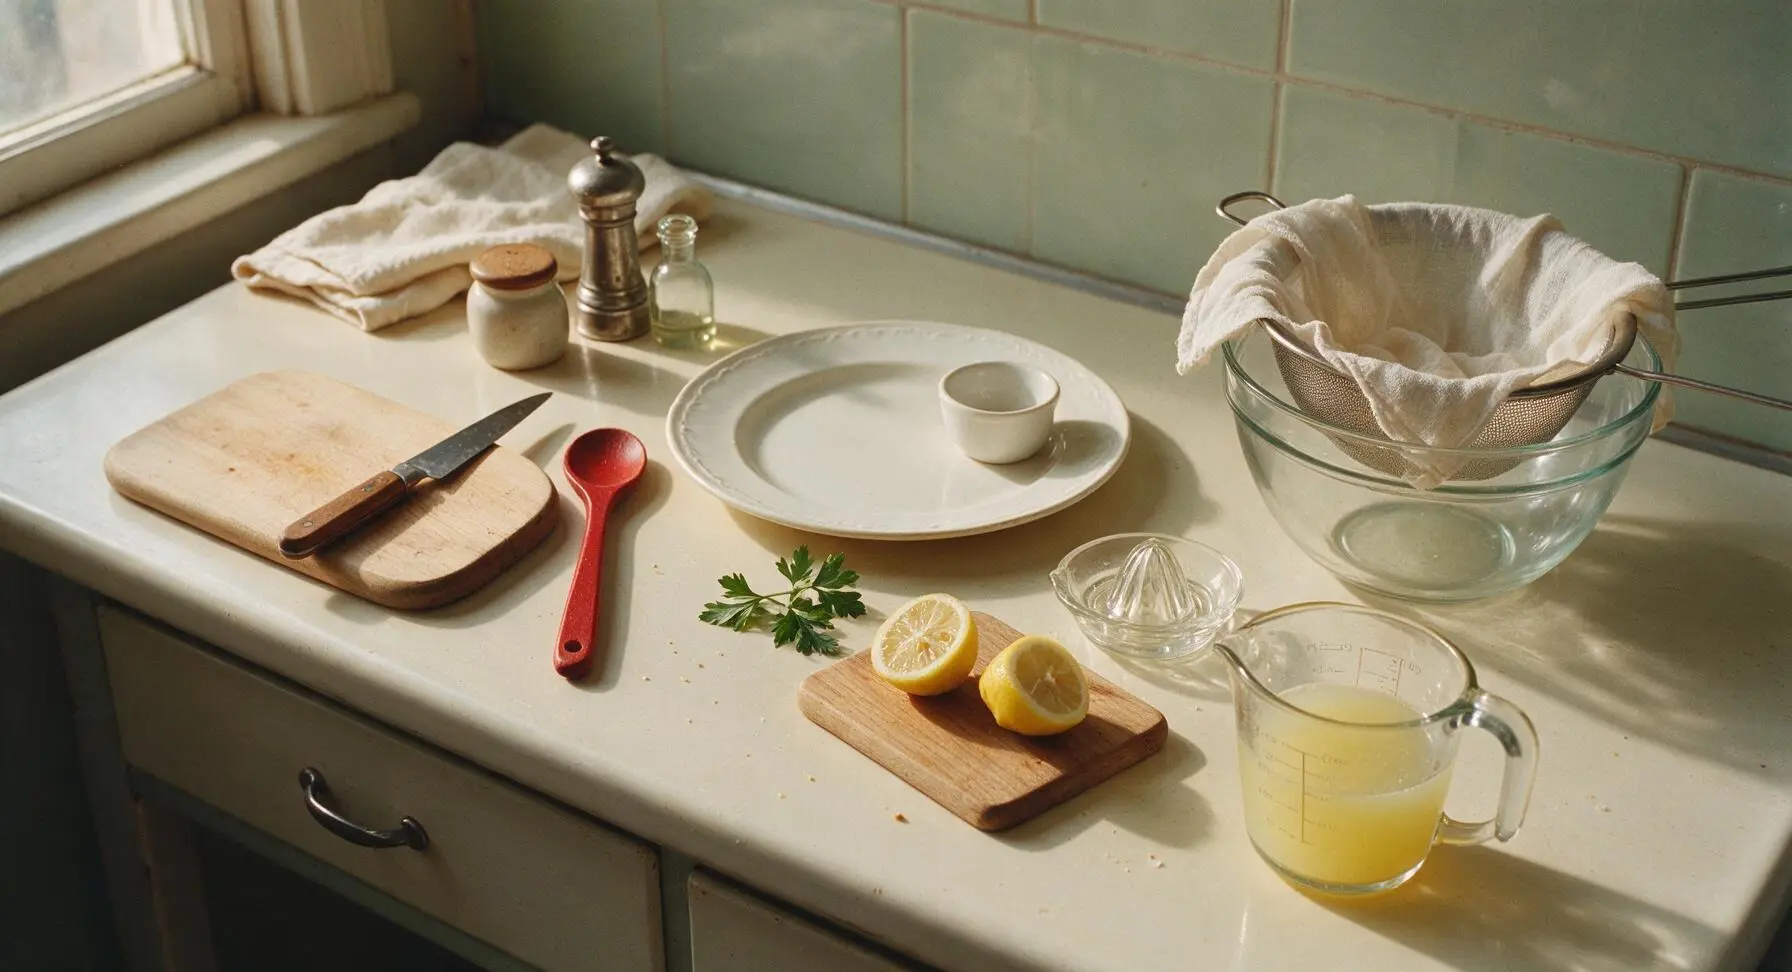
Step 1
step1:Prep Tools and Acid
2

Heat Milk Gently

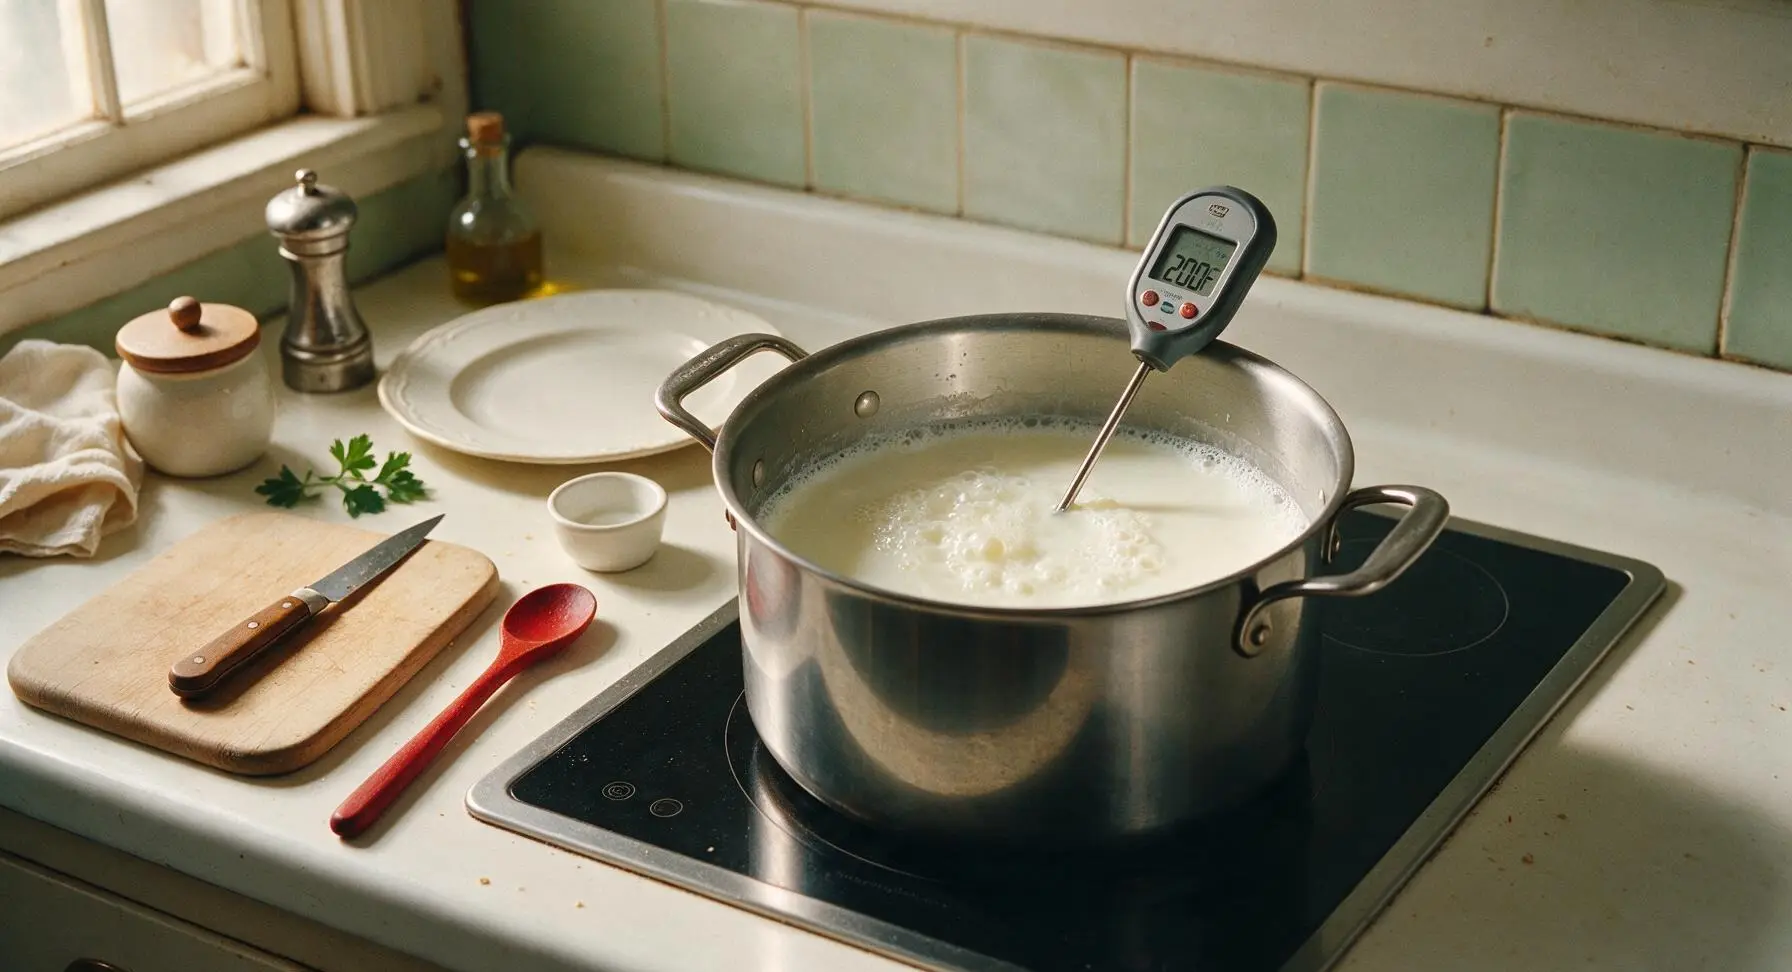
Pour the full 2 liters of whole milk into the 6-quart stainless steel stock pot, then set the pot on the matte black induction cooktop over medium-low heat. Warm the milk slowly, stirring occasionally with the long-handled slotted spoon to prevent scorching on the pot bottom, until it reaches a frothy, rolling boil at 93C (200F). Watch closely as the milk heats, as it can quickly boil over once it reaches temperature, rising fast up the pot sides.
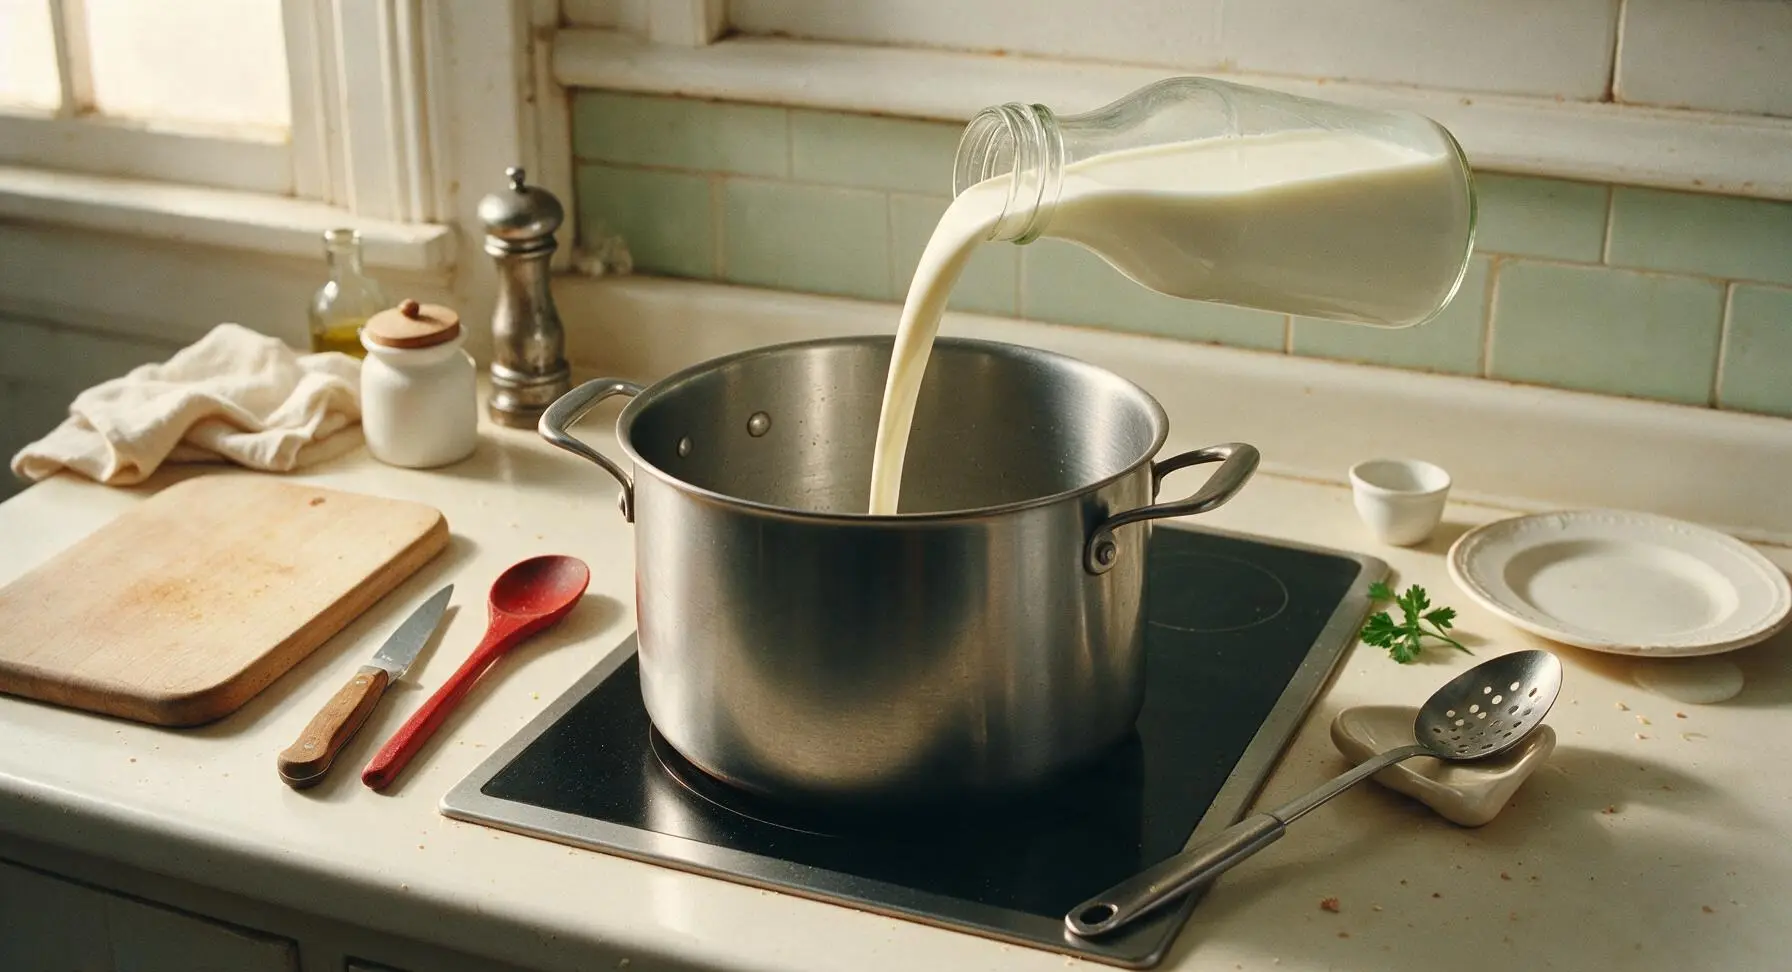
Step 2
step2:Heat Milk Gently
Step 2
step2:Heat Milk Gently
3

Curdle Milk with Acid

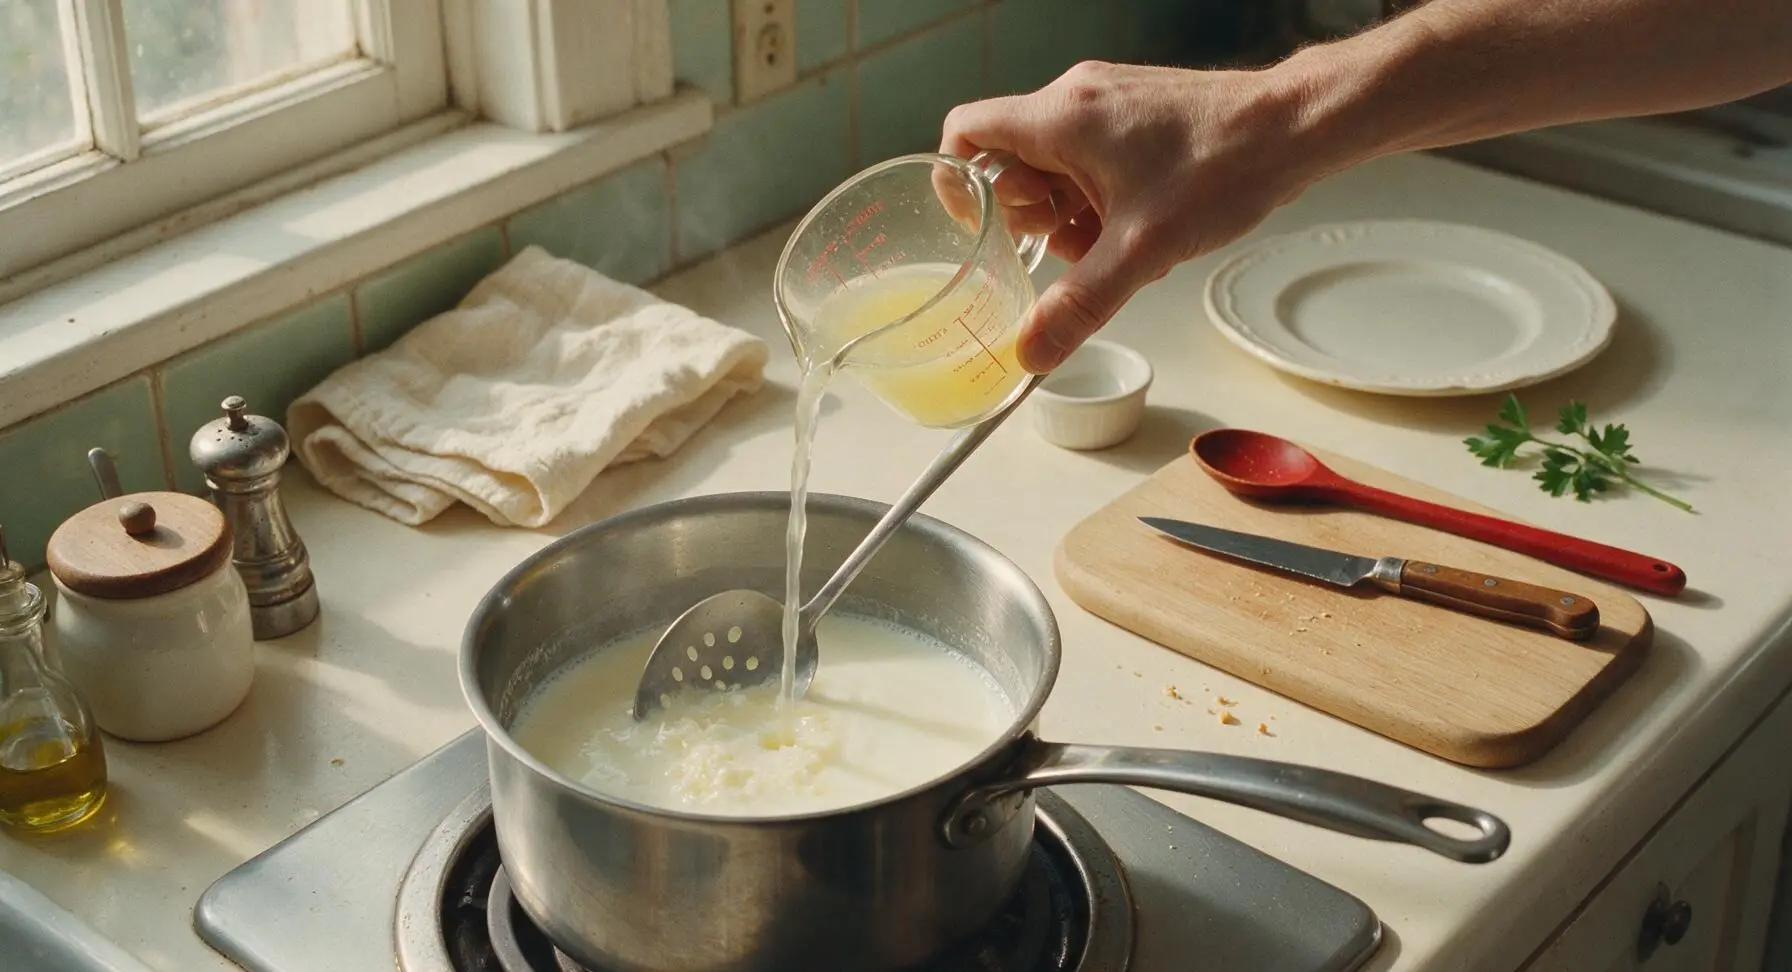
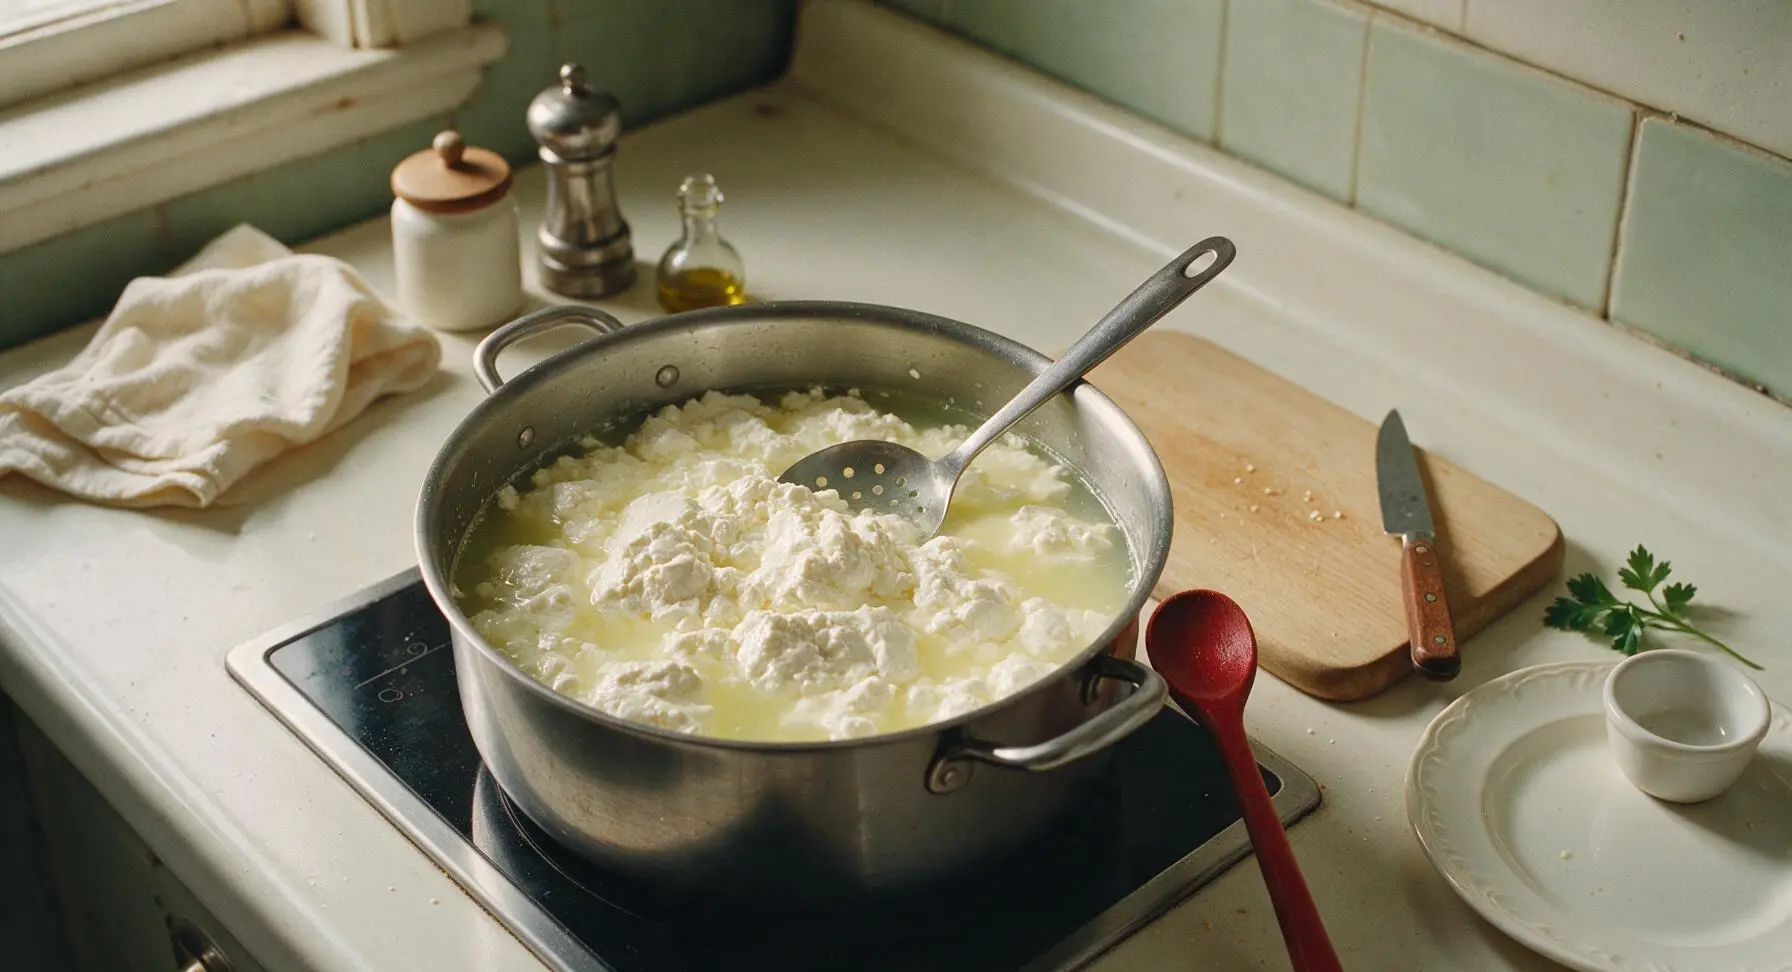
Turn the induction cooktop down to its lowest heat setting. While stirring the hot milk slowly in a steady circular motion with the slotted spoon, pour the reserved lemon juice in a slow, steady stream. Continue stirring gently for 1-2 minutes, until large, lumpy white curds fully separate from the thin, translucent pale greenish-yellow whey. If curds do not form after 2 minutes, add 1 extra tablespoon of lemon juice to encourage complete separation, waiting 30 seconds between additions.
Step 3
step3:Curdle Milk with Acid
Step 3
step3:Curdle Milk with Acid
4

Season Curds Lightly

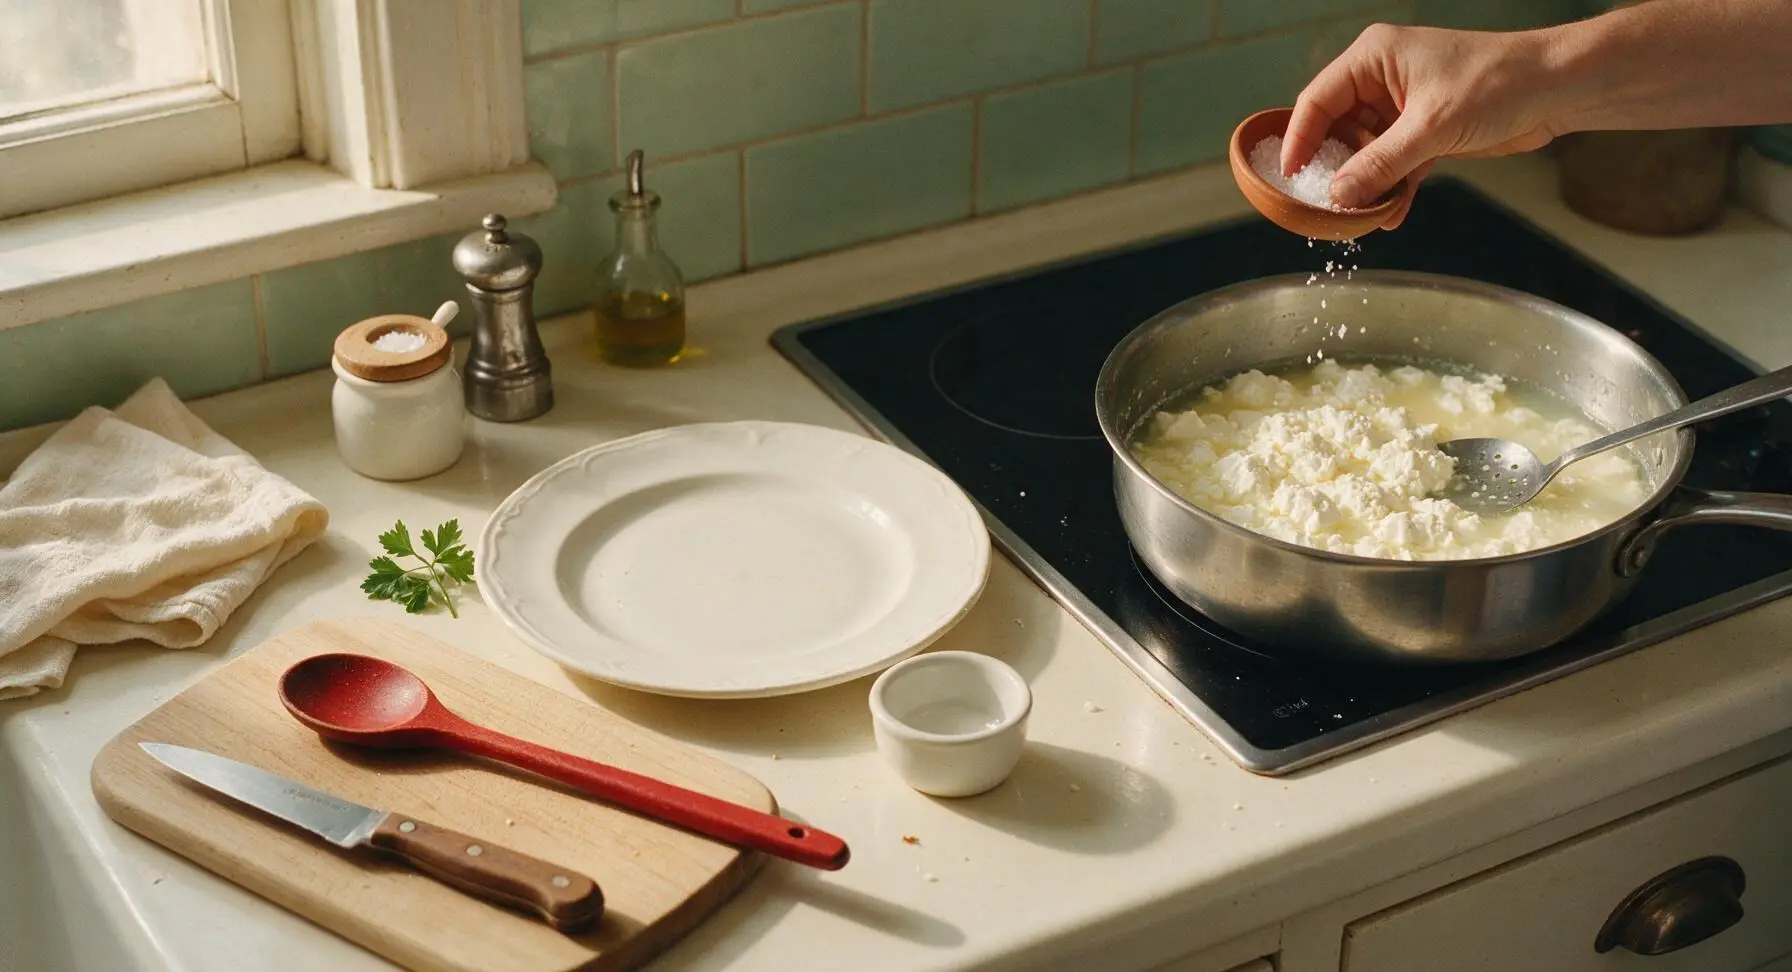
Turn off the induction cooktop completely, sliding the pot slightly off the burner to stop residual heating. Sprinkle the 1 teaspoon of flaky sea salt over the separated curds, stirring very gently with the slotted spoon to distribute the salt evenly without breaking curds into tiny fragments. Let the curd mixture rest for 5 minutes at room temperature to allow curds to firm up slightly before straining.
Step 4
step4:Season Curds Lightly
5

Strain Out Whey

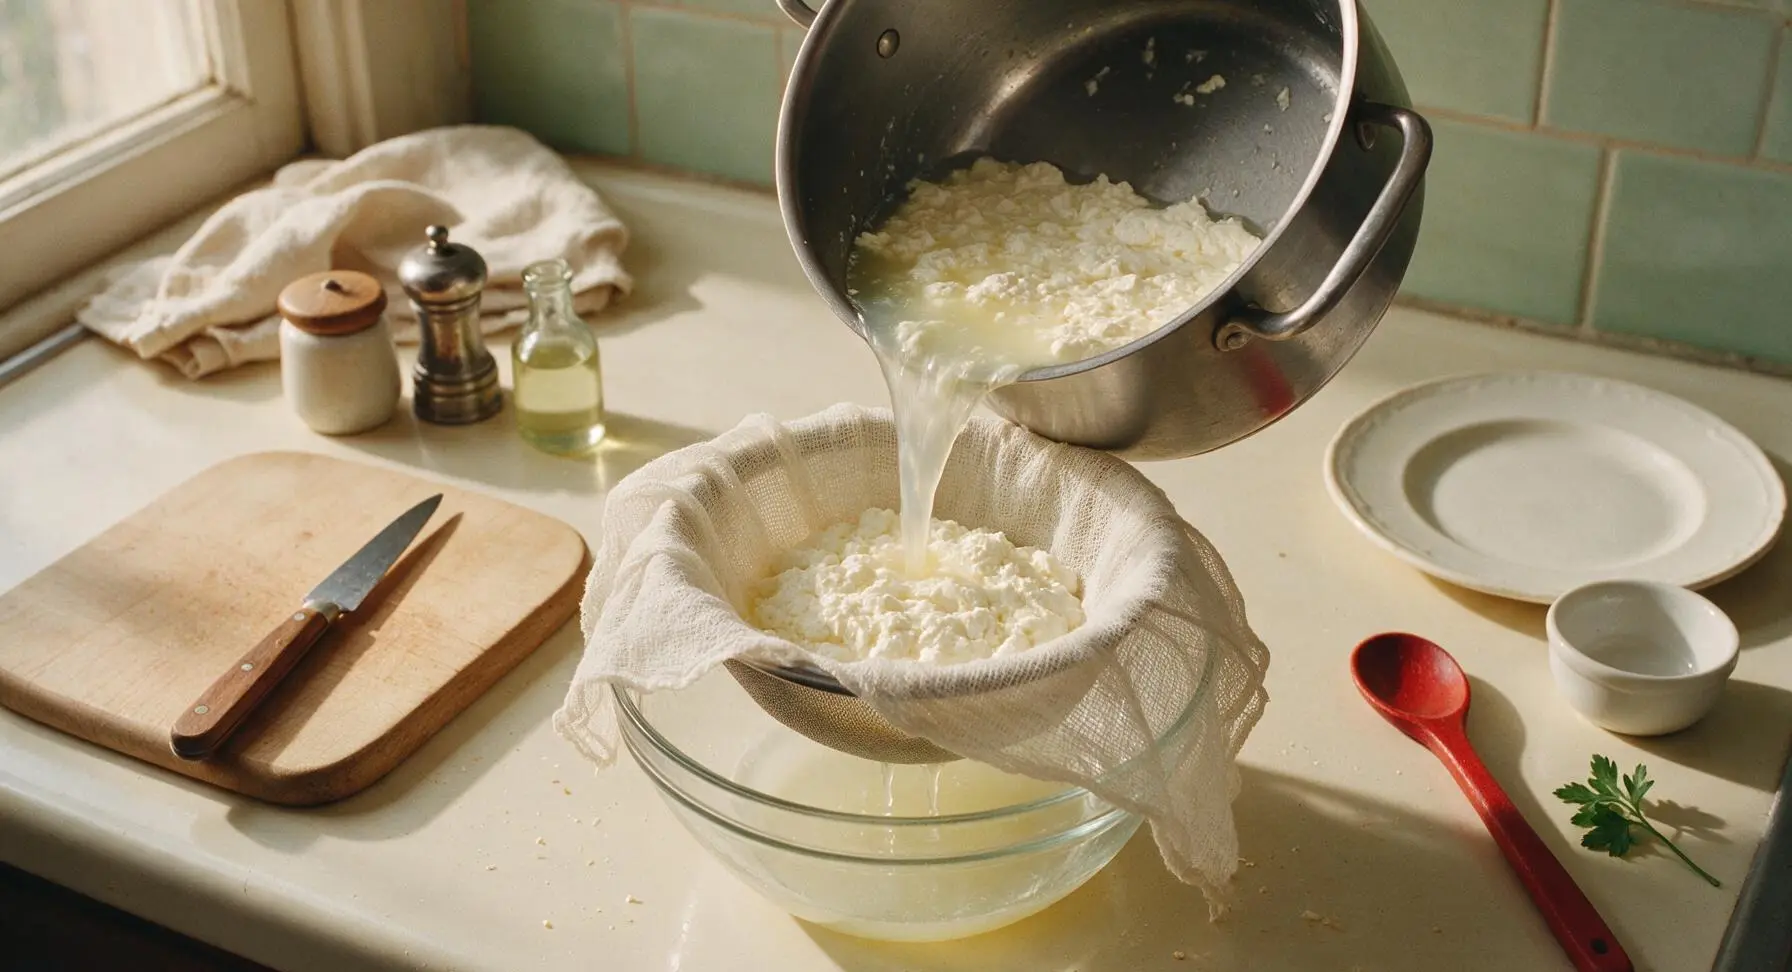
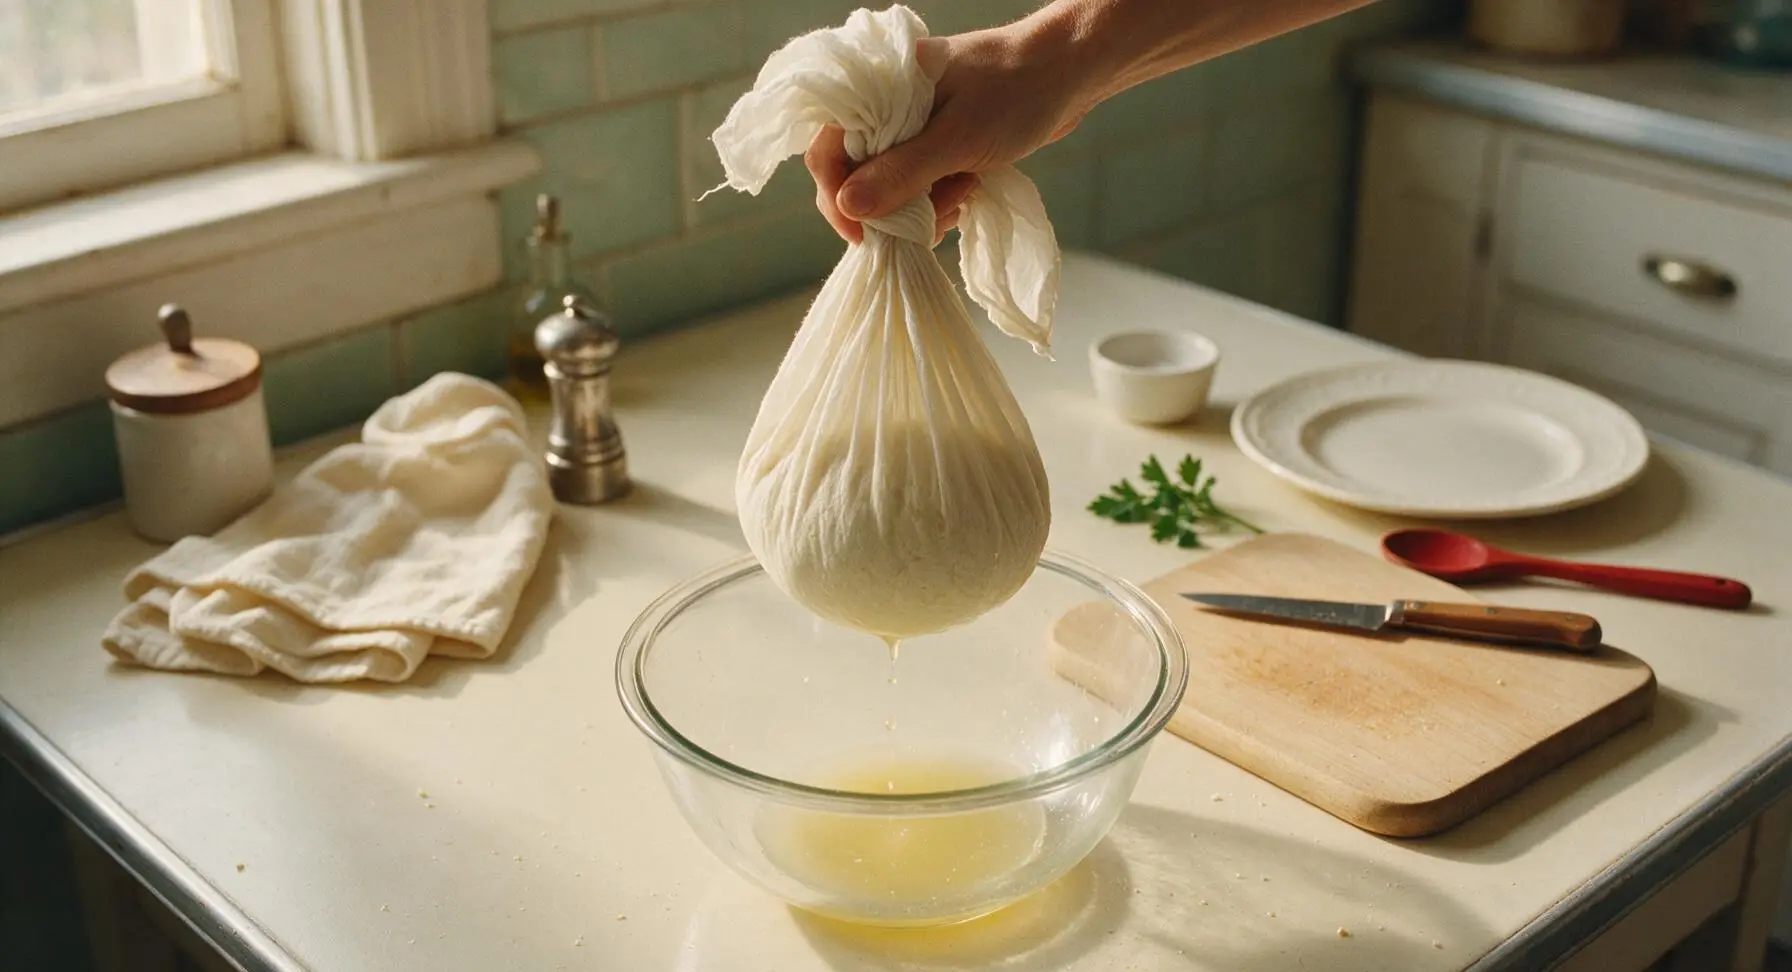
Carefully lift the stock pot and pour the entire mixture of curds and whey into the cheesecloth-lined strainer set over the glass mixing bowl, letting thin whey drain completely through the cloth into the bowl below. Let curds drain for 10 minutes at room temperature, until no steady stream of whey drips from the strainer bottom. Gather the edges of the cheesecloth together to form a tight bundle around the curds, squeezing very gently to press out excess whey—stop squeezing when only slow, occasional drips fall from the cloth, as over-squeezing creates dry, crumbly paneer.
Step 5
step5:Strain Out Whey
Step 5
step5:Strain Out Whey
6

Press to Set Firm

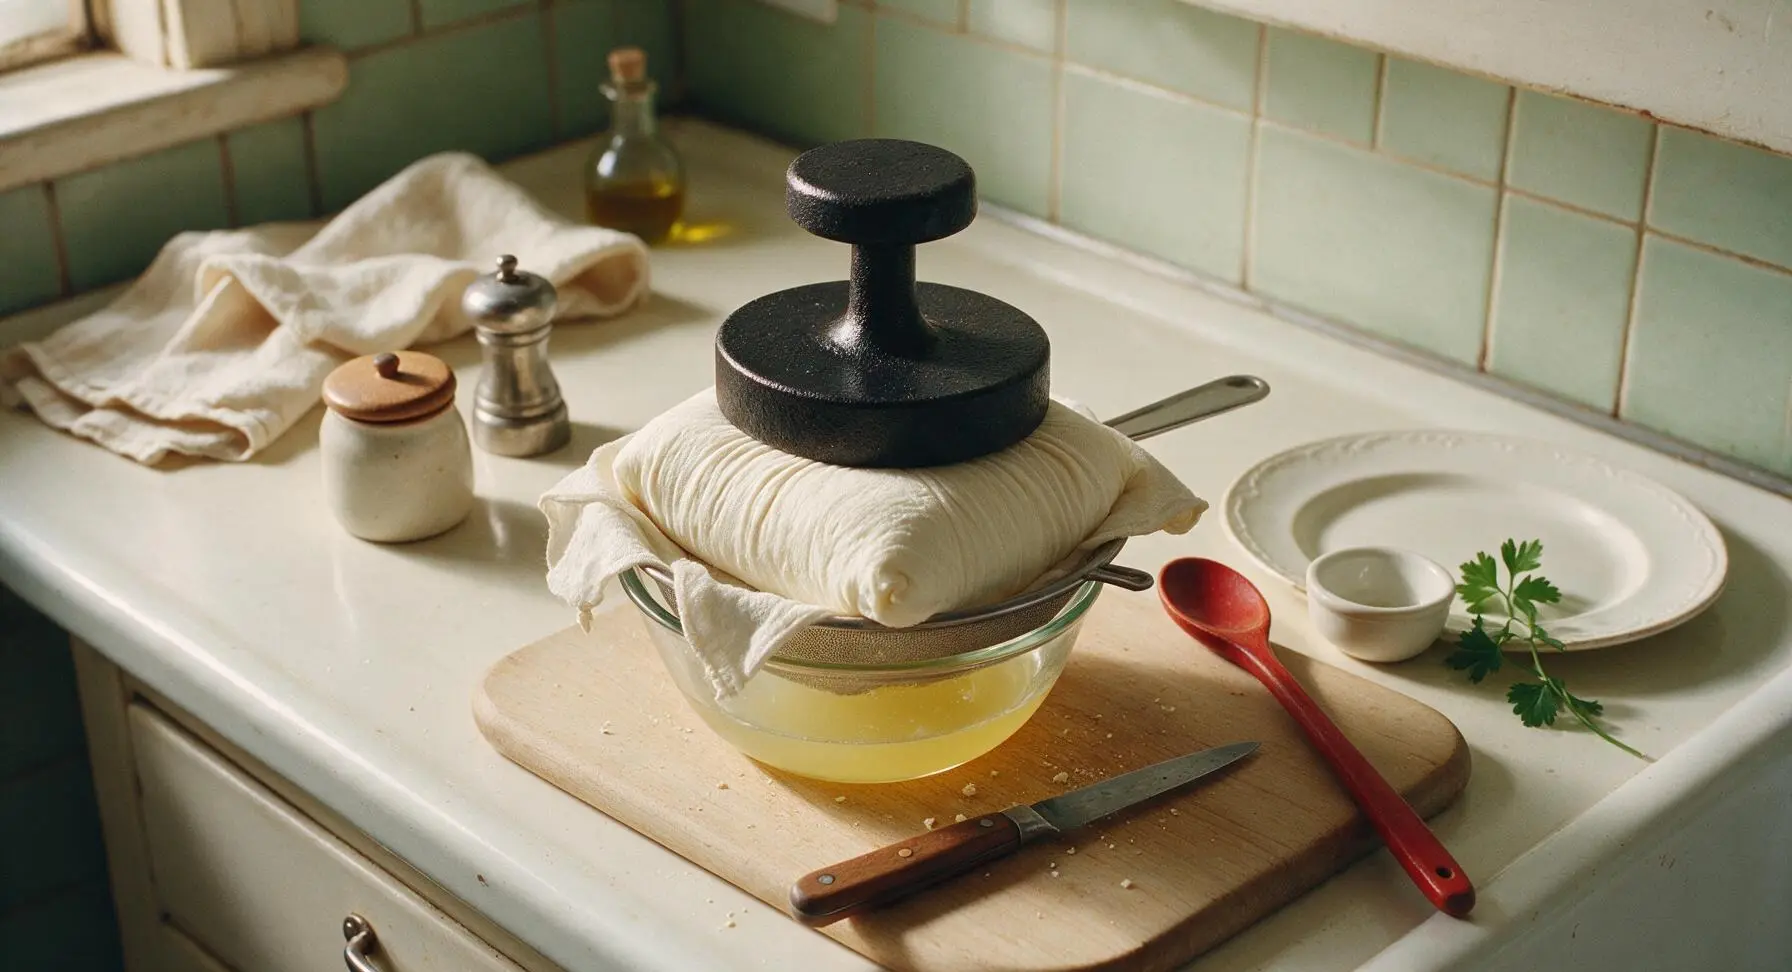
Keep the curds wrapped tightly in the cheesecloth, shaping the bundle into a rough 15cm (6 inch) square block, then set it back flat in the strainer over the mixing bowl. Place the 1kg cast iron press weight squarely on top of the wrapped curd block. Let the paneer press at room temperature for 1 to 1.5 hours, until it is firm enough to hold its shape when unwrapped, springing back slightly when pressed gently with a finger, with no soft oozing curd.
Step 6
step6:Press to Set Firm
7

Unmold and Serve

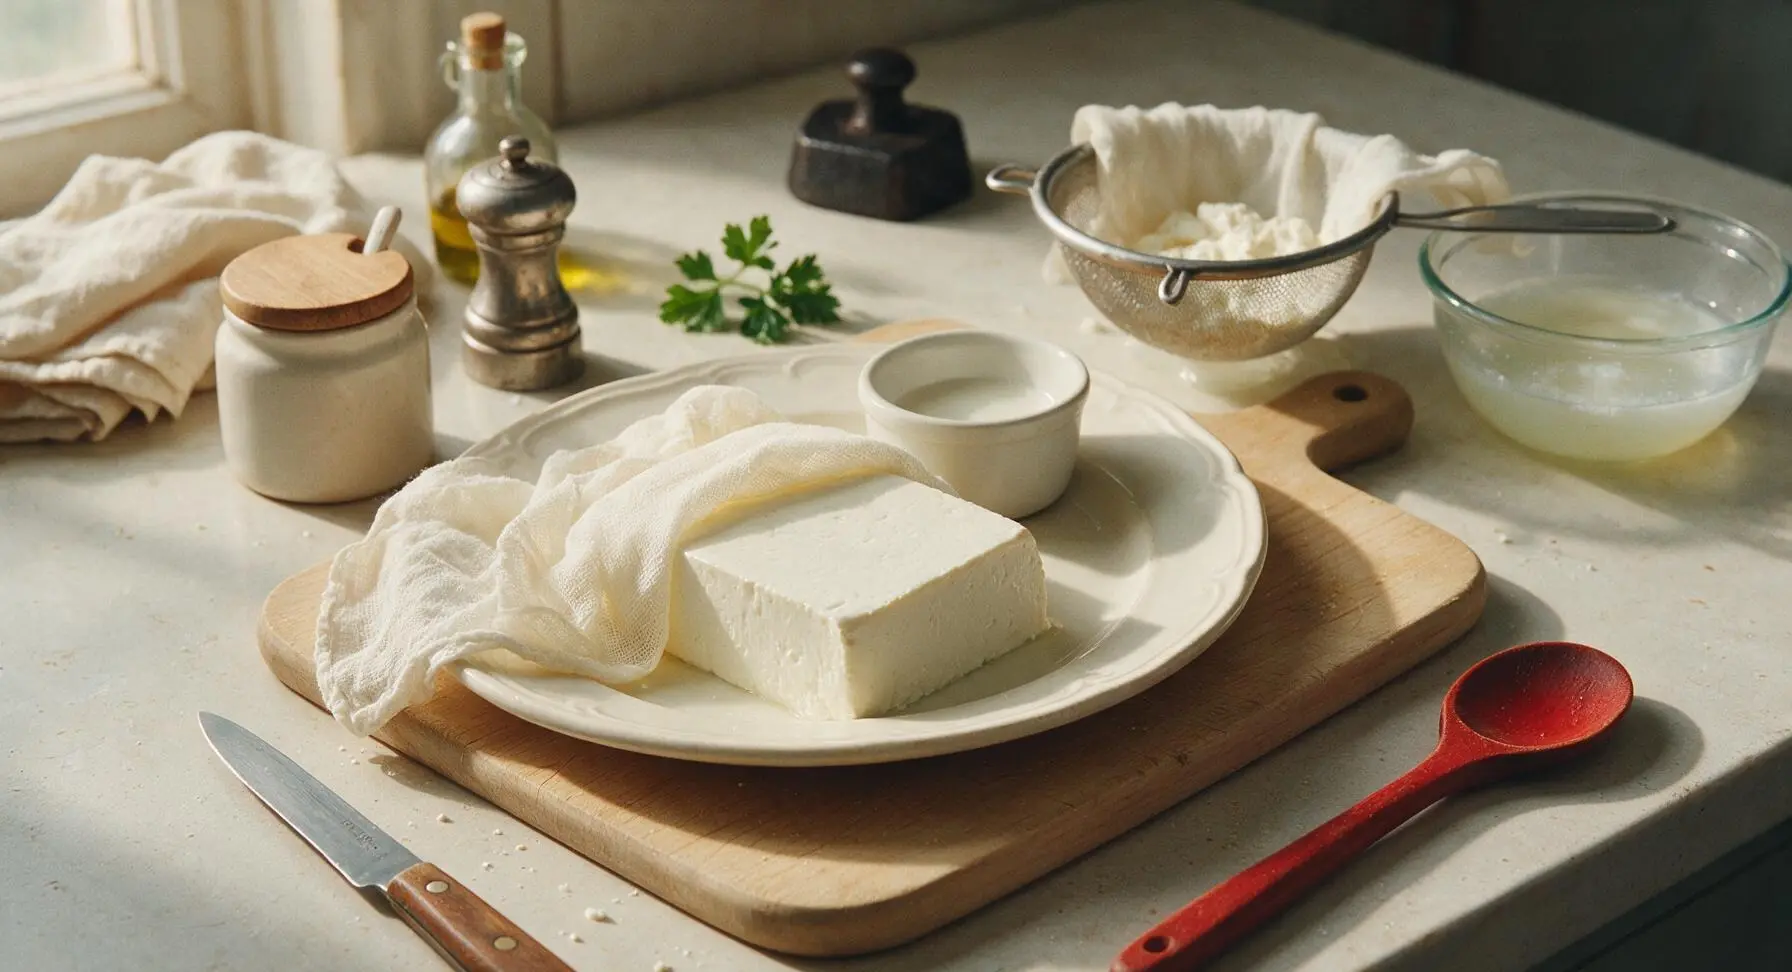
Lift the cast iron weight off the paneer, then carefully peel back the cheesecloth to reveal a smooth, firm, opaque white paneer block. Transfer the block to the matte cream ceramic serving platter, slicing into 2cm thick slices and fanning them lightly. For storage, submerge the unused paneer block in cold water in an airtight container and refrigerate for up to 3 days.
Step 7
step7:Unmold and Serve

Tips

1.Avoid ultra-pasteurized milk for this recipe: high-heat ultra-pasteurization alters milk protein structure, leading to soft, crumbly curds that will not set into a firm, sliceable paneer block even with extended pressing. Regular pasteurized whole milk works best.
2.Do not over-squeeze curds during straining: removing too much whey results in dry, rubbery paneer instead of the soft, creamy, melt-in-your-mouth texture that defines fresh homemade paneer. Stop squeezing when only slow, occasional drips fall from the cheesecloth.
3.Save the drained whey! It is high in protein and has a mild, tangy flavor perfect for adding to smoothies, cooking rice, kneading into roti or bread dough, or even watering acid-loving houseplants. Store strained whey in a sealed glass jar in the refrigerator for up to 5 days.


✨ You May Also Like

Main Course
🍜 United Kingdom

A showstopping classic of tender seared beef, savory mushroom duxelles, and crisp prosciutto wrapped in flaky golden puff pastry, baked to juicy perfection.

⏱️ 2 hours 1Main Course ★ 4.7
Main Course
🍜 India

Tender charred marinated chicken simmered in a rich, spiced creamy tomato sauce, this iconic Anglo-Indian curry pairs perfectly with basmati rice or warm naan.

⏱️ 50 minuteMain Course ★ 4.6
Main Course
🍜 Thailand

Classic tangy, sweet, and savory Thai stir-fried rice noodles with shrimp, tofu, and crunchy garnishes, balancing all five core Thai flavor profiles.

⏱️ 30 minuteMain Course ★ 4.5
Main Course
🍜 United Kingdom

Crispy golden beer-battered cod and fluffy double-fried chips, served with tangy tartar sauce and malt vinegar: the timeless, beloved British pub comfort classic.

⏱️ 45 minuteMain Course ★ 4.7
Main Course
🍜 Mexico

Smoky, chile-marinated pork tacos with caramelized pineapple, fresh cilantro, and lime: a beloved classic Mexican street food perfect for casual summer gatherings.

⏱️ 1 hour 45Main Course ★ 4.8
Main Course
🍜 United States

Crunchy Fritos corn chips layered with savory beef chili and melted cheddar, topped with cool, zesty fixings for a beloved, cozy Tex-Mex comfort food.

⏱️ 35 minuteMain Course ★ 4.8

homemade paneer:Frequently Asked Questions

1.Why do I need to avoid ultra-pasteurized milk for this paneer recipe? ▾
Ultra-pasteurized milk is heated to extremely high temperatures for long shelf life, which denatures milk proteins in a way that only forms tiny, weak, crumbly curds that won’t press into a smooth, firm block. Regular pasteurized whole cow’s milk forms large, tight curds that create that signature creamy, sliceable fresh paneer texture.
2.Can I use low-fat or skim milk instead of whole cow’s milk for this recipe? ▾
You technically can, but your finished paneer will be dry, rubbery, and missing that rich, delicate milky flavor that makes homemade versions better than store-bought. The fat in whole cow’s milk creates that soft, creamy bite perfect for curries, skewers, or quick salted snacks, so skip the low-fat options for best results.
3.How much fresh lemon juice do I actually need to curdle the milk properly? ▾
Start with 2 tablespoons of fresh lemon juice per half-gallon of whole milk, adding an extra teaspoon at a time if curds don’t fully separate after a minute of gentle stirring. You’ll know you have the right amount when the pale yellow whey runs completely clear, with no cloudy, milky streaks left in the pot.
4.Can I substitute bottled lemon juice for fresh lemon juice here? ▾
Bottled lemon juice works in a pinch, since its consistent acid level will reliably curdle milk, but fresh lemon juice gives a brighter, cleaner milky flavor without the flat, slightly metallic aftertaste some shelf-stable bottled juices carry. If you use bottled, pick unsweetened, 100% lemon juice with no added preservatives for the closest results.
5.Why are my curds really small and not clumping together into large chunks? ▾
This almost always happens if you added acid too slowly, stirred too aggressively after curds started forming, used ultra-pasteurized milk, or didn’t heat milk to a full gentle rolling boil before adding lemon juice. Turn the heat up slightly, add an extra teaspoon of lemon juice, and let it sit 30 seconds to encourage larger, tighter curds to form.
6.Do I have to add flaky sea salt to the paneer, or can I leave it out? ▾
Salt is totally optional, but a light sprinkle of flaky sea salt mixed into drained curds before pressing amplifies that bright, fresh dairy flavor and makes paneer delicious eaten plain as a quick, high-protein snack. If you plan to use paneer in heavily salted curries or marinated skewers, you can cut the salt in half or skip it entirely to control total sodium.
7.What should I do with the leftover whey after I drain the curds? ▾
Don’t pour that nutrient-dense leftover whey down the drain! You can use it in place of water or milk to make soft flatbreads, add it to smoothies for a quick protein boost, use it as a tangy brine for marinating chicken, or even water acid-loving houseplants, since it’s packed with calcium and beneficial minerals.
8.How long do I need to press the paneer to get the right texture? ▾
For soft, creamy paneer that holds its shape in curries, press it for 15 to 20 minutes under a 2 to 3 pound weight, like a heavy canned good or small cast iron pan set on a flat plate. If you want firmer paneer for grilling on skewers or pan-frying, press it for 30 to 45 minutes to squeeze out extra whey for a denser, less crumbly bite.
9.Can I press paneer at home without buying a special cheese press? ▾
You absolutely don’t need a fancy cheese press! Line a fine-mesh sieve with cheesecloth or a clean, lint-free cotton kitchen towel, pour in the drained curds, tie the cloth corners tight, set a flat plate on top, and weigh it down with heavy pantry items. This low-effort setup works just as well as specialty equipment for small-batch fresh paneer.
10.Why is my finished paneer crumbly instead of smooth and sliceable? ▾
Crumbly paneer usually means you didn’t press it long enough to squeeze out excess whey, stirred the curds too roughly while they formed, or used milk with too low a fat content. If it’s already crumbly, don’t toss it! It works perfectly in scrambled paneer dishes, curry fillings, or stuffed flatbreads where a firm, sliceable texture isn’t required.
11.How long does homemade fresh paneer stay good in the refrigerator? ▾
Stored in an airtight container submerged in plain, cold water (changed daily), fresh homemade paneer will stay creamy and fresh for up to 5 days in the refrigerator. Don’t store it unwrapped in open air, as it will dry out quickly, develop a tough outer rind, and pick up stray off-flavors from other foods in your fridge.
12.Can I freeze homemade paneer to use later? ▾
You can freeze paneer for up to 3 months, though it will be slightly firmer and less creamy than fresh once thawed. Wrap it tightly in plastic wrap, then seal it in a labeled freezer bag to prevent freezer burn, and thaw it in the fridge overnight before using. It works best in cooked curries rather than eaten plain after freezing.
13.Can I use other types of acid besides lemon juice to curdle the milk? ▾
Yes! You can use plain white vinegar, fresh lime juice, or even plain full-fat active-culture yogurt to curdle the milk, as long as you add it slowly and watch for that clear whey separation. Lemon juice is our top pick for its mild, bright flavor that doesn’t overpower the delicate, sweet milky taste of fresh paneer.
14.Do I need to rinse the curds after draining them from the whey? ▾
A quick 10-second rinse under cold, running water after draining stops the curds from continuing to cook from residual heat, and washes away any excess lemon juice that could make the paneer taste overly sour. Don’t rinse for longer than that, or you’ll wash away too much of the sweet, milky flavor that makes fresh paneer so delicious.
15.Why does my homemade paneer have a sour, off flavor? ▾
Sour paneer is almost always caused by adding too much lemon juice, skipping the quick cold rinse of curds after draining, or heating milk too quickly which scorches the milk solids and creates an off, tangy flavor. For your next batch, add acid one teaspoon at a time, rinse curds briefly, and heat milk slowly to avoid burning on the pot bottom.
16.Can I mix herbs or spices into the paneer for extra flavor? ▾
Absolutely! After draining and before pressing, you can mix in finely chopped cilantro, toasted cumin seeds, cracked black pepper, chili flakes, or even minced garlic into the curds for flavored paneer perfect for grilling on skewers or eating as a quick snack. Just skip very wet mix-ins, which can make the final paneer mushy and prone to falling apart.
17.How do I know when the milk is hot enough to add the lemon juice? ▾
Heat the milk over medium heat, stirring occasionally to prevent scorching on the pot bottom, until it reaches a gentle, rolling boil with small bubbles steadily breaking across the entire surface, around 200°F if you use a thermometer. Don’t let it boil over or hit a violent, rapid boil, which can make finished curds tough and rubbery.
18.Will this homemade paneer hold up to grilling or pan-frying without falling apart? ▾
Yes, as long as you press it for the full 30 to 45 minutes to create a dense, firm block, it will hold up perfectly to grilling, pan-frying, and tossing in thick curries. Cut it into 1-inch cubes, pat the surface dry before cooking, and avoid stirring too aggressively for the first few minutes to let a slight, crisp crust form.

Comments (17)

2 days ago

OMG I cannot believe how easy this was! I’ve been buying storebought paneer for years for my saag paneer meal prep and this is SO much better. Took exactly 20 minutes like the recipe said, no fancy equipment needed. Game changer for my weeknight dinners!

yesterday

Wait did you use whole milk or 2%? I tried making paneer once with 2% and it turned out super crumbly, wanna get this right on my first go!

yesterday

Great question! We recommend full-fat whole milk for the firmest, creamiest paneer that holds its shape perfectly in curries. If you only have 2% you can still make it work, just add a couple tablespoons of heavy cream to bump up the fat content!

1 week ago

My kids went crazy for this! I cubed it up, pan fried it with a little taco seasoning, and served it with rice and beans for a random weeknight fusion dinner and they asked for seconds before I even sat down. Who knew homemade cheese was this doable?

5 days ago

That taco seasoning twist sounds absolutely delicious! We love how versatile fresh paneer is – it picks up whatever flavor you toss it with, so it’s perfect for fun fusion meals like that. So glad your kids loved it!

3 days ago

Super straightforward recipe, turned out way better than I expected! Only reason I’m knocking off a star is I forgot to save the whey the first time – don’t make my mistake, that stuff is amazing for adding to smoothies or baking bread! Will absolutely be making this again.

5 days ago

Made a double batch of this Sunday for my weekly meal prep and it held up perfectly all week! I tossed cubes into curries, tossed it on salads, even crumbled some over my breakfast avocado toast. So much cheaper than buying the pre-packaged stuff at the grocery store too.

3 days ago

Wait how long does this actually last in the fridge? I’ve been nervous to make homemade cheese because I thought it would go bad in like 2 days!

3 days ago

Great question! Stored in an airtight container submerged in fresh water, your homemade paneer will stay good for 5-7 days in the fridge. Just change the water every other day to keep it fresh! It also freezes really well for up to 3 months if you want to make big batches ahead.

2 weeks ago

Tried this for a potluck at work last week – I made palak paneer with the homemade cheese and literally everyone asked for the recipe. Multiple people said it was better than the takeout from our local Indian spot down the street. Total win!

1 week ago

Oh this is such a good potluck idea! I’ve been trying to find a vegetarian dish that isn’t just pasta salad for our next block party, this is going on my list for sure.

30 minutes ago

Recipe was pretty easy, but I messed up the curdling step at first because I poured the lemon juice in too fast and the curds were super tiny. Ended up taking me an extra 10 minutes to strain everything, but the final paneer still tasted good! Just go slow when adding the acid next time I guess.

yesterday

This tastes exactly like the paneer my nani used to make when I was a kid! I was worried homemade wouldn’t live up to that memory but it’s perfect – soft, not rubbery like the store bought kind, has that fresh milky flavor I’ve been missing for years. Thank you so much for this recipe!

yesterday

This comment means the world to us! That fresh, milky, non-rubbery texture is exactly what we were going for with this recipe – so happy it brought back such lovely family memories for you.

2 hours ago

Wait a second – this is basically the same method as making ricotta? Who knew I could just press it a little longer and get paneer? I added a pinch of salt and a tiny bit of garam masala to the curds before pressing and it came out insanely flavorful. 10/10

30 minutes ago

Wait adding garam masala directly to the curds? That’s genius! I’ve only ever seasoned it after frying, I’m definitely trying that on my next batch.

5 minutes ago

Right?! I made ricotta last month and when I saw this recipe I had the exact same thought. The only difference is how long you press it – paneer is way firmer so it doesn’t melt when you cook it. Total game changer for cheap homemade cheese!

5 minutes ago

Great high protein option for my post-workout meals! I pan fry a few cubes to throw on top of bowls and it keeps me full for hours. Love that I know exactly what’s in it – no weird preservatives or additives like the pre-packaged brands have. Easy peasy.

just now

So glad you’re loving it! The lack of weird additives is one of our favorite parts of making paneer at home too. It’s such a versatile, protein-packed staple to keep in the fridge for quick meals.

1 week ago

Tested this out on my last camping trip with a portable camp stove and it worked like a charm! We crumbled it up to put in campfire tacos and it was a huge hit. Only note is if you’re making it without a fine mesh strainer, a clean cotton t-shirt works way better than cheesecloth in a pinch. Will be making this on every trip now.

3 days ago

So excited to find this! I’ve been missing paneer in my diet because a lot of the store bought brands near me have hidden gluten additives (weird, I know) but this is 100% gluten free with just milk and lemon juice. Made my first batch last night and had it with roasted veggies for dinner, chef’s kiss.

2 days ago

Wait thank you for mentioning the hidden gluten in store bought! I have a wheat allergy and never even thought to check the labels on paneer, this is going to be a total game changer for my family too.

just now

Help! I’m making this right now and I don’t have a heavy pan to press the paneer with. What else can I use? I really don’t wanna mess this up, I already got the curds all separated!

just now

I used a big jar full of water last time when I couldn’t find my cast iron! Just set it on top of the plate over your wrapped paneer and it works exactly the same, no fancy equipment needed.

just now

Great tip from Lila! Canned goods, a full water pitcher, or even a stack of heavy cookbooks all work perfectly for pressing paneer. You just need even, consistent weight to press out the excess whey so it firms up – you’ve got this!

2 days ago

Who else is using this homemade paneer to make that viral paneer french toast I saw on TikTok? It works SO well because the fresh paneer is firmer than store bought, it gets crispy on the outside and stays soft inside. Brunch party this weekend is gonna slap.

1 week ago

Obsessed with how zero waste this recipe is! I used the leftover whey to make lentil soup and water my tomato plants (diluted, obviously) and it worked amazing. No fancy packaging to throw away, no weird ingredients, just perfect cheese every time. This is going to be a permanent staple in my kitchen.

5 days ago

We love all the creative ways people are using the leftover whey! Using it for soup and to water plants is such a smart, zero-waste hack – thanks so much for sharing that tip with other readers!

5 days ago

I tried making paneer years ago and it turned out so rubbery I swore I’d never try again, but this recipe was foolproof! The tip to not over-stir after adding the lemon juice was the game changer for me. My butter chicken last night was restaurant quality, I’m so proud of myself.

3 days ago

Oh my god that was my mistake last time I tried! I stirred so much the curds were tiny and I pressed it way too long so it was like a rubber bouncy ball. Gotta give this recipe a shot now that I know the trick.

2 days ago

So glad that tip worked for you! Over-stirring and over-pressing are the two most common culprits for rubbery homemade paneer – 15-20 minutes under weight is all you need for that perfect soft but firm texture. You’ve got this Joe, can’t wait to hear how your batch turns out!

2 weeks ago

Wait before anyone asks – I tested this with full fat barista blend oat milk and apple cider vinegar instead of lemon juice for a vegan version! It’s a little softer than regular paneer but it holds up in curries if you press it a little longer. Great base recipe to tweak!

yesterday

Made this for my family’s Sunday dinner last night to go with our usual curry spread and my dad, who is the pickiest eater on the planet and swears store bought is ‘the only real paneer’, said it was the best he’s ever had. I’m never going back to store bought, this is way too easy and tasty.

yesterday

That’s the highest praise possible! If a desi dad says homemade paneer is better than store bought? You know you nailed it. Trying this recipe this weekend to impress my own dad now.



