
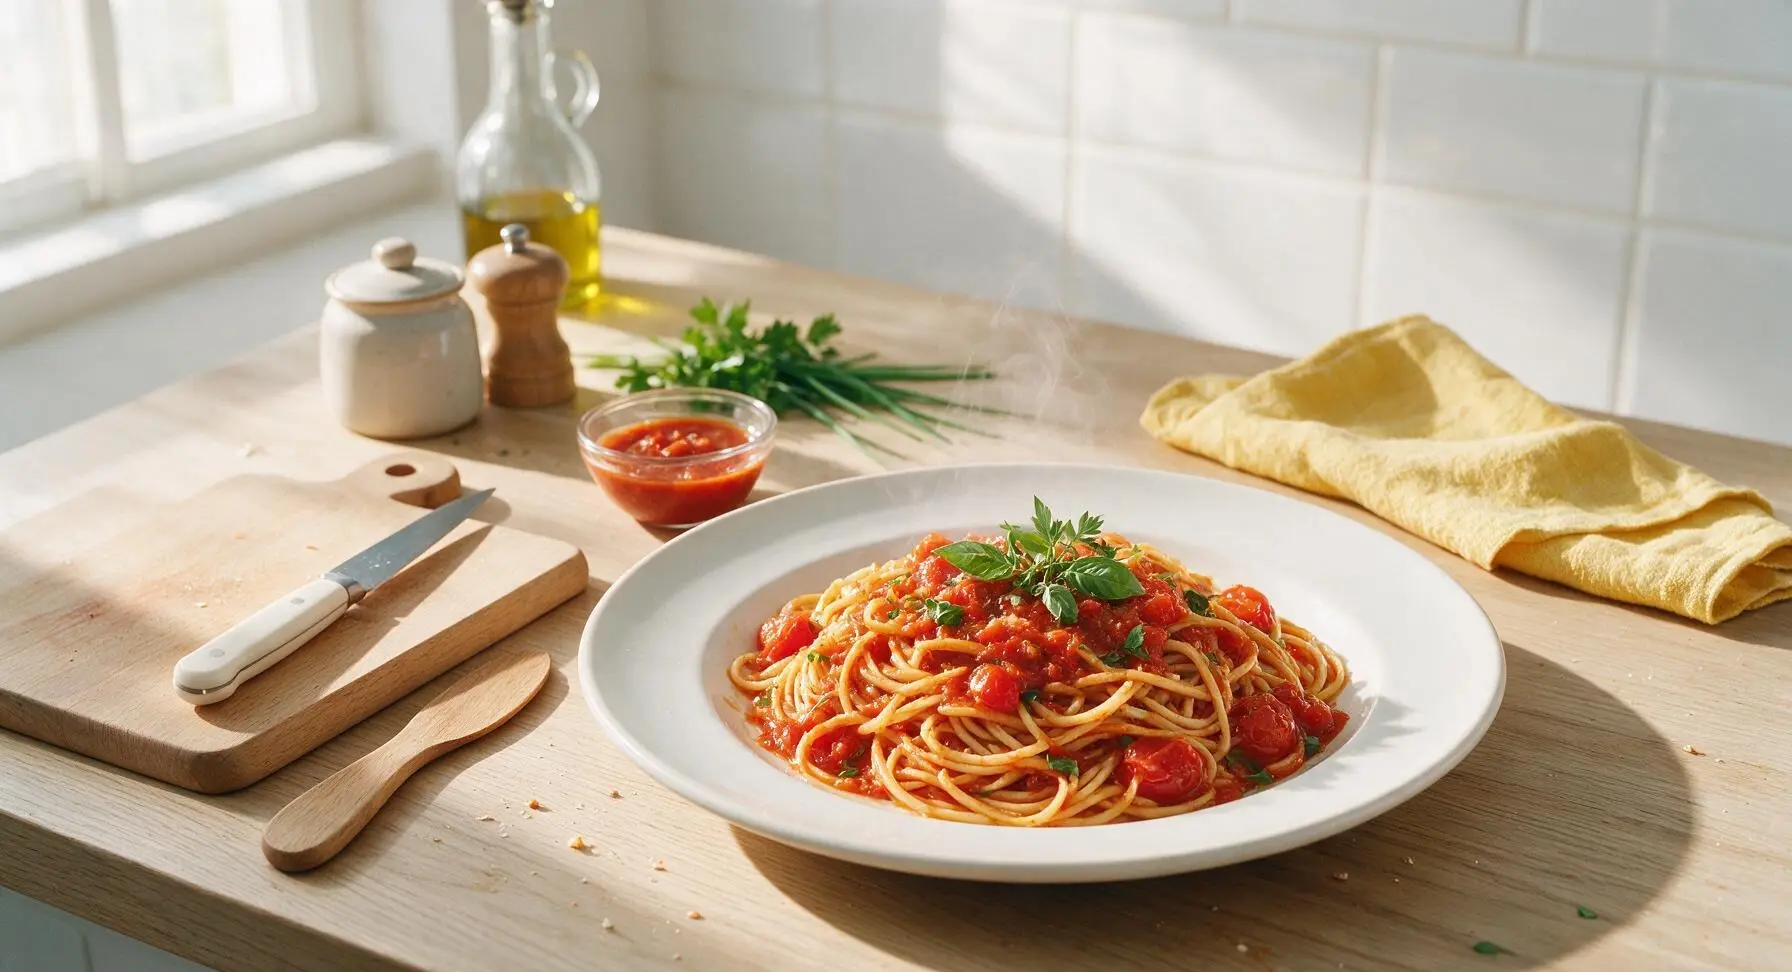
italian pasta sauce

title 1
italian pasta sauce
⏱️ cook time 45 minutes
🍽️ servings 4
⚡ Difficulty easy

intro

Rich, slow-simmered Southern Italian pasta sauce, bright with fresh basil and sweet San Marzano tomatoes, tossed with al dente pasta for a cozy, deeply flavored family meal.

Ingredients
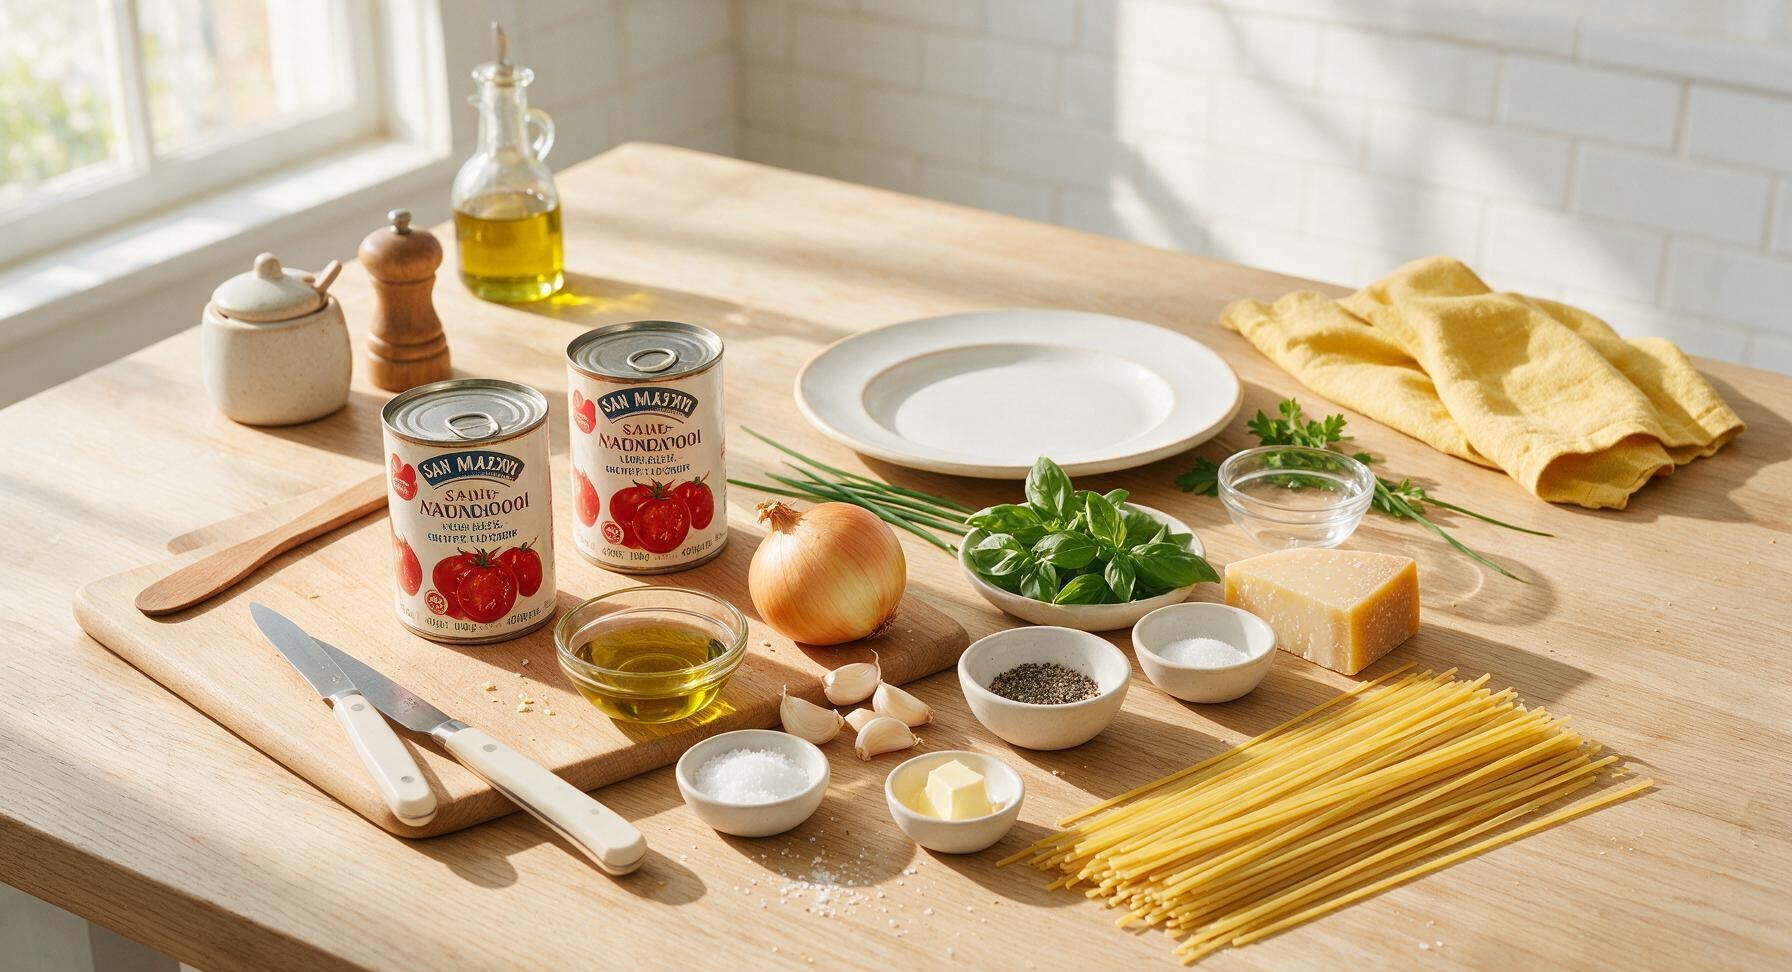
Canned San Marzano whole peeled tomatoes 800g (2 x 400g cans)
Extra-virgin olive oil 3 tbsp
Small yellow onion 1 (120g)
Garlic cloves 4 (12g)
Kosher salt 1 tsp, plus extra for pasta water
Freshly ground black pepper 1/2 tsp
Fresh basil 15g (1/2 cup packed leaves)
Parmigiano-Reggiano rind 1 (5cm piece)
Granulated sugar (optional) 1/4 tsp
Unsalted butter 1 tbsp (14g)
Dried spaghetti 400g

Steps

1

Prep Aromatic Base

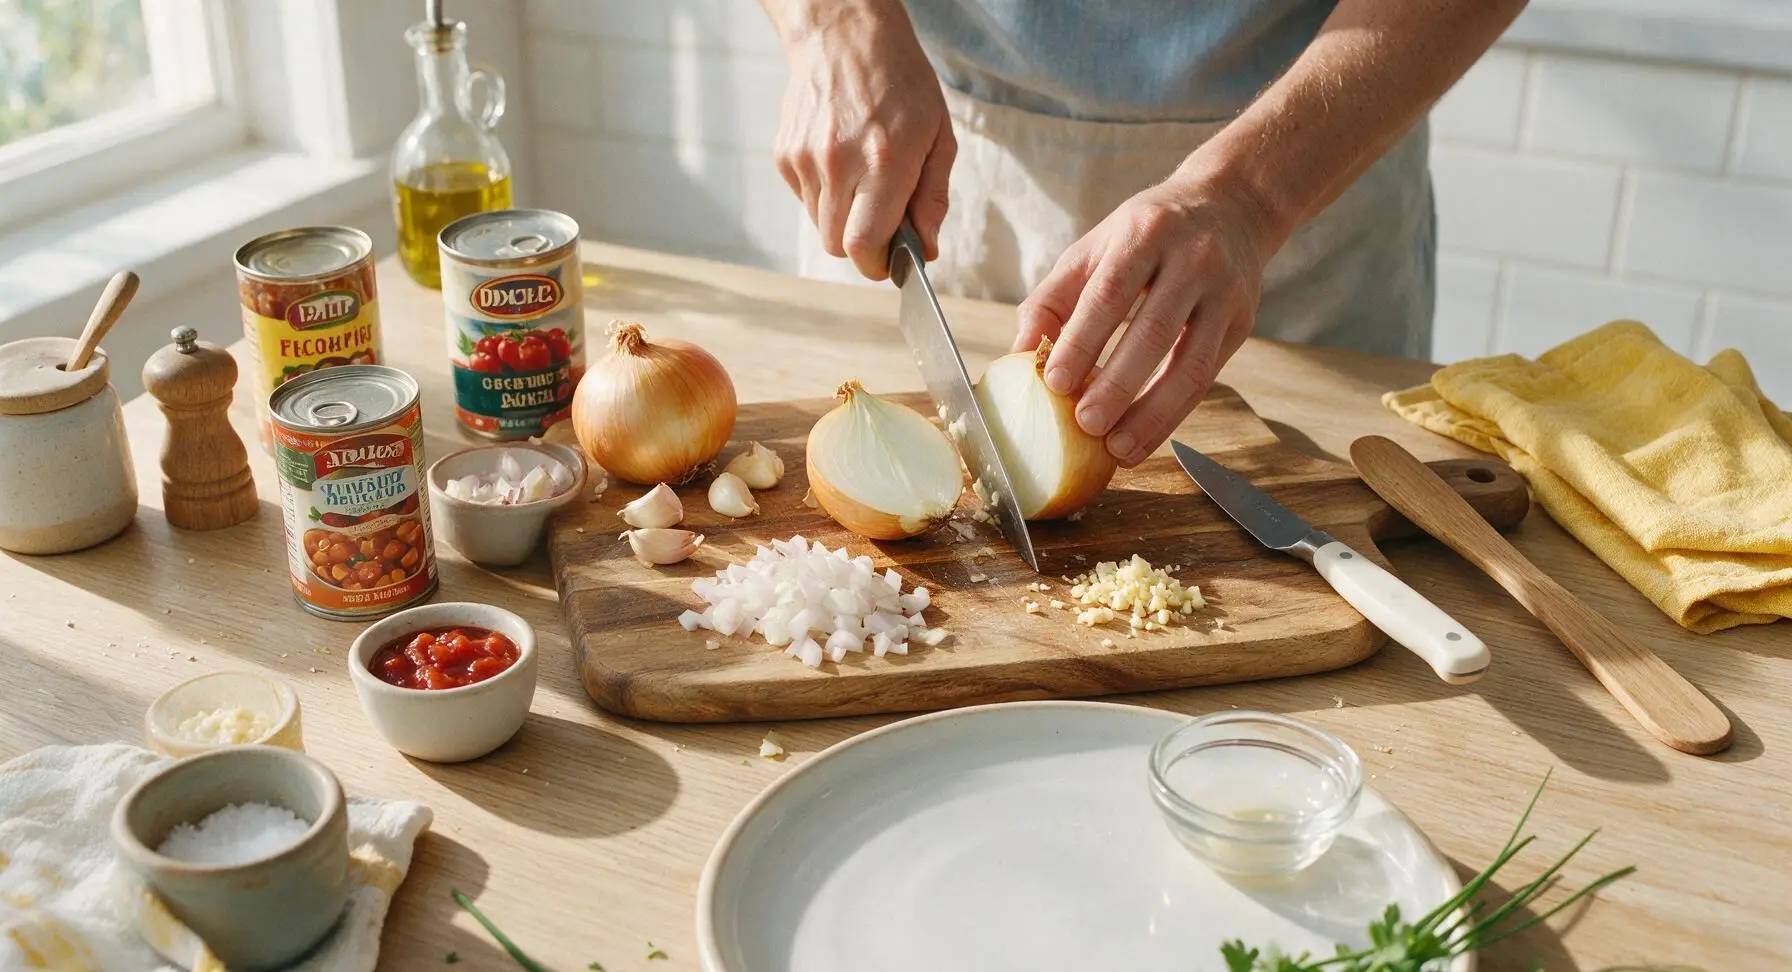
Place the yellow onion on the acacia wood cutting board. Using the chef’s knife, trim the root and stem ends, peel off the papery outer skin, and dice the onion into uniform 5mm pieces. Crush the garlic cloves with the flat side of the knife blade, peel off the skins, and mince finely. Set prepped aromatics aside on the edge of the cutting board. This prep takes approximately 5 minutes, with no cooking required at this stage.
Step 1
step1:Prep Aromatic Base
2

Warm Olive Oil

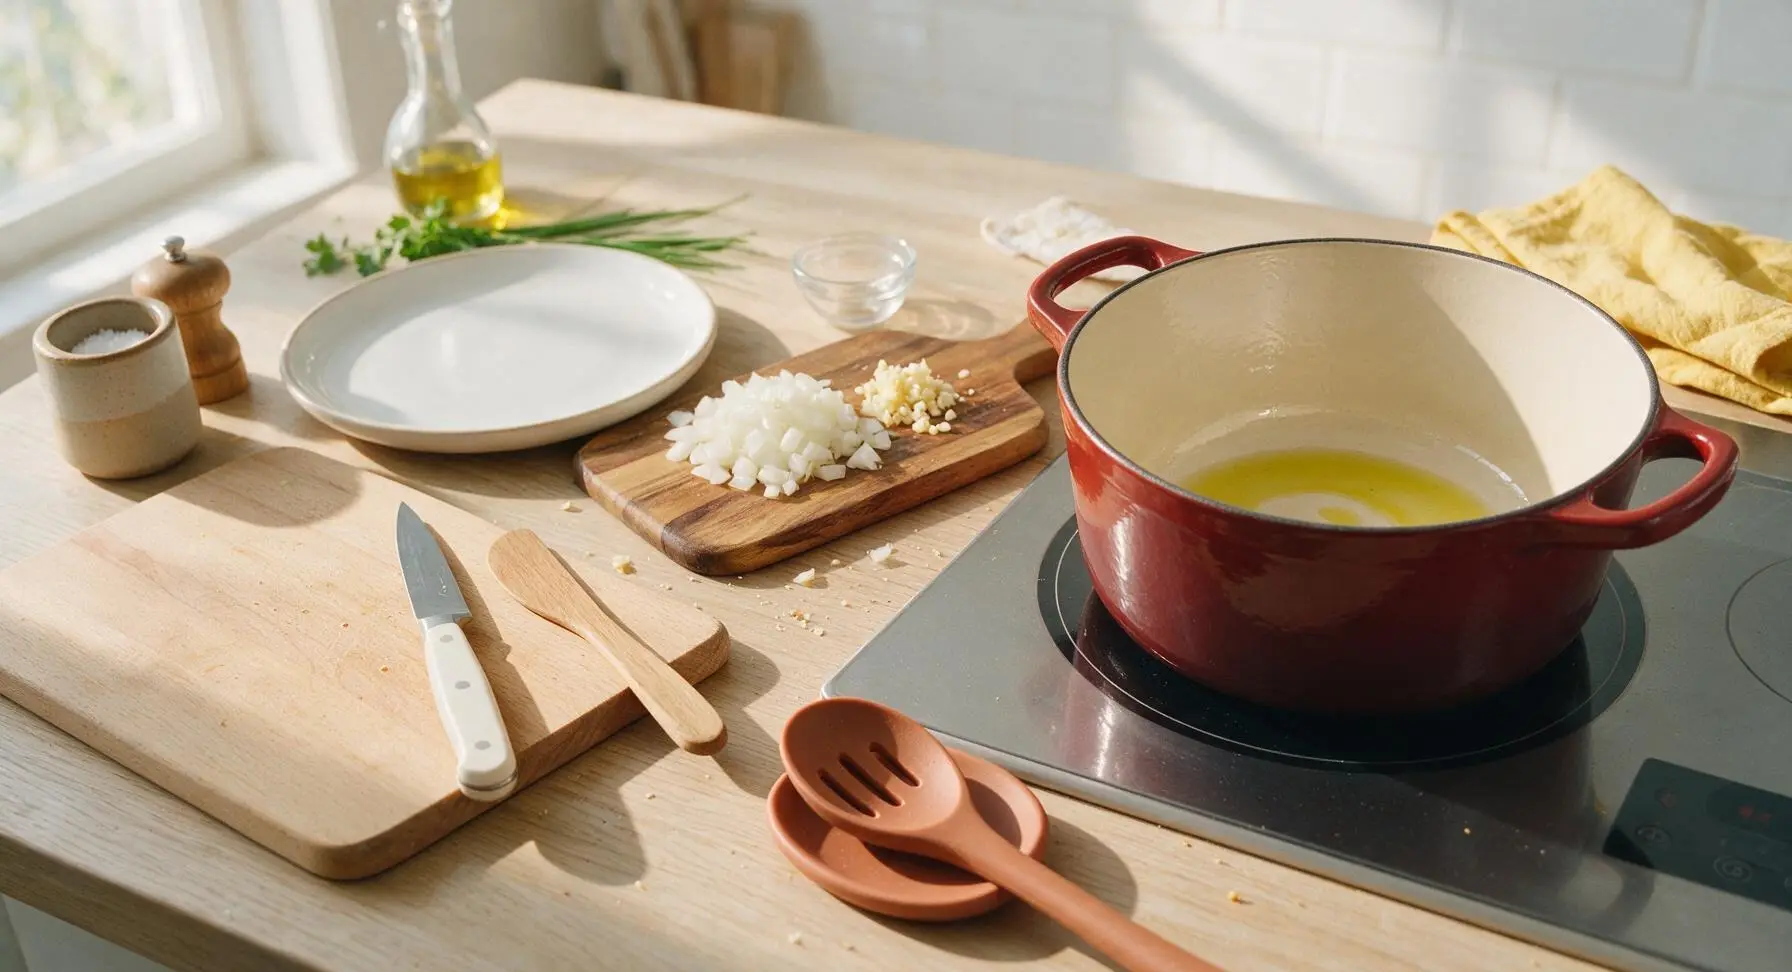
Place the enameled cast iron Dutch oven on the integrated induction cooktop set to medium-low heat (setting 3 out of 10, approximately 140C/285F). Add the 3 tablespoons of extra-virgin olive oil, and heat for 1 minute until the oil shimmers across the pot bottom but does not smoke. Watch closely to avoid burning the oil, which will give the finished sauce a persistent bitter flavor.
Step 2
step2:Warm Olive Oil
3

Sauté Aromatics Gently

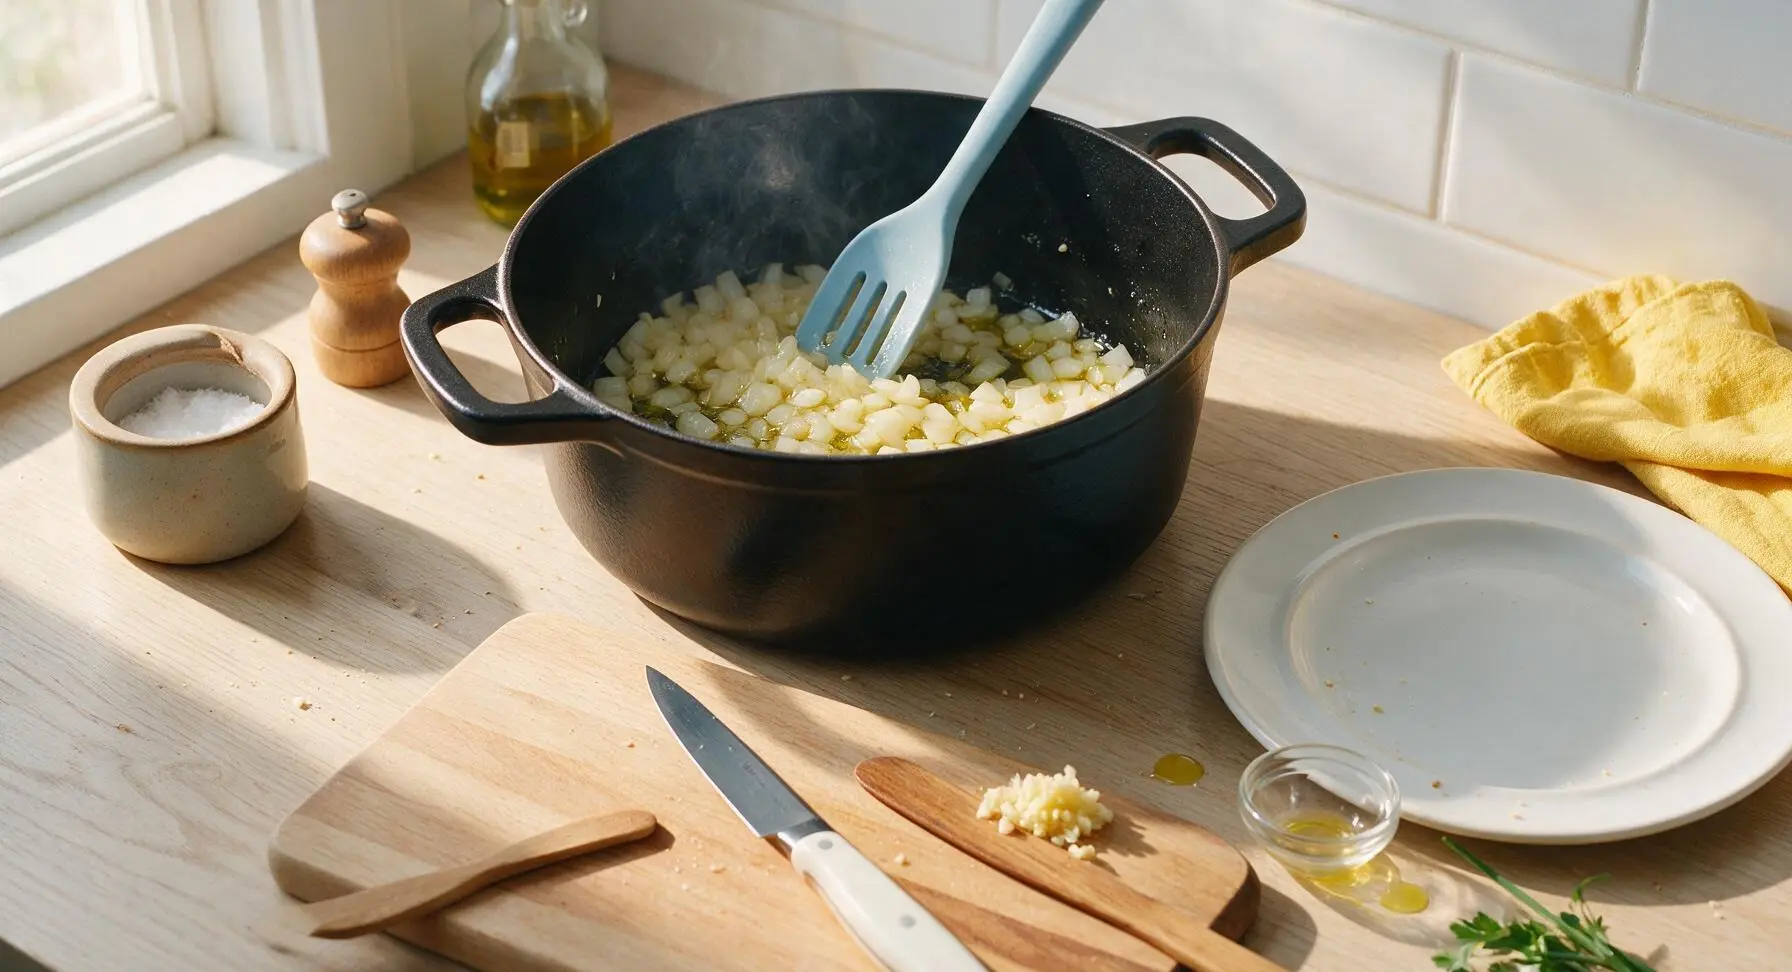
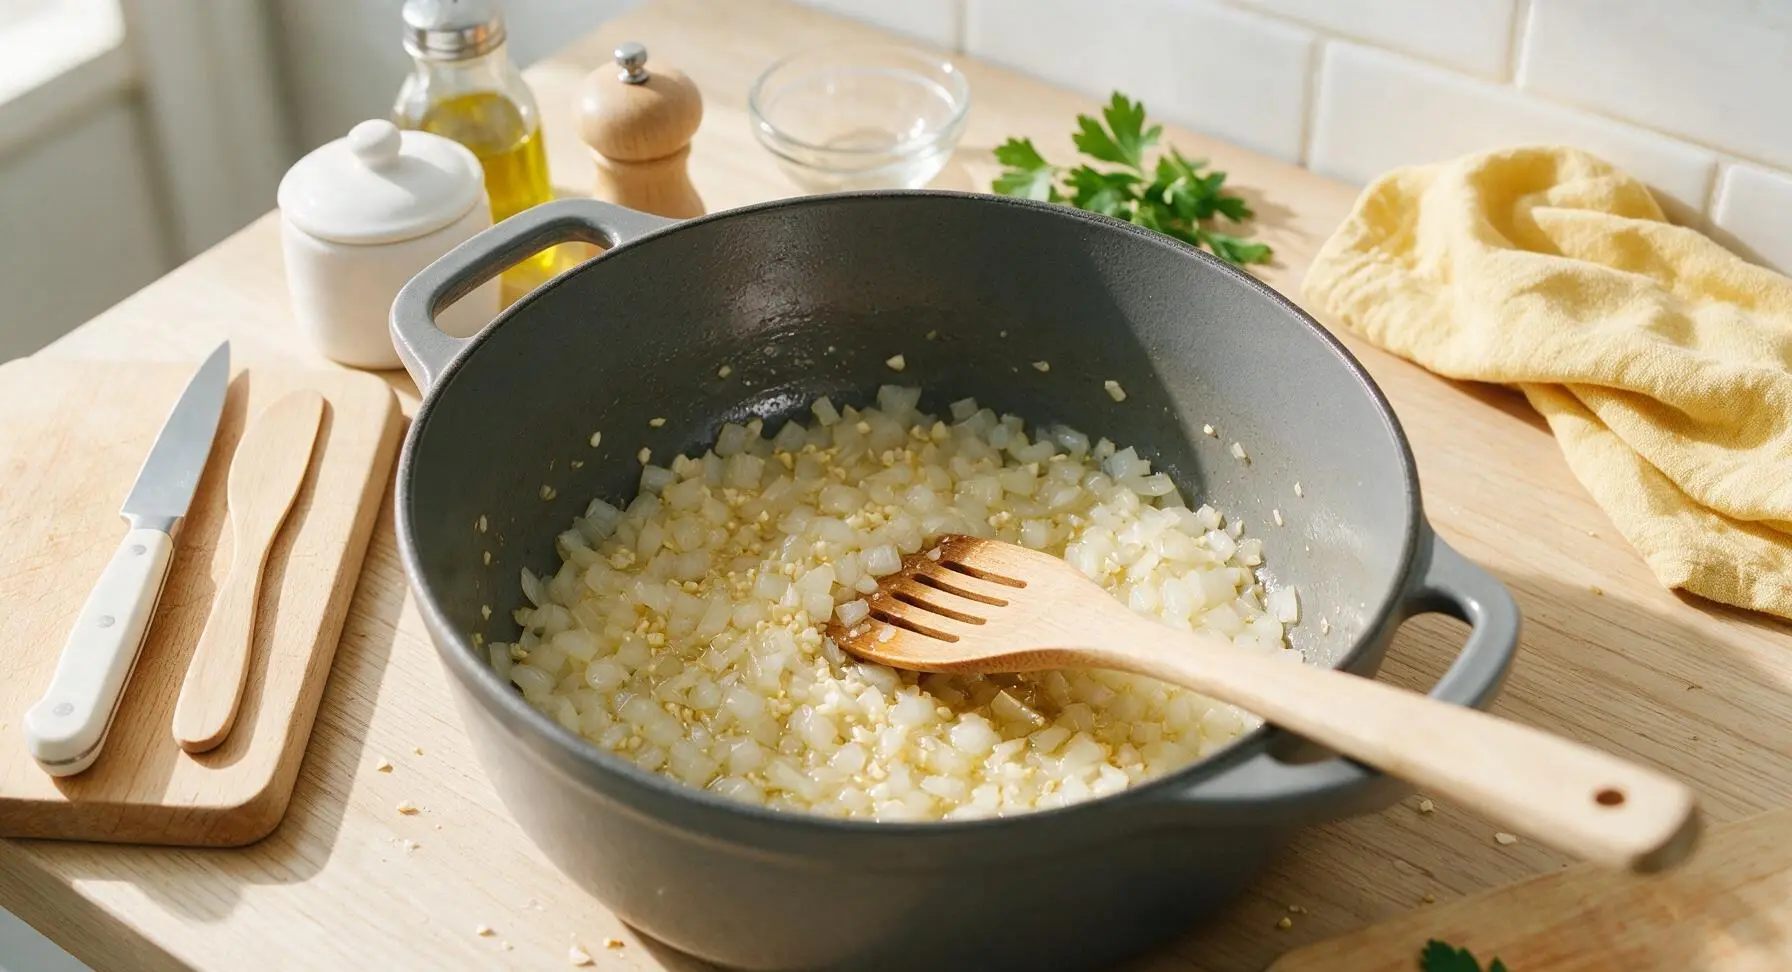
Add the diced onion to the warm oil, and cook for 7 minutes, stirring occasionally with the silicone slotted spoon, until the onion is soft, translucent, and pale golden with no crisp or browned edges. Add the minced garlic and cook for an additional 30 seconds, stirring constantly, until the garlic releases a bright, nutty aroma. Do not let the garlic brown or burn, as scorched garlic will impart an unpleasant bitter taste to the sauce.
Step 3
step3:Sauté Aromatics Gently
Step 3
step3:Sauté Aromatics Gently
4

Add Tomatoes and Rind

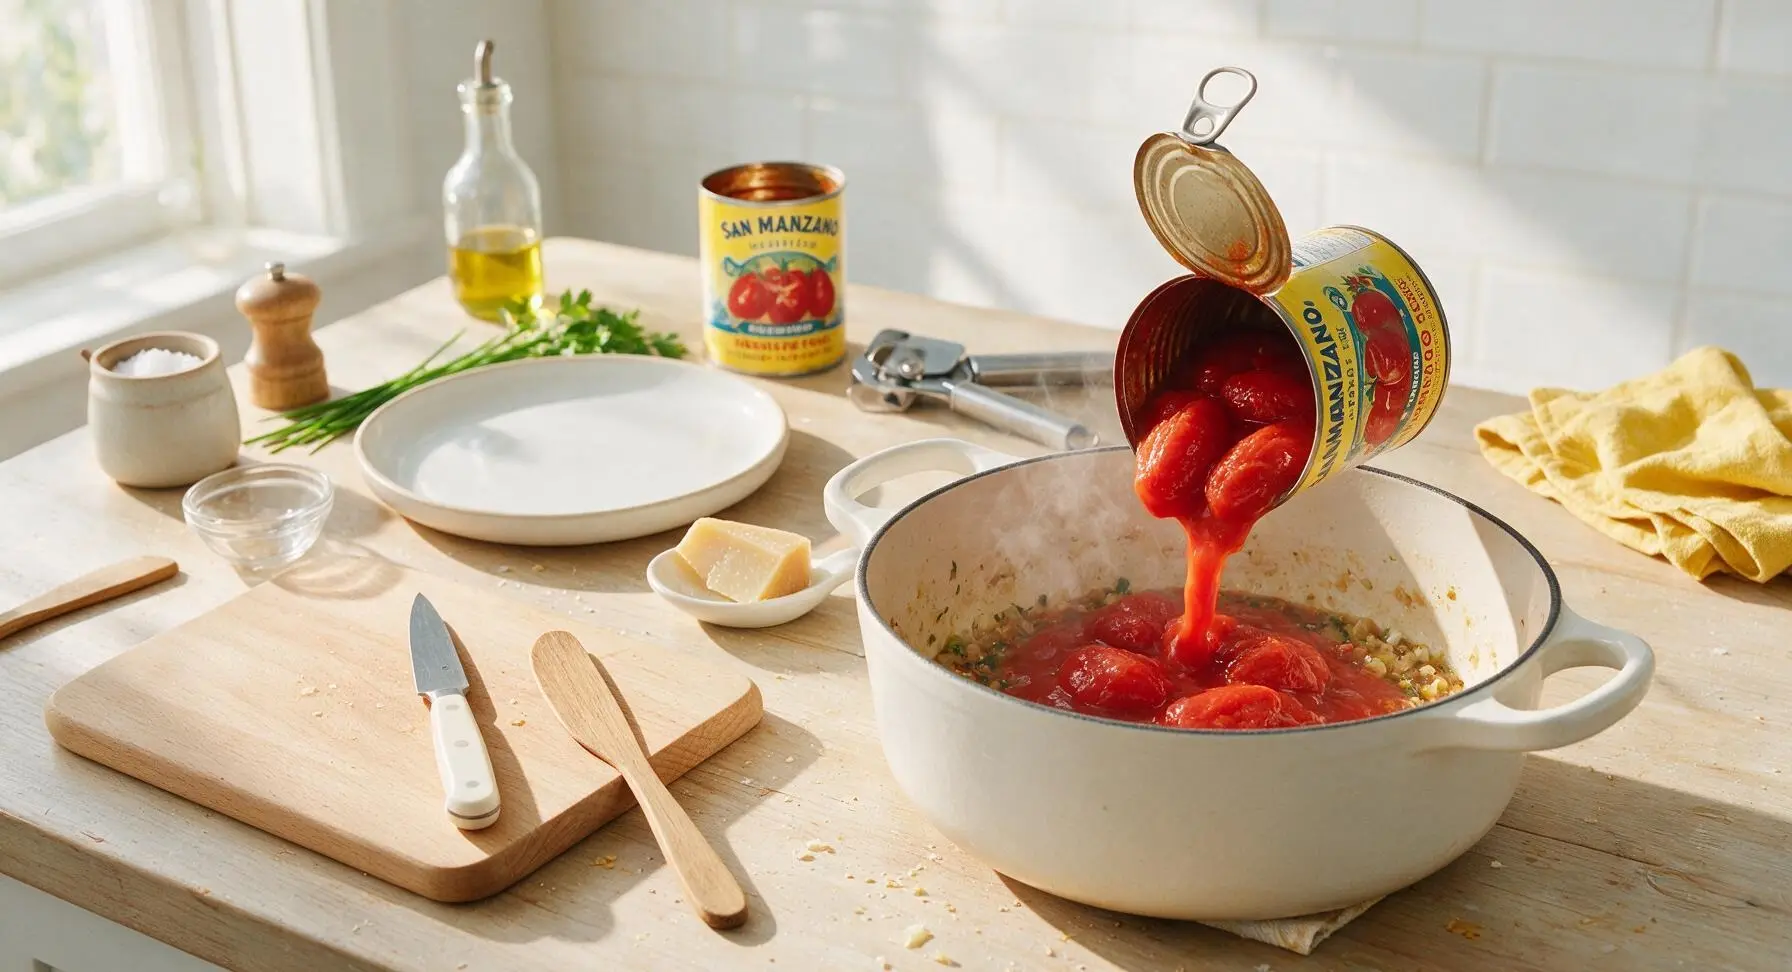
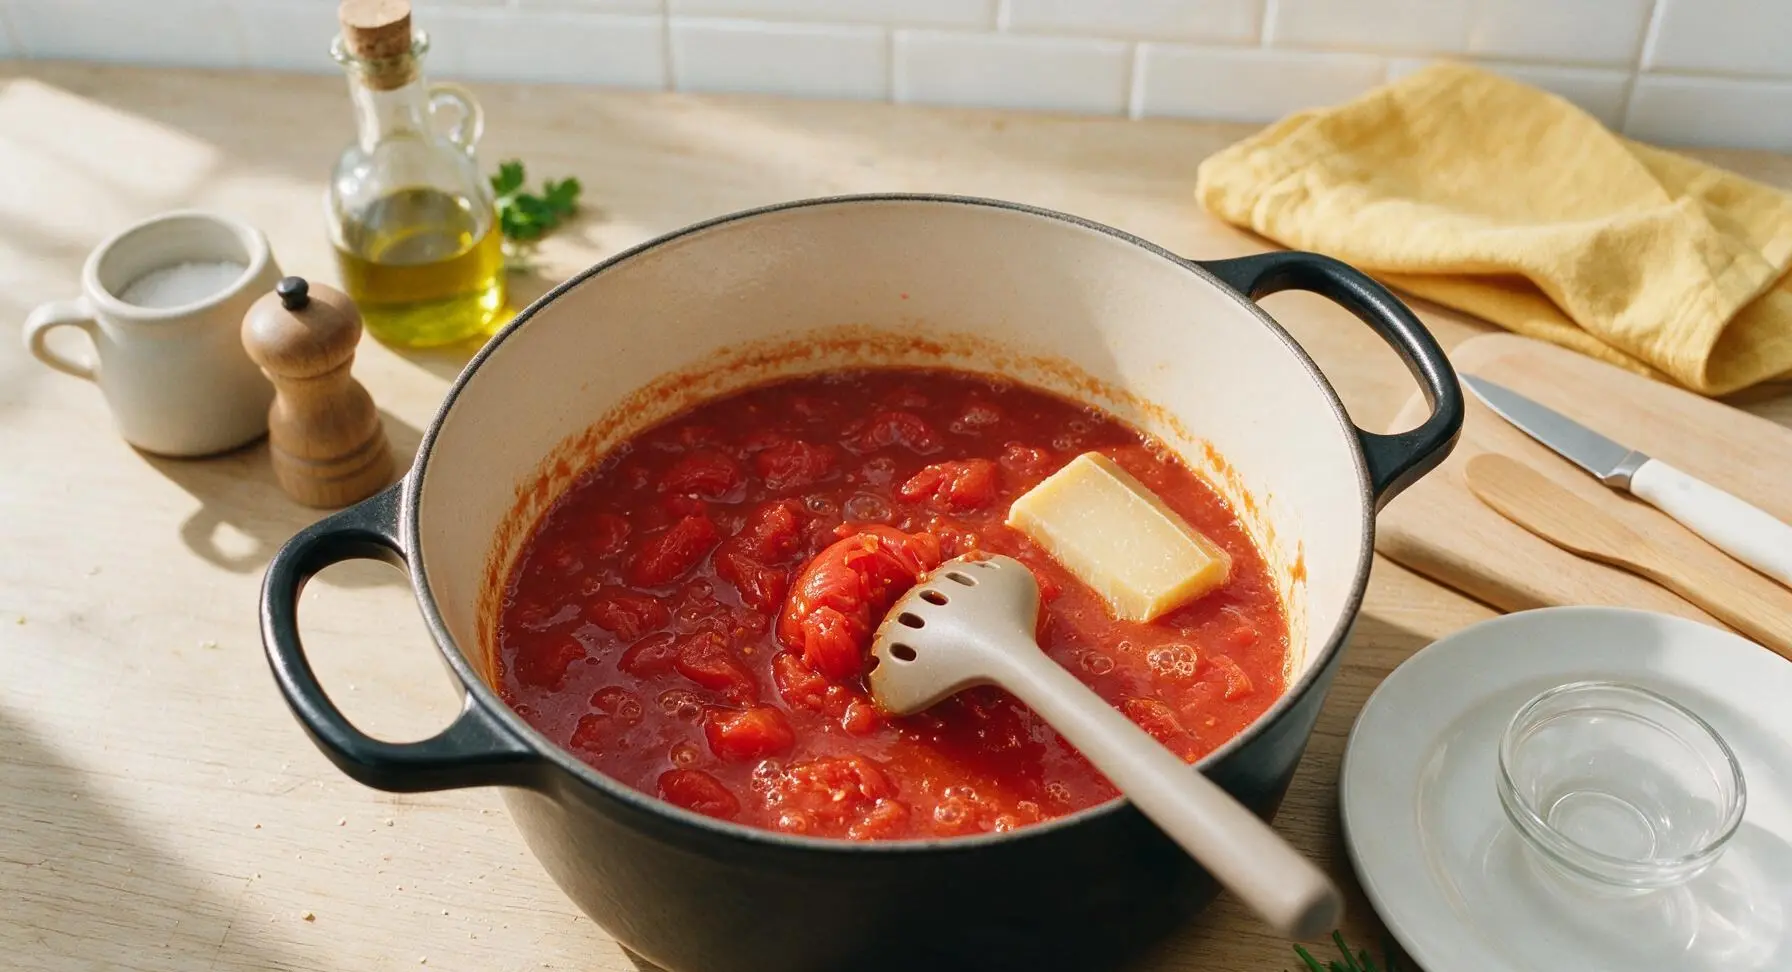
Use the stainless steel can opener to open both cans of San Marzano tomatoes. Pour the entire contents (tomatoes and their packing juice) into the Dutch oven. Add the Parmigiano-Reggiano rind, 1 teaspoon kosher salt, 1/2 teaspoon black pepper, and optional 1/4 teaspoon sugar if your tomatoes taste particularly tart on first bite. Use the slotted spoon to gently crush the whole tomatoes against the side of the pot into rough 2-3cm chunks, leaving some texture rather than mashing into a completely smooth puree.
Step 4
step4:Add Tomatoes and Rind
Step 4
step4:Add Tomatoes and Rind
5

Simmer Sauce Slowly

Bring the sauce to a very gentle, low bubble (reduce heat to low, setting 2 out of 10, approximately 95C/200F). Partially cover the Dutch oven with its lid, leaving a 2cm gap to allow steam to escape so the sauce does not splatter across the cooktop. Simmer for 30 minutes, stirring every 5 minutes to prevent the sauce from sticking to the bottom of the pot, until the sauce thickens to a rich, coating consistency, and bright orange-red tomato oil separates to glisten on the surface.
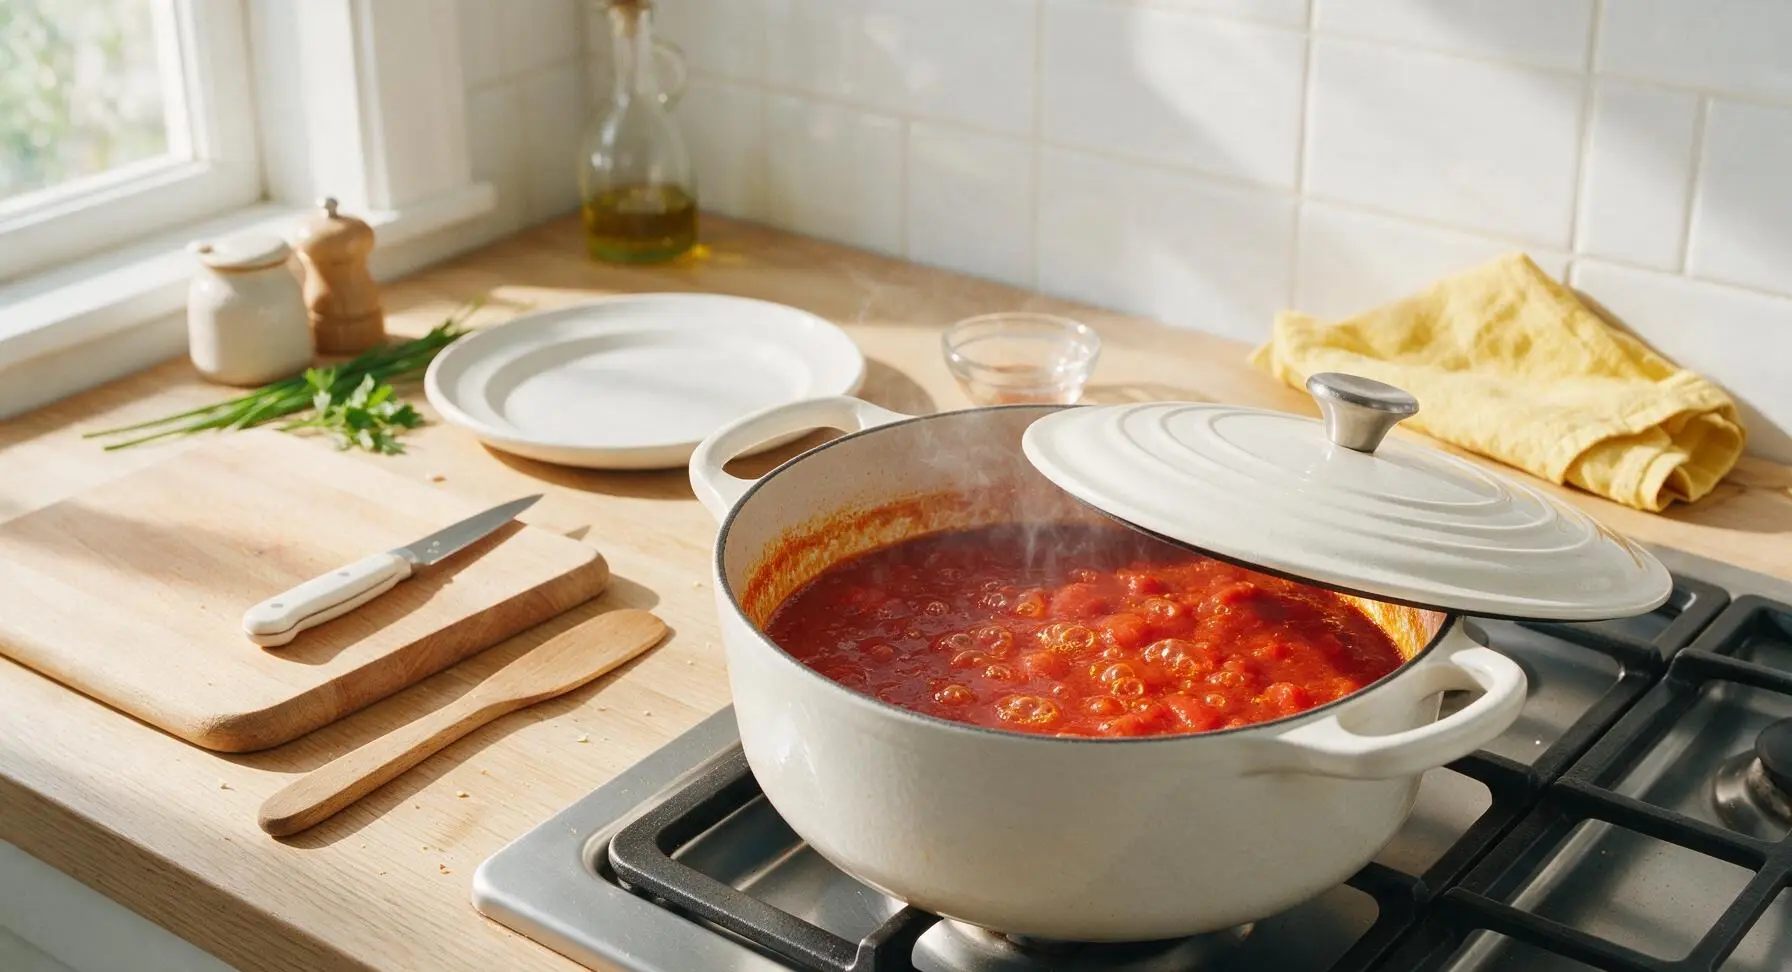
Step 5
step5:Simmer Sauce Slowly
6

Finish Sauce Base

After 30 minutes of simmering, remove the Parmigiano-Reggiano rind from the sauce and discard it. Tear half of the fresh basil leaves into rough pieces and stir them into the sauce, along with the 1 tablespoon of unsalted butter. Stir continuously for 1 minute until the butter melts completely, giving the sauce a glossy, silky sheen. Taste and adjust salt or pepper if needed, then turn off the heat and let the sauce rest for 5 minutes while you cook the pasta.
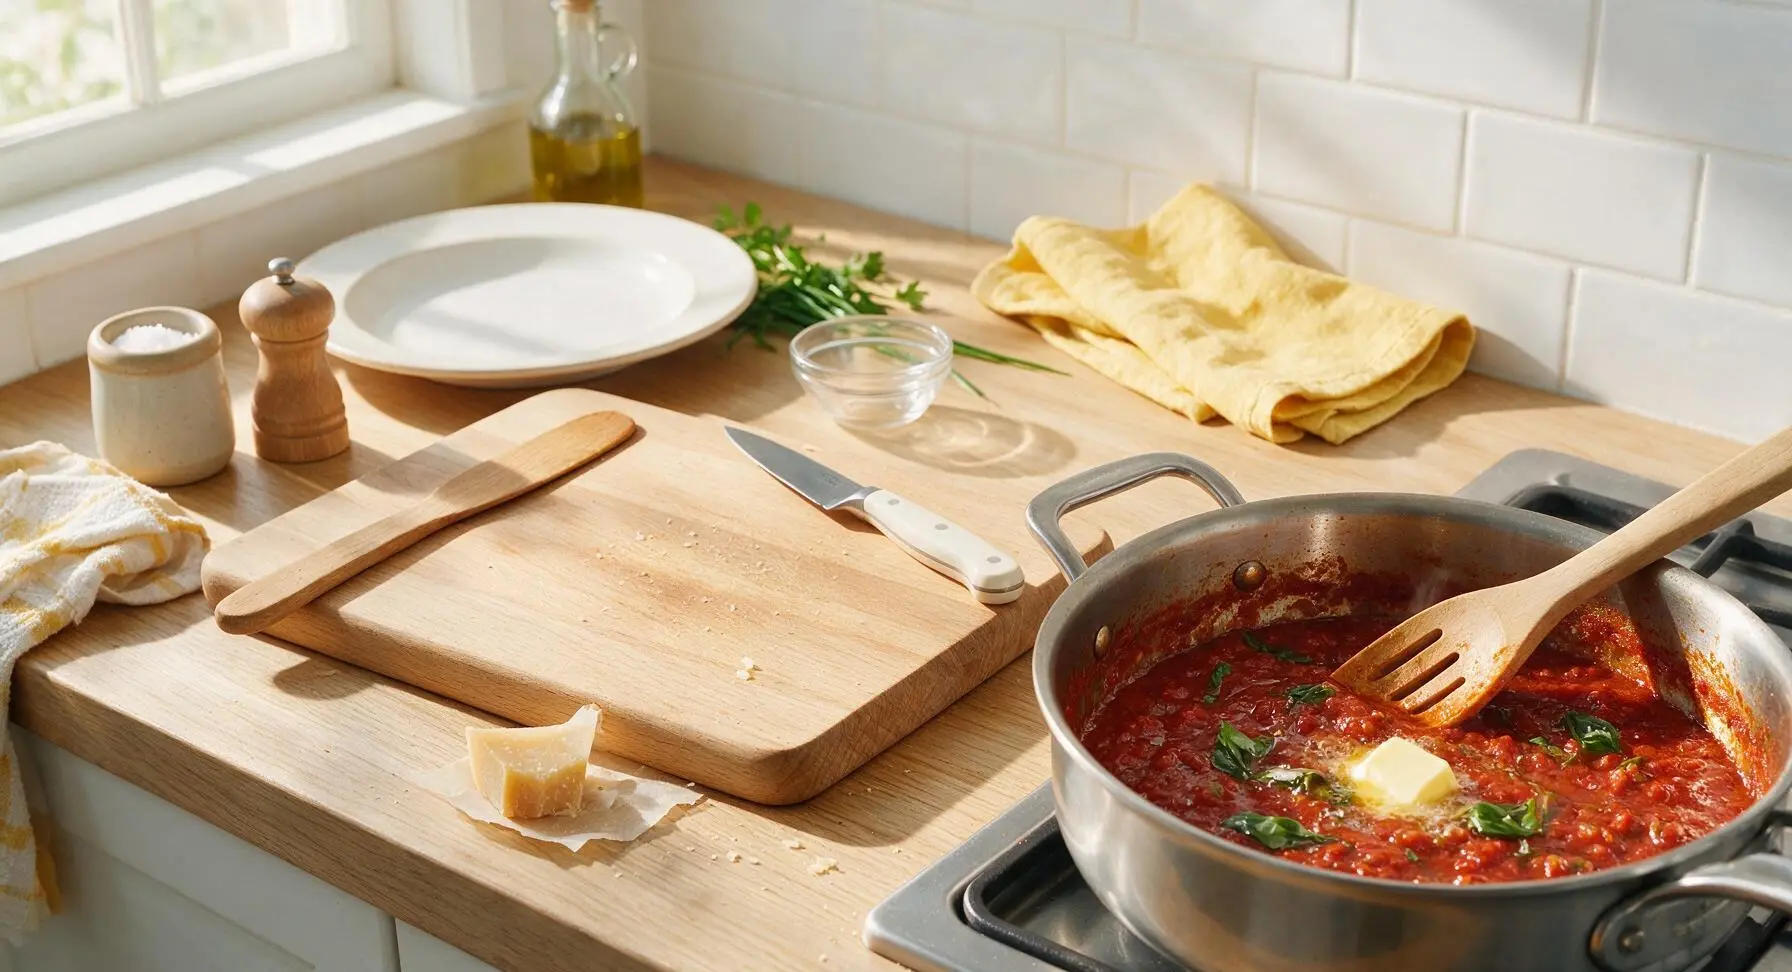
Step 6
step6:Finish Sauce Base
7

Toss with Pasta

While the sauce rests, cook 400g dried spaghetti in heavily salted boiling water (water should taste as salty as seawater) for 2 minutes less than the package recommended time, until very al dente with a faint white core at the center of each strand. Reserve 1/2 cup of starchy pasta cooking water in the clear glass measuring cup, then drain the pasta in the stainless steel colander without rinsing. Add drained pasta directly to the Dutch oven with the sauce, turn heat to low, and toss vigorously for 1-2 minutes, adding small splashes of reserved pasta water as needed, until the sauce emulsifies and clings tightly to every pasta strand.
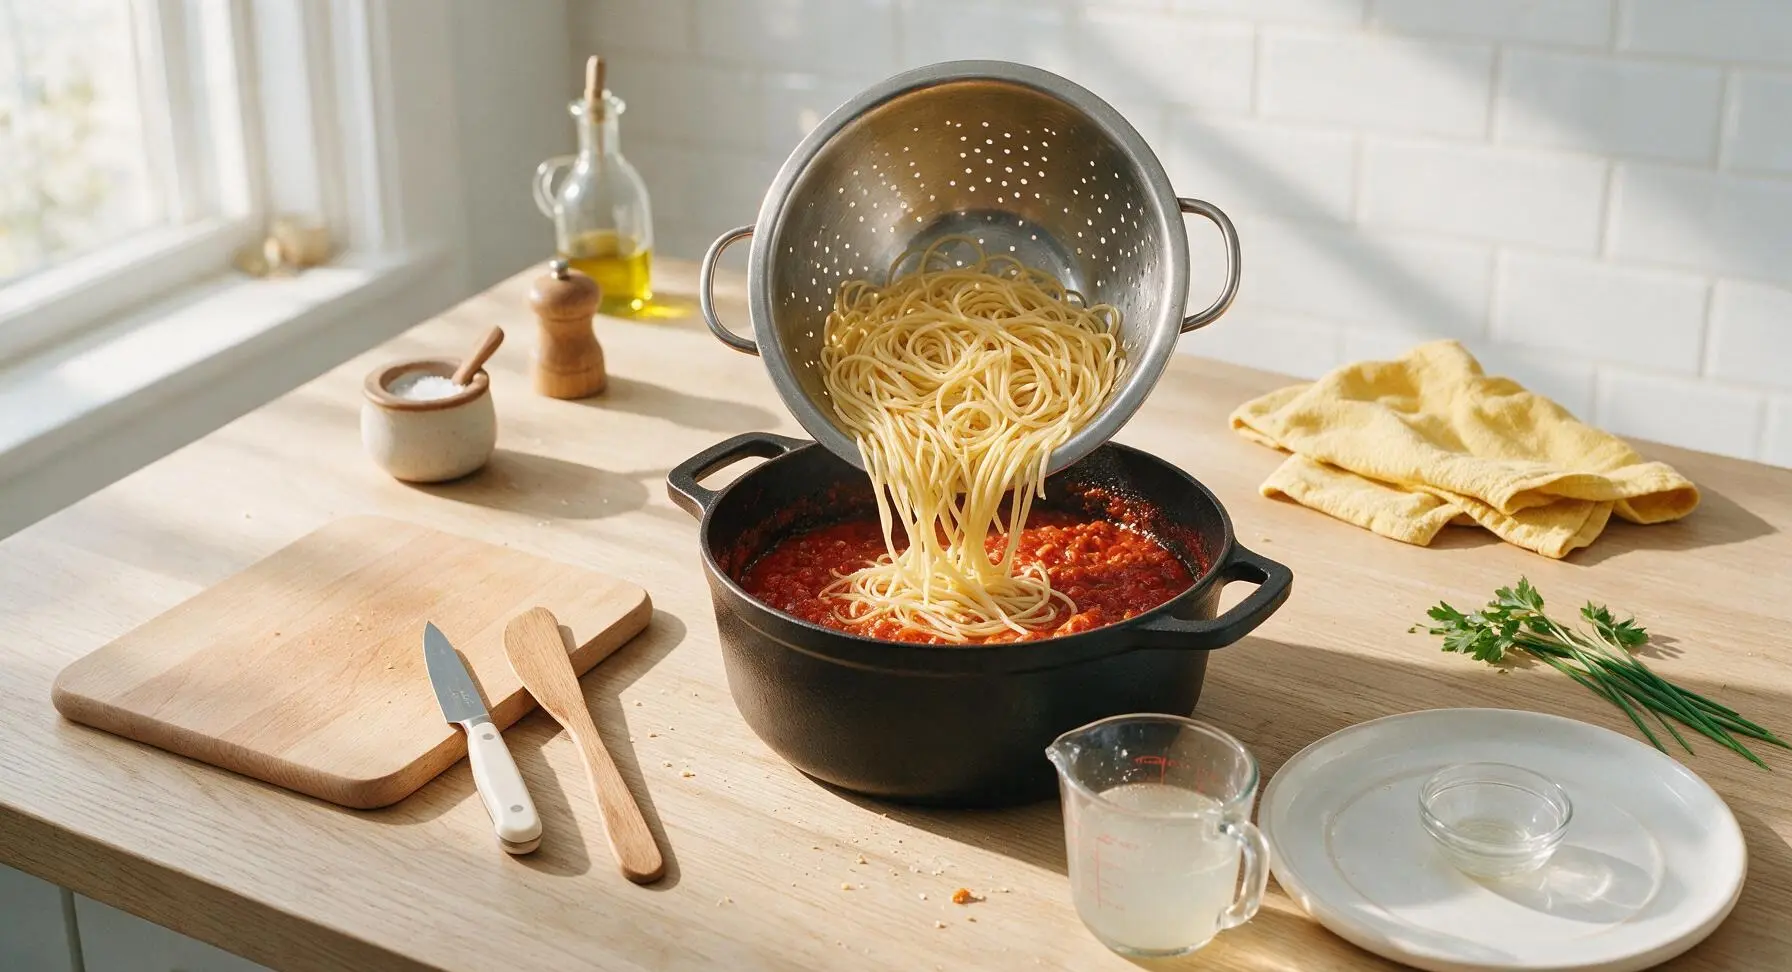
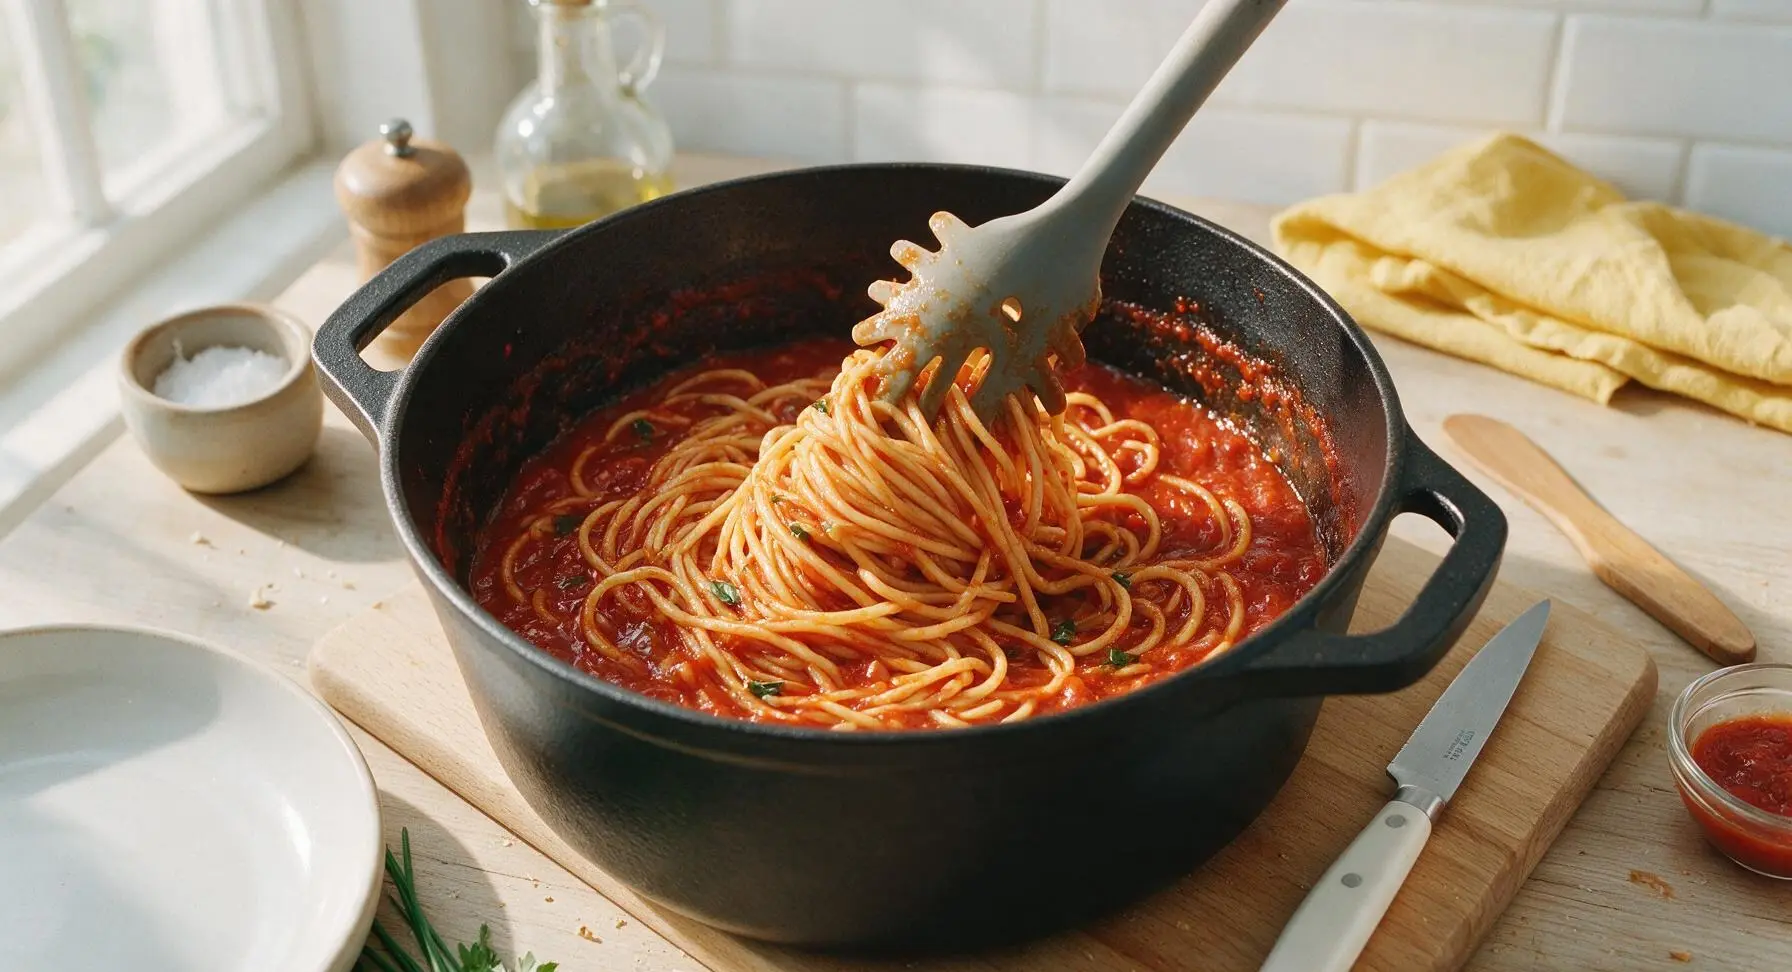
Step 7
step7:Toss with Pasta
Step 7
step7:Toss with Pasta

Tips

1.Always use certified San Marzano tomatoes grown in the volcanic soil near Mount Vesuvius for the sweetest, least acidic tomato flavor; standard grocery store canned tomatoes often have a metallic, tart taste that requires extra sugar to balance.
2.Never rinse pasta after draining: the starchy coating on cooked pasta strands helps the sauce emulsify and cling tightly, rather than sliding off into the bottom of the bowl.
3.This sauce freezes perfectly for up to 3 months in airtight containers; let it cool completely before freezing, and skip adding the finishing butter until you reheat the sauce for the silkiest, non-grainy texture.


✨ You May Also Like

Main Course
🍜 United Kingdom

A showstopping classic of tender seared beef, savory mushroom duxelles, and crisp prosciutto wrapped in flaky golden puff pastry, baked to juicy perfection.

⏱️ 2 hours 1Main Course ★ 4.7
Main Course
🍜 India

Tender charred marinated chicken simmered in a rich, spiced creamy tomato sauce, this iconic Anglo-Indian curry pairs perfectly with basmati rice or warm naan.

⏱️ 50 minuteMain Course ★ 4.6
Main Course
🍜 Thailand

Classic tangy, sweet, and savory Thai stir-fried rice noodles with shrimp, tofu, and crunchy garnishes, balancing all five core Thai flavor profiles.

⏱️ 30 minuteMain Course ★ 4.5
Main Course
🍜 United Kingdom

Crispy golden beer-battered cod and fluffy double-fried chips, served with tangy tartar sauce and malt vinegar: the timeless, beloved British pub comfort classic.

⏱️ 45 minuteMain Course ★ 4.7
Main Course
🍜 Mexico

Smoky, chile-marinated pork tacos with caramelized pineapple, fresh cilantro, and lime: a beloved classic Mexican street food perfect for casual summer gatherings.

⏱️ 1 hour 45Main Course ★ 4.8
Main Course
🍜 United States

Crunchy Fritos corn chips layered with savory beef chili and melted cheddar, topped with cool, zesty fixings for a beloved, cozy Tex-Mex comfort food.

⏱️ 35 minuteMain Course ★ 4.8

italian pasta sauce:Frequently Asked Questions

1.Why do you recommend San Marzano tomatoes specifically, and can I substitute other canned tomatoes? ▾
San Marzano tomatoes grow in mineral-rich volcanic soil near Mount Vesuvius, giving them a uniquely sweet, low-acid flavor and thick, firm flesh that breaks down perfectly during long simmers. If you can’t find them, substitute high-quality canned whole peeled plum tomatoes with no added calcium chloride—skip pre-diced tomatoes, as their preservatives prevent a silky texture.
2.Do I really need to simmer this sauce for hours, or can I make a faster version? ▾
The low, slow 2.5 to 3 hour simmer is what builds that classic mellow, deep flavor by letting ingredients meld without boiling off bright tomato notes. If you’re short on time, you can simmer it for 45 minutes on low, but the long cook delivers that cozy, family-style depth quick sauces can’t match—just stir occasionally to prevent sticking.
3.The recipe lists a small yellow onion—do I dice it, or leave it whole? ▾
Traditional Southern Italian versions often use a halved, whole onion simmered in the sauce to infuse gentle, sweet allium flavor without sharp, crunchy bits. You can fish it out after simmering for an ultra-smooth sauce, or dice it fine first if you prefer a textured, chunkier sauce with soft, caramelized onion bits in every bite.
4.How much garlic should I use, and is it okay to brown it for deeper flavor? ▾
For this classic sauce, 4 to 6 thinly sliced or lightly crushed garlic cloves is the sweet spot—any more and it can overpower the bright tomato flavor. Never brown your garlic, as that adds bitter, harsh notes; cook it just until fragrant, 30 to 60 seconds over low heat, before adding tomatoes to keep the flavor mellow and sweet.
5.Do I need to add sugar to cut the acidity of the tomatoes? ▾
Skip the added sugar! High-quality San Marzano tomatoes are naturally low-acid and sweet on their own, and the slow simmer with onion and garlic softens any remaining sharp edge. If you get a slightly tangy batch, stir in a tiny pinch of baking soda (1/8 teaspoon at a time) instead of sugar to neutralize acid without making the sauce cloying.
6.What type of pot is best for slow-simmering this sauce? ▾
Reach for a heavy-bottomed Dutch oven or stock pot for this recipe—thick, heavy bottoms distribute heat evenly, so the sauce won’t scorch or stick during the long simmer. Avoid thin, lightweight aluminum pots, which can react with acidic tomatoes to create a faint metallic off-flavor, plus they form hot spots that burn easily.
7.Should I simmer the sauce with the lid on or off? ▾
Keep the lid slightly ajar, tilted to leave a small gap for steam to escape, while the sauce simmers on the lowest heat setting. This lets excess water evaporate slowly to build a rich, coating consistency, while trapping enough heat to keep the simmer gentle instead of letting it boil rapidly, which breaks down tomato flavor and causes bitterness.
8.Can I add meat to this sauce to make a hearty meat sauce? ▾
This tomato base is the perfect starting point for a meat sauce! Brown 1 pound of ground beef, sweet Italian sausage, or a mix of both before adding garlic and tomatoes, or toss in a few bone-in pork ribs to simmer with the sauce for ultra-rich depth. Just skim any excess fat off the top before serving if you add meat.
9.How do I make a smooth sauce instead of a chunky, rustic one? ▾
For a rustic, chunky sauce, simply crush San Marzano tomatoes by hand as you add them to the pot, leaving small, tender chunks intact. For a silky, smooth sauce, use an immersion blender to puree it right in the pot after simmering, or run it through a food mill—skip countertop blenders, which incorporate too much air and make sauce foamy.
10.When should I add fresh basil, and can I use dried basil instead? ▾
Add a big handful of fresh basil sprigs in the last 10 minutes of simmering to keep its bright, aromatic flavor intact—adding it too early makes it taste muted and bitter. If you don’t have fresh basil, use 1 teaspoon of dried basil added when you pour in the tomatoes, but fresh is always worth grabbing for that classic bright flavor.
11.How long does this sauce stay fresh, and can I freeze it? ▾
Stored in an airtight container, this sauce will stay fresh in the fridge for up to 5 days, and it freezes beautifully for up to 4 months. Let it cool completely before portioning it into freezer-safe bags or containers, leaving a little headspace for expansion, and thaw it in the fridge overnight before reheating gently on the stovetop.
12.Why does the recipe call for kosher salt instead of regular table salt? ▾
Kosher salt has larger, flakier crystals that dissolve evenly and make it easy to season gradually without over-salting, which is key for long-simmered sauces where flavors concentrate over time. If you only have table salt, use half the amount the recipe calls for, as table salt is much denser and can make sauce overly salty in a 1:1 swap.
13.Should I rinse the canned tomatoes, or keep the juice from the can? ▾
Don’t rinse your San Marzano tomatoes! That thick, bright tomato juice in the can is packed with flavor, and it forms the base of the sauce as it simmers down. Just fish out any hard, tough stem ends or stray packed basil leaves from the can, then crush the tomatoes right into the pot along with all their juice.
14.Why does my sauce turn out watery even after simmering for hours? ▾
Watery sauce usually comes from boiling it too fast, which makes tomatoes break down and release excess water instead of evaporating slowly, or using pre-diced tomatoes with added firming agents that prevent proper breakdown. If your sauce is too thin at the end of cook time, simmer uncovered for 10 extra minutes, stirring often, to thicken it.
15.What pasta shapes pair best with this slow-simmered sauce? ▾
This rich, thick sauce pairs perfectly with sturdy, textured pasta shapes that hold onto sauce well—think spaghetti, rigatoni, penne, or bucatini. Always toss pasta with the sauce in the pan for 1 to 2 minutes before serving, instead of pouring sauce on top, to help it cling, and reserve 1/2 cup of starchy pasta water to loosen it if needed.
16.Can I add extra vegetables like bell peppers or mushrooms to the sauce? ▾
Absolutely! Diced bell peppers, cremini mushrooms, or even finely shredded carrot can add great depth and texture—just sauté them slowly in olive oil after your onion softens, before adding garlic and tomatoes, to cook out their raw, watery flavor. Keep additions simple, though, so the bright San Marzano tomato flavor stays the star.
17.Do I need to add oregano or pre-mixed Italian seasoning to the sauce? ▾
Classic Southern Italian slow-simmered sauce relies on just a few core ingredients, so heavy spice mixes are unnecessary. If you love oregano, add a tiny pinch of dried oregano (1/4 teaspoon) when you add the tomatoes, but skip generic “Italian seasoning” blends, which often have stale, overpowering herbs that drown out fresh tomato and basil notes.
18.Is it normal for the sauce to splatter a lot while it simmers? ▾
A little splatter is totally normal as the thick sauce bubbles gently, which is why the slightly ajar lid trick works so well—it catches most splatters while letting steam escape. If you’re getting big, messy pops, your heat is too high; turn it down to the lowest setting so bubbles are small and slow, and use a splatter screen for extra protection if you have one.
19.Can I make this sauce in a slow cooker instead of on the stovetop? ▾
You absolutely can! Sauté the garlic and onion in olive oil first to bring out their savory flavor, then add all ingredients (save fresh basil) to your slow cooker, and cook on low for 4 to 6 hours. Leave the lid cracked for the last 30 minutes if the sauce is too thin, then stir in fresh basil right before serving for that same deep, slow-simmered taste.
20.How much extra-virgin olive oil do I need, and what role does it play? ▾
Good extra-virgin olive oil adds a rich, fruity base that rounds out bright tomato acidity and carries the flavor of garlic and basil throughout the sauce. Use 1/4 cup for a full batch—enough to coat the onion and garlic as they sauté, and enough to leave a faint, glossy sheen on the finished sauce, without making it greasy or heavy.

Comments (7)

2 days ago

Wow, this is SO good! I was nervous to try homemade sauce because my last attempt came out super watery and bland, but following this exact recipe gave me the richest, most flavorful sauce I’ve ever made. I added a pinch of extra red pepper flakes for a tiny kick and it was perfect for our neighborhood potluck last night — everyone was asking for the recipe! I’m already prepping a double batch this weekend for meal prep so I have jars to freeze for busy weeks.

yesterday

Wait how did you store the frozen batches? I’ve been wanting to freeze sauce too but I always get freezer burn on mine!

yesterday

So glad it was a hit at your potluck, Jessie! If you’re freezing it, let the sauce cool completely first, then pour it into airtight freezer-safe containers leaving about an inch of headspace for expansion — it’ll keep perfectly for 3-4 months that way!

30 minutes ago

Super solid recipe, way easier than I expected for a slow-simmered sauce! The only tweak I made was adding a handful of sliced mushrooms because my wife loves them, and it turned out great. Only knocked off one star because I wish the recipe noted if you should use canned San Marzano tomatoes vs regular diced — I used regular and it was still tasty, but I bet San Marzano would kick it up a notch.

1 week ago

Game. Changer. I used to think slow simmered sauce had to cook for HOURS to get that deep flavor, but 45 minutes was totally enough? My roommate walked in and thought I’d been cooking all afternoon. We had it over spaghetti with some homemade meatballs and it tasted straight out of the little Italian spot I grew up going to in Brooklyn. Will absolutely be my go-to sauce recipe from now on.

5 days ago

Love to hear that, Luna! The quick simmer at a low bubble with the lid slightly ajar is the trick to getting that deep, long-cooked flavor without waiting half the day — so glad you and your roommate enjoyed it!

yesterday

Made this for my post-hike dinner last night after a long trail day, and it hit every single spot. I didn’t even have fresh garlic on hand so I used the jarred minced stuff and it was still chef’s kiss. Super low effort, minimal cleanup, way better than any takeout pasta I’ve ordered in the last year. 10/10 would make again even on days I’m not dead tired from hiking.

2 weeks ago

My kids are SO picky about pasta sauce, they usually turn their noses up at anything that isn’t the neon orange cheese-covered jarred stuff, but they devoured this! I told them it was 'special fancy restaurant sauce' and they asked if we could have it every Tuesday for our weekly family pasta night, even my oldest who hates 'bits' in his sauce loved it (I made sure to dice the onions super fine like the recipe said, total win).

1 week ago

Oh my gosh same! My kids only eat that super sweet jarred sauce, I’ve been scared to try homemade. Did you add any sugar to cut the tomato acidity, or is it not needed with this recipe?

5 days ago

I didn’t add any sugar at all! The slow simmer mellowed out the tomato acidity perfectly, no bitter aftertaste at all. My son who hates tangy food didn’t complain once, I promise it’s kid-approved!

5 days ago

Really great base recipe! I made a big batch on Sunday to portion out for weekday lunches, and it held up really well all week in the fridge. My only note is that I had to simmer it an extra 10 minutes to get it to the thickness I prefer, since I like my sauce to coat the noodles without running all over the plate. Still super tasty, will definitely be using this as my base to add veggies and meat to in the future.

3 days ago

Great tip about adjusting the simmer time for thickness! Everyone has their own preference, so if you like a thicker sauce, leaving it on the heat a little longer with the lid off is the perfect move. So glad it worked for your meal prep rotation!

2 hours ago

Just finished making this for my book club potluck tonight and I could cry it’s so good. I added a half pound of browned Italian sausage like some other reviewers mentioned and it’s *chef’s kiss*. I already know the girls are gonna lose their minds when they try this. Can’t wait to serve it with some garlic bread on the side!

5 minutes ago

Wait the sausage addition sounds incredible! I’m making this for my partner’s birthday dinner next week, I’ll definitely have to throw that in — thanks for the tip!



