
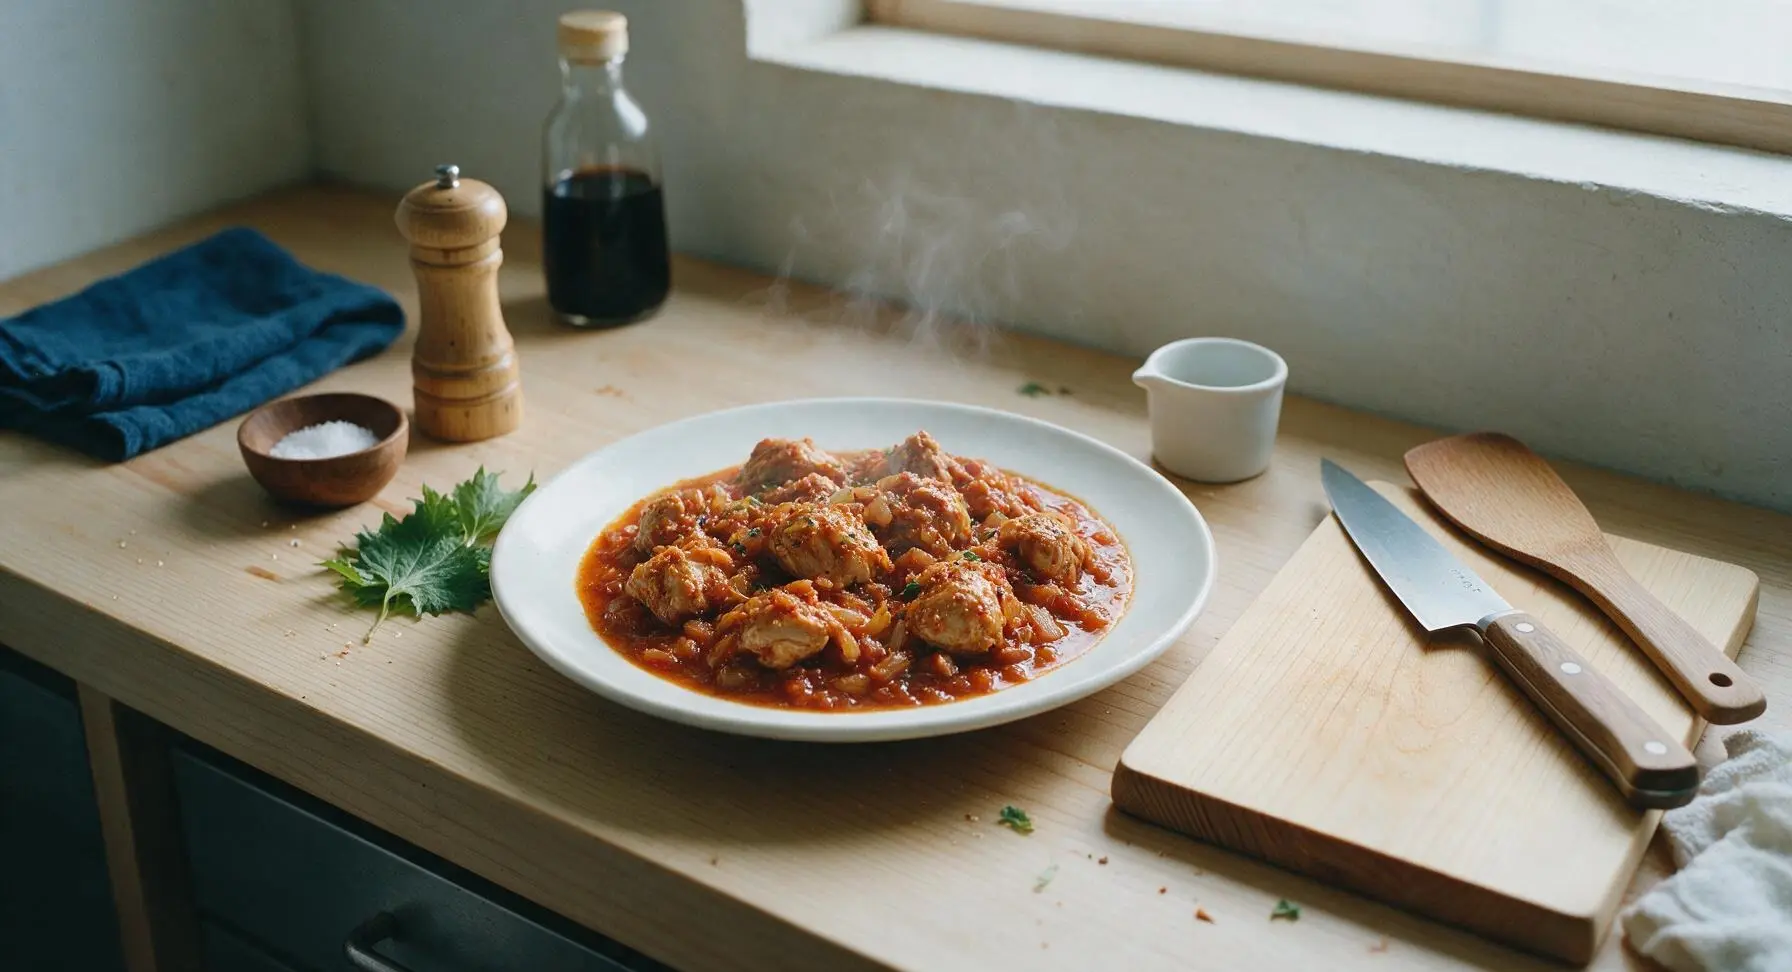
masala chicken

title 1
masala chicken
⏱️ cook time 30 minutes
🍽️ servings 4
⚡ Difficulty easy

intro

Tender chicken pieces simmered in a rich, aromatic tomato-onion gravy layered with warm Indian spices, perfect for pairing with fluffy basmati rice or buttery naan.

Ingredients
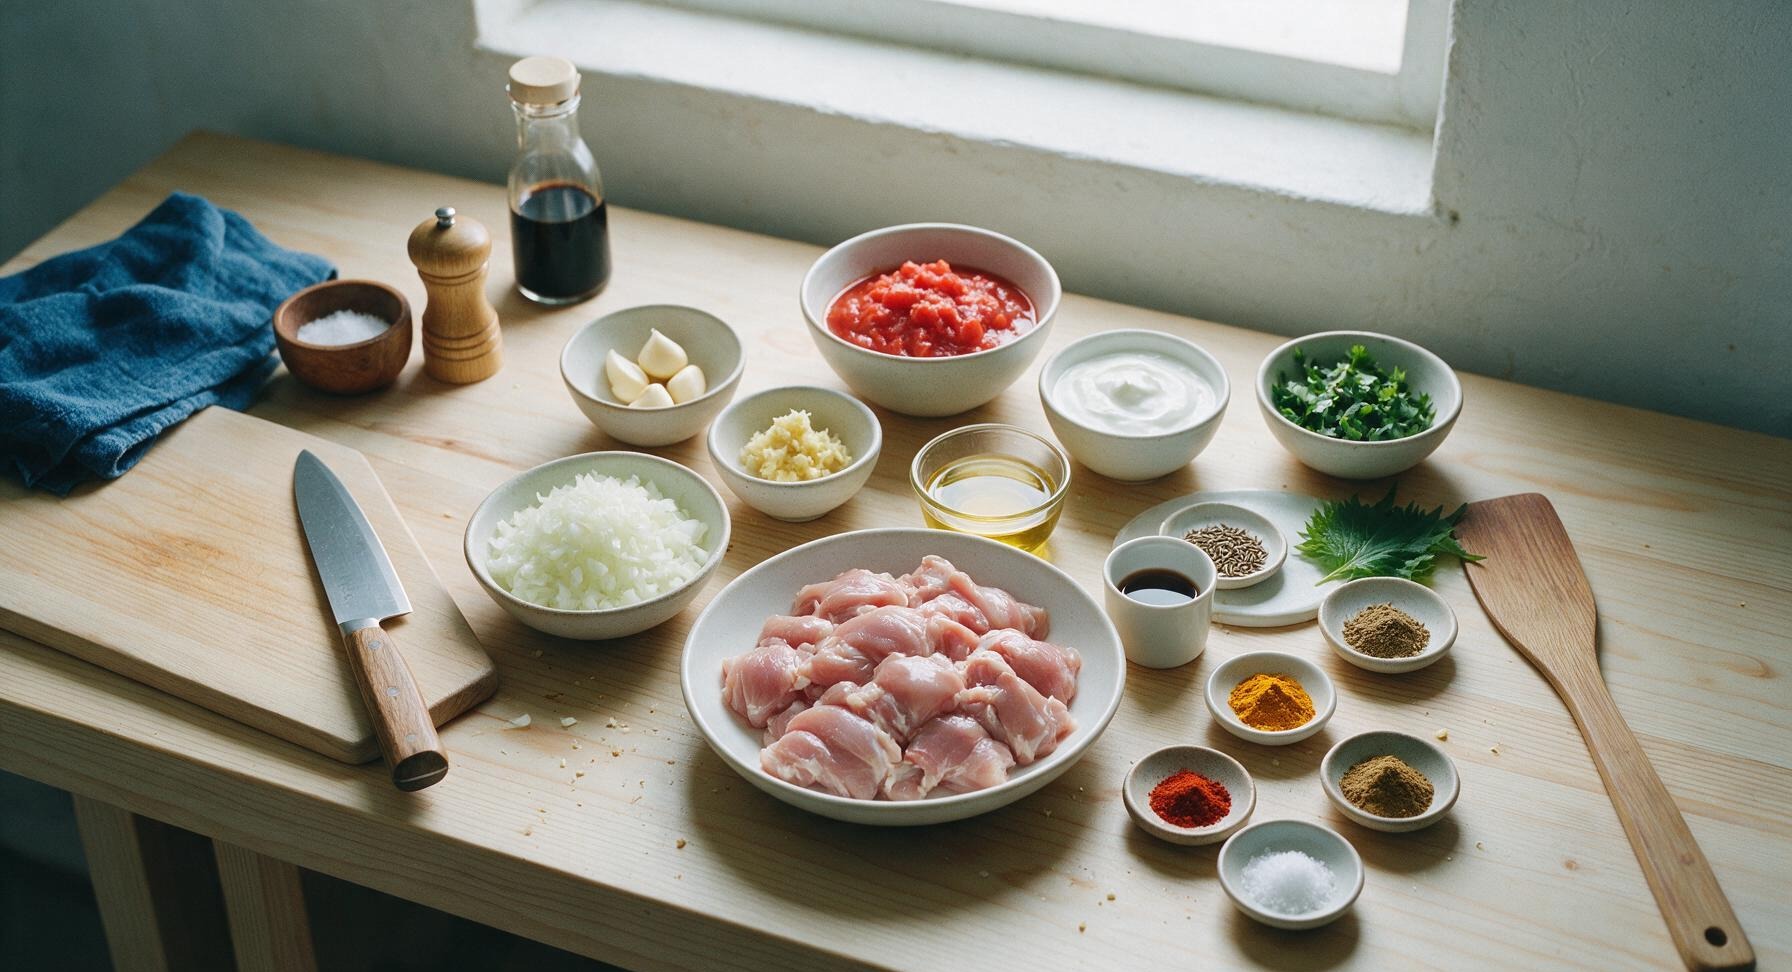
Boneless skinless chicken thighs 600g, cut into 5cm pieces
Yellow onion 2 medium (300g), finely chopped
Garlic cloves 4 large, minced
Fresh ginger 2 tbsp (20g), grated
Crushed tomatoes (no added salt) 400g can
Full-fat plain yogurt 120g
Vegetable oil (or ghee) 2 tbsp
Whole cumin seeds 1 tsp
Ground coriander 2 tsp
Ground turmeric 1/2 tsp
Garam masala 1 tsp
Red chili powder 1/2 tsp (adjust for heat preference)
Kosher salt 1 tsp
Fresh cilantro 1/4 cup, chopped (for garnish)

Steps

1

Prep Chicken and Aromatics

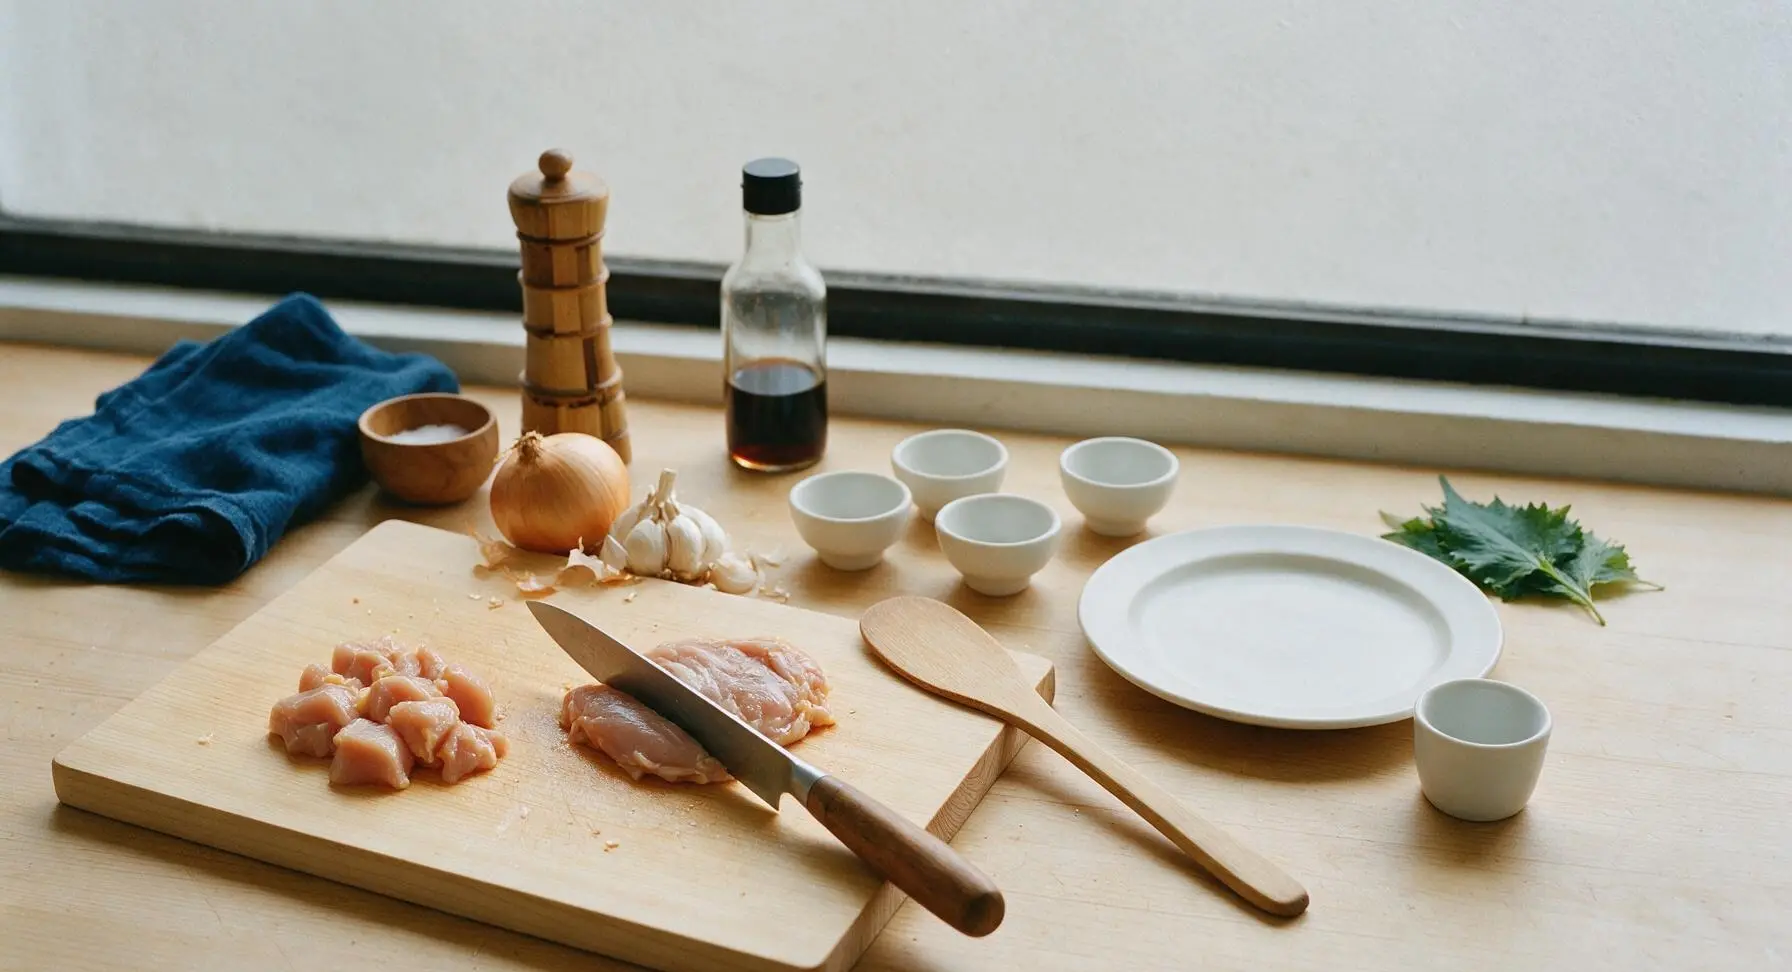
Place the 600g boneless skinless chicken thighs on the light beige cutting board. Use the 8-inch chef knife to trim any excess fat or silver skin, then cut the chicken into uniform 5cm pieces. Transfer cut chicken to a clean bowl, then finely chop the 2 yellow onions, mince the 4 garlic cloves, and grate the ginger on the same cutting board. Keep each aromatic separate for sequential cooking.
Step 1
step1:Prep Chicken and Aromatics
2

Bloom Whole Cumin Seeds

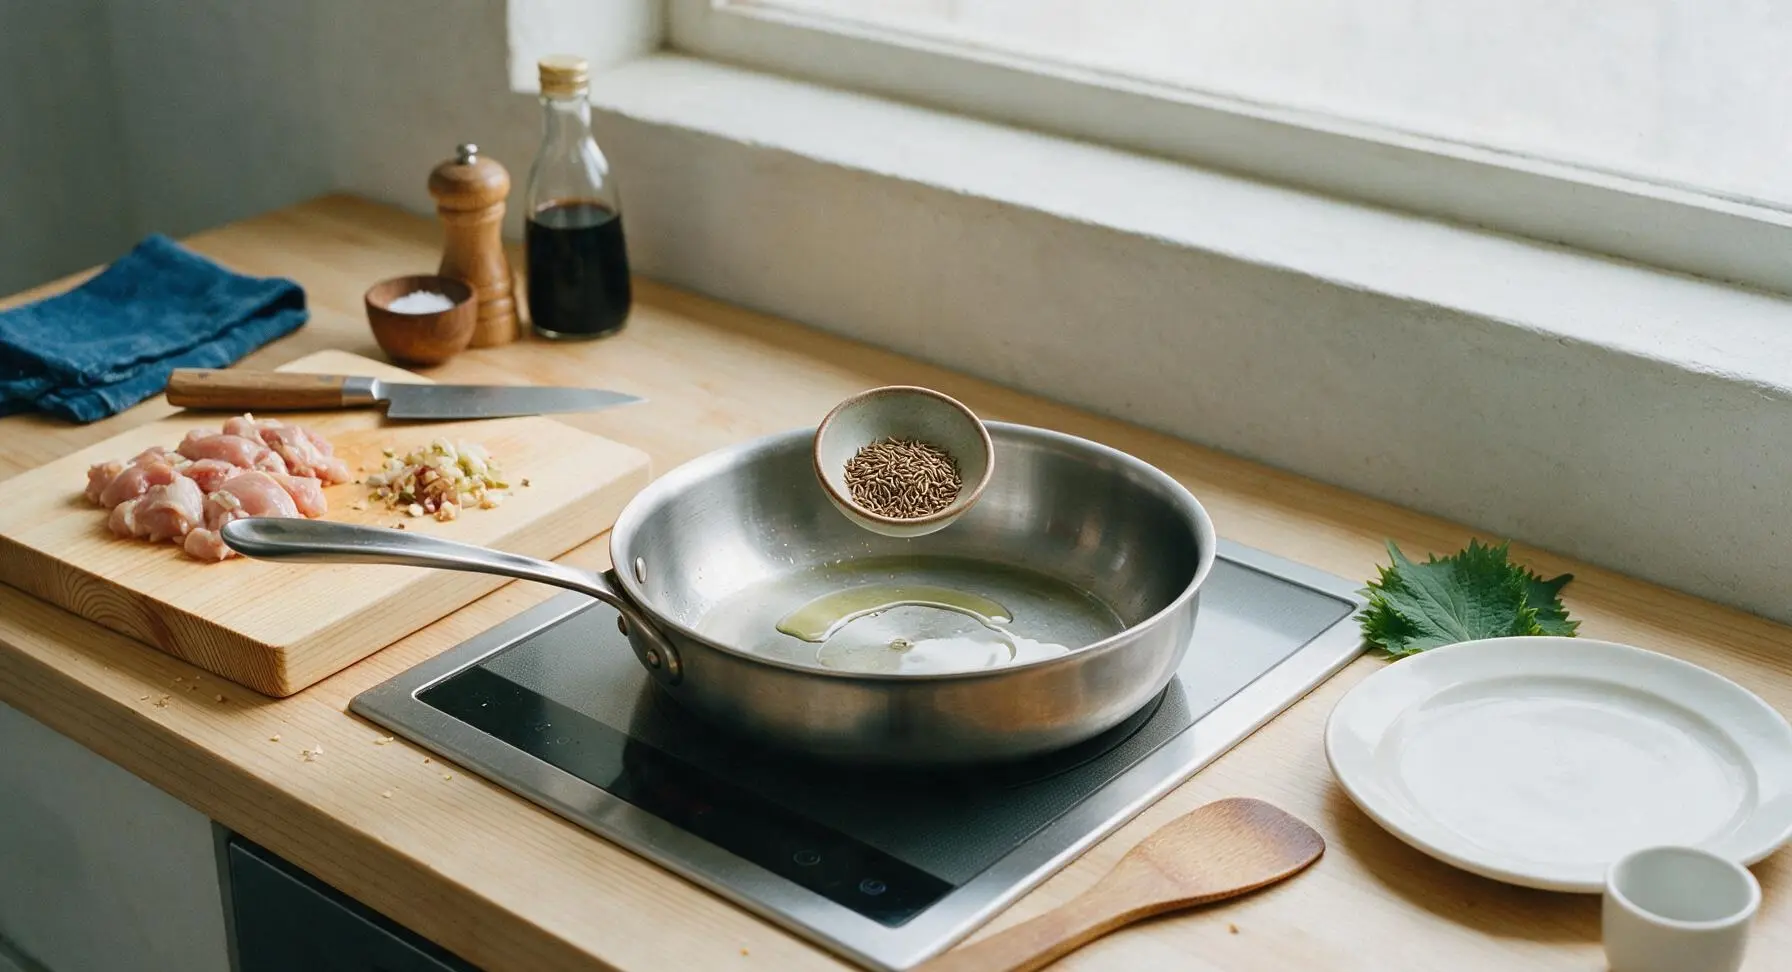
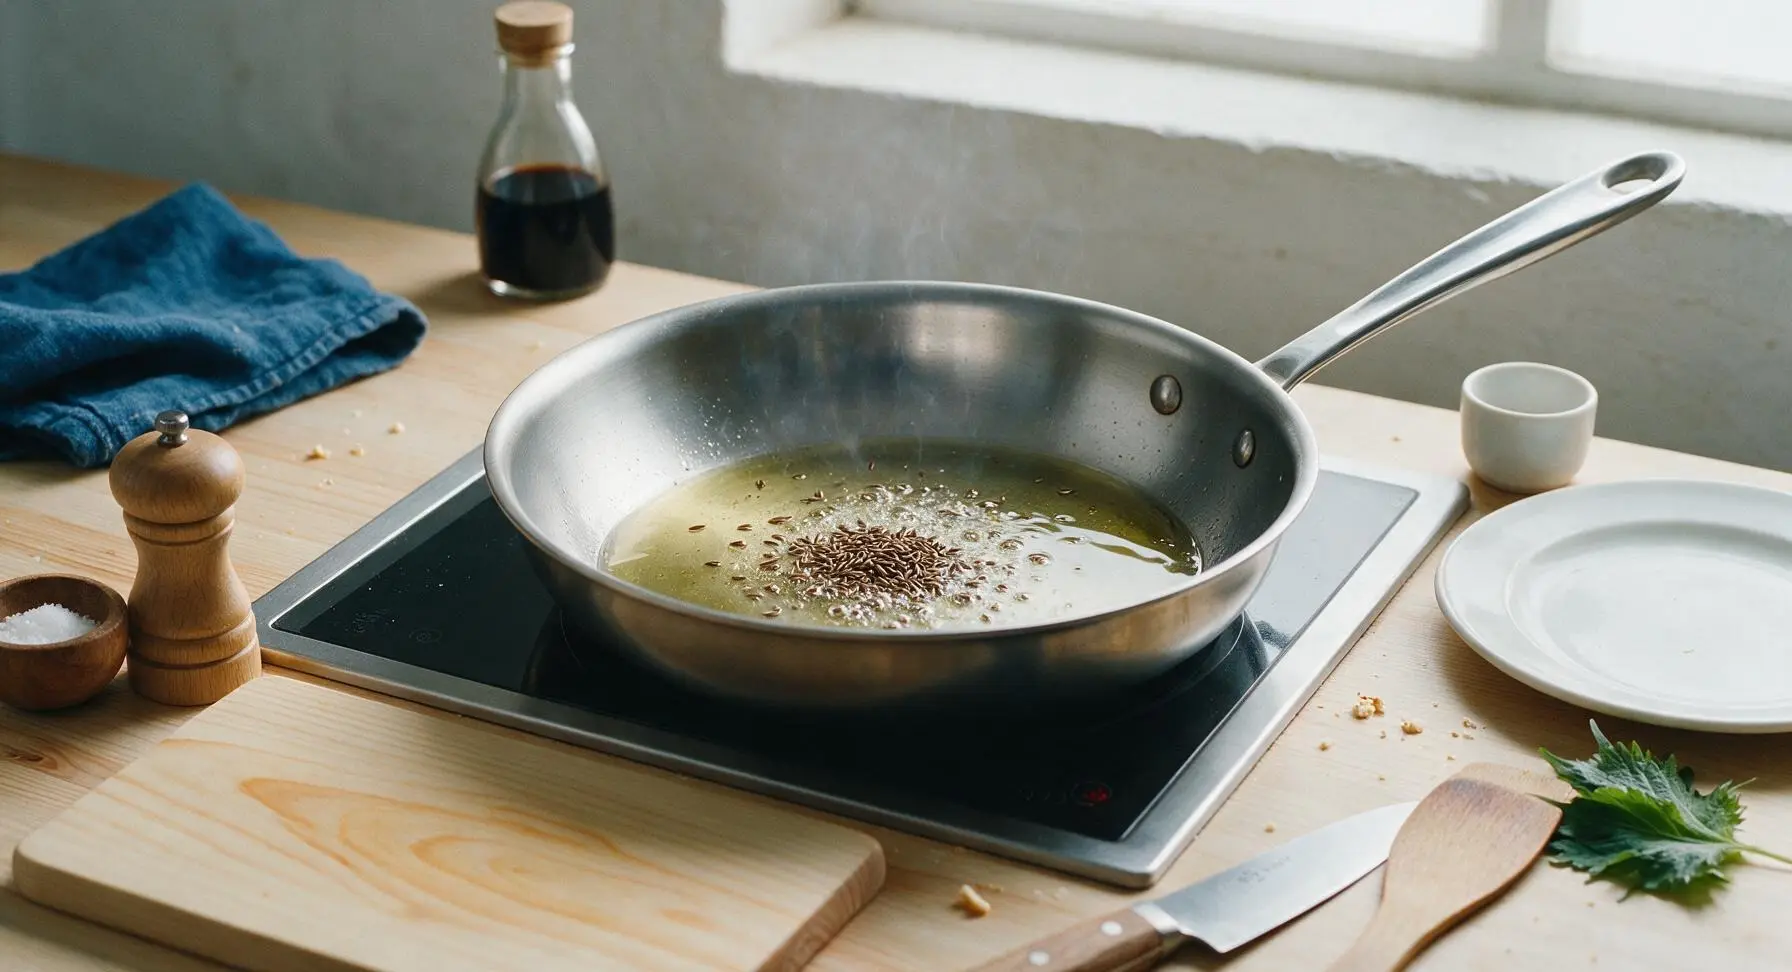
Place the 3-quart stainless steel sauté pan on the induction cooktop over medium heat (160C/320F). Add 2 tbsp vegetable oil (or ghee) and heat for 1 minute until shimmering. Add 1 tsp whole cumin seeds and cook for 30 seconds, until the seeds sizzle, turn a slightly darker brown, and release a nutty aroma. Do not burn the seeds, as this will make the gravy bitter.
Step 2
step2:Bloom Whole Cumin Seeds
Step 2
step2:Bloom Whole Cumin Seeds
3

Sauté Onion Base

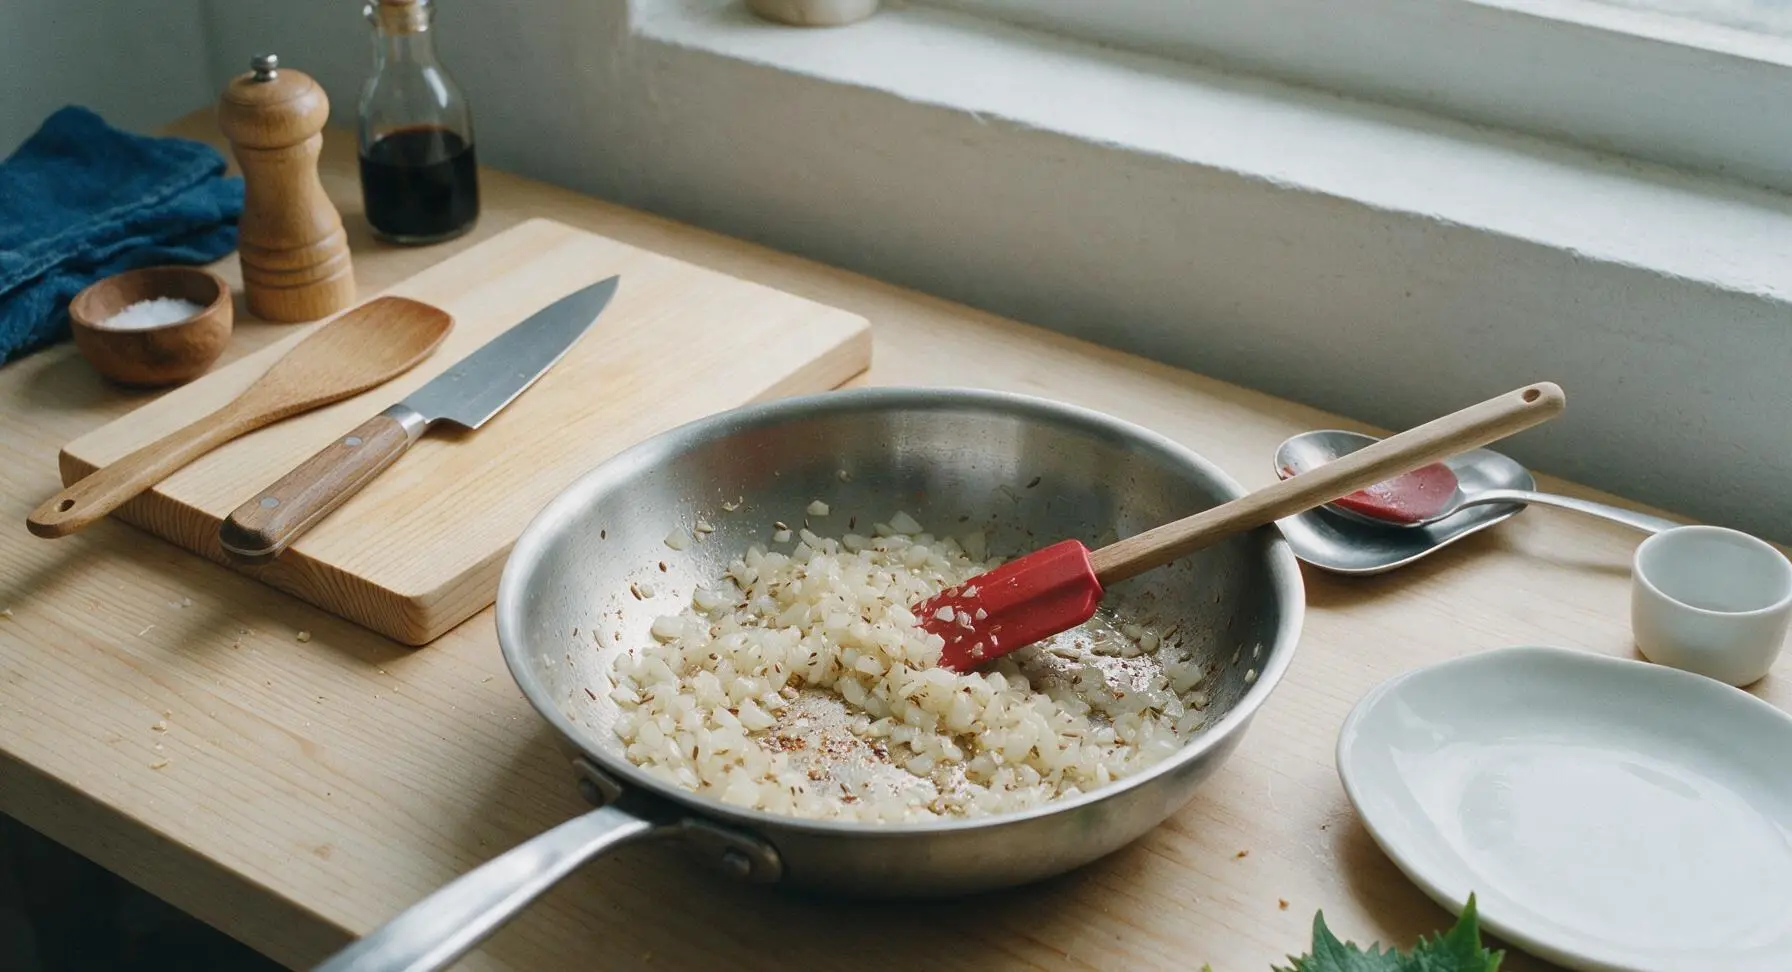
Add the finely chopped yellow onions to the pan with the bloomed cumin. Stir with the silicone spatula to coat onions in oil, then cook for 8-10 minutes over medium heat, stirring occasionally, until the onions turn a deep golden brown and soften completely. If the onions start to stick to the pan bottom, add 1 tbsp of water to deglaze and lift browned bits.
Step 3
step3:Sauté Onion Base
4

Cook Ginger and Garlic

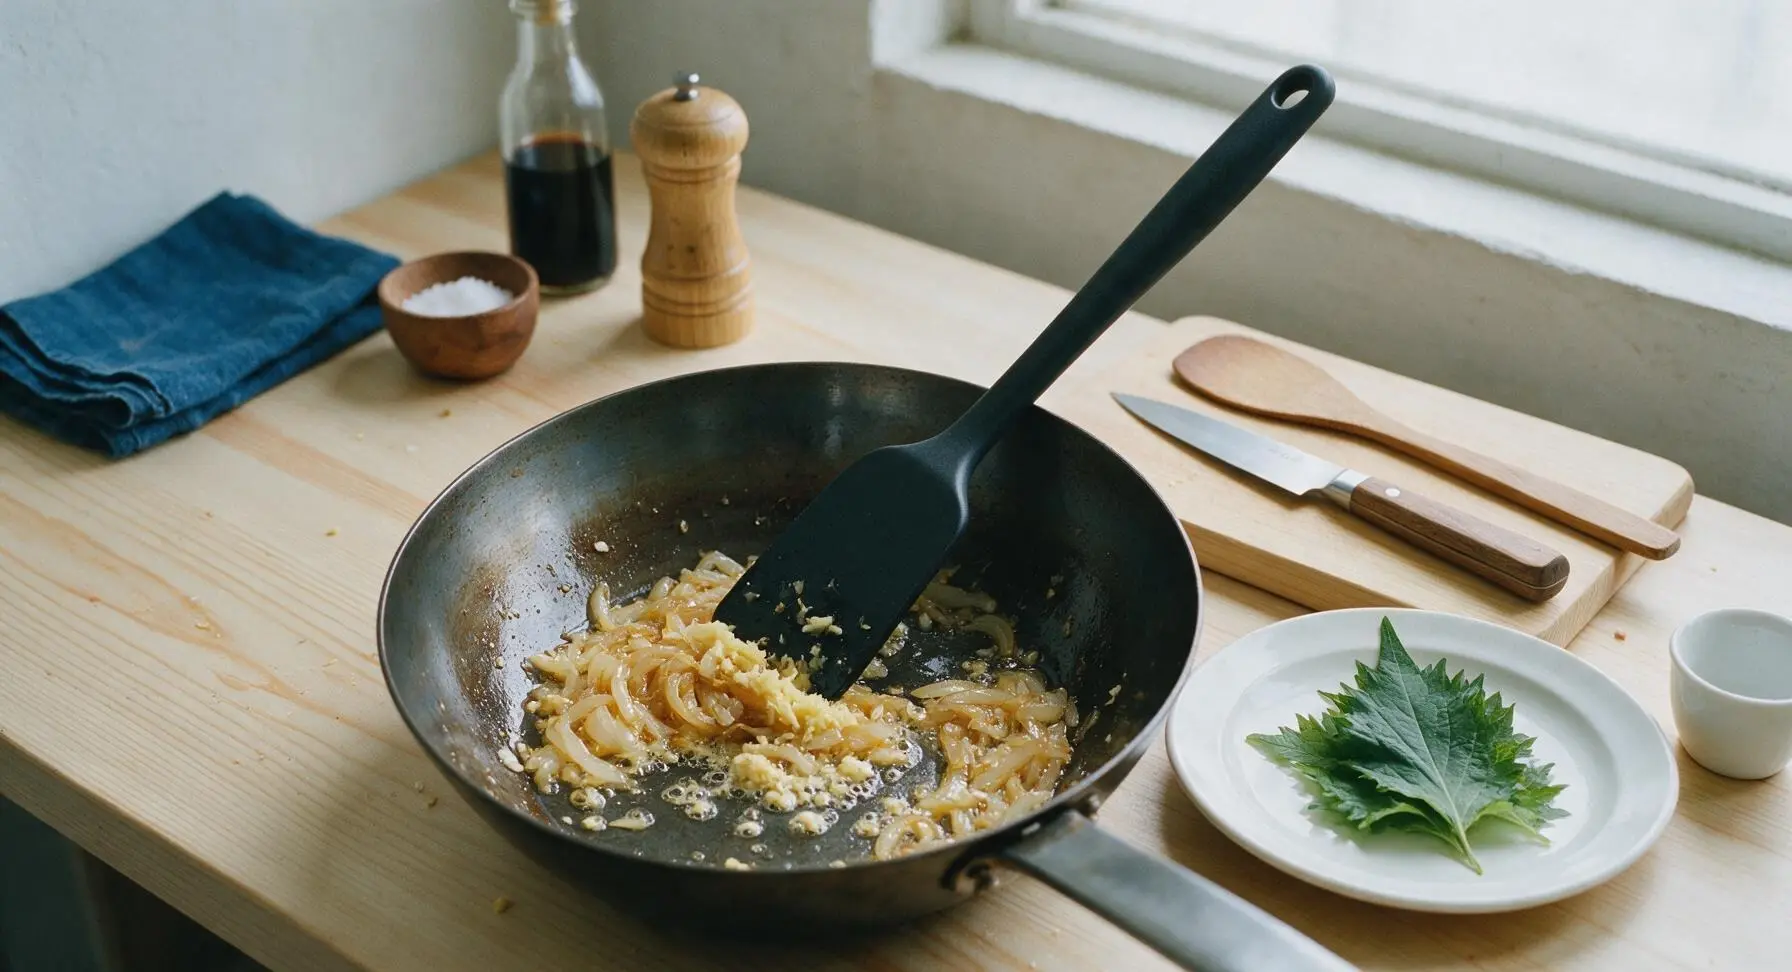
Add the minced garlic and grated ginger to the browned onions, stirring constantly with the spatula for 60 seconds, until the sharp raw smell of garlic fades and a warm, fragrant aroma rises. Be careful not to burn the garlic, as it will turn bitter quickly and ruin the gravy flavor.
Step 4
step4:Cook Ginger and Garlic
5

Toast Ground Spices

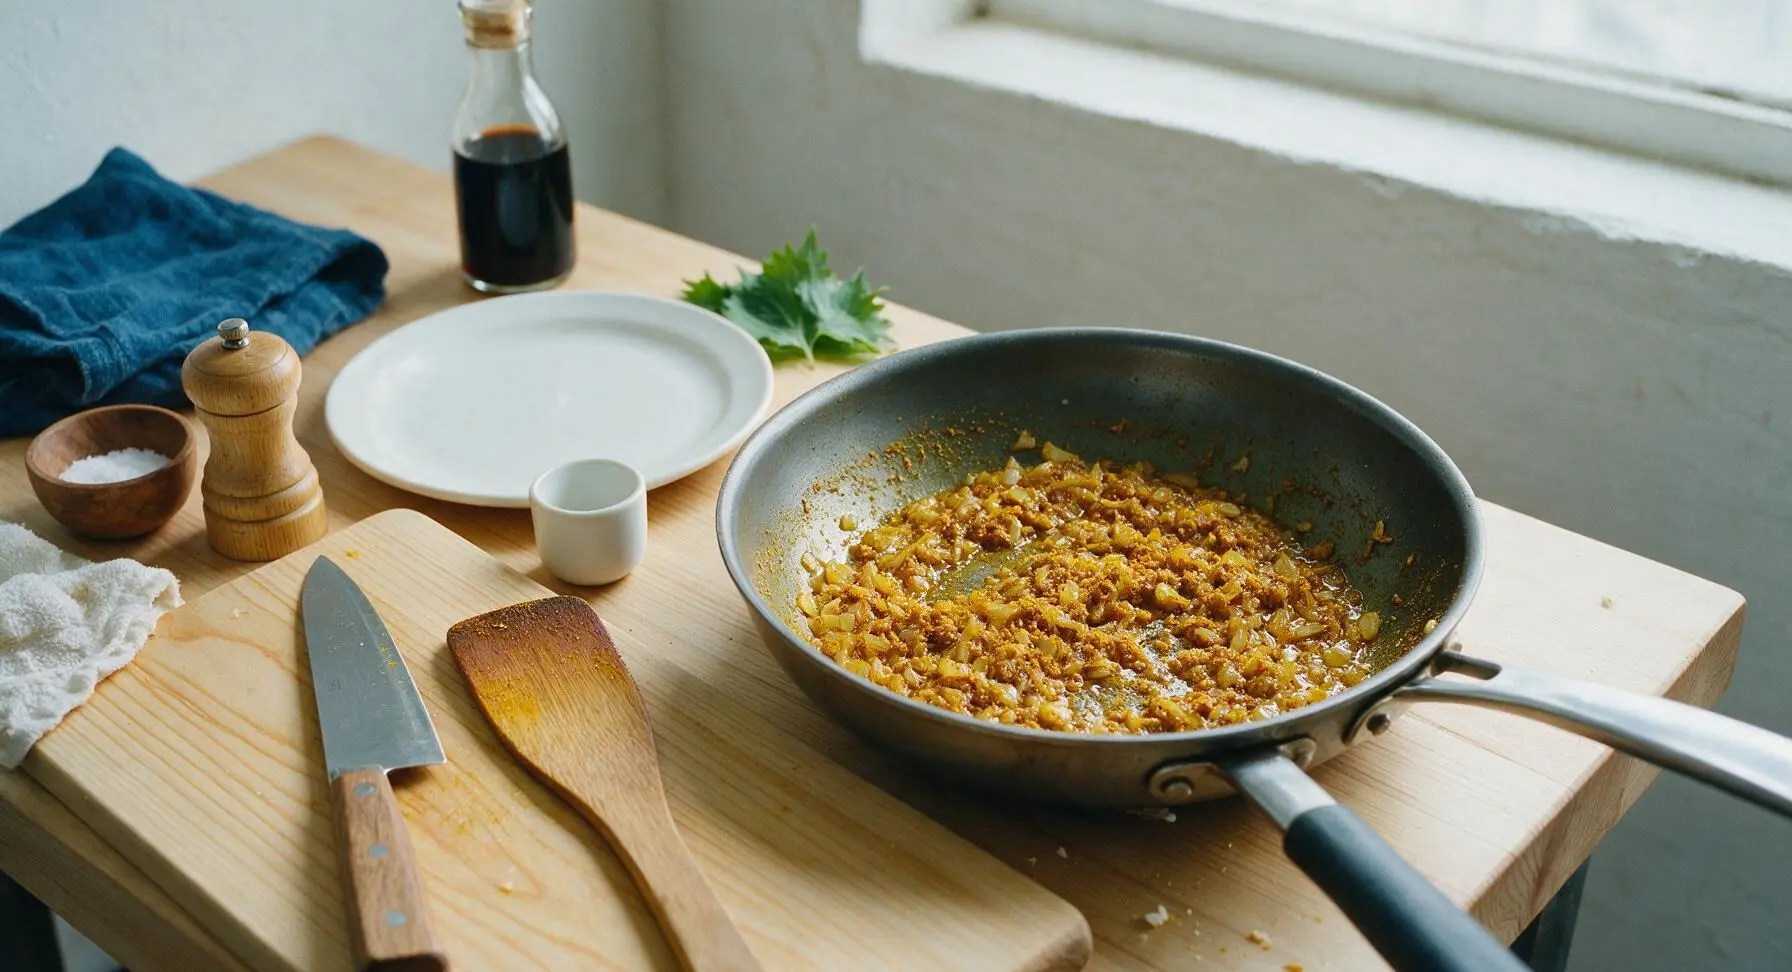
Lower the heat to medium-low (140C/285F). Add 2 tsp ground coriander, 1/2 tsp ground turmeric, 1/2 tsp red chili powder, and 1 tsp kosher salt to the pan. Stir constantly for 30 seconds to toast the ground spices in the oil, until the spices darken slightly and release a rich, deep aroma. This toasting step is critical to develop full, rounded spice flavor instead of a flat, raw spice taste.
Step 5
step5:Toast Ground Spices
6

Simmer Tomato Gravy

Pour the 400g can of crushed tomatoes into the spiced onion mixture, stirring to fully combine. Bring to a gentle simmer, then cook for 8 minutes over medium-low heat, stirring occasionally, until the tomato softens, the oil separates from the gravy at the edges of the pan, and the sharp raw tomato taste is completely gone.
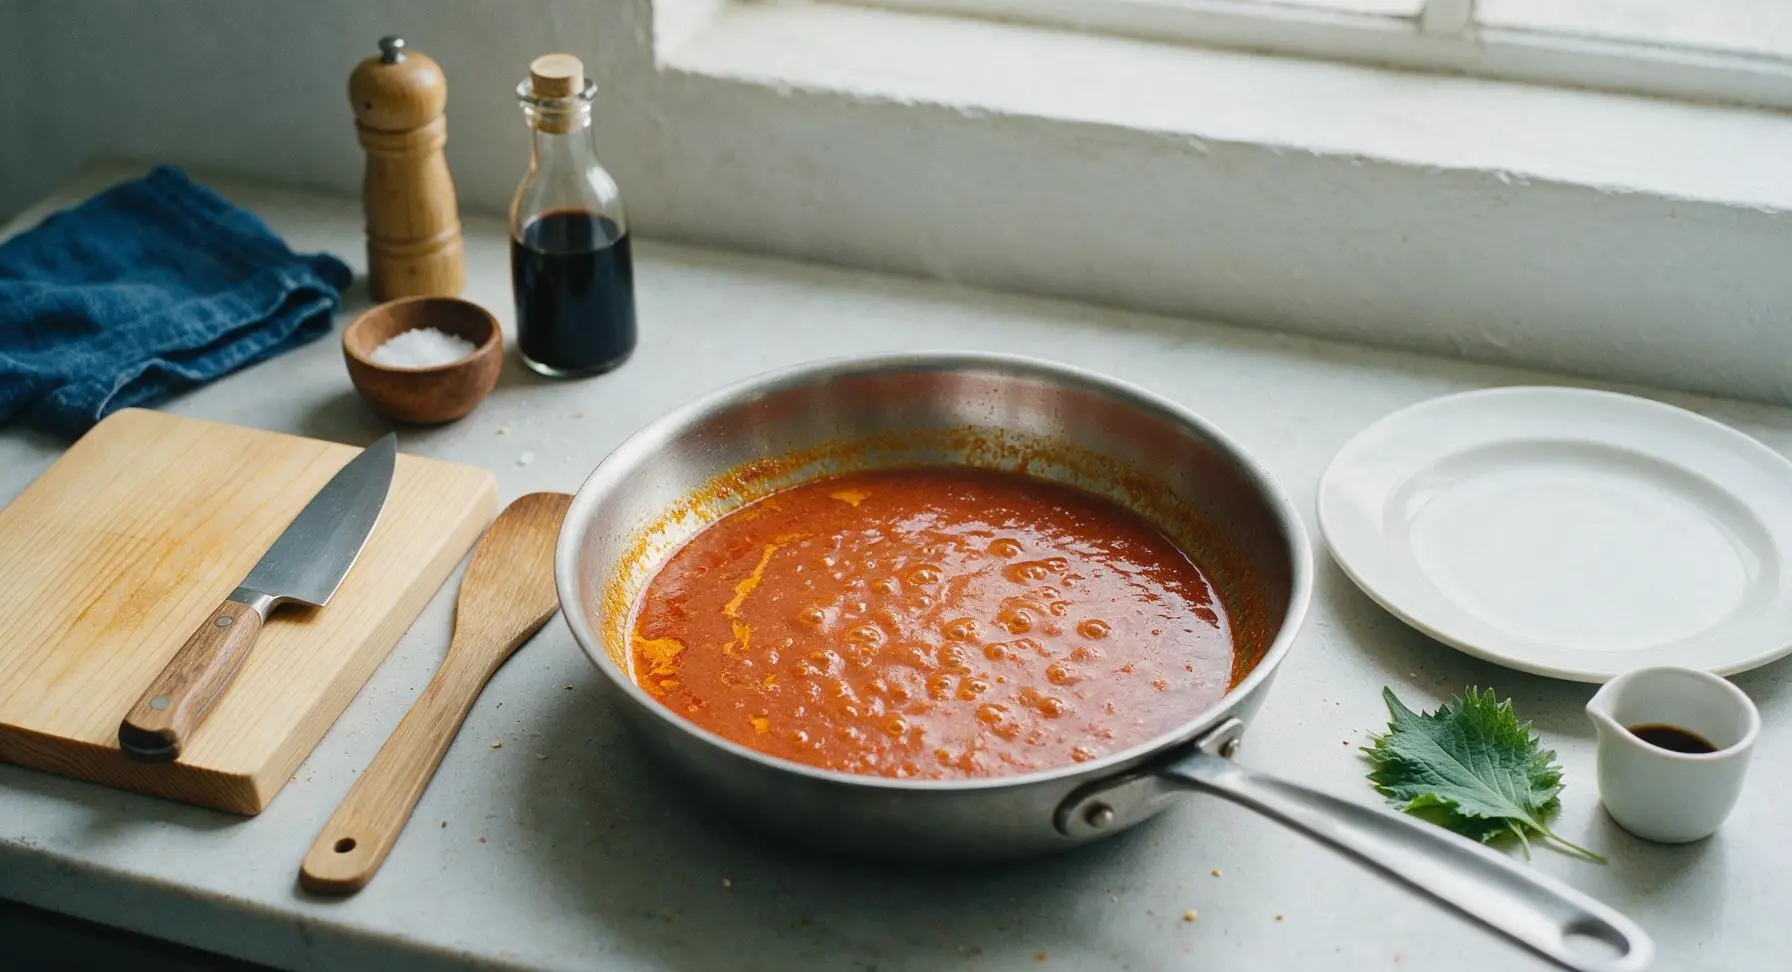
Step 6
step6:Simmer Tomato Gravy
7

Add Chicken to Gravy

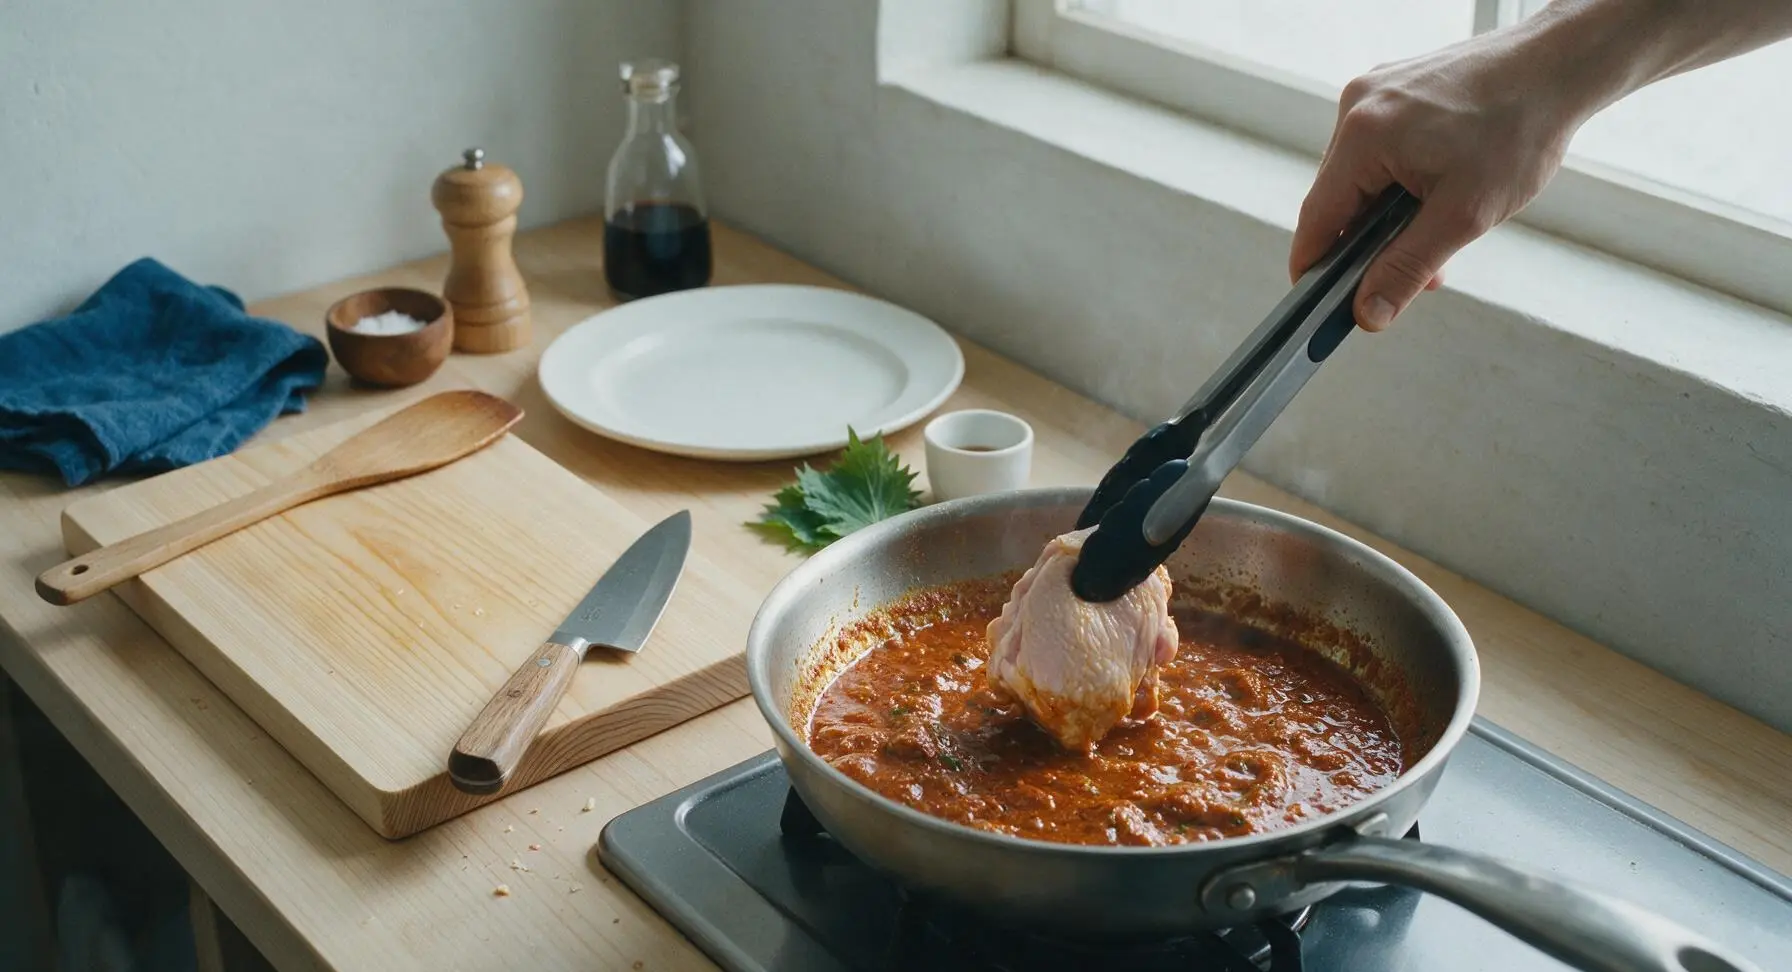
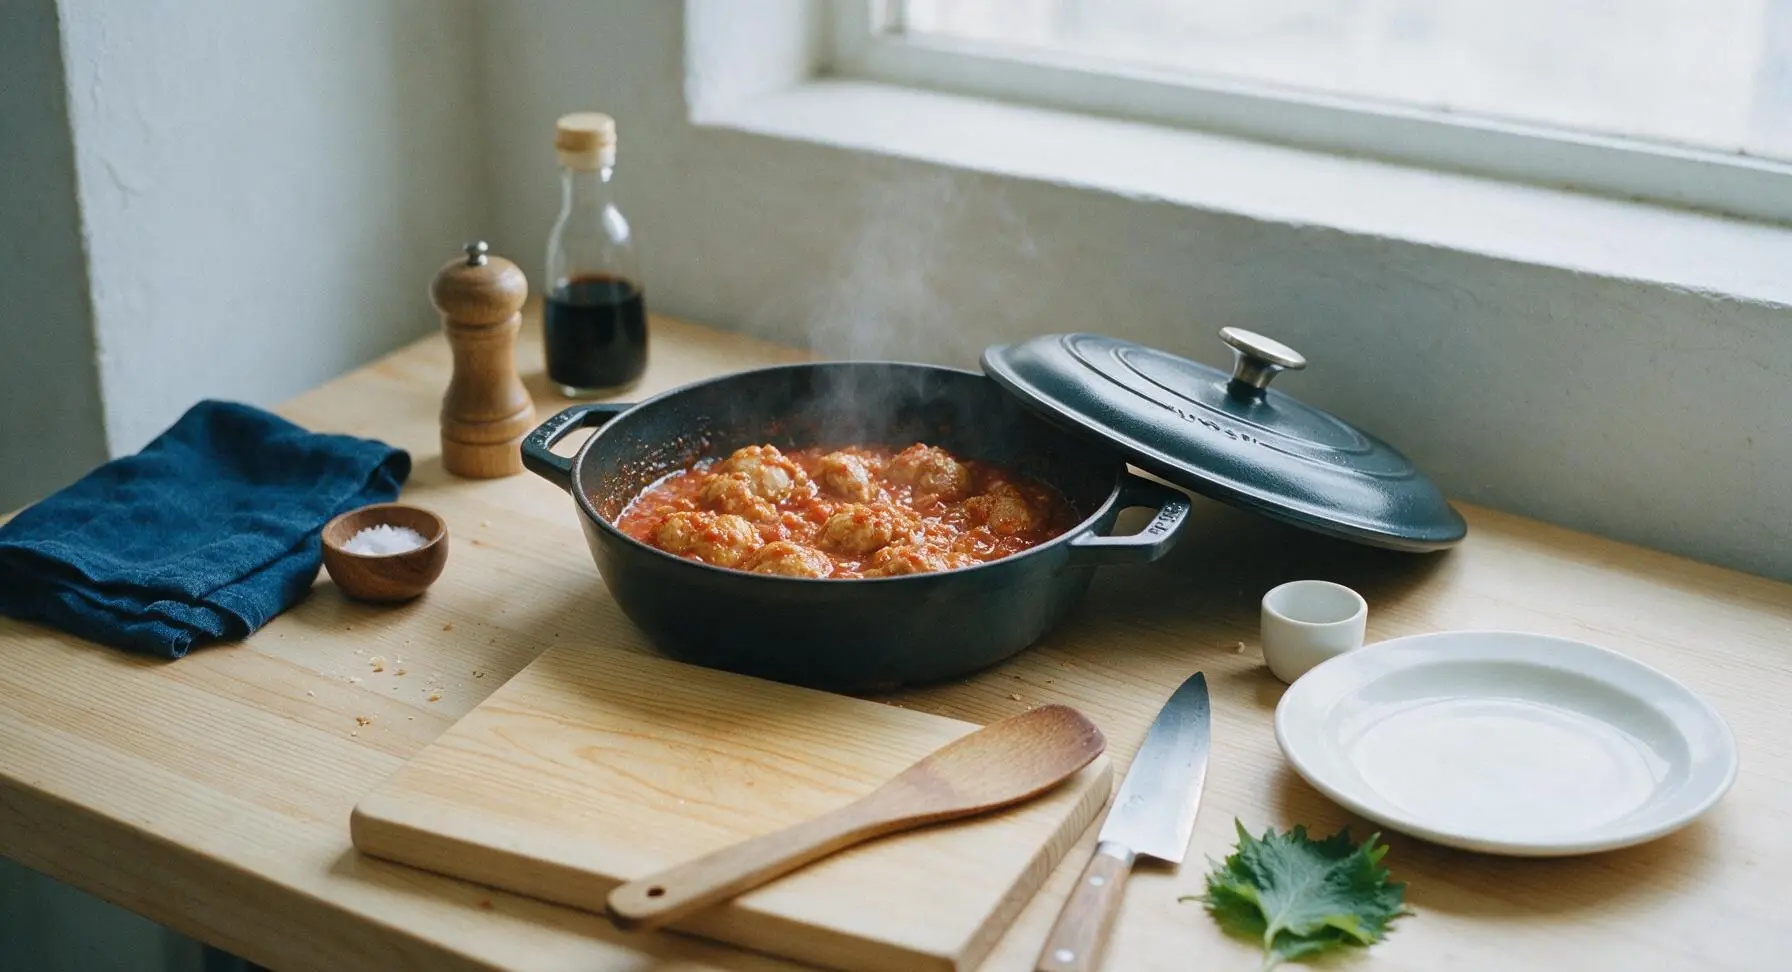
Add the cut chicken pieces to the simmering gravy, using the silicone-tipped tongs to turn each piece and coat fully in the spiced tomato mixture. Increase heat to medium, bring back to a gentle simmer, then cover the pan and cook for 10 minutes, stirring once halfway through, until the chicken reaches an internal temperature of 74C/165F and is tender when pierced with a fork.
Step 7
step7:Add Chicken to Gravy
Step 7
step7:Add Chicken to Gravy
8

Finish Gravy and Season

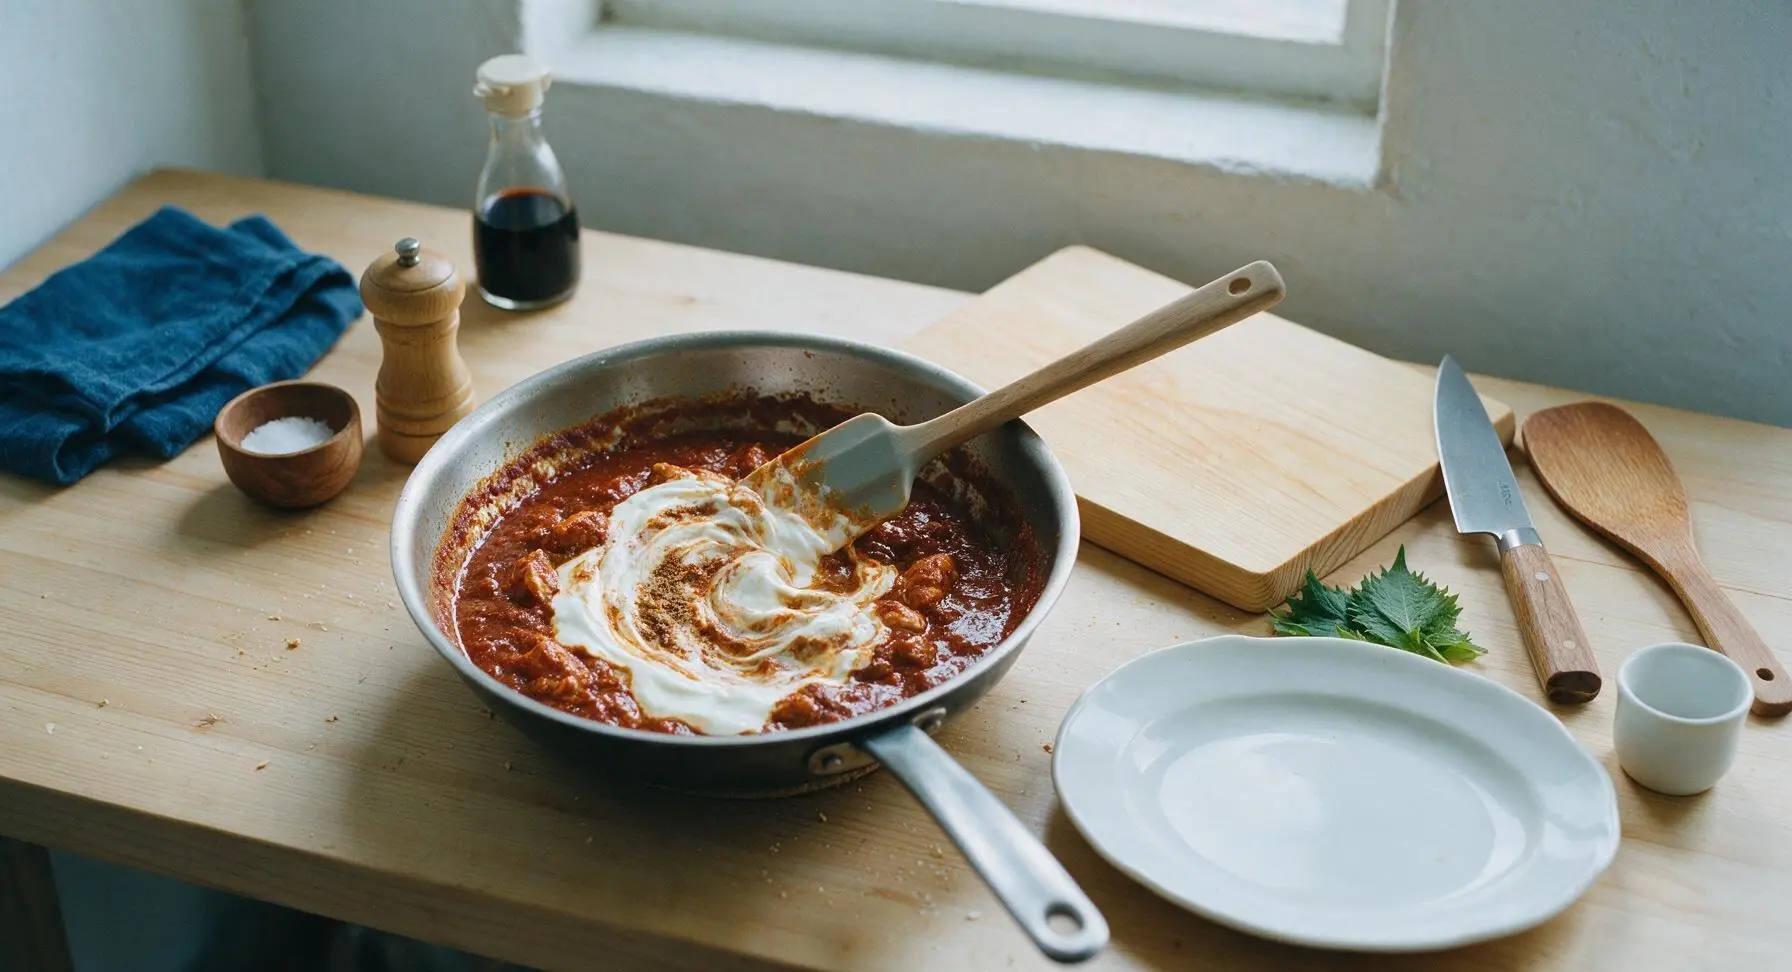
Turn the heat to low. Stir in 120g full-fat plain yogurt and 1 tsp garam masala, stirring continuously for 1 minute to fully incorporate the yogurt without curdling. Taste and adjust salt if needed. Simmer uncovered for 2 more minutes until the gravy is thick enough to coat the back of the silicone spatula.
Step 8
step8:Finish Gravy and Season
9

Garnish and Rest

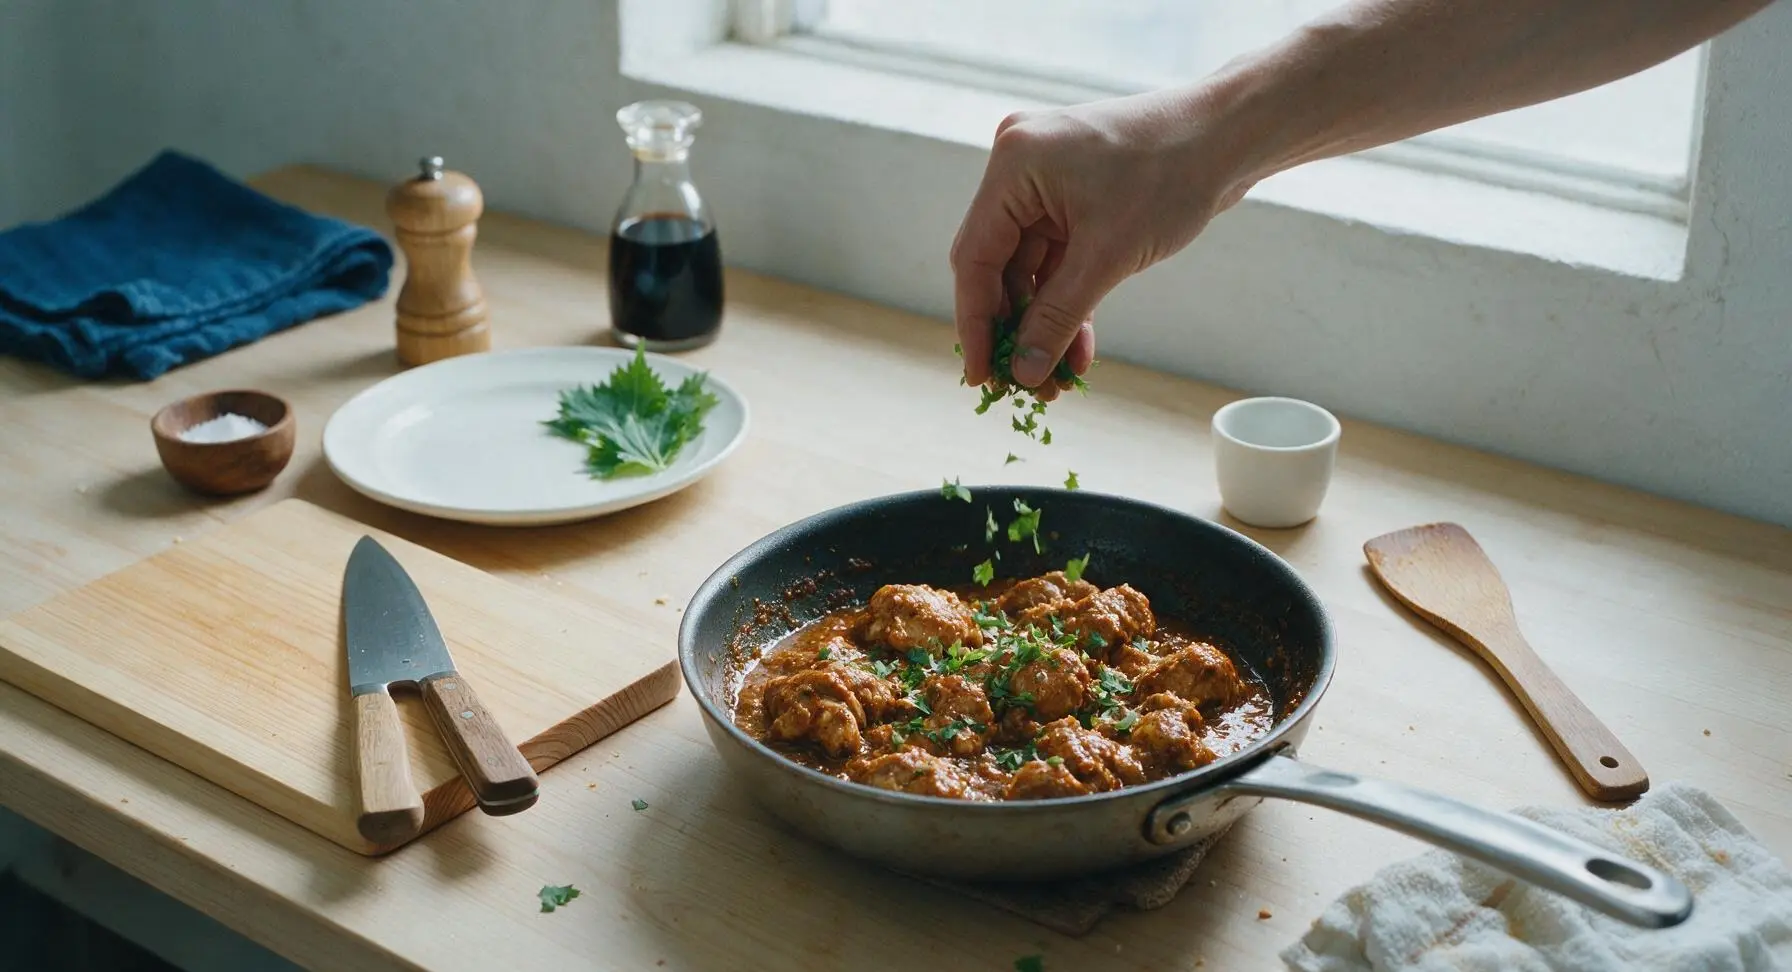
Turn off the heat. Sprinkle half of the chopped fresh cilantro over the masala chicken, then let the dish rest for 3 minutes to allow the flavors to meld before serving. Reserve the remaining cilantro for garnishing plated portions.
Step 9
step9:Garnish and Rest

Tips

1.Opt for boneless skinless chicken thighs over chicken breast: thigh meat has a slightly higher fat content that stays juicy and tender during simmering, while lean breast meat will quickly dry out and become tough in the thick spiced gravy.
2.Do not skip blooming the whole spices and toasting ground spices in hot oil: the key flavor compounds in Indian spices are fat-soluble, so heating them in oil before adding wet ingredients creates a far deeper, more aromatic gravy than stirring spices directly into tomato sauce.
3.Use full-fat yogurt and stir constantly when adding it to the hot gravy: low-fat yogurt has a higher water content that is prone to curdling, while constant stirring over low heat ensures the yogurt emulsifies smoothly into the gravy for a creamy, non-grainy texture.


✨ You May Also Like

Main Course
🍜 United Kingdom

A showstopping classic of tender seared beef, savory mushroom duxelles, and crisp prosciutto wrapped in flaky golden puff pastry, baked to juicy perfection.

⏱️ 2 hours 1Main Course ★ 4.7
Main Course
🍜 India

Tender charred marinated chicken simmered in a rich, spiced creamy tomato sauce, this iconic Anglo-Indian curry pairs perfectly with basmati rice or warm naan.

⏱️ 50 minuteMain Course ★ 4.6
Main Course
🍜 Thailand

Classic tangy, sweet, and savory Thai stir-fried rice noodles with shrimp, tofu, and crunchy garnishes, balancing all five core Thai flavor profiles.

⏱️ 30 minuteMain Course ★ 4.5
Main Course
🍜 United Kingdom

Crispy golden beer-battered cod and fluffy double-fried chips, served with tangy tartar sauce and malt vinegar: the timeless, beloved British pub comfort classic.

⏱️ 45 minuteMain Course ★ 4.7
Main Course
🍜 Mexico

Smoky, chile-marinated pork tacos with caramelized pineapple, fresh cilantro, and lime: a beloved classic Mexican street food perfect for casual summer gatherings.

⏱️ 1 hour 45Main Course ★ 4.8
Main Course
🍜 United States

Crunchy Fritos corn chips layered with savory beef chili and melted cheddar, topped with cool, zesty fixings for a beloved, cozy Tex-Mex comfort food.

⏱️ 35 minuteMain Course ★ 4.8

masala chicken:Frequently Asked Questions

1.Why does this recipe use boneless skinless chicken thighs instead of chicken breast? ▾
Boneless, skinless chicken thighs have a mild, rich fat content that keeps them tender and juicy through the 20-25 minute simmer, instead of turning dry and rubbery like lean chicken breast. They also absorb warm spice notes far better. If you swap for breast, cut it into 1.5-inch chunks and reduce simmer time by 8-10 minutes to avoid toughness.
2.Can I substitute regular salted crushed tomatoes or diced tomatoes for the no-salt crushed tomatoes listed? ▾
You absolutely can, though no-salt crushed tomatoes give you full control over sodium levels for a perfectly balanced gravy. If using diced tomatoes, give them a quick blitz in a blender or crush by hand first for a smooth, non-chunky texture. If using salted canned tomatoes, wait to add extra salt until the end to avoid over-seasoning.
3.How fine should I chop the yellow onion for the gravy base? ▾
Aim for a fine, ¼-inch dice for your yellow onion, since it will cook down and soften into the gravy over medium heat. If you prefer ultra-silky restaurant-style gravy, you can blend sautéed onion, ginger, and garlic into a smooth paste before adding tomatoes and spices, letting the mix cool slightly first to avoid hot splatters.
4.Do I have to use fresh ginger and garlic, or can I use pre-minced jarred versions? ▾
Fresh ginger and garlic deliver the brightest, most aromatic base for this masala, but jarred pre-minced versions work as a time-saver in a pinch. Use 1 tablespoon of pre-minced garlic and 1.5 teaspoons of pre-minced ginger for every 3 garlic cloves and 1-inch fresh ginger knob called for, skipping versions with added preservatives that leave a bitter aftertaste.
5.How do I get that rich, deep restaurant-style gravy color without artificial food coloring? ▾
That signature deep, warm reddish-brown color comes from slow-sautéing finely diced yellow onion over medium-low heat until it turns deep golden (not burnt!) before adding ginger, garlic, and spices. Cooking crushed tomatoes for 5-7 minutes until they darken and lose their raw, tinny canned taste also builds that rich, natural color with no additives.
6.How long should I simmer the chicken to make sure it’s tender but not overcooked? ▾
Once you add seared chicken thigh chunks to the tomato-onion gravy, bring the mix to a gentle bubble, then reduce heat to low, cover, and simmer for 20-25 minutes. Stir every 5 minutes to prevent gravy from sticking to the pan bottom. The chicken is done when it pulls apart easily with a fork and hits a 165°F internal temperature.
7.Can I make this masala chicken ahead of time for meal prep? ▾
This masala chicken actually tastes better the next day, as spices meld deeper into the chicken and gravy as it chills. Store fully cooled chicken in an airtight container in the fridge for up to 4 days, or freeze for up to 3 months. Reheat gently on the stovetop over low heat, adding a splash of water if gravy thickens too much.
8.What’s the best way to serve this North Indian masala chicken? ▾
This rich, spiced gravy pairs perfectly with fluffy steamed basmati rice to soak up every bit of sauce, or warm buttery naan for scooping. You can also serve it alongside cooling cucumber raita, quick pickled onions, or a simple crisp green salad to cut through the gravy’s richness for a balanced, satisfying meal.
9.My gravy turned out too thin—how do I thicken it without ruining the flavor? ▾
If your gravy is runny after simmering, remove the lid, turn heat to medium-low, and let it cook uncovered for 5-8 minutes, stirring occasionally, to let excess water evaporate. Skip cornstarch or flour, which dull bright spice flavors; slow reduction concentrates the tomato and onion notes for a richer, more well-rounded gravy.
10.Can I make this recipe with bone-in chicken instead of boneless thighs? ▾
You can absolutely use bone-in, skin-on chicken thighs or drumsticks if you prefer, just adjust the cook time. Sear skin-on pieces first until the skin is crispy, then simmer in the gravy for 30-35 minutes until chicken is cooked through and pulls easily from the bone. The bone will add extra savoriness to the finished gravy.
11.Why does my gravy taste bitter, and how can I fix it? ▾
Bitter gravy almost always comes from burning garlic, ginger, or ground spices when sautéing, or from undercooked canned tomatoes. To fix it, stir in a tiny pinch of sugar, a tablespoon of heavy cream, or a squeeze of fresh lemon juice to balance bitterness, and cook spices only 30-60 seconds until fragrant, not dark or smoking.
12.Do I need to marinate the chicken first for this recipe? ▾
You don’t need a long marinade for this home-style recipe, thanks to juicy chicken thighs and a long, gentle simmer in flavorful gravy. For extra depth, you can toss chicken chunks with a pinch of salt, turmeric, and a teaspoon of ginger-garlic paste 15-20 minutes before cooking, but this step is totally optional for quick weeknight meals.
13.Can I adapt this recipe to be dairy-free or vegan? ▾
This recipe is naturally dairy-free as written, as long as you skip optional garnishes like butter or cream. To make a fully vegan version, swap the boneless chicken thighs for 1.5-inch chunks of pressed firm tofu, cauliflower florets, or drained chickpeas, and simmer for 10-12 minutes until add-ins are tender and coated in spiced gravy.
14.What core spices do I need for authentic North Indian masala flavor, without buying a huge specialty spice set? ▾
You don’t need a dozen rare spices for great home-style masala chicken. The core warm spices you’ll need are ground cumin, ground coriander, turmeric, garam masala, and a pinch of red chili powder for heat. Toast them briefly in the pan after sautéing aromatics to unlock their full, aromatic flavor before adding tomatoes.
15.My chicken turned out tough even though I used thighs—what did I do wrong? ▾
Tough chicken thighs almost always come from cooking the gravy at too high a rolling boil, rather than a gentle low simmer, or adding chicken before the gravy base is fully cooked. High heat makes chicken muscle fibers seize up and turn chewy. Next time, keep heat low once you add chicken, maintaining a soft, steady bubble as it cooks.

Comments (12)

2 days ago

OMG this masala chicken is such a weeknight win! 30 minutes total is no joke, I threw it together after soccer practice last night and my kids devoured it, even the picky one who turns his nose up at anything with 'spice' in the name. Served it with rice and roasted broccoli, zero leftovers. SO good!

1 week ago

Game changer for my Sunday meal prep! I made a double batch on Sunday, portioned it out with basmati rice, and it held up perfectly all week for work lunches. Not too heavy, the spice level is totally adjustable, even my coworker who hates spicy food asked for the recipe when he smelled it heating up in the break room.

5 days ago

Made this for our neighborhood potluck last weekend and people were lined up for seconds! I was worried it would be too complicated since I don’t cook Indian food often, but the easy steps were totally foolproof. Will 100% be adding this to my regular rotation.

30 minutes ago

Super easy to make in my tiny dorm kitchen with basic equipment! I didn’t have all the exact spices so I used a pre-mixed garam masala I had lying around and it still slapped. Way better than takeout, and way cheaper too.

2 hours ago

Quick question before I make this for date night tomorrow! How spicy is the recipe as written? I love loads of heat but my partner can only handle really mild flavors, I don’t want to make something he can’t eat.

1 hour ago

Great question! The base recipe is mild-medium as written, totally approachable for folks who don’t love super spicy food. If you want extra heat for your portion, just set aside your partner’s serving first, then stir in extra red chili powder or a chopped fresh green chili to your half — easy fix so everyone leaves dinner happy!

1 week ago

Made this for our weekly Sunday family dinner and everyone absolutely raved! My college-aged grandson even asked me to text him the recipe so he can make it for his roommates. The only small tweak I made was tossing in a handful of frozen peas right at the end, and it worked perfectly with the masala sauce.

5 days ago

Adding peas sounds like such a good call! My kids beg for peas in every saucy chicken dish, I’m definitely stealing that tweak when I make this later this week.

yesterday

That 30 minute cook time is no exaggeration! I got home late from a work meeting last night, threw this together, and had it on the table in 28 minutes (yes, I timed it). My husband fully thought I picked up takeout from our favorite local Indian spot until I told him I made it. Total home run.

yesterday

That makes us so happy to hear! There’s nothing better than a quick homemade meal that tastes just as good as restaurant takeout, especially on busy weeknights. So glad it was a hit!

2 weeks ago

I was on the hunt for a high-protein, flavorful recipe to make after long weekend trail days, and this checks every box! It’s filling, packed with flavor, and doesn’t leave me feeling sluggish the way super creamy takeout curries usually do. I used boneless skinless chicken thighs instead of breast because that’s what I had in the fridge, and it came out so juicy.

1 week ago

Thanks for the chicken thigh tip! I always think thighs turn out juicier than breast but was worried it would mess up the cook time, so I’m glad to know that swap works perfectly here.

2 days ago

Made this with my 10 year old daughter last night for our weekly daddy-daughter cooking night, and it was so easy she was able to do most of the steps herself! She was so proud to serve it to my wife at dinner, and it tasted absolutely amazing. Such a great recipe for getting kids involved in the kitchen without a ton of mess or stress.

1 day ago

That is so sweet to hear! Getting kids in the kitchen is such a fun way to spend quality time together, and I love that this recipe was simple enough for your daughter to take the lead on. Hope you two have many more fun, delicious cooking nights ahead!

5 minutes ago

Panic question! I’m making this tonight for my partner’s birthday dinner (masala chicken is his absolute favorite from our local takeout spot) and I just realized I don’t have any fresh ginger. Can I substitute ground ginger instead? If so, how much should I use? I really don’t want to mess this up!

3 minutes ago

I did that exact swap the last time I made this! I used 1/4 teaspoon of ground ginger for every teaspoon of fresh the recipe calls for, and it turned out totally great. No one in my family noticed a difference at all.

1 minute ago

Great question, and that swap works perfectly! As mentioned above, the standard ratio is 1/4 teaspoon ground ginger for every 1 teaspoon of fresh ginger the recipe calls for. You’ve got this — I’m sure your partner is going to love it, happy birthday to him!

3 days ago

Brought this masala chicken to my office potluck yesterday and I swear half the team came up to ask for the recipe by the end of lunch! I served it with warm storebought naan for dipping, and people were literally sopping up every last drop of the sauce off their plates. 10/10, I’m making this for every single gathering from now on.

2 days ago

Wait a second — were you the person who brought that chicken?! I had two full servings, it was easily the best dish at the whole potluck. I was too busy going back for seconds to track down who made it, so I’m thrilled I stumbled on the recipe here!

2 days ago

That’s such a fun story! Serving it with warm naan for dipping is such a perfect call, I love that idea. So glad this recipe was the star of your office potluck!

3 days ago

This was so tasty! I’m dairy free so I swapped the heavy cream for full fat canned coconut milk, and it came out so creamy and delicious I didn’t miss the dairy at all. My only tiny note is that I wish the recipe listed recommended side dishes — I panicked a little last minute trying to throw something together to serve with it. But overall, 10/10, will absolutely make again!

2 days ago

That coconut milk swap sounds incredible! I’m dairy free too so I was worried I wouldn’t be able to make this recipe, now I can’t wait to try your version. For what it’s worth, I usually serve curries like this with basmati rice and roasted cauliflower, it’s a perfect combo!

2 days ago

So glad the coconut milk swap worked out beautifully for you — that’s actually one of our go-to dairy-free modifications for this recipe! Thanks so much for the feedback about serving suggestions, I’ll update the recipe notes soon to add ideas like basmati rice, warm naan, roasted veggies, and cucumber raita as great pairings.



