
baked chicken and rice

title 1
baked chicken and rice
⏱️ cook time 55 minutes
🍽️ servings 4
⚡ Difficulty easy

intro

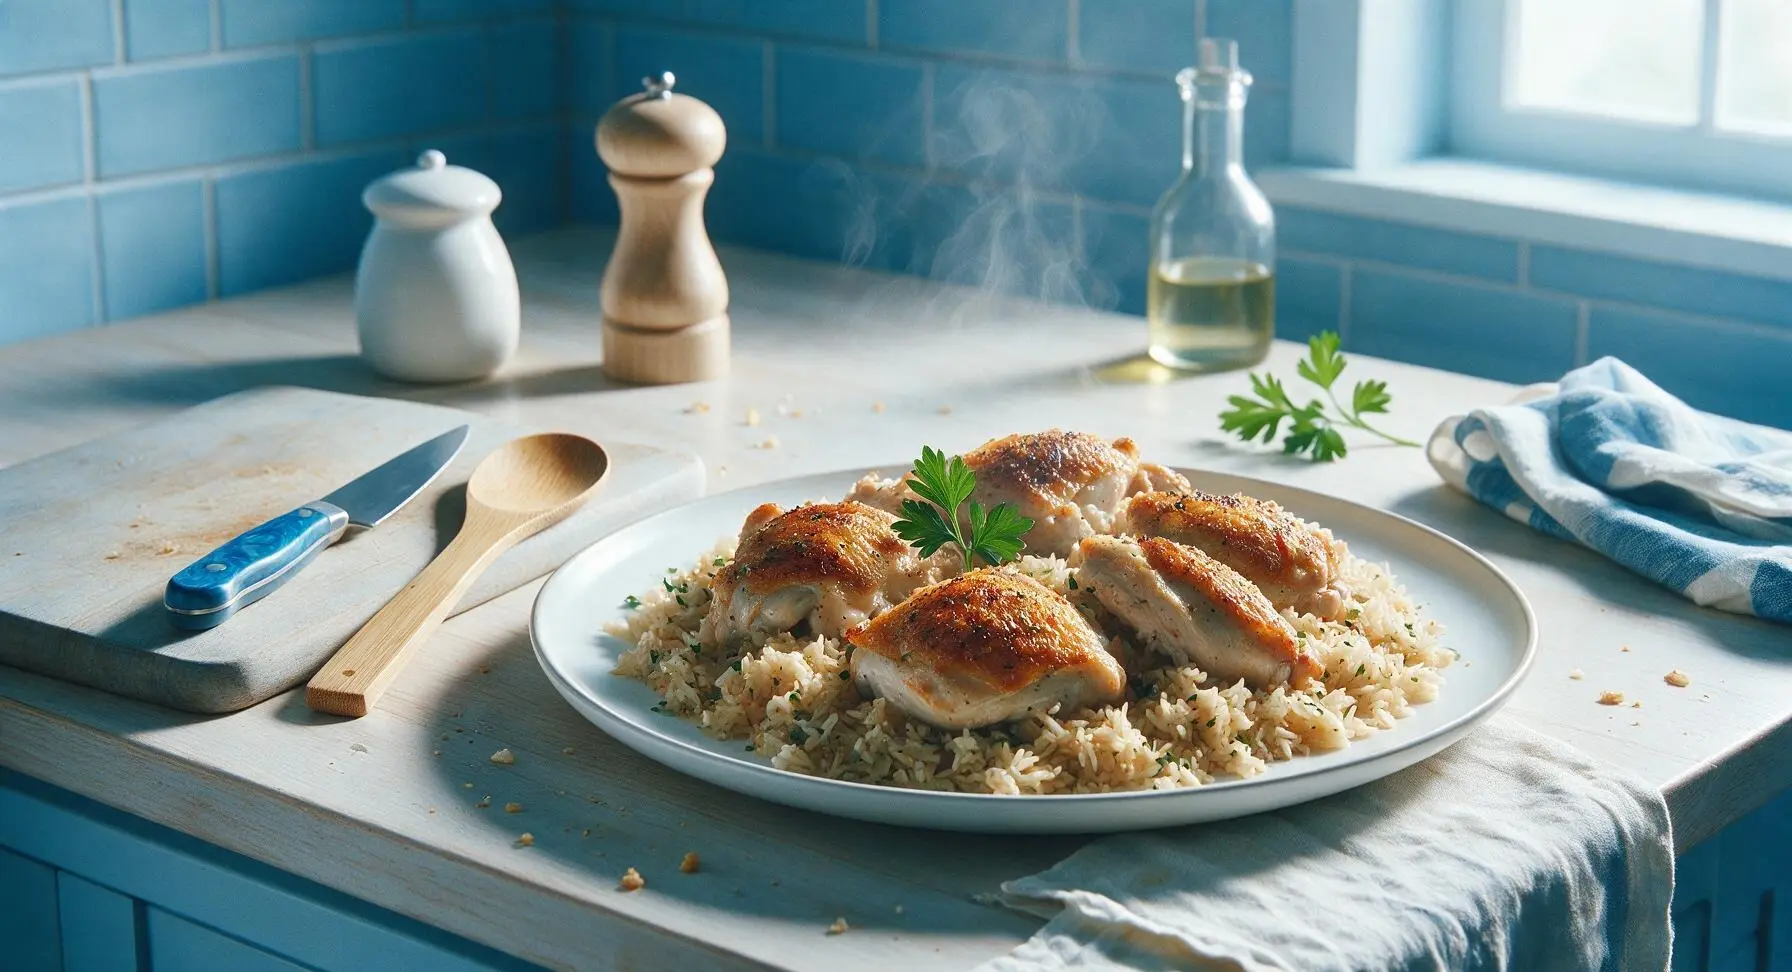
Juicy, crispy-skinned seasoned chicken baked over fluffy herb-infused rice, all made in one pan for minimal cleanup—pure cozy, satisfying comfort food.

Ingredients
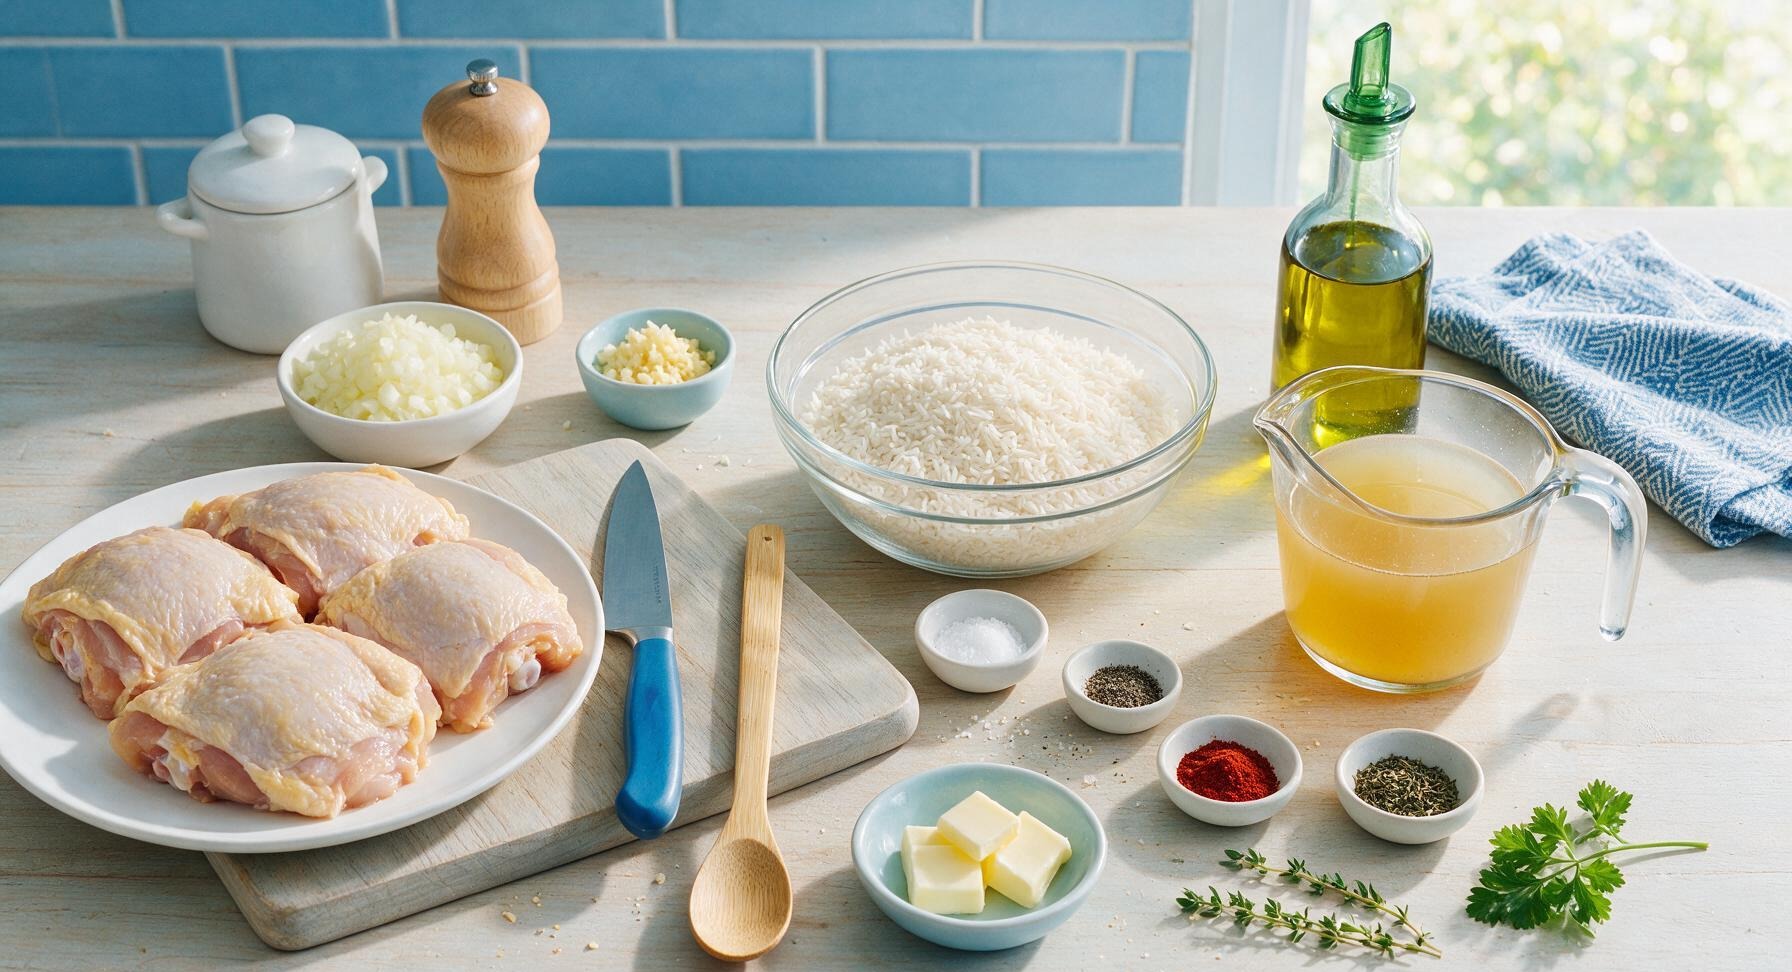
Bone-in, skin-on chicken thighs (patted dry) 4 pieces (680g / 1.5 lbs)
Uncooked long-grain white rice (rinsed) 1.5 cups
Low-sodium chicken broth (warmed) 3 cups
Medium yellow onion (finely diced) 1 (150g)
Garlic cloves (minced) 3 (15g)
Extra-virgin olive oil 2 tablespoons
Kosher salt (divided) 1 teaspoon
Freshly ground black pepper (divided) ½ teaspoon
Smoked paprika ½ teaspoon
Dried thyme ½ teaspoon
Unsalted butter (cut into 4 pieces) 2 tablespoons
Fresh thyme sprigs (for garnish) 2

Steps

1

Preheat Oven, Prep Dish

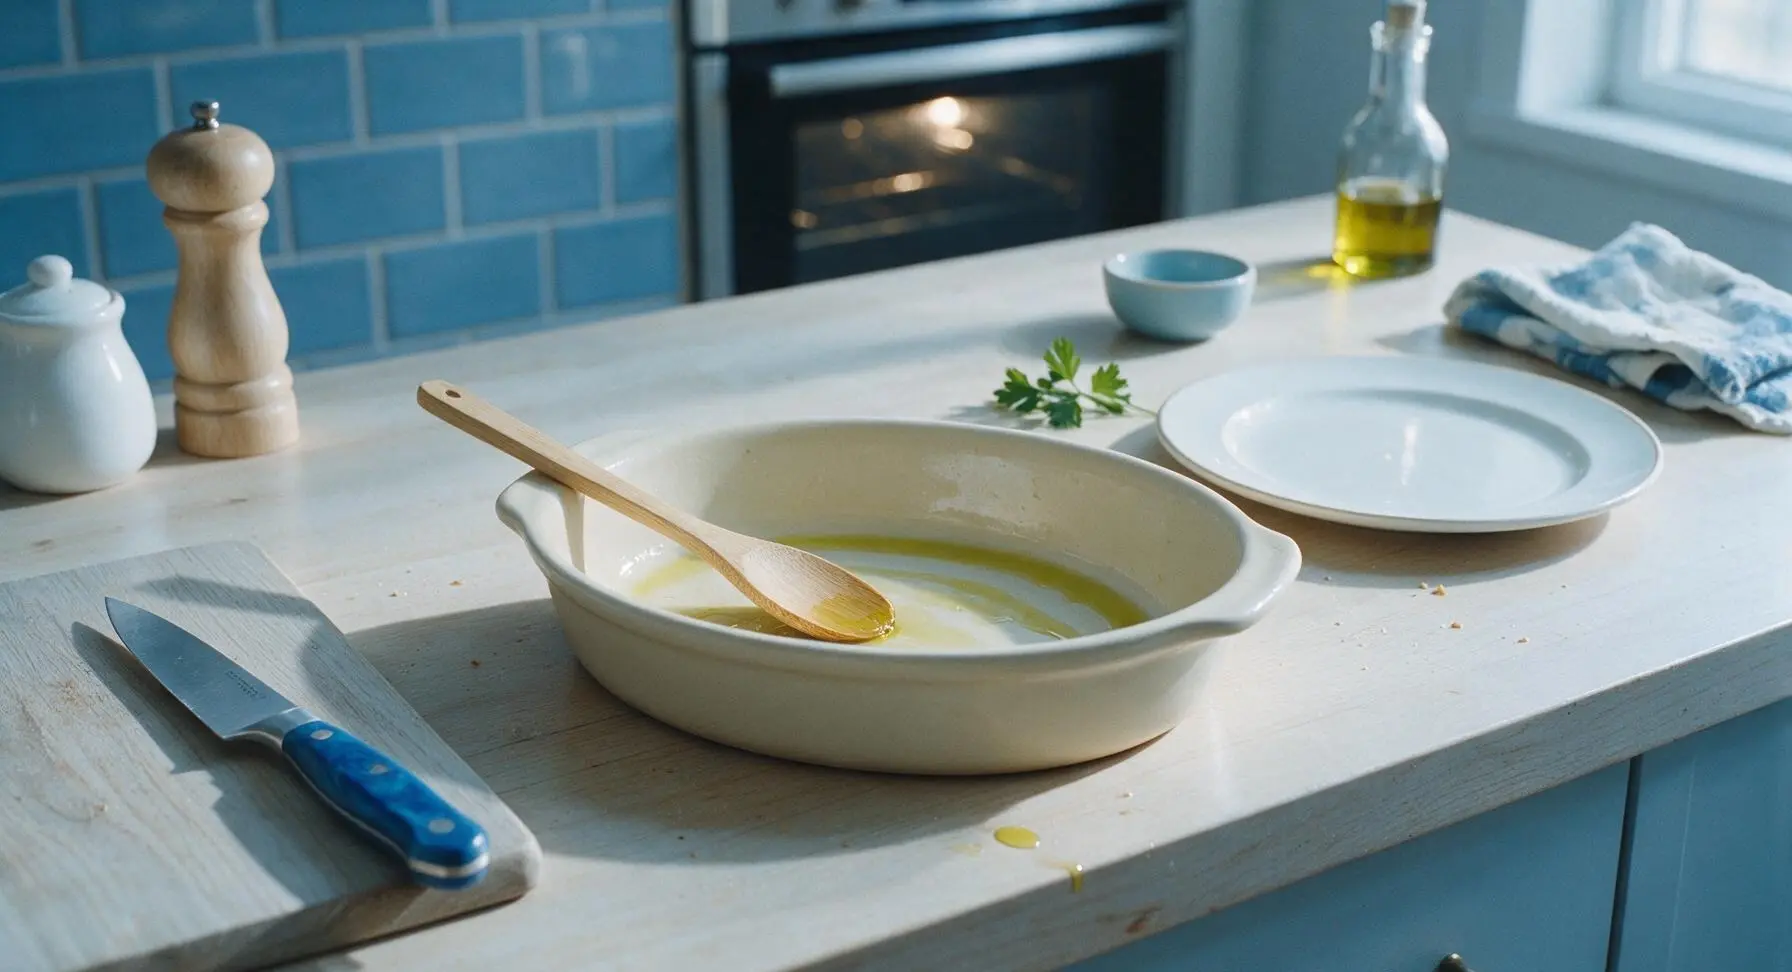
Adjust oven rack to the middle position, preheat oven to 375°F (190°C). Drizzle 1 tablespoon of olive oil across the bottom of the 9x13 inch matte cream ceramic baking dish, use the bamboo spoon to spread it evenly to coat the bottom and lower ½ inch of the sides, preventing rice from sticking during baking.
Step 1
step1:Preheat Oven, Prep Dish
2

Layer Rice and Aromatics

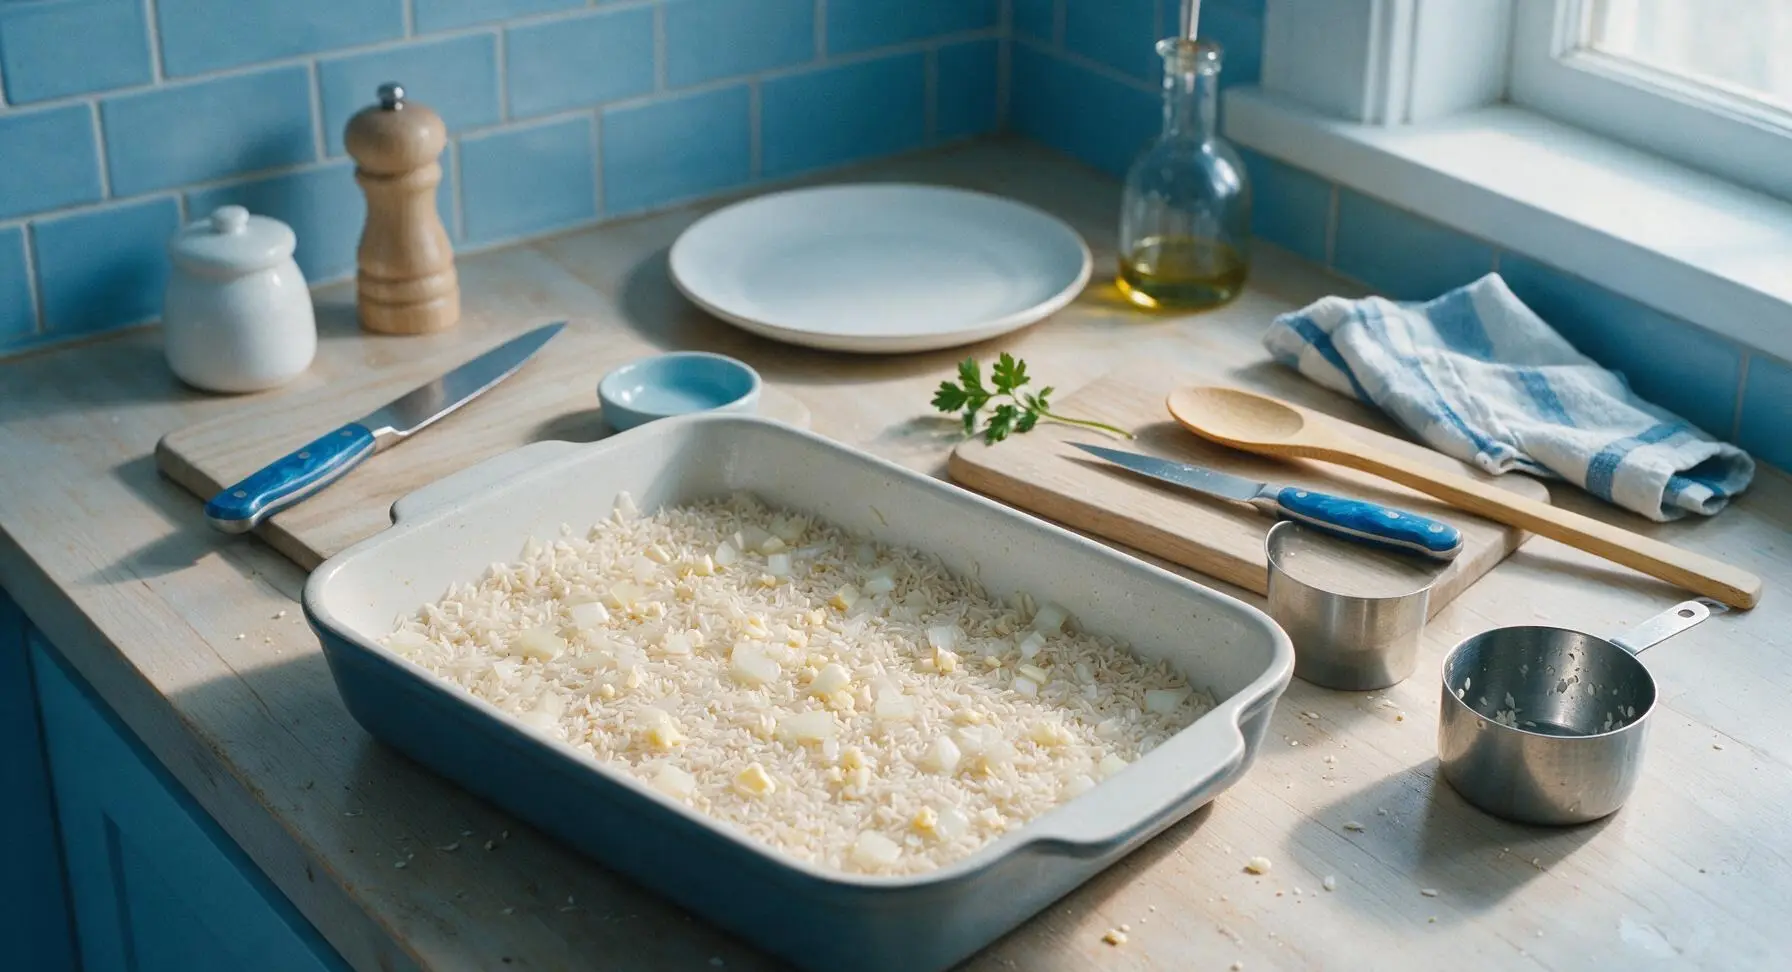
Spread the rinsed, drained long-grain white rice in an even layer across the bottom of the oiled baking dish. Sprinkle the diced yellow onion and minced garlic evenly over the rice, then season the rice layer with ½ teaspoon kosher salt, ¼ teaspoon black pepper, and all of the dried thyme. Dot the surface of the rice with half of the cut butter pieces.
Step 2
step2:Layer Rice and Aromatics
3

Season Chicken Thighs

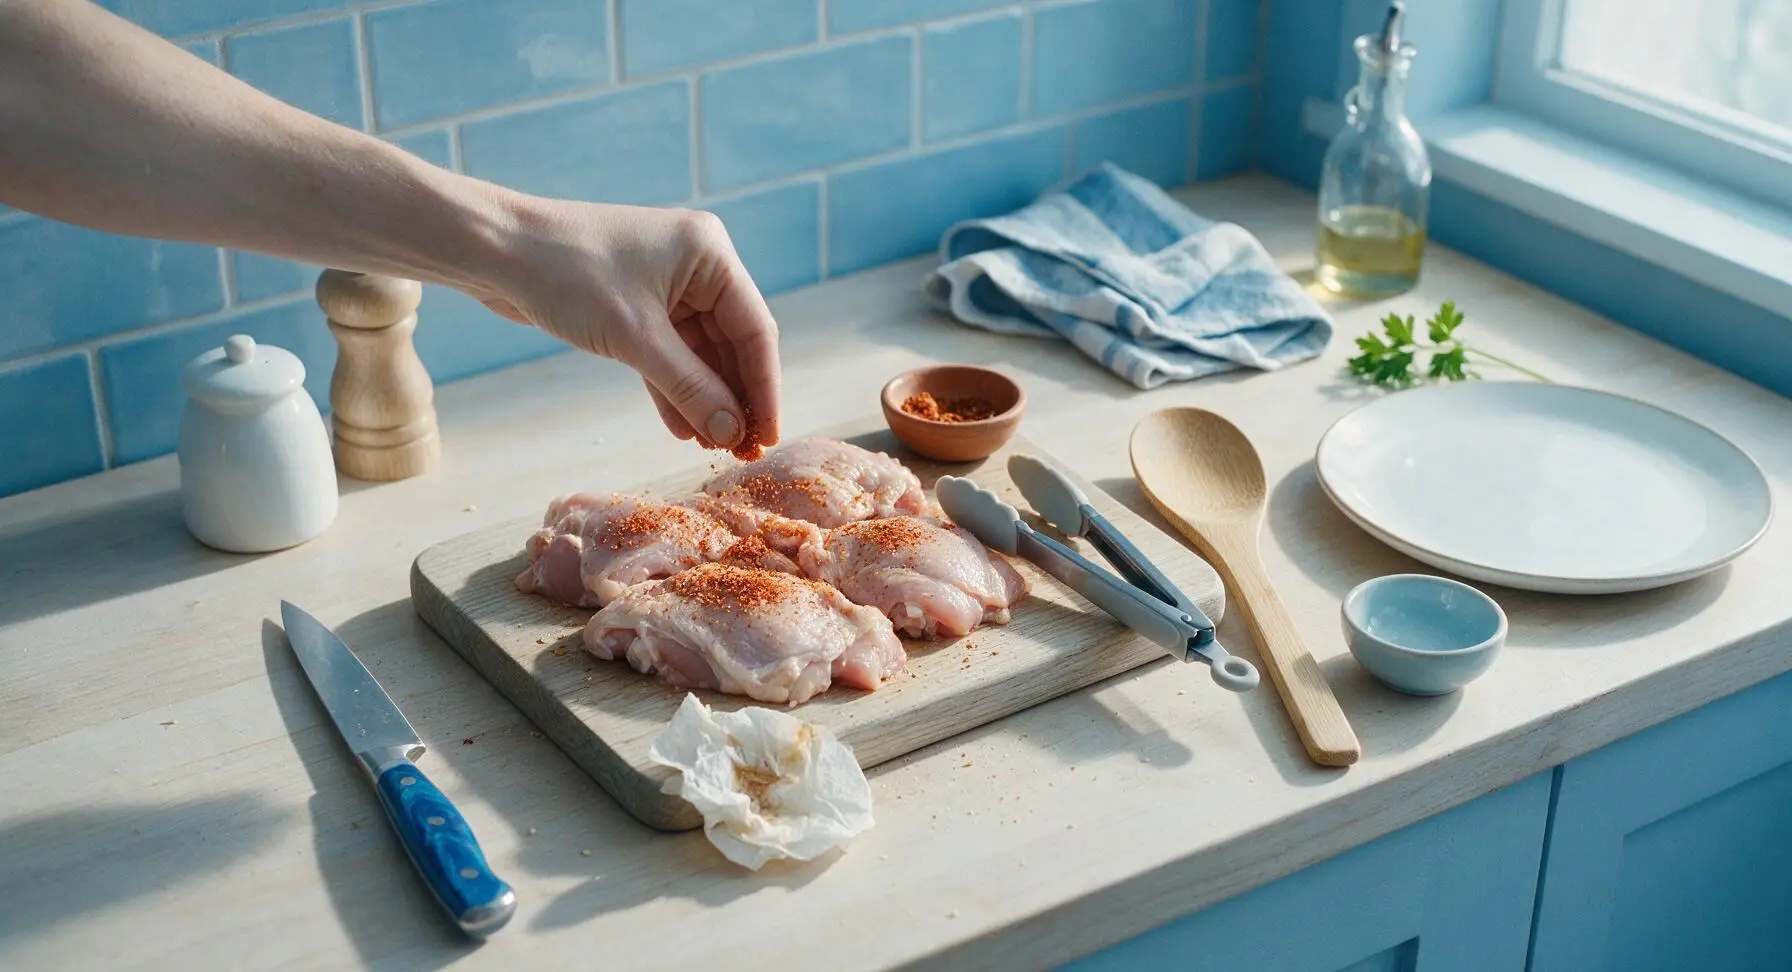
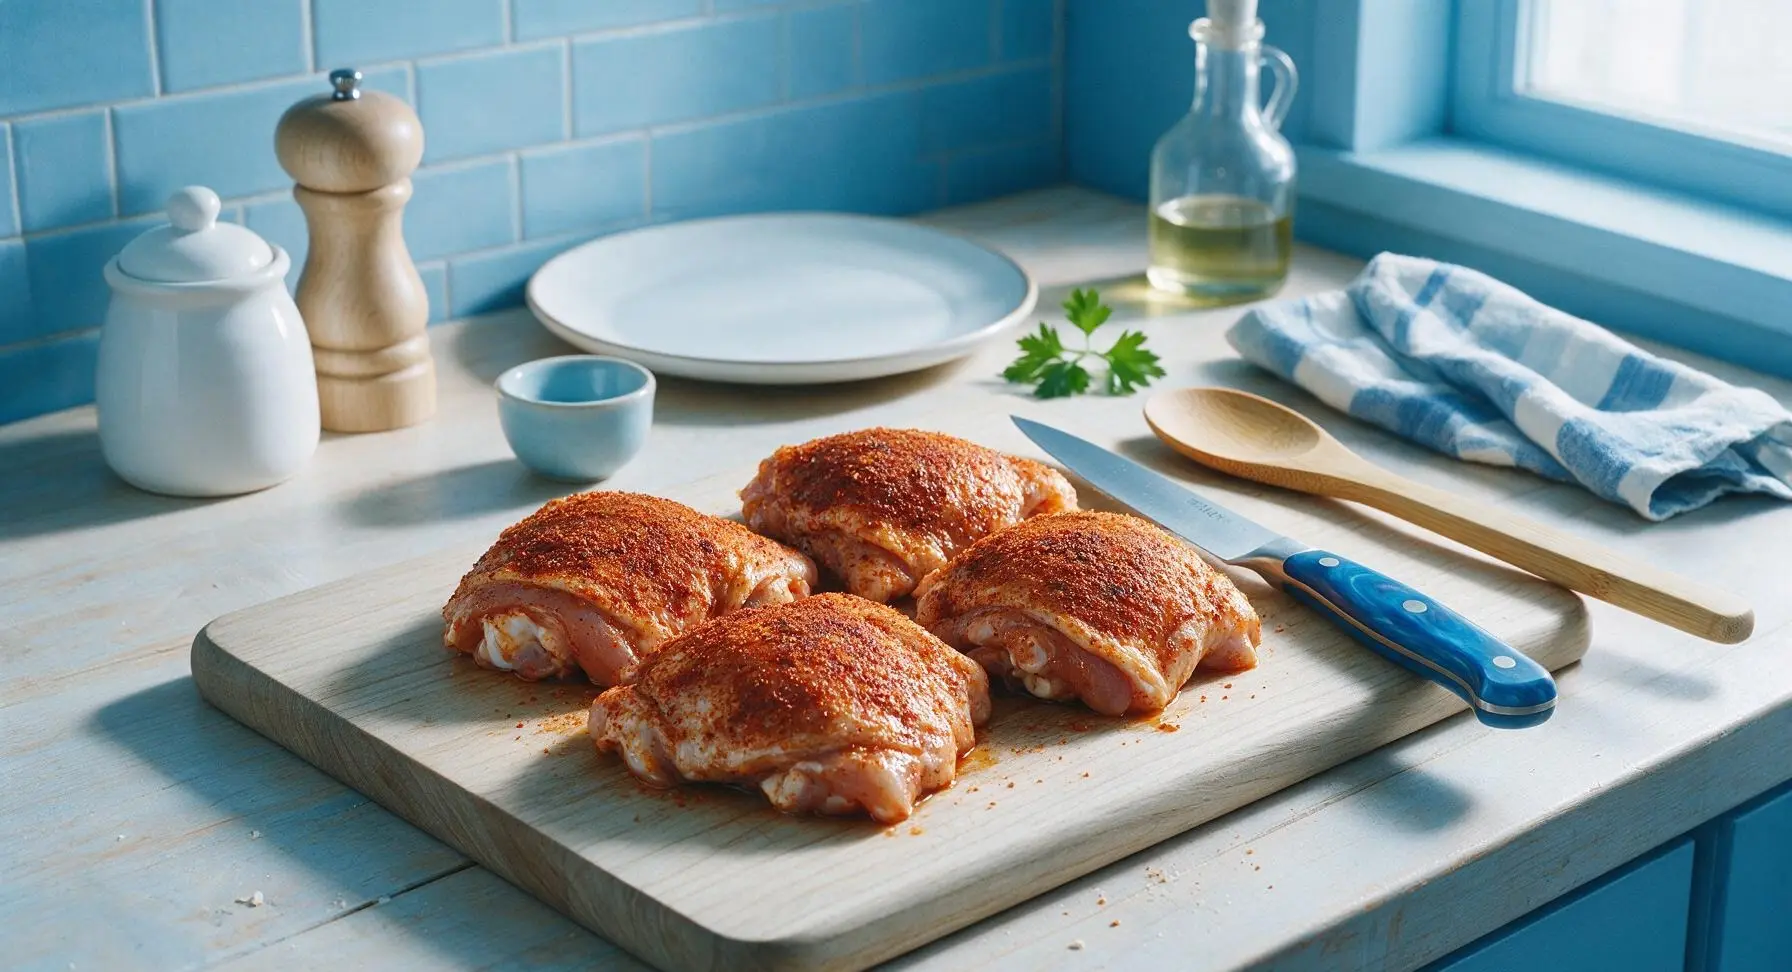
Pat the 4 chicken thighs completely dry with paper towels (this is critical for crispy skin). Rub the skin and flesh with the remaining 1 tablespoon olive oil. Mix the remaining ½ teaspoon kosher salt, ¼ teaspoon black pepper, and smoked paprika in a small terracotta pinch bowl, then sprinkle the spice mix evenly over all sides of the chicken thighs, pressing gently so the spices adhere.
Step 3
step3:Season Chicken Thighs
Step 3
step3:Season Chicken Thighs
4

Arrange Chicken, Add Broth

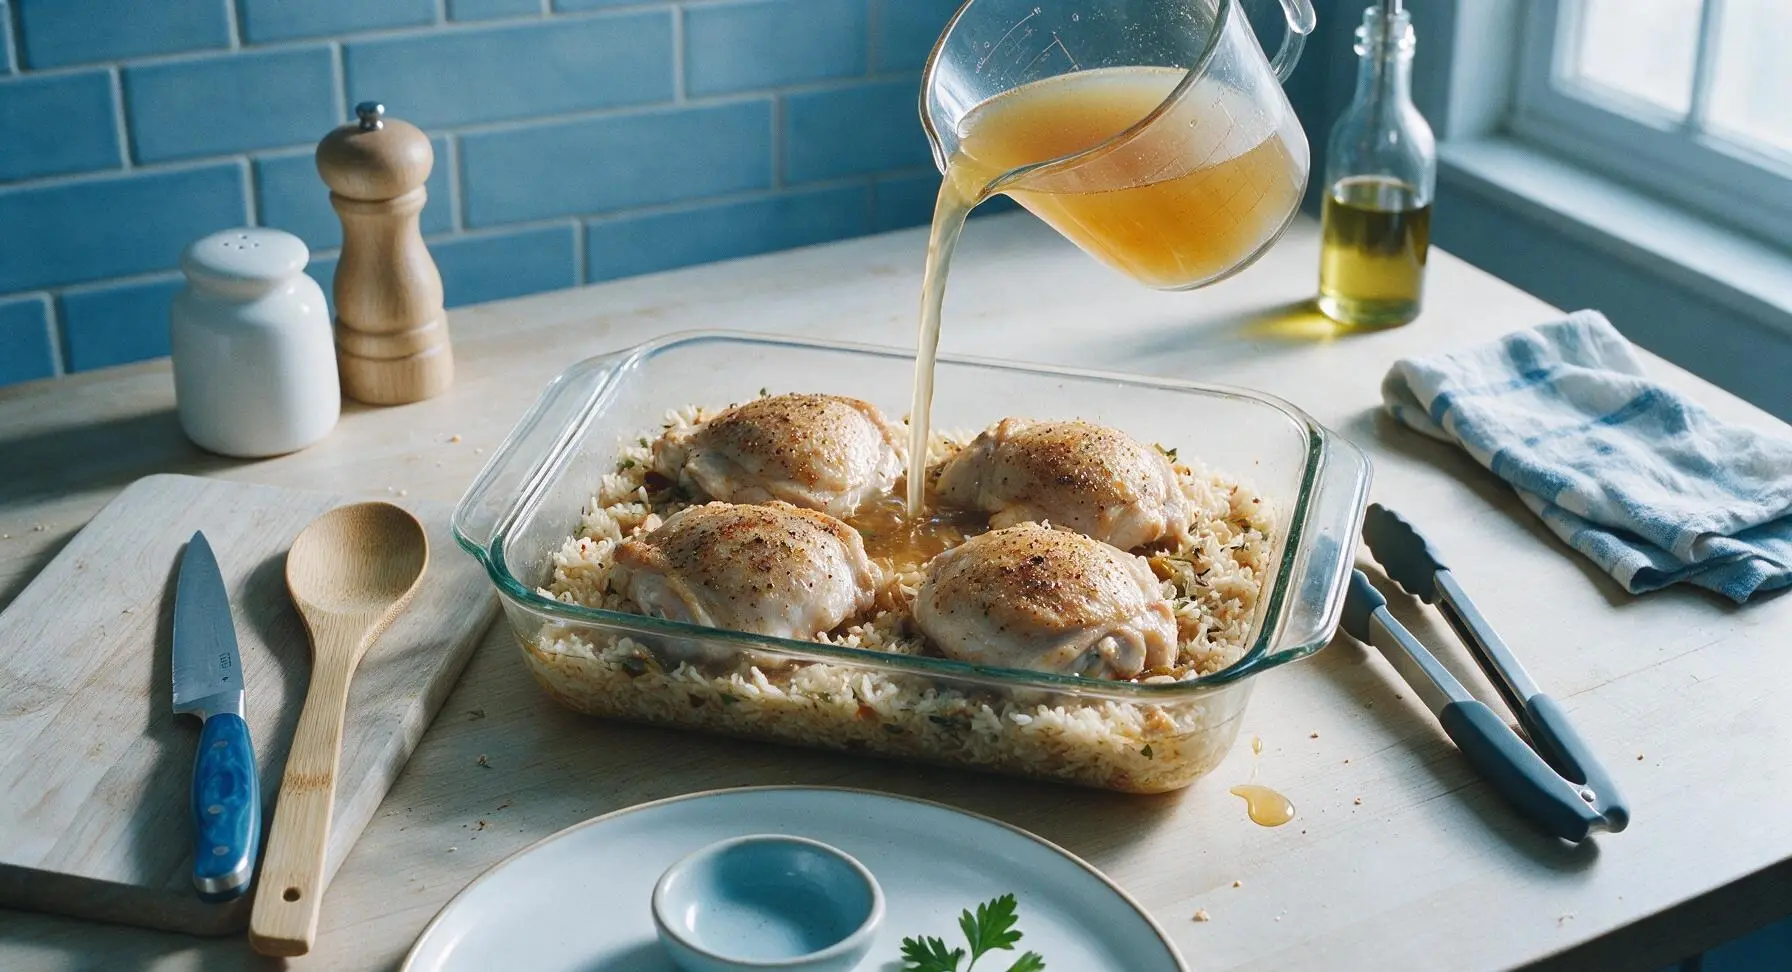
Use the silicone-tipped tongs to place the seasoned chicken thighs skin-side up in a single layer on top of the rice and aromatics, spacing them evenly across the dish (leave ½ inch gaps between thighs so heat circulates). Slowly pour the warmed chicken broth into the dish along the edges, taking care not to pour directly over the chicken skin (this washes off spices and prevents crisping). The liquid should come just to the top of the rice, not covering the chicken skin.
Step 4
step4:Arrange Chicken, Add Broth
5

Cover and Bake

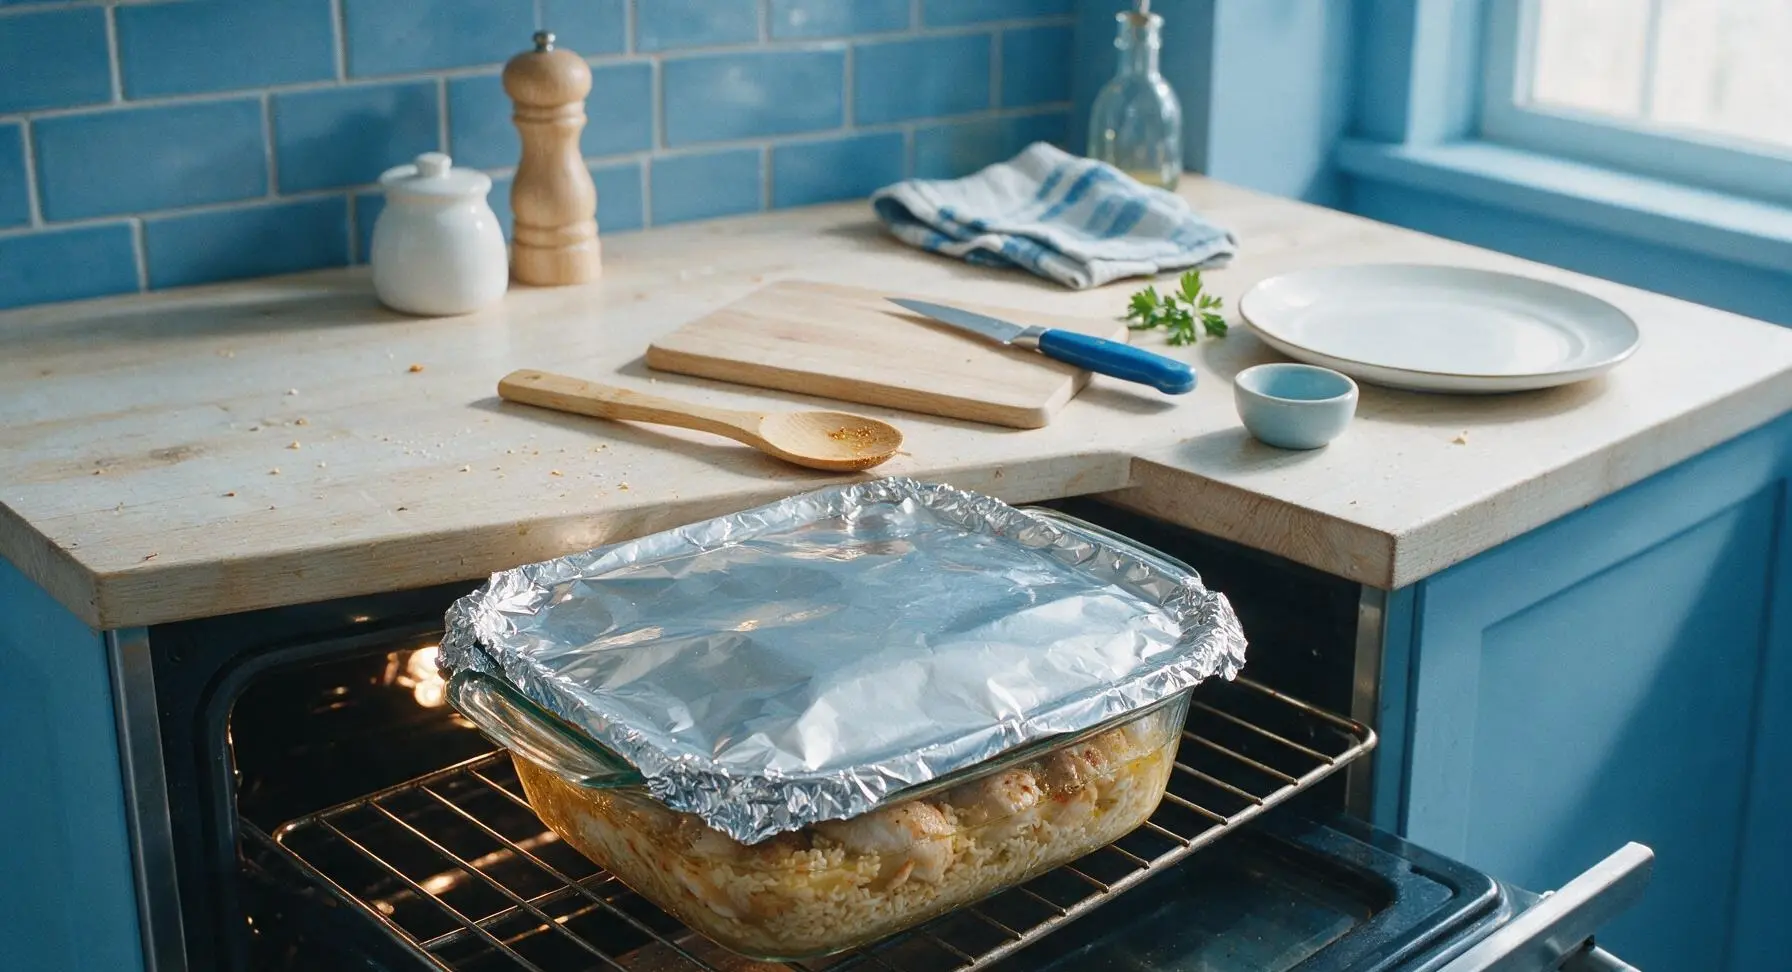
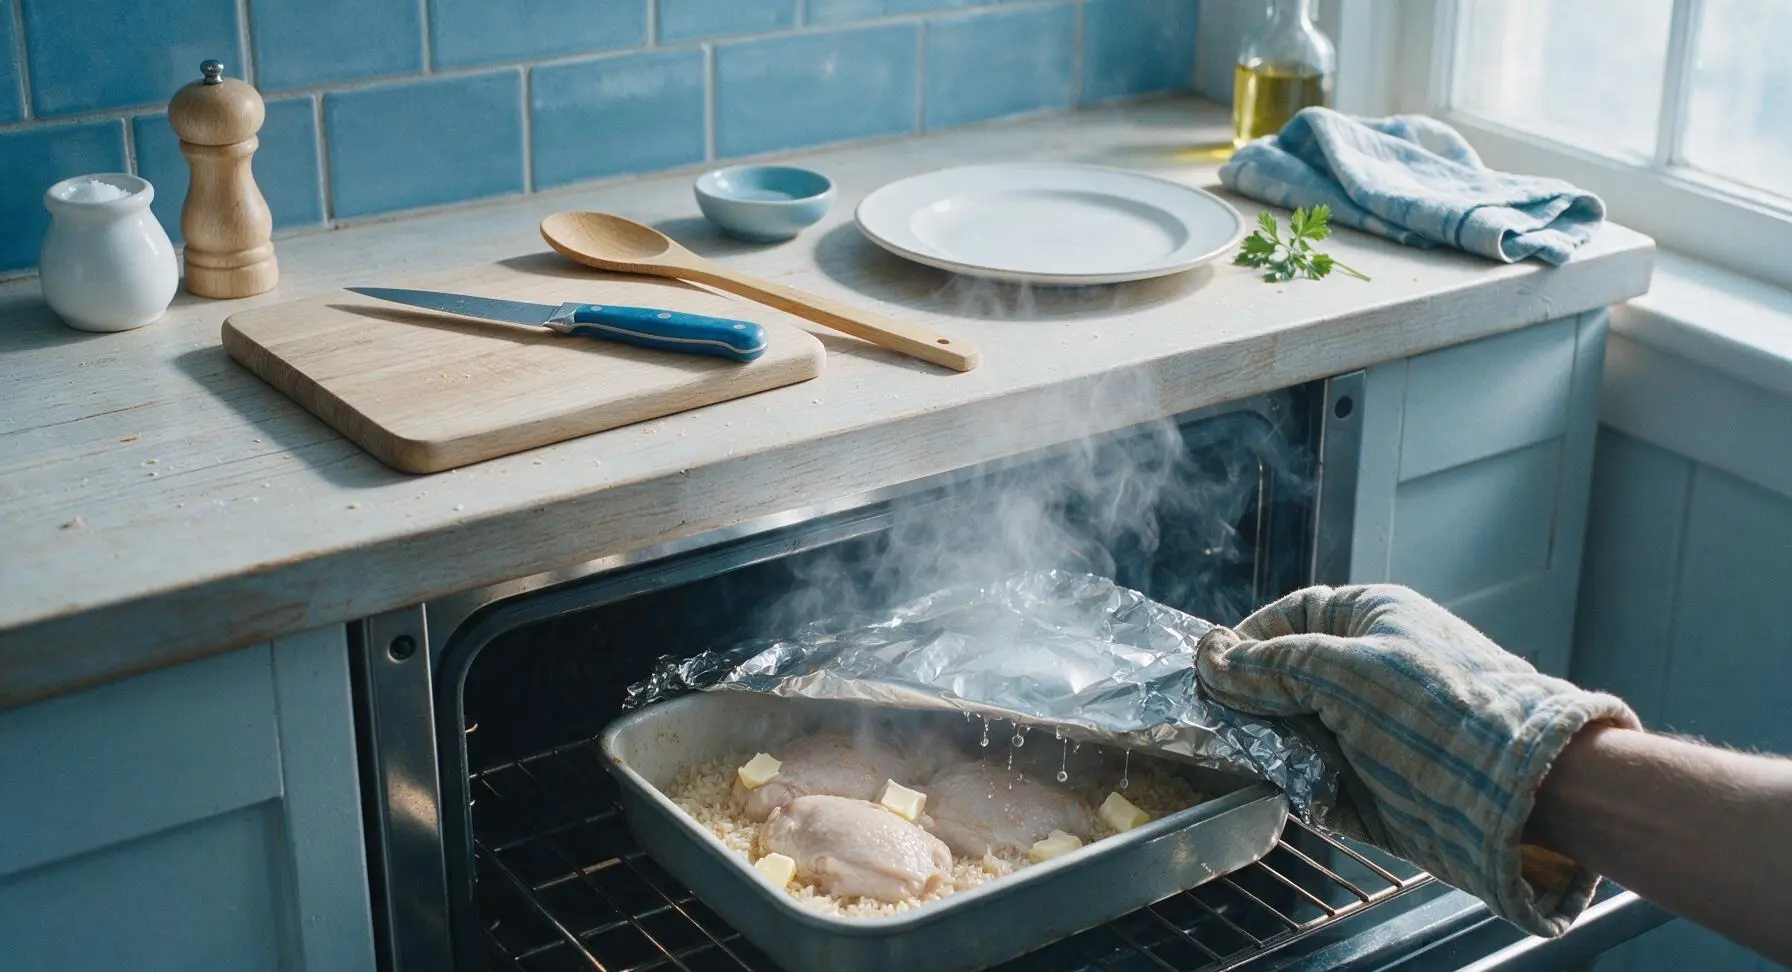
Tightly cover the baking dish with a sheet of heavy-duty aluminum foil, crimping the edges firmly to create a steam-tight seal. Place the dish on the middle oven rack, bake covered for 40 minutes. The steam trapped under the foil will cook the rice evenly and keep the chicken juicy.
Step 5
step5:Cover and Bake
6

Uncover, Crisp Skin

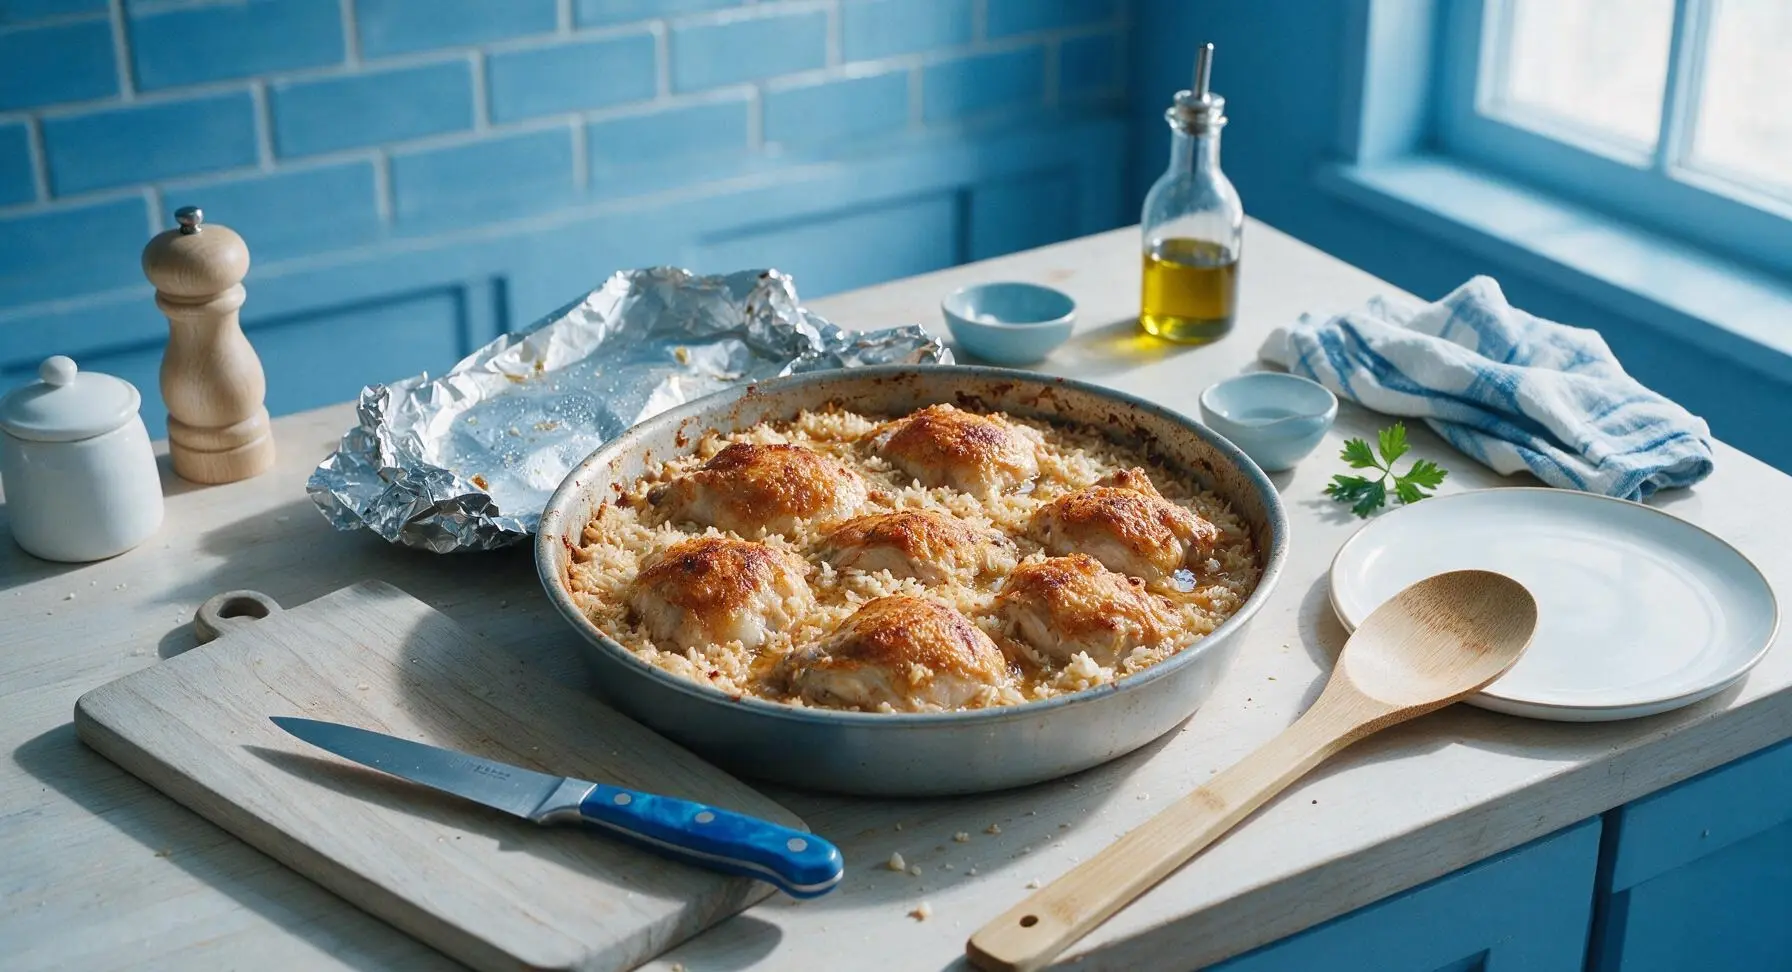
After 40 minutes of covered baking, carefully pull the oven rack out, remove the foil (watch for escaping hot steam), dot the remaining butter pieces around the chicken thighs. Return the dish to the oven, bake uncovered for 10-12 minutes more, until the chicken skin is deep golden brown and crispy, the rice is tender, and all liquid is fully absorbed. The internal temperature of the chicken should reach 165°F (74°C) when checked with a meat thermometer.
Step 6
step6:Uncover, Crisp Skin
Step 6
step6:Uncover, Crisp Skin
7

Rest and Garnish

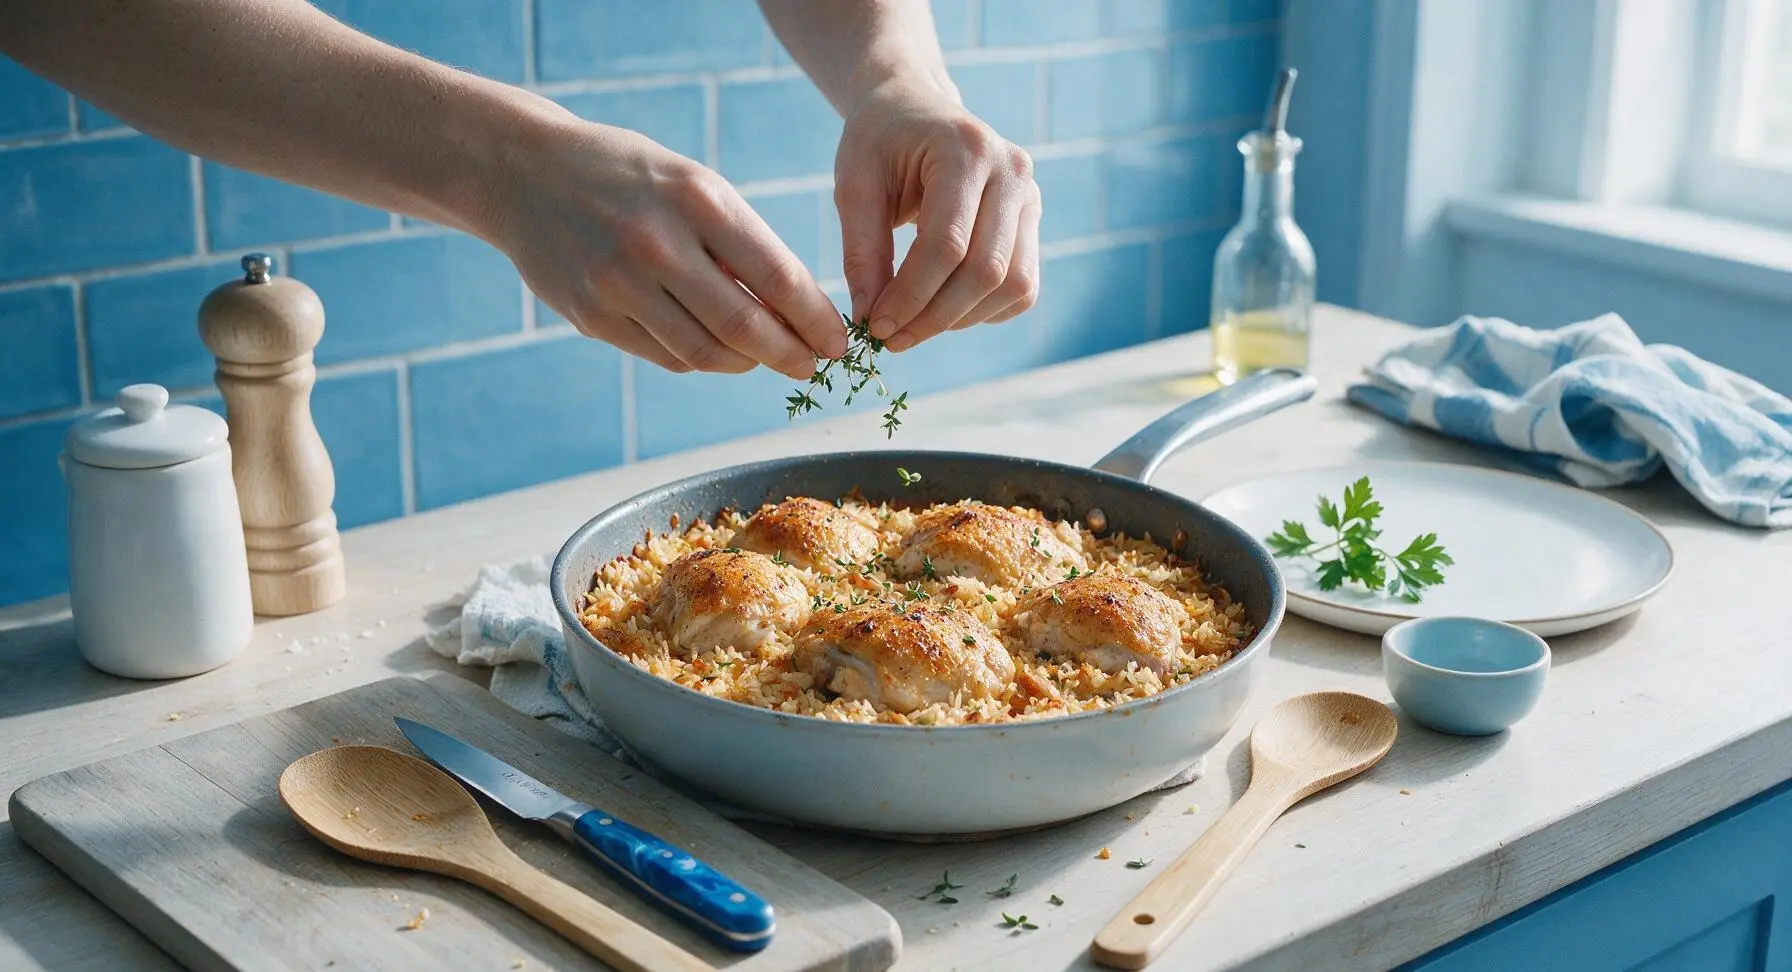
Remove the baking dish from the oven, let it rest for 5 minutes to allow the rice to absorb any remaining pan juices and the chicken to reabsorb its moisture. Sprinkle fresh thyme leaves over the top of the chicken and rice before serving.
Step 7
step7:Rest and Garnish
8

Plate and Serve

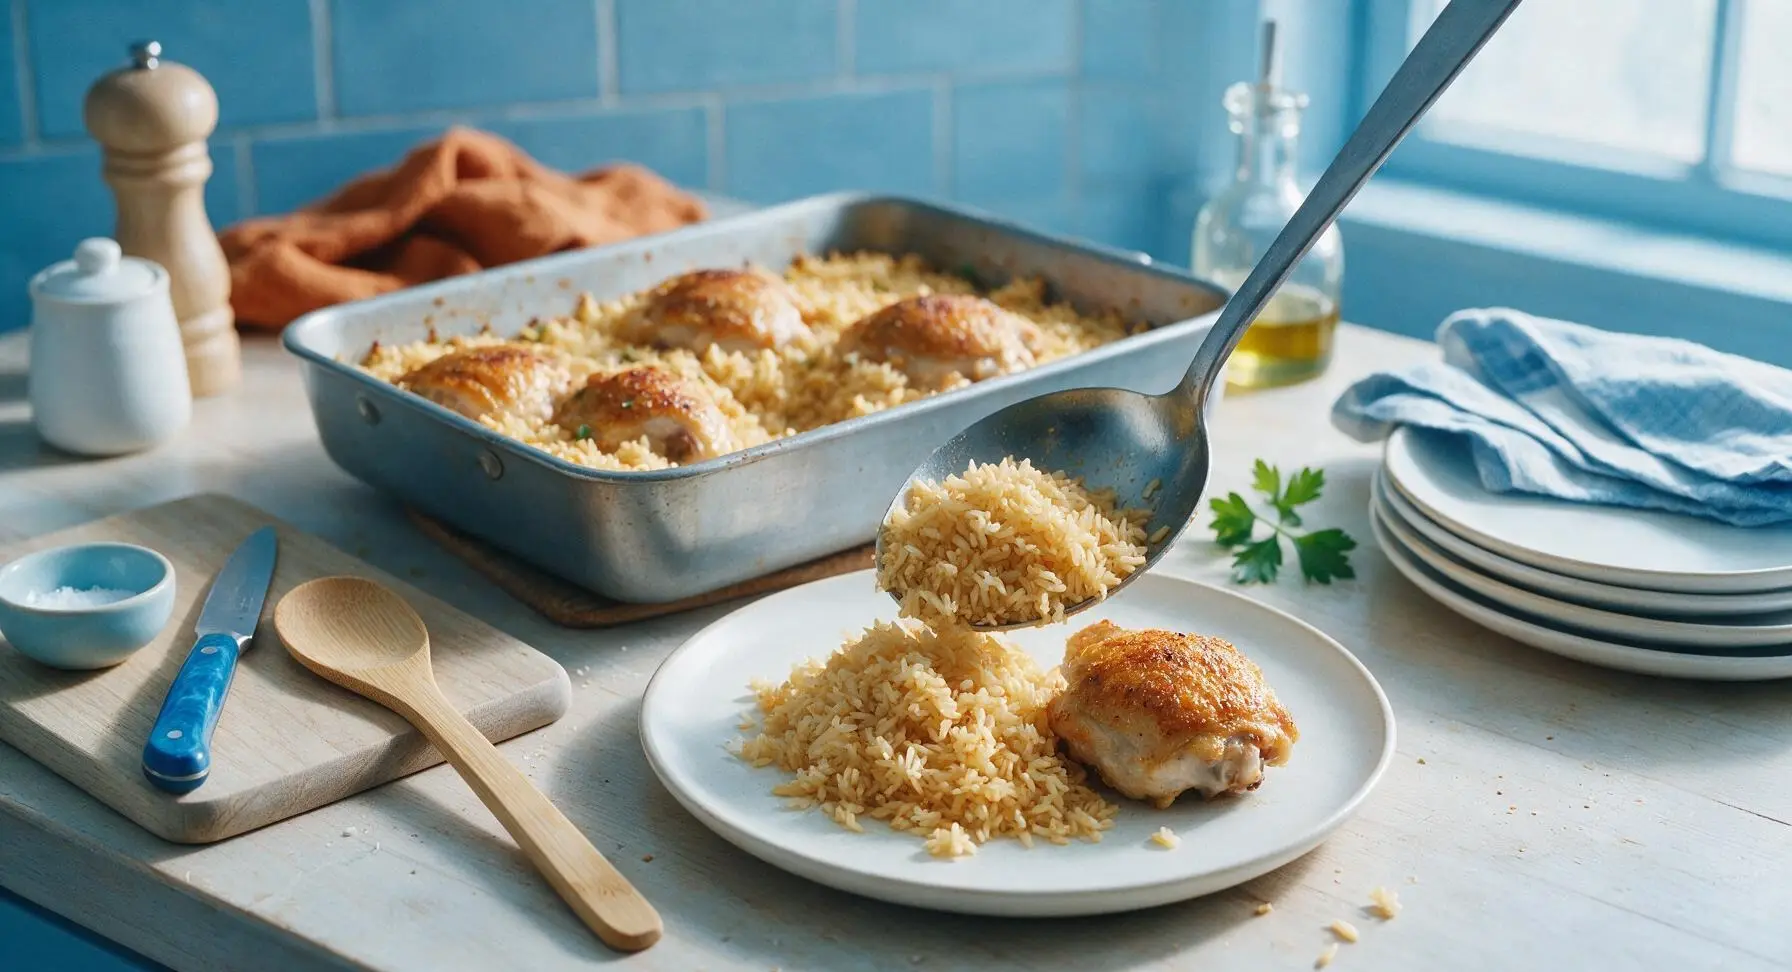
Use a large spoon to scoop a serving of fluffy rice onto a matte warm white ceramic dinner plate, top with one crispy chicken thigh, spoon a small amount of pan juices over the top, and serve immediately.
Step 8
step8:Plate and Serve

Tips

1.Always rinse uncooked long-grain rice under cold running water until the water runs completely clear before using—this removes excess surface starch that would otherwise turn the baked rice gummy and sticky, rather than light and fluffy with separate grains.
2.Pat chicken thighs completely dry with paper towels before seasoning and baking—any residual moisture on the chicken skin will create steam during cooking, leading to soft, rubbery skin instead of the crisp, golden brown top that makes this dish feel special.
3.Use warmed chicken broth when adding liquid to the baking dish—cold broth lowers the initial temperature of the dish, extends cooking time, and often leads to unevenly cooked rice with crunchy, underdone grains in the center of the pan.


✨ You May Also Like

Main Course
🍜 United Kingdom

A showstopping classic of tender seared beef, savory mushroom duxelles, and crisp prosciutto wrapped in flaky golden puff pastry, baked to juicy perfection.

⏱️ 2 hours 1Main Course ★ 4.7
Main Course
🍜 India

Tender charred marinated chicken simmered in a rich, spiced creamy tomato sauce, this iconic Anglo-Indian curry pairs perfectly with basmati rice or warm naan.

⏱️ 50 minuteMain Course ★ 4.6
Main Course
🍜 Thailand

Classic tangy, sweet, and savory Thai stir-fried rice noodles with shrimp, tofu, and crunchy garnishes, balancing all five core Thai flavor profiles.

⏱️ 30 minuteMain Course ★ 4.5
Main Course
🍜 United Kingdom

Crispy golden beer-battered cod and fluffy double-fried chips, served with tangy tartar sauce and malt vinegar: the timeless, beloved British pub comfort classic.

⏱️ 45 minuteMain Course ★ 4.7
Main Course
🍜 Mexico

Smoky, chile-marinated pork tacos with caramelized pineapple, fresh cilantro, and lime: a beloved classic Mexican street food perfect for casual summer gatherings.

⏱️ 1 hour 45Main Course ★ 4.8
Main Course
🍜 United States

Crunchy Fritos corn chips layered with savory beef chili and melted cheddar, topped with cool, zesty fixings for a beloved, cozy Tex-Mex comfort food.

⏱️ 35 minuteMain Course ★ 4.8

baked chicken and rice:Frequently Asked Questions

1.Why do you recommend bone-in, skin-on chicken thighs instead of chicken breasts for this recipe? ▾
Bone-in, skin-on thighs stay juicy through the full bake time, render golden, crispy skin, and drip savory fat down to season the rice as it cooks. Lean boneless, skinless breasts dry out easily with this method, and won’t add that rich, deep flavor the rice needs to taste fully seasoned without extra added oil.
2.Do I really need to rinse the long-grain white rice before using it? ▾
Yes, absolutely—rinsing uncooked long-grain white rice washes away loose surface starch that would otherwise make your baked rice gummy, clumpy, or mushy instead of light and fluffy. Rinse under cool running water until the water runs almost clear, then drain really well before adding it to the pan so you don’t throw off the liquid ratio.
3.Why does the chicken broth need to be warmed before adding it to the pan? ▾
Warming the broth first prevents a sudden temperature drop in the hot pan that would make rice cook unevenly, leave crunchy undercooked grains at the edges, or add extra bake time. Cold broth can also cause rendered chicken fat to seize up, keeping it from evenly coating and flavoring rice. Pop it in the microwave for 2 minutes to warm it quickly.
4.Can I swap the long-grain white rice for brown rice in this recipe? ▾
You can, but you’ll need to adjust for brown rice’s longer cook time and higher liquid needs. Add ¼ cup extra warmed broth, and plan for 15 to 20 extra minutes of covered bake time before setting the chicken on top, so the rice finishes tender at the same time the chicken reaches a safe internal temperature.
5.Why is patting the chicken thighs dry such an important step? ▾
Patting chicken completely dry with paper towels before seasoning is non-negotiable for crispy, golden skin instead of soggy, rubbery skin. Any leftover moisture on the skin surface will steam rather than crisp as it bakes, even at high heat. Take 30 seconds to pat every inch of skin dry right before seasoning for that shatteringly crisp top everyone loves.
6.Do I need to keep the pan covered the entire time it bakes? ▾
Cover the pan tightly with aluminum foil or a tight-fitting oven-safe lid for the first 30 minutes of baking so the rice can steam evenly and absorb broth without drying out. Uncover for the last 10 to 15 minutes to let chicken skin crisp fully and let excess surface moisture on the rice evaporate for a fluffy, not mushy, texture.
7.Can I add extra vegetables to this one-pan meal? ▾
Absolutely! Finely diced carrots, celery, frozen peas, or sliced bell peppers work beautifully here. Add firm, dense veggies like carrots and celery right in with the diced onion and minced garlic before adding rice, so they soften as they bake. Toss frozen peas into the rice during the last 5 minutes of baking so they heat through without turning mushy.
8.How do I tell when the chicken and rice are fully cooked and safe to eat? ▾
Use an instant-read thermometer for perfect, consistent results: chicken thighs should reach an internal temperature of 165°F at the thickest part, not touching bone. The rice should be tender with no crunchy, uncooked grains when fluffed with a fork. If rice is still crunchy, add 2 tablespoons warm broth, cover, and bake 5 more minutes.
9.What type of pan works best for this one-pan recipe? ▾
Use a heavy-bottomed, oven-safe 12-inch skillet (cast iron works perfectly here) or a 9x13-inch high-sided baking dish to contain all the rice, broth, and chicken without bubbling over. Avoid thin, flimsy pans that cause rice on the bottom to burn before the middle cooks through, and make sure it creates a tight seal when covered.
10.Why does my baked rice turn out mushy every time I make this? ▾
Mushy rice usually comes down to one of three easy-to-fix issues: you skipped rinsing the rice to remove excess starch, you used too much broth relative to your rice amount, or you didn’t drain rinsed rice well enough, adding extra unmeasured water. Stick to a 2:1 ratio of warm broth to well-drained rice for consistently fluffy results.
11.Does this recipe work well for weekly meal prep? ▾
This dish holds up great for 3 to 4 days of meal prep stored in airtight containers in the fridge. Let it cool completely within 2 hours of baking, portion it out, and reheat individual servings in the microwave with a tiny splash of extra broth to keep rice from drying out. Note that chicken skin will lose its crispness when refrigerated.
12.Can I use boneless, skinless chicken thighs if that’s what I have on hand? ▾
You can, but you’ll miss out on the deep flavor from the bone and rendered skin fat that seasons the rice. If using boneless, skinless thighs, add 1 tablespoon of olive oil when sautéing the onion and garlic to make up for missing fat, and cut 5 to 7 minutes off total bake time so the thinner thighs don’t overcook and turn tough.
13.What seasonings pair best with this simple chicken and rice? ▾
Stick to cozy, balanced seasonings that don’t overpower the core ingredients: kosher salt, black pepper, dried thyme, smoked paprika, and a pinch of garlic powder for the chicken work beautifully, plus a bay leaf tucked into the rice before baking for subtle herb depth. Finish with fresh chopped parsley out of the oven for a bright pop.
14.My chicken skin comes out soggy every time—what am I doing wrong? ▾
Soggy chicken skin almost always traces back to excess moisture on the skin before baking, placing chicken skin-side down in the pan, or keeping the pan covered for the full bake time. Make sure to pat chicken completely dry, place it skin-side up on top of the rice, and uncover for the final 10 to 15 minutes to let hot air crisp the skin properly.
15.Is it okay to use store-bought chicken broth instead of homemade? ▾
Absolutely, and low-sodium store-bought broth is actually preferred here because it lets you control the exact salt level of the final dish, so you don’t end up with overly salty rice or chicken. If you only have regular-sodium broth, cut it with ¼ cup water and skip extra salt in the rice at the start, then adjust seasoning to taste at the end.

Comments (14)

2 days ago

OMG this one-pan baked chicken and rice is a total game changer for our weeknight dinners! I was so sick of scrubbing 3 different pots and pans after cooking, and the rice came out perfectly fluffy every single bite, not mushy at all. My kids devoured it and asked for seconds before I even sat down!

1 day ago

Same here! My 7 year old who turns his nose up at literally anything with rice ate two full servings last night. Total win.

1 day ago

That makes our day so happy to hear! If your kids love it, try tossing in a handful of frozen peas next time for an extra veggie boost that cooks right in with no extra work.

3 days ago

Made this for my Sunday meal prep yesterday and it held up perfectly all week for work lunches! The chicken stayed juicy, no dry bits at all, and the seasoning is spot on. I added a little smoked paprika for extra depth and it was *chef’s kiss*. So easy even for someone who burns toast half the time lmao

1 week ago

Wait, hold up—no boiling the rice first? I was so skeptical this would turn into a crunchy, burnt mess but it came out SO good. Used boneless skinless thighs instead of breasts because that’s what I had in the fridge, zero regrets. Cook time was exactly what the recipe said too, no guessing.

6 days ago

Thighs are actually our favorite swap for this recipe too! The extra fat renders down and makes the rice even more flavorful, great call.

2 weeks ago

Brought this to my neighborhood block party potluck last weekend and people were asking me for the recipe before I even set the dish down! Only thing I did different was top it with a little fresh parsley before serving for a pop of color. Easy to transport, no fancy ingredients, total crowd pleaser.

12 days ago

I brought this to my book club potluck too! Everyone thought I spent hours on it, little did they know it was one pan and 10 minutes of prep lmao

12 days ago

Love that it works for potlucks! It reheats like a dream too, which makes it perfect for serving a crowd. Great call with the fresh parsley for color!

5 days ago

As a college student with literally one baking pan and a tiny dorm oven, this recipe was made for me. No fancy equipment, cheap ingredients, leftovers for days. 10/10 will be making this every other week for the rest of the semester probably.

30 minutes ago

So happy this is naturally gluten free without any weird swaps! I’ve been looking for easy weeknight meals that don’t require specialty ingredients and this checks every box. The only issue I had was my rice was a little crunchy on the edges—any tips?

10 minutes ago

So glad you enjoyed it! If the edges are crunchy, try covering your pan a little tighter with aluminum foil next time to trap more steam in, that usually does the trick! You can also add an extra 2 tablespoons of chicken broth for a little more moisture.

yesterday

Paired this with a crisp sauvignon blanc last night for our date night in and it felt way fancier than a 55 minute one-pan meal. I added some sautéed mushrooms on top right before serving and it was divine. Will absolutely be adding this to our regular rotation.

2 hours ago

Ooh the mushroom addition sounds amazing! I’m making this for my anniversary dinner next week, might steal that idea!

1 week ago

Great macro-friendly option for meal prep! I used brown rice instead of white and added extra broccoli florets, baked it an extra 10 minutes and it turned out perfect. High protein, minimal cleanup, hits the spot after a long gym session.

5 days ago

How’d the brown rice turn out? I’ve been nervous to swap because I thought it wouldn’t cook all the way through in the oven!

4 days ago

So glad the brown rice swap worked for you! Just a heads up for anyone else trying it: adding an extra 1/4 cup broth and 10-12 minutes of cook time (like Fran did!) is exactly what you need for perfectly cooked brown rice in this recipe.

2 hours ago

Made this in my RV oven last weekend while we were camping and it worked like a charm! No need for a bunch of cookware to wash, which is perfect when you’re boondocking with limited water. Seasoning is mild enough that even my grandkids ate it without complaining.

5 minutes ago

This is a great base recipe! I tossed in a diced jalapeño and a sprinkle of cayenne to give it a little kick, and it was chef’s kiss. Super easy to customize based on what you have in the fridge, which is my favorite kind of recipe. 10/10

just now

Love that spicy twist! A little jalapeño adds such a nice bright heat that pairs perfectly with the savory chicken and rice, we’ll have to try that on our next test run!

2 days ago

Uh, full transparency—this is the first thing I’ve ever successfully cooked that didn’t come out of a frozen box. I followed the directions exactly and it didn’t burn! My roommate thought I ordered takeout lmao. Easy enough for total newbies, trust me.

1 day ago

Same! I’m a total beginner and I was so nervous I’d mess it up, but the steps are so straightforward even I couldn’t screw it up. Welcome to the home cooking club!

3 days ago

Made this last night and even my dog was hovering by the oven the whole time it baked begging for a bite! Used boneless skinless thighs, added a little extra garlic powder, and the rice soaked up all that chicken flavor so well. Cleanup took 2 minutes tops. Obsessed.

1 week ago

This recipe is so affordable! All the ingredients cost me under $12 total at the grocery store, and it fed my whole family of 4 with leftovers. So sick of recipes that require fancy expensive ingredients I’ll never use again. This is a new staple.

6 days ago

We love budget-friendly meals that don’t skimp on flavor! That’s exactly why we developed this recipe—great food doesn’t have to cost a fortune, or require a million specialty items.

5 days ago

Y’all, I was skeptical about baking rice in the oven instead of making it on the stovetop, but this converted me. The rice gets all that savory flavor from the chicken broth and seasonings instead of just being plain bland rice. Served it with a side of collard greens and it was the perfect Sunday supper.

4 days ago

The collard green side sounds perfect! I served mine with cornbread and it felt like a proper Sunday dinner at my grandma’s house, no lie.

3 days ago

We’re so glad you gave oven-baked rice a shot! Those classic southern sides sound like the perfect pairing—now you’re making us hungry for cornbread and collards too!



