
batter for sweet and sour chicken

title 1
batter for sweet and sour chicken
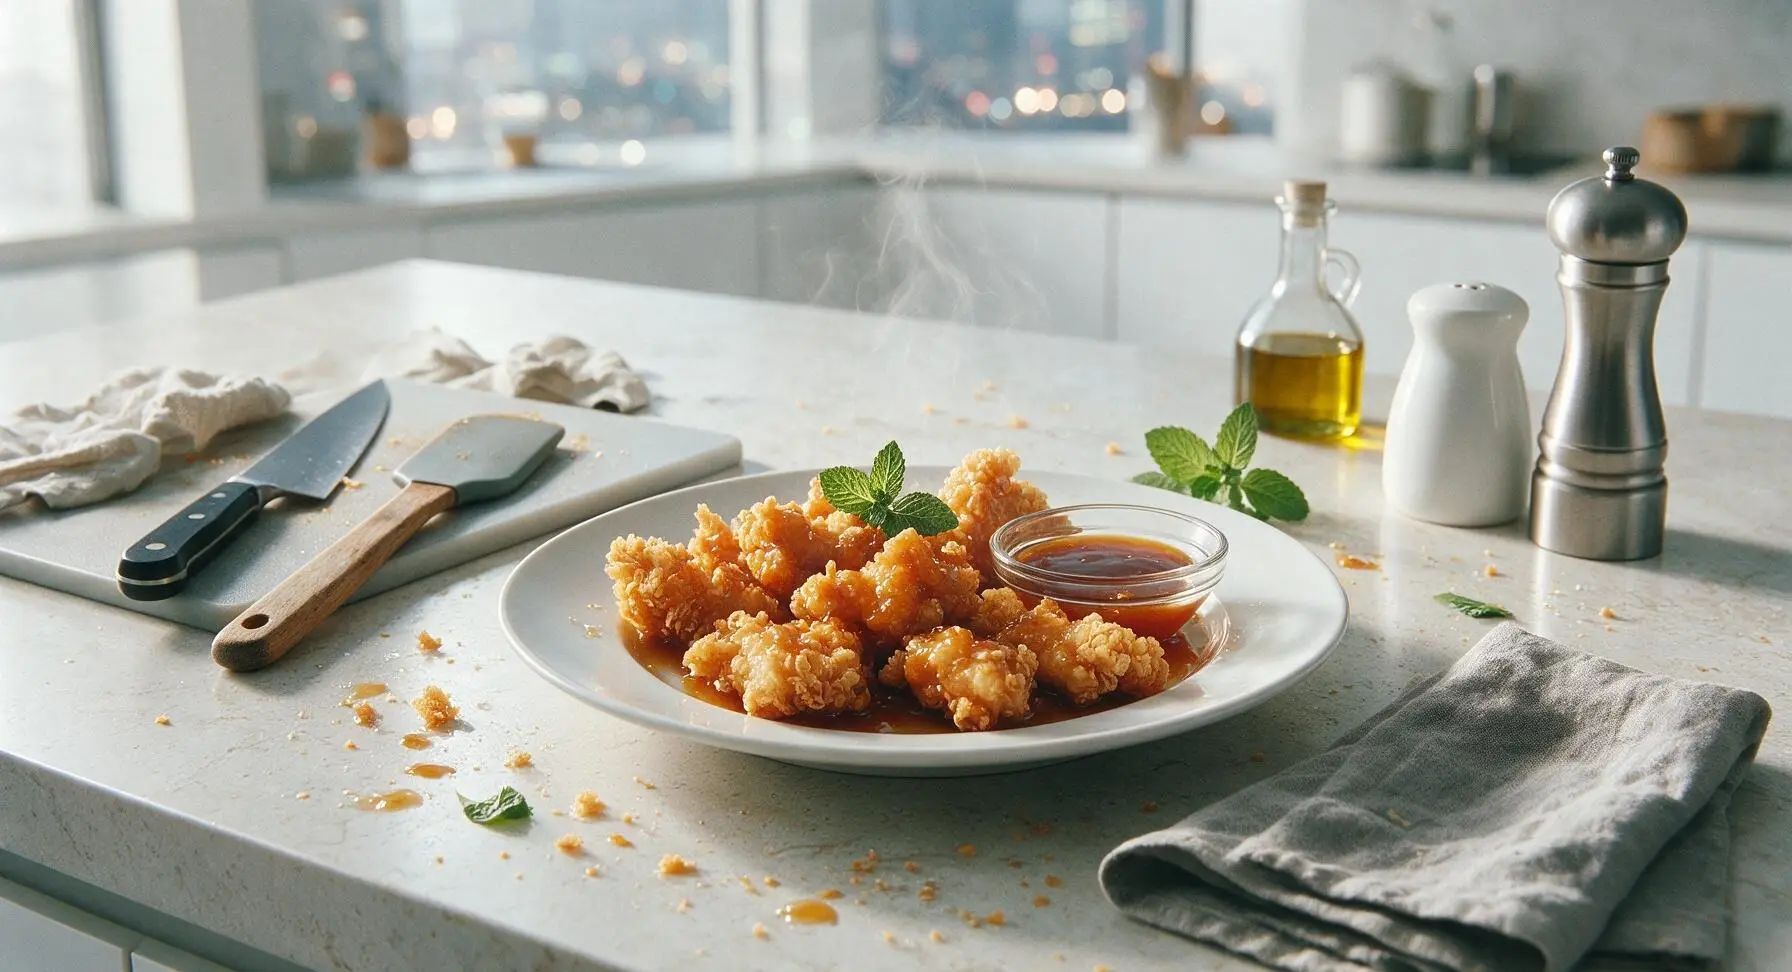
⏱️ cook time 15 minutes
🍽️ servings 4
⚡ Difficulty easy

intro

This shattery, ultra-crisp batter is the secret to takeout-style sweet and sour chicken, creating a light, non-greasy coating that stays crisp even when tossed in tangy sauce.

Ingredients
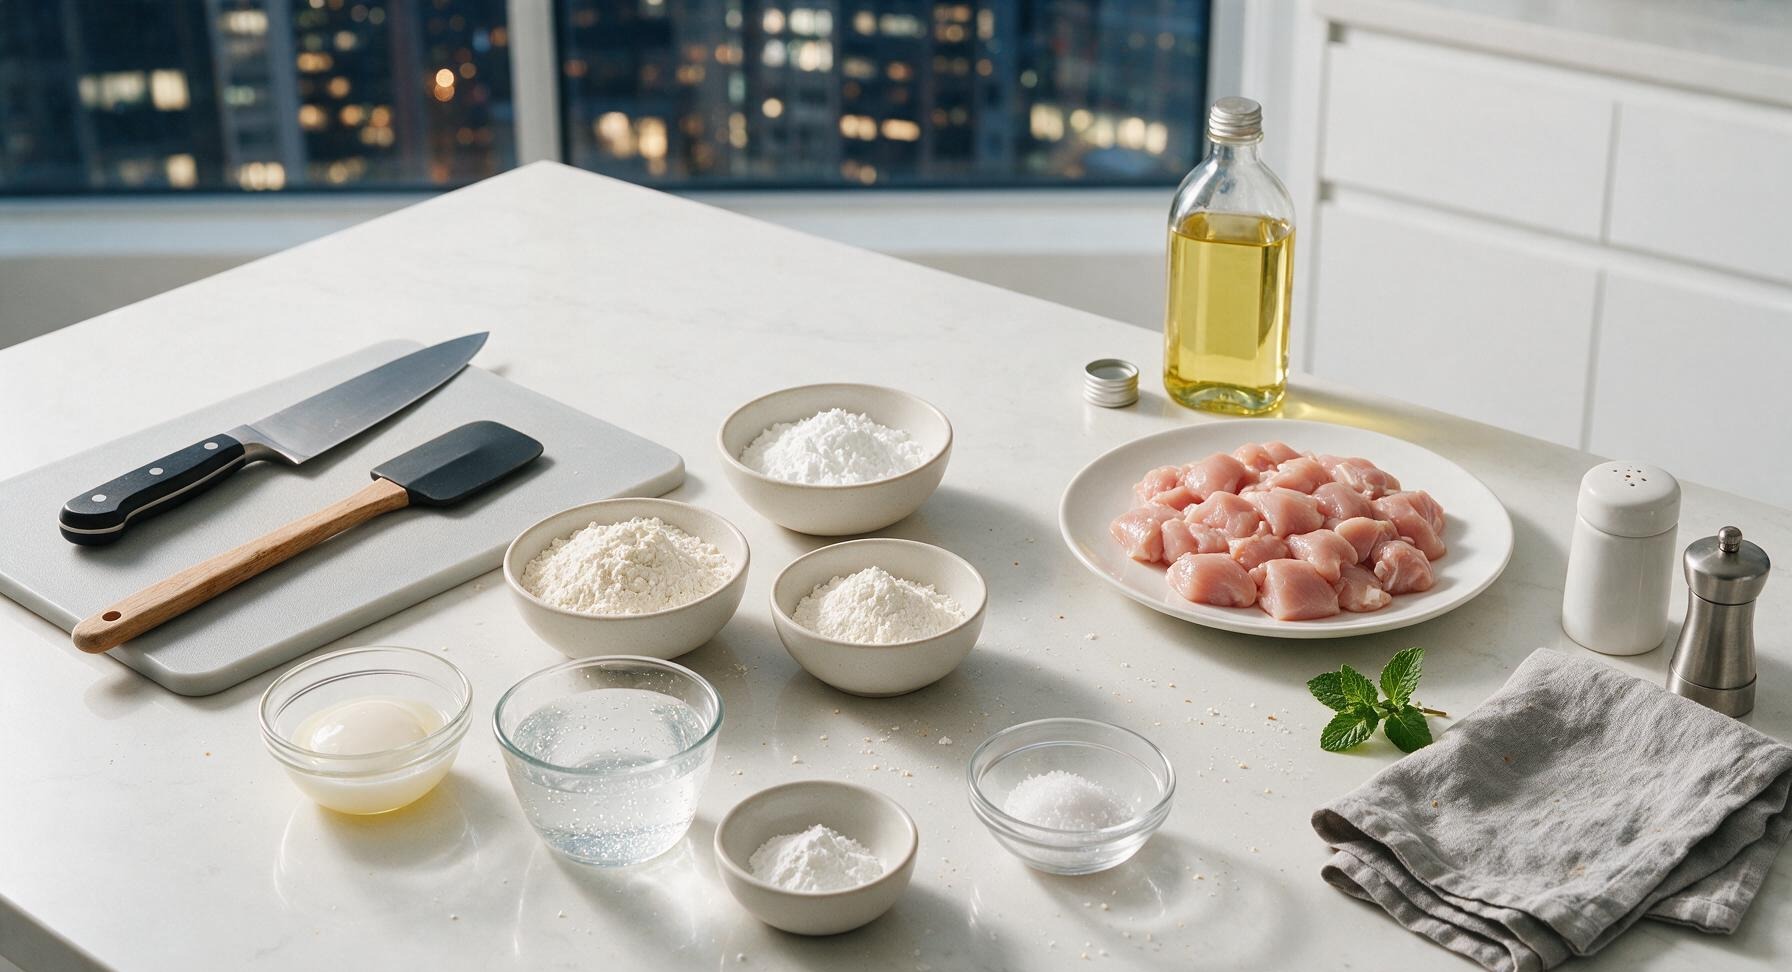
Boneless skinless chicken thighs, cut into 1-inch cubes 450g
All-purpose flour, spooned and leveled 60g (½ cup)
Cornstarch 60g (½ cup)
White rice flour 30g (¼ cup)
Baking powder 1 tsp (4g)
Large egg white (no yolk) 1 (30g)
Ice-cold sparkling water 180ml (¾ cup)
Fine sea salt ½ tsp (3g)
Neutral canola oil (1 tbsp for batter, 4 cups for frying) 975ml

Steps

1

Prep Chicken and Dry Mix

Pat 450g of 1-inch cubed boneless, skinless chicken thighs completely dry with paper towels and set aside. Add 60g all-purpose flour, 60g cornstarch, 30g white rice flour, 1 tsp baking powder, and ½ tsp fine sea salt to the medium brushed stainless steel mixing bowl. Whisk for 30 seconds with the stainless steel wire whisk until dry ingredients are fully blended, with no concentrated clumps of baking powder remaining.
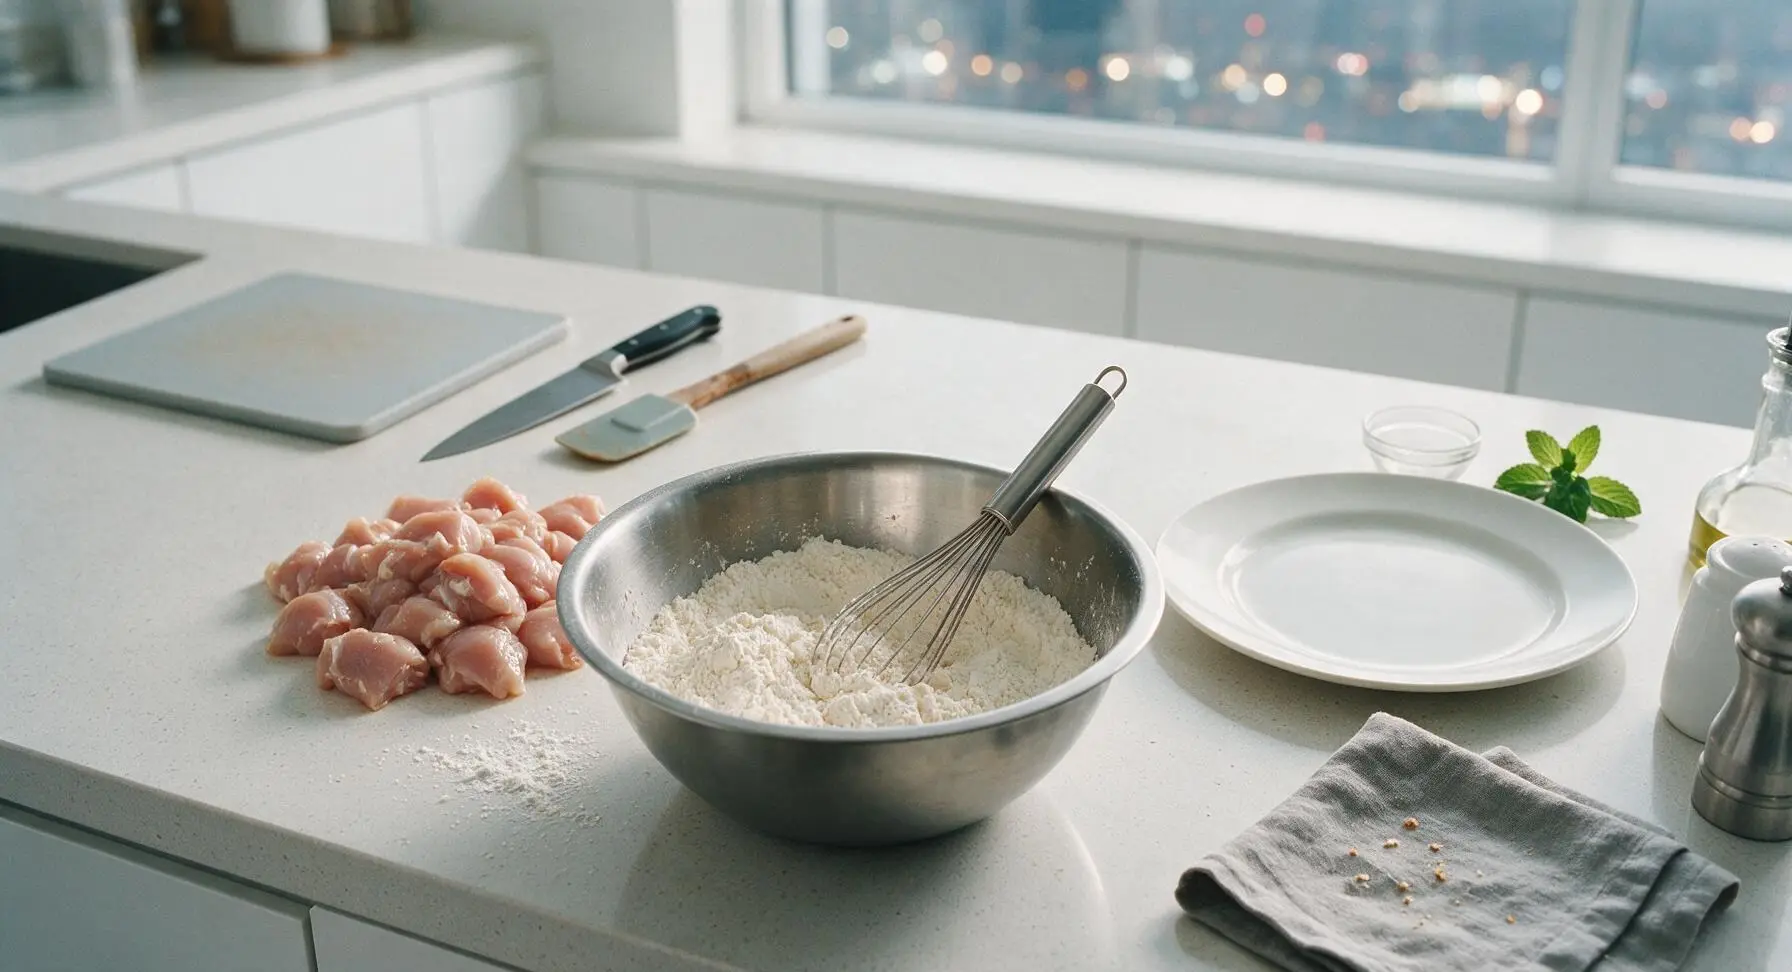
Step 1
step1:Prep Chicken and Dry Mix
2

Add Wet Batter Ingredients

Create a shallow 2-inch well in the center of the blended dry mix. Add 1 large egg white, 1 tbsp neutral canola oil, and ¾ cup ice-cold sparkling water directly into the well. Do not begin stirring immediately, as this will prevent dry flour lumps from flying out of the bowl.
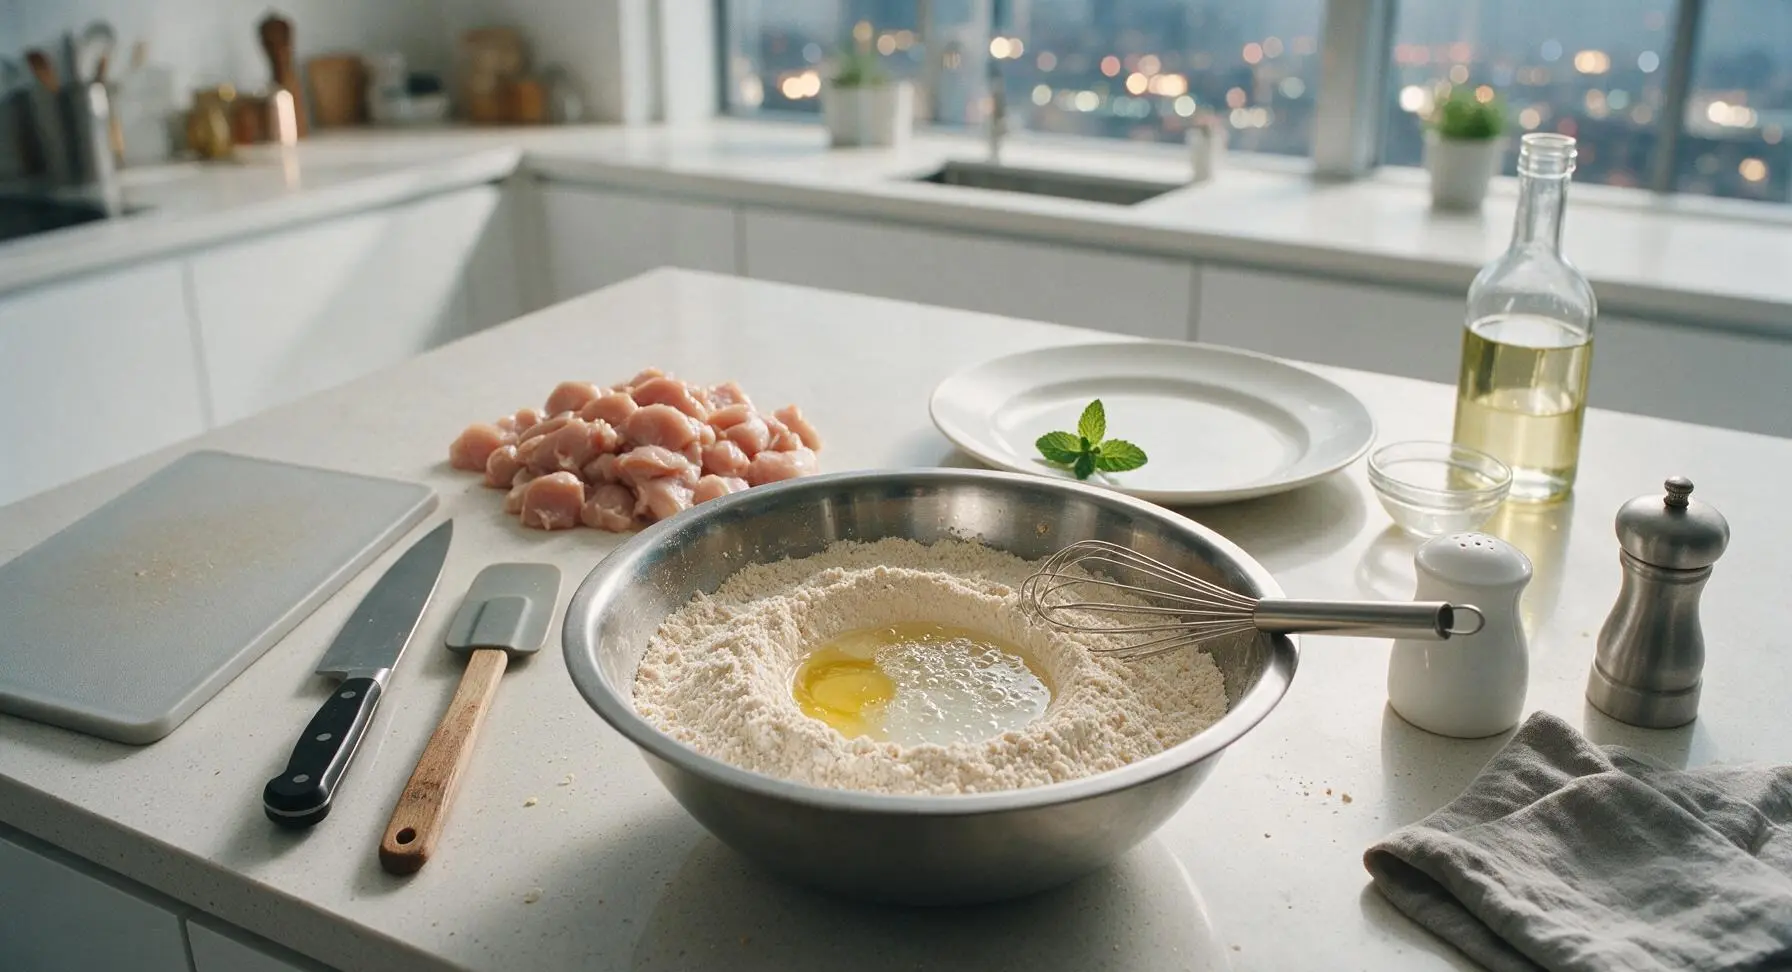
Step 2
step2:Add Wet Batter Ingredients
3

Mix Batter to Lumpy Consistency

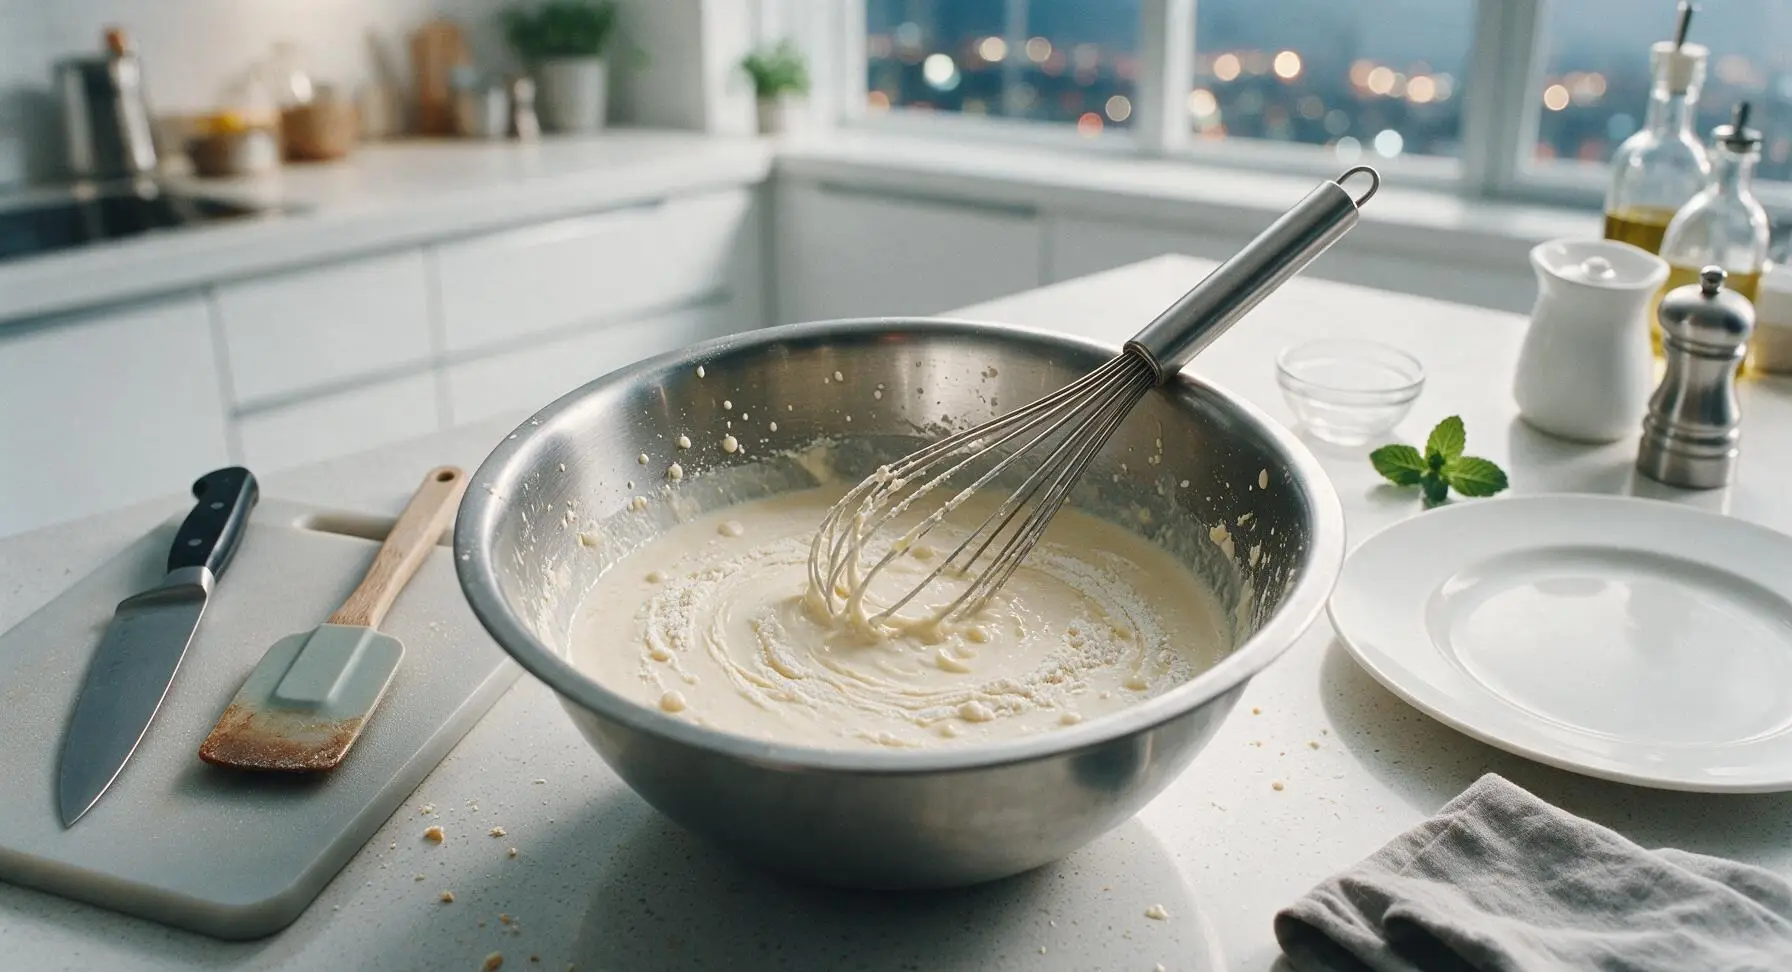
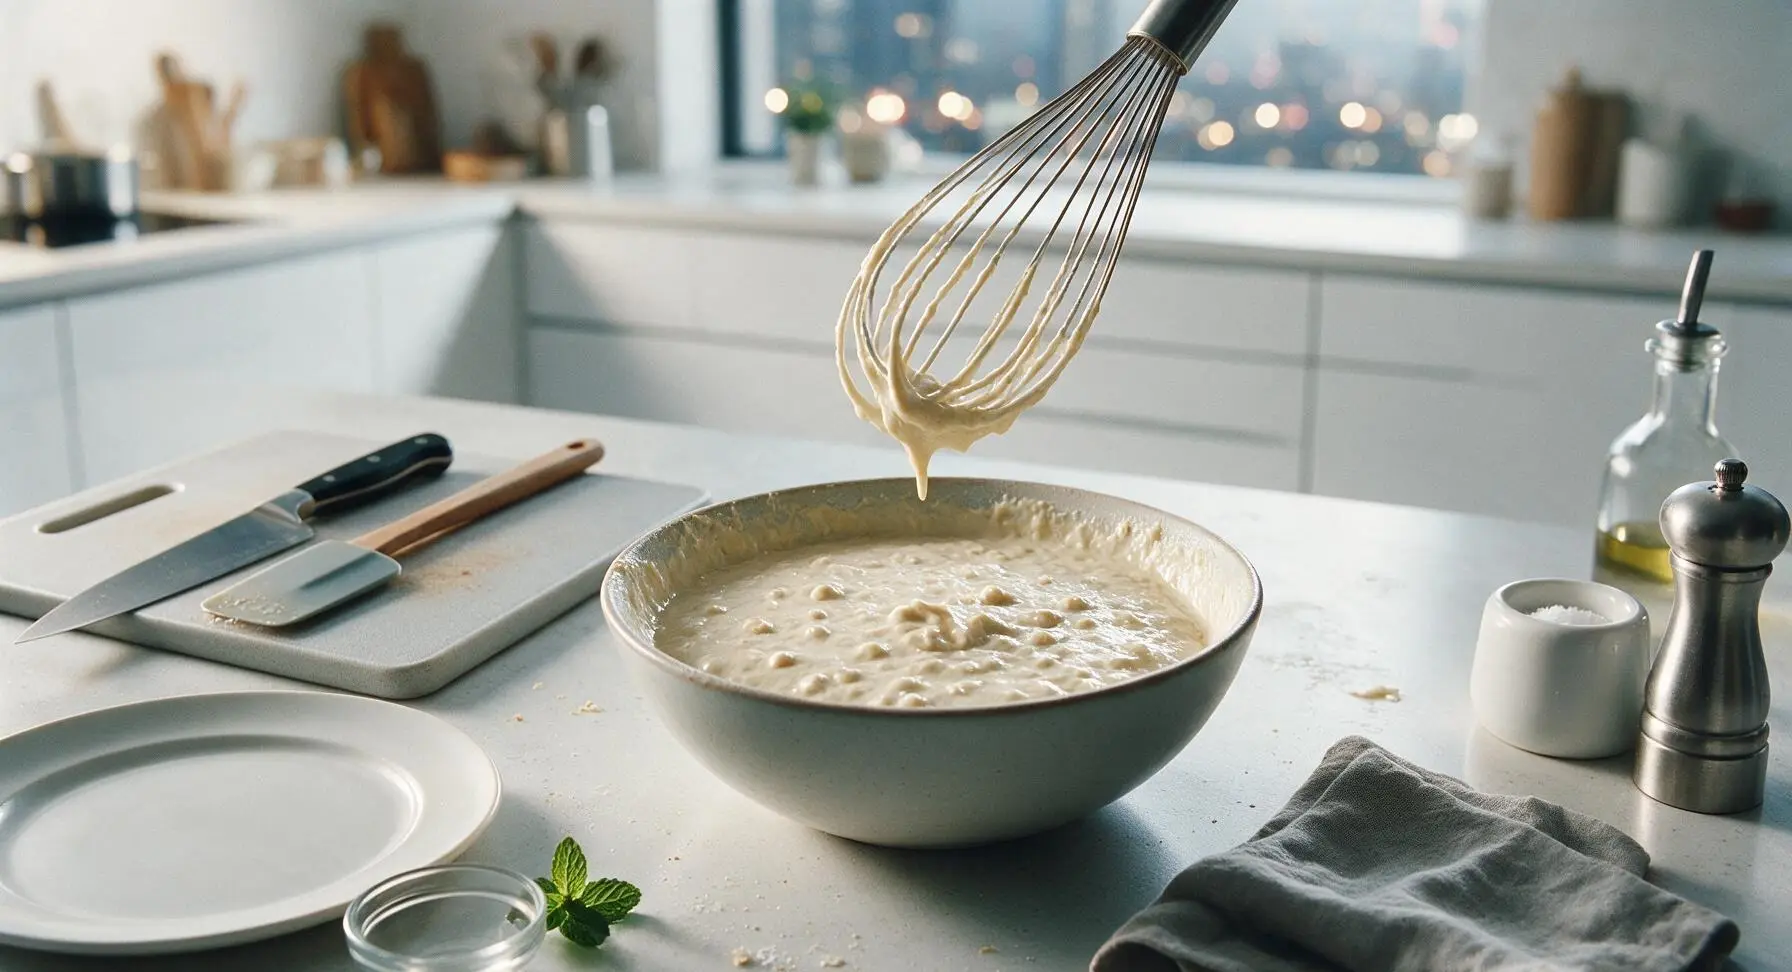
Use the wire whisk to gently stir the wet ingredients into the dry mix, mixing only just until no large pockets of loose dry flour remain. The finished batter should be thick enough to coat the back of a spoon, with small pea-sized lumps across its surface — do NOT overmix to a smooth, pourable consistency, as this develops gluten and creates a chewy, tough coating. Adjust consistency if needed: add 1 tbsp extra cold sparkling water if too thick, or 1 tbsp extra cornstarch if too thin. Let the batter rest for 5 minutes at room temperature to allow flour to hydrate evenly.
Step 3
step3:Mix Batter to Lumpy Consistency
Step 3
step3:Mix Batter to Lumpy Consistency
4

Heat Oil for Frying

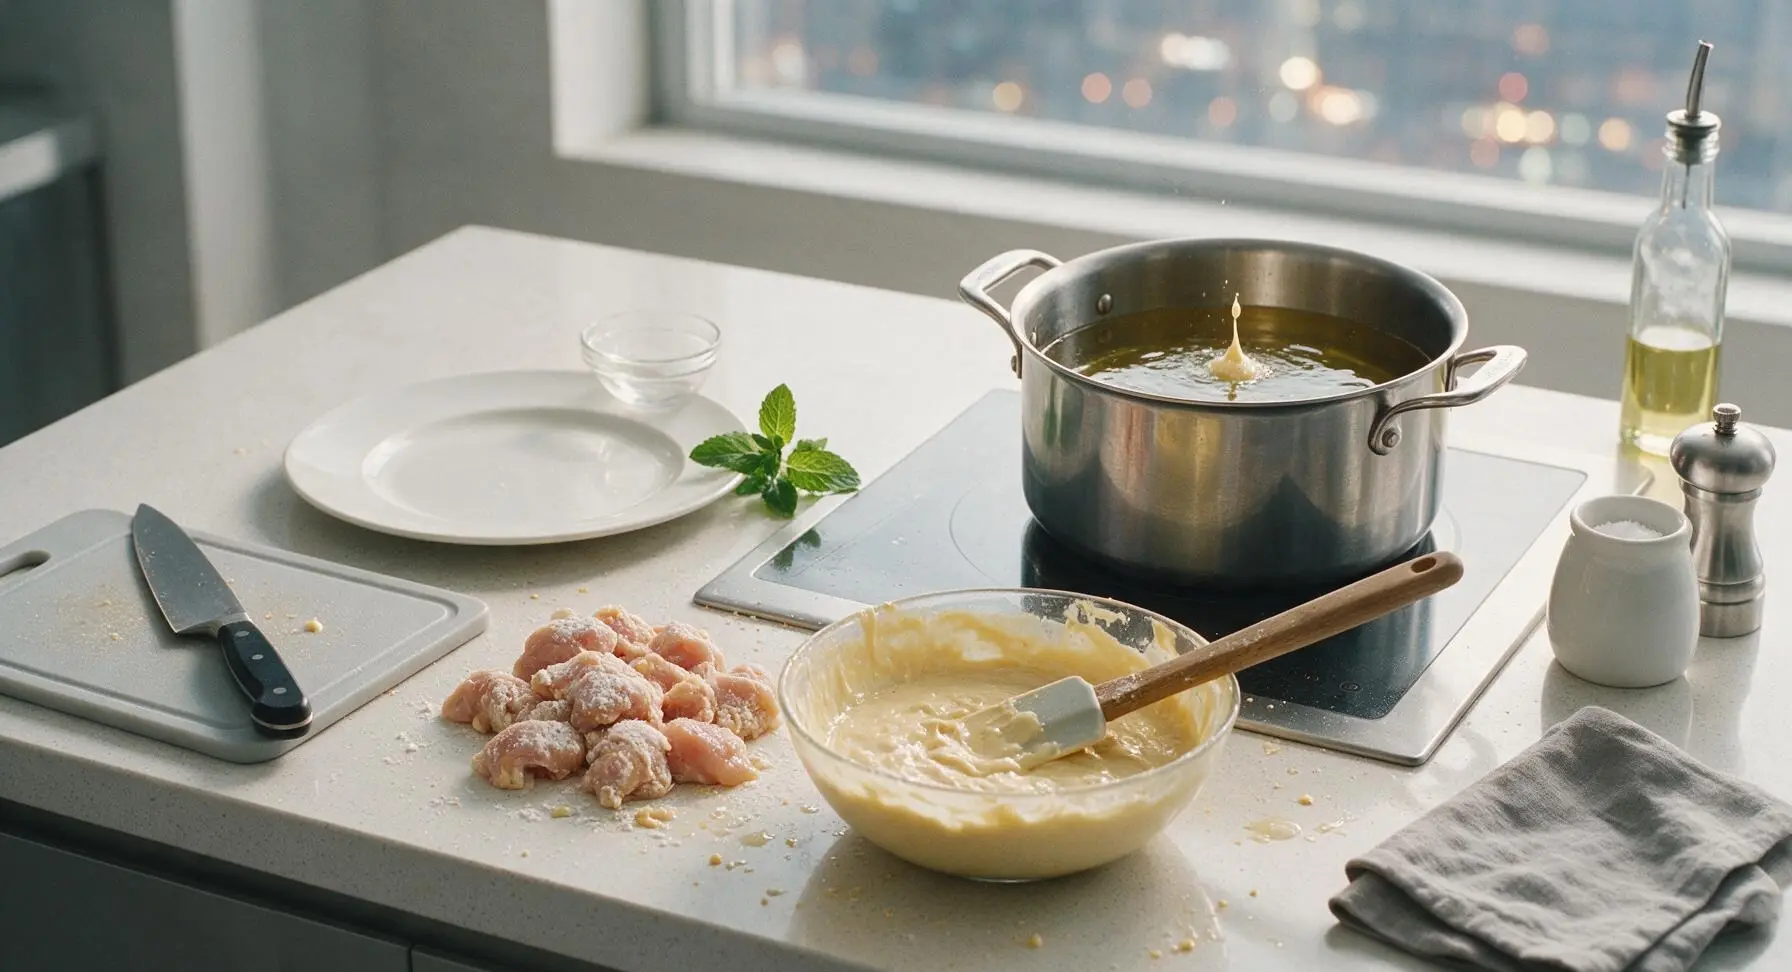
Place the 3-quart heavy-bottomed stainless steel Dutch oven on the back right induction cooktop, add 4 cups of canola oil, and heat over medium heat until the oil reaches 175C (350F). Test temperature by dropping a single tiny drop of batter into the oil: it should sizzle immediately, rise to the surface in 2 seconds, and turn pale golden in 10 seconds. If the batter burns instantly, the oil is too hot; if it sinks and does not sizzle, the oil is too cold.
Step 4
step4:Heat Oil for Frying
5

Coat Chicken in Batter

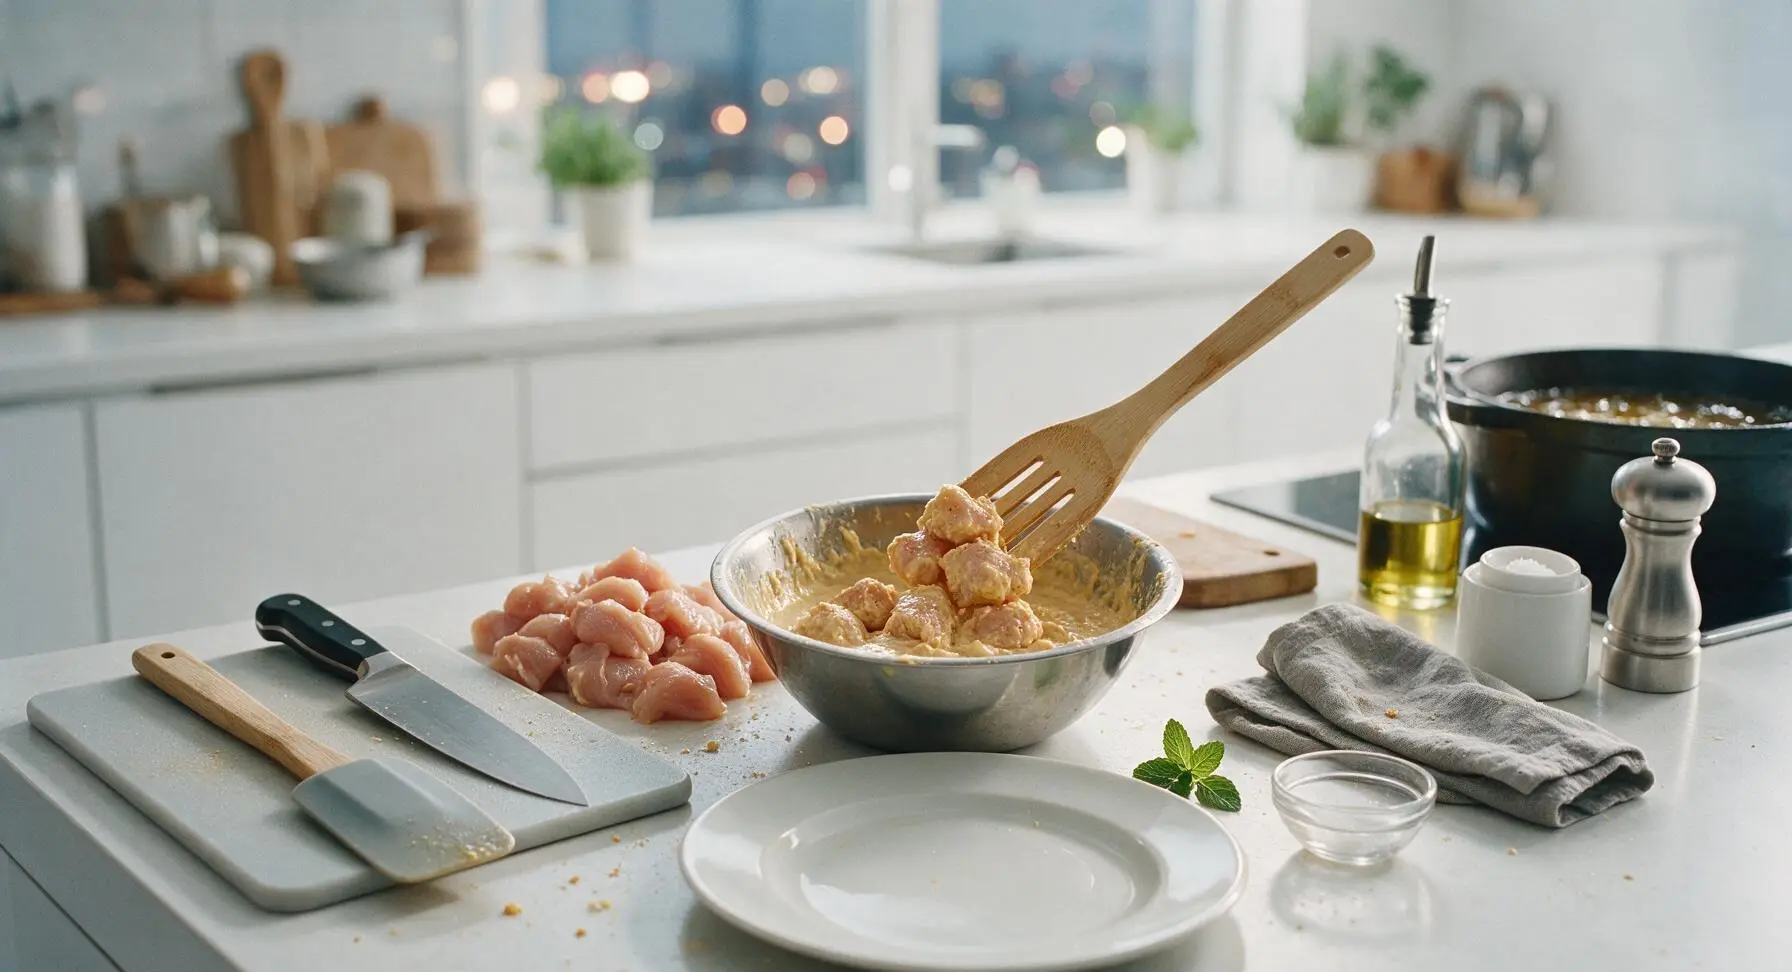
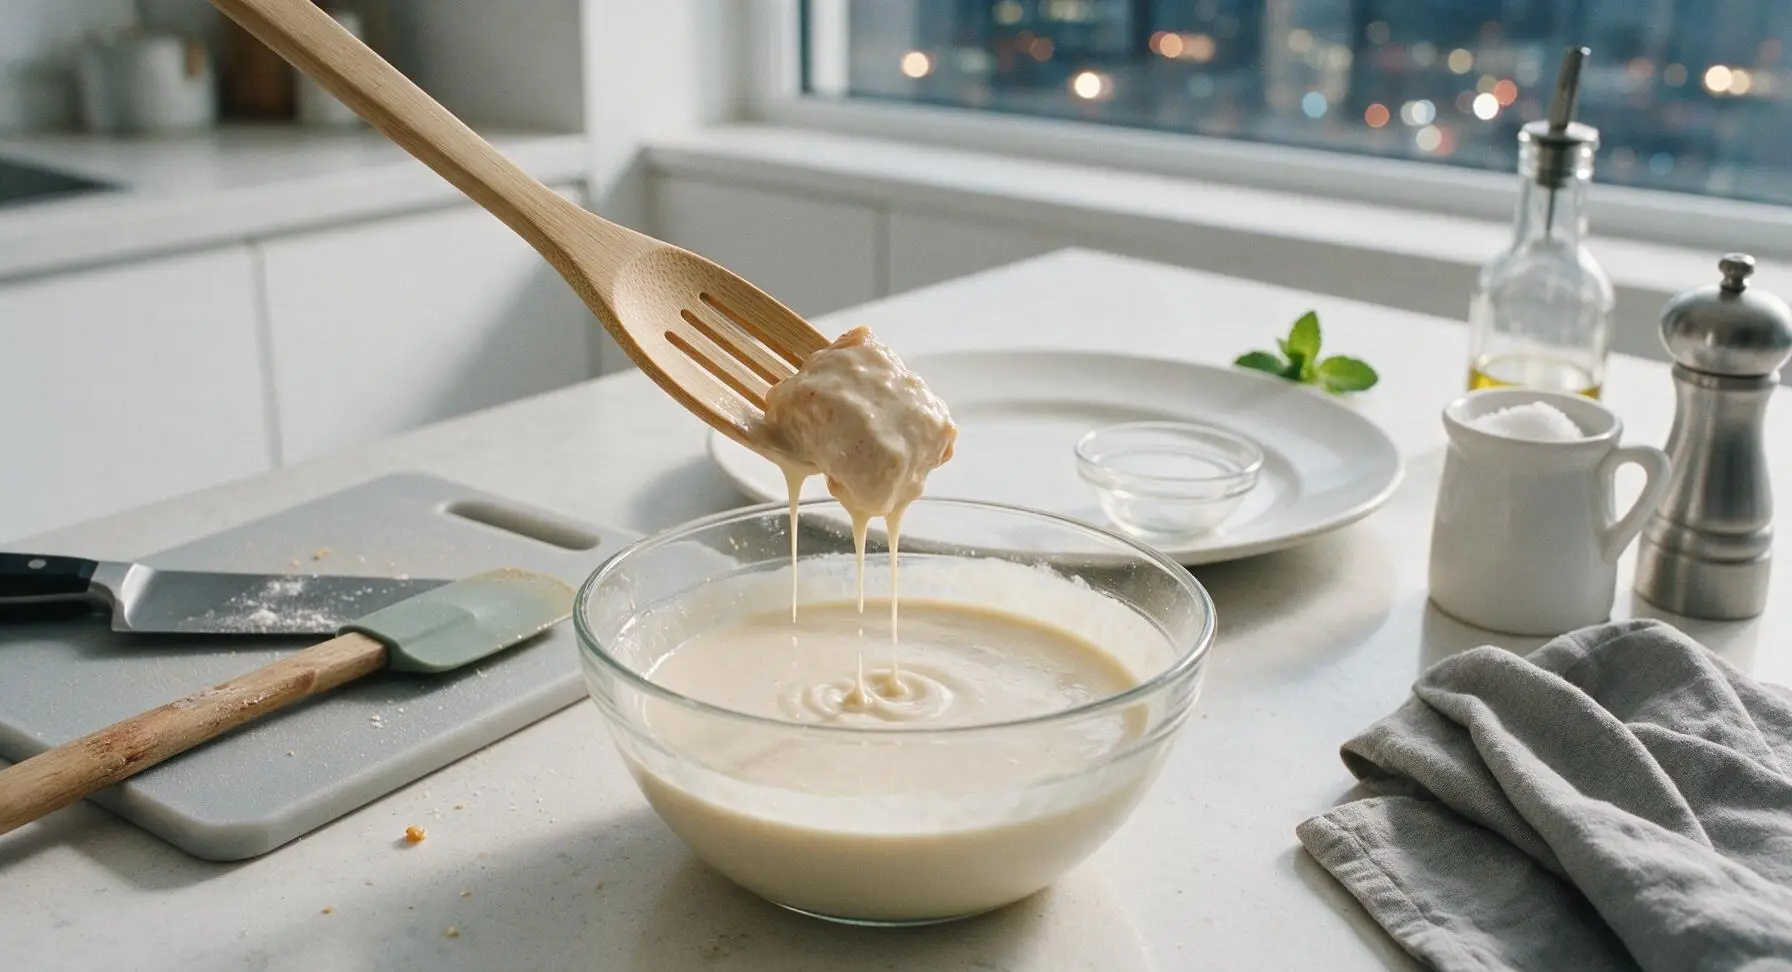
Working in small batches of 5-6 chicken pieces at a time, add cubed chicken to the rested batter, turning gently with the light bamboo slotted spoon to fully coat every piece. Do not add all chicken at once, as this will drop the batter temperature and cause thick, uneven clumps. Hold each coated piece above the bowl for 2 seconds to let excess batter drip off, leaving a thin, even coating — thick batter will create a doughy, bready texture instead of a crisp crust.
Step 5
step5:Coat Chicken in Batter
Step 5
step5:Coat Chicken in Batter
6

Par-Fry Chicken Pieces

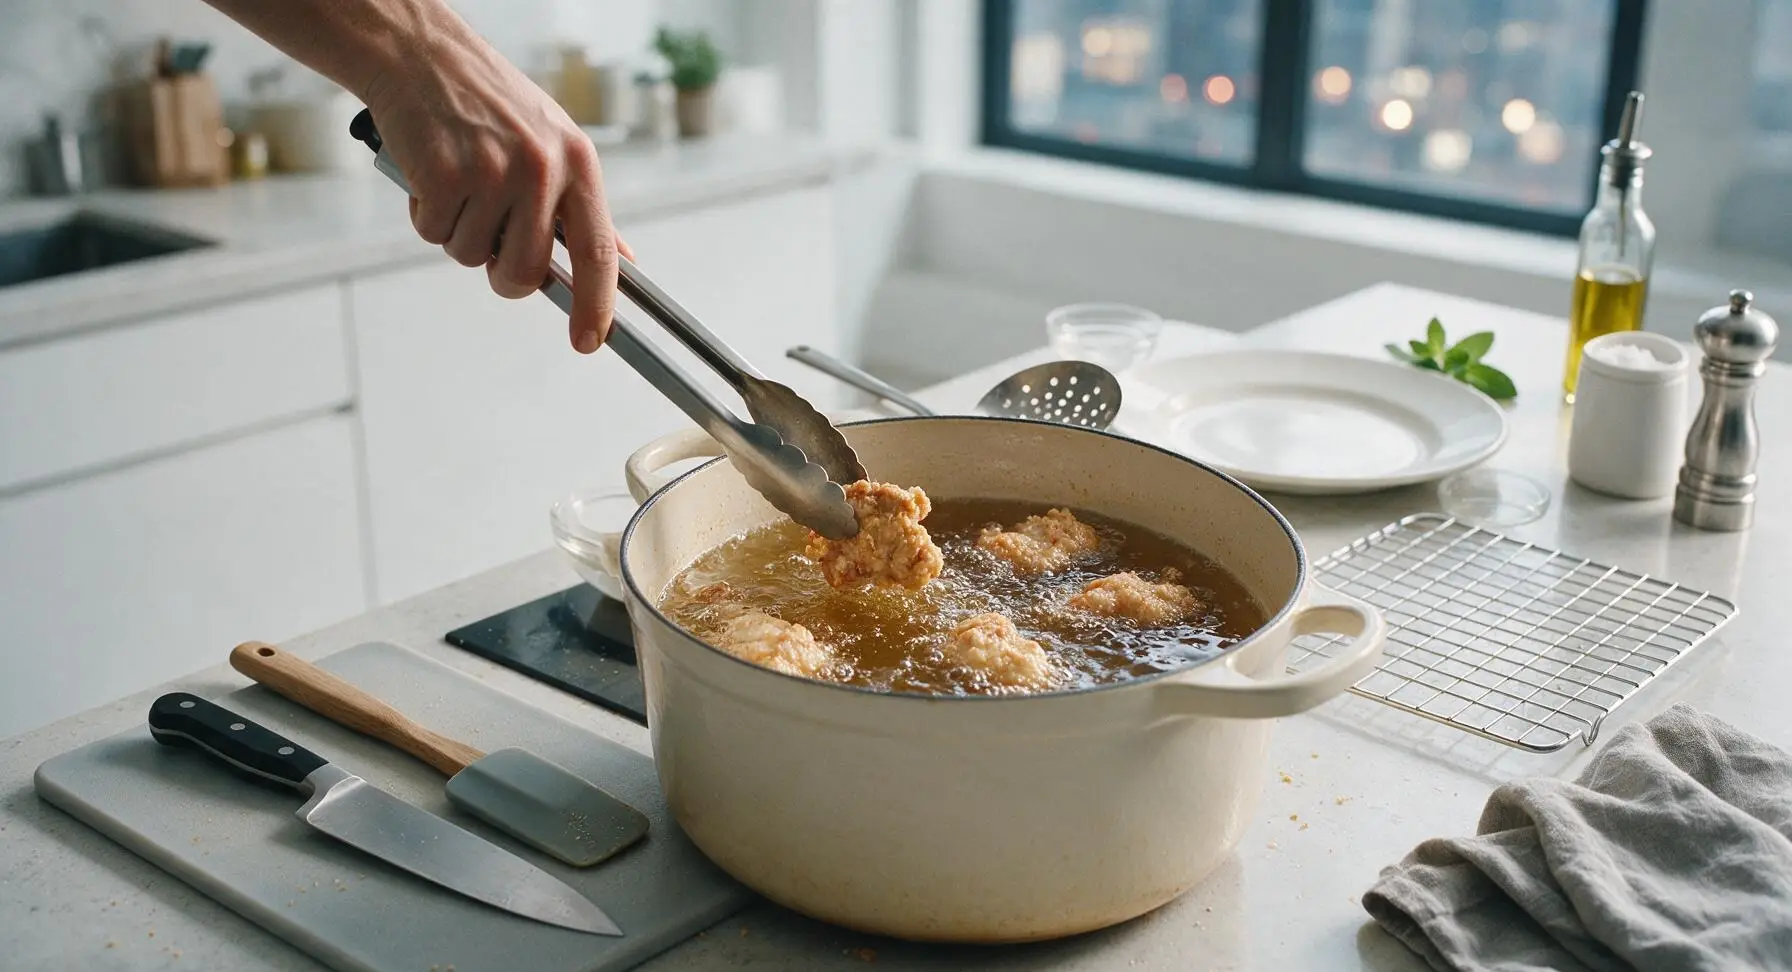
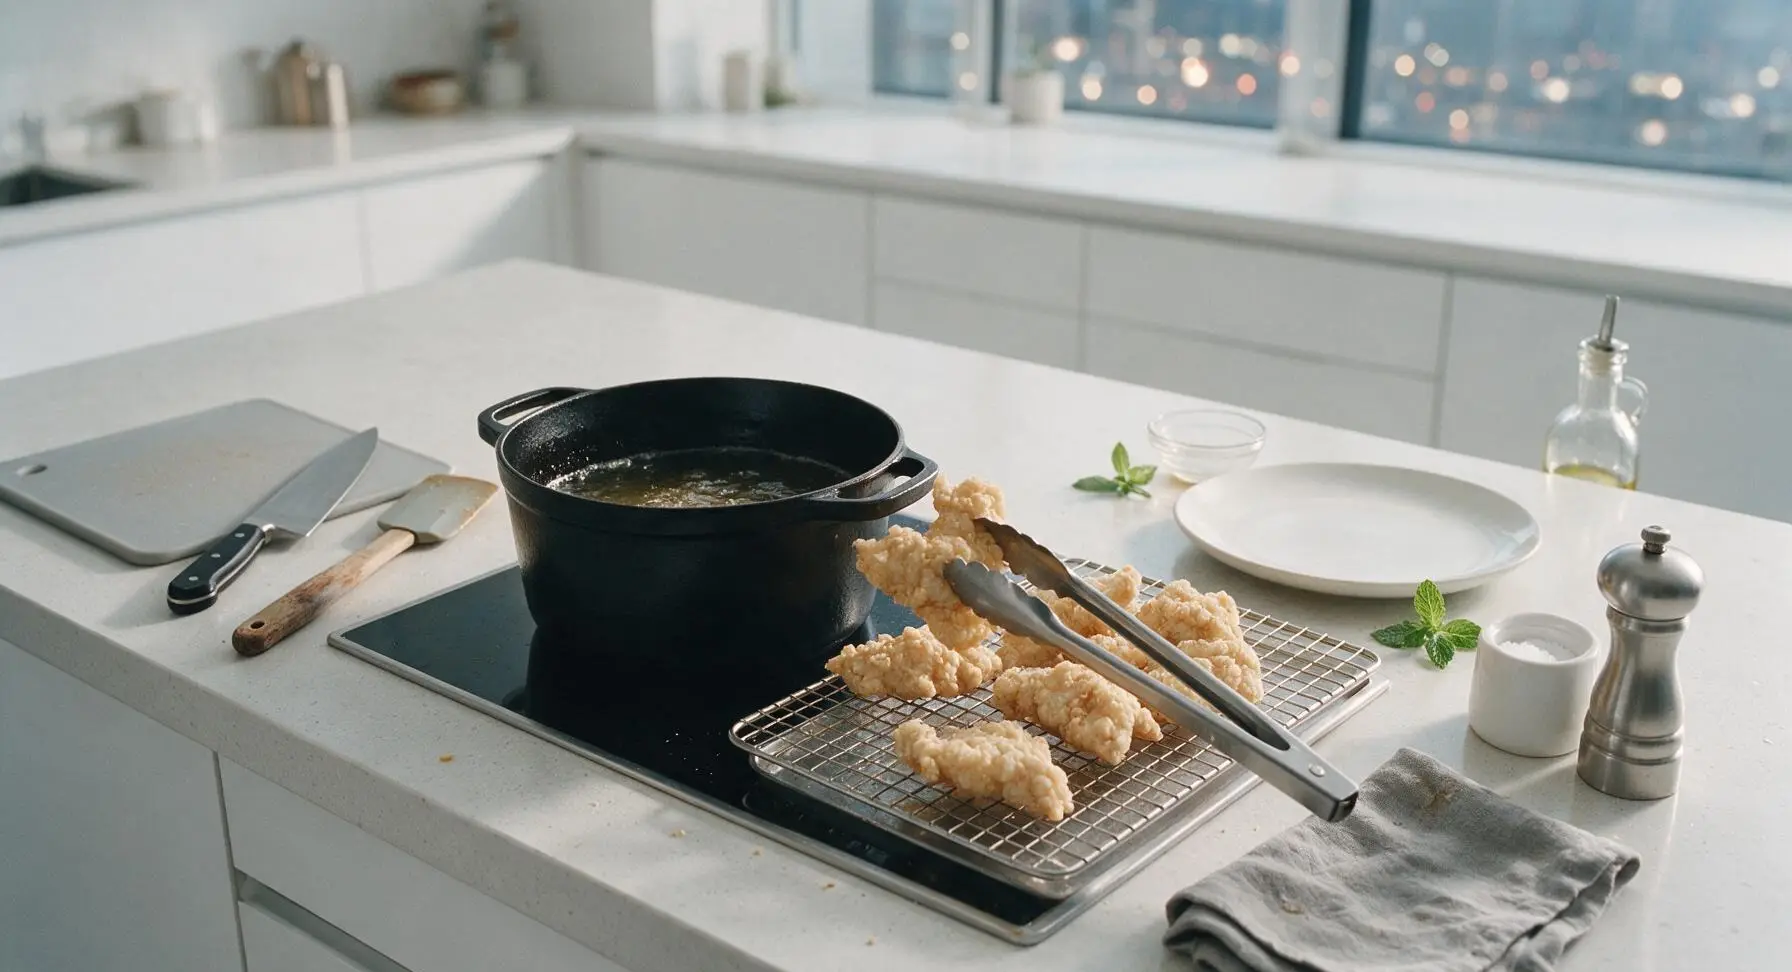
Use the stainless steel tongs to carefully lower coated chicken pieces one by one into the 350F oil, taking care not to drop pieces from height to avoid hot oil splatters. Cook 5-6 pieces per batch to avoid dropping oil temperature, frying for 3 minutes until the batter is fully set and pale blonde in color, not deep golden. Use the slotted spoon to remove par-cooked pieces from the oil, letting excess oil drain for 5 seconds before placing them on the chrome wire cooling rack.
Step 6
step6:Par-Fry Chicken Pieces
7

Second Fry for Crispness

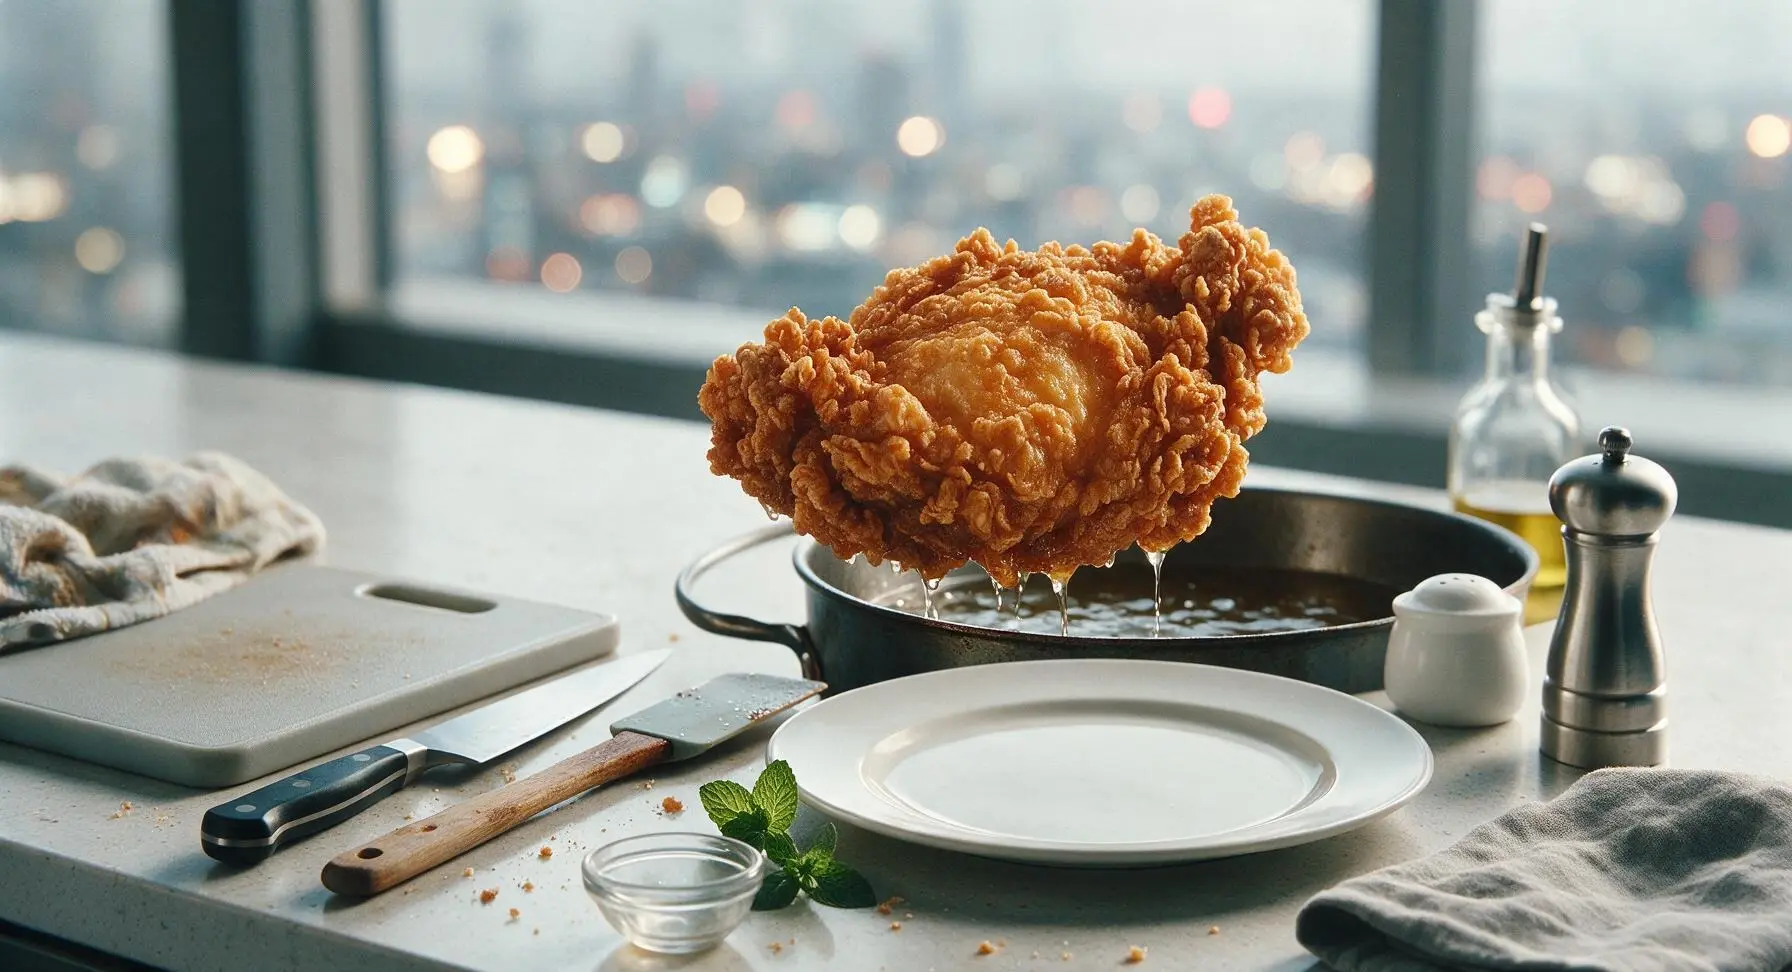
After all chicken pieces have completed their first 3-minute par-fry and rested on the rack for 2 minutes, increase the oil temperature to 190C (375F). Return par-fried chicken to the oil in batches of 7-8 pieces, frying for exactly 2 minutes until the batter is a deep even golden color with a rough, bubbly, shattery texture. Watch closely at this temperature, as the high heat will burn the batter quickly if left too long.
Step 7
step7:Second Fry for Crispness
Step 7
step7:Second Fry for Crispness
8

Drain and Rest Chicken

Use the bamboo slotted spoon to remove twice-fried chicken pieces from the hot oil, letting excess oil drain over the pot for 3 seconds before placing them back on the paper-towel lined chrome cooling rack. Lightly season the hot batter with a tiny pinch of fine sea salt immediately after removing from oil. Let pieces rest for 1 minute to let the batter set fully, which prevents sogginess when tossed in sweet and sour sauce. Transfer to the matte cream white ceramic dinner plate to serve.
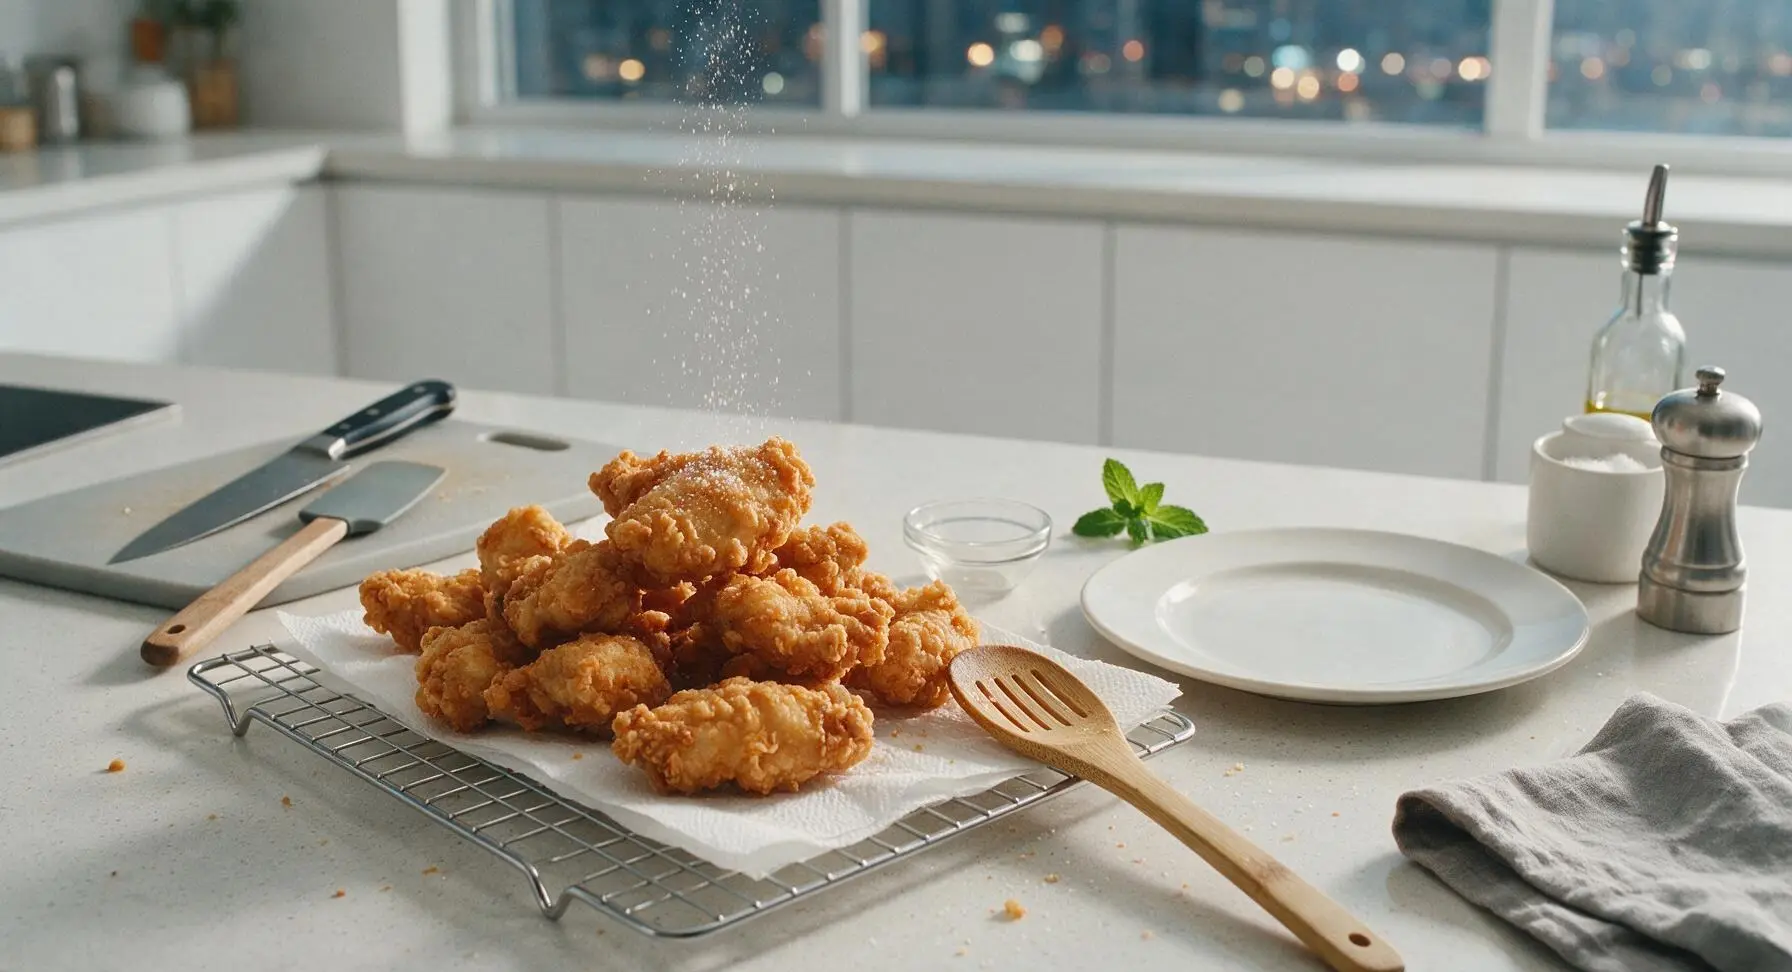
Step 8
step8:Drain and Rest Chicken

Tips

1.Use ice-cold sparkling water instead of room-temperature still water for the batter. Cold water slows gluten development in the wheat flour to keep the coating light, while dissolved carbonation adds tiny air bubbles that create a shattery, non-greasy crunch instead of a dense, chewy crust.
2.Resist the urge to mix the batter until completely smooth. Small pea-sized lumps are ideal: overmixing develops excess gluten, which makes the batter tough and bread-like, and can cause the coating to pull away from the chicken while frying.
3.Do not skip the double-fry step. The first lower-temperature fry cooks the chicken and sets the batter structure without burning it, while the second higher-temperature fry drives off excess surface moisture to create a long-lasting crisp that won’t turn soggy when tossed in sweet and sour sauce.


✨ You May Also Like

Main Course
🍜 United Kingdom

A showstopping classic of tender seared beef, savory mushroom duxelles, and crisp prosciutto wrapped in flaky golden puff pastry, baked to juicy perfection.

⏱️ 2 hours 1Main Course ★ 4.7
Main Course
🍜 India

Tender charred marinated chicken simmered in a rich, spiced creamy tomato sauce, this iconic Anglo-Indian curry pairs perfectly with basmati rice or warm naan.

⏱️ 50 minuteMain Course ★ 4.6
Main Course
🍜 Thailand

Classic tangy, sweet, and savory Thai stir-fried rice noodles with shrimp, tofu, and crunchy garnishes, balancing all five core Thai flavor profiles.

⏱️ 30 minuteMain Course ★ 4.5
Main Course
🍜 United Kingdom

Crispy golden beer-battered cod and fluffy double-fried chips, served with tangy tartar sauce and malt vinegar: the timeless, beloved British pub comfort classic.

⏱️ 45 minuteMain Course ★ 4.7
Main Course
🍜 Mexico

Smoky, chile-marinated pork tacos with caramelized pineapple, fresh cilantro, and lime: a beloved classic Mexican street food perfect for casual summer gatherings.

⏱️ 1 hour 45Main Course ★ 4.8
Main Course
🍜 United States

Crunchy Fritos corn chips layered with savory beef chili and melted cheddar, topped with cool, zesty fixings for a beloved, cozy Tex-Mex comfort food.

⏱️ 35 minuteMain Course ★ 4.8

batter for sweet and sour chicken:Frequently Asked Questions

1.Why does this batter stay crispy even after being tossed in sweet and sour sauce? ▾
That long-lasting crisp comes from the blend of cornstarch and white rice flour, which form a rigid, low-gluten structure that doesn’t break down quickly when exposed to sauce. The small amount of baking powder creates tiny, shattery air pockets that prevent sogginess, unlike all-flour batters that turn mushy minutes after saucing.
2.Can I use chicken breast instead of boneless skinless chicken thighs for this recipe? ▾
You can, but chicken thighs are strongly recommended for juiciness and that classic takeout texture. If you use breast, cut it into uniform 1-inch cubes, don’t overcook it, and brine it for 30 minutes in lightly salted water first to keep it from drying out during the high-heat frying process.
3.Is white rice flour mandatory, or can I substitute it with something I already have? ▾
White rice flour is key for that signature shattery, non-greasy takeout crunch, as it has no gluten and creates a lighter, crisper coating than wheat flour alone. If you’re in a total pinch, you can swap it for extra cornstarch, but the coating will be slightly denser and won’t stay crisp as long after saucing.
4.What’s the correct dry ingredient ratio for the perfect batter consistency? ▾
For ideal texture, whisk together ½ cup spooned and leveled all-purpose flour, ½ cup cornstarch, ½ cup white rice flour, and 1 teaspoon baking powder before adding ice-cold water. Aim for a thin, pancake-batter-like consistency—too thick, and you’ll get a doughy coating; too thin, and it won’t stick to chicken.
5.How cold does the mixing water need to be for the best batter results? ▾
Use ice-cold water straight from the fridge, or even add a couple of ice cubes to the water while you mix. Cold water slows gluten development in the small amount of all-purpose flour, which keeps the batter light instead of tough and chewy, and helps the coating set fast when it hits hot oil.
6.What oil temperature should I use to fry the battered chicken? ▾
Heat your neutral frying oil (like canola or peanut) to 350°F for the first fry, using a clip-on candy thermometer to track temperature accurately. If oil is too cool, the batter will soak up excess grease; if too hot, the outside will burn before the chicken reaches a safe 165°F internal temperature.
7.Do I really need to double-fry the chicken to get that takeout-style crisp? ▾
Yes, double frying is non-negotiable for that long-lasting, shattery takeout texture. Do a first 3-4 minute fry to cook the chicken through, pull it out to rest for 5 minutes, then do a 1-2 minute second fry at 375°F to set the ultra-crisp outer layer that holds up to sauce.
8.Why is my batter turning out thick and doughy instead of light and crispy? ▾
A thick, doughy batter almost always comes from two common mistakes: adding too much dry mix relative to water, or overmixing the batter which develops excess gluten. Whisk only until dry ingredients are just incorporated—lumps are totally fine—and thin with extra cold water until it coats the back of a spoon thinly.
9.Can I mix this batter ahead of time to cut down on weeknight prep? ▾
I don’t recommend mixing the batter more than 10 minutes before you plan to fry it. The baking powder will start to lose its leavening power as it sits, and the flours will absorb too much water, leading to a denser, less crisp coating. Measure dry ingredients ahead in a sealed bag to save prep time instead.
10.How do I keep the batter from sliding off the chicken when I fry it? ▾
First, pat your chicken cubes completely dry with paper towels before dipping—excess surface moisture keeps batter from adhering properly. Don’t overcrowd the fryer, which drops oil temperature fast and makes batter slip, and let coated chicken rest 2 minutes after dipping before lowering it gently into oil.
11.Can I bake this battered chicken instead of frying it for a lighter meal? ▾
You can, but it won’t have that exact shattery takeout crisp. To bake, arrange battered chicken on a wire rack set over a baking sheet, spray generously with neutral oil, and bake at 425°F for 20-25 minutes, flipping halfway, until golden and cooked through. The coating will be crisp but slightly less light than fried.
12.Why is my finished fried batter greasy instead of light and non-greasy? ▾
Greasy batter almost always traces back to oil that was too cool when you added the chicken, or overcrowding the pot which drops oil temperature quickly. When oil is at the correct temperature, the batter instantly seals and repels oil instead of soaking it up. Always let oil come back up to temp between batches to avoid this issue.
13.Can I use this batter for other takeout dishes besides sweet and sour chicken? ▾
Absolutely! This versatile, crisp batter works perfectly for any sauced Chinese-American takeout dish, from orange chicken to sesame chicken, General Tso’s chicken, or even crispy fried cauliflower for a vegetarian swap. It holds up beautifully to all thick, tangy, sweet glazes without getting soggy.
14.Do I need to season the batter itself, or just season the chicken? ▾
You should do both for the most flavorful, well-balanced result. Add ¼ teaspoon each of salt and white pepper to the dry batter mix to give the coating subtle flavor, and toss your chicken cubes with a pinch of salt and tiny splash of soy sauce before dipping to make sure every bite is seasoned.
15.Can I use potato starch instead of cornstarch in this batter recipe? ▾
Cornstarch creates a slightly firmer, longer-lasting crisp that holds up exceptionally well to sweet and sour sauce, which is why it’s our pick here. Potato starch will give you a lighter, more delicate crunch, but it breaks down faster when tossed in sauce, so it’s not ideal if you’re not serving immediately.
16.How long will the fried chicken stay crisp after I toss it in sweet and sour sauce? ▾
When made correctly with this batter, the chicken will stay crisp for 15-20 minutes after saucing, which is right in line with classic takeout quality. Toss it in sauce right before serving instead of letting it sit in sauce for long periods to extend that crisp texture as much as possible.
17.Can I make this batter gluten-free for friends with dietary restrictions? ▾
Yes, you can easily make this batter fully gluten-free by swapping the regular all-purpose flour for a 1:1 gluten-free all-purpose baking mix. Since the batter already relies heavily on rice flour and cornstarch for texture, you won’t notice a meaningful difference in crunch or flavor with this simple swap.
18.Why do you recommend chicken thighs over chicken tenderloins for this recipe? ▾
Chicken thighs have a slightly higher fat content that stays juicy even through the high heat of double frying, which matches the tender, moist takeout texture people love. Chicken tenderloins are very lean, so they dry out much faster during frying, leading to tough, bland bites inside the crisp coating.
19.Do I need to coat chicken in dry flour first before dipping it in the wet batter? ▾
You don’t need a pre-coat of dry flour for this batter if you pat the chicken dry first. In fact, an extra dry flour layer can make the coating thicker and doughier instead of light and shattery. Just dip dry chicken cubes directly into the cold, mixed batter right before frying for the most authentic texture.

Comments (14)

2 days ago

OMG this batter is a total game changer! I’ve tried so many copycat sweet and sour chicken recipes and they always turn out soggy 10 minutes after I toss them in sauce, but this stayed crispy through our entire family dinner last night. My kids begged for seconds, even my super picky 7 year old! SO good, will be making this every other week for meal prep from now on.

1 day ago

That makes our day to hear! So glad the crispiness held up for you—pro tip if you’re making it for meal prep, keep the sauce separate until you’re ready to reheat and it’ll stay crunchy even longer!

1 week ago

Took this to a neighborhood potluck last weekend and people were hounding me for the recipe all night. The crunch is exactly like the takeout spot we order from down the street, no cap. 10/10, super easy to throw together even after a long work day.

3 days ago

Wait, has anyone tried this with gluten free all purpose flour? My husband has celiac so I’m always hunting for takeout dupes we can both eat, and this looks too good to pass up.

2 days ago

I made it last week with Cup4Cup GF flour and it worked perfectly! Crunch was exactly the same, no weird gritty texture at all. Just make sure your oil is hot enough before you drop the chicken in!

5 days ago

Y’all I messed up so bad the first time I made this 😂 I used cold water instead of ice cold like the recipe says and my batter was way too thin, half of it slid off the chicken in the fryer. Second try? *Chef’s kiss* Crispy, perfect, tasted exactly like the takeout I used to get growing up. Who knew water temperature made that big of a difference?

4 days ago

Oh I did the exact same thing my first go round! I thought it was no big deal until I had a pan full of weird fried batter blobs and naked chicken lmao. Ice water is non-negotiable apparently!

4 days ago

We’ve all been there! The ice cold water helps keep the batter light and extra crispy when it hits the hot oil, and helps it stick to the chicken way better. Glad you gave it a second shot and it worked out!

2 weeks ago

Made this for my parents when they came to visit last Sunday and my dad said it was better than the Chinese restaurant he’s been going to for 30 years. High praise coming from that man, let me tell you. The 15 minute cook time is no joke either, I had the whole dish on the table in under 40 minutes total.

30 minutes ago

Quick question—has anyone tried making this batter in the air fryer instead of deep frying? I try to avoid deep frying at home when I can but I’m dying for that crispy takeout texture.

5 minutes ago

Great question! You can totally make this in the air fryer—spray the battered chicken generously with oil, cook at 400F for 12-15 minutes flipping halfway, and it’ll get nice and crispy. It won’t be *exactly* the same as deep fried, but it’s a delicious lighter alternative!

yesterday

Game. Changer. I used this batter for shrimp too when I made sweet and sour shrimp last night and it worked just as well! Crunch held up even when I tossed everything in sauce and drove 20 minutes to my friend’s game night. 1000/10

yesterday

Wait how did it do with tofu? I’ve been looking for a crispy batter for tofu stir fry and this sounds like it might hit!

2 hours ago

@SeafoodSally I tried it with extra firm pressed tofu last week and it was insane! Just pat the tofu really dry before dipping it in the batter and it sticks perfect, gets so crispy.

1 week ago

I was so skeptical a batter this easy could actually taste like takeout, but wow. I didn’t even have to run to the store for fancy ingredients, everything was already in my pantry. My three kids ate every last bite on their plates, no negotiating required. Will be on our weekly dinner rotation for sure.

5 days ago

Same! I love that I don’t have to buy a bunch of random specialty stuff for it. So many copycat recipes call for weird ingredients I’ll never use again, this one is totally pantry staple friendly.

3 days ago

Tasted great when it was fresh, but I made way too much and the leftovers got a little soggy when I microwaved them the next day. Next time I’ll reheat them in the oven like I do with leftover takeout, I bet that fixes it. Still way better than any other batter recipe I’ve tried before.

just now

Y’all. I literally just finished eating this and I’m still sitting at the table shocked. How is this better than the $18 takeout order I get every Friday? The batter is so light and crispy, not heavy and greasy like some recipes I’ve tried. 15 minute cook time is NOT a lie, I timed it. Worth every single calorie.

just now

Right?! I added up the cost last time I made it and it was like $4 per serving, way cheaper than delivery and tastes better. Wild.

just now

Love to hear that! We developed this specifically to cut down on that heavy, greasy batter a lot of home recipes use, so we’re stoked it hits that perfect takeout note for you.

2 hours ago

Super quick question—what temperature should the oil be for frying? I don’t have a candy thermometer so I usually just guess, and I always end up burning things or having them turn out soggy. Help!

1 hour ago

Great question! Aim for 350F for the oil. If you don’t have a thermometer, you can test it by dropping a tiny bit of batter into the oil—if it sizzles immediately and floats to the top, the oil is ready! If it burns quickly, turn the heat down a little, if it sinks and doesn’t sizzle, give it another minute or two to heat up.

5 days ago

Made this for my son’s hockey team dinner after practice last night and the teenage boys ate every single piece. They kept asking when I was going to make it again, said it was better than the team banquet food. Easy, fast, crowd pleaser—can’t ask for more than that as a busy mom.

2 weeks ago

Wait I know this is a batter recipe but does anyone have a good sweet and sour sauce recipe to go with it? I used a store bought one last time and it was way too vinegary for my taste, would love a homemade dupe for the takeout sauce too!

1 week ago

I use 1/2 cup sugar, 1/3 cup apple cider vinegar, 1/4 cup ketchup, 1 tbsp soy sauce, 1 tsp garlic powder, and a slurry of 1 tbsp cornstarch + 2 tbsp water, simmered until thick. Tastes EXACTLY like the takeout sauce, not too tangy!

1 week ago

That homemade sauce recipe is spot on! We actually have a full takeout-style sweet and sour sauce recipe linked right at the top of this post if you want to check that out too, it pairs perfectly with this crispy batter.

1 week ago

I’ve been cooking for 40+ years and I have to say, this batter formula is spot on. The ratio of cornstarch to flour is perfect, the ice water trick is classic takeout technique that so many home recipes leave out. Made this for my grandkids last weekend and they gave it two thumbs up. Great recipe, especially for new cooks since it’s so hard to mess up once you follow the directions.

5 days ago

This makes me feel so much better about trying it! I’m a total newbie in the kitchen and I was nervous I’d mess it up, but if it’s easy enough for beginners I’m definitely making it this weekend.



