
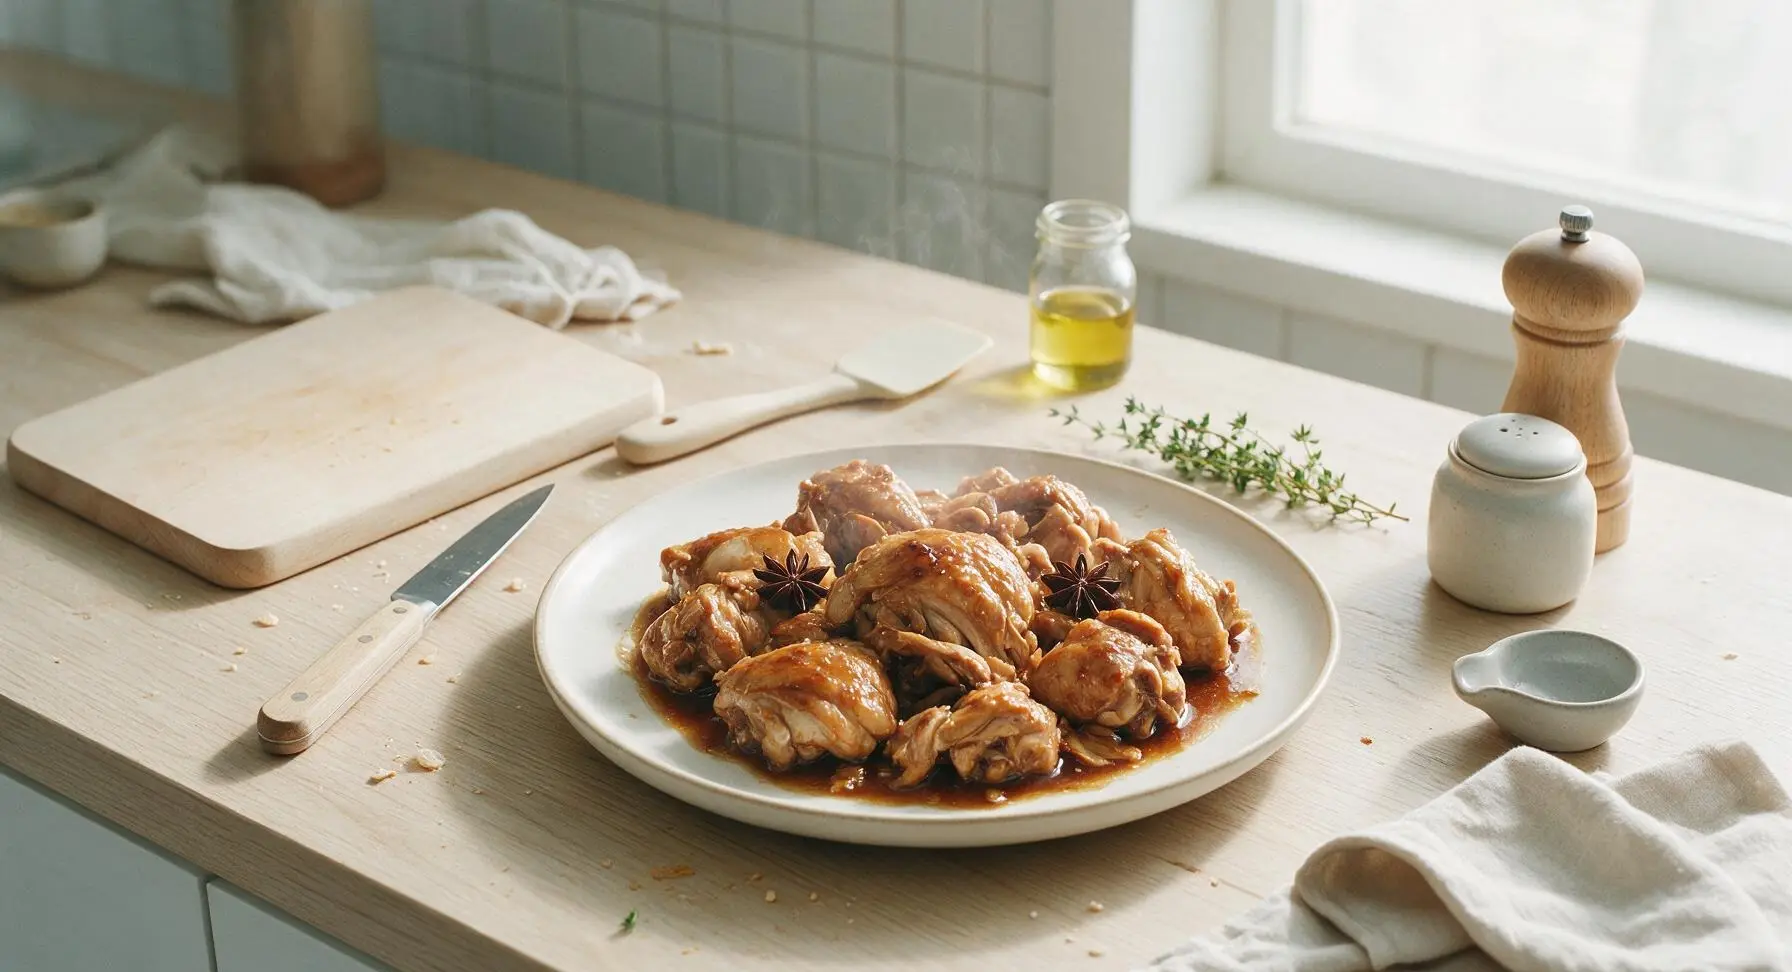
braised chicken

title 1
braised chicken
⏱️ cook time 45 minutes
🍽️ servings 4
⚡ Difficulty easy

intro

Tender fall-off-the-bone chicken coated in glossy, umami-rich soy braising sauce, warm with ginger and star anise, perfect for spooning over steamed rice at casual family meals.

Ingredients
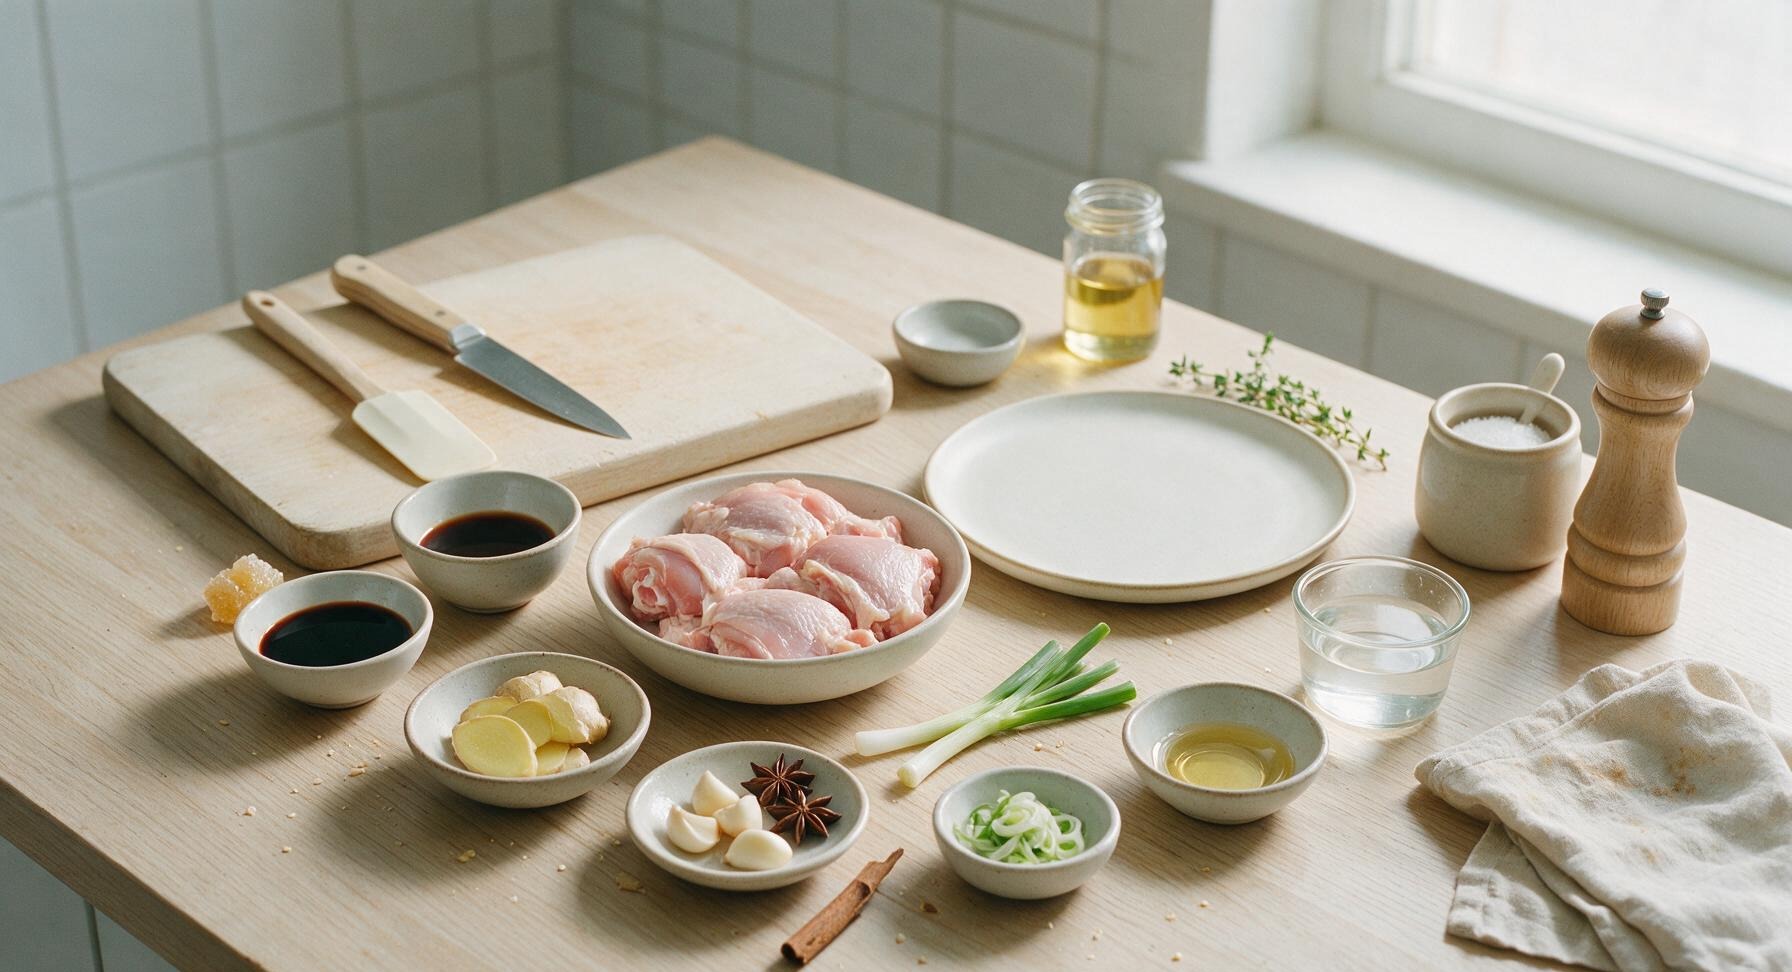
Bone-in, skin-on chicken thighs 800g (about 6 pieces, trimmed of excess loose skin)
Light soy sauce 3 tablespoons
Dark soy sauce 1 tablespoon
Shaoxing cooking wine 2 tablespoons
Yellow rock sugar 15g (about 3 small pieces)
Fresh ginger 20g, peeled and cut into 5mm thick slices
Garlic cloves 6 cloves, lightly crushed
Whole star anise 2 pods
Small cassia cinnamon stick 1 (5cm length)
Fresh scallions 3 stalks, 2 cut into 5cm sections, 1 thinly sliced for garnish
Neutral cooking oil (canola or peanut) 1 tablespoon
Warm water 250ml

Steps

1

Prep and pat chicken dry

Place the 800g bone-in skin-on chicken thighs on the acacia cutting board. Use the chef knife to trim any excess loose skin or large fat deposits from the edges of the thighs. Tear 2 sheets of unbleached paper towel and thoroughly pat every surface of the chicken completely dry, paying extra attention to the skin side. Dry chicken will sear to a crisp golden crust instead of steaming; the skin should feel matte and dry to the touch, not damp or slippery.
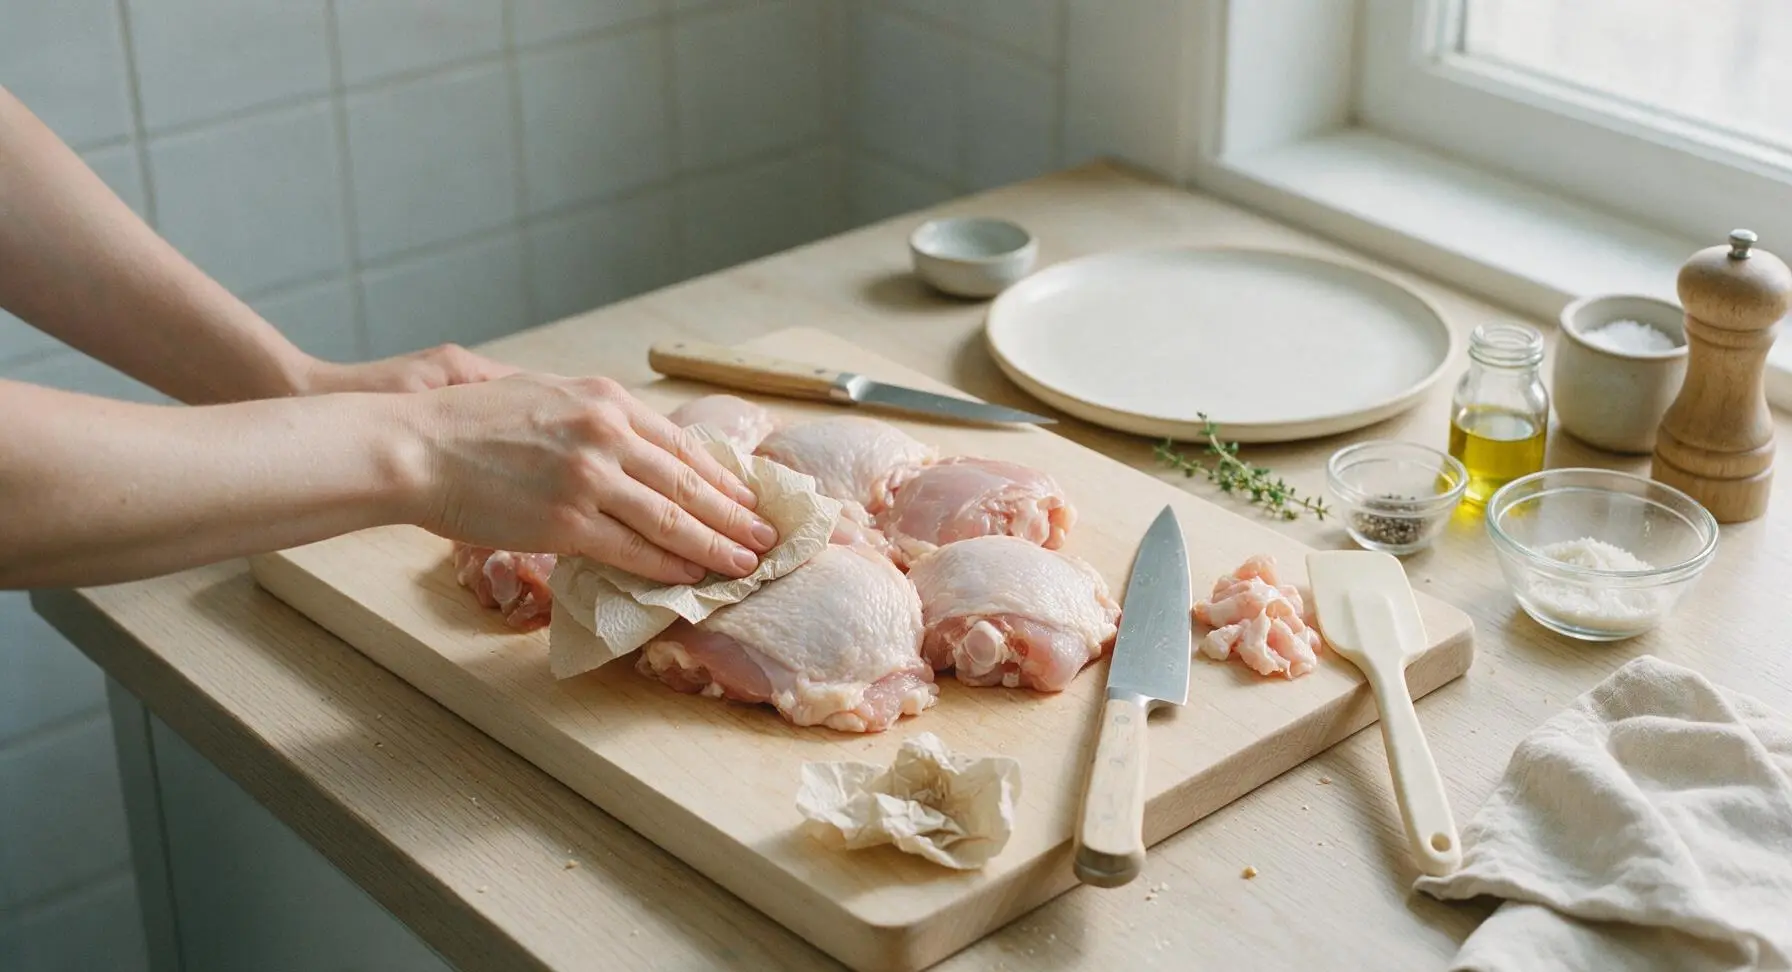
Step 1
step1:Prep and pat chicken dry
2

Sear chicken until golden

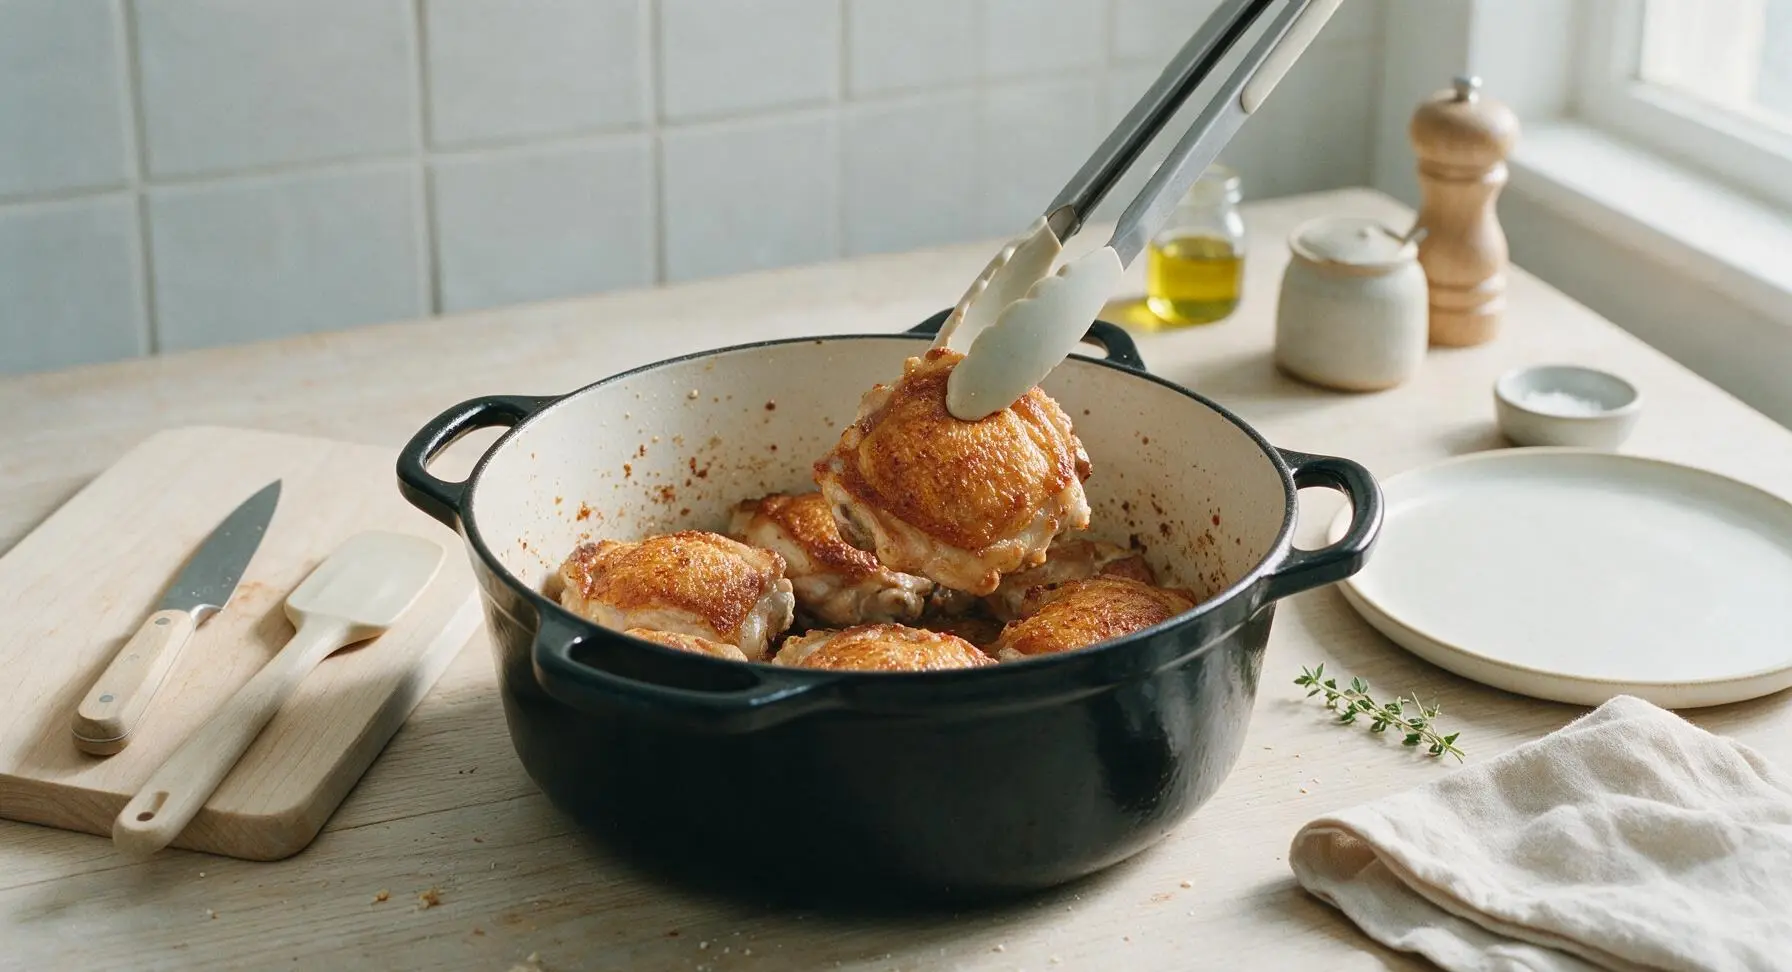
Heat 1 tablespoon neutral oil in the enamel Dutch oven over medium heat (160C/320F) for 1 minute until the oil shimmers. Use the silicone-tipped tongs to place the chicken thighs skin-side down in a single layer in the pot, working in 2 batches if needed to avoid overcrowding (crowding causes steaming instead of searing). Sear for 6-7 minutes without moving, until the skin is deep golden brown and crisp, releasing easily from the pot bottom when lifted with tongs. Flip each piece and sear the bone/meat side for 2 minutes, then transfer seared pieces temporarily to the empty edge of the acacia cutting board while you cook the aromatics.
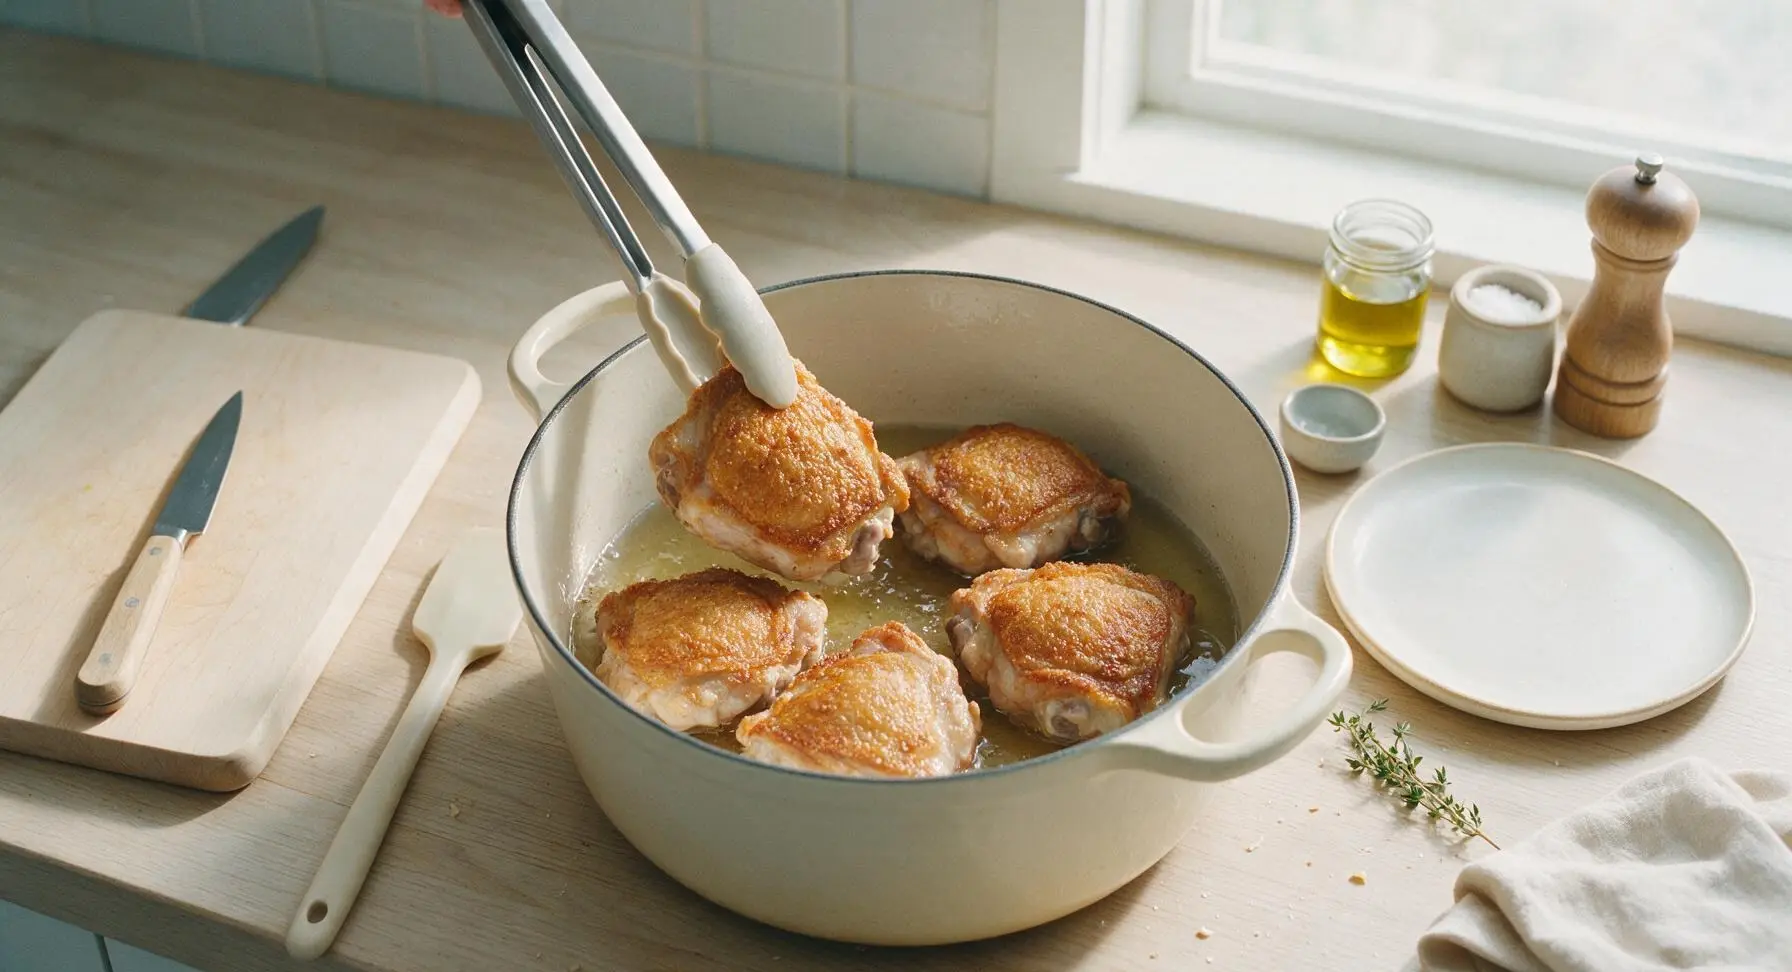
Step 2
step2:Sear chicken until golden
Step 2
step2:Sear chicken until golden
3

Sauté aromatics and spices

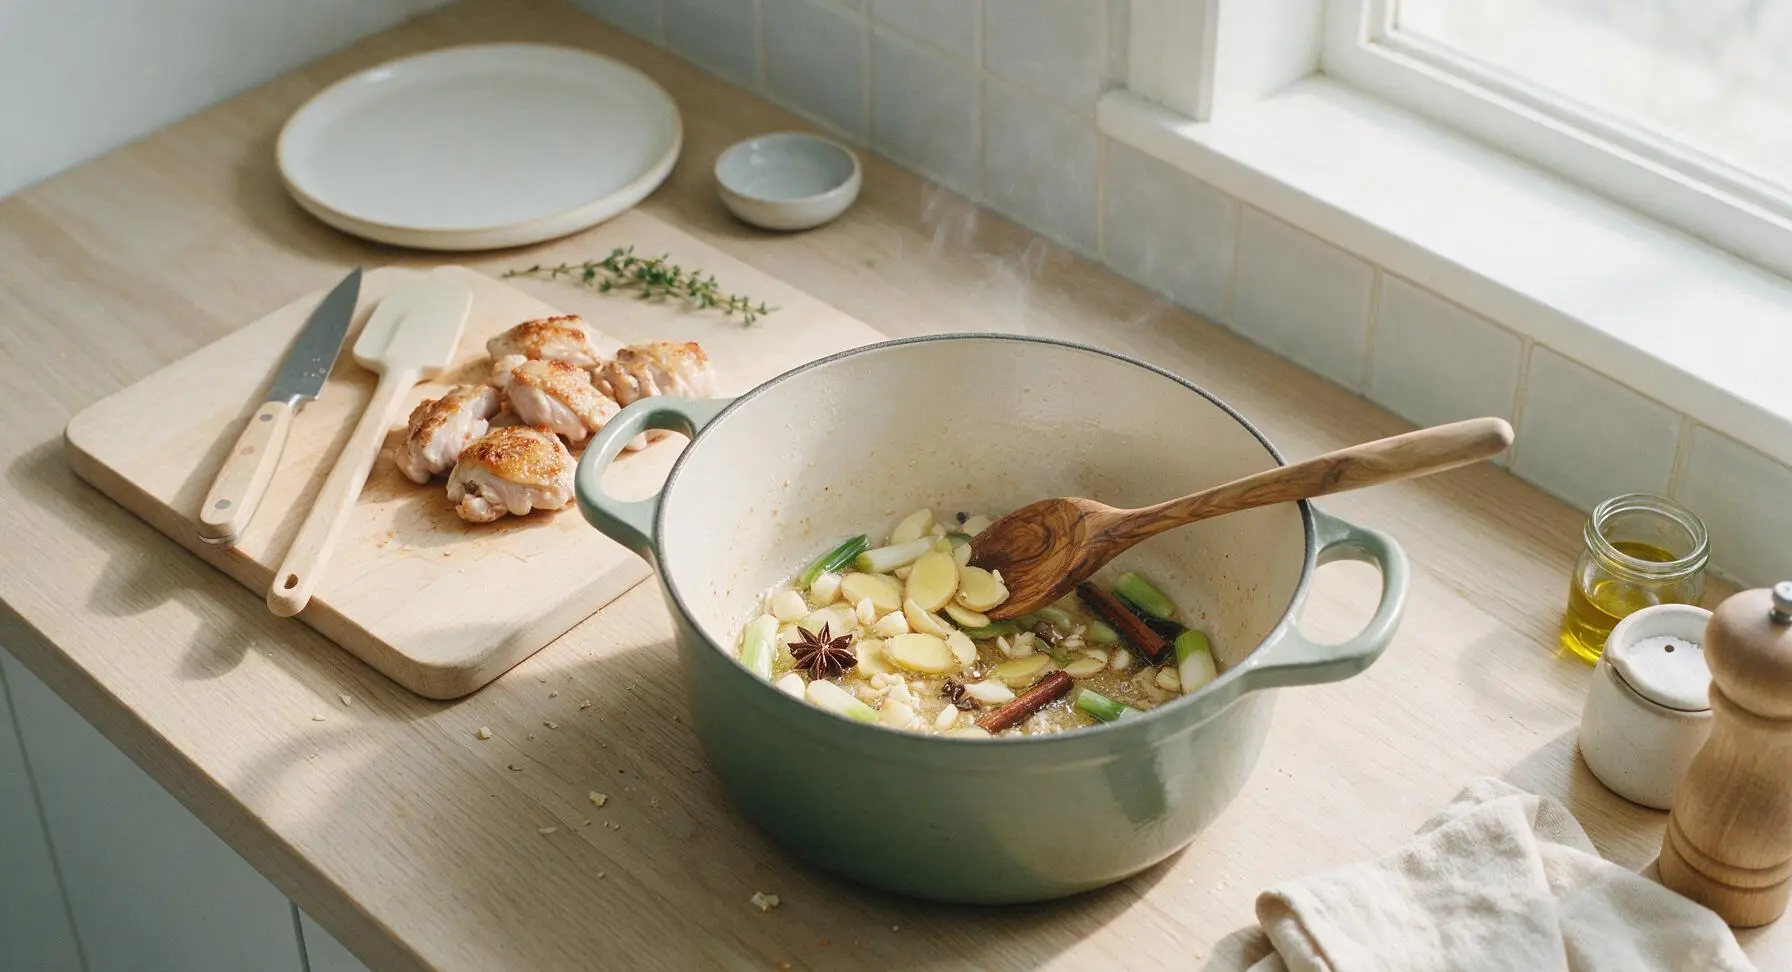
Leave 1 tablespoon of rendered chicken fat in the Dutch oven, discarding any excess. Lower heat to medium-low (140C/285F). Add the sliced ginger, crushed garlic, scallion sections, star anise, and cinnamon stick to the pot. Use the olive wood spoon to stir continuously for 1-2 minutes, until the aromatics release a warm, fragrant scent, the ginger edges turn pale golden, and the garlic is soft but not browned (burnt garlic will make the sauce bitter).
Step 3
step3:Sauté aromatics and spices
4

Add braising liquids and sugar

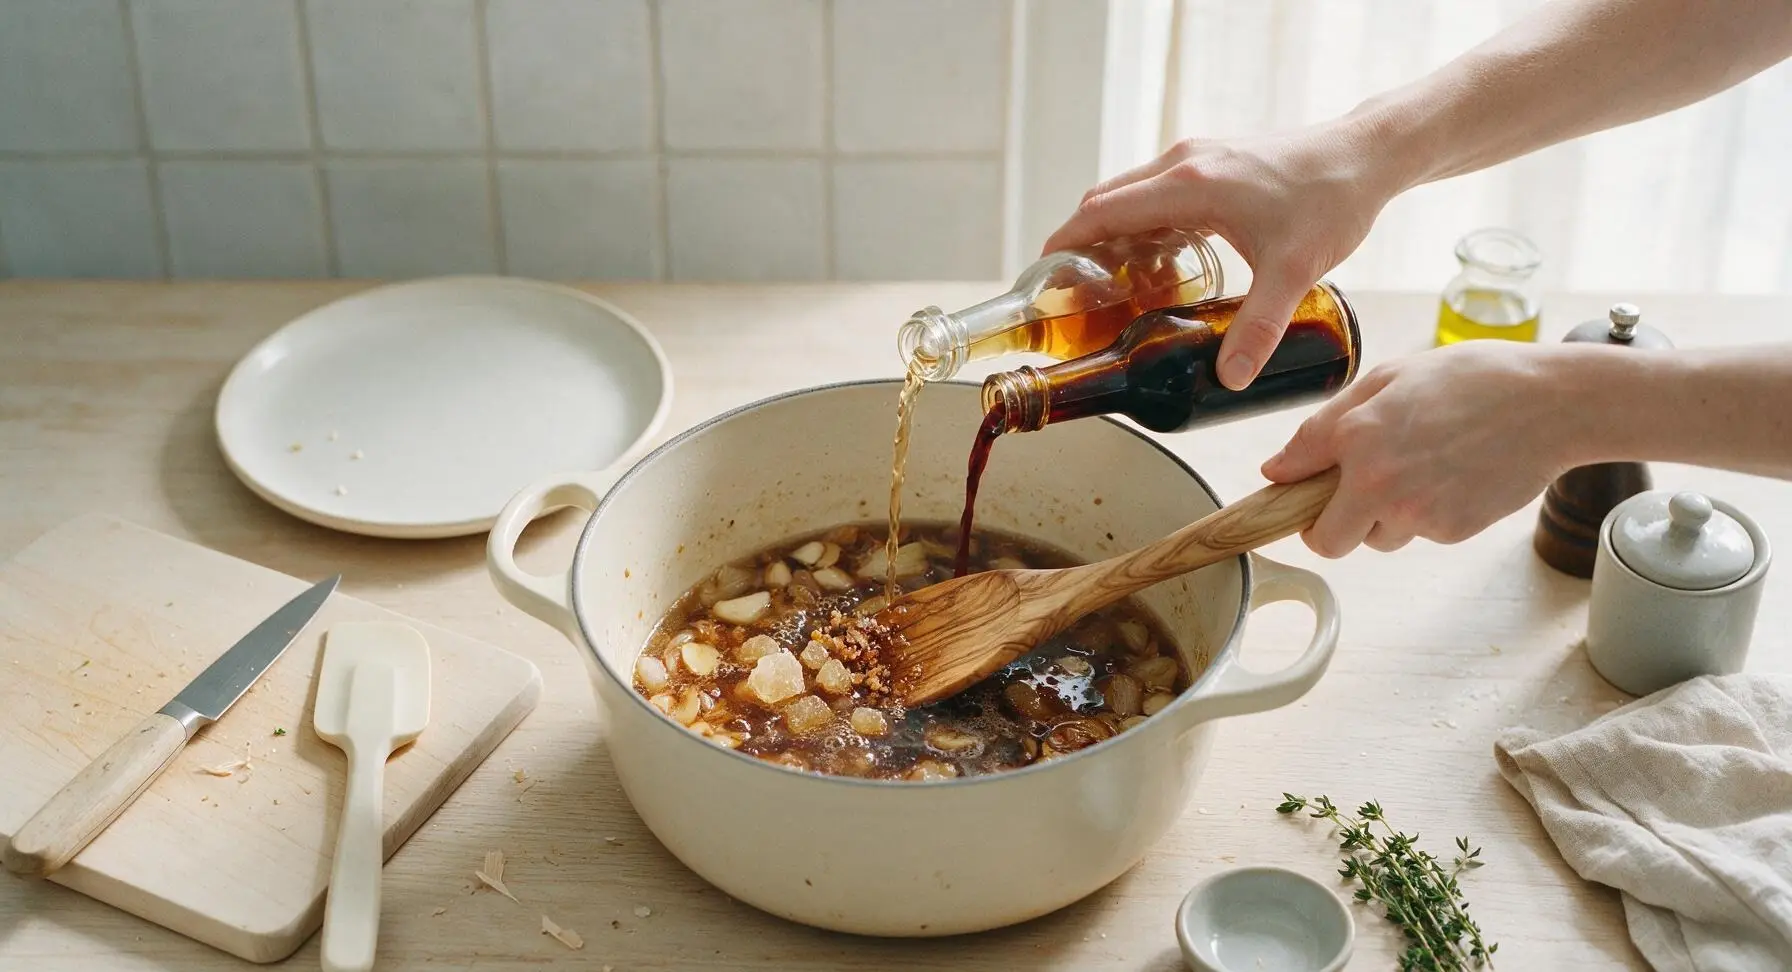
Pour in the 2 tablespoons Shaoxing wine, scraping the bottom of the pot with the olive wood spoon to lift all the browned fond bits (these hold deep savory flavor). Add 3 tablespoons light soy sauce, 1 tablespoon dark soy sauce, 15g yellow rock sugar, and 250ml warm water to the pot. Stir gently to dissolve the rock sugar, then bring the liquid to a gentle simmer (small bubbles breaking slowly at the surface, not a rolling boil).
Step 4
step4:Add braising liquids and sugar
5

Simmer chicken until tender

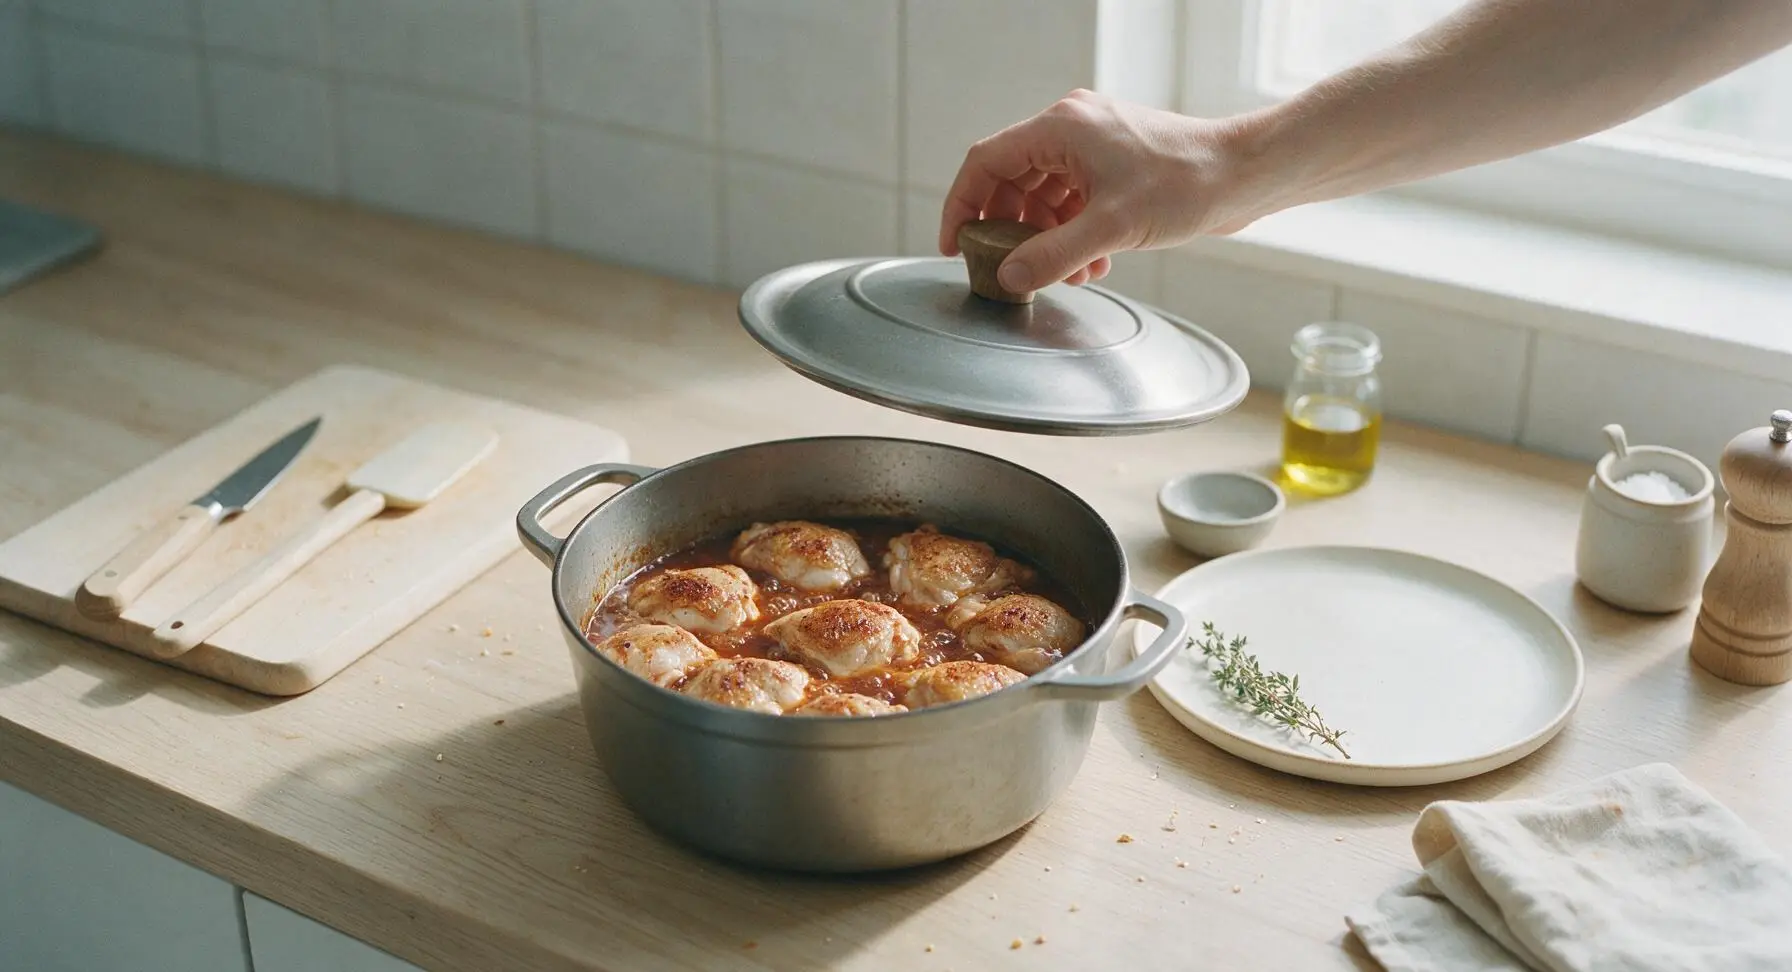
Return all seared chicken pieces to the Dutch oven, arranging them skin-side up in a single layer so they are half-submerged in the braising liquid. Bring the liquid back to a gentle simmer, then turn heat to low (110C/230F), cover the pot with its lid, and braise for 30 minutes. Do not lift the lid unnecessarily during this time; the steady gentle heat will tenderize the chicken and infuse it with spice flavor. After 30 minutes, the chicken should be tender when pierced with a fork, with juices running pale yellow, not pink.
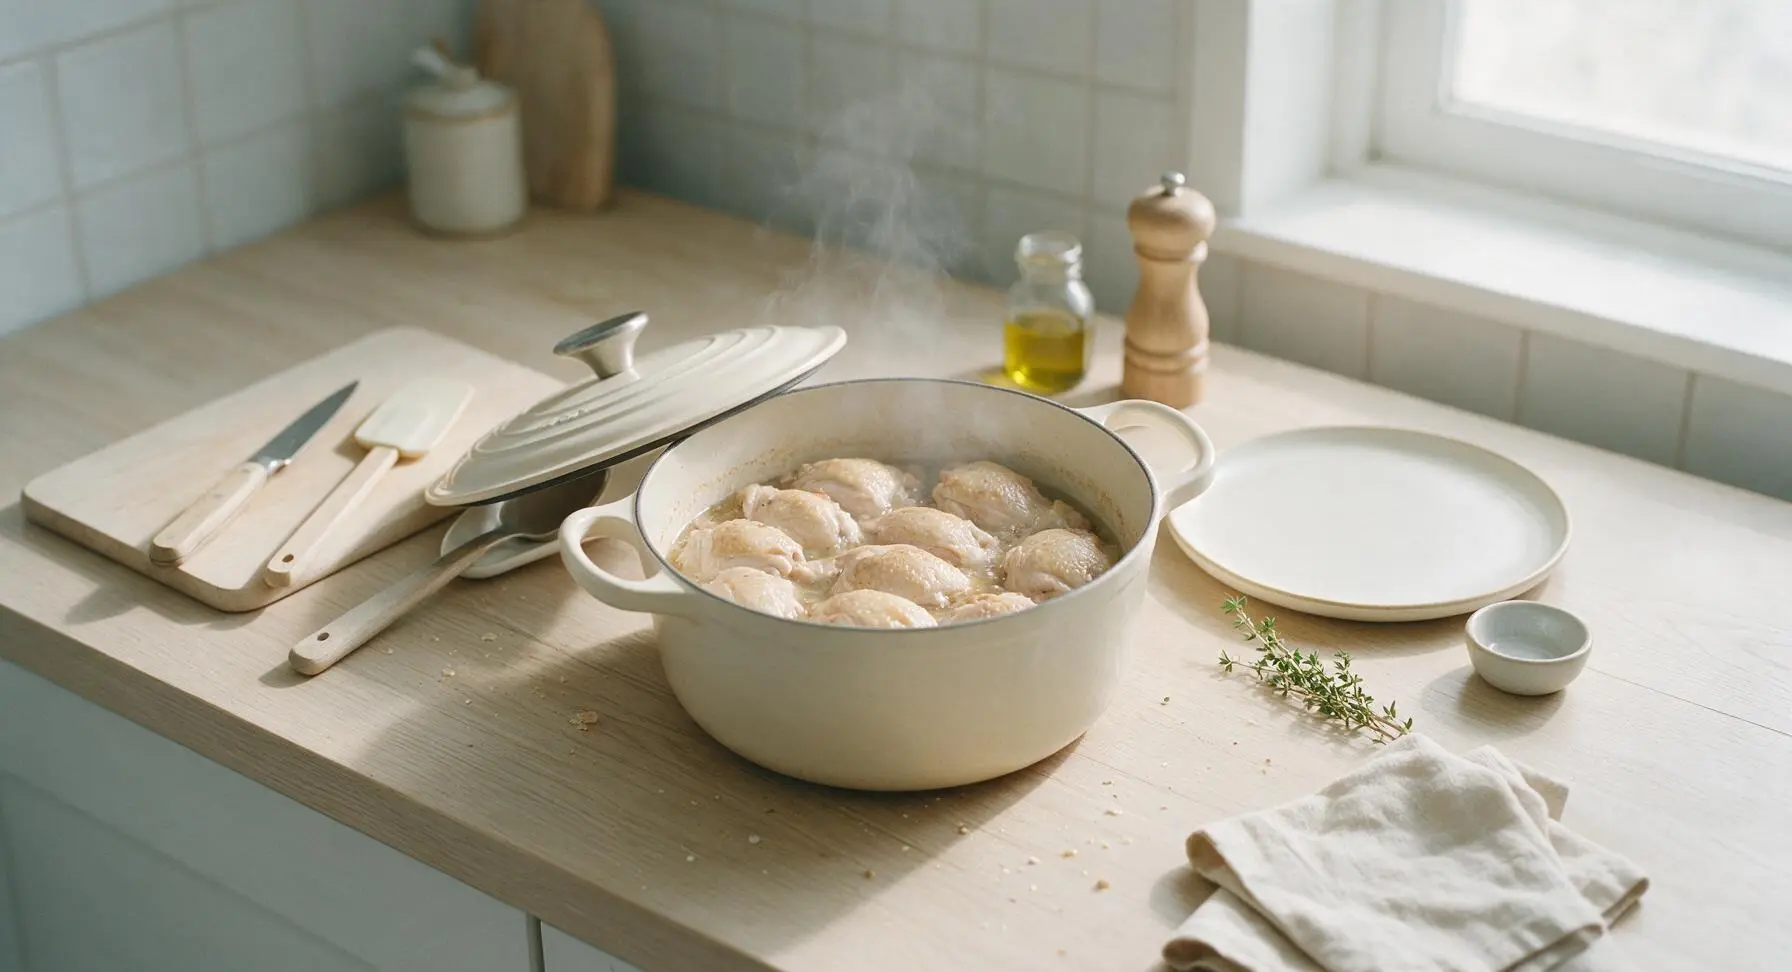
Step 5
step5:Simmer chicken until tender
Step 5
step5:Simmer chicken until tender
6

Reduce sauce to glossy finish

Remove the pot lid, turn heat up to medium (150C/300F). Use the olive wood spoon to baste the chicken pieces repeatedly with the braising liquid as it simmers, for 5-7 minutes, until the sauce reduces to a thick, glossy coating that clings to the back of the spoon. The sauce should be deep mahogany brown, not watery; tilt the pot to check that it pools thickly rather than running freely. Discard the cinnamon stick, star anise pods, and large ginger/garlic pieces if desired for a smoother sauce.
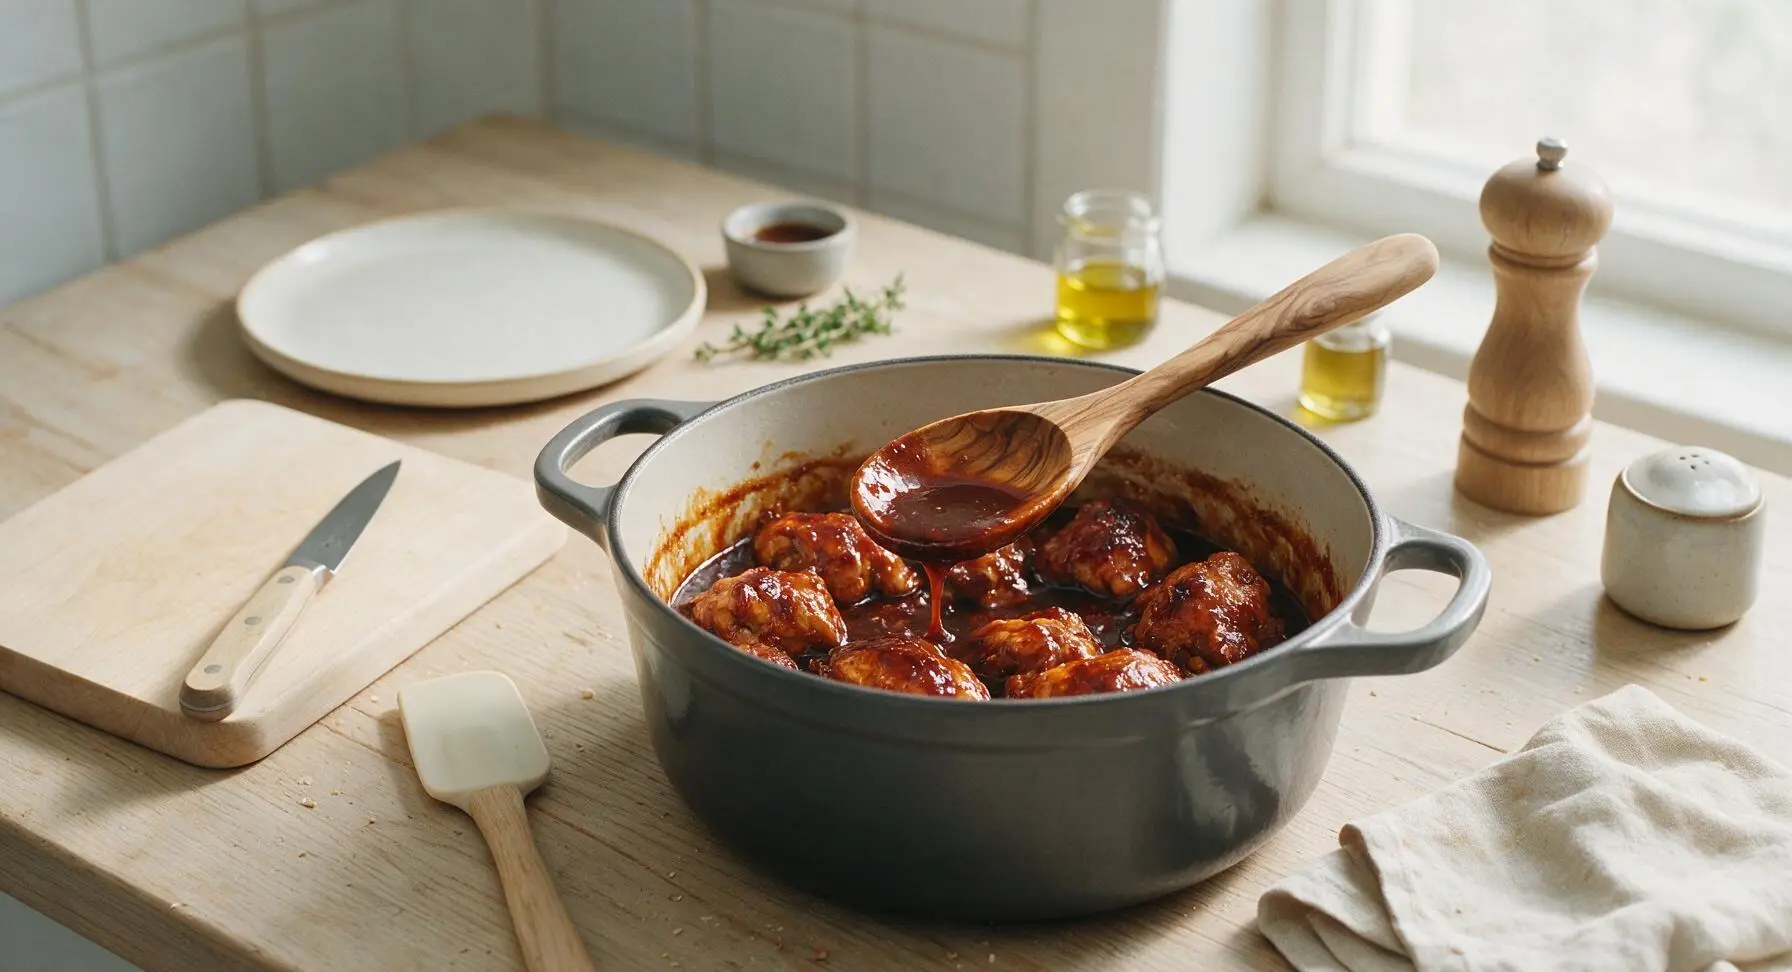
Step 6
step6:Reduce sauce to glossy finish
7

Plate and garnish to serve

Use the silicone-tipped tongs to transfer the braised chicken pieces to the terracotta stoneware dinner plate, arranging them in a loose pile. Spoon 2-3 tablespoons of the thick reduced sauce over the chicken, letting it drip down the sides of the pieces. Garnish with the reserved thinly sliced scallion greens, and place one star anise from the braising liquid on the plate rim for decoration. Serve immediately with steamed rice in the matching terracotta rice bowl.
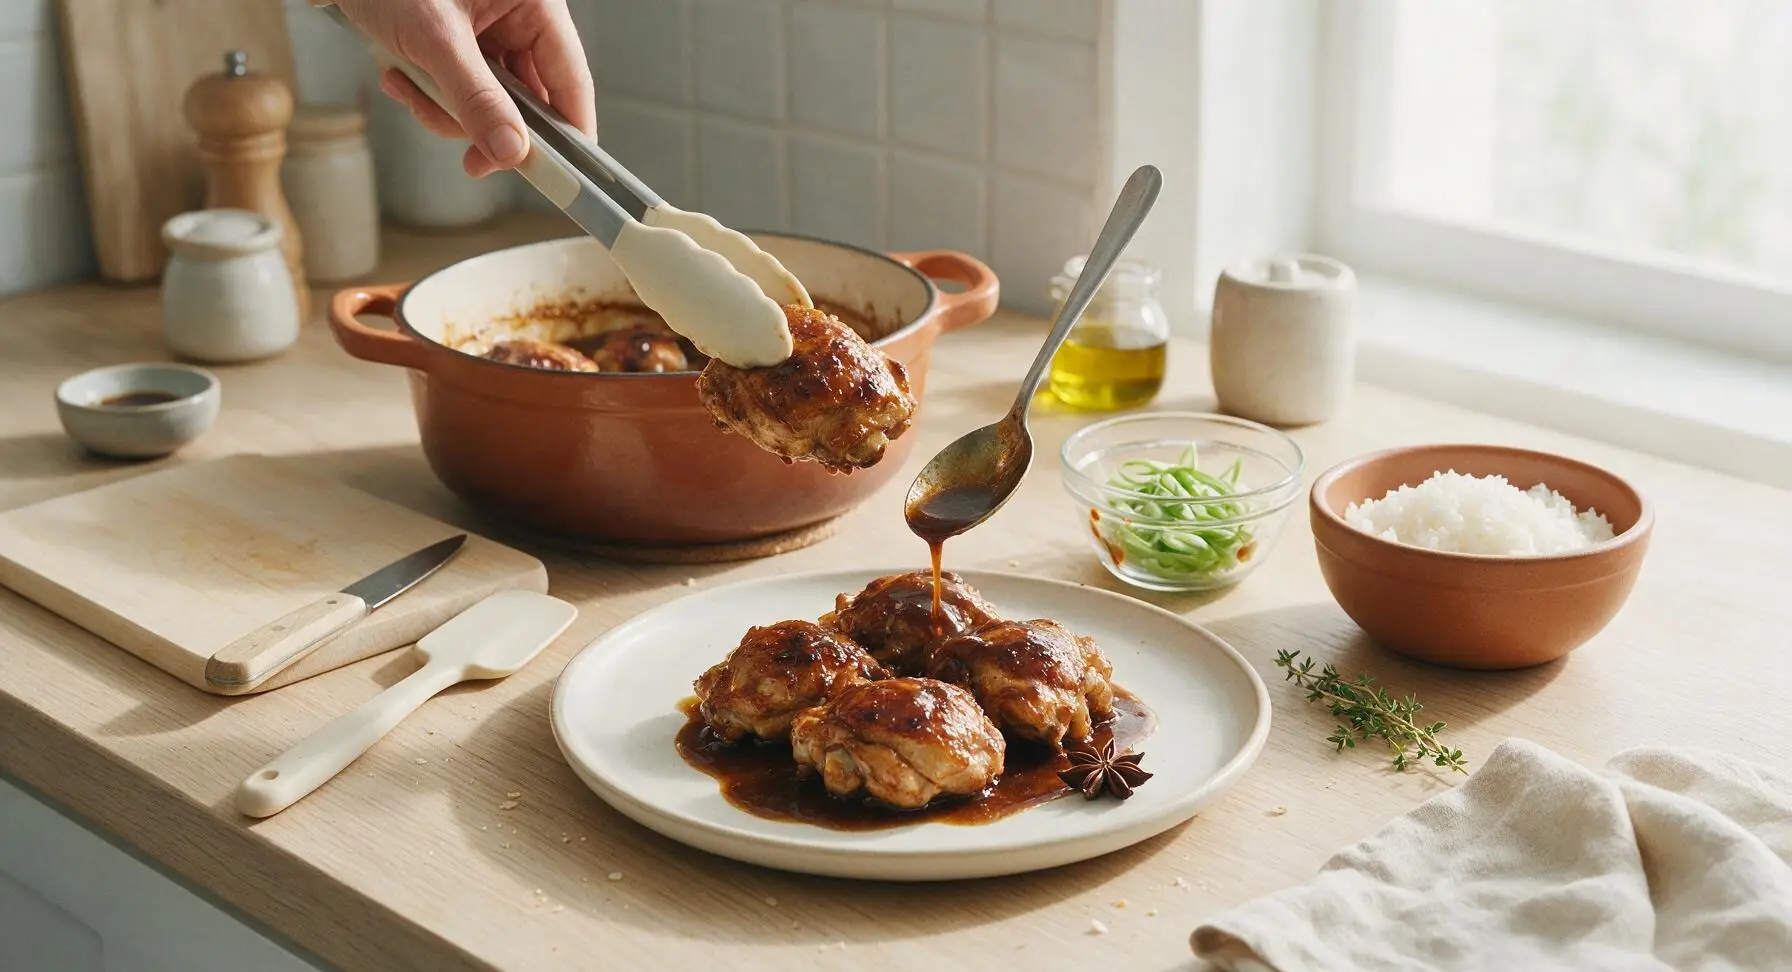
Step 7
step7:Plate and garnish to serve

Tips

1.Always pat chicken completely dry with paper towels before searing: any residual moisture on the skin will cause steaming instead of crisping, preventing the deep golden maillard crust that adds rich, nutty depth to the final braising sauce.
2.Use warm, not cold, water when mixing the braising liquid: cold water will shock the hot seared chicken and cause muscle fibers to seize up, resulting in tougher, less juicy meat instead of tender, fall-off-the-bone results.
3.When reducing the final sauce, keep heat at medium rather than high: a rapid boil will cause the soy sauce to caramelize too quickly and turn bitter, while a gentle simmer creates a smooth, glossy, perfectly balanced coating for the chicken.


✨ You May Also Like

Main Course
🍜 United Kingdom

A showstopping classic of tender seared beef, savory mushroom duxelles, and crisp prosciutto wrapped in flaky golden puff pastry, baked to juicy perfection.

⏱️ 2 hours 1Main Course ★ 4.7
Main Course
🍜 India

Tender charred marinated chicken simmered in a rich, spiced creamy tomato sauce, this iconic Anglo-Indian curry pairs perfectly with basmati rice or warm naan.

⏱️ 50 minuteMain Course ★ 4.6
Main Course
🍜 Thailand

Classic tangy, sweet, and savory Thai stir-fried rice noodles with shrimp, tofu, and crunchy garnishes, balancing all five core Thai flavor profiles.

⏱️ 30 minuteMain Course ★ 4.5
Main Course
🍜 United Kingdom

Crispy golden beer-battered cod and fluffy double-fried chips, served with tangy tartar sauce and malt vinegar: the timeless, beloved British pub comfort classic.

⏱️ 45 minuteMain Course ★ 4.7
Main Course
🍜 Mexico

Smoky, chile-marinated pork tacos with caramelized pineapple, fresh cilantro, and lime: a beloved classic Mexican street food perfect for casual summer gatherings.

⏱️ 1 hour 45Main Course ★ 4.8
Main Course
🍜 United States

Crunchy Fritos corn chips layered with savory beef chili and melted cheddar, topped with cool, zesty fixings for a beloved, cozy Tex-Mex comfort food.

⏱️ 35 minuteMain Course ★ 4.8

braised chicken:Frequently Asked Questions

1.Why do you recommend bone-in, skin-on chicken thighs instead of lean chicken breast for this recipe? ▾
Bone-in, skin-on thighs stay juicy and tender through the slow braise, unlike lean breast which easily dries out and turns stringy. The rendered skin fat builds rich sauce depth, and the bone adds subtle, savory umami. If you must use breast, cut it into thick chunks and add it only in the last 15 minutes of cooking to avoid toughness.
2.What can I use as a substitute if I don’t have Shaoxing cooking wine? ▾
Dry sherry is the closest swap for Shaoxing wine, as it has the same nutty, fermented depth that balances the salty soy and sweet sugar. Skip grocery store “cooking wine” loaded with added salt; if you avoid alcohol entirely, use low-sodium chicken broth mixed with 1 teaspoon of unseasoned rice vinegar to cut through richness.
3.Can I use just one type of soy sauce instead of both light and dark soy? ▾
Light soy sauce adds the salty, umami base without making the dish overly dark, while dark soy sauce lends that signature deep amber color and subtle caramel note. Using only light soy will leave you with pale, flat-tasting sauce, while using only dark soy will make the dish harshly salty and unappetizingly dark, so both are worth keeping on hand.
4.Why use yellow rock sugar instead of regular white granulated sugar? ▾
Yellow rock sugar melts slowly to create a smoother, less cloyingly sweet sauce than sharp white granulated sugar, and it helps build that iconic glossy sheen that coats every piece of chicken. If you don’t have it on hand, use 2/3 the amount of light brown sugar as a backup, since it has a similar mild, caramelized sweetness.
5.Do I need to blanch the chicken before braising it? ▾
Blanching chicken in boiling water for 3 to 4 minutes then rinsing off gray scum is optional, but it creates a clearer, cleaner-tasting sauce with no bitter, cloudy bits. If you’re short on time, skip the blanch, sear the chicken well, and simply skim any foamy scum that rises to the surface during the first 10 minutes of braising.
6.How do I get that glossy, non-greasy sauce instead of a thin, oily mess? ▾
After searing the chicken, pour off all but 1 tablespoon of rendered chicken fat before adding your braising liquids—you don’t need extra cornstarch for thickness. Simmer uncovered for the last 5 to 7 minutes of cooking to let the sauce reduce naturally, which creates that perfect shiny, clingy texture that sticks to the chicken.
7.Can I make this red-braised chicken in a slow cooker instead of on the stovetop? ▾
Absolutely! First sear the chicken and sauté your ginger and star anise in a pan to build deep flavor, then transfer everything to your slow cooker with the braising liquids. Cook on LOW for 3.5 to 4 hours until the chicken is pull-apart tender, then pour the sauce into a pan to reduce on the stovetop for that classic glossy finish.
8.What other aromatics can I add without ruining the classic home-style flavor? ▾
This recipe is very flexible! Add a couple smashed garlic cloves, a small cinnamon stick, 1 or 2 dried red chiles for gentle heat, or a strip of dried tangerine peel for bright, citrusy depth that cuts through richness. Just skip heavy, overpowering spices like cloves or cardamom, as they’ll cover up the simple, comforting soy and chicken flavor.
9.How long do I need to braise the chicken to get that fall-off-the-bone texture? ▾
For perfectly tender, fall-off-the-bone chicken thighs, keep the braise at a gentle, low simmer (never a rolling boil) for 35 to 40 minutes on the stovetop. Boiling too hard will make the chicken tough and stringy, and it will cause the sauce to evaporate too quickly before the flavors have time to fully meld together.
10.Can I add vegetables to this dish, and when should I add them? ▾
Definitely! Hearty veggies like peeled potato chunks, carrot rounds, or rehydrated shiitake mushrooms work beautifully here. Add them about 20 minutes before the chicken finishes braising so they cook through and absorb the sauce without turning mushy. Delicate greens like bok choy should be blanched separately and added right at serving time.
11.How should I store leftovers, and how long will they stay good? ▾
Let leftover braised chicken and sauce cool completely, then store it in an airtight container in the fridge for up to 4 days, or freeze for up to 3 months. The flavors actually deepen and taste better after a day in the fridge! Reheat gently on the stovetop over low heat, adding a tiny splash of water if the sauce thickens too much as it warms.
12.My sauce came out too salty—how can I fix that without starting over? ▾
Don’t panic if your sauce is over-salted! Toss in a small, peeled potato chunk and simmer for 10 minutes to absorb excess salt, or stir in a tiny pinch more rock sugar and a splash of rice vinegar to balance the saltiness. Next time, taste your braising liquid before adding the chicken, and reach for low-sodium light soy if you’re sensitive to salt.
13.Can I make this less sweet if I don’t like sugary braised dishes? ▾
Absolutely, this home-style recipe is easy to adjust to your taste. Cut the yellow rock sugar in half, or skip most of it if you prefer a more savor-focused profile. Just keep about 1 teaspoon of sugar at minimum if you want that classic glossy sauce texture, as the sugar helps the reduced sauce cling evenly to each chicken piece.
14.Do I need to keep the pot covered the whole time the chicken braises? ▾
Keep the pot covered for the first 25 minutes of braising to trap steam and cook the chicken evenly, then crack the lid or remove it entirely for the last 10 to 15 minutes to let the sauce reduce and thicken. If you leave the lid sealed the whole time, the sauce will stay thin and watery instead of coating the chicken nicely.
15.What’s the best way to serve this for a casual family meal? ▾
Serve this red-braised chicken family-style in a large shallow bowl, spooning all the glossy sauce over the top, alongside a big pot of steamed white rice to soak up every last drop. Pair it with a simple stir-fried green vegetable like yu choy or broccoli to balance the rich, savory chicken for a cozy, complete weeknight meal.

Comments (17)

2 days ago

OMG this red-braised chicken was the star of our Sunday family dinner last night! My 7 and 9 year old practically licked their plates, even the picky one who turns her nose up at any sauce-covered meat usually. I served it over jasmine rice with some steamed bok choy and everyone asked for seconds. Total game changer for our weeknight rotation too since it was way easier than I thought it'd be! Wait, quick question: can I swap bone-in thighs for boneless if that's all I have on hand for meal prep this week?

yesterday

I did boneless thighs last week when I made this! Just cut the cook time down by like 10 minutes so they don't get tough, worked perfectly for my meal prep containers

yesterday

So glad your whole family loved it! Boneless thighs work great — just as MidwestCook99 mentioned, reduce simmer time by 8-10 minutes so the meat stays juicy. It holds up really well for 3-4 days in the fridge for meal prep too!

1 week ago

Brought this to our neighborhood block party potluck last weekend and people were hovering over the crockpot (wait, I kept it warm in the crock after making it on the stove!) asking for the recipe before I even set the serving spoon down. SO good, the sauce is perfectly sweet and savory, not too salty like some red braised recipes I've tried before. Only thing I messed up was I didn't have rock sugar, so I used regular brown sugar — did that change the flavor much? It still tasted amazing but just curious.

5 days ago

I used brown sugar too when I made it! I actually liked the deeper molasses note it added, wouldn't have even known it was a swap if I didn't do it myself

5 days ago

Love that it was a potluck hit! Brown sugar is a totally fine 1:1 swap for rock sugar here — it adds a slightly warmer, deeper sweetness which works beautifully with the soy and ginger. No need to run to the specialty store if you don't have rock sugar on hand!

3 days ago

As a broke college student who can barely make scrambled eggs without burning them, this recipe was actually foolproof! 45 minutes total, no fancy ingredients, and it tastes like something I'd order at my favorite local Chinese takeout spot for a fraction of the price. I made a big batch on Sunday and ate it for lunch all week, no boredom at all. Wait, has anyone tried adding potatoes or carrots to this? I feel like that would bulk it up even more for cheap.

2 days ago

I tossed in cubed russet potatoes and carrot chunks the last 15 minutes of simmering last time! They soaked up all that delicious sauce, it was chef's kiss. Highly recommend

2 days ago

That's such a smart, budget-friendly call! Adding root veggies in the last 15-20 minutes of cooking is a classic home-style touch — they soak up all that savory sauce and make the dish even more filling. So impressed you pulled this off as a new cook, that's awesome!

5 days ago

Made this for my wife's birthday dinner since she's been craving comfort food, and she said it's better than the version her grandma used to make (don't tell grandma lol). The only adjustment I made was adding a little extra chili flake for a tiny kick, which we both loved. Quick question: how do you get the chicken skin to stay that perfect glossy brown? Mine was a little paler than the photos even after searing.

3 days ago

Make sure you pat the chicken totally dry with paper towels before searing! I used to skip that step and my skin always stuck and looked pale, dry skin = crispy, browned seared skin that takes the sauce color so well

3 days ago

Happy birthday to your wife! SearingProSam is spot on — patting the chicken completely dry before searing, and making sure your pan is hot enough before adding the chicken, will give you that deep, glossy golden sear that picks up the braising sauce color perfectly. The extra chili flake sounds like a delicious add too!

2 weeks ago

I was so excited to try this because red braised chicken is my absolute favorite takeout order, but I have to eat gluten free. I swapped the regular soy sauce for tamari and it turned out INCREDIBLE. My whole family (none of whom are gluten free) didn't even notice a difference! I did notice the sauce was a little thinner than I expected, any tips for thickening it up a bit without using wheat-based thickeners?

1 week ago

Mix a teaspoon of cornstarch with a tablespoon of cold water and stir it into the sauce the last 2 minutes of cooking! It's gluten free, thickens it right up to that perfect glossy consistency, I do that every time

1 week ago

So thrilled the tamari swap worked out for you! The cornstarch slurry tip is exactly what we'd recommend — it's totally gluten free, gives the sauce that classic shiny, thick texture, and doesn't alter the flavor at all. So glad you got to enjoy one of your favorite dishes at home!

yesterday

I've been trying to cut back on takeout spending and this recipe alone is gonna save me at least $50 a month, no joke. It tastes exactly like the $18 plate I get from the place down the street, and I can make enough for 4 people for like $10 total. No weird additives, super straightforward, 10/10. Already added the ingredients to my permanent grocery list.

yesterday

That's what we love to hear! Restaurant-quality meals at home for a fraction of the cost is what home cooking is all about. So stoked this is going into your regular rotation!

30 minutes ago

Uh, I've never cooked chicken that didn't come from a frozen dinner bag before, and I didn't mess this up at all?? The instructions were so clear, I didn't even have to Google what 'blanching' was because the recipe explained every step. My roommate came home while it was cooking and thought I ordered in, that's how good the whole apartment smelled. 100% making this again.

5 minutes ago

Way to go on your first from-scratch chicken dish! That smell filling your apartment is exactly the home-style vibe we're going for. Can't wait to hear what you think when you make it next time!

1 week ago

This is a new staple for our weekly Sunday supper! We've made it three times in the last month, and every time we switch up the sides — broccoli, rice, mashed potatoes, even roasted green beans, it pairs with everything. The sauce is so good I end up drizzling a little extra over whatever side I'm serving, no shame. Is there a way to make this in a slow cooker on busy work days?

5 days ago

Love that it's become a Sunday staple! You can absolutely make this in the slow cooker: sear the chicken first if you have time, then add all the braising ingredients and cook on low for 3-4 hours. It'll be fall-off-the-bone tender!

2 hours ago

I added a couple dried Sichuan peppercorns and a splash of black vinegar when I made this last night and oh my GOD, it took it to the next level. Don't get me wrong, the base recipe is perfect as is, but if you like a little tingly, tangy kick, those additions are chef's kiss. My roommate ate three servings, he's currently napping on the couch from the food coma lmao.

30 minutes ago

Oh the black vinegar addition sounds insane, I'm definitely trying that when I make this this weekend! I love a little tang to cut through the rich sauce, that's such a good call

5 days ago

This is my new go-to meal prep protein for the week! It stays juicy even after reheating in the office microwave, which is a miracle because most chicken gets so rubbery when you reheat it. I portion it out with rice and steamed broccoli on Sundays, and it makes my coworkers so jealous when I pull it out at lunch. 10/10, no notes.

3 days ago

We're so glad it holds up for meal prep! The braising liquid is the secret to keeping it juicy even after reheating — no dry, rubbery chicken here. Your coworkers definitely have good reason to be jealous!

yesterday

I was so nervous to make this because my son has sensory issues with weird textures and strong flavors, but he ate two full drumsticks and asked if we could have it again tomorrow! The flavor is warm and savory but not overpowering, the meat gets so tender it falls right off the bone, no weird chewy bits. This is going in our permanent 'win' dinner folder for sure.

yesterday

Oh this makes me so happy to see! My kid also has texture aversions and I've been looking for new chicken recipes that aren't just plain baked tenders, I'm adding this to my list to try next week

3 days ago

I was worried we'd have a ton of leftover chicken go bad after I made a double batch last weekend, but the leftovers were somehow BETTER the second day? The sauce soaked into the chicken even more, it was so flavorful. I even tossed the leftover sauce with some noodles for a quick lunch the next day, zero waste. Absolute banger of a recipe.

2 days ago

You're so right — braised dishes always taste better the next day as the flavors meld! Using the leftover sauce on noodles is such a smart, zero-waste hack, we love that. Great call making a double batch!

2 days ago

Made this for date night with my partner last night and they were so impressed they asked if I took a secret cooking class lmao. I served it with garlic green beans and scallion pancakes, and we ate the whole entire batch between the two of us while we watched a movie. Perfect cozy date night meal, way better than going out to an overpriced restaurant. Will be making this again for sure.

5 minutes ago

All the ingredients for this were stuff I already had in my pantry and fridge! I didn't have to make a single special trip to the grocery store, which is my favorite kind of recipe. I used a mix of drumsticks and thighs because that's what I had in the freezer, and it turned out perfectly. The cook time was spot on too, 45 minutes exactly from start to finish, no waiting around for hours. Only reason I'm not giving 5 stars is I used regular soy sauce and it was a touch too salty for my taste, next time I'll use low-sodium. Otherwise SO good.

1 week ago

Made this for our Sunday football watch party with the guys, and it was gone in 10 minutes flat. I set out a big platter of it with some toothpicks as an appetizer, and everyone was raving about how good it was. Way better than the usual boring wings and pizza we usually get, I'm already assigned to bring it to the next watch party next weekend. Easy to make, feeds a crowd, total win.

2 weeks ago

I've been making red braised chicken for my family for over 40 years, and this recipe is almost exactly the one I got from my mom back in the day! The balance of soy, sugar, ginger, and star anise is perfect, no weird extra ingredients that don't belong. I made it for my grandkids last week and they said it tastes just like my usual version, which is the highest compliment I can give. Great, straightforward home-style recipe.

just now

I've been on such a bad cooking streak lately — I burned three batches of air fryer chicken last week, messed up pasta two nights in a row, I was convinced I couldn't cook anything edible. This recipe broke the streak! It was so forgiving, even when I accidentally added a little too much ginger at first, it still came out delicious. My confidence is back, I'm already browsing more of your recipes to try next. Thank you!



