
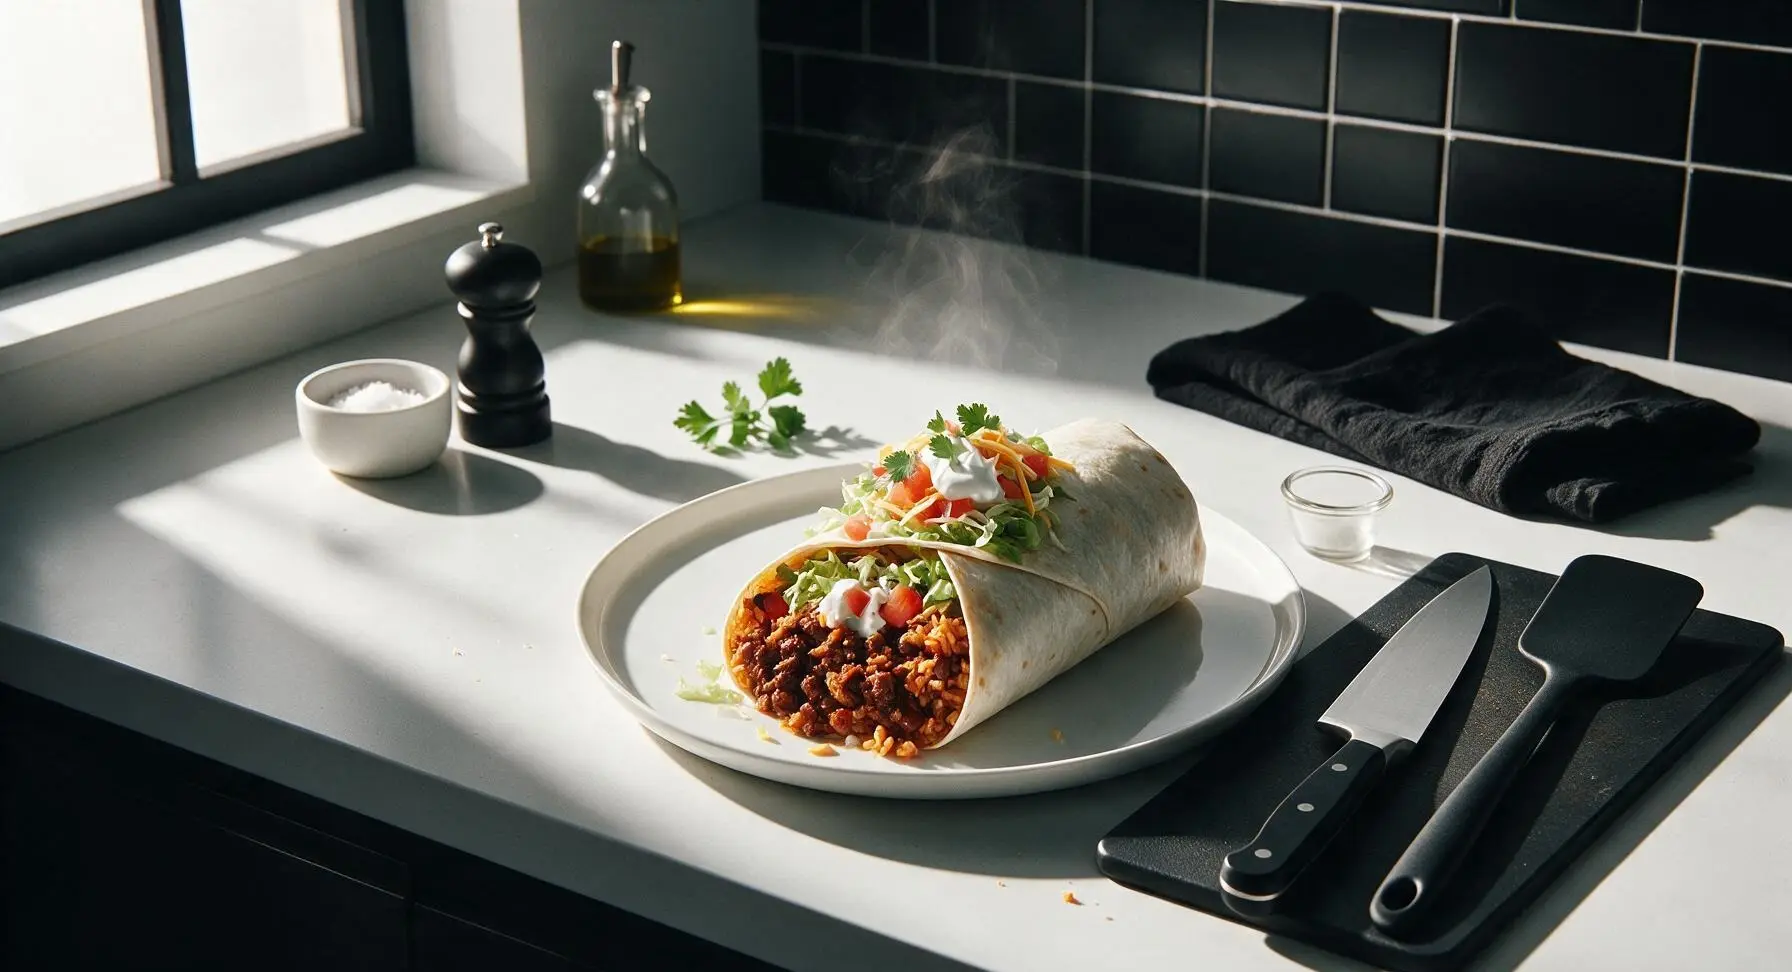
burrito go

title 1
burrito go
⏱️ cook time 15 minutes
🍽️ servings 4
⚡ Difficulty easy

intro

A hearty, leak-proof stuffed Tex-Mex burrito packed with spiced beef, rice, beans, and fresh toppings, wrapped tight for mess-free on-the-go eating any night of the week.

Ingredients
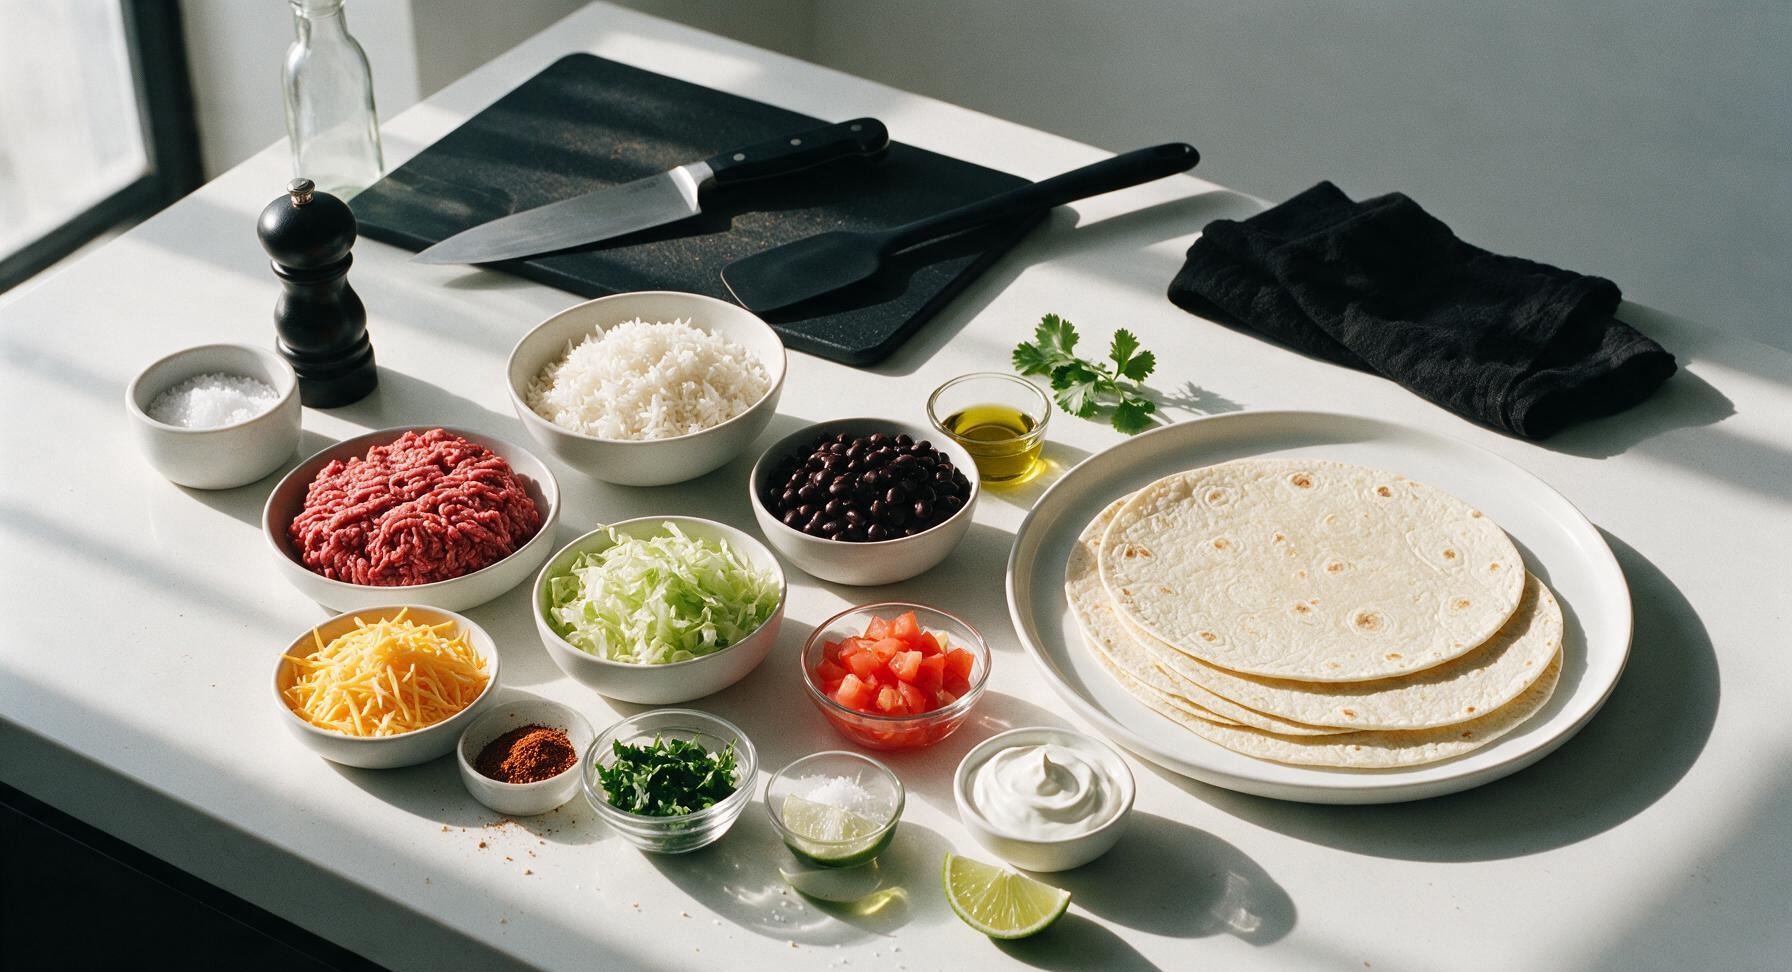
10-inch flour tortillas 4 each
80/20 lean ground beef 500g
Cooked long-grain white rice 2 cups (360g)
Canned black beans (rinsed, drained) 400g
Shredded sharp cheddar cheese 1 cup (115g)
Taco seasoning blend 2 tablespoons
Shredded iceberg lettuce 1 cup (70g)
Roma tomato (seeded, diced) 1 medium (120g)
Sour cream 1/2 cup (113g)
Fresh cilantro (chopped) 1/4 cup (10g)
Kosher salt 1 teaspoon
Fresh lime (cut into wedges) 1 medium
Olive oil 1 tablespoon

Steps

1

Brown Seasoned Ground Beef

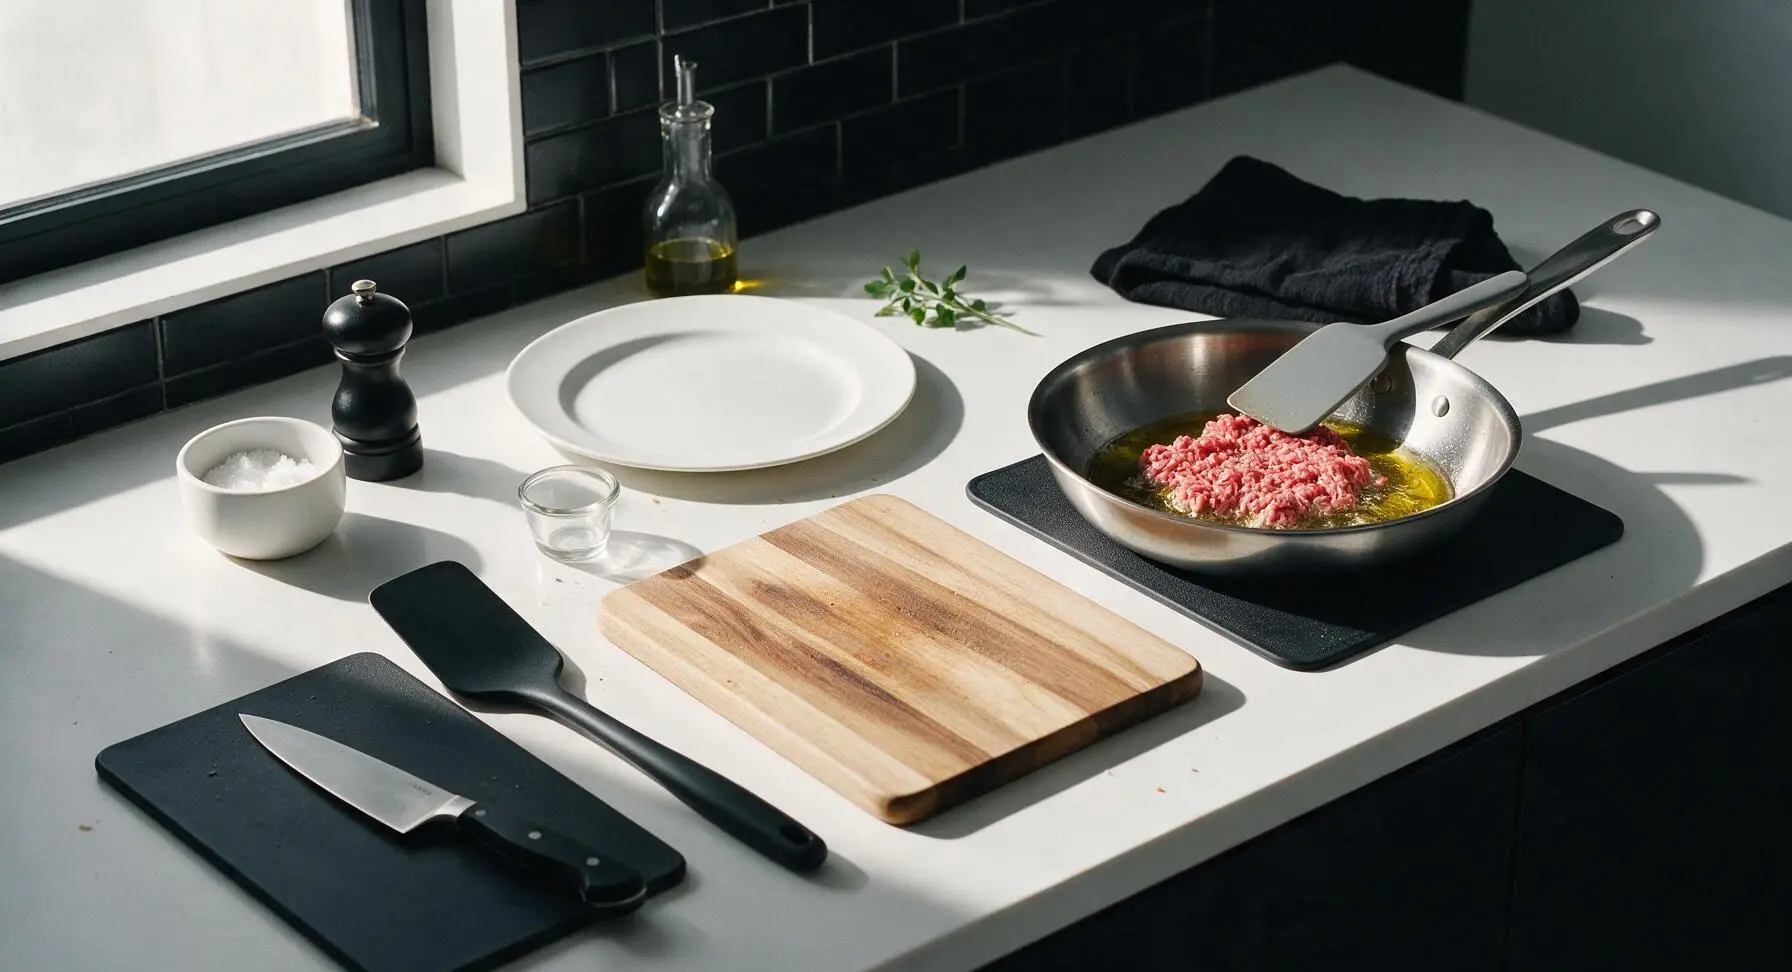
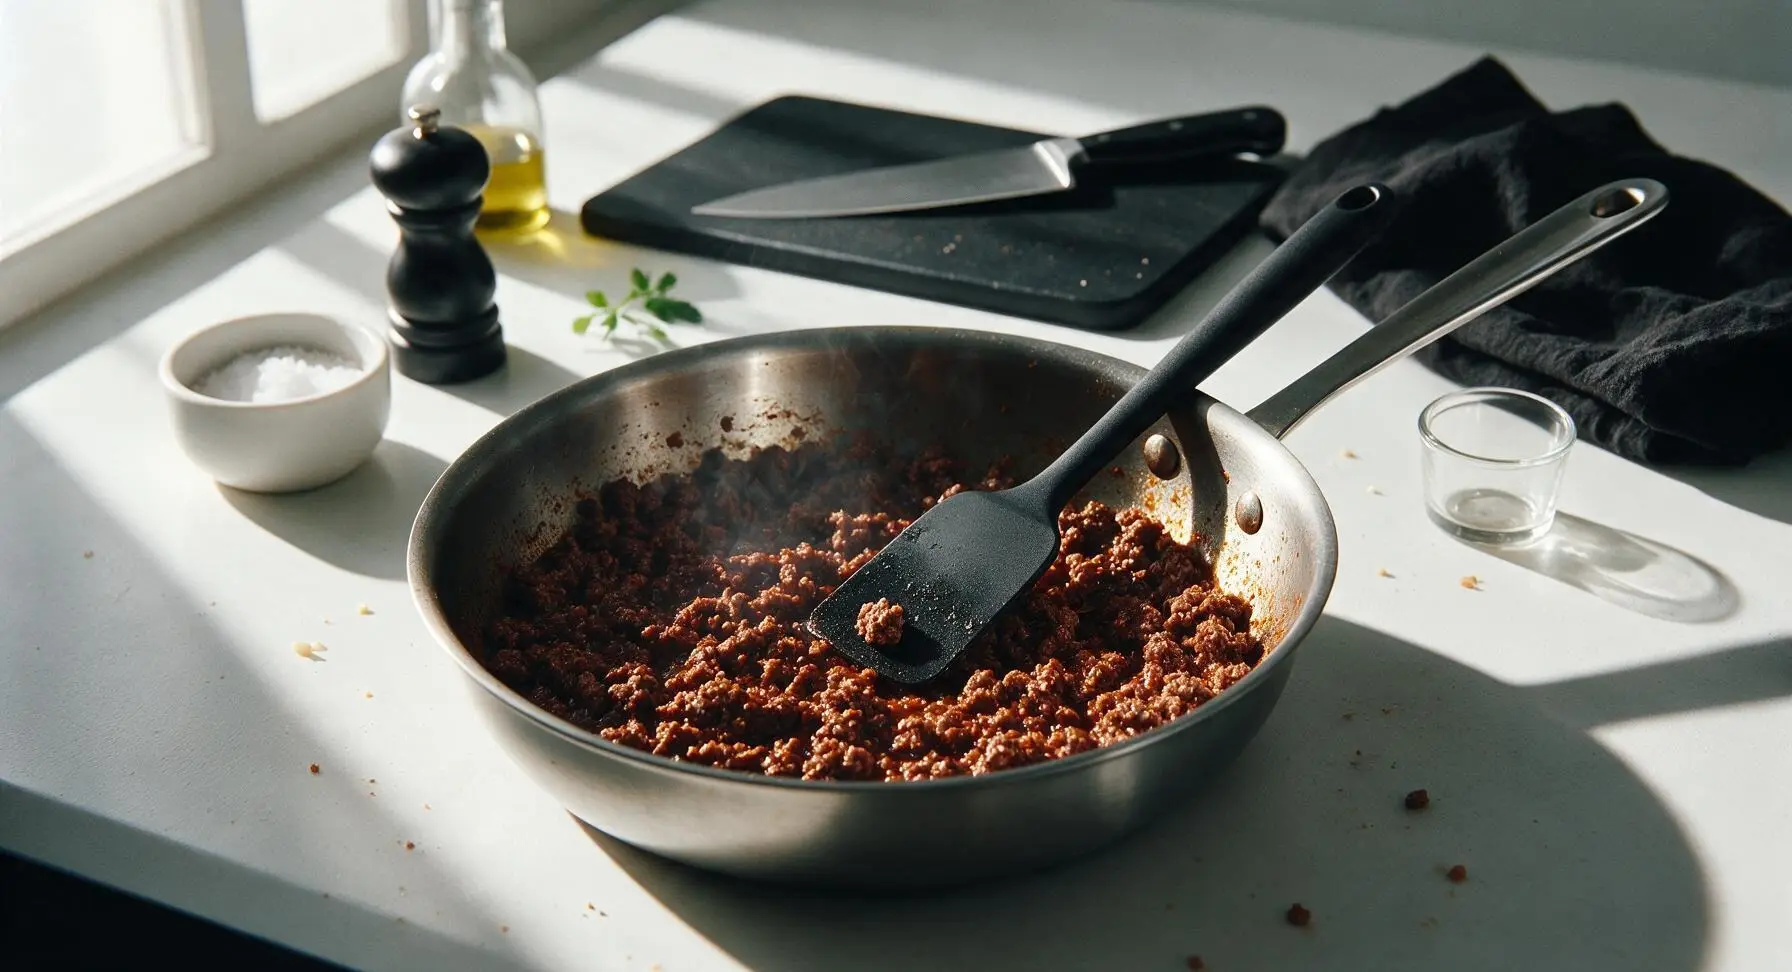
Heat 1 tablespoon olive oil in the 24cm stainless steel skillet over medium heat (175°C/350°F). Add 500g 80/20 ground beef to the pan, breaking it into small crumbles with the matte grey silicone spatula as it cooks. Cook for 5-6 minutes until no pink remains, drain excess rendered grease, then stir in 2 tablespoons taco seasoning and 60ml (1/4 cup) water. Simmer 2 minutes until the spice sauce thickens to coat every beef crumble, then remove the pan from heat to cool slightly.
Step 1
step1:Brown Seasoned Ground Beef
Step 1
step1:Brown Seasoned Ground Beef
2

Prep Beans and Veggies

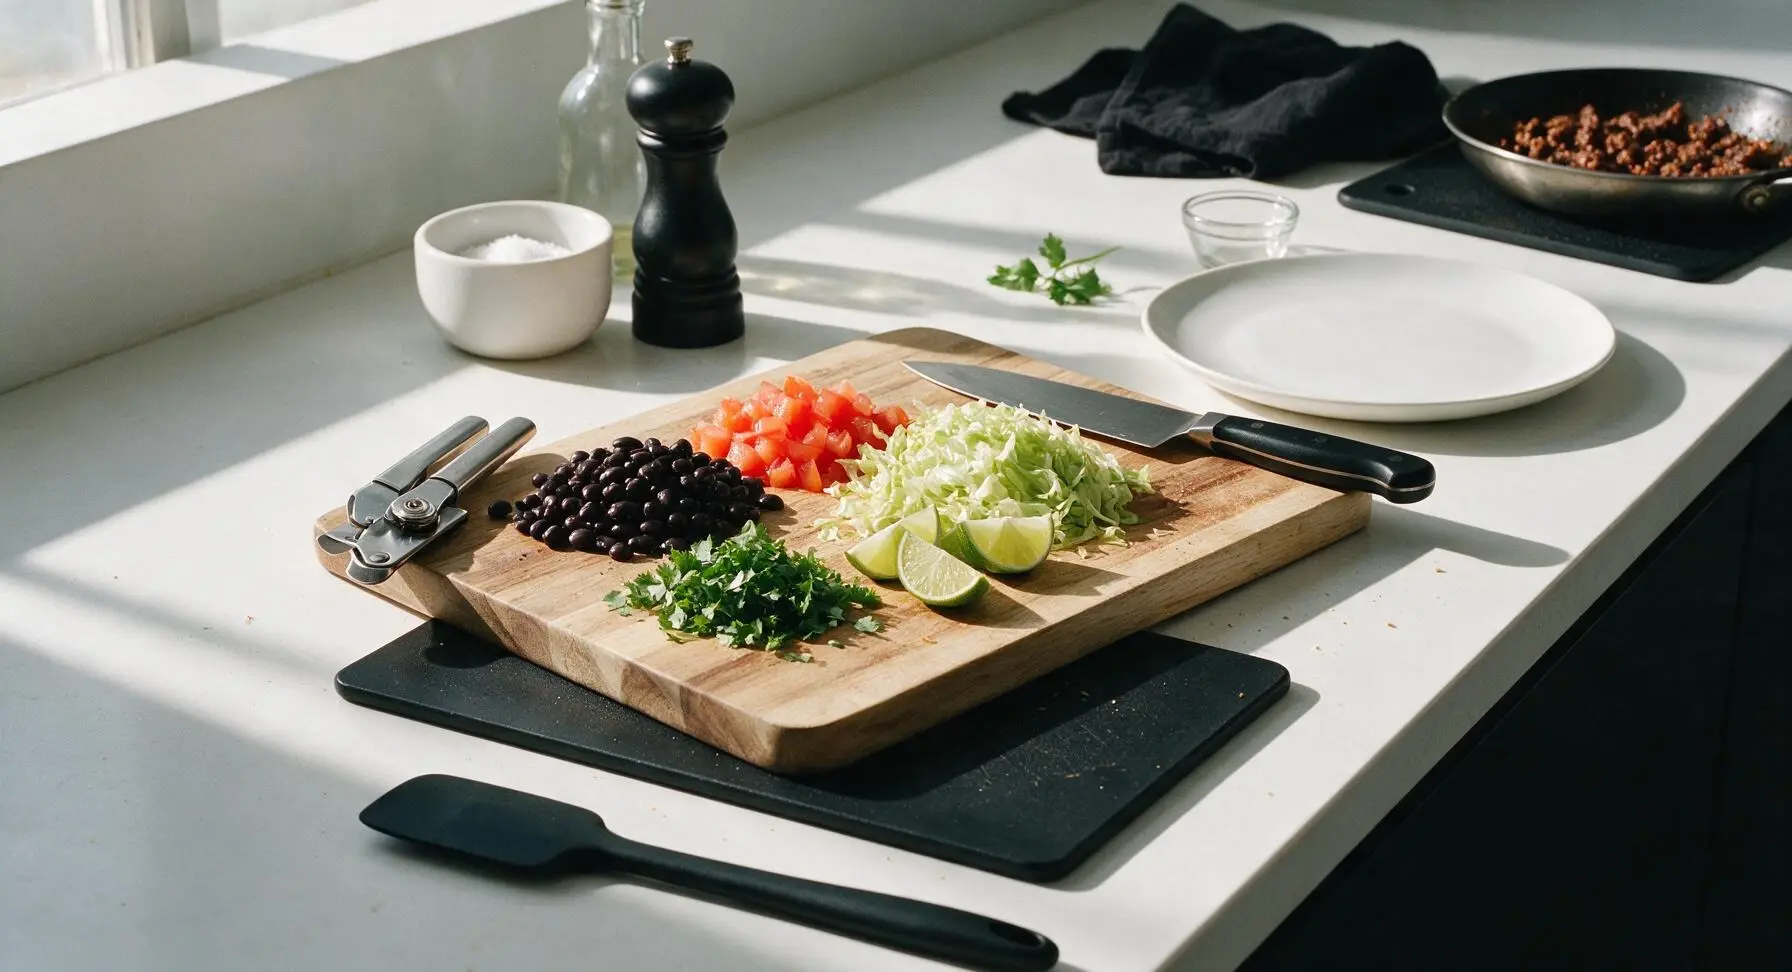
Place the light acacia wood cutting board at center counter. Use the matte black stainless steel can opener to open the 400g can of black beans, rinse thoroughly under cool water and drain fully. Using the 20cm stainless steel chef knife, core and seed 1 medium Roma tomato, dice into 1cm pieces, shred 1 cup iceberg lettuce into thin strips, chop 1/4 cup fresh cilantro, and cut the lime into 4 wedges. Arrange drained beans and prepped veggies in small separate piles on the edge of the cutting board for easy assembly.
Step 2
step2:Prep Beans and Veggies
3

Warm Flour Tortillas

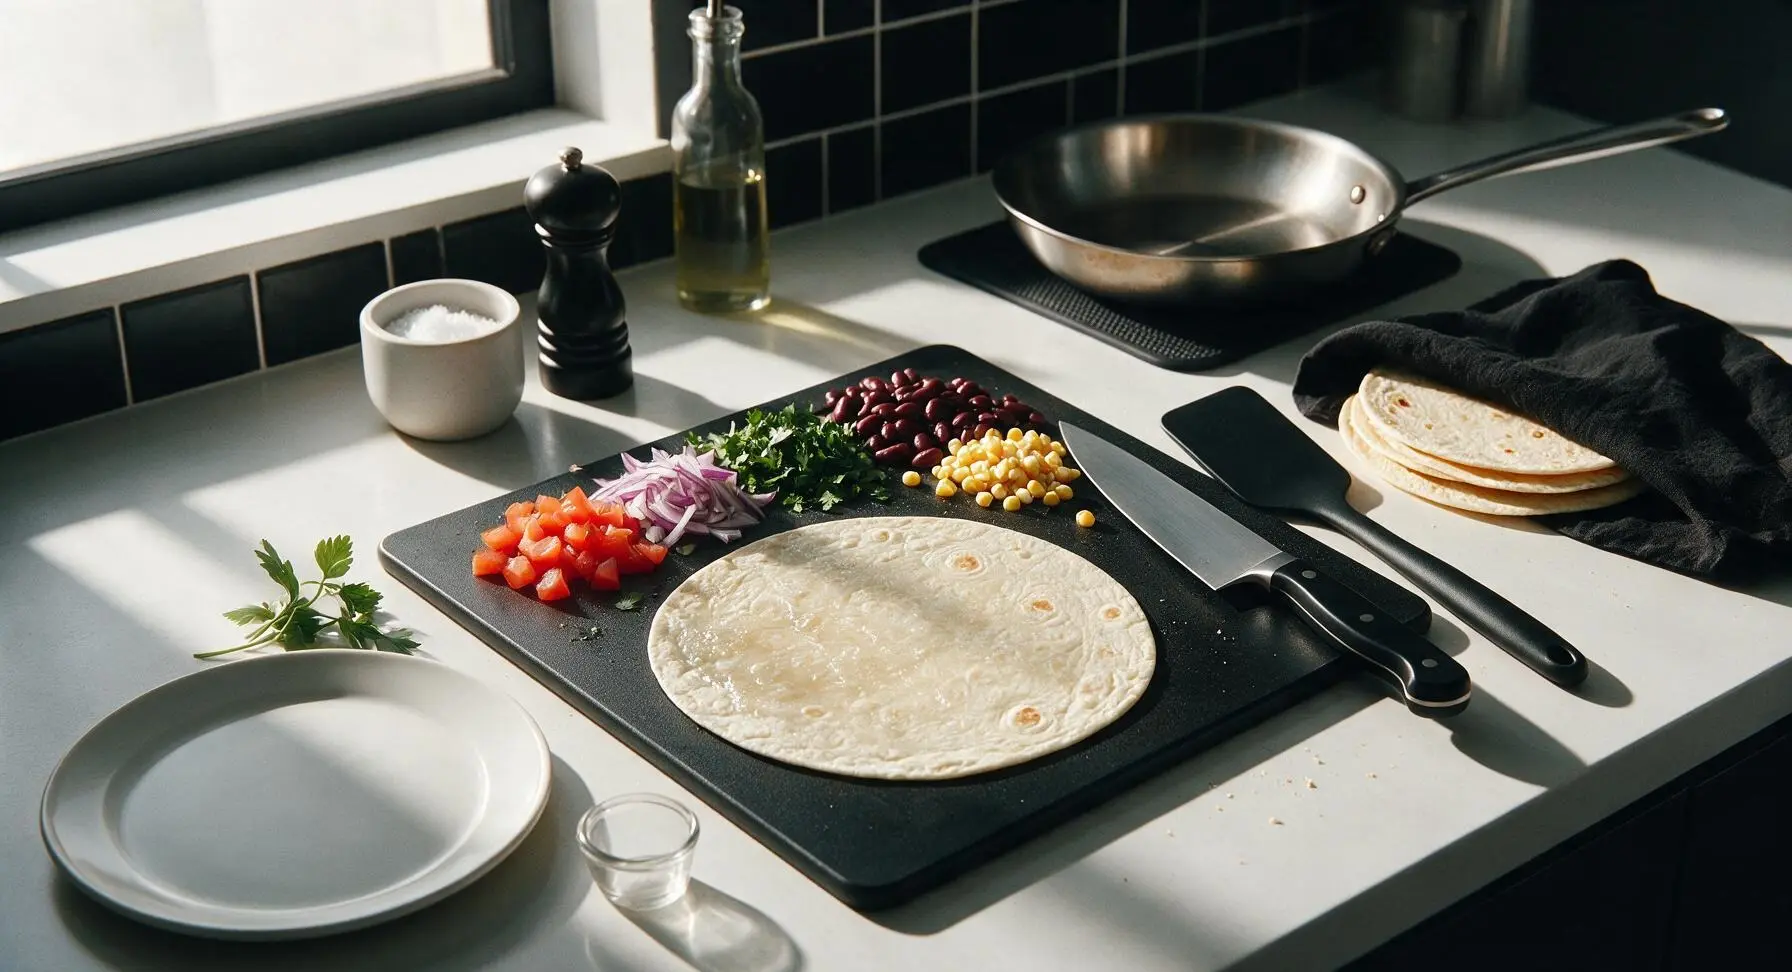
Heat each of the 4 10-inch flour tortillas in the dry stainless steel skillet over low heat for 10 seconds per side until soft and pliable, with no crisp or browned edges. Stack warmed tortillas near the top right of the cutting board, tucking the edge of the faded cream linen towel over the stack to trap steam and keep tortillas soft while assembling—this prevents cracking during rolling.
Step 3
step3:Warm Flour Tortillas
4

Layer Fillings Evenly

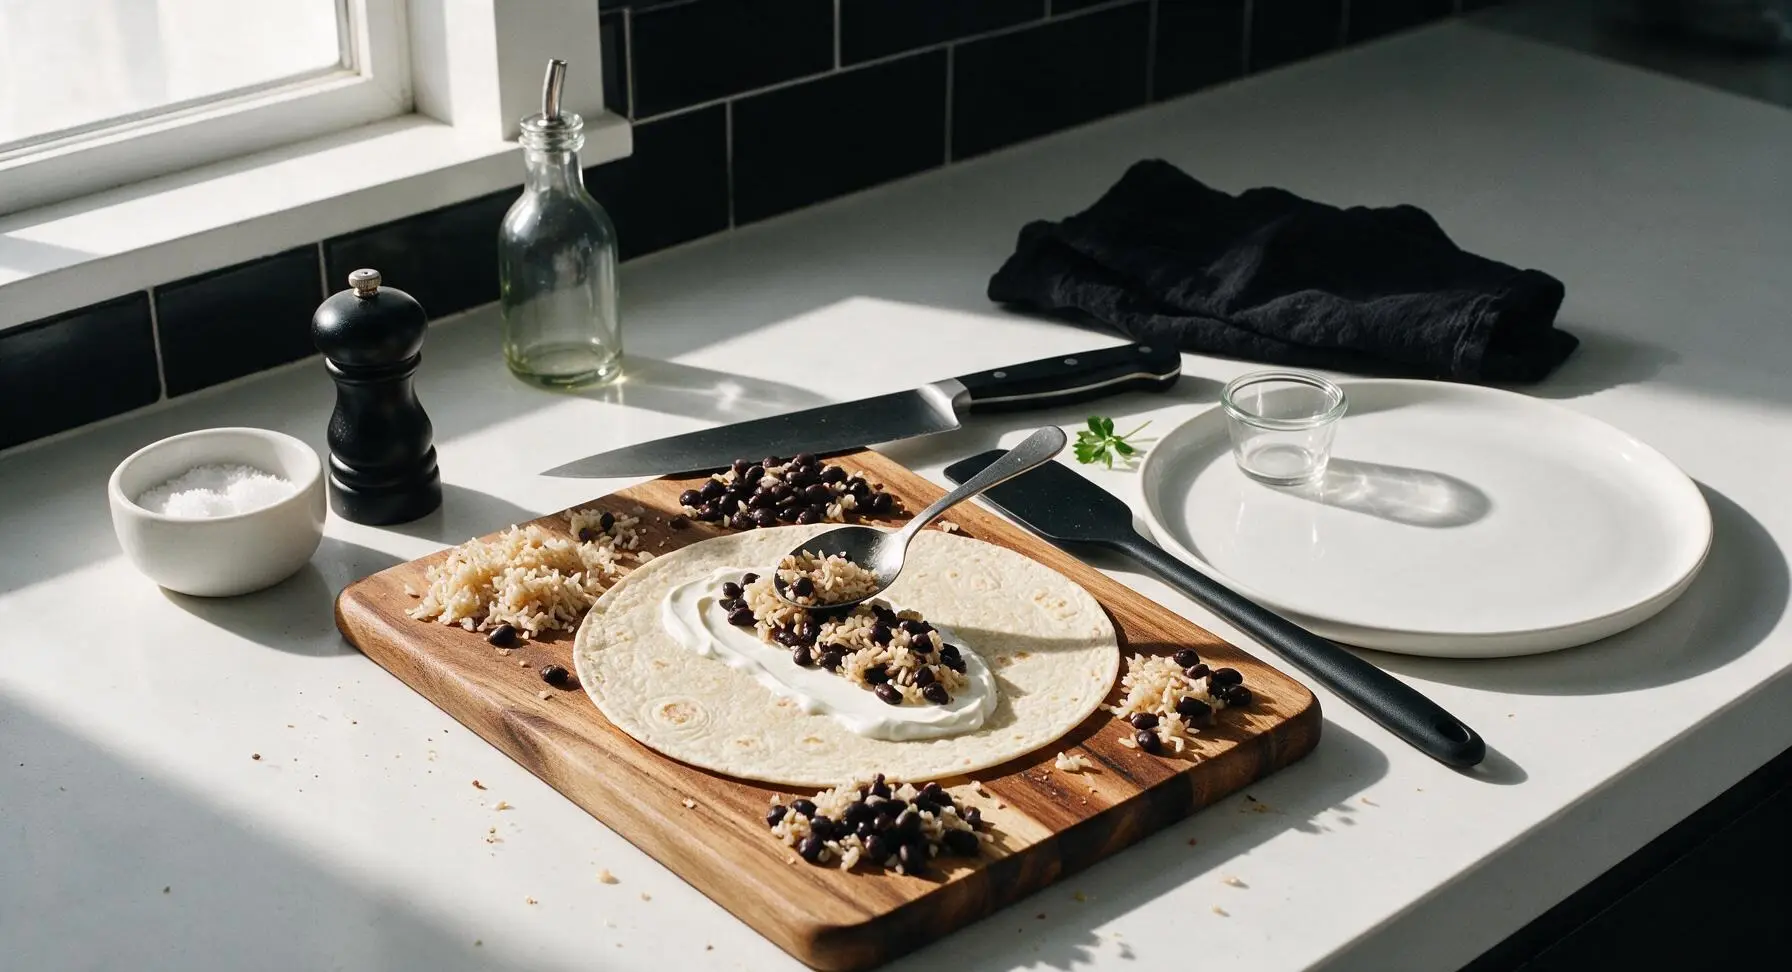
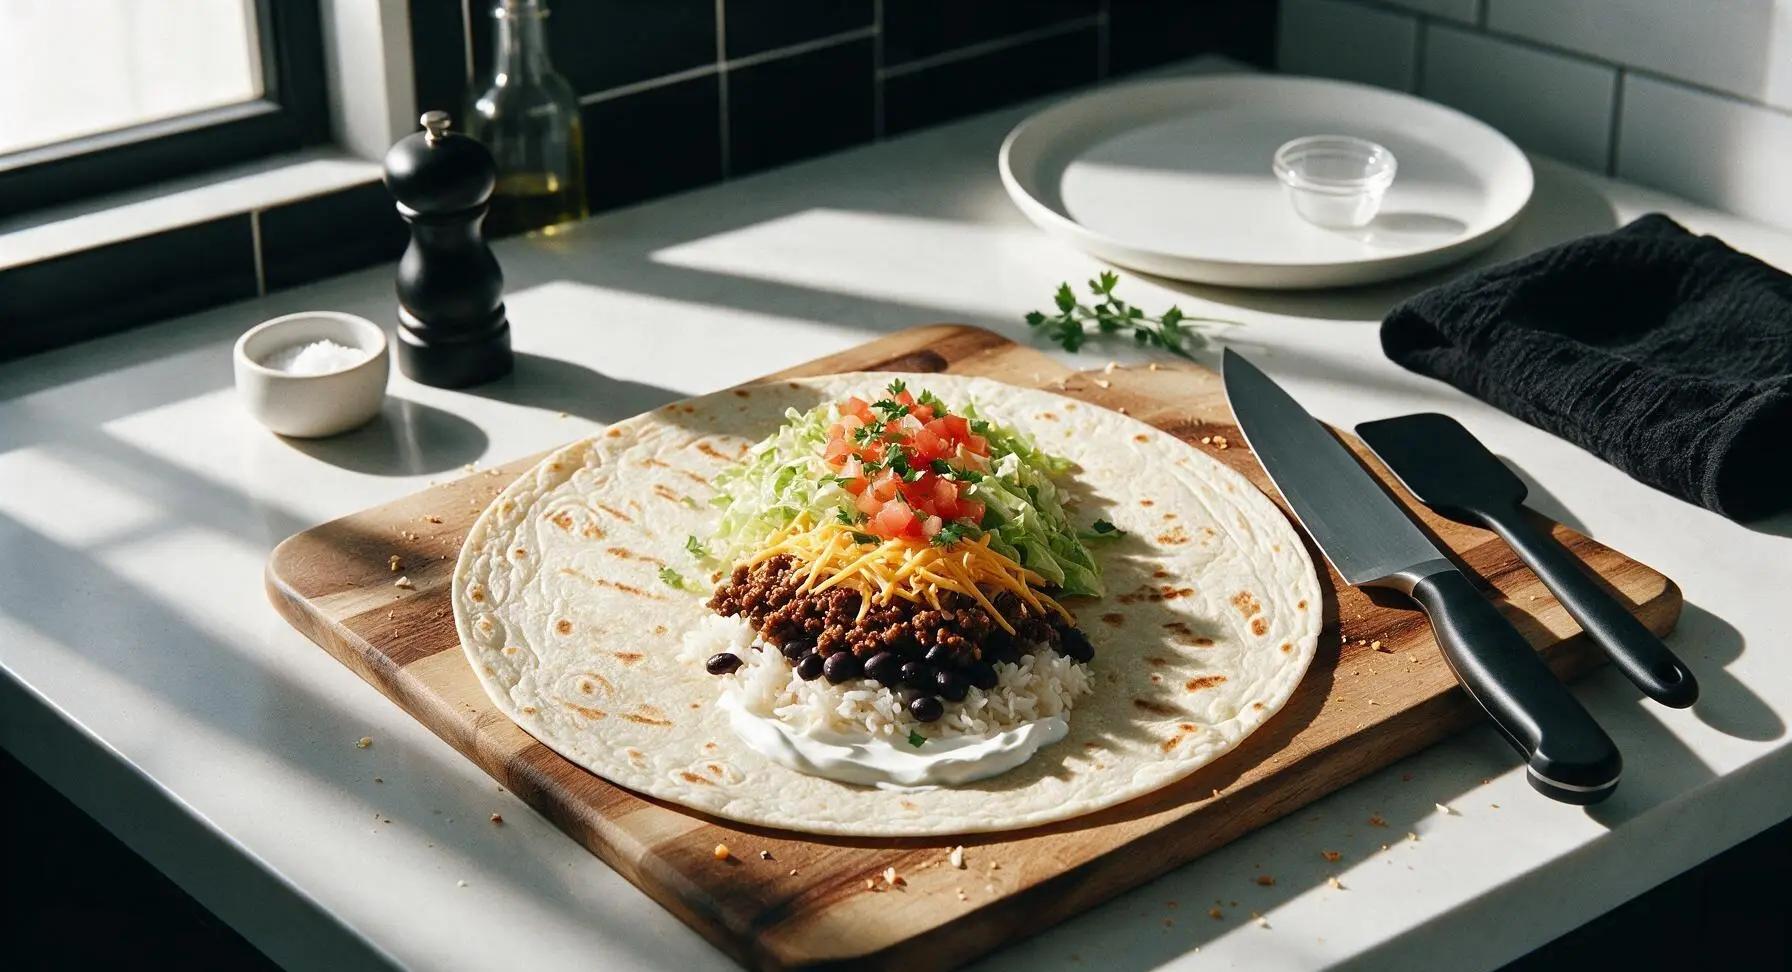
Lay one warmed tortilla flat on the acacia wood cutting board. Spread 2 tablespoons of sour cream in a 10cm (4-inch) wide strip down the center of the tortilla, leaving 5cm (2 inches) of clear space at the top and bottom edges. Layer 1/2 cup cooked white rice, 1/3 cup seasoned black beans, 1/4 of the spiced ground beef, 1/4 cup shredded cheddar, 1/4 cup shredded lettuce, 2 tablespoons diced tomato, and a pinch of chopped cilantro over the sour cream. Squeeze one lime wedge lightly over the fillings, taking care not to overstuff (overstuffing causes bursting when rolling).
Step 4
step4:Layer Fillings Evenly
Step 4
step4:Layer Fillings Evenly
5

Roll Tight Sealed Burrito

Fold the top and bottom 5cm (2-inch) edges of the tortilla inward over the ends of the filling strip. Hold the folded edges in place with one hand, then pull the right side of the tortilla tight over the fillings, tucking it firmly under the filling to eliminate trapped air gaps. Roll the burrito tightly all the way to the left edge to form a firm, smooth cylinder, seam side down, with no open gaps for fillings to leak out. Repeat the layering and rolling process for all 4 tortillas.
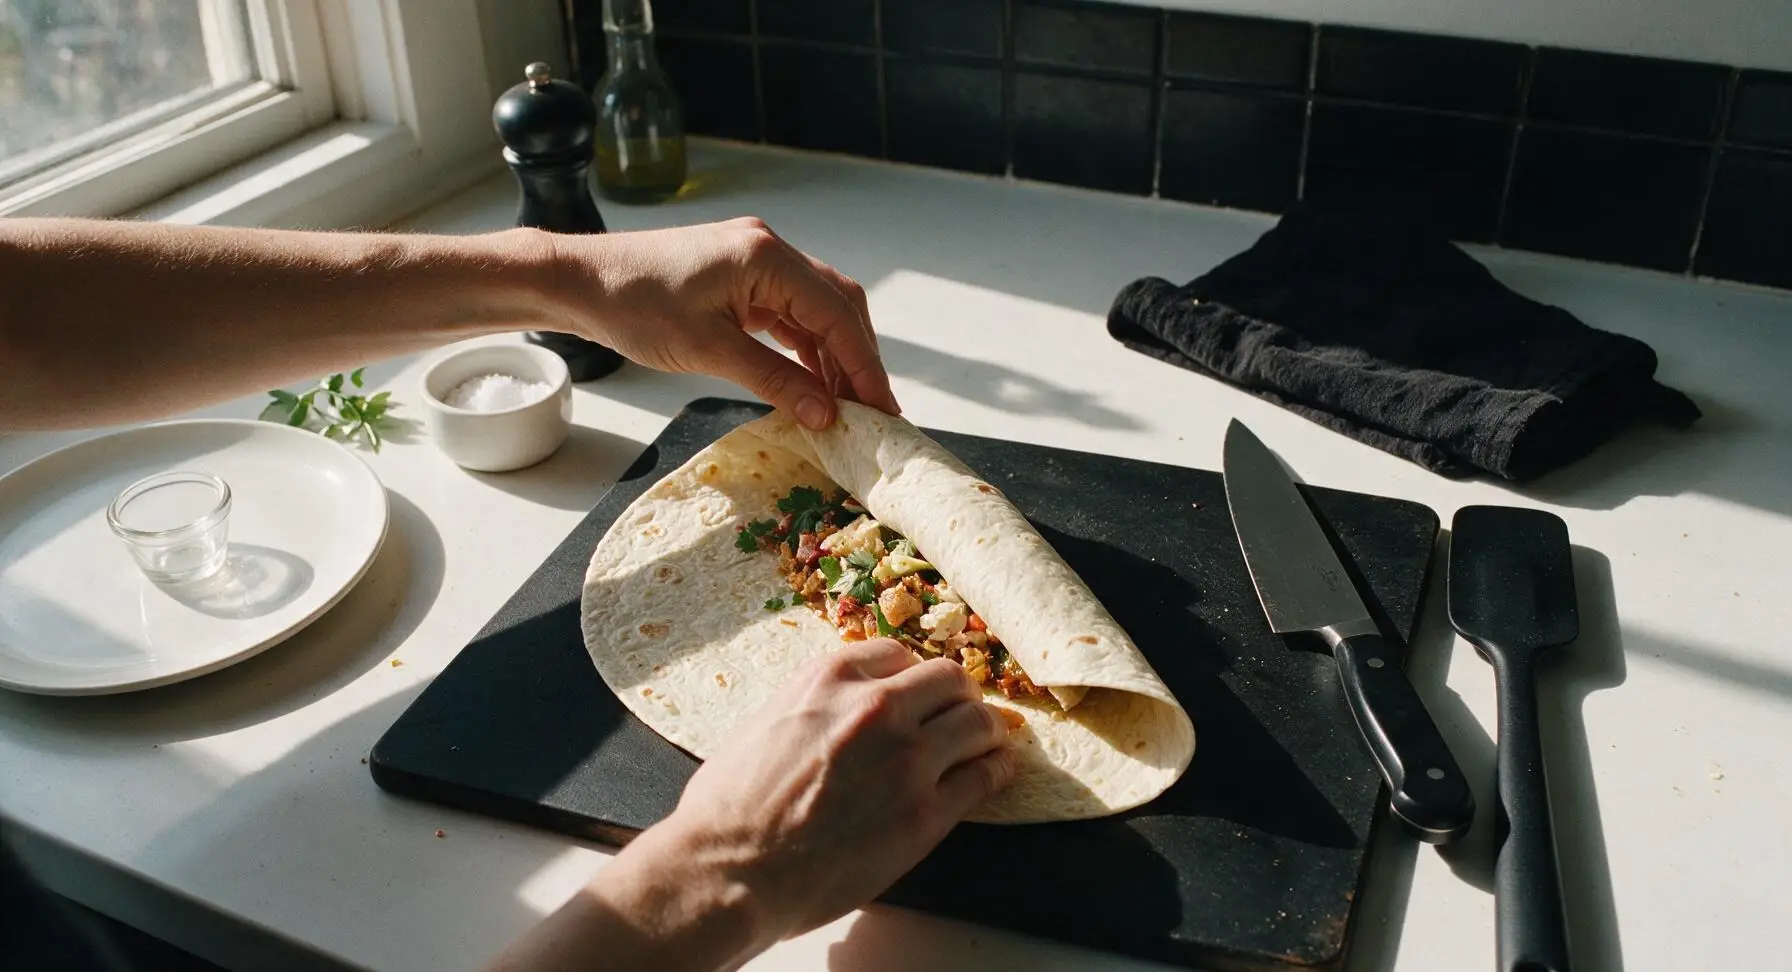
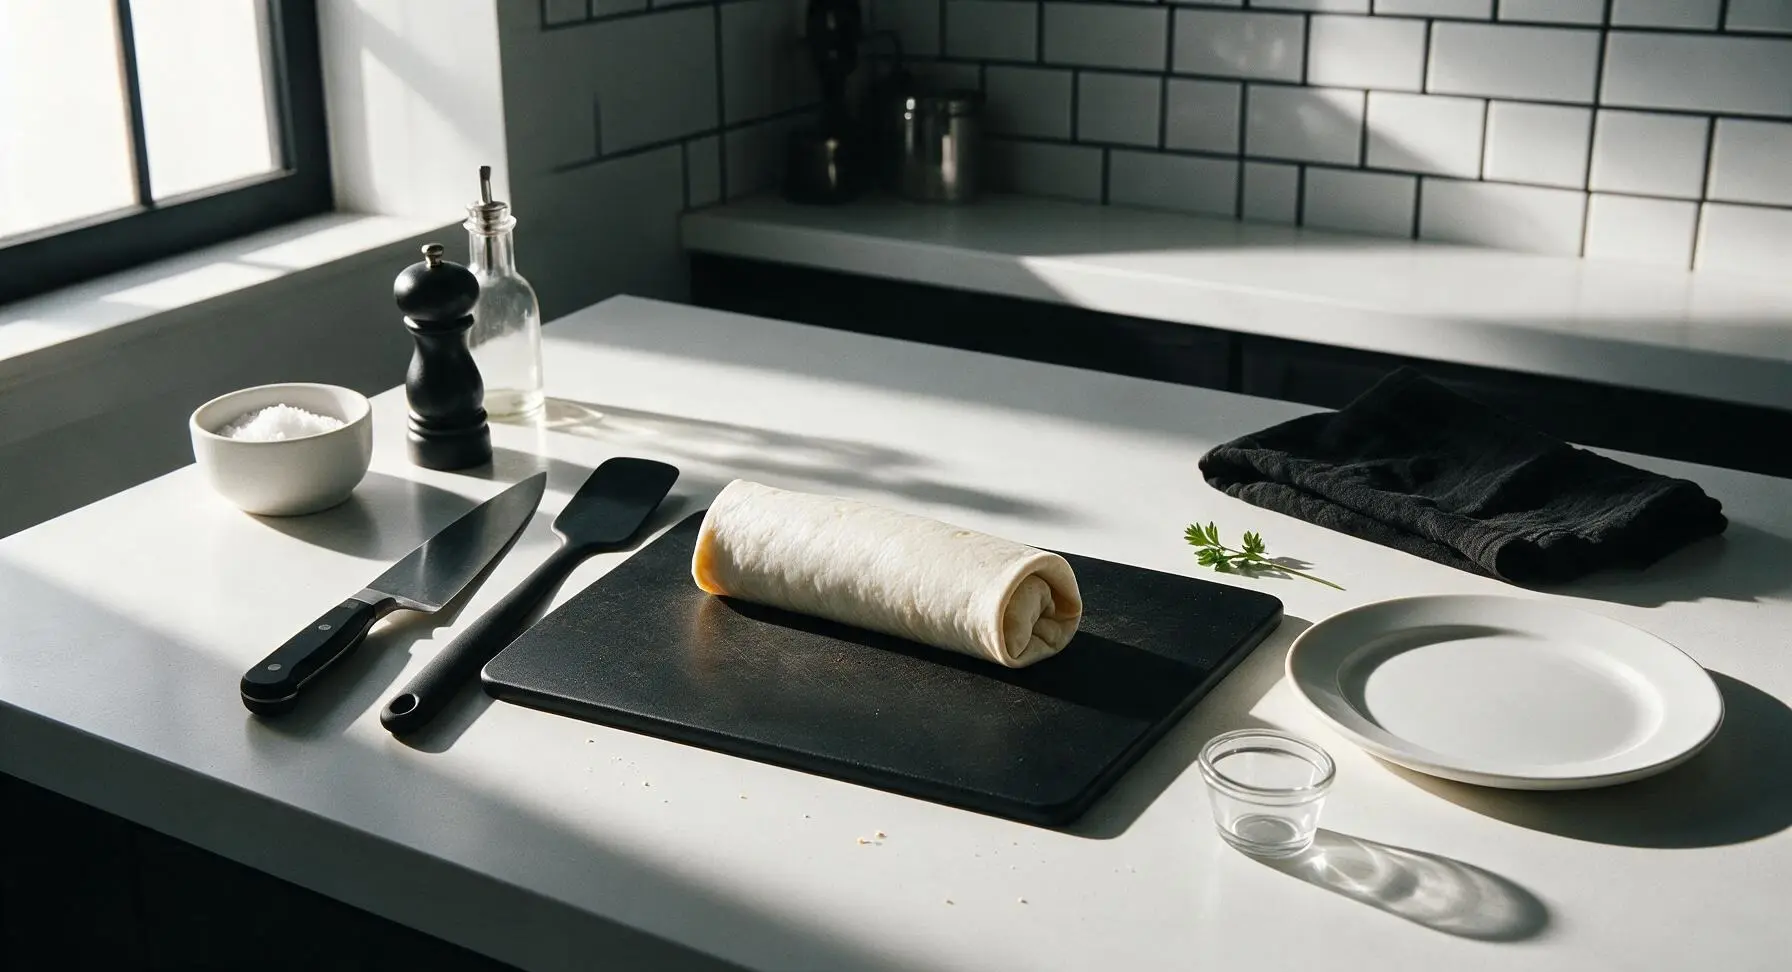
Step 5
step5:Roll Tight Sealed Burrito
Step 5
step5:Roll Tight Sealed Burrito
6

Wrap for On-the-Go

Lay one 30cm square of unbleached parchment paper flat on the cutting board. Place a rolled burrito diagonally across the center of the paper, fold the bottom corner of the paper up over the burrito, then roll tightly to enclose the burrito fully, twisting the top open end of the paper to create a secure, easy-to-hold wrap. For immediate serving, cut one burrito diagonally in half to expose the cross-section of fillings, and place it on the 24cm matte cream ceramic dinner plate.
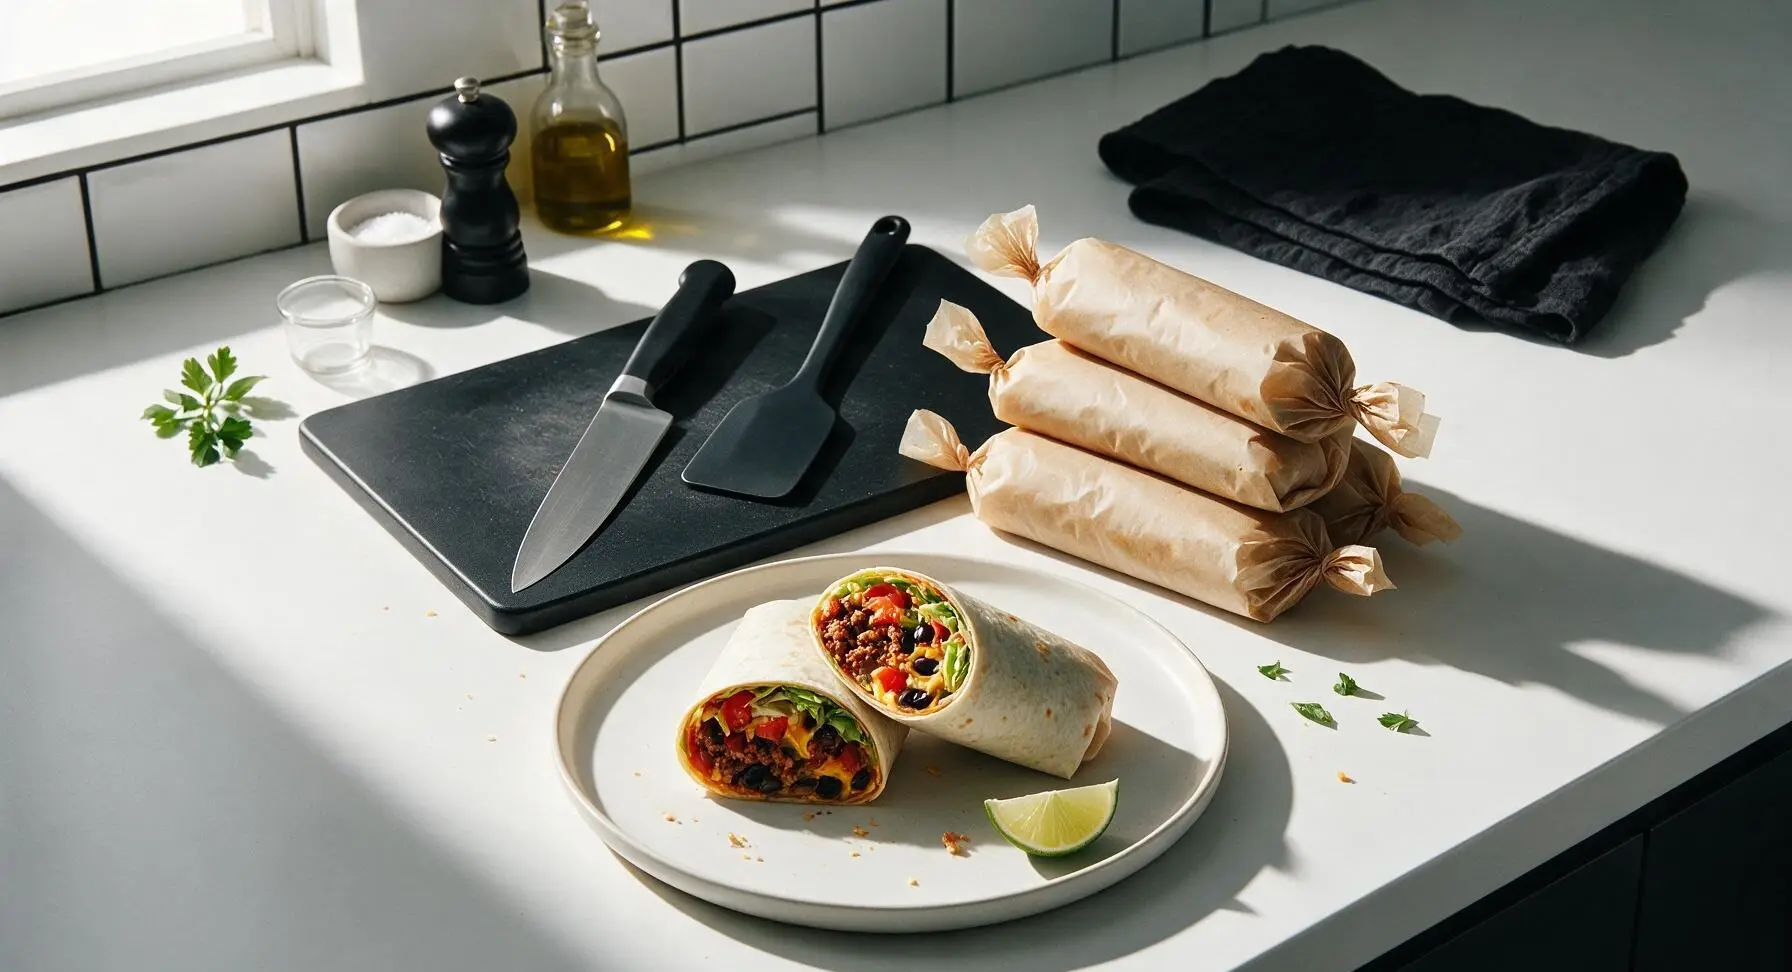
Step 6
step6:Wrap for On-the-Go

Tips

1.Warm tortillas right before assembly: Cold or room-temperature tortillas crack and split when folded, but 10 seconds of gentle dry heat makes them pliable enough to roll tight without breaking, preventing messy leaks while eating on the move.
2.Stick to the 2-inch clear border rule: Leaving 5cm (2 inches) of empty tortilla edge on all sides of the filling creates a tight seal that won’t pop open when you bite into the burrito. Overstuffing by even 1/2 cup makes a secure roll impossible.
3.Let hot fillings cool 5 minutes before rolling: Steam from piping hot beef or rice will make the tortilla soggy within an hour if wrapped immediately. Slightly cooled fillings keep the tortilla firm, so wrapped burritos stay fresh for up to 3 days in the fridge for meal prep.


✨ You May Also Like

Main Course
🍜 United Kingdom

A showstopping classic of tender seared beef, savory mushroom duxelles, and crisp prosciutto wrapped in flaky golden puff pastry, baked to juicy perfection.

⏱️ 2 hours 1Main Course ★ 4.7
Main Course
🍜 India

Tender charred marinated chicken simmered in a rich, spiced creamy tomato sauce, this iconic Anglo-Indian curry pairs perfectly with basmati rice or warm naan.

⏱️ 50 minuteMain Course ★ 4.6
Main Course
🍜 Thailand

Classic tangy, sweet, and savory Thai stir-fried rice noodles with shrimp, tofu, and crunchy garnishes, balancing all five core Thai flavor profiles.

⏱️ 30 minuteMain Course ★ 4.5
Main Course
🍜 United Kingdom

Crispy golden beer-battered cod and fluffy double-fried chips, served with tangy tartar sauce and malt vinegar: the timeless, beloved British pub comfort classic.

⏱️ 45 minuteMain Course ★ 4.7
Main Course
🍜 Mexico

Smoky, chile-marinated pork tacos with caramelized pineapple, fresh cilantro, and lime: a beloved classic Mexican street food perfect for casual summer gatherings.

⏱️ 1 hour 45Main Course ★ 4.8
Main Course
🍜 United States

Crunchy Fritos corn chips layered with savory beef chili and melted cheddar, topped with cool, zesty fixings for a beloved, cozy Tex-Mex comfort food.

⏱️ 35 minuteMain Course ★ 4.8

burrito go:Frequently Asked Questions

1.What size tortilla works best to avoid tearing or leaking when wrapping these portable burritos? ▾
Stick with the 10-inch flour tortillas called for in the recipe—smaller sizes won’t hold all the fillings without tearing, while oversized tortillas get floppy and hard to seal tight. For extra sturdiness, warm tortillas for 10 seconds in the microwave before wrapping to make them pliable and less prone to cracking as you fold.
2.Why use 80/20 ground beef instead of a leaner blend for the filling? ▾
The 20% fat content in 80/20 ground beef adds rich, classic Tex-Mex flavor without making the filling greasy, and it keeps spiced beef moist even when you prep burritos ahead for on-the-go meals. Leaner blends tend to dry out during cooking, leaving crumbly, bland filling that falls out of the wrap easily.
3.Do I have to rinse and drain canned black beans before adding them to the burrito? ▾
Absolutely—rinsing and draining canned black beans washes away the starchy, salty canning liquid that would make your burrito soggy and leak through the tortilla over time. Skipping this step is one of the most common causes of mushy, messy wraps that don’t hold up for portable eating.
4.How much filling is too much to add per burrito to keep it sealed tight? ▾
Aim for roughly 1 cup of total combined fillings per 10-inch tortilla. Overstuffing is the top reason burritos burst open mid-fold or while you’re eating on the go. Spread fillings in a narrow line down the tortilla center, leaving a 2-inch border on all sides to give you enough room to fold cleanly.
5.What’s the right order to layer fillings to make these burritos leak-proof? ▾
Start with a thin base of shredded sharp cheddar closest to the tortilla—it melts to create a natural moisture barrier—then add rice, spiced beef, and black beans. Tuck any extra fresh toppings in the center of the stack, and keep wet ingredients away from tortilla edges to prevent sogginess and seepage as you wrap.
6.Can I make these burritos ahead of time for weekly meal prep? ▾
Definitely! Assembled, tightly wrapped burritos stay fresh in the fridge for up to 3 days, or you can freeze them for up to 3 months. Wrap each individually in plastic wrap or aluminum foil after folding to lock in freshness, and reheat in the microwave or oven when you’re ready for a quick grab-and-go meal.
7.Why use long-grain white rice instead of short-grain for the filling? ▾
Long-grain white rice cooks up light, fluffy, and separate, so it doesn’t clump up or turn mushy when mixed with other fillings. Short-grain rice has higher starch content, which creates a sticky, dense texture that makes burritos feel heavy, and it absorbs too much moisture leading to soggy tortillas over time.
8.How do I fold the burrito so it doesn’t come unwrapped while I’m eating? ▾
After arranging fillings down the center, fold the left and right sides of the tortilla in over the ends of the filling line first. Then, fold the bottom flap of the tortilla up tightly over the fillings, tucking it under the ingredients to create a snug seal, before rolling the burrito all the way up to the top edge.
9.Can I swap the sharp cheddar for a different type of cheese? ▾
You can, but shredded sharp cheddar is ideal because its bold, tangy flavor cuts through the rich beef and beans, and it melts smoothly to create that moisture-blocking layer near the tortilla. If you swap, go for a similar melting cheese like pepper jack or Colby, and avoid crumbly cheeses that won’t help seal the wrap.
10.My tortillas keep cracking when I try to fold them—what am I doing wrong? ▾
Cold tortillas are stiff and prone to cracking, so always warm them first. Stack tortillas between damp paper towels and microwave for 10 to 15 seconds, or warm them one at a time in a dry skillet for 5 seconds per side right before assembly. This makes them flexible enough to fold tight without splitting, even when packed full.
11.Can I add fresh toppings like salsa or lettuce without making the burrito soggy? ▾
You can, but pat wet toppings like diced tomatoes or salsa dry with a paper towel first, and nestle them in the center of the filling stack, away from the tortilla edges. Skip very watery toppings like runny hot sauce if you’re prepping burritos more than a day ahead, and add those right before eating for best texture.
12.What’s the best way to reheat a pre-made Burrito Go wrap so it stays mess-free? ▾
For a crispy, non-soggy wrap, reheat unwrapped burritos in a 350°F oven for 10 to 12 minutes, or wrap in a damp paper towel and microwave for 60 to 90 seconds if you’re short on time. Let it rest for 1 minute after reheating so the cheese sets and fillings don’t pour out when you take your first bite.
13.Do I need to season the black beans separately from the spiced beef? ▾
You don’t have to, but tossing the drained, rinsed black beans with a pinch of the same taco seasoning you use for the beef while the beef finishes cooking will amp up their flavor without making them mushy. Just make sure any excess moisture cooks off before adding beans to the burrito to avoid soggy tortillas.
14.Can I make these burritos gluten-free for people with dietary restrictions? ▾
Yes, simply swap the regular 10-inch flour tortilla for a certified gluten-free 10-inch tortilla, and double check that your taco seasoning for the beef doesn’t contain hidden gluten. All the core fillings—beef, rice, black beans, and cheddar—are naturally gluten-free as long as you avoid cross-contamination during prep.
15.How do I keep fillings from falling out the bottom of the burrito when I take bites? ▾
The key is the initial fold: always tuck the side ends in first before rolling, and hold the sealed bottom edge closest to your mouth as you eat. If you’re extra worried about leaks, wrap the bottom third of the folded burrito in a small strip of parchment paper to catch any stray fillings while you’re on the go.

Comments (20)

2 days ago

OMG this is such a game changer for my weekday work lunches! I used to spend $12 a day on takeout burritos near my office and now I can prep these on Sunday and grab one on my way out the door. Loaded it up with cilantro lime rice, black beans, grilled chicken, and a little extra guac, no sogginess even by lunchtime! SO good.

yesterday

Wait do you wrap them in foil before storing in the fridge? I tried making burritos for meal prep once and they were totally soggy by day 2, would love to avoid that!

yesterday

Great question! We recommend wrapping them tightly in parchment paper first then a layer of foil if prepping 2-3 days ahead. If you’re adding extra guac or sour cream, tuck those in a tiny side container to keep the tortilla from getting mushy. So stoked these are working for your work lunches, Mia!

3 days ago

Made these for my crew before the ASU game last weekend and they were a smash hit! So much easier to eat standing around in the parking lot than nachos or tacos that fall apart everywhere. I added pickled jalapeños for a little kick and everyone went back for seconds.

2 days ago

Love the pickled jalapeño add-in! These were made for game day snacking for exactly that no-mess reason, so glad your crew enjoyed them.

1 week ago

My kids are obsessed with these! I’ve been packing them in their school lunches all week and they keep asking for more. Even my super picky 7 year old who turns his nose up at anything with beans ate the whole thing without complaining. 10/10 for busy weeknights too, since they come together so fast.

5 days ago

Super easy to make vegan! I swapped the meat for seasoned roasted sweet potato and cauliflower, used dairy free cheese, and it came out so flavorful. Perfect for grabbing on my way to yoga class when I don’t have time to sit down for breakfast.

3 days ago

Oh that roasted sweet potato swap sounds chef’s kiss! I’ve been hunting for easy portable vegan meals for my upcoming camping trip, definitely stealing that idea.

yesterday

15 minute cook time is no joke! I got home late from work last night, threw these together with leftover taco meat I had in the fridge, shredded cheese, and a bag of frozen corn, and dinner was on the table before my kids even finished arguing about what show to watch. Total weeknight win.

2 hours ago

Leftover taco meat is such a perfect hack for these! We love recipes that work with whatever odds and ends you have in the fridge, no fancy grocery run needed.

1 week ago

Brought these to my neighborhood block party potluck last Saturday and people were raving about them! I set out a little topping bar so people could customize their own, but the pre-made loaded ones I wrapped up were gone in 10 minutes flat. Only downside is I didn’t make enough for myself!

5 days ago

Wait the topping bar idea is genius! I’m hosting a potluck next month and was stressing about what to make, this solves all my problems. Did you cut them in half for easier serving?

5 days ago

The build-your-own bar is such a fun call for parties! We recommend slicing them diagonally in half if serving to a crowd so they’re easier to hold and share. Sorry you didn’t get to save one for yourself, next time double the batch!

2 hours ago

These are perfect for post-workout meals! I load mine up with extra ground turkey, brown rice, black beans, and a scoop of corn salsa, wrap it tight, and eat it on my drive home from the gym. Way cheaper and healthier than hitting the drive thru every time I’m done lifting.

5 minutes ago

I do the same! I make a batch on Sunday with extra protein and they keep me full through my entire morning shift at the hospital, no mid-morning vending machine runs.

5 days ago

Okay I was skeptical because every portable burrito I’ve ever made turns into a soggy, drippy mess 20 minutes after wrapping it, but this method actually works! The tip to layer the cheese against the tortilla first to create a moisture barrier? Total game changer. No drips on my work laptop this week, win.

3 days ago

Wait the cheese barrier tip?! I must have skipped over that part when I read the recipe, that makes so much sense. I had a drip disaster on my work notebook last time I brought a burrito in, definitely trying that next time.

3 days ago

So glad that trick worked for you! Melting a thin layer of cheese right against the warm tortilla creates a little waterproof seal that keeps all the juicier fillings from seeping through, no more sad soggy wraps.

2 weeks ago

Bro this is so easy even I can make it and I burn toast half the time. Total lifesaver for late study sessions when I don’t want to order expensive Uber Eats. Loaded it up with leftover chili, cheese, and crushed tortilla chips for crunch, chef’s kiss.

2 weeks ago

Made a batch of these for our cross-country road trip last week and they were perfect! We kept them in the cooler and ate them at rest stops instead of stopping for fast food the whole drive. Saved us so much money and they tasted way better than any gas station burrito I’ve ever had.

1 week ago

Road trip approved! We love how portable these are for long drives, hikes, or any adventure where you don’t want to rely on fast food stops. So smart to keep them in the cooler!

1 week ago

I added a healthy scoop of my homemade habanero hot sauce to the filling and these had the perfect kick! My only note is that I wish the recipe mentioned how well these freeze — I wrapped a few extra and popped them in the freezer, reheated one in the microwave for 2 minutes this morning and it tasted just as fresh as the day I made it.

5 days ago

Wait they freeze well?! That’s a game changer for my monthly freezer prep sessions. Do you wrap them in plastic before freezing or just foil?

3 days ago

Great catch! These freeze beautifully for up to 3 months — just wrap them tightly in plastic wrap then foil before freezing, and reheat in the microwave or oven when you’re ready to eat. Love the habanero hot sauce add!

3 days ago

Who says burritos are only for lunch or dinner? I made these for brunch last weekend with scrambled eggs, crispy bacon, hash browns, and a little salsa verde. My brunch guests went crazy for them, and we didn’t even need plates! 10/10 will be making these for every brunch from now on.

2 days ago

Love that this doesn’t require a bunch of fancy equipment! I only have a tiny hot plate in my studio apartment and I was able to make these no problem, no oven needed, minimal cleanup. Perfect for people with tiny kitchens who still want good home cooked food.

yesterday

Same! I live in a dorm with just a microwave and a mini griddle and these worked perfectly. I heated the tortilla on the griddle, heated up canned beans and pre-cooked rice in the microwave, and it came out amazing.

1 week ago

These saved me during my kid’s soccer tournament last weekend! I packed a whole cooler full of them for the team and all the parents were asking for the recipe. They’re easy for the kids to eat between games, no messy hands, and they kept everyone full through hours of being out in the sun.

5 days ago

Tasted great, but I had to swap the regular flour tortilla for a gluten free one and it kept cracking when I tried to wrap it tight. Ended up eating it in a bowl because I couldn’t get it to stay closed, still delicious but not quite as portable for me.

3 days ago

So sorry the gluten free tortilla gave you trouble! We recommend warming GF tortillas for 10-15 seconds in the microwave before wrapping to make them more flexible, which helps prevent cracking. We’re glad it still tasted great even if it didn’t wrap perfectly!

2 days ago

Threw these on the grill for 2 minutes after wrapping them to get a little char on the tortilla and melt the cheese all the way through, and holy cow that took them to the next level. Had them for a backyard cookout last weekend and even my brother in law who ‘hates Tex-Mex’ ate two.

yesterday

The grill char idea is genius! I never thought to throw assembled burritos on the grill for a minute, I always just fill them cold. That smoky flavor would be insane.

yesterday

Your brother in law who hates Tex-Mex ate two? That’s the highest possible endorsement for this recipe, lmao. Definitely trying the grill trick this weekend.

just now

I keep a couple of these in my insulated delivery bag when I’m working long shifts so I don’t have to spend money on takeout between orders. They hold up for hours, stay warm, and I don’t have to worry about making a mess in my car when I’m parked between stops. Absolute lifesaver for gig workers.

30 minutes ago

Okay don’t judge me but I added a layer of crushed Doritos inside my burrito for extra crunch and it was the best decision I’ve made all month. The cheesy crunch paired with the rice and beans is unreal, y’all have to try it.

5 minutes ago

No judgment at all, that’s a legendary hack! I do the same with Fritos sometimes, that salty crunch just hits different in a burrito. Can’t wait to try it with Doritos next time.

yesterday

This was super easy for my first time ever making burritos! The only issue I had was that I overstuffed mine and half the filling fell out when I picked it up, oops. Tasted amazing though, just need to practice not overfilling next time.

2 hours ago

Girl I did the exact same thing my first time! I swear your eyes are always bigger than your tortilla when you’re loading these up. It still tastes good even if half of it ends up on the plate, lmao.

2 hours ago

We’ve all been there! It’s so tempting to load every last bit of filling in, but leaving a 1-inch border around the edge of the tortilla makes folding so much easier with no spillage. So glad it tasted great even with the little filling mishap!

2 days ago

Packed these for a picnic in the park with my partner last weekend and they were perfect! No need for utensils, no messy containers to haul home, and they pair so well with chips and guac and a cold seltzer (okay, and a frozen margarita I snuck in). Will be our go-to picnic food all summer long.



