
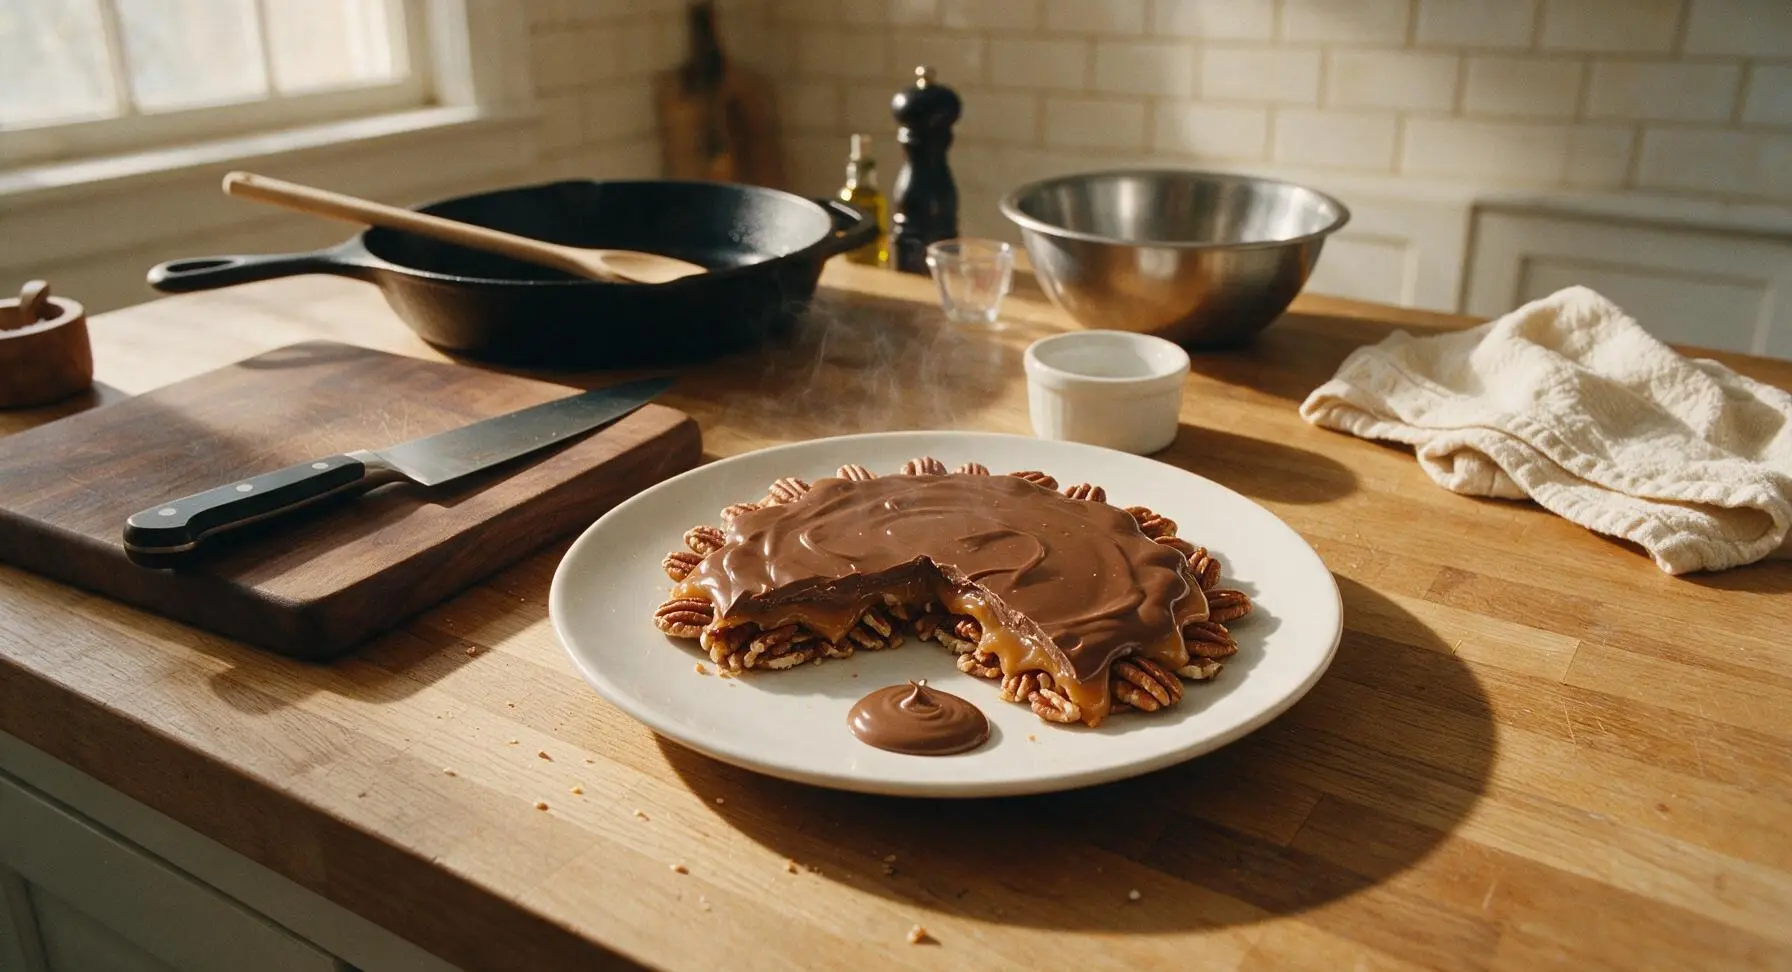
Canadian Turtles

title 1
Canadian Turtles
⏱️ cook time 25 minutes
🍽️ servings 12
⚡ Difficulty medium

intro

Buttery toasted pecans, chewy homemade caramel, and smooth milk chocolate form these iconic Canadian candy clusters, a beloved winter holiday staple with perfect crunch in every bite.

Ingredients
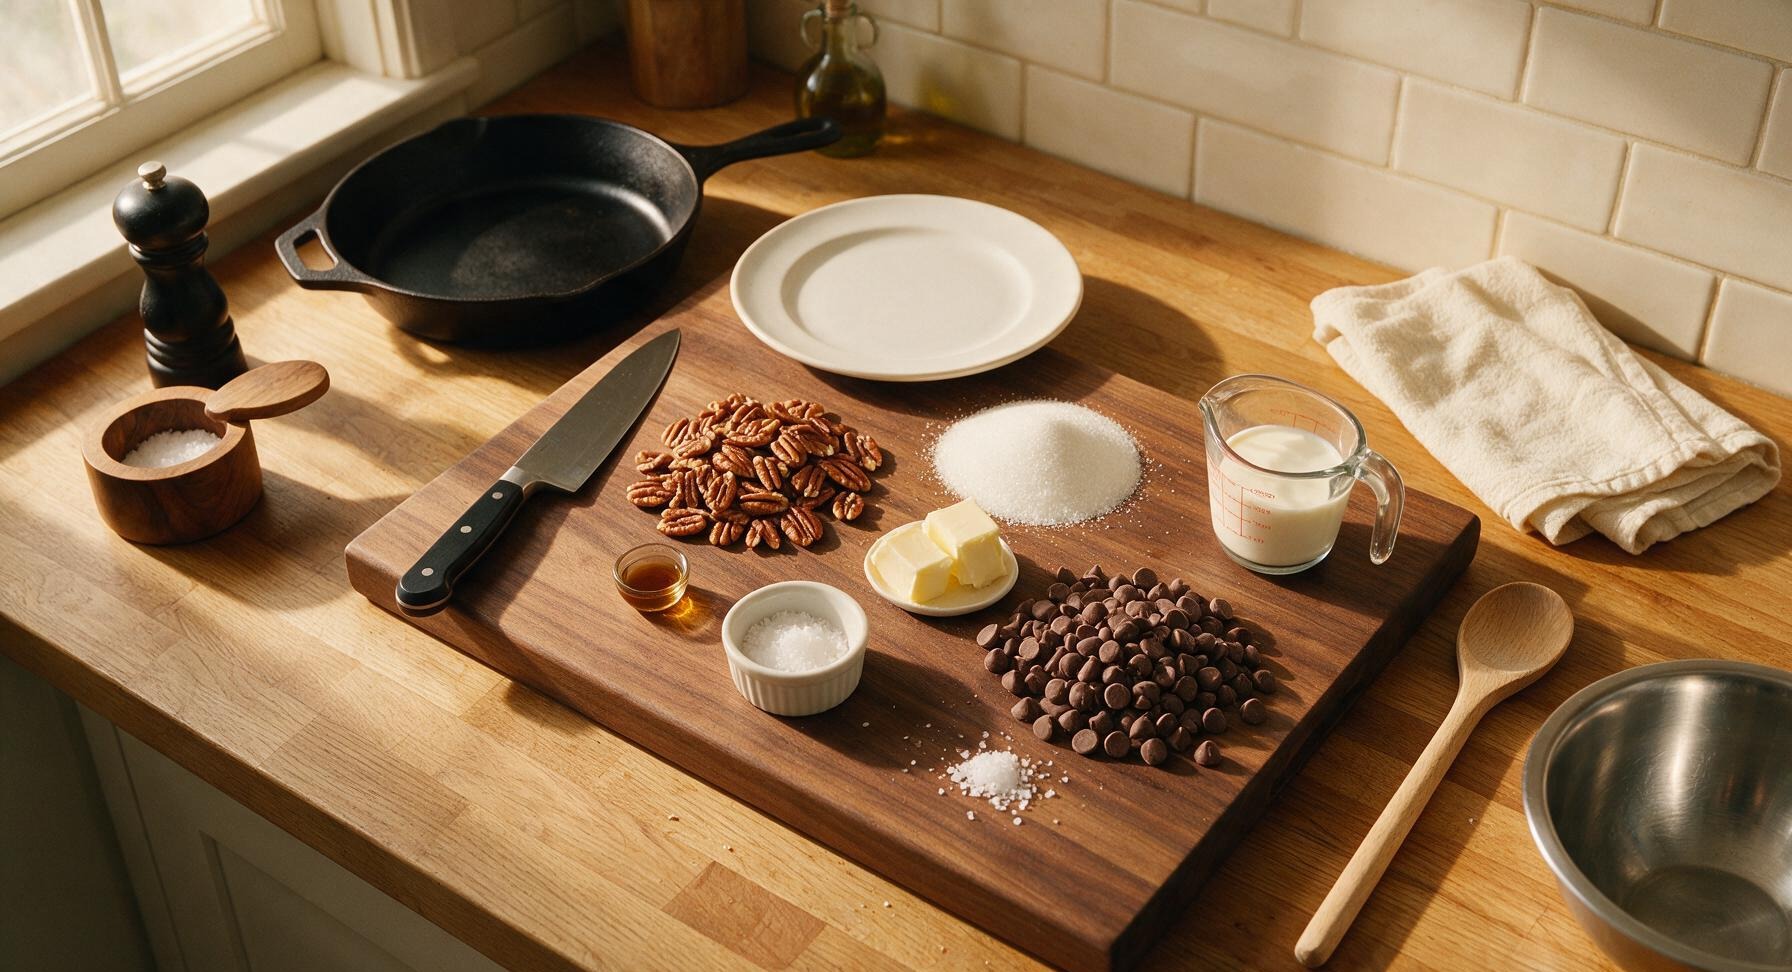
Raw pecan halves 2 cups (220g)
Granulated sugar 1 cup (200g)
Heavy whipping cream ½ cup (120ml)
Unsalted butter 4 tbsp (57g)
Pure vanilla extract 1 tsp (5ml)
Milk chocolate chips (35% cacao) 2 cups (340g)
Flaky sea salt 1 tsp

Steps

1

Toast Pecan Halves

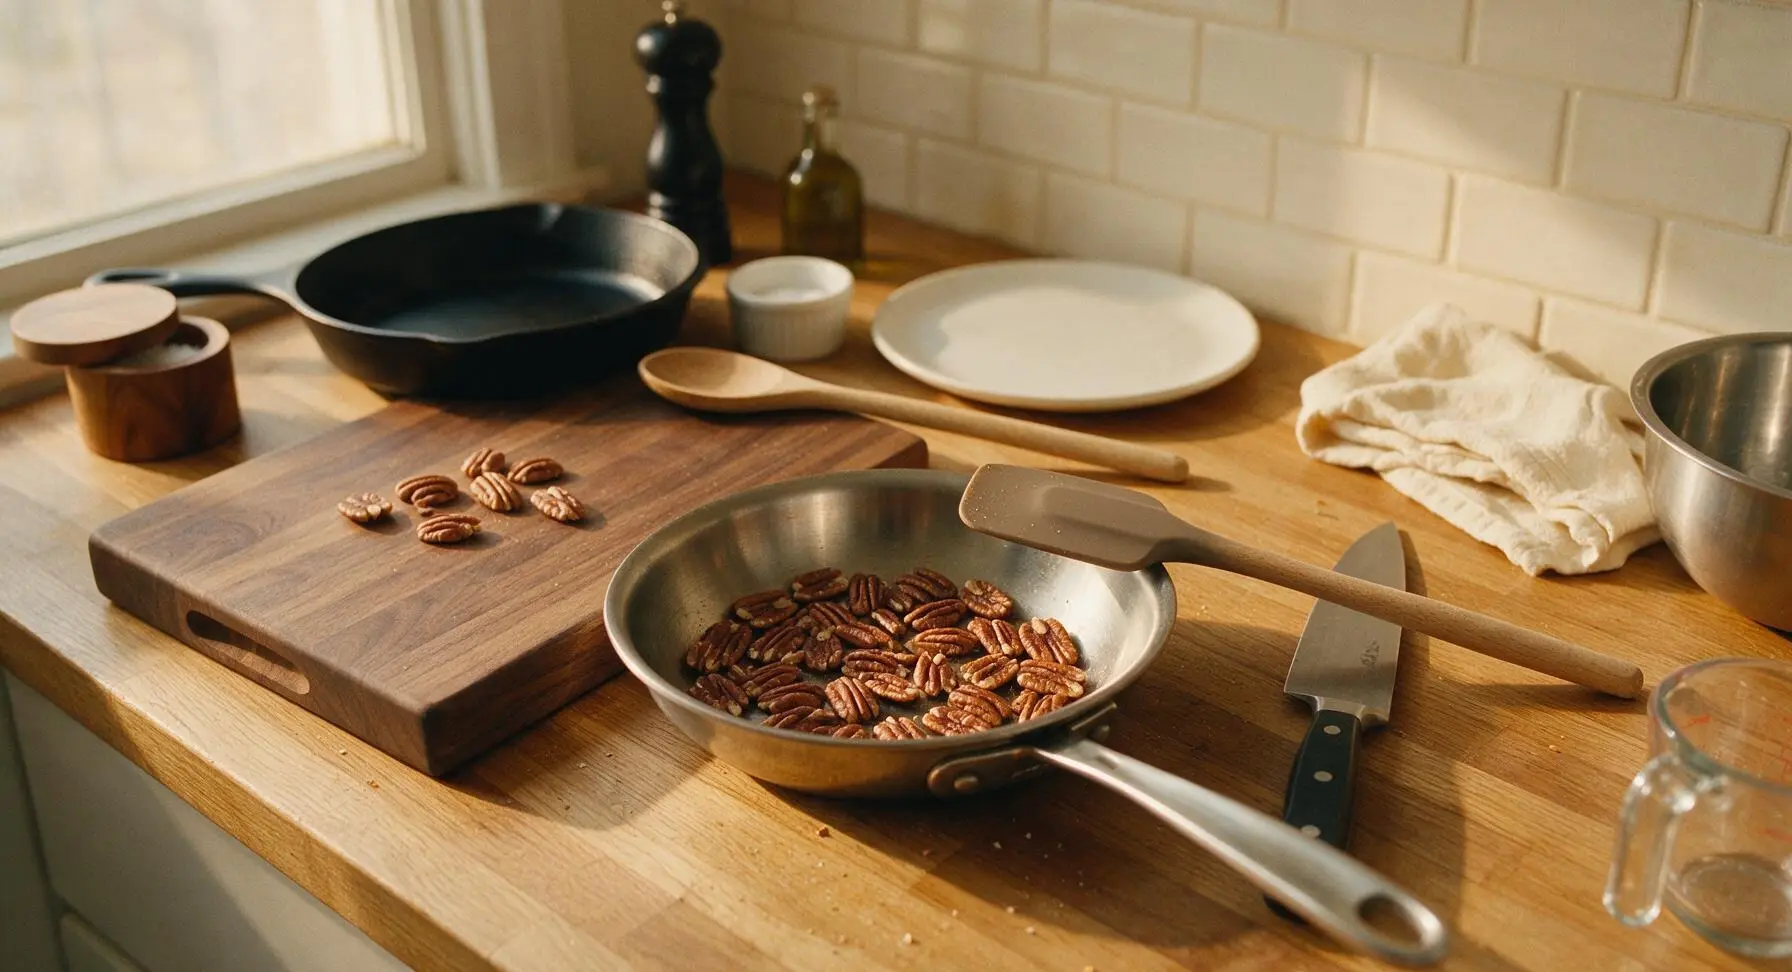
Place the small brushed stainless steel skillet over medium-low heat. Add 2 cups of raw pecan halves in a single even layer, toasting for 4-5 minutes while stirring frequently with the taupe silicone spatula. Watch for a warm nutty aroma and slightly deepened golden-brown color as a visual cue they are done; do not leave unattended, as pecans burn in as little as 30 seconds once hot. Transfer toasted pecans to the maple cutting board to cool fully for 10 minutes.
Step 1
step1:Toast Pecan Halves
2

Arrange Pecan Clusters

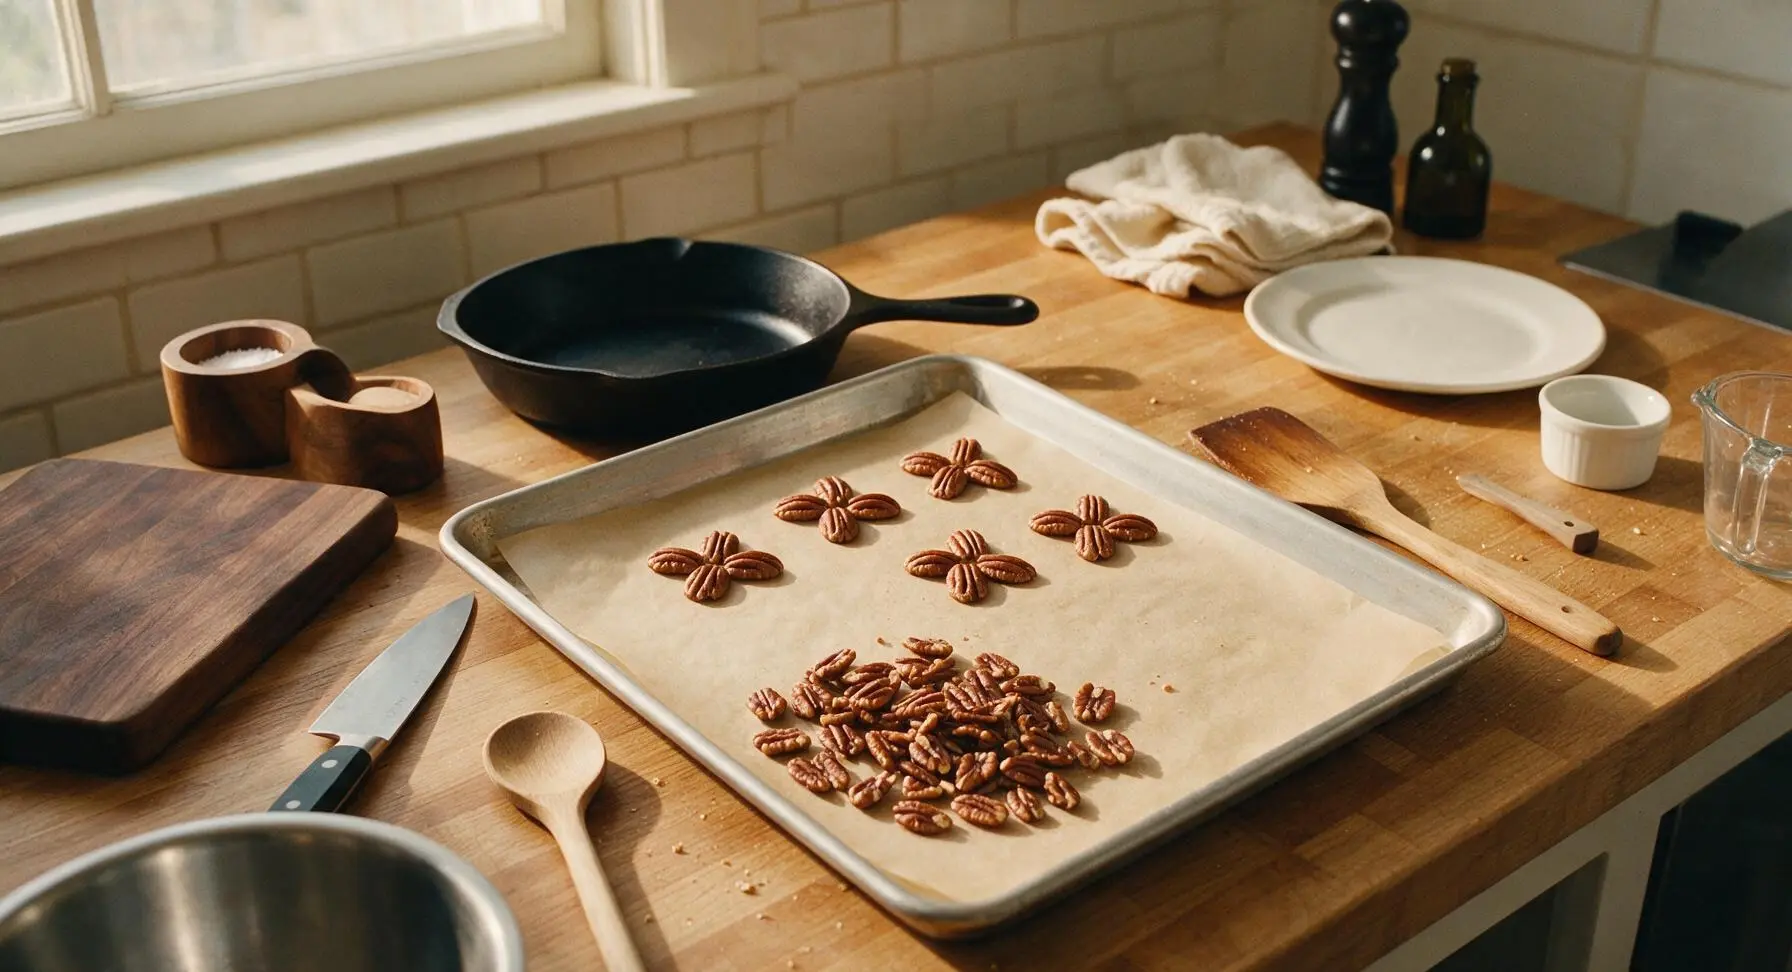
Line the large rimmed aluminum baking sheet with unbleached parchment paper. Once pecans are fully cool, arrange them into 24 small clusters on the parchment, using 4 pecan halves per cluster arranged to point outward like turtle legs, leaving 1 inch of open space between each cluster. Set the prepared baking sheet aside while you make the caramel.
Step 2
step2:Arrange Pecan Clusters
3

Cook Caramel Base

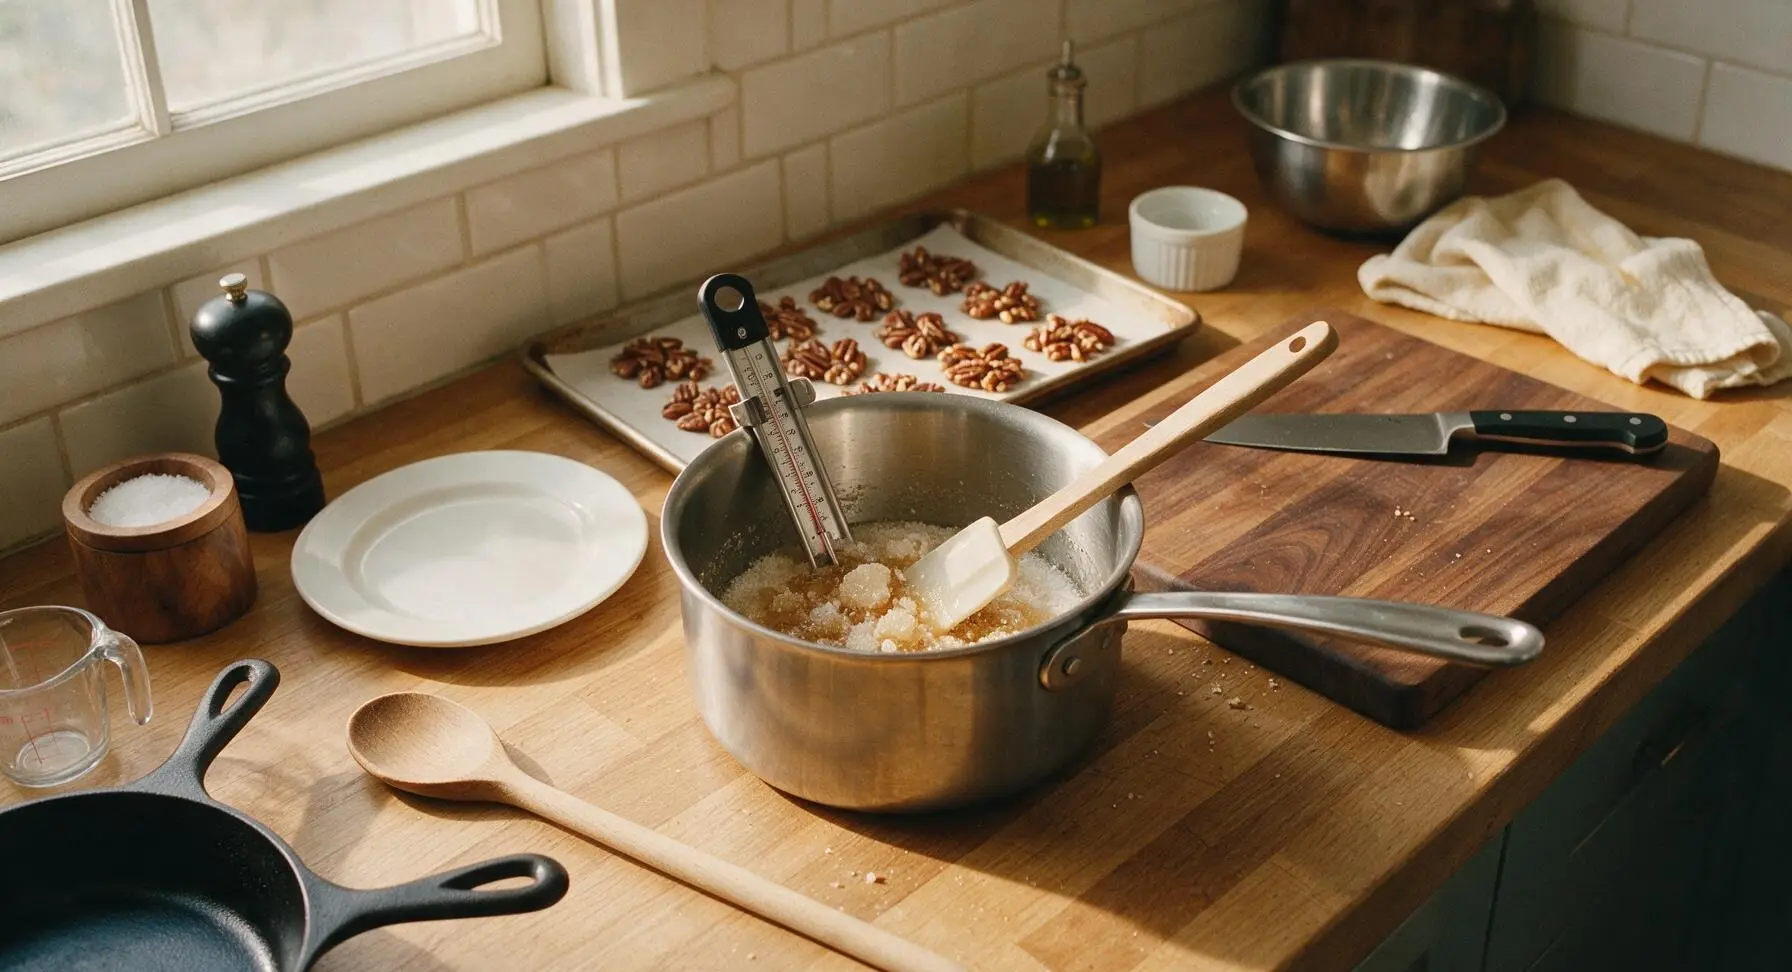
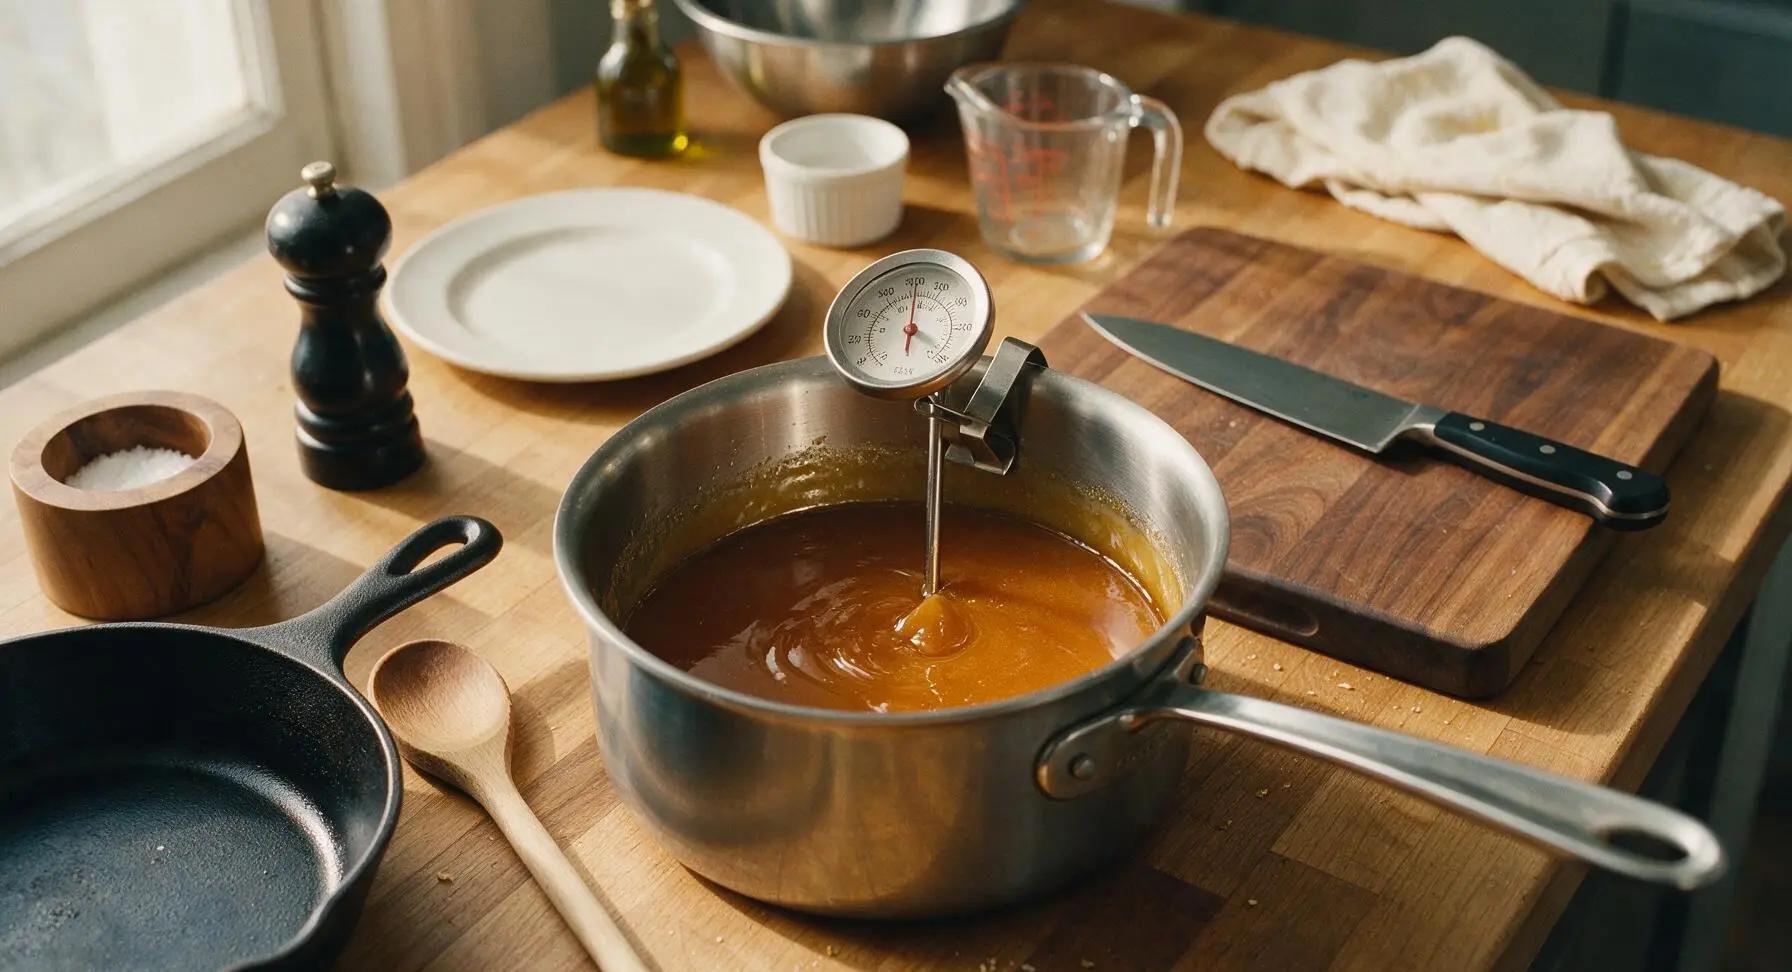
Pull the 1.5L heavy-bottomed stainless steel saucepan to the center work area, placing it over medium heat. Add 1 cup of granulated sugar to the pan, stirring gently at first with the silicone spatula as the sugar melts, forming dry clumps before liquefying into a smooth deep amber liquid. Clip the candy thermometer to the pan rim, and cook until the sugar reaches exactly 320°F, about 8-10 minutes total. Remove from heat immediately once it hits temperature to avoid burning.
Step 3
step3:Cook Caramel Base
Step 3
step3:Cook Caramel Base
4

Finish Warm Caramel

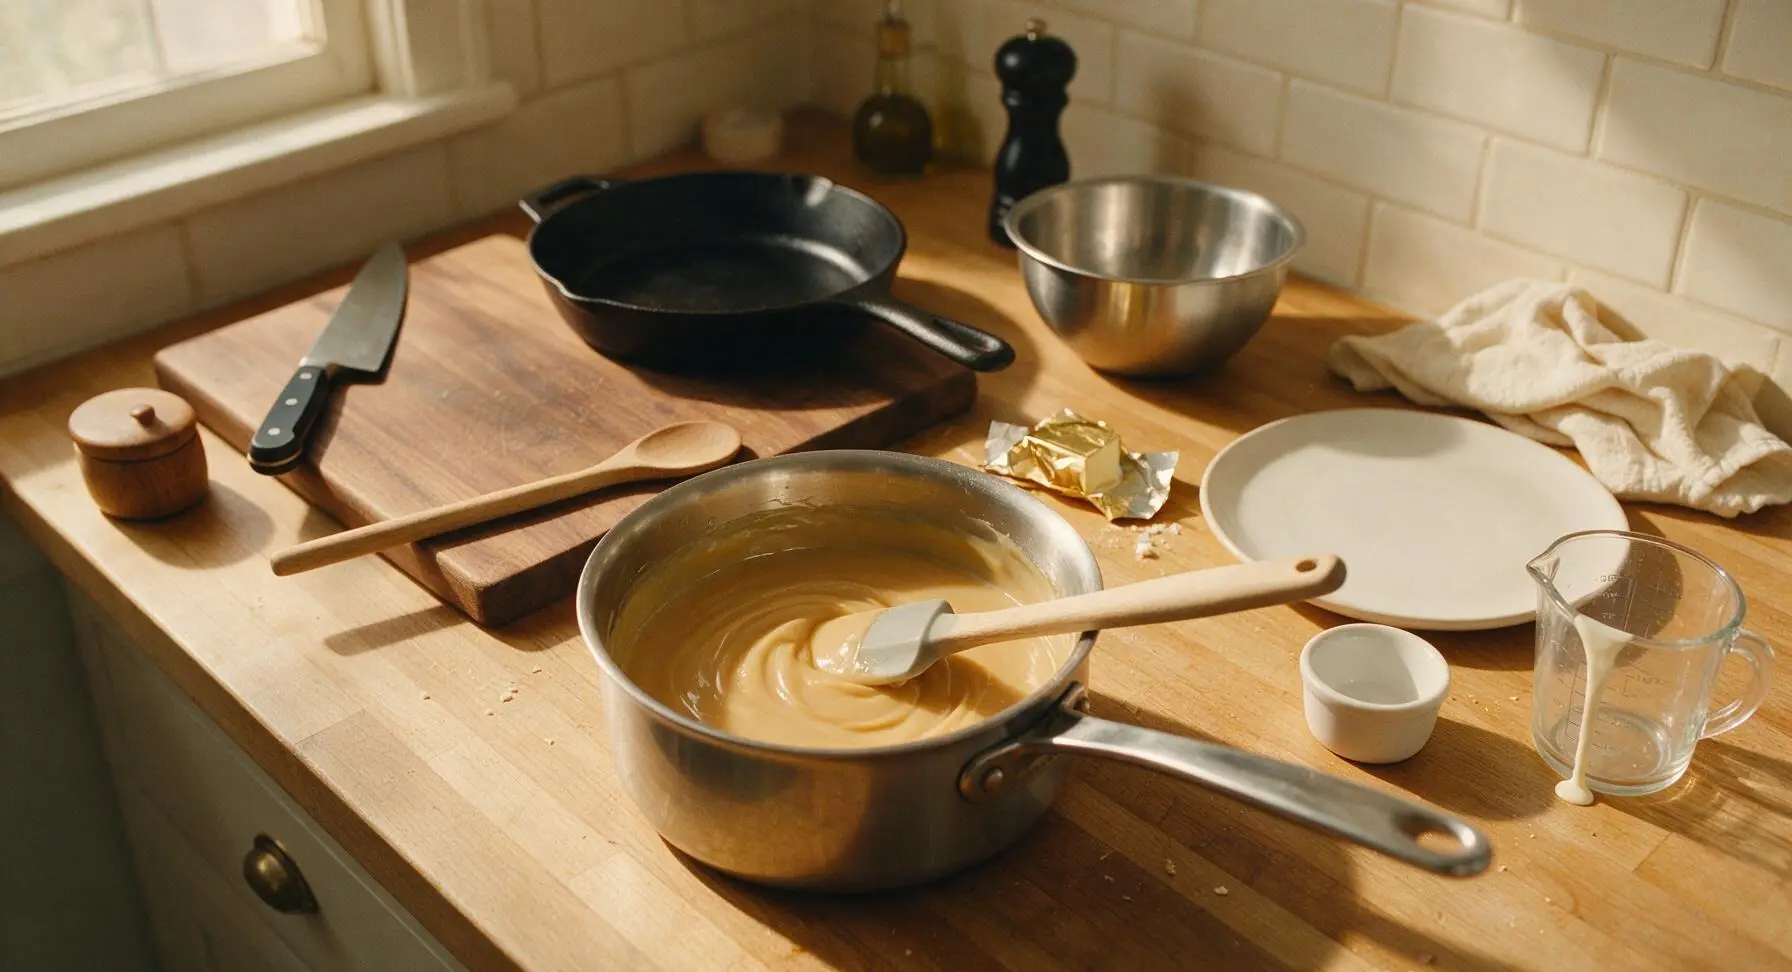
Carefully stir 4 tablespoons of cold unsalted butter into the hot melted sugar until fully combined and smooth. Slowly pour in ½ cup of gently warmed heavy cream (warmed to 100°F to prevent seizing) while stirring constantly, followed by 1 teaspoon of pure vanilla extract. Stir the mixture until completely smooth, then let it cool for 5 minutes off heat until it thickens to a pourable, honey-like consistency that does not run freely.
Step 4
step4:Finish Warm Caramel
5

Top Pecans With Caramel

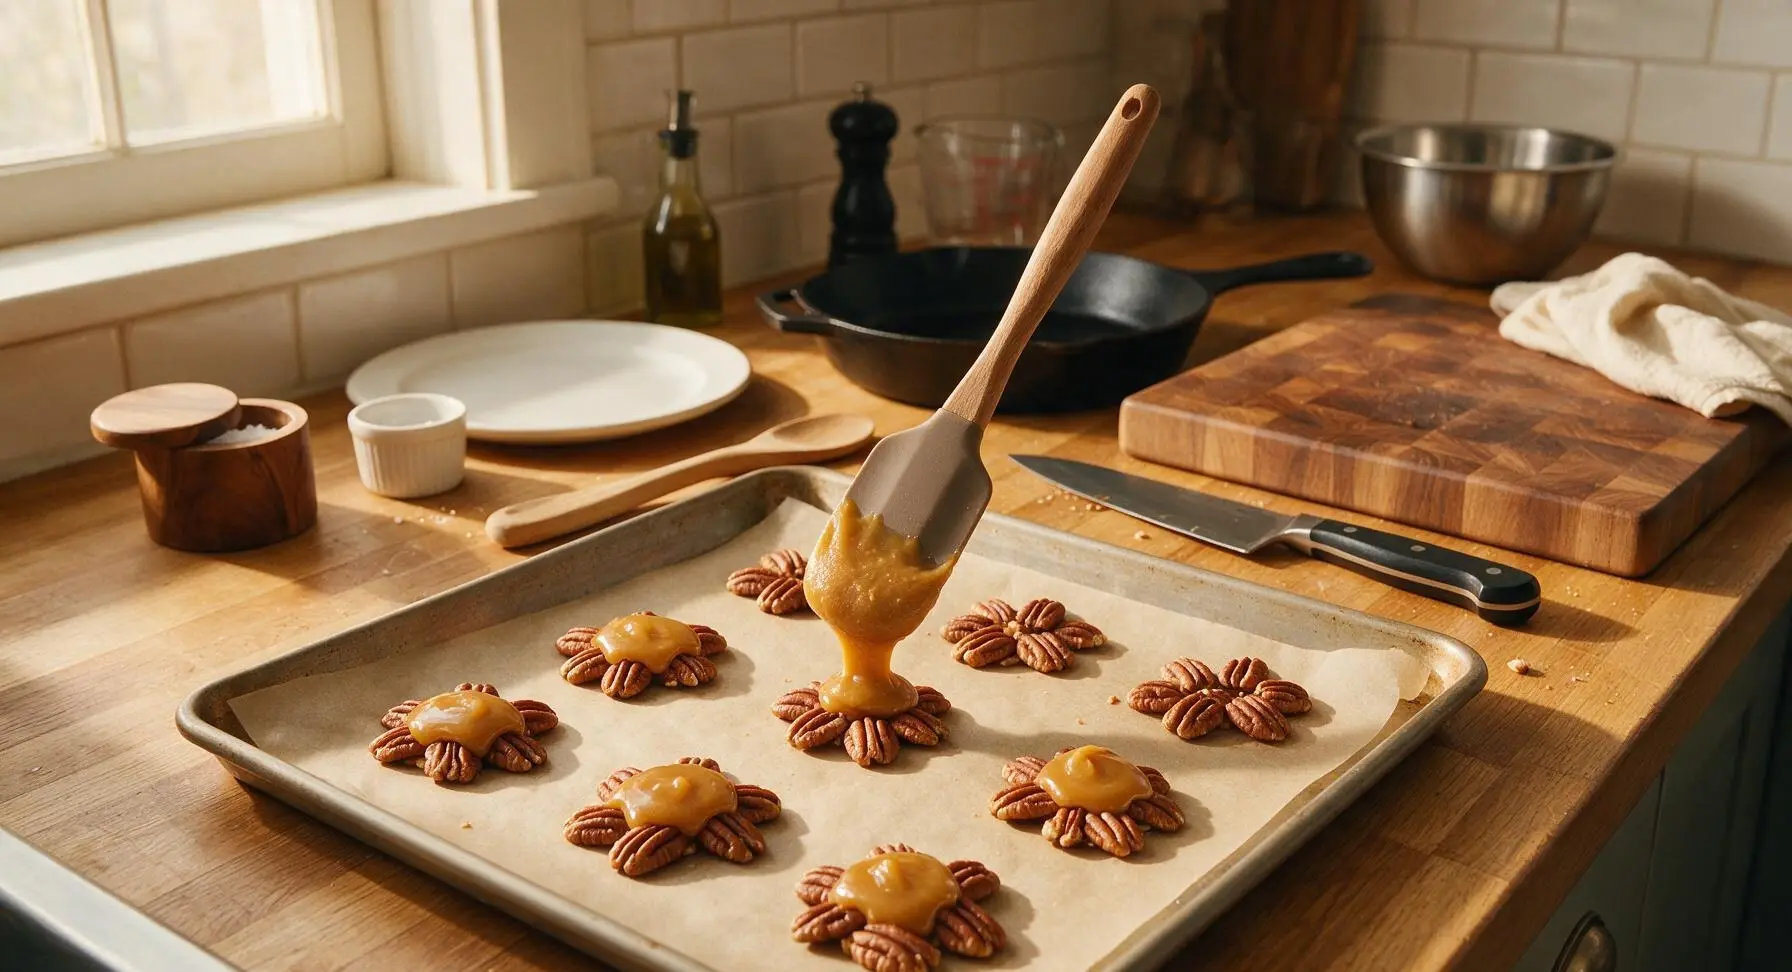
Pull the baking sheet with pecan clusters back to the center work area. Spoon 1 tablespoon of the warm thickened caramel directly over the center of each pecan cluster, making sure the caramel connects all four pecan halves to hold the cluster together. Avoid over-pouring caramel, as excess will run off the clusters onto the parchment. Let the caramel set for 10 minutes at room temperature until it is firm to the touch and no longer sticky when lightly pressed.
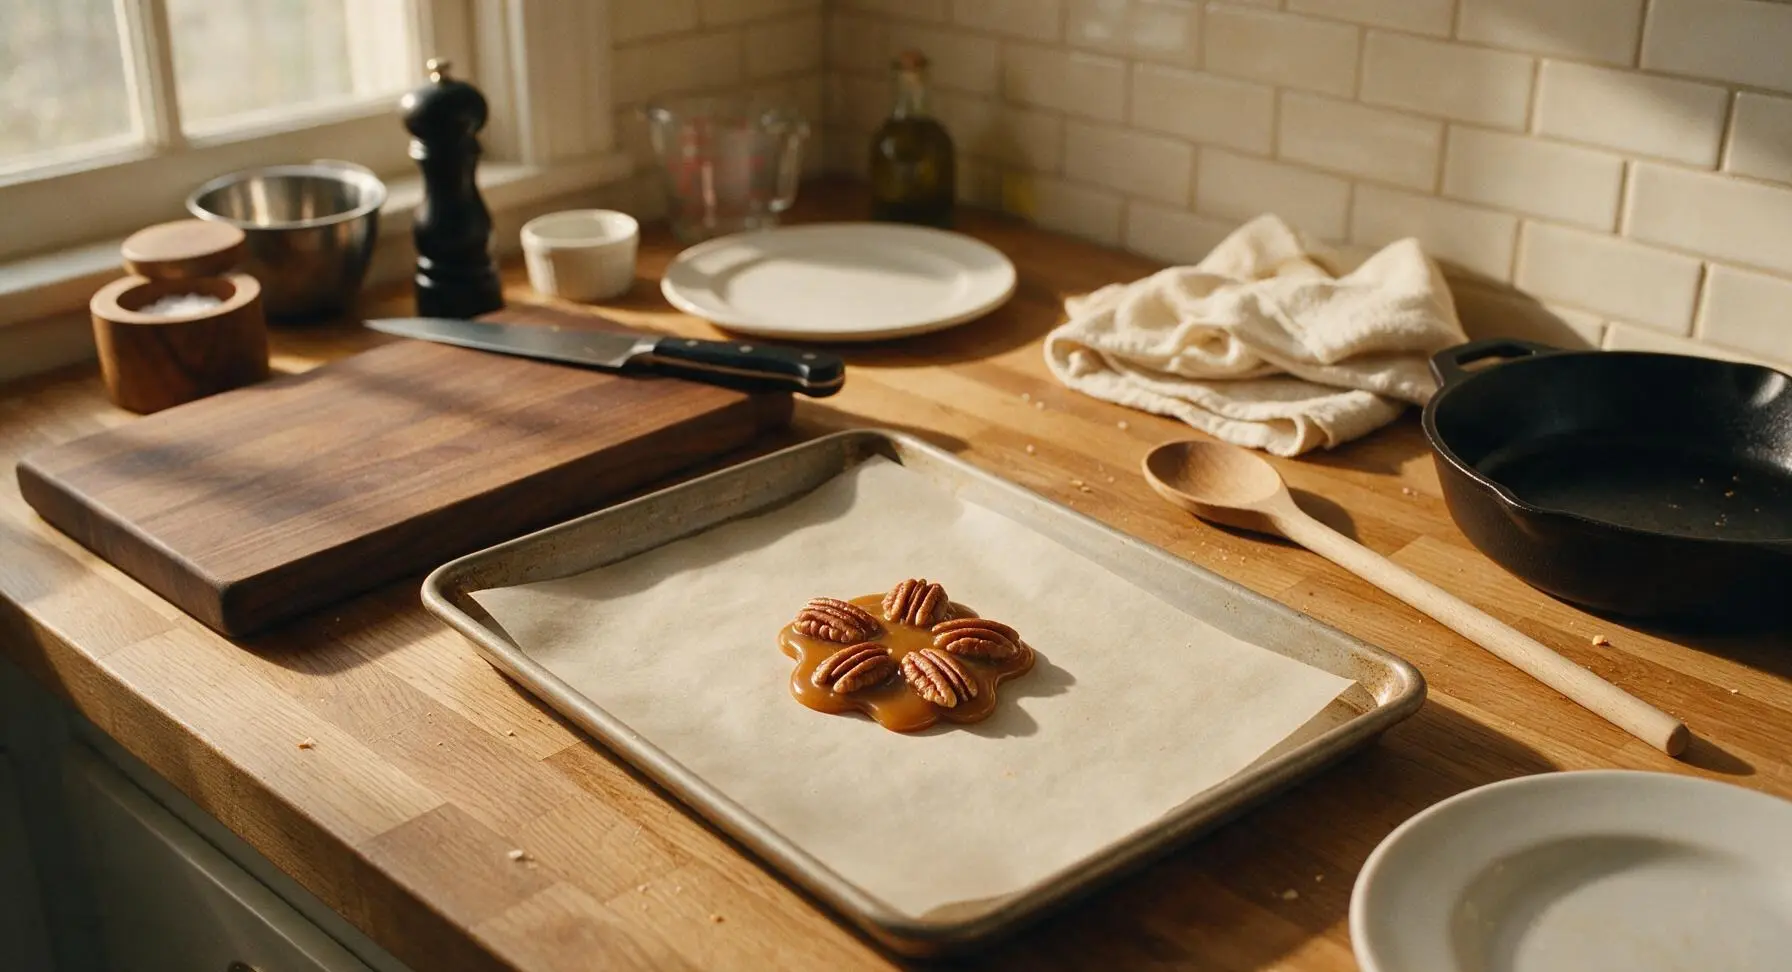
Step 5
step5:Top Pecans With Caramel
Step 5
step5:Top Pecans With Caramel
6

Melt Milk Chocolate

Pull the 1L small stainless steel saucepan to the work area, filling it with 1 inch of water and bringing to a gentle simmer. Set the medium clear glass mixing bowl on top of the pan, making sure the bottom of the bowl does not touch the simmering water (double boiler setup). Add 2 cups of milk chocolate chips to the bowl, stirring slowly with the small offset spatula until the chocolate is fully smooth and fully melted, about 5 minutes. Remove the bowl from the heat and let the chocolate cool for 2 minutes so it does not melt the set caramel when applied.
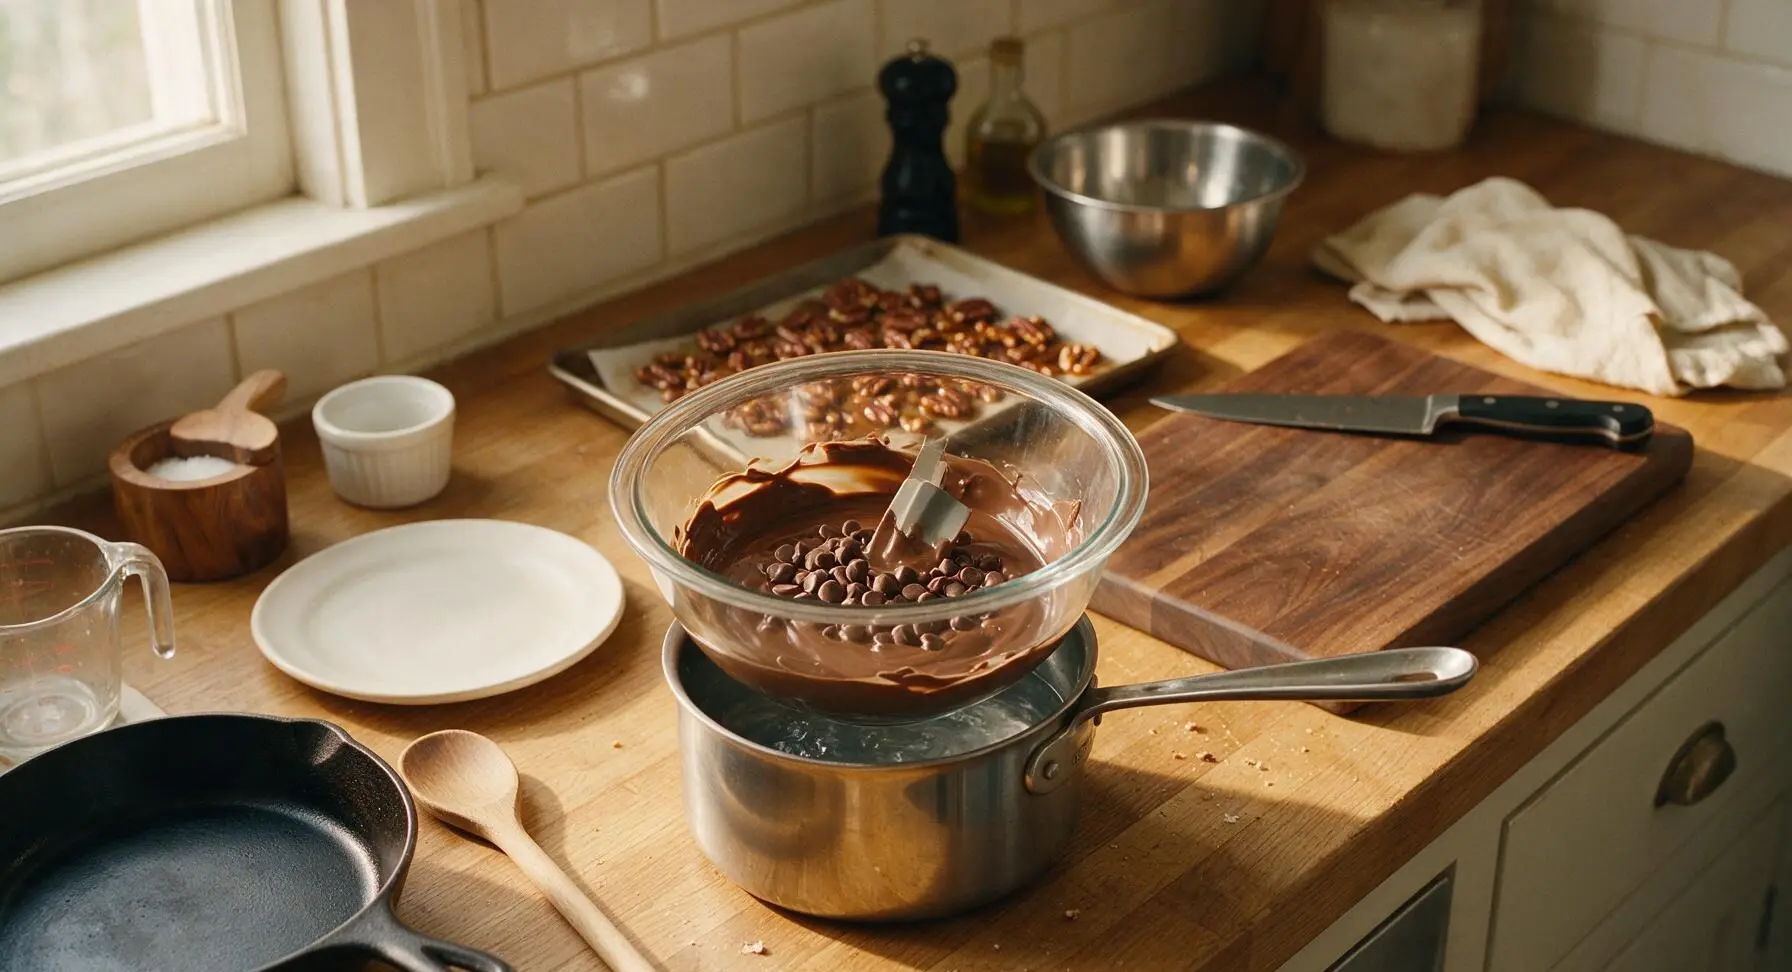
Step 6
step6:Melt Milk Chocolate
7

Coat With Chocolate

Pull the baking sheet with set caramel clusters back to center. Spoon 1 tablespoon of melted milk chocolate over the top of each cluster, using the small offset spatula to spread the chocolate slightly so it covers all of the caramel and touches the inner edges of the pecan halves. Leave the very tips of the pecan 'legs' exposed for the classic turtle appearance.
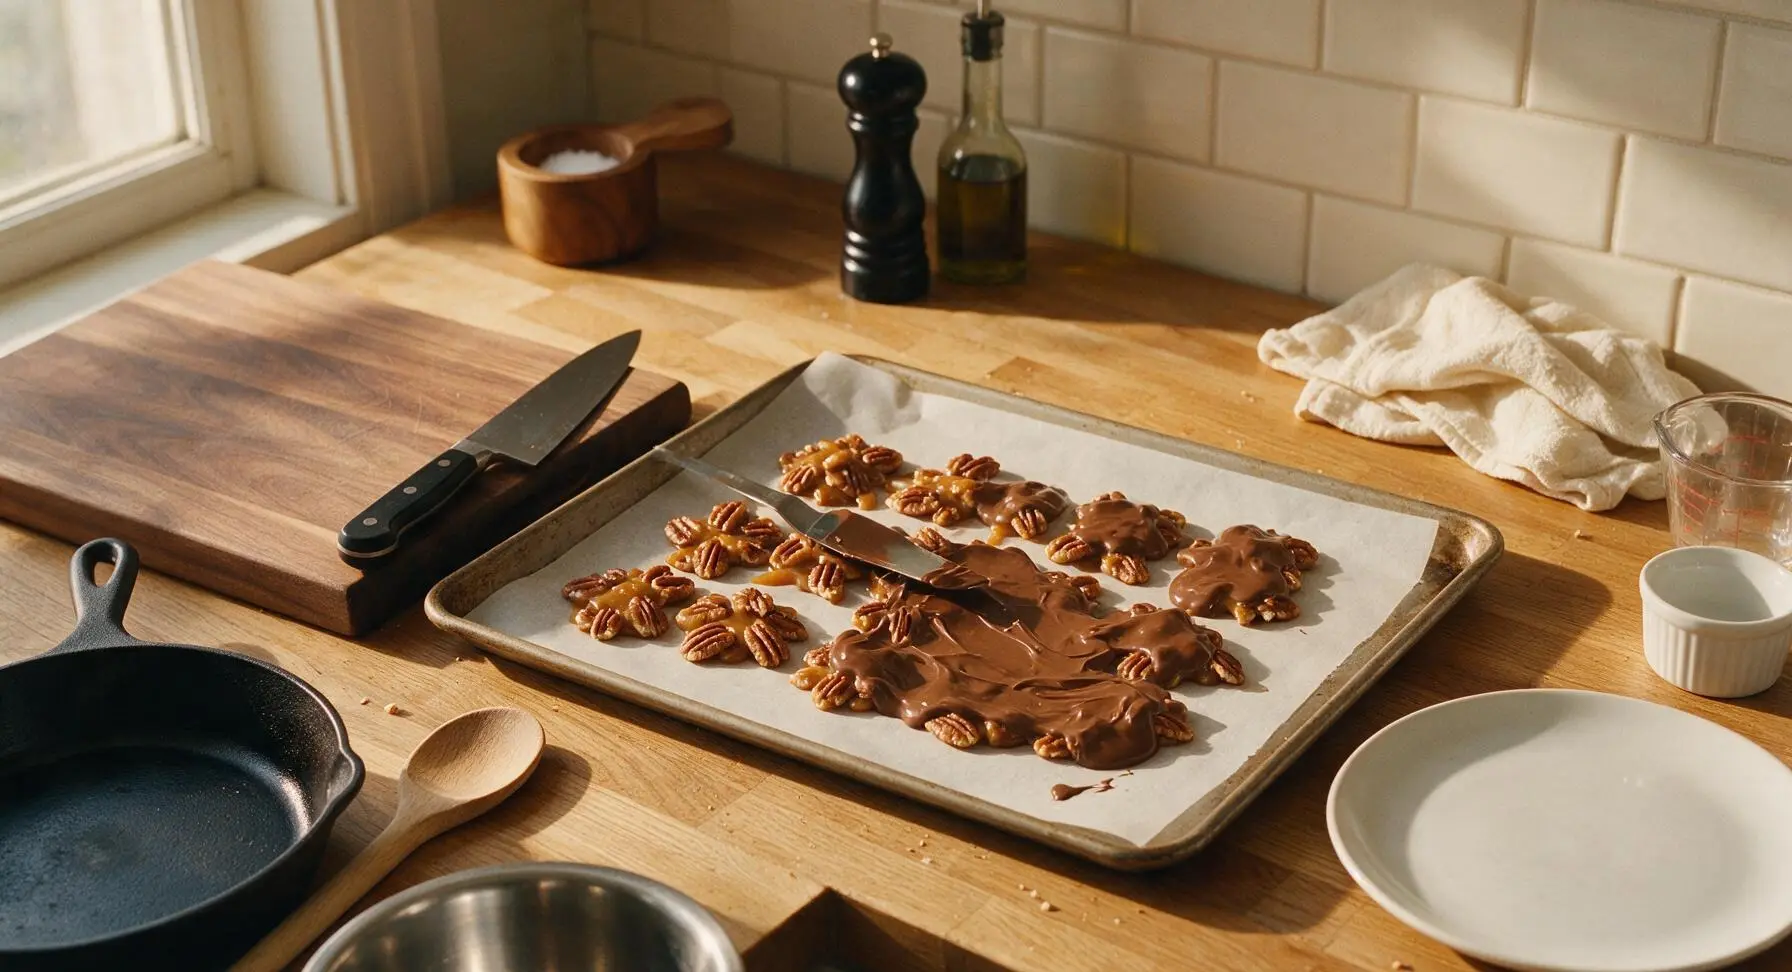
Step 7
step7:Coat With Chocolate
8

Finish And Chill Candy

Immediately after spreading chocolate on each cluster, sprinkle a tiny pinch of flaky sea salt over the top of the still-wet chocolate. Transfer the entire baking sheet to the refrigerator to chill for 45 minutes, until the chocolate is fully set and firm to the touch with no give when pressed. Once set, peel the turtles off the parchment and arrange them on the cream ceramic serving platter.
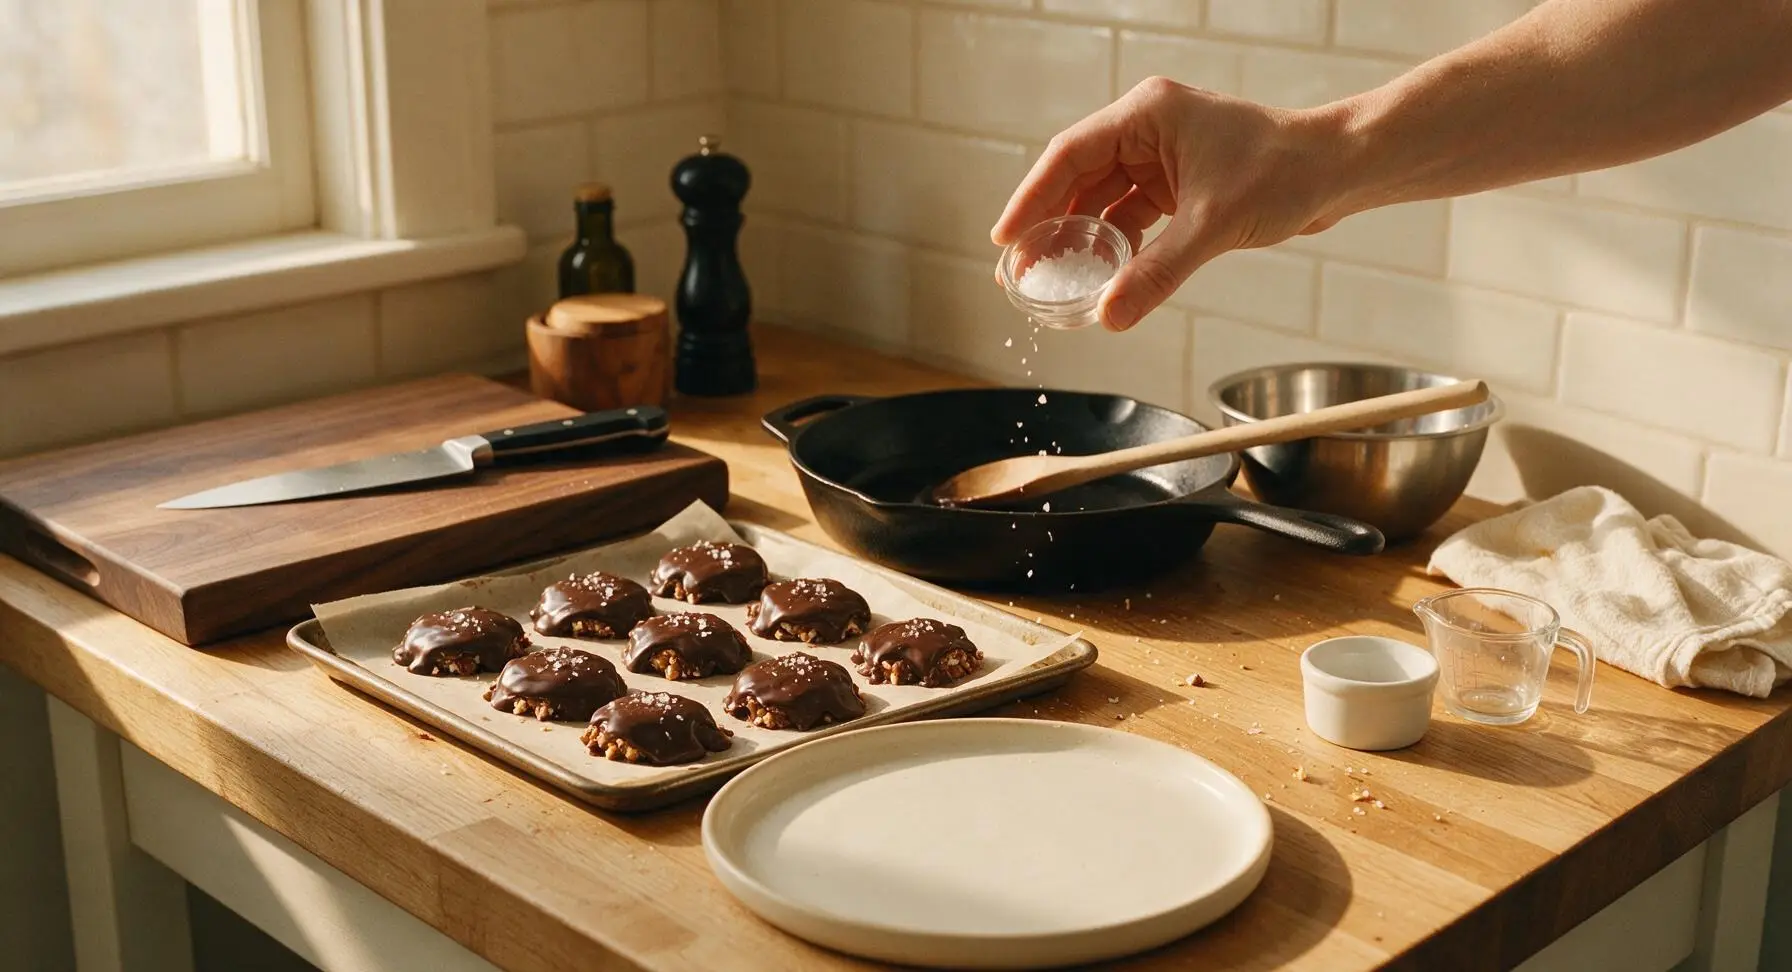
Step 8
step8:Finish And Chill Candy

Tips

1.Warm heavy cream to 100°F before stirring it into hot melted sugar to prevent caramel from seizing into hard, grainy lumps; cold cream causes a rapid temperature drop that shocks the melted sugar and creates unwanted crystals.
2.Avoid vigorous stirring when melting sugar for caramel, as this can cause sugar crystals to form on the pan sides and create a grainy final texture; swirl the pan gently instead to encourage even melting.
3.Wait the full 10 minutes for caramel to set before adding melted chocolate, otherwise warm, soft caramel will melt the chocolate from below and cause the layers to slide apart when the candy is picked up.


✨ You May Also Like

Desserts & Baking
🍜 Italy

Creamy, coffee-kissed classic Northern Italian no-bake dessert, with layers of rum-spiked mascarpone cream, soft ladyfingers, and a rich cocoa dusting.

⏱️ 4 hours 3Desserts & Baking ★ 4.7
Desserts & Baking
🍜 France

Flaky, shatteringly crisp, buttery French croissants with golden exteriors and soft, airy layered interiors, perfect for pairing with coffee for a special morning treat.

⏱️ 12 hours Desserts & Baking ★ 4.5
Desserts & Baking
🍜 United States

Warm, spiced baked apples topped with a fluffy golden biscuit crust, this cozy dessert pairs perfectly with vanilla ice cream for cool-weather comfort.

⏱️ 55 minuteDesserts & Baking ★ 4.6
Desserts & Baking
🍜 United States

A star-spangled classic American blueberry pie with buttery flaky crust and bright sweet-tart filling, perfect for summer patriotic gatherings.

⏱️ 1 hour 25Desserts & Baking ★ 4.7
Desserts & Baking
🍜 United States

A beloved no-bake regional Maine candy with a chewy coconut-potato center coated in rich dark chocolate, a New England holiday staple since the 1870s.

⏱️ 2 hours 3Desserts & Baking ★ 4.8
Desserts & Baking
🍜 France

Luxuriously creamy, floral frozen custard made with aromatic Tahitian vanilla beans, boasting a smooth, rich texture that melts slowly on the tongue.

⏱️ 3 hours 3Desserts & Baking ★ 4.5

Canadian Turtles:Frequently Asked Questions

1.Do I need to toast the raw pecan halves before assembling these turtles? ▾
Toasting is highly recommended to get that deep, rich, nutty flavor that makes classic Canadian turtles taste authentic. Spread pecans in a single layer on a baking sheet, toast at 350°F for 6 to 8 minutes until fragrant, then cool fully before using. Skipping this step will leave your nuts tasting flat and muted compared to the traditional recipe.
2.Can I use half-and-half or milk instead of heavy whipping cream for the caramel? ▾
Stick to heavy whipping cream for the best chewy, rich caramel texture. Lower-fat dairy options like half-and-half or whole milk have too little butterfat, which will make your caramel runnier, less creamy, and more likely to develop a grainy texture as it cooks. The high fat content in heavy cream creates that smooth, luxe mouthfeel classic turtles are known for.
3.Can I use salted butter instead of unsalted butter in the caramel? ▾
You can, but skip any added pinch of salt in the recipe to keep flavors balanced. Unsalted butter lets you control exactly how much salt goes into your caramel, so you get that perfect subtle salty-sweet contrast without it tasting overly briny. If you use salted butter, taste the warm caramel before pouring to adjust as needed.
4.Can I use imitation vanilla extract instead of pure vanilla extract for the caramel? ▾
Pure vanilla extract adds a warm, deep, rounded flavor that pairs perfectly with buttery caramel and toasted pecans, but you can use imitation vanilla if that’s what you have on hand. Use the same measured quantity called for in the recipe, but note that imitation vanilla can have a slightly sharp, artificial aftertaste if overused.
5.My homemade caramel turned out grainy—what went wrong, and can I fix it? ▾
Grainy caramel almost always comes from stray sugar crystals forming on the pan sides as the granulated sugar melts. Fix it by adding 1 tablespoon of water, covering the pan for 2 to 3 minutes to let steam dissolve the crystals, then resume cooking. Avoid stirring melting sugar, and use a wet pastry brush to wipe pan sides if you spot crystals early.
6.How do I get the perfect chewy caramel texture, not too runny or too rock-hard? ▾
The key is cooking caramel to the correct firm-ball stage, which is 248°F on a candy thermometer clipped to the pan (not touching the hot bottom). If you don’t have a thermometer, drop a tiny bit of caramel into ice water: it should form a firm, pliable ball that holds its shape without turning brittle when squeezed.
7.Do I really need a candy thermometer to make successful caramel for these turtles? ▾
A candy thermometer makes the process far more foolproof, but you don’t strictly need one. Use the cold water test: drop a pea-sized bit of cooking caramel into a bowl of ice water, let it sit 10 seconds, then fish it out. For turtle caramel, it should form a firm, chewy ball that doesn’t ooze between your fingers or crack.
8.Can I use dark or white chocolate instead of milk chocolate for the coating? ▾
Absolutely, though traditional Canadian turtles use smooth milk chocolate for that mild, creamy balance with caramel and pecans. If swapping for dark chocolate, pick a 55-60% cacao option to avoid overpowering the other flavors; for white chocolate, use a high-cacao-butter pick to avoid a waxy, cloyingly sweet finish. Temper your chocolate for a snappy, non-streaky coating.
9.How long do homemade Classic Canadian Turtles stay fresh, and how should I store them? ▾
Stored in an airtight container layered between sheets of parchment paper to prevent sticking, homemade turtles stay fresh for up to 2 weeks in the refrigerator, or 1 week at cool room temperature (around 65°F). Avoid warm, humid storage spots, as the chocolate will develop bloom and the caramel will soften and lose its signature chew.
10.My chocolate coating came out dull and streaky instead of glossy and snappy—what happened? ▾
Dull, streaky, soft chocolate happens when you don’t temper it properly, so cocoa butter separates and rises to the surface as it sets. For a perfect glossy, snappy finish, heat milk chocolate gently to 88°F, seed it with a small chunk of solid, good-quality milk chocolate as you stir, and keep all water out of the melting chocolate to avoid seizing.

Comments (9)

2 days ago

OMG these turned out SO good! I made them for my boys’ after-school snack and they devoured the whole batch in 2 days flat. The caramel was perfectly chewy, not too sticky that it pulls out fillings, which is a win in my book. Will 100% be making these for our neighborhood potluck next month!

5 days ago

This was my first time making candy from scratch and it went pretty well! The only hiccup I had was my chocolate seized up a little when I was melting it, so the coating wasn’t as smooth as I wanted. Flavor was still chef’s kiss though, my roommates loved them.

3 days ago

So glad you enjoyed the flavor! Quick tip for next time: melt your chocolate slowly over a double boiler with no water getting in the bowl, that’ll prevent seizing. A tiny bit of coconut oil stirred in can help smooth it out if it does clump up!

1 week ago

Game. Changer. I’ve been buying store-bought turtles for our family Christmas cookie tin for years, but homemade is on another level. I toasted the pecans first like I saw someone suggest in a different comment and it added such a nice nutty depth. 10/10, will replace my old recipe forever.

5 days ago

Wait toasting the pecans is such a good call! I never thought to do that, I bet that makes the flavor way nuttier. Gonna try that when I make these this weekend!

3 days ago

Toasting pecans is such an easy upgrade! We’re big fans of that trick too—just watch them closely so they don’t burn, they go from perfectly toasty to bitter super fast.

3 days ago

Made these for my dorm floor potluck and people were begging me for the recipe! Cook time was way shorter than I expected for homemade candy, which was perfect because I only have a tiny dorm kitchen. No fancy equipment needed either, love that.

2 days ago

Dude same! I made them in my dorm last week and my RA even came by to grab a couple. So easy to make even with the janky microwave we have on our floor.

yesterday

My kids loved it! I was worried the caramel would be too messy for my 6 and 8 year old to help with, but it was super easy to let them place the pecans and drizzle chocolate once things cooled a bit. We added a little flaky sea salt on top of half the batch and that sweet-salty combo is unreal. Already got texts from the other moms at school asking for the recipe!

2 weeks ago

These are so tasty! I made a big batch for meal prep snacks for the week, but I found the caramel got a little too soft when I stored them in an airtight container on the counter. Anybody else have that issue? Still tasted amazing, just a little messier than I wanted.

1 week ago

I had the same problem! I stuck mine in the fridge after they set fully and they held their shape way better. Just let them sit out for 5 minutes before eating so the caramel isn’t too hard.

5 days ago

Carl’s tip is spot on! If your kitchen runs warm, storing them in the fridge in an airtight container will keep the caramel firm. You can also cook the caramel just 1-2 degrees higher if you prefer a chewier, firmer set at room temp!

3 days ago

These were so good as a gluten-free treat option! I had a hard time getting the caramel to the right temp without a candy thermometer, though. I ended up with it a little too runny on my first batch, second batch was better but took forever. Wished the recipe noted what to look for if you don’t have a thermometer!

yesterday

Thanks for the feedback! If you don’t have a candy thermometer, you can test the caramel by dropping a tiny bit into a cup of cold water—if it forms a soft, pliable ball that holds its shape, you’re at the perfect soft ball stage for these. We’ll add that tip to the recipe card soon!

2 hours ago

Just pulled these out of the kitchen and they’re perfect! I made these as a little thank-you gift for my kid’s soccer coaches and they look so fancy, no one will believe they only took 25 minutes of cook time. I used dark chocolate instead of milk because that’s what I had in the pantry and it pairs so well with the sweet caramel and salty pecans. 10/10, will be making these for every holiday gift from now on.

30 minutes ago

Just made these for the first time and WOW. I was worried medium difficulty meant I’d mess it up, but the steps were so straightforward! I added a little pinch of flaky sea salt on top like my grandma used to do with her Christmas candies and it took these right over the top. My husband already asked when I’m making the next batch.

just now

Love the flaky sea salt addition! It cuts through the sweetness of the caramel and chocolate so perfectly—we’re so glad you and your husband enjoyed them!



