
chicken burritos in the oven

title 1
chicken burritos in the oven
⏱️ cook time 45 minutes
🍽️ servings 4
⚡ Difficulty easy

intro

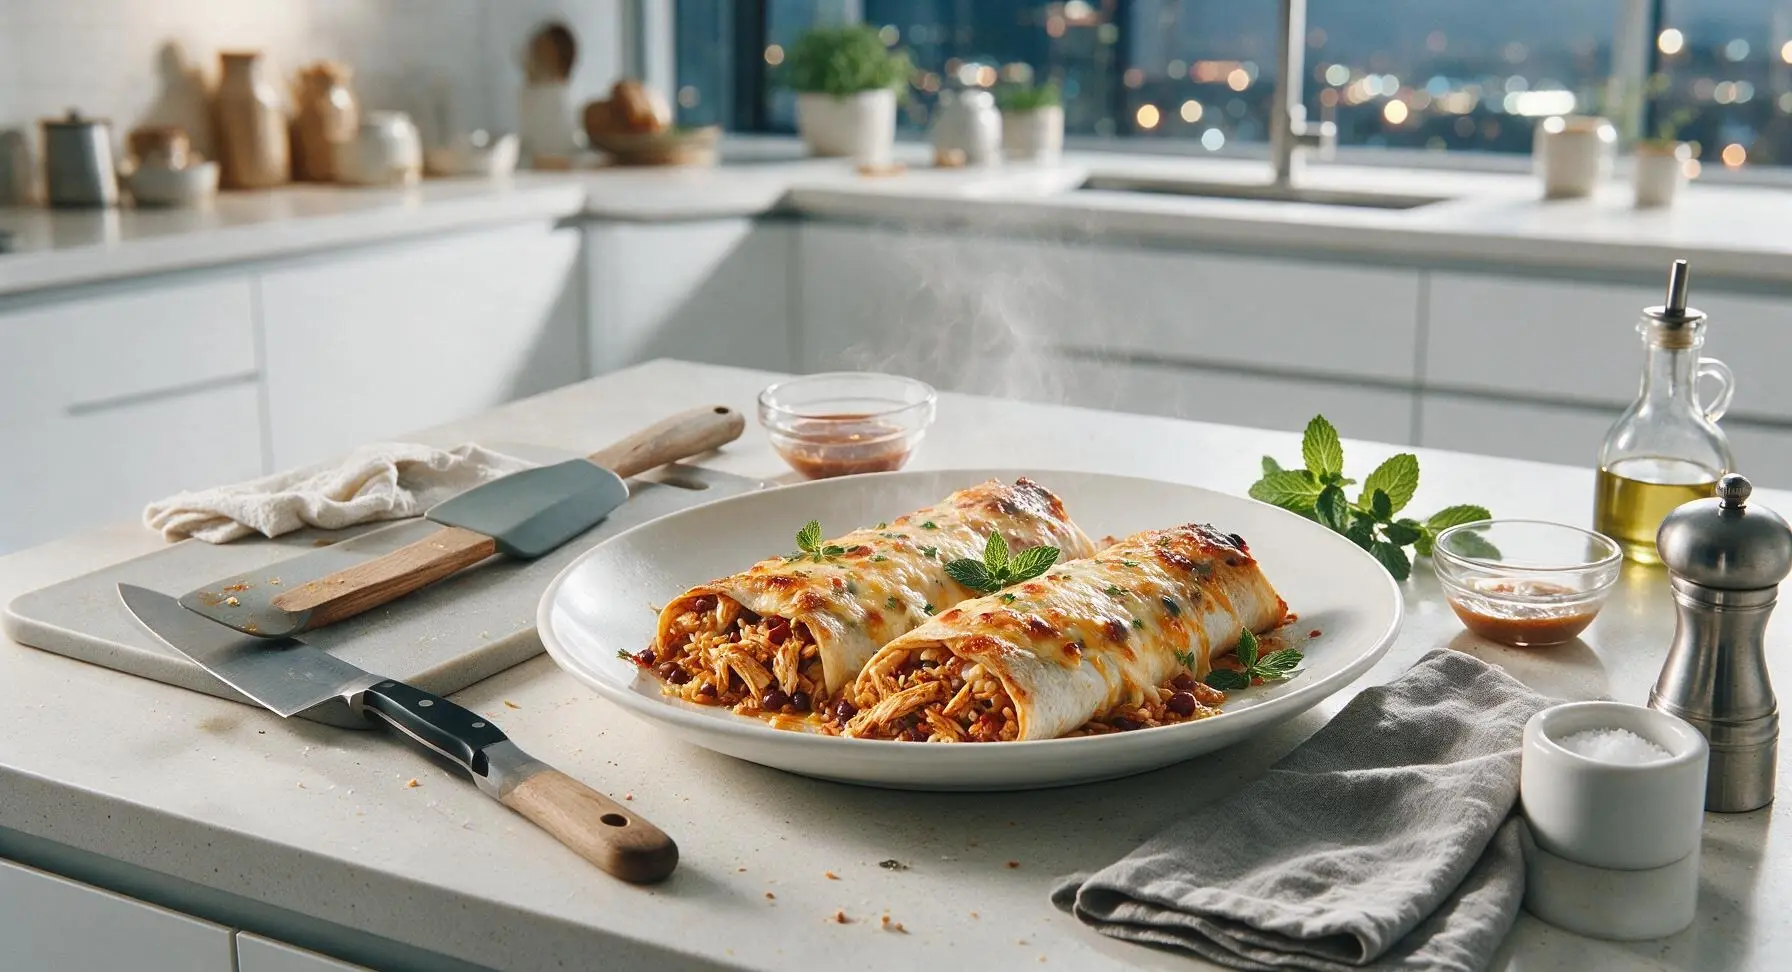
Warm, melty oven-baked chicken burritos loaded with seasoned shredded chicken, beans, rice, and cheese, baked to golden crispy-edged perfection for a cozy, satisfying meal.

Ingredients
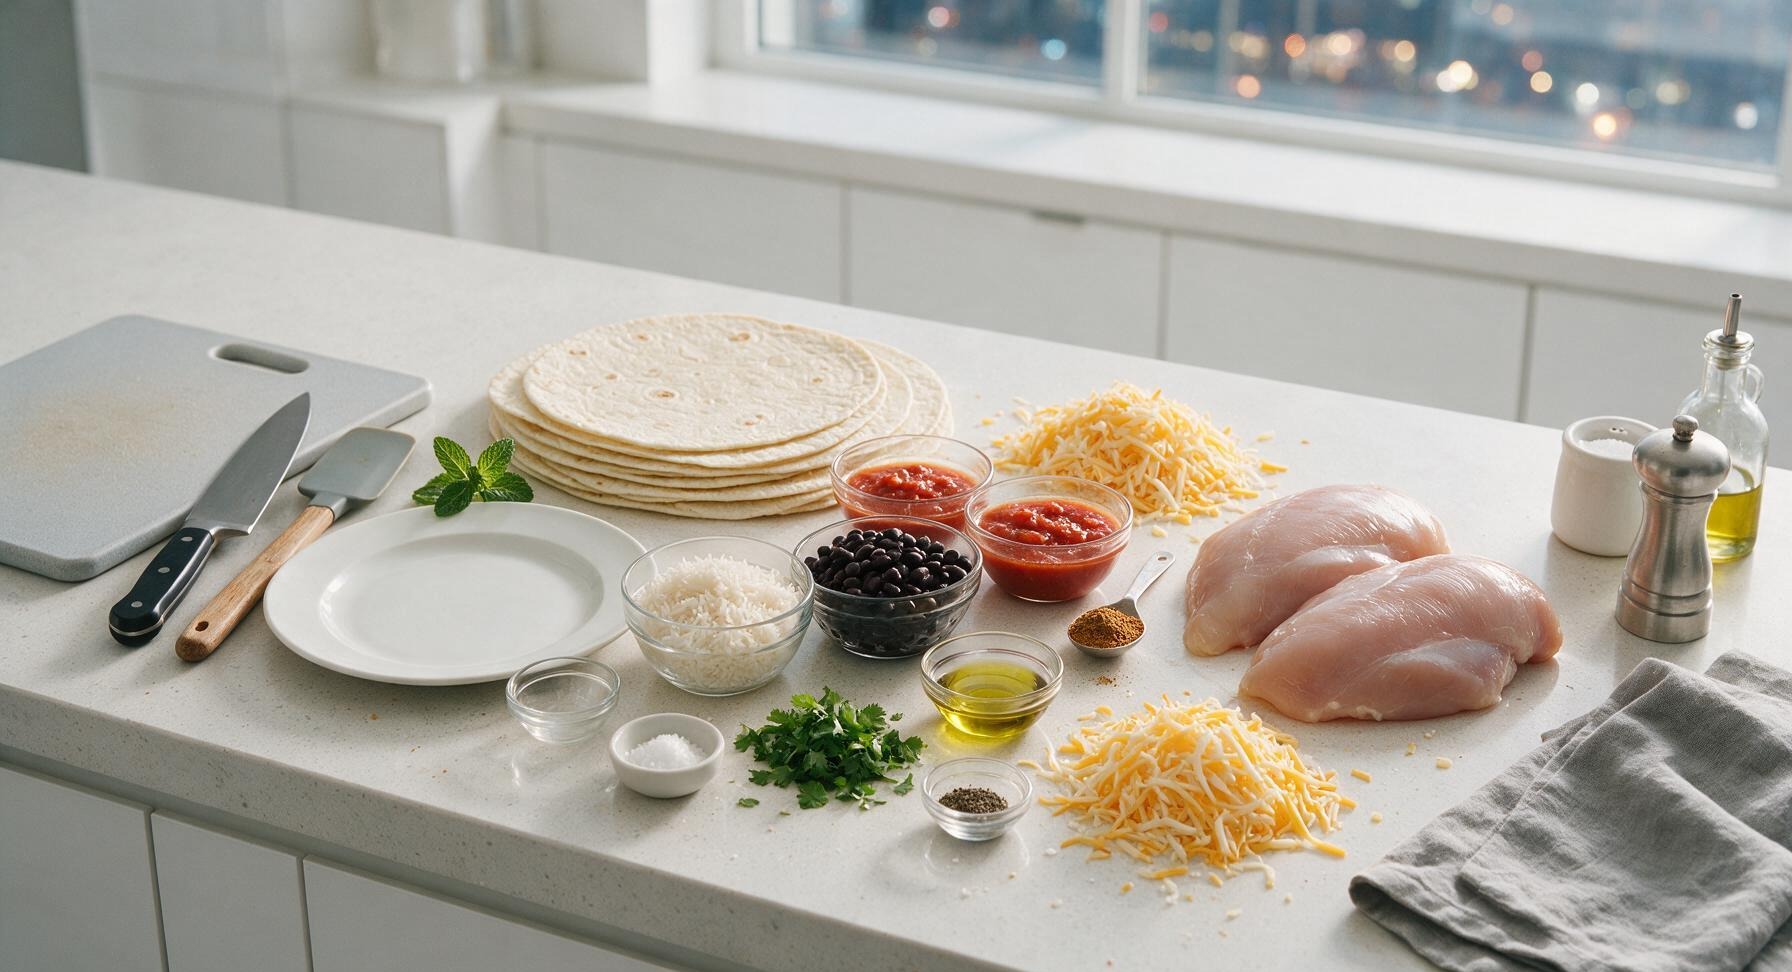
Boneless skinless chicken breasts 500g (2 large breasts)
10-inch large flour tortillas 8 pieces
Cooked long-grain white rice 200g (1 cup, cooked)
Canned black beans, rinsed and drained 400g (1 standard can)
Mild red salsa 360g (1.5 cups, divided)
Shredded cheddar-jack cheese blend 200g (2 cups, divided)
Taco seasoning 2 tbsp
Extra-virgin olive oil 1 tbsp
Kosher salt 1 tsp
Ground black pepper ½ tsp
Fresh cilantro 10g (¼ cup, chopped)

Steps

1

Prep and Bake Chicken

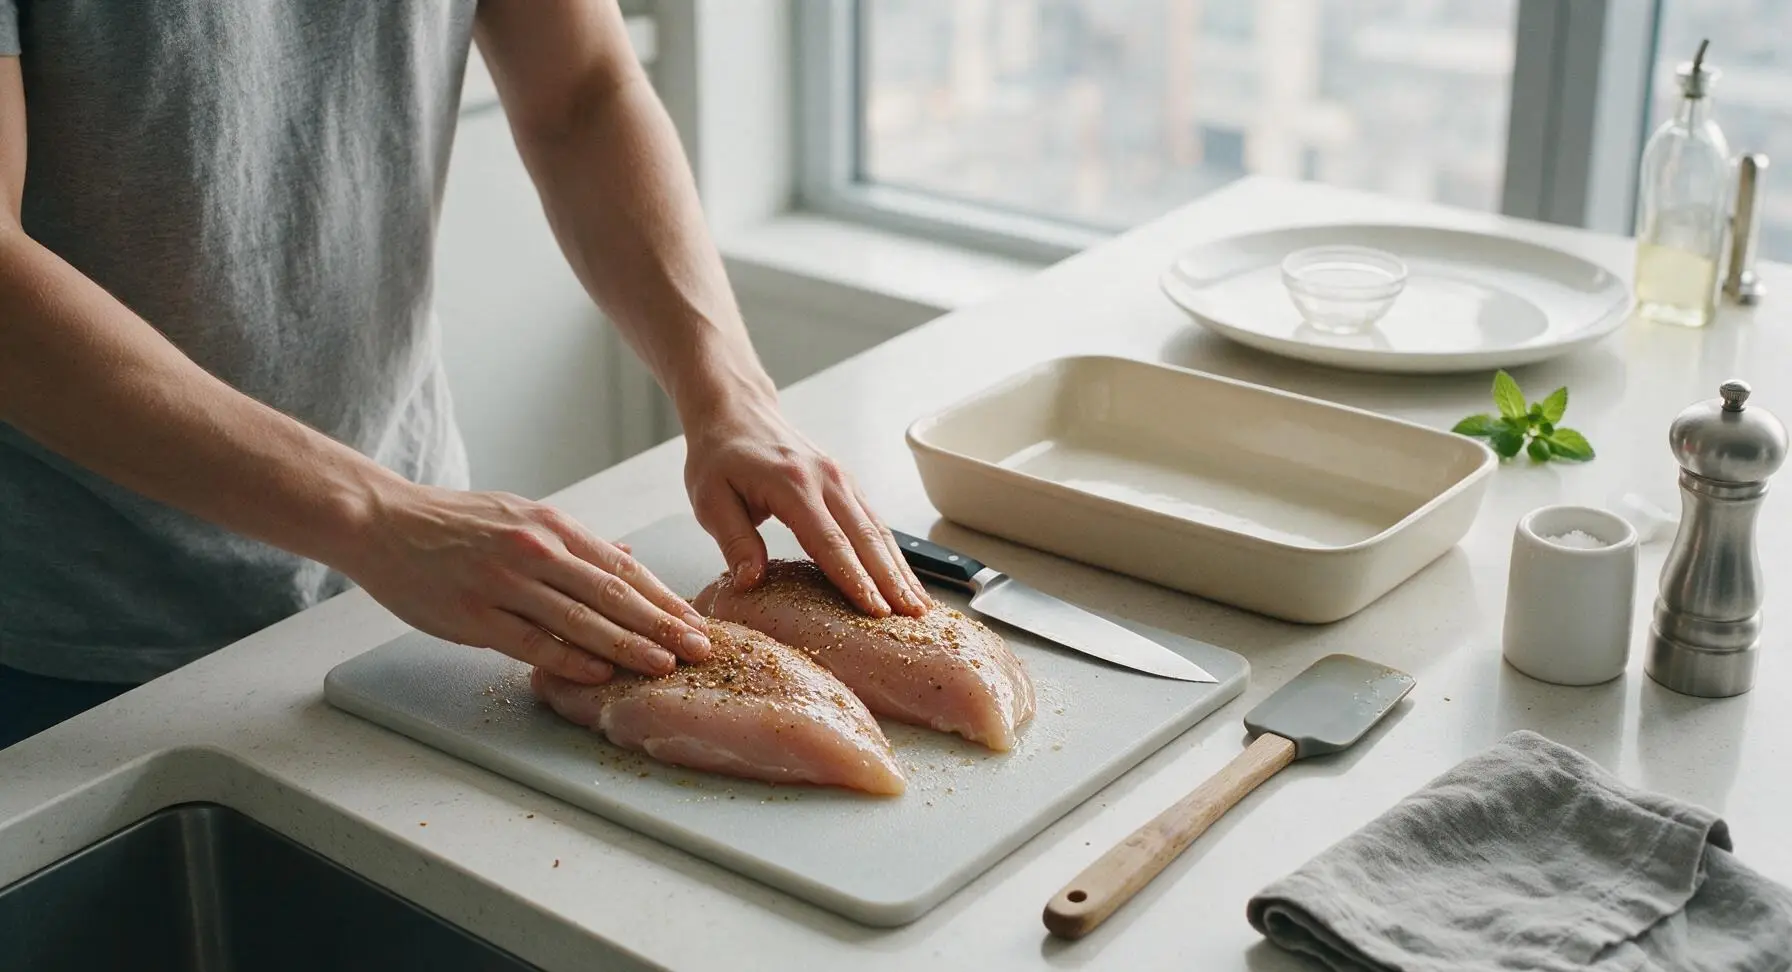
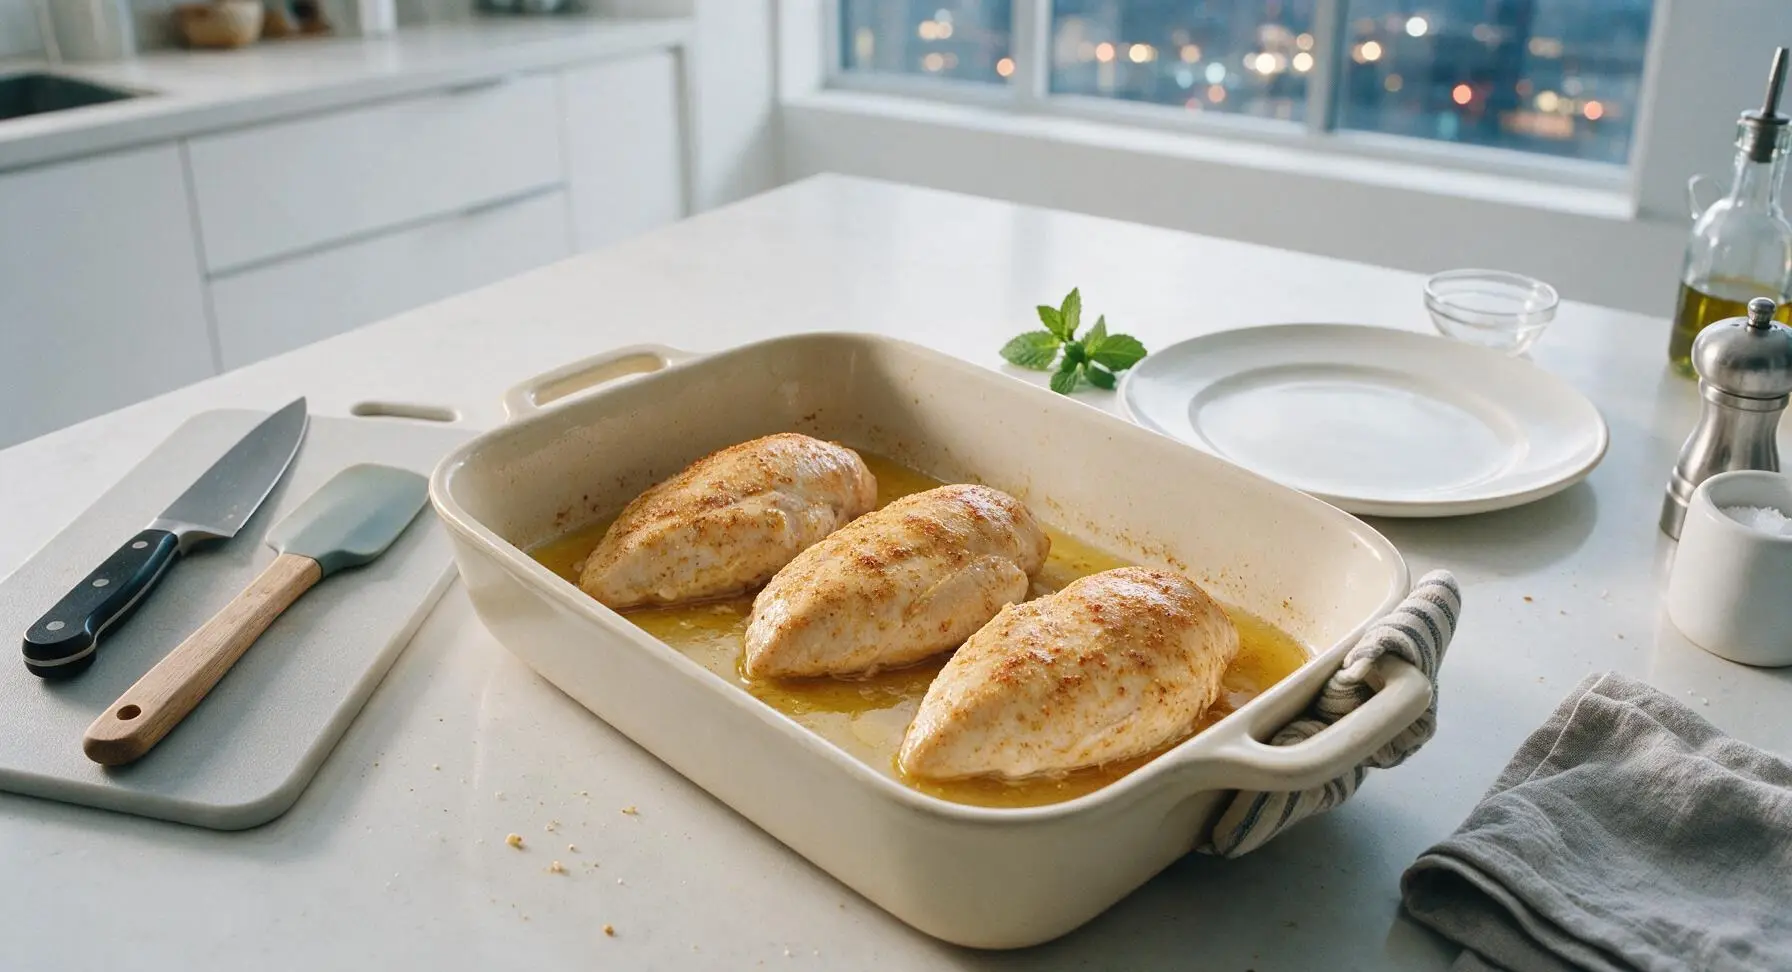
First, preheat your oven to 190°C (375°F). Place the 500g boneless skinless chicken breasts on the light maple cutting board. Pat the chicken fully dry with the corner of the indigo cotton kitchen towel, then rub all surfaces with ½ tbsp olive oil, 1 tbsp taco seasoning, ½ tsp kosher salt, and ¼ tsp ground black pepper. Transfer the seasoned chicken to the 9x13 inch matte cream ceramic baking dish, and bake for 20–22 minutes. The chicken is done when an instant-read thermometer inserted into the thickest part reads 74°C (165°F), and juices run completely clear (no pink) when pierced with the chef’s knife. Remove the dish from the oven, and let the chicken rest for 5 minutes before shredding.
Step 1
step1:Prep and Bake Chicken
Step 1
step1:Prep and Bake Chicken
2

Shred Cooked Chicken

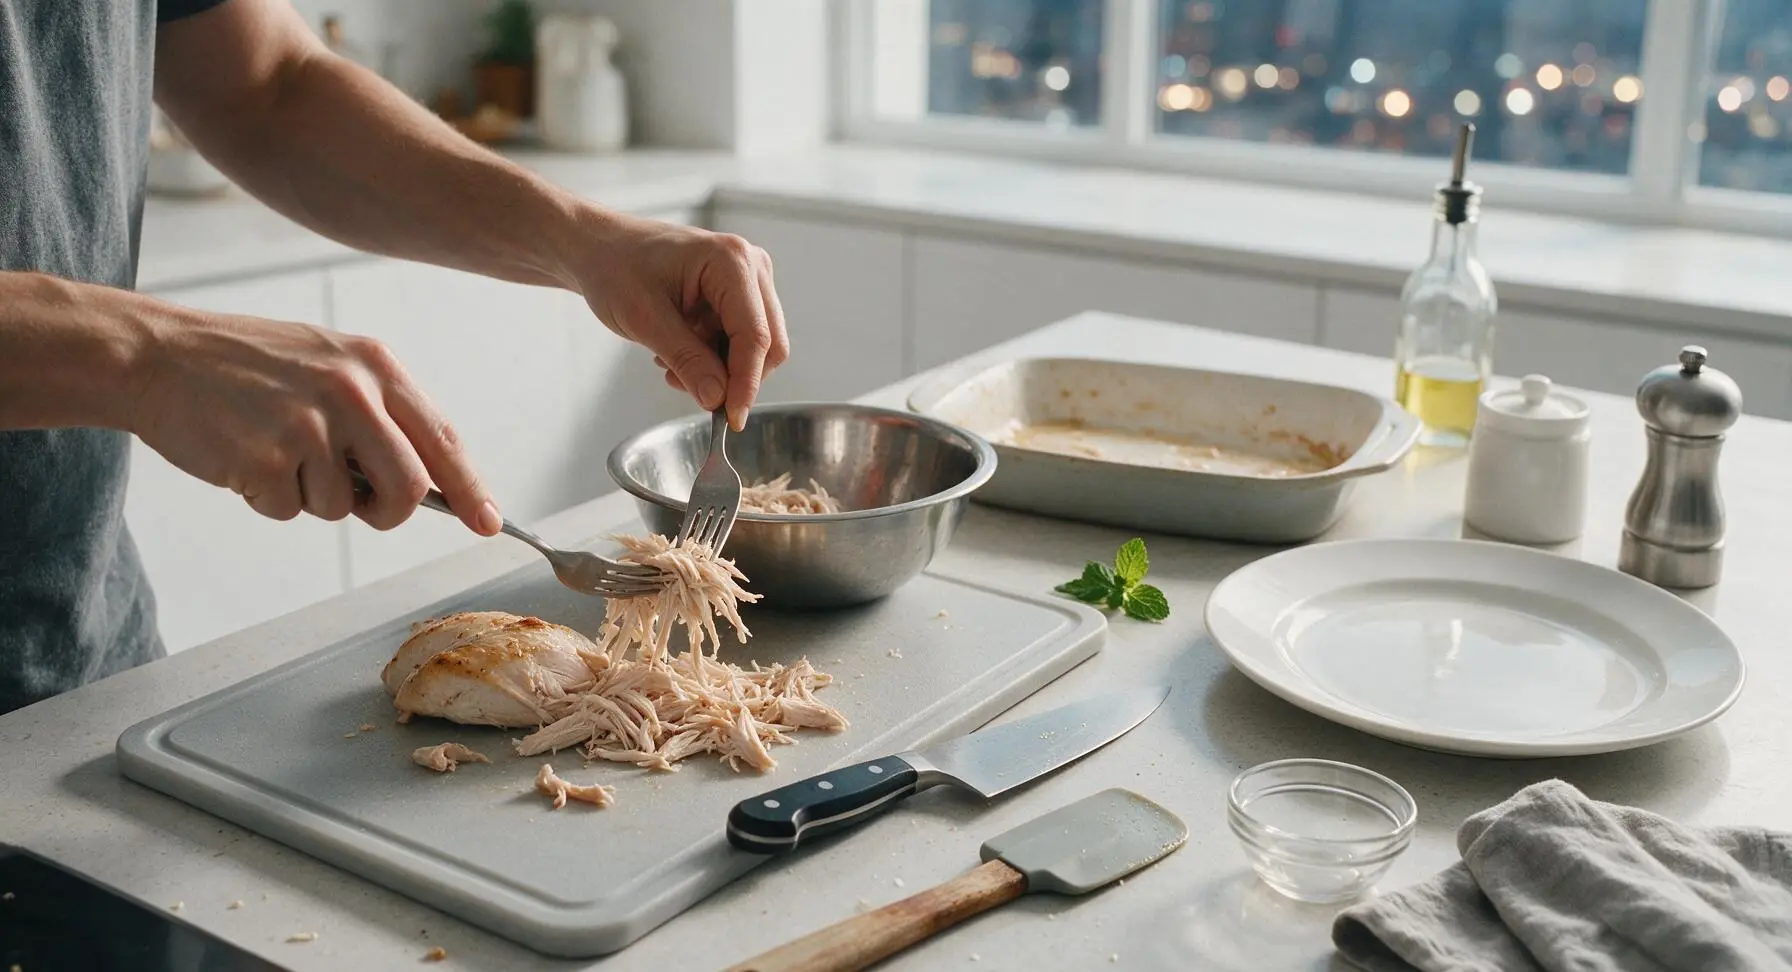
Transfer the rested, baked chicken breasts from the baking dish back to the light maple cutting board. Hold one fork in each hand to pull the warm chicken apart into thin, bite-sized shreds, discarding any small pieces of tough connective tissue or excess fat as you work. Scoop all finished shredded chicken into the waiting stainless steel mixing bowl.
Step 2
step2:Shred Cooked Chicken
3

Mix Burrito Filling

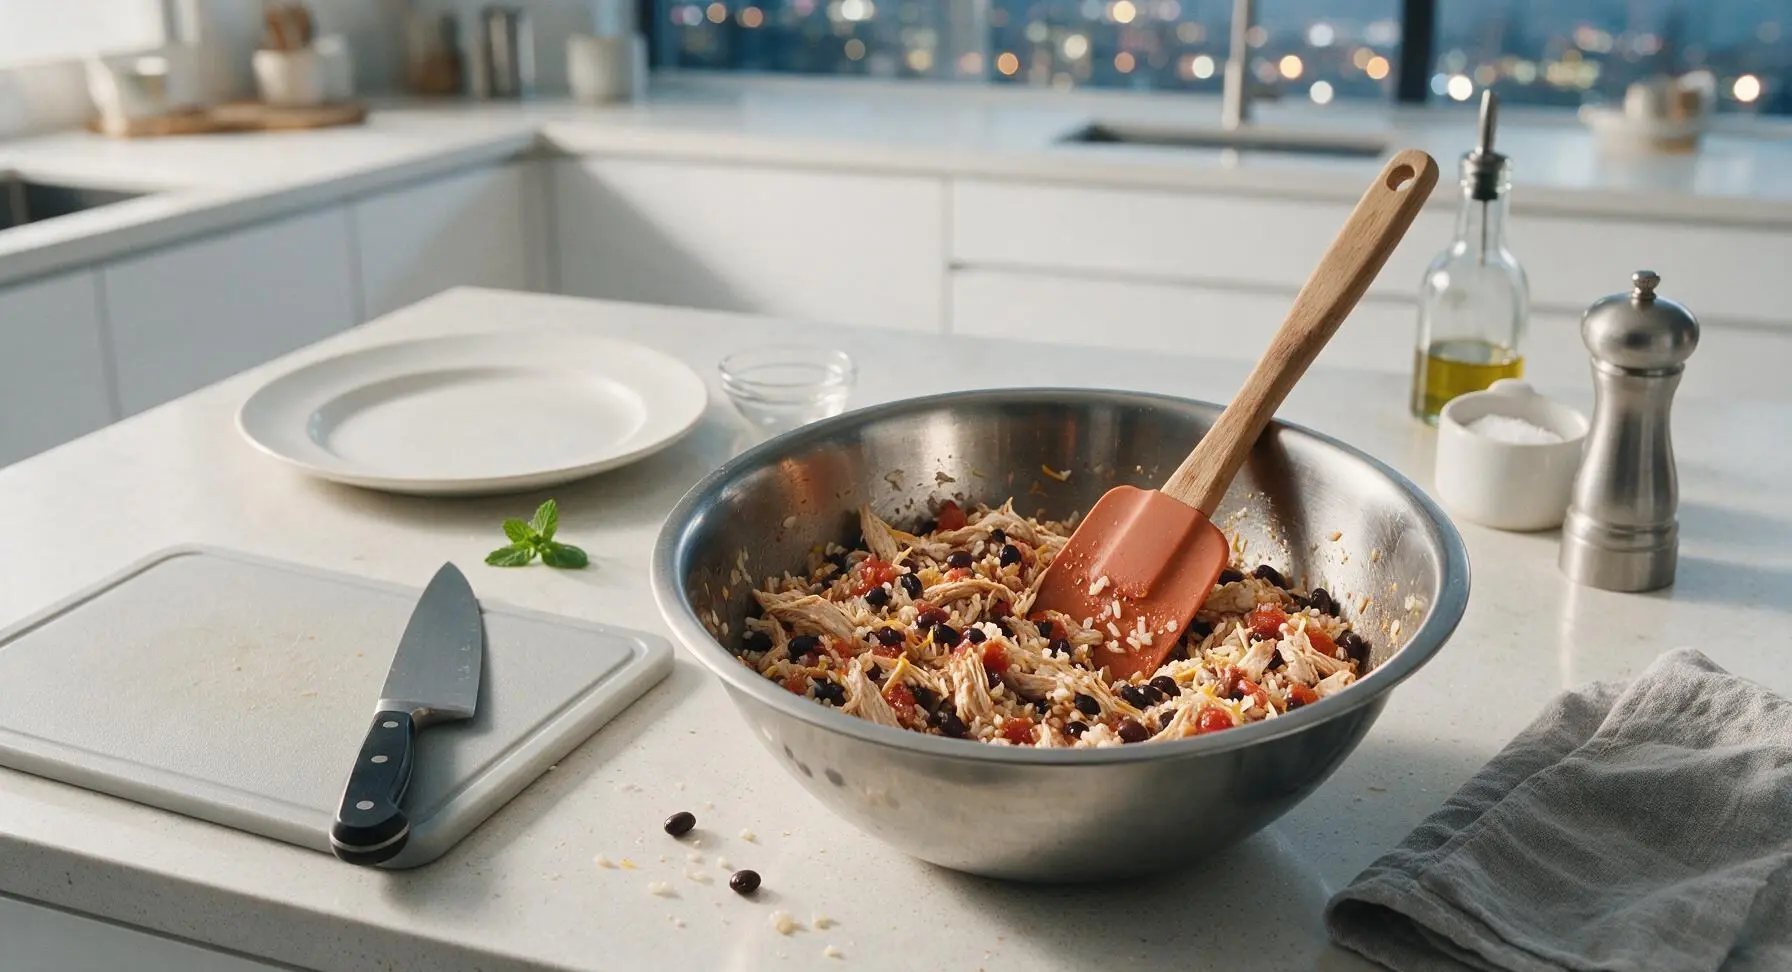
Add the cooked white rice, rinsed and drained black beans, ½ cup of red salsa, 1 cup of shredded cheddar-jack cheese, remaining 1 tbsp taco seasoning, ½ tsp kosher salt, and ¼ tsp black pepper to the mixing bowl with shredded chicken. Use the terracotta silicone spatula to stir all ingredients thoroughly until evenly combined, with no dry clumps of rice or patches of unseasoned chicken visible.
Step 3
step3:Mix Burrito Filling
4

Assemble Rolled Burritos

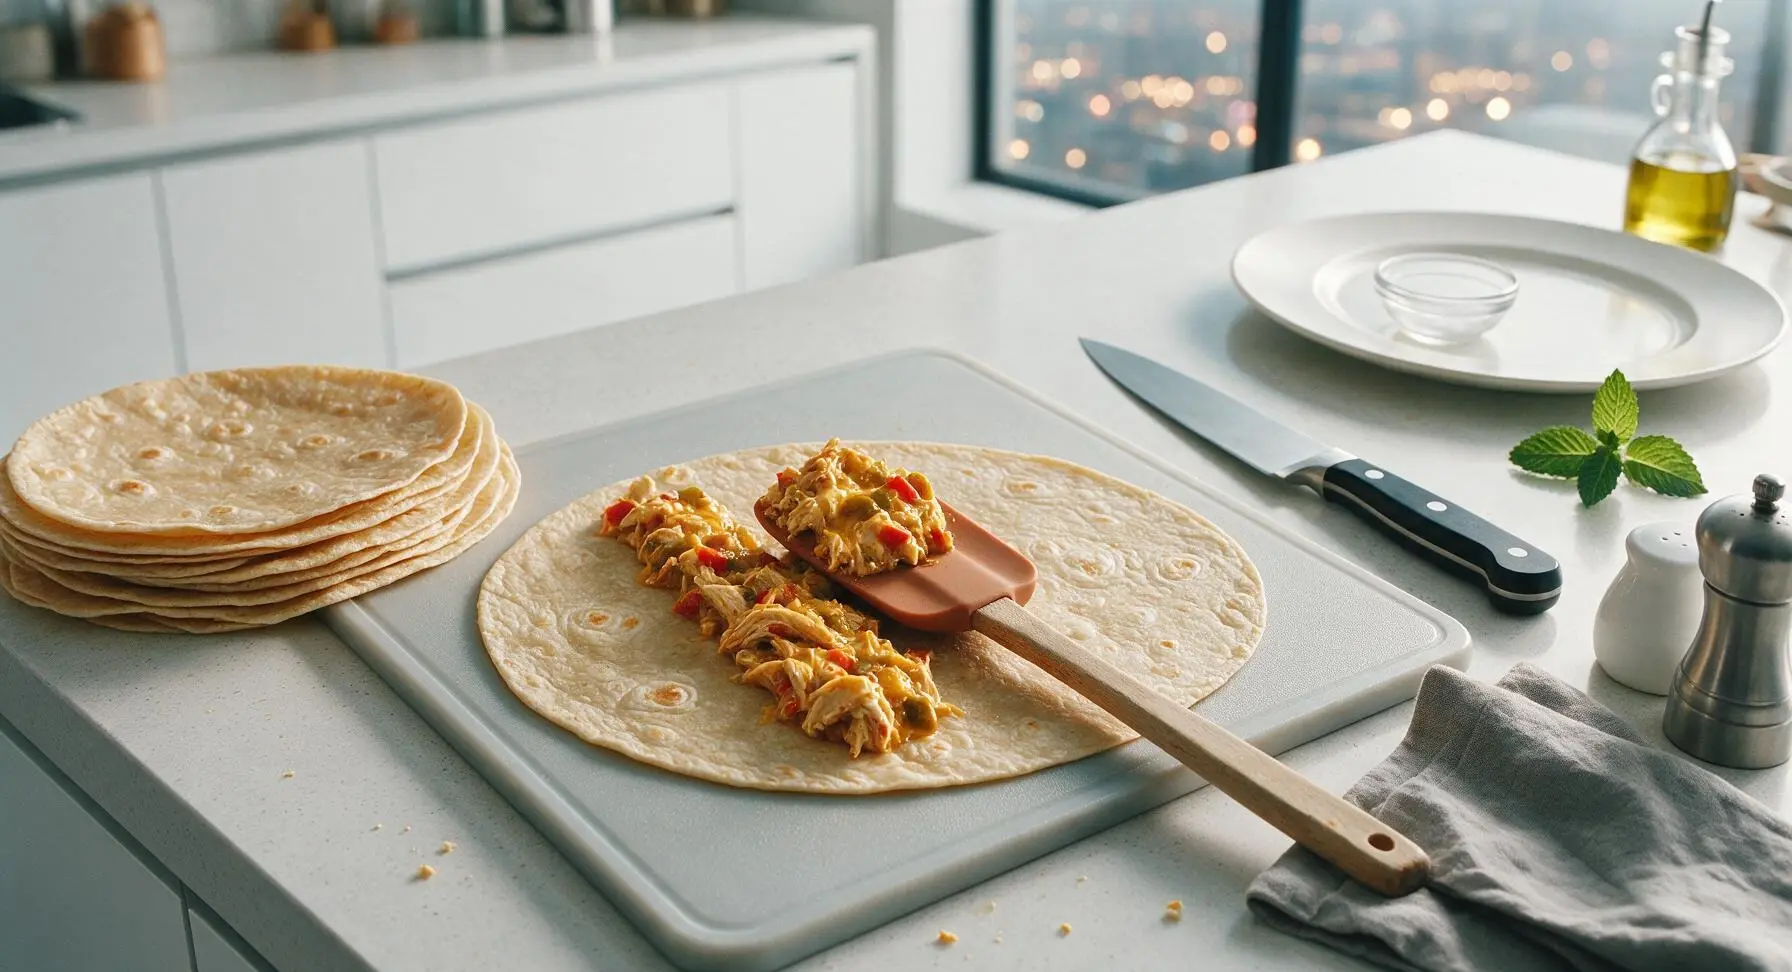
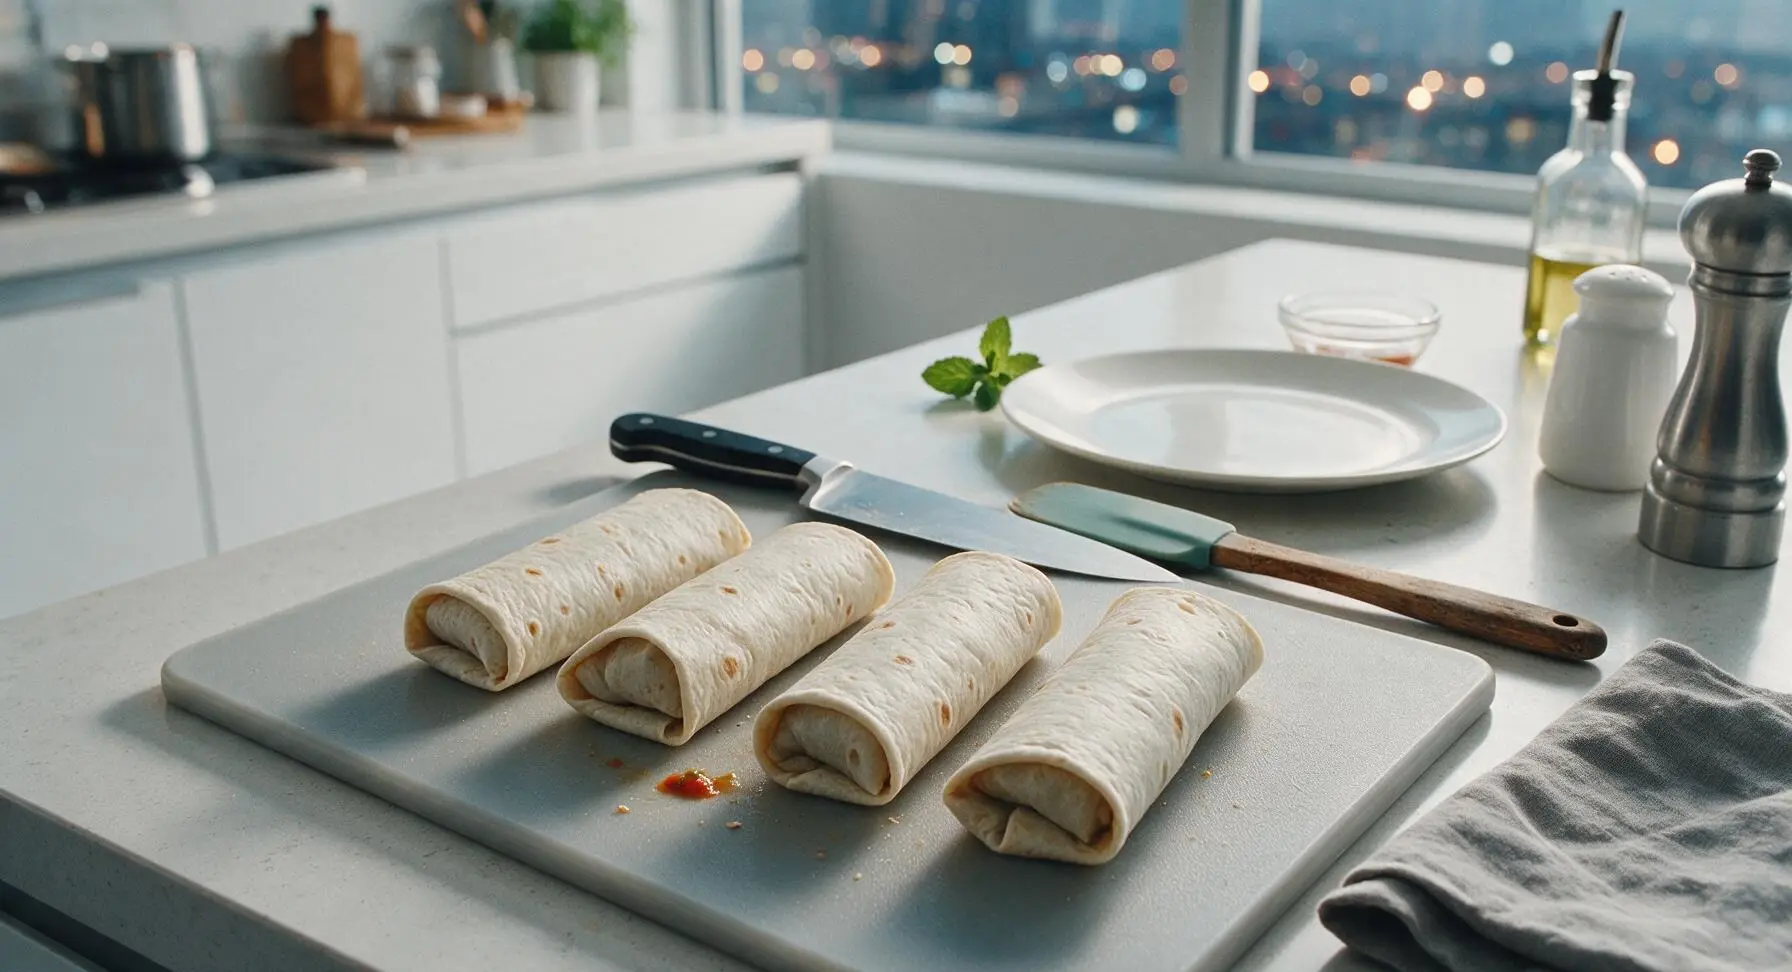
Warm the stack of flour tortillas for 10 seconds in the microwave to make them pliable (this prevents cracking during rolling). Lay one tortilla flat on the maple cutting board, and scoop a heaped ½ cup of the chicken filling in a straight 2-inch wide line down the center of the tortilla, leaving a 2cm border at the top and bottom edges. Fold the short top and bottom edges in over the filling, then roll the tortilla tightly from one long edge to the other to form a neatly sealed burrito. Repeat with all remaining tortillas and filling.
Step 4
step4:Assemble Rolled Burritos
Step 4
step4:Assemble Rolled Burritos
5

Arrange in Baking Dish

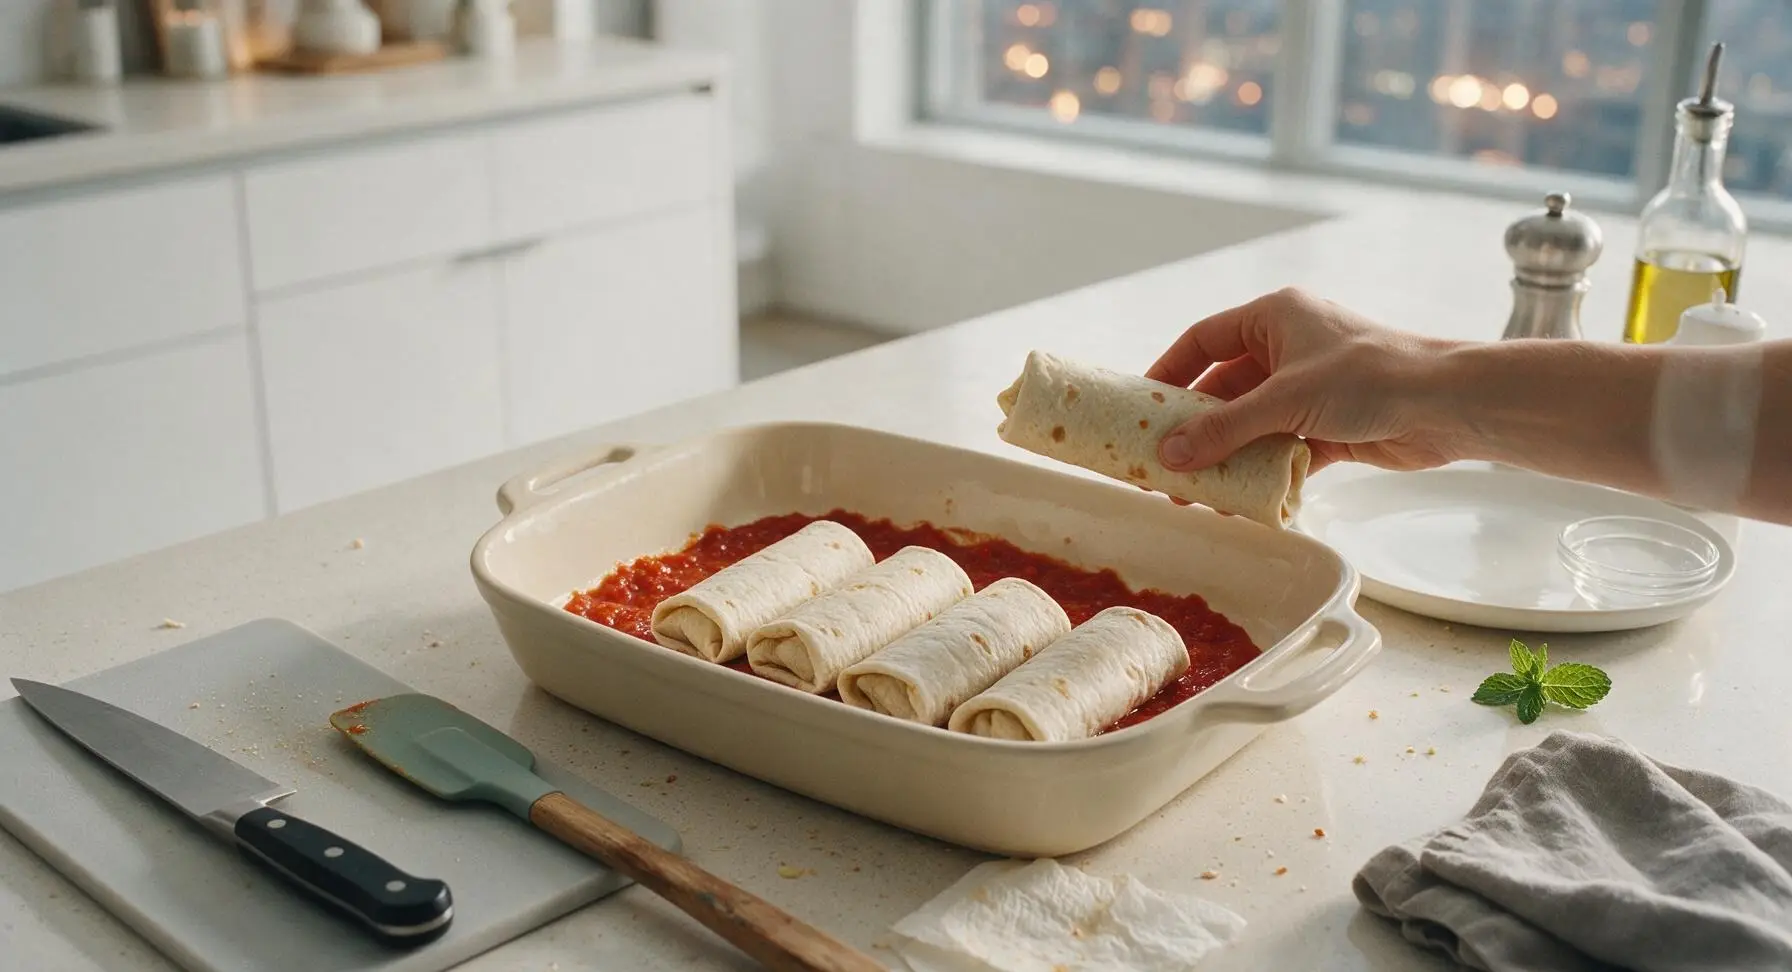
Use a paper towel to wipe any small bits of chicken residue from the cream ceramic baking dish (no need to wash fully, as leftover juices add flavor). Spread ½ cup of the remaining red salsa evenly across the entire bottom of the dish, then place the rolled burritos in the dish seam-side down, packing them snugly in a single even layer.
Step 5
step5:Arrange in Baking Dish
6

Top and Bake Burritos

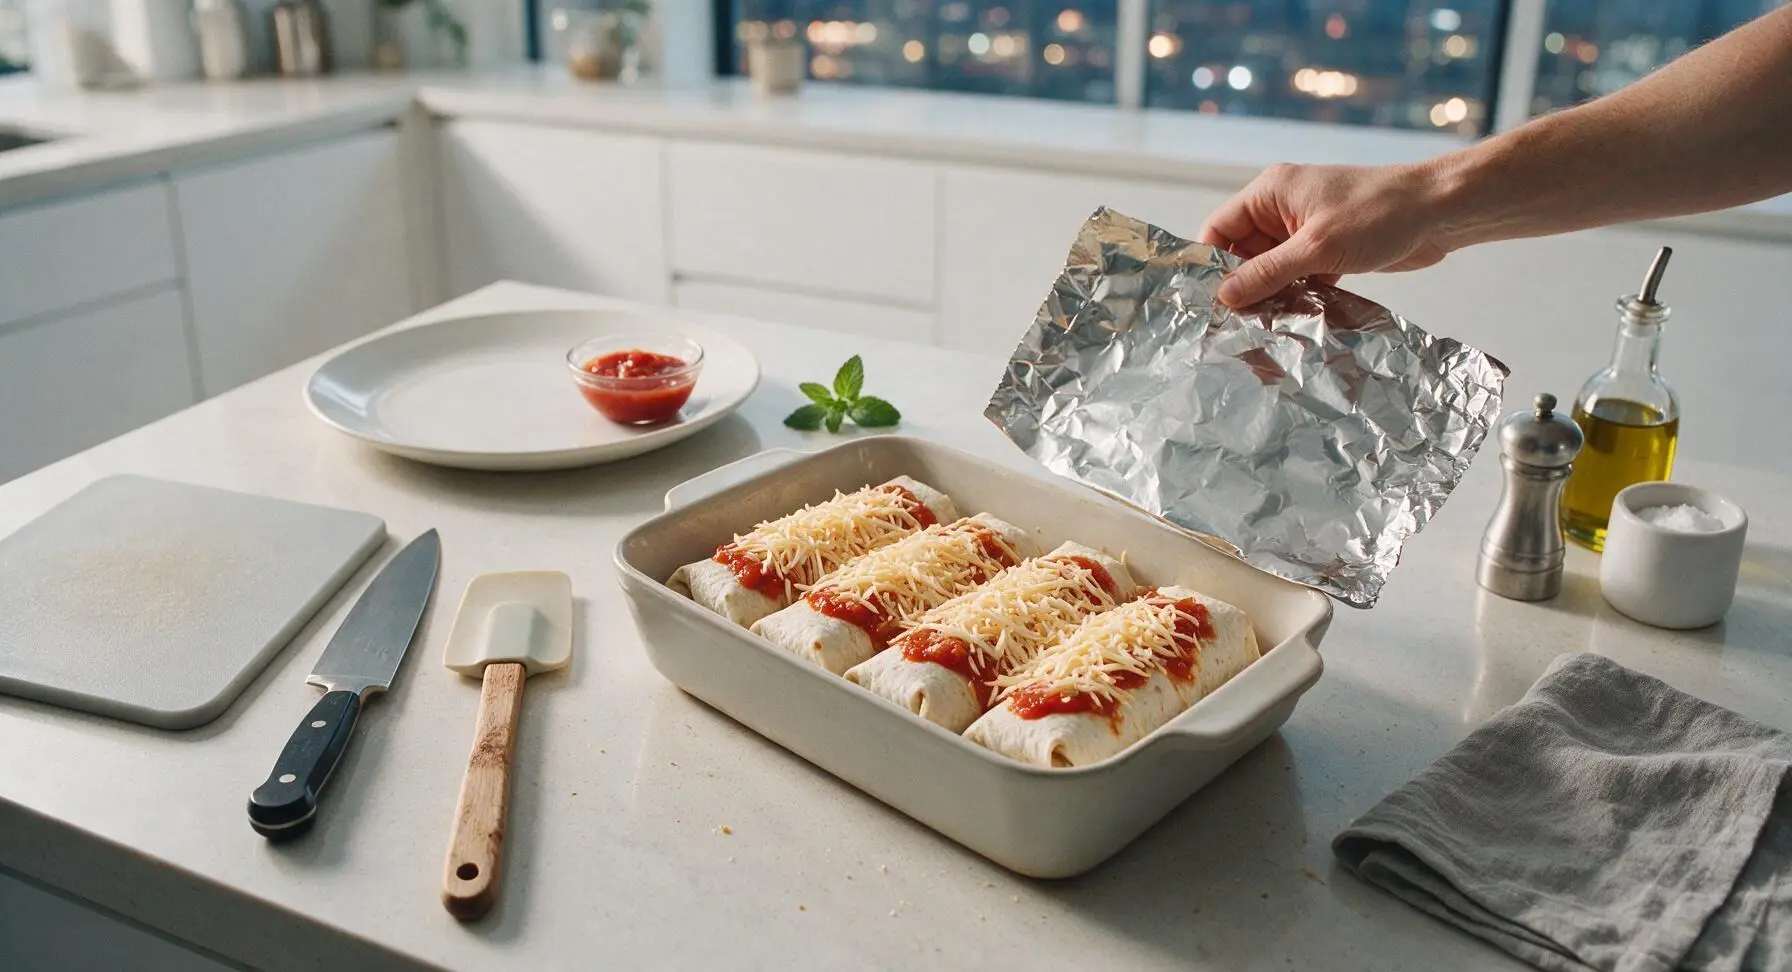
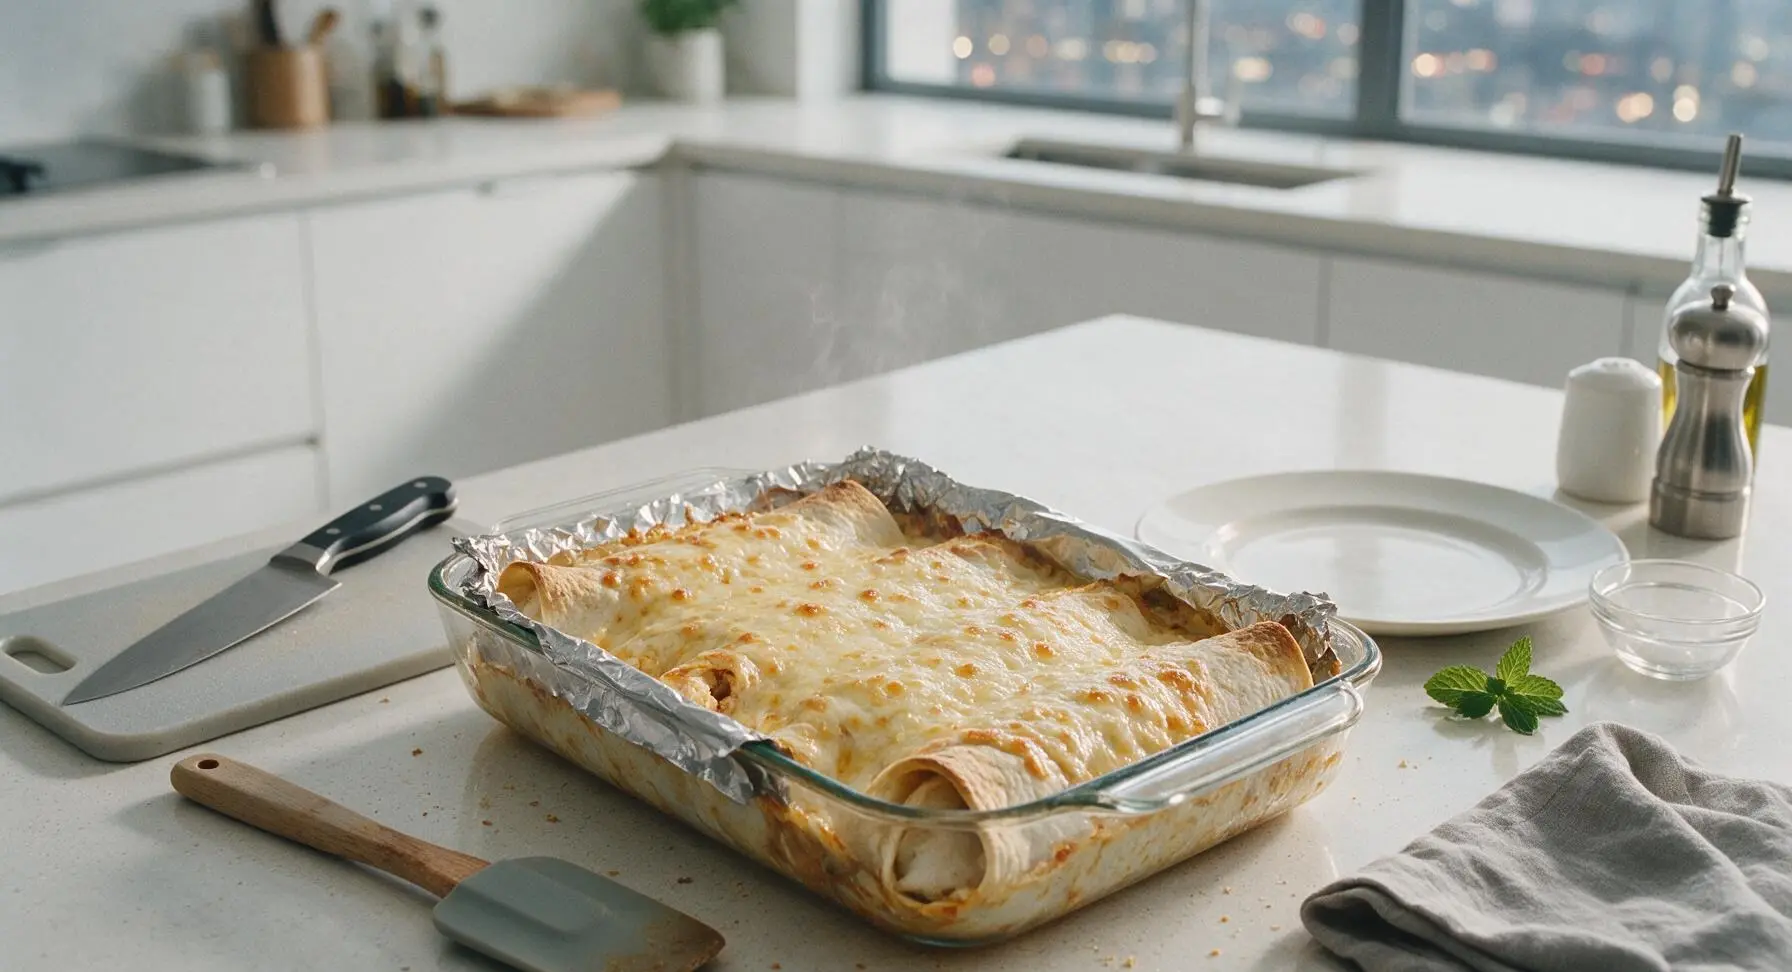
Pour the final ½ cup of red salsa evenly over the top of the arranged burritos, spreading it gently to cover the tortilla tops. Sprinkle the remaining 1 cup of shredded cheddar-jack cheese evenly over the salsa. Cover the dish tightly with aluminum foil, and bake at 190°C (375°F) for 15 minutes. Remove the foil, then continue baking for 8 more minutes, until the cheese is fully melted and bubbly, and the exposed tortilla edges are golden and slightly crisp.
Step 6
step6:Top and Bake Burritos
Step 6
step6:Top and Bake Burritos
7

Garnish and Rest

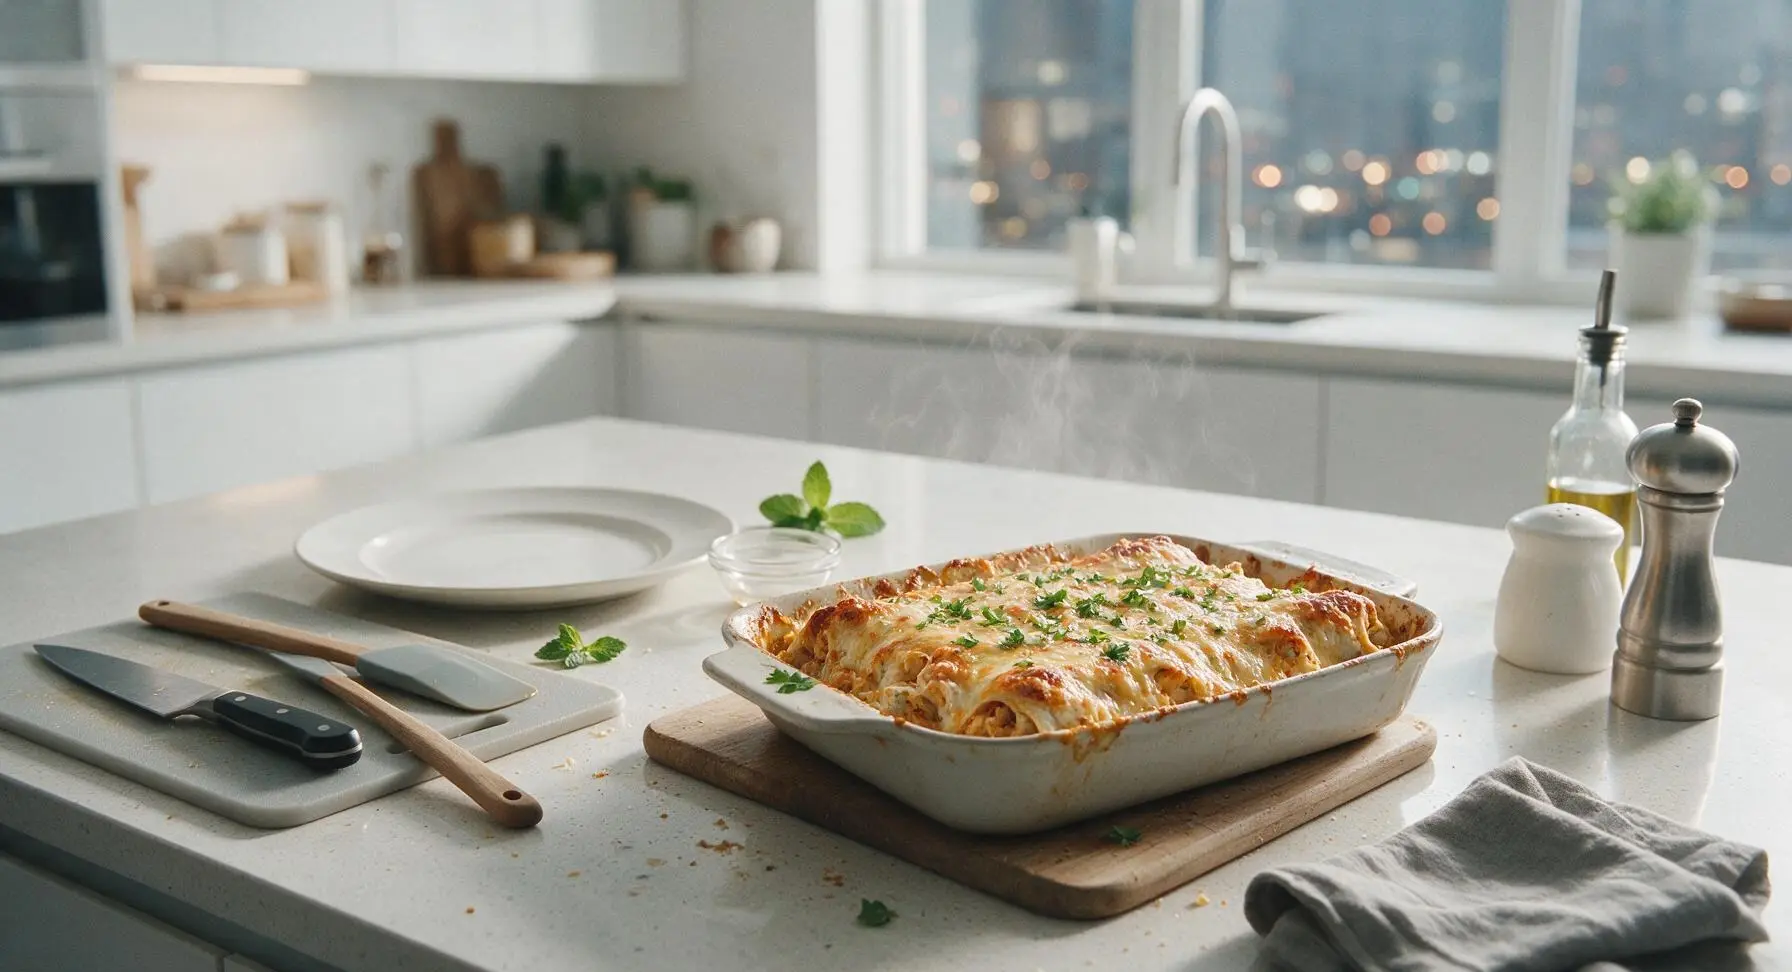
Let the baked burritos rest for 5 minutes at room temperature (this allows the hot filling to set so it does not run when cut). Sprinkle the top of the burritos with freshly chopped cilantro for a bright, fresh flavor contrast before serving.
Step 7
step7:Garnish and Rest

Tips

1.Warm flour tortillas for 10 seconds in the microwave before rolling: Cold tortillas crack and tear easily when folded, which causes filling to leak out during baking; warming makes them pliable enough for tight, neat rolls that stay sealed.
2.Always place rolled burritos seam-side down in the baking dish: The weight of the filling presses the tortilla seam closed as it bakes, preventing burritos from unrolling and spilling their cheesy contents across the dish.
3.Let baked burritos rest for 5 full minutes before serving: The molten cheese and piping-hot filling will be extremely runny straight from the oven; resting allows the filling to set, so slices hold their shape and won’t cause burnt mouths on the first bite.


✨ You May Also Like

Main Course
🍜 United Kingdom

A showstopping classic of tender seared beef, savory mushroom duxelles, and crisp prosciutto wrapped in flaky golden puff pastry, baked to juicy perfection.

⏱️ 2 hours 1Main Course ★ 4.7
Main Course
🍜 India

Tender charred marinated chicken simmered in a rich, spiced creamy tomato sauce, this iconic Anglo-Indian curry pairs perfectly with basmati rice or warm naan.

⏱️ 50 minuteMain Course ★ 4.6
Main Course
🍜 Thailand

Classic tangy, sweet, and savory Thai stir-fried rice noodles with shrimp, tofu, and crunchy garnishes, balancing all five core Thai flavor profiles.

⏱️ 30 minuteMain Course ★ 4.5
Main Course
🍜 United Kingdom

Crispy golden beer-battered cod and fluffy double-fried chips, served with tangy tartar sauce and malt vinegar: the timeless, beloved British pub comfort classic.

⏱️ 45 minuteMain Course ★ 4.7
Main Course
🍜 Mexico

Smoky, chile-marinated pork tacos with caramelized pineapple, fresh cilantro, and lime: a beloved classic Mexican street food perfect for casual summer gatherings.

⏱️ 1 hour 45Main Course ★ 4.8
Main Course
🍜 United States

Crunchy Fritos corn chips layered with savory beef chili and melted cheddar, topped with cool, zesty fixings for a beloved, cozy Tex-Mex comfort food.

⏱️ 35 minuteMain Course ★ 4.8

chicken burritos in the oven:Frequently Asked Questions

1.Can I use pre-cooked shredded chicken to cut down on prep time for these burritos? ▾
Absolutely! Store-bought rotisserie chicken works perfectly here—just shred 2 cups worth, toss it with the recipe’s seasoning and a splash of mild red salsa to amp up flavor before assembling. It cuts prep time by 20+ minutes, and no one will taste the difference once the burritos are baked with all that melty cheese.
2.How do I keep my baked burritos from turning out soggy instead of crispy? ▾
Great question! First, pat your rinsed, drained black beans fully dry so excess moisture doesn’t seep into the tortillas, and avoid overfilling each burrito. Arrange them seam-side down on a lightly greased baking sheet, and brush tortilla tops with a thin layer of oil to get that perfect golden, crispy crust.
3.Can I assemble these burritos ahead of time and freeze them for quick weeknight meals? ▾
You totally can! Assemble the burritos completely, wrap each tightly in plastic wrap then aluminum foil, and freeze for up to 3 months. When you’re ready to bake, unwrap them, add 10-12 minutes to the standard 375°F bake time, and cook until heated through with crispy edges.
4.What type of cheese gives the best melty, stretchy pull for these burritos? ▾
For that ideal melty, stretchy texture, use a 50/50 blend of shredded Monterey Jack and mild cheddar. Monterey Jack melts ultra-smooth, while cheddar adds savory, sharp depth. Pre-shredded cheese works in a pinch, but block cheese shredded at home melts better, as it has no anti-caking powder coatings.
5.My flour tortillas crack when I try to roll the burritos—what am I doing wrong? ▾
That almost always happens when tortillas are cold! Warm your 10-inch flour tortillas for 10-15 seconds each in the microwave, wrapped in a damp paper towel, right before rolling. This makes them soft and pliable, so they fold tight around filling without splitting or cracking as you tuck the ends in.
6.Can I swap the long-grain white rice for a different rice or low-carb alternative? ▾
Absolutely! Cooked brown rice works as a direct 1:1 swap for the long-grain white rice, just make sure it’s fully cooled before adding it to the filling so it doesn’t make tortillas soggy. For a lower-carb option, swap rice for seasoned riced cauliflower, sautéed first to remove any excess moisture.
7.How much filling should I add per burrito to avoid leaks while baking? ▾
Stick to roughly ½ cup of total filling per 10-inch tortilla: layer scoops of chicken, rice, beans, salsa, and cheese down the center, leaving a 1.5-inch border on the short ends. Fold the ends in first, then roll tightly from the long edge, and place seam-side down on the pan to prevent leaks.
8.What temperature do I need to cook the chicken to for proper food safety? ▾
If you’re cooking raw boneless, skinless chicken breasts for the filling, make sure they reach an internal temperature of 165°F as measured with an instant-read food thermometer before shredding. Assembled fresh burritos are done baking when their center filling also hits 165°F, usually 18-22 minutes at 375°F.
9.Can I mix extra vegetables into the filling without ruining the burrito texture? ▾
Definitely! Diced sautéed bell peppers, sweet corn, caramelized onions, or roasted poblano peppers make fantastic, flavorful additions. Just be sure to cook high-moisture veggies first and pat them fully dry before adding to filling, so excess water doesn’t turn your tortilla shells soggy as they bake.
10.Why do the edges of my burritos burn before the filling is heated all the way through? ▾
That usually means your oven is running hot, or the burritos are placed too close to the top heating element. Use an oven thermometer to confirm your temperature is correctly set to 375°F, and bake on the middle rack. If edges brown too fast, tent the pan loosely with foil for the last 5-7 minutes.
11.What toppings pair best with these burritos right after they come out of the oven? ▾
My go-to fresh toppings are a dollop of sour cream, a scoop of creamy guacamole, diced fresh tomato, a sprinkle of chopped cilantro, and a squeeze of bright lime. If you love a little heat, add a drizzle of hot sauce or pickled jalapeños to cut through the rich, cheesy, savory filling perfectly.

Comments (15)

2 days ago

OMG these oven-baked cheesy chicken burritos are a total GAME CHANGER for my weeknight family dinners! I’ve made them three times in the last two weeks, and even my super picky 7-year-old asks for seconds. The cheese gets perfectly crispy on the edges baked in the oven, no soggy tortillas here! I added a little extra diced green chile for a kick and it was chef’s kiss.

1 day ago

So happy to hear these are a hit with your family, Mia! Adding extra green chiles is such a tasty call—pro move for a little extra heat. So glad you’re not dealing with soggy tortillas, that’s exactly why we love baking them instead of pan-frying!

18 hours ago

Seconding the green chile add! I threw in a can of roasted corn too last time I made these for our neighborhood potluck and people were begging for the recipe.

1 week ago

Super easy recipe, perfect for Sunday meal prep! I made a big batch on Sunday, wrapped them individually in foil, and grabbed one for lunch every day this week. They reheat amazingly in the oven or even the microwave if I’m short on time. Only thing I did differently was use whole wheat tortillas to add a little extra fiber.

6 days ago

Love that you’re using these for meal prep, Jake! Whole wheat tortillas are such a smart swap, and the individual foil wrapping trick is perfect for quick grab-and-go meals. So glad they hold up well for reheating!

30 minutes ago

Tried these last night for dinner and honestly? SO good. I was worried they’d be bland because a lot of baked burrito recipes skimp on seasoning, but the spice blend on the chicken was perfect. My teenage son ate three in one sitting lmao. Will definitely be adding these to our regular rotation.

3 days ago

Brought these to my office potluck last week and they were the first dish gone! I was a little nervous because I had to bake them at home then transport them 20 minutes, but they stayed perfectly cheesy and warm the whole time. Only note: I wish I’d made a double batch, people came back for thirds!

2 days ago

Wait how did you keep them warm for transport? I need to bring these to my kid’s soccer team potluck this weekend and I’m stressing about them getting cold!

2 days ago

Great question, Beth! If you’re transporting them, wrap the whole baking dish tightly in two layers of foil right after taking them out of the oven, and they’ll stay warm for 30-45 minutes easily. You can also pop them in a cooler with a couple of hot packs for longer trips!

5 days ago

As a broke college student with barely any cooking skills, this recipe was so easy to follow! I didn’t have all the exact seasonings so I just used a taco seasoning packet I had in my pantry, and it still turned out fire. Total cost for the whole batch was like $12, fed me and my three roommates no problem.

4 days ago

Wait taco seasoning packet hack is genius, I was gonna skip making this because I don’t have a bunch of random spices in my dorm. Gonna make these this weekend for our movie night!

yesterday

Made these with gluten-free flour tortillas for my family (two of us have celiac) and they worked perfectly! I was worried the GF tortillas would get crunchy or fall apart in the oven, but they held up great and tasted exactly like the regular ones. 10/10, will make again.

1 week ago

These are good, but I felt like they were missing a little something? I followed the recipe exactly, but next time I think I’ll add some pickled jalapeños and a dollop of sour cream on top after baking. Also, I baked mine for 40 minutes and the edges were a little more burnt than I like, so maybe adjust cook time if your oven runs hot.

6 days ago

Thanks so much for the honest feedback! Ovens definitely run hot or cold across different models, so checking them a few minutes early is always a great call. Pickled jalapeños and sour cream sound like incredible additions—we love seeing all the fun customizations people come up with!

2 weeks ago

Wait, can I make these ahead and freeze them? I’m due with my second baby in three weeks and I’m stocking my freezer with easy meals I can just pop in the oven on chaotic nights. This recipe looks perfect but I don’t want to mess up the texture freezing it!

2 weeks ago

Congrats on the new baby, Zoe! These freeze amazingly well. Assemble them fully (skip adding any fresh toppings like salsa or sour cream before freezing), wrap each tightly in plastic wrap then foil, and they’ll keep for up to 3 months. Bake straight from frozen at 375 for 30 minutes covered, then 10 minutes uncovered to crisp up!

1 week ago

I froze a batch of these last month when my husband had surgery and they were a total lifesaver! The cheese doesn’t get grainy at all when you reheat from frozen, totally worth making ahead.

2 hours ago

Who knew baking burritos was so much better than pan frying them? No splattering oil all over my stovetop, no flipping them and having filling fall out, and the whole pan is done at the same time. I added some black beans and rice to the filling to stretch it further and it was so filling.

30 minutes ago

The no oil splatter thing is what sold me! I hate making stovetop burritos because I always burn myself on popping oil, can’t wait to try this baked method this week.

5 minutes ago

I consider myself a burrito connoisseur and these absolutely slap. The ratio of cheese to chicken to filling is perfect, no sad overstuffed burritos that burst open in the oven. I dipped mine in homemade queso and it was the best meal I’ve made all month, no cap.

2 weeks ago

Made these for my grandkids when they visited over the weekend and they ate every last bite! I used leftover rotisserie chicken I had from Sunday dinner instead of cooking chicken from scratch, and it cut down the prep time so much. Even my husband, who swears he doesn’t like “Mexican food”, went back for a second one.

2 weeks ago

Using leftover rotisserie chicken is our favorite time-saving hack for this recipe, Sue! So glad your grandkids (and your husband!) enjoyed these—nothing beats a meal the whole family loves, especially when it comes together quick.

yesterday

Got home late from work last night, threw these together in 15 minutes, popped them in the oven, and we had dinner on the table in under 45 minutes total. No fancy ingredients, no complicated steps, exactly what I need for busy weeknights. 10/10, easy enough for even the most sleep-deprived parent to pull off.

18 hours ago

Sleep-deprived parent over here with twin toddlers, this is exactly the kind of recipe I’ve been searching for! Do you think pre-shredded cheese works okay, or is fresh shredded better?

12 hours ago

Pre-shredded works totally fine! I use it all the time for these to save time, just make sure you get the melting kind like a Mexican blend, it turns out great.

just now

I added a healthy dose of hot sauce to the chicken filling and topped them with extra pepper jack cheese for more heat, and these were absolute fire. The cook time was spot on for my oven, tortillas were crispy on the outside, soft and cheesy on the inside. Already sent the recipe to my whole friend group.

3 days ago

This recipe is so affordable to make, even with grocery prices being crazy right now! I got all the ingredients for under $15, and it made 6 big burritos that fed my family of four with leftovers for lunch the next day. Way cheaper than getting takeout burritos, and tastes way better too.

2 days ago

Right?! I stopped getting our weekly takeout burritos once I found this recipe, I save almost $30 a week making these at home. The leftovers are even better the next day imo!

5 days ago

First recipe I’ve ever made completely on my own without calling my mom for help, and it turned out perfect! The instructions were super clear and easy to follow, no weird confusing steps. I felt like a real chef pulling these golden, cheesy burritos out of the oven. So proud of how they came out!



