
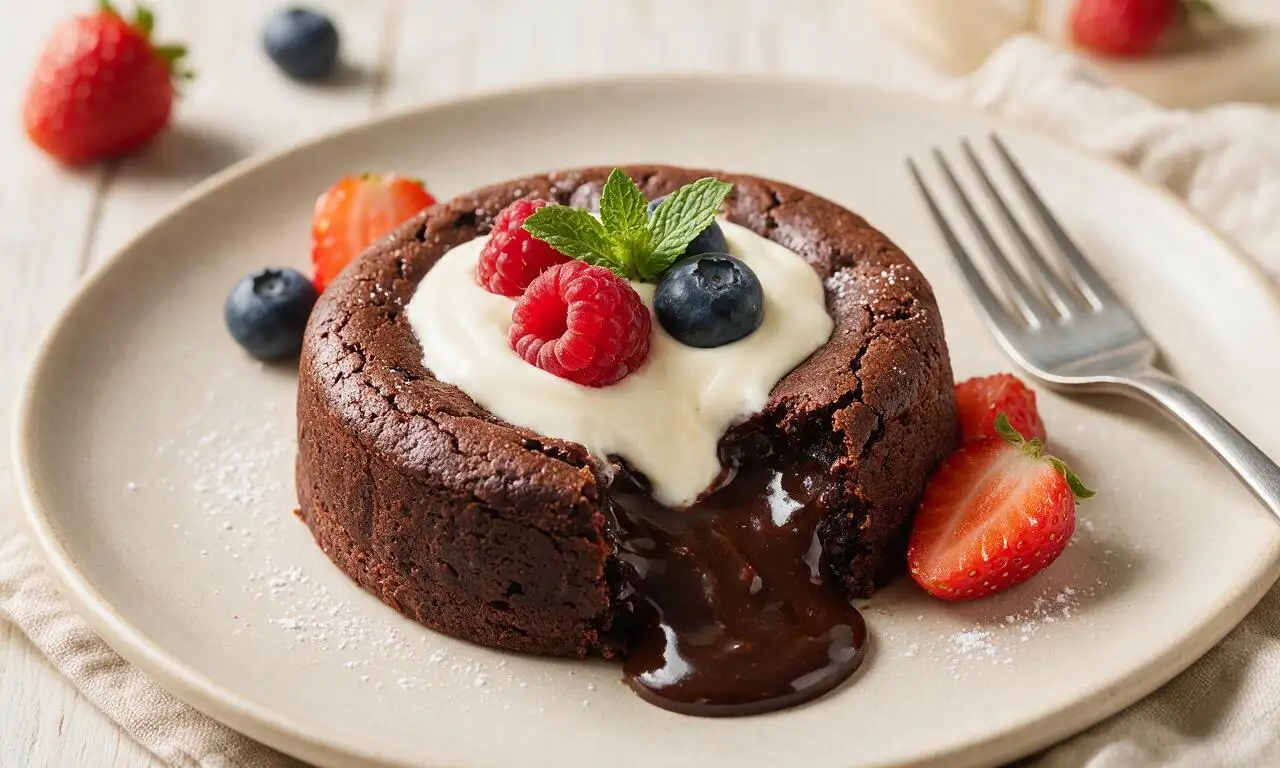
Chocolate Lava Cake

title 1
Chocolate Lava Cake
⏱️ cook time 25 minutes
🍽️ servings 4
⚡ Difficulty medium

intro

Warm, indulgent individual chocolate cakes with a rich gooey molten center, quick to prepare and perfect for intimate special meals.

Ingredients

70% cacao dark chocolate 170 grams (6 ounces)
Unsalted butter 113 grams (1/2 cup / 1 stick)
Large eggs 2 whole eggs + 2 egg yolks (136 grams total)
Granulated sugar 50 grams (1/4 cup)
All-purpose flour 30 grams (1/4 cup, spooned and leveled)
Pure vanilla extract 5 milliliters (1 teaspoon)
Fine sea salt 0.5 grams (1/8 teaspoon)
Unsweetened cocoa powder (for dusting) 5 grams (1 tablespoon)

Steps

1

Prep oven and ramekins

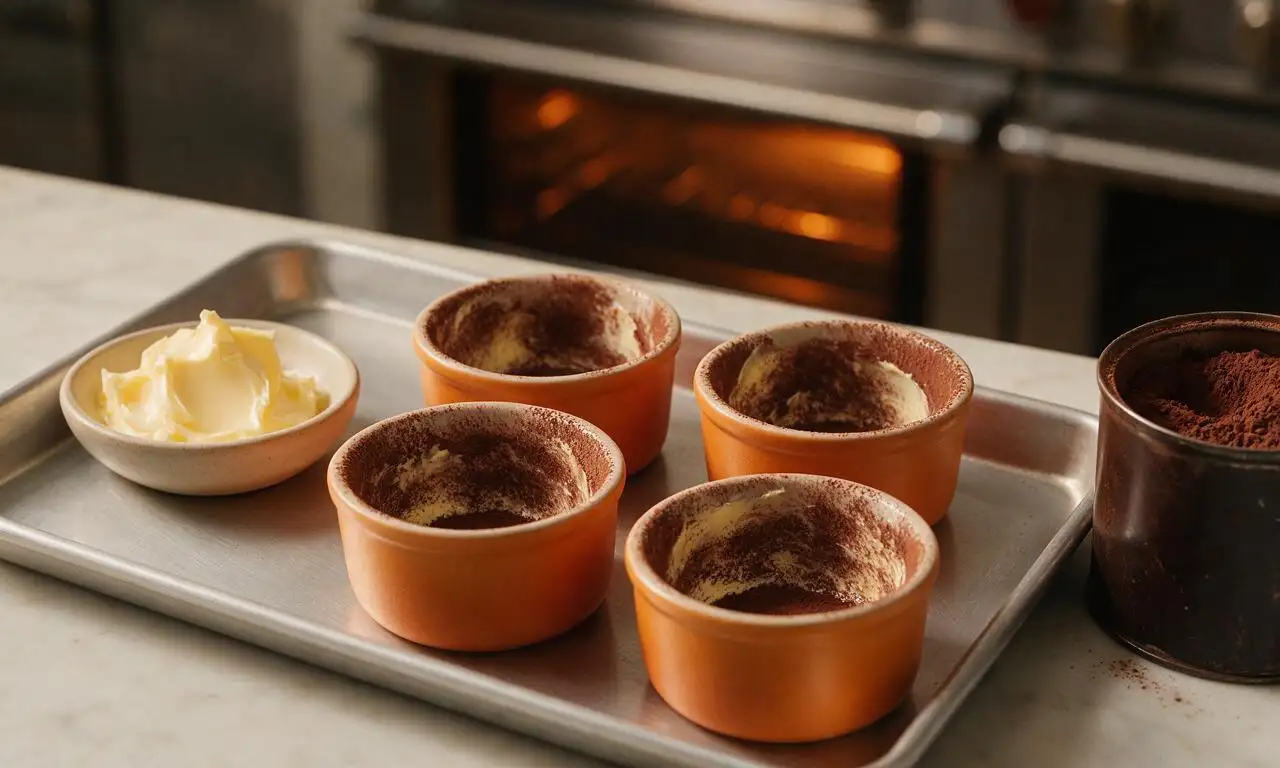
Preheat your oven to 220°C (425°F) with a rack positioned in the exact center. Generously grease the interior of four 177ml (6oz) ceramic ramekins with softened butter, then dust each evenly with 1/4 tablespoon of unsweetened cocoa powder, tapping out excess to prevent sticking. Set prepared ramekins on a small rimmed baking sheet for easy transfer to and from the oven.
Step 1
step1:Prep oven and ramekins
2

Melt chocolate and butter

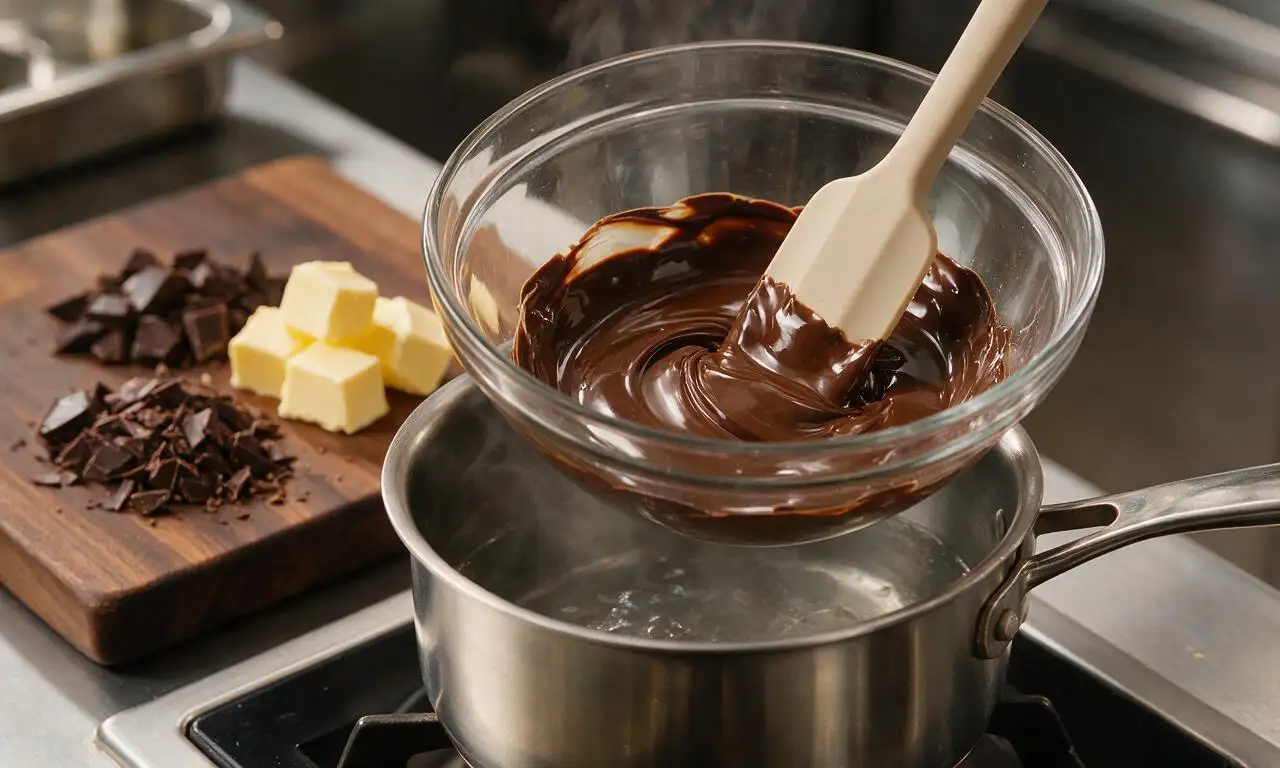
Chop 170g of 70% cacao dark chocolate into uniform 1cm pieces, and cut 113g unsalted butter into 2cm cubes. Combine both in a heatproof glass bowl set over a small pot of gently simmering water (double boiler, ensure the bowl does not touch the water surface). Stir constantly with a silicone spatula over medium-low heat for 3-4 minutes until completely smooth and melted, then remove the bowl from heat and let cool for 2 minutes.
Step 2
step2:Melt chocolate and butter
3

Whisk egg base

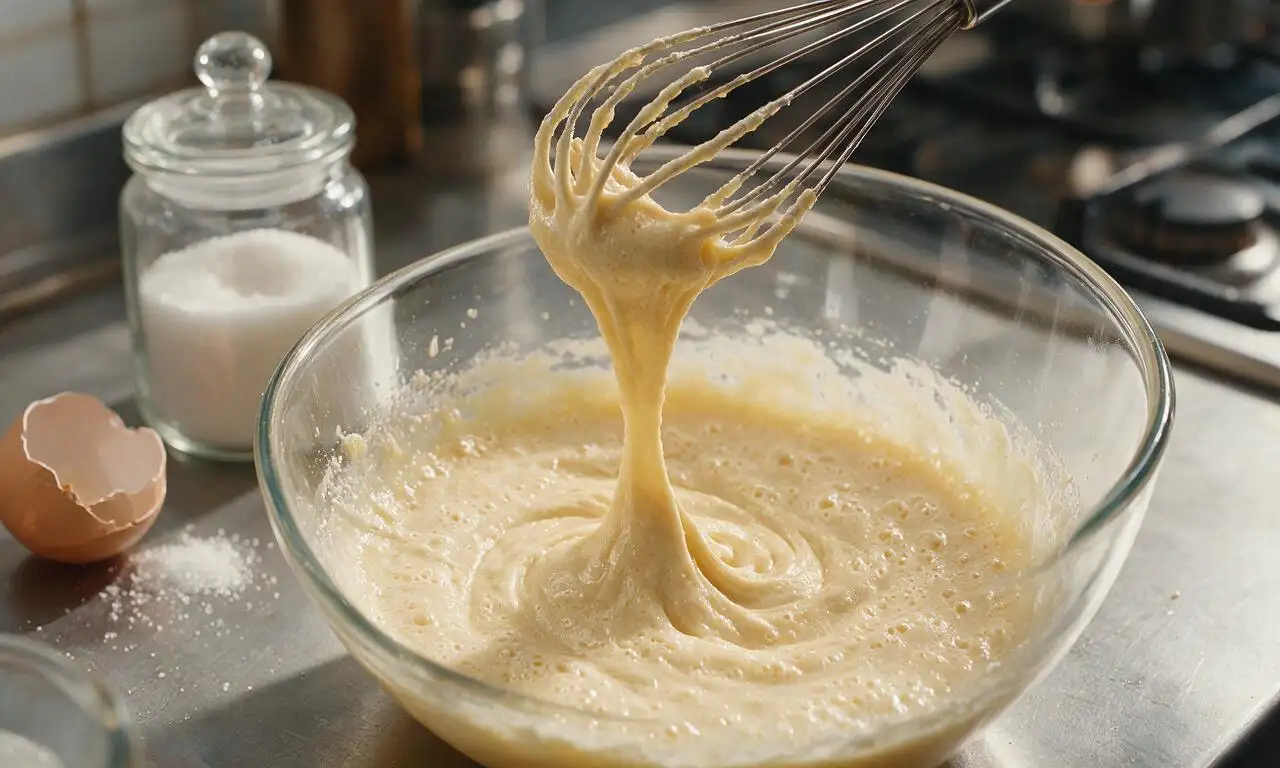
In a separate medium mixing bowl, combine 2 large whole eggs, 2 large egg yolks, 50g granulated sugar, and 1/8 teaspoon fine sea salt. Whisk vigorously by hand for 2 full minutes until the mixture turns pale golden, thickens noticeably, and leaves a slow, thick ribbon trail when the whisk is lifted 5cm above the bowl surface. Stir in 1 teaspoon pure vanilla extract to fully incorporate.
Step 3
step3:Whisk egg base
4

Fold chocolate batter

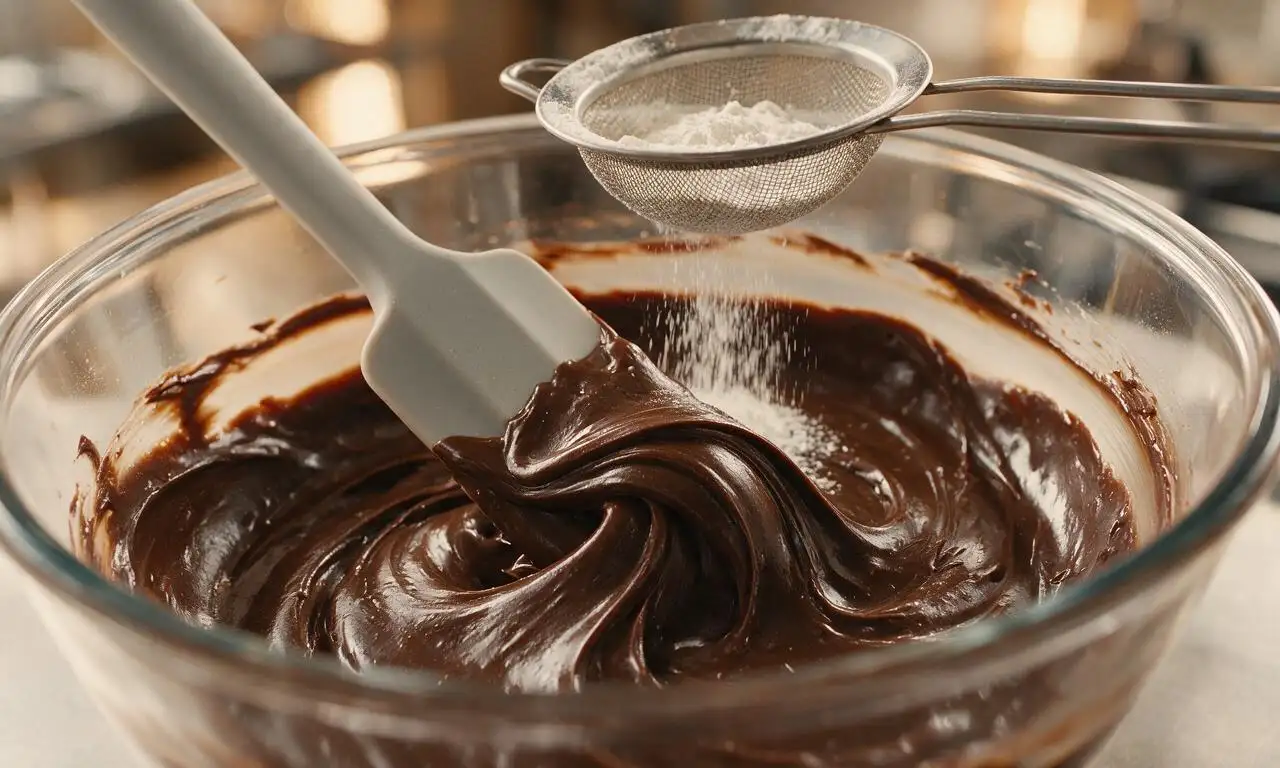
Pour the slightly cooled melted chocolate and butter mixture into the whisked egg base, stirring gently with a silicone spatula until just combined. Sift 30g of spooned-and-leveled all-purpose flour evenly over the top of the mixture, then fold in slow, broad strokes just until no dry flour streaks remain—do not overmix, as this will create a dense, tough cake texture instead of a tender crumb.
Step 4
step4:Fold chocolate batter
5

Bake lava cakes

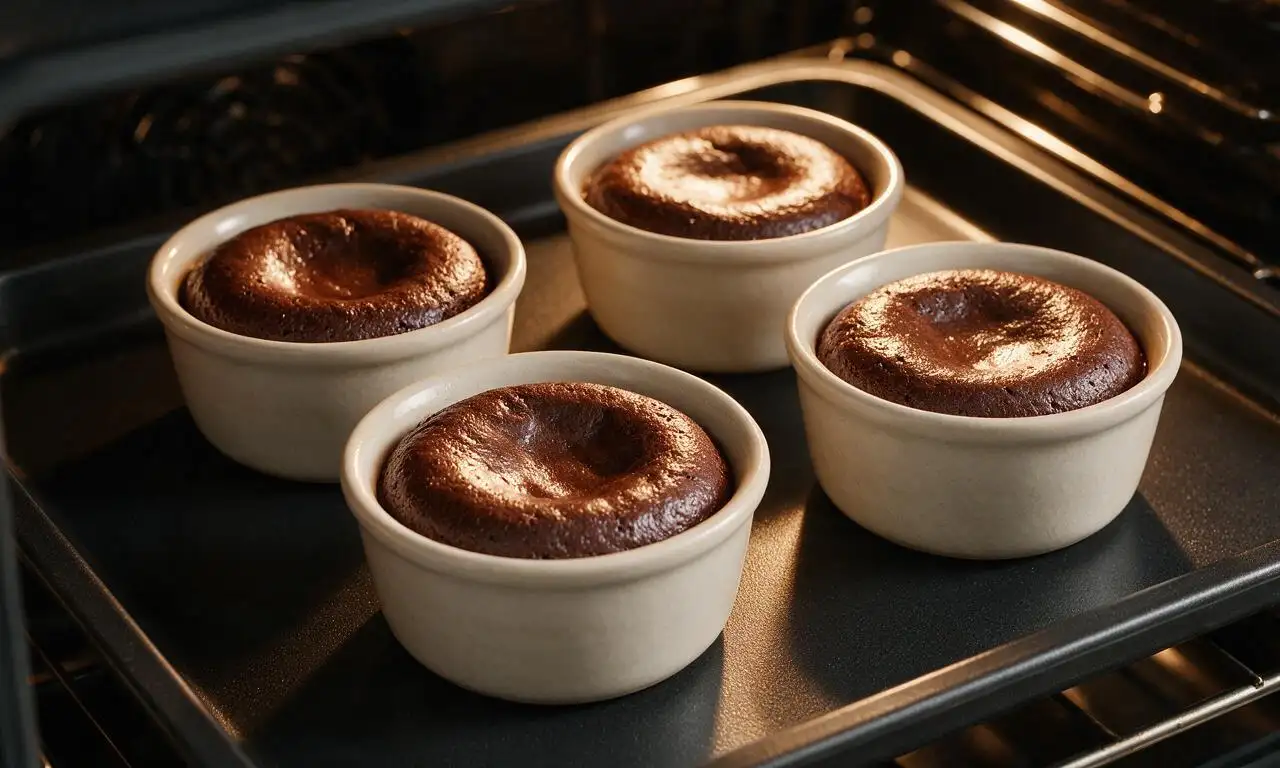
Divide the batter evenly between the four prepared ramekins, filling each to 1cm below the rim to leave room for rising. Bake on the center oven rack for exactly 8-9 minutes at 220°C (425°F): the cake edges will be fully set and slightly puffed, but the very 2cm center will look soft and jiggly when the baking sheet is gently shaken. Do not bake longer than 10 minutes, as extended baking will eliminate the signature molten lava center.
Step 5
step5:Bake lava cakes
6

Unmold and serve

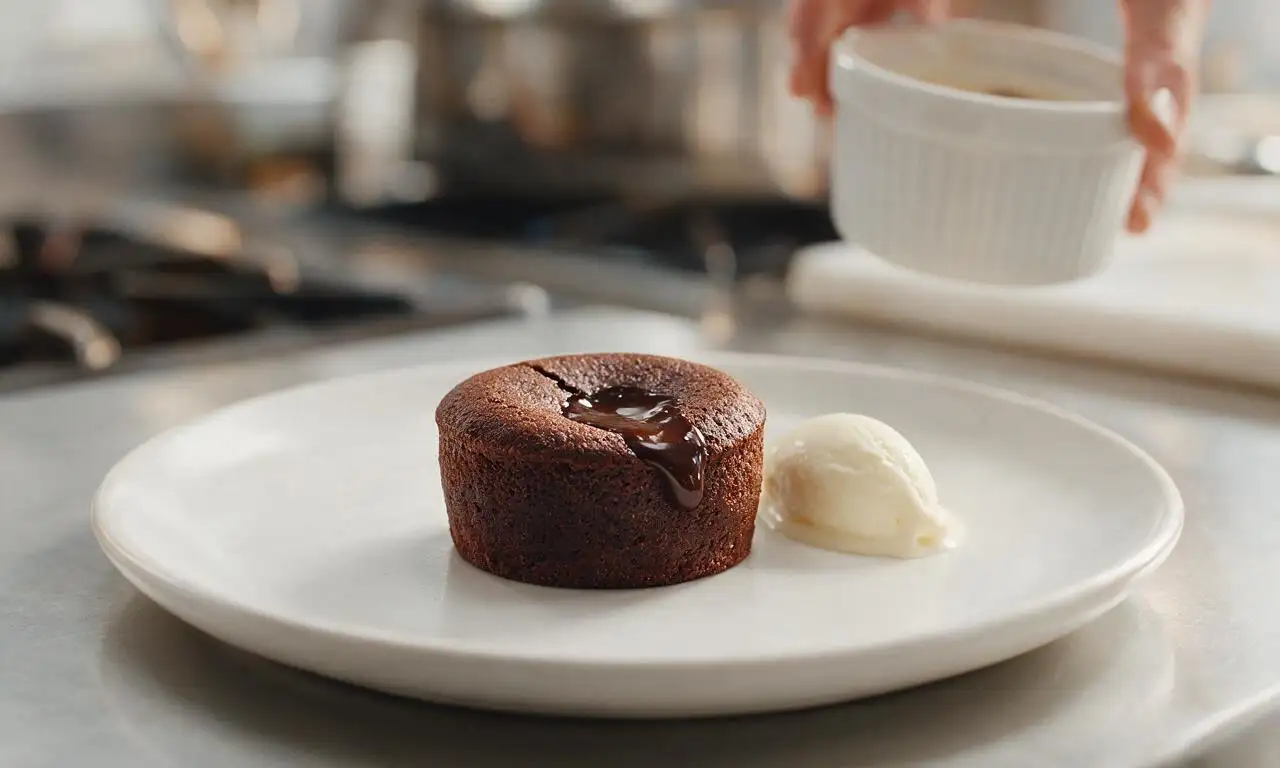
Remove the baking sheet from the oven and let the cakes rest in their ramekins for exactly 60 seconds. Carefully run a small sharp paring knife around the inner edge of each ramekin to loosen the cake, then place a small 15cm dessert plate upside down over each ramekin, flip quickly and confidently in one smooth motion, and lift the ramekin straight up to release the cake. Serve immediately, optionally dusted with powdered sugar or paired with a scoop of vanilla bean ice cream.
Step 6
step6:Unmold and serve

Tips

1.For stress-free entertaining, portion batter into prepared ramekins, cover tightly with plastic wrap, and refrigerate for up to 24 hours—add 1-2 minutes to bake time when cooking directly from chilled, no need to bring to room temperature.
2.Avoid opening the oven door for the first 7 minutes of baking, as sudden drops in oven temperature can cause the cakes to deflate and lose their tall, puffed edge.
3.For an extra-luxurious molten center, press a 10g square of solid dark chocolate into the center of each batter-filled ramekin before baking; it will melt into an extra gooey pocket as the cake cooks.


✨ You May Also Like

Desserts & Baking
🍜 Italy

Creamy, coffee-kissed classic Northern Italian no-bake dessert, with layers of rum-spiked mascarpone cream, soft ladyfingers, and a rich cocoa dusting.

⏱️ 4 hours 3Desserts & Baking ★ 4.7
Desserts & Baking
🍜 France

Flaky, shatteringly crisp, buttery French croissants with golden exteriors and soft, airy layered interiors, perfect for pairing with coffee for a special morning treat.

⏱️ 12 hours Desserts & Baking ★ 4.5
Desserts & Baking
🍜 United States

Warm, spiced baked apples topped with a fluffy golden biscuit crust, this cozy dessert pairs perfectly with vanilla ice cream for cool-weather comfort.

⏱️ 55 minuteDesserts & Baking ★ 4.6
Desserts & Baking
🍜 United States

A star-spangled classic American blueberry pie with buttery flaky crust and bright sweet-tart filling, perfect for summer patriotic gatherings.

⏱️ 1 hour 25Desserts & Baking ★ 4.7
Desserts & Baking
🍜 United States

A beloved no-bake regional Maine candy with a chewy coconut-potato center coated in rich dark chocolate, a New England holiday staple since the 1870s.

⏱️ 2 hours 3Desserts & Baking ★ 4.8
Desserts & Baking
🍜 France

Luxuriously creamy, floral frozen custard made with aromatic Tahitian vanilla beans, boasting a smooth, rich texture that melts slowly on the tongue.

⏱️ 3 hours 3Desserts & Baking ★ 4.5

Chocolate Lava Cake:Frequently Asked Questions

1.Why didn’t my lava cake have a gooey, runny center when I cut into it? ▾
That’s almost always from overbaking, the number one lava cake mistake! Bake at 425°F for exactly 10 to 12 minutes—edges should be fully set, but the very center will look slightly jiggly when you nudge the ramekin. If your oven runs hot, shave 1 minute off bake time, and pull cakes as soon as edges pull slightly away from the ramekin sides.
2.Can I prep the lava cake batter ahead of time for a dinner party, or do I have to bake it right away? ▾
Absolutely—this is one of my go-to pro hacks for stress-free entertaining! Portion batter into greased ramekins, cover tightly with plastic wrap, and refrigerate for up to 48 hours. When you’re ready to bake, add 2 to 3 minutes to the total bake time; you don’t even need to bring the batter to room temperature first to get that perfect molten core.
3.Do I have to use 70% cacao dark chocolate, or can I swap in a sweeter chocolate variety? ▾
You can swap, but I recommend sticking close to 70% cacao for the most balanced, rich flavor. If you use milk chocolate or a lower-cacao dark chocolate, the cake will turn out overly sweet and cloying, since the recipe already includes measured granulated sugar. If you prefer milder chocolate, use 60% cacao dark chocolate at minimum for ideal texture and taste.
4.How do I get lava cakes out of the ramekins in one piece without breaking or sticking? ▾
It all comes down to simple prep before you pour in the batter! Grease the inside of each ramekin thoroughly with softened unsalted butter, then dust with a light coating of cocoa powder (skip flour for extra chocolate flavor) and tap out excess. Let baked cakes rest 1 minute out of the oven, then run a thin paring knife around the edge before inverting onto a plate.
5.Why did my lava cakes turn out dense and rubbery instead of light and tender? ▾
That tough texture almost always comes from overmixing the batter once you add the all-purpose flour. Stir flour in just until no dry streaks remain—overmixing develops gluten in the flour, which creates chewy, tough cakes instead of that delicate, melt-in-your-mouth crumb. Also, make sure your melted chocolate and butter isn’t boiling hot when you add eggs, as that can curdle eggs and cause density too.
6.I don’t have ceramic ramekins—can I bake these lava cakes in a regular metal muffin tin instead? ▾
You absolutely can, no special equipment required! Grease the muffin cups the exact same way you would ramekins, and reduce bake time by 2 to 3 minutes, since metal conducts heat faster than ceramic. This makes slightly smaller lava cakes, so plan on 1.5 muffin-sized cakes per guest if serving a group, and keep a close eye on them to avoid overbaking.

Comments (19)

2 hours ago

OMG this was SO good! I made these for my date night last night and my partner literally asked if I ordered them from a fancy downtown restaurant. The gooey center was perfect, not runny, not overcooked. Total game changer for easy but impressive desserts!

yesterday

Really solid recipe! My only hiccup was my first batch came out a little more cooked through than I wanted, probably left them in 2 minutes too long. Flavor was insane though, super rich chocolate taste that didn’t feel cloying.

2 hours ago

So glad you enjoyed the flavor! Pro tip: start checking them at the 12 minute mark if your oven runs hot—edges should be set but the center will still jiggle a little for that perfect lava flow.

3 days ago

My kids loved it! I made these for our weekly family dinner and even my super picky 7 year old asked for seconds. I dusted a little extra powdered sugar on top and served with vanilla bean ice cream, chef’s kiss.

yesterday

Wait the ice cream pairing is non-negotiable right?! I did the same last weekend and the warm cake melting the ice cream is *chefs kiss*

1 week ago

Brought these to a neighborhood potluck last weekend and people were swarming the dessert table for them. I was shocked how easy they were for how fancy they look! Will absolutely be adding this to my regular rotation for get-togethers.

5 days ago

Taste was great but I struggled with getting them out of the ramekins! Half of mine stuck and lost that perfect oozing center when I flipped them. Did I not grease them enough?

3 days ago

I had that same issue first try! I greased my ramekins with butter and dusted them with cocoa powder instead of flour on my second batch and they slid right out, no sticking at all!

2 days ago

Great tip from BakingNewbie22! Cocoa powder instead of flour also adds an extra little chocolate kick without leaving that powdery flour residue on the outside of the cakes. Make sure you get every crevice of the ramekin greased too!

2 weeks ago

I’ve been making lava cakes for 30 years and this recipe is easily one of the best I’ve tried. The ratio of dark chocolate to butter is perfect, not too heavy. My grandkids beg me to make these every time they come visit.

1 week ago

That means the world coming from a seasoned lava cake pro! So glad your grandkids love them—nothing beats a classic recipe that stands the test of time.

30 minutes ago

Just pulled these out of the oven for my anniversary dinner and wow. I’m not a great baker by any stretch but these came out perfectly on the first try. My wife is gonna lose her mind when she sees the lava pour out. Thanks for the easy to follow steps!

1 week ago

Really great recipe! I swapped in semi-sweet chocolate instead of dark because that’s what I had in the pantry, and it still turned out delicious. Next time I’ll add a little pinch of sea salt on top to cut the sweetness a bit.

5 days ago

The sea salt hack is unreal! I did that last time I made them and it elevates the chocolate so much, 10/10 recommend.

3 days ago

Love that swap! Semi-sweet works perfectly here for folks who prefer a less intense chocolate flavor, and that flaky sea salt finish is such a delicious upgrade.

2 days ago

Wait 25 minutes total cook time? I was convinced these would take way longer to make. I threw these together last minute when friends showed up unannounced and everyone thought I spent hours on dessert. Total lifesaver.

yesterday

Right?! I keep pre-portioned batter in my freezer for exactly those last minute guest situations, it bakes up straight from frozen in like 15 minutes. Game. Changer.

5 days ago

I made these with a 1:1 gluten free all purpose flour blend and they came out almost exactly like the regular version! Super happy I didn’t have to skip out on lava cake for my gluten sensitive sister’s birthday.

3 days ago

Thanks for sharing this! I’ve been nervous to try lava cake GF for my son, I’ll have to grab that 1:1 blend and test it out this weekend.

2 days ago

So glad the GF swap worked for you! We’ve tested this with a couple different 1:1 blends and they all hold up really well—no gritty texture or weird aftertaste at all.

just now

Just took my first bite and I’m speechless. I don’t even have a big sweet tooth but this is perfectly rich, not overly sweet, and that warm gooey center is everything. Worth every single calorie, no regrets.

3 days ago

I followed the recipe exactly but my centers were totally solid, no lava at all. Bummer because the flavor was amazing, I just missed that classic oozing middle.

2 days ago

Oh no, sorry to hear that! Oven temperatures can vary a ton—if you know your oven runs hot, shave 1-2 minutes off the bake time, and don’t be afraid to pull them when the edges look set even if the center feels jiggly. That jiggle is exactly the lava you’re looking for!

2 weeks ago

Made these for my Galentine’s Day brunch and they were the star of the show! I added a tiny dollop of raspberry compote in the center of each one before baking for a little fruity twist, and everyone went crazy for it.

1 week ago

Oh my gosh the raspberry compote idea is genius! The tartness would cut through the rich chocolate so perfectly, I’m definitely stealing that for my next batch.

5 days ago

That fruity twist sounds incredible! We love seeing fun customizations like that—we might have to test that raspberry version ourselves for a future recipe variation.

1 week ago

Tastes exactly like the lava cakes I used to get at that fancy chain restaurant back in the 90s! Total nostalgia trip. Super straightforward instructions, no fancy equipment needed, just a bowl, a whisk, and some ramekins.

3 days ago

I was just thinking the same thing! I’ve been chasing that exact restaurant lava cake taste for years and this recipe nails it. So much cheaper than going out too!

2 days ago

I was skeptical you could meal prep these but I made the batter ahead and kept it in the fridge for 2 days before baking, and they came out perfect! So great to have a fancy dessert ready to pop in the oven on busy weeknights.

yesterday

If you’re a chocolate lover, STOP SCROLLING and make this immediately. I used 70% cacao dark chocolate and it’s so rich, decadent, and literally melts in your mouth. Served with a little whipped cream and fresh berries, absolute perfection.

2 hours ago

70% cacao is the only way to go! I tried it with milk chocolate once and it was way too sweet for me, the dark chocolate gives it that perfect deep flavor.

30 minutes ago

Couldn’t agree more! The higher cacao content gives that rich, complex chocolate flavor that makes lava cake feel so luxurious. The fresh berries are such a nice fresh pairing too!

5 days ago

I don’t have ramekins so I used a muffin tin instead! It worked pretty well, just had to adjust the bake time down a couple minutes since the wells are smaller. Only complaint is they were a little harder to get out, but nothing a little extra butter couldn’t fix.

3 days ago

Great hack for folks who don’t have ramekins! Muffin tins work perfectly as a substitute, you’re totally right that you just need to shave a minute or two off the bake time since they’re smaller. So glad you made it work!

1 week ago

Made this as the first dessert my husband and I baked together in our new house, and it was such a fun little activity! The steps were easy enough for two total newbies to follow without messing up, and the end result was so romantic. We’ll be making this for years to come.

30 minutes ago

Wait why did I think lava cakes were some super fancy hard to make dessert? This recipe was so straightforward, I had all the ingredients in my pantry already, and it came out perfect on the first try. I’ll never pay $12 for a restaurant lava cake again!

5 minutes ago

Right?! The restaurant markup on these is insane. It costs like $2 total to make two at home, and they taste better than the ones I’ve gotten at most steakhouses.



