
coating chicken with cornstarch

title 1
coating chicken with cornstarch
⏱️ cook time 10 minutes
🍽️ servings 4
⚡ Difficulty easy

intro

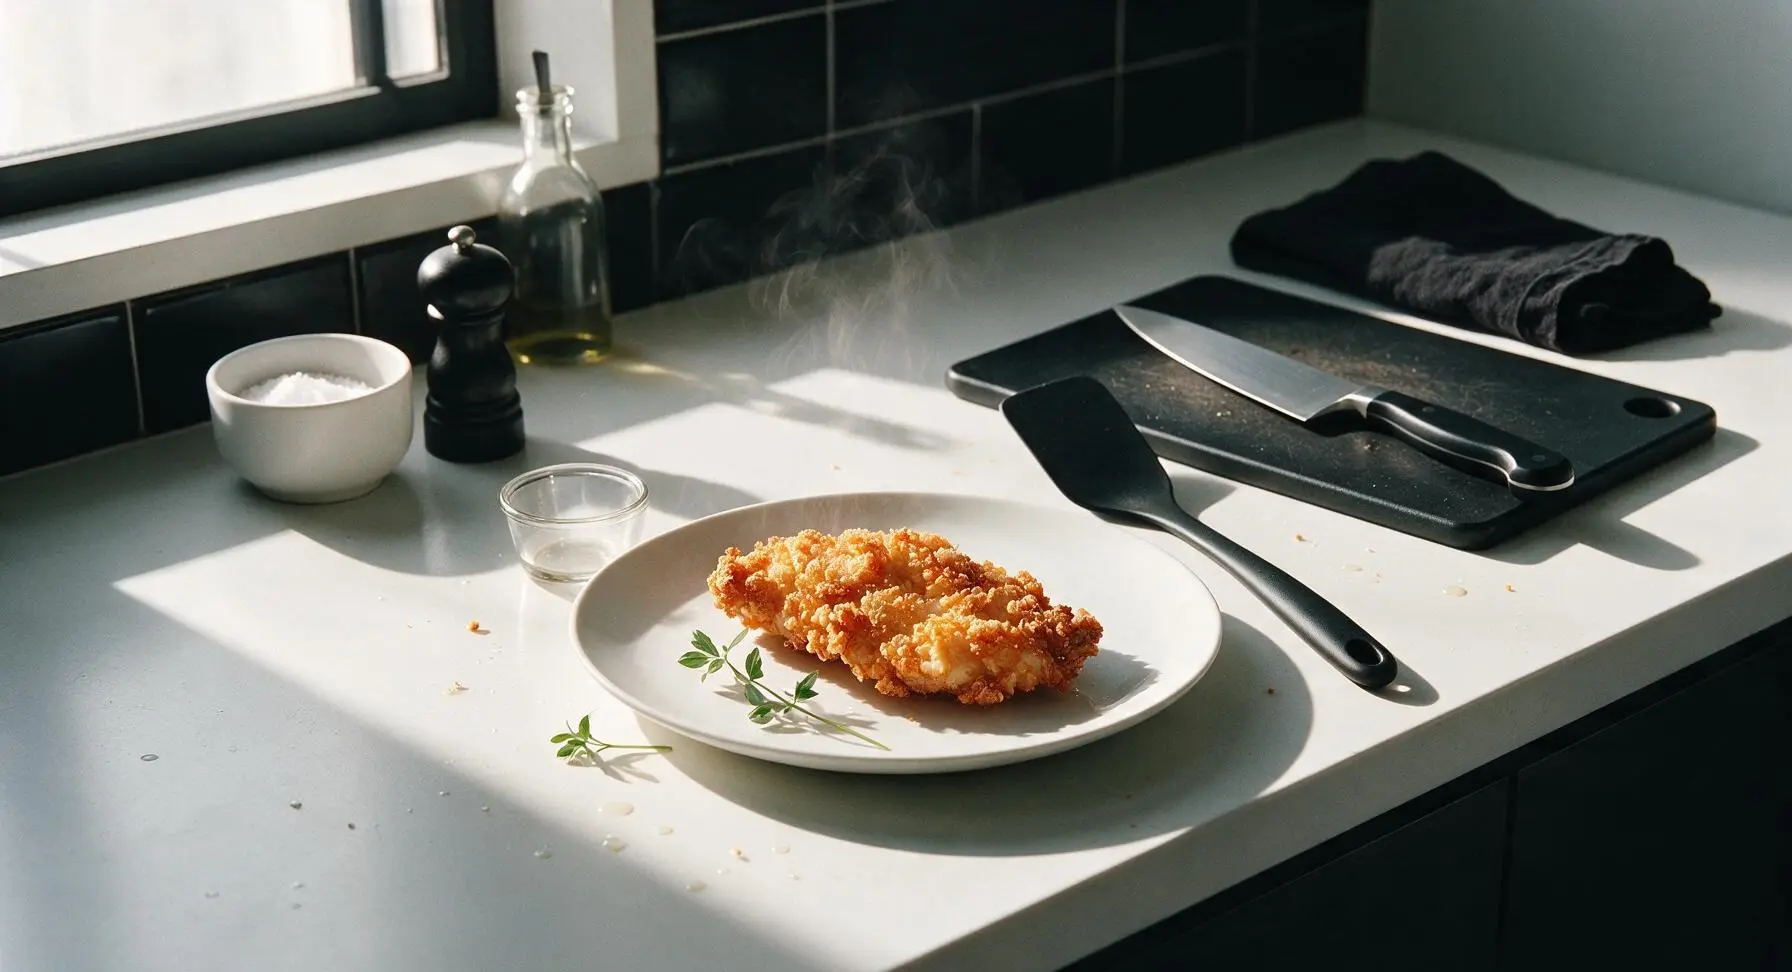
Master the classic cornstarch coating technique for shatteringly crisp, juicy chicken perfect for stir fries, orange chicken, and quick weeknight meals.

Ingredients
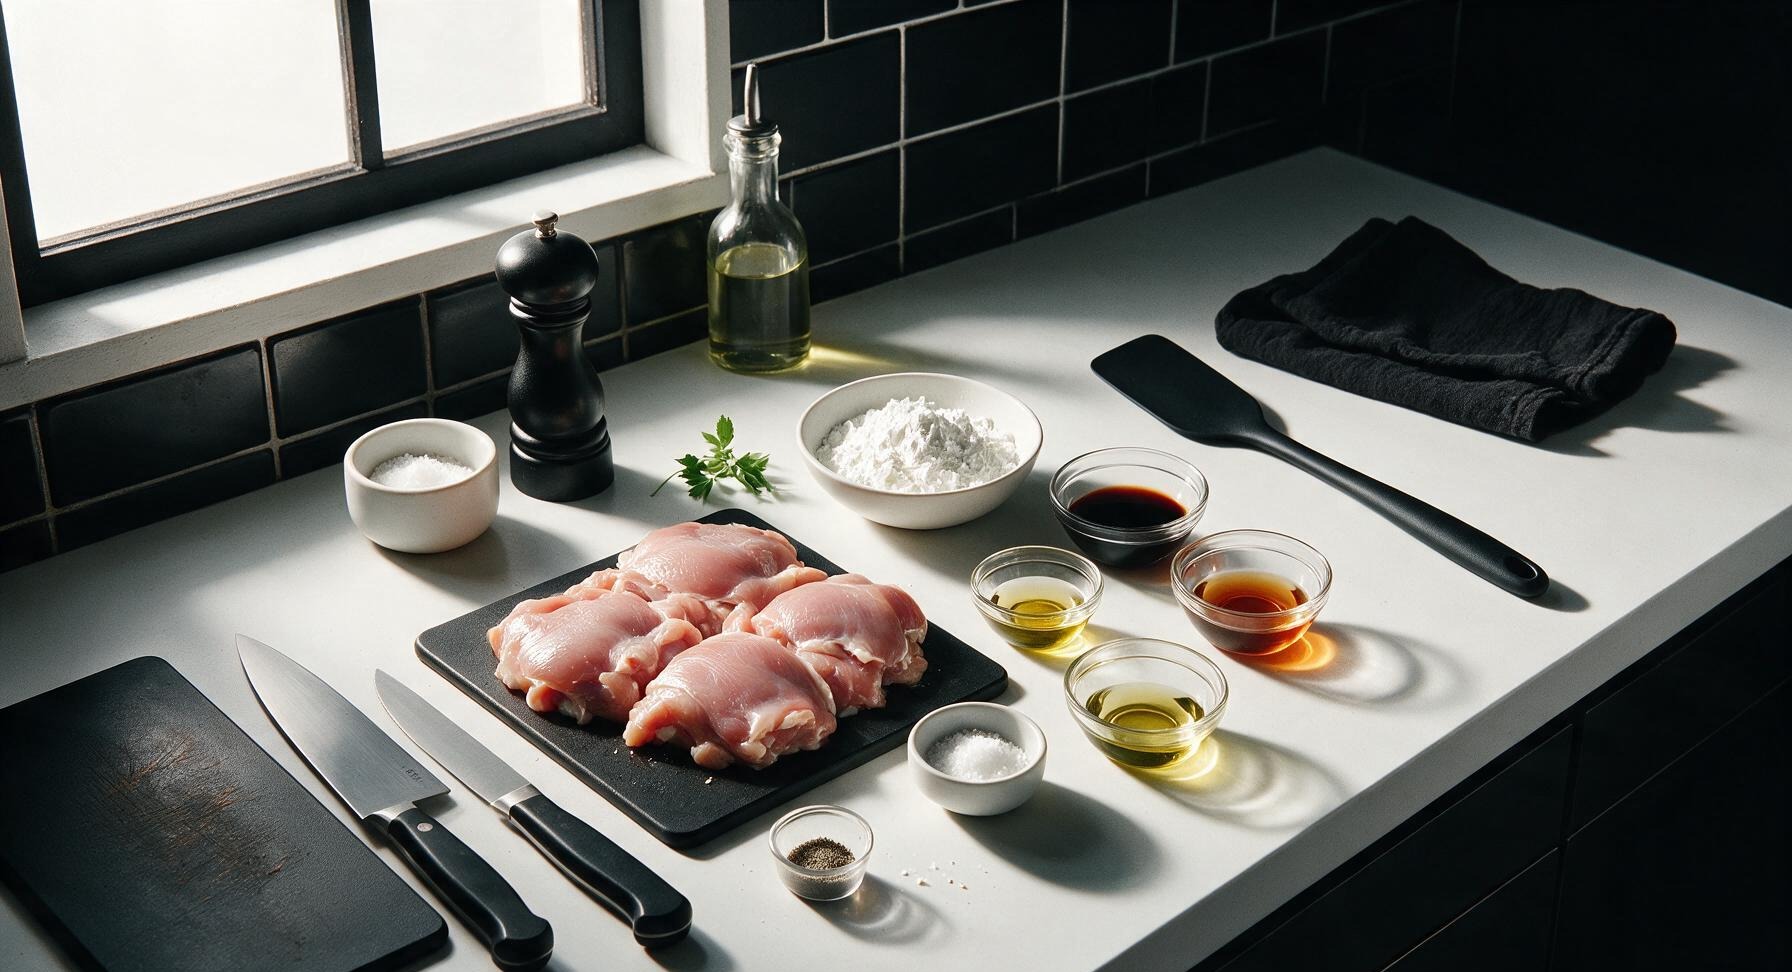
Boneless skinless chicken thighs 600g (about 4 large thighs)
Cornstarch 4 tablespoons (32g)
Low-sodium soy sauce 1 tablespoon (15ml)
Shaoxing rice wine 1 tablespoon (15ml)
Toasted sesame oil 1 teaspoon (5ml)
Fine sea salt 1/2 teaspoon
Ground white pepper 1/4 teaspoon
Neutral canola/avocado oil 2 tablespoons (30ml)

Steps

1

Trim and cut chicken

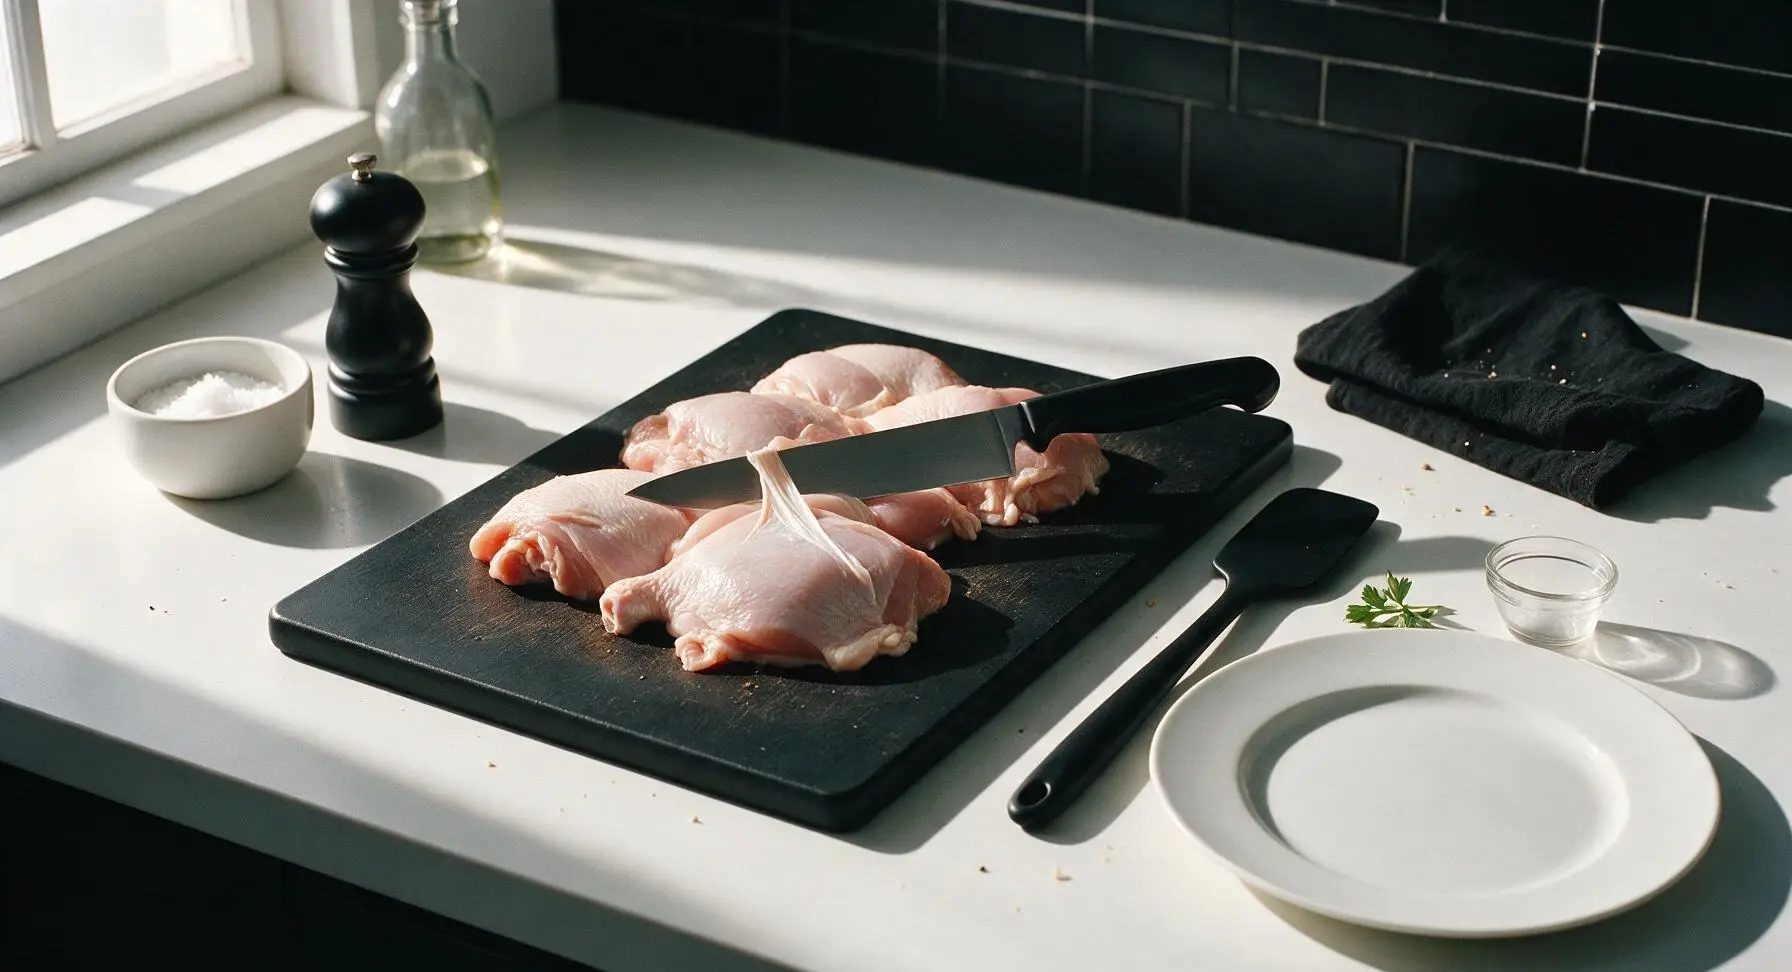
Place 600g boneless, skinless chicken thighs on the bamboo cutting board. Use the 7-inch santoku knife to trim off any excess hard fat or silver skin from the thighs, then cut into uniform 2.5cm (1-inch) bite-sized pieces. Uniform size ensures even coating and consistent cooking later; avoid cutting pieces larger than 2.5cm, as they will cook unevenly and the coating may burn before the chicken is done.
Step 1
step1:Trim and cut chicken
2

Pat chicken dry

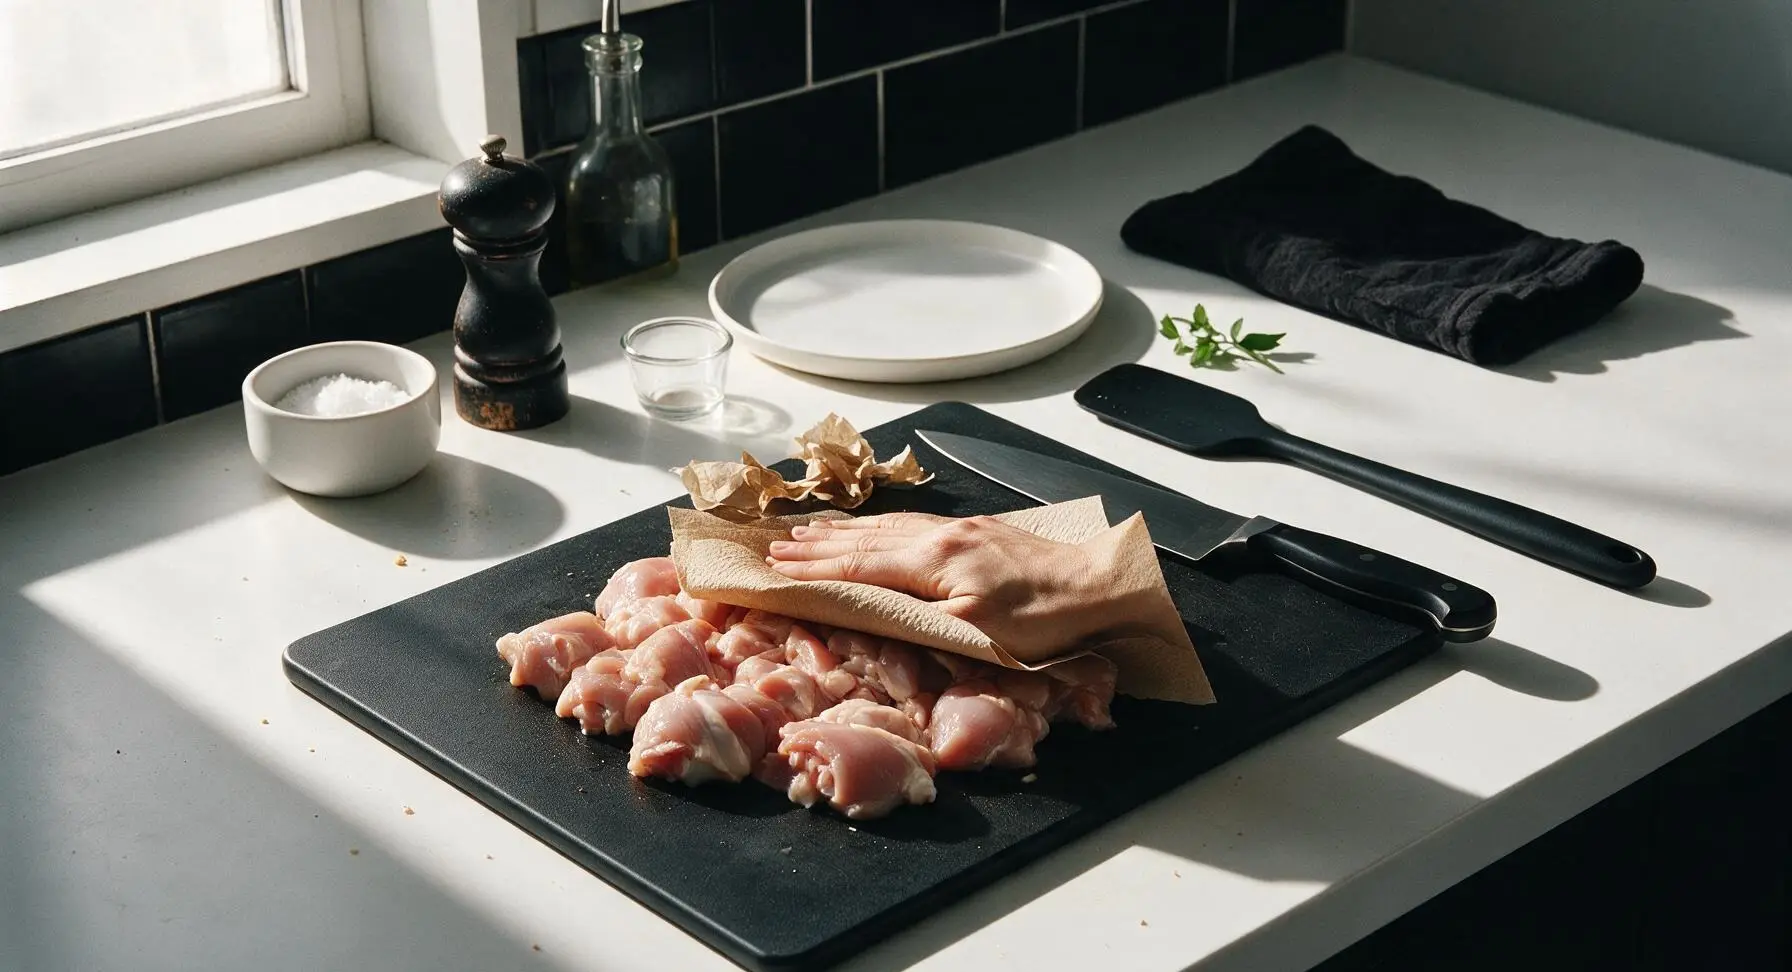
Tear 2-3 sheets from the unbleached paper towel roll to pat every surface of the cut chicken pieces thoroughly dry. Pay special attention to cut edges that release extra moisture; the chicken surface should feel completely dry to the touch, with no visible wet sheen, before moving to seasoning. Excess surface moisture is the top cause of clumpy, gummy cornstarch coating that slides off during cooking.
Step 2
step2:Pat chicken dry
3

Season chicken lightly

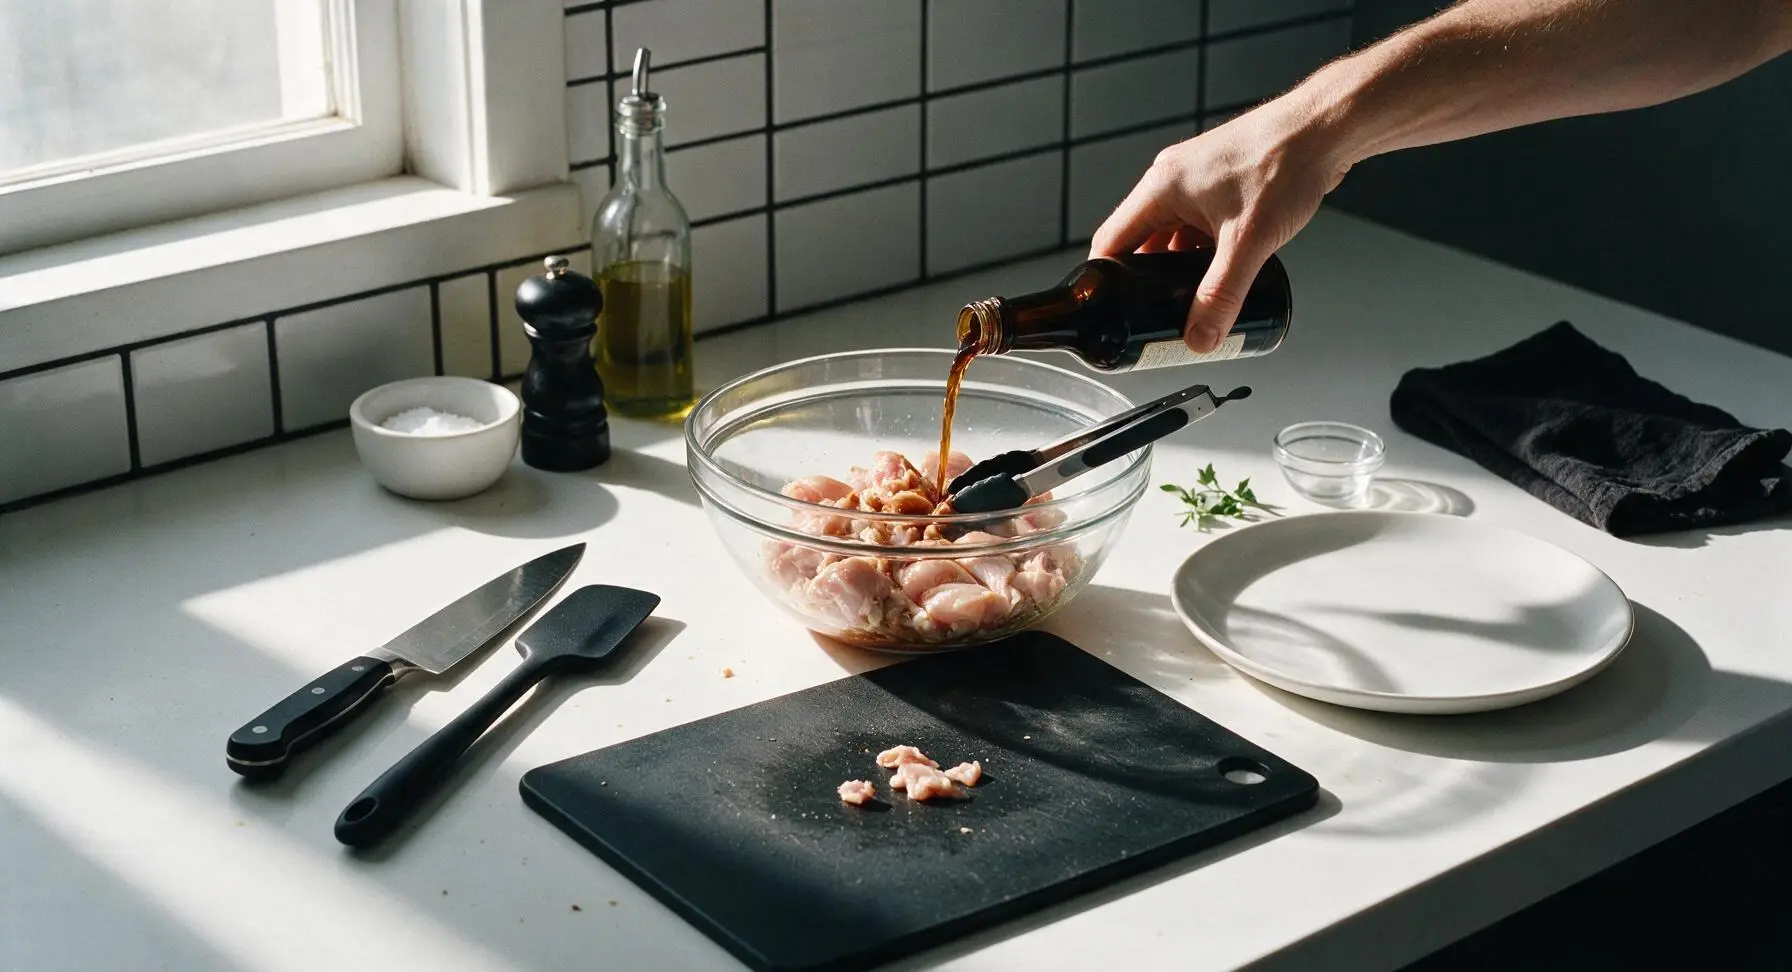
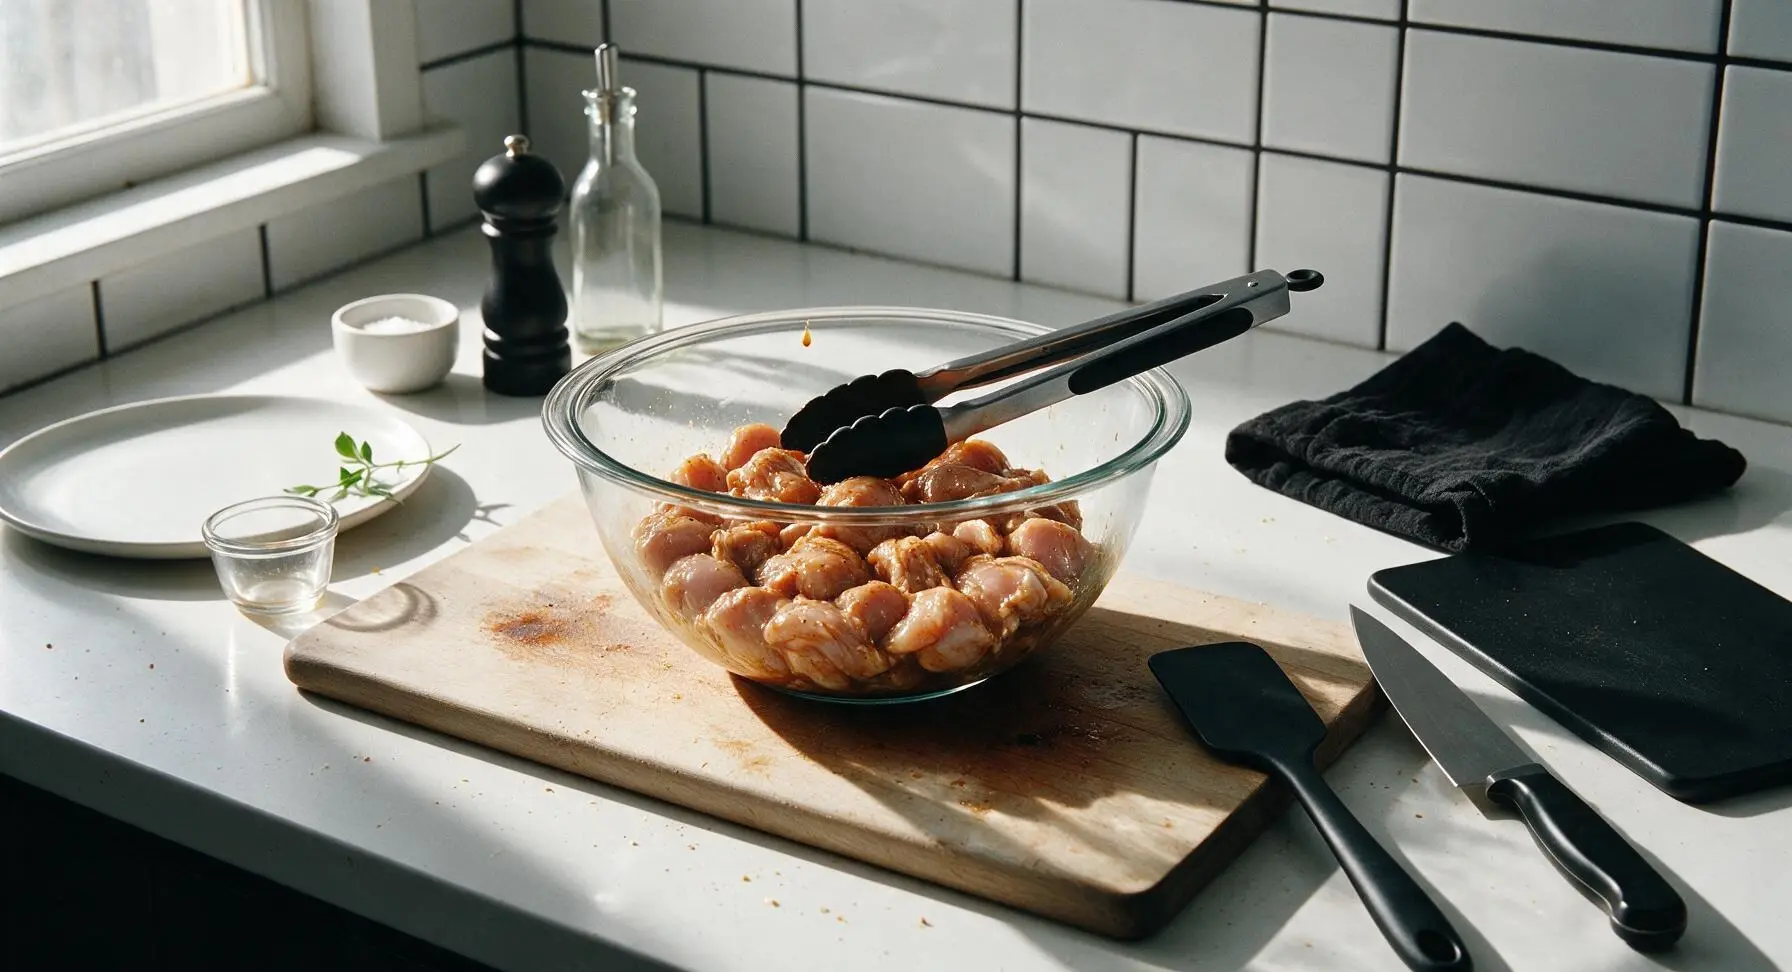
Transfer the dried chicken pieces to the clear borosilicate glass mixing bowl. Add 1 tablespoon low-sodium soy sauce, 1 tablespoon Shaoxing rice wine, 1 teaspoon toasted sesame oil, 1/2 teaspoon fine sea salt, and 1/4 teaspoon ground white pepper to the bowl. Use the silicone-tipped tongs to toss the chicken thoroughly for 30 seconds, until every piece is coated in a thin, glossy layer of seasoning. Let the seasoned chicken rest for 5 minutes at room temperature to absorb flavor; this thin seasoning layer helps cornstarch adhere evenly without creating clumps.
Step 3
step3:Season chicken lightly
Step 3
step3:Season chicken lightly
4

Sift cornstarch gradually

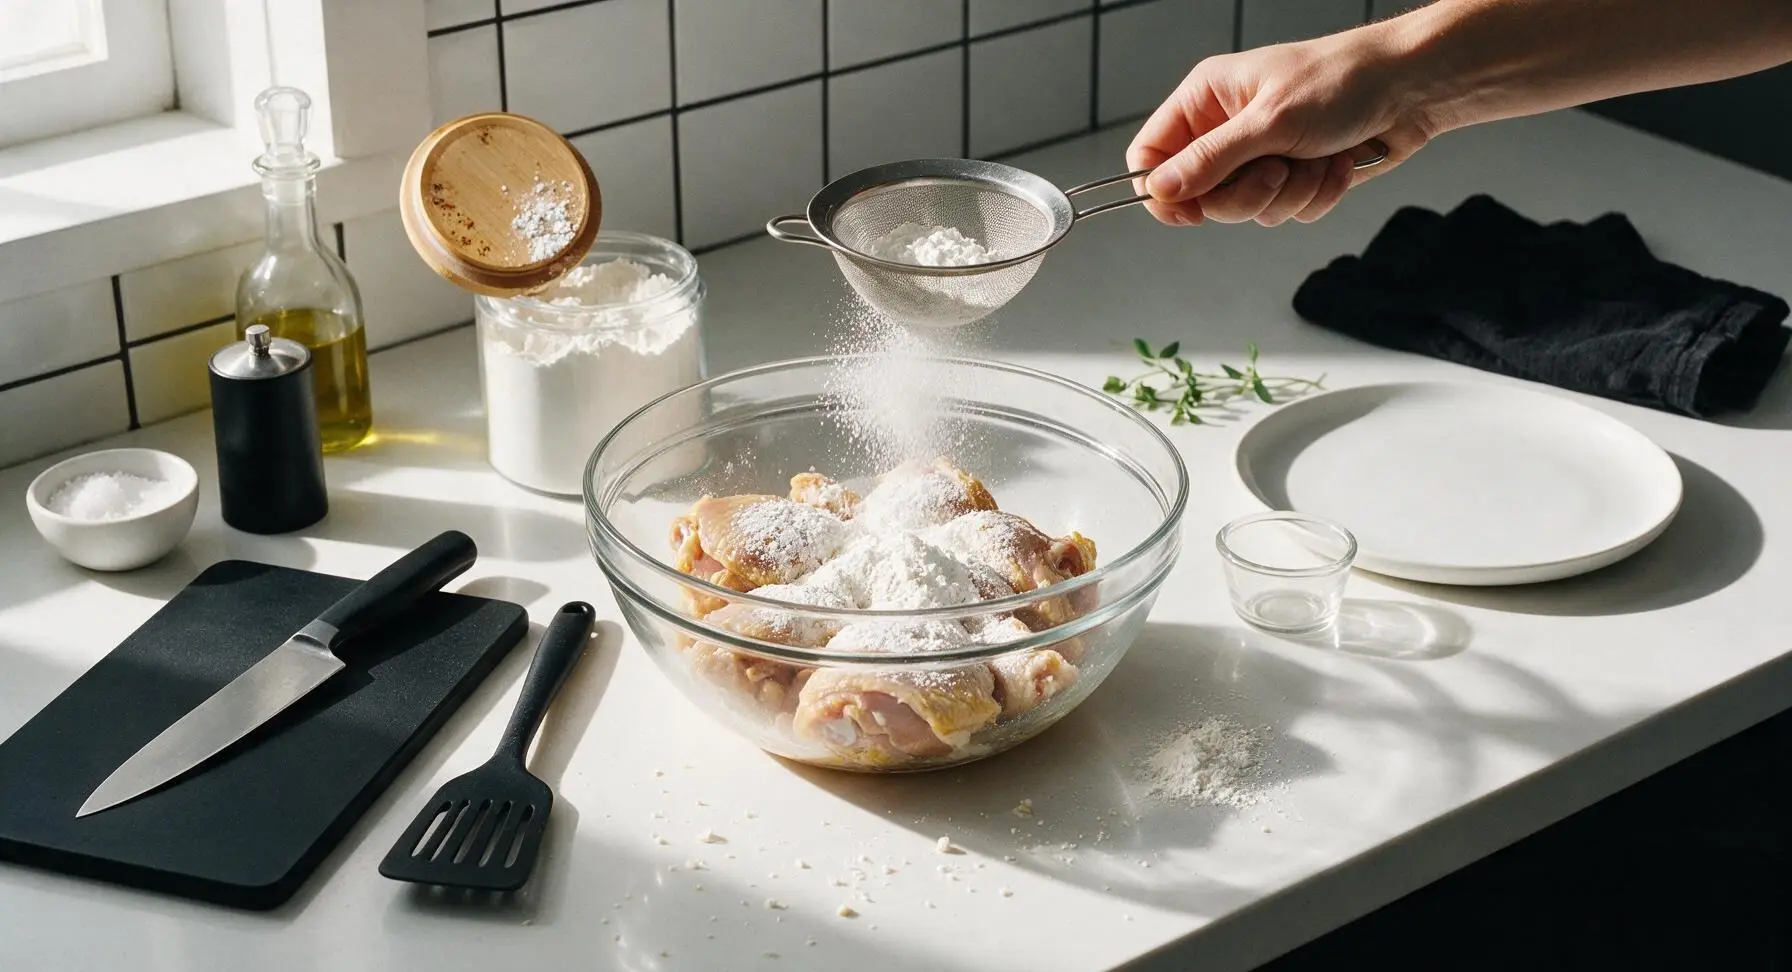
Measure 4 tablespoons (32g) of cornstarch from the glass storage canister. Hold the fine-mesh stainless steel strainer over the mixing bowl, add cornstarch in three batches (2 tablespoons first, then 1 tablespoon, then 1 final tablespoon), sifting a thin dusting of starch over the seasoned chicken and tossing well with tongs between each batch. Sifting breaks up any lumps in the cornstarch before it hits the chicken, preventing dry, starchy clumps in the finished coating.
Step 4
step4:Sift cornstarch gradually
5

Toss for even coating

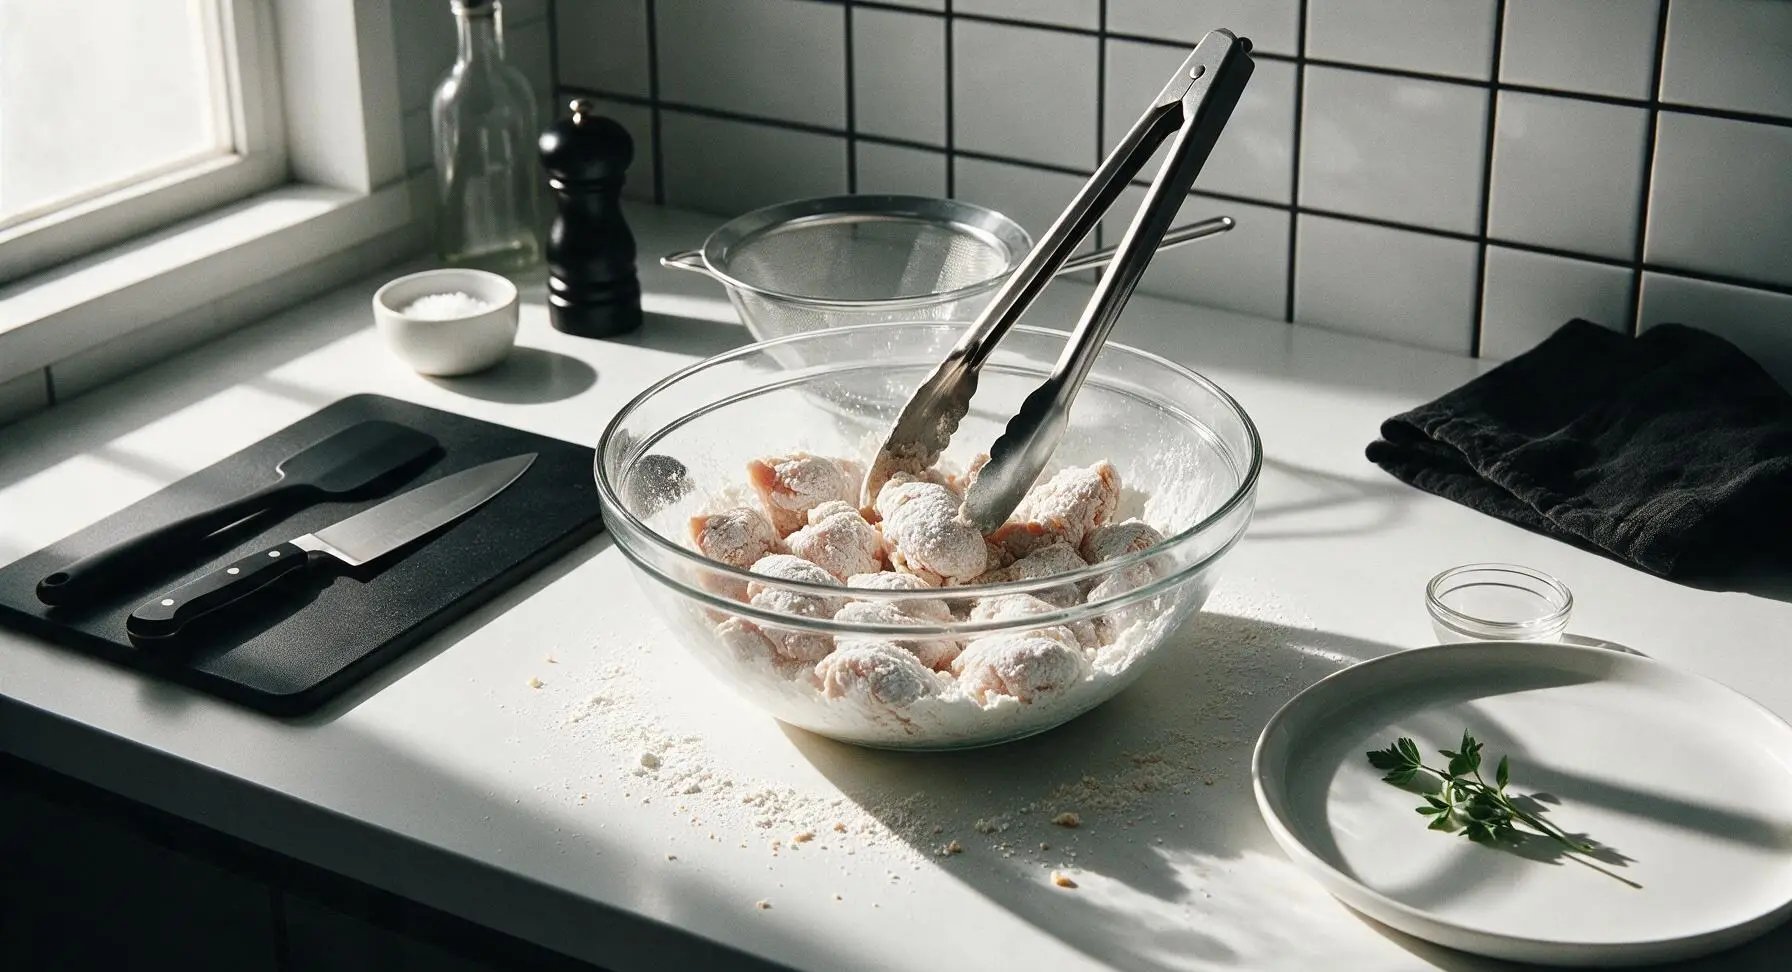
After all 4 tablespoons of cornstarch are added, continue tossing the chicken pieces with the tongs for 1 full minute, turning pieces from the bottom of the bowl to the top, until every piece is fully coated in a thin, matte white layer of cornstarch. There should be no dry, loose cornstarch left at the bottom of the bowl, and no bare pink chicken spots visible on any piece. If dry starch remains at the bowl bottom, spritz no more than 1/4 teaspoon of water over the pieces and toss again to help the starch adhere.
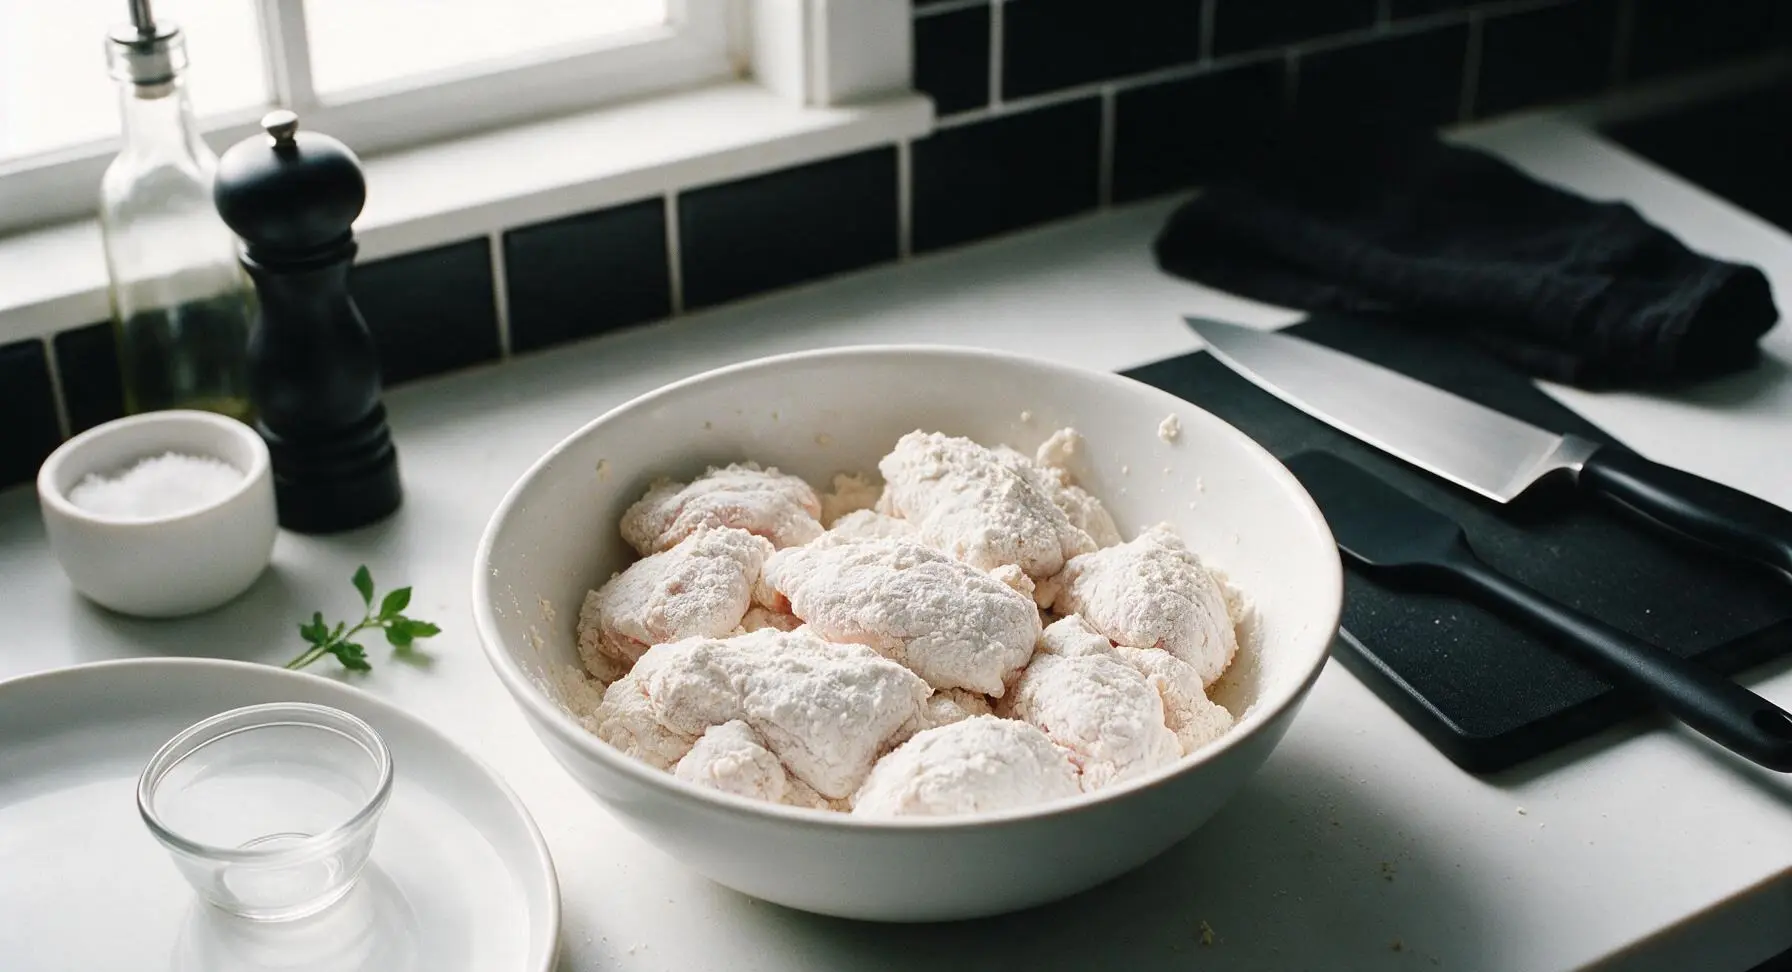
Step 5
step5:Toss for even coating
Step 5
step5:Toss for even coating
6

Let coating set

Leave the coated chicken pieces in the mixing bowl, uncovered, at room temperature for 5 minutes. This rest period lets the cornstarch absorb the thin layer of seasoning on the chicken surface, creating a tight, adherent coating that will not fall off during cooking, rather than a powdery layer that slides off when it hits hot oil. The coating will shift from bright chalky white to a slightly translucent, soft matte finish as it sets.
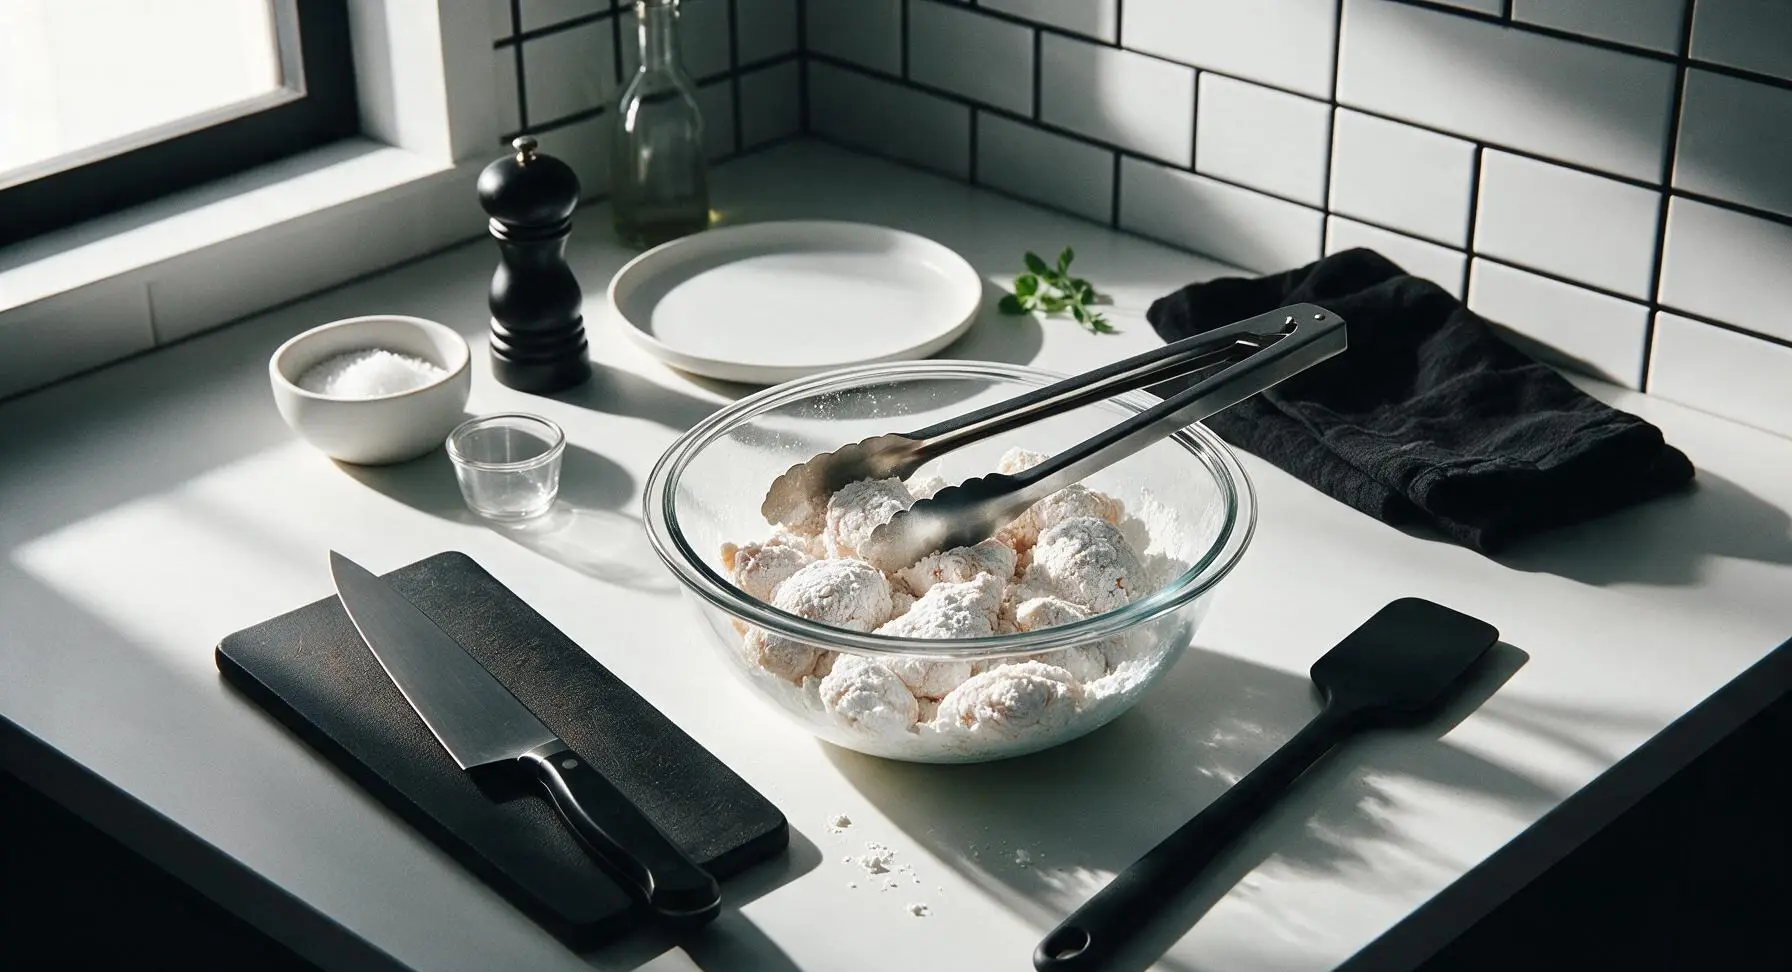
Step 6
step6:Let coating set
7

Sear to crisp finish

Retrieve a 24cm matte black seasoned carbon steel skillet and place it on the counter work surface. Heat 2 tablespoons of neutral cooking oil in the skillet over medium-high heat until the oil shimmers (approximately 175C/350F). Add the coated chicken pieces in a single layer, leaving 1cm of space between each piece, and cook for 3 minutes per side without moving, until the cornstarch coating turns golden, craggy, and crisp, and the chicken reaches an internal temperature of 75C/165F. Do not stir the chicken for the first 3 minutes, as this will tear the still-soft coating.
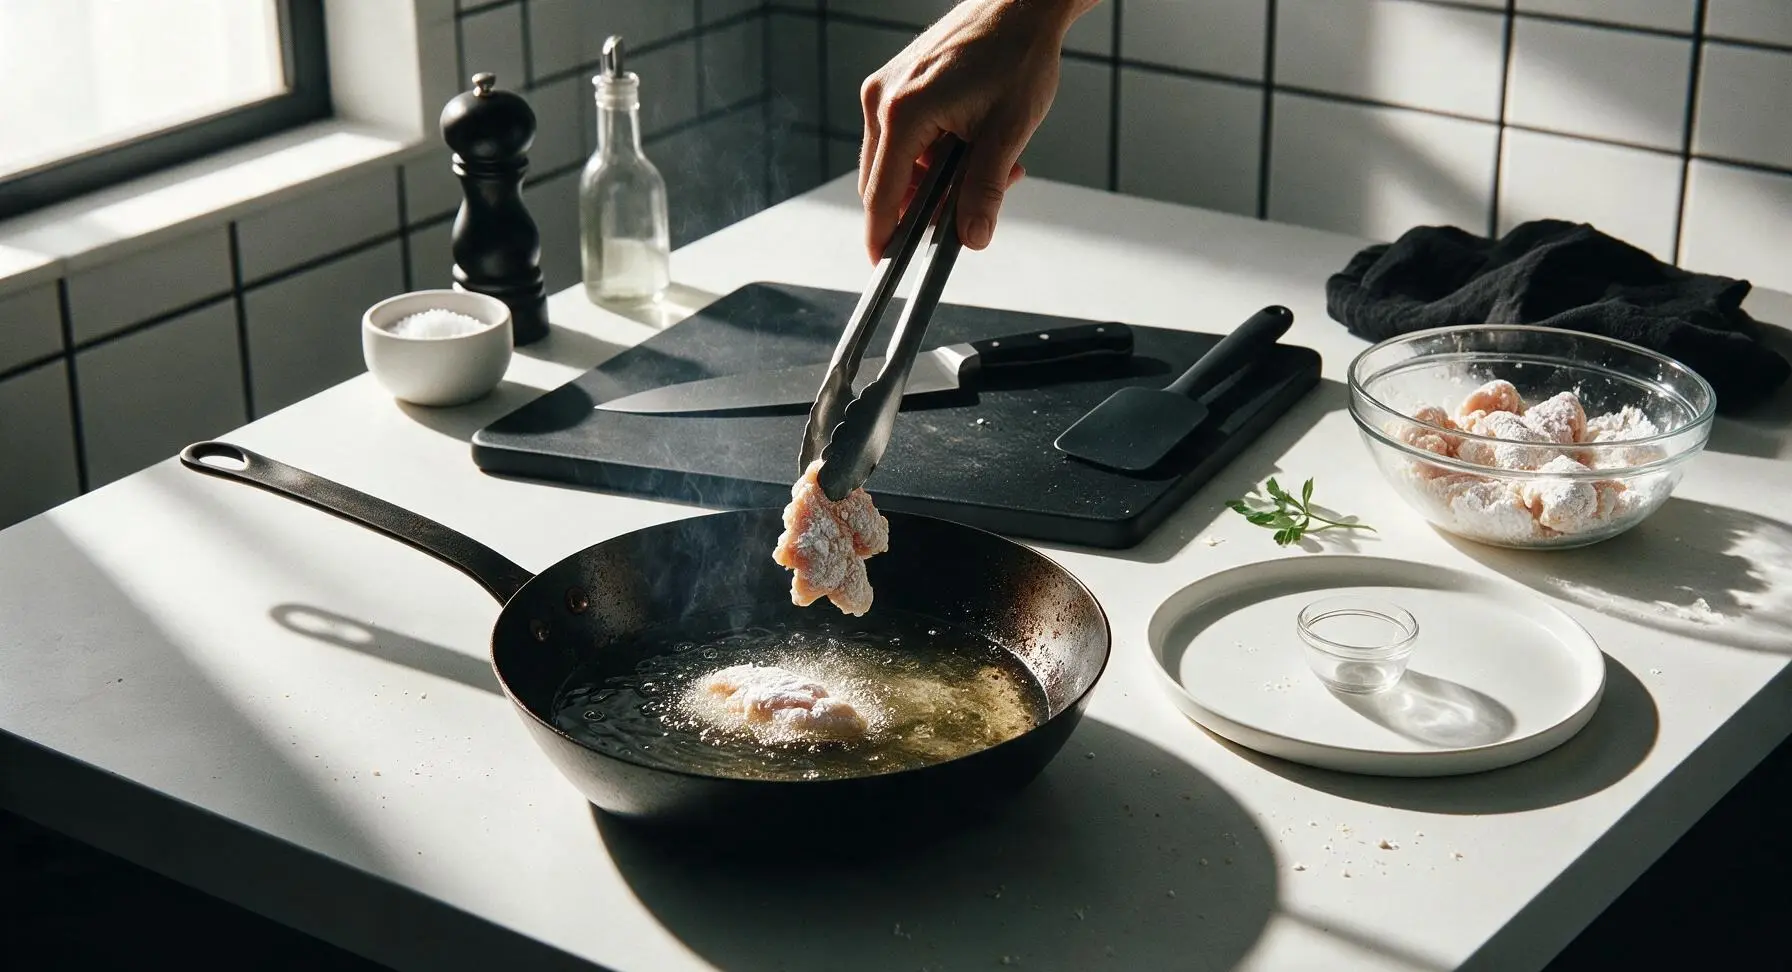
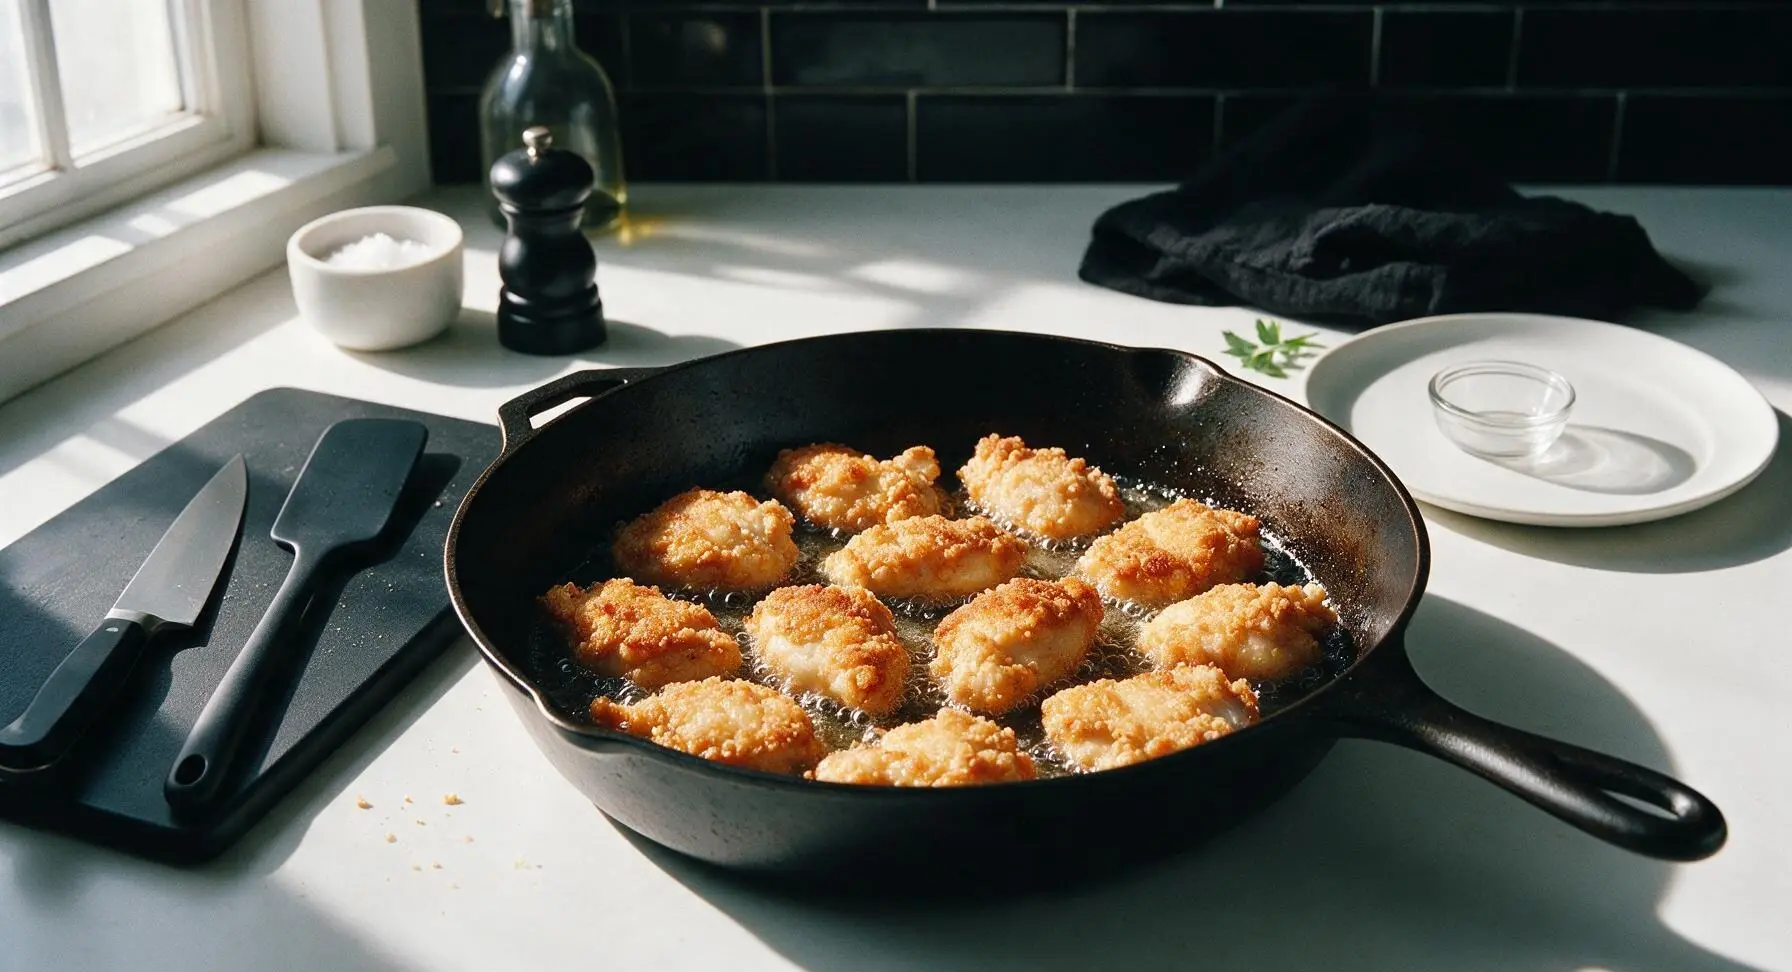
Step 7
step7:Sear to crisp finish
Step 7
step7:Sear to crisp finish
8

Plate and rest

Use the tongs to transfer the golden, crisp cooked chicken pieces to the waiting matte warm white ceramic dinner plate, piling them loosely. Let the chicken rest for 1 minute before serving, so excess oil drains slightly and the coating stays shatteringly crisp. The finished chicken will have a crunchy, textured cornstarch crust surrounding juicy, tender seasoned meat, perfect for tossing in sauce, adding to stir fries, or serving as is.
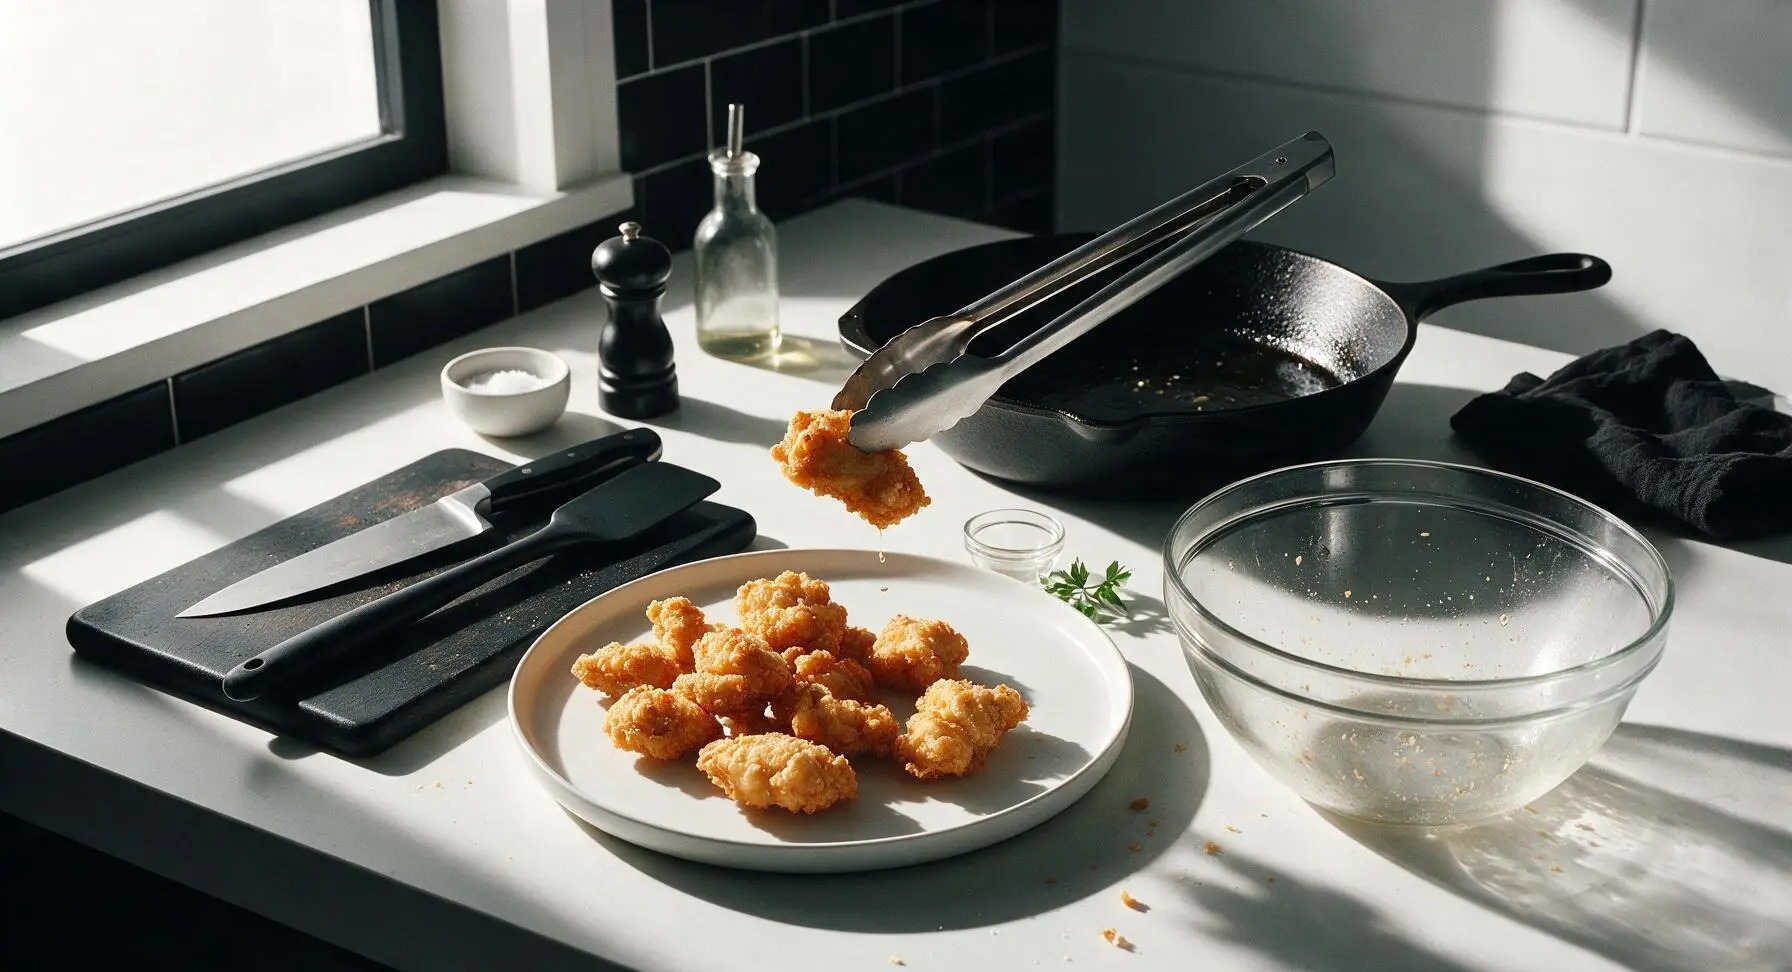
Step 8
step8:Plate and rest

Tips

1.Always pat chicken completely dry before seasoning: any residual moisture from packaging or thawing will turn cornstarch into a gummy paste instead of forming a light, crisp coating, and will cause the coating to slide off during cooking.
2.Add cornstarch in small batches and sift it over the chicken: dumping all starch at once creates dry clumps that won’t adhere evenly, leaving some pieces over-coated in thick starch and others bare.
3.Don’t move the chicken for the first 3 minutes of searing: the cornstarch coating needs time to set and crisp against the hot pan; stirring too early will tear the coating and leave it stuck to the pan instead of on the chicken.


✨ You May Also Like

Main Course
🍜 United Kingdom

A showstopping classic of tender seared beef, savory mushroom duxelles, and crisp prosciutto wrapped in flaky golden puff pastry, baked to juicy perfection.

⏱️ 2 hours 1Main Course ★ 4.7
Main Course
🍜 India

Tender charred marinated chicken simmered in a rich, spiced creamy tomato sauce, this iconic Anglo-Indian curry pairs perfectly with basmati rice or warm naan.

⏱️ 50 minuteMain Course ★ 4.6
Main Course
🍜 Thailand

Classic tangy, sweet, and savory Thai stir-fried rice noodles with shrimp, tofu, and crunchy garnishes, balancing all five core Thai flavor profiles.

⏱️ 30 minuteMain Course ★ 4.5
Main Course
🍜 United Kingdom

Crispy golden beer-battered cod and fluffy double-fried chips, served with tangy tartar sauce and malt vinegar: the timeless, beloved British pub comfort classic.

⏱️ 45 minuteMain Course ★ 4.7
Main Course
🍜 Mexico

Smoky, chile-marinated pork tacos with caramelized pineapple, fresh cilantro, and lime: a beloved classic Mexican street food perfect for casual summer gatherings.

⏱️ 1 hour 45Main Course ★ 4.8
Main Course
🍜 United States

Crunchy Fritos corn chips layered with savory beef chili and melted cheddar, topped with cool, zesty fixings for a beloved, cozy Tex-Mex comfort food.

⏱️ 35 minuteMain Course ★ 4.8

coating chicken with cornstarch:Frequently Asked Questions

1.Why does this recipe use boneless skinless chicken thighs instead of chicken breast? ▾
Boneless, skinless chicken thighs have a higher fat content than lean breast, so they stay juicy even after high-heat cooking and won’t dry out if you leave them on the heat a minute too long. Their slightly firmer texture also holds the cornstarch coating far better than delicate breast meat for consistent crispness on every bite.
2.Can I use chicken breast if that’s all I have on hand? ▾
Absolutely, just make two small tweaks for great results. Cut breast into uniform 1-inch pieces, toss with ¼ teaspoon of baking soda along with your marinade, and let it rest 15 minutes before coating to lock in moisture. Don’t overcook it—pull it once it hits 165°F internally to keep it from getting tough.
3.Do I need to track down Shaoxing rice wine, or is there an easy substitute? ▾
Shaoxing rice wine adds a deep, savory, slightly sweet umami depth that cuts through richness, but if you don’t have it, dry sherry is the closest flavor match. Avoid using sweet mirin here unless you cut back on added sweeteners in your final dish, as it will throw off the overall flavor balance.
4.Why do you call for low-sodium soy sauce instead of regular? ▾
Low-sodium soy sauce lets you control the total salt level of the dish without sacrificing that classic savory umami soy flavor. Regular soy sauce is often salty enough to make the finished chicken overly briny, especially if you plan to toss it in a salty stir-fry or orange chicken sauce later. If you only have regular, cut the amount by 25% to compensate.
5.What size should I cut the chicken for the best crisp and texture? ▾
Aim for uniform 1-inch cubes across every piece of chicken. This size cooks quickly enough that the cornstarch coating gets perfectly golden and crisp before the chicken overcooks, and it’s the ideal bite size for tossing in stir fries, orange chicken sauce, or serving as a quick standalone weeknight protein.
6.How long should I marinate the chicken before coating it in cornstarch? ▾
You only need 15 to 20 minutes of marinating time at room temperature for the soy, Shaoxing wine, and sesame oil to penetrate the chicken and add flavor. Don’t marinate longer than 1 hour in the fridge, because excess marinade liquid will make the cornstarch coating gummy instead of shatteringly crisp when cooked.
7.How much cornstarch do I need to get that signature crispy coating? ▾
For 1 pound of chicken thighs, you’ll need roughly ¾ cup of cornstarch, added a tablespoon at a time, until every piece is evenly coated with a dry, matte, powdery layer. You don’t want any wet, sticky spots left on the chicken, because those spots will turn soggy instead of crisping up during cooking.
8.Should I press the cornstarch firmly into the chicken, or just toss it lightly? ▾
Give the cornstarch a light press into each piece after tossing to help it adhere, but don’t pack it on thickly. A thin, even layer that sticks to the marinated chicken surface is what creates that shatteringly crisp crust—thick, packed cornstarch will turn hard and doughy instead of light and crispy when cooked.
9.Can I let the cornstarch-coated chicken rest before cooking, or do I need to cook it immediately? ▾
You can let coated chicken rest on a wire rack for up to 20 minutes before cooking, which actually helps the cornstarch adhere better and reduces coating fall-off during cooking. Don’t let it rest longer than 30 minutes, though, because the cornstarch will absorb too much moisture from the chicken and turn gummy when cooked.
10.What type of oil works best for cooking this chicken to maximize crispness? ▾
Use a neutral, high-smoke-point oil like canola, vegetable, peanut, or avocado oil for cooking. Heat it to 350°F before adding the chicken—if the oil is too cool, the coating will absorb excess oil and turn soggy, but over 375°F, the cornstarch will burn before the chicken cooks through to a juicy center.
11.Can I bake this cornstarch chicken instead of frying it for a lighter option? ▾
Yes, you can get great crispness in the oven! Arrange coated chicken pieces in a single layer on a wire rack set over a baking sheet, spray generously with oil, and bake at 425°F for 18 to 20 minutes, flipping halfway through. The elevated rack lets air circulate so the coating crisps instead of getting soggy on the pan.
12.Why is my cornstarch coating falling off the chicken when I cook it? ▾
Coating fall-off usually happens for one of three reasons: your oil wasn’t hot enough when you added the chicken, you overcrowded the pan which dropped the oil temperature too fast, or you didn’t let the coated chicken rest a few minutes to let the starch adhere. Work in small batches and don’t stir for the first 2 minutes to let the crust set.
13.Why is my finished coating chewy instead of shatteringly crisp? ▾
Chewy coating almost always traces back to excess moisture. Either you didn’t let excess marinade drip off the chicken before coating, you used too little cornstarch leaving wet spots, or you cooked the chicken at too low a temperature so the starch didn’t set properly. Make sure coated pieces have a dry, matte powdery finish before hitting hot oil.
14.Can I freeze the coated, uncooked chicken for quick future weeknight meals? ▾
Absolutely! Arrange the coated, uncooked chicken pieces in a single layer on a baking sheet, freeze until solid, then transfer to a freezer bag for up to 3 months. Cook straight from frozen at 350°F (no thawing needed) for 5 to 7 minutes, until cooked through and crisp, for a super fast meal prep protein.
15.How do I reheat leftover cooked chicken so it stays crispy instead of soggy? ▾
Skip the microwave, which will turn the coating gummy and rubbery. Instead, spread leftover chicken in a single layer on a baking sheet and reheat in a 400°F oven for 6 to 8 minutes, or air fry at 375°F for 3 to 4 minutes, until the coating is crisp again and the chicken is heated through. Toss with sauce right after reheating.
16.Is toasted sesame oil necessary, or can I use regular sesame oil? ▾
Toasted sesame oil has a deep, nutty, rich aroma that untoasted regular sesame oil lacks, so it adds far more flavor to the marinade with just a small amount. If you only have regular sesame oil, you can use it, but add a tiny pinch of toasted white sesame seeds to your final dish to make up for that missing nutty depth. Never use it as your frying oil, since it has a low smoke point.
17.What dishes pair best with this crispy cornstarch-coated chicken? ▾
This crispy chicken is incredibly versatile! It’s the perfect base for takeout-style orange chicken, lemon chicken, or General Tso’s chicken, works beautifully tossed into colorful veggie stir fries, can be served over steamed rice with a quick drizzle of chili crisp, or even eaten plain as a high-protein, kid-friendly weeknight dinner option.

Comments (6)

1 week ago

This recipe is so easy I almost didn’t believe it would turn out! I made it for my church potluck last Sunday, cut the chicken into bite-sized pieces, and served it with a little honey mustard dip on the side. I had three people come up to me asking for the recipe before we even got to dessert. 10/10, will be in my regular rotation forever.

5 days ago

The honey mustard dip idea is genius! I made these as tenders for my kid’s birthday party last weekend and served them with ranch, but honey mustard would be such a good swap for next time. So glad I’m not the only one who thinks this is the easiest weeknight chicken ever.

3 days ago

Tried this last night for my weekly grill night but cooked it on the cast iron out on the patio instead of inside, and wow. That cornstarch coating gets so much crispier than regular flour, no soggy spots even when I tossed it in a little buffalo sauce after cooking. Will absolutely be making this for our next game day watch party. SO good.

2 days ago

OMG this chicken is a total game changer! I threw this together last night for family dinner when I forgot to thaw anything else, and my 3 kids who normally turn their nose up at any chicken that isn’t dinosaur-shaped nuggets asked for SECONDS. So crispy even without deep frying? I’m shook. 10 minute cook time is no joke too, perfect for chaotic weeknights.

yesterday

Right?! I made this for my teen’s soccer team potluck last weekend and every single piece was gone in 10 minutes. People kept asking me for the recipe! I added a little paprika to the cornstarch coating for extra kick, chef’s kiss.

yesterday

So happy this was a hit with your kids and at the potluck! Love the paprika add-in idea — a little smoked paprika or garlic powder in the coating works so well for extra flavor without ruining that crispy crunch.

yesterday

Wait, I tried this earlier and my coating kept falling off the chicken? Did I do something wrong? I patted the chicken dry like I thought you were supposed to, but half the cornstarch sloughed off when I put it in the pan. Flavor was good when I got the crispy bits though, so I wanna give it another shot.

2 hours ago

I had that happen the first time too! Turns out I had my pan heat too low, so the coating didn’t set right away. Make sure your oil is shimmering hot before you lay the chicken down, and don’t move it around for the first 3 minutes — that helped me so much!

30 minutes ago

Sam is spot on! The two biggest culprits for falling-off coating are oil that isn’t hot enough, and moving the chicken too early. You also want to make sure you’re not crowding the pan, which drops the oil temp fast. Give it another try with those tips and I bet it turns out perfectly!

2 hours ago

Made this for dinner last night and it was amazing! Quick question though — does this hold up well for meal prep? I usually portion out proteins on Sunday to eat for lunches all week, and I hate when chicken gets soggy in the fridge. Would this stay crispy if I reheat it in the air fryer for a couple minutes?

5 minutes ago

Great question! This actually holds up way better than flour-coated chicken for meal prep. If you store it in an airtight container with a paper towel to absorb excess moisture, then reheat it in the air fryer at 375F for 3-4 minutes, it’ll get almost as crispy as the day you made it. Hope that helps!

just now

Y’all, if you haven’t tried tossing this crispy cornstarch chicken in a little sweet chili sauce right after it comes out of the pan, you are MISSING OUT. The crunch stays perfectly crisp even coated in sauce, and that sweet-spicy combo is unreal. I’ll admit I ate half the batch straight out of the skillet standing over the stove last night, zero regrets. No fancy ingredients, 10 minute cook time, perfect for when I don’t feel like putting in a ton of effort for dinner. 10/10.



