
crispy chilli chicken

title 1
crispy chilli chicken
⏱️ cook time 15 minutes
🍽️ servings 4
⚡ Difficulty medium

intro

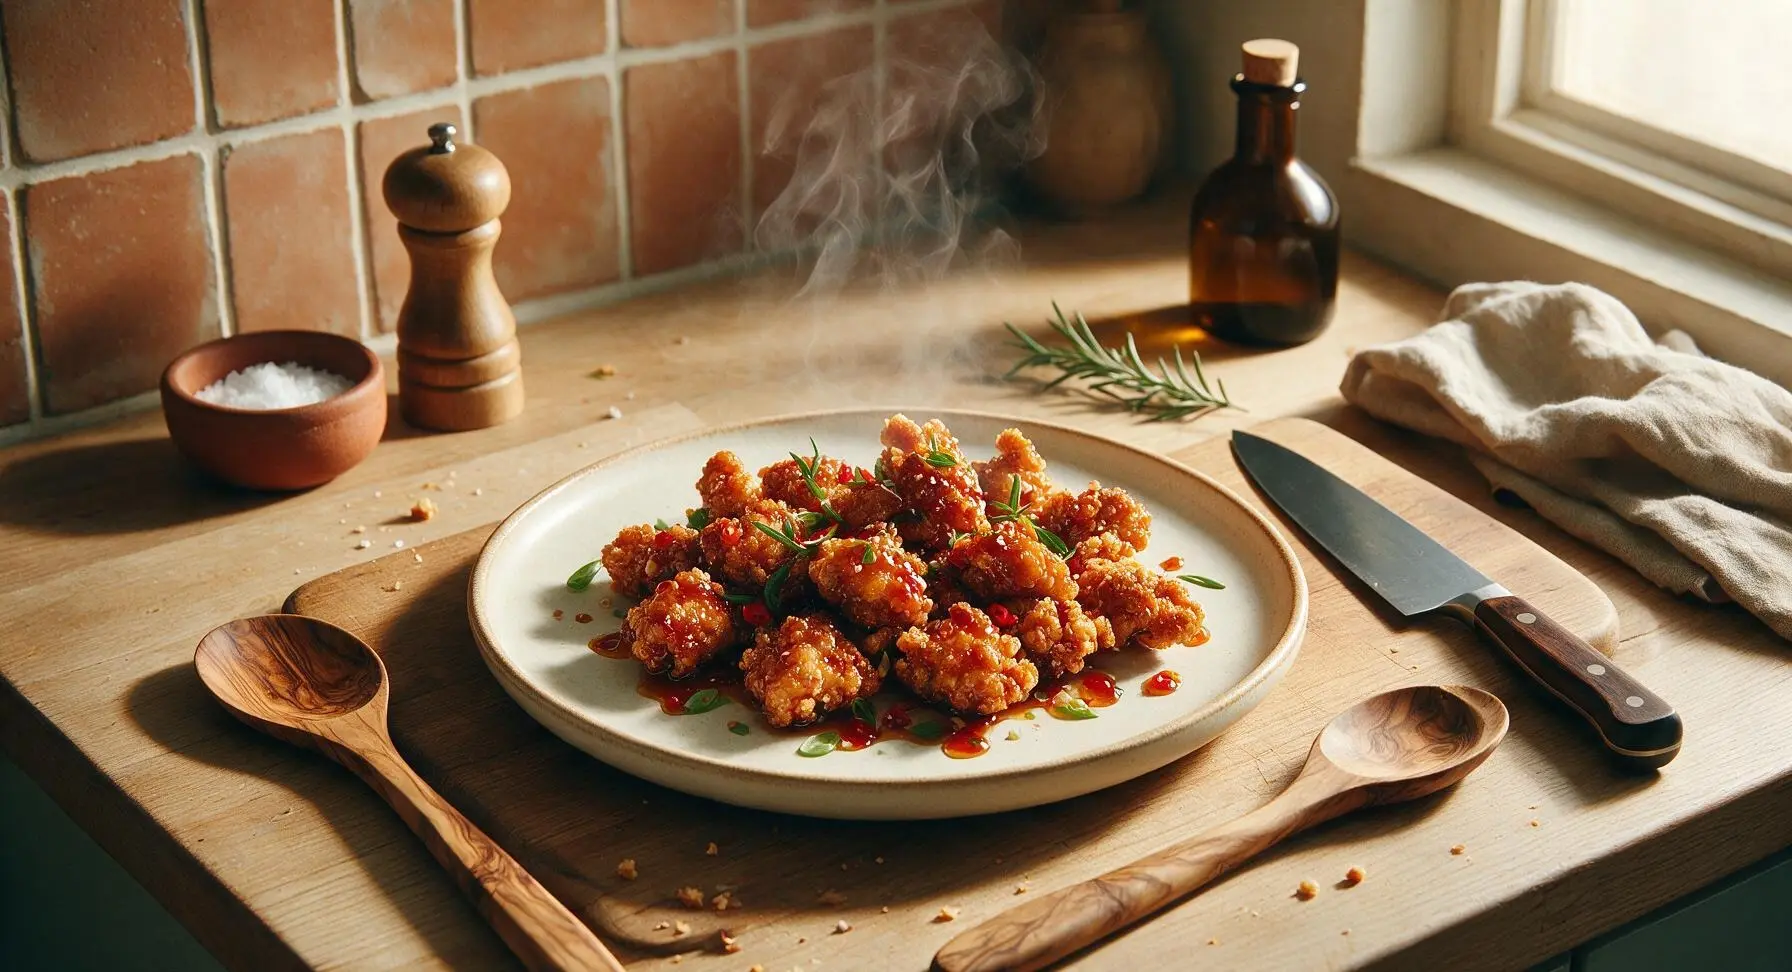
Shatteringly crisp bite-sized chicken tossed in a sticky, tangy-sweet chilli glaze, this beloved takeout classic delivers bold, spicy flavor in under 40 minutes.

Ingredients
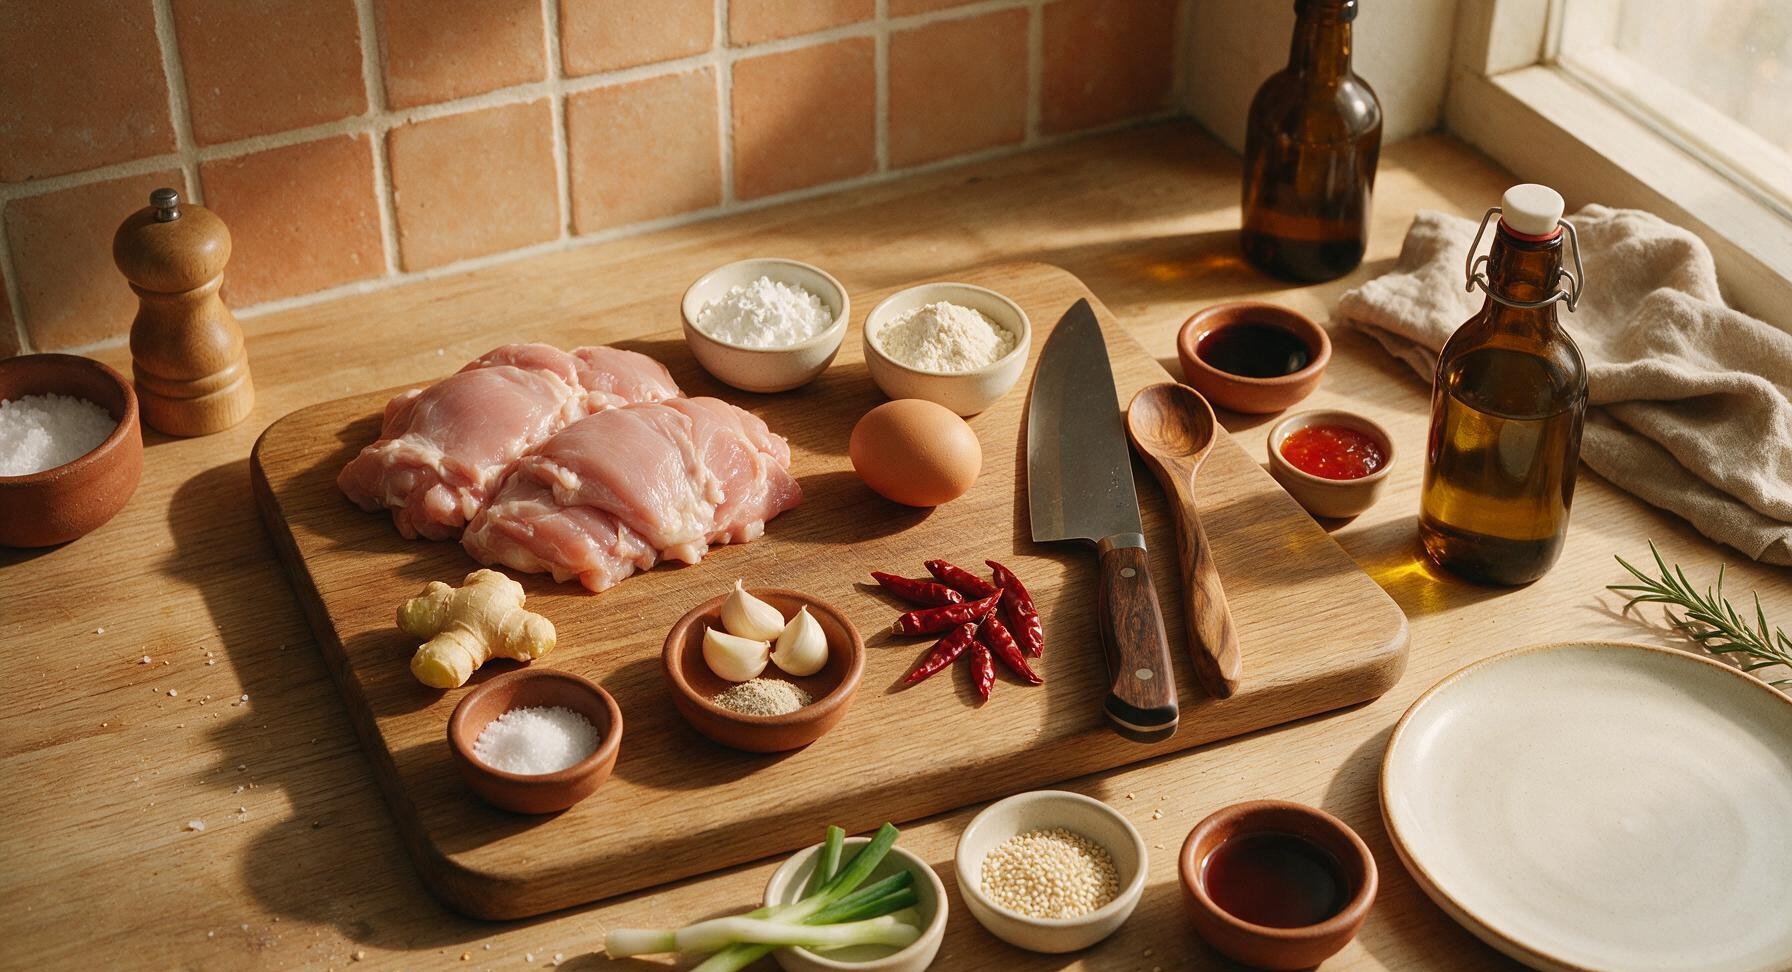
Boneless skinless chicken thighs 500g
Cornstarch 60g
All-purpose flour 30g
Large egg 1 count
Light soy sauce 3 tbsp (45ml)
Sweet chilli sauce 2 tbsp (30ml)
Rice vinegar 1 tbsp (15ml)
Fresh garlic 4 cloves (15g)
Fresh ginger 1 inch piece (10g)
Dried red chillies 6 pieces
Spring onions (scallions) 3 stalks
Toasted white sesame seeds 1 tsp
Neutral cooking oil (canola/peanut) 500ml (for frying)
Salt 1 tsp
Ground white pepper 1/2 tsp

Steps

1

Cut and prep chicken

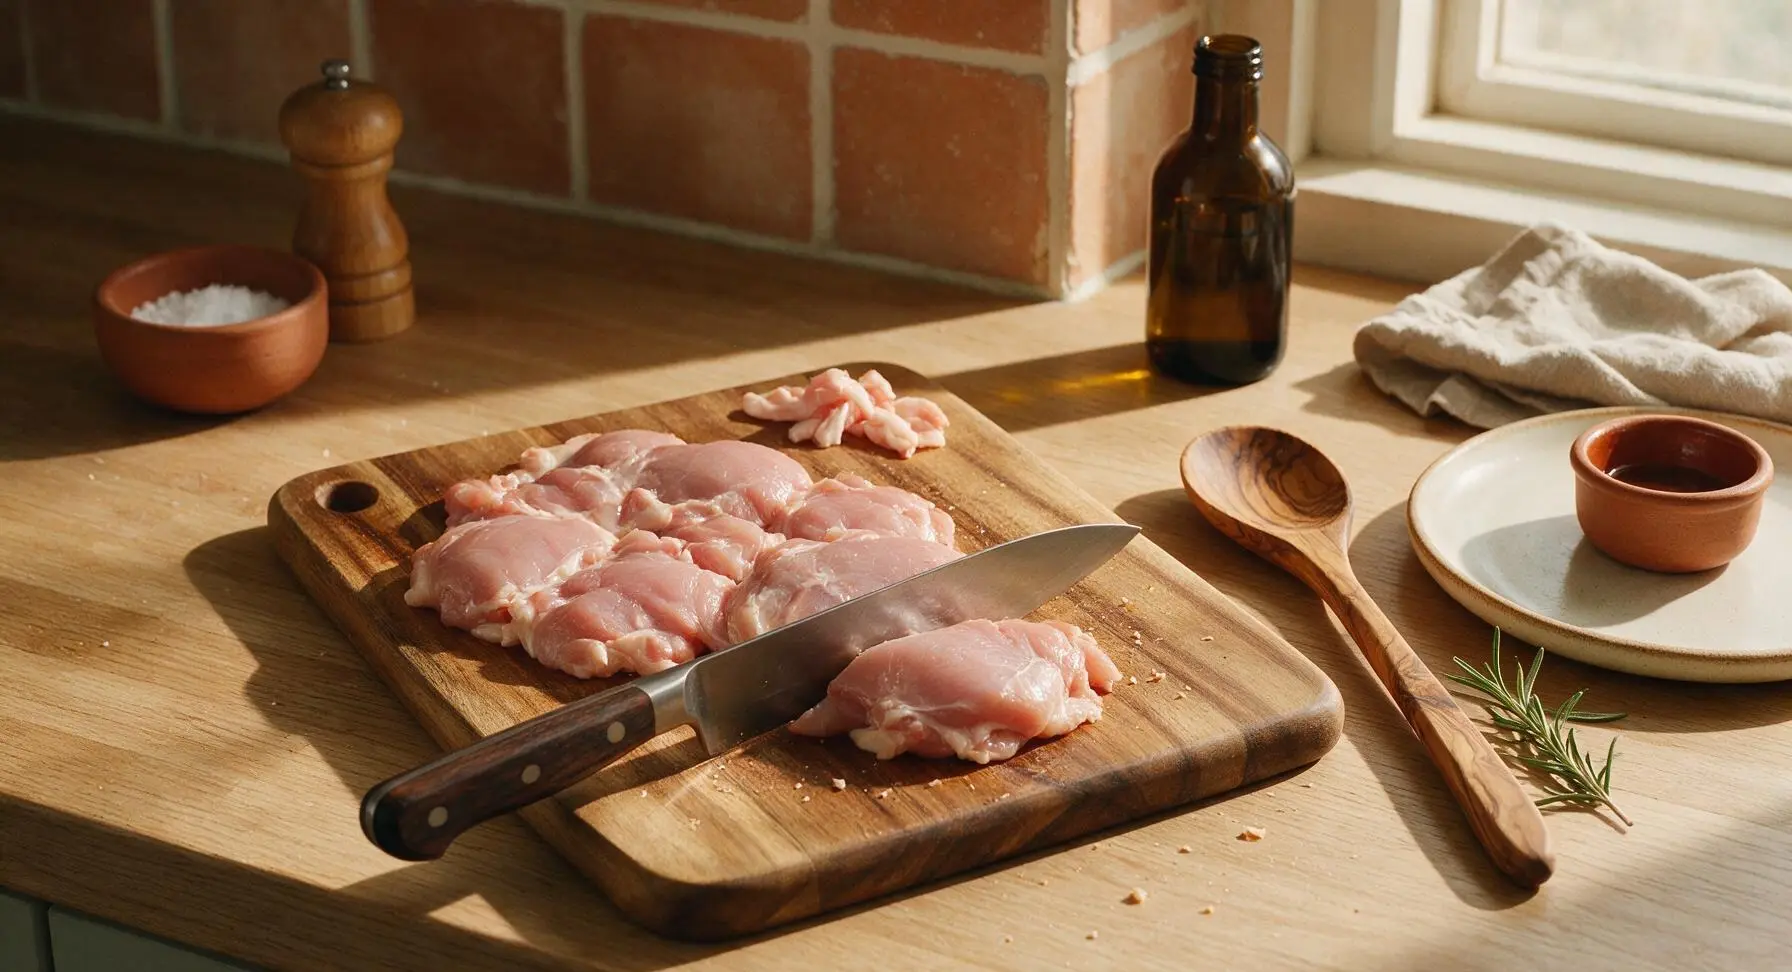
Place 500g boneless skinless chicken thighs on the acacia wood cutting board. Use the 8-inch chef knife to trim any excess fat or silver skin, then cut into uniform 3cm bite-sized pieces. Pat chicken pieces completely dry with paper towel to reduce oil splatter and encourage a crispier crust during frying.
Step 1
step1:Cut and prep chicken
2

Marinate chicken pieces

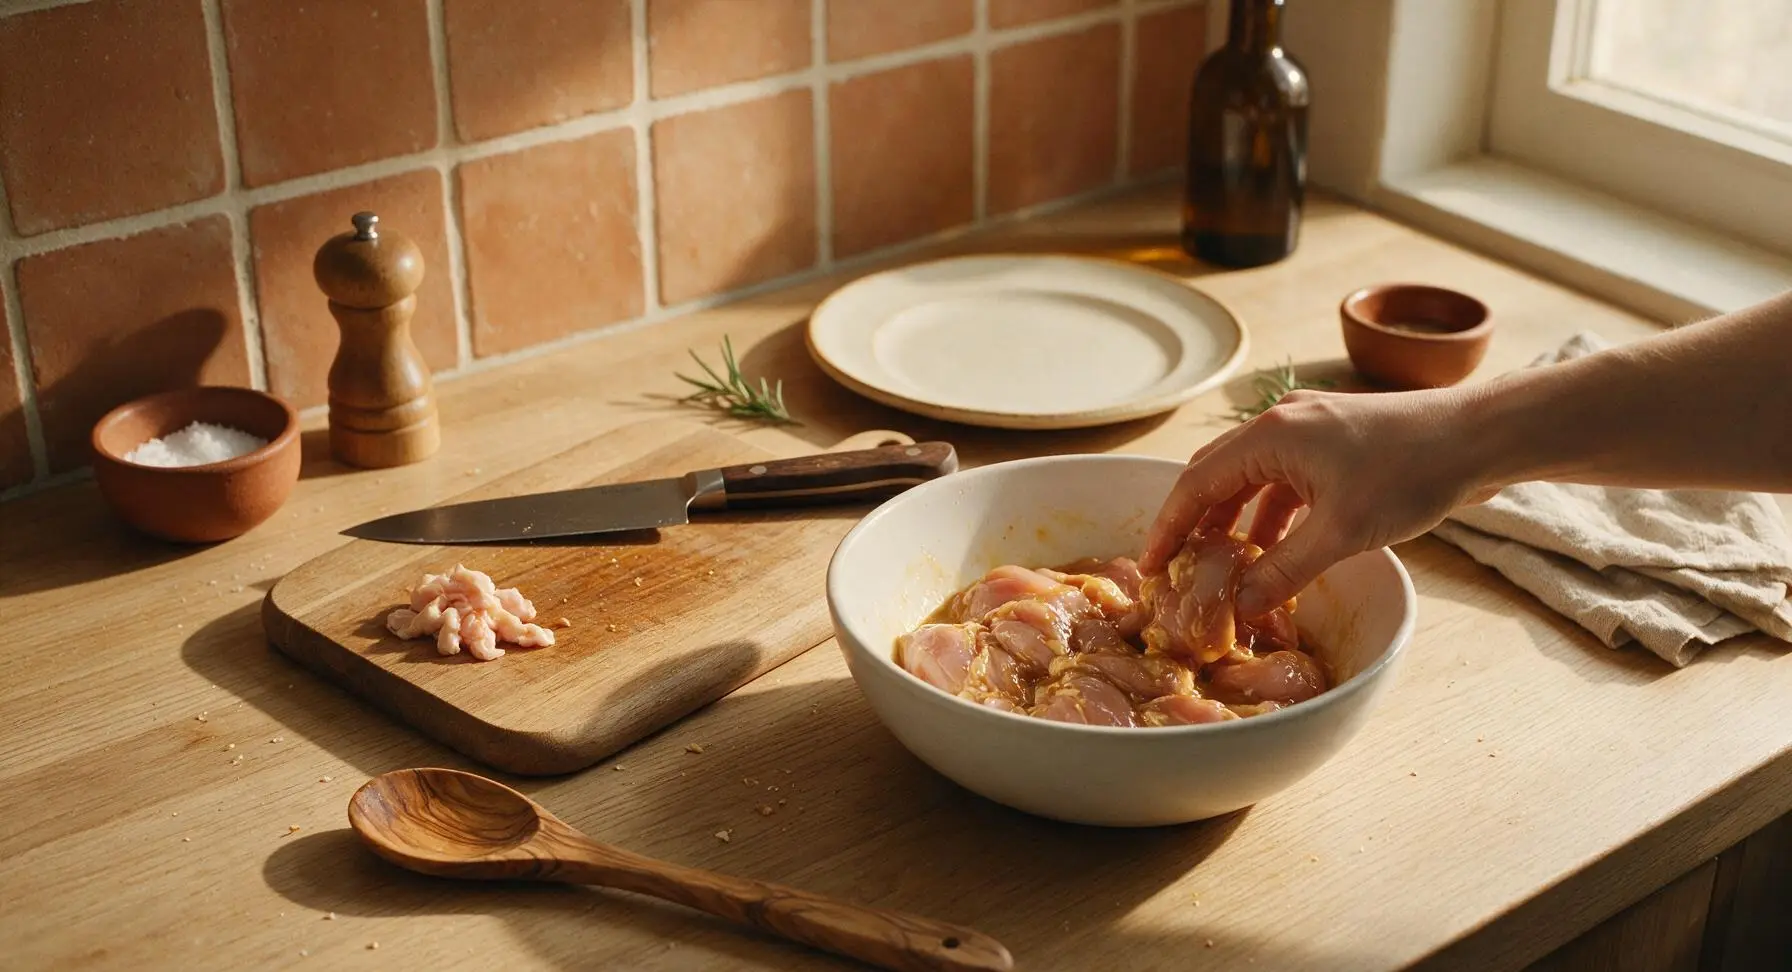
Transfer cut chicken pieces to the 20cm matte white ceramic mixing bowl. Add 1 tbsp light soy sauce, 1 tsp salt, 1/2 tsp ground white pepper, and 1 whole large egg. Toss thoroughly with clean hands to coat every piece evenly, then let rest 10 minutes at room temperature for marinade to absorb. Chicken will look slightly glossy and wet after mixing.
Step 2
step2:Marinate chicken pieces
3

Coat for crispy crust

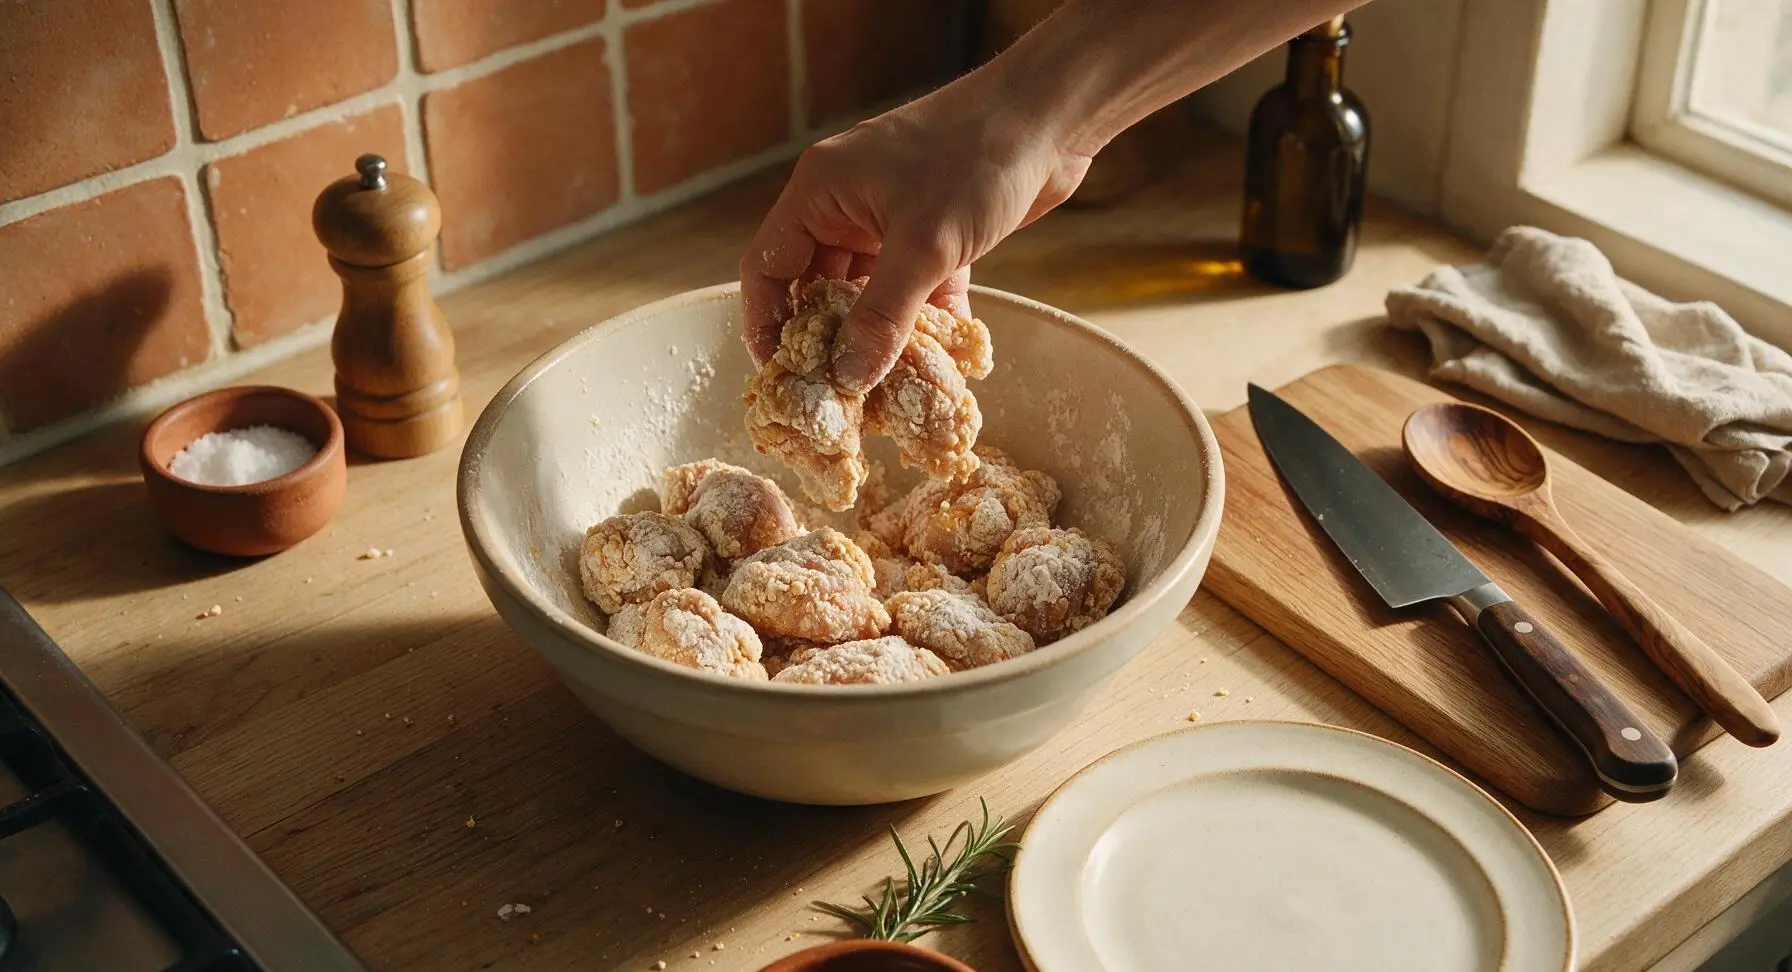
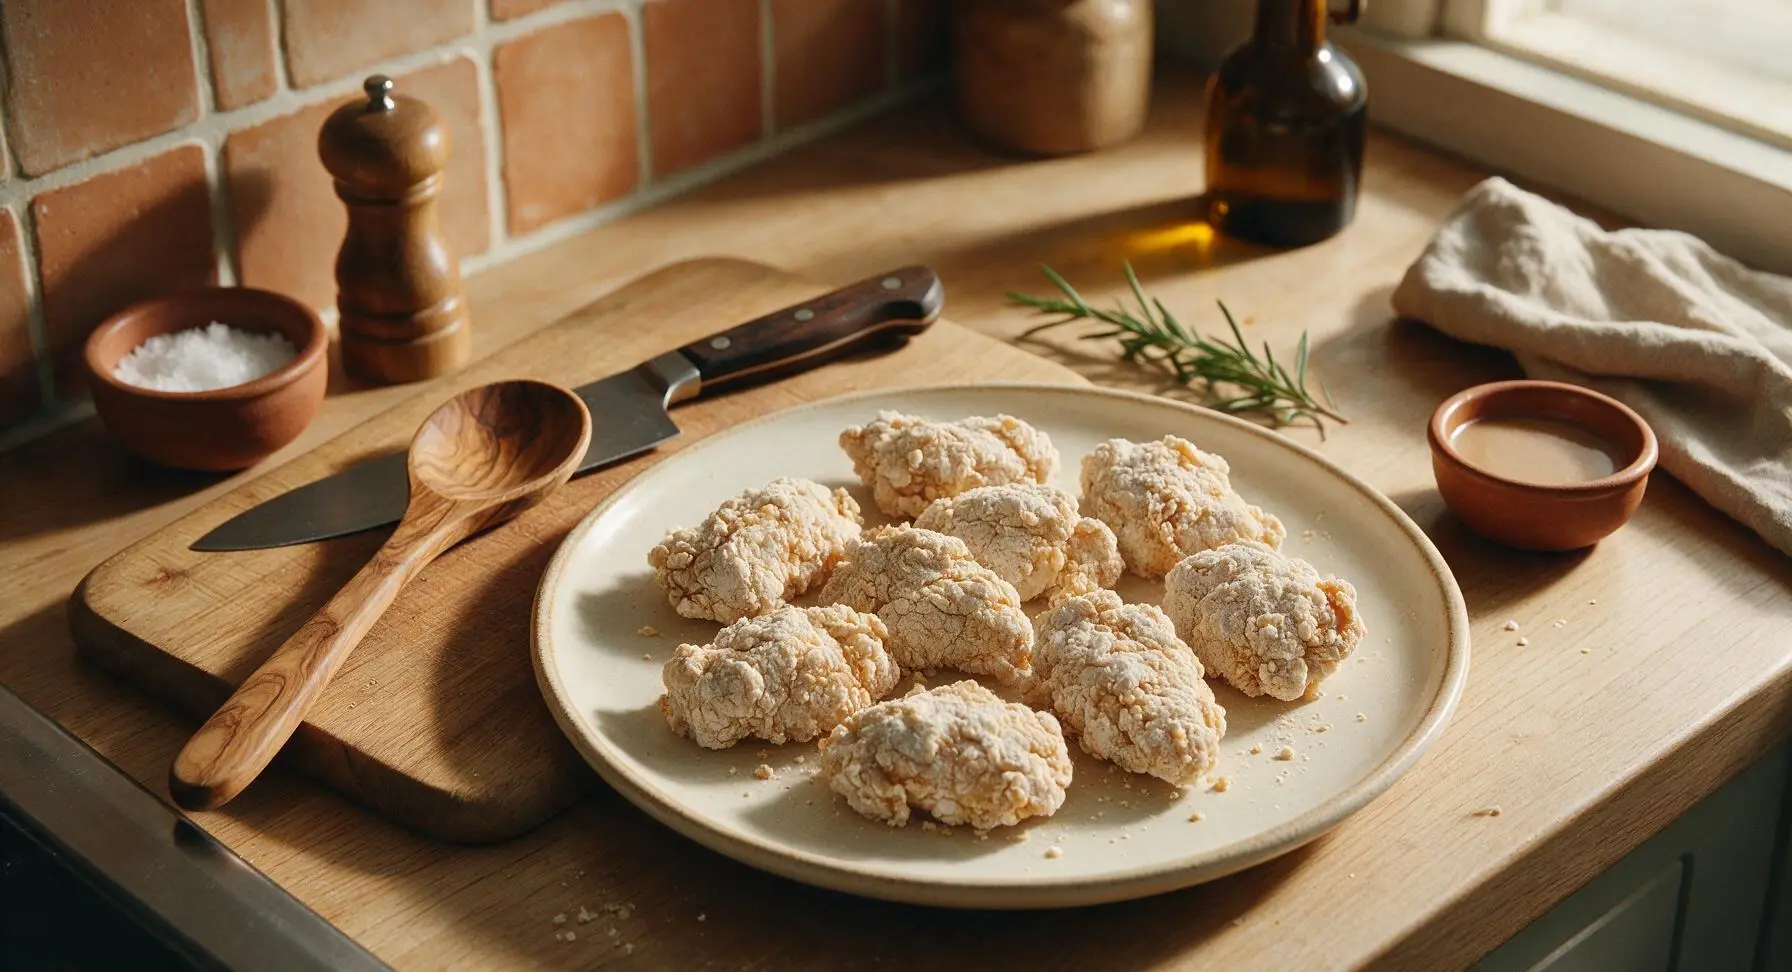
Add 60g cornstarch and 30g all-purpose flour to the bowl with marinated chicken. Toss vigorously until every piece is fully coated in a dry, shaggy, uneven layer of starch. No dry flour should remain at the bottom of the bowl, and each piece should have a rough, craggy surface that creates extra crunch when fried. Let coated chicken rest 5 minutes so starch adheres properly and does not fall off during frying.
Step 3
step3:Coat for crispy crust
Step 3
step3:Coat for crispy crust
4

First fry chicken pieces

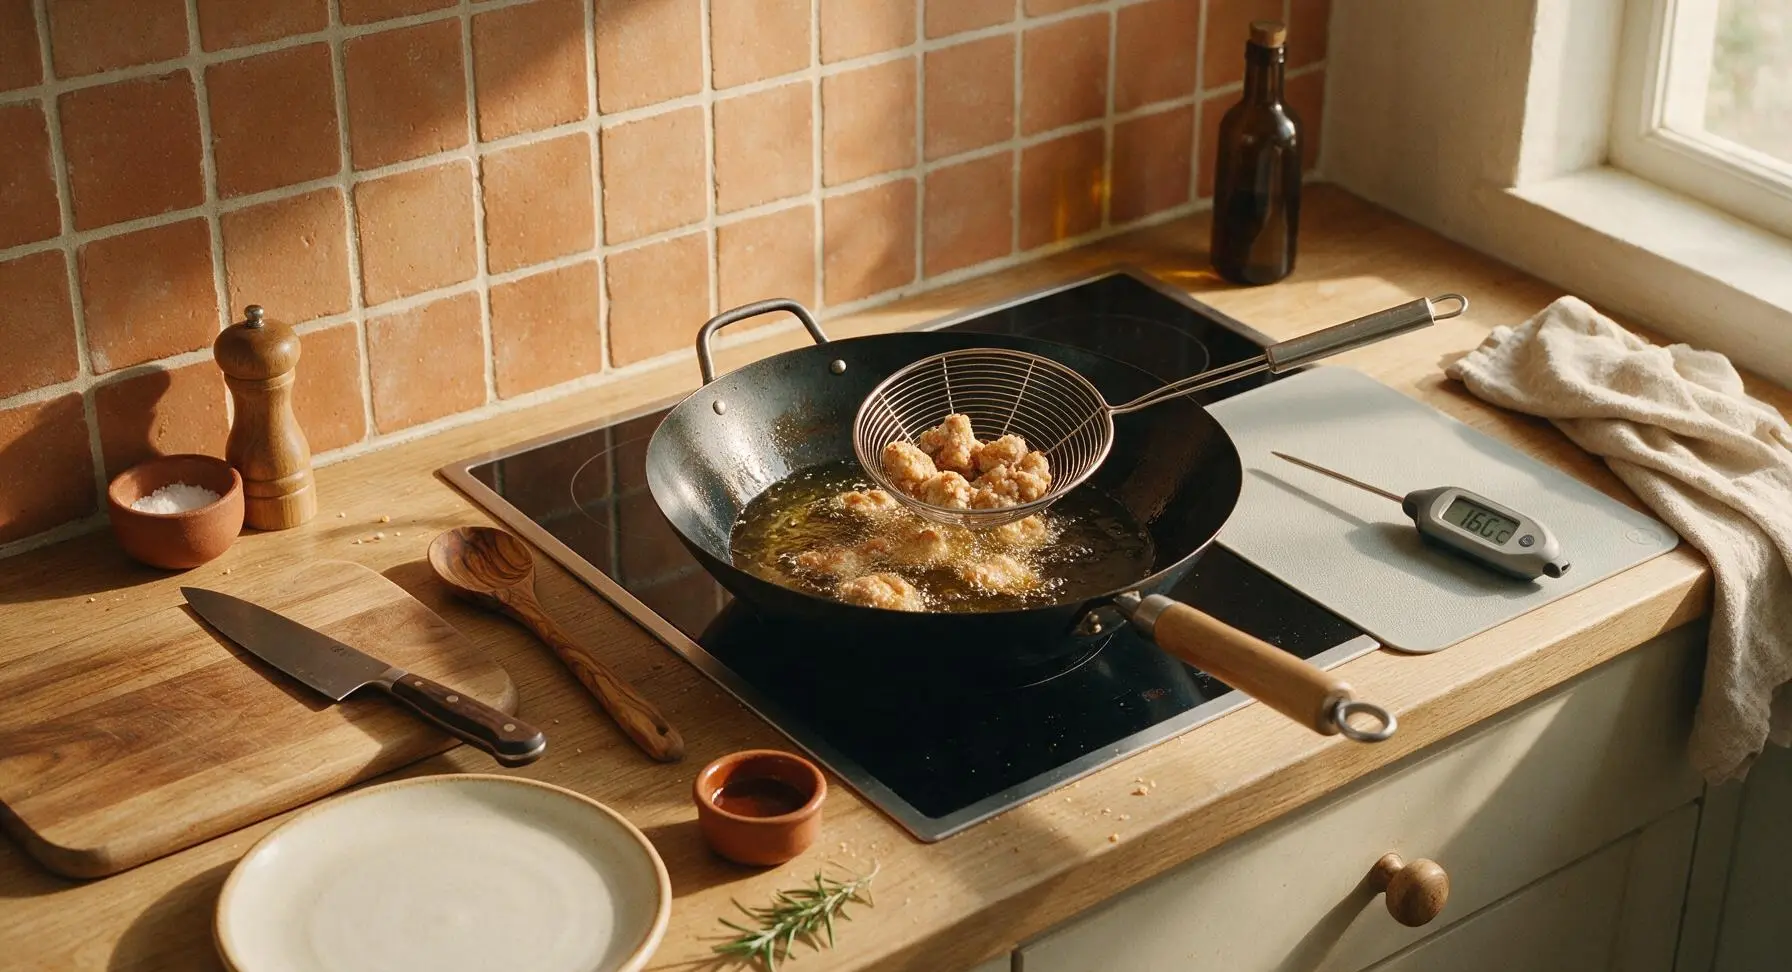
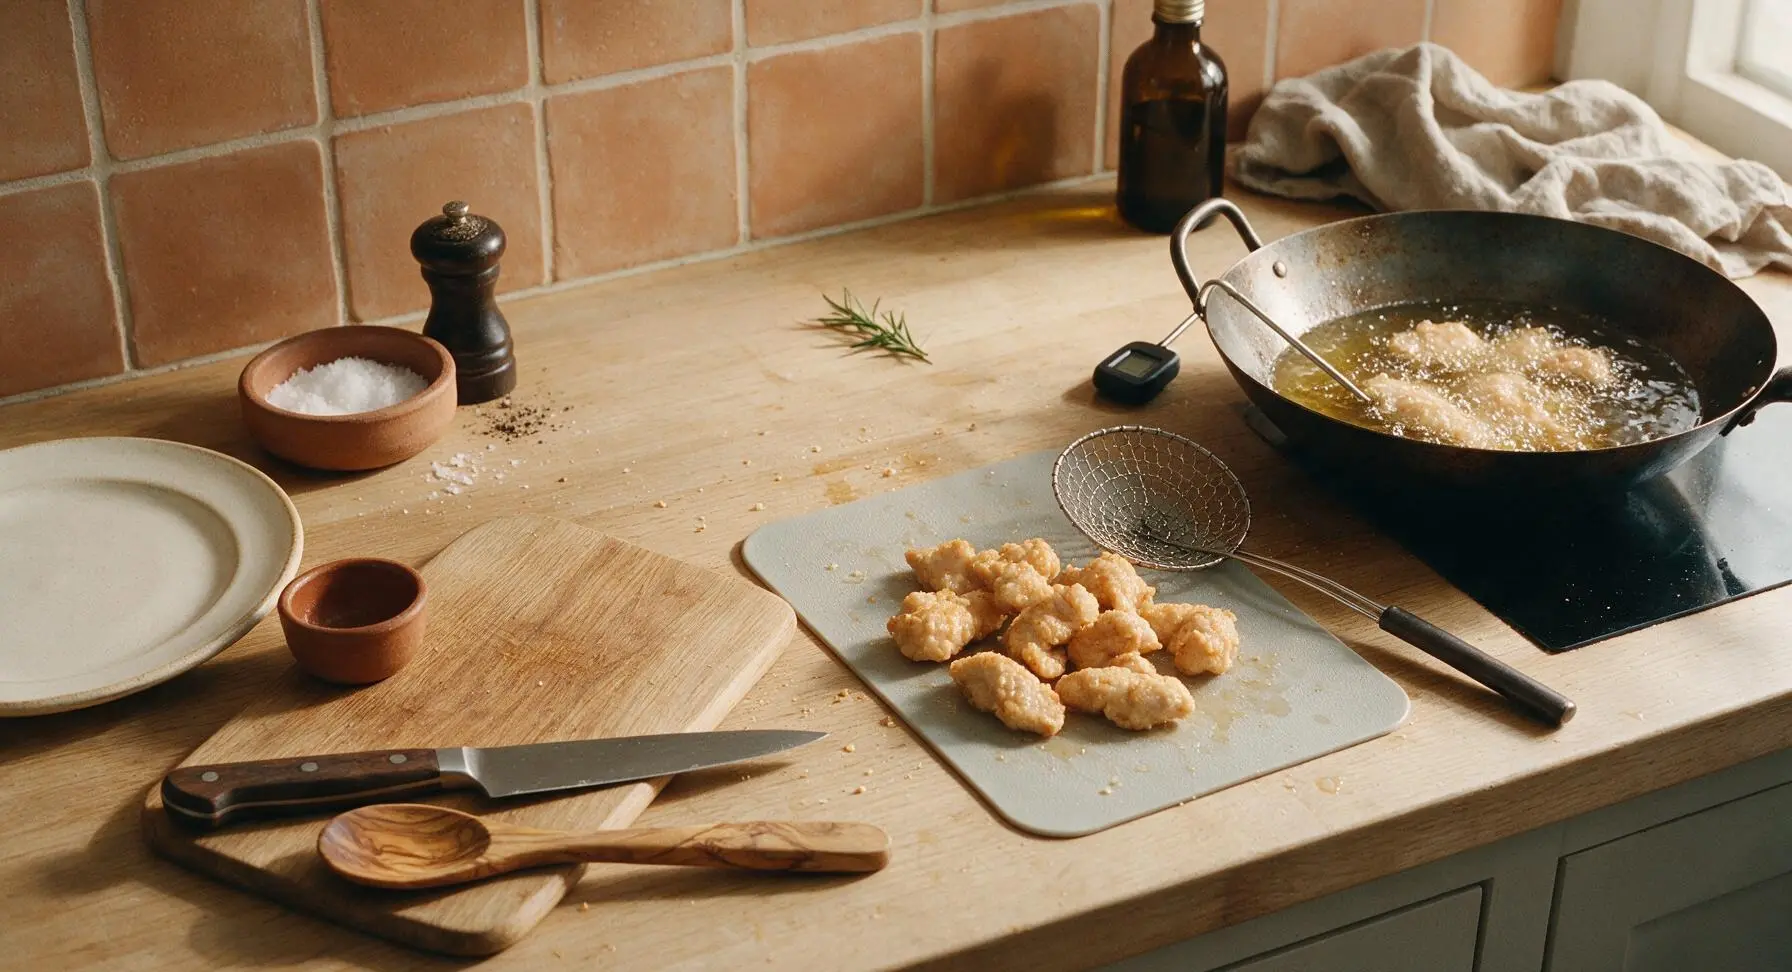
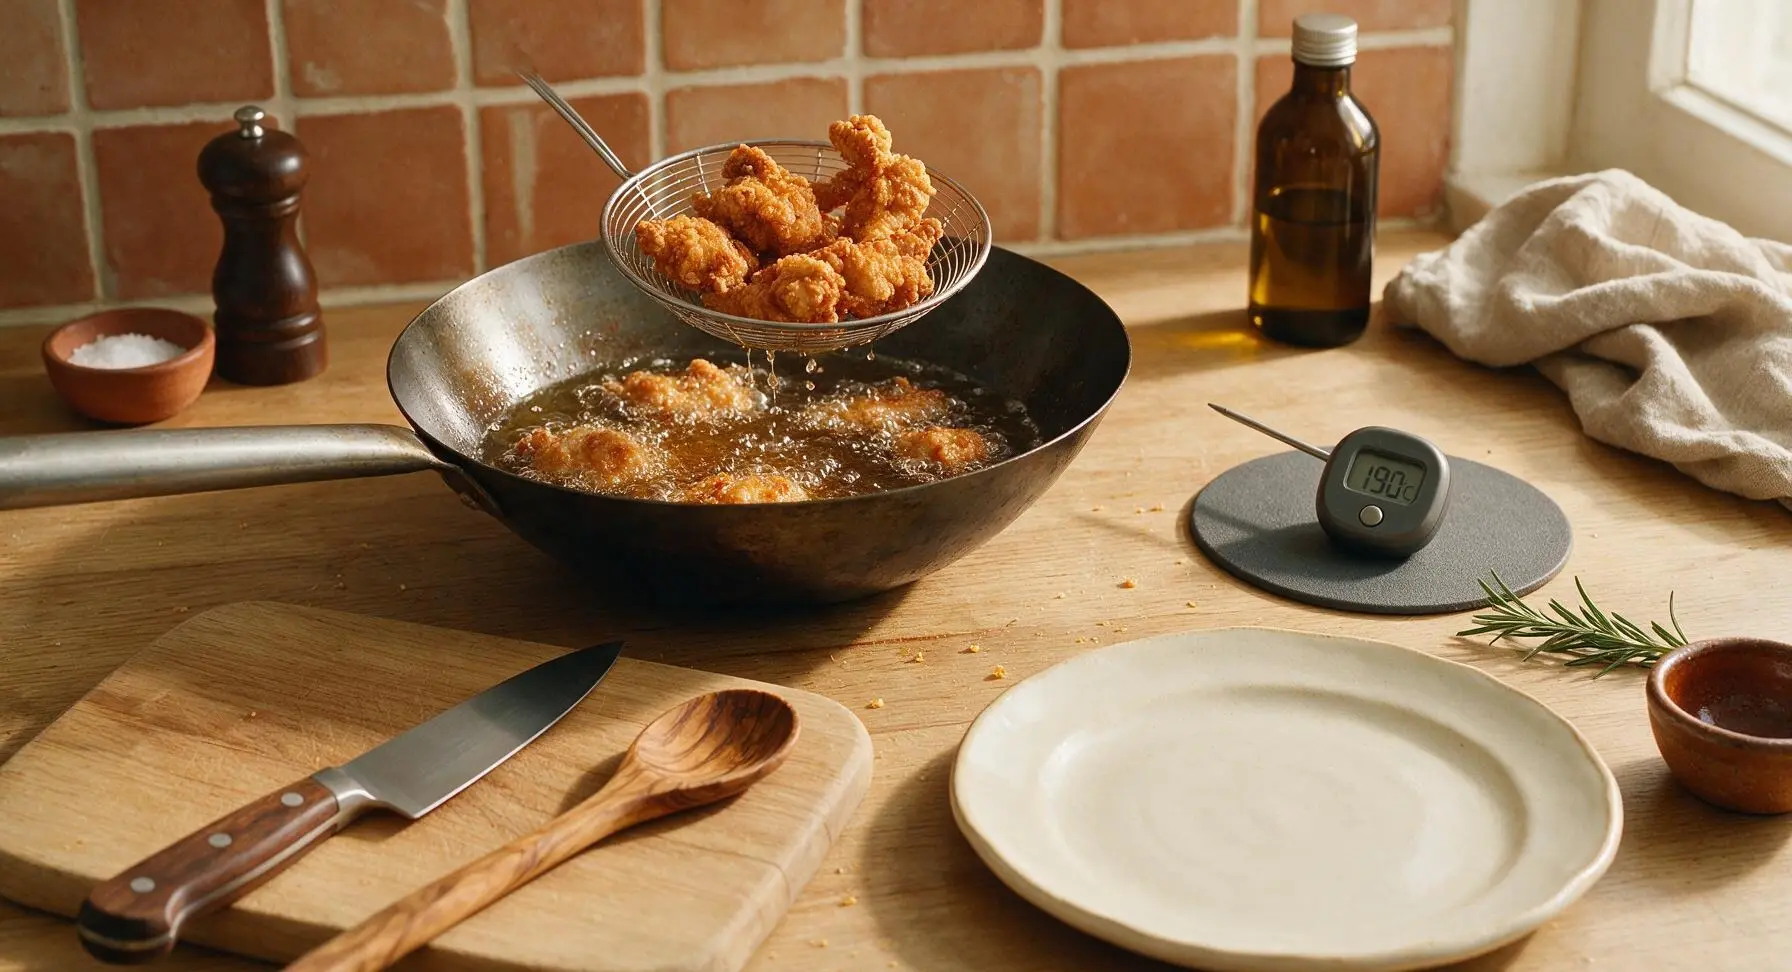
Heat 500ml neutral cooking oil in the 30cm carbon steel wok to 160C (320F), verified with the digital kitchen thermometer. Working in 2 small batches to avoid dropping oil temperature, lower coated chicken pieces into hot oil carefully using the wire skimmer. Fry 3 minutes per batch, until chicken is pale golden and cooked through, but not yet deeply browned. Remove chicken with the skimmer and set aside on the pale grey silicone mat to drain.
Step 4
step4:First fry chicken pieces
Step 4
step4:First fry chicken pieces
5

Double fry for crispness

Increase oil temperature in the wok to 190C (375F). Return all partially fried chicken pieces to the hot oil in a single batch (the high temperature prevents greasiness). Fry for 2 full minutes, until chicken is deep golden brown, with a visibly crisp, crunchy crust. Remove immediately with the wire skimmer, drain excess oil on the silicone mat. This double-fry method ensures the crust stays crispy even after being tossed in sauce.
Step 5
step5:Double fry for crispness
6

Make tangy chilli sauce

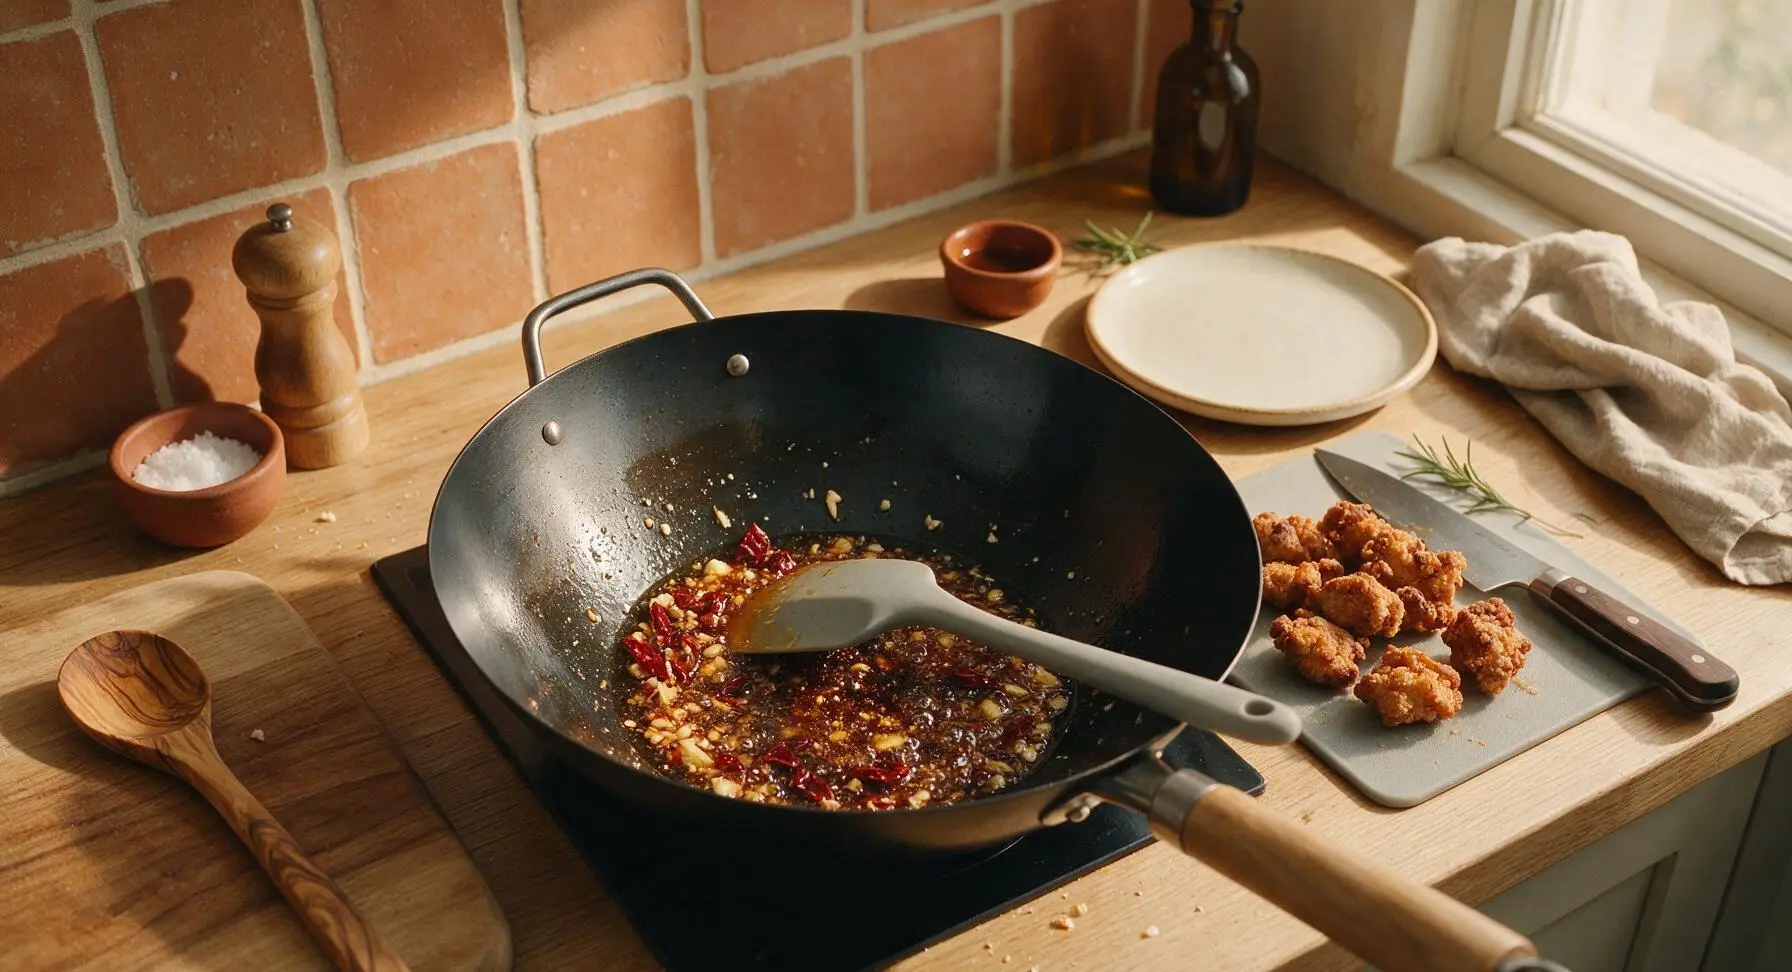
Carefully pour off all but 1 tbsp of frying oil from the wok, place back over medium heat. Mince 4 garlic cloves and the 1-inch piece of ginger, add to the wok along with 6 dried red chillies (torn into pieces, seeds removed for less heat if preferred). Stir fry 15 seconds until fragrant, taking care not to burn the garlic. Add 2 tbsp light soy sauce, 2 tbsp sweet chilli sauce, and 1 tbsp rice vinegar to the wok, stir with the silicone spatula until sauce bubbles and thickens slightly, about 30 seconds.
Step 6
step6:Make tangy chilli sauce
7

Toss chicken in sauce

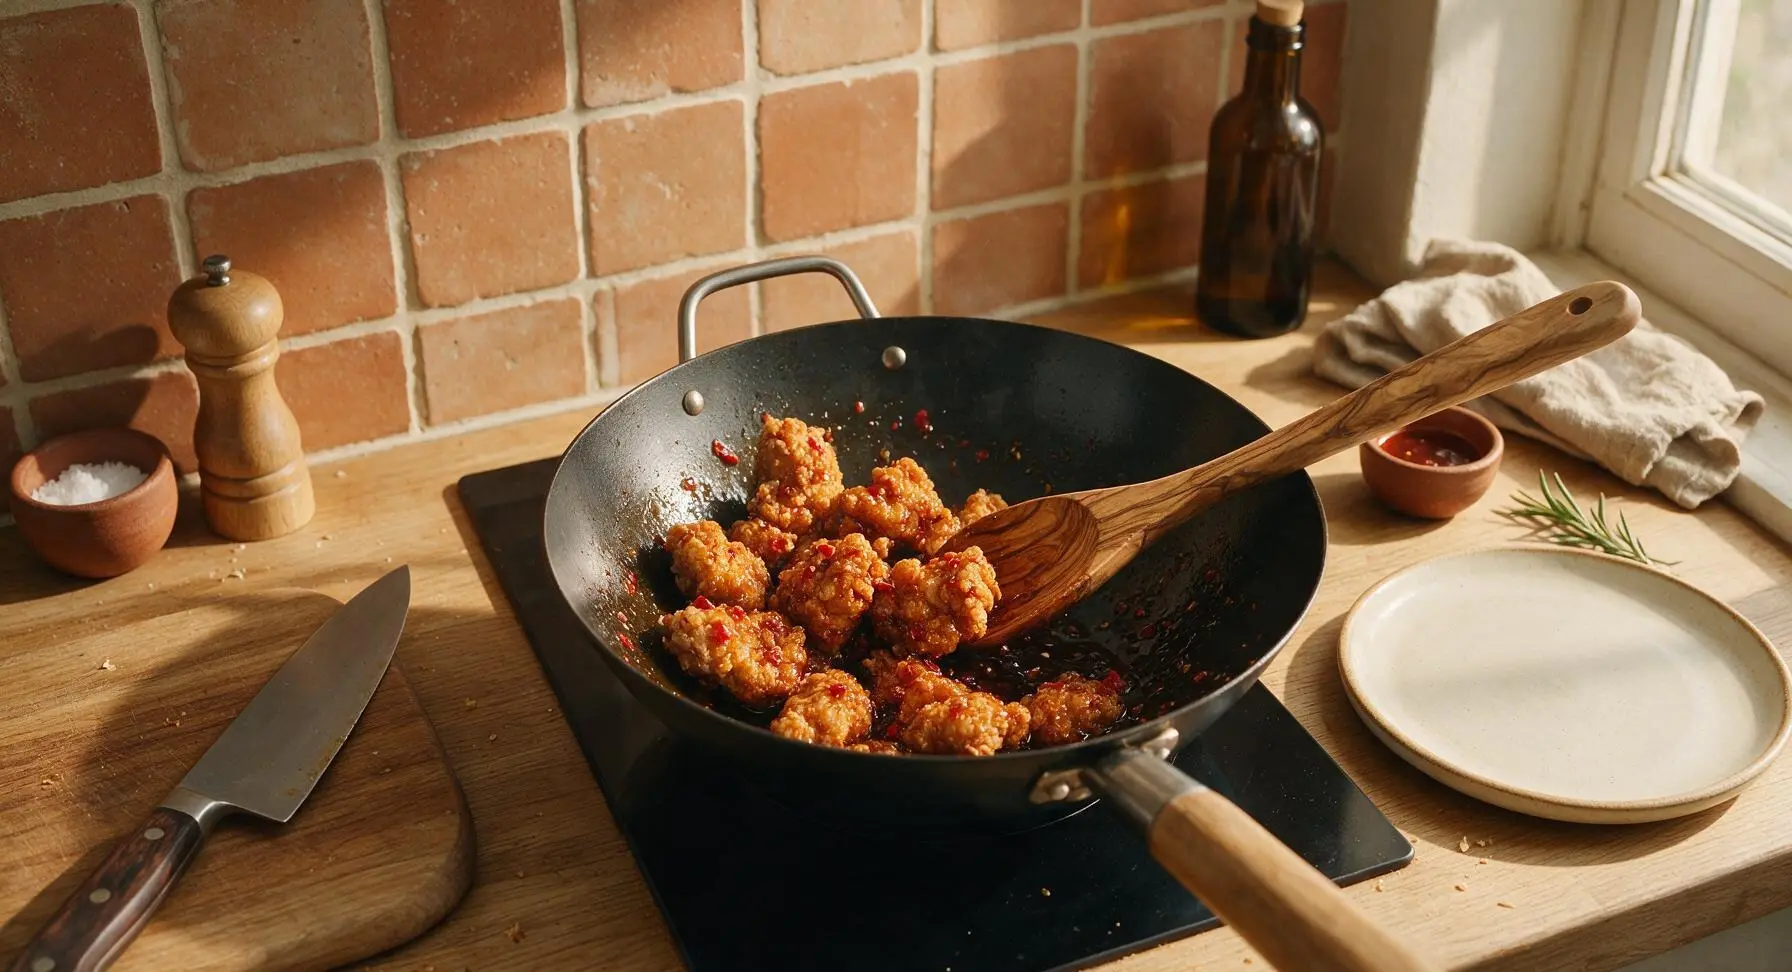
Add all double-fried crispy chicken pieces to the wok with bubbling sauce. Toss rapidly with the long olive wood spoon for 30-45 seconds, until every piece is evenly coated in a thin, glossy layer of sauce. Do not toss for too long—over-soaking in sauce will make the crispy crust go soggy. Turn off heat immediately once coated.
Step 7
step7:Toss chicken in sauce
8

Plate and garnish dish

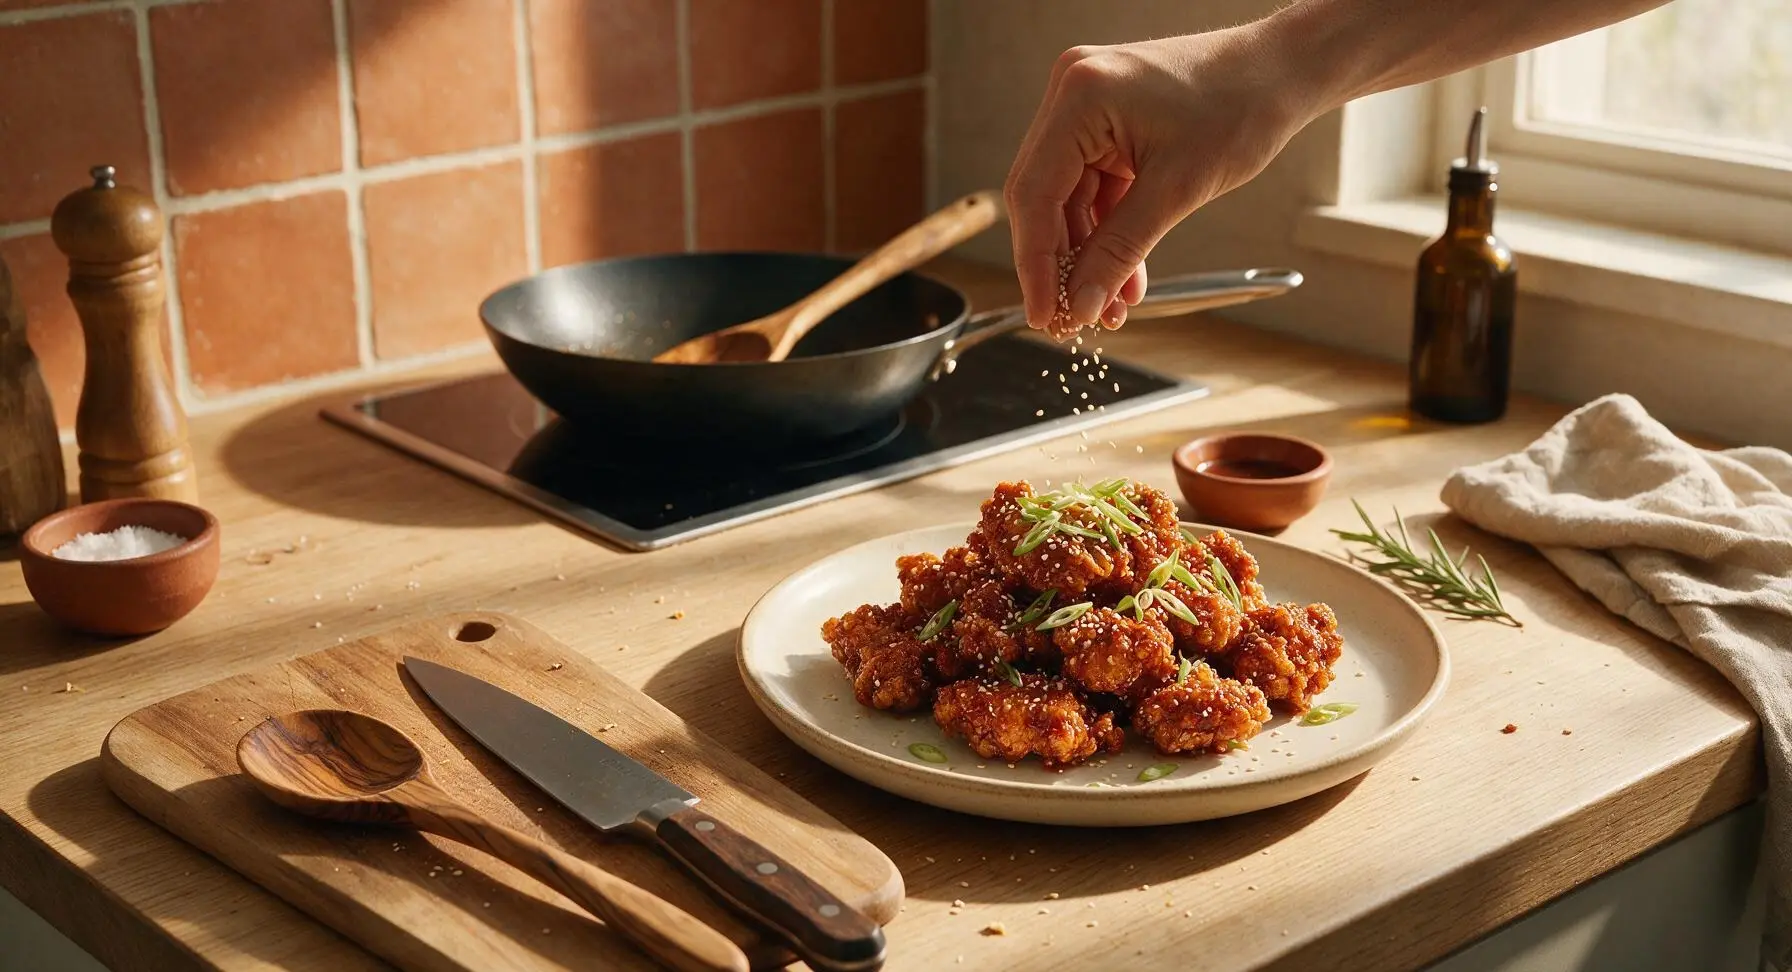
Transfer sauced crispy chilli chicken to the matte off-white stoneware dinner plate. Slice 3 spring onion stalks into thin 5mm diagonal slices, scatter over the top of the chicken along with 1 tsp toasted white sesame seeds. Add a small sprig of fresh basil from the potted plant for a bright, fresh garnish. Serve immediately while the crust is still hot and crisp.
Step 8
step8:Plate and garnish dish

Tips

1.Use boneless, skinless chicken thighs instead of breast meat: Thighs have higher natural fat content that stays juicy and tender during high-heat frying, while lean breast meat easily dries out and becomes tough, even with a thick crispy crust.
2.Never skip the double-fry step: The first 160C fry cooks the chicken through and sets the starch coating, while the second 190C fry drives off excess surface moisture to create a shatteringly crisp crust that stays crunchy for 15-20 minutes after saucing, instead of turning soggy immediately.
3.Toss and serve immediately: The crispy crust will begin to soften after 2 minutes of contact with wet sauce, so have any side dishes (like steamed rice or stir-fried veggies) fully ready before adding chicken to the sauce, to serve at peak crispness.


✨ You May Also Like

Main Course
🍜 United Kingdom

A showstopping classic of tender seared beef, savory mushroom duxelles, and crisp prosciutto wrapped in flaky golden puff pastry, baked to juicy perfection.

⏱️ 2 hours 1Main Course ★ 4.7
Main Course
🍜 India

Tender charred marinated chicken simmered in a rich, spiced creamy tomato sauce, this iconic Anglo-Indian curry pairs perfectly with basmati rice or warm naan.

⏱️ 50 minuteMain Course ★ 4.6
Main Course
🍜 Thailand

Classic tangy, sweet, and savory Thai stir-fried rice noodles with shrimp, tofu, and crunchy garnishes, balancing all five core Thai flavor profiles.

⏱️ 30 minuteMain Course ★ 4.5
Main Course
🍜 United Kingdom

Crispy golden beer-battered cod and fluffy double-fried chips, served with tangy tartar sauce and malt vinegar: the timeless, beloved British pub comfort classic.

⏱️ 45 minuteMain Course ★ 4.7
Main Course
🍜 Mexico

Smoky, chile-marinated pork tacos with caramelized pineapple, fresh cilantro, and lime: a beloved classic Mexican street food perfect for casual summer gatherings.

⏱️ 1 hour 45Main Course ★ 4.8
Main Course
🍜 United States

Crunchy Fritos corn chips layered with savory beef chili and melted cheddar, topped with cool, zesty fixings for a beloved, cozy Tex-Mex comfort food.

⏱️ 35 minuteMain Course ★ 4.8

crispy chilli chicken:Frequently Asked Questions

1.Why do you use boneless skinless chicken thighs instead of chicken breast for this recipe? ▾
Boneless, skinless chicken thighs are ideal because their mild, evenly distributed fat keeps bites juicy even after high-heat frying, with none of the dry, stringy texture common with overcooked chicken breast. Their richer, savorier flavor also stands up perfectly to the bold tangy-sweet chili glaze instead of getting lost. If you swap for breast, cut pieces ½-inch smaller and watch cook time closely to avoid overcooking.
2.How do I get that signature shatteringly crisp coating that doesn’t turn soggy? ▾
The secret is the equal mix of all-purpose flour and cornstarch in the coating, plus letting battered chicken rest 5 minutes before frying so the coating adheres instead of sliding off. Fry in small batches at a steady 350°F to keep oil temperature consistent, and never overcrowd the pan—dropping oil temps lead to soggy, grease-soaked crust every time.
3.Can I make this crispy chili chicken gluten-free? ▾
Absolutely! Swap the all-purpose flour for a 1:1 gluten-free all-purpose baking mix (pick one with xanthan gum to help the coating adhere), and replace regular light soy sauce with tamari or certified gluten-free light soy sauce. Cornstarch is naturally gluten-free, so your final coating will still get that same shatteringly crisp, takeout-perfect texture.
4.Do I have to deep fry this recipe to get crispy results, or can I use an air fryer? ▾
You don’t have to deep fry! For air fryer prep, spray battered chicken pieces lightly with neutral oil, arrange in a single layer with space between each piece, and cook at 380°F for 12–14 minutes, flipping halfway, until crisp and cooked through. Toss in glaze right before serving to keep the coating crisp, just like the deep-fried version.
5.What purpose does the large egg serve in the chicken coating? ▾
The beaten large egg acts as the "glue" that helps the flour and cornstarch coating stick tightly to the chicken pieces, so it doesn’t slide off during frying or when you toss bites in the sticky chili glaze. It also creates a lighter, airier crust structure than a dry-only coating, for that perfect crisp bite instead of a hard, dense shell.
6.How spicy is this dish, and can I adjust the heat level to my taste? ▾
The base recipe has a balanced, medium heat that’s approachable for most people who enjoy a mild kick, paired with that signature tangy-sweet glaze. To turn up the heat, add extra dried chili flakes, a spoonful of chili oil, or a diced fresh Thai chili to the glaze. To mellow it out, cut the chili amount in half and add an extra pinch of sugar to balance.
7.Why is light soy sauce called for instead of dark soy sauce here? ▾
Light soy sauce has a saltier, brighter, less concentrated umami flavor than dark soy sauce, so it seasons the chicken and glaze without making the final dish overly dark, bitter, or heavy. Dark soy sauce has a thicker, sweeter, more caramelized profile that would overpower the light, crisp texture and throw off the glaze’s tangy-sweet balance.
8.How long does this recipe actually take to make from start to finish? ▾
From prep to table, this recipe takes right around 35 minutes total, which makes it perfect for quick weeknight dinners. You’ll spend about 15 minutes prepping chicken and mixing the glaze, 15 minutes frying (or air frying) in small batches, and 5 minutes tossing everything together to serve—no lengthy marination required for great, takeout-style flavor.
9.Can I prep components of this dish ahead of time for faster weeknight meals? ▾
You can cut chicken thighs into bite-sized pieces and store them in an airtight container in the fridge for up to 2 days ahead, but wait to coat them in the egg, flour, and cornstarch until right before you cook. Pre-coating chicken early will make the coating turn gummy, and it won’t crisp up properly when you cook it later.
10.Why does the coating sometimes fall off my chicken when I fry it? ▾
Coating usually slides off for one of three common reasons: your oil wasn’t hot enough when you added the chicken, you didn’t let coated chicken rest 5 minutes before frying to let the batter set, or you overcrowded the pan which dropped the oil temperature too fast. Always pat chicken dry before coating too, so the egg sticks well to the surface.
11.What type of oil is best for frying this crispy chili chicken? ▾
Use a neutral, high-smoke-point oil like canola, vegetable, peanut, or avocado oil for frying, since these won’t burn or add off-flavors to the chicken at the 350°F cooking temperature. Skip olive oil, toasted sesame oil, or butter for frying—their low smoke points lead to bitter, burnt-tasting coating and can smoke up your kitchen quickly.
12.When should I toss the chicken in the chili glaze to keep it crispy? ▾
Wait to toss hot, freshly cooked crisp chicken in the warm chili glaze until immediately before you serve it. If you let chicken sit in the glaze for more than 2–3 minutes, moisture from the sticky glaze will seep into the crisp coating and turn it soggy, ruining that shatteringly crisp texture the recipe is known for.
13.Can I bake this chicken in the oven if I don’t have an air fryer or want to avoid deep frying? ▾
Absolutely! Arrange coated chicken pieces on a wire rack set over a baking sheet (this lets air circulate all around for even crisping), spray lightly with oil, and bake at 425°F for 18–20 minutes, flipping halfway, until golden and crisp. The wire rack is key—baking directly on a sheet pan will leave the bottom of pieces soggy.
14.What side dishes pair best with this crispy chili chicken? ▾
This takeout classic pairs perfectly with fluffy steamed white rice, jasmine rice, or crispy chow mein noodles to soak up extra tangy-sweet chili glaze. For a lighter option, serve it alongside steamed broccoli, stir-fried bok choy, or a crisp cucumber salad tossed in a little rice vinegar and sesame seeds to cut the dish’s richness.
15.How should I store leftovers, and will the chicken stay crispy? ▾
Store leftover chicken (separate from extra glaze, if possible) in an airtight container in the fridge for up to 3 days. To reheat and bring back crispness, spread pieces on a baking sheet and warm at 375°F for 8–10 minutes, or air fry at 350°F for 4–5 minutes, then toss in fresh warmed glaze. Skip the microwave—it will turn the coating rubbery.
16.Do I need to marinate the chicken for a long time to get good flavor? ▾
You don’t need a long marinade for this recipe! A quick 10-minute toss of cut chicken pieces in a splash of the light soy sauce before adding the egg and coating is more than enough to build deep, savory flavor, without adding extra moisture that would make the coating soggy. Long marinades will make chicken too wet for a shatteringly crisp crust.

Comments (7)

2 days ago

OMG this crispy chilli chicken is a total game changer! I made it for my family dinner last night and both my picky 7 and 10 year old cleaned their plates, no complaints at all. The crunch was perfect even after I tossed it in the sauce, which I was worried about at first. 15 minute cook time is chef’s kiss for busy weeknights too!

yesterday

So glad I’m not the only one who was scared the crust would get soggy! I pressed my cornstarch coating on extra tight like I saw in a TikTok tip and that helped a ton, totally held up to the sauce.

yesterday

So happy your kids loved it, Sarah! The key to keeping that crunch is making sure your oil is hot enough (around 375°F) before you add the chicken, and don’t overcrowd the pan — that’s a super common mistake people make that leads to soggy crust!

1 week ago

SO good! I meal prepped this on Sunday for my weekday lunches and it held up way better than I expected. I kept the sauce separate and tossed it with the chicken right before microwaving, and the crispiness was still there even after 3 days in the fridge. 10/10 will be making this on rotation.

5 days ago

That’s such a smart meal prep hack, Lindsey! Storing the sauce separately is exactly what I recommend for anyone making this ahead of time, so glad it worked out for your weekly lunches!

yesterday

This was such a hit at my office potluck earlier this week! I will say the difficulty feels spot on as medium — I burned my first batch of chicken because I had the heat too high, but the second batch turned out perfectly crispy. The chilli sauce has the exact right balance of sweet and heat, not too overwhelming, and even my coworkers who don’t like spicy food went back for seconds. Will make again, just gonna watch my oil temp closer next time.

2 hours ago

This recipe is so good I’ve made it three times already! Quick question — has anyone tried swapping the chicken for extra firm tofu to make it vegetarian? My partner doesn’t eat meat and I’d love to make this for our date night in this weekend, that glaze is too good to not share.

30 minutes ago

I did this last week! Press the tofu for at least 30 minutes to get all the water out, then coat it the exact same way you do the chicken. It gets SO crispy, my meat-eating roommate preferred the tofu version honestly!

5 minutes ago

Great question, Jess! Mia’s tip about pressing the tofu is spot on. I’ve tested this swap too, and extra firm tofu (cut into 1 inch cubes, pressed well) works perfectly as a substitute — just fry it the same amount of time as the chicken and you’ll get that same perfect crunch!

2 weeks ago

Game changer alert! I’ve tried so many takeout copycat crispy chilli chicken recipes and they always come out soggy or bland, but this one is better than our local Chinese takeout spot. Saved me $15 on takeout last night, all my roommates were obsessed.

1 week ago

Right?! I thought I was the only one who thought it beat takeout. I added a sprinkle of sesame seeds and chopped green onion on top right before serving, made it look and taste just like restaurant quality.

30 minutes ago

My kids loved it! I was worried the chilli would be too spicy for my 5 year old so I cut the chilli flakes in half and added a tiny extra drizzle of honey, and she ate two full servings. This is going straight into our weeknight dinner rotation, so fast to throw together even on nights when I get home late from work.

5 minutes ago

That’s such a great adjustment for kids, Carly! Cutting the spice and adding a touch of honey makes it totally kid-friendly without losing that great chilli flavor — I’m so glad your whole family enjoyed it!

just now

Made this last night for my roommate’s small birthday hang and everyone was raving about it. Quick heads up for new cooks — definitely prep all your ingredients before you start frying! This cooks so fast (that 15 minute cook time is no joke) that if you’re scrambling to measure out sauce ingredients while the chicken is in the oil, you’ll end up burning it before you know it. 10/10, will absolutely be making this again for game night next month.



