
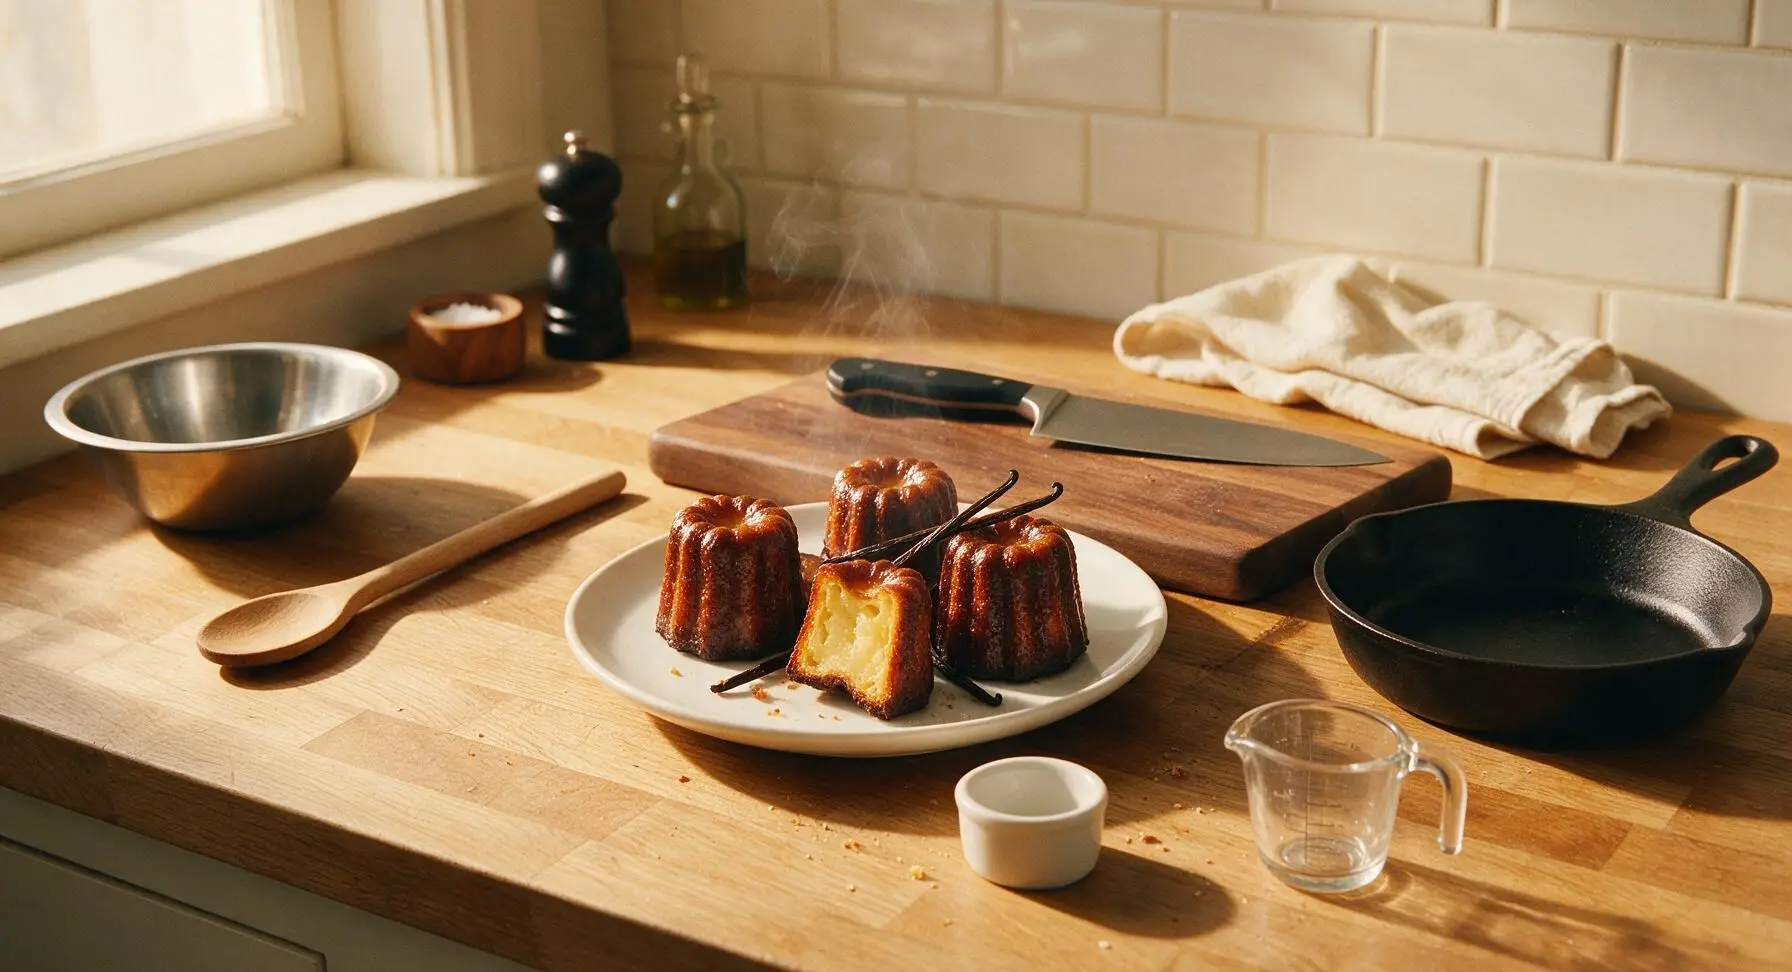
French Canelés

title 1
French Canelés
⏱️ cook time 1 hour 10 minutes
🍽️ servings 12
⚡ Difficulty medium

intro

Crisp, deeply caramelized rum-vanilla shells shatter to reveal soft, custardy centers—these iconic Bordeaux pastries are a masterclass in textural contrast.

Ingredients
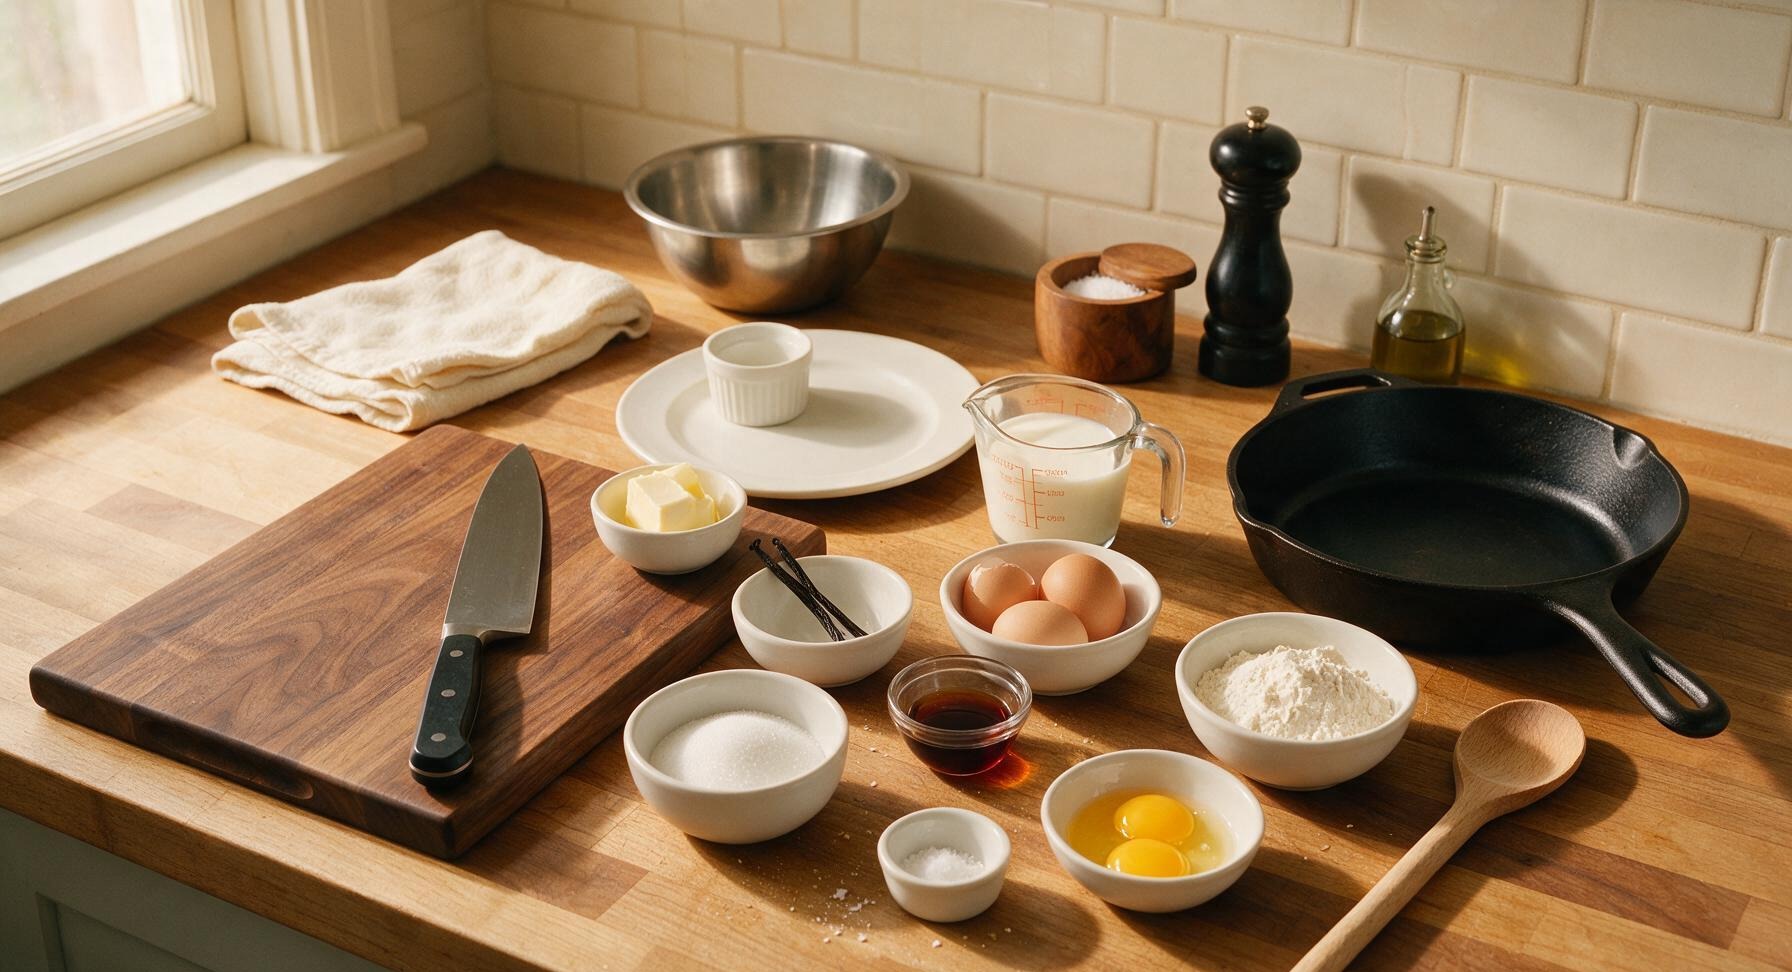
Whole milk 500ml
Unsalted butter 50g (plus 1 tbsp extra for greasing molds)
Whole vanilla bean 1 pod, split lengthwise
Dark rum 3 tbsp
Granulated sugar 200g
All-purpose flour 100g
Fine sea salt 1/4 tsp
Large eggs (2 whole, 2 yolks) 4 total (2 whole, 2 separated yolks)

Steps

1

Heat Infused Milk

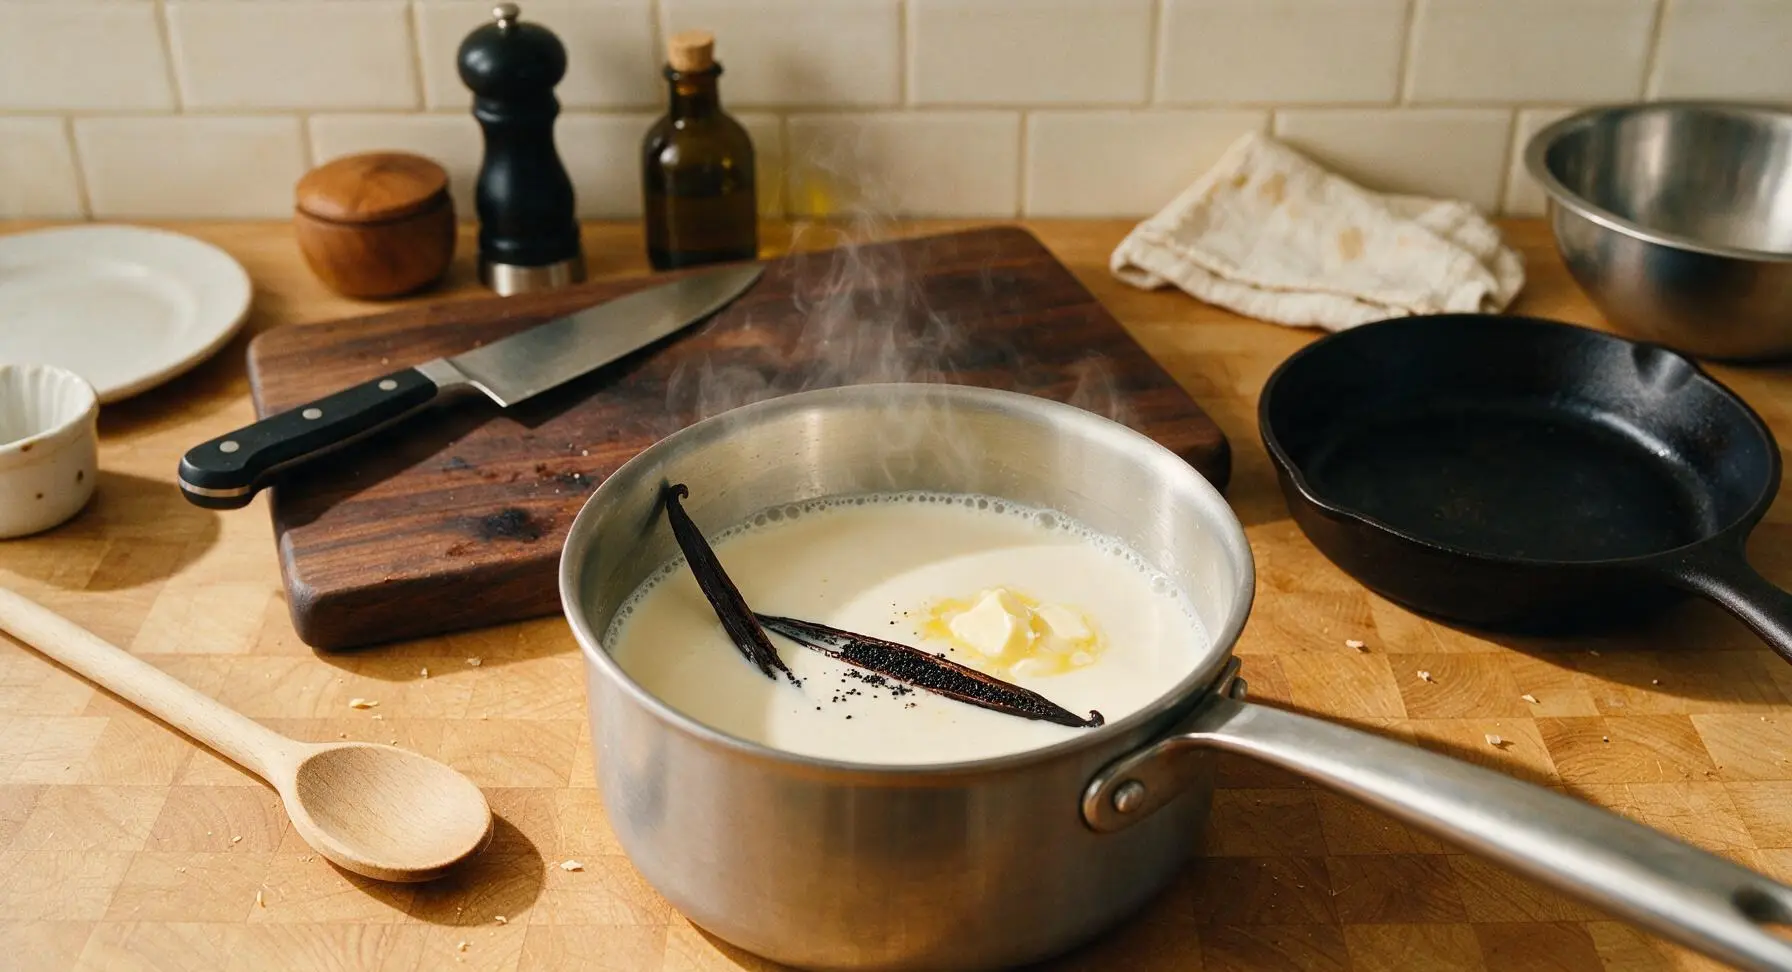
Place the 1.5L brushed stainless steel saucepan over medium-low heat. Add 500ml whole milk, 50g unsalted butter, and 1 split vanilla bean (scrape the tiny black seeds into the milk first, then drop the empty pod into the pan). Heat gently until the mixture reaches 85°C/185°F, with tiny, steady bubbles forming around the pan edge; do not bring to a rolling boil, as this will scald the milk. Remove the pan from heat and let the vanilla infuse for 10 minutes at room temperature.
Step 1
step1:Heat Infused Milk
2

Whisk Egg Batter Base

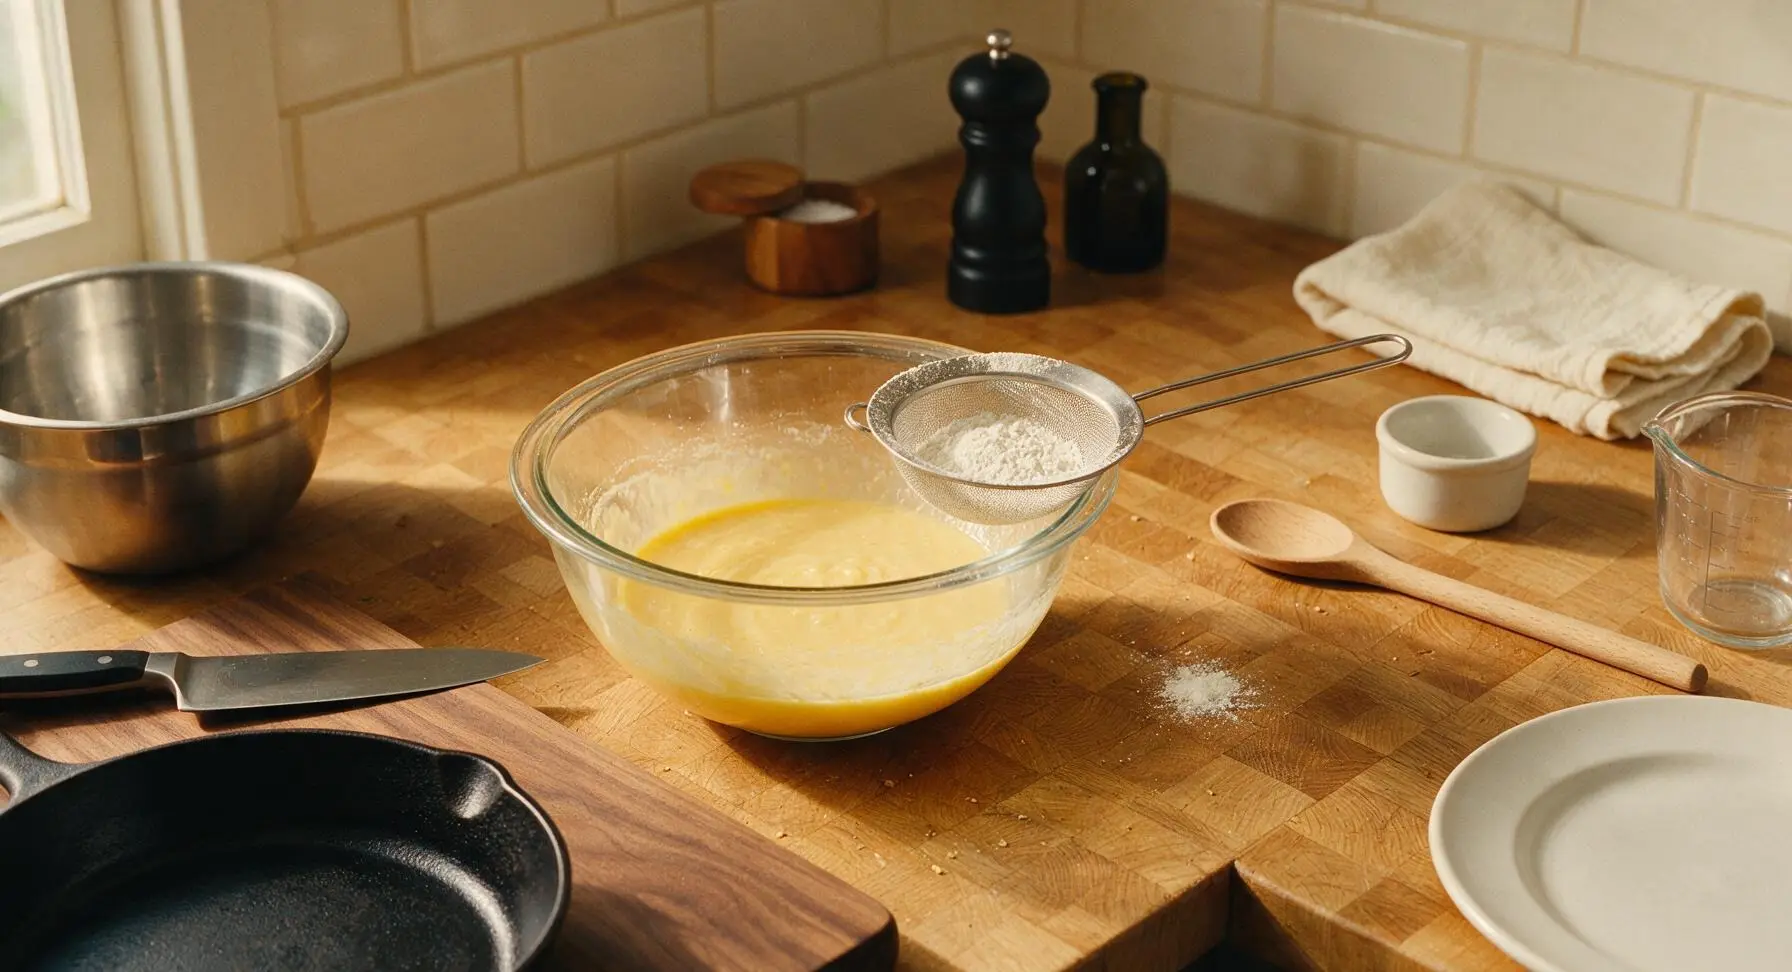
While the milk infuses, add 2 whole large eggs, 2 large egg yolks, 200g granulated sugar, and 1/4 tsp fine sea salt to the 2L clear glass mixing bowl. Whisk gently just until the mixture is smooth and pale yellow—do not whisk vigorously to incorporate air, as this creates unwanted large holes in the finished canelés. Sift 100g all-purpose flour into the bowl through the fine-mesh sieve, then stir with the silicone spatula until no dry flour lumps remain.
Step 2
step2:Whisk Egg Batter Base
3

Temper Milk into Batter

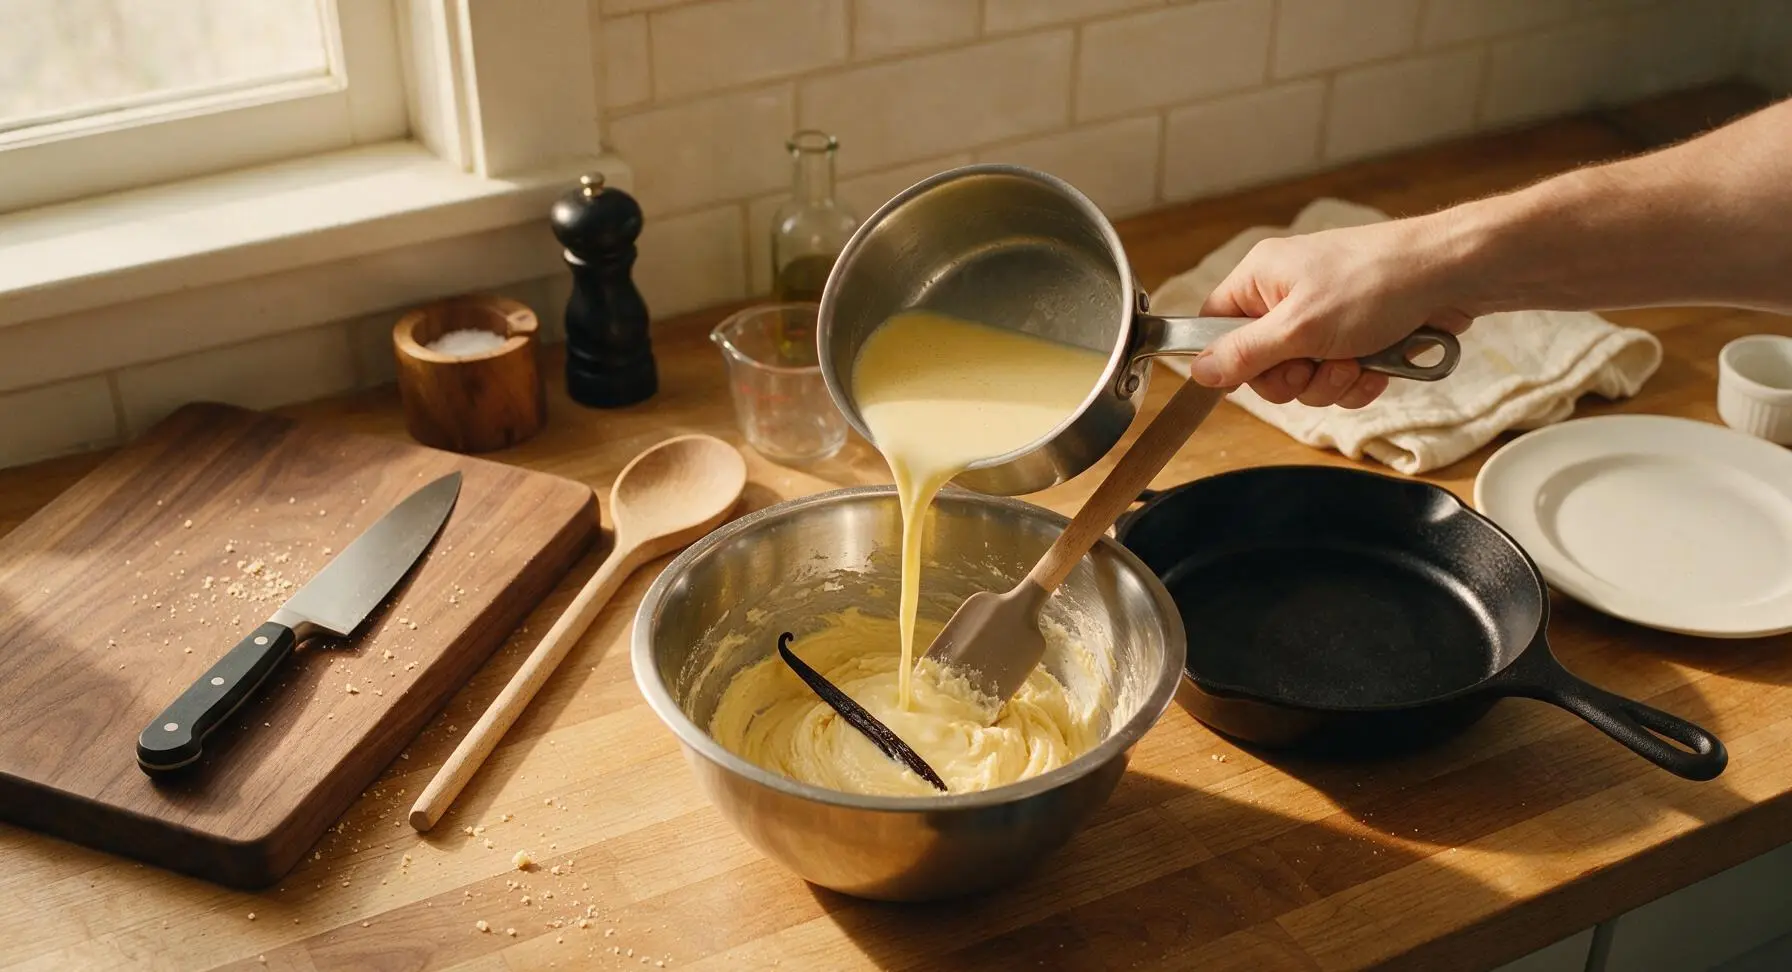
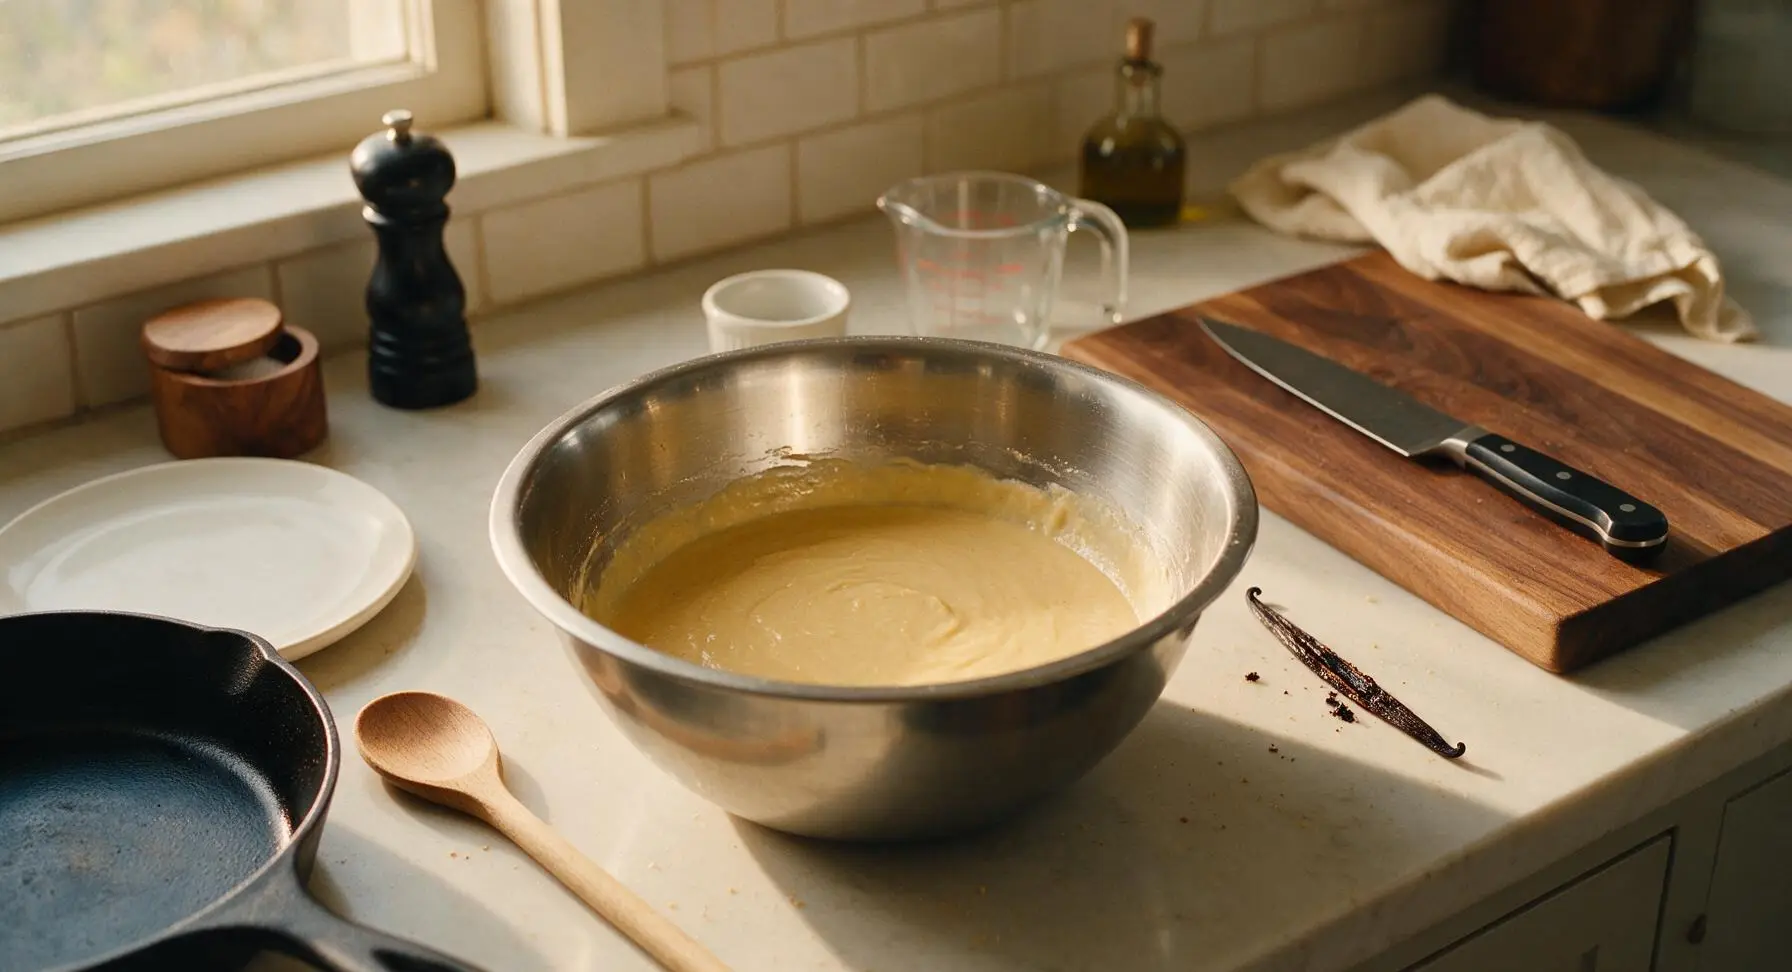
Slowly pour one-third of the warm infused milk into the egg-flour mixture, stirring constantly with the silicone spatula to gently warm the eggs and prevent curdling. Once the mixture is smooth, pour in the remaining warm milk, stirring continuously, then stir in 3 tbsp dark rum. Fish out the vanilla bean pod from the batter and set it aside to dry for another use if desired.
Step 3
step3:Temper Milk into Batter
Step 3
step3:Temper Milk into Batter
4

Strain and Chill Batter

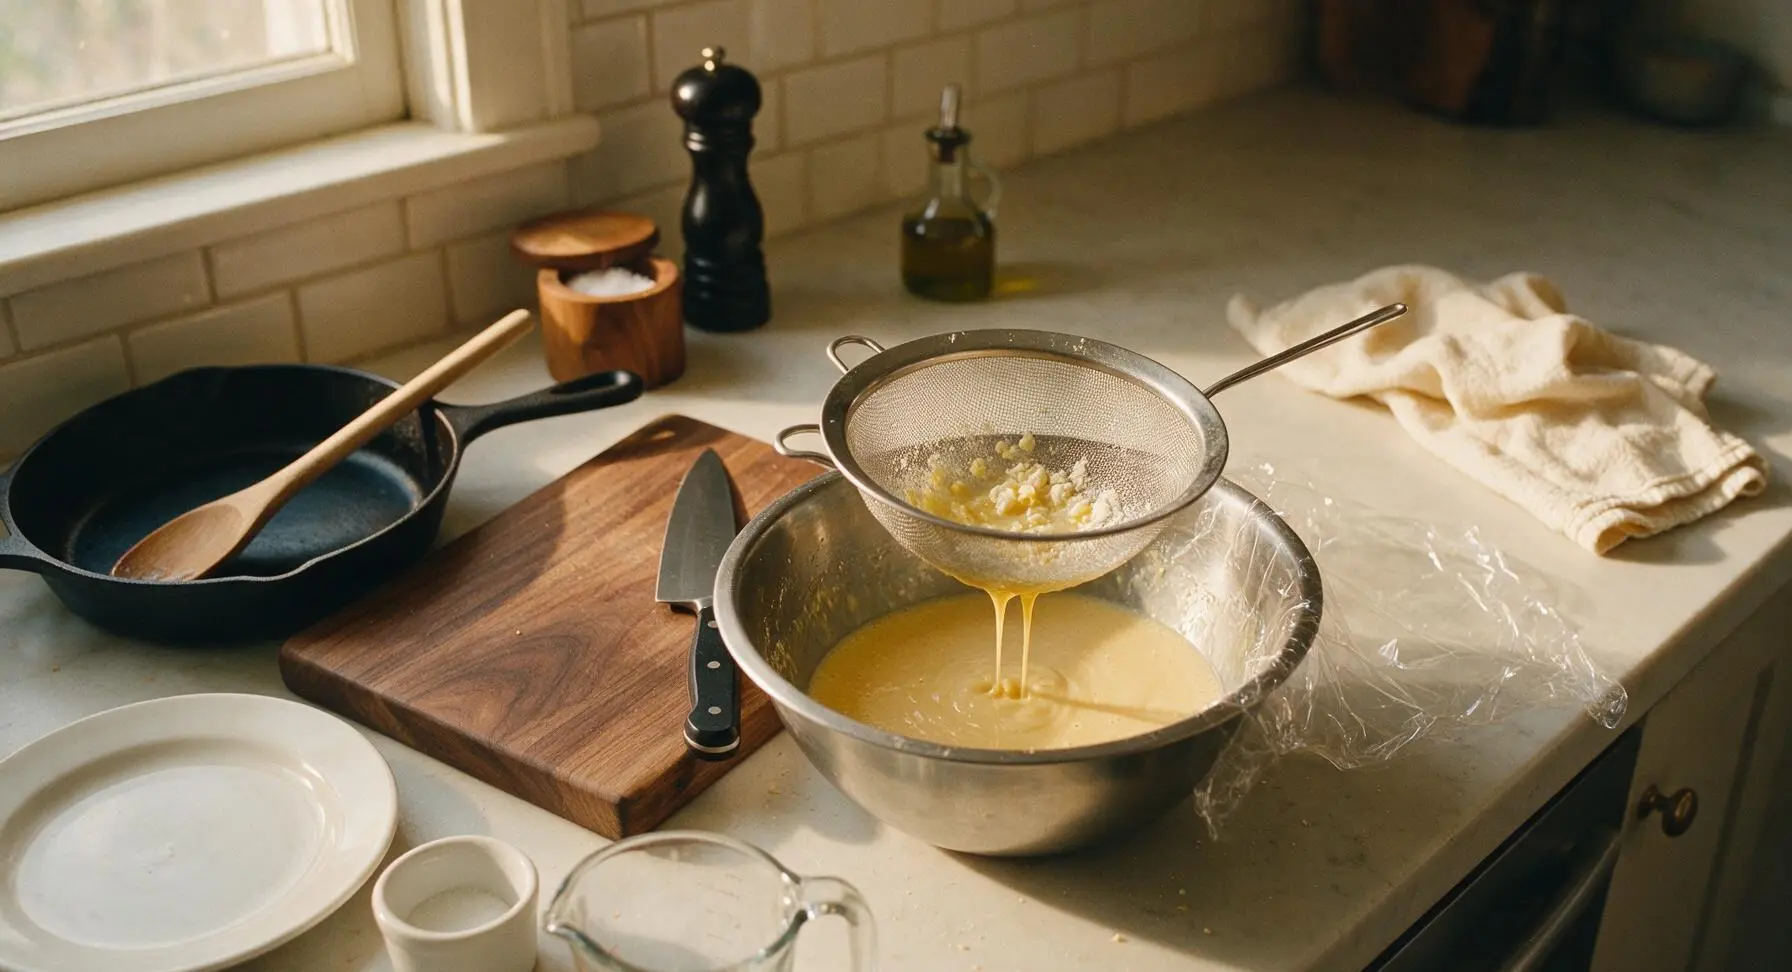
Place the fine-mesh sieve over the top of the clean glass mixing bowl. Pour the entire thin batter through the sieve to catch any small lumps of flour or bits of curdled egg, resulting in a perfectly smooth base. Cover the bowl tightly with plastic wrap and refrigerate for a full 24 hours (minimum 12 hours, maximum 48 hours) to allow the flour to hydrate and flavors to develop; do not stir the batter while it chills.
Step 4
step4:Strain and Chill Batter
5

Butter Copper Molds

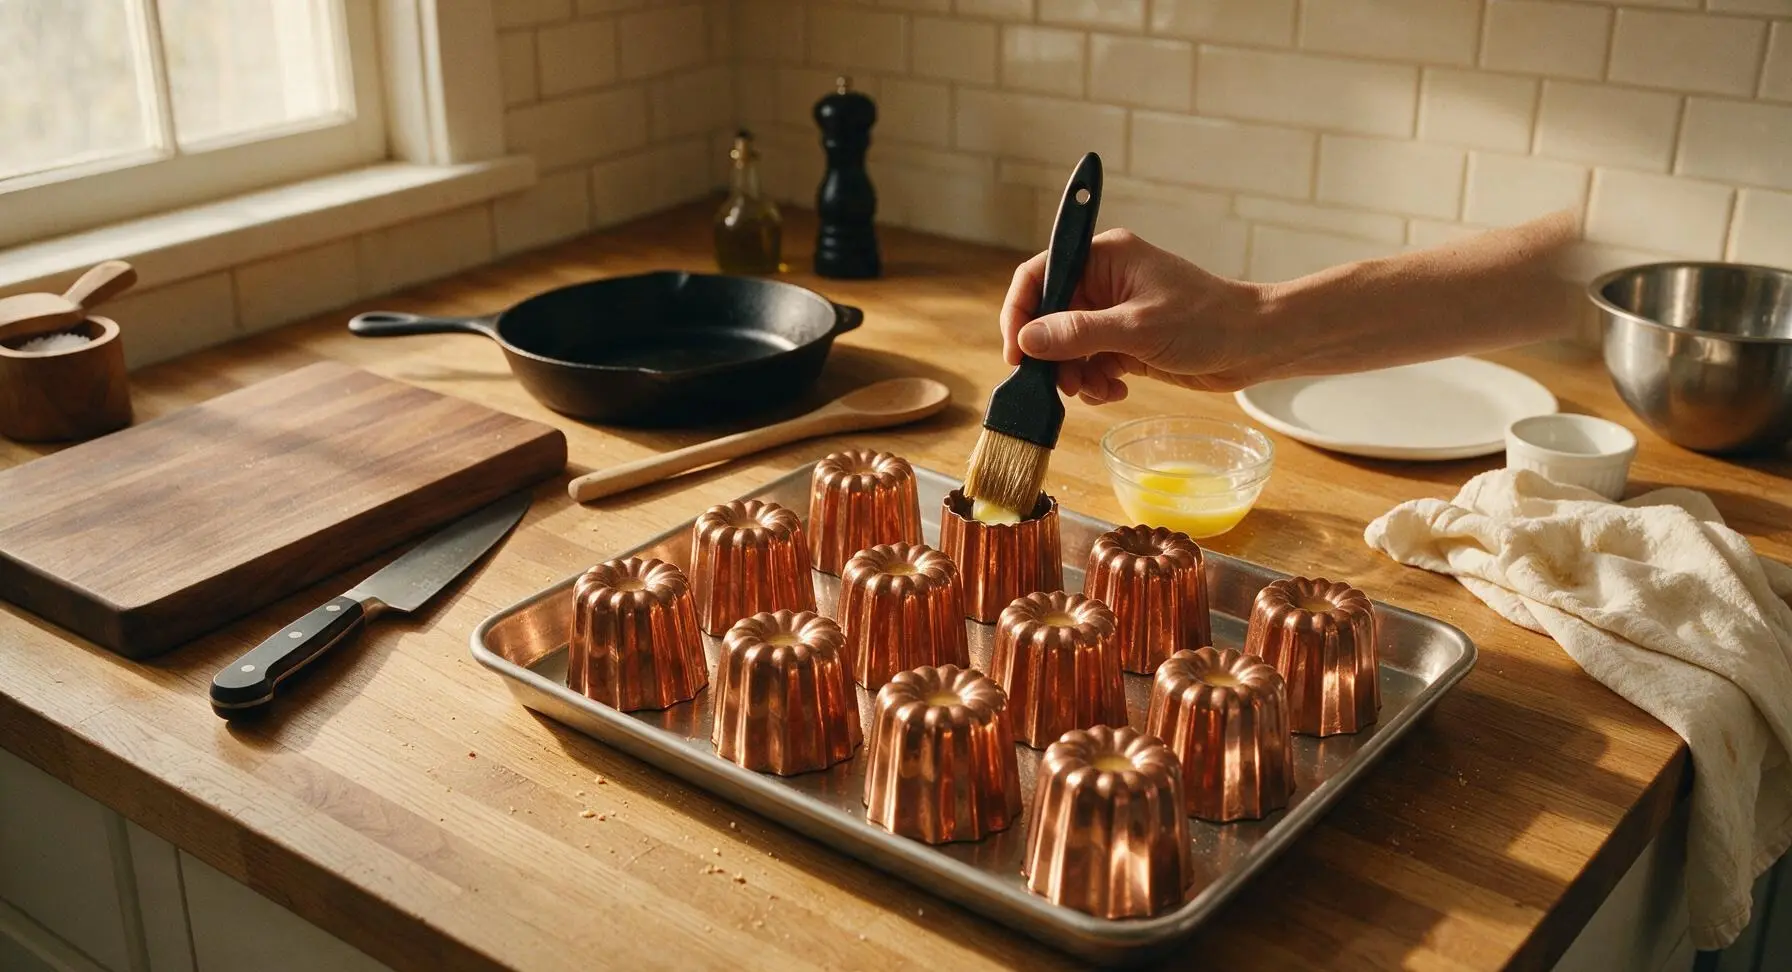
When ready to bake, preheat your oven to 240°C/465°F, with a rack positioned in the middle. Melt the remaining 1 tbsp unsalted butter. Use the natural boar bristle pastry brush to coat the entire interior surface of each tinned copper canelé mold with a thin, even layer of melted butter, making sure to coat every fluted ridge and the bottom of each mold. Arrange the buttered molds on a rimmed baking sheet and chill for 5 minutes to let the butter set firmly.
Step 5
step5:Butter Copper Molds
6

Fill Molds for Baking

Remove the rested batter from the refrigerator and stir it very gently to recombine (it will have separated into a thin top layer and thicker settled layer at the bottom). Pour batter into each chilled, buttered mold, filling to exactly 1cm below the rim—overfilling will cause batter to spill over the molds and burn in the oven. Wipe any batter drips from the outside of the molds with a corner of the linen tea towel.
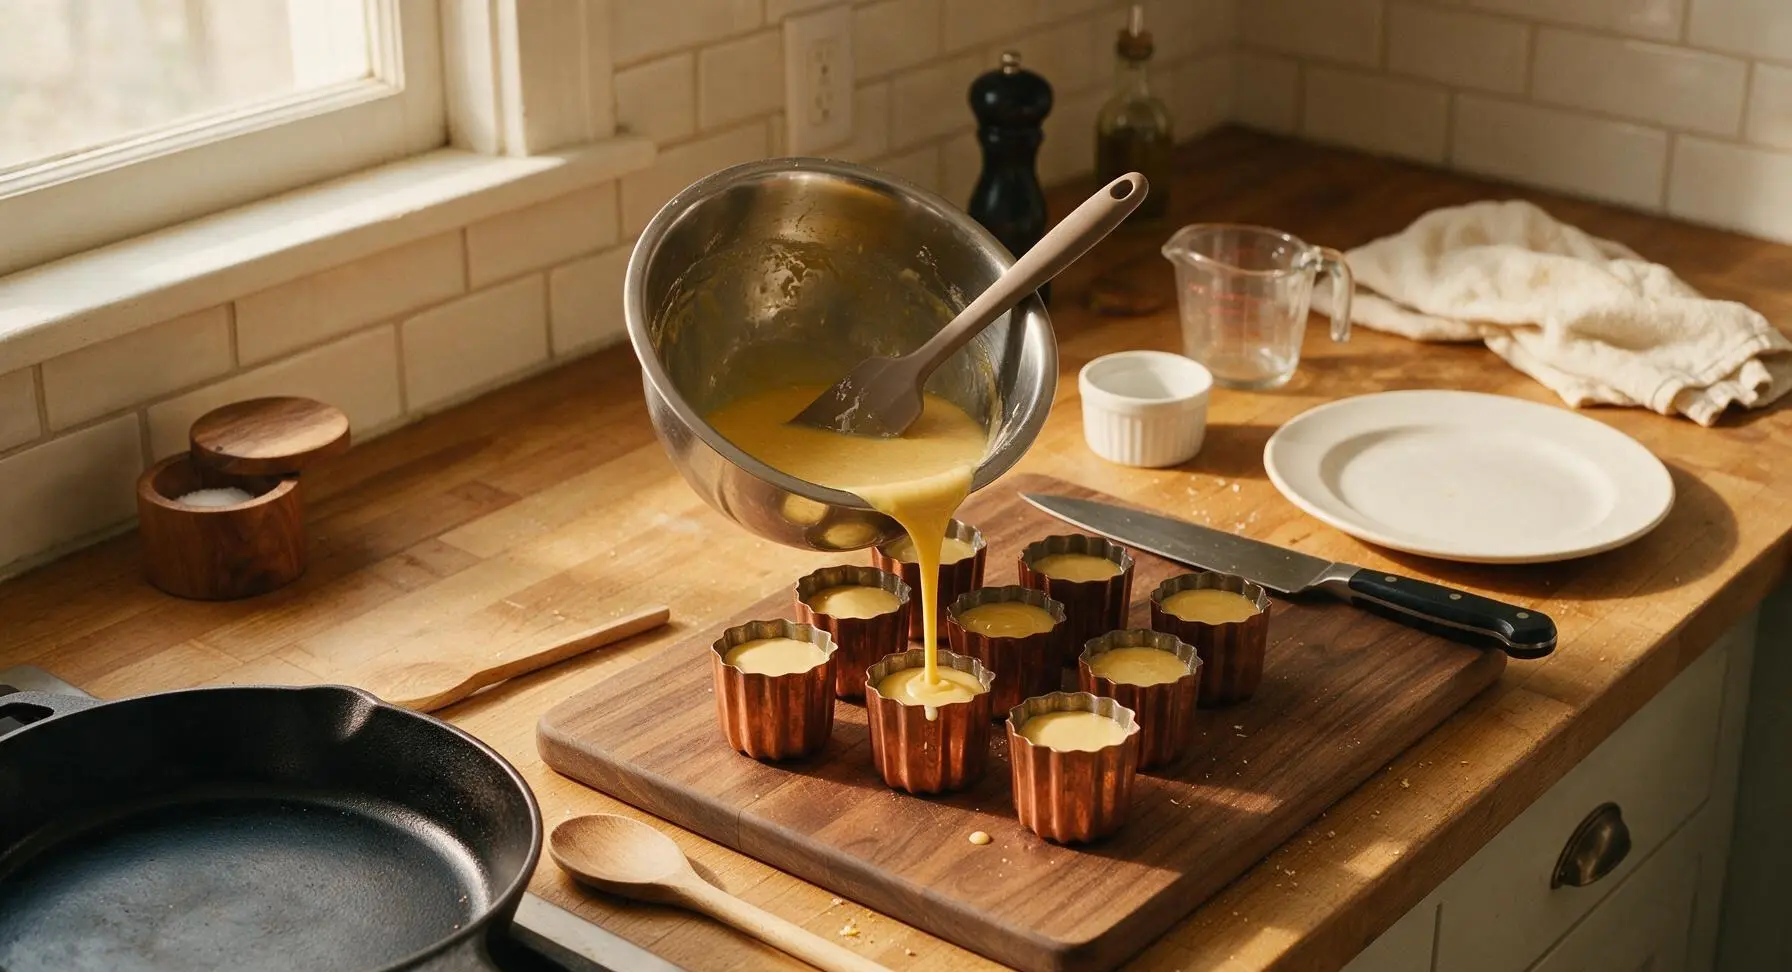
Step 6
step6:Fill Molds for Baking
7

Bake Canelés Slowly

Slide the baking sheet of filled molds onto the middle oven rack. Bake at 240°C/465°F for 15 minutes, then reduce the oven temperature to 180°C/350°F (do not open the oven door during the first 20 minutes of baking to prevent collapse) and continue baking for 55 minutes. The canelés are done when their exterior is a deep, glossy mahogany brown, almost dark amber-black at the fluted edges; they will rise above the mold rims early in baking then settle back as they finish.
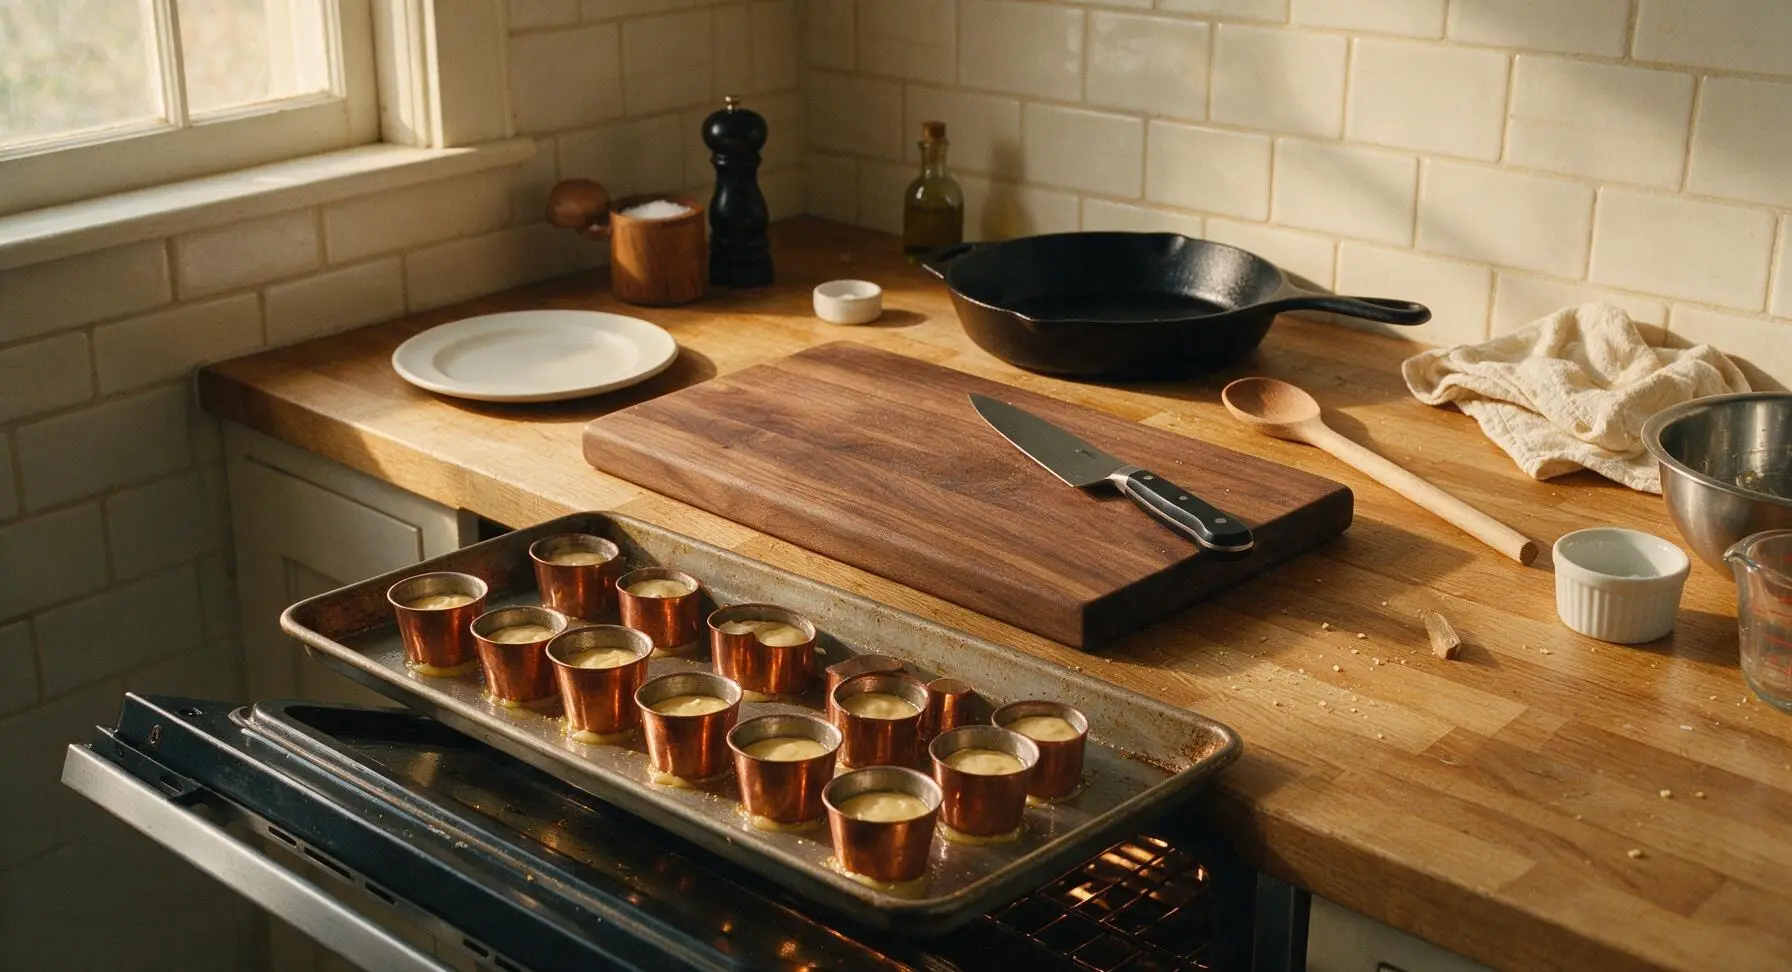
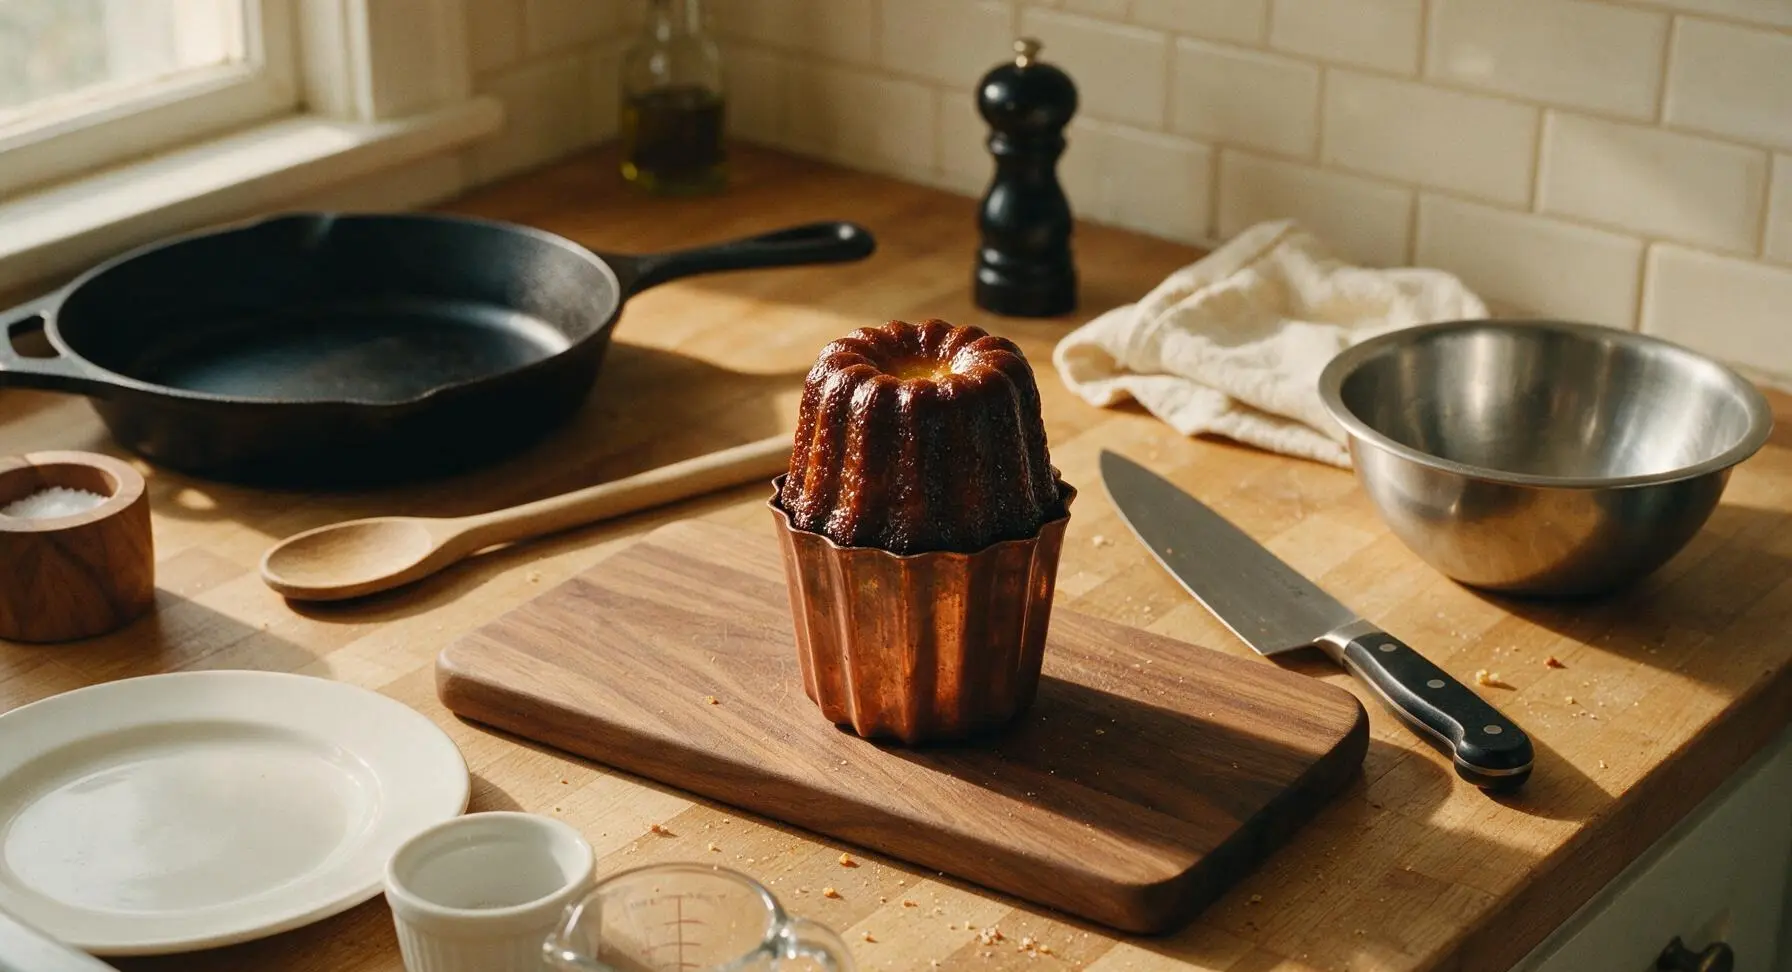
Step 7
step7:Bake Canelés Slowly
Step 7
step7:Bake Canelés Slowly
8

Unmold and Cool

As soon as you remove the canelés from the oven, immediately tip each mold upside down onto the chrome wire cooling rack to release the canelés—if left in the molds for more than 2 minutes, the caramelized sugar will stick and the canelés will not release cleanly. Let canelés cool completely for 30 minutes at room temperature; the crust will crisp as they cool, and the soft custard interior will set to its perfect tender texture.
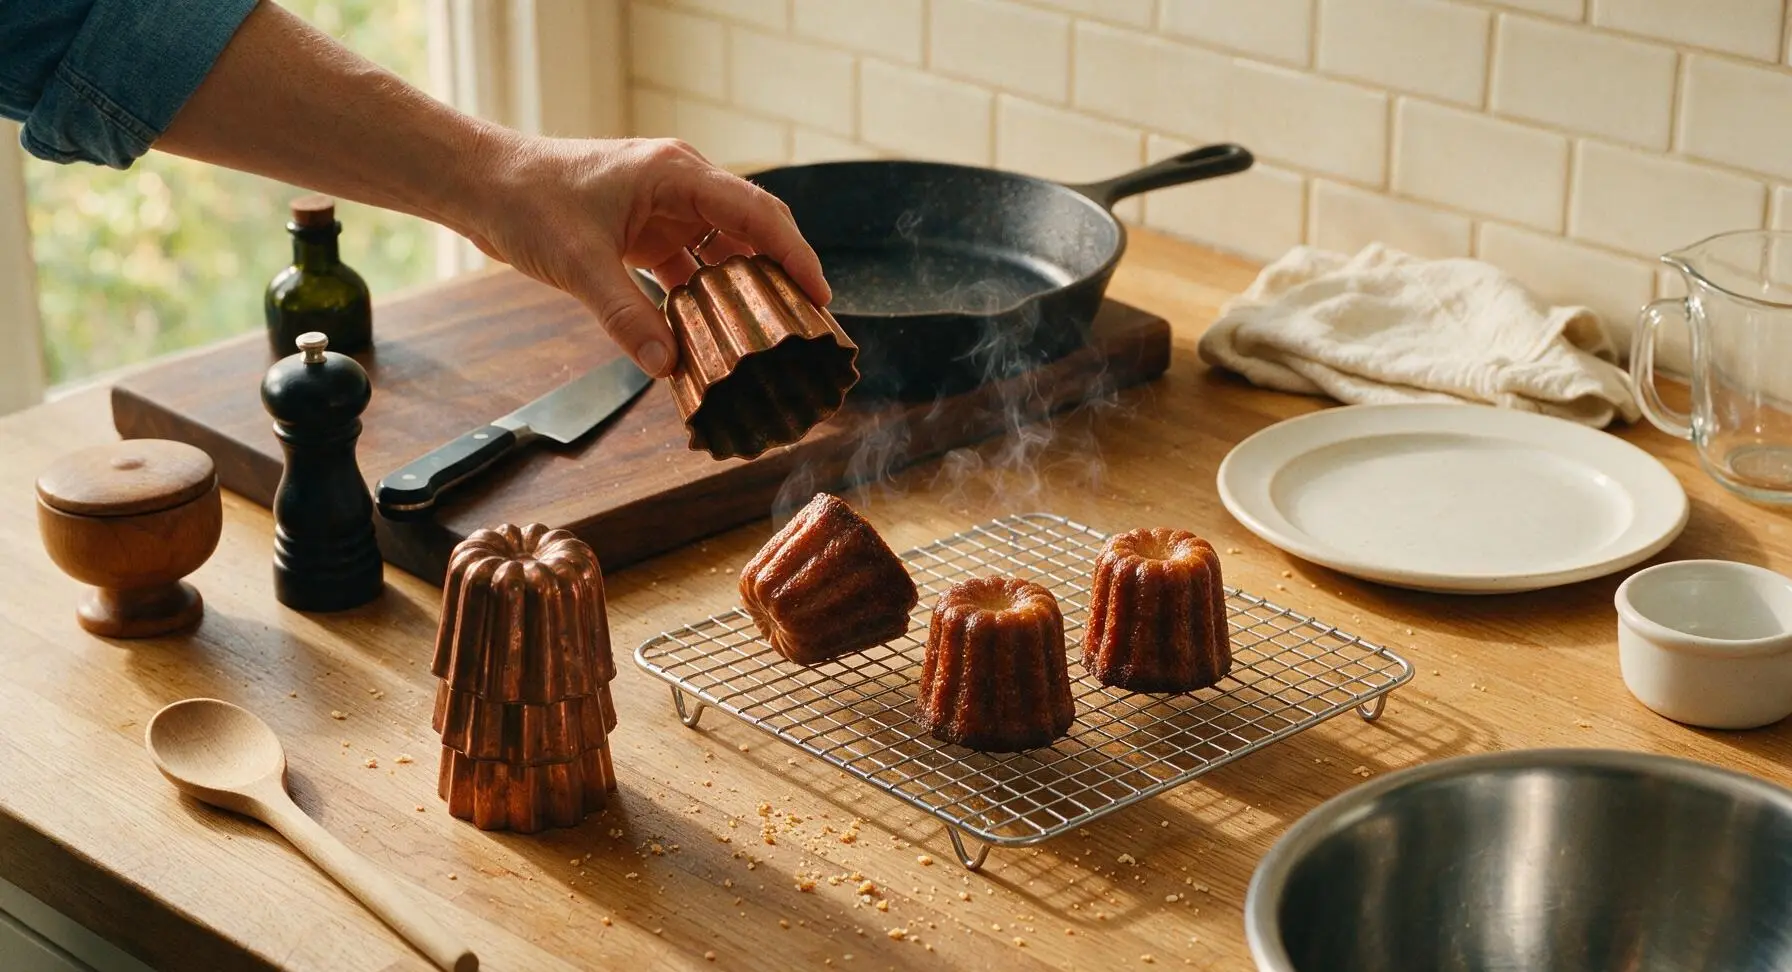
Step 8
step8:Unmold and Cool

Tips

1.Never over-whisk the batter: incorporating excess air creates large, irregular air pockets that cause canelés to rise too quickly, crack, and collapse in the oven, leading to a hollow, dry interior instead of the signature dense, tender custard center.
2.Chill buttered molds for 5 minutes before filling: the set butter creates a non-stick barrier that helps the caramelized crust release cleanly, and encourages a uniformly thick, crisp crust to form up every fluted ridge of the mold. Tinned copper molds deliver the best heat conduction for a deep crust, though heavy silicone molds work for casual home baking.
3.Resist the urge to skip the 24-hour batter rest: this long chill allows gluten in the flour to relax, starch to fully hydrate, and rum and vanilla flavors to meld deeply, resulting in a smoother texture and preventing unsightly surface cracks on the finished canelé crust.


✨ You May Also Like

Desserts & Baking
🍜 Italy

Creamy, coffee-kissed classic Northern Italian no-bake dessert, with layers of rum-spiked mascarpone cream, soft ladyfingers, and a rich cocoa dusting.

⏱️ 4 hours 3Desserts & Baking ★ 4.7
Desserts & Baking
🍜 France

Flaky, shatteringly crisp, buttery French croissants with golden exteriors and soft, airy layered interiors, perfect for pairing with coffee for a special morning treat.

⏱️ 12 hours Desserts & Baking ★ 4.5
Desserts & Baking
🍜 United States

Warm, spiced baked apples topped with a fluffy golden biscuit crust, this cozy dessert pairs perfectly with vanilla ice cream for cool-weather comfort.

⏱️ 55 minuteDesserts & Baking ★ 4.6
Desserts & Baking
🍜 United States

A star-spangled classic American blueberry pie with buttery flaky crust and bright sweet-tart filling, perfect for summer patriotic gatherings.

⏱️ 1 hour 25Desserts & Baking ★ 4.7
Desserts & Baking
🍜 United States

A beloved no-bake regional Maine candy with a chewy coconut-potato center coated in rich dark chocolate, a New England holiday staple since the 1870s.

⏱️ 2 hours 3Desserts & Baking ★ 4.8
Desserts & Baking
🍜 France

Luxuriously creamy, floral frozen custard made with aromatic Tahitian vanilla beans, boasting a smooth, rich texture that melts slowly on the tongue.

⏱️ 3 hours 3Desserts & Baking ★ 4.5

French Canelés:Frequently Asked Questions

1.Why do my canelés turn out with a pale, soft shell instead of the signature deep caramelized crisp exterior? ▾
This almost always traces to three common missteps: too low an oven temperature, an uneven or too-thick mold coating, or under-rested batter. Preheat your oven to 450°F (convection works best for even heat), apply a thin beeswax and unsalted butter coating that sets fully before pouring, and rest batter 48 hours to let the granulated sugar caramelize evenly into that perfect shattery shell.
2.Can I skip the dark rum in the recipe, or use a non-alcoholic substitute? ▾
Dark rum adds that signature warm, toasty aromatic note that balances the sweet vanilla and rich caramel, but you can absolutely swap it if needed. For a non-alcoholic version, replace the rum with 2 teaspoons high-quality rum extract mixed with 2 tablespoons whole milk to keep the batter consistency right, without losing that classic deep flavor profile.
3.Why is the center of my canelés dense and bready instead of soft and custardy? ▾
That tough, bready texture happens when you overmix the batter, bake at too low a temperature for too long, or fill molds too full. Treat the batter like a thin, lump-free crepe batter—don’t overwhisk once you add flour, fill molds only 3/4 full, and pull canelés when the shell is deep amber and the center has a gentle, jiggly custard set.
4.Do I really need to use a whole vanilla bean, or can I substitute vanilla extract? ▾
A whole vanilla bean delivers those tiny, aromatic seed flecks and a deep, rounded vanilla flavor that extract can’t quite match, but you can make a solid swap if needed. Use 1 tablespoon of high-quality pure vanilla extract (skip imitation vanilla for the best flavor) and stir it into the warm whole milk and butter mixture as it cools to let the flavor infuse fully.
5.How long do I need to rest canelé batter, and is that step actually necessary? ▾
For perfect, even texture, rest your covered batter in the fridge for a minimum of 24 hours, and ideally 48 hours. This rest lets the flour fully hydrate in the whole milk base, the rum’s harsh alcohol notes mellow, and trapped air bubbles dissipate so your canelés bake smoothly without large, uneven holes ruining that velvety custard center.
6.Can I use affordable silicone canelé molds instead of traditional copper ones? ▾
Traditional copper molds conduct heat beautifully for ultra-even caramelization, but food-grade silicone canelé molds work perfectly well for home bakers with one small adjustment. Raise your oven temperature by 25°F, and apply the same thin beeswax and unsalted butter coating to silicone molds to get that crisp, non-stick shell that releases cleanly every time.
7.Why do my canelés stick to the molds even after I grease them? ▾
Sticking almost always comes from a too-thick grease coating, or not letting the coating set fully before pouring batter. Melt equal parts beeswax and unsalted butter, swirl a thin layer inside each mold, invert to drain excess completely, then chill molds for 10 minutes to set the coating. Skip regular cooking spray, which leaves a gummy residue that ruins release and caramelization.
8.How should I store leftover canelés to keep their crisp shell and soft custard center? ▾
Canelés are best eaten within 4 to 6 hours of baking, when the shell is shatteringly crisp and the center is perfectly creamy. Store leftovers in an airtight container at room temperature for up to 2 days, and re-crisp them in a 350°F oven for 5 minutes right before serving. Skip the microwave, which turns the shell soggy and makes the custard rubbery.
9.Why does my batter curdle when I mix warm milk into the egg and sugar mixture? ▾
Curdling happens when you pour scalding hot whole milk directly onto eggs too quickly, which cooks the egg proteins before they can emulsify smoothly. Avoid this by tempering first: slowly whisk 1/2 cup of the warm milk and melted butter mixture into your whisked eggs and granulated sugar, then stir that warmed mix back into the remaining milk for a lump-free batter.

Comments (18)

5 minutes ago

OMG these turned out SO good! I brought them to my book club potluck last night and everyone was begging for the recipe. The crispy caramelized shell with that soft vanilla-rum custard inside? Absolute perfection. I was nervous since they’re medium difficulty but the steps were so easy to follow!

1 week ago

Game changer! I’ve been intimidated to make canelés for years after a failed attempt at a different recipe left me with burnt, goopy messes. These came out perfect on the first try! I used silicone molds since I don’t have copper ones, and they still released beautifully.

5 days ago

Wait did you grease your silicone molds extra? I tried silicone for canelés last year and half the batch stuck to the pan, wondering if I skimped on the melted butter coating!

3 days ago

My kids loved it! I skipped the rum since we don’t keep alcohol in the house and swapped in a little extra vanilla paste, and they still tasted incredible. Served them after our Sunday family dinner and even my super picky 8 year old asked for seconds.

2 days ago

That’s such a good non-alcoholic swap! I’m making these for my church potluck next weekend and have a few folks who don’t drink, I’ll definitely do extra vanilla paste instead of rum.

yesterday

So glad the whole family loved them! The extra vanilla swap works perfectly, and you can also add a tiny splash of almond extract for extra depth if you’d like. Just make sure your batter chills for at least 12 hours for that signature custardy texture!

5 days ago

Took these to my office meal prep swap yesterday and people were losing their minds. Only note: cook time was spot on for my oven, but I know ovens run hot/cold so I’d start checking at the 60 minute mark if you’re making them for the first time.

3 days ago

Great tip about checking early, Frank! Oven calibration makes a huge difference with canelés — you’re looking for a deep, dark amber exterior to get that perfect crispy caramelized crust, so don’t pull them when they’re just pale golden!

2 weeks ago

These are way easier than I thought they’d be for a medium difficulty recipe! I love that I can mix the batter up the night before and just pop them in the oven when I get home from work. Perfect little treat for weekday dessert.

1 week ago

Okay full transparency: my first batch was a total flop. I didn’t let the batter rest long enough and they were flat and pale. Gave it a second go, let the batter sit 24 hours in the fridge, and holy cow — perfect. Worth the extra wait, don’t rush the rest step y’all.

5 days ago

Oh thank god someone else admitted their first batch flopped! I almost threw my molds in the trash after my first sad, flat attempt, I’ll definitely let the batter rest a full 24 hours next time.

3 days ago

So glad you gave the recipe a second shot! The long rest period lets the flour fully hydrate and air bubbles settle, which is non-negotiable for that dense, creamy center and even rise. Most first-time canelé fails come from rushing that rest step!

yesterday

SO good! I used the traditional copper molds I inherited from my grandma, and they gave that perfect crisp edge just like the canelés I had when I visited Bordeaux a few years ago. This recipe is the real deal, no adjustments needed.

just now

Ugh I’m so jealous of your inherited copper molds! I’ve been saving up for a set for months — silicone works fine for now but I know copper gives that next-level crisp crust. So stoked these tasted just like the ones you had in Bordeaux!

2 weeks ago

Made these in my tiny dorm oven and they still slapped! I halved the recipe since I only have a 6-cup silicone mold, and they were the perfect study snack for finals week. My roommates keep asking when I’m making more.

1 week ago

Wait halving the recipe worked okay without messing up the ratios? I only have a tiny 6-cup mold too and I was nervous to cut the recipe in half, that’s such a relief to hear!

1 week ago

We love that you made these work in a dorm kitchen! Halving the recipe works totally seamlessly, just keep an eye on cook time — smaller batches can cook 5-10 minutes faster since there’s less cold batter hitting the hot oven.

3 days ago

Made these for my neighborhood block party potluck and they were the first dessert gone! I dusted a tiny bit of flaky sea salt on top of half the batch and people went feral for that sweet-salty combo. 10/10, will make again.

2 days ago

The flaky sea salt addition is absolute genius! It cuts through the rich custard and makes the caramel flavor pop even more — we’re going to add that as a fun variation tip in the recipe notes, thanks so much for sharing!

2 hours ago

These are solid, but I found them a little too sweet for my taste. Next time I’ll cut the sugar by a tablespoon or two to balance out the rum and vanilla. Otherwise, texture was spot on, crispy outside creamy inside.

1 week ago

Game changer dessert for dinner parties! I made these for a French-themed dinner club night and everyone thought I bought them from a fancy patisserie. The only thing I did different was brush the molds with beeswax and butter like my French host mom taught me, and they released like a dream.

5 days ago

Wait you used beeswax and butter to coat the molds? I’ve only ever used plain butter, does that make the crust extra shiny and crisp? I need to pick up some beeswax to try that on my next batch!

3 days ago

The beeswax coating is such a classic traditional trick! It creates that ultra-shiny, snappy crisp crust and helps the canelés slide right out of the molds without sticking. It’s totally optional but absolutely worth the extra step if you have food-grade beeswax on hand.

2 days ago

My only complaint is that these are so addictive I ate three straight out of the oven oops. Cook time was exactly 70 minutes for me, I used dark rum and it gave that perfect warm, deep flavor that doesn’t overpower the vanilla. So good.

yesterday

Same! I told myself I’d only have one with my morning coffee and ended up eating half the batch before my partner even got home from work. These things are dangerously addictive, I can’t be left alone with them!

2 weeks ago

I made these for a post-hike snack for my trail group and they held up perfectly! I was worried they’d get soggy in the cooler, but the crispy crust stayed intact for hours and everyone loved the portable little size. Great for on-the-go treats, not just fancy dinners.

1 week ago

What a brilliant idea to bring these on a hike! I always write canelés off as a fancy sit-down dessert, I never thought to pack them for trips. I’m definitely making a batch for our next golf outing with friends.

1 week ago

We love that you took these on the trail! Their sturdy caramelized crust and compact size make them way more portable than a lot of other French pastries — just don’t leave them in a super hot car for hours, or the caramel will get melty and sticky!

1 week ago

I’ve tried three different canelé recipes over the last year and this is hands down the best one. The ratios are perfect, the instructions are clear even for a medium-skill bake, and I haven’t had a single stuck canelé since I started using this method. My new go-to.

yesterday

I added a tiny bit of orange zest to the batter and it was chef’s kiss. That bright citrus note cuts through the rich custard so well, especially when the canelés are still a little warm from the oven. 10/10 recipe, super adaptable.

2 hours ago

Orange zest is such a lovely addition! A lot of traditional bakers in Bordeaux add a hint of citrus to their batter too, so your tweak is totally authentic to the region. So glad you enjoyed the recipe!

5 days ago

Quick heads up for my fellow high altitude bakers! I’m at 7,000 feet outside Denver and had to add an extra tablespoon of milk, bump the oven temp down 25 degrees, and add 5 minutes to the cook time to get them to set properly. They turned out incredible after those small tweaks!

3 days ago

Thank you so much for sharing these adjustments! I’m at 8,000 feet in the Rockies and I was fully prepared to mess up three batches before getting it right, this saves me so much time and wasted ingredients.

2 days ago

We really appreciate you sharing your high altitude tweaks! High altitude baking is always tricky, and we’re going to add these tips to the recipe notes so other mountain bakers don’t have to troubleshoot on their own. So glad they turned out great for you!

30 minutes ago

I’ve been paying $6 a pop for canelés at my local fancy bakery and I can’t believe how easy these are to make at home for a fraction of the cost. Game changer for my weekly dessert prep, I’m going to keep a stash in the freezer for last minute guests.

5 minutes ago

Wait you can freeze baked canelés? Do they reheat okay in the oven? I’ve never thought to freeze pastries like this, but having a stash for last minute guests would be a total game changer for me too!

just now

I’ve been baking for 40+ years and these canelés took me right back to the trip my husband and I took to Bordeaux for our 25th anniversary. The flavor is exactly spot on, not too rummy, perfectly caramelized, just like the ones we had at that little sidewalk patisserie. Wonderful recipe.



