
Grilled Cheese Burrito

title 1
Grilled Cheese Burrito
⏱️ cook time 12 minutes
🍽️ servings 4
⚡ Difficulty easy

intro

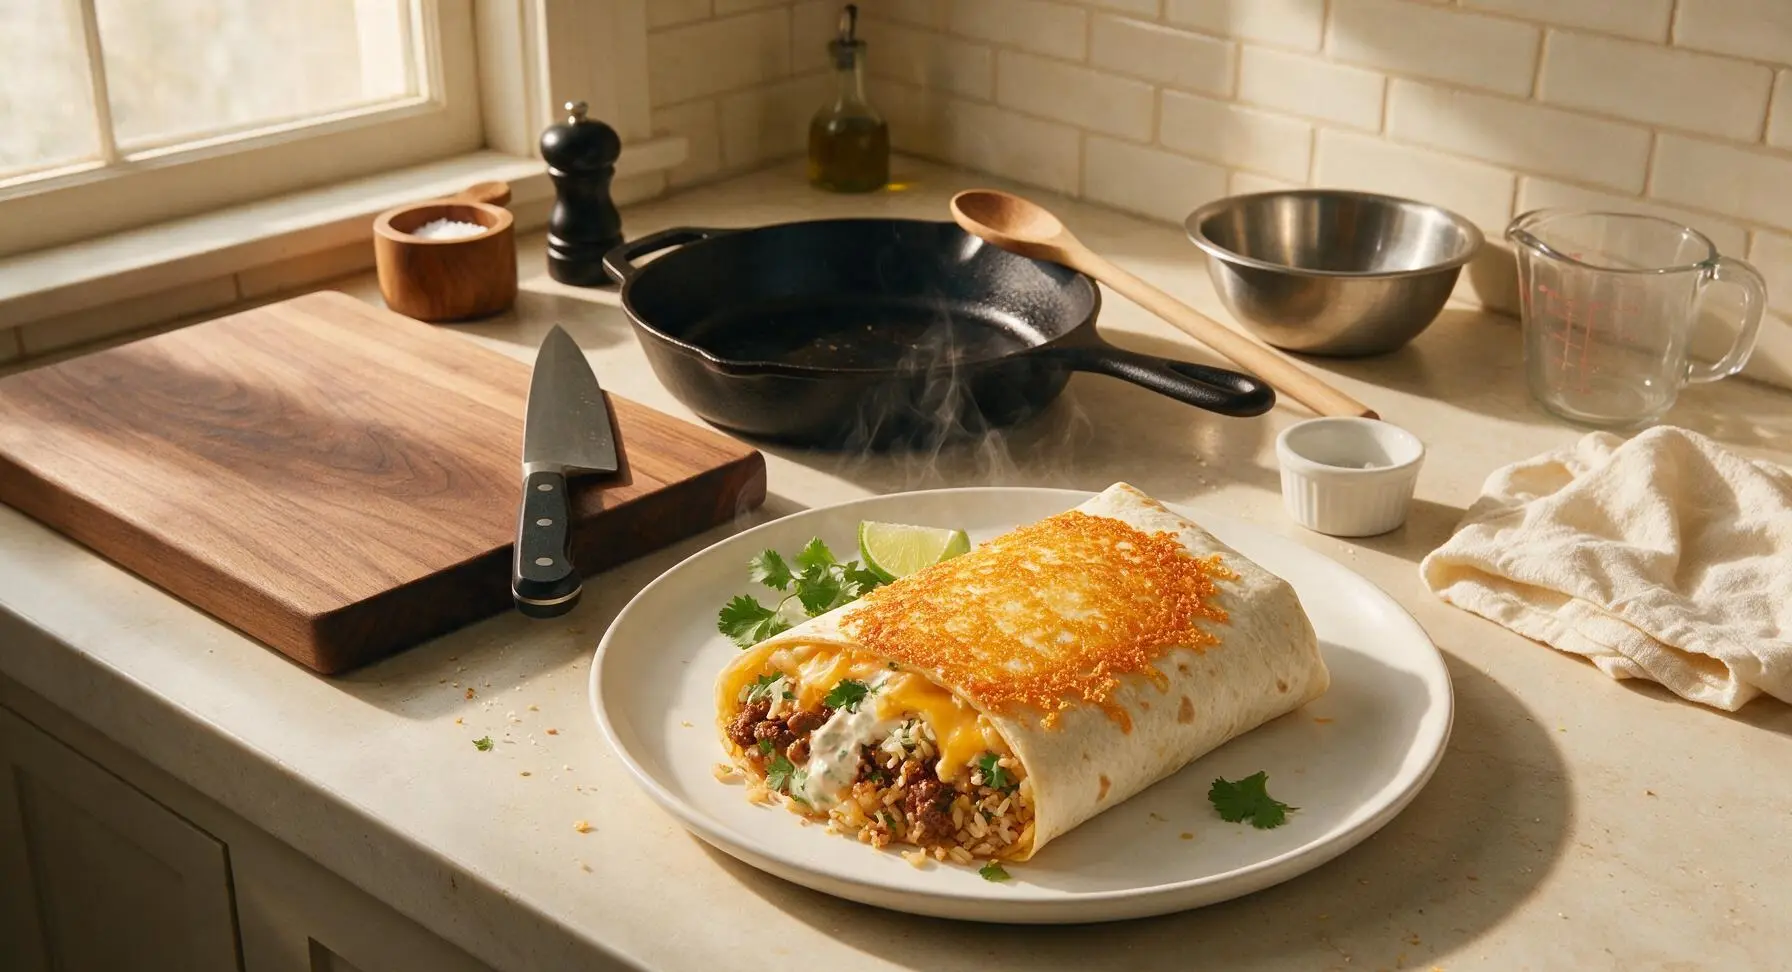
Crispy lacy cheese-crusted tortillas wrapped around melted cheddar, seasoned beef, cilantro rice, and creamy chipotle—this handheld grilled cheese burrito is cozy, indulgent comfort food.

Ingredients
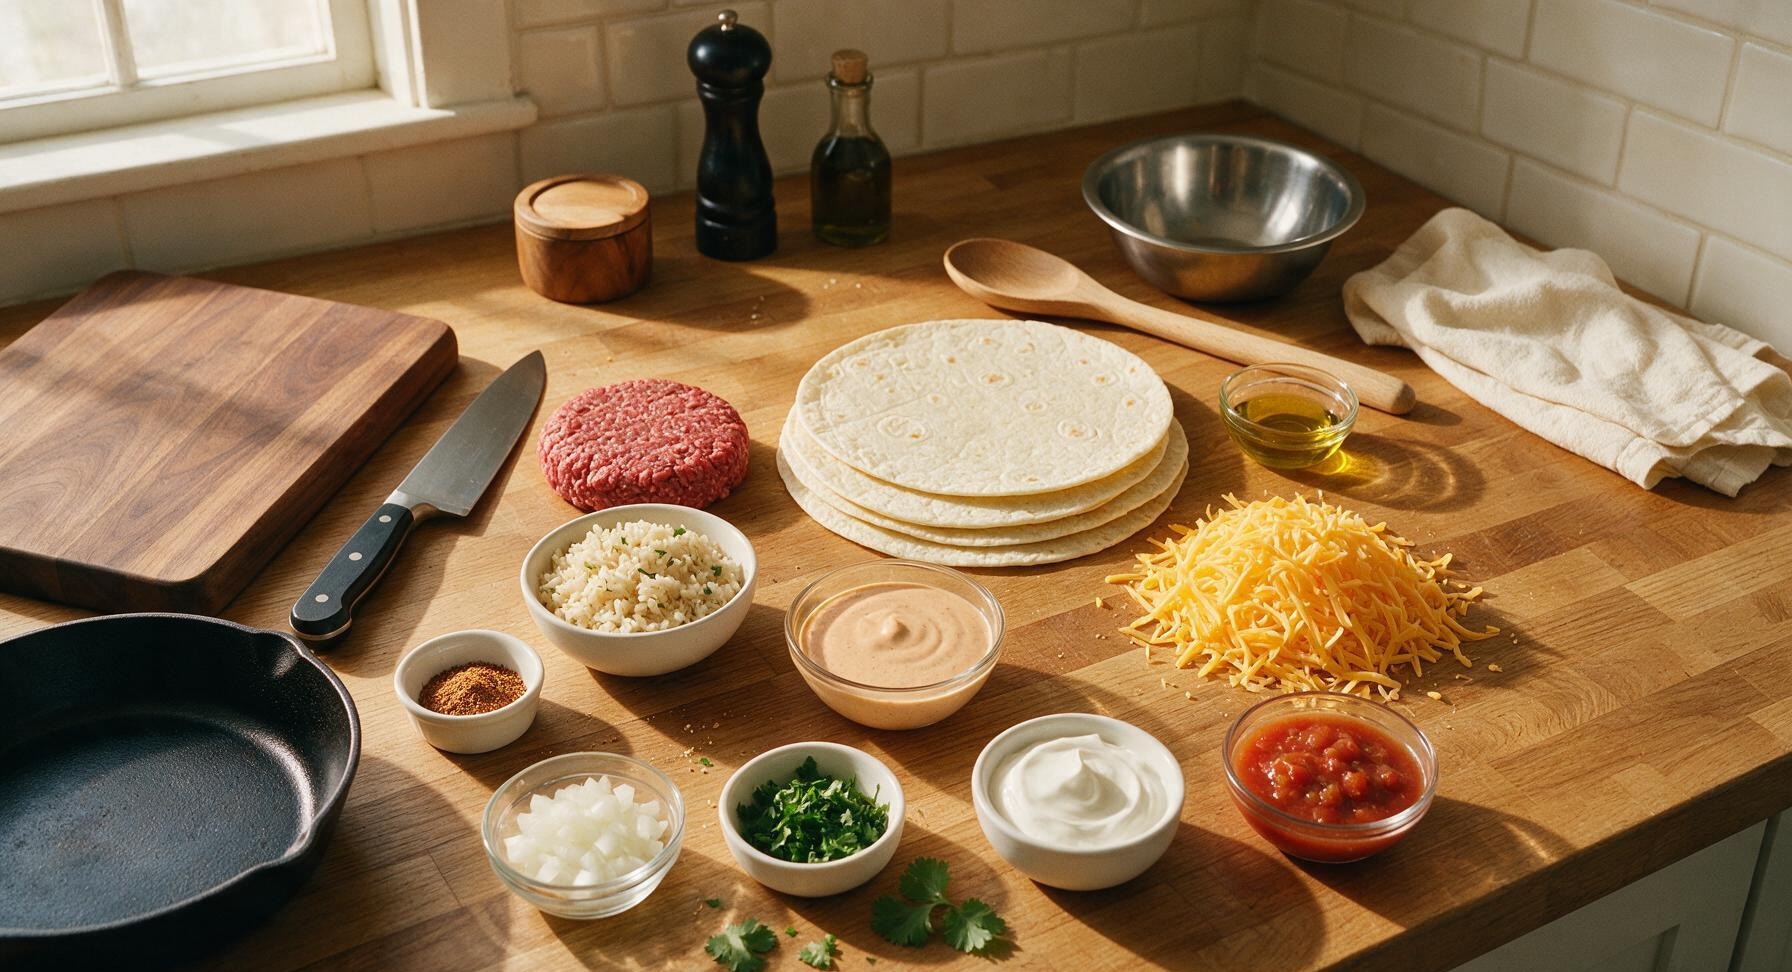
Large 10-inch flour tortillas (burrito size) 4 each
Lean ground beef (90/10) 1 lb (450g)
Shredded sharp cheddar cheese 1.5 cups (165g)
Cooked cilantro lime rice 1 cup (185g)
Creamy chipotle sauce 1/3 cup (80ml)
Taco seasoning mix 1 tbsp (8g)
Diced white onion 1/4 cup (40g)
Fresh cilantro (chopped, plus extra for garnish) 2 tbsp (5g)
Sour cream (for serving) 1/4 cup (60g)
Mild red salsa (for serving) 1/4 cup (65g)
Olive oil 1 tsp (5ml)

Steps

1

Brown Seasoned Beef

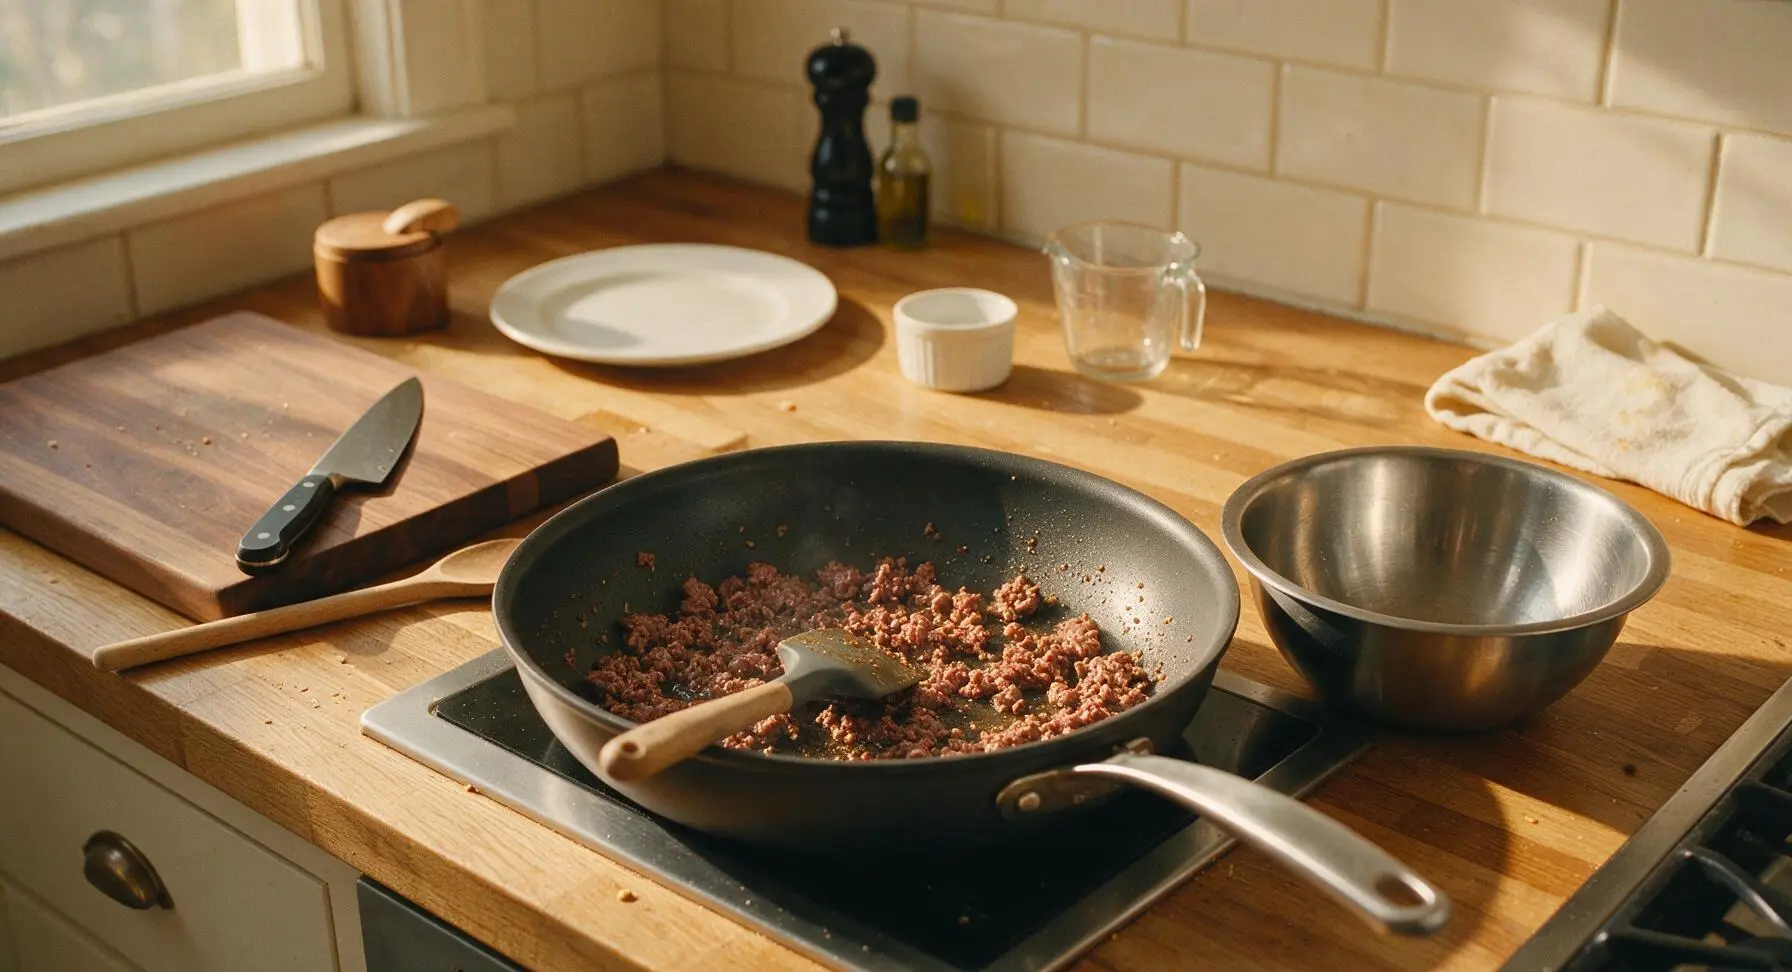
Place the 12-inch matte charcoal non-stick skillet on the stovetop over medium heat (350°F / 175°C). Add 1 teaspoon olive oil, then crumble in 1lb lean ground beef. Sprinkle with 1 tablespoon taco seasoning, using the silicone spatula to break the beef into small, even crumbles as it cooks. Cook for 5-6 minutes, until no pink remains and the beef is fully cooked through. Drain excess grease, then transfer the cooked beef to the medium stainless steel mixing bowl and set aside. Wipe the skillet clean with a paper towel for later use.
Step 1
step1:Brown Seasoned Beef
2

Mix Burrito Filling

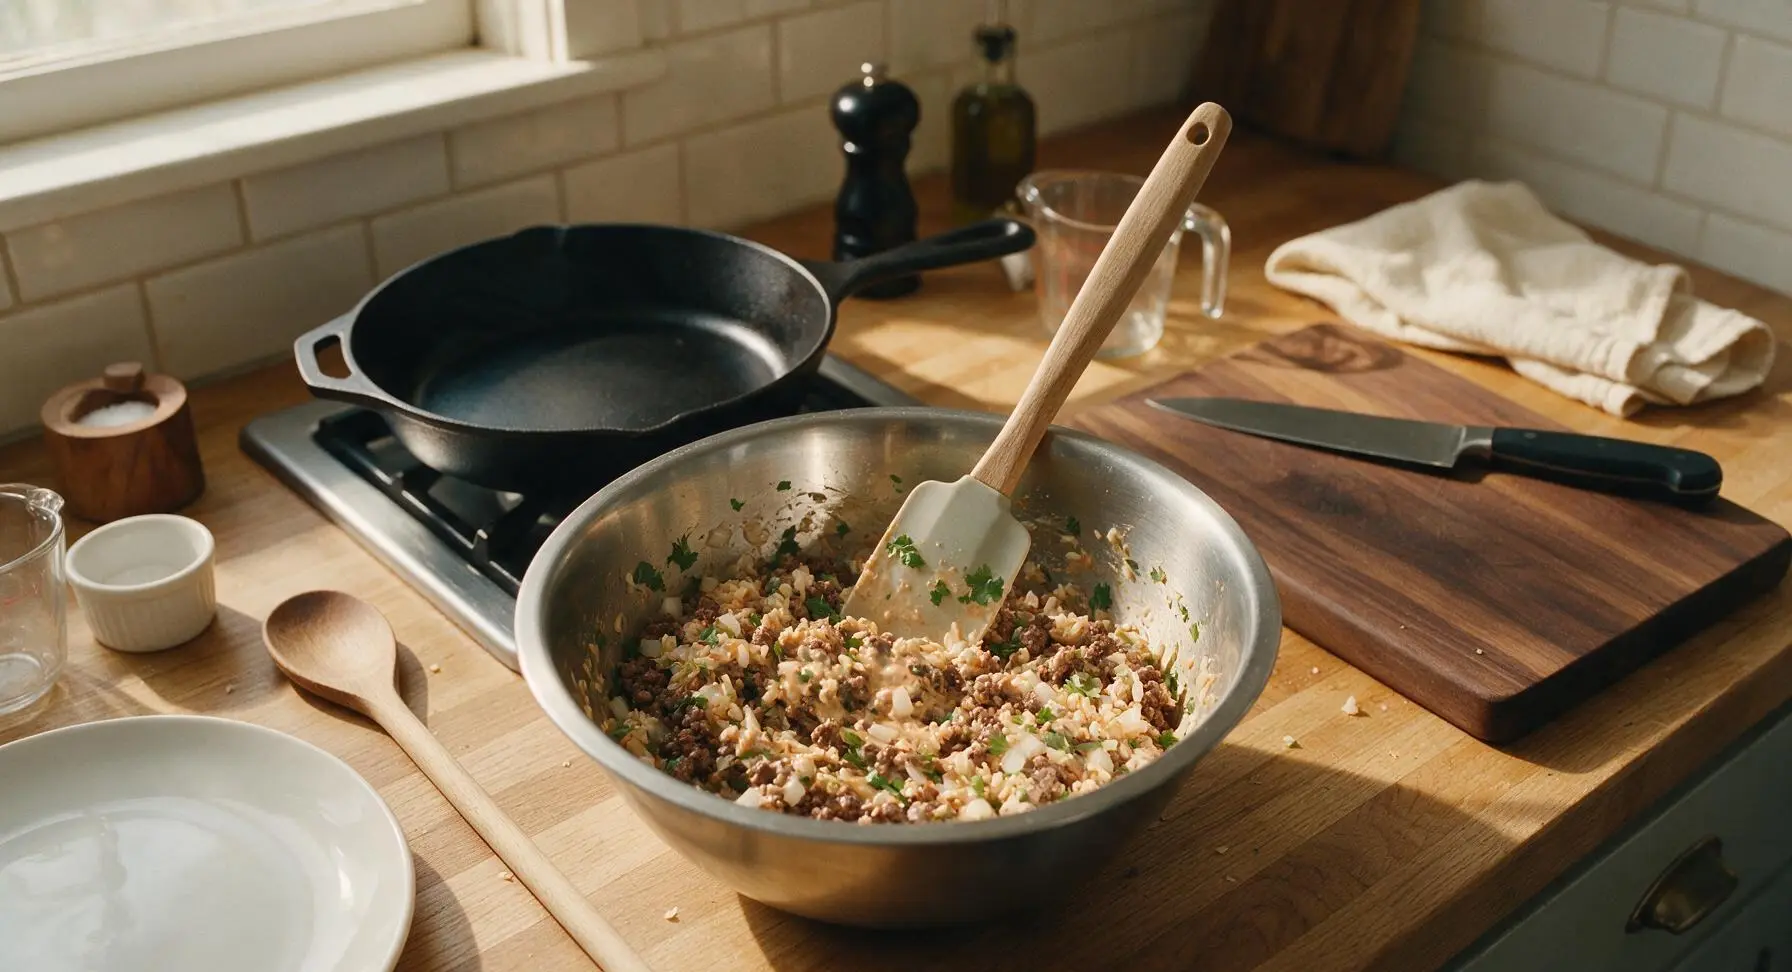
To the medium stainless steel mixing bowl with cooked beef, add 1 cup cooked cilantro lime rice, 1/4 cup diced white onion, 2 tablespoons chopped fresh cilantro, and 1/4 cup of the creamy chipotle sauce. Stir thoroughly with the silicone spatula until all ingredients are evenly combined, with sauce coating every grain of rice and beef crumble. The mixture should be warm, not hot enough to melt cheese prematurely.
Step 2
step2:Mix Burrito Filling
3

Layer Fillings on Tortillas

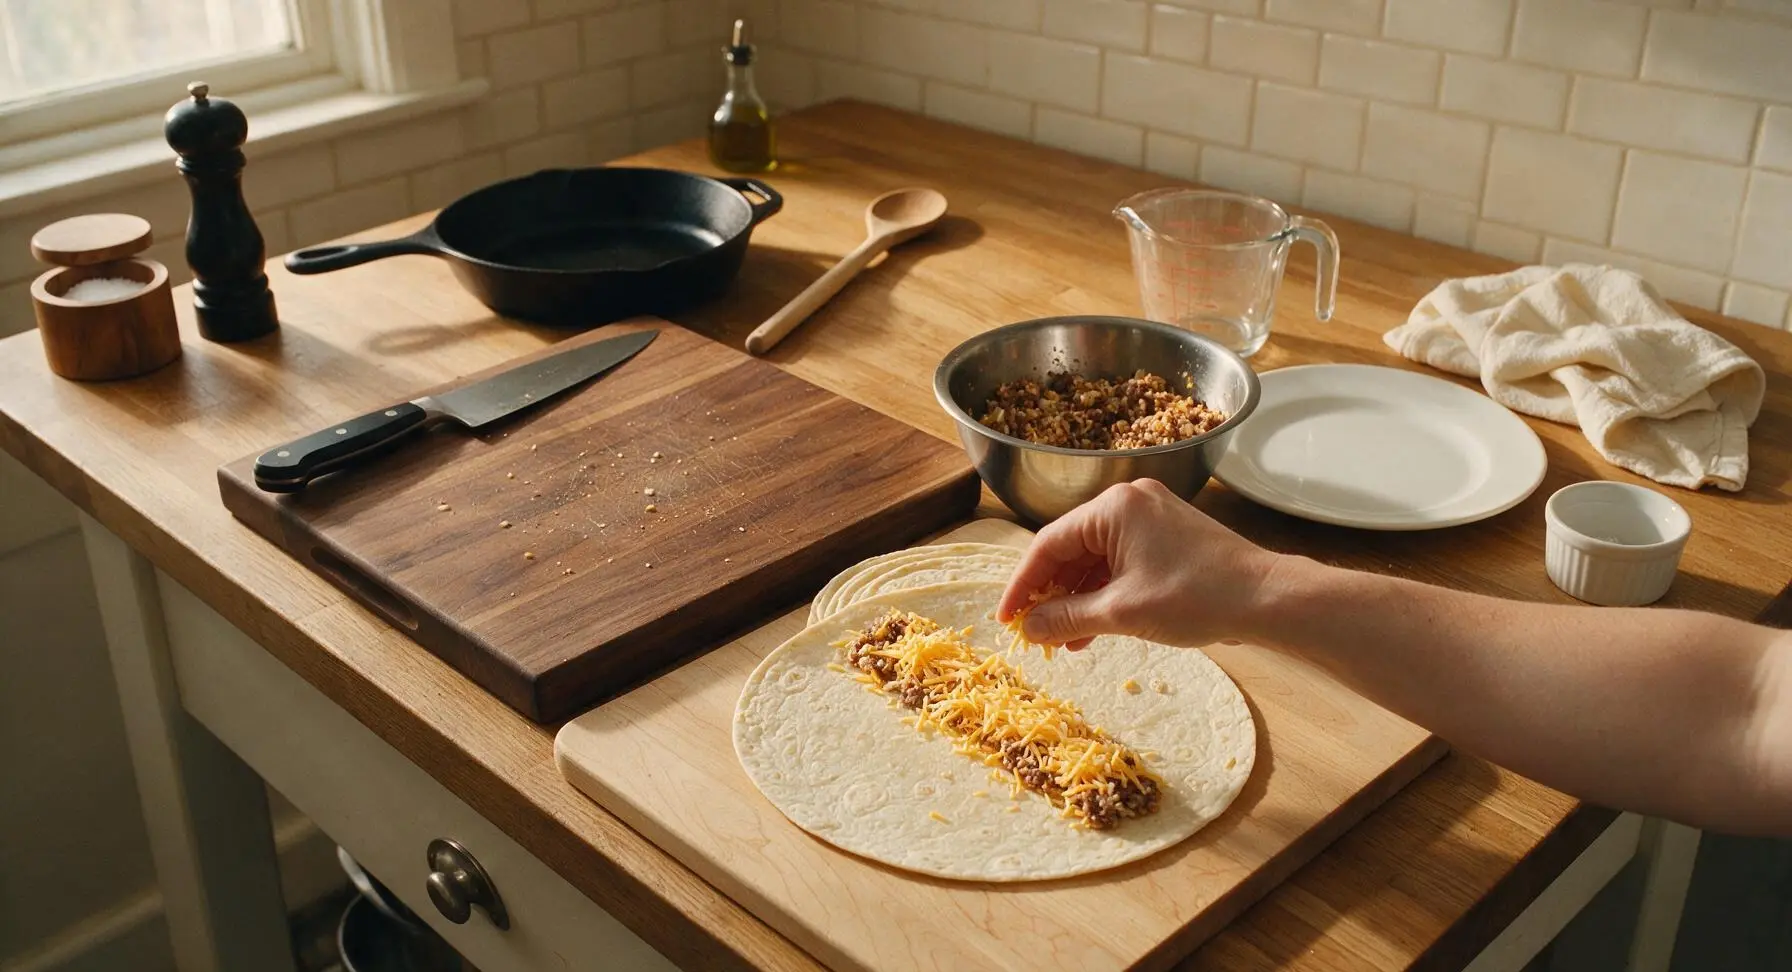
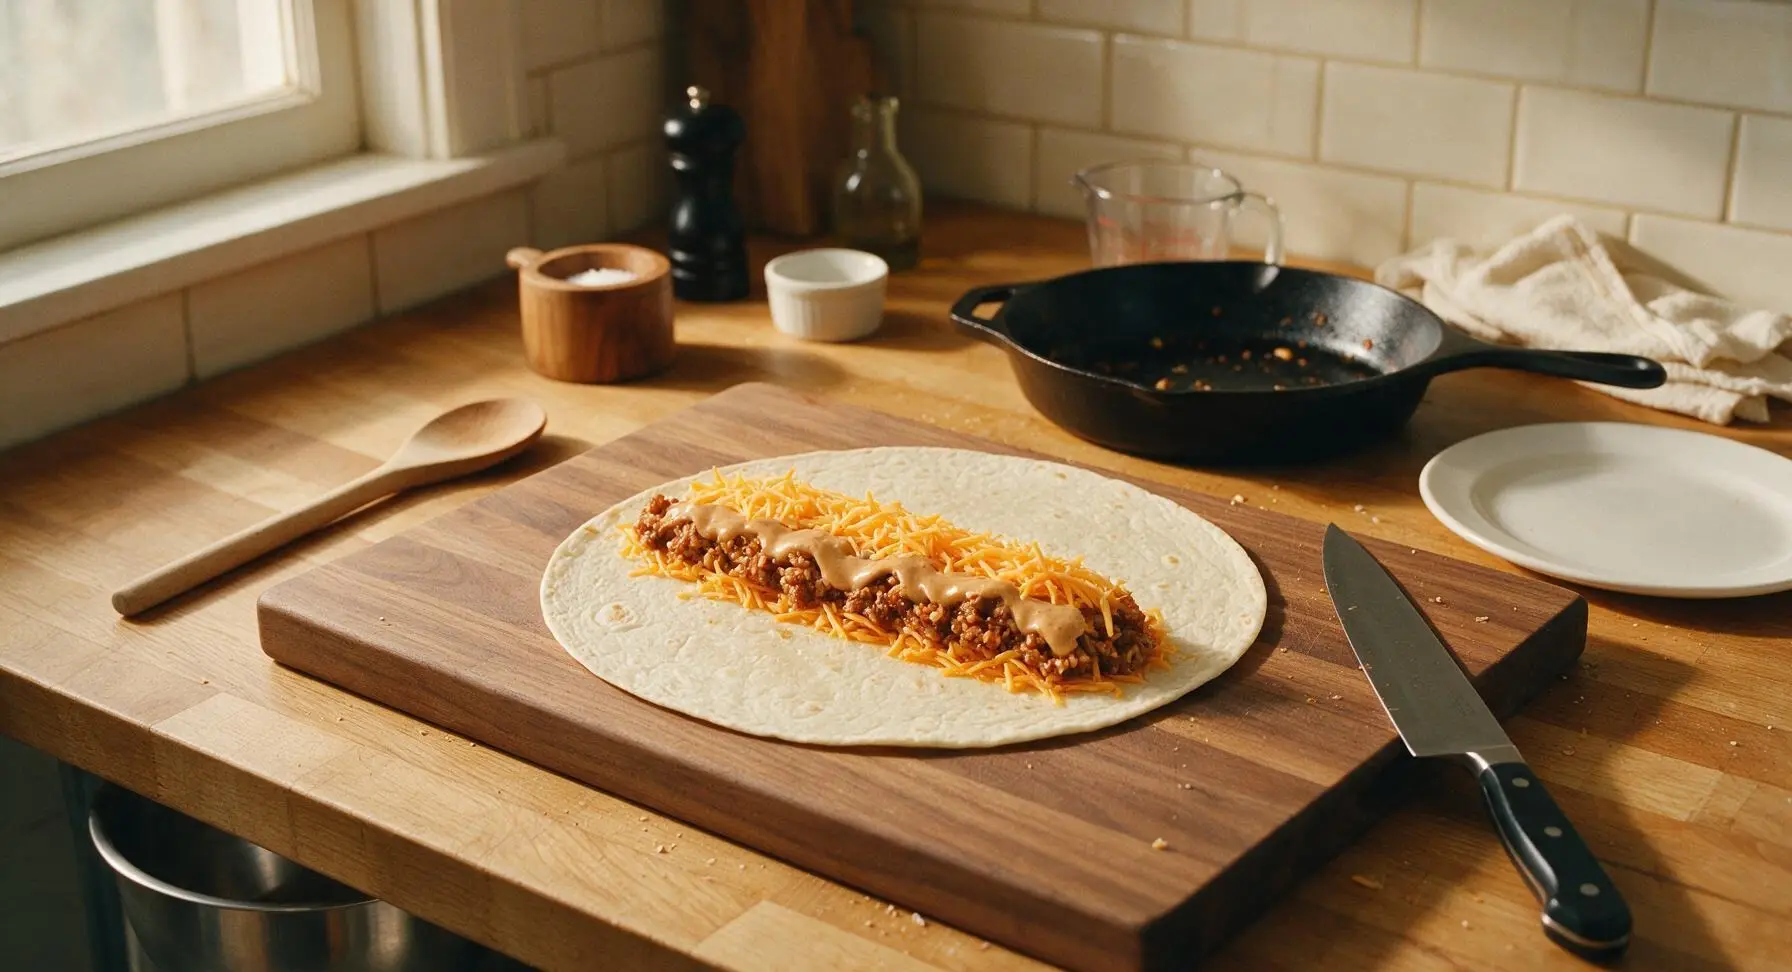
Lay one 10-inch flour tortilla flat on the large maple wood cutting board. Sprinkle 2 tablespoons of shredded cheddar in a 4-inch wide strip down the center of the tortilla, leaving 2 inches of space at the top and bottom for folding. Top the cheese with 1/4 of the beef and rice filling, then spread 1 teaspoon of the remaining creamy chipotle sauce over the filling, and top with another 2 tablespoons of shredded cheddar. Set aside the remaining 1/2 cup of cheddar for the outer cheese crust. Repeat the layering process for all 4 tortillas.
Step 3
step3:Layer Fillings on Tortillas
Step 3
step3:Layer Fillings on Tortillas
4

Fold Burritos Tightly

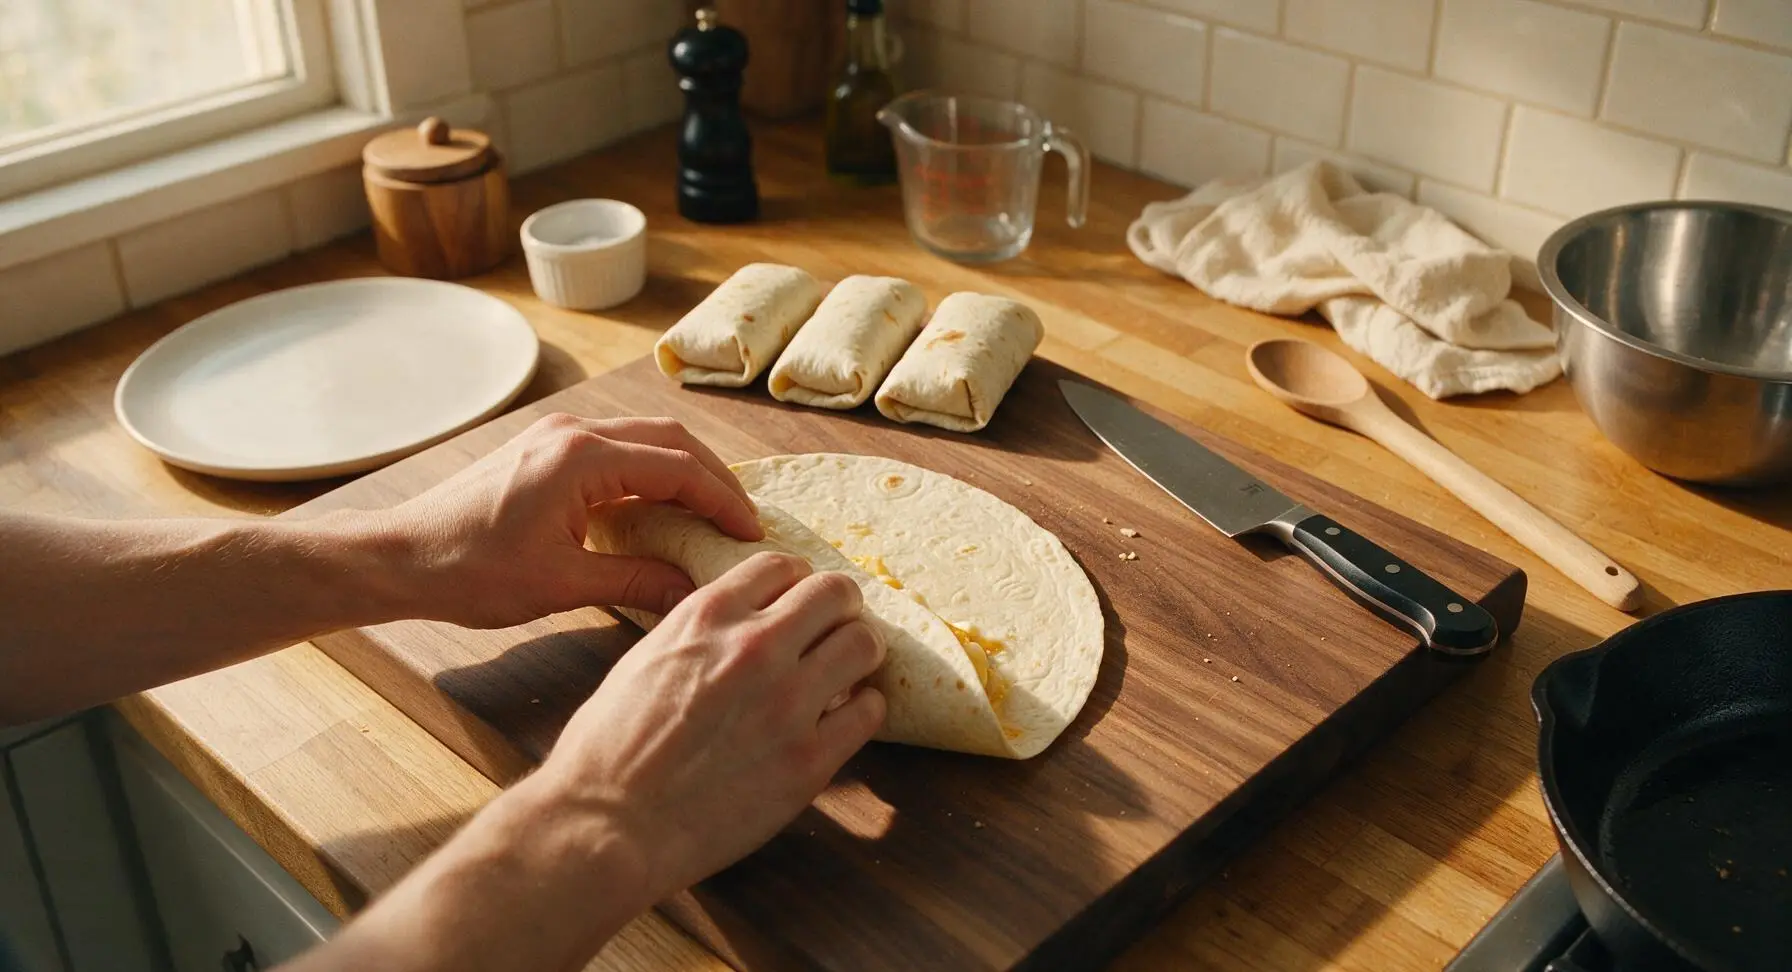
Fold the 2-inch top and bottom edges of the tortilla in over the filling, then roll the tortilla tightly from one long side to the other to form a sealed, cylindrical burrito. Ensure the seam side faces down to prevent unrolling while cooking. Set folded burritos aside on the edge of the cutting board as you work, tucking any loose filling back into the ends as needed to prevent leaks.
Step 4
step4:Fold Burritos Tightly
5

Crisp Outer Cheese Crust

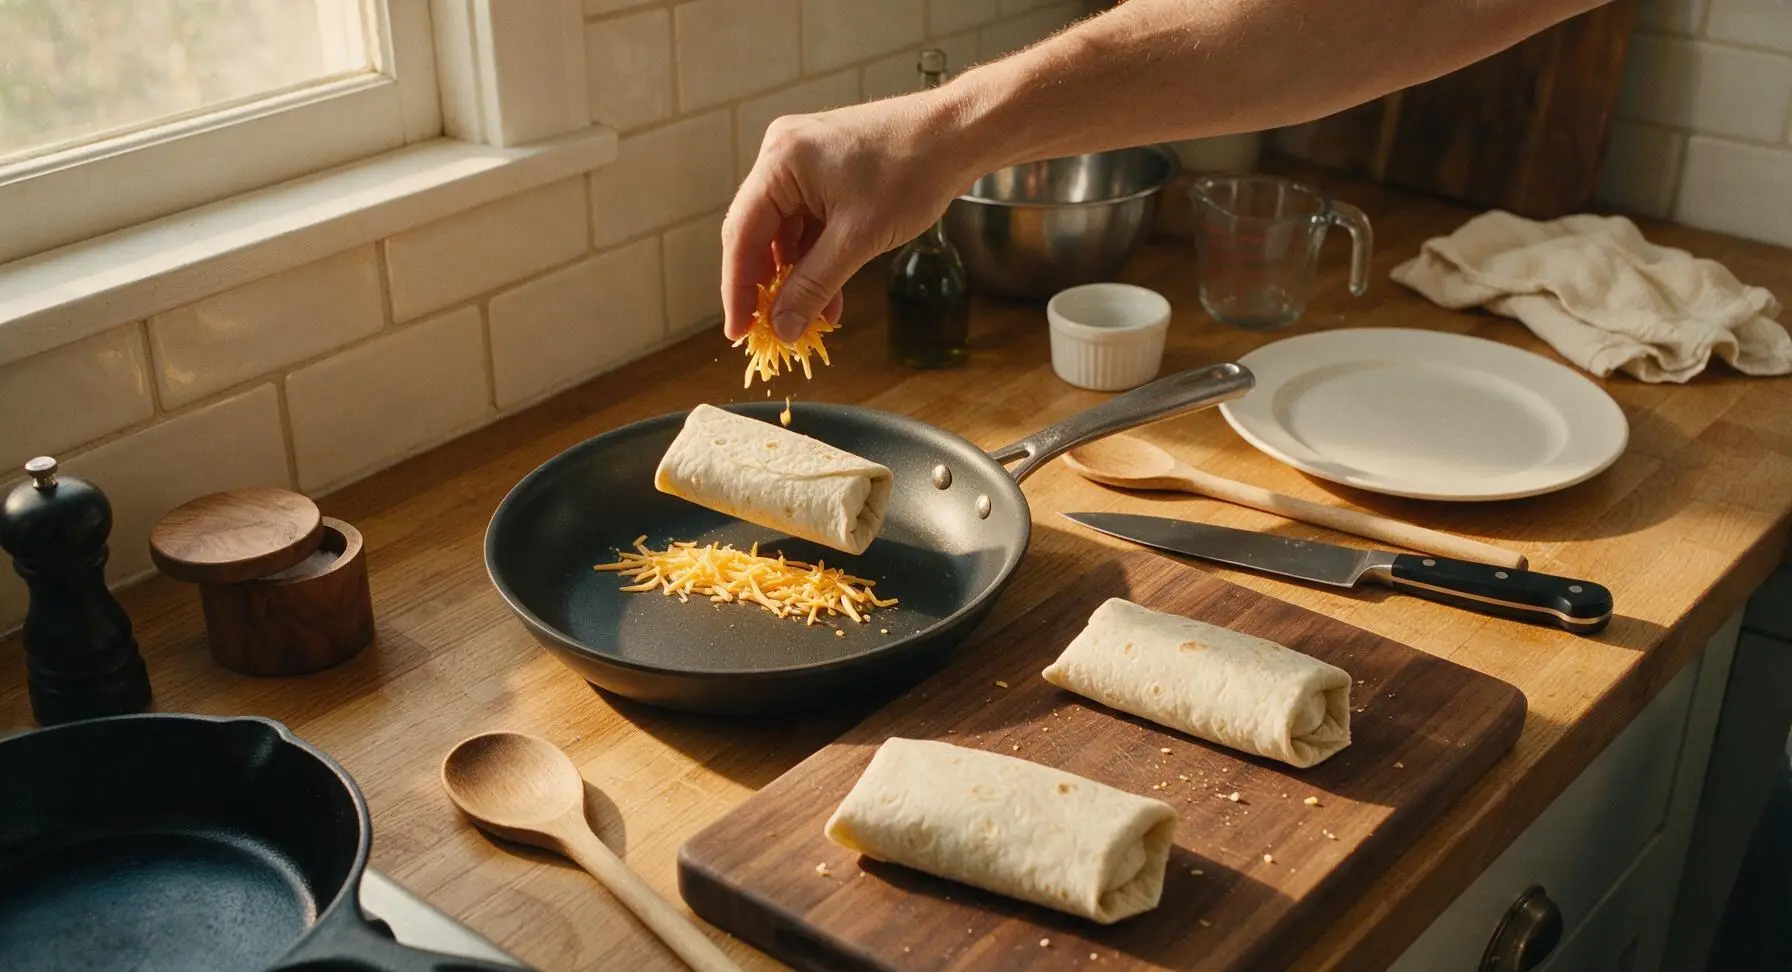
Return the clean 12-inch matte charcoal non-stick skillet to medium-low heat (325°F / 160°C). Sprinkle 2 tablespoons of the reserved shredded cheddar in a 4-inch long strip directly onto the dry skillet surface for each burrito, then immediately place a folded burrito seam-side down directly on top of the cheese. Cook for 2 minutes, until the cheese on the pan melts, turns deep golden, and forms a crispy, lacy crust adhered to the bottom of the burrito. Work in batches of 2 to avoid overcrowding the pan.
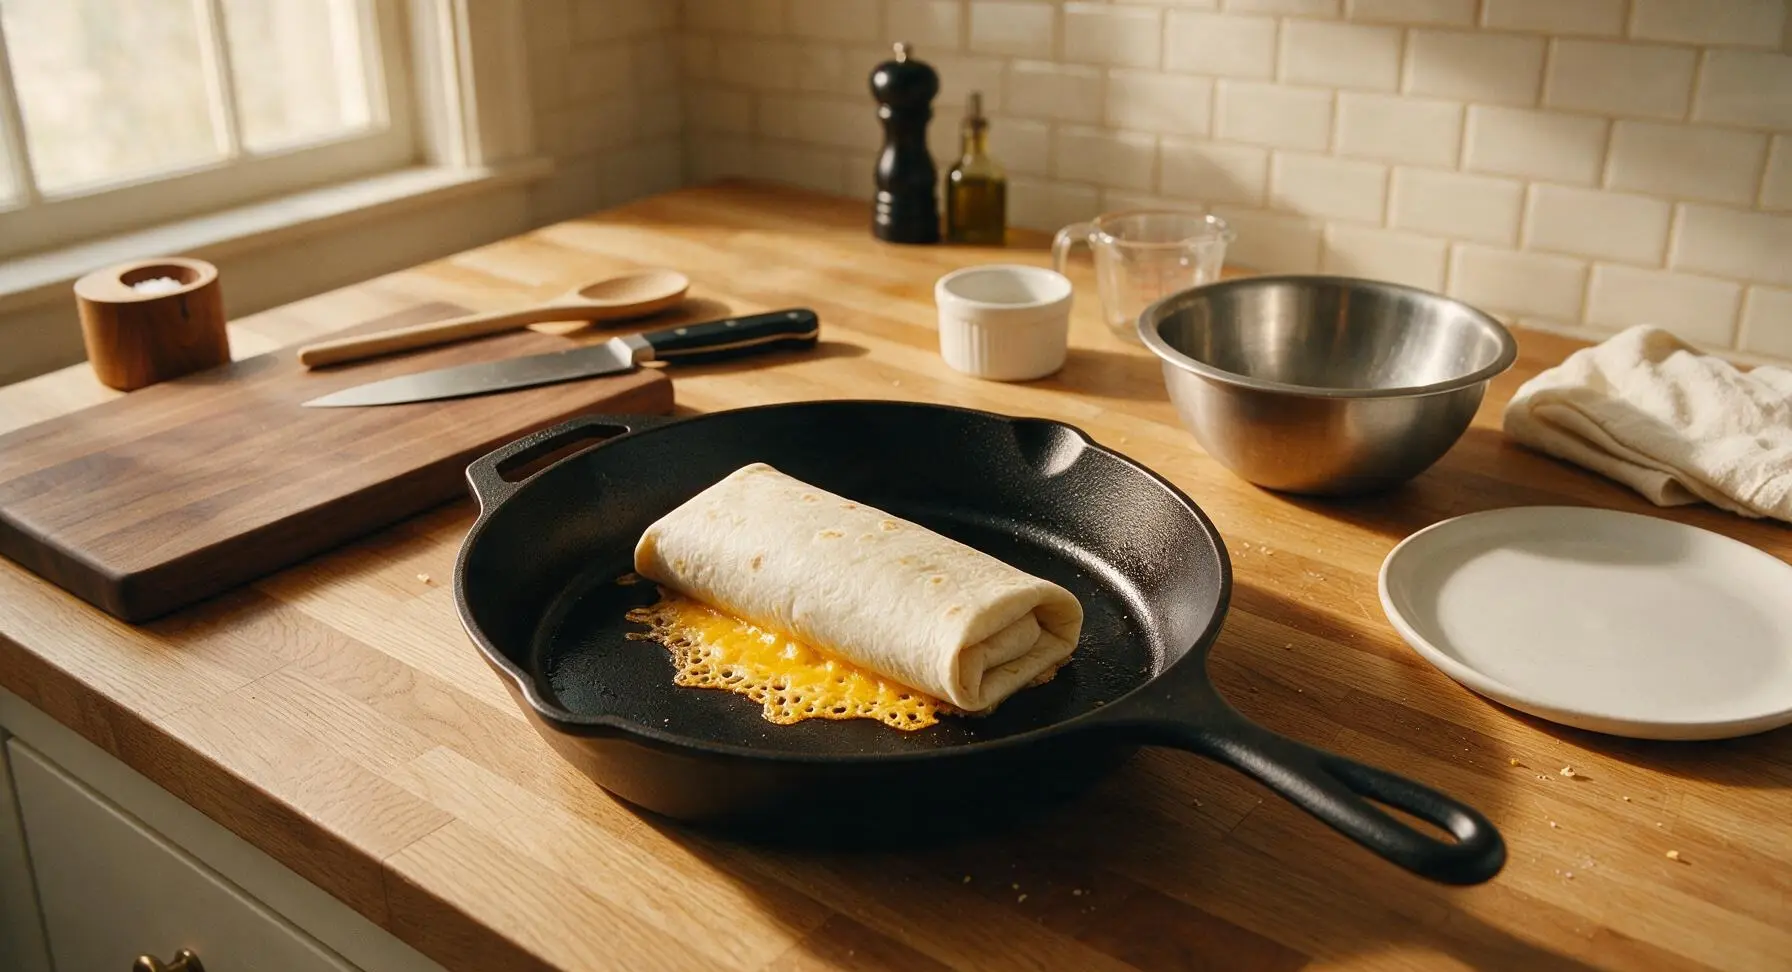
Step 5
step5:Crisp Outer Cheese Crust
Step 5
step5:Crisp Outer Cheese Crust
6

Toast All Sides Evenly

Use the long stainless steel tongs to carefully flip each burrito, toasting the remaining three sides for 1-2 minutes each, until the entire tortilla is golden and slightly crispy, and all inner cheese is fully melted. The outer cheese crust should be deep golden and crunchy, not dark brown or burnt. If small amounts of cheese ooze out of the ends during cooking, let it crisp on the pan for an extra cheesy bite.
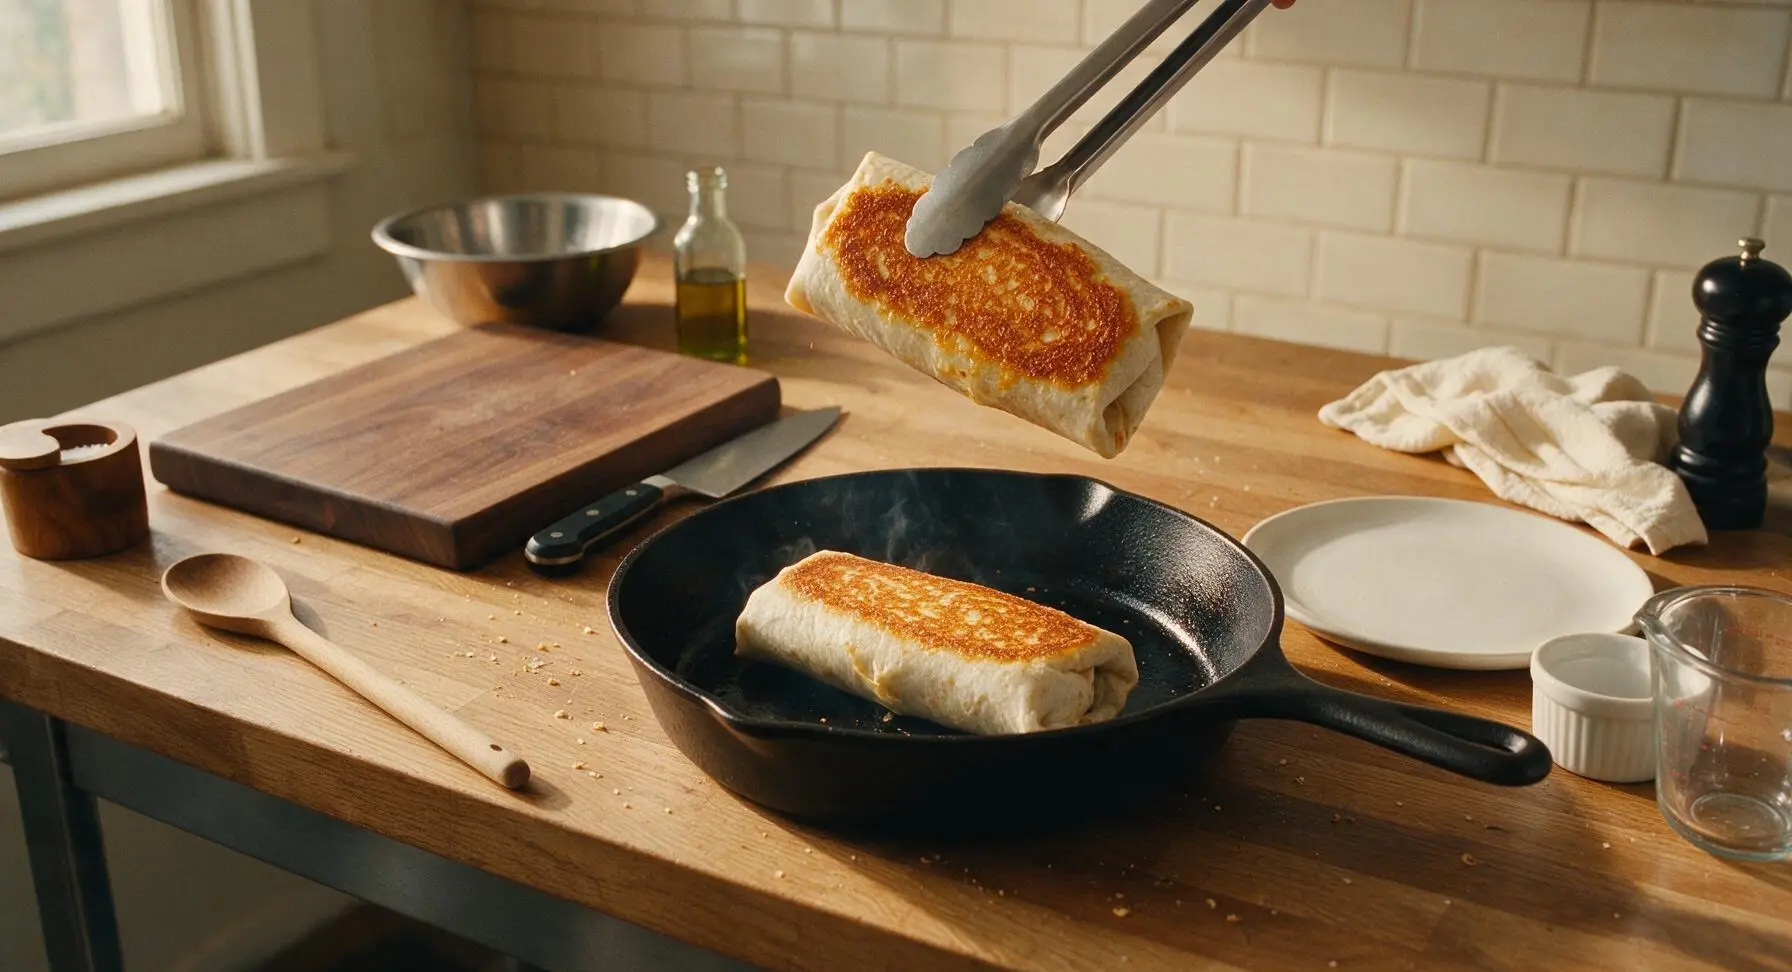
Step 6
step6:Toast All Sides Evenly
7

Rest Burritos Briefly

Once all sides are toasted and crispy, use the tongs to transfer burritos from the skillet back to the maple wood cutting board. Let them rest for 2 minutes to allow the melted cheese to set slightly, which prevents excessive oozing when you cut into them, and lets the filling cool to a safe, edible temperature.
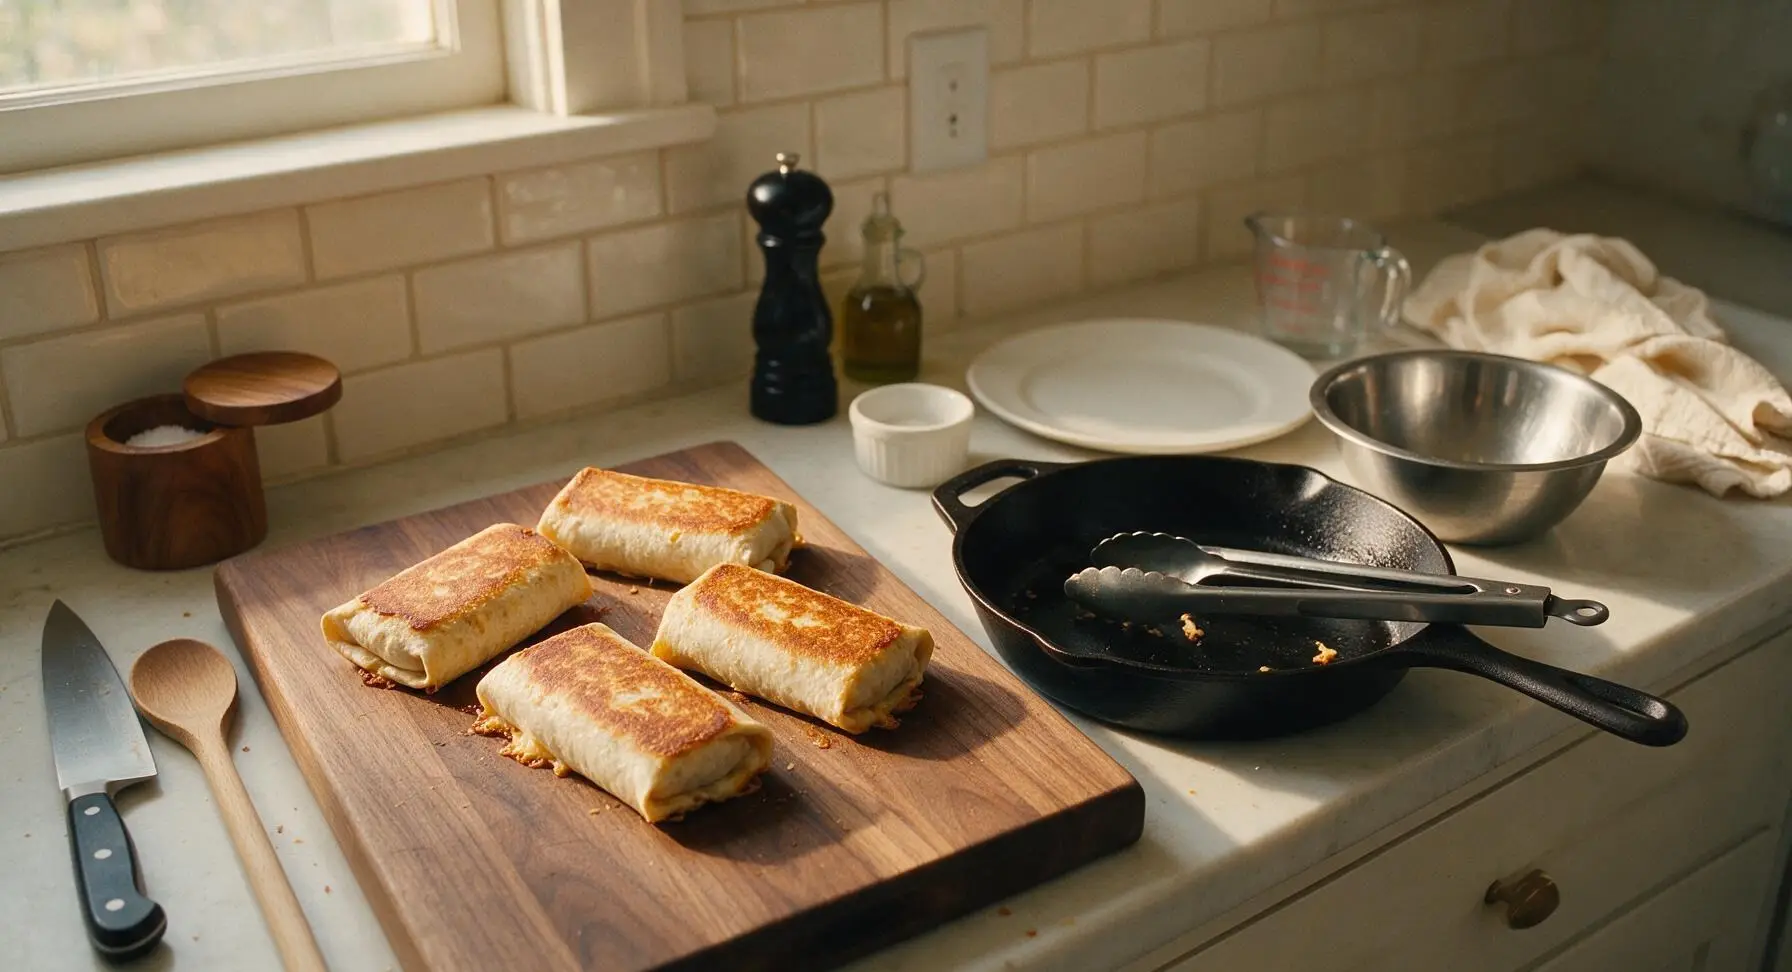
Step 7
step7:Rest Burritos Briefly
8

Plate and Serve

Place one rested burrito on the matte cream ceramic dinner plate. Use the 8-inch chef knife to cut it in half diagonally to reveal the layered filling. Garnish with a light sprinkle of chopped cilantro, and serve with the small clear glass ramekins of sour cream and red salsa on the side.
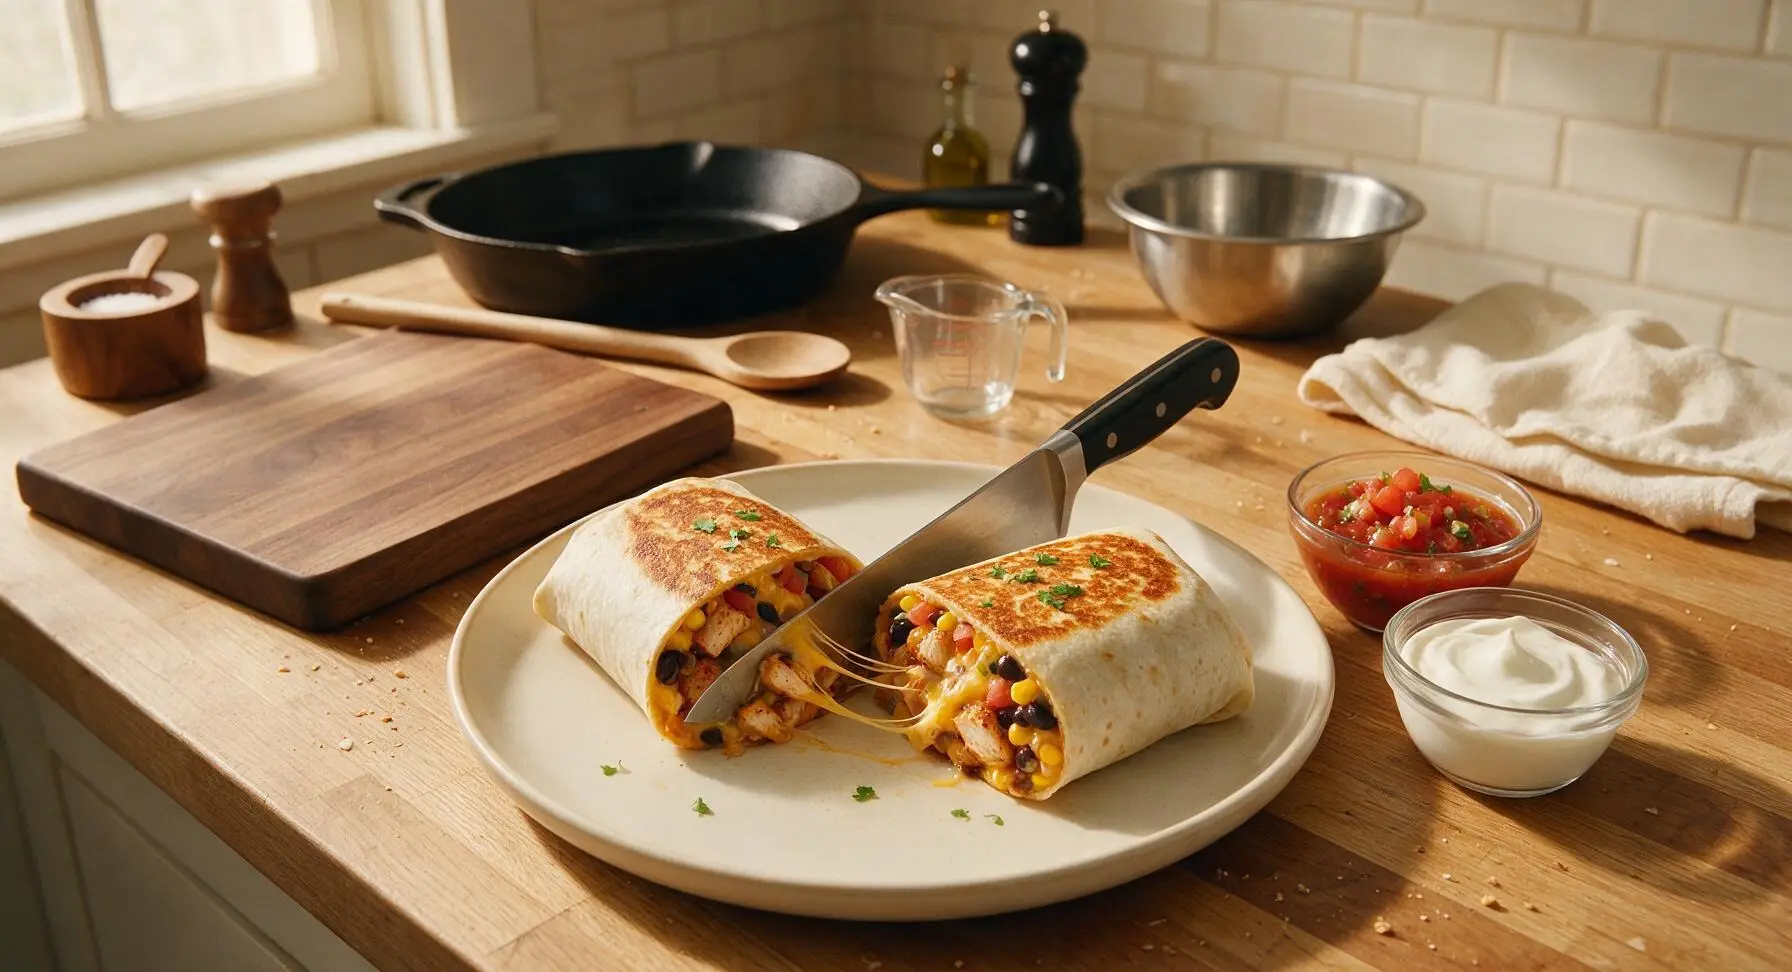
Step 8
step8:Plate and Serve

Tips

1.Warm tortillas for 10 seconds in the microwave before assembling: this softens the gluten in the flour tortillas, making them more flexible and preventing cracking or tearing when folding tight burritos, so no filling leaks out during toasting.
2.Stick to the measured filling amount per burrito: overstuffing will stretch the tortilla too thin, causing it to split open while cooking, leading to lost filling, burnt cheese in your skillet, and messy burritos that fall apart when eaten.
3.Keep the skillet at medium-low heat for toasting: higher heat will burn the outer tortilla and crispy cheese crust before the inner cheese has time to fully melt, leading to a bitter, burnt exterior and cold, un-melted filling in the center.


✨ You May Also Like

Main Course
🍜 United Kingdom

A showstopping classic of tender seared beef, savory mushroom duxelles, and crisp prosciutto wrapped in flaky golden puff pastry, baked to juicy perfection.

⏱️ 2 hours 1Main Course ★ 4.7
Main Course
🍜 India

Tender charred marinated chicken simmered in a rich, spiced creamy tomato sauce, this iconic Anglo-Indian curry pairs perfectly with basmati rice or warm naan.

⏱️ 50 minuteMain Course ★ 4.6
Main Course
🍜 Thailand

Classic tangy, sweet, and savory Thai stir-fried rice noodles with shrimp, tofu, and crunchy garnishes, balancing all five core Thai flavor profiles.

⏱️ 30 minuteMain Course ★ 4.5
Main Course
🍜 United Kingdom

Crispy golden beer-battered cod and fluffy double-fried chips, served with tangy tartar sauce and malt vinegar: the timeless, beloved British pub comfort classic.

⏱️ 45 minuteMain Course ★ 4.7
Main Course
🍜 Mexico

Smoky, chile-marinated pork tacos with caramelized pineapple, fresh cilantro, and lime: a beloved classic Mexican street food perfect for casual summer gatherings.

⏱️ 1 hour 45Main Course ★ 4.8
Main Course
🍜 United States

Crunchy Fritos corn chips layered with savory beef chili and melted cheddar, topped with cool, zesty fixings for a beloved, cozy Tex-Mex comfort food.

⏱️ 35 minuteMain Course ★ 4.8

Grilled Cheese Burrito:Frequently Asked Questions

1.What size tortilla works best for grilled cheese burritos? ▾
Stick with 10-inch burrito-sized large flour tortillas for the best results. Smaller tortillas won’t hold all the filling without spilling, while oversized tortillas tend to get soggy in spots instead of developing that signature crispy lacy cheese crust. Let tortillas sit at room temp for 10 minutes before folding to prevent cracking.
2.Can I use a different fat ratio for the ground beef? ▾
90/10 lean ground beef is ideal because it has enough fat for rich, savory flavor without leaving your burrito soggy from excess grease. If you use a fattier blend like 80/20, be sure to fully drain all rendered fat after browning, and blot the beef with paper towels before adding it to avoid a mushy tortilla.
3.Why is sharp cheddar the recommended cheese for these burritos? ▾
Sharp cheddar melts smoothly, has a bold, tangy flavor that cuts through the rich beef and creamy chipotle, and crisps up into that perfect lacy, golden crust when grilled. Pre-shredded cheese works in a pinch, but freshly shredded melts better because it lacks anti-caking starches that can make the crust grainy.
4.Can I make the cilantro lime rice component ahead of time? ▾
Absolutely! Cook the cilantro lime rice 2 to 3 days ahead and store it in an airtight container in the fridge. Let it come to room temperature for 15 minutes before assembling burritos, or warm it briefly in the microwave—cold rice will cause uneven heating and keep the inner cheese from melting properly.
5.How do I get that signature crispy lacy cheese crust on the outside? ▾
To nail that iconic crispy cheese crust, sprinkle a thin, even layer of shredded sharp cheddar directly onto your preheated nonstick skillet before laying the folded burrito on top. Cook for 1 to 2 minutes over medium heat until the cheese melts, turns golden, and forms a lacy, crisp layer that sticks to the tortilla.
6.What’s a quick substitute for creamy chipotle sauce if I don’t have any? ▾
You can make a quick dupe by mixing ½ cup sour cream, 2 tablespoons of adobo sauce from a can of chipotles in adobo, a squeeze of fresh lime juice, and a pinch of garlic powder. Adjust the adobo amount to make it milder or spicier to match your heat preference, then stir until completely smooth before using.
7.How much filling should I add per burrito to avoid messy spills? ▾
Stick to roughly ¼ cup seasoned beef, ⅓ cup cilantro lime rice, 2 tablespoons creamy chipotle sauce, and 2 tablespoons of shredded cheddar per 10-inch tortilla. Overstuffing will make folding impossible, cause filling to leak out while grilling, and prevent the tortilla from crisping evenly across the surface.
8.What’s the best way to fold a burrito so it doesn’t pop open while cooking? ▾
First, fold the left and right sides of the tortilla in toward the center, covering the edges of the filling. Then, tuck the bottom flap of the tortilla tightly over the filling, and roll it firmly toward the top edge to make a tight, sealed log. Don’t roll too loosely, or filling will seep out and burn on the skillet.
9.Can I adapt this recipe to be vegetarian? ▾
Absolutely! Swap the 90/10 lean ground beef for seasoned crumbled plant-based ground, well-drained sautéed black beans, or roasted sweet potato cubes. Make sure any veggie filling is patted dry so excess moisture doesn’t make the tortilla soggy, and keep all other components the same for that classic crispy, cheesy finish.
10.What stovetop heat setting gives the best grilled cheese burrito results? ▾
Cook these over medium heat for the best outcome. Too high, and the outer cheese crust will burn before the inner cheese and filling are fully melted. Too low, and the tortilla will get soggy instead of crisp, leaving you with a limp burrito instead of that signature crunchy cheese exterior.
11.Can I freeze these burritos for quick make-ahead meals? ▾
You can freeze assembled, uncooked burritos tightly wrapped in plastic wrap and aluminum foil for up to 3 months. Skip adding the outer cheese crust before freezing—when you’re ready to cook, thaw the burrito in the fridge overnight, then cook it in the skillet with shredded cheddar for the crispy crust as normal.
12.Why does my cheese crust keep sticking to the pan when I cook? ▾
Sticking usually happens for one of three reasons: your pan isn’t fully preheated before adding the cheese, you’re trying to flip the burrito too early before the cheese sets, or you’re using too little cheese for the crust. Wait until the cheese is deep golden and lifts easily with a thin spatula before flipping.
13.Can I add extra fillings like beans or guacamole to the burritos? ▾
You can add small amounts of well-drained black beans, pickled jalapeños, or diced white onion, but skip very wet fillings like fresh guacamole, runny salsa, or extra sour cream inside the burrito. Excess moisture will make the tortilla soggy, prevent smooth cheese melt, and cause filling to leak while grilling.
14.How should I season the ground beef for this recipe? ▾
For a classic, well-balanced seasoning that pairs perfectly with the other fillings, brown the beef over medium heat, then season with 1 teaspoon chili powder, ½ teaspoon cumin, ½ teaspoon garlic powder, ½ teaspoon onion powder, and pinches of salt and black pepper. Stir to coat, then drain any excess grease before assembling.
15.Can I cook these grilled cheese burritos on an outdoor grill? ▾
You can, but use a cast-iron skillet or flat griddle plate set on your grill grates to contain the melting cheese and prevent it from dripping into your grill burners and causing flare-ups. Keep the grill at medium heat (around 375°F) and cook the burritos the same way you would on the stovetop.
16.How long do the burritos stay crispy after cooking, and how do I hold them for a crowd? ▾
These burritos are crispiest when served immediately after cooking, when the outer cheese crust is crackly and the inner filling is fully melted. If you need to hold them for 10 to 15 minutes for a group, set them on a wire rack over a baking sheet in a 200°F oven—don’t stack them, or the crust will turn soggy.
17.What sides pair best with these rich, cheesy burritos? ▾
Pair these indulgent burritos with light, bright sides to cut through the rich, cheesy flavor: tortilla chips and fresh pico de gallo, a simple lime-dressed green salad, roasted Mexican street corn, or tangy pickled red onions. Skip heavy, creamy sides like loaded queso, which will make the meal feel overly dense and heavy.

Comments (19)

2 hours ago

OMG this grilled cheese burrito is a GAME CHANGER. I made these for our weekly Taco Tuesday crew last night and everyone was begging for the recipe before they left. The crispy cheese crust on the outside? *Chef’s kiss* So much better than the fast food version, and so quick to throw together!

30 minutes ago

So stoked these were a hit for your Taco Tuesday crew! That crispy cheese crust is definitely our favorite part too — pro tip: add a little pickled jalapeño to the cheese layer for an extra zing if you like heat!

yesterday

My kids devoured these! I’ve been struggling to find weeknight dinners that don’t get pushed around the plate, and all three of my boys asked for seconds. 12 minute cook time is a total lifesaver on soccer practice nights, no joke. I added a little seasoned ground beef and rice inside and it was perfect.

yesterday

Ugh same! My two are also in soccer and I’m always scrambling for fast dinners — adding this to next week’s meal plan stat!

3 days ago

Bro I’m a college kid with barely any cooking skills and I nailed this first try. Total cost per burrito was like $2, way cheaper than ordering takeout. I stuffed mine with leftover shredded chicken, cheese, and a little hot sauce. 10/10 will make every Sunday for meal prep.

2 days ago

Wait did you use a regular pan or a griddle? I only have a tiny dorm hot plate and wondering if this will still work!

2 days ago

Great question! A regular nonstick pan works perfectly even on a small hot plate — just keep the heat to medium so the cheese crisps up without burning before the filling is warm. So glad you loved the recipe, Jake!

5 days ago

Made these for our backyard cookout over the weekend and they were such a hit! Only reason I’m not giving 5 stars is I wish I’d thought to grease the griddle a little first, the first two stuck a bit. Once I figured that out they came out perfect, everyone kept going back for more.

1 week ago

These are meal prep GOLD. I made a batch on Sunday, wrapped them individually in foil, and they heated up perfectly in the oven for lunch all week. The crispy cheese shell stays way crispier than regular burritos when you reheat them, I’m obsessed.

5 days ago

Love that you’re using these for meal prep! Pro tip: if you’re reheating, unwrap the foil for the last 2 minutes in the oven to get that outer cheese extra crispy again!

2 days ago

Y’all. I added a layer of crushed Flamin’ Hot Cheetos inside mine and it was the best decision I’ve made all month. The crunch? The spice? Paired with the melted grilled cheese on the outside? Absolute perfection. Don’t knock it till you try it!

yesterday

OH MY GOD that is genius. I have a bag of Flamin’ Hots in my pantry right now, I’m making these tonight just for that addition!

2 hours ago

Lol that sounds way too spicy for me but I bet it’d be good with regular crunchy Cheetos too, might have to test that!

30 minutes ago

Made this for dinner tonight with my 7 year old, she loved helping sprinkle the cheese on the tortilla before grilling. Super easy to let little kids help with since there’s no fancy steps, and it felt like a fun treat instead of a boring weeknight meal. Will absolutely be making this again.

2 weeks ago

I am the laziest cook ever and this was so easy. I didn’t even pre-make anything, just used pre-shredded cheese, leftover taco meat from the fridge, and a jar of salsa. Took me 12 minutes exactly like the recipe says, zero cleanup almost. SO good.

1 week ago

Same! I use pre-shredded everything for weeknight meals, nobody has time to grate cheese after a long work day lol. Glad to know it turns out just as good!

5 days ago

Made these on my outdoor flattop grill for the guys during our football watch party, they went faster than the wings! I did smoked brisket inside the burritos with a little BBQ sauce, which was chef’s kiss. Only note: make sure you don’t overstuff them, I had a couple burst open on the grill. Still tasted amazing though.

3 days ago

Brisket and BBQ sauce in these sounds unreal, I need to try that version next! And you’re so right about overstuffing — it’s tempting to pack them full, but a little less filling means no burst burritos and more crispy cheese per bite!

2 days ago

Wait brisket? That’s next level. I was just gonna do ground beef, but I have leftover brisket in the freezer from last weekend — game plan for Sunday’s game is set!

5 minutes ago

Just made this for a quick lunch and wow, I can’t believe how flavorful it is for how little effort it takes. I used vegan cheese and black beans for a vegetarian version and it still came out so crispy and cheesy, no weird texture at all. Obsessed.

just now

So happy the vegetarian swap worked out for you! We’ve tested this with a few different vegan cheese brands and the ones that melt best are the shreds sold in block form, not the pre-shredded ones with anti-caking coating, if you want even better results next time!

1 week ago

Packed these for our beach day last weekend and they were perfect! No soggy bread like regular sandwiches, they held up great in the cooler. We wrapped them in foil and stashed them in an insulated bag so they were still warm when we got to the beach — everyone walking by was asking what we were eating lol.

3 days ago

Made these to take on our day hike yesterday and they were the perfect trail food! High calorie, super filling, didn’t get squished in my pack, and the cheesy outside didn’t get all messy. We added scrambled eggs and breakfast sausage to ours for a breakfast burrito version and it slapped.

2 days ago

Breakfast version?! That’s brilliant. I’m always looking for good camp breakfast ideas that don’t require a ton of cleanup, this is going on our next camping trip menu!

2 days ago

The breakfast burrito twist is one of our favorite variations too! We like to add a little crispy hash brown inside for extra crunch on camping trips, it’s so good over a camp stove.

2 weeks ago

These were good, but I think I messed up the cheese layer? I put too much cheese on the outside and it slid right off the tortilla when I flipped it, made a huge mess on my pan. The part that stayed on was amazing though, I’ll definitely try again with less cheese next time.

1 week ago

I had that same problem my first try! I found out you gotta let the cheese melt for like 30 seconds on the pan before you lay the tortilla on top, it sticks way better that way.

1 week ago

That tip from HomeCook101 is spot on! Letting the cheese melt just slightly before setting the tortilla on top helps it adhere so it doesn’t slide off when you flip. Give that a shot next time, it makes all the difference!

yesterday

Added a layer of cream cheese and pickled jalapeños inside mine and it tasted just like the jalapeño popper burrito I get from my local food truck, but half the price. 10/10, will be making this every Friday night for movie night from now on.

2 days ago

It’s 110 degrees out here right now so I refuse to turn my oven on for dinner, and this recipe worked perfectly on my little countertop griddle with no extra heat in the house. Cooked up in 12 minutes, no hot kitchen, full happy family. Win win win.

yesterday

Ugh same! I’m in Tucson and I avoid my oven like the plague June through August, can’t wait to try this on my griddle this week!

1 week ago

Brought these to our neighborhood potluck last weekend and I swear I gave out the recipe to half the block. People kept coming up to me asking where I got them, they couldn’t believe I made them at home. I did a mix of chicken and beef fillings so there was something for everyone.

5 days ago

These would be perfect for our block party next month! Did you keep them warm in a crockpot or just serve them room temp?

3 days ago

So thrilled these were a potluck hit! We usually keep them wrapped in foil in a low temp (200F) oven or insulated cooler to keep them warm for events, they stay tasty for a couple hours that way!

3 days ago

I was gonna make regular taco casserole for our office potluck but switched to these last minute and it was the best call ever. Even the picky eaters in the office loved them, and they were so easy to transport cut in half on a platter. No messy serving utensils needed!

just now

Wait why is this so good??? I ate two whole burritos in one sitting no shame. I didn’t even have any meat so I just did beans, rice, and cheese and it was still better than any takeout I’ve gotten near campus. 10/10, my roommates are already asking when I’ll make it again.

just now

Girl I feel that, I ate three when I made these last week. No shame, they’re that good!

2 weeks ago

My grandson showed me this recipe and we made it together when he visited last week. It was so easy even my old hands could manage the steps, and we had so much fun cooking together. He said it was better than the burritos he gets at the fast food place, which made my whole week.



