
Kimchi Fried Rice Ribs

title 1
Kimchi Fried Rice Ribs
⏱️ cook time 30 minutes
🍽️ servings 4
⚡ Difficulty medium

intro

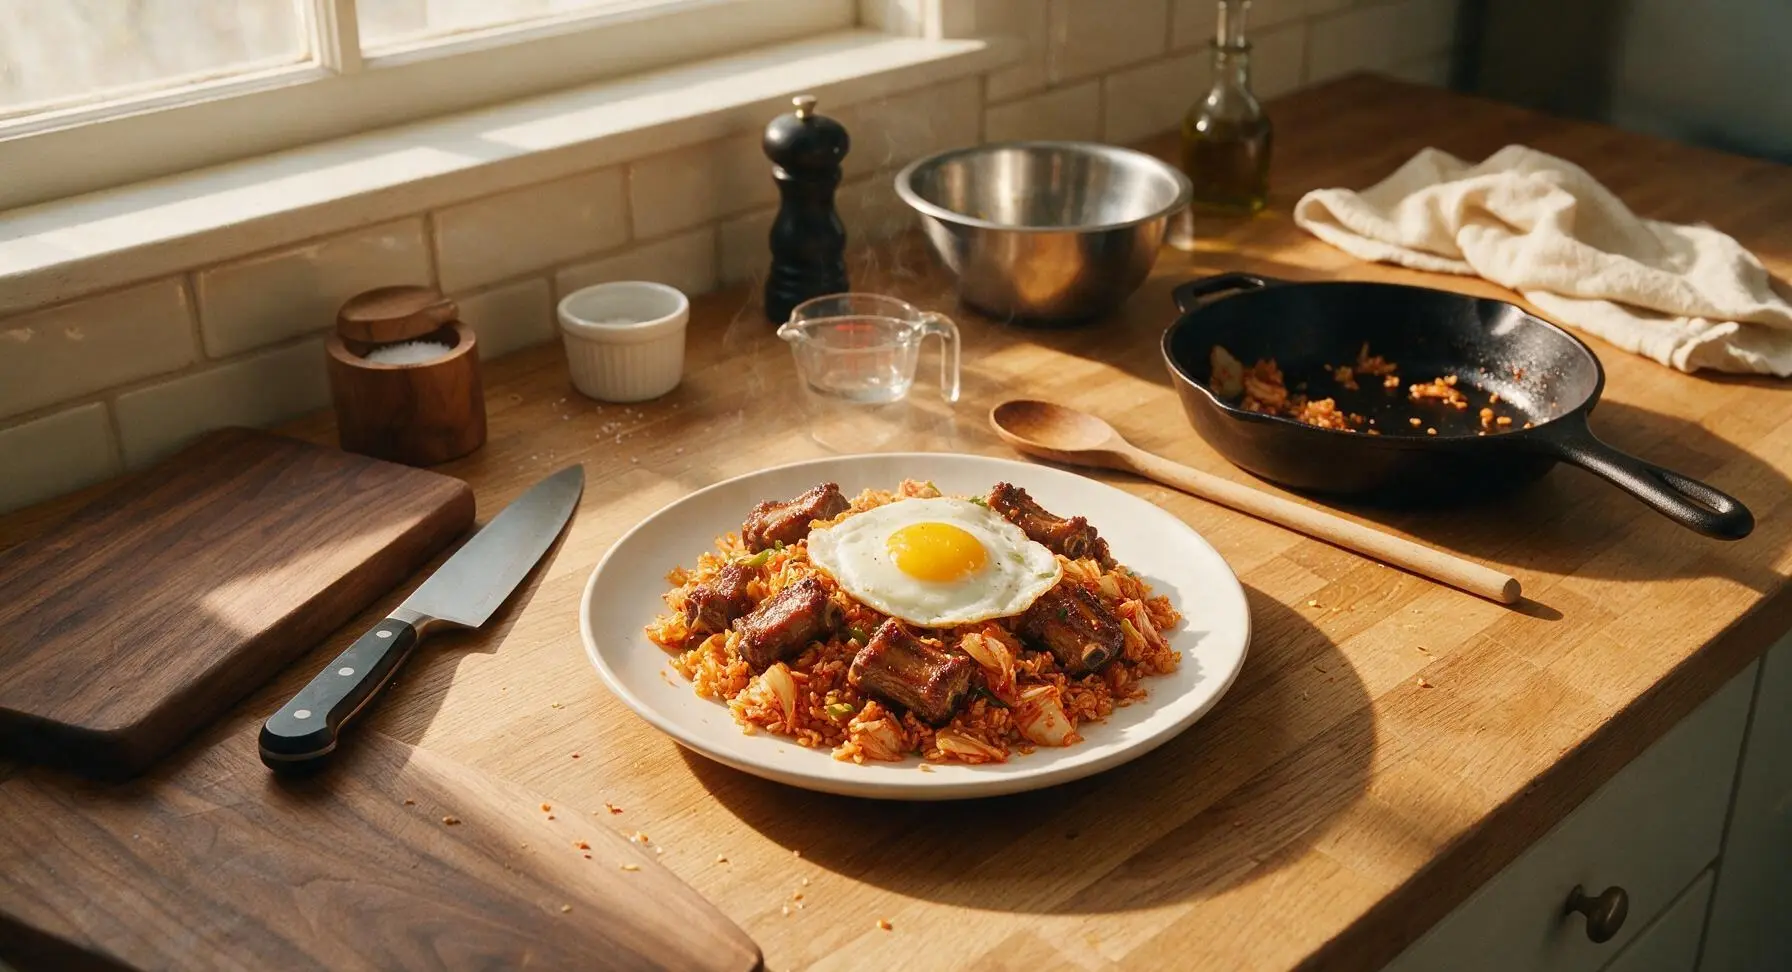
Tender caramelized pork riblets tossed with tangy, umami kimchi fried rice, topped with a runny sunny-side up egg—bold, cozy, balanced comfort food ready in under an hour.

Ingredients
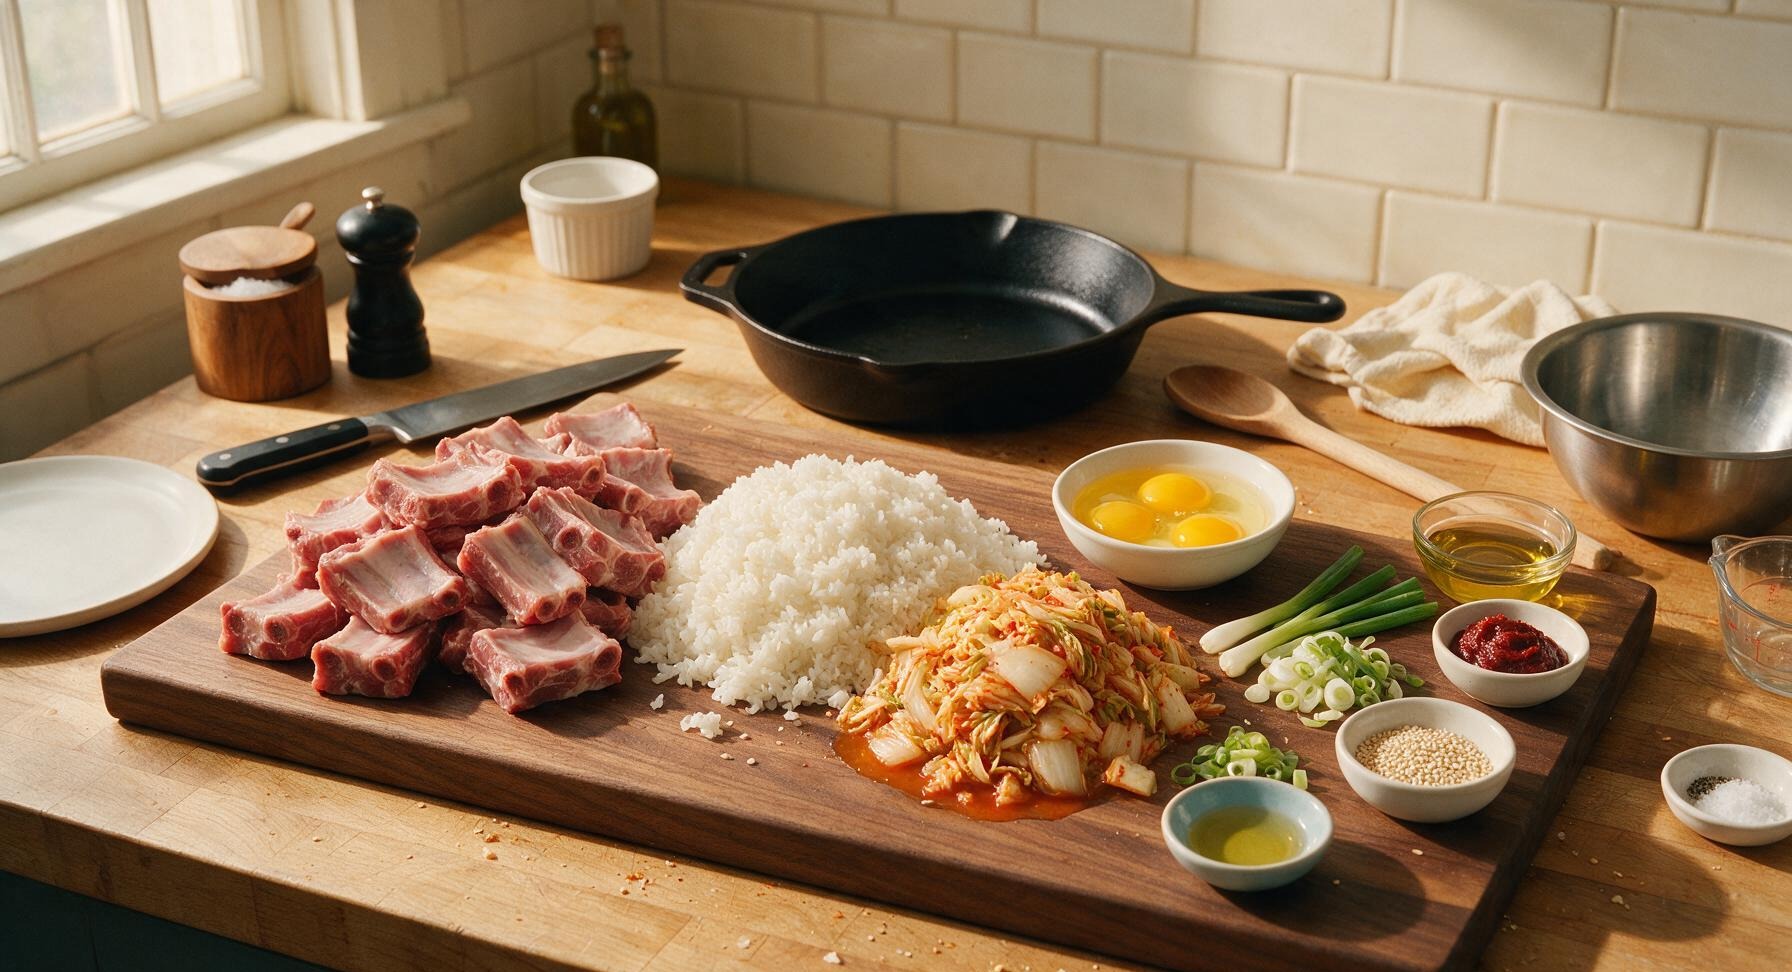
Pork baby back ribs, cut into 2-bone riblets 800g
Day-old cooked short-grain white rice 3 cups (540g)
Ripe napa cabbage kimchi, chopped, with reserved brine 2 cups (300g, plus 1/4 cup brine)
Large eggs 4 units
Scallions, whites and greens separated, thinly sliced 6 stalks (60g)
Gochujang (Korean chili paste) 2 tbsp (30g)
Garlic, minced 2 cloves (6g)
Neutral cooking oil (avocado or canola) 1 tbsp (15ml)
Toasted sesame oil 1 tsp (5ml)
Toasted white sesame seeds 1 tbsp (10g)
Coarse sea salt 1 tsp (5g)
Ground black pepper 1/2 tsp (2g)

Steps

1

Prep Ribs and Aromatics

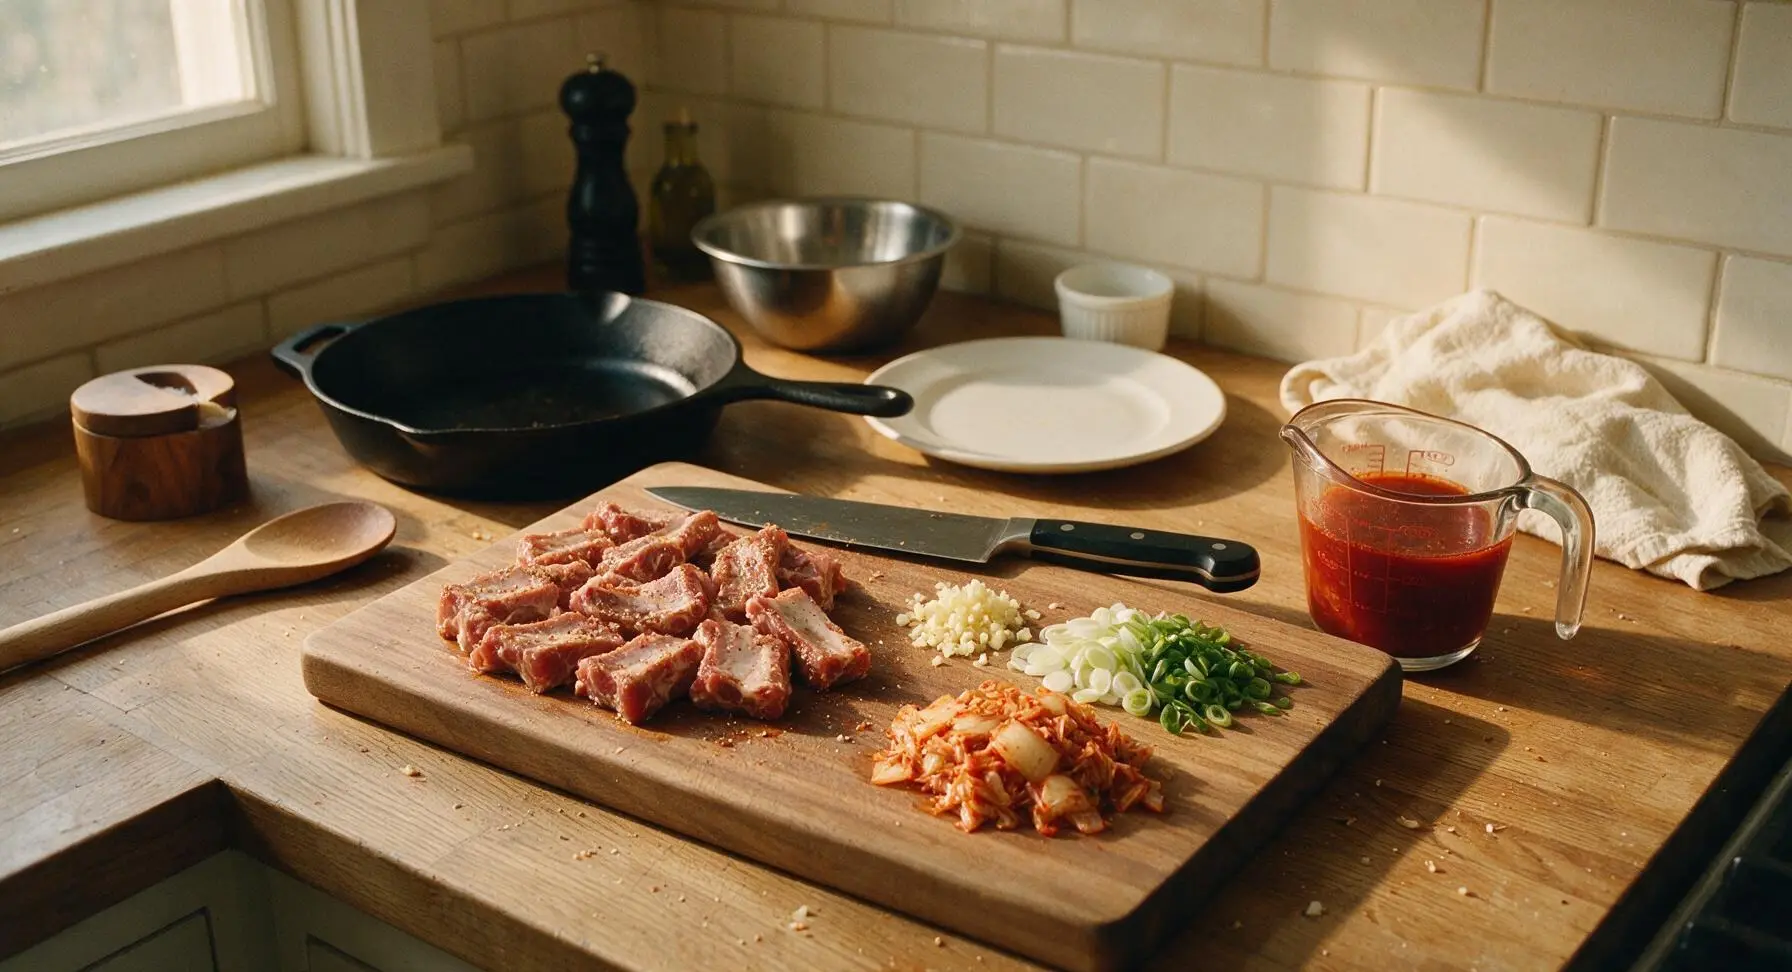
Place the baby back riblets on the acacia cutting board. Pat completely dry with paper towels, then season all sides evenly with 1/2 teaspoon coarse sea salt and all the ground black pepper. Use the chef knife to mince the garlic, separate scallion whites from greens and thinly slice both, then chop kimchi into 1/2-inch pieces, reserving 1/4 cup kimchi brine in the glass measuring cup. Set prepped ingredients aside within easy reach.
Step 1
step1:Prep Ribs and Aromatics
2

Sear Ribs Until Golden

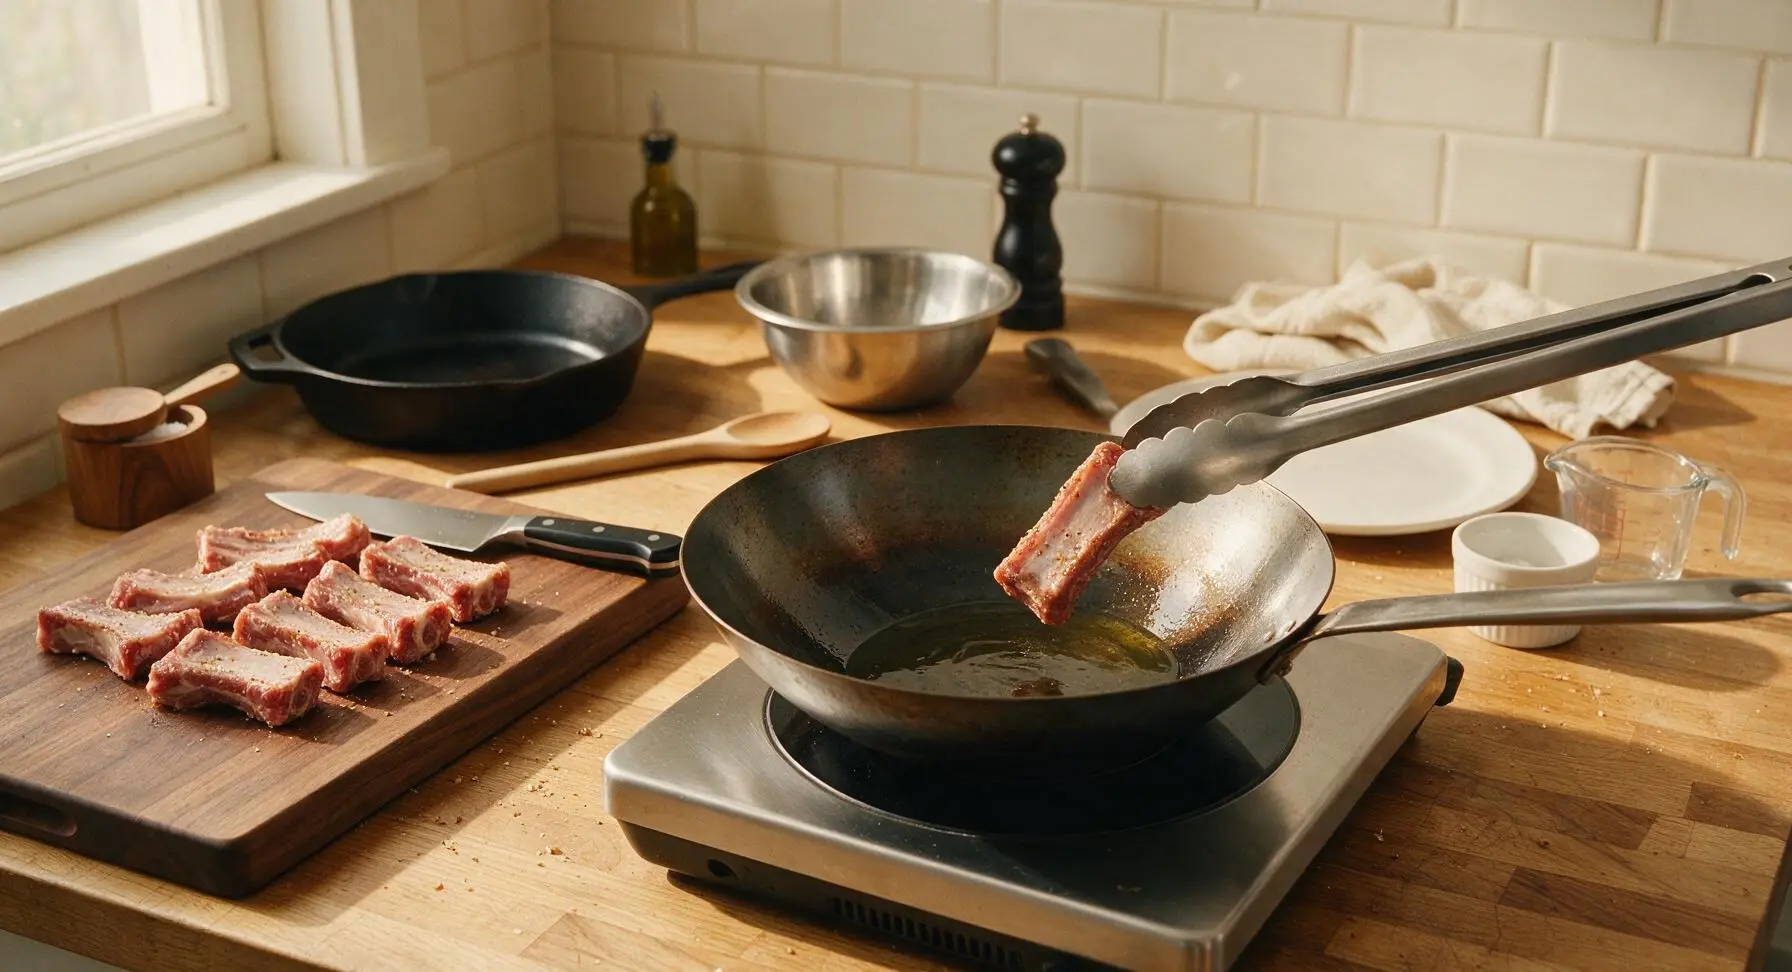
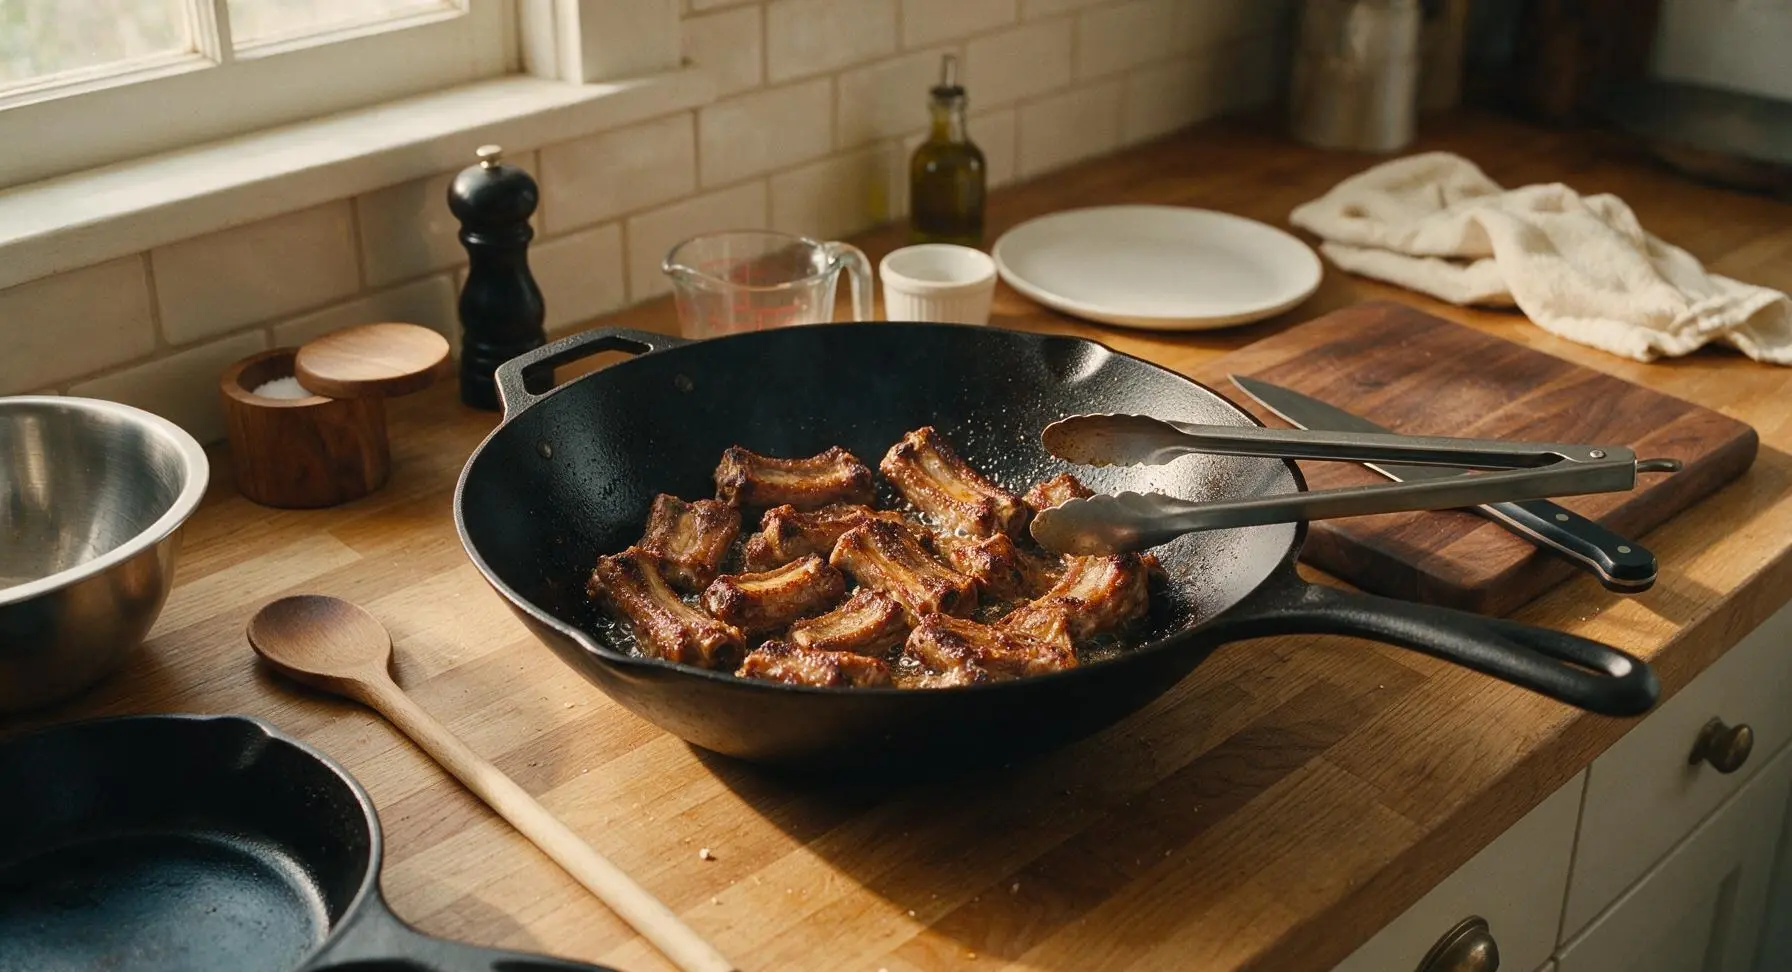
Place the 12-inch carbon steel wok on the center inset induction burner over medium-high heat, add 1 teaspoon neutral cooking oil. Once the oil shimmers (about 1 minute, 190C/375F), use the stainless steel tongs to arrange riblets in a single layer, meaty side down. Sear 4 minutes per side, until deep golden brown with crispy caramelized edges. Cook in two batches if needed to avoid overcrowding, which causes steaming instead of searing.
Step 2
step2:Sear Ribs Until Golden
Step 2
step2:Sear Ribs Until Golden
3

Sauté Kimchi Base

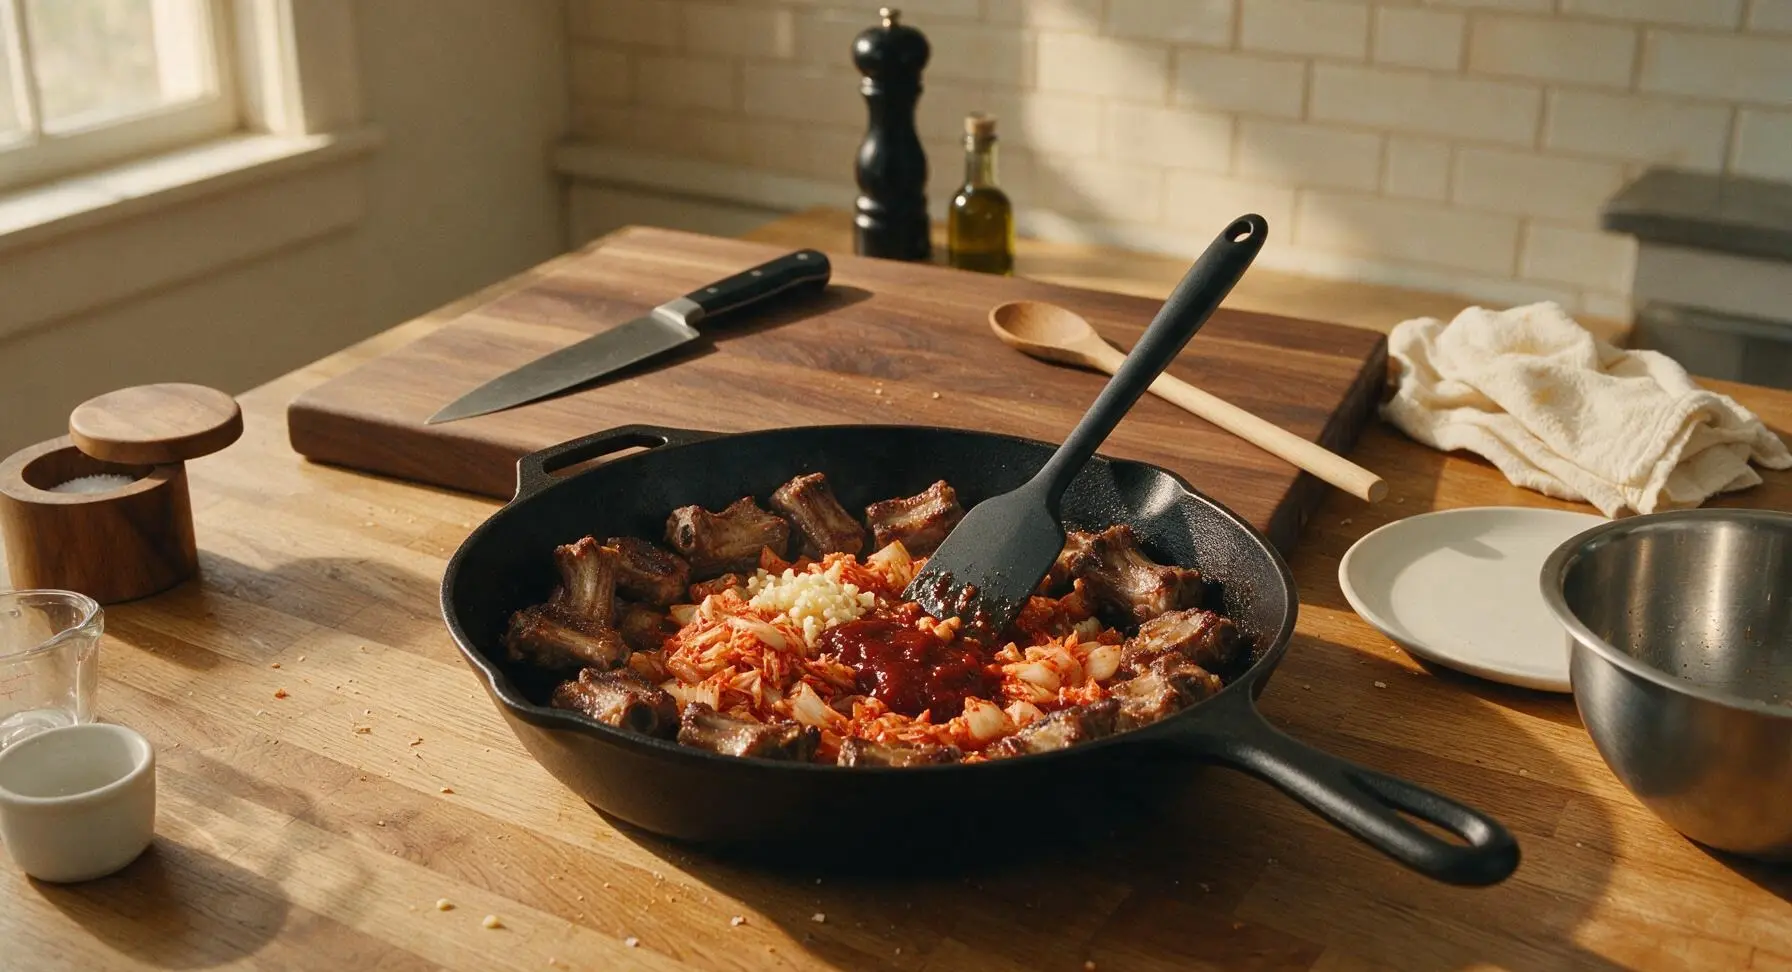
Once all ribs are seared, push them to the outer edges of the wok. Add the remaining 2 teaspoons neutral oil to the wok’s center, then toss in minced garlic and scallion whites, stirring with the silicone spatula for 30 seconds until fragrant (do not let garlic burn). Add chopped kimchi and gochujang to the center, stirring constantly for 2 minutes, until kimchi softens slightly and releases its bright tangy aroma.
Step 3
step3:Sauté Kimchi Base
4

Simmer Ribs Until Tender

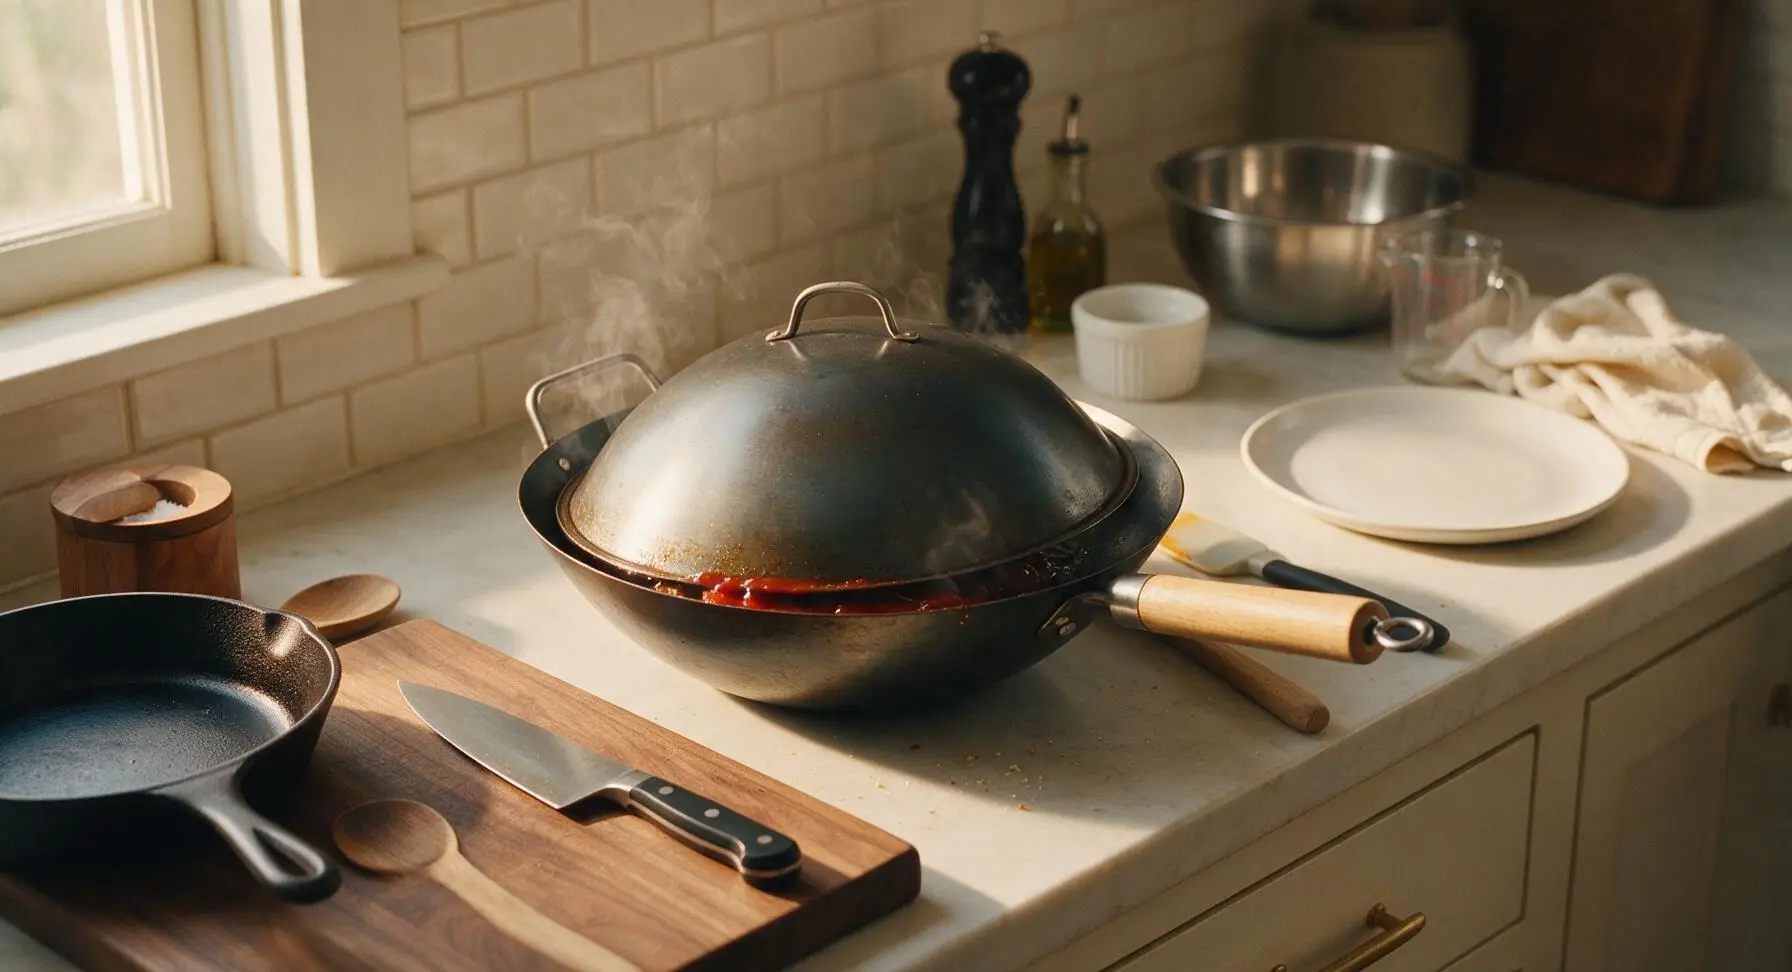
Pour reserved 1/4 cup kimchi brine and 1/2 cup room-temperature water into the wok, stirring to coat ribs evenly in the sauce. Bring liquid to a gentle simmer, then reduce heat to medium-low, cover with the matching carbon steel wok lid, and simmer 15 minutes, stirring once halfway through. The ribs are done when tender enough to pierce easily with a fork, and the sauce has thickened to a light glaze that coats the back of the spatula.
Step 4
step4:Simmer Ribs Until Tender
5

Toss Rice with Ribs

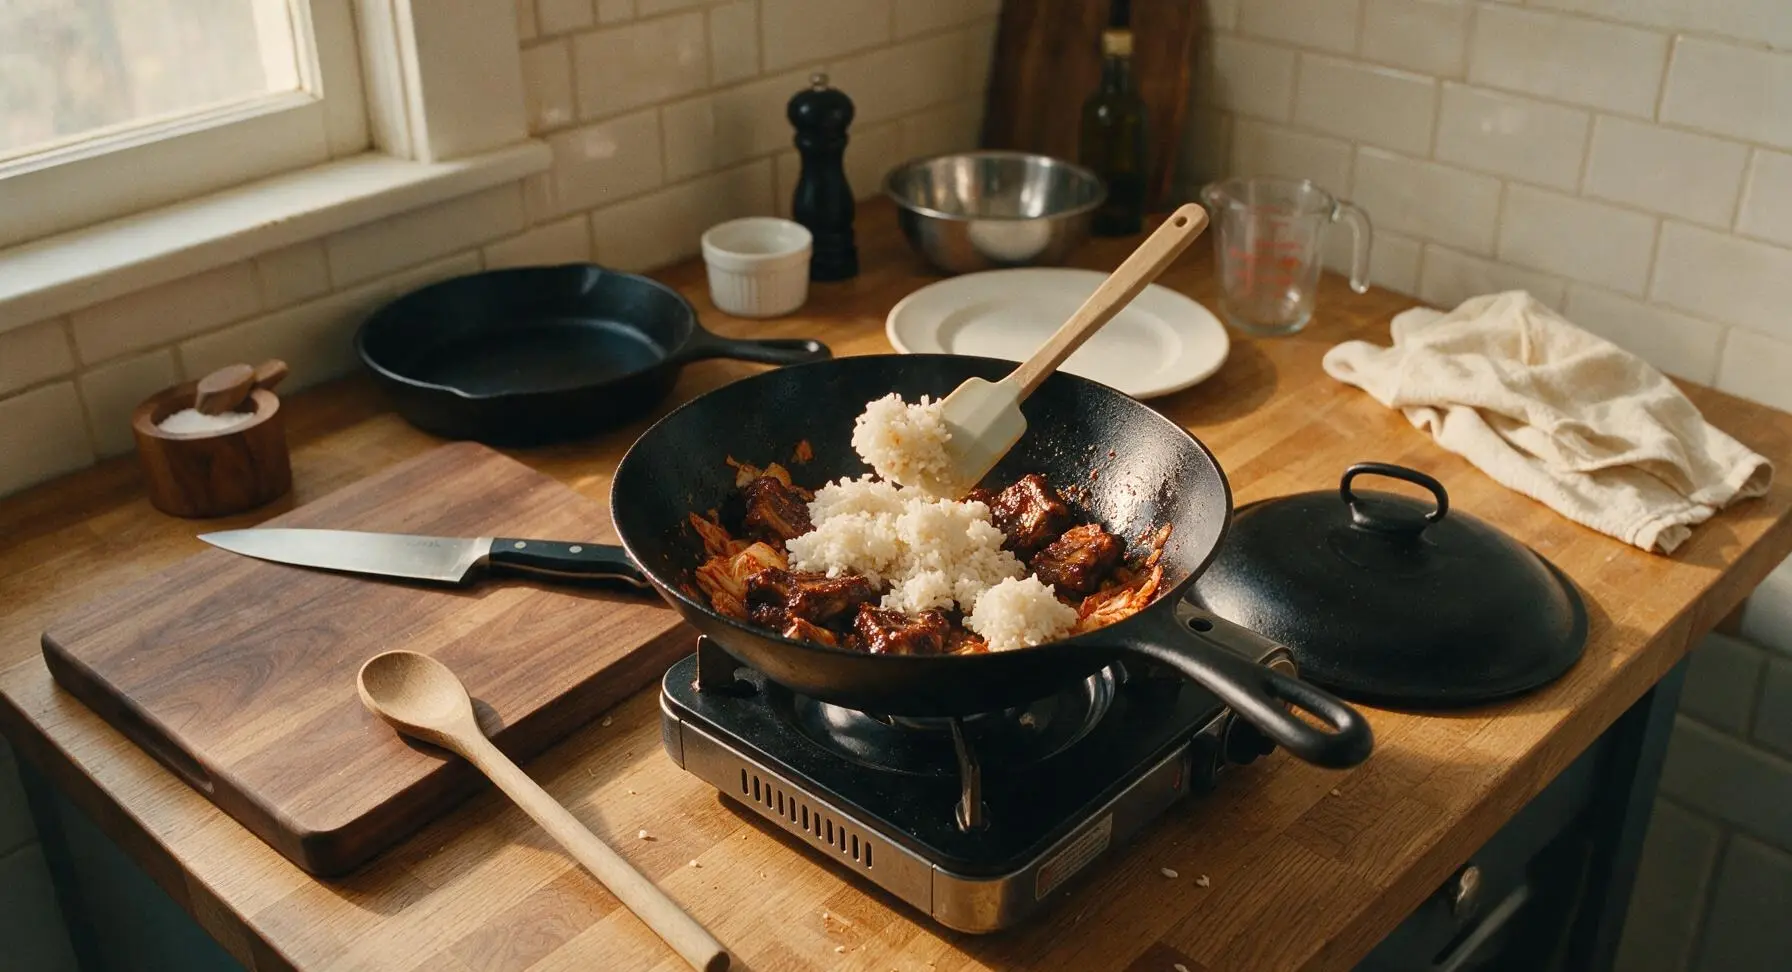
Remove the wok lid, turn heat back up to medium. Add day-old short-grain rice to the wok, using the silicone spatula to firmly break up any hard rice clumps, tossing continuously to coat every grain in the red kimchi glaze. Stir-fry for 5 minutes, until rice is fully heated through, with slightly crispy golden spots where it touches the hot wok, and evenly mixed with ribs and kimchi. Turn off heat, drizzle with toasted sesame oil, and toss once more to combine.
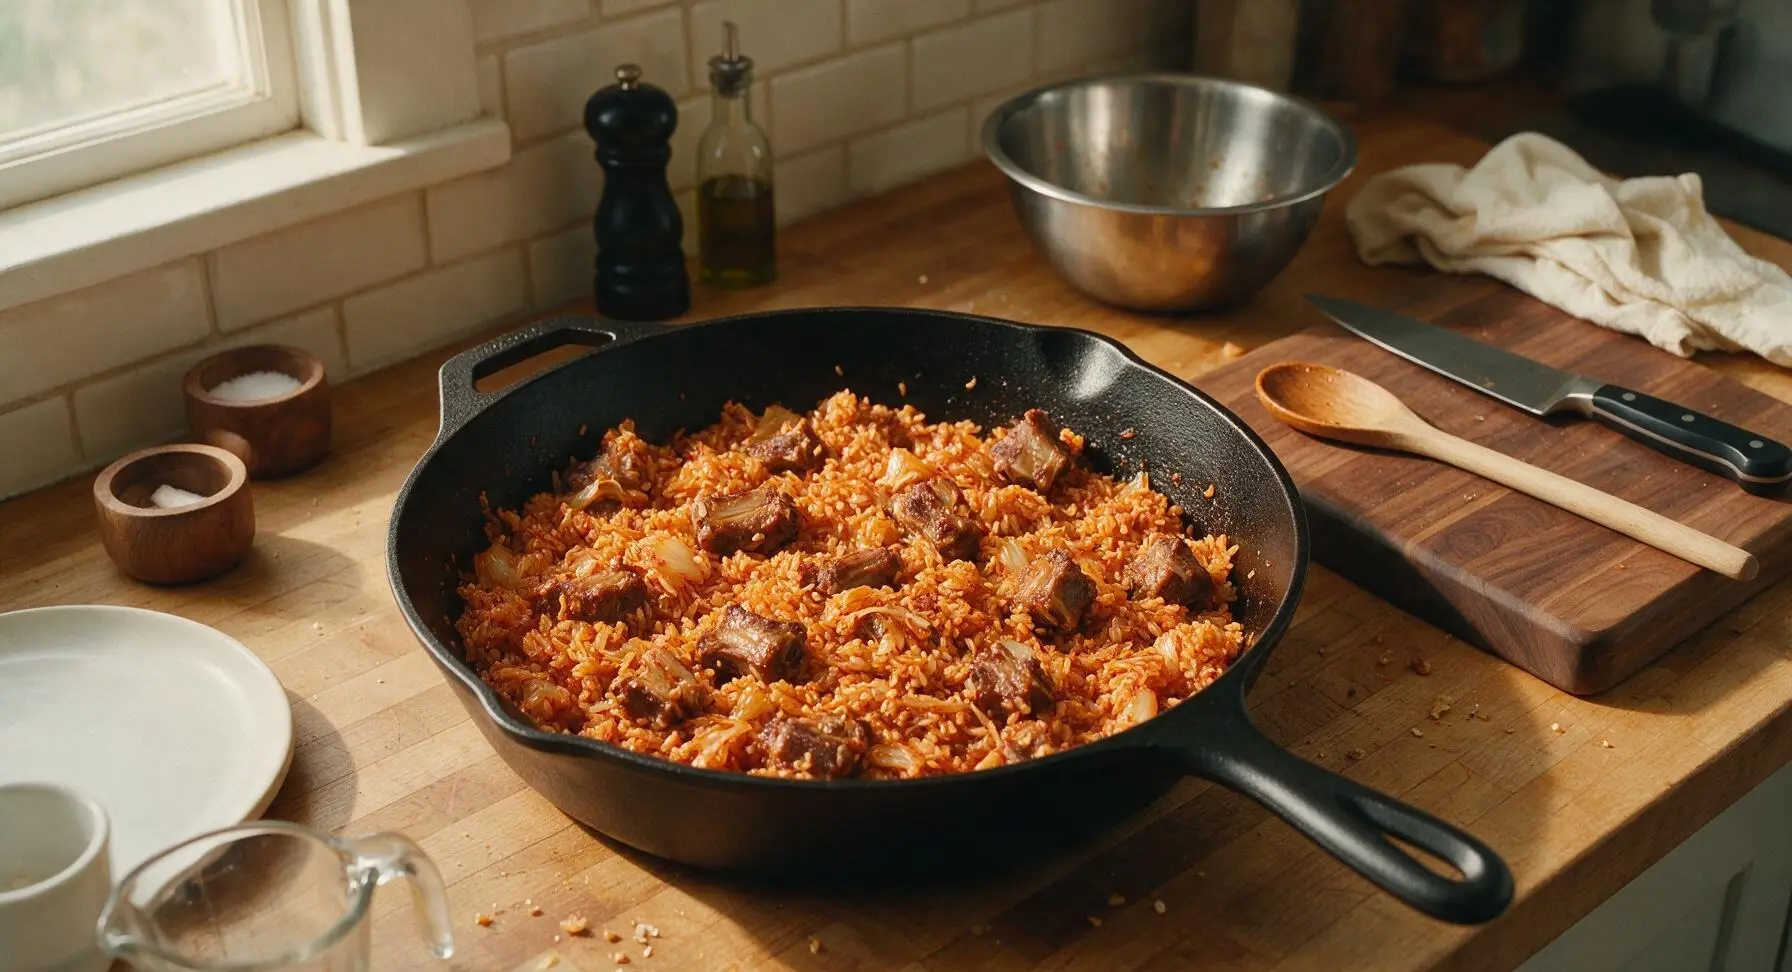
Step 5
step5:Toss Rice with Ribs
Step 5
step5:Toss Rice with Ribs
6

Fry Runny-Yolk Eggs

When the rice has 2 minutes left to stir-fry, place the 10-inch nonstick frying pan on the right auxiliary induction burner over medium heat. Add a tiny splash of remaining neutral oil, then crack 4 eggs into the pan, taking care not to break the yolks. Fry 2 minutes, until egg whites are fully set and opaque, but yolks remain bright golden and runny. Lightly season eggs with the remaining 1/2 teaspoon sea salt.
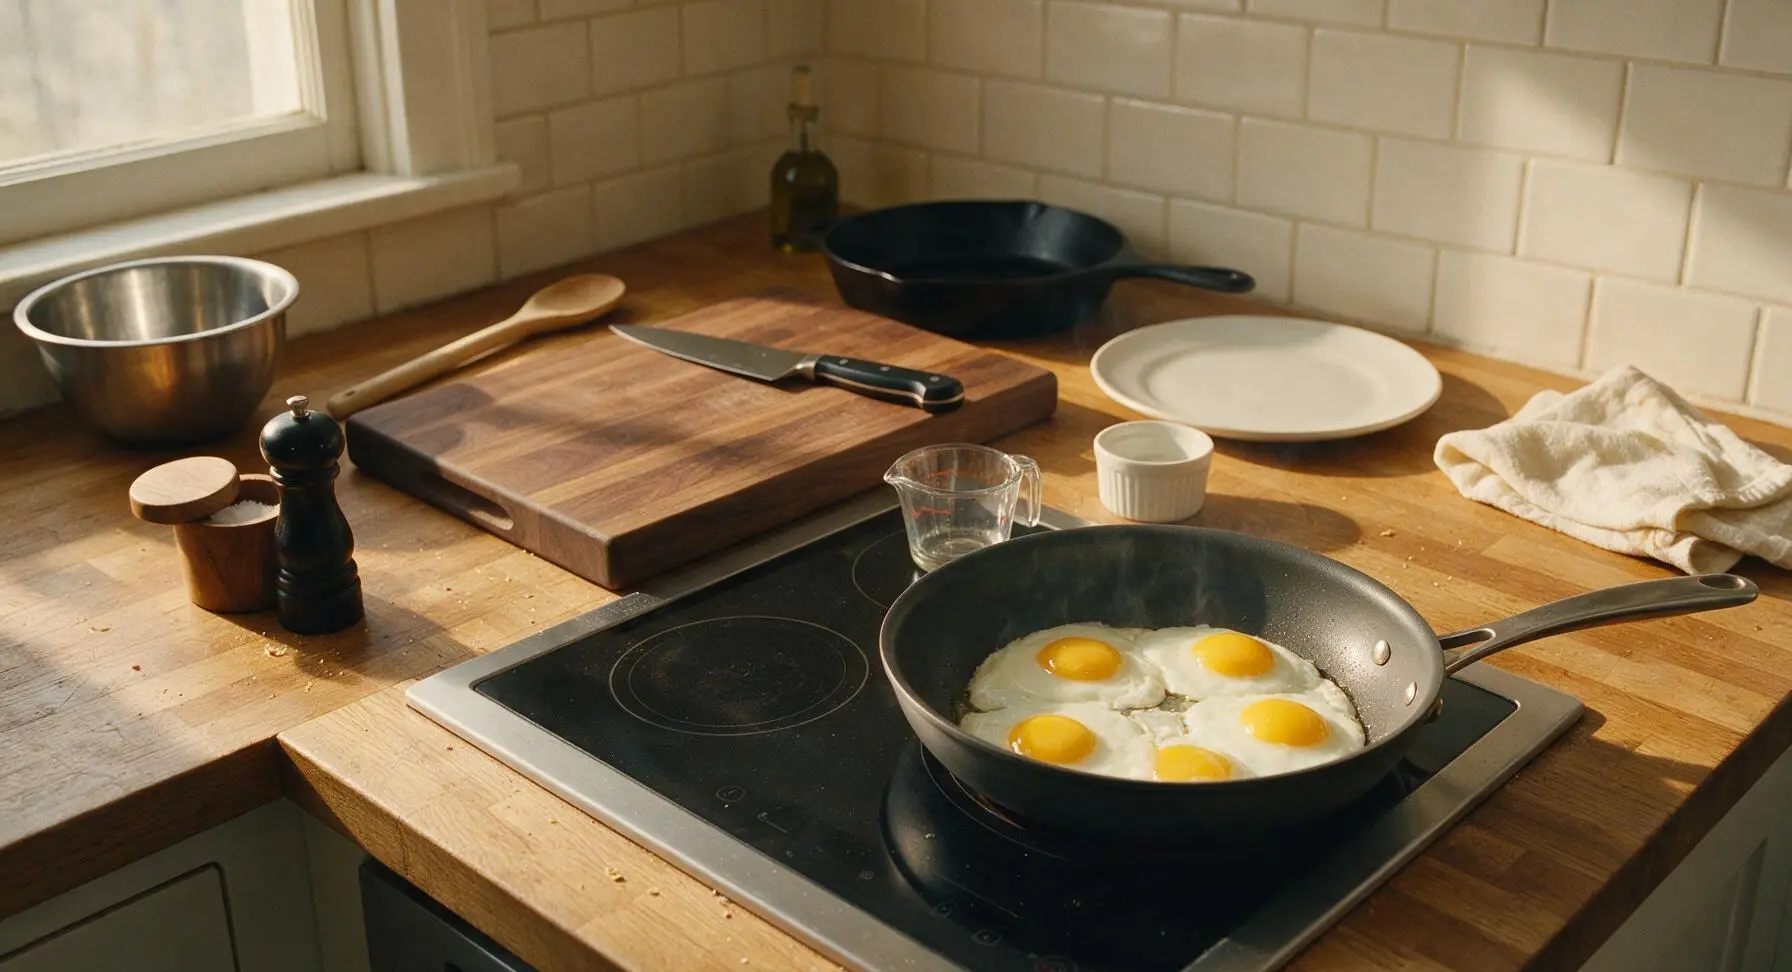
Step 6
step6:Fry Runny-Yolk Eggs
7

Plate and Garnish Dish

Divide the kimchi fried rice and riblets evenly between the 4 matte cream ceramic dinner plates, mounding rice slightly in the center of each plate. Lean 2-3 riblets against each rice mound, then top each mound with one sunny-side up egg. Sprinkle each serving with sliced scallion greens and a pinch of toasted white sesame seeds. Serve immediately while hot, so the egg yolk stays runny.
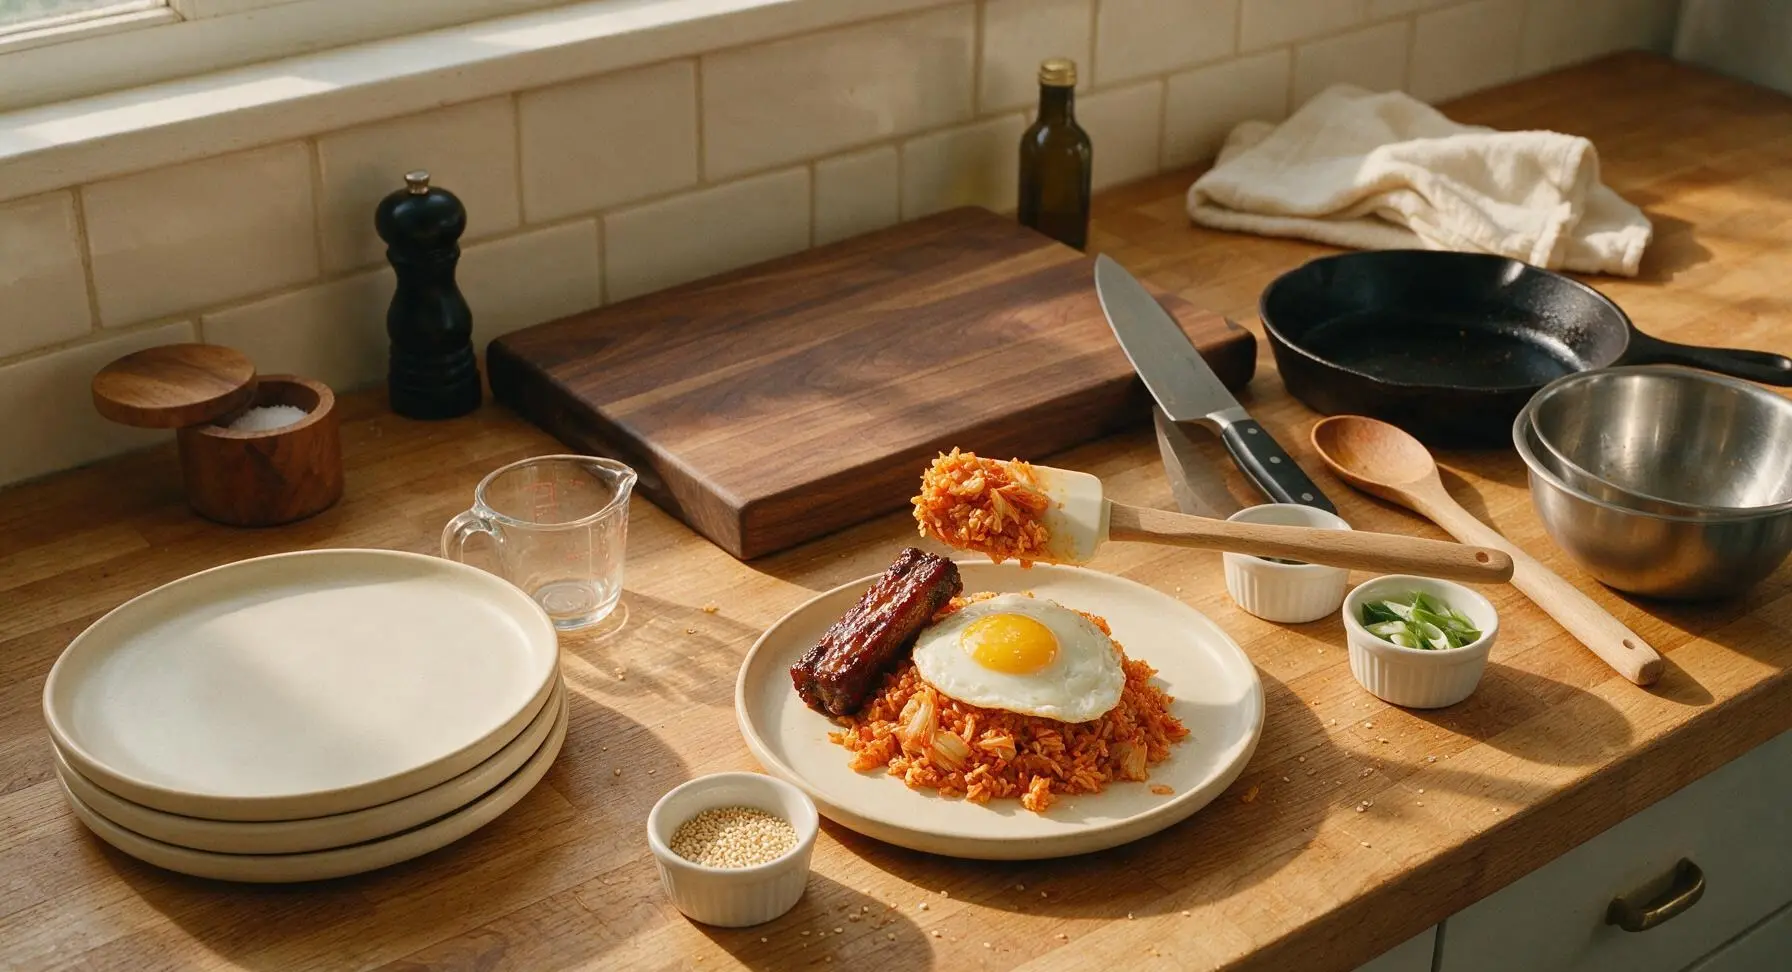
Step 7
step7:Plate and Garnish Dish

Tips

1.Use day-old cold rice for the best texture: fresh-cooked rice is too moist and will turn mushy when stir-fried, while cold day-old rice grains separate easily and crisp up slightly on the hot wok surface.
2.Choose well-fermented, sour ripe kimchi (at least 2 weeks old) for this recipe: young, fresh kimchi lacks the deep tangy umami that balances the rich pork ribs, and won’t release enough brine to make a flavorful glaze.
3.Don’t skip patting the ribs dry before searing: excess surface moisture will cause the ribs to steam instead of developing a crispy, caramelized golden crust that locks in meaty flavor.


✨ You May Also Like

Main Course
🍜 United Kingdom

A showstopping classic of tender seared beef, savory mushroom duxelles, and crisp prosciutto wrapped in flaky golden puff pastry, baked to juicy perfection.

⏱️ 2 hours 1Main Course ★ 4.7
Main Course
🍜 India

Tender charred marinated chicken simmered in a rich, spiced creamy tomato sauce, this iconic Anglo-Indian curry pairs perfectly with basmati rice or warm naan.

⏱️ 50 minuteMain Course ★ 4.6
Main Course
🍜 Thailand

Classic tangy, sweet, and savory Thai stir-fried rice noodles with shrimp, tofu, and crunchy garnishes, balancing all five core Thai flavor profiles.

⏱️ 30 minuteMain Course ★ 4.5
Main Course
🍜 United Kingdom

Crispy golden beer-battered cod and fluffy double-fried chips, served with tangy tartar sauce and malt vinegar: the timeless, beloved British pub comfort classic.

⏱️ 45 minuteMain Course ★ 4.7
Main Course
🍜 Mexico

Smoky, chile-marinated pork tacos with caramelized pineapple, fresh cilantro, and lime: a beloved classic Mexican street food perfect for casual summer gatherings.

⏱️ 1 hour 45Main Course ★ 4.8
Main Course
🍜 United States

Crunchy Fritos corn chips layered with savory beef chili and melted cheddar, topped with cool, zesty fixings for a beloved, cozy Tex-Mex comfort food.

⏱️ 35 minuteMain Course ★ 4.8

Kimchi Fried Rice Ribs:Frequently Asked Questions

1.Why does this recipe call for day-old short-grain white rice instead of freshly cooked rice? ▾
Freshly cooked short-grain rice holds too much surface moisture, which turns mushy and gummy when stir-fried instead of developing that signature chewy, toasty separate-grain texture. Day-old rice, dried out slightly in the fridge, fries up perfectly. If you’re in a pinch, spread freshly cooked rice in a thin layer on a baking sheet and chill for 30 minutes before using—never stir-fry warm, fresh rice.
2.Can I substitute a different pork cut if I don’t have baby back ribs cut into 2-bone riblets? ▾
You can absolutely swap baby back riblets for spare riblets cut to the same 2-bone size; just note they’ll need 5 to 7 extra minutes of cook time to turn tender. Boneless country-style pork ribs cut into 1-inch chunks work too, though you’ll miss the fun finger-friendly rib experience. Skip lean cuts like pork loin, which will dry out quickly during searing.
3.How do I make sure my riblets turn tender and caramelized, not tough and chewy? ▾
Don’t rush the initial cook step: sear riblets over medium heat, covered, for 18 to 22 minutes, flipping occasionally, to render excess fat and tenderize the meat before turning heat up to crisp and caramelize the edges. Toss them with a splash of reserved kimchi brine in the last 2 minutes of cooking to build that sticky, tangy glaze without overcooking the meat.
4.My kimchi is fresh and not very sour or fermented—how do I adjust to get that bold, tangy flavor? ▾
Bubbly, slightly sour fully ripe kimchi is ideal for this dish, but if yours is mild, bump up tang by adding 1 to 2 extra tablespoons of reserved kimchi brine, ½ teaspoon of unseasoned rice vinegar, and a tiny pinch of sugar to balance. Let the kimchi sauté for 2 extra minutes before adding rice to deepen its umami, fermented notes.
5.Can I make Kimchi Fried Rice Ribs ahead of time for weekly meal prep? ▾
The cooked riblet and kimchi fried rice portion stores really well for up to 3 days in an airtight container in the fridge, and reheats beautifully in a skillet over medium heat with a tiny splash of water to loosen it up. Skip cooking the eggs ahead, though—fry sunny-side up eggs fresh right before serving for that perfect runny yolk.
6.Why does the recipe say to separate scallion whites and greens instead of tossing them all in at once? ▾
Firm, aromatic scallion whites mellow out beautifully when sautéed early with kimchi and riblets to build a deep, savory flavor base for the dish. Delicate scallion greens cook in seconds, so you’ll toss them in at the very end for a bright, fresh pop of color and mild onion bite. Adding them all at once leaves whites undercooked and greens slimy.
7.How do I make the perfect runny sunny-side up egg for topping without undercooked whites? ▾
Cook eggs in a thin layer of neutral oil over medium-low heat, not high heat, to avoid burnt edges and raw, translucent whites. Once whites are fully opaque around the edges (about 2 minutes), spoon a little hot oil over the top of the whites to set any remaining clear spots without flipping the egg, which would break the runny yolk. Pull it off the heat as soon as whites are fully set.
8.How can I adjust this recipe to be less spicy for kids or people who don’t tolerate heat well? ▾
If you’re sensitive to spice, rinse chopped kimchi lightly under cold water to remove some of the spicy gochugaru coating before sautéing, and cut the added kimchi brine by half. You can also swap a quarter of the spicy kimchi for plain sautéed napa cabbage to mellow flavor, and serve with a small dollop of sour cream on the side to cool lingering heat.

Comments (20)

2 hours ago

OMG this was SO good! I made it for Sunday family dinner and everyone went back for seconds. The kimchi tang pairs perfectly with the savory ribs, I can’t believe I never thought to combine these before!

yesterday

Total game changer for weeknight meals! Cook time was actually 30 minutes like the recipe said, no weird hidden steps. I used extra fermented kimchi for more punch, would 100% make again.

2 hours ago

So glad the timing worked out for your weeknight! Extra fermented kimchi is chef’s kiss, that extra tang cuts through the richness of the ribs so well.

3 days ago

My kids loved this! Only thing is my ribs came out a little tougher than I wanted, did I cut them too thick? I followed the cook time exactly otherwise, the flavor was unreal.

2 days ago

I had that same issue first time! Try slicing them against the grain into 1/2 inch thick cuts, they come out fall-apart tender every time now. I make this for meal prep every other week!

yesterday

Great tip from GrillDadRob! Slicing against the grain is key here, and if you have an extra 2 minutes you can give them a quick sear before tossing with the fried rice to lock in juiciness too.

1 week ago

Made this for our K-drama watch party potluck last weekend and it was the first dish gone! People kept asking me for the recipe all night, felt like a total cooking rockstar.

5 days ago

This holds up so well for meal prep! I portioned it out for 4 days of lunches and the rice didn’t get mushy at all, even with the kimchi juice. 10/10 for work lunches.

3 days ago

Wait do you reheat it in the microwave or on the stove? I want to try this for my work lunches too but I’m always scared fried rice gets rubbery when reheated.

2 weeks ago

I added a tablespoon of gochujang to the fried rice for extra heat and WOW, that took it to the next level. If you love spicy food don’t sleep on that addition.

1 week ago

Oh that sounds amazing! Did you add it when you were stir frying the rice or toss it with the ribs at the end?

5 days ago

Love that hack! We actually mention a gochujang variation in the recipe notes, it adds such a nice warm heat that pairs perfectly with the sour kimchi. Adding it during the stir fry step helps it coat every grain of rice!

30 minutes ago

Full transparency, I’m a terrible cook and I was nervous this would be too hard since it’s medium difficulty, but it was so straightforward! I didn’t mess anything up and my roommate said it tasted like takeout from our favorite Korean spot.

5 minutes ago

That makes us so happy to hear! We work hard to make even medium-difficulty recipes accessible for new cooks, so we’re thrilled it turned out takeout-level good for you.

2 days ago

I swapped the regular ribs for boneless short ribs because that’s what I had in the freezer, and it still turned out incredible. The kimchi fried rice base is so flavorful it doesn’t even matter what cut you use honestly.

1 week ago

Made this on the grill last weekend instead of cooking the ribs on the stovetop, got a nice smoky char on them before chopping and mixing with the rice. Total crowd pleaser at the cookout.

5 days ago

Smoky grilled ribs with kimchi fried rice?! That’s genius, I’m absolutely stealing this for my next tailgate.

2 weeks ago

The flavor was great, but I wish the recipe specified how ripe the kimchi should be! I used super fresh kimchi I bought that day and it was way too mild, no tang at all. Ended up adding extra rice vinegar to compensate.

1 week ago

Pro tip: always use kimchi that’s been open in your fridge for at least a week for fried rice! The fresh stuff is great for eating straight but it’s too crisp and mild for cooking.

3 days ago

That’s such a great point, we’ll update the recipe notes to specify that well-fermented, slightly sour kimchi works best here! A splash of rice vinegar is the perfect quick fix if you only have fresh kimchi on hand, great call.

just now

Made this in my tiny dorm kitchen with a cheap hot plate and it still banged. Used pre-cooked rice from the dining hall and leftover ribs from the takeout place down the street, 10/10 hack for broke college students.

3 days ago

I made this gluten free by swapping the soy sauce for tamari and it worked perfectly! No weird texture or off flavor, my whole family ate it even the non-gluten-free folks.

2 days ago

Thanks for sharing that swap! We get so many questions about gluten free adaptations for this recipe, so we’ll add that tamari works as a 1:1 swap for soy sauce to the notes soon.

5 days ago

My picky 7 year old asked for seconds! That’s basically a Michelin star in my house. I left a little plain rice on the side for him at first but he ended up stealing all the kimchi rice from my plate too.

3 days ago

Wait did your kid think the kimchi was too sour? My 6 year old turns his nose up at anything tangy, I’ve been scared to try kimchi recipes with him!

2 days ago

I was worried too! I used a little less kimchi than the recipe called for and mixed in a tiny bit of butter to mellow the tang, he didn’t even complain. Definitely try it!

2 days ago

I used leftover St. Louis style ribs from our BBQ two nights ago and this was the best leftover repurpose I’ve ever made. Didn’t even have to cook the ribs from scratch, cut the cook time down to 15 minutes total!

yesterday

Leftover ribs?! That’s such a smart use, I never would’ve thought to repurpose leftover BBQ ribs into fried rice. Making this tomorrow with the ribs I have in the fridge from Labor Day!

2 hours ago

The balance of flavors here is insane. Salty ribs, tangy kimchi, slightly crispy rice, a runny yolk on top? I added a fried egg like the recipe suggested and it was absolute perfection.

1 week ago

Wait, is the 30 minute cook time including prep? I spent like 20 minutes chopping kimchi and slicing ribs before I even started cooking, so total time was closer to 50 minutes for me. Still tasted amazing though!

5 days ago

I buy pre-sliced short ribs and pre-chopped kimchi from the Asian market by my house, cuts prep down to like 5 minutes total! Game changer for busy nights.

3 days ago

Great question! The 30 minute cook time is active cook time, not including prep. We’ll make that clearer in the recipe header to avoid confusion! Pre-chopped ingredients are such a great time saver too.

yesterday

Brought this to our office potluck yesterday and had three people slide into my work DMs asking for the recipe. Even the person who “hates kimchi” had two servings, wild.

30 minutes ago

That’s the best testimonial we could ask for! Converting kimchi skeptics one serving of kimchi fried rice ribs at a time 😂

5 minutes ago

I added an extra scoop of rice and a side of steamed broccoli to bulk this up for my post-workout meal, and it hit so hard. High protein, tons of flavor, way better than the boring chicken and rice I usually eat.

2 days ago

Made this for date night last night and my boyfriend said it’s better than the kimchi fried rice we had on our trip to Seoul last year. Massive win, I’m adding this to our regular rotation.

yesterday

Did you serve it with anything else? I’m making this for my anniversary dinner next week and want to round out the meal!

2 hours ago

I served it with quick pickled cucumbers and those frozen pork dumplings from Trader Joe’s! It was the perfect low-effort spread so I didn’t spend the whole date night stuck in the kitchen.

1 week ago

I used pork spare ribs I got on sale for $2 a pound and this still tasted like a fancy restaurant meal. No need for expensive cuts, the seasoning and kimchi do all the heavy lifting.

3 days ago

Yes! I’ve made this with cheap ribs too and no one can tell. It’s become my go-to when I’m feeding a group on a tight budget, everyone raves about it.



