
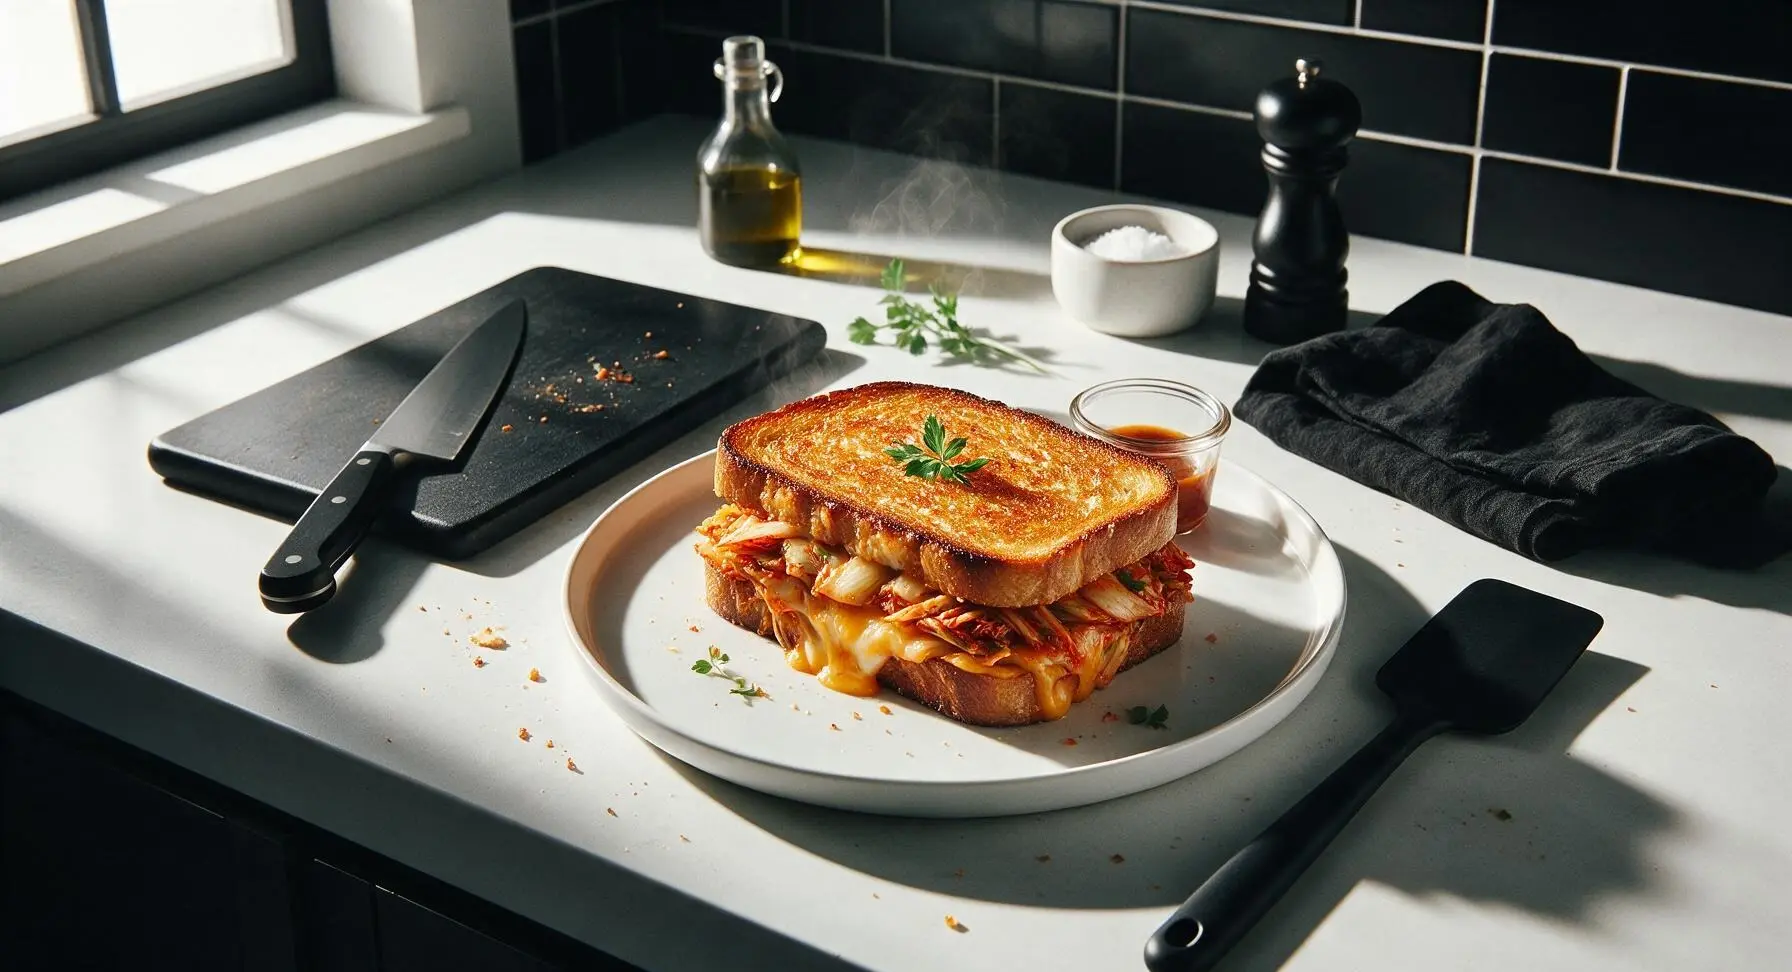
kimchi toast

title 1
kimchi toast
⏱️ cook time 7 minutes
🍽️ servings 2
⚡ Difficulty easy

intro

Crispy buttery toast layered with tangy fermented kimchi and gooey melted cheddar, packed with umami depth and ready in 12 minutes for a fast, cozy, flavor-packed meal.

Ingredients
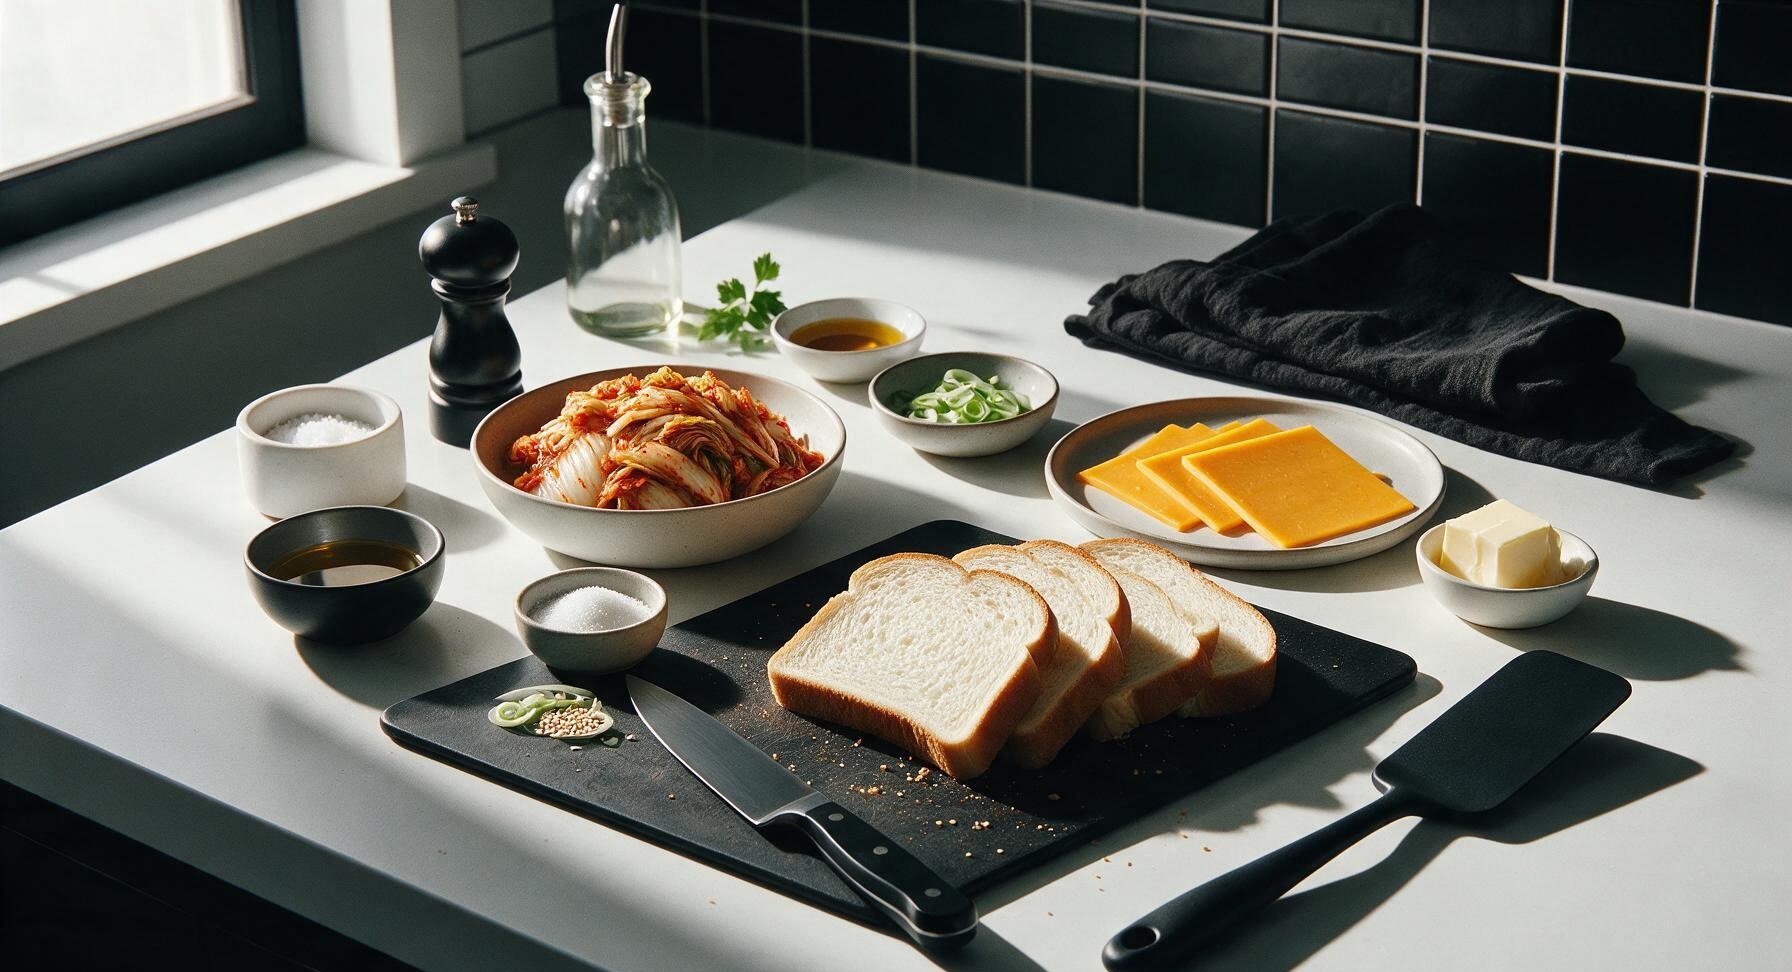
Thick-cut white sandwich bread 4 slices
Well-fermented napa cabbage kimchi 1 cup (150g)
Sharp cheddar cheese 4 slices (120g)
Unsalted butter 2 tbsp (28g)
Granulated sugar 1 tsp
Toasted sesame oil 1 tsp
Scallion 1 stalk, thinly sliced
Toasted sesame seeds 1/4 tsp

Steps

1

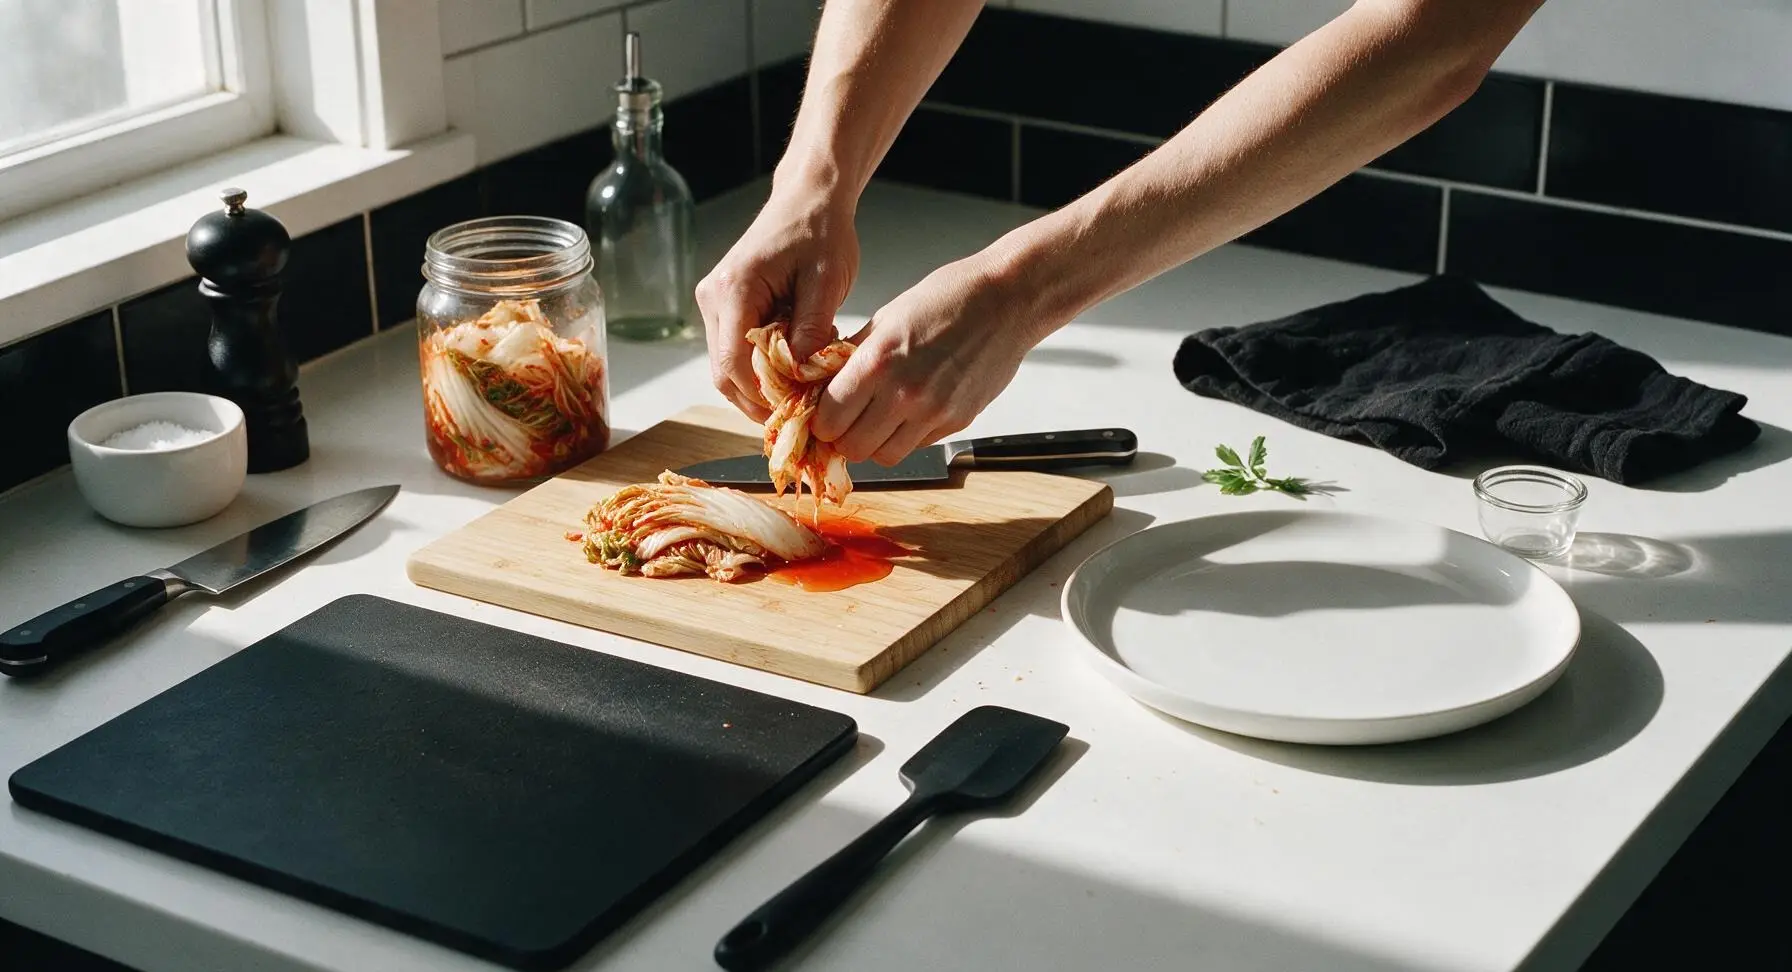
Squeeze and chop kimchi

Scoop 1 cup of well-fermented kimchi from the glass jar onto the bamboo cutting board. Use clean hands to firmly squeeze out all excess brine (reserve 1 tsp of brine for extra tang if desired), until the kimchi feels damp but not dripping. Use the santoku knife to chop the squeezed kimchi into rough 1cm pieces, then gather into a small pile at the edge of the cutting board. Discard excess squeezed brine or save for other recipes.
Step 1
step1:Squeeze and chop kimchi
2

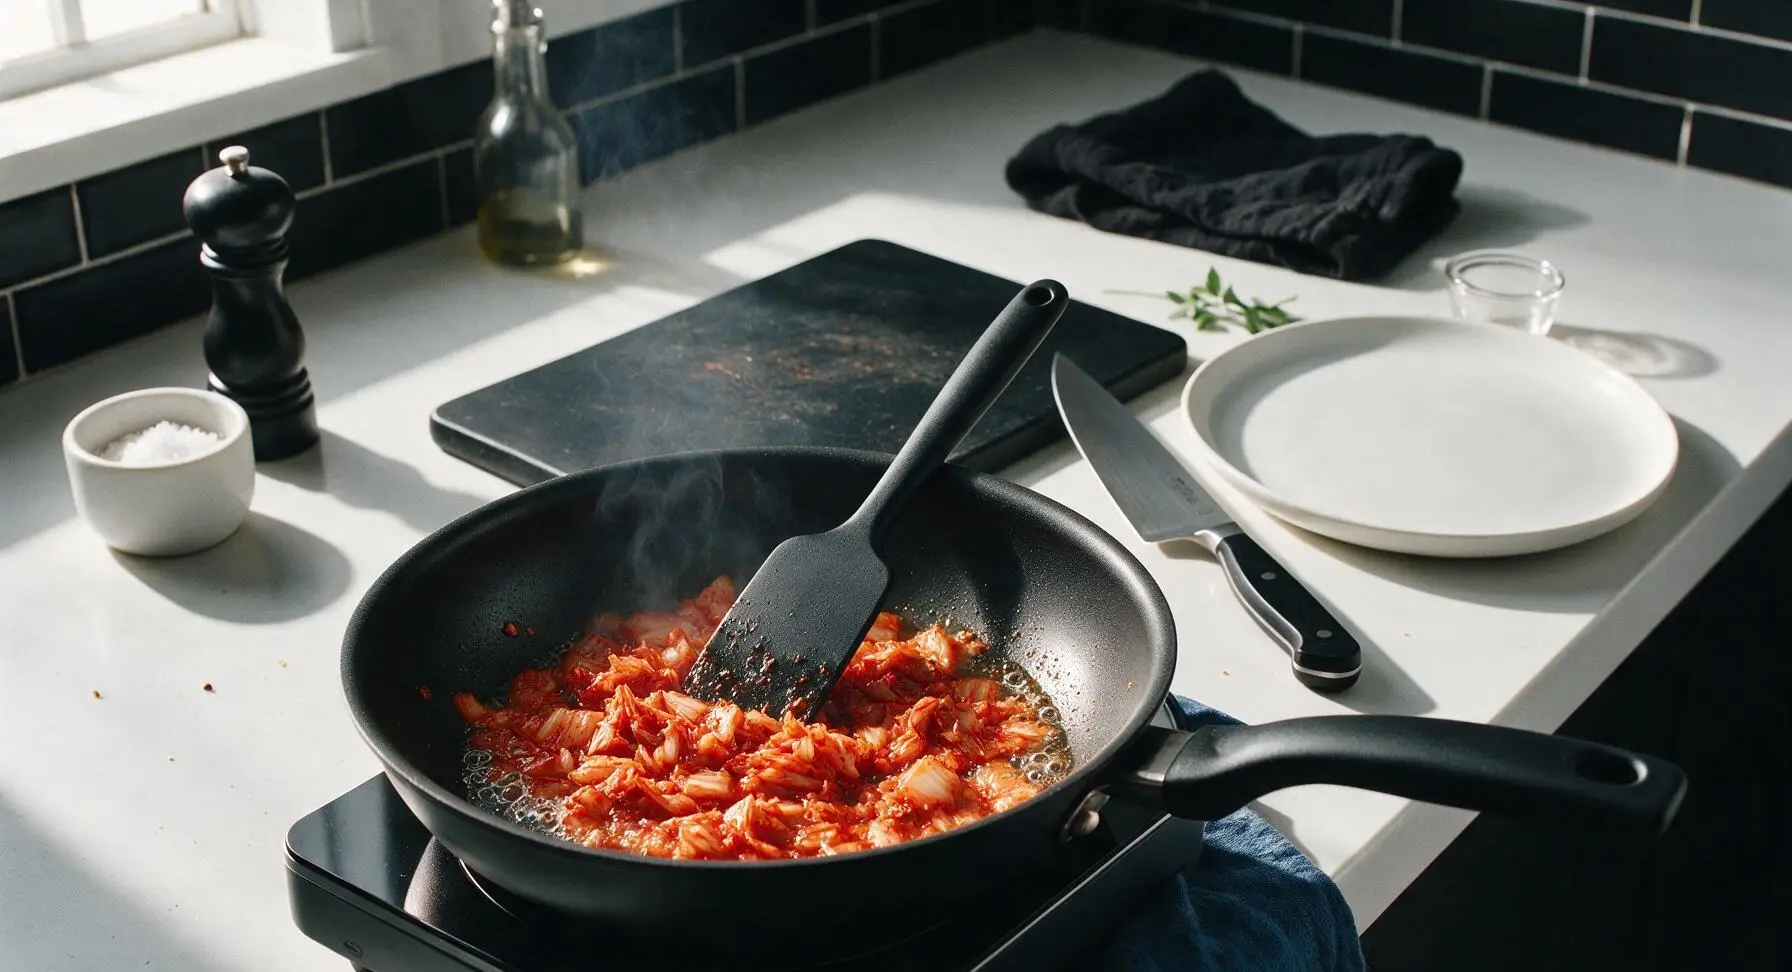
Sauté kimchi filling

Add 1 tsp of butter to the matte black non-stick skillet, heating over medium heat (350°F / 175°C) until the butter foams slightly. Add the chopped kimchi and 1 tsp granulated sugar, stirring constantly with the silicone spatula for 2 minutes, until the kimchi softens, develops slightly caramelized darker red edges, and smells bright and savory. Stir in 1 tsp toasted sesame oil, then transfer the cooked kimchi back to the edge of the cutting board to cool for 1 minute. Wipe the skillet clean with a corner of the indigo kitchen towel to remove any stuck kimchi bits before toasting.
Step 2
step2:Sauté kimchi filling
3

Butter bread slices

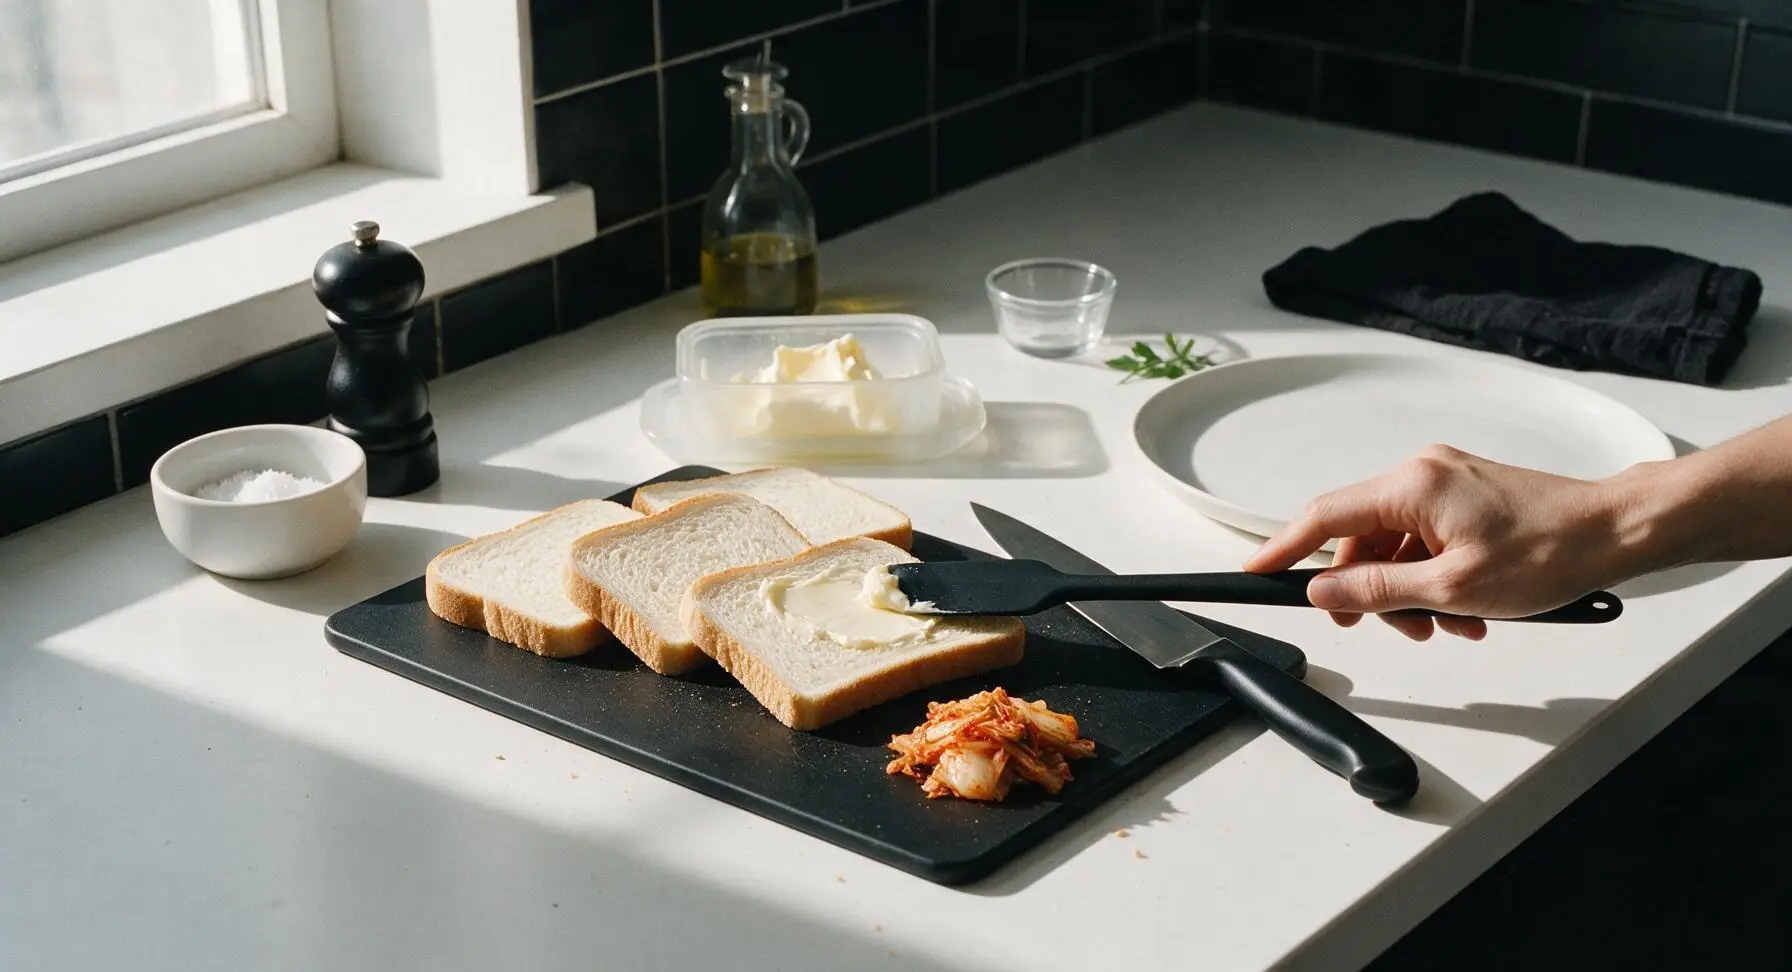
Lay all 4 slices of sandwich bread flat on the bamboo cutting board. Use the tip of the silicone spatula to spread 1/2 tbsp of softened unsalted butter evenly across one full side of each slice, spreading all the way to the crust edges to ensure even browning and no dry, pale spots. The buttered sides will face outward against the pan when assembled to create a crispy, golden crust.
Step 3
step3:Butter bread slices
4

Assemble toast layers

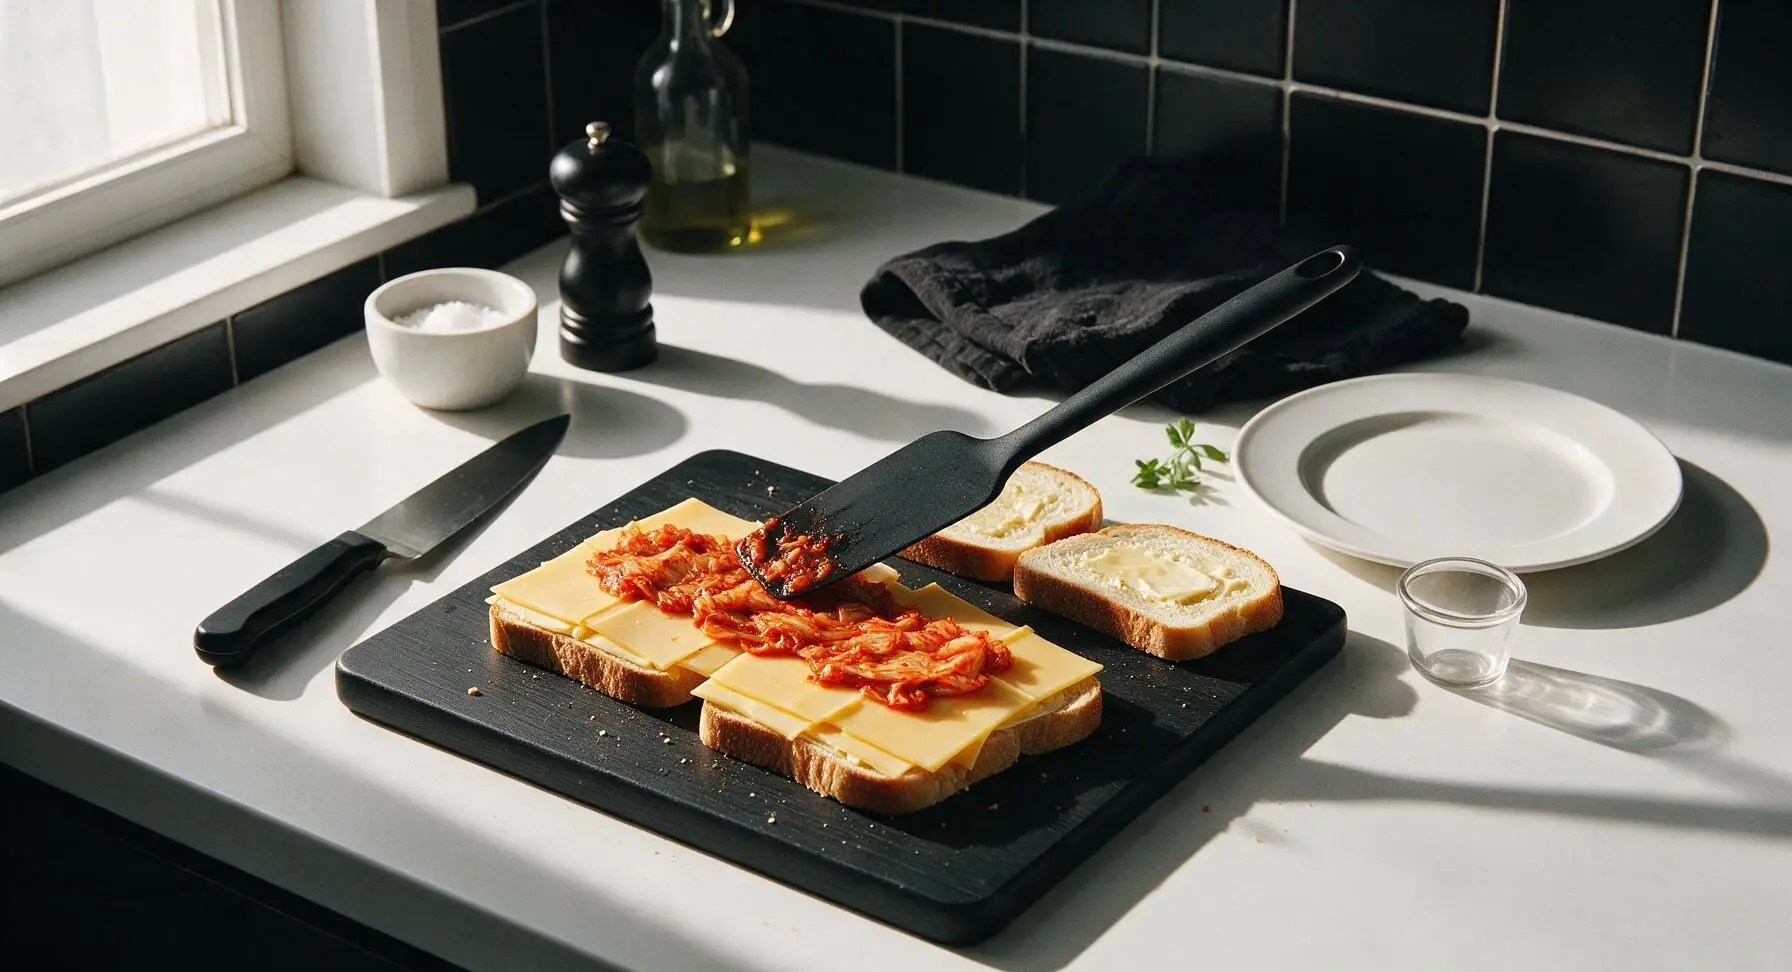
Flip two of the bread slices over so their buttered sides face down on the cutting board. Layer 2 slices of sharp cheddar cheese on each unbuttered surface, covering the bread edge to edge. Divide the cooled sautéed kimchi evenly between the two slices, spreading it in a thin, uniform layer over the cheese. Top each stack with the remaining two bread slices, buttered side facing up, to form two full sandwiches. Press down gently on the top of each sandwich with the palm of your hand to help the layers adhere.
Step 4
step4:Assemble toast layers
5

Toast sandwiches evenly

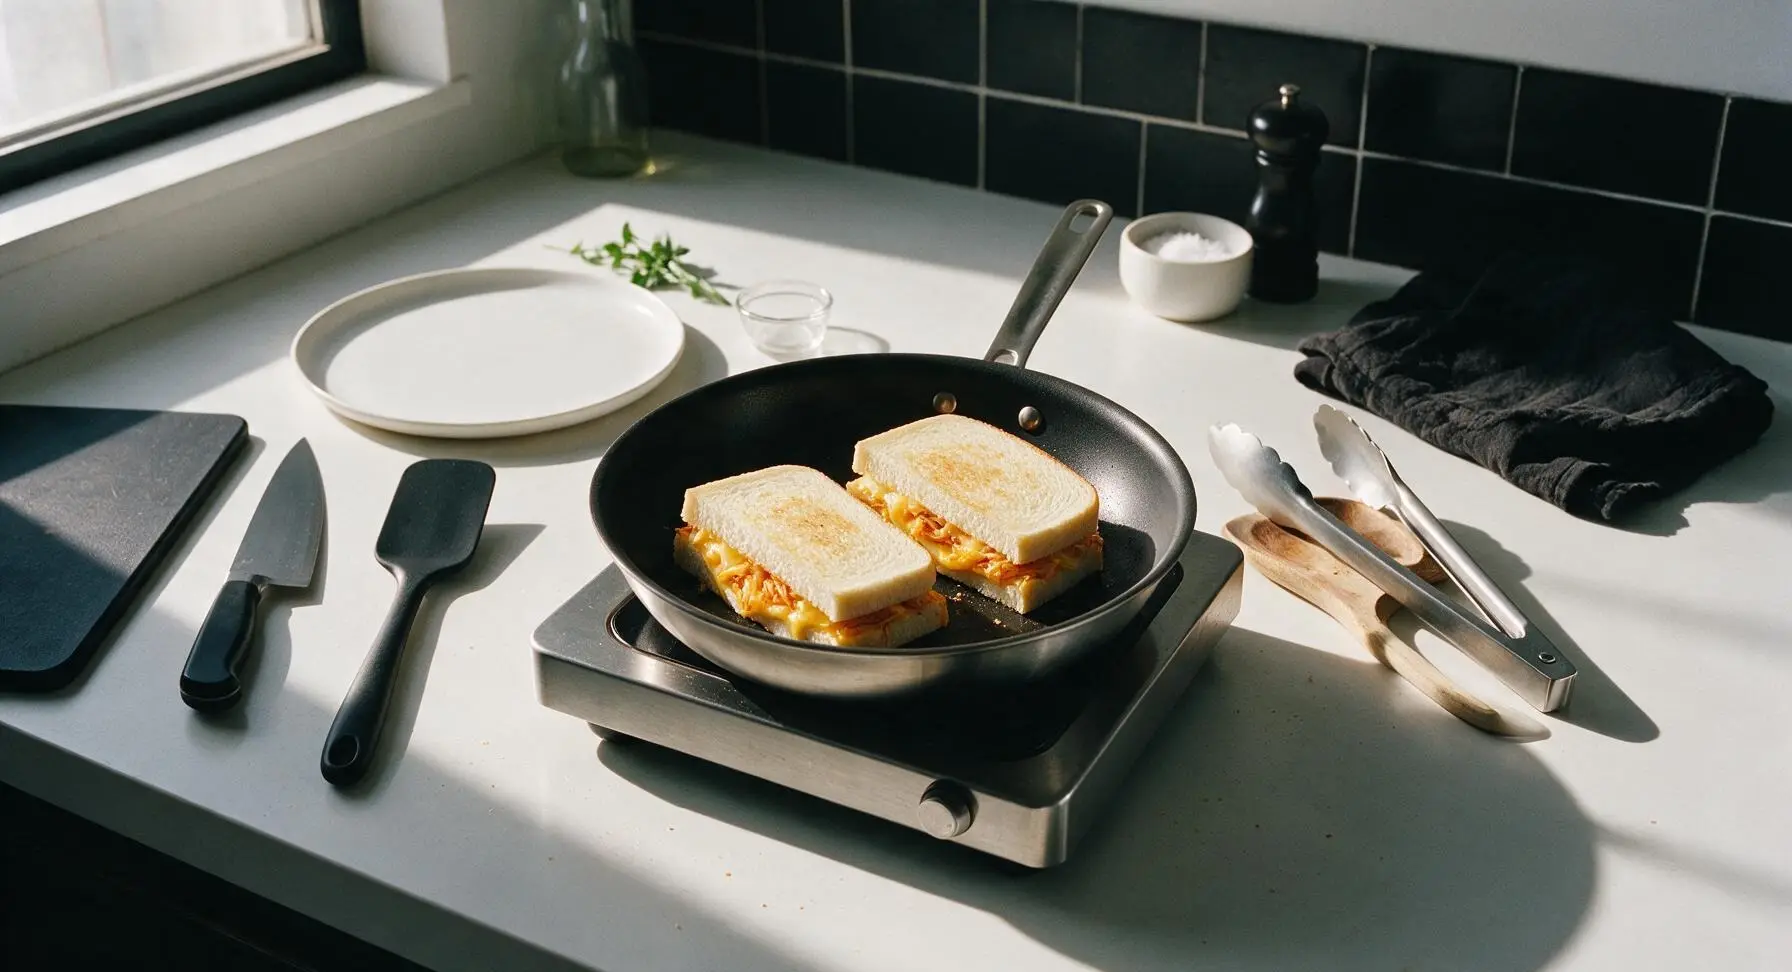
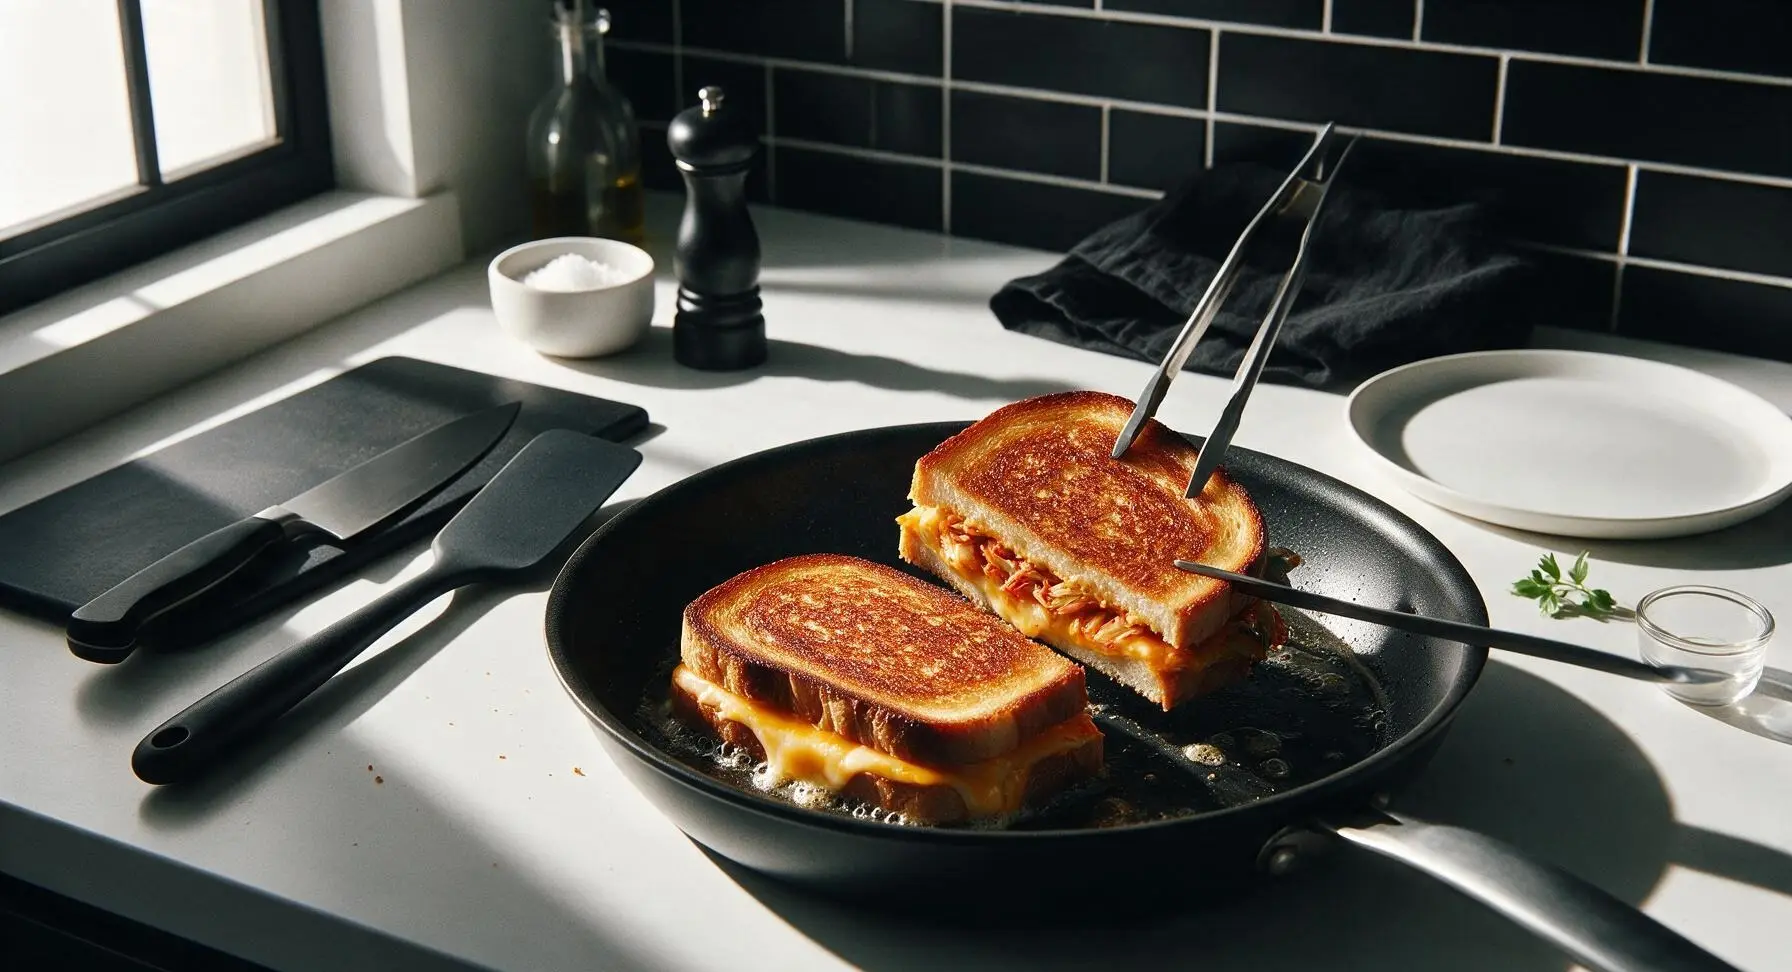
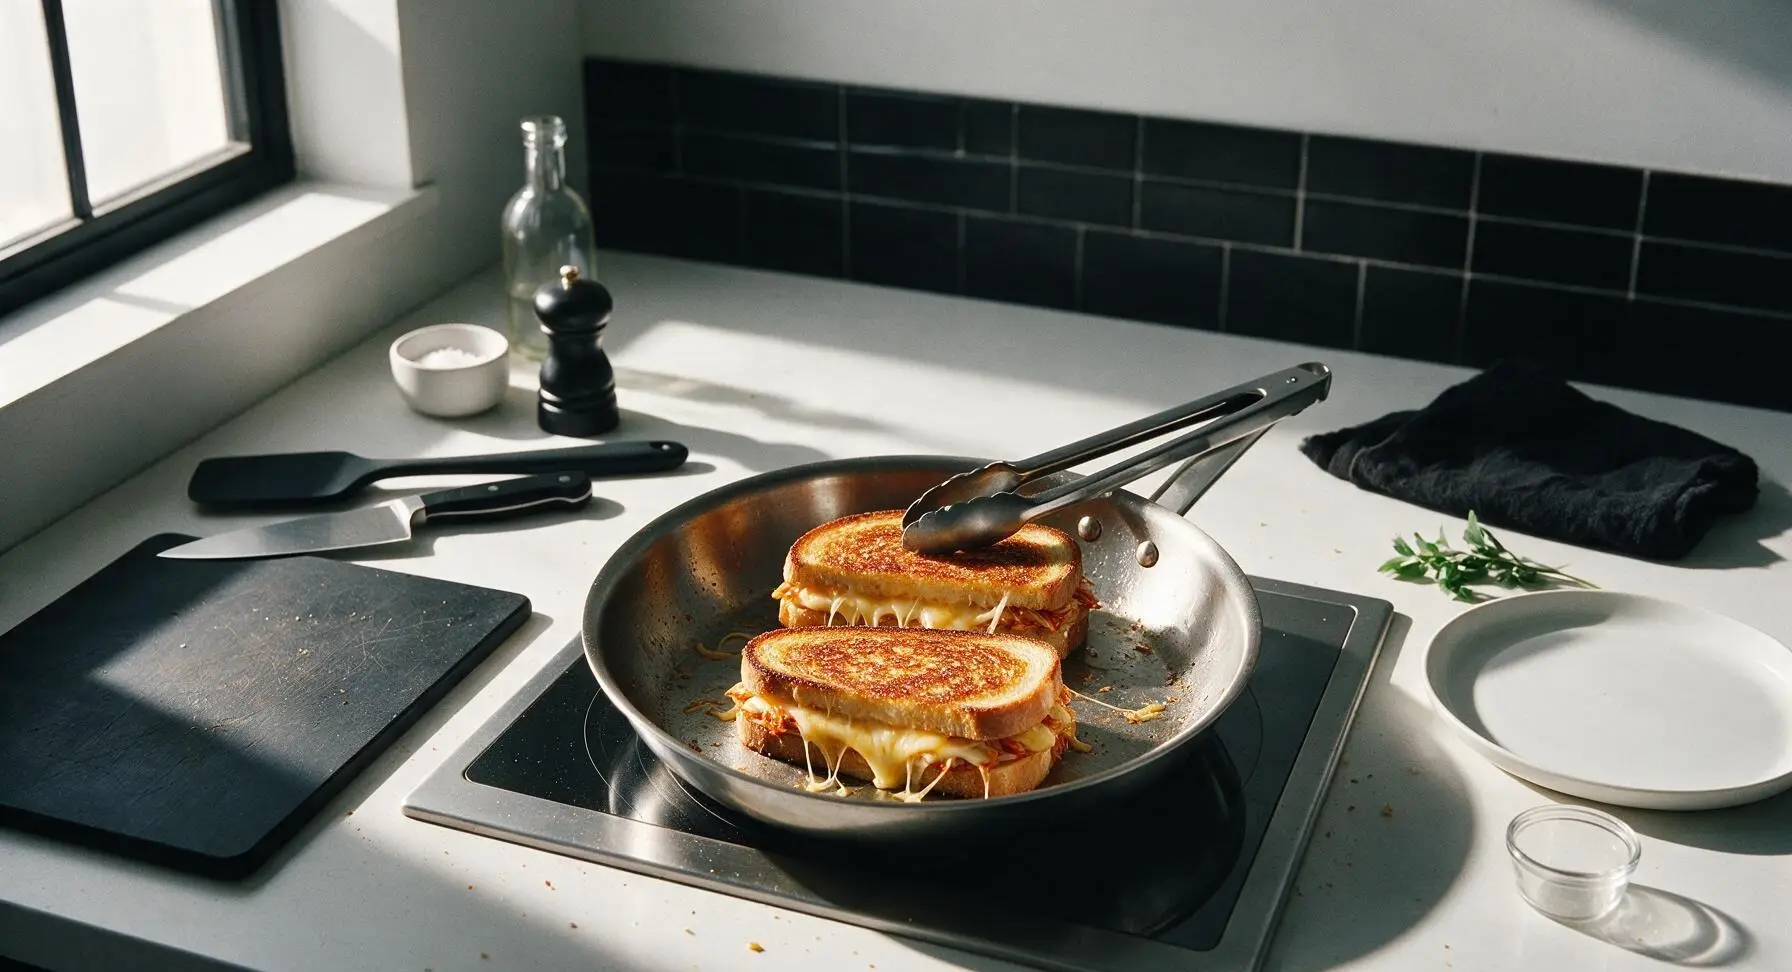
Carefully transfer both assembled sandwiches to the cleaned matte black skillet, cooking over medium-low heat (325°F / 160°C) for 3 minutes on the first side. Use the stainless steel tongs to gently press down on the top of each sandwich every 30 seconds to ensure even contact with the pan. Cook until the bottom bread is deep golden brown with crispy, darker edges, and the bottom layer of cheese begins to melt and stick slightly to the bread. Do not use high heat, as this will burn the bread before the cheese melts.
Step 5
step5:Toast sandwiches evenly
Step 5
step5:Toast sandwiches evenly
6

Flip and melt cheese

Use the stainless steel tongs to carefully flip both sandwiches over to the second side. Cook for an additional 2-3 minutes, pressing gently with the tongs every 30 seconds, until the second side matches the first in golden crispness, and all the cheese is fully melted, with small strands oozing out from the sandwich edges onto the pan. Turn off the induction burner once done.
Step 6
step6:Flip and melt cheese
7

Slice and garnish

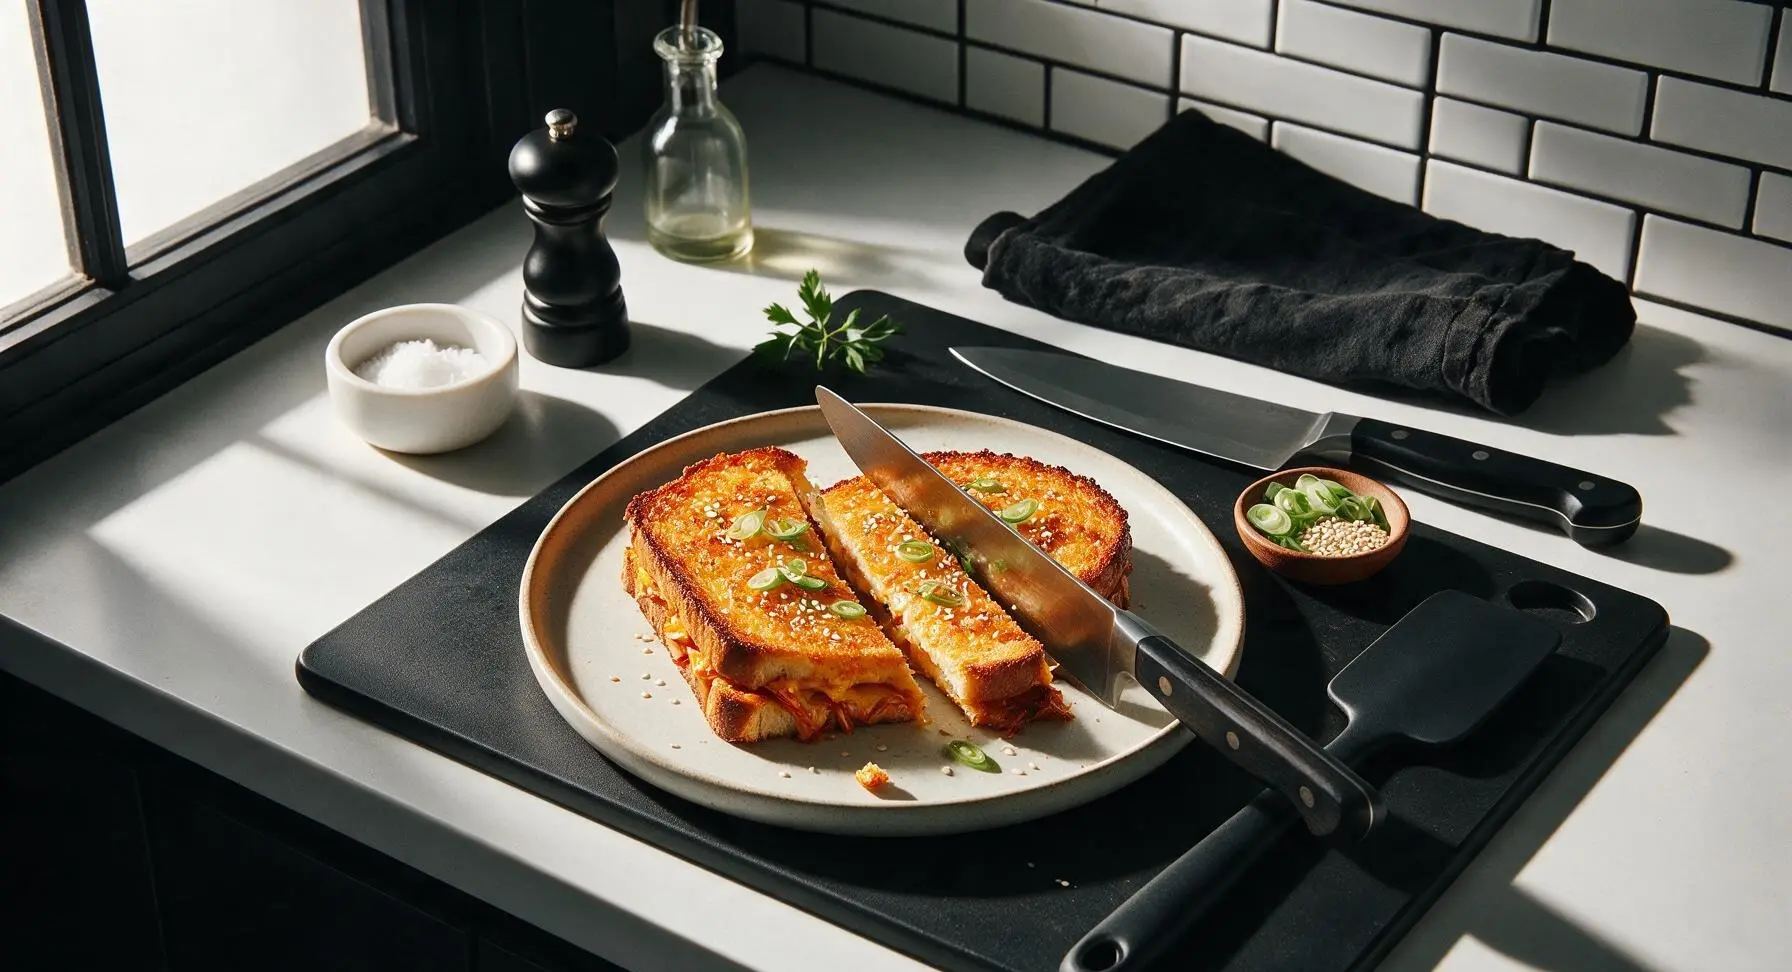
Use the tongs to transfer the hot cooked toasts to the matte off-white stoneware dinner plate. Use the santoku knife to cut each toast diagonally into two equal triangular halves. Arrange the halves slightly stacked, then sprinkle thinly sliced scallion greens and 1/4 tsp toasted sesame seeds over the top for garnish. Serve immediately while hot and crispy.
Step 7
step7:Slice and garnish

Tips

1.Opt for over-fermented, slightly sour kimchi instead of freshly made kimchi: The tangy, deeply fermented flavor caramelizes beautifully when sautéed, cutting through the richness of butter and melted cheese for a more balanced, complex bite than mild, fresh kimchi.
2.Squeeze kimchi thoroughly to remove excess brine before cooking: Any leftover dripping brine will soak into the bread layers, leading to soggy toast instead of the desired crisp, buttery crust, even if you fully butter the bread edges.
3.Keep heat at medium-low for the entire toasting process: High heat will burn the butter and bread crust in as little as 90 seconds, before the cheese has time to fully melt and adhere to the kimchi filling, resulting in bitter, charred bread with cold, un-melted center.


✨ You May Also Like

Breakfast
🍜 United States

Crisp-edged, fluffy lard griddle cakes are a nostalgic homestyle staple, with rich savoriness from rendered lard, perfect topped with maple syrup or savory gravy.

⏱️ 25 minuteBreakfast ★ 4.8
Breakfast
🍜 United States

Flaky, buttery homemade buttermilk biscuits smothered in creamy, peppery pork sausage gravy: a beloved, hearty Southern American comfort food classic.

⏱️ 35 minuteBreakfast ★ 4.8
Breakfast
🍜 United States

Golden, custardy brioche stuffed with sweet cream cheese and fresh berries, pan-fried to crisp perfection. An indulgent, cozy breakfast perfect for slow weekend mornings.

⏱️ 30 minuteBreakfast ★ 4.7
Breakfast
🍜 United States

Flaky, buttery Southern-style biscuits stuffed with savory salty country ham, a portable, satisfying classic perfect for casual on-the-go meals.

⏱️ 25 minuteBreakfast ★ 4.8
Breakfast
🍜 United States

Iconic puffy baked pancake popularized in Seattle, with crisp golden edges and soft custardy center, served warm with classic sweet toppings.

⏱️ 35 minuteBreakfast ★ 4.6
Breakfast
🍜 United States

Fluffy, golden pancakes studded with juicy peak-summer mixed berries, drizzled with maple syrup for a bright, comforting, crowd-pleasing family breakfast.

⏱️ 25 minuteBreakfast ★ 4.7

kimchi toast:Frequently Asked Questions

1.Why is there granulated sugar in this savory kimchi toast recipe? That seems out of place. ▾
Great catch! That tiny pinch of sugar isn’t there to make the toast sweet—it balances the bright, sour tang of well-fermented kimchi and the sharp, salty bite of cheddar, rounding out all the bold umami flavors so no single note overpowers the others. Stick to just 1/4 teaspoon per serving; any more will throw off that perfectly balanced, cozy flavor profile.
2.Do I need to prep the kimchi any special way before adding it to the toast? ▾
Absolutely—give your kimchi a light squeeze over a small bowl to drain off excess brine before chopping and layering it on the bread. Skipping this step leads to soggy, limp toast that loses that signature buttery crisp. Opt for at least 2-week-old well-fermented napa cabbage kimchi here, as fresher kimchi won’t have that deep, tangy umami punch the recipe needs.
3.Can I swap the thick-cut white sandwich bread for something else I have on hand? ▾
Thick-cut white sandwich bread works best because its soft, sturdy crumb holds up to melted cheese and kimchi without getting soggy, and toasts up to a perfect golden crunch. If you need a swap, use thick-cut sourdough or mild country white. Skip thin sliced sandwich bread or dense, seedy whole grain loaves, which will either turn mushy or overpower the bright filling flavors.
4.How do I get the cheddar fully melted without burning the outside of the toast? ▾
Cook over medium-low heat, not high! Melt your unsalted butter in the skillet first, add the assembled toast, then cover the pan with a lid for 2 to 3 minutes per side. The trapped gentle steam melts the sharp cheddar all the way through before the bread has a chance to scorch, giving you that ideal gooey center and evenly crisp, buttery crust.
5.Can I make this toast ahead of time for quick weekday breakfasts or lunches? ▾
This toast tastes best eaten immediately off the pan for that perfect crispy, gooey texture, but you can prep components ahead to cut down on cook time. Pre-portion drained, chopped kimchi and shredded cheddar in airtight fridge containers for up to 4 days, so all you have to do is assemble and toast when you’re ready. Don’t fully assemble ahead, as the bread will turn soggy from the kimchi.
6.What simple add-ins work well if I want to make this toast more filling? ▾
For a heartier meal, you can add a thin spread of mayo to the bread, a sprinkle of crispy crumbled bacon, or a single thin slice of ripe avocado between the kimchi and cheese. Just stick to small portions of add-ins! Too many extra wet or heavy ingredients will weigh the toast down and ruin that light, shatteringly crisp crust that makes this dish so satisfying.

Comments (7)

2 days ago

OMG this is such a game changer! I threw this together for my kids’ after school snack yesterday and they begged me to make it again for breakfast today. The crispy cheddar edge paired with the tangy kimchi? *Chef’s kiss* So easy to throw together even on our chaotic school mornings.

yesterday

Wait did you squeeze the excess juice out of the kimchi first? I tried it last week and my toast got a little soggy :(

yesterday

Great question! We definitely recommend squeezing excess brine out of the kimchi before piling it on the bread to keep that perfect crispy crunch. You can also pat it lightly with a paper towel for extra insurance!

30 minutes ago

7 minute cook time? Sign me up. I made this at 1am after getting home from a late shift and it hit every single spot. I added a little drizzle of hot honey on top and holy cow, that might be my new permanent late night go-to. Only knocking off one star because I only had mild cheddar on hand instead of extra sharp, which is totally my bad — I can only imagine how much better it is with the right cheese!

5 minutes ago

So stoked this hit the spot for your post-shift snack! Hot honey is such a chef’s kiss add-on, we’re totally going to test that variation ourselves. Pro tip: extra sharp cheddar does take the savoriness up a notch, but mild works great in a pinch!

1 week ago

I brought a platter of these cut into little triangles to my neighborhood potluck last weekend and people were hovering over the plate the whole time! Multiple neighbors asked for the recipe, can’t believe how simple and flavorful it is. The crispy cheese crust that forms on the outside of the bread is insanely good.

5 days ago

I just tested a single serving for lunch and it’s SO good! Has anyone tried prepping the kimchi/cheese filling ahead to make these even faster on busy weekdays? Would that work or would it get too mushy?

3 days ago

I prepped a big batch of the squeezed kimchi and shredded cheddar mix in a tupperware on Sunday, and it’s been perfect! Just scoop onto bread and cook for 3 minutes a side, no sogginess at all as long as you drained the kimchi really well.

2 days ago

Love that meal prep hack from Ron! We don’t recommend assembling the full toast ahead and storing it, but pre-mixing the drained kimchi and cheese will cut your cook time down even more for those busy weekdays.

2 hours ago

This looks so good! Quick question: does this work with vegan cheddar? I have a dairy sensitivity but kimchi toast is my absolute favorite and I’ve been searching for a crispy version that doesn’t require dairy.

30 minutes ago

I made it last night with vegan sharp cheddar slices and it crisped up PERFECTLY! Just make sure you cook it on medium low a little longer so the cheese gets fully melty and crispy on the edges, no sad rubbery vegan cheese here!

5 minutes ago

10/10, made this in my dorm toaster oven for $3 worth of ingredients and it tastes better than the $12 fancy toast at the cafe down the street from campus. Game. Changer. I used the sourdough ends I had left in my bread bag and it slapped.

yesterday

I added a sprinkle of gochugaru flakes and a slice of cooked bacon to mine this morning and WOW. The salty bacon, tangy kimchi, gooey cheddar? I will be eating this every single Saturday from now on. So easy, so much flavor, zero fuss.

2 hours ago

That bacon and gochugaru addition sounds absolutely incredible! We love seeing people put their own creative spin on this quick recipe – thanks so much for sharing your hack, we’re definitely testing that combo this weekend!



