
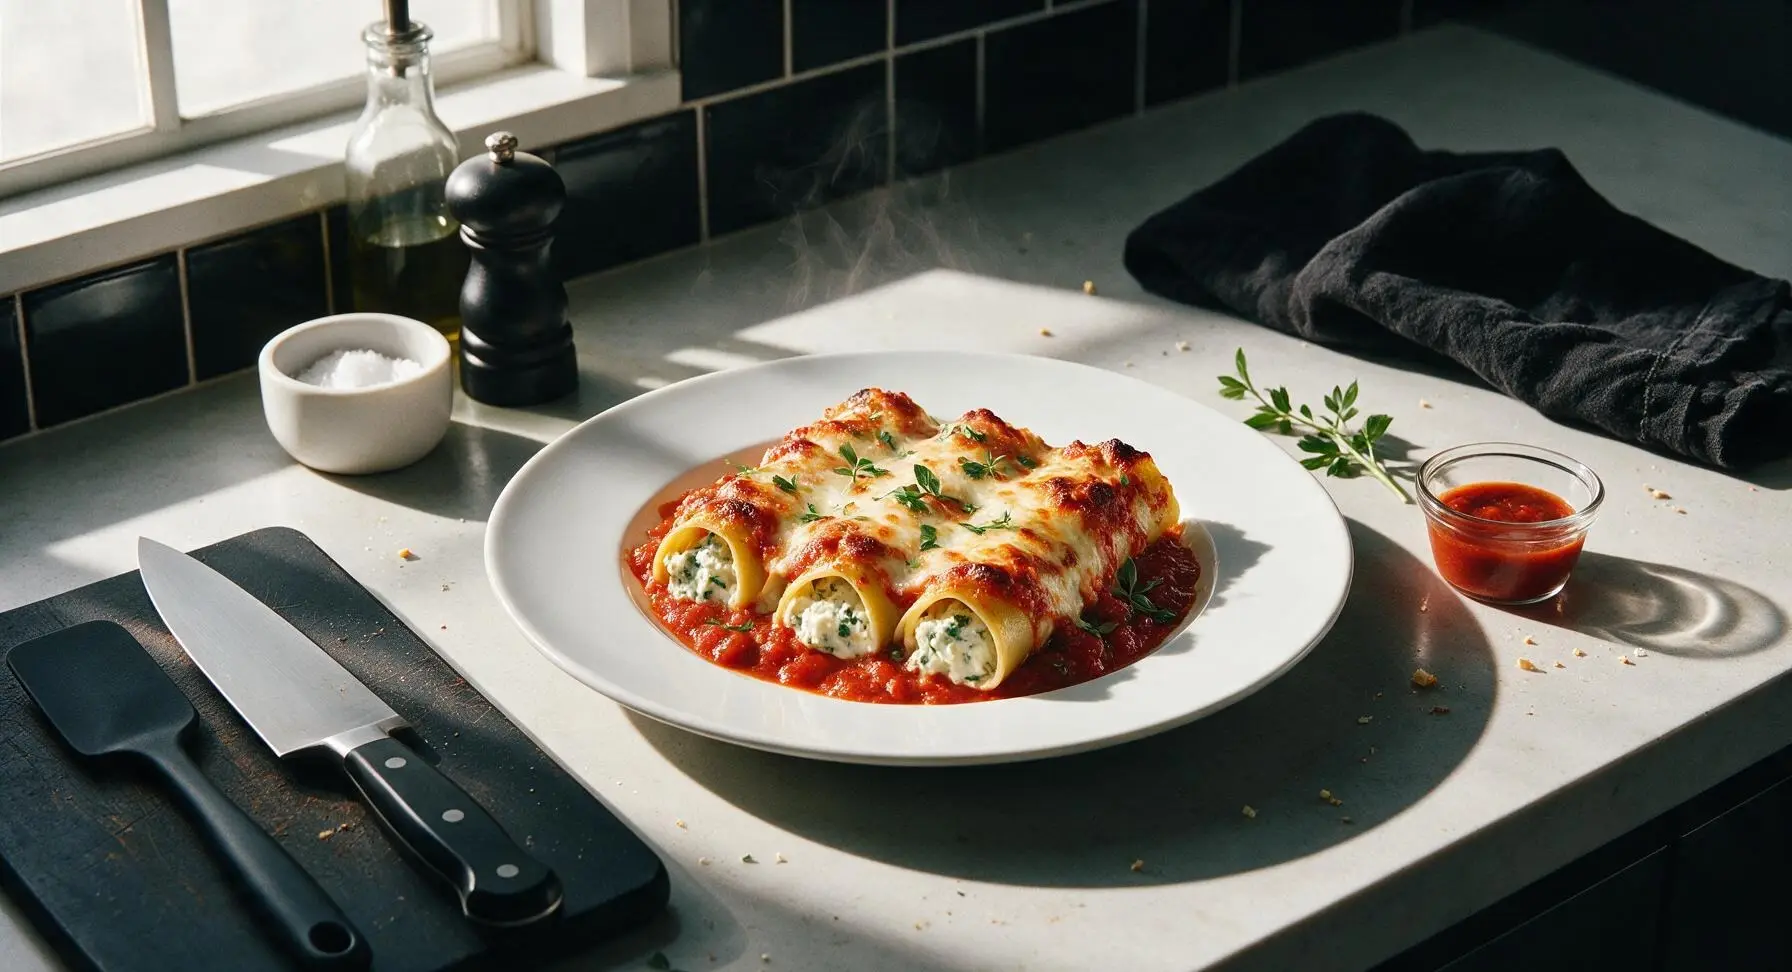
manicotti

title 1
manicotti
⏱️ cook time 50 minutes
🍽️ servings 4
⚡ Difficulty medium

intro

Tender pasta tubes stuffed with creamy herbed ricotta, smothered in bright marinara and melted cheese, baked to bubbly golden perfection—cozy, nostalgic comfort food made for gathering around the table.

Ingredients
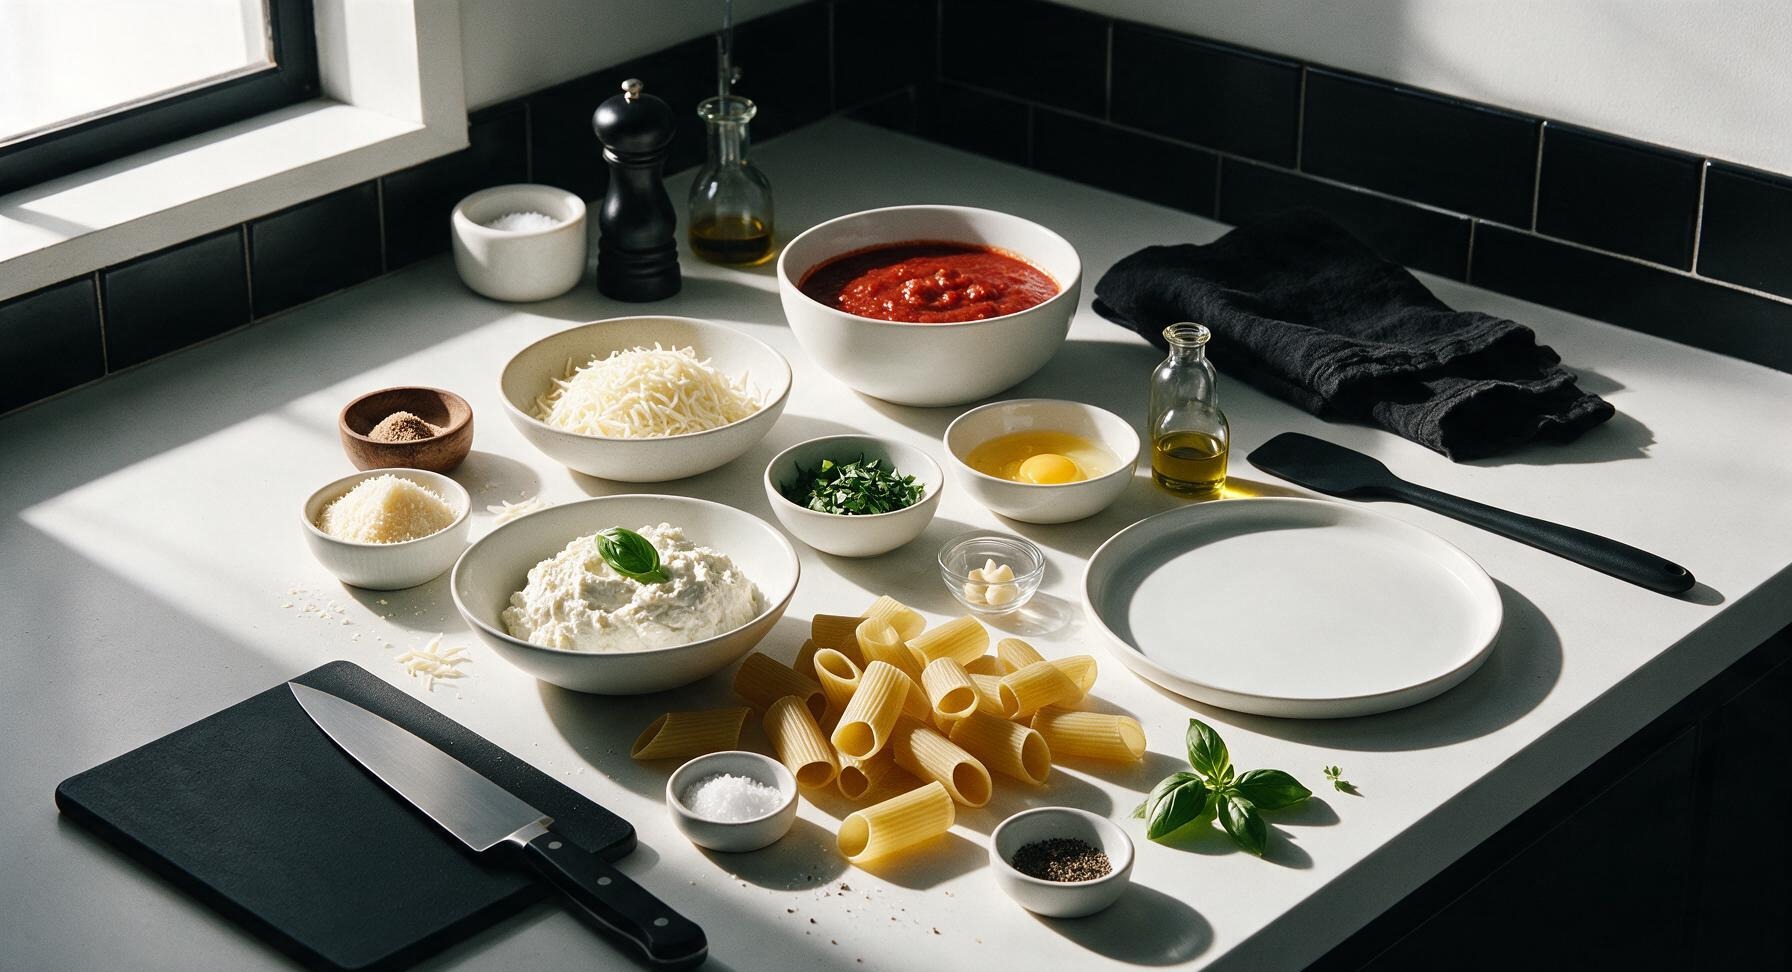
Dry manicotti pasta shells 12 shells (approx 225g)
Whole milk ricotta cheese 425g (15oz)
Whole milk mozzarella cheese 225g (8oz), shredded, divided
Parmigiano-Reggiano cheese 50g (1/2 cup), finely grated, divided
Marinara sauce 700g (24oz), divided
Large eggs 2, lightly beaten
Garlic cloves 2, finely minced
Fresh basil 1/4 cup chopped, plus 8 whole leaves for garnish
Kosher salt 1 tbsp (for pasta water) + 1 tsp (for filling)
Freshly ground black pepper 1/2 tsp
Ground nutmeg 1/4 tsp
Extra-virgin olive oil 1 tsp, for tossing cooked pasta

Steps

1

Parboil Pasta Shells

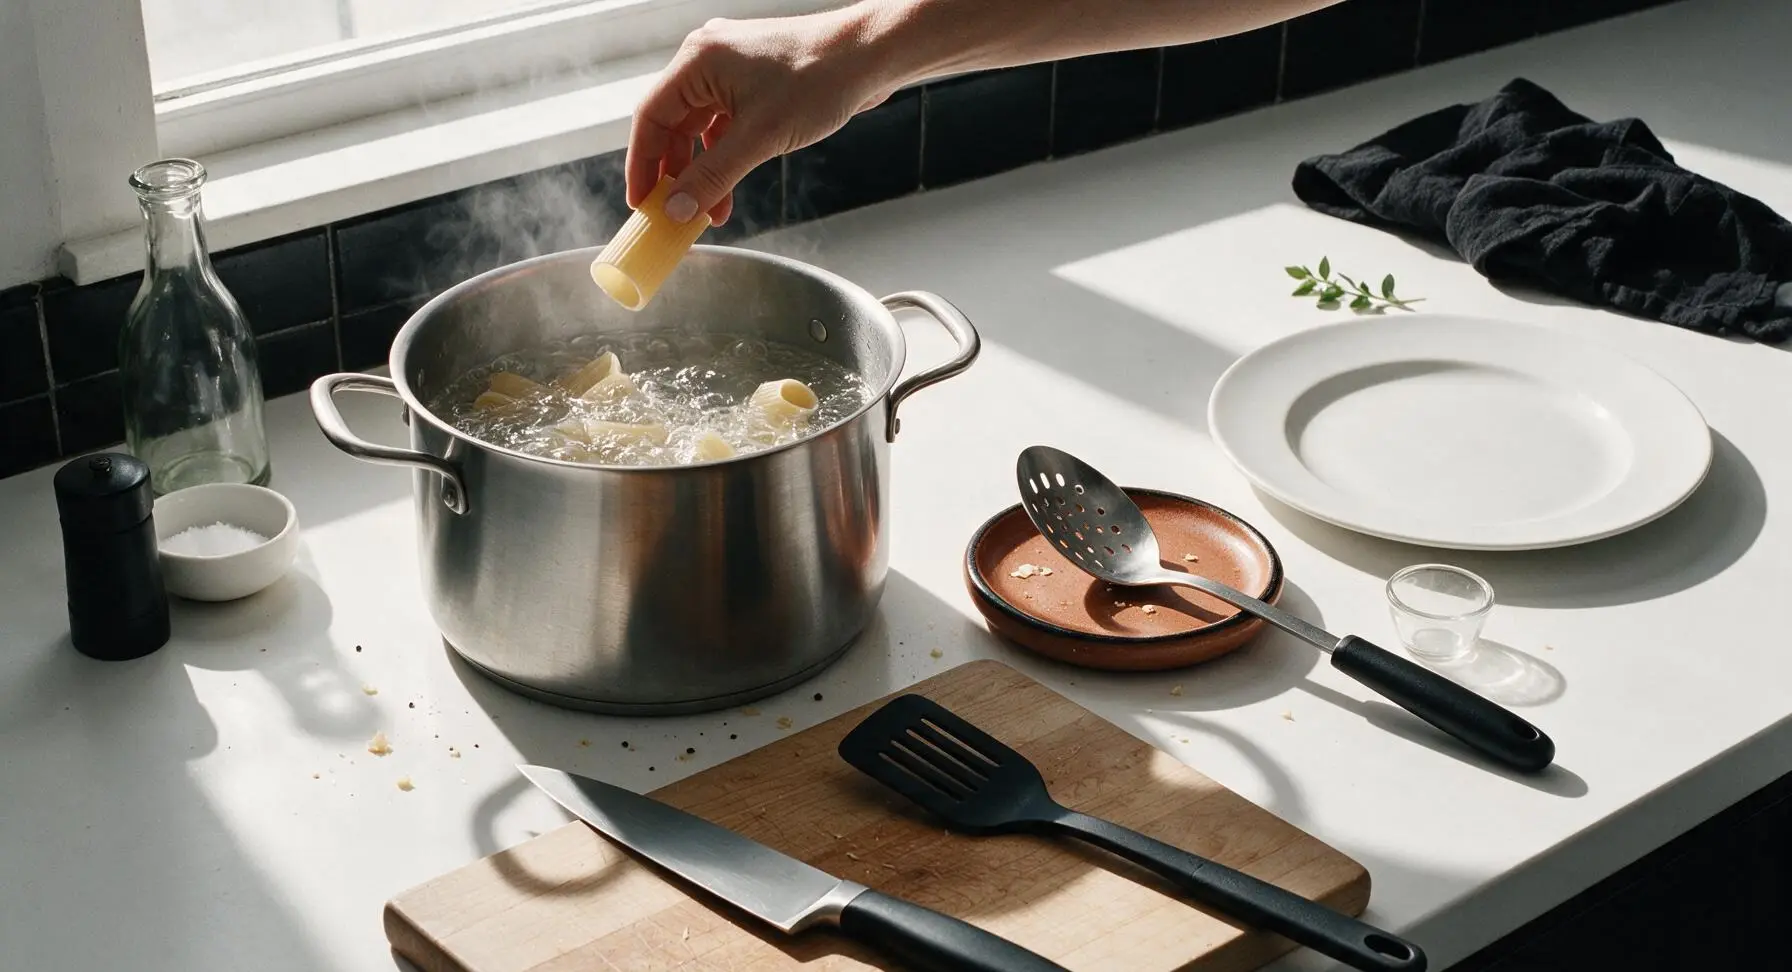
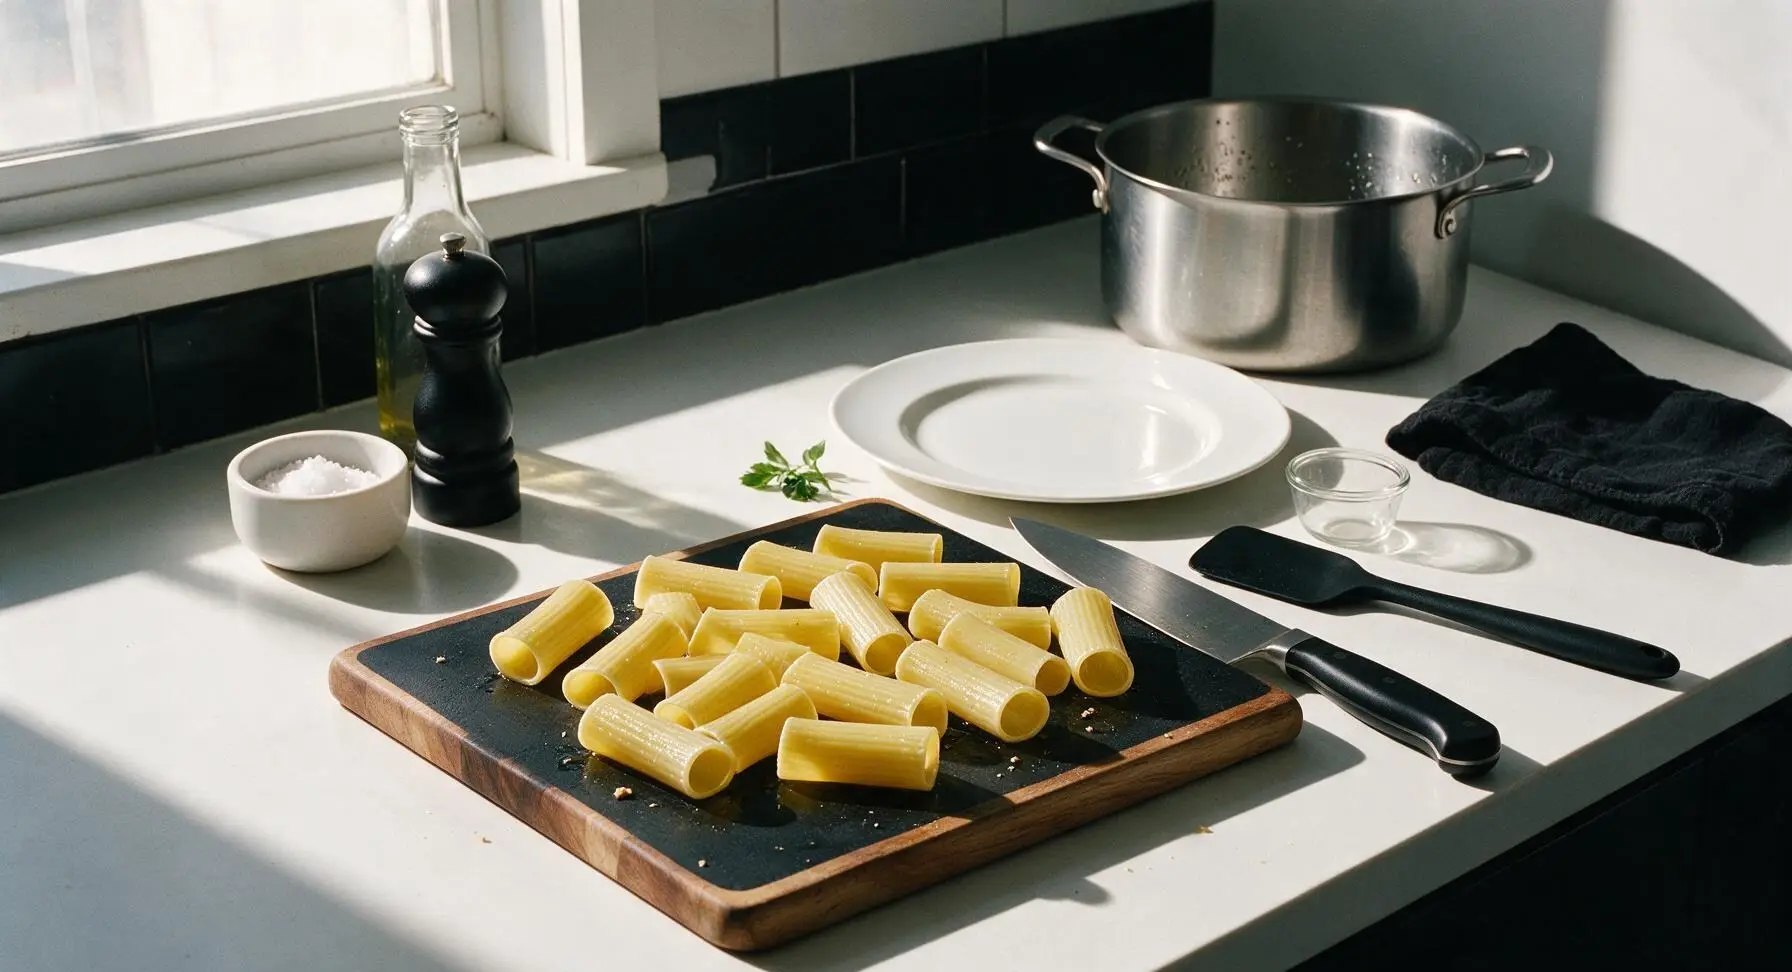
Fill the 6L stainless steel stock pot with 4L of cold water, add 1 tablespoon of kosher salt, and bring to a rolling boil over high heat. Add 12 dry manicotti shells, stir gently with the slotted stainless steel spoon to prevent sticking to the pot bottom, and parboil for exactly 6 minutes (shells will be very al dente, firm to the bite, with a slight white core visible when broken open). Drain the shells thoroughly, rinse briefly with cool water to stop the cooking process, toss with 1 teaspoon of olive oil to prevent sticking, and arrange in a single layer on the maple cutting board. Do not overcook, as soft shells will tear easily during stuffing.
Step 1
step1:Parboil Pasta Shells
Step 1
step1:Parboil Pasta Shells
2

Prep Baking Dish

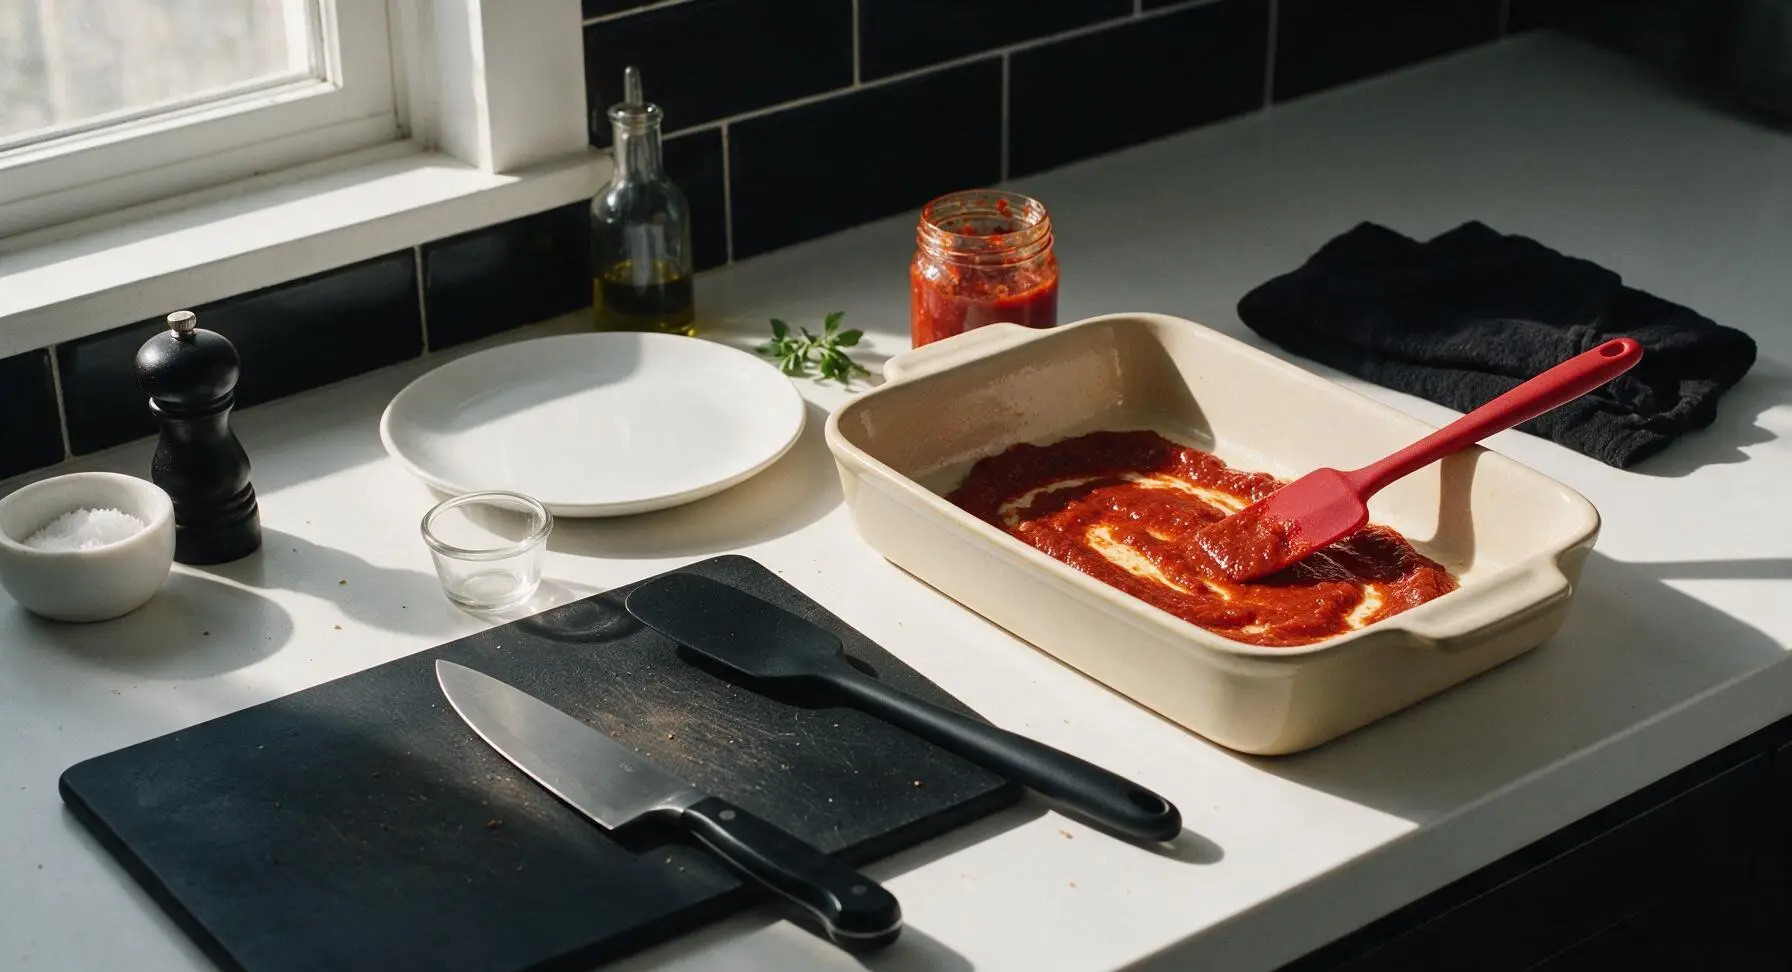
Preheat oven to 375°F (190°C). Use the red silicone spatula to spread 1 cup (approximately 230g) of marinara sauce evenly across the bottom of the 9x13 inch matte cream ceramic baking dish, creating a thin, consistent layer that prevents pasta from sticking to the dish during baking. Return the dish to its fixed center-right position on the counter.
Step 2
step2:Prep Baking Dish
3

Mix Cheese Filling

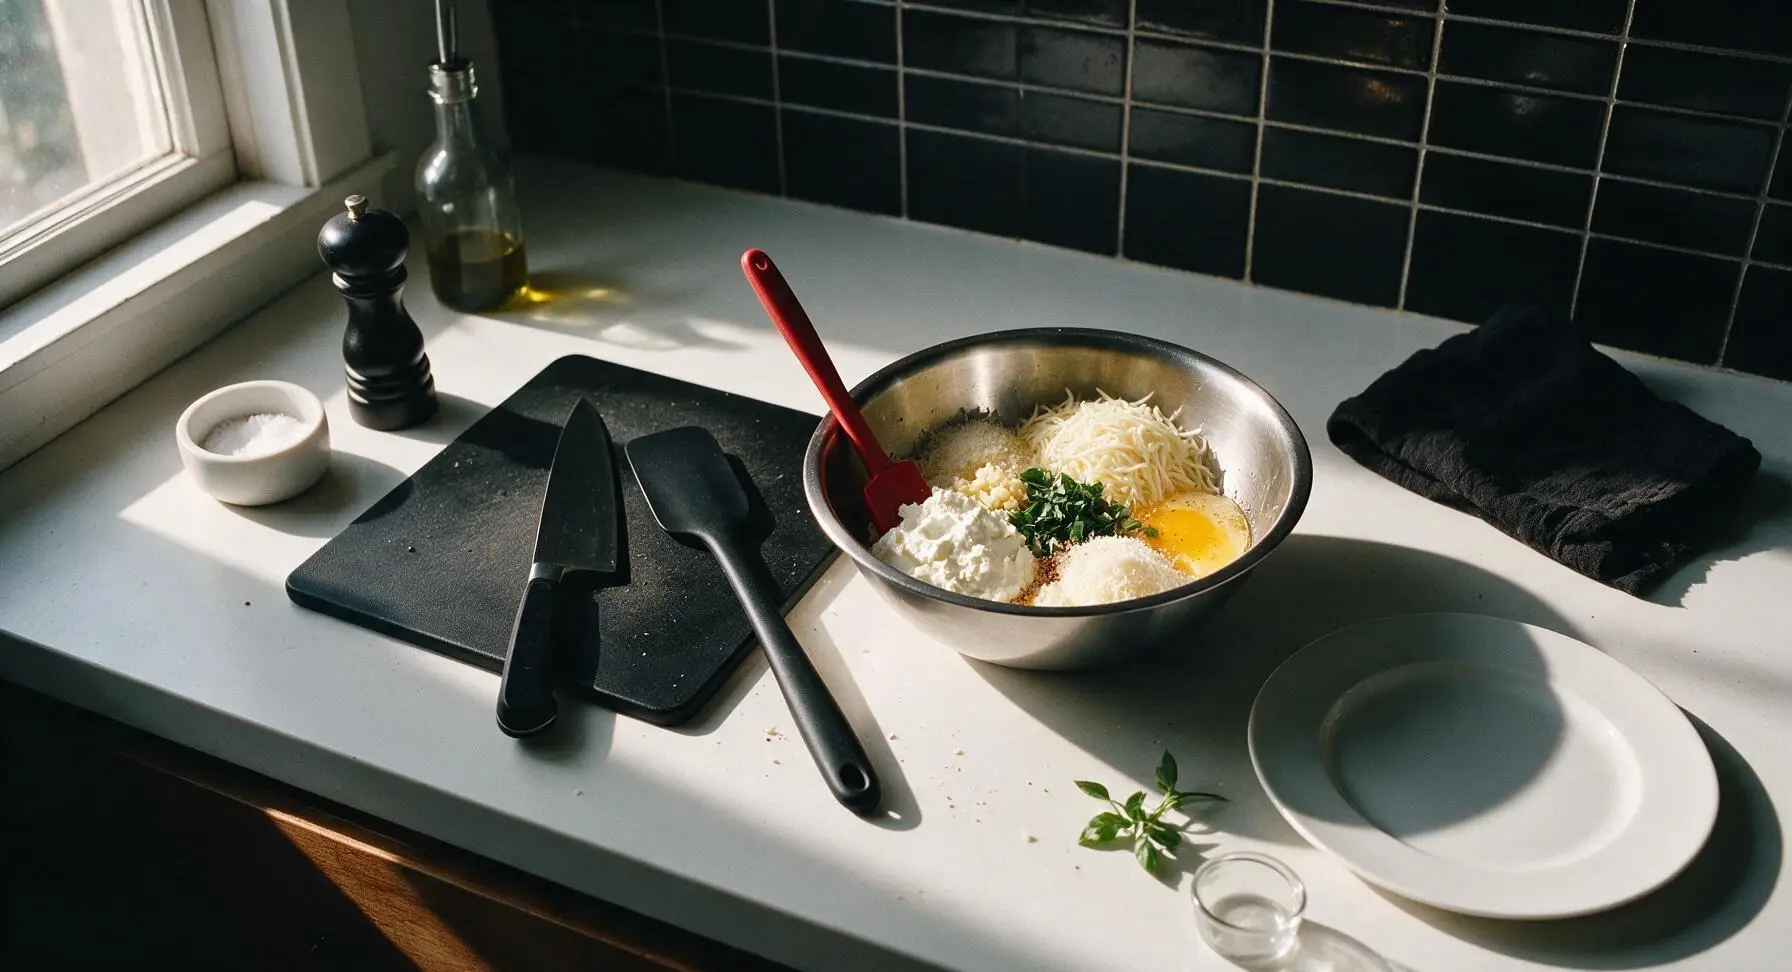
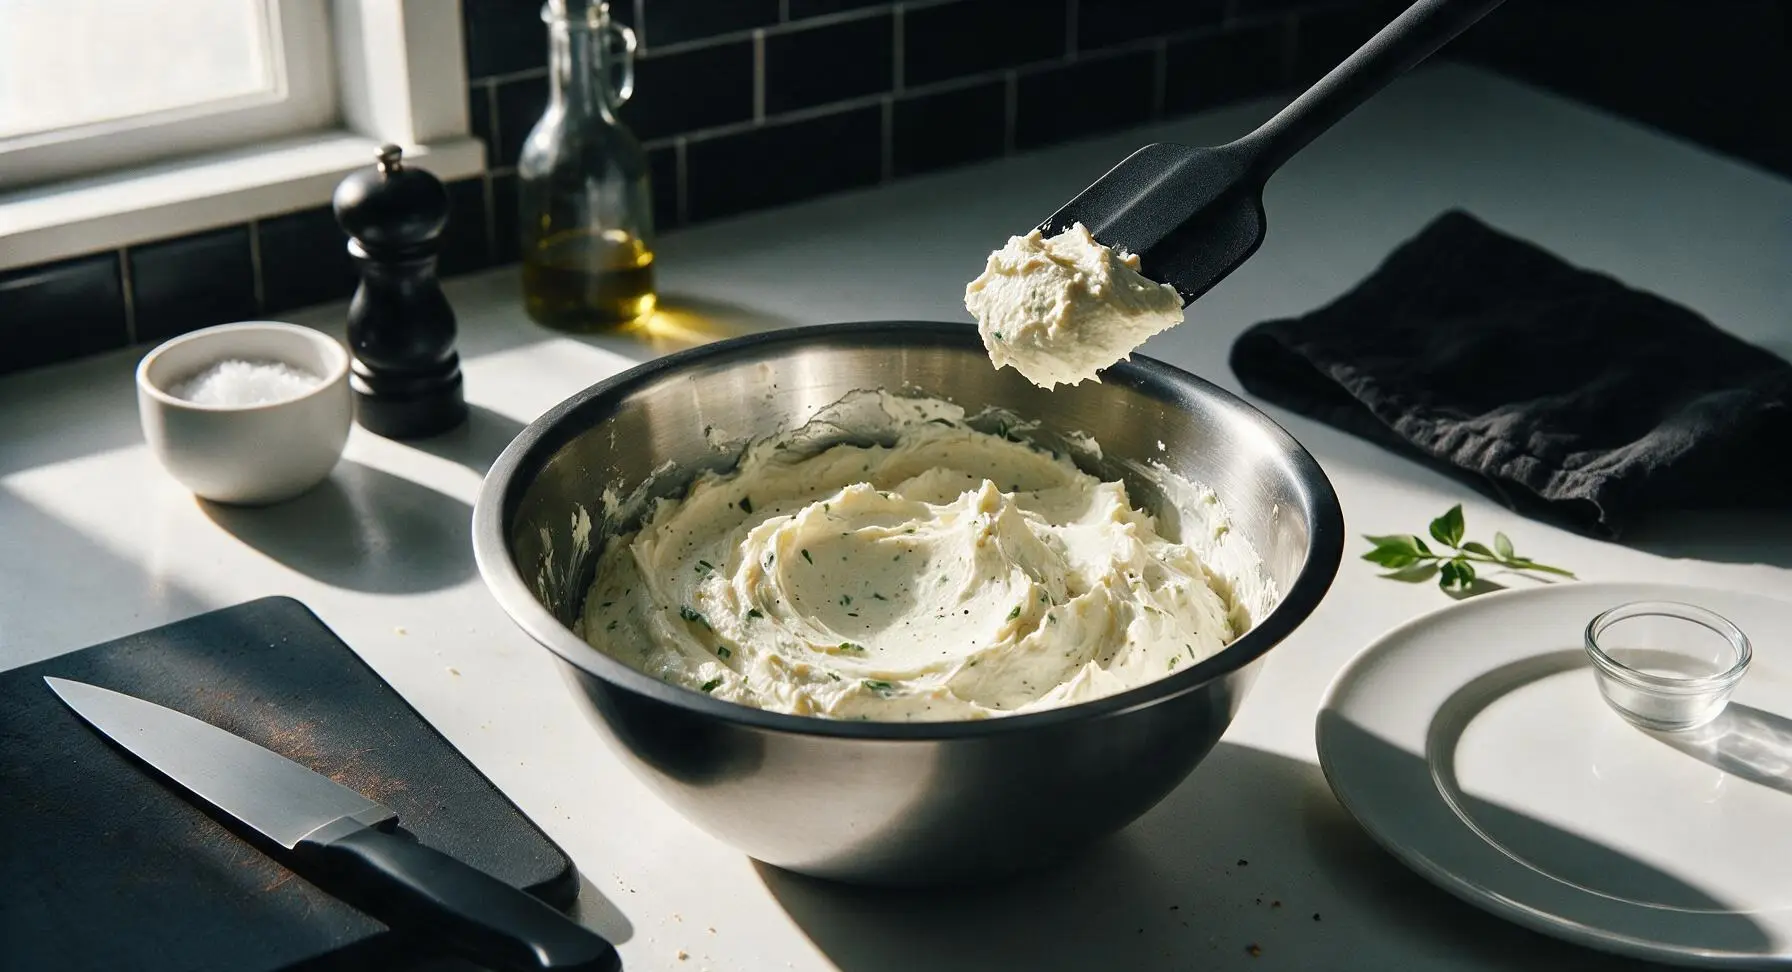
In the 24cm stainless steel mixing bowl, combine 425g whole milk ricotta, 150g (2/3 of total) shredded mozzarella, 35g (2/3 of total) finely grated parmesan, 2 lightly beaten large eggs, minced garlic, chopped fresh basil, 1 teaspoon kosher salt, 1/2 teaspoon freshly ground black pepper, and 1/4 teaspoon ground nutmeg. Stir thoroughly with the silicone spatula until all ingredients are fully incorporated, creating a smooth, thick, creamy filling with no visible streaks of unblended egg.
Step 3
step3:Mix Cheese Filling
Step 3
step3:Mix Cheese Filling
4

Stuff Manicotti Shells

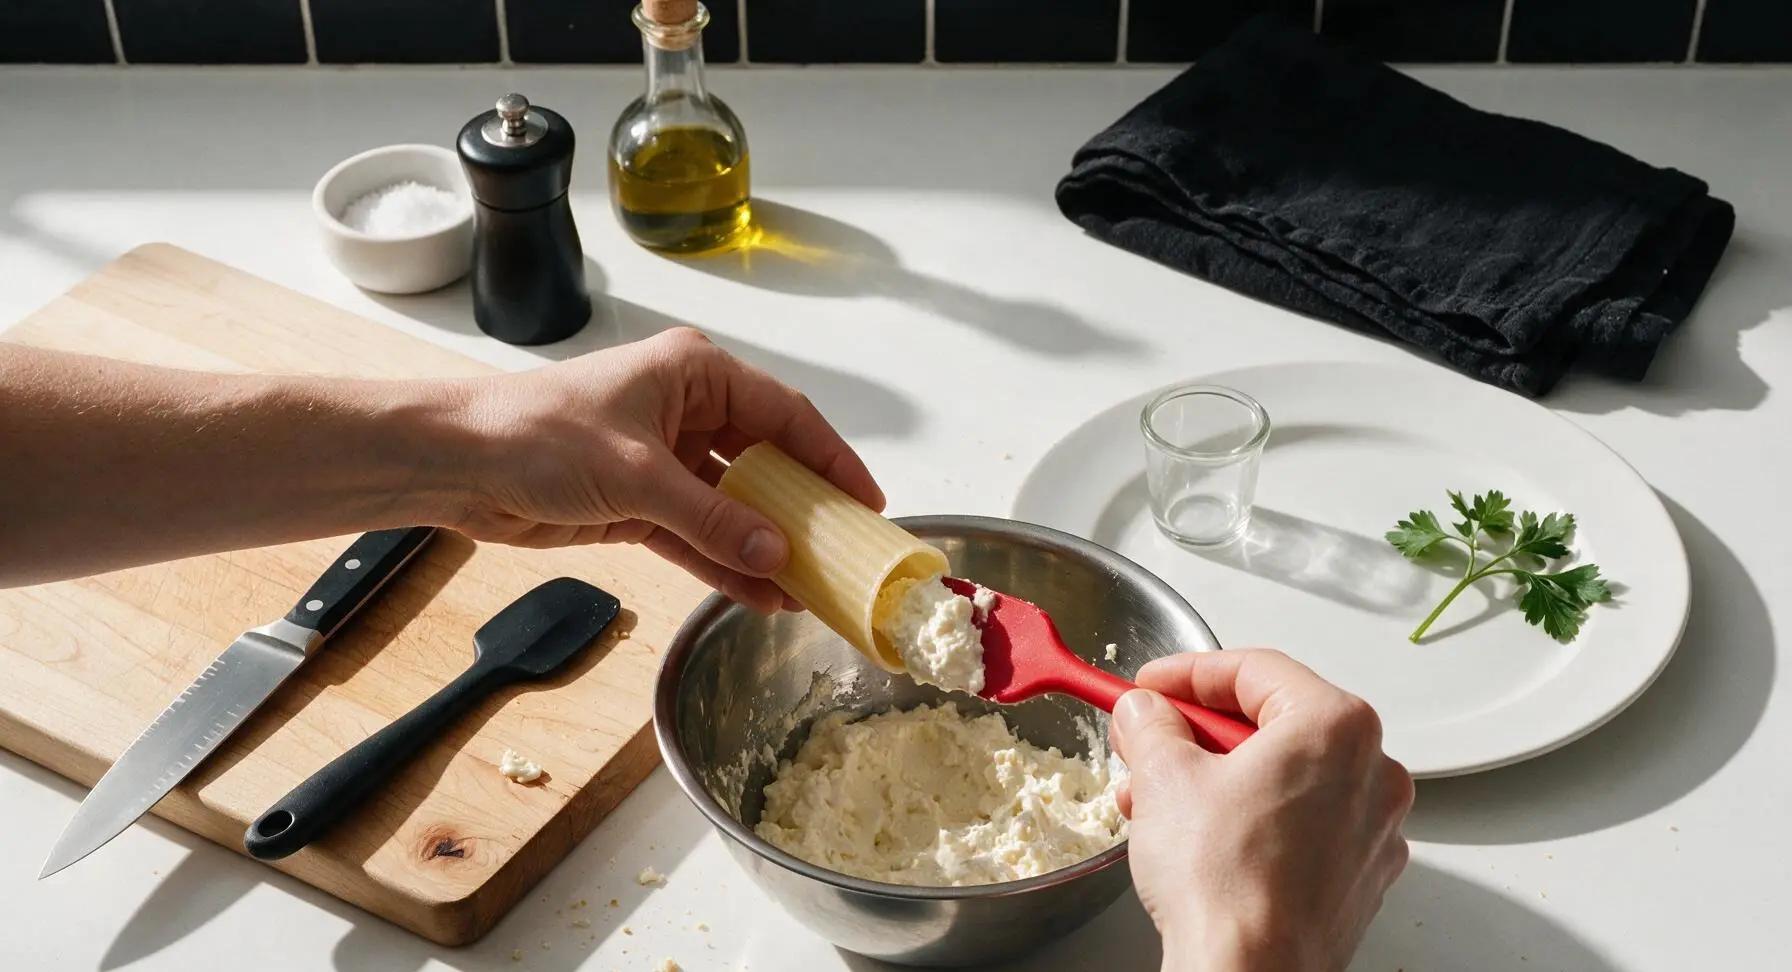
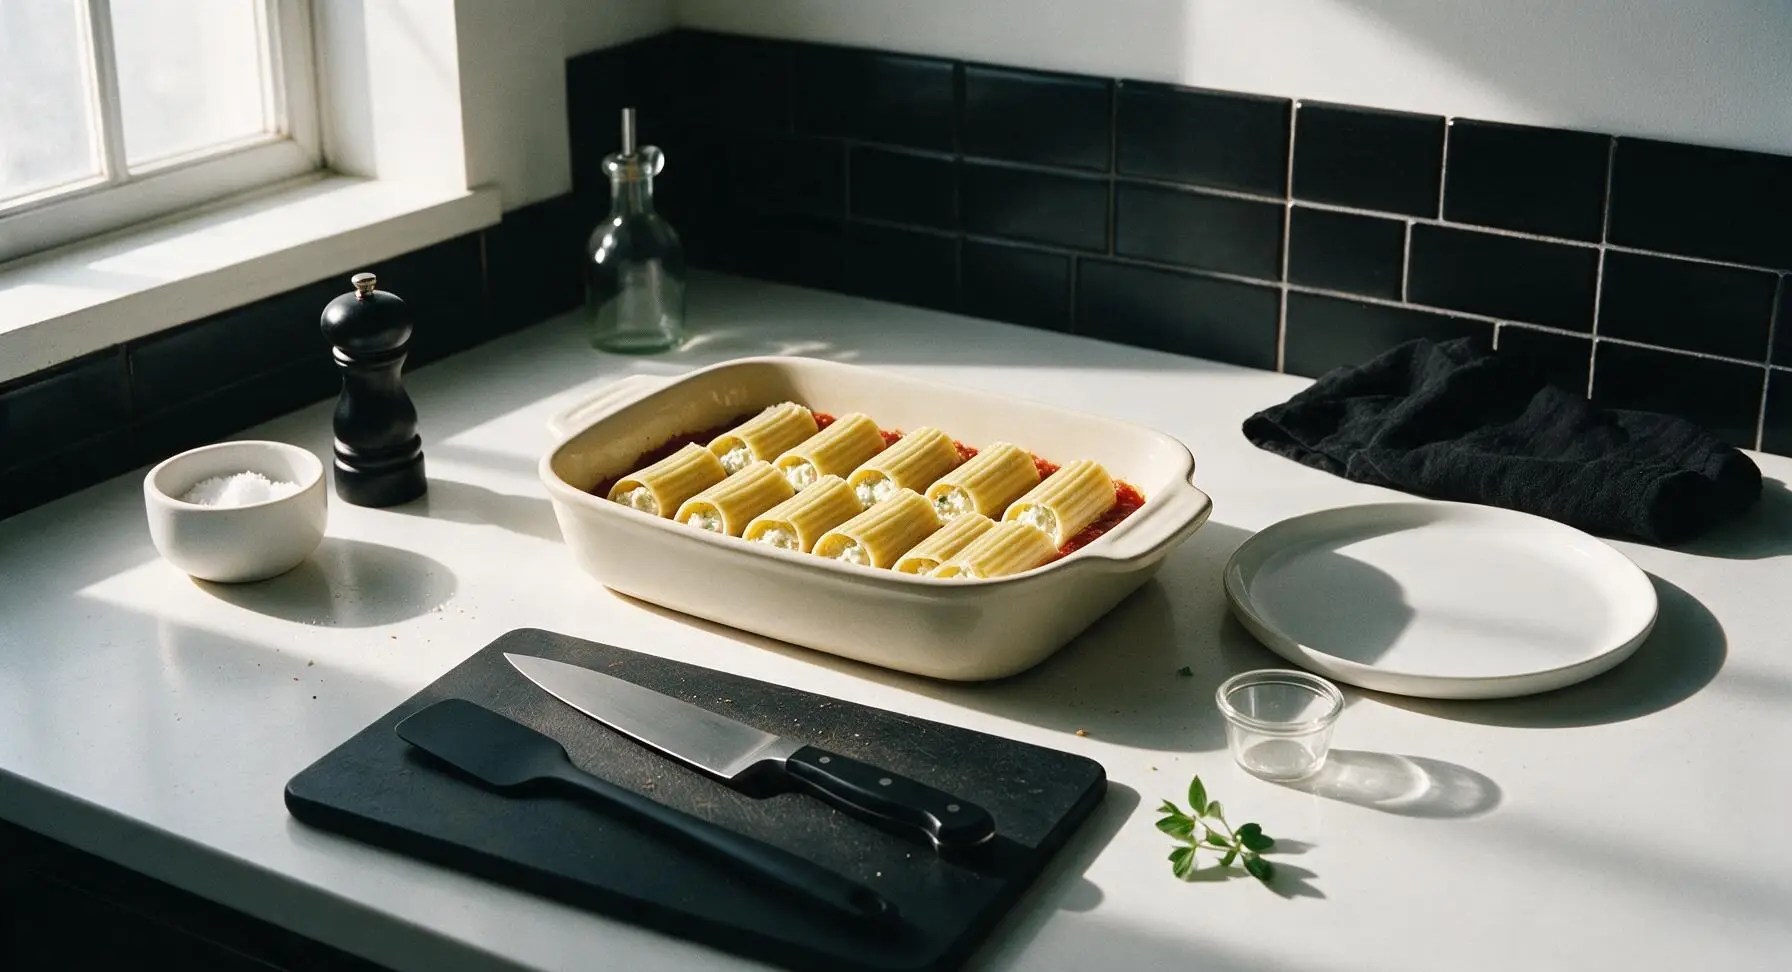
Working one shell at a time, hold a parboiled manicotti tube in one hand over the mixing bowl, use the silicone spatula to scoop approximately 3 tablespoons of cheese filling into each shell, filling it end to end without overpacking. Arrange stuffed shells in three neat rows of four in the sauce-lined baking dish, nestling them slightly into the bottom layer of marinara. Wipe any smudges of filling from the dish rim with the edge of the cotton towel as you work.
Step 4
step4:Stuff Manicotti Shells
Step 4
step4:Stuff Manicotti Shells
5

Top Sauce and Cheese

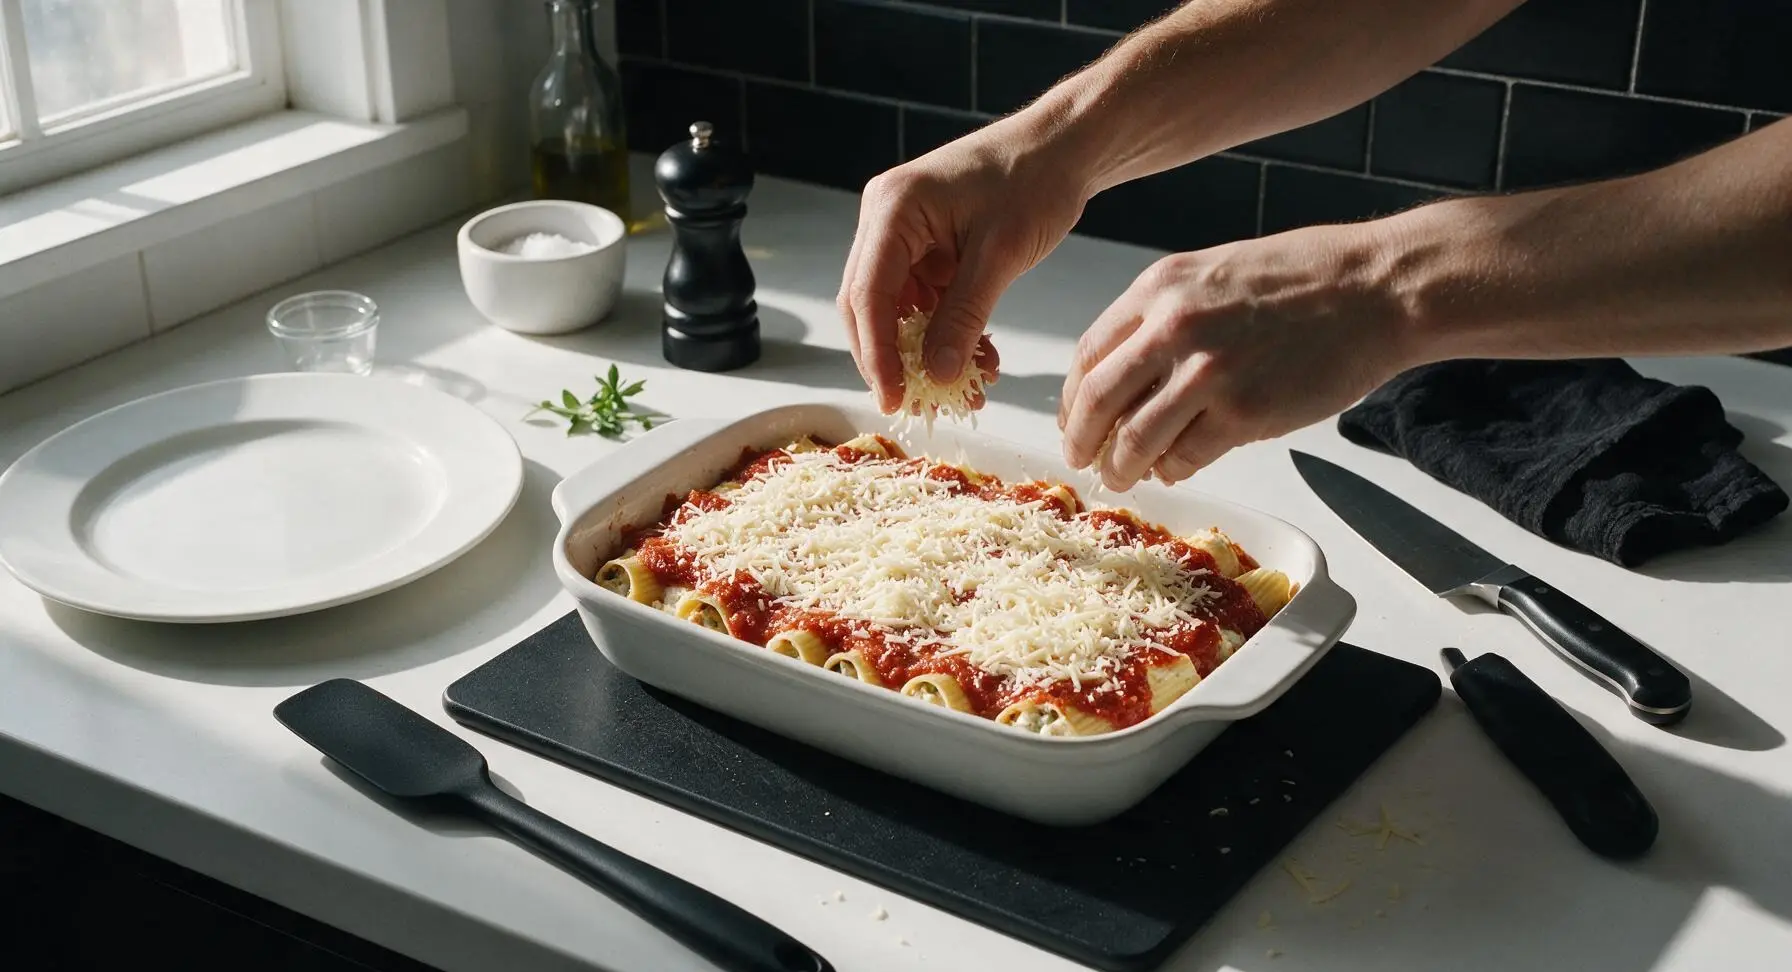
Spoon the remaining 470g of marinara sauce evenly over the top of the stuffed manicotti, spreading gently with the spatula to cover most of the pasta (leave small gaps of pasta exposed for textural contrast). Sprinkle the remaining 75g shredded mozzarella and 15g grated parmesan evenly over the sauce, creating a light, even cheese layer that will bubble and brown during baking.
Step 5
step5:Top Sauce and Cheese
6

Bake Until Bubbly

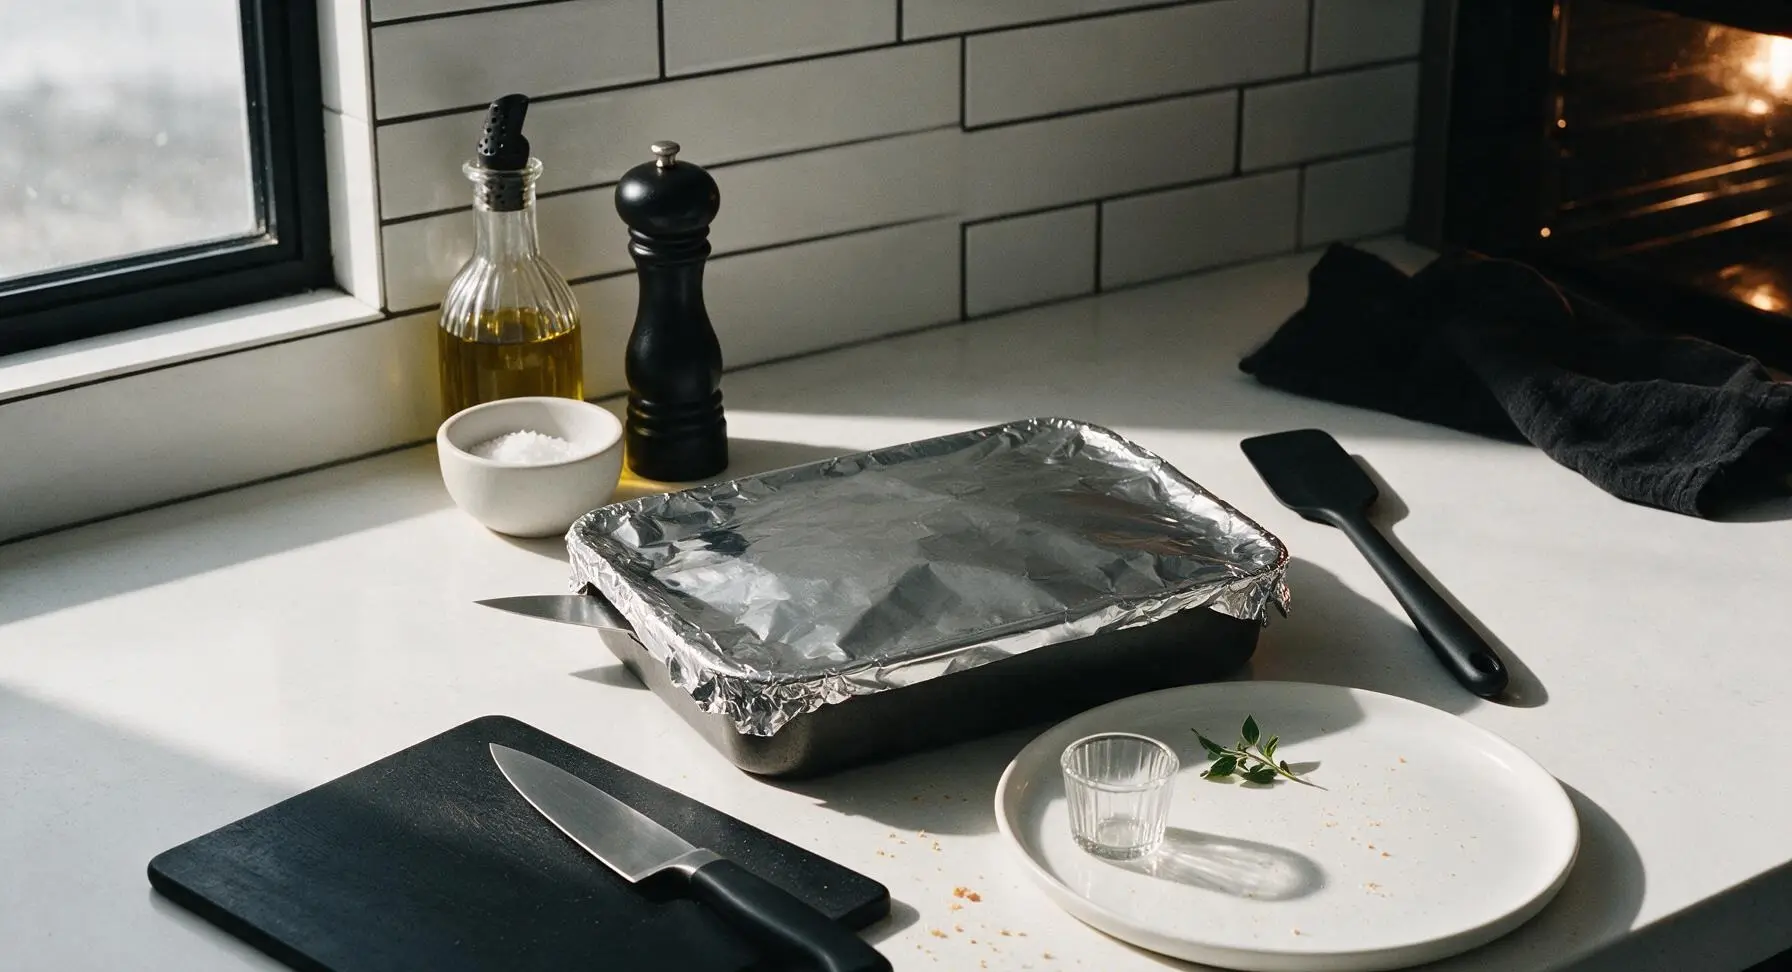
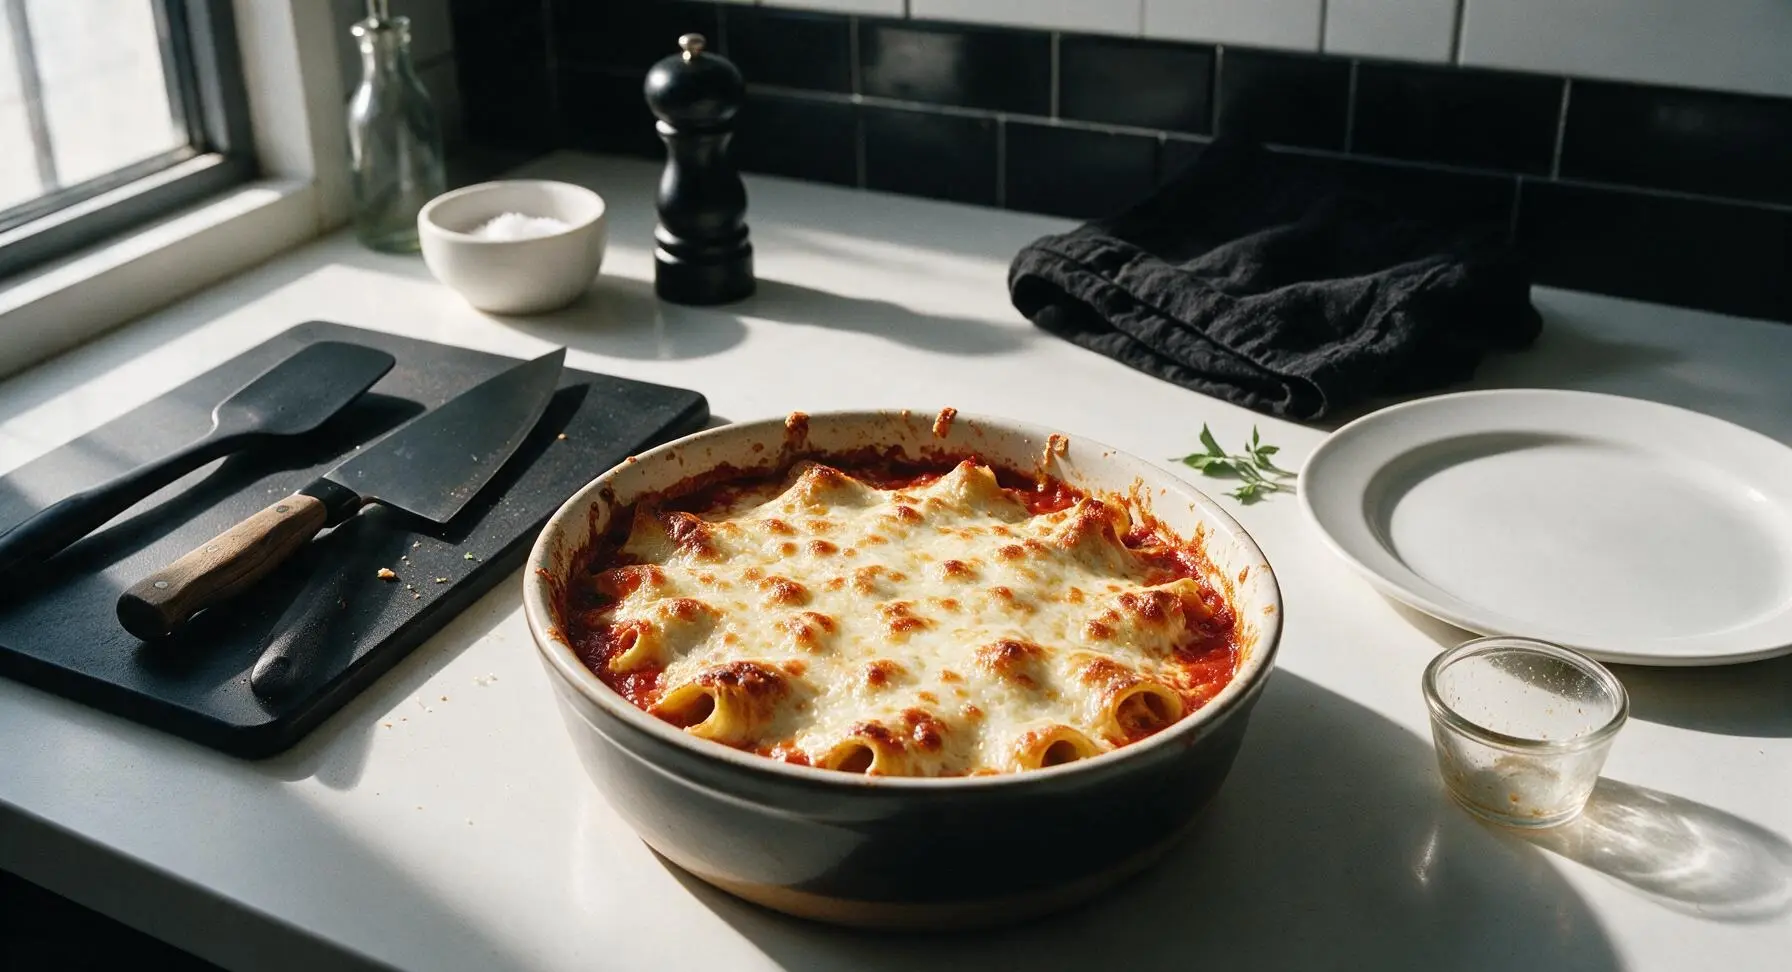
Cover the baking dish tightly with aluminum foil, place on the middle rack of the preheated 375°F (190°C) oven, and bake for 30 minutes. Remove the foil, then bake for an additional 10-12 minutes, until the cheese on top is fully melted, dotted with golden brown spots, and the marinara is bubbling vigorously around the edges of the dish. Remove from the oven and set back on the counter to rest for 10 minutes before serving, to allow the filling to set.
Step 6
step6:Bake Until Bubbly
Step 6
step6:Bake Until Bubbly
7

Plate and Garnish

Use a large metal serving spatula to lift 3 manicotti tubes from the baking dish, placing them diagonally across the matte off-white hand-thrown ceramic dinner plate. Spoon a small amount of extra sauce and melted cheese from the baking dish over the top, add a light dusting of extra parmesan from the small ramekin, and tuck two fresh whole basil leaves on the side for garnish.
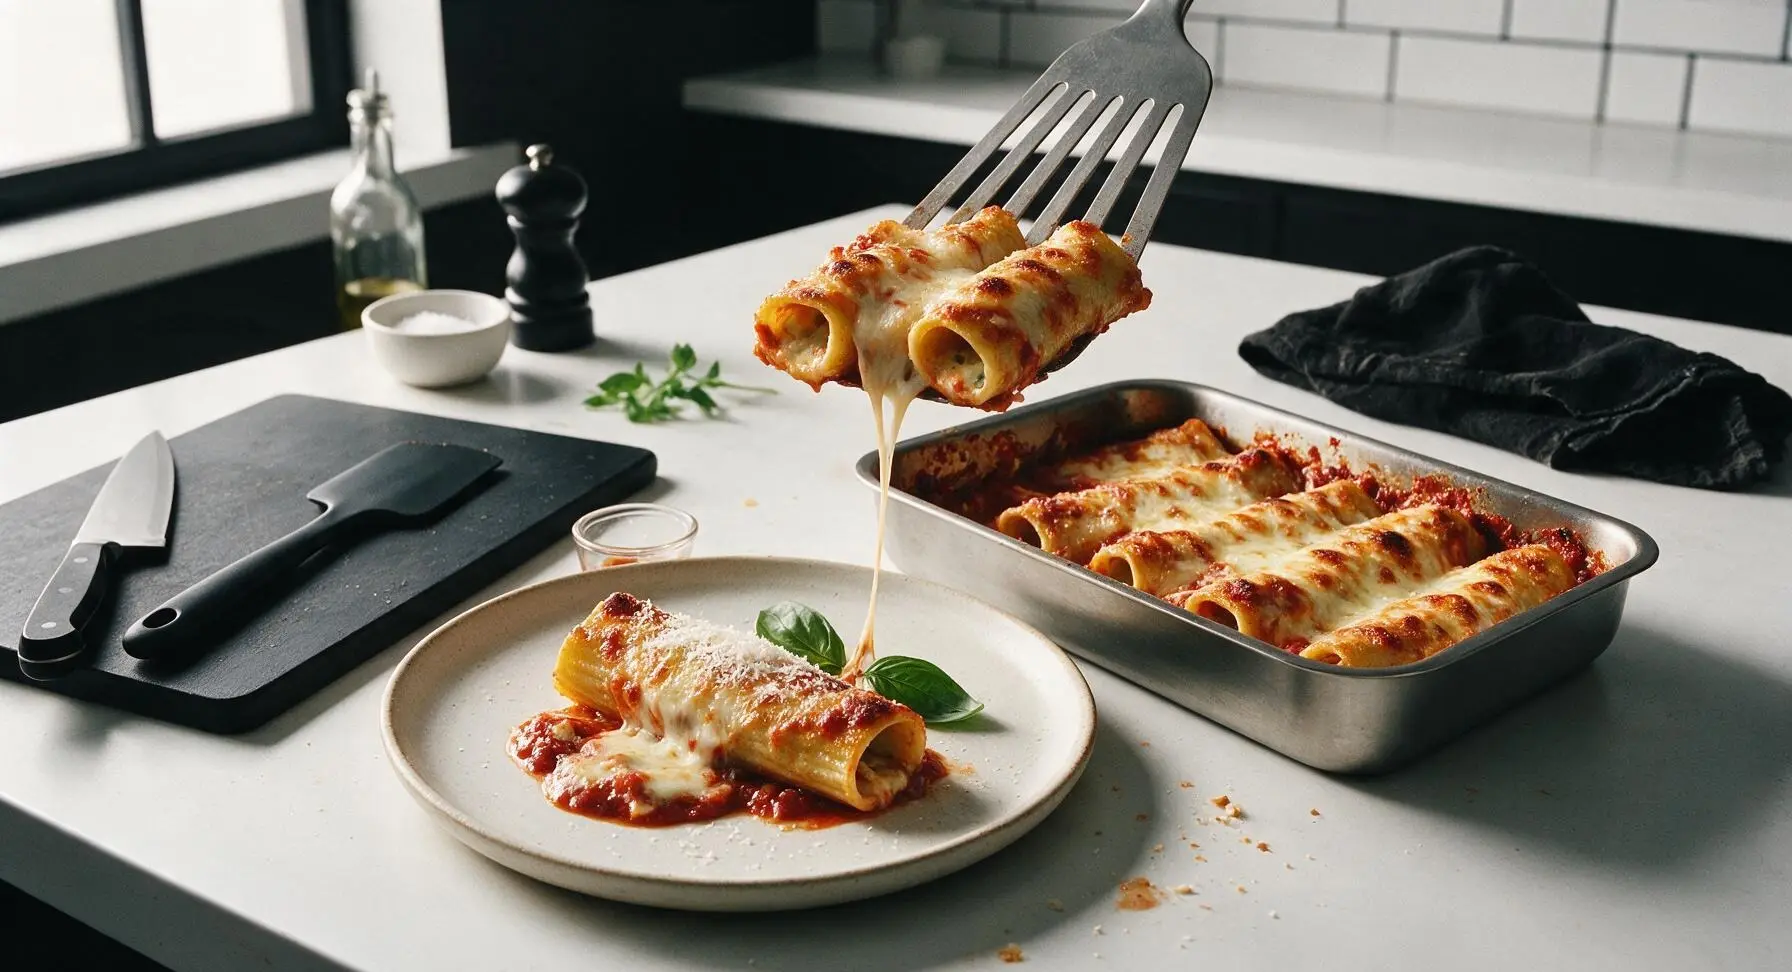
Step 7
step7:Plate and Garnish

Tips

1.Parboil pasta only to very al dente (6 minutes, not the full package cooking time): fully cooked shells will turn mushy and tear easily during stuffing, leading to filling leakage during baking. The pasta will finish cooking fully in the oven as it absorbs moisture from the sauce.
2.Let baked manicotti rest for 10 full minutes before serving: the hot ricotta-egg filling is runny straight out of the oven, and the rest period allows it to set into a creamy, sliceable consistency that stays inside the pasta instead of running across the plate.
3.Avoid overstuffing the pasta shells: the cheese filling expands as it heats in the oven, so packing each tube with more than 3 tablespoons of filling will cause shells to split, leaving baked filling stuck to the dish instead of in each bite.


✨ You May Also Like

Main Course
🍜 United Kingdom

A showstopping classic of tender seared beef, savory mushroom duxelles, and crisp prosciutto wrapped in flaky golden puff pastry, baked to juicy perfection.

⏱️ 2 hours 1Main Course ★ 4.7
Main Course
🍜 India

Tender charred marinated chicken simmered in a rich, spiced creamy tomato sauce, this iconic Anglo-Indian curry pairs perfectly with basmati rice or warm naan.

⏱️ 50 minuteMain Course ★ 4.6
Main Course
🍜 Thailand

Classic tangy, sweet, and savory Thai stir-fried rice noodles with shrimp, tofu, and crunchy garnishes, balancing all five core Thai flavor profiles.

⏱️ 30 minuteMain Course ★ 4.5
Main Course
🍜 United Kingdom

Crispy golden beer-battered cod and fluffy double-fried chips, served with tangy tartar sauce and malt vinegar: the timeless, beloved British pub comfort classic.

⏱️ 45 minuteMain Course ★ 4.7
Main Course
🍜 Mexico

Smoky, chile-marinated pork tacos with caramelized pineapple, fresh cilantro, and lime: a beloved classic Mexican street food perfect for casual summer gatherings.

⏱️ 1 hour 45Main Course ★ 4.8
Main Course
🍜 United States

Crunchy Fritos corn chips layered with savory beef chili and melted cheddar, topped with cool, zesty fixings for a beloved, cozy Tex-Mex comfort food.

⏱️ 35 minuteMain Course ★ 4.8

manicotti:Frequently Asked Questions

1.Do I need to pre-boil dry manicotti shells before stuffing them? ▾
You have two easy options! Boil shells 2 minutes less than the package directs for al dente, so they’re firm enough to stuff without tearing, if you want a shorter total bake time. If you skip boiling, add ½ cup water to your marinara, cover tightly with foil, and bake 10 extra minutes to let noodles cook fully in the sauce.
2.What’s the easiest, least messy way to stuff manicotti shells? ▾
Skip the tiny spoon that tears noodles and gets filling everywhere! Spoon your herbed ricotta mixture into a gallon zip-top bag, snip a ½-inch hole off one corner, and pipe filling straight into each end of the pasta tube. It’s fast, cuts down on torn shells, and gives you evenly filled noodles with zero messy fingers.
3.Can I use part-skim ricotta instead of whole milk ricotta for the filling? ▾
You technically can, but whole milk ricotta makes a far creamier, richer filling that won’t turn grainy or watery as it bakes. If you only have part-skim, stir in 2 ounces of softened cream cheese to boost fat content, and drain off excess watery whey from the ricotta first to avoid a runny final dish.
4.How do I keep my baked manicotti from turning out soggy? ▾
Two simple tricks prevent mushy, soggy manicotti! First, don’t overcook shells if you pre-boil them—pull them when they’re still very firm, since they’ll cook more in the oven. Second, spread a thin base layer of marinara in your baking dish, and reserve half your mozzarella to add in the last 10 minutes of baking for a crisp, golden top.
5.Can I assemble classic manicotti ahead of time for a dinner party? ▾
Absolutely—this is the perfect make-ahead gathering dish! Assemble stuffed, sauced manicotti fully (hold off on the top mozzarella layer for now), cover tightly with plastic wrap, and refrigerate for up to 2 days. When ready to bake, remove plastic, add the top cheese, cover with foil, and add 5 to 7 minutes to bake time to account for the cold start.
6.Do I have to cover the baking dish with foil while the manicotti cooks? ▾
Yes, keep the dish tightly covered with aluminum foil for the first 35 minutes of baking. This traps steam to cook pasta evenly and prevents the top layer of mozzarella and Parmigiano-Reggiano from burning or crusting over too fast. Remove foil for the final 10 to 12 minutes so the cheese gets bubbly and light golden around the edges.
7.How do I drain ricotta properly so the filling isn’t runny? ▾
For a thick, lush filling that doesn’t leak watery whey all over your dish, line a fine-mesh sieve with paper towels or cheesecloth, spoon in the ricotta, and let it drain in the fridge for 30 to 60 minutes before mixing. For extra thickness, gently press the top of the ricotta with a paper towel to soak up any lingering surface moisture.
8.Can I freeze leftover baked manicotti for later? ▾
Definitely! Let fully baked manicotti cool completely, then cut individual portions and wrap each tightly in plastic wrap followed by a layer of aluminum foil. Freeze for up to 3 months. To reheat, unwrap, place in a baking dish, top with a spoonful of extra marinara, cover, and bake at 350°F for 25 to 30 minutes until heated through.
9.How much ricotta filling should I put in each manicotti shell? ▾
Aim for 2 to 3 tablespoons of filling per shell—enough to fill the tube fully without squeezing out the ends when you set it in the baking dish. Overstuffing causes filling to bubble out and make a burnt mess as it bakes, while understuffing leaves you with bland bites of plain pasta with no cheesy center.
10.Can I add mix-ins like meat or veggies to the classic cheese filling? ▾
Of course! The traditional version is strictly cheesy, but you can stir ½ cup cooked, crumbled Italian sausage, squeezed-dry sautéed spinach, or finely diced roasted mushrooms into the ricotta for extra depth. Just make sure any add-ins are fully drained so they don’t thin out the filling or make your final dish watery.

Comments (8)

just now

First time ever making stuffed pasta and this was… okay? I definitely messed up stuffing the noodles, half of them split open when I was trying to get the ricotta mix in. Maybe I cooked the noodles a minute too long? Flavor was good though, my roommate ate three pieces so it can’t be that bad. Might try again when I have more patience lmao

30 minutes ago

This recipe was so budget friendly! I already had most of the ingredients in my fridge/pantry—ricotta, mozzarella, marinara, pasta—so I only had to pick up parmesan and some fresh parsley on my grocery run. Total cost for the whole tray was like $12, which fed me and my two roommates for two nights. Only tiny issue is I wish there was a note about not overcooking the noodles before stuffing, mine were a little soft. Still delicious though!

5 minutes ago

Pro tip for next time: undercook the noodles by 3 whole minutes! They keep cooking in the oven while it bakes so they won’t get mushy. I learned that the hard way after my first batch turned to pasta mush lmao

2 hours ago

I swapped the regular manicotti noodles for gluten-free rice noodles and this still turned out amazing! I was worried the GF noodles would get mushy after 50 minutes in the oven, but I undercooked them by 2 minutes before stuffing and they held up perfectly. My husband who eats regular gluten didn’t even notice the difference! Will definitely make this again for our next family dinner where my celiac cousin is coming

yesterday

Made this for my teen son’s birthday dinner since manicotti is his absolute favorite. Let me tell you, he said this is better than the version our local Italian restaurant serves! I mixed a little ground Italian sausage into the ricotta filling for extra protein and it was chef’s kiss. 10/10, no notes, will be making this for every birthday from now on

30 minutes ago

Happy birthday to your son! That is such a huge compliment, especially when it’s compared to a local Italian spot—we’re flattered! Adding Italian sausage to the filling is such a tasty, hearty twist, I’m definitely going to try that myself next time I make it

2 days ago

OMG this baked manicotti was a total game changer for our Sunday family dinner! I was worried it would be too fussy since the difficulty says medium, but the steps were super straightforward. My three kids devoured two servings each and even asked for seconds before they finished their first plates. I added a little extra mozzarella on top because we’re cheese obsessed over here, 10/10 will make again for our next potluck!

2 hours ago

Wait the extra mozzarella hack is genius! I did the same thing last time I made it and the crispy cheese edges were *chef’s kiss*

30 minutes ago

So glad your family loved it! Adding extra cheese is always a welcome tweak—those crispy, bubbly edges are honestly the best part. Great call bringing it to a potluck, it’s always a crowd pleaser!

3 days ago

Really solid manicotti recipe! I prepped all the filling and stuffed the noodles on Sunday night, then popped it in the oven after work on Tuesday—total weeknight win. Only reason I’m not giving 5 stars is I wish the filling had a little more seasoning guidance? I added a pinch of nutmeg and some red pepper flakes to the ricotta mix and it was perfect. Cook time was spot on at 50 minutes, no soggy noodles here!

yesterday

Thanks for the awesome feedback! Meal prepping this dish is such a smart move, it holds up beautifully in the fridge for a few days before baking. Great tip on the nutmeg and red pepper flakes—those add such a nice depth of flavor, I’ll have to note that for future updates!

1 week ago

I brought this manicotti to my neighborhood block party last weekend and people were begging me for the recipe before I even set the tray down! SO good, the ricotta filling is so creamy and doesn’t get watery like other recipes I’ve tried in the past. I used store-bought marinara to save time and it still tasted totally homemade. Will be in my regular rotation from now on!

3 days ago

Wait I was at that party!!! That was the manicotti you brought? I had two helpings, no joke best pasta dish I’ve had all summer. Can confirm everyone was raving about it

2 days ago

That makes me so happy to hear! There’s no higher compliment than a neighborhood block party stamp of approval. Using good quality store-bought marinara is such a great time-saver, no shame in that at all!

2 weeks ago

I’ve been chasing my grandma’s old manicotti recipe for years and this is the closest I’ve ever gotten! The blend of three cheeses in the filling is exactly what I remember from Sunday dinners at her house as a kid. I added a little fresh basil between the layers just like she used to, and it took me right back. I almost cried when I took the first bite, no joke. Thank you so much for this recipe!

1 week ago

Aww this is so sweet! I made this last week and added fresh basil too, it makes such a big difference. There’s nothing quite like the recipes that remind you of family, right?

5 days ago

This comment made my whole day. There is no higher praise than a recipe that feels like family and brings back those special childhood memories. The fresh basil addition sounds absolutely perfect—what a lovely nod to your grandma’s version



