
mexican villa burrito enchilada style

title 1
mexican villa burrito enchilada style
⏱️ cook time 30 minutes
🍽️ servings 4
⚡ Difficulty easy

intro

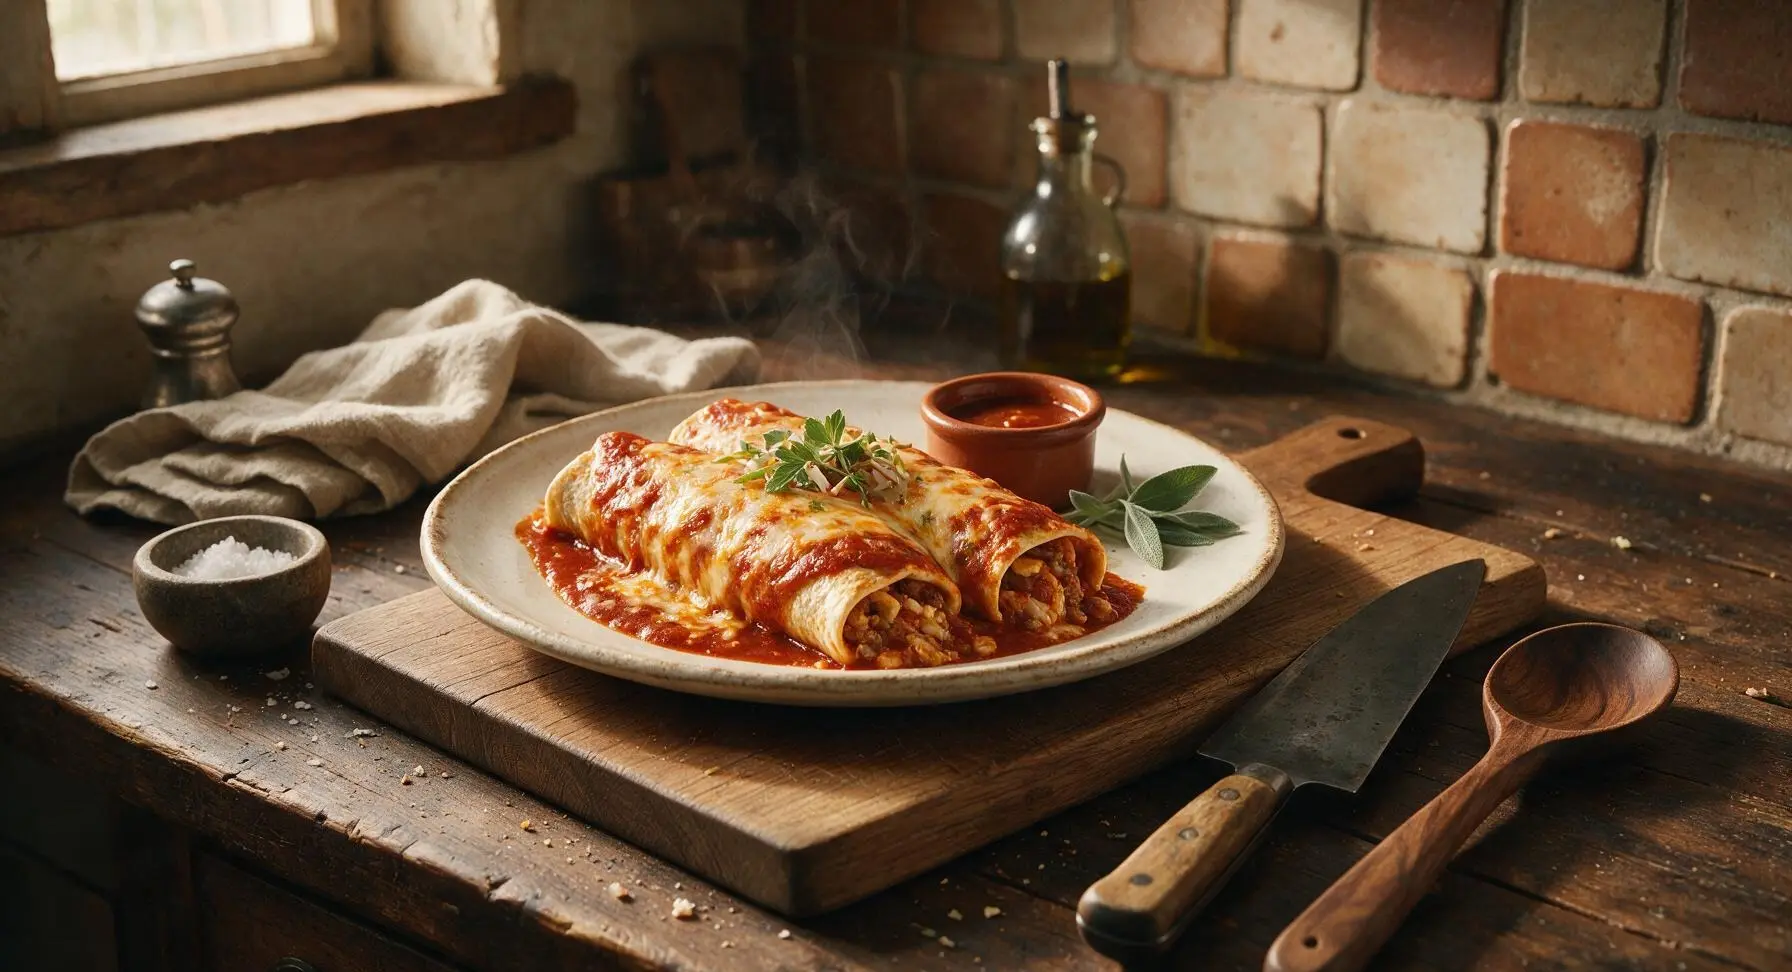
Tightly rolled, generously stuffed burritos smothered in rich red enchilada sauce and bubbly melted cheese, baked to cozy vintage Mexican villa restaurant-style comfort food perfection.

Ingredients
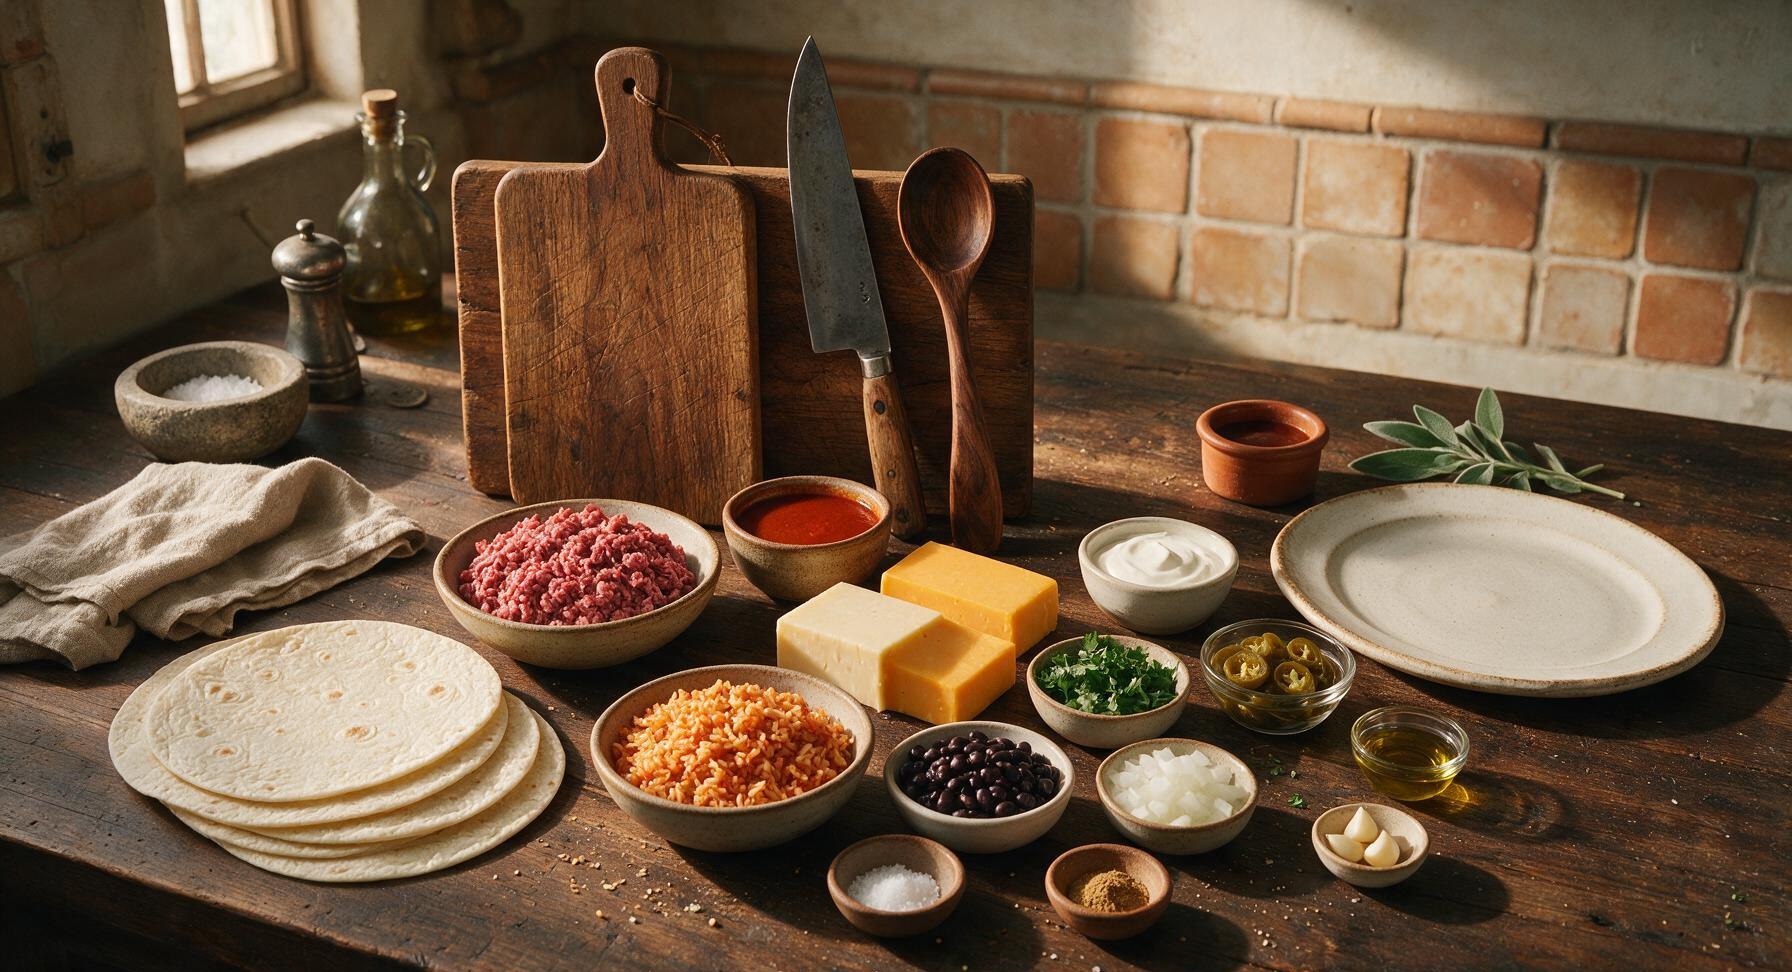
10-inch large flour tortillas 4 each
Lean ground beef (90/10) 450g
Red enchilada sauce 2 cups (480ml)
Monterey Jack cheese (block) 225g
Sharp cheddar cheese (block) 115g
Cooked Spanish rice 1.5 cups
Black beans, rinsed and drained 1 cup
White onion, finely diced 1/2 cup
Garlic, minced 3 cloves
Ground cumin 1 tsp
Kosher salt 1 tsp
Fresh cilantro, chopped 1/4 cup
Sour cream 1/2 cup
Pickled jalapeño slices 1/4 cup
Olive oil 1 tbsp

Steps

1

Grate Cheese, Preheat Oven

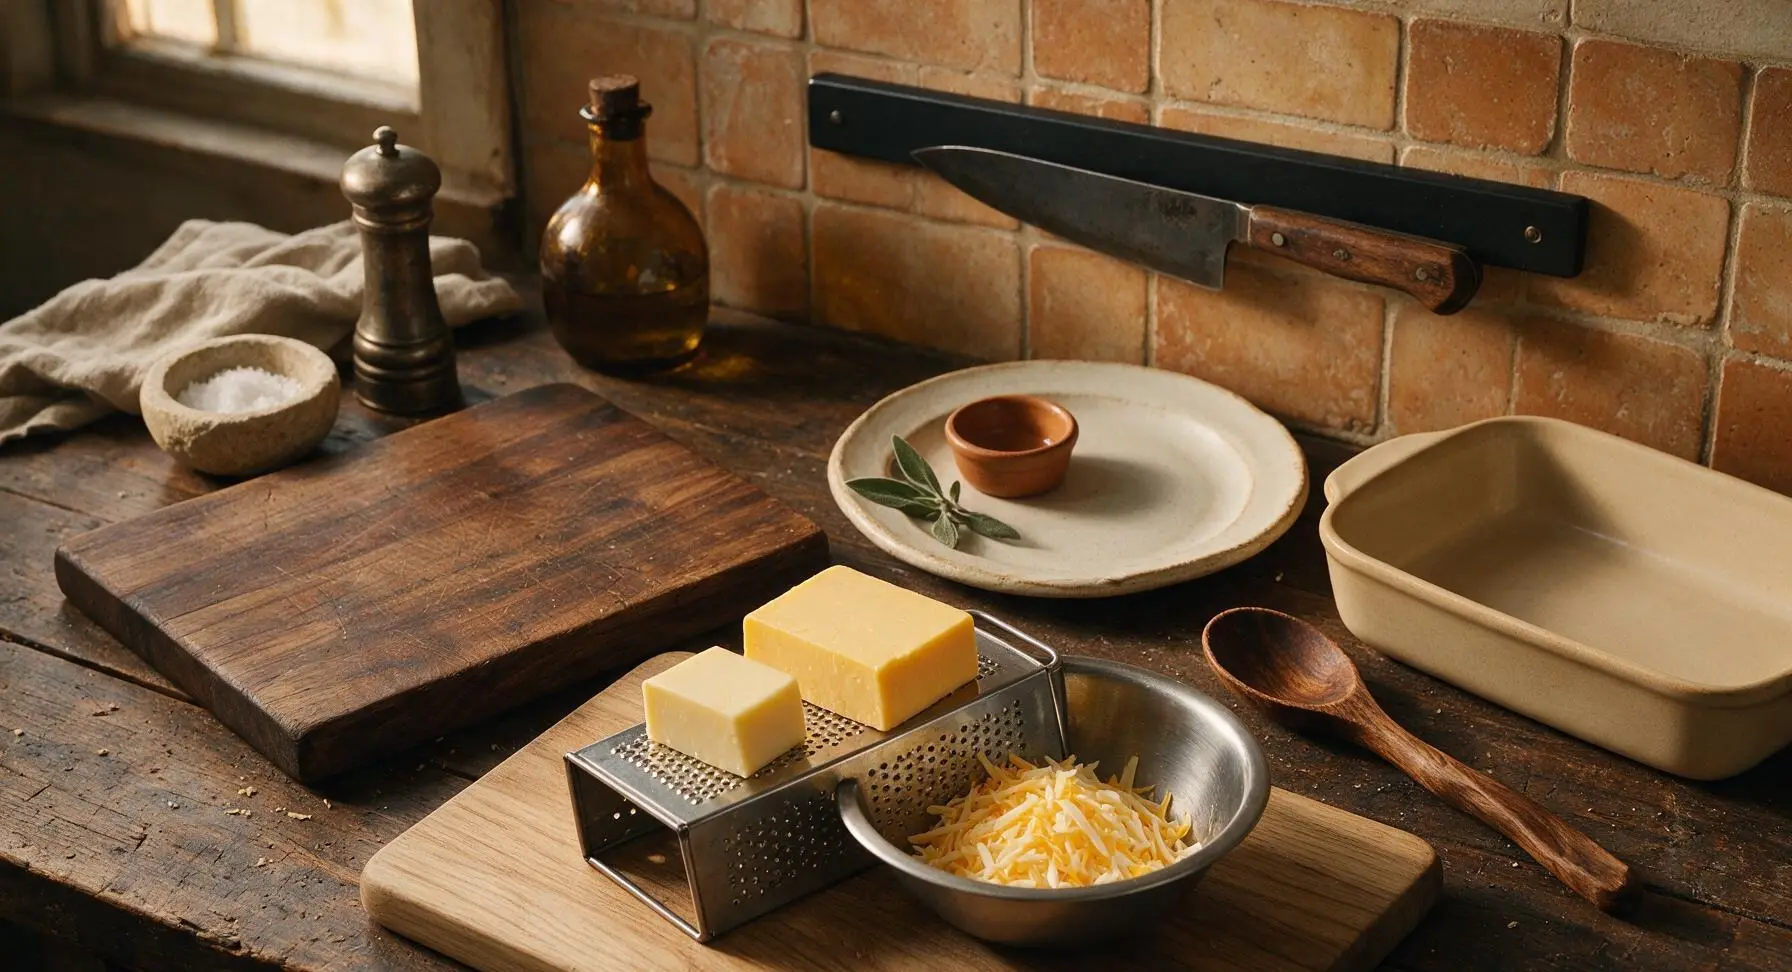
Preheat your oven to 180C (350F). Place the stainless steel box grater on the light oak cutting board. Grate the Monterey Jack and sharp cheddar cheese into the medium stainless steel mixing bowl, tossing gently to combine. Set aside 1 cup of the mixed cheese for topping the burritos, leaving the rest for the filling. Visual cue: cheese shreds are uniform in size, with no large clumps, totaling roughly 4 cups of shredded cheese.
Step 1
step1:Grate Cheese, Preheat Oven
2

Sauté Beef and Aromatics

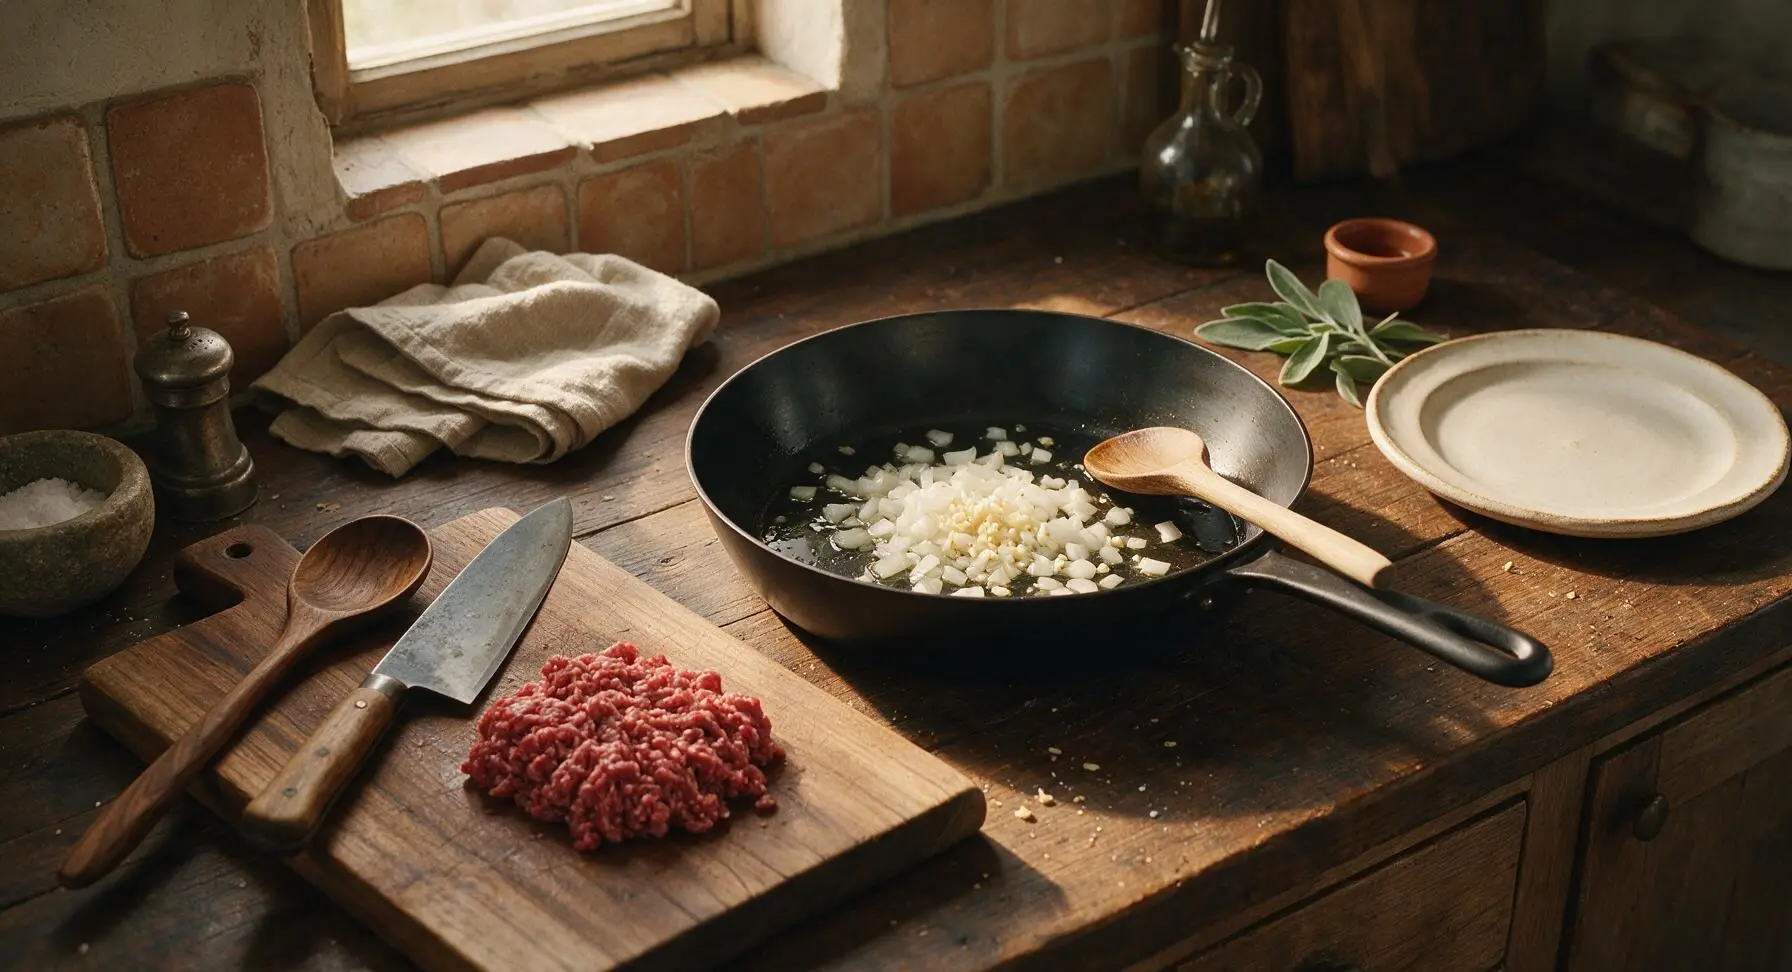
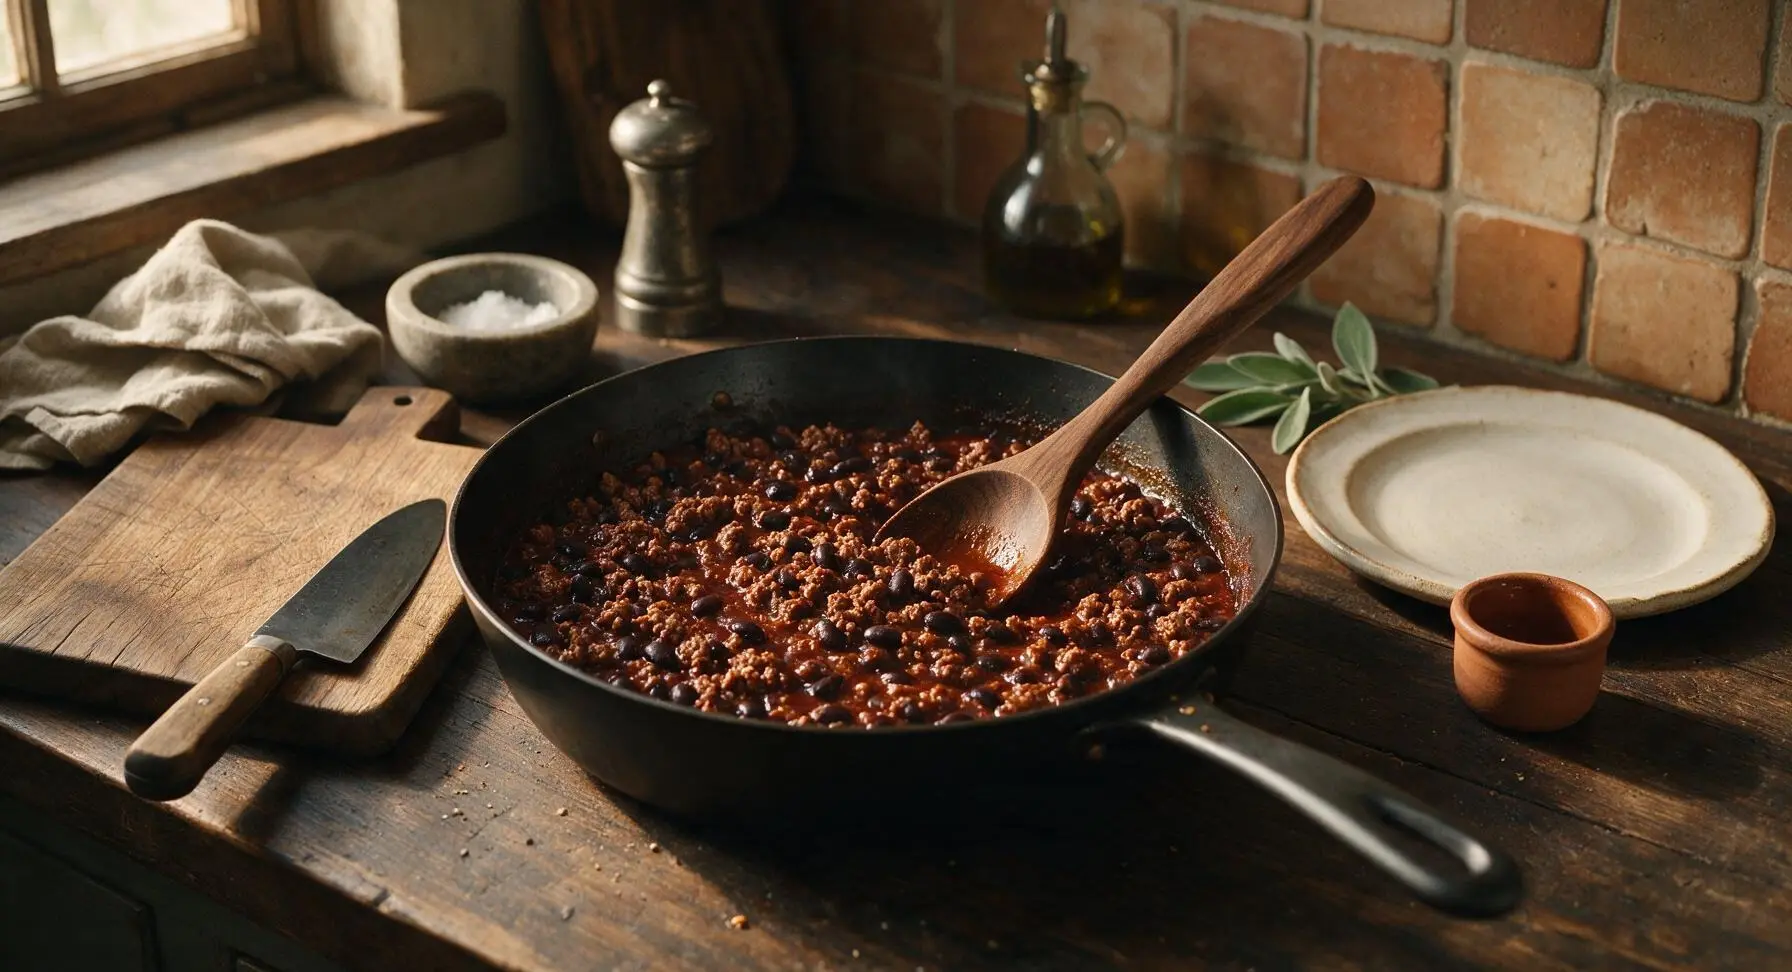
Heat 1 tablespoon olive oil in the 12-inch matte black carbon steel skillet over medium heat. Add the white onion (diced with the chef knife on the oak cutting board), sauté for 3 minutes until soft and translucent. Add minced garlic and ground cumin, cook for 30 seconds until fragrant. Add the ground beef, breaking it apart with the light oak wooden spoon as it cooks, for 6-7 minutes until fully browned with no pink remaining. Drain any excess grease, then stir in rinsed black beans and 1/2 cup of the red enchilada sauce, simmering for 2 minutes until thickened. Season with 1 teaspoon kosher salt, taste and adjust as needed.
Step 2
step2:Sauté Beef and Aromatics
Step 2
step2:Sauté Beef and Aromatics
3

Warm Tortillas for Rolling

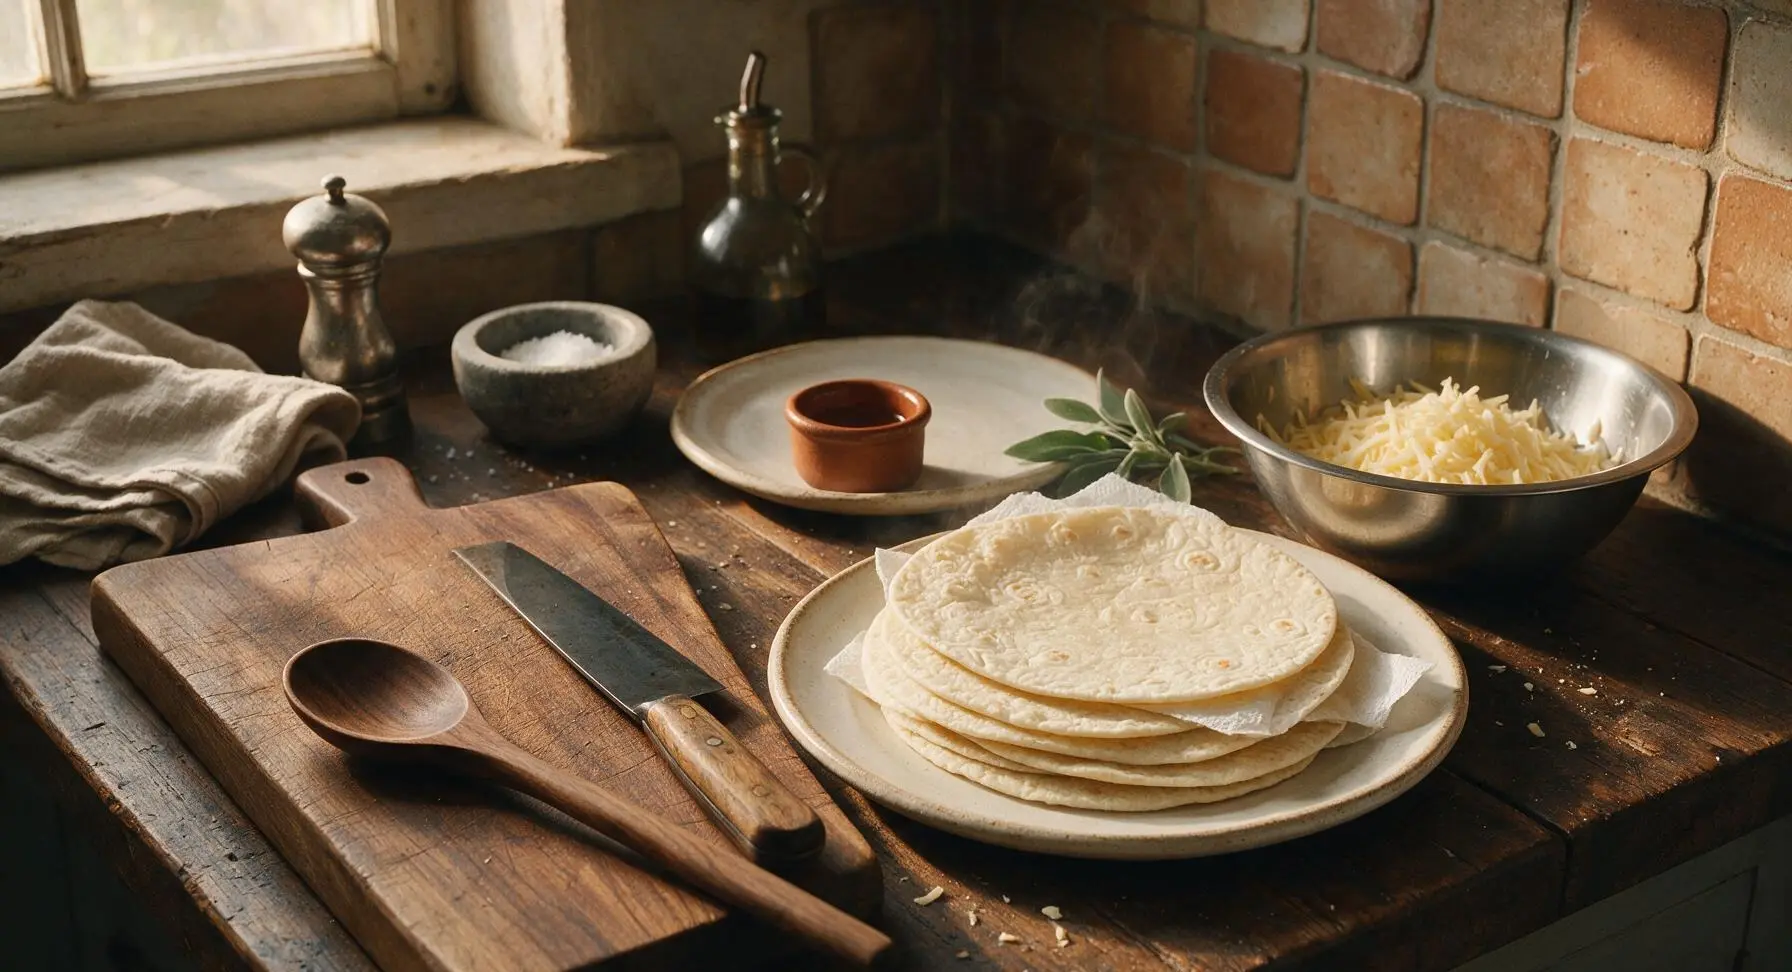
Stack the 4 large flour tortillas on a microwave-safe plate, cover with a damp paper towel, and warm for 30 seconds until soft and pliable. Visual cue: tortillas bend easily without cracking when lifted, which prevents tearing during rolling. Do not skip this step, as cold tortillas will split when folded.
Step 3
step3:Warm Tortillas for Rolling
4

Fill and Roll Burritos

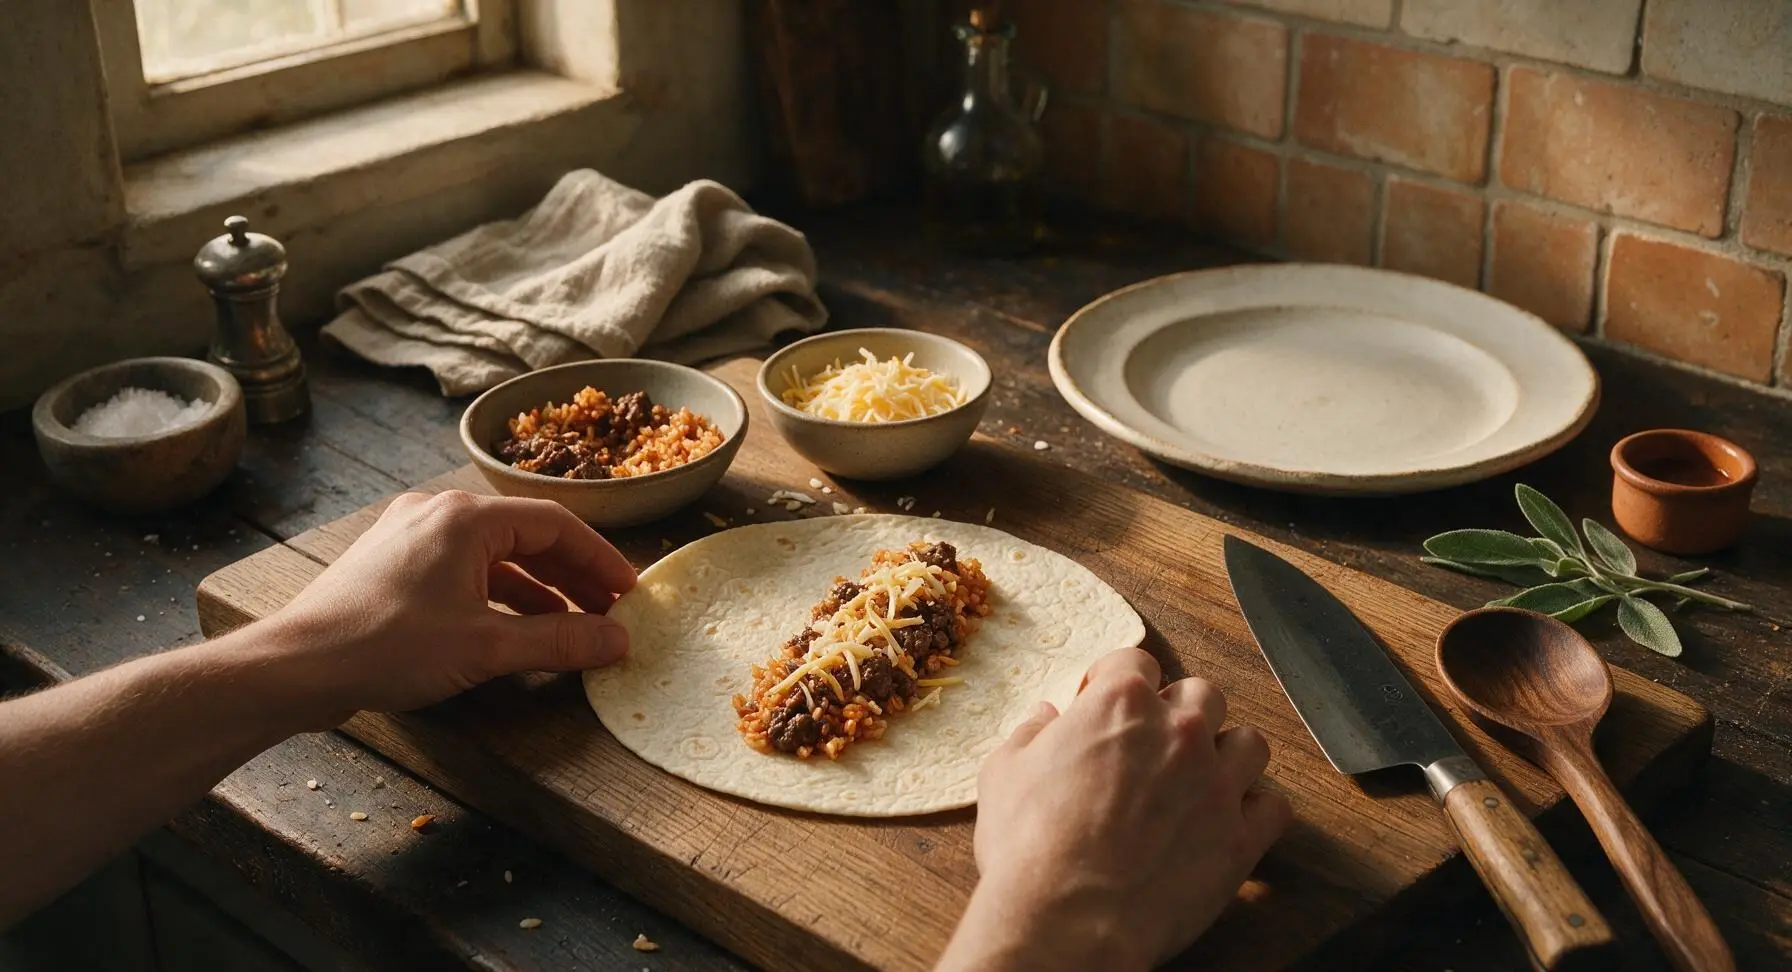
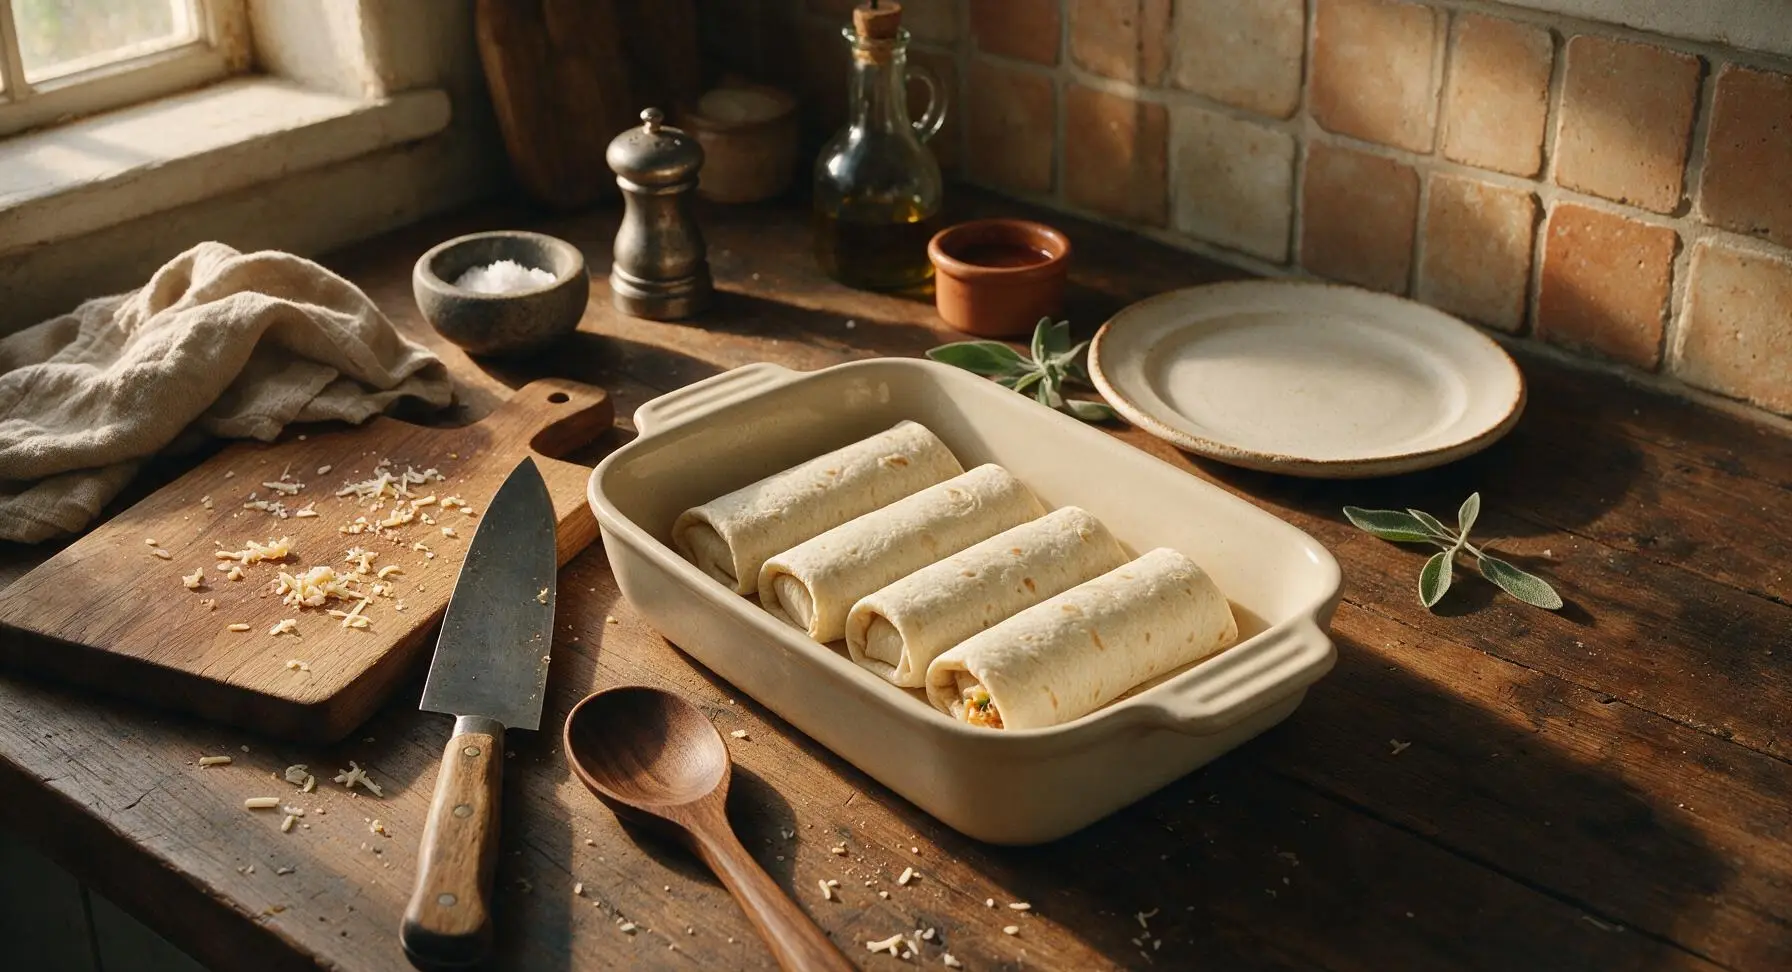
Lay one warm tortilla flat on the light oak cutting board. Add 1/4 of the cooked beef and bean mixture down the center of the tortilla, top with 1/3 cup cooked Spanish rice, and 2 tablespoons of the shredded cheese mix. Fold the sides of the tortilla in toward the center, then roll tightly from the bottom up to form a sealed burrito, tucking edges in to prevent filling from leaking out during baking. Repeat with all 4 tortillas.
Step 4
step4:Fill and Roll Burritos
Step 4
step4:Fill and Roll Burritos
5

Top with Sauce and Cheese

Pour the remaining 1.5 cups of red enchilada sauce evenly over the top of the rolled burritos, making sure to cover every exposed tortilla surface to prevent it from drying out in the oven. Sprinkle the reserved 1 cup of shredded mixed cheese evenly over the sauced burritos, letting some cheese fall into the sauce around the edges of the dish.
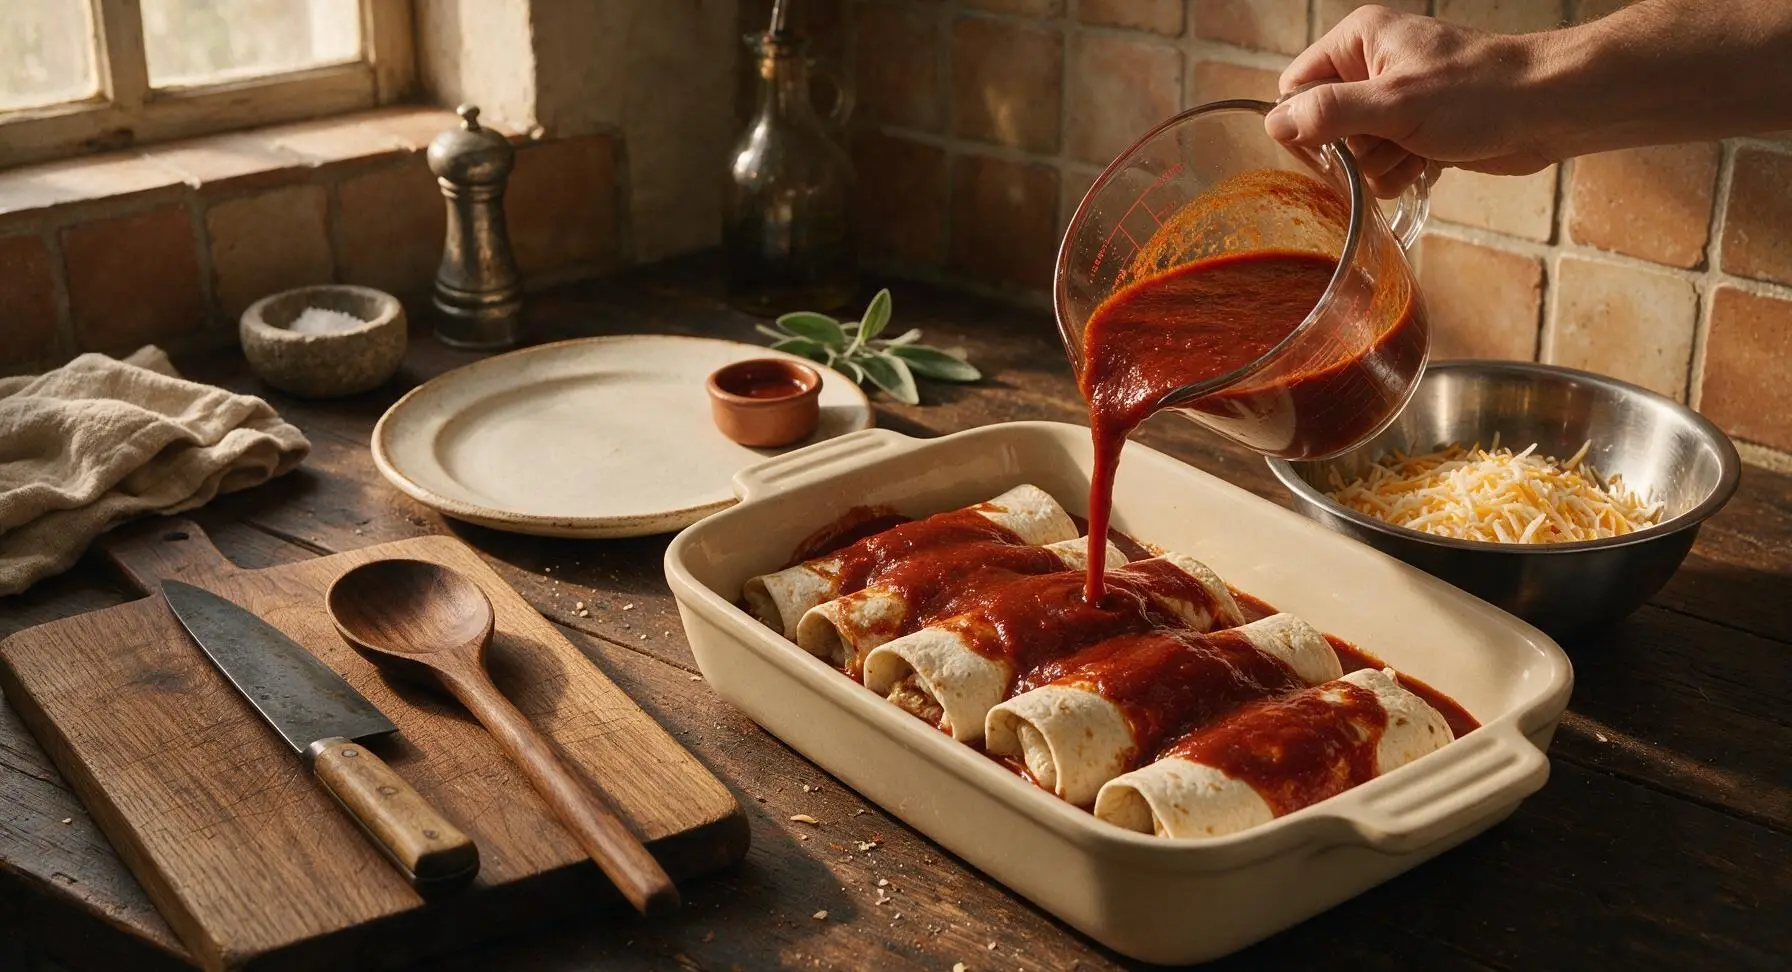
Step 5
step5:Top with Sauce and Cheese
6

Bake Until Golden Bubbly

Place the baking dish in the preheated 350F (180C) oven, bake for 20-22 minutes until the sauce is bubbling around the edges of the dish, and the cheese is fully melted with faint golden brown spots across the top. Visual cue: small bubbles of sauce will pop through the cheese around the burrito edges when it is done. Remove from the oven and let rest for 5 minutes before serving to allow the filling to set.
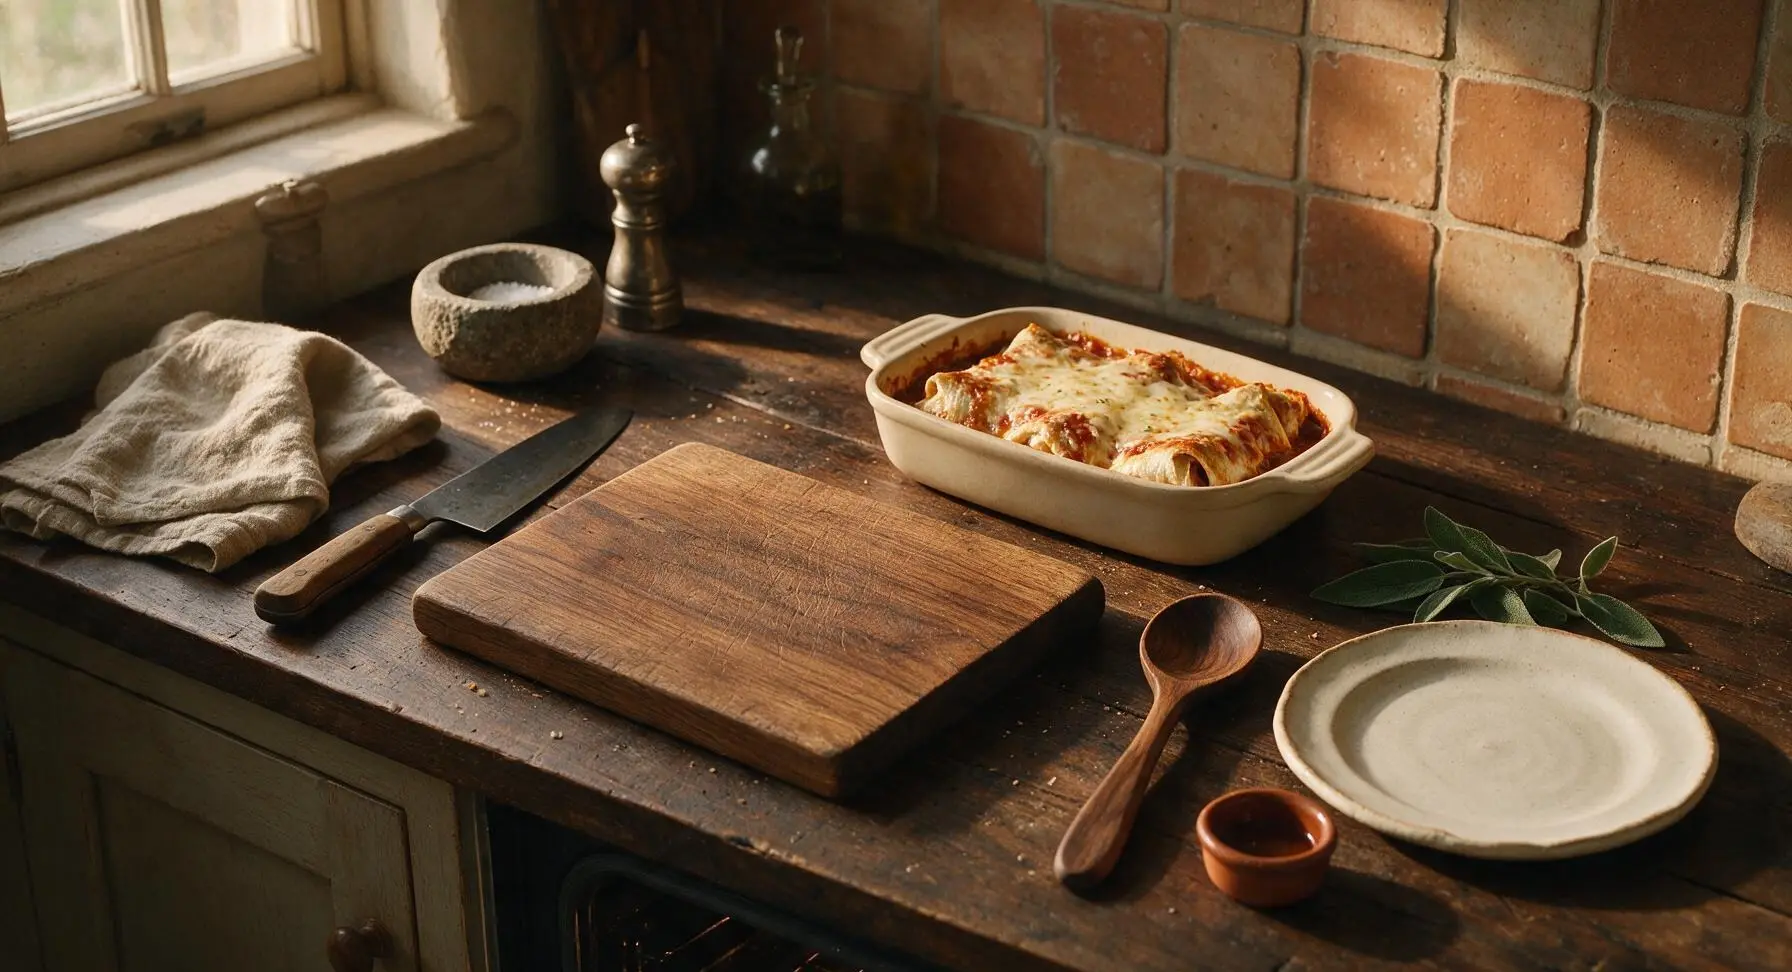
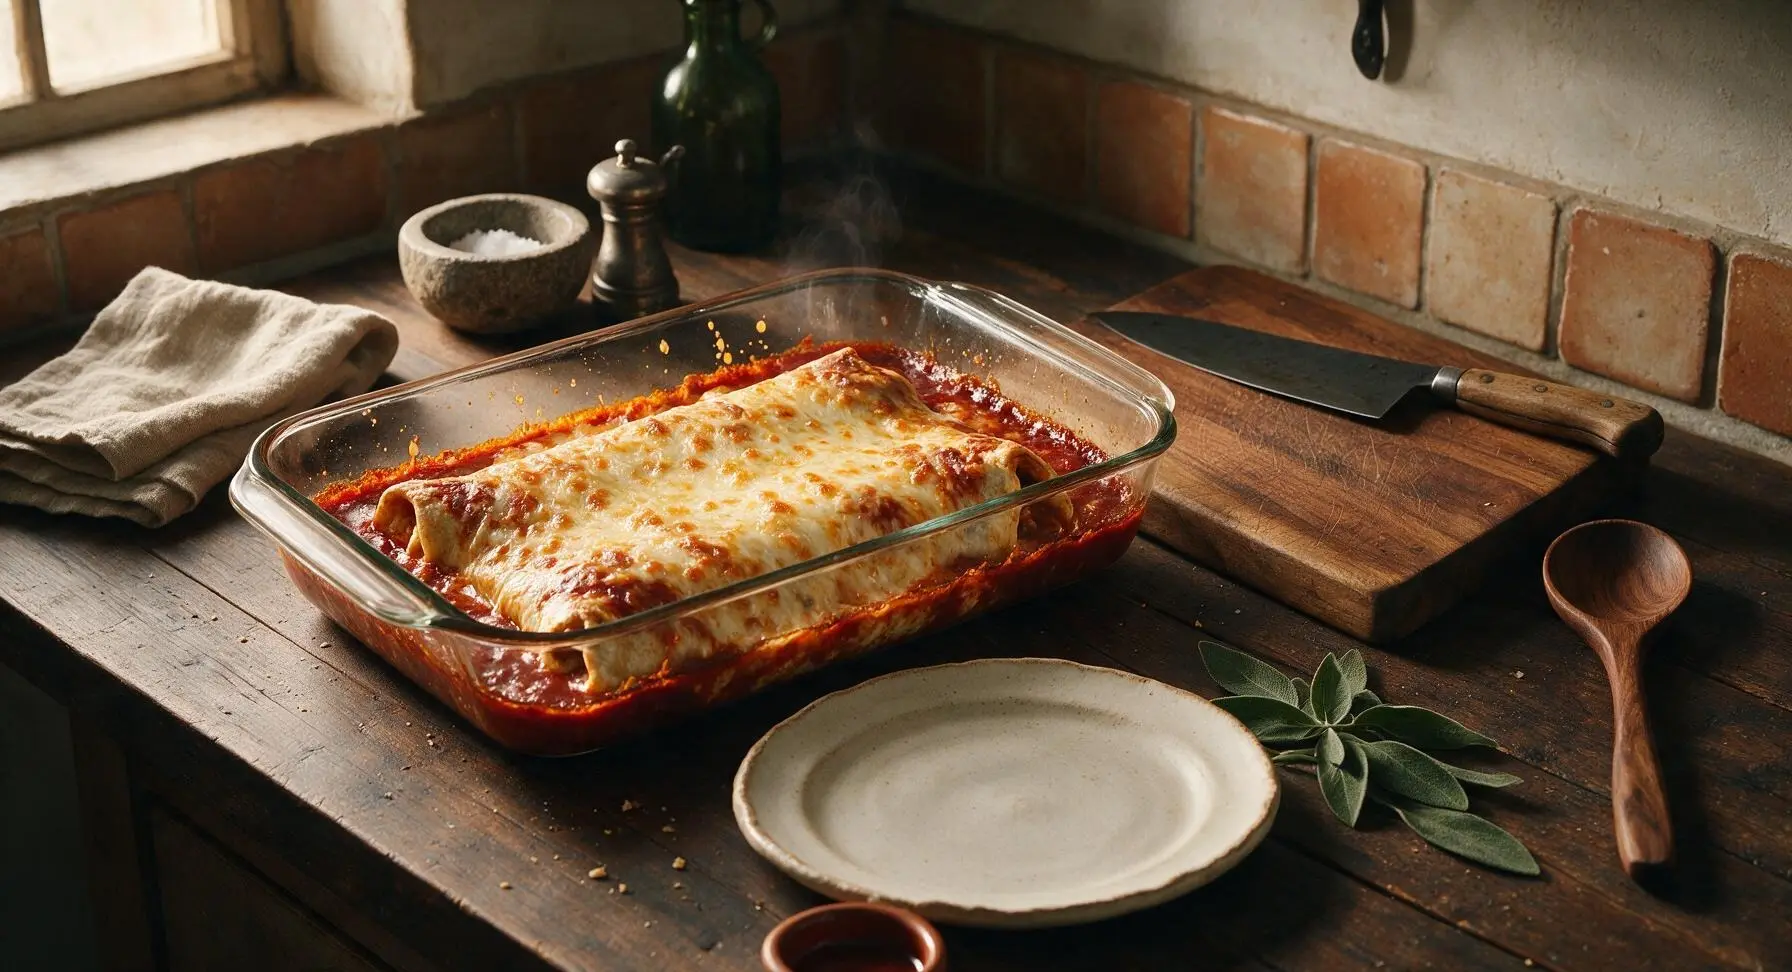
Step 6
step6:Bake Until Golden Bubbly
Step 6
step6:Bake Until Golden Bubbly
7

Plate and Add Garnishes

Use a wide spatula to lift one burrito from the baking dish, place it on the wide-rimmed terracotta dinner plate. Cut the burrito in half diagonally to expose the layered filling. Top with a dollop of sour cream, a sprinkle of chopped fresh cilantro, and 2-3 pickled jalapeño slices, if desired. Spoon a small amount of extra sauce from the baking dish into the clear glass ramekin for serving.
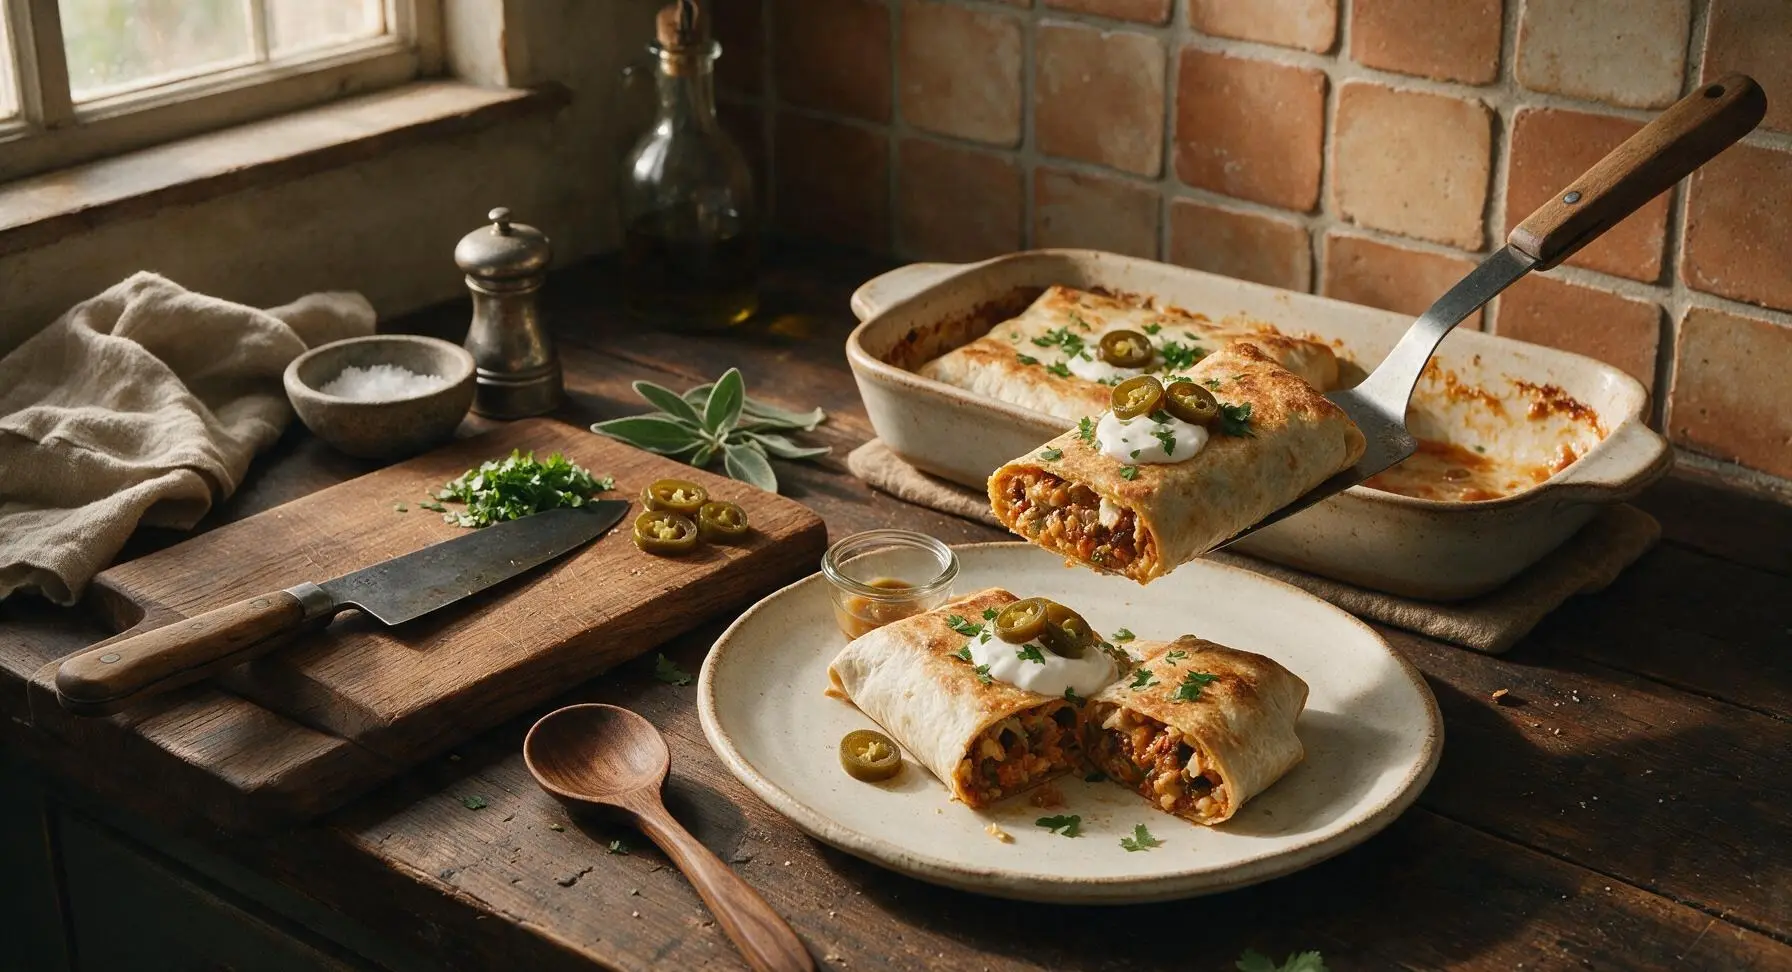
Step 7
step7:Plate and Add Garnishes

Tips

1.Warm tortillas before rolling: Cold flour tortillas crack and split when folded, leading to filling leaks during baking. Heating them for 30 seconds in the microwave with a damp paper towel makes them pliable enough to roll tightly without tearing.
2.Cover all exposed tortilla with sauce: Any dry tortilla surface exposed to direct oven heat will turn tough and leathery instead of soft and sauce-infused. Spread sauce all the way to the dish edges to ensure every bite has the signature tender, saucy texture.
3.Rest burritos 5 minutes after baking: The filling is extremely hot and runny straight out of the oven; a short rest allows the cheese, sauce, and rice to set slightly, so burritos hold their shape when cut instead of spilling filling across the plate.


✨ You May Also Like

Main Course
🍜 United Kingdom

A showstopping classic of tender seared beef, savory mushroom duxelles, and crisp prosciutto wrapped in flaky golden puff pastry, baked to juicy perfection.

⏱️ 2 hours 1Main Course ★ 4.7
Main Course
🍜 India

Tender charred marinated chicken simmered in a rich, spiced creamy tomato sauce, this iconic Anglo-Indian curry pairs perfectly with basmati rice or warm naan.

⏱️ 50 minuteMain Course ★ 4.6
Main Course
🍜 Thailand

Classic tangy, sweet, and savory Thai stir-fried rice noodles with shrimp, tofu, and crunchy garnishes, balancing all five core Thai flavor profiles.

⏱️ 30 minuteMain Course ★ 4.5
Main Course
🍜 United Kingdom

Crispy golden beer-battered cod and fluffy double-fried chips, served with tangy tartar sauce and malt vinegar: the timeless, beloved British pub comfort classic.

⏱️ 45 minuteMain Course ★ 4.7
Main Course
🍜 Mexico

Smoky, chile-marinated pork tacos with caramelized pineapple, fresh cilantro, and lime: a beloved classic Mexican street food perfect for casual summer gatherings.

⏱️ 1 hour 45Main Course ★ 4.8
Main Course
🍜 United States

Crunchy Fritos corn chips layered with savory beef chili and melted cheddar, topped with cool, zesty fixings for a beloved, cozy Tex-Mex comfort food.

⏱️ 35 minuteMain Course ★ 4.8

mexican villa burrito enchilada style:Frequently Asked Questions

1.Why do you recommend using block cheese instead of pre-shredded for this recipe? ▾
Pre-shredded cheese is coated in potato starch and anti-caking agents to prevent clumping in the bag, which stops it from melting into that smooth, stretchy, bubbly texture classic to this restaurant-style dish. Grating your own Monterey Jack and sharp cheddar from a block melts evenly, clings perfectly to the burritos, and has a fresher, richer flavor with no odd starchy aftertaste.
2.What’s the benefit of using 90/10 lean ground beef instead of a fattier blend? ▾
Fattier ground beef blends like 80/20 release excess grease as it cooks, which can make tortillas soggy and dilute the rich flavor of the red enchilada sauce. The 90/10 lean blend has just enough fat to stay juicy and flavorful when seasoned, without leaving a greasy puddle at the bottom of your baking dish after baking for cohesive, clean bites.
3.How tight should I roll the burritos to keep filling from leaking out while baking? ▾
Aim for a tight, firm roll without stretching the tortilla to the point of tearing. Start by tucking the left and right side edges in over the filling first, then roll from the bottom edge up snugly. Place each burrito seam-side down in your baking dish, and they’ll hold their shape, keep filling contained, and hold up perfectly under sauce and cheese.
4.Can I use corn tortillas instead of 10-inch flour tortillas for this recipe? ▾
This vintage villa-style recipe is designed for large, pliable 10-inch flour tortillas, which are sturdy enough to hold hearty stuffing and smothered sauce without falling apart. Corn tortillas are smaller and more delicate, better suited for individual thin enchiladas rather than stuffed burritos—swap them only if you’re okay with smaller, tear-prone portions.
5.How much enchilada sauce should I use to get that classic smothered restaurant texture? ▾
Use enough sauce to fully coat the top of every burrito without submerging them completely, roughly 2 to 2.5 cups for a 9x13 dish holding 4 to 6 burritos. Pour a thin base layer in the dish first, arrange the burritos, then pour the rest evenly over the top so every bite gets rich, tangy sauce without turning tortillas mushy.
6.Do I need to toast or warm the tortillas before stuffing and rolling them? ▾
Absolutely—warm your flour tortillas for 10 to 15 seconds per side on a dry skillet, or wrap them in damp paper towels and microwave for 30 seconds before assembling. Cold tortillas are stiff and far more likely to crack or tear when rolled tightly around beef filling, leading to leaks and messy, uneven portions once baked.
7.What oven temperature and bake time gives that perfectly bubbly cheese top without burning? ▾
Bake at 375°F, covered with foil for the first 20 minutes to heat the beef filling all the way through, then uncover and bake for 10 to 12 more minutes. That extra uncovered time lets the cheese melt fully, develop tiny golden bubbly spots across the top, and lets the sauce thicken just enough without burning tortilla edges.
8.Can I prep these burritos ahead of time for a weeknight meal or party? ▾
Definitely! Assemble the rolled, stuffed burritos and place them in your baking dish, cover tightly, and refrigerate for up to 24 hours before baking. Wait to top with sauce and cheese until right before you pop them in the oven, though—adding sauce too early will soak into tortillas and leave you with soggy, mushy burritos.
9.Is there a quick way to add extra flavor to the ground beef filling without fancy ingredients? ▾
Stir 2 tablespoons of the red enchilada sauce, plus a pinch of ground cumin, garlic powder, and onion powder into your browned, drained ground beef before stuffing the tortillas. This ties the beef flavor directly to the smothered sauce on top, so the filling doesn’t taste bland or disconnected, no fancy specialty ingredients required.
10.Why do these burritos taste different from regular smothered burritos I get at fast-casual spots? ▾
This recipe leans into the old-school Mexican villa restaurant vibe, which prioritizes tightly rolled, simply seasoned beef, smooth mild red sauce, and a blend of melted Jack and cheddar baked until bubbly. It skips the overstuffed rice, beans, and extra mix-ins common at fast-casual spots for that cozy, nostalgic comfort food core.
11.Can I freeze these burritos for later meals? ▾
Yes! Wrap individual unbaked, stuffed burritos (hold the sauce and cheese for later) tightly in plastic wrap and foil, and freeze for up to 3 months. When you’re ready to eat, thaw them in the fridge overnight, arrange in a baking dish, top with sauce and cheese, and bake as directed, adding 5 extra covered minutes to heat filling through.
12.What simple toppings work best with these burritos without ruining the classic vibe? ▾
Stick to light, fresh toppings added right after baking: a dollop of sour cream, a sprinkle of chopped white onion, a few slices of pickled jalapeño, or a small spoonful of fresh pico de gallo. Skip heavy, loaded toppings like extra queso or mounds of guacamole, as those cover up the rich, simple baked cheese and sauce flavor that defines this classic style.
13.How do I keep the bottom of the burritos from getting soggy while they bake? ▾
First, fully drain all excess grease from your cooked ground beef before stuffing to avoid extra moisture. Pour a thin, even ¼ cup layer of enchilada sauce on the bottom of the baking dish instead of a thick pool, and place rolled burritos seam-side down so the filling weight seals the edge shut, keeping excess sauce from seeping inside as it bakes.

Comments (8)

3 days ago

OMG this was SO good! I made this for my family taco night last night and even my super picky 7 year old asked for seconds. The enchilada sauce smothered over the burrito is a total game changer—why have I never thought to do that before? Cook time was totally accurate too, had the whole thing on the table in 30 minutes flat after work. 10/10 will be making this weekly for meal prep!

2 days ago

Wait did you use store bought enchilada sauce or homemade? I’m trying this this weekend for a potluck and don’t want to mess it up!

yesterday

So glad your family loved it! Store bought works perfectly for a quick weeknight meal, but if you have 10 extra minutes our homemade red enchilada sauce recipe pairs amazing with this too. Enjoy the potluck!

just now

Made this for my roommate and I last night after seeing it pop up on my feed—so easy even I can’t mess it up, and I burn toast half the time. I added a little extra cheese on top before broiling and *chef’s kiss*. Will definitely be adding this to my regular rotation.

5 days ago

Great recipe, super straightforward. Only note is that I wish it had a note about freezing? I made a big batch to freeze for work lunches and wasn’t sure if the smothered sauce holds up well. Still tasted great fresh though, 4 stars instead of 5 just for that missing info!

3 days ago

Thanks for the feedback, Mike! Great question—these actually freeze really well for up to 3 months! Just wrap them tightly in foil before adding the final cheese topping, thaw in the fridge overnight, then top with cheese and bake for 15 minutes when you’re ready to eat. I’ll add that note to the recipe soon!

2 weeks ago

Tried this last night for dinner and it tasted exactly like the burritos I used to get at my favorite local Mexican spot back in college! I used shredded chicken instead of ground beef because that’s what I had in the fridge, and it still turned out perfect. My husband already asked when we’re having it again.

1 week ago

Oh good to know chicken works! I don’t eat red meat so I was worried I’d have to do a bunch of substitutions, that saves me so much hassle.

5 days ago

I did black beans and roasted veggies as a filling last week and it was chef’s kiss! Super customizable for whatever diet you follow, this recipe is so forgiving.

1 week ago

I brought these to my neighborhood block party potluck last weekend and people were literally coming up to me asking for the recipe all night! I set them up in a big baking dish smothered in sauce and cheese, kept them warm in the crockpot and they were a hit. Easy to make for a crowd too!

5 days ago

Wait how many burritos does this recipe make? I need to make enough for 20 people at our next block party and don’t want to run out!

yesterday

Game. Changer. I have three kids under 10 with zero patience for wait time at dinner, and this came together so fast on a chaotic school night. I let the kids add their own toppings (lettuce, sour cream, guac) after it came out of the oven and they thought it was the coolest build-your-own dinner night. My kids loved it, no complaints, zero leftovers, total win in my book.

2 hours ago

Loved the base recipe! I added pickled jalapenos and a dollop of hot sauce inside each burrito before rolling them up, and sprinkled some cotija cheese on top instead of regular cheddar. So much flavor, and it was still super easy to throw together. Only thing is I wish the sauce was a little spicier, but that’s just my personal preference!

30 minutes ago

Love that spicy twist! We’re big hot sauce fans over here too—adding a chopped chipotle pepper in adobo to the enchilada sauce is a great way to kick up the heat if you want even more spice next time you make it. Great call with the cotija, that sounds delicious!

30 minutes ago

First time ever cooking something that isn’t microwave mac and cheese, and this actually turned out edible!!! I was so nervous I’d mess up the rolling part but the directions were so clear, I didn’t have any issues. My dorm mates all begged for a bite when they smelled it cooking down the hall. Total win for a beginner cook!

5 minutes ago

Wait did you make this in a dorm kitchen? I only have a tiny toaster oven in my suite, will that work instead of a regular oven?

just now

So proud of you for nailing your first cooked meal! That toaster oven will absolutely work—just adjust the cooking time down by a few minutes and keep an eye on the cheese to make sure it doesn’t burn. Let us know how it turns out if you give it a try!



