
mongolian beef recipe easy

title 1
mongolian beef recipe easy
⏱️ cook time 15 minutes
🍽️ servings 4
⚡ Difficulty easy

intro

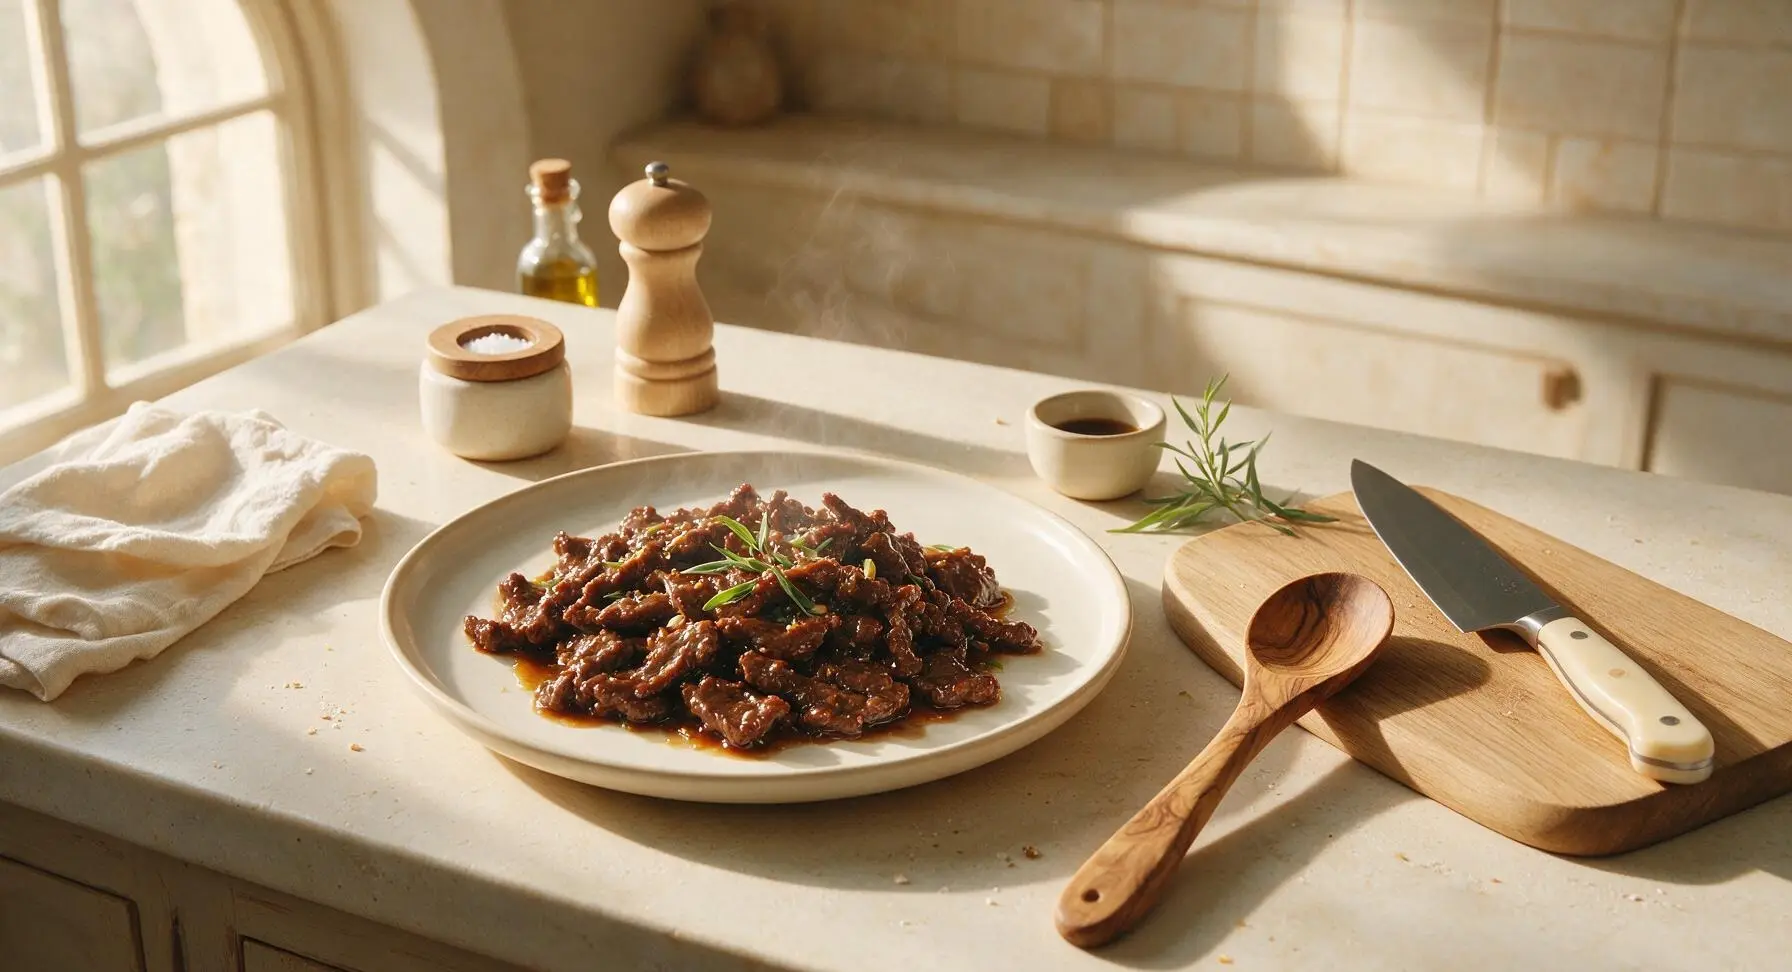
Tender, crisp-edged beef coated in a glossy sweet-savory soy-ginger sauce, this takeout classic comes together in 25 minutes for restaurant-quality results with minimal effort.

Ingredients
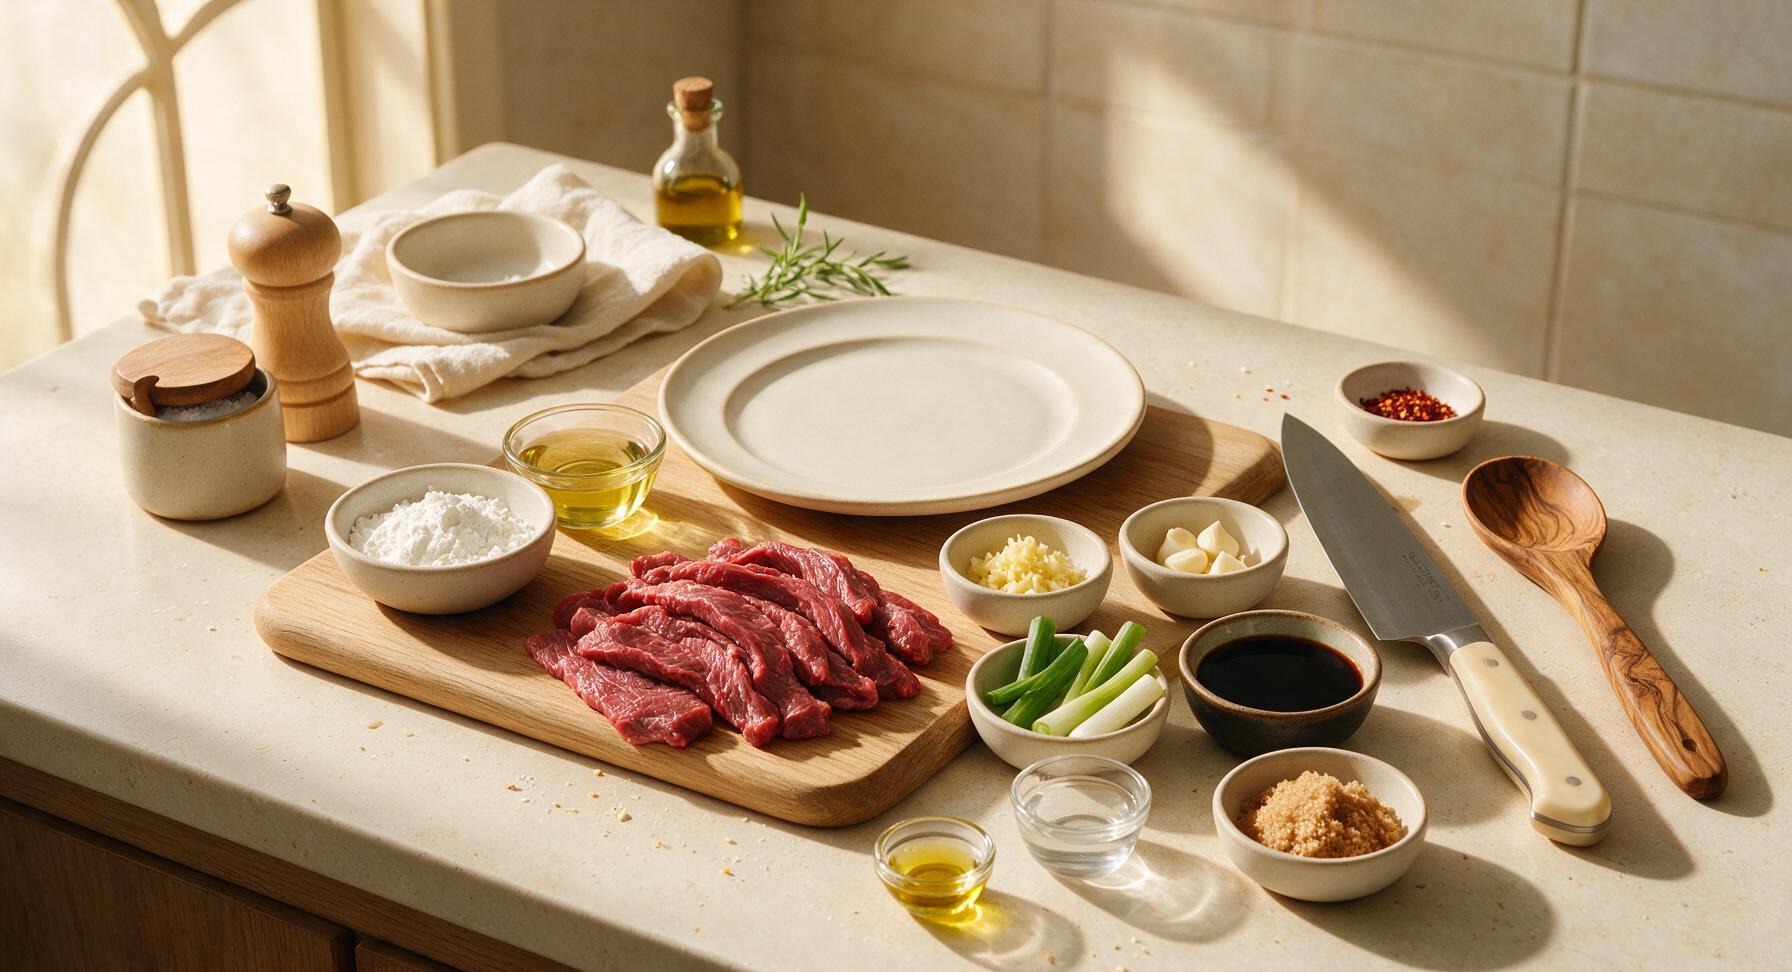
Flank steak 450g (1lb)
Cornstarch 3 tablespoons
Neutral canola oil 1/4 cup
Fresh ginger 2 tablespoons, minced
Garlic 3 cloves, minced
Scallions 4 stalks, cut into 5cm pieces, green/white parts separated
Low-sodium soy sauce 1/3 cup
Light brown sugar 1/4 cup, packed
Water 2 tablespoons
Toasted sesame oil 1 teaspoon
Red pepper flakes (optional) 1/4 teaspoon

Steps

1

Slice Beef Thinly

Place the flank steak on the pale honey bamboo cutting board. Using the 8-inch walnut-handled chef knife, slice against the grain into 3mm thick strips, cutting at a 45-degree angle to create wide, tender pieces. Pat all slices thoroughly dry with a paper towel to ensure crisp searing; excess surface moisture will cause the beef to steam instead of developing a light crust.
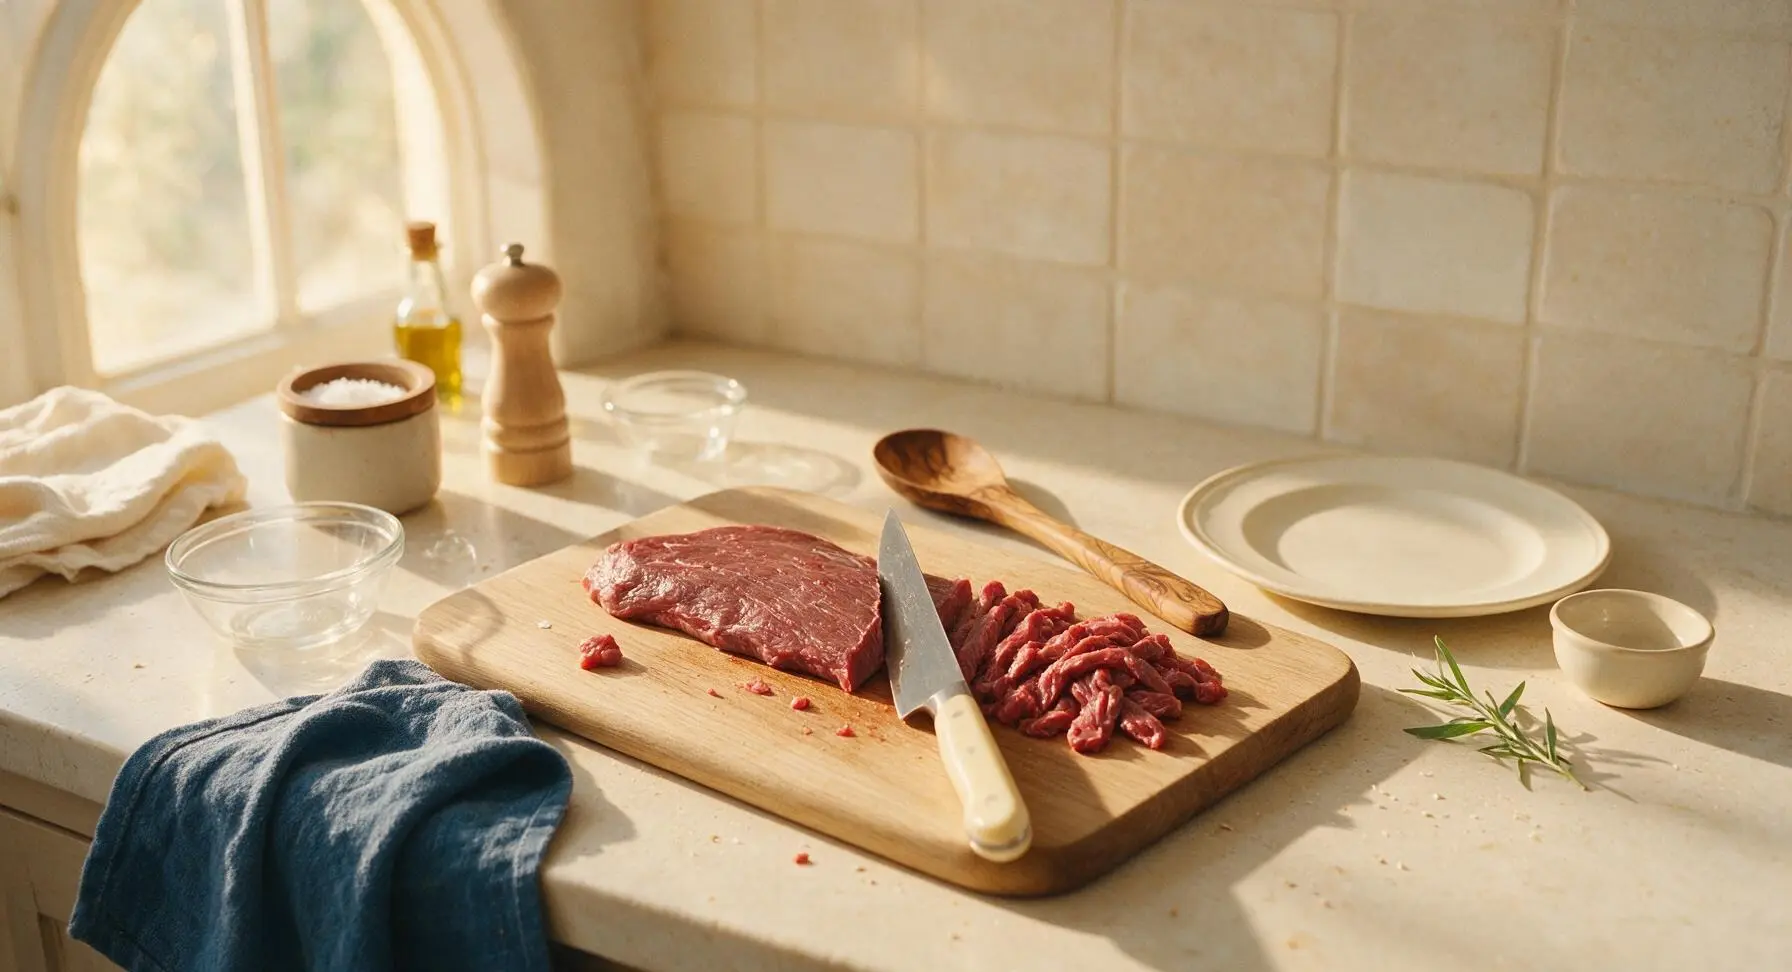
Step 1
step1:Slice Beef Thinly
2

Coat with Cornstarch

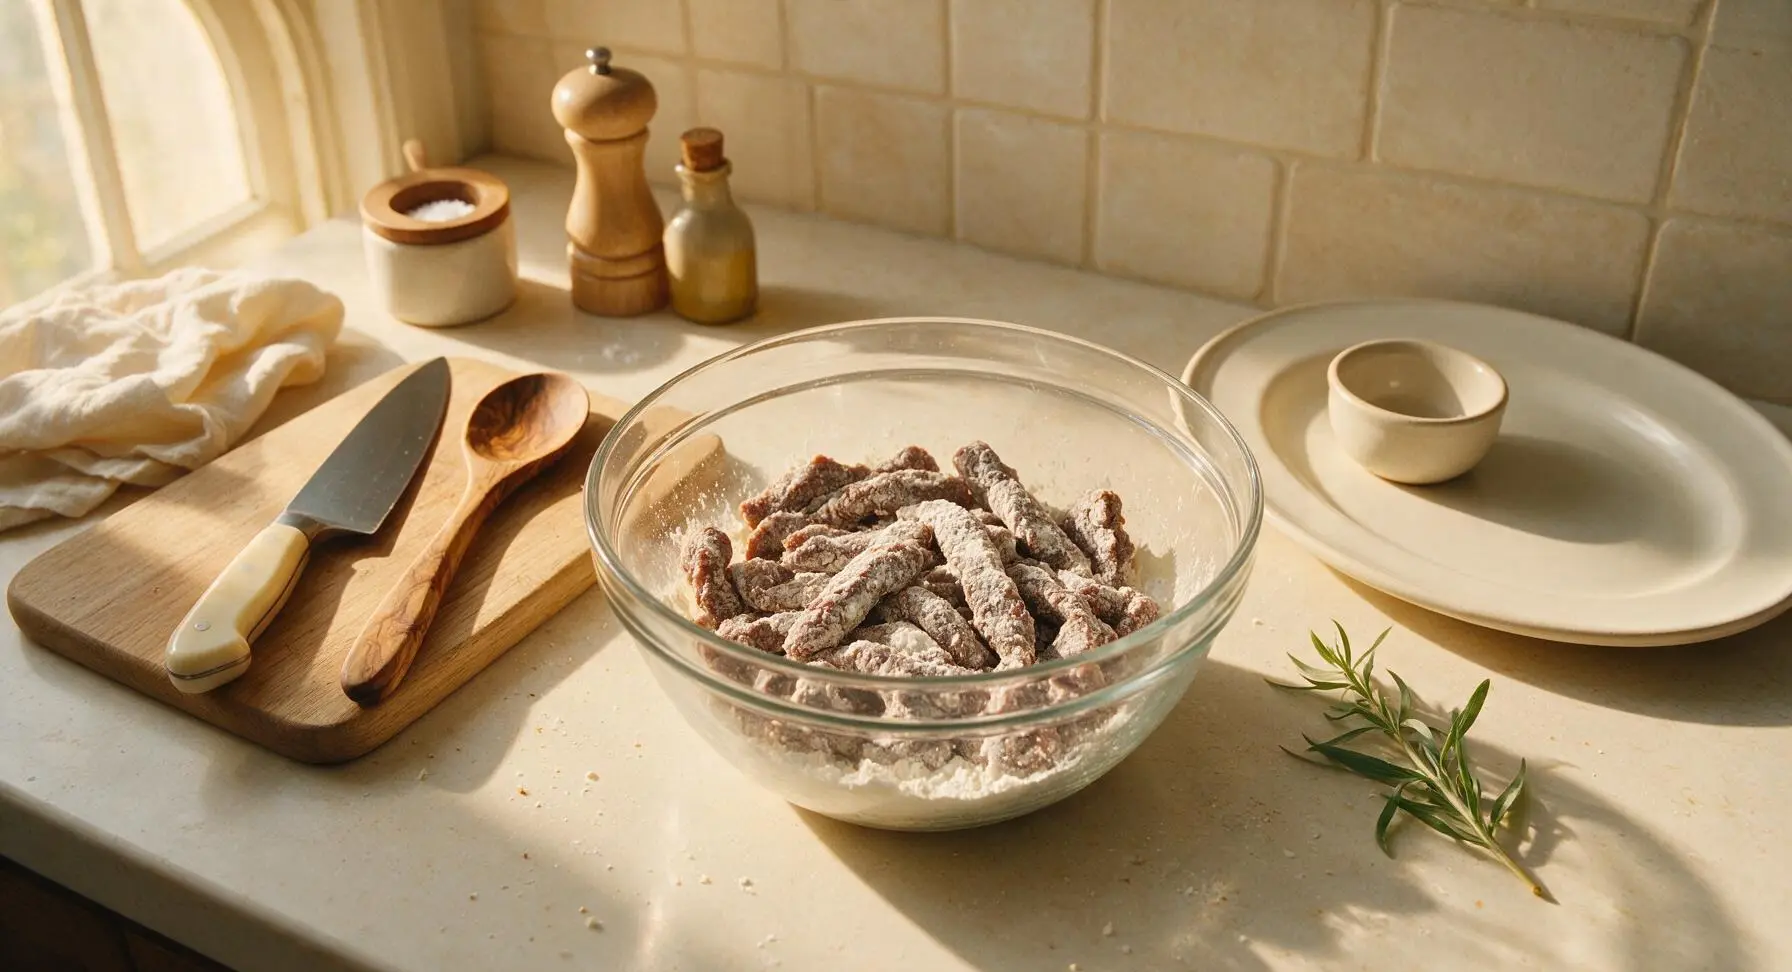
Add the sliced beef and 3 tablespoons cornstarch to one of the clear glass prep bowls. Toss thoroughly until every slice is lightly and evenly coated in a thin, dry layer of cornstarch, with no damp spots or clumps of starch left at the bottom of the bowl. Let the coated beef rest for 5 minutes to allow the starch to fully adhere to the meat surface, which prevents the coating from falling off during searing.
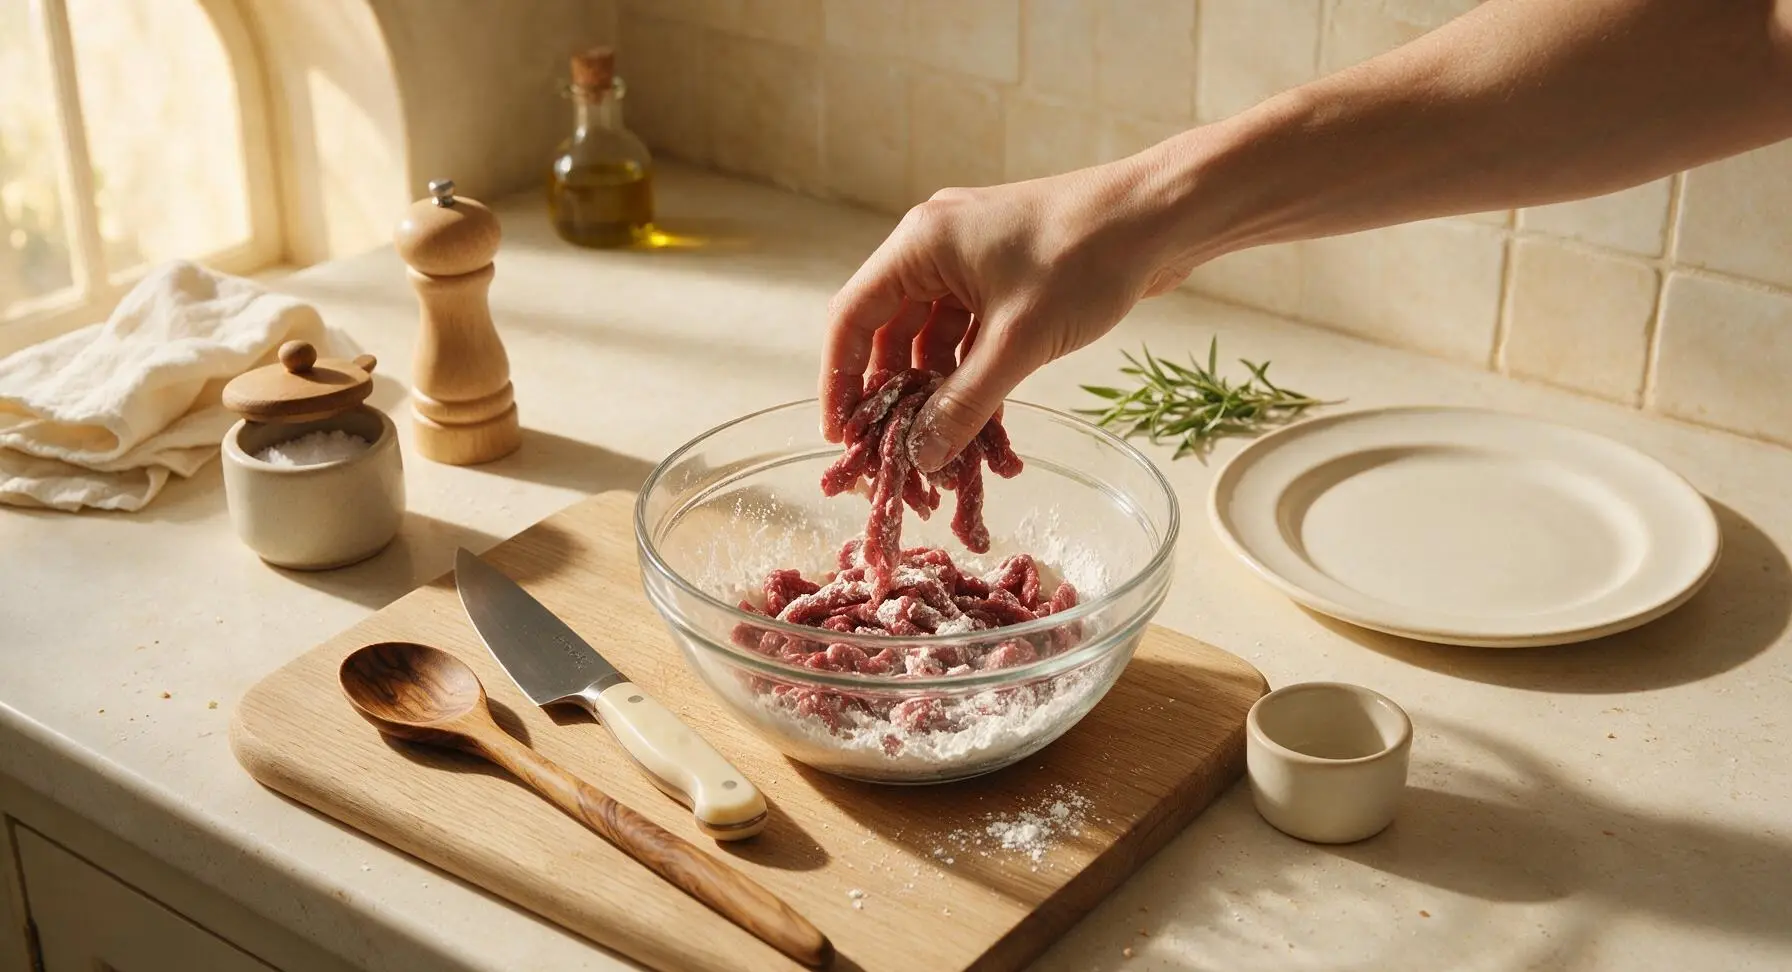
Step 2
step2:Coat with Cornstarch
Step 2
step2:Coat with Cornstarch
3

Mix Stir-Fry Sauce

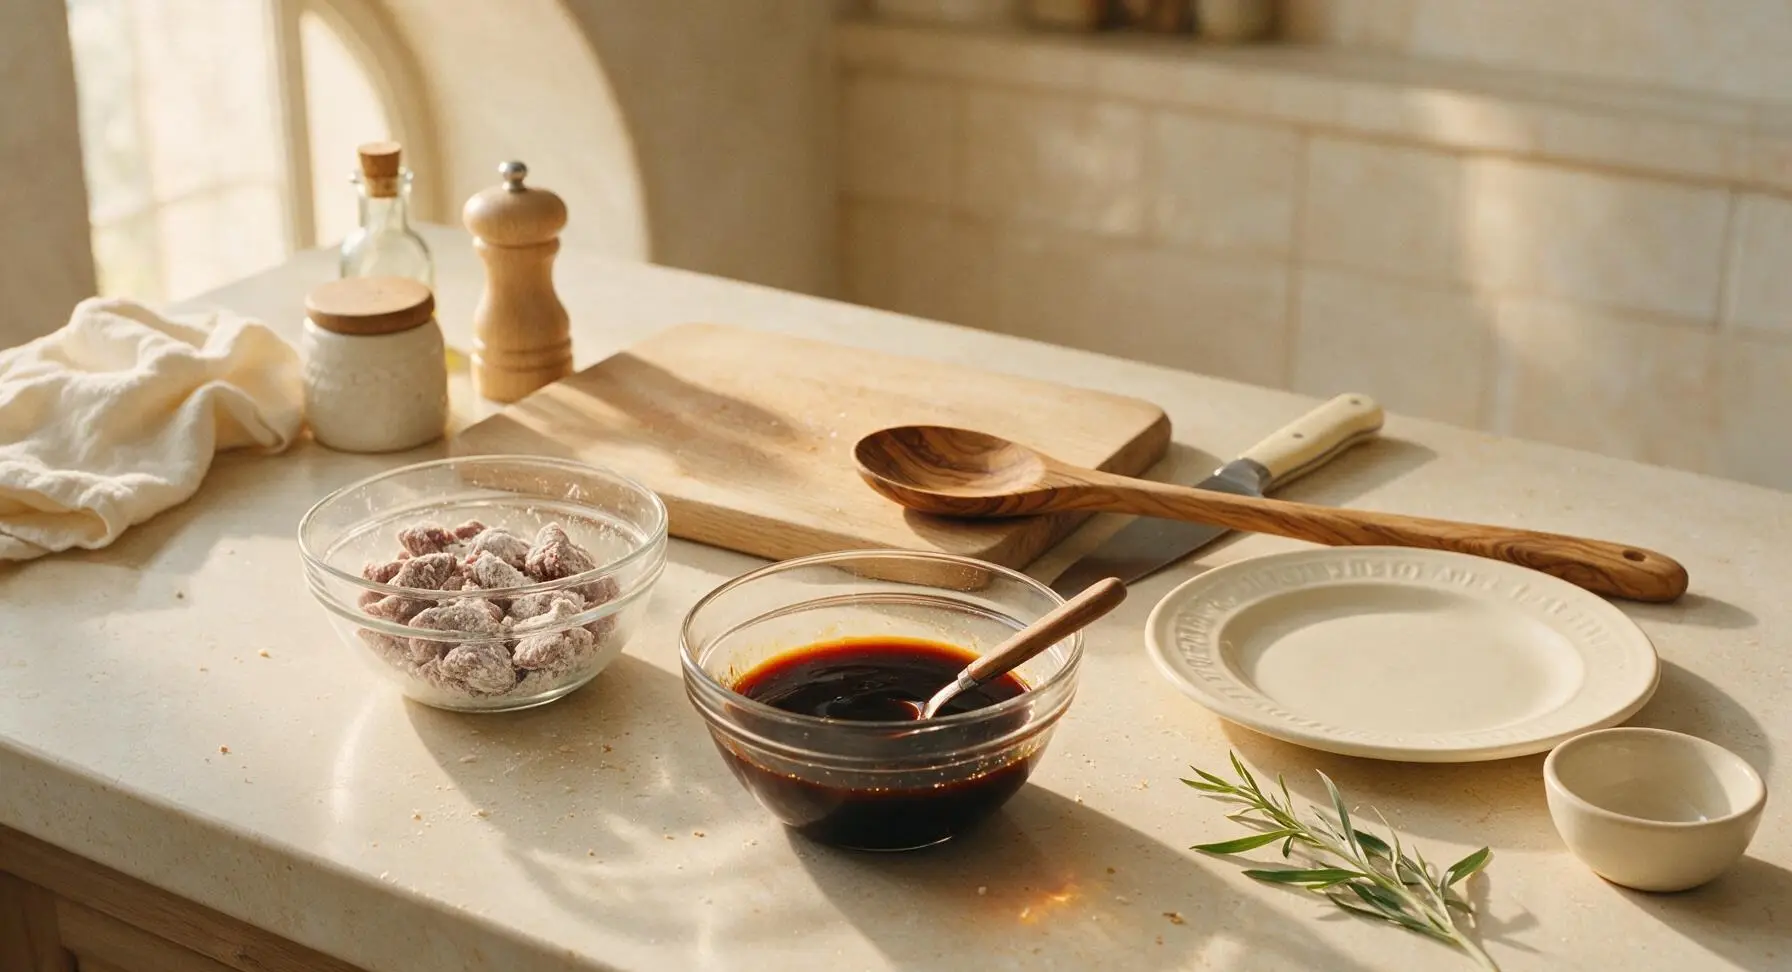
In a second clear glass prep bowl, combine 1/3 cup low-sodium soy sauce, 1/4 cup packed light brown sugar, 2 tablespoons water, 1 teaspoon toasted sesame oil, and 1/4 teaspoon red pepper flakes (if using). Stir with a small spoon until the brown sugar is fully dissolved and the sauce is smooth, with no grainy sugar residue settled at the bottom of the bowl. Set the bowl near the back of the counter within easy reach for cooking.
Step 3
step3:Mix Stir-Fry Sauce
4

Sear Beef Until Crisp

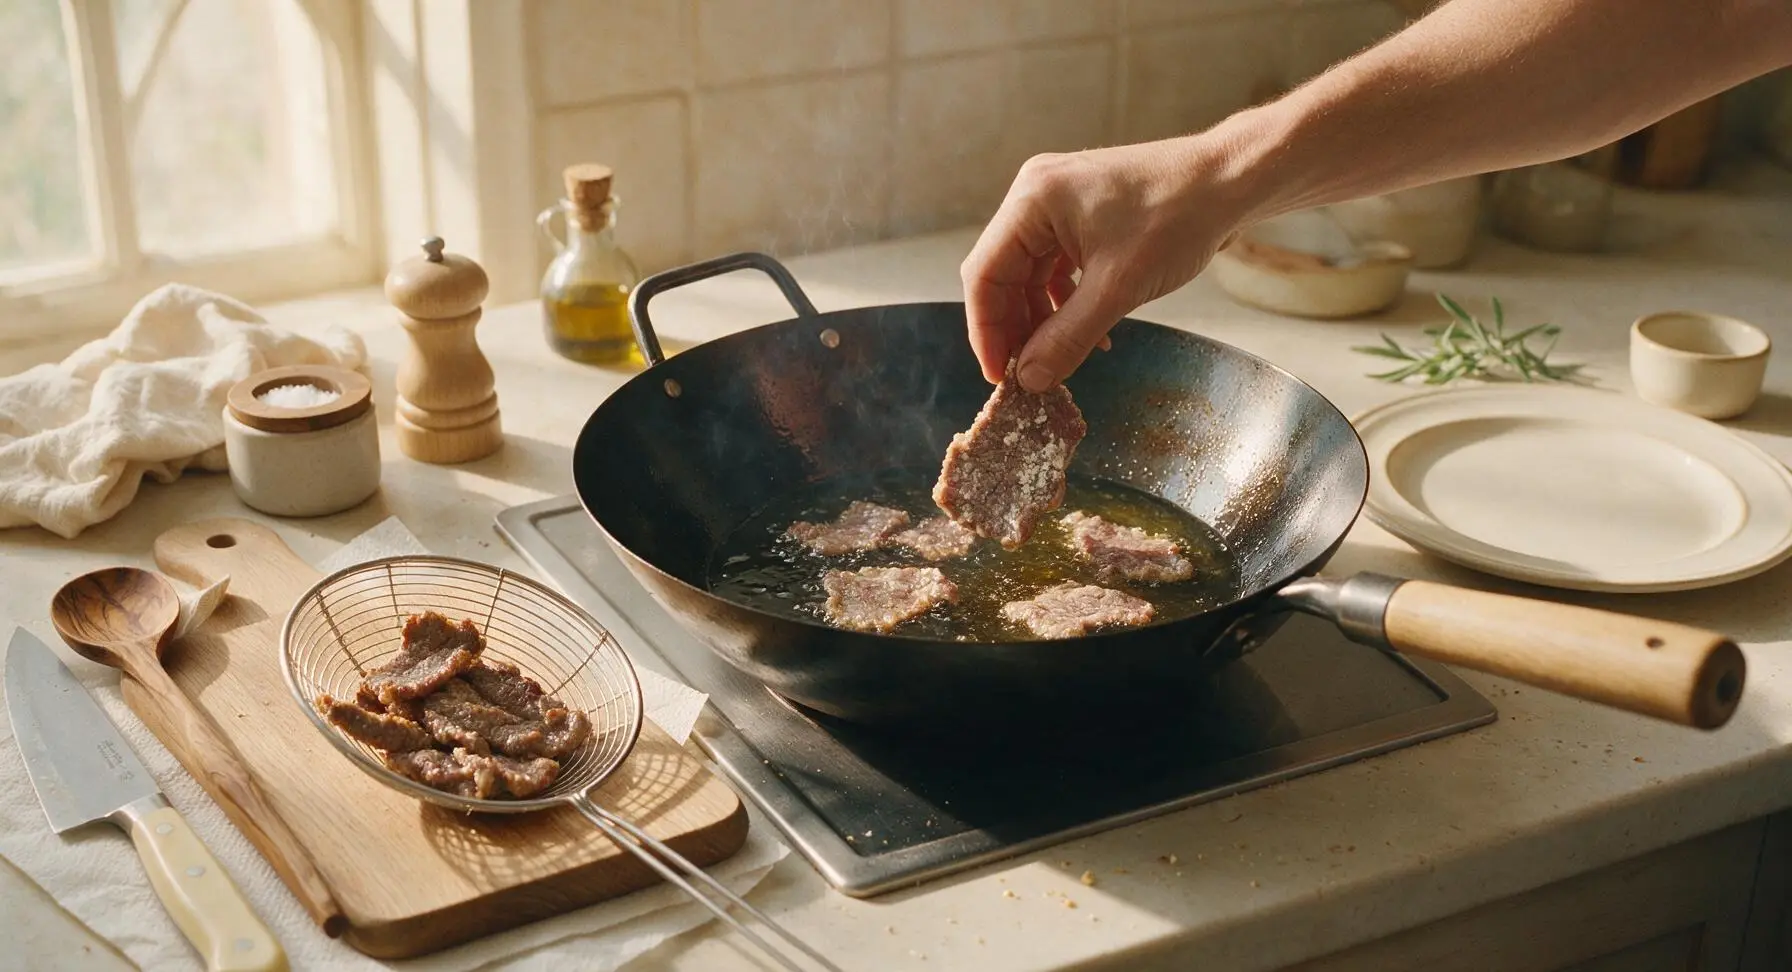
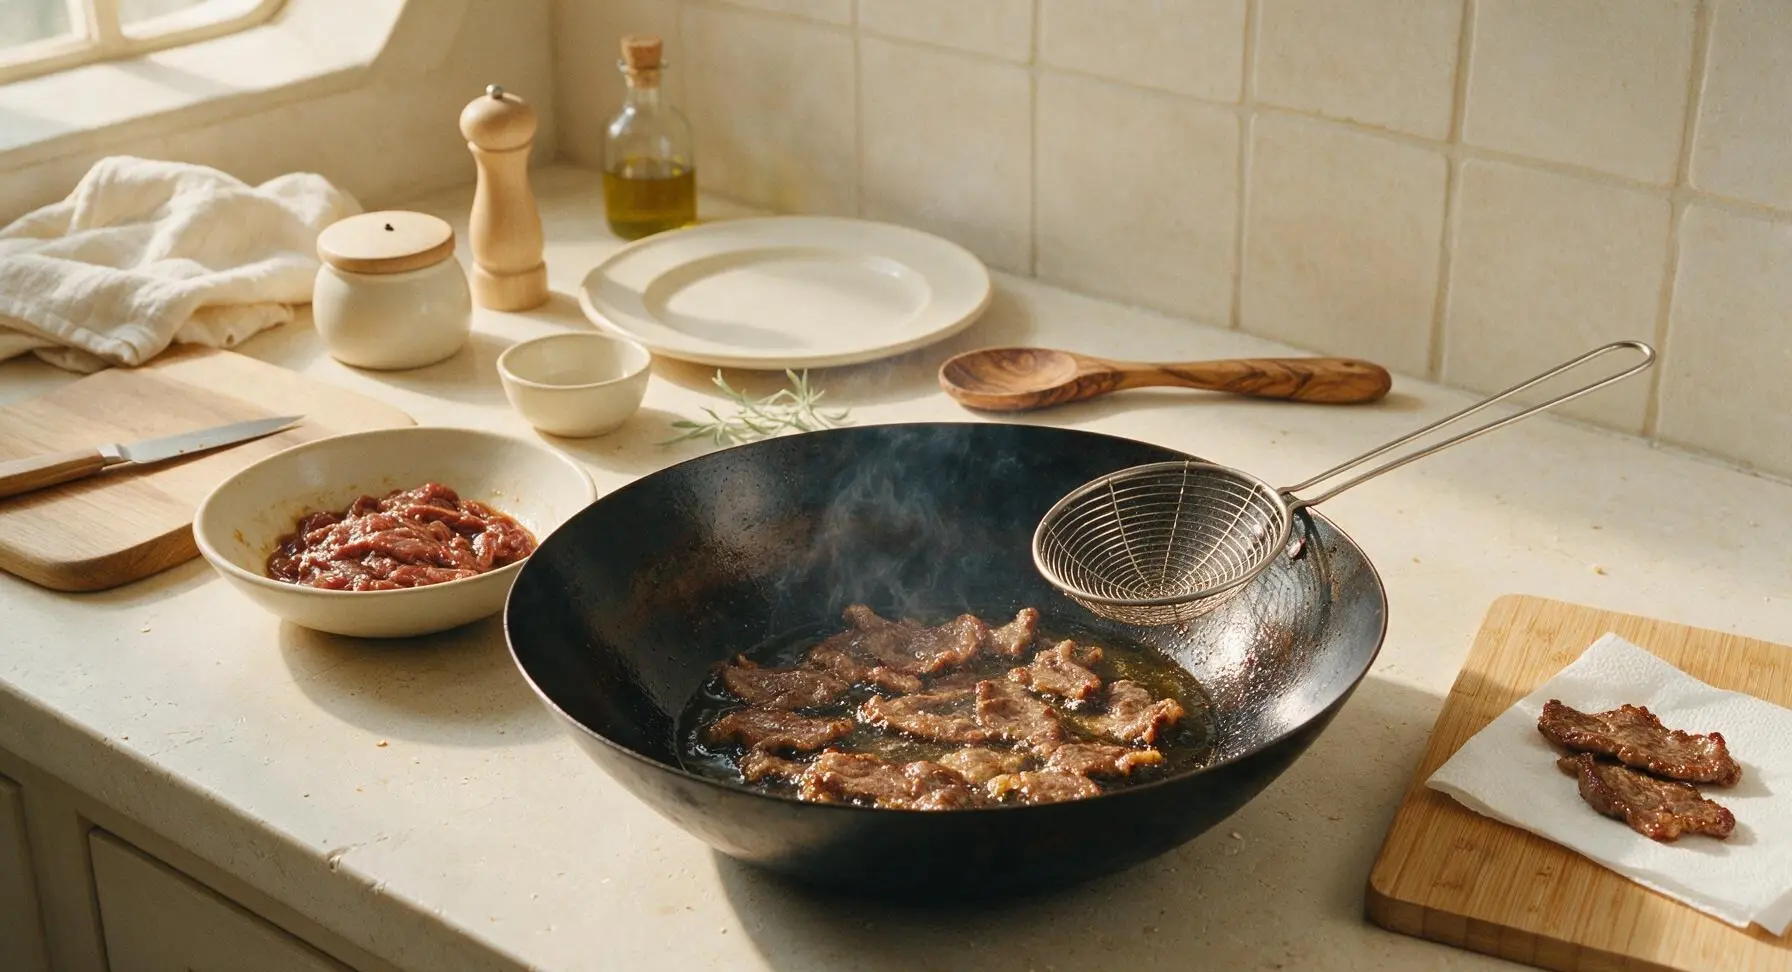
Heat 1/4 cup neutral canola oil in the 10-inch seasoned black carbon steel wok over medium-high heat until the oil shimmers (approximately 190C/375F). Working in two small batches to avoid crowding the pan, add coated beef slices in a single, even layer. Sear for 1 minute per side, until the edges are light golden and crispy, and the beef is just cooked through (no pink remaining on the outside). Use the stainless steel wire skimmer to transfer seared beef to a paper-towel-lined spot on the right edge of the bamboo cutting board to drain excess oil.
Step 4
step4:Sear Beef Until Crisp
Step 4
step4:Sear Beef Until Crisp
5

Cook Aromatic Base

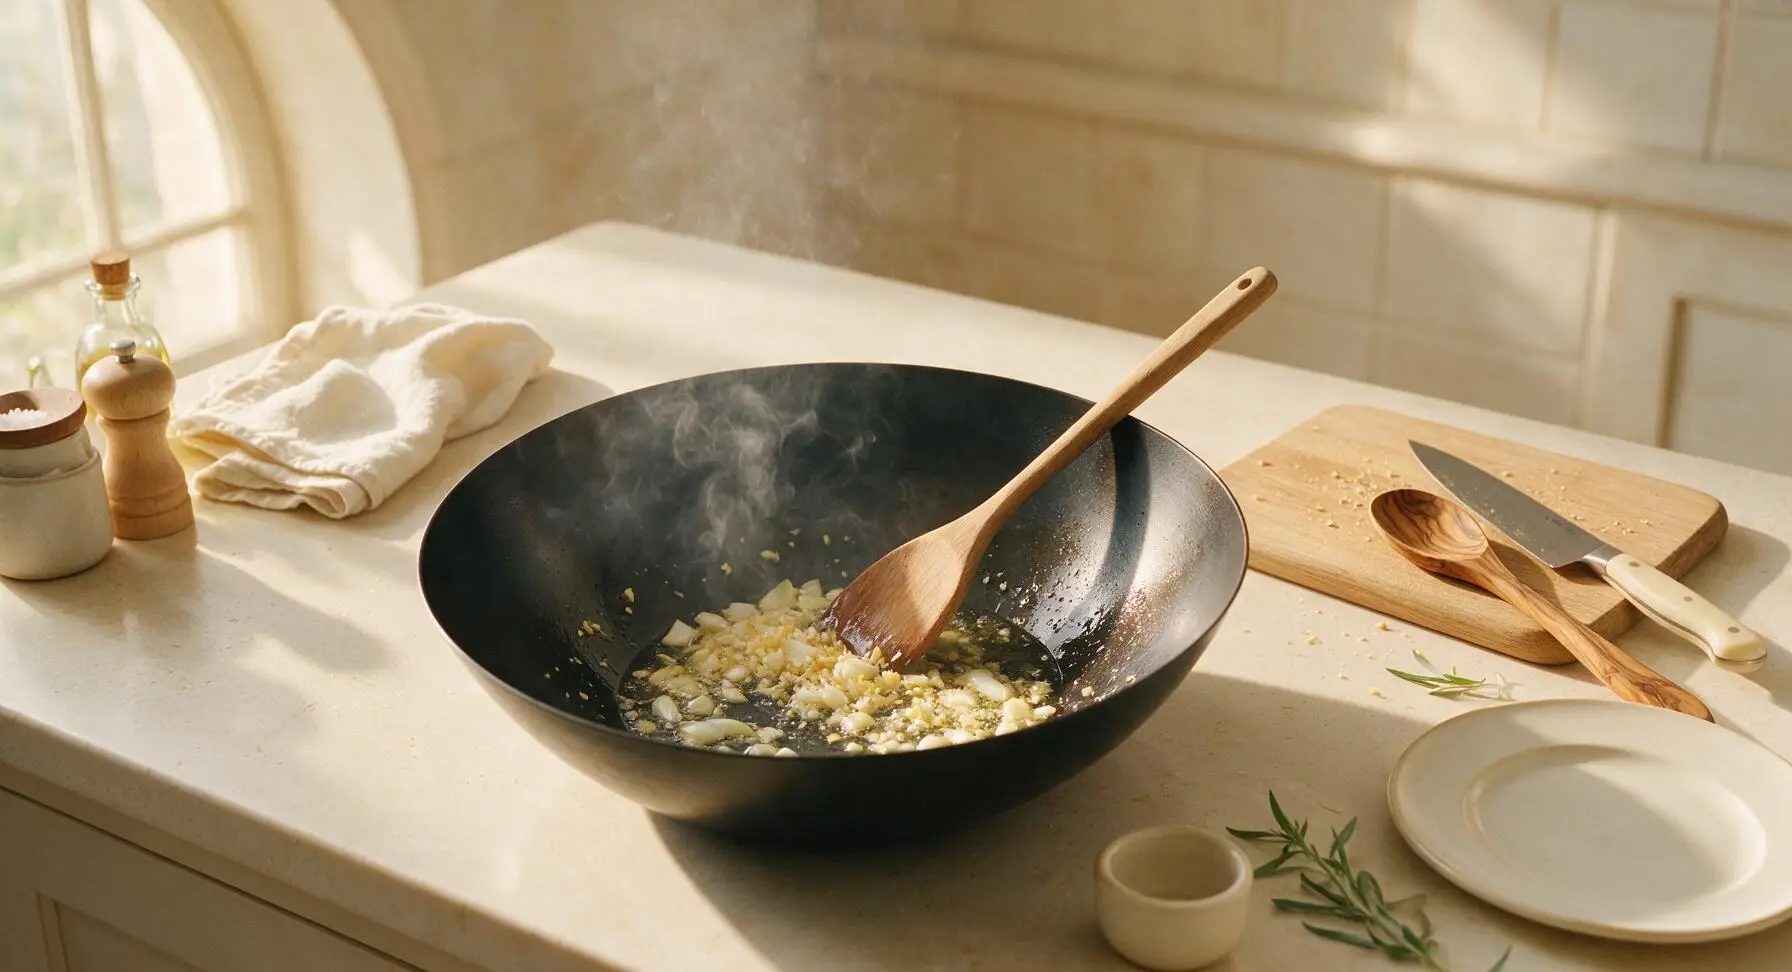
Carefully pour off all but 1 teaspoon of oil from the wok, leaving any browned crispy starch bits at the bottom for extra flavor. Return the wok to medium heat, add the white parts of the cut scallions, 2 tablespoons minced ginger, and 3 minced garlic cloves. Stir-fry constantly with the beechwood wooden spoon for 30 seconds, until bright and fragrant, taking extreme care not to burn the garlic, which will turn bitter quickly.
Step 5
step5:Cook Aromatic Base
6

Toss Beef in Sauce

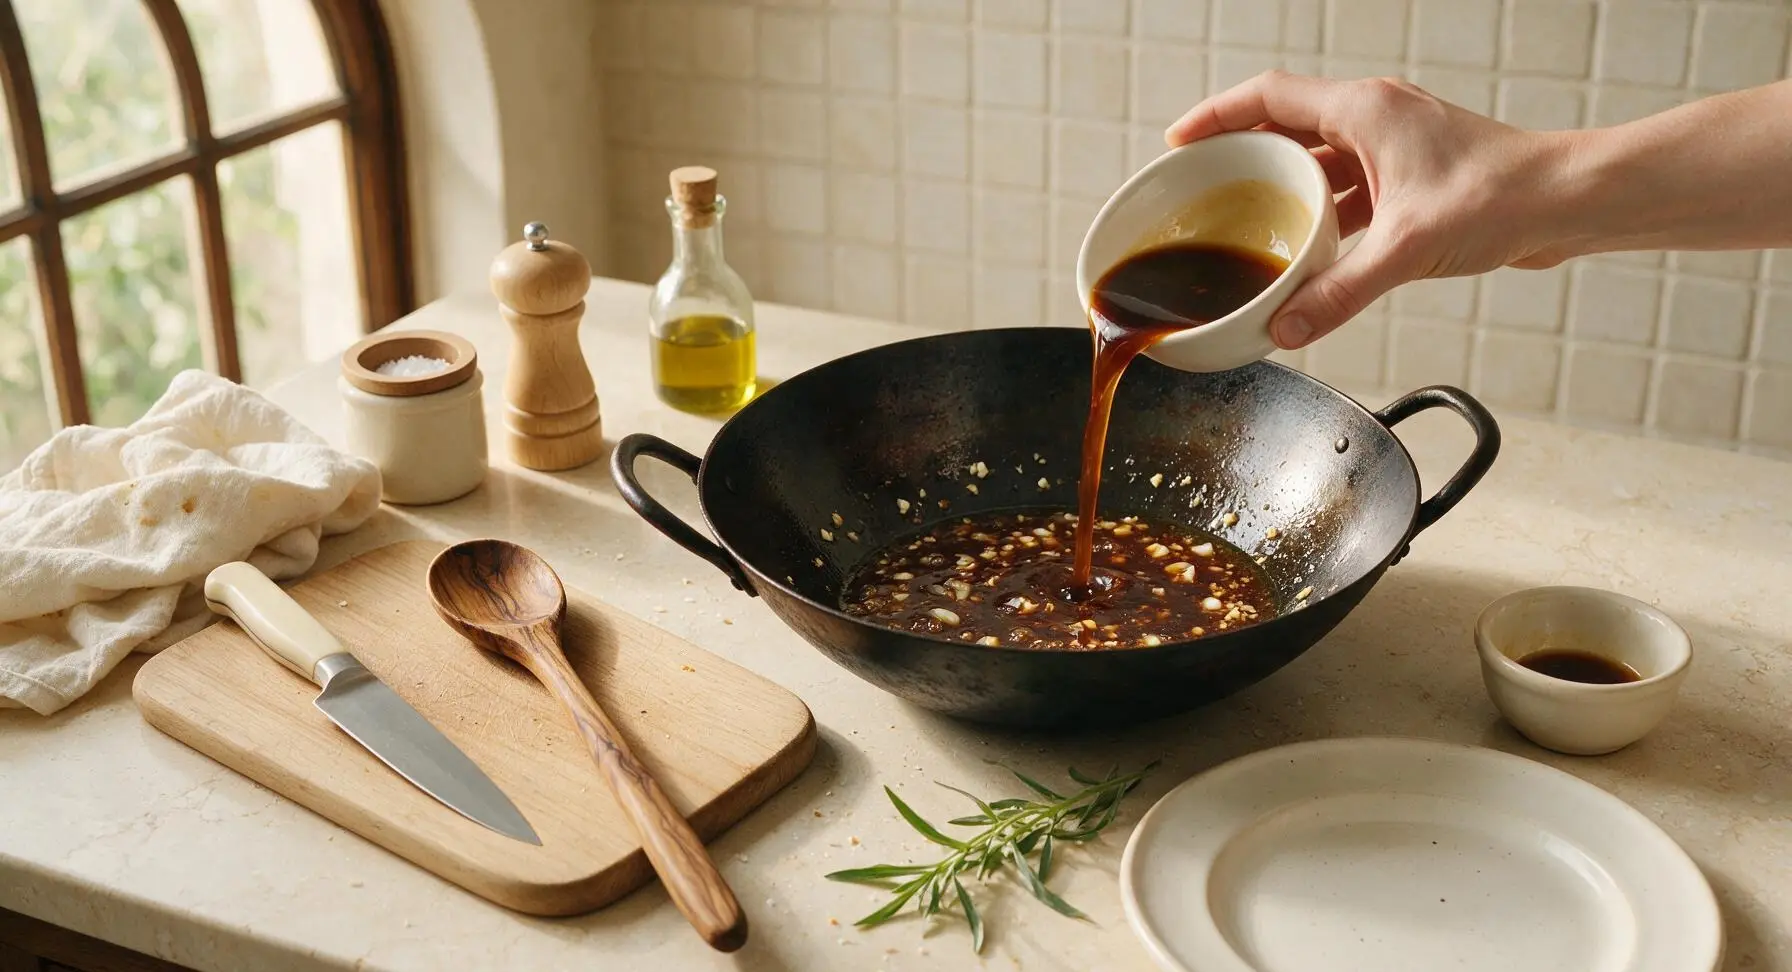
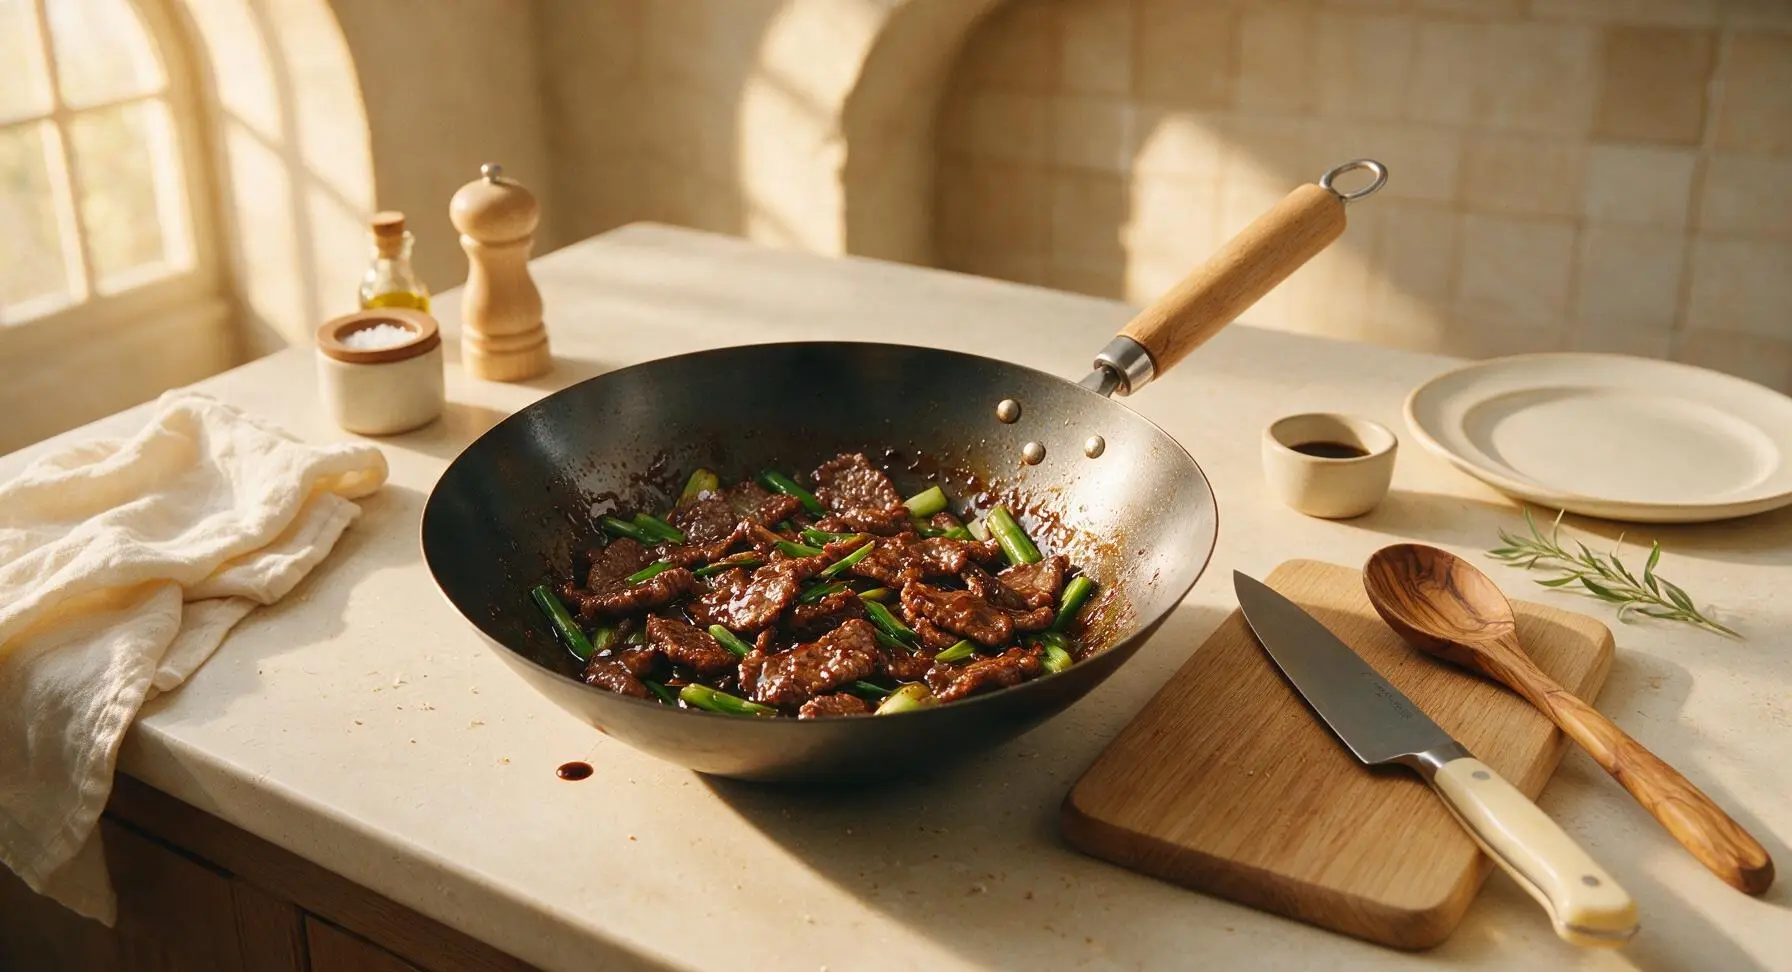
Give the pre-mixed sauce a quick stir to re-incorporate any settled ingredients, then pour it into the wok with the cooked aromatics. Bring the sauce to a gentle simmer, stirring constantly, and cook for 1 minute until it thickens slightly to a light, syrupy consistency. Add all the seared beef slices and the green parts of the scallions back into the wok. Toss continuously for 30 seconds, until every beef slice is evenly coated in the glossy, thickened sauce, and the scallion greens are just slightly wilted.
Step 6
step6:Toss Beef in Sauce
Step 6
step6:Toss Beef in Sauce
7

Plate and Serve

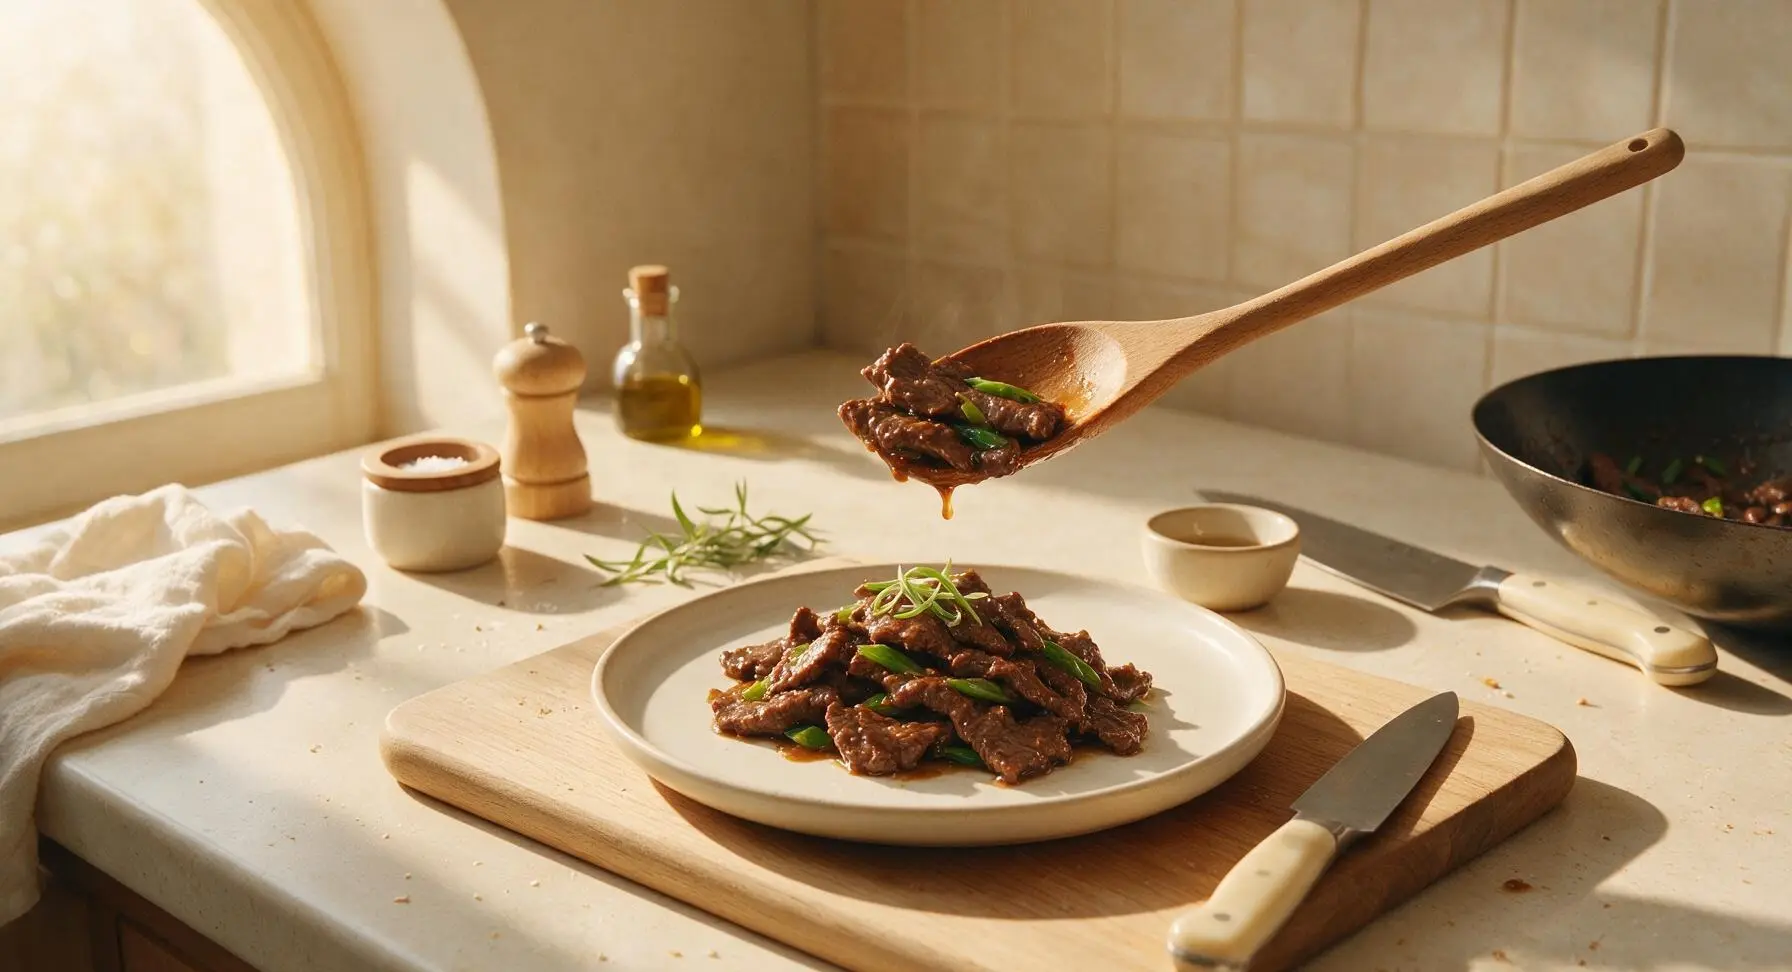
Turn off the heat under the wok. Use the beechwood wooden spoon to transfer all the sauced beef and scallions to the matte off-white hand-thrown ceramic dinner plate, piling the slices in a loose, natural mound. Garnish with a pinch of extra thin-sliced green scallion tops for bright color contrast. Serve immediately while hot, alongside steamed white rice if desired, for the crispiest beef texture.
Step 7
step7:Plate and Serve

Tips

1.For ultra-thin, even beef slices, pop the flank steak in the freezer for 15 minutes before slicing to firm it up. Always slice against the grain at a 45-degree angle: this cuts through the tough long muscle fibers, resulting in tender bites instead of stringy, chewy beef.
2.Never crowd the wok when searing beef: adding too many slices at once drops the oil temperature rapidly, causing the beef to steam instead of developing a light, crispy outer crust. Cook in two small batches, even if it adds an extra minute of cook time, for the best texture.
3.Watch the aromatics closely: garlic and ginger can burn in as little as 10 seconds over high heat, turning bitter and ruining the balanced sweet-savory flavor of the sauce. Add the sauce as soon as you smell their bright, warm, fragrant aroma, before any pieces start to turn dark brown.


✨ You May Also Like

Main Course
🍜 United Kingdom

A showstopping classic of tender seared beef, savory mushroom duxelles, and crisp prosciutto wrapped in flaky golden puff pastry, baked to juicy perfection.

⏱️ 2 hours 1Main Course ★ 4.7
Main Course
🍜 India

Tender charred marinated chicken simmered in a rich, spiced creamy tomato sauce, this iconic Anglo-Indian curry pairs perfectly with basmati rice or warm naan.

⏱️ 50 minuteMain Course ★ 4.6
Main Course
🍜 Thailand

Classic tangy, sweet, and savory Thai stir-fried rice noodles with shrimp, tofu, and crunchy garnishes, balancing all five core Thai flavor profiles.

⏱️ 30 minuteMain Course ★ 4.5
Main Course
🍜 United Kingdom

Crispy golden beer-battered cod and fluffy double-fried chips, served with tangy tartar sauce and malt vinegar: the timeless, beloved British pub comfort classic.

⏱️ 45 minuteMain Course ★ 4.7
Main Course
🍜 Mexico

Smoky, chile-marinated pork tacos with caramelized pineapple, fresh cilantro, and lime: a beloved classic Mexican street food perfect for casual summer gatherings.

⏱️ 1 hour 45Main Course ★ 4.8
Main Course
🍜 United States

Crunchy Fritos corn chips layered with savory beef chili and melted cheddar, topped with cool, zesty fixings for a beloved, cozy Tex-Mex comfort food.

⏱️ 35 minuteMain Course ★ 4.8

mongolian beef recipe easy:Frequently Asked Questions

1.What cut of beef works best for this recipe, and can I use a substitute if I don’t have flank steak? ▾
Flank steak is ideal here because its tight, lean grain slices ultra-thin easily, sears to a perfect crisp edge fast, and stays tender when cooked quickly over high heat. If you don’t have it, swap for skirt steak or hanger steak; skip tough, heavily marbled cuts like chuck that won’t crisp or tenderize well in the short cook time.
2.Do I really need to coat the beef in cornstarch before searing? ▾
Yes, that thin cornstarch coating is non-negotiable for that signature takeout texture! It creates a light, crisp barrier on the beef that locks in juiciness, prevents thin slices from overcooking, and helps the glossy soy-ginger sauce cling evenly to every piece instead of pooling at the bottom of the pan.
3.Why does the recipe call for canola oil instead of another cooking oil? ▾
Neutral canola oil is perfect here because it has a high smoke point (around 400°F) that lets you get a hard, fast sear on the beef without burning or developing off-flavors. Its mild taste won’t compete with bright ginger, garlic, and soy notes in the sauce, so all the classic takeout flavors shine through.
4.How do I make sure my beef turns out tender instead of tough and chewy? ▾
Two easy tricks guarantee tender beef every time: first, slice your flank steak against the grain into ¼-inch thick pieces, which cuts through tough muscle fibers so they don’t seize up when cooked. Second, don’t overcrowd the pan when searing—cook in small batches over high heat for 1-2 minutes per side to avoid steaming.
5.Can I use dried ginger or garlic instead of fresh for this recipe? ▾
Fresh ginger and garlic are key to that bright, authentic takeout flavor here—dried versions taste flat and muted in comparison. If you’re in a total pinch, use ¼ teaspoon garlic powder per fresh clove and ⅛ teaspoon ground ginger per tablespoon of fresh grated, but fresh will give you far better, restaurant-worthy results.
6.How long does this recipe actually take to make from start to finish? ▾
This easy version comes together in 25 minutes total, no fancy prep required. Plan 10 minutes to slice your beef and mix the quick sauce, 10 minutes to sear the beef in batches and sauté the ginger and garlic, and 5 minutes to toss everything together in the glossy sauce before serving.
7.Why is my sauce runny instead of thick and glossy like restaurant takeout? ▾
Runny sauce usually happens for one of two reasons: either you didn’t let the cornstarch coating on the beef meld into the sauce as it simmers, or you added too much extra liquid to the pan. Let the beef toss in the sauce over medium heat for 1-2 minutes, and residual cornstarch will thicken it to that perfect glossy coating consistency.
8.Do I need a wok to make this Mongolian beef, or will a regular skillet work? ▾
You don’t need a wok at all for great results! A large, heavy-bottomed stainless steel or cast iron skillet works perfectly, as long as it holds high heat well. Just make sure your pan is fully preheated before adding canola oil and beef, so you get that crisp sear instead of steaming the meat.
9.Can I prep components of this recipe ahead for fast weeknight meals? ▾
Absolutely! You can slice your flank steak against the grain, toss it in the cornstarch coating, and store it in an airtight container in the fridge for up to 24 hours ahead. You can also pre-mince ginger and garlic and mix sauce components, so all you have to do is sear and toss for a 10-minute finish.
10.Should I marinate the beef first to get more depth of flavor? ▾
You don’t need a long marinade for this quick recipe! The cornstarch coating locks in beefy flavor, and the fast-cooked soy-ginger sauce coats every piece deeply as you toss it together. A long marinade will actually make the cornstarch coating gummy and prevent that crisp edge, so skip the extra soak for best texture.
11.What are the best side dishes to serve with this easy Mongolian beef? ▾
This dish pairs perfectly with fluffy steamed white rice, which soaks up every bit of that glossy sweet-savory sauce, or quick stir-fried bok choy or broccoli for a veggie boost. For a lighter swap, serve it over cauliflower rice or alongside roasted broccoli to cut through the rich, savory flavor of the sauce.
12.Why is my beef sticking to the pan when I try to sear it? ▾
Sticking usually happens if your pan isn’t hot enough, or if you try to flip the beef too early. Let your canola oil shimmer (but not smoke) before adding the beef in a single layer, and let it cook undisturbed for 1 full minute before flipping—this lets the crisp cornstarch crust form, so slices release easily.
13.Can I add vegetables to this recipe to make it a more balanced one-pan meal? ▾
Definitely! Bell peppers, snap peas, broccoli florets, or sliced onion all work beautifully. Just sear your veggies first in a little canola oil until crisp-tender, set them aside, then cook the beef as directed. Toss veggies back in with the beef and sauce at the end so they stay crisp and don’t get mushy.
14.How should I store leftovers, and how long will they stay good? ▾
Store cooled leftover Mongolian beef in an airtight container in the fridge for up to 3 days. Reheat it in a skillet over medium heat with a tiny splash of water or soy sauce to loosen the sauce, rather than the microwave, which will make the beef tough and the cornstarch coating soggy.
15.Is this recipe spicy? I have young kids who don’t tolerate hot food well. ▾
The base version of this easy Mongolian beef is not spicy at all—it has that classic balanced sweet-savory flavor from soy, ginger, and garlic that most kids love. If you want a little heat for adult servings, toss in a pinch of red pepper flakes or a drizzle of chili oil at the end, leaving kid portions plain.

Comments (15)

2 hours ago

OMG this was SO good! I threw it together on a busy weeknight after soccer practice and my whole family devoured it. 15 minutes is no joke, I didn’t even have time to finish setting the table before it was done. Tastes exactly like the Mongolian beef we get at our local takeout spot, but way less greasy!

3 days ago

Game changer for my weekly meal prep! I made a big batch on Sunday, portioned it out with rice and steamed broccoli, and it held up perfectly all week for work lunches. The sauce is so flavorful, I didn’t even get bored eating it four days in a row. Will absolutely be making this on repeat.

1 week ago

My kids are so hard to please when it comes to dinner, and they both asked for SECONDS of this! I was shocked, usually they turn their noses up at anything with “sauce” but this sweet, savory flavor hit just right. I added a little extra broccoli to sneak in some veggies and they didn’t even complain. Total win.

just now

As someone who can barely boil pasta without messing it up, this recipe was foolproof! I had all the ingredients on hand (I subbed regular soy sauce for low-sodium because that’s what I had) and it turned out perfect first try. My roommates thought I ordered takeout, lmao. Only reason I’m not giving 5 stars is I wish the sauce was a little thicker, but that’s probably because I rushed the cornstarch step. Otherwise amazing!

5 days ago

Made this for our neighborhood potluck last weekend and people were begging me for the recipe! I doubled the batch because I know how folks eat at these things, and there was barely a scoop left by the end. I did toss in a pinch of red pepper flakes for a little kick, which went over really well.

4 days ago

So glad it was a potluck hit! The red pepper flakes add such a nice subtle heat – great call adding that in. Thanks for sharing!

30 minutes ago

I’m so excited to make this for date night tonight! Quick question: has anyone tried making this with flank steak vs. sirloin? I only have flank steak in the freezer right now and I’m wondering if it’ll work the same, or if I need to adjust the cook time at all? Don’t want to end up with tough beef ruining the night!

10 minutes ago

I used flank steak last week! Just slice it super thin against the grain and it comes out perfectly tender, no extra cook time needed. Date night will be a hit, promise!

yesterday

Quick question – is there an easy swap for the regular soy sauce to make this gluten free? I have celiac so I can’t do regular soy, but I’ve been craving Mongolian beef forever and this recipe looks too easy to pass up!

yesterday

Great question! You can swap regular soy sauce 1:1 for gluten-free tamari and it will taste exactly the same – no other adjustments needed. Hope you love it!

2 weeks ago

I was a little skeptical that a 15-minute recipe could actually taste good, but wow, this delivered. I didn’t have any fresh ginger on hand so I used a teaspoon of ground ginger from the spice cabinet and it still slapped. Served it over jasmine rice and my twins ate every bite on their plates, which is basically a miracle in our house.

1 week ago

Oh I’m so glad the ground ginger trick works! I never have fresh ginger on hand either, I was just about to ask if that swap would work. Saving this for next week’s dinner rotation!

1 week ago

This is now my go-to weeknight dinner when I don’t feel like putting in a ton of effort. My only tiny note is that the first time I made it, I cooked the sauce a little too long and it got way too thick, almost candy-like. Any tips for getting that perfect glossy, not-goopy consistency?

6 days ago

Thanks for the honest feedback! The trick is to let the sauce come to a gentle simmer for just 1-2 minutes after adding the cornstarch slurry, and stir constantly. If it starts getting too thick, you can stir in a tiny splash of water or chicken broth to thin it right out. Hope that helps for next time!

3 days ago

I brought this to my book club potluck earlier this week and everyone was raving! One girl said it was better than the Mongolian beef we get at the fancy Asian fusion place downtown. I added some bell peppers and snap peas to make it a little more substantial, and it paired so well with the sauce.

2 days ago

Wait I was at that book club!!! I was the one who asked for the recipe, I can’t believe I found it already. Making it for my husband tomorrow night, he’s gonna lose his mind lol

5 minutes ago

Help! I tried making this tonight and my beef came out super chewy, what did I do wrong? I followed the recipe exactly as written, but I think I maybe cooked the beef too long? I was so excited for this and it was a total flop for me, want to get it right next time.

2 minutes ago

I had that happen my first time too! I realized I cut my beef too thick. If you slice it really thin (like, pop it in the freezer for 15 minutes first to make it easier to slice super thin) it cooks super fast and stays tender.

1 minute ago

So sorry your first batch didn’t turn out! Mia is absolutely right – thin slices against the grain are key, and you only need to sear the beef for about 30 seconds per side since it’s cut so thin. Give it another try, we promise it’s worth it!

2 days ago

I’m not a huge red meat eater, so I swapped the beef for extra firm pressed tofu (cubed, pan fried until crispy first) and OMG it was insane. The sauce clung to the crispy tofu perfectly, even my meat-obsessed boyfriend said he preferred the tofu version. Has anyone tried this with chicken? Curious if that works too!

1 day ago

I made it with thinly sliced chicken breast last week! It was so good, I cooked the chicken the exact same way as the beef and it came out juicy and flavorful. My kid who hates beef even ate two servings.

18 hours ago

Wait the tofu swap is genius! I’ve been looking for more veggie-forward weeknight meals, I’m definitely trying that this weekend. Thanks for the idea!

1 week ago

This was super easy to make, but I found the sauce a little too sweet for my taste. I love savory, less sweet Asian-inspired dishes, is there a way to cut the sweetness without ruining the sauce balance? I’d love to make this again, just adjust it to my taste preferences!

5 days ago

I had the same thought last time I made it! I cut the brown sugar down by a tablespoon and added a tiny extra splash of soy sauce and a pinch of white pepper, it was perfect, not too sweet at all.

4 days ago

Great question! If you prefer less sweet sauce, you can reduce the brown sugar by 1-2 tablespoons and add an extra teaspoon of soy sauce to balance it out, just like Steve did. You can also add a tiny squeeze of fresh lime juice at the end to brighten it up and cut the sweetness even more!

yesterday

Y’all, I was halfway through making this when I realized I had no cornstarch. Panicked, used a little flour to thicken the sauce and it still turned out amazing? Total happy accident! My family had no idea I messed up, they thought it was takeout. 10/10 for being forgiving for chaotic weeknight cooks like me.

10 hours ago

Oh thank god I’m not the only one who forgets key ingredients mid-recipe! I did the exact same flour swap last month and thought I was a genius, glad it worked for you too. This recipe really is impossible to mess up.

2 hours ago

Wait flour works?? I always thought you needed cornstarch for Asian sauces, that’s a game changer. I never keep cornstarch in my pantry for some reason, so I’m excited to try this now!

2 weeks ago

I made this for our weekly Sunday family dinner a couple weeks back, and even my 82-year-old dad who complains about “new fangled recipes” went back for thirds. He said it tasted just like the Chinese food he used to get when he was a kid growing up in San Francisco. That’s the highest possible praise if you ask me! This is going in the permanent recipe box.

2 weeks ago

That makes our day to hear! Nothing beats a recipe that gets the whole family excited, especially across generations. Thanks so much for taking the time to leave such a sweet note!

1 week ago

Your dad’s taste is impeccable! I grew up in SF too, and I’ve been looking for a recipe that matches that old-school takeout flavor for years. Adding this to my meal plan for next week!



