
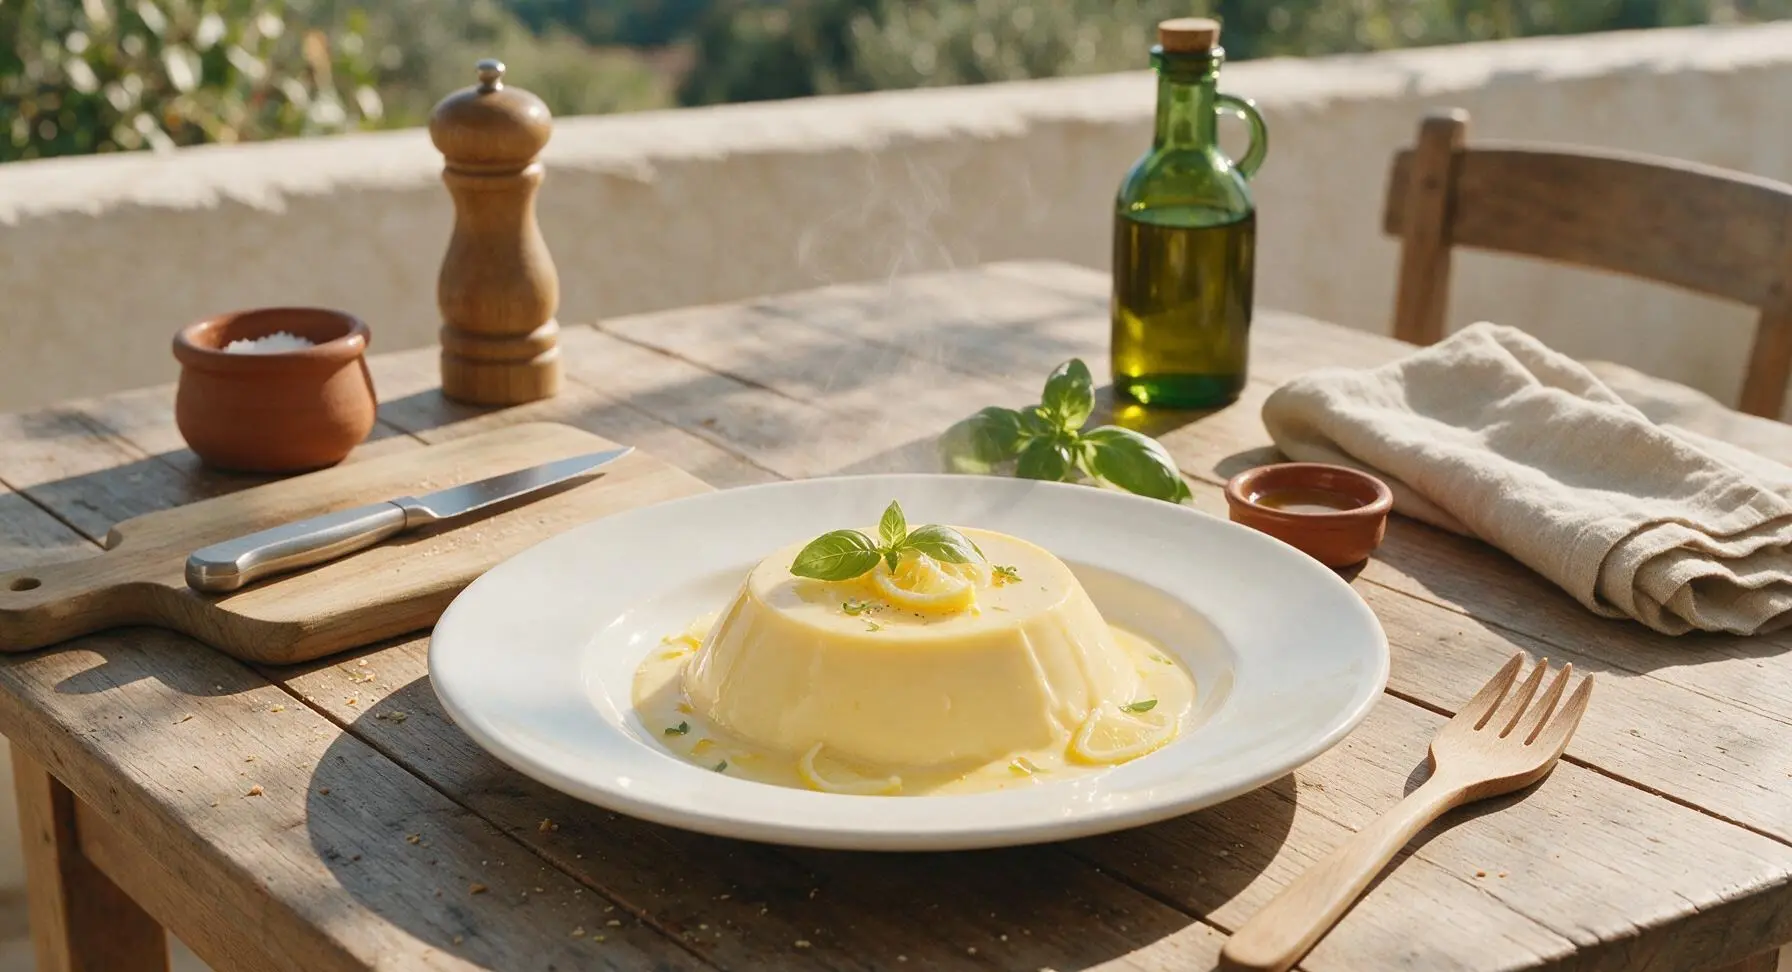
quick lemon pudding

title 1
quick lemon pudding
⏱️ cook time 10 minutes
🍽️ servings 4
⚡ Difficulty easy

intro

Silky, bright tangy-sweet stovetop lemon pudding ready in 15 minutes, no oven required. Luxuriously smooth with bold fresh lemon flavor, perfect for last-minute weeknight treats.

Ingredients
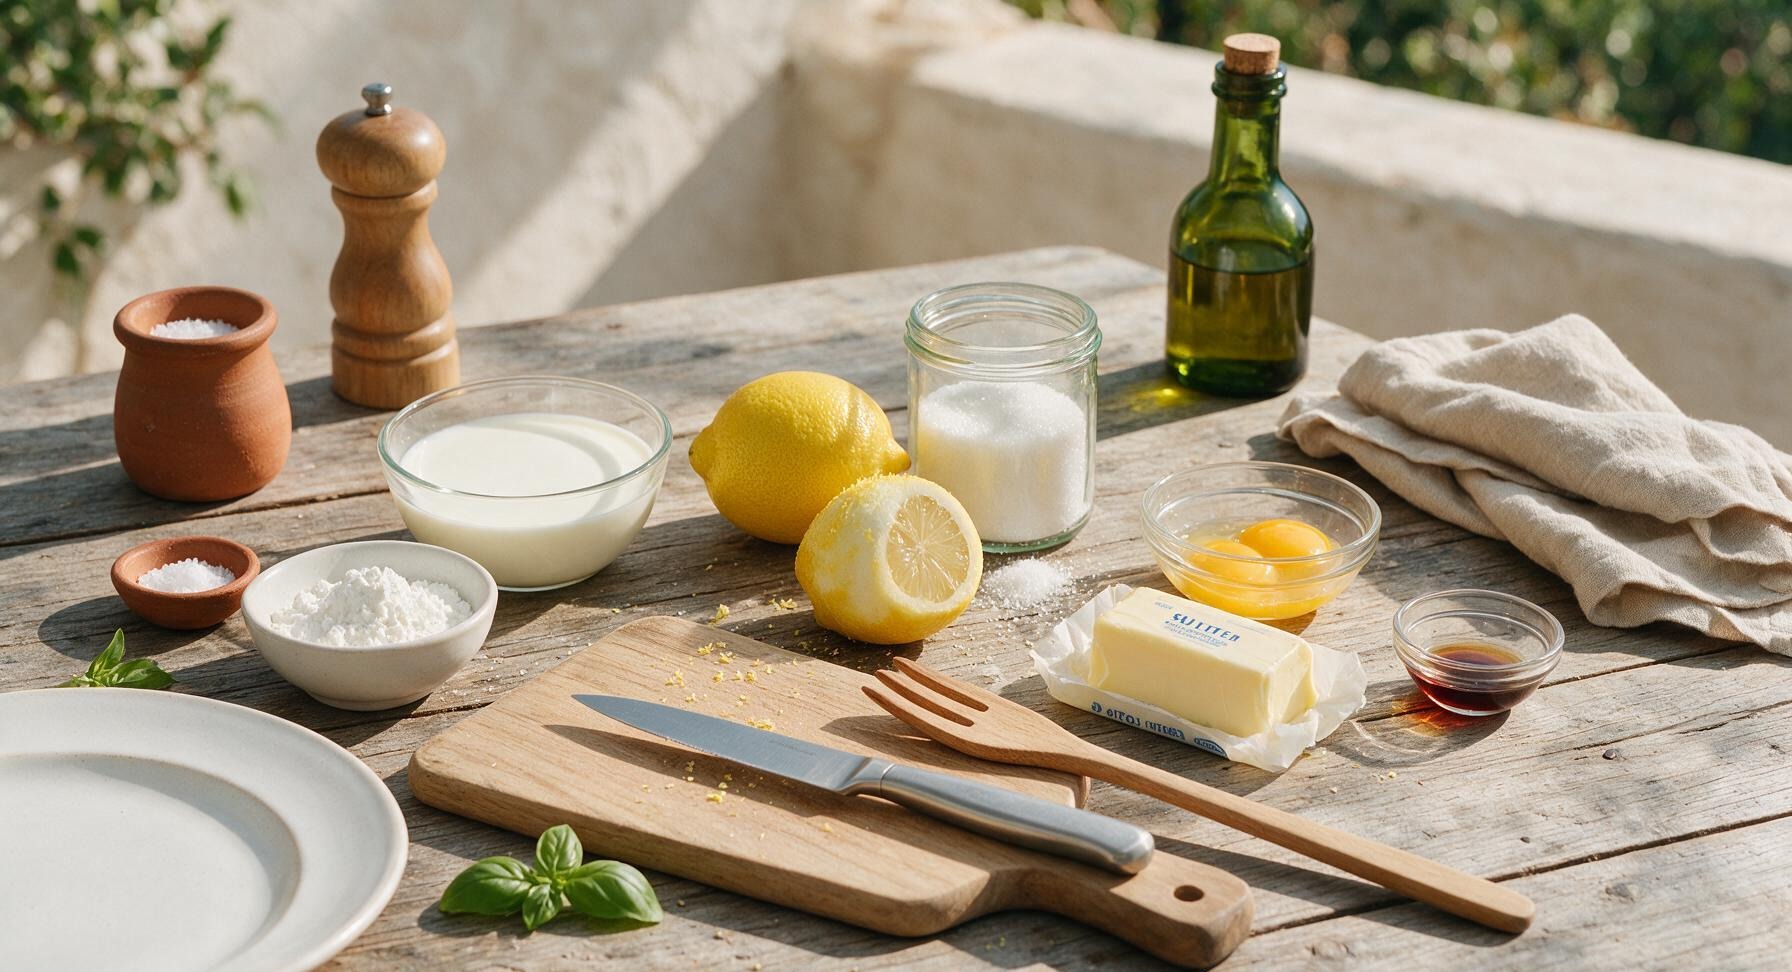
Whole milk 500ml (2 cups)
Fresh lemons 2 medium (yields 1 tbsp zest + 60ml/1/4 cup juice)
Granulated sugar 60g (1/3 cup)
Cornstarch 25g (3 tbsp)
Large egg yolks 2 pieces
Unsalted butter 28g (2 tbsp)
Pure vanilla extract 5ml (1 tsp)
Fine sea salt 1g (1/8 tsp)

Steps

1

Zest and juice lemons

Set the light bamboo cutting board in its fixed left-of-center position. Using the fine stainless steel zester, remove only the bright yellow outer zest from both lemons, applying light pressure to avoid scraping the bitter white pith underneath. Cut the zested lemons in half and squeeze to collect 60ml (1/4 cup) of fresh juice, picking out and discarding any seeds that fall into the juice. Set the collected zest and juice on the top right corner of the cutting board.


Step 1
step1:Zest and juice lemons
Step 1
step1:Zest and juice lemons
2

Whisk dry ingredients

Place the 2L stainless steel saucepan on the flush matte black induction cooktop in its fixed center-back position. Add the granulated sugar, cornstarch, and fine sea salt to the cold, dry saucepan. Use the pale yellow silicone whisk to stir the dry ingredients together for 30 seconds until fully combined, with no clumps of cornstarch stuck to the bottom or corners of the pan.
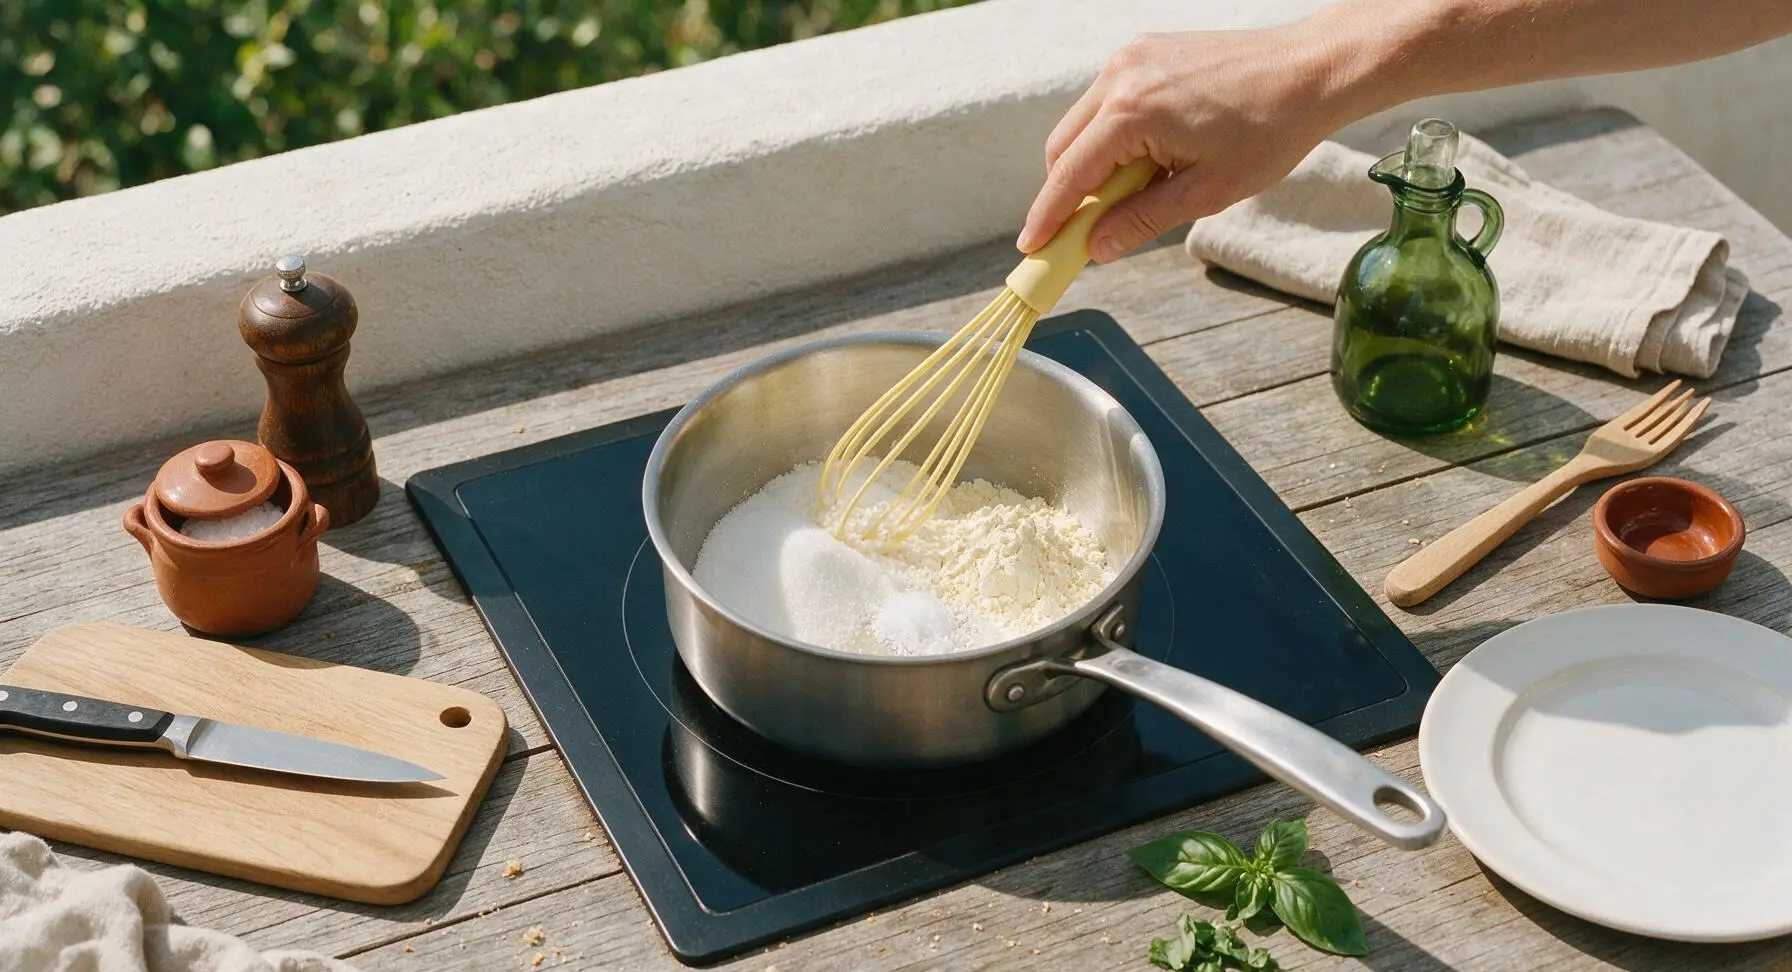
Step 2
step2:Whisk dry ingredients
3

Whisk milk and yolks

Slowly pour the cold whole milk into the saucepan with the dry ingredients, whisking constantly with the silicone whisk to prevent cornstarch clumps from forming. Once all the milk is incorporated and the mixture is completely smooth, add the two egg yolks and whisk vigorously for 20 seconds until the mixture is uniform, with no streaks of yellow yolk visible on the surface.

Step 3
step3:Whisk milk and yolks
4

Cook until thickened

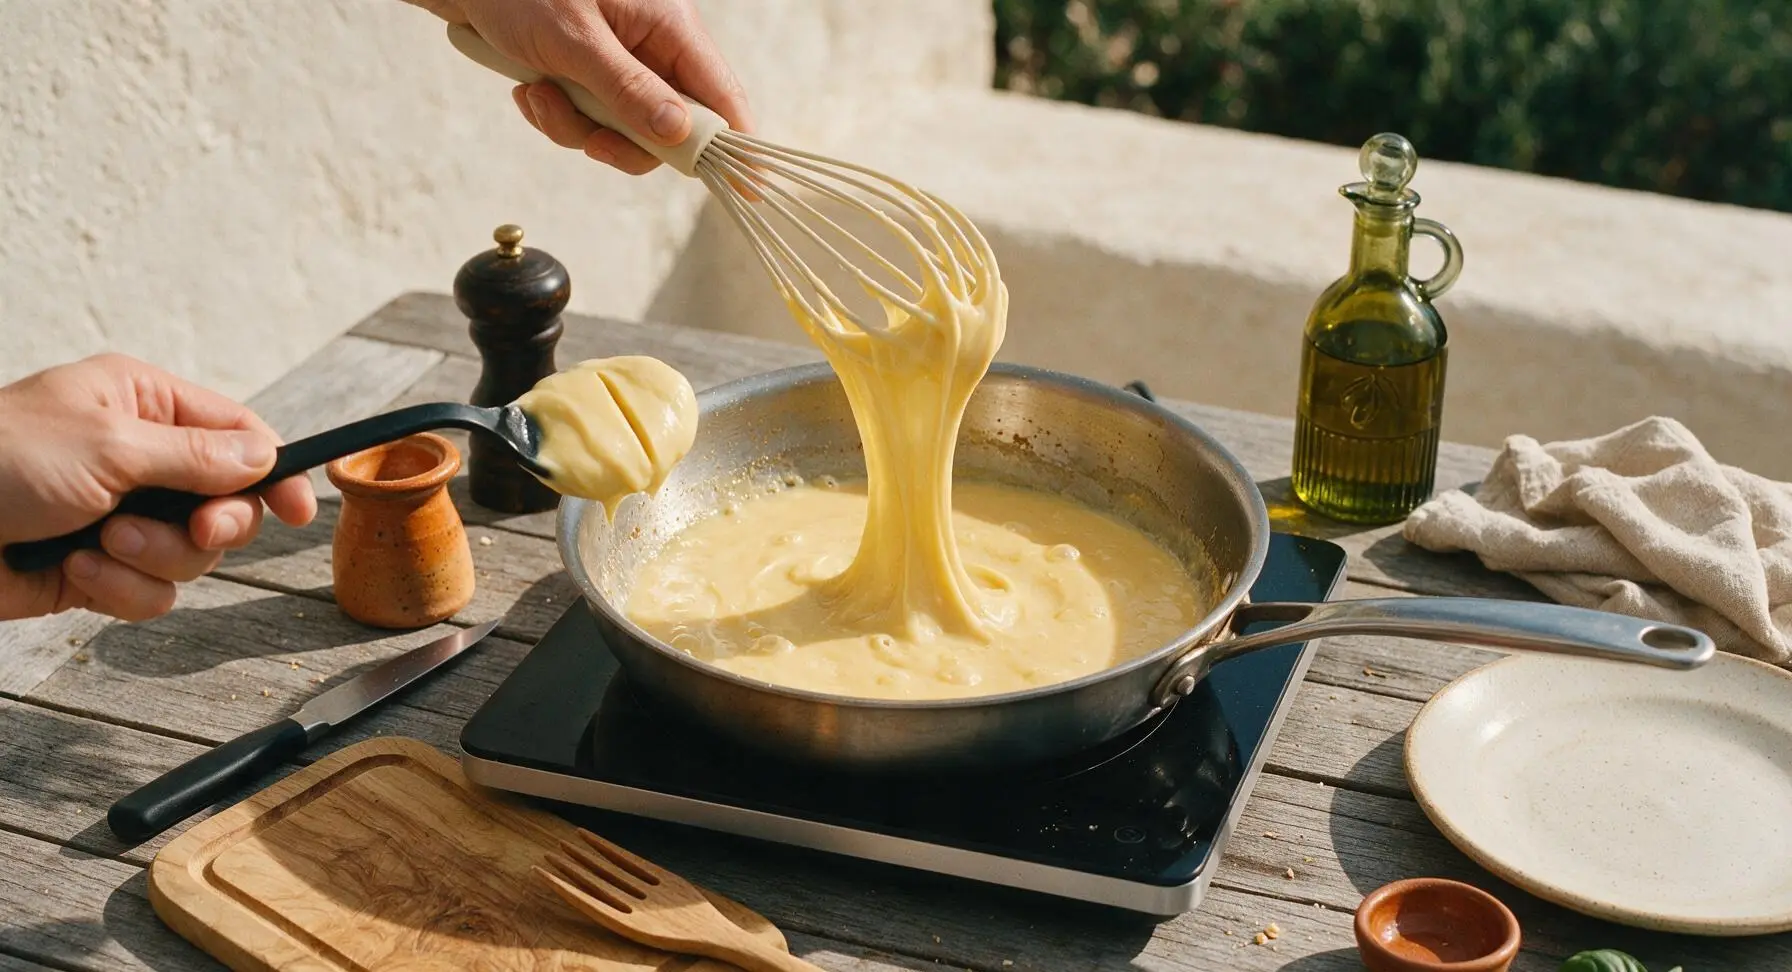
Turn the induction cooktop to medium heat (160C/320F). Cook the pudding mixture, whisking constantly in slow, steady circles that scrape the entire bottom of the pan, for 6-8 minutes. The pudding is fully cooked when it reaches a gentle, slow rolling bubble and coats the back of the silicone whisk thickly enough that a line drawn with a finger through the coating holds its sharp shape without running or dripping.
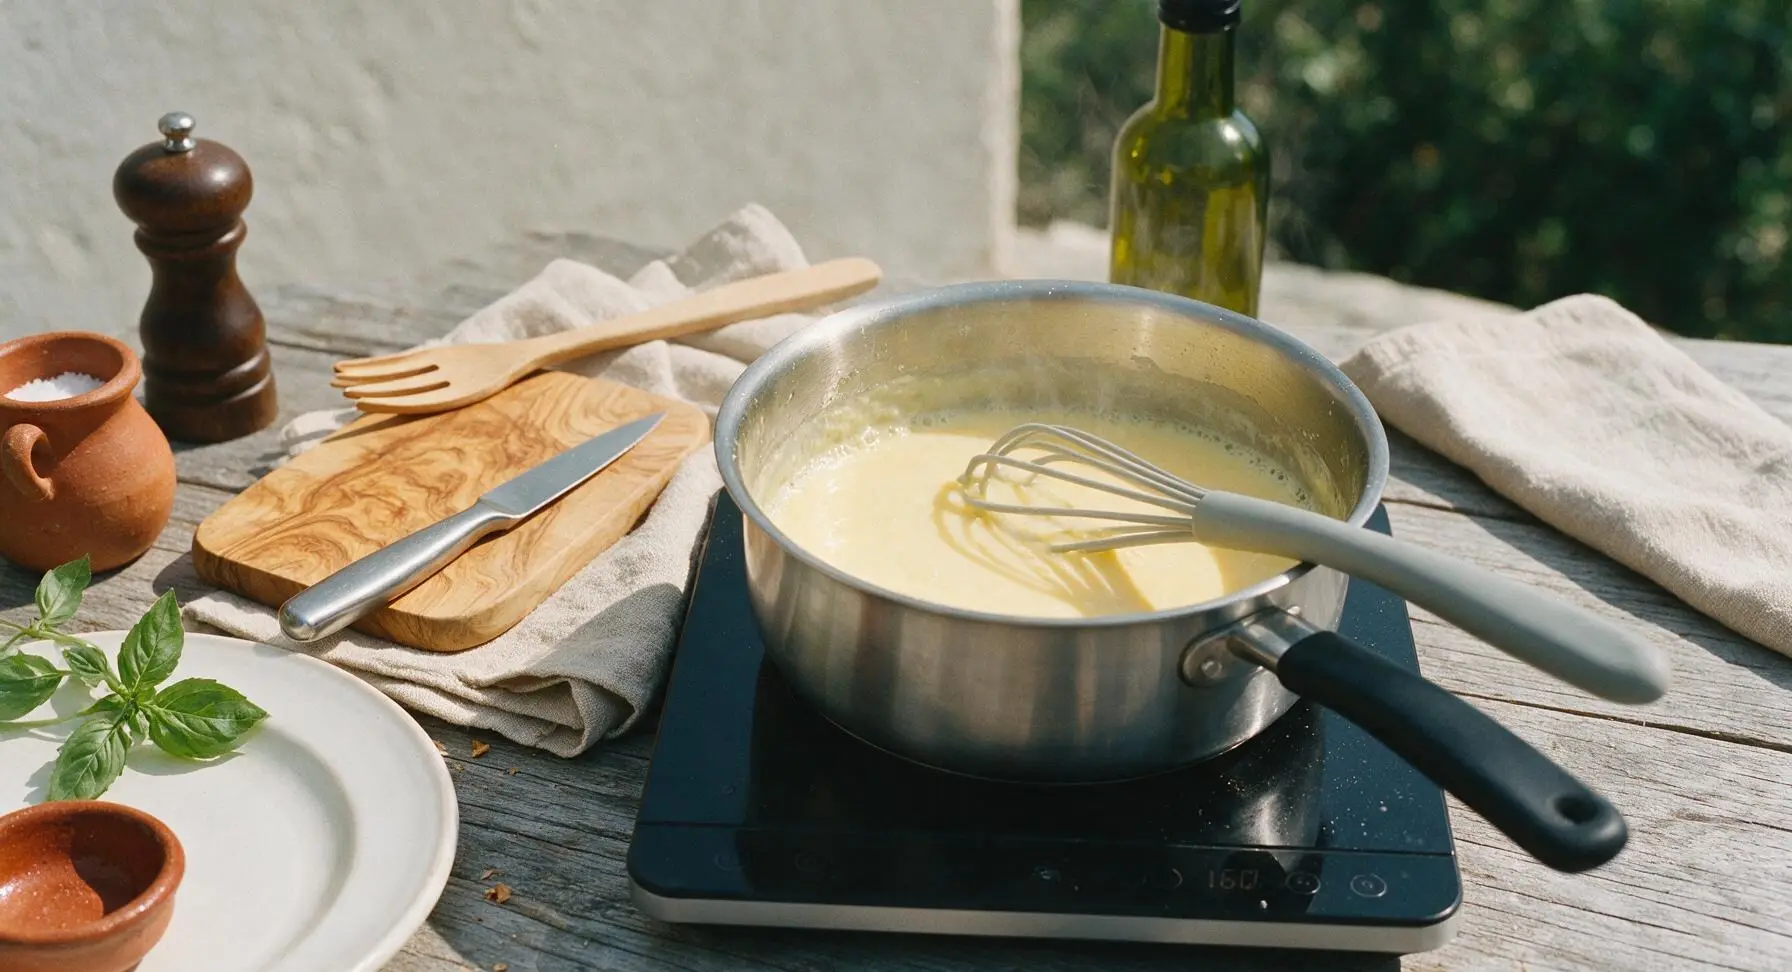
Step 4
step4:Cook until thickened
Step 4
step4:Cook until thickened
5

Add lemon and butter

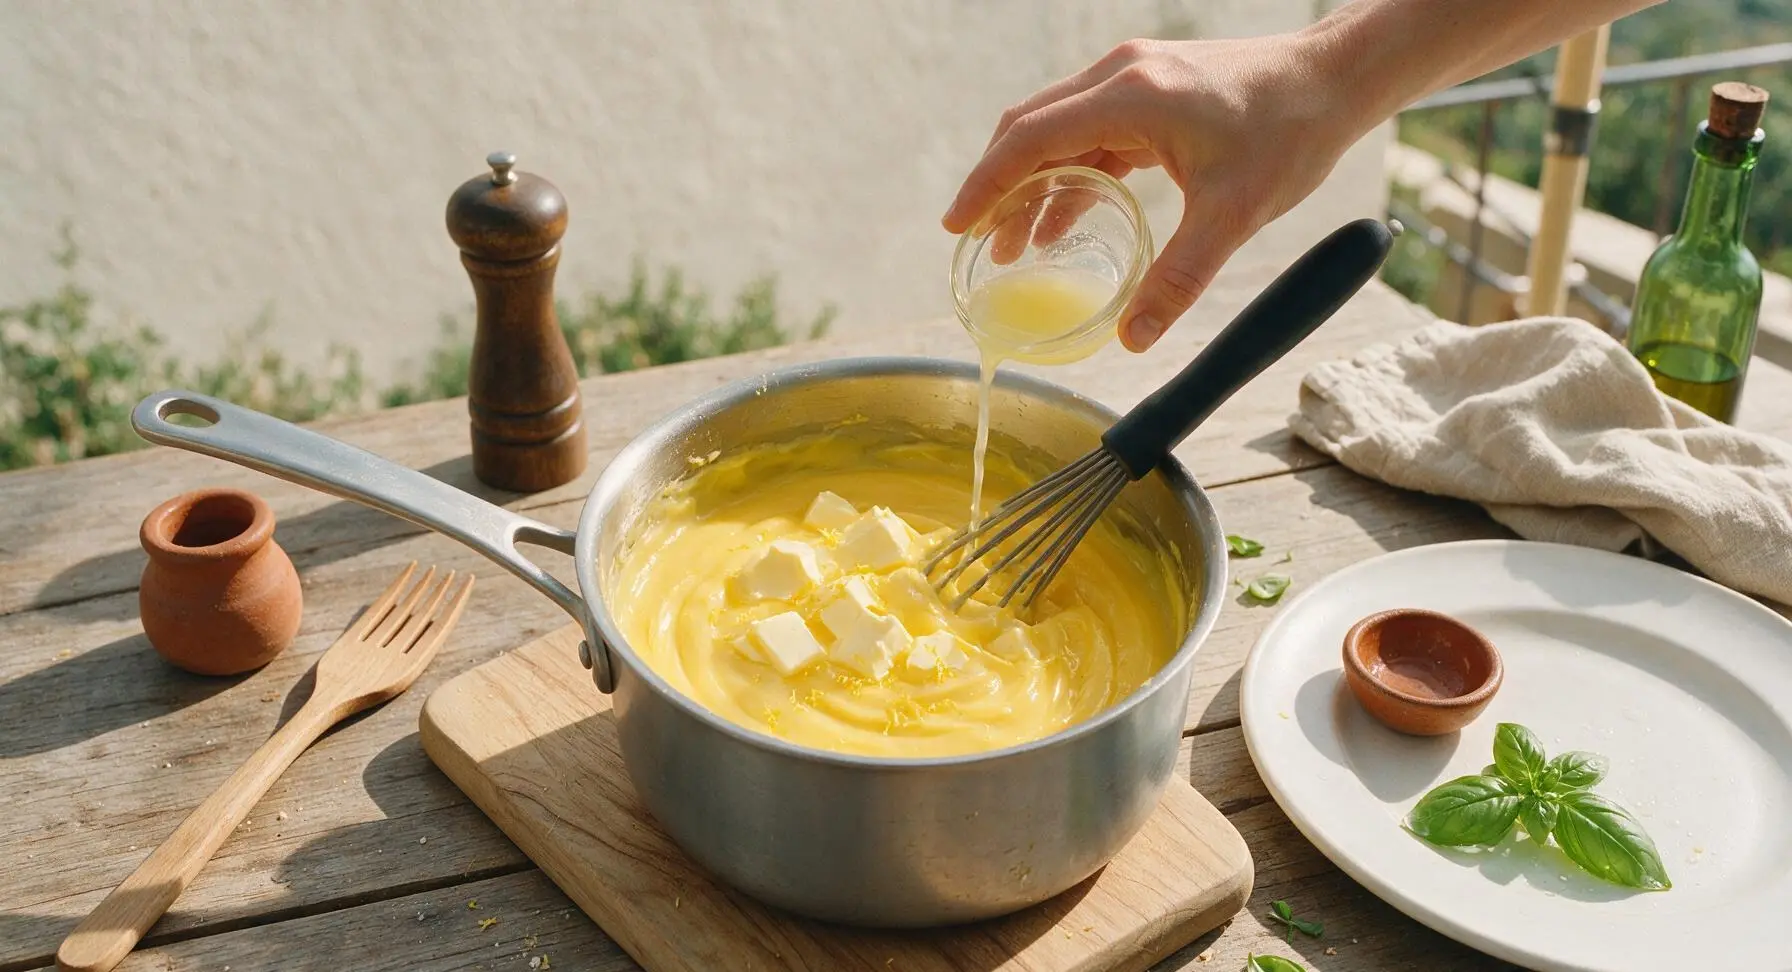
Turn off the induction cooktop heat immediately once the pudding thickens. Add the reserved lemon zest, fresh lemon juice, cubed unsalted butter, and vanilla extract to the hot pudding. Whisk steadily for 1 full minute until the butter is completely melted and all additions are fully incorporated, resulting in a smooth, glossy, bright pale yellow pudding.
Step 5
step5:Add lemon and butter
6

Strain for silkiness

Set the fine-mesh stainless steel sieve over the 1.5L clear glass heatproof mixing bowl (positioned temporarily in front of the cooktop for straining). Pour the hot pudding through the sieve, using the silicone whisk to gently press the pudding through the mesh, catching any tiny lumps of cooked egg or undissolved cornstarch in the sieve to ensure an ultra-silky final texture. Discard any soft lumps left in the sieve after straining.

Step 6
step6:Strain for silkiness
7

Portion into ramekins

Take one matte white ceramic ramekin from the stacked set at the far right front, followed by the remaining three, lining them up in a row in front of the mixing bowl. Carefully pour the strained warm pudding evenly between the four ramekins, filling each to 5mm below the rim. Tap each ramekin gently on the countertop once filled to pop any small air bubbles on the pudding surface.

Step 7
step7:Portion into ramekins
8

Garnish and serve

Top each warm pudding with a small twisted curl of fresh lemon zest for extra bright aroma. For a firmer set, chill the ramekins in the refrigerator for 10 minutes before serving; for instant enjoyment, serve immediately while warm. The pudding will keep, covered tightly with plastic wrap, in the refrigerator for up to 3 days.

Step 8
step8:Garnish and serve

Tips

1.Avoid scraping the white pith when zesting lemons: the spongy white pith directly under the yellow zest contains harsh bitter compounds that will make your pudding taste unpleasantly sharp instead of bright and citrusy. Use light, short strokes with the zester for the best flavor.
2.Whisk constantly while the pudding cooks: cornstarch thickens very quickly once it reaches boiling temperature, and can form gluey lumps or burn on the hot pan bottom if left unstirred for even 10 seconds. Slow, steady whisking across the entire pan bottom guarantees a perfectly smooth texture.
3.Don’t skip the straining step: even with perfect whisking, tiny flecks of cooked egg yolk or undissolved cornstarch can form in the hot pudding. Straining removes these small bits for a luxuriously silky, restaurant-quality texture with no gritty or lumpy bites.


✨ You May Also Like

Desserts & Baking
🍜 Italy

Creamy, coffee-kissed classic Northern Italian no-bake dessert, with layers of rum-spiked mascarpone cream, soft ladyfingers, and a rich cocoa dusting.

⏱️ 4 hours 3Desserts & Baking ★ 4.7
Desserts & Baking
🍜 France

Flaky, shatteringly crisp, buttery French croissants with golden exteriors and soft, airy layered interiors, perfect for pairing with coffee for a special morning treat.

⏱️ 12 hours Desserts & Baking ★ 4.5
Desserts & Baking
🍜 United States

Warm, spiced baked apples topped with a fluffy golden biscuit crust, this cozy dessert pairs perfectly with vanilla ice cream for cool-weather comfort.

⏱️ 55 minuteDesserts & Baking ★ 4.6
Desserts & Baking
🍜 United States

A star-spangled classic American blueberry pie with buttery flaky crust and bright sweet-tart filling, perfect for summer patriotic gatherings.

⏱️ 1 hour 25Desserts & Baking ★ 4.7
Desserts & Baking
🍜 United States

A beloved no-bake regional Maine candy with a chewy coconut-potato center coated in rich dark chocolate, a New England holiday staple since the 1870s.

⏱️ 2 hours 3Desserts & Baking ★ 4.8
Desserts & Baking
🍜 France

Luxuriously creamy, floral frozen custard made with aromatic Tahitian vanilla beans, boasting a smooth, rich texture that melts slowly on the tongue.

⏱️ 3 hours 3Desserts & Baking ★ 4.5

quick lemon pudding:Frequently Asked Questions

1.How long does this quick lemon pudding take to make from start to finish? ▾
This no-oven, stovetop pudding comes together in just 15 minutes total. You’ll spend roughly 5 minutes prepping ingredients—juicing lemons, measuring pantry staples, separating eggs—and 10 minutes cooking on the stovetop. It’s ideal for last-minute weeknight treats, and you can serve it warm right away or chill it if you prefer a colder treat.
2.Can I use bottled lemon juice instead of fresh lemons? ▾
Fresh lemon juice is strongly recommended to get that bright, bold, zesty flavor that makes this pudding stand out. Bottled lemon juice often has a flat, slightly metallic aftertaste from added preservatives. If you’re in a total pinch, use 100% unsweetened bottled lemon juice, but fresh will always give you far better, brighter results.
3.Why does this recipe use egg yolks instead of whole eggs? ▾
Egg yolks are what give this pudding its luxuriously silky, rich, smooth texture without any rubbery or overly eggy off-notes. Whole eggs include whites that can set too firmly or create a curdled texture if overheated, so sticking to just large yolks keeps the texture soft, creamy, and perfectly indulgent.
4.Can I use plant-based milk instead of whole milk? ▾
Whole milk creates the richest, creamiest base for this pudding, but you can swap in unsweetened barista-blend oat milk for a dairy-free version. Skip thin, watery options like plain almond milk or skim milk, as they will create a runny, thin pudding that won’t set properly with the cornstarch thickener.
5.How do I keep the egg yolks from curdling while cooking? ▾
To prevent curdling, always temper your egg yolks first: slowly whisk a small splash of the hot milk-sugar mixture into the beaten yolks to raise their temperature gradually before adding them back to the pot. Cook over medium-low heat, whisking constantly, and never let the pudding come to a rolling boil.
6.My pudding turned out lumpy—what did I do wrong, and can I fix it? ▾
Lumps usually come from adding cornstarch directly to hot liquid without mixing it first, or not whisking consistently as it thickens. You can fix lumpy pudding easily by pouring it through a fine-mesh sieve before serving to catch any clumps. Next time, whisk cornstarch with cold milk first to make a smooth slurry before heating.
7.How do I know when the pudding is done cooking on the stovetop? ▾
The pudding is done when it coats the back of a spoon thickly enough that you can draw a clean line through the coating with your finger, and it holds that shape without running. It will thicken a little more as it cools, so don’t overcook it or it will turn stiff and gelatinous instead of silky.
8.Can I make this lemon pudding ahead of time? ▾
Absolutely! You can make this lemon pudding up to 3 days ahead of serving. Store it in an airtight container in the fridge, and press a piece of plastic wrap directly onto the surface of the pudding to prevent a thick skin from forming as it chills. Give it a quick stir before serving to loosen it up if needed.
9.Do I have to chill the pudding before serving? ▾
No, you don’t! Unlike baked lemon puddings or custards that require chilling to set, this stovetop version is perfectly delicious served warm right off the stove if you want an immediate treat. If you prefer a firmer, colder pudding, chill it for at least 1 hour in the fridge before topping and serving.
10.Can I reduce the amount of granulated sugar in the recipe? ▾
You can cut the granulated sugar by up to 2 tablespoons without ruining the texture, but keep in mind the sugar balances the sharp tang of the fresh lemon juice. Cutting too much sugar will make the pudding overly sour and can also prevent it from setting to that perfect silky, smooth consistency you want.
11.What role does cornstarch play in this recipe? ▾
Cornstarch is the key thickener that lets this pudding come together so quickly without baking. It creates that stable, silky, smooth set without the long cooking time required for flour-thickened custards. Measure it accurately—too little makes runny pudding, too much creates a gummy, stiff texture.
12.Can I add lemon zest for extra lemon flavor? ▾
Definitely! Adding 1 to 2 teaspoons of finely grated fresh lemon zest (only the bright yellow outer layer, no bitter white pith) when you take the pudding off the heat will amp up that bright, fresh citrus flavor even more. It adds a lovely aromatic note without making the pudding taste bitter.
13.Why did a thick skin form on top of my pudding as it cooled? ▾
A skin forms when the surface of the pudding is exposed to air as it cools, causing the top layer to dry out and thicken faster than the rest. The easy fix is to press a sheet of plastic wrap directly onto the entire surface of the pudding right after pouring it into dishes, with no air gaps allowed.
14.Can I freeze leftover lemon pudding for later? ▾
Freezing isn’t recommended for this cornstarch-thickened pudding, as the texture will break down when it thaws, turning watery and grainy instead of silky smooth. This recipe is so quick to whip up that it’s easier to make a fresh batch when you’re craving it, rather than trying to store leftovers long-term in the freezer.
15.What are good toppings to serve with this lemon pudding? ▾
Classic, delicious toppings include a dollop of freshly whipped cream, a sprinkle of extra lemon zest, a few fresh berries, shortbread cookie crumbles, or a light dusting of powdered sugar. For a fun, complementary twist, top it with a spoonful of raspberry compote, which pairs perfectly with bright lemon tang.
16.My pudding is too runny even after cooking—can I fix it? ▾
If your pudding is runny, it usually means you didn’t cook it long enough to activate the cornstarch, or you used too much milk or lemon juice. Put it back on medium-low heat, whisking constantly, for 2 to 3 more minutes until it thickens. If it still won’t set, stir in a tiny extra teaspoon of cornstarch mixed with cold milk.
17.Is this quick lemon pudding naturally gluten-free? ▾
Yes! This quick lemon pudding is naturally gluten-free as written, as long as you use pure cornstarch. Double-check the cornstarch package for cross-contamination warnings if you have severe gluten allergies or celiac disease, since some brands process cornstarch on shared equipment with wheat products.
18.Can I use this pudding as a filling for cakes or tarts? ▾
Absolutely! This silky lemon pudding works beautifully as a filling for no-bake tarts, layer cakes, or cream puffs. If you’re using it as a filling, cook it for 1 extra minute to make it slightly thicker, then let it chill completely before assembling to prevent it from making crusts or cake layers soggy.
19.Can I make this pudding without egg yolks for an egg-free version? ▾
You can make an egg-free version by swapping the large egg yolks for an extra 2 tablespoons of cornstarch and 2 tablespoons of melted unsalted butter to add richness. Keep in mind the texture will be a little less luxuriously creamy than the original, but it will still have that bright, tangy lemon flavor and smooth set.

Comments (7)

2 days ago

OMG this quick lemon pudding is a total game changer! I threw it together last night for our impromptu family dinner after soccer practice and it was done before the kids even finished setting the table. That bright, tangy lemon flavor is SO good, not too cloyingly sweet like the store-bought pudding cups. 10 minute cook time is no joke, I will absolutely be adding this to my weekly meal prep rotation!

yesterday

Wait did you bring this to the neighborhood potluck last month? I swear I had a lemon pudding that tasted exactly like this and I’ve been chasing the recipe ever since! So excited to try it this weekend for my book club.

2 hours ago

So glad this was a hit with your family! That 10 minute cook time makes it perfect for busy weeknights when you don’t have hours to spend on dessert. Pro tip: top with a handful of fresh berries for an extra pop of color and flavor if you have them on hand!

yesterday

Made this for my kids’ after school snack yesterday and my kids loved it! They begged for seconds before they even finished their first bowl. I love that it doesn’t require any fancy ingredients I don’t already keep in my pantry, that’s a huge win for busy school nights. The tangy lemon cuts through the richness so nicely, I might even make a bigger batch for our church potluck next Sunday.

30 minutes ago

We’re so happy your kids loved it! It scales up really easily for potlucks, just double or triple the recipe and keep it chilled until serving – it holds up perfectly for a couple hours at room temperature too.

1 week ago

SO good! I packed individual servings of this for our day hike in the Rockies last weekend and it was the perfect light, refreshing pick-me-up at the summit. I topped mine with a little granola for crunch and it was chef’s kiss. The 10 minute cook time meant I didn’t have to wake up extra early to prep it before we hit the trail, total win. Only reason it’s not 5 stars is I wish it was a little thicker, but that’s just my personal preference!

5 days ago

Quick question for folks who’ve made this – has anyone tried using bottled lemon juice instead of fresh? I ran out of fresh lemons mid-prep today and almost panicked, used bottled and it still turned out pretty tasty but I’m curious if fresh makes a huge difference? Either way it was super quick and easy, my partner ate half the pan before it even finished cooling.

3 days ago

I’ve done both! Fresh is definitely brighter and more zingy, but bottled works totally fine for a quick weeknight dessert when you don’t have time to run to the grocery store. I add a tiny extra splash of vanilla when I use bottled to make it taste a little richer, total game changer.

2 weeks ago

Game changer alert! I’ve been looking for a quick, no-fuss dessert to add to my Sunday meal prep lineup and this is it. I tested it, and it stays good in the fridge for 4 whole days without getting watery or weirdly separated like some other pudding recipes I’ve tried. My whole office was raving about it when I brought extra in for my team on Monday.

1 week ago

Wait it stays good for 4 days? That’s way longer than I expected! I’ve been making it the night before I need it because I was worried it would separate, that’s such good info for my next meal prep week.

5 days ago

Thrilled to hear this is working so well for your meal prep! The adjusted cornstarch ratio in this recipe is what keeps it from separating or getting watery in the fridge, so you can absolutely make it a few days ahead without any issues. So glad your team enjoyed it!

3 days ago

So happy I stumbled on this recipe! I swapped the regular all-purpose flour for a 1:1 gluten free flour blend and it turned out absolutely perfect, no weird gritty texture at all. My gluten free kiddo was so excited to have a homemade pudding that didn’t come from a pre-made cup, he said it tasted just like the lemon pie his grandma used to make. 10/10, will be making this on repeat.

2 days ago

Thanks so much for sharing that gluten free swap! We love hearing about modifications that work for different dietary needs, that’s such a helpful tip for other readers who eat gluten free. So glad your kiddo enjoyed it!

just now

Made this for my weekend brunch last Sunday instead of my usual lemon bars and it was such a hit! I served it in little mason jars with a dollop of whipped cream and a thin lemon slice on top, it looked so fancy and literally took 10 minutes to make. Everyone was asking for the recipe before they left, can’t beat that.



