
sauce for shrimp over rice

title 1
sauce for shrimp over rice
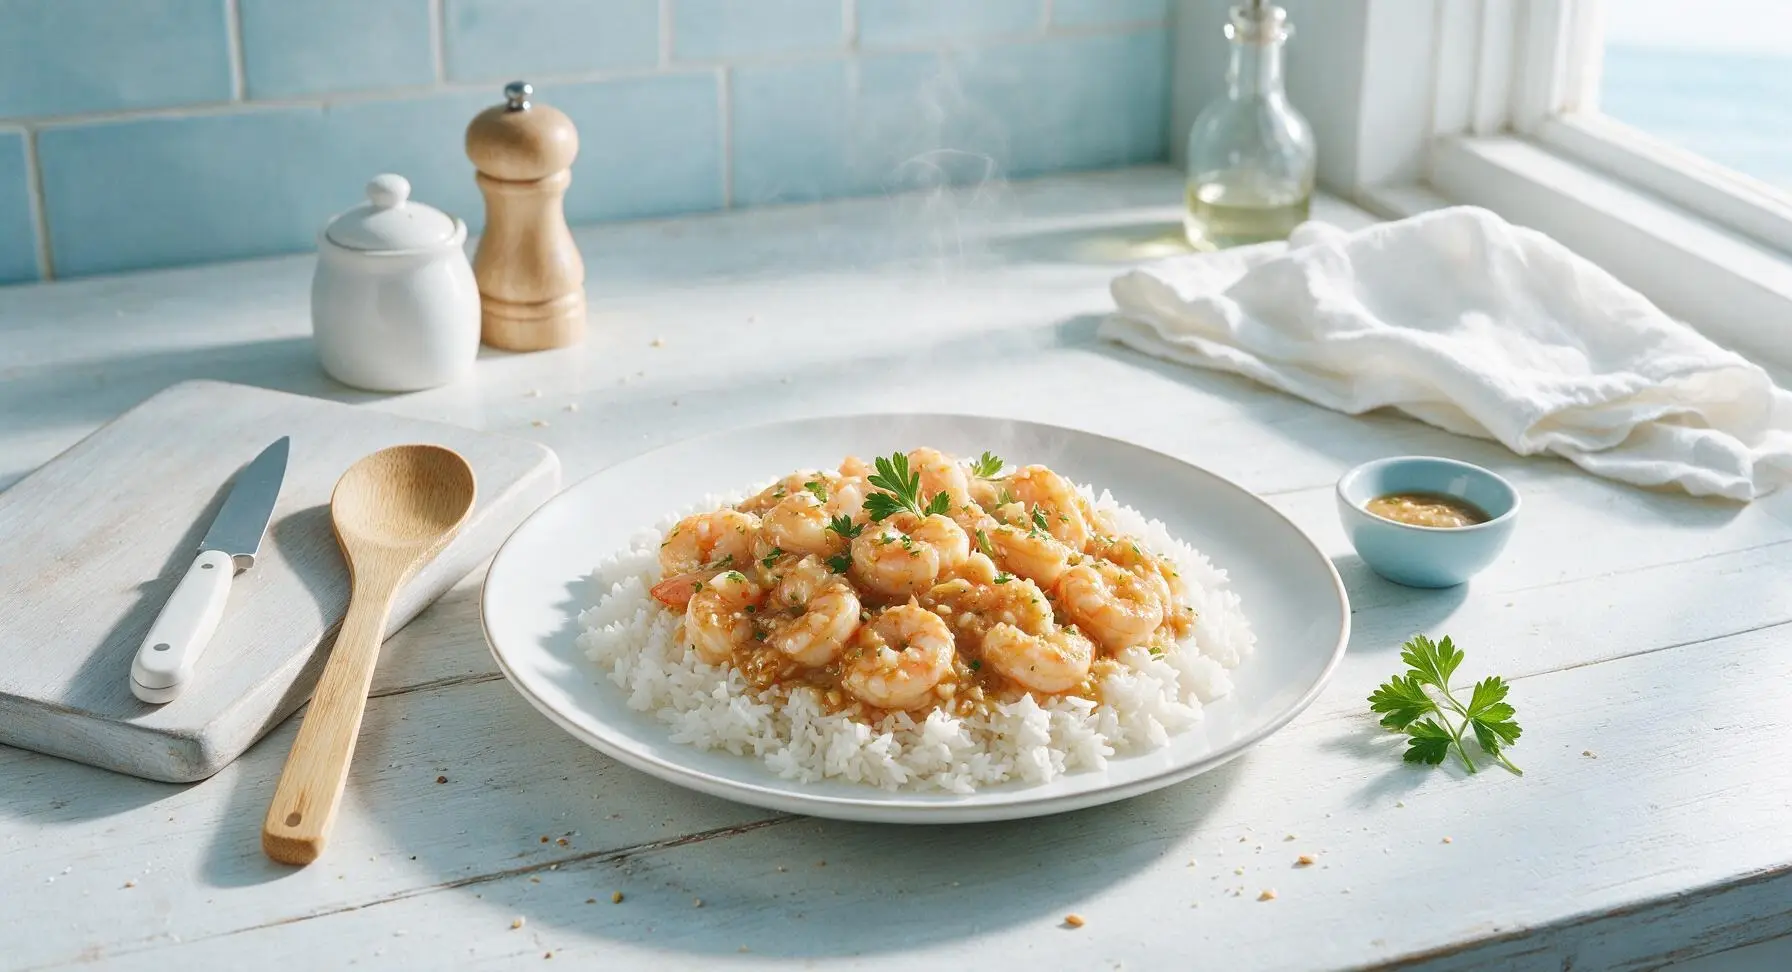
⏱️ cook time 10 minutes
🍽️ servings 4
⚡ Difficulty easy

intro

Silky, umami-packed garlic shrimp sauce coating plump tender shrimp, served over fluffy steamed rice—fast, comforting, and bright for easy weeknight meals.

Ingredients
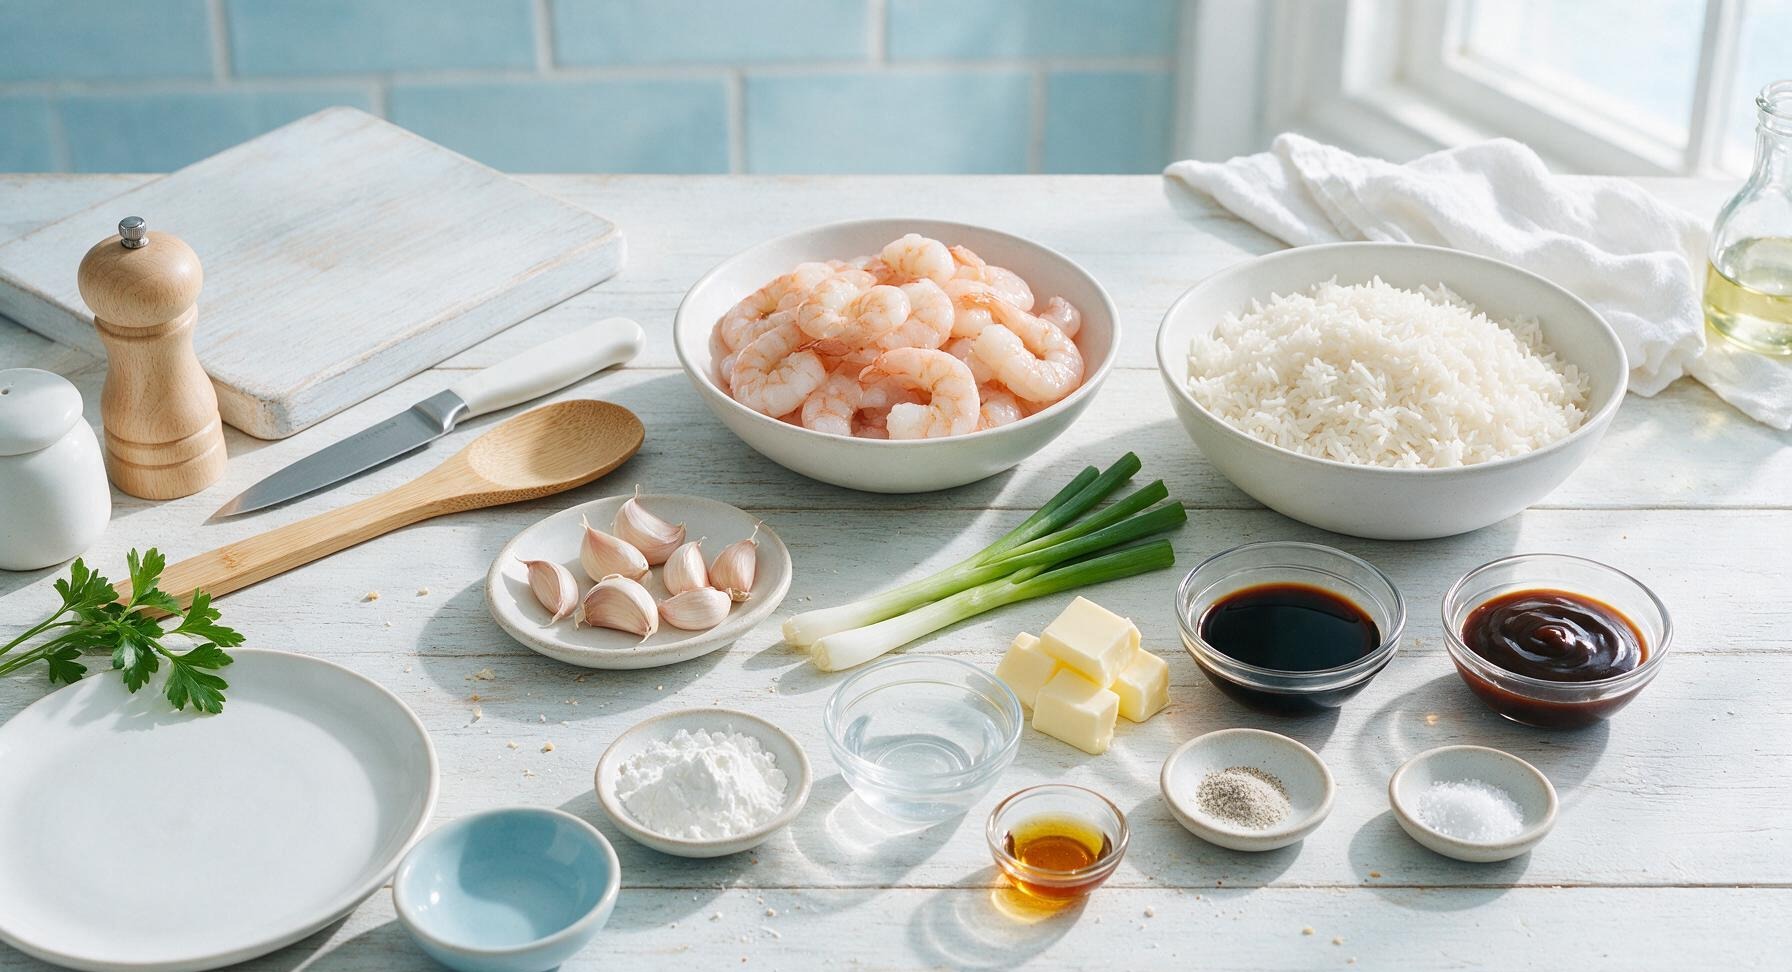
Large raw shrimp (peeled, deveined, tail-off) 450g (1lb)
Cooked long-grain white rice 3 cups (540g)
Garlic cloves 8 (25g)
Fresh scallions 3 stalks (30g)
Unsalted butter 2 tablespoons (28g)
Low-sodium soy sauce 2 tablespoons (30ml)
Oyster sauce 1 tablespoon (15ml)
Cornstarch 1 tablespoon (8g)
Cold water ¼ cup (60ml)
Toasted sesame oil 1 teaspoon (5ml)
Ground white pepper ¼ teaspoon
Kosher salt ¼ teaspoon

Steps

1

Prep shrimp and aromatics

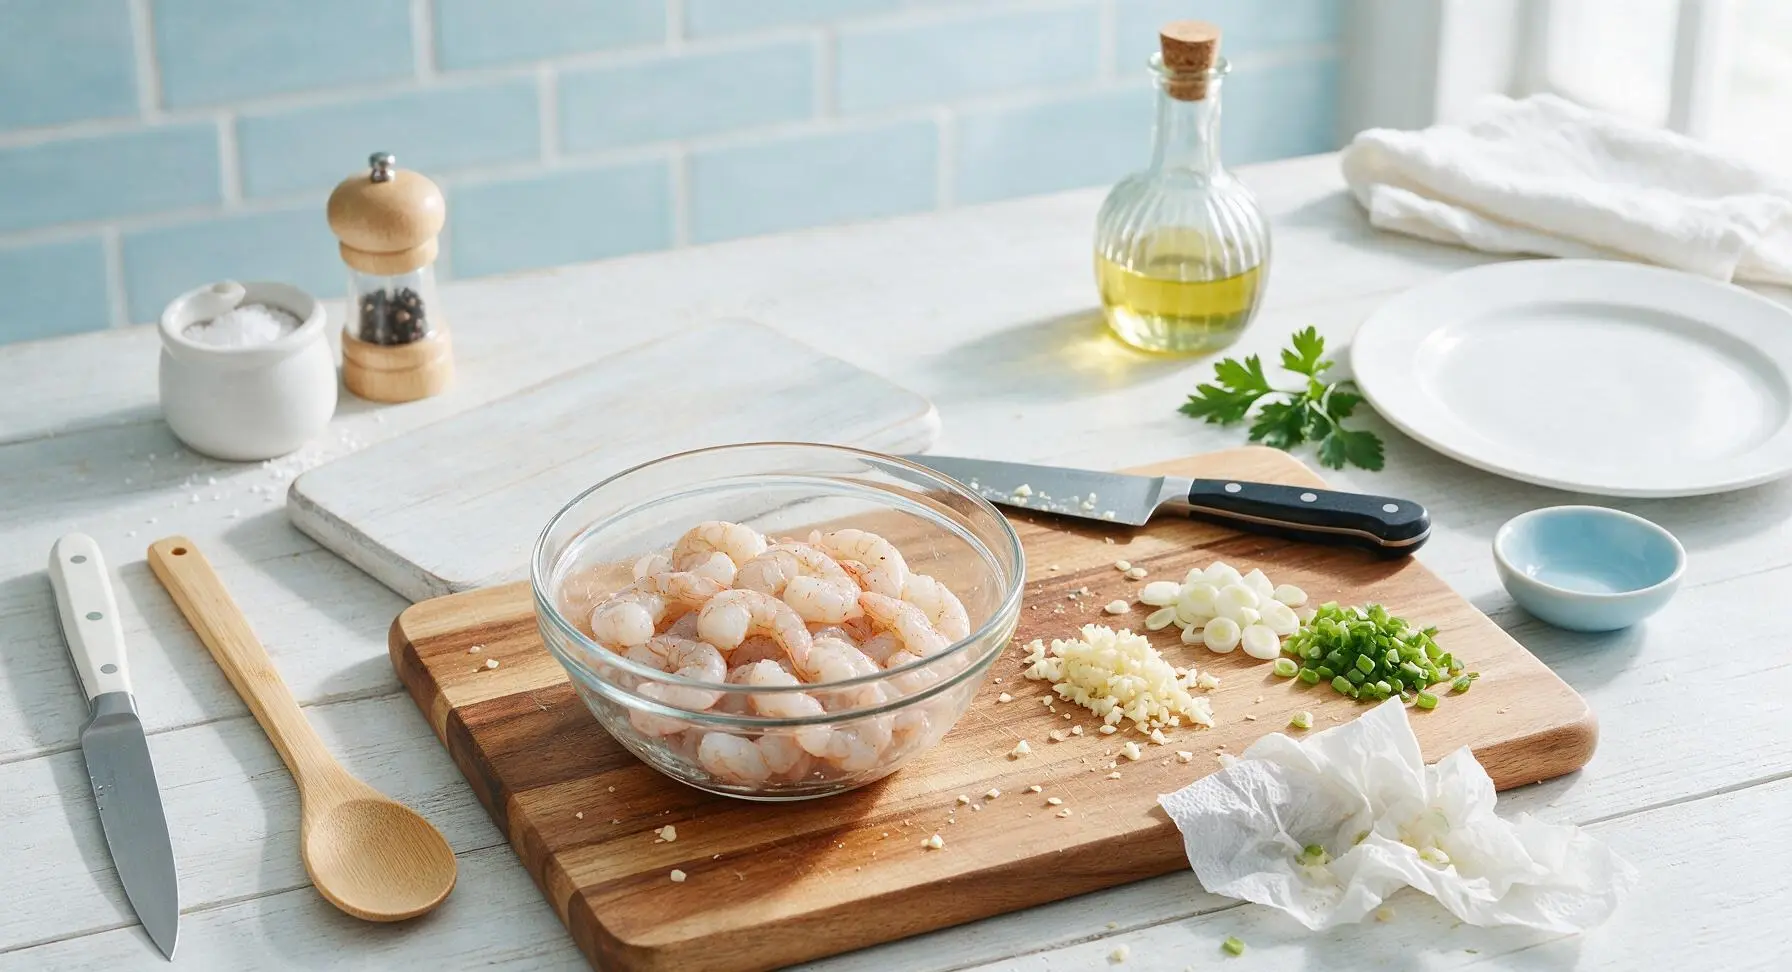
Pat 450g peeled, deveined tail-off large shrimp completely dry with paper towels, season with ¼ teaspoon kosher salt and ⅛ teaspoon ground white pepper, set aside. On the acacia wood cutting board, use the 6-inch chef’s knife to mince 8 garlic cloves finely, separate the white and green portions of 3 scallion stalks, slice the white parts thinly, and chop the green parts finely to reserve for garnish.
Step 1
step1:Prep shrimp and aromatics
2

Mix sauce slurry

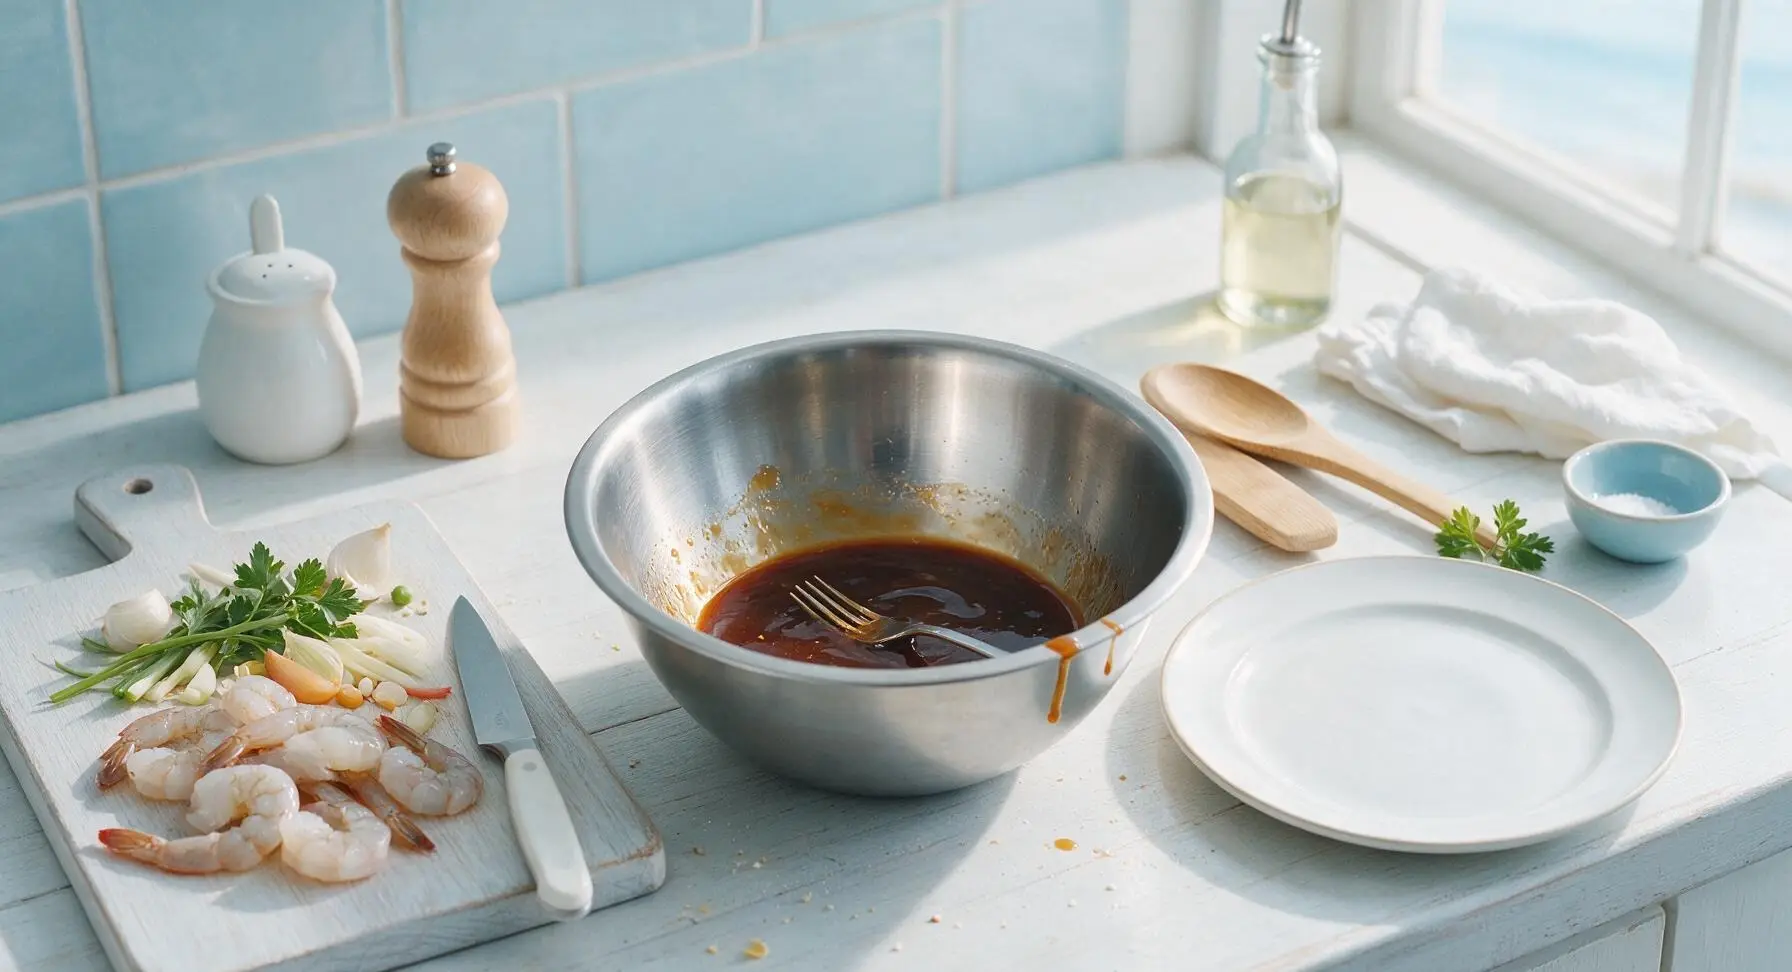
In the small brushed stainless steel mixing bowl, combine 2 tablespoons low-sodium soy sauce, 1 tablespoon oyster sauce, 1 tablespoon cornstarch, ¼ cup cold water, remaining ⅛ teaspoon ground white pepper, and 1 teaspoon toasted sesame oil. Stir with a small fork until cornstarch is fully dissolved, with no dry lumps remaining at the bottom of the bowl.
Step 2
step2:Mix sauce slurry
3

Sear seasoned shrimp

Heat the 10-inch stainless steel skillet over medium-high heat until a drop of water dances across the surface and evaporates in 2 seconds, then add 1 tablespoon unsalted butter. Once butter is fully melted and foaming subsides, add seasoned shrimp in a single even layer (do not crowd the pan) and cook for 1.5 minutes on the first side, until edges turn bright opaque pink.
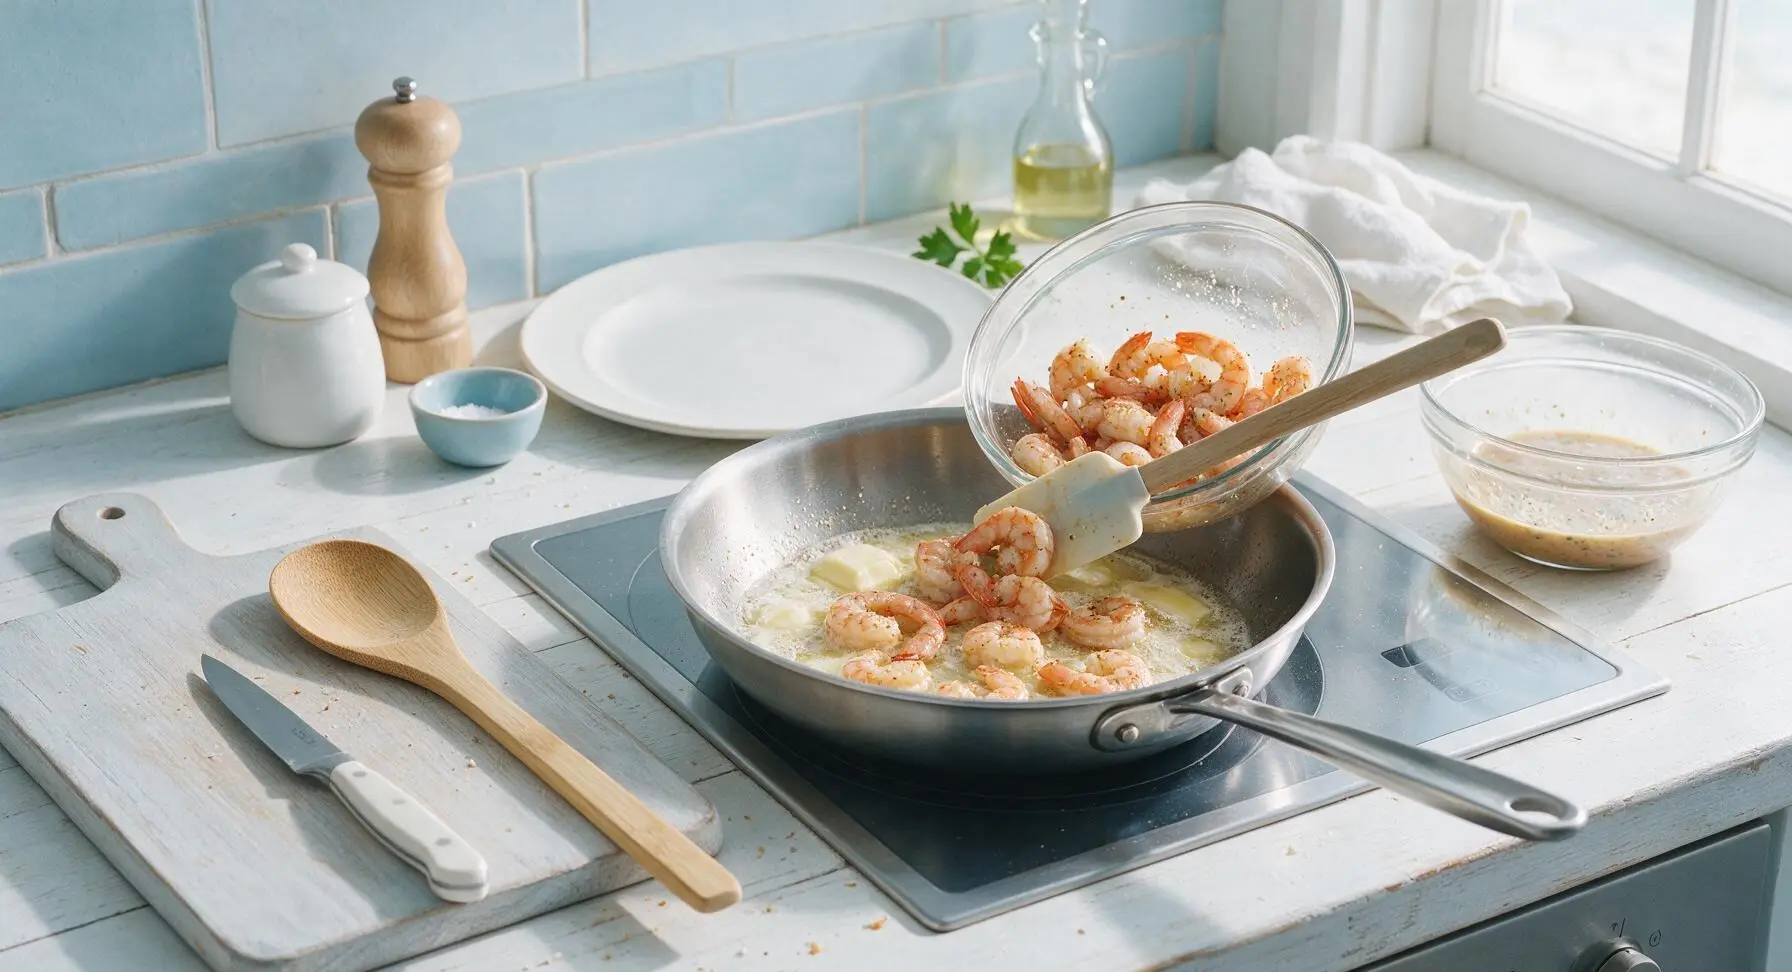
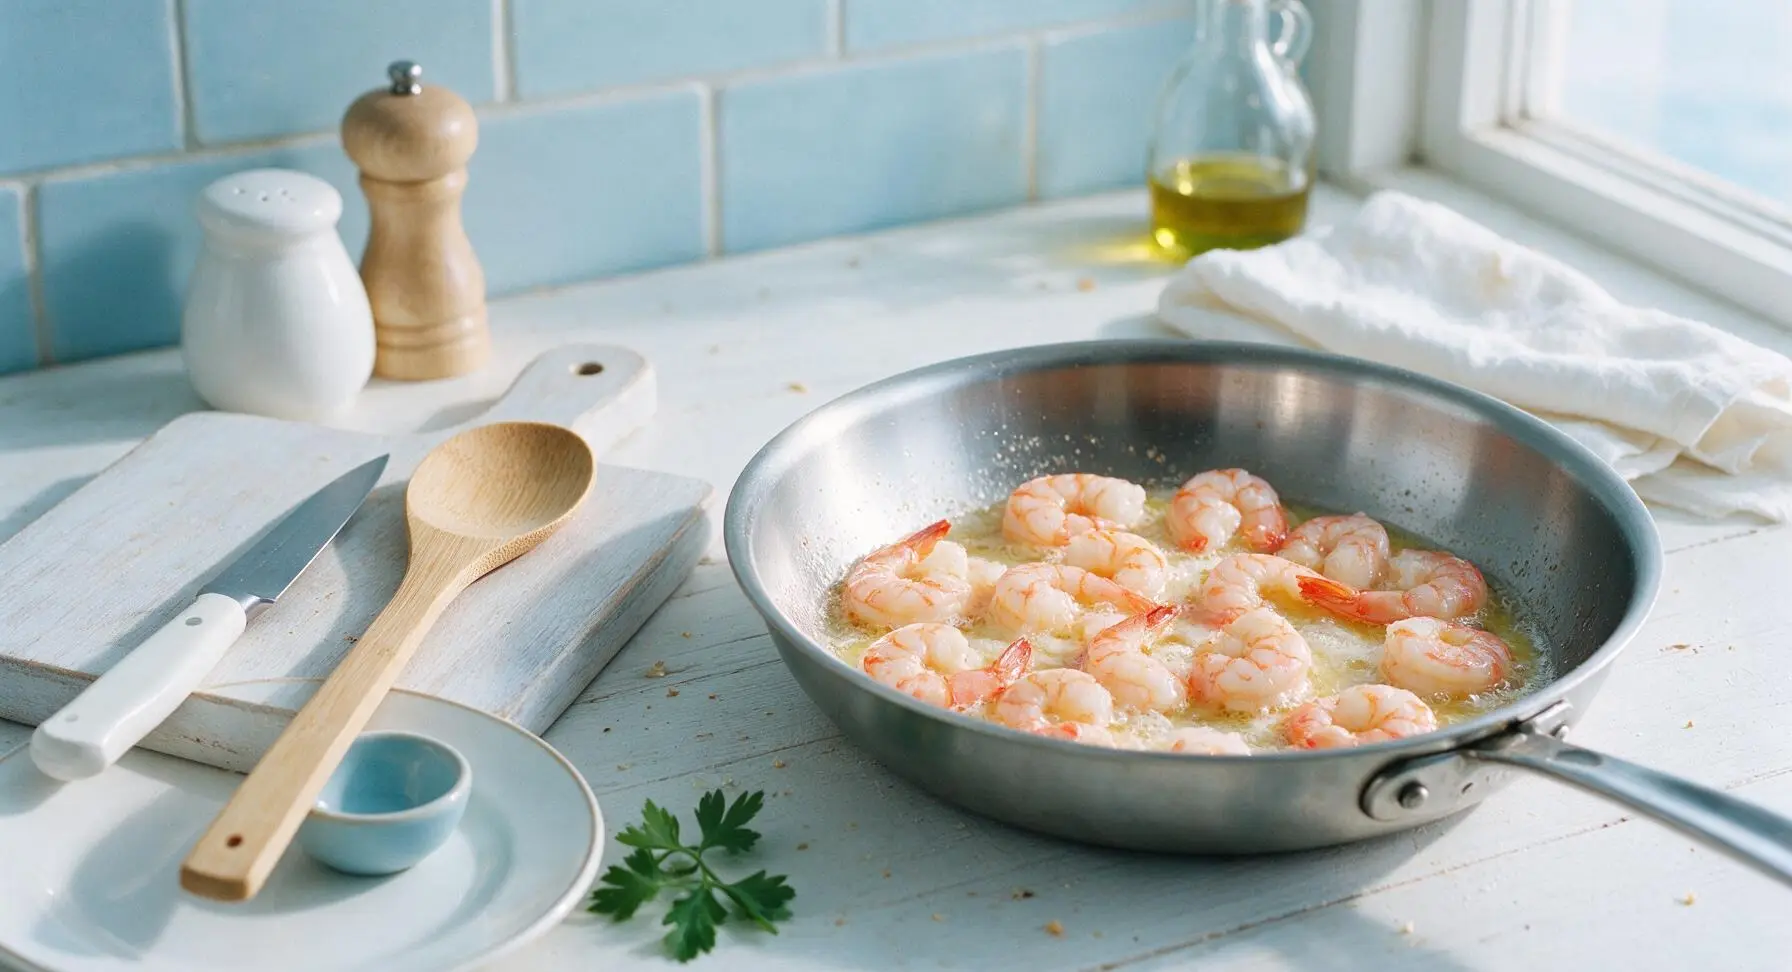
Step 3
step3:Sear seasoned shrimp
Step 3
step3:Sear seasoned shrimp
4

Sauté garlic and scallions

Flip the shrimp using the silicone spatula, add the remaining 1 tablespoon unsalted butter, minced garlic, and sliced scallion whites to the empty space in the skillet. Sauté for 30 seconds, stirring constantly, until garlic releases a fragrant nutty aroma—do not let garlic turn golden brown, as it will develop a bitter flavor.
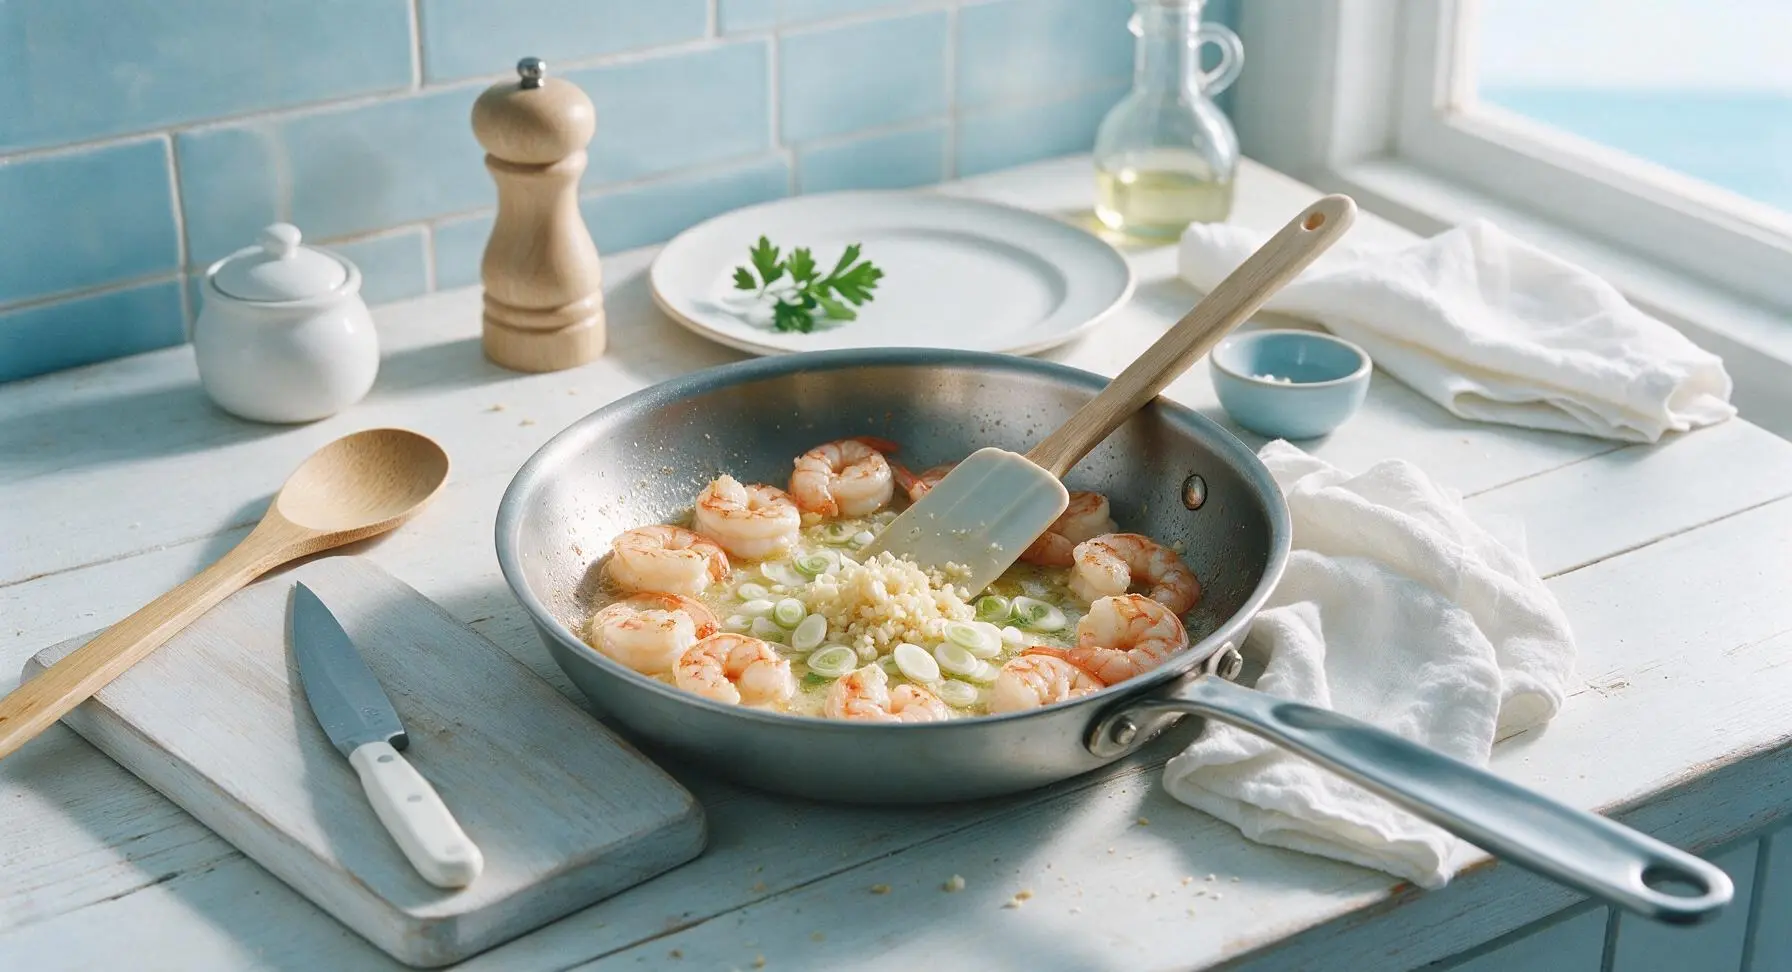
Step 4
step4:Sauté garlic and scallions
5

Thicken sauce to coat

Give the sauce slurry a quick re-stir to re-incorporate settled cornstarch, then pour it evenly over the shrimp in the skillet. Stir constantly with the silicone spatula as the sauce comes to a gentle simmer, 45 seconds to 1 minute, until the sauce turns glossy, translucent, and thick enough to coat the back of the spatula, with no cloudy raw cornstarch streaks remaining.
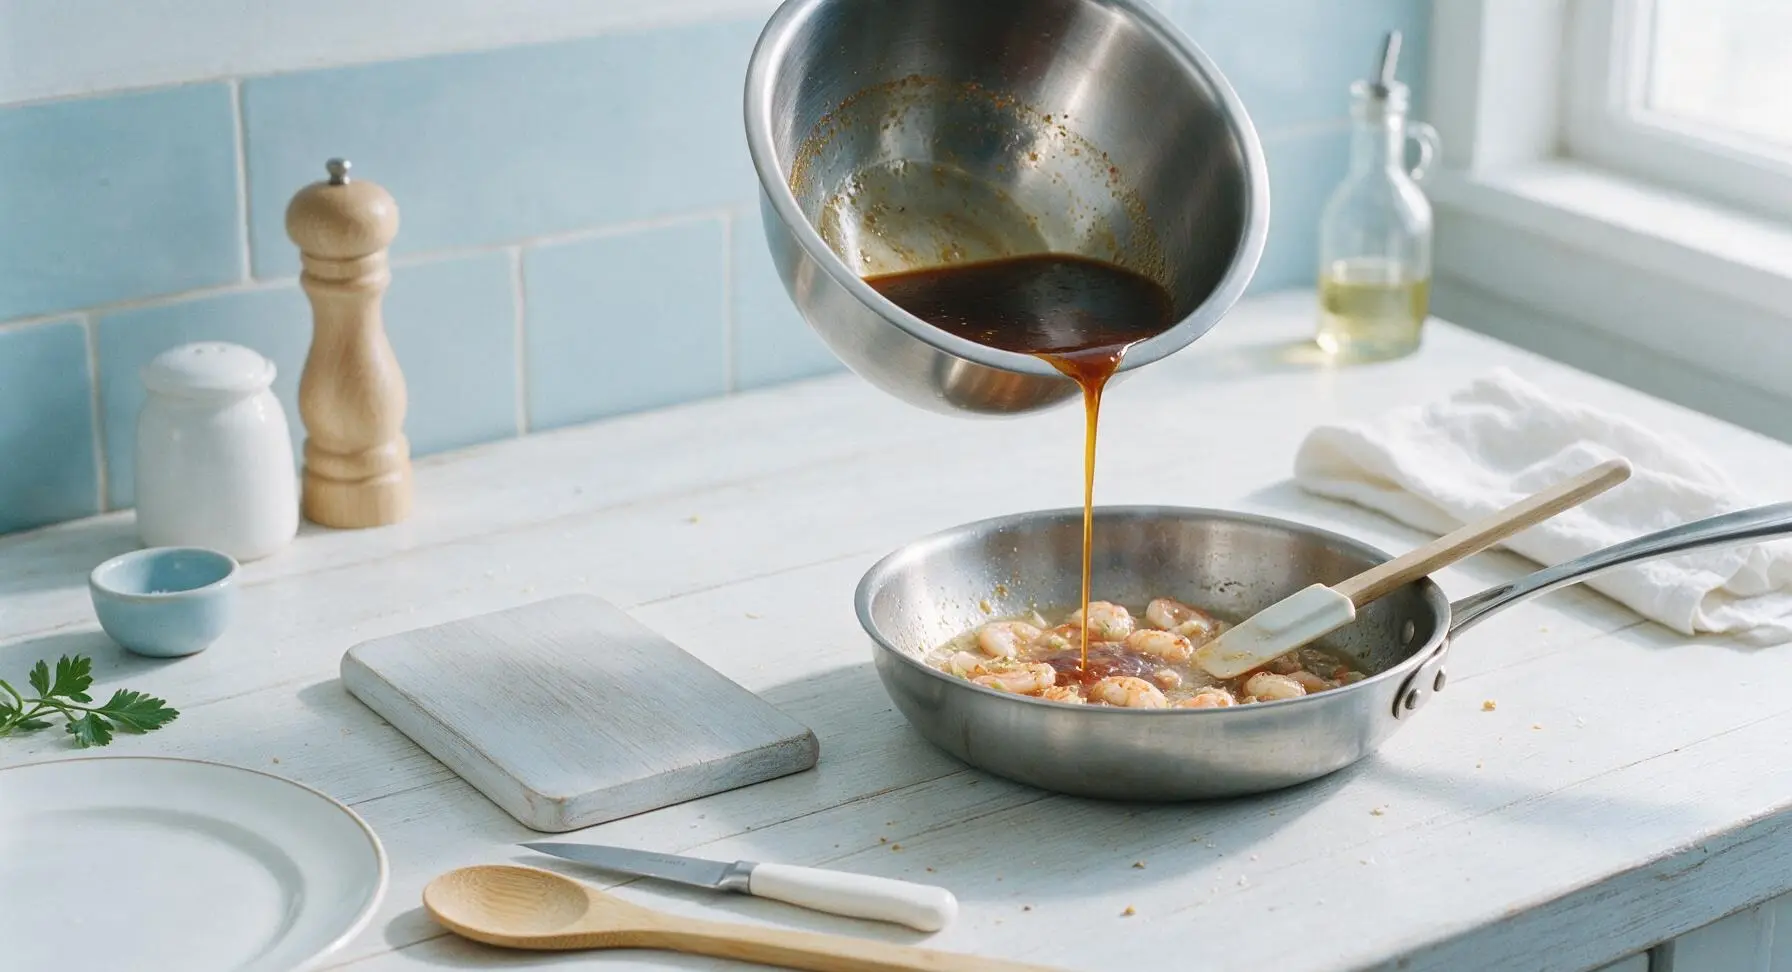
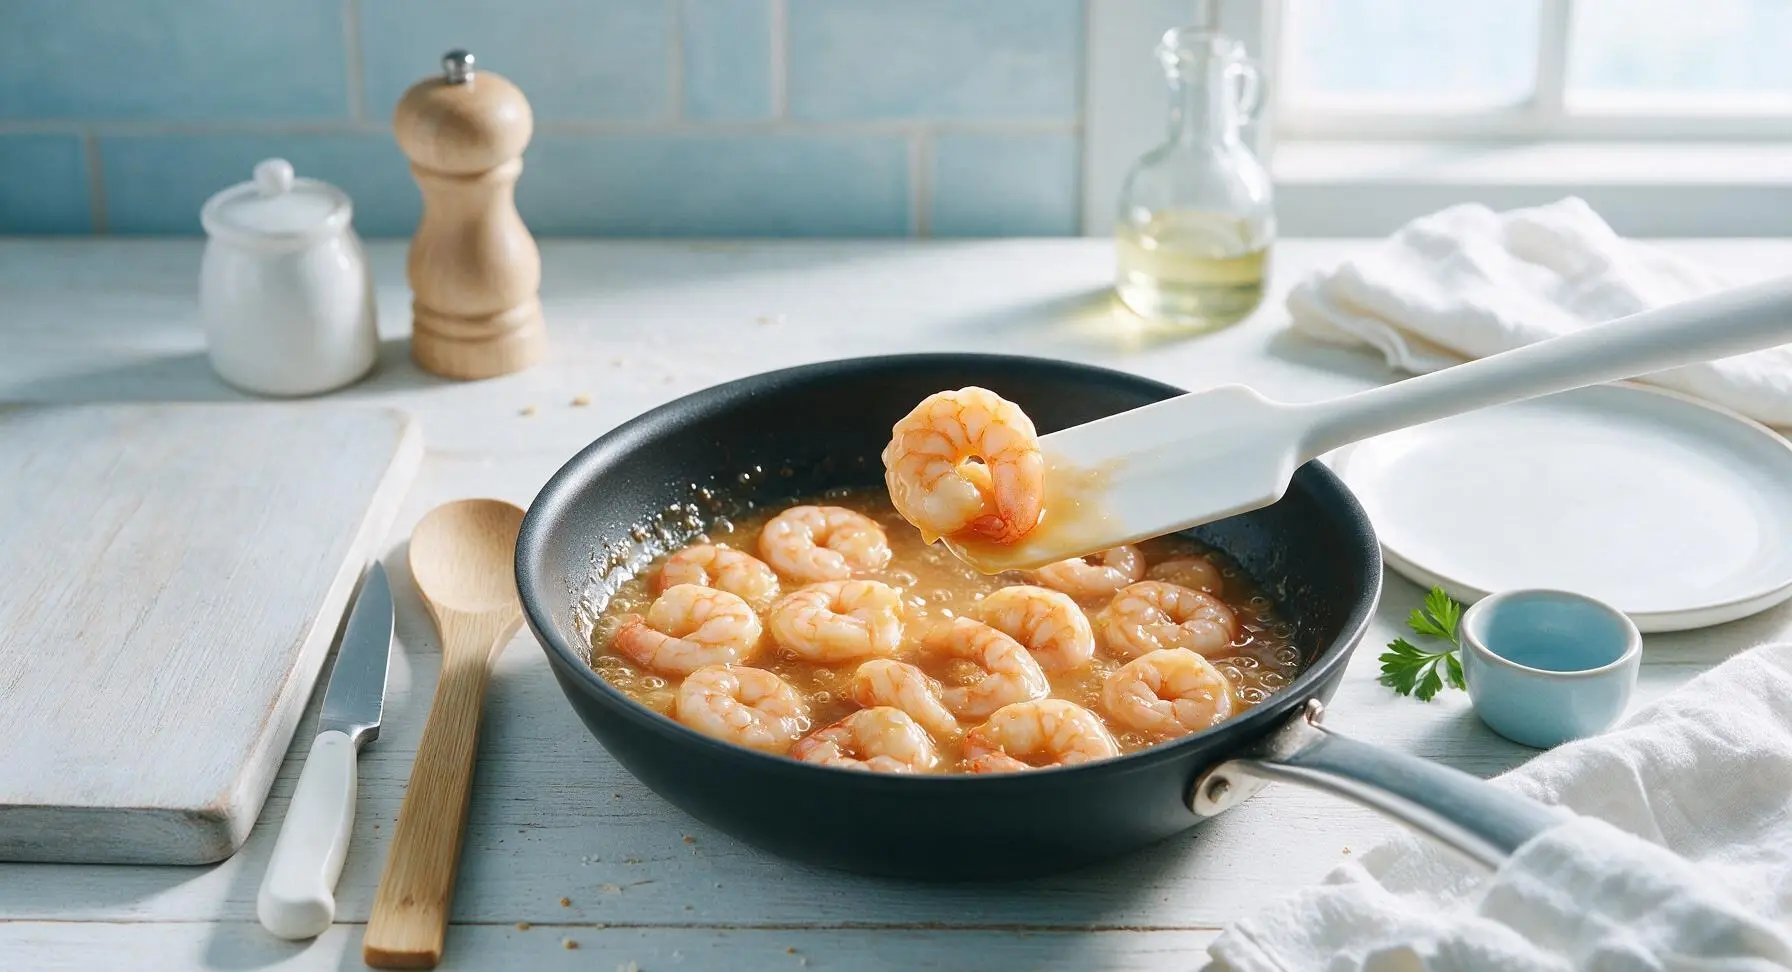
Step 5
step5:Thicken sauce to coat
Step 5
step5:Thicken sauce to coat
6

Mound rice on plate

Scoop ¾ cup of warm, fluffy cooked long-grain white rice onto the matte off-white ceramic dinner plate, mounding it gently and pressing a small shallow indentation into the top center to catch sauce and prevent sliding.
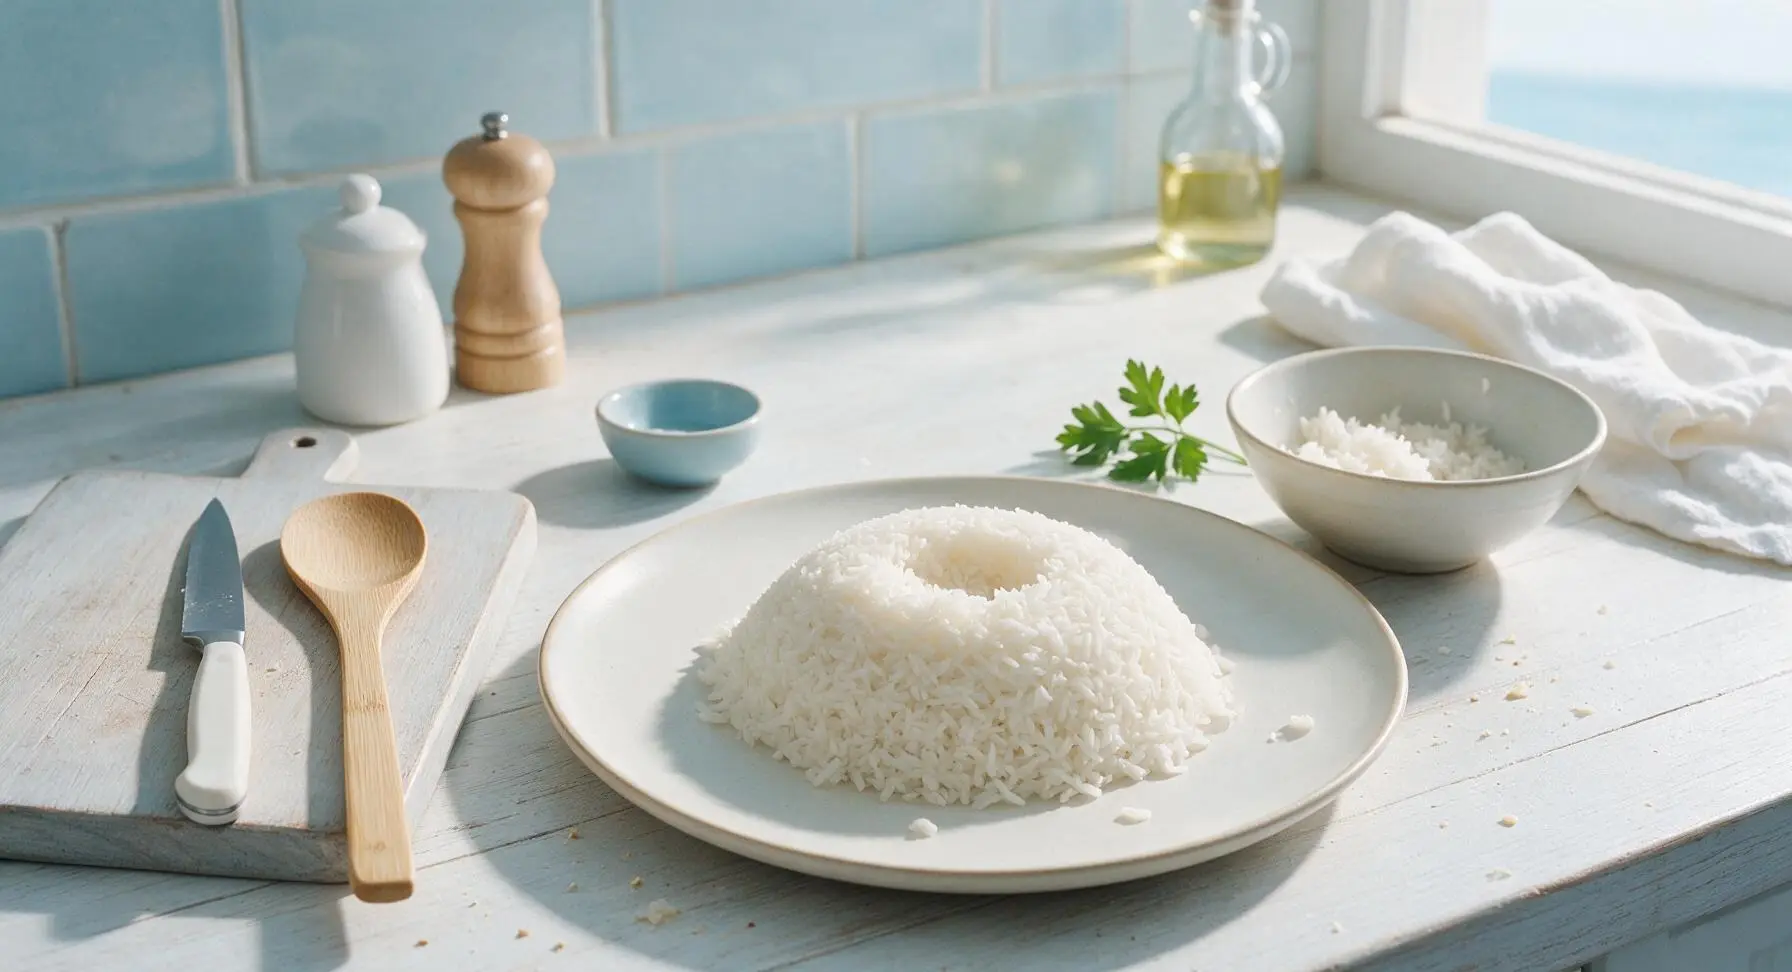
Step 6
step6:Mound rice on plate
7

Top rice with shrimp

Turn off the skillet heat, use the silicone spatula to lift 5-6 sauced shrimp from the pan, arranging them fanned slightly across the top of the rice mound. Drizzle 2-3 spoonfuls of extra glossy sauce over the rice to coat the exposed surface.
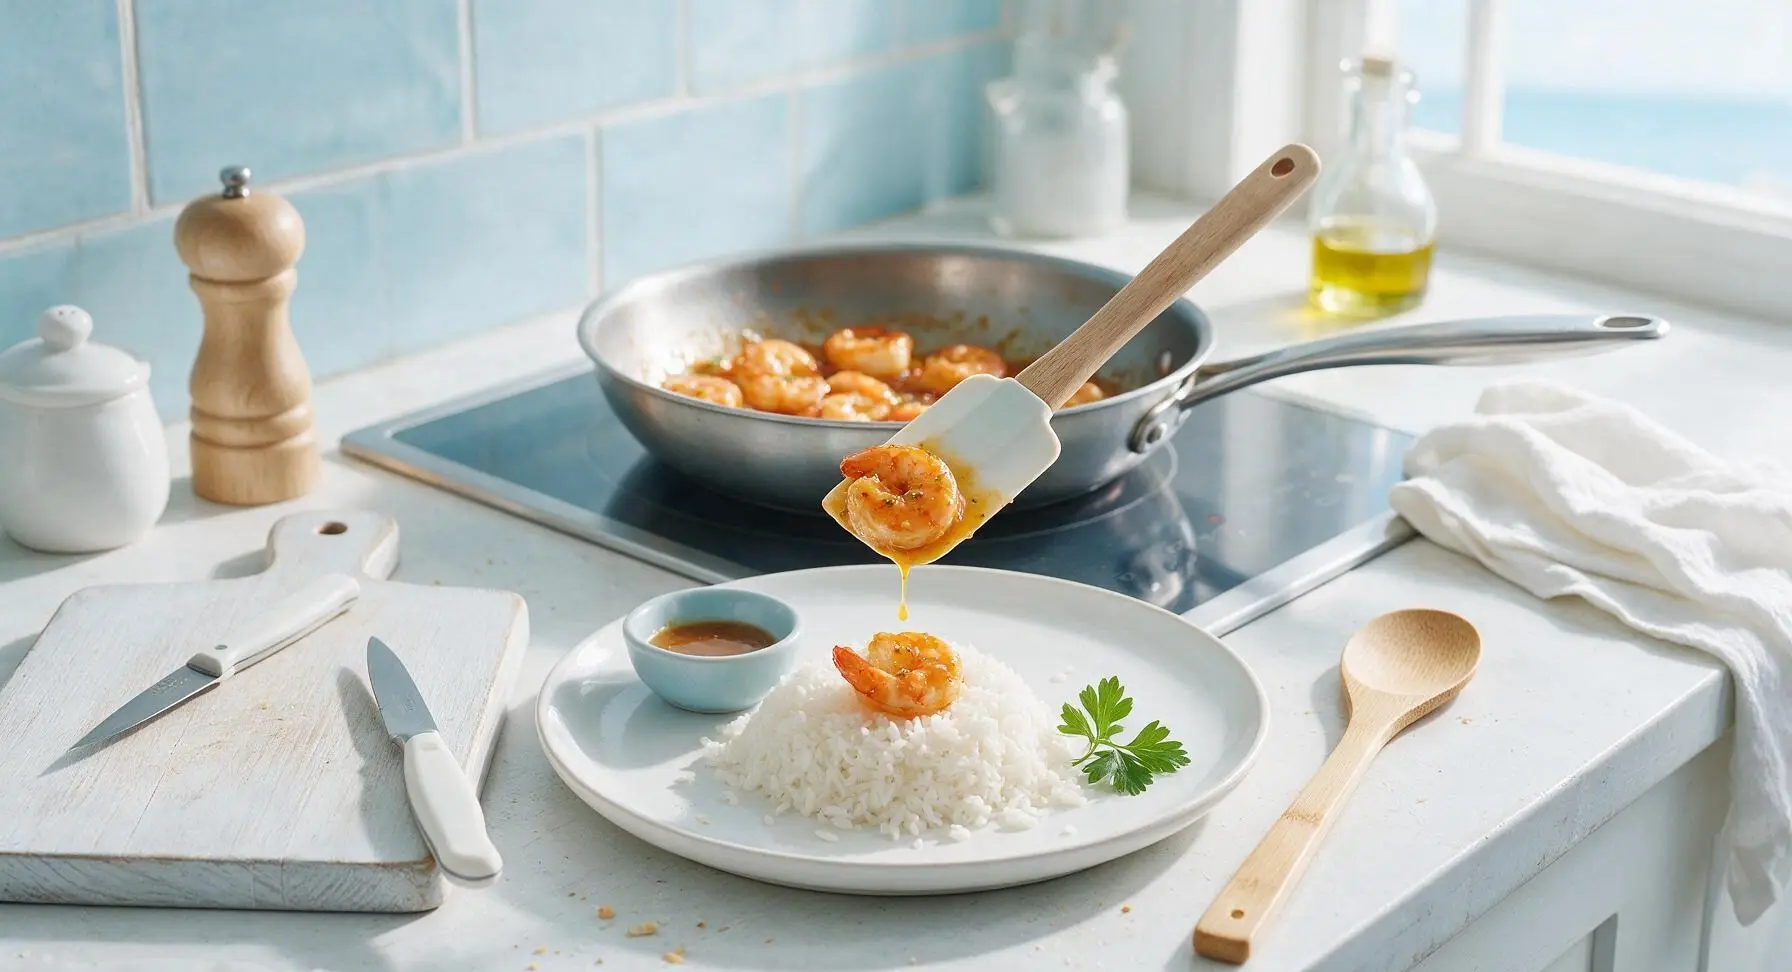
Step 7
step7:Top rice with shrimp
8

Garnish and serve

Sprinkle the reserved finely chopped scallion greens evenly over the sauced shrimp and rice, add a light twist of ground white pepper if desired. Serve immediately while the sauce is hot and glossy, before the rice absorbs excess sauce and becomes mushy.
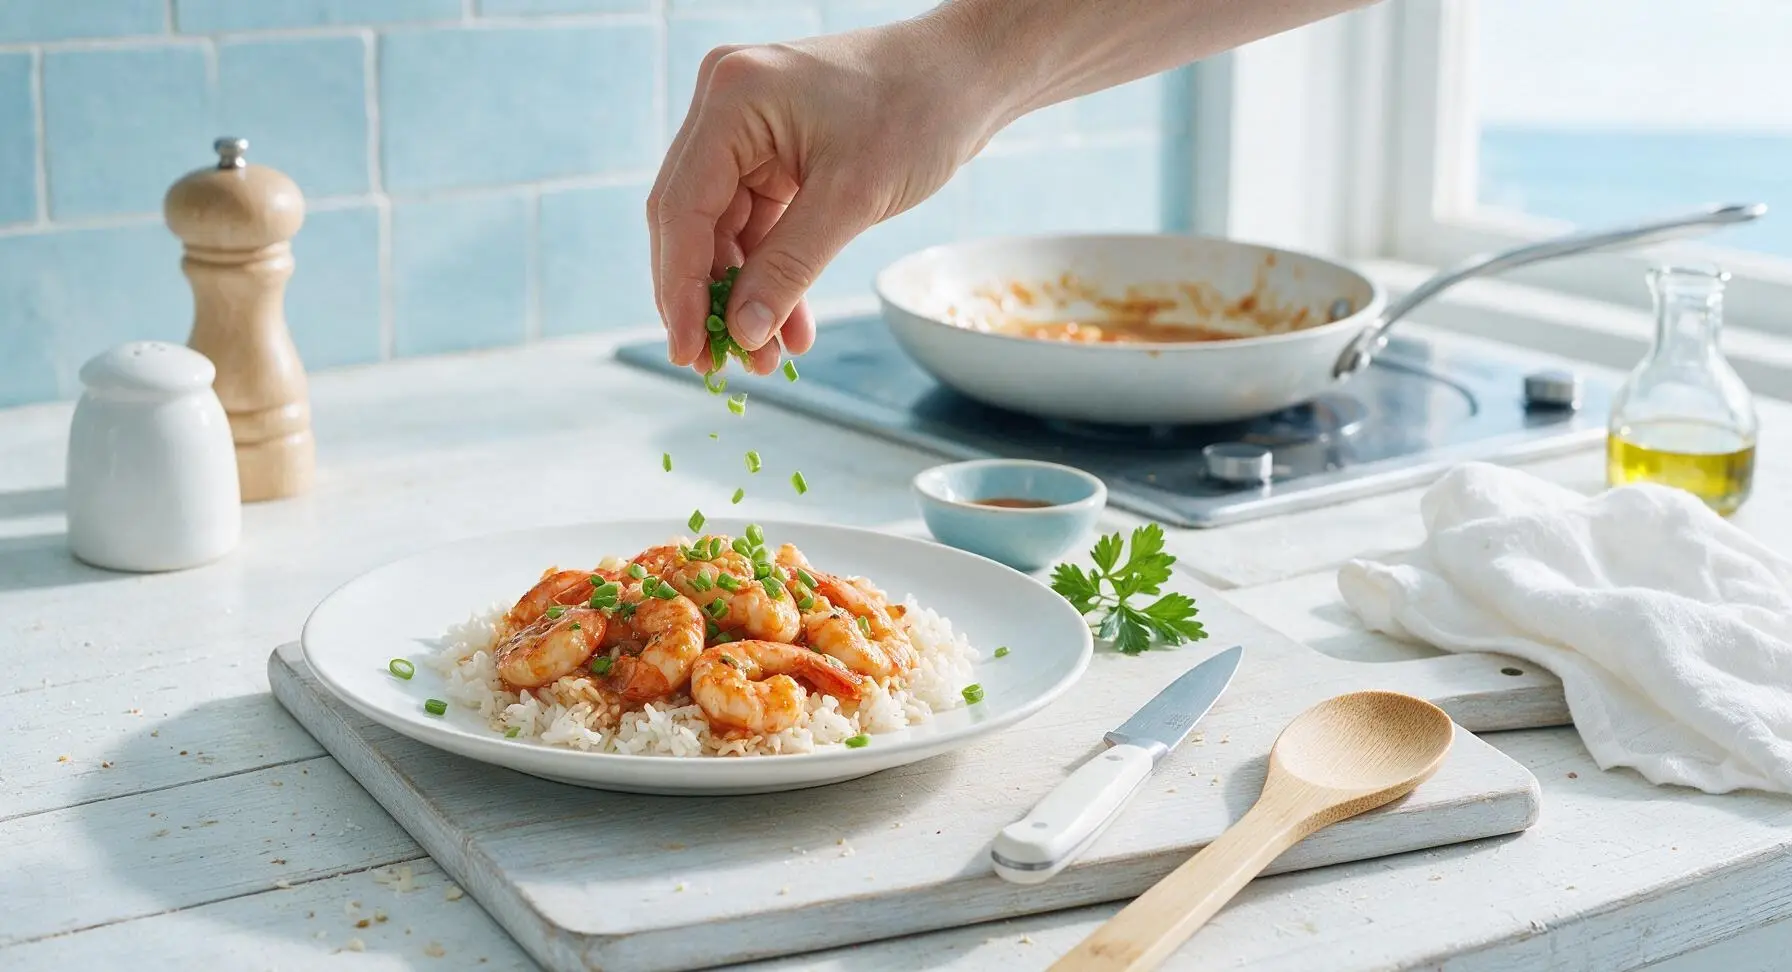
Step 8
step8:Garnish and serve

Tips

1.Pat shrimp completely dry with paper towels before searing: excess surface moisture will cause shrimp to steam instead of sear, leading to a mushy texture and no slightly crisp, sauce-gripping edge on the shrimp.
2.Re-stir the cornstarch slurry immediately before pouring it into the pan: cornstarch sinks to the bottom of the mixing bowl within 2 minutes of sitting, so skipping this step will leave most of the thickener behind, resulting in a thin, watery sauce that won’t coat shrimp or rice properly.
3.Remove the pan from heat as soon as shrimp curl into a tight 'C' shape: shrimp turn from perfectly tender to rubbery in as little as 30 seconds once overcooked, and residual heat from the hot sauce will finish cooking them through without making them tough.


✨ You May Also Like

Main Course
🍜 United Kingdom

A showstopping classic of tender seared beef, savory mushroom duxelles, and crisp prosciutto wrapped in flaky golden puff pastry, baked to juicy perfection.

⏱️ 2 hours 1Main Course ★ 4.7
Main Course
🍜 India

Tender charred marinated chicken simmered in a rich, spiced creamy tomato sauce, this iconic Anglo-Indian curry pairs perfectly with basmati rice or warm naan.

⏱️ 50 minuteMain Course ★ 4.6
Main Course
🍜 Thailand

Classic tangy, sweet, and savory Thai stir-fried rice noodles with shrimp, tofu, and crunchy garnishes, balancing all five core Thai flavor profiles.

⏱️ 30 minuteMain Course ★ 4.5
Main Course
🍜 United Kingdom

Crispy golden beer-battered cod and fluffy double-fried chips, served with tangy tartar sauce and malt vinegar: the timeless, beloved British pub comfort classic.

⏱️ 45 minuteMain Course ★ 4.7
Main Course
🍜 Mexico

Smoky, chile-marinated pork tacos with caramelized pineapple, fresh cilantro, and lime: a beloved classic Mexican street food perfect for casual summer gatherings.

⏱️ 1 hour 45Main Course ★ 4.8
Main Course
🍜 United States

Crunchy Fritos corn chips layered with savory beef chili and melted cheddar, topped with cool, zesty fixings for a beloved, cozy Tex-Mex comfort food.

⏱️ 35 minuteMain Course ★ 4.8

sauce for shrimp over rice:Frequently Asked Questions

1.Can I use frozen shrimp instead of fresh for this dish? ▾
Absolutely! Frozen large shrimp works perfectly here—just thaw it fully in the fridge overnight, then pat it completely dry with paper towels before cooking so it sears nicely instead of steaming. Stick to 21-25 count per pound shrimp for the plump, juicy bite this recipe is designed for.
2.Why does my garlic shrimp sauce turn out grainy instead of silky? ▾
Grainy sauce almost always comes from cooking garlic too fast over high heat, which makes it crisp and crumbly instead of melting into the butter base. Cook your minced garlic over medium-low heat just until fragrant, about 30 seconds, then stir in a splash of warm stock to emulsify the butter into a smooth, glossy coating.
3.Can I use a different type of rice instead of long-grain white rice? ▾
You can, but long-grain white rice gives the fluffy, separate grain texture that holds the sauce without turning mushy. Jasmine rice is the closest swap, but short-grain sushi rice, brown rice, or even cauliflower rice work too—just note they’ll change the overall texture and may require adjusted cook times.
4.How do I keep my shrimp from getting rubbery and overcooked? ▾
The trick is to cook shrimp quickly over medium-high heat, only 1 to 2 minutes per side, until they just turn opaque and curl into a loose C shape. As soon as they hit that point, pull them out temporarily while you build the sauce, then toss them back in at the end to warm through so they don’t overcook.
5.Can I make this recipe dairy-free? ▾
Definitely! Swap the unsalted butter for an equal amount of high-heat vegan butter, or use a light, neutral refined olive oil if you prefer. Skip cold-pressed extra virgin olive oil for cooking the garlic, since its low smoke point can make the sauce taste bitter and ruin that smooth, silky texture.
6.How far ahead can I prep the ingredients for this weeknight meal? ▾
You can prep all components up to 2 days ahead: peel and devein shrimp, mince garlic, chop scallions, and cook your rice, storing each in separate airtight containers in the fridge. Wait to cook the shrimp and sauce until right before serving, since the shrimp only takes 3 to 4 minutes total to cook to perfect tenderness.
7.Do I have to remove the tails from the shrimp like the recipe suggests? ▾
Tail-off shrimp is recommended here because it makes the dish much easier to eat over rice, no messy fingers required. If you love the look of tail-on shrimp for serving, you can leave the last tail segment on—just remind your diners to remove tails before eating so they don’t get a crunchy, unexpected bite.
8.What’s the best way to get that deep, umami garlic flavor without burnt garlic? ▾
Mince your garlic to a uniform, fine size so it cooks evenly, and don’t walk away from the pan once it hits the melted butter. Burnt garlic tastes harsh and bitter, so pull the pan off heat the second the garlic turns pale golden and smells nutty, before it darkens to a deep, unpleasantly bitter brown.
9.Can I add extra vegetables to this dish to make it more filling? ▾
Absolutely! Toss in quick-cooking veggies like diced bell pepper, snap peas, baby spinach, or thinly sliced mushrooms right after you sauté the garlic. Cook them for 2 to 3 minutes until just crisp-tender before adding the shrimp back in, so they don’t leach too much water and make the sauce watery.
10.How should I store leftovers of this shrimp and rice dish? ▾
Store leftover shrimp sauce and rice in separate airtight containers in the fridge for up to 3 days. Don’t mix them together before storing, because the rice will absorb too much of the silky sauce and get mushy, and the shrimp can develop a rubbery texture if it sits in sauce for too long in the cold fridge.
11.What’s the best way to reheat leftovers so the shrimp stays tender? ▾
Reheat the shrimp sauce gently in a small skillet over low heat, stirring often, until it’s just warmed through—don’t crank the heat high, or the shrimp will turn rubbery. Warm the rice separately in the microwave with a damp paper towel over top to fluff it up, then spoon the sauce over rice right before serving.
12.Can I use salted butter instead of unsalted butter for the sauce? ▾
You can, but cut back on any extra added salt (like soy sauce or finishing salt) by about half, since salted butter has added sodium that can make the dish overly salty. I prefer unsalted butter because it lets me control exact seasoning, so bright garlic and sweet shrimp flavor stays front and center instead of being masked.
13.What part of the scallions should I use, and when do I add them? ▾
Use both the white/light green parts and the dark green tops of the scallions! Add the thinly sliced white and light green parts to the pan with the garlic to build a deep, savory base, then save the delicate dark green slices to sprinkle over top right before serving for a fresh, bright pop of flavor and color.
14.My sauce is too thin and won’t coat the shrimp or rice—how do I fix that? ▾
Make a quick slurry by mixing 1 teaspoon of cornstarch with 1 tablespoon of cold water, then stir it into the simmering sauce a little at a time. Let it bubble for 30 seconds, and it will thicken into that perfect silky, coating consistency—just don’t add too much slurry at once, or you’ll end up with a gummy paste instead of a light sauce.
15.How many servings does this recipe make, and can I scale it up for a family? ▾
The base recipe makes 4 generous weeknight servings, and it scales really easily for larger groups! Just make sure you don’t overcrowd the pan when searing the shrimp—if you’re doubling or tripling the recipe, cook the shrimp in batches so it sears properly instead of steaming, which keeps it plump and tender.
16.Can I add extra seasonings to punch up the flavor without ruining the silky texture? ▾
Definitely! A pinch of red pepper flakes for mild heat, a squeeze of fresh lemon juice right at the end for brightness, or a tiny splash of low-sodium soy sauce for extra umami all work beautifully. Just avoid thick, chunky seasonings that will make the smooth sauce feel gritty or break its silky emulsion.
17.How long does this dish take to make from start to finish for a weeknight dinner? ▾
If you have pre-cooked rice on hand, the whole dish comes together in just 15 minutes total! Prep your shrimp, garlic, and scallions while the butter melts in the pan, and the sauce and shrimp cook in under 10 minutes, making it perfect for busy nights when you want a cozy, satisfying meal without a long time spent in the kitchen.

Comments (5)

2 hours ago

OMG this recipe is a total weeknight game changer! I got home late from soccer practice with the kids, threw this together in literally 10 minutes like it said, and my whole family cleared their plates. The sauce is so silky and garlicky without being overpowering, even my picky 7 year old asked for seconds. Will absolutely be adding this to our regular meal prep rotation!

30 minutes ago

That makes my day to hear, Mia! So glad it worked out for your busy soccer night—this recipe was designed specifically for those chaotic weeknights when you still want something tasty and satisfying. Pro tip: toss in a handful of frozen peas next time for an extra veggie boost without adding any extra cook time!

5 minutes ago

Seconding the frozen pea add-in! I did that last night and it was chef's kiss, my partner thought I ordered takeout lmao

yesterday

SO good, I made this for my work potluck yesterday and everyone was hounding me for the recipe! I used a little extra shrimp because my coworkers are seafood fanatics, and the sauce still came out perfectly silky with no clumps at all. Only thing I changed was adding a tiny pinch of red pepper flakes for a little kick, which went so well with the garlic.

2 hours ago

Love the red pepper flake hack, Luna! A little heat pairs so beautifully with the creamy garlic base. So stoked this was a hit at your work potluck—nothing better than a dish that impresses a crowd without all the hassle!

3 days ago

Tried this a couple nights ago when I was too tired to do a big cook and wow, way better than the garlic shrimp takeout I usually order. The texture of the sauce is insane for how little effort it takes, I didn't even have to mess with a fancy roux or anything. 10/10, will make again when I'm feeling lazy but don't want to waste money on delivery.

1 week ago

Perfect for my Sunday meal prep! I made a big batch, divided it over rice in glass containers, and it reheated like a dream all week. The sauce didn't get gummy or separate at all, which is usually my biggest problem with creamy sauce dishes for prep. Only reason I'm not giving 5 stars is I wish the recipe had a note about how long it stays good in the fridge, but mine lasted 4 days with no issues so that's a win in my book.

5 days ago

Great question about fridge life, Sophie! Stored in an airtight container, this stays good for 3-4 days in the fridge, which makes it perfect for meal prep like you did. So glad it reheated well for you—we test all our recipes for meal prep friendliness for exactly that reason!

5 days ago

This was so tasty when I made it with fresh shrimp over the weekend! Quick question though—can I use frozen shrimp for this next time? I always have a big bag in my freezer but I worry it'll get rubbery or make the sauce watery. Also, has anyone tried this over cauliflower rice for a lower carb swap?

3 days ago

I used frozen shrimp when I made this earlier this week! Just thaw it completely and pat it super dry with paper towels before cooking, and it came out totally tender with zero rubbery texture. I served mine over cauli rice too, it was so good I didn't even miss regular white rice!

2 days ago

Carol's tip is spot on! Frozen shrimp works perfectly here as long as you thaw it fully and pat off all excess moisture to keep the sauce silky and thick. It's also delicious over cauliflower rice, roasted broccoli, or even buttered pasta if you want to switch up the base!



