
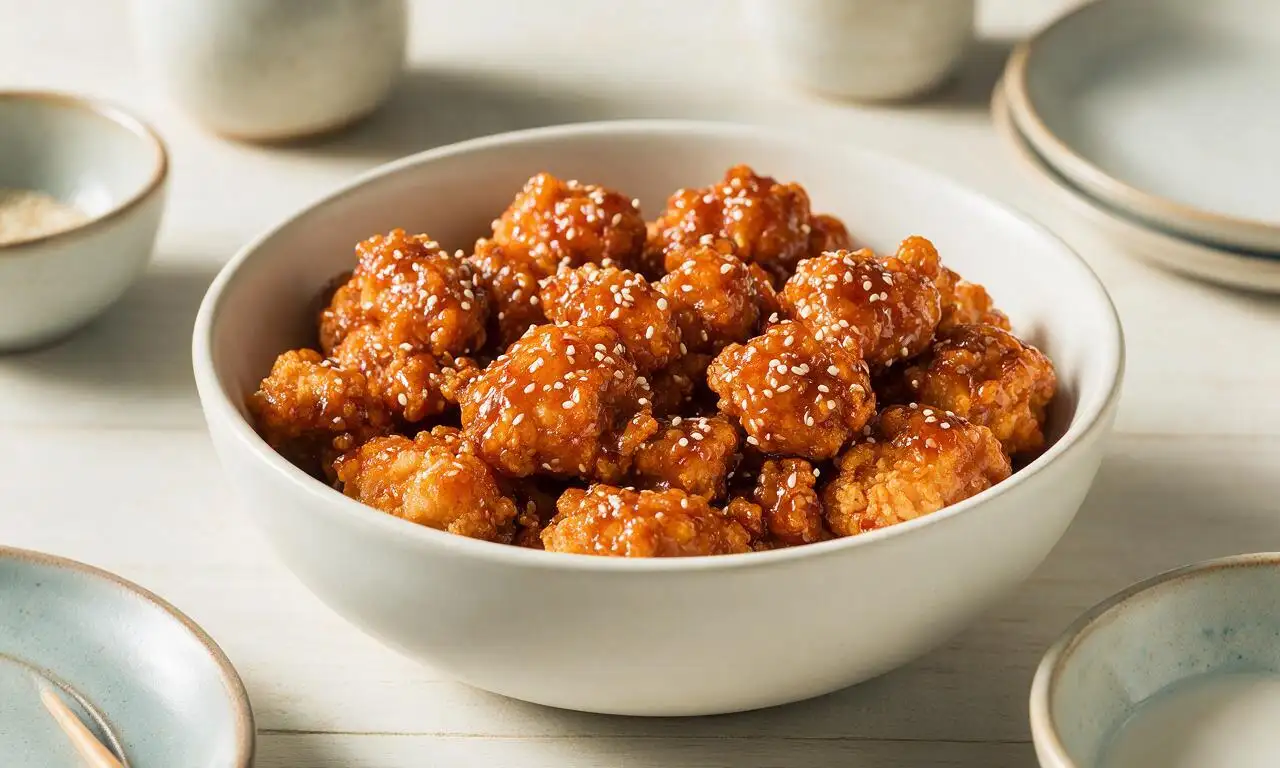
Sesame Chicken

title 1
Sesame Chicken
⏱️ cook time 35 minutes
🍽️ servings 4
⚡ Difficulty easy

intro

Crispy golden chicken tossed in a sweet-savory glossy sesame sauce, the beloved Chinese-American takeout classic made simple for home cooking.

Ingredients

Boneless skinless chicken thighs 450g (1 lb, cut into 2.5cm cubes)
Large egg 1, beaten
Cornstarch 7 tablespoons (56g, divided for coating and sauce slurry)
All-purpose flour 3 tablespoons (24g)
Neutral canola oil 500ml (for frying, plus 1 teaspoon for sautéing aromatics)
Light soy sauce 3 tablespoons (45ml, divided for marinade and sauce)
Ground white pepper 1/4 teaspoon
Honey 2 tablespoons (30ml)
Unseasoned rice vinegar 1.5 tablespoons (22ml)
Toasted sesame oil 1 teaspoon (5ml)
Garlic 3 cloves, minced
Fresh ginger 5g (1 teaspoon, grated)
Scallions 2, sliced (green and white parts separated)
Toasted white sesame seeds 2 tablespoons

Steps

1

Prep and marinate chicken

Pat 450g boneless skinless chicken thighs completely dry with paper towels, cut into uniform 2.5cm (1 inch) cubes. Toss with 1 tablespoon light soy sauce, 1/4 teaspoon ground white pepper, and 1 beaten large egg, then let rest for 10 minutes at room temperature.
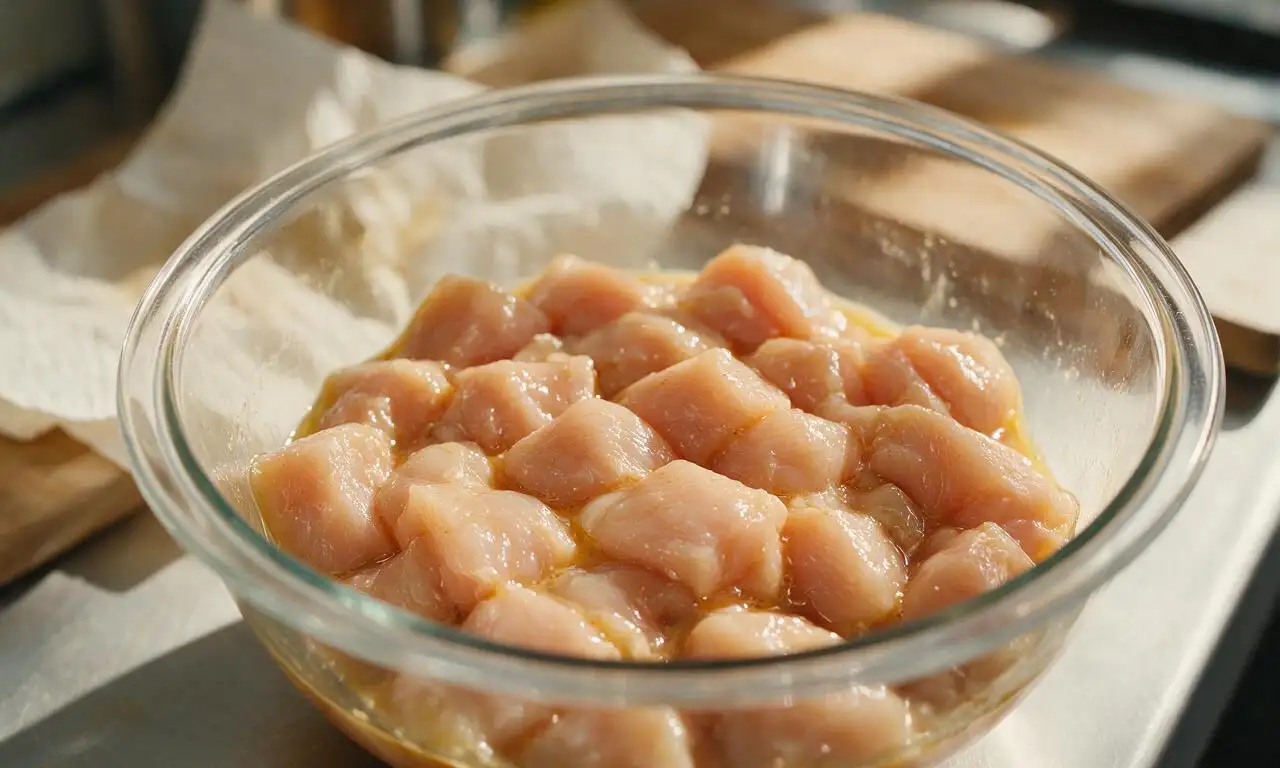
Step 1
step1:Prep and marinate chicken
2

Coat chicken pieces evenly

Add 6 tablespoons cornstarch and 3 tablespoons all-purpose flour to the marinated chicken, toss thoroughly until every piece is fully coated in a dry, shaggy, powdery layer with no wet spots remaining. Let coated chicken rest 5 minutes so the starch layer adheres firmly and does not fall off during frying.
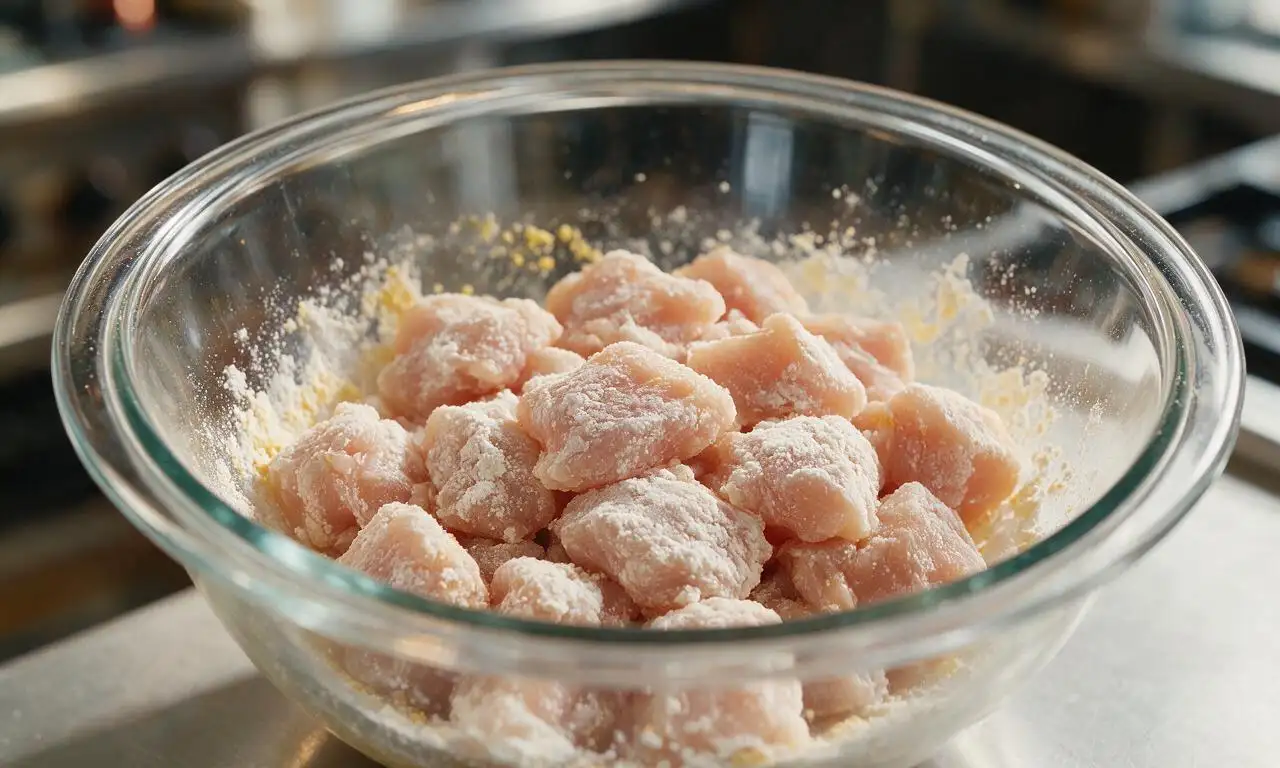
Step 2
step2:Coat chicken pieces evenly
3

Fry chicken until crispy

Heat 500ml neutral canola oil in a deep heavy-bottomed pot or wok to 175°C (350°F) over medium-high heat. Carefully lower coated chicken pieces one by one to avoid clumping, frying in 2 separate batches to prevent dropping oil temperature. Fry each batch for 4 minutes until pale golden, remove with a slotted spoon and drain on a wire rack for 3 minutes. Increase oil temperature to 190°C (375°F), refry all chicken for 1 final minute until deep golden and ultra crispy, then set aside.
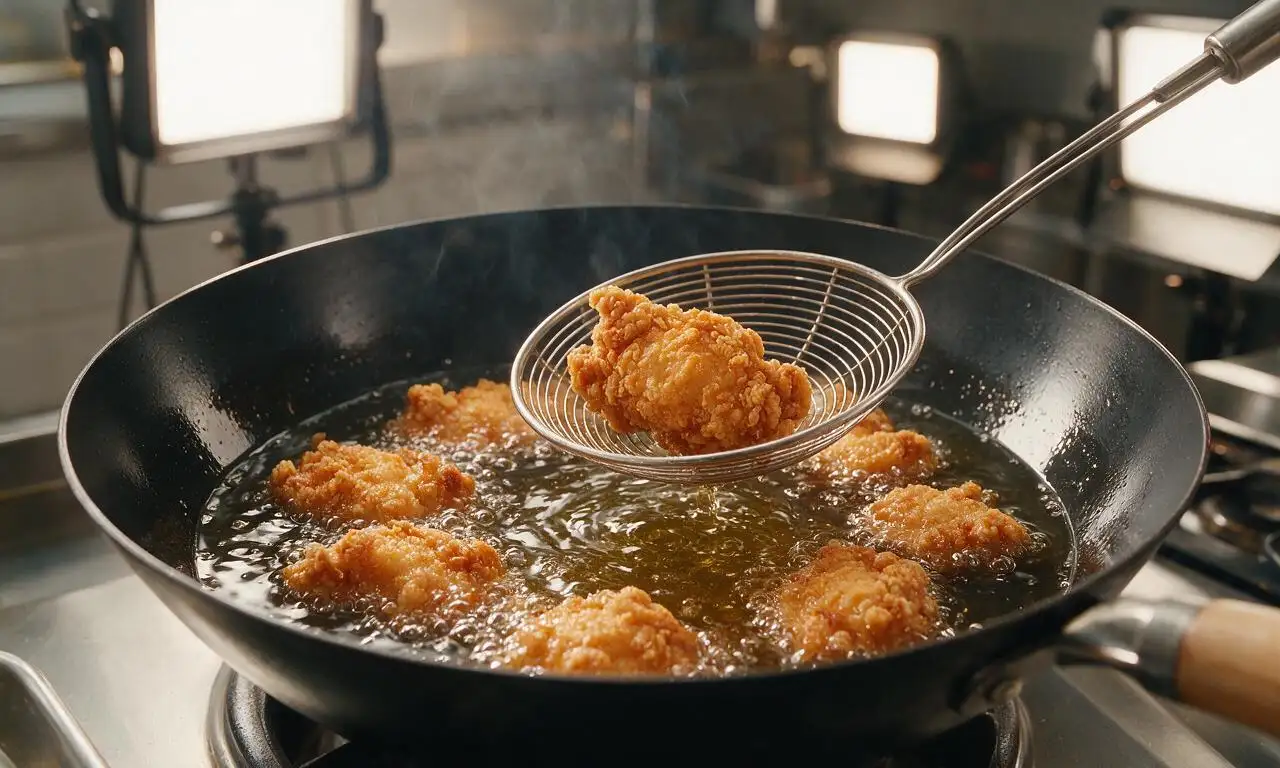
Step 3
step3:Fry chicken until crispy
4

Make the sesame sauce

While chicken drains, heat 1 teaspoon neutral canola oil in a small saucepan over medium heat. Add 3 minced garlic cloves, 5g grated fresh ginger, and the sliced white parts of 2 scallions, sauté for 30 seconds until fragrant, taking care not to burn the aromatics. Pour in 2 tablespoons light soy sauce, 2 tablespoons honey, 1.5 tablespoons unseasoned rice vinegar, and 1 teaspoon toasted sesame oil, stir to combine. Bring to a gentle simmer, then stir in a slurry of 1 tablespoon cornstarch mixed with 2 tablespoons cold water, cook for 1 minute until the sauce thickens to a glossy consistency that coats the back of a spoon.
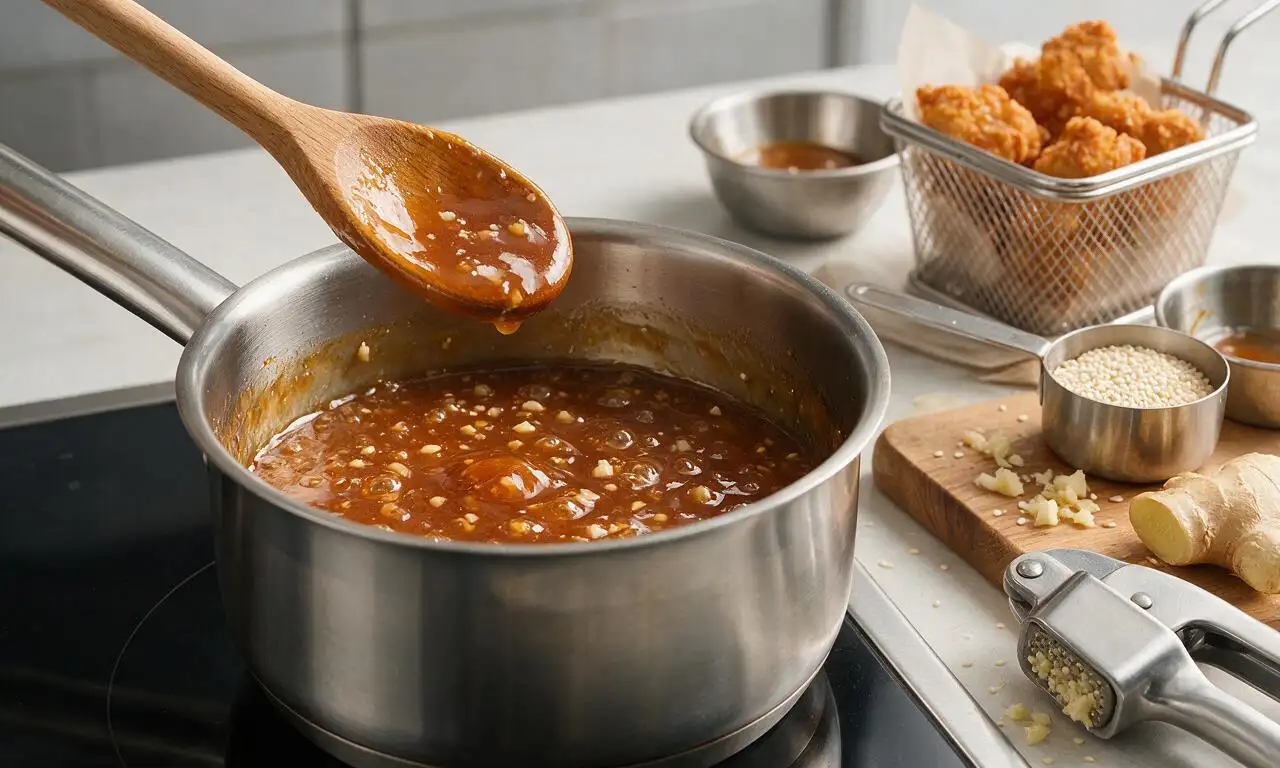
Step 4
step4:Make the sesame sauce
5

Toss chicken in sauce

Add all crispy fried chicken pieces to the saucepan with the warm sauce, turn heat to low, toss rapidly for 30 seconds until every chicken piece is evenly coated in the glossy sauce. Do not over-toss or let the chicken sit in hot sauce, as this will make the crispy coating turn soggy.
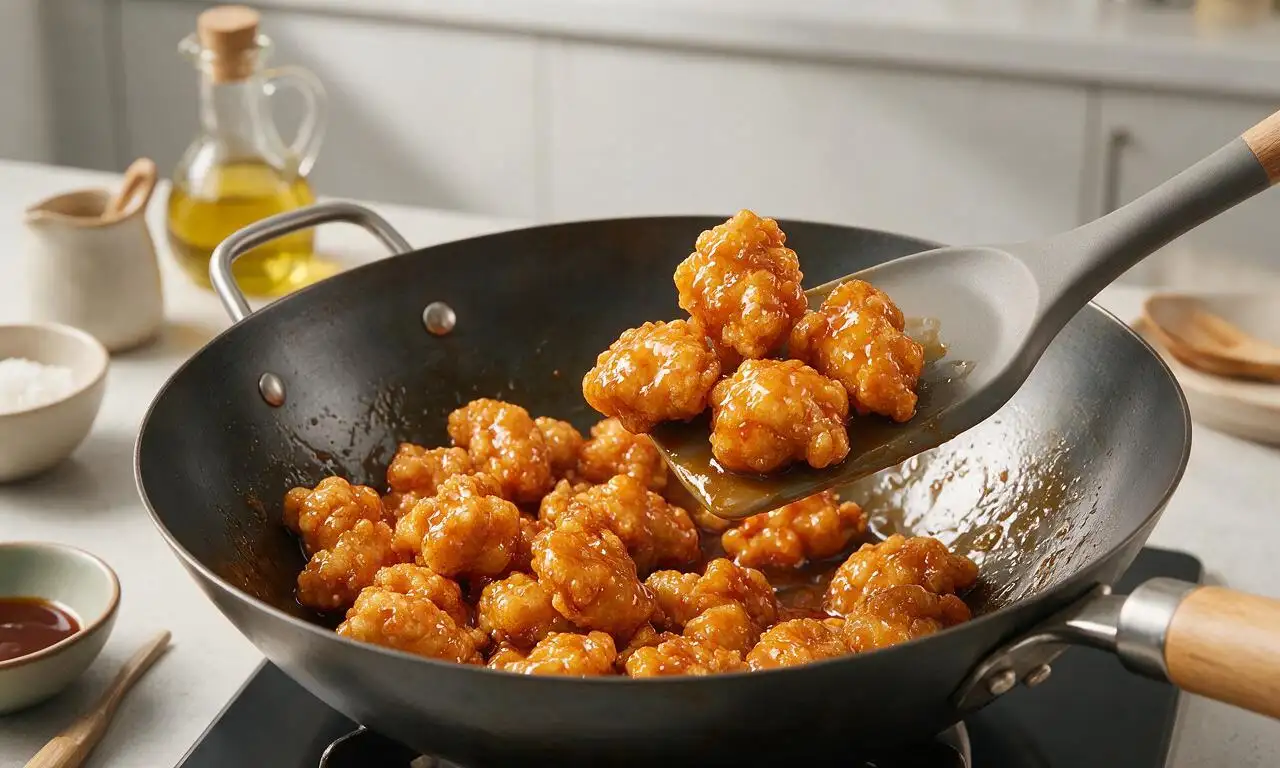
Step 5
step5:Toss chicken in sauce
6

Garnish and serve

Transfer the sauced chicken to a warm serving platter, sprinkle evenly with 2 tablespoons toasted white sesame seeds and the sliced green parts of the 2 scallions. Serve immediately while the chicken is hot and crispy, paired with steamed white rice if desired.
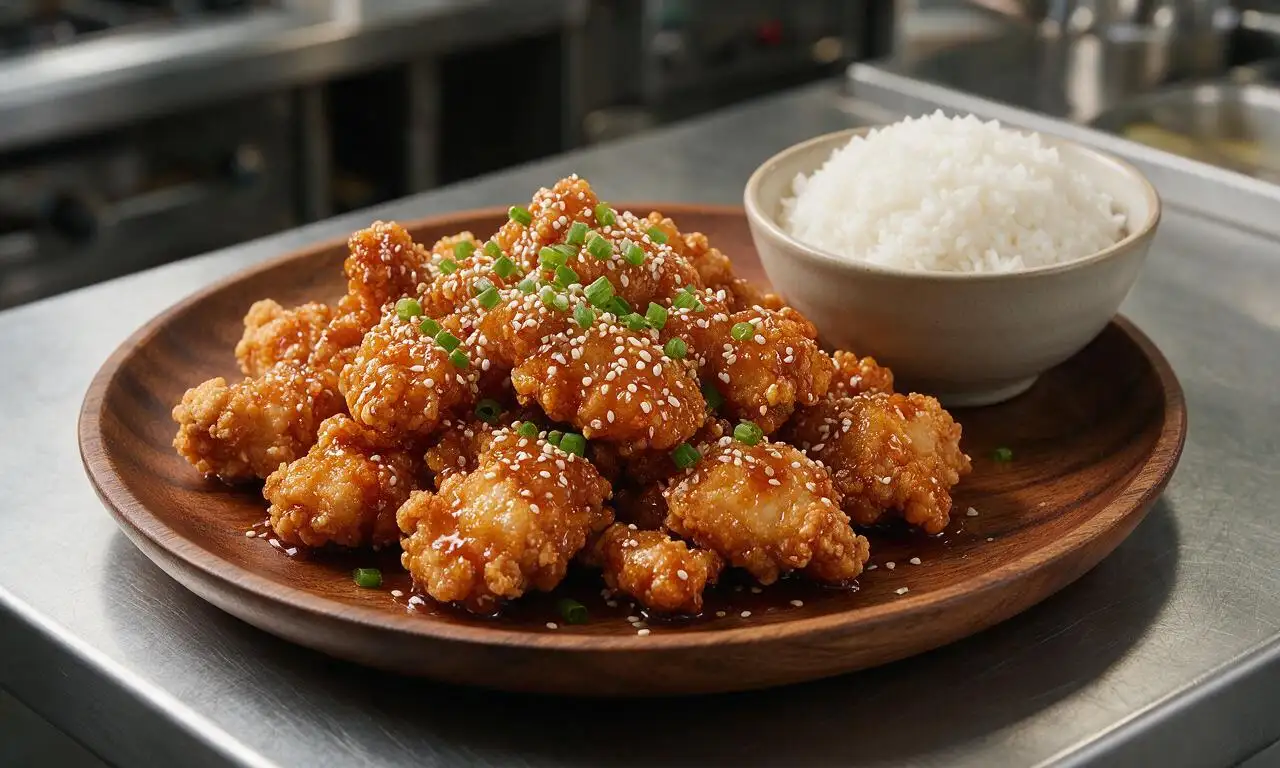
Step 6
step6:Garnish and serve

Tips

1.Always fry chicken in small batches: overcrowding the oil drops its temperature rapidly, leading to greasy, soggy chicken instead of light, crispy pieces.
2.Wait to toss chicken in the sauce until right before serving: even 5 minutes of sitting in sauce will soften the crispy fried coating significantly.
3.For extra juicy chicken, use boneless skinless chicken thighs instead of breast meat; thighs stay tender even through high-heat frying and don’t dry out easily.


✨ You May Also Like

Main Course
🍜 United Kingdom

A showstopping classic of tender seared beef, savory mushroom duxelles, and crisp prosciutto wrapped in flaky golden puff pastry, baked to juicy perfection.

⏱️ 2 hours 1Main Course ★ 4.7
Main Course
🍜 India

Tender charred marinated chicken simmered in a rich, spiced creamy tomato sauce, this iconic Anglo-Indian curry pairs perfectly with basmati rice or warm naan.

⏱️ 50 minuteMain Course ★ 4.6
Main Course
🍜 Thailand

Classic tangy, sweet, and savory Thai stir-fried rice noodles with shrimp, tofu, and crunchy garnishes, balancing all five core Thai flavor profiles.

⏱️ 30 minuteMain Course ★ 4.5
Main Course
🍜 United Kingdom

Crispy golden beer-battered cod and fluffy double-fried chips, served with tangy tartar sauce and malt vinegar: the timeless, beloved British pub comfort classic.

⏱️ 45 minuteMain Course ★ 4.7
Main Course
🍜 Mexico

Smoky, chile-marinated pork tacos with caramelized pineapple, fresh cilantro, and lime: a beloved classic Mexican street food perfect for casual summer gatherings.

⏱️ 1 hour 45Main Course ★ 4.8
Main Course
🍜 United States

Crunchy Fritos corn chips layered with savory beef chili and melted cheddar, topped with cool, zesty fixings for a beloved, cozy Tex-Mex comfort food.

⏱️ 35 minuteMain Course ★ 4.8

Sesame Chicken:Frequently Asked Questions

1.Why do you use boneless skinless chicken thighs instead of chicken breast for this recipe? ▾
Boneless, skinless chicken thighs are ideal here because they stay juicy and tender even after double-frying for that signature crisp crust, with none of the dry, chalky bites you often get with breast. The small amount of natural fat in thighs also matches the rich, satisfying texture of classic takeout. If you do swap for breast, cut pieces slightly smaller and watch fry time closely to avoid overcooking.
2.Why do I need both cornstarch and all-purpose flour for the chicken coating, instead of just one? ▾
The mix of cornstarch and all-purpose flour creates that perfect shatteringly crisp, light crust that doesn’t turn soggy when tossed in sauce, instead of a heavy, bready or overly delicate coating. Flour adds structure so the crust sticks firmly to the egg-washed chicken, while cornstarch cuts gluten formation to keep the crunch light, just the way takeout spots make it.
3.Can I bake the chicken instead of frying it in canola oil for a lighter version? ▾
You can, though it won’t have the exact same deep-fried crispness as traditional takeout. Toss your coated chicken pieces with 2 tablespoons of canola oil, arrange in a single layer on a wire rack set over a baking sheet, and bake at 425°F for 20-25 minutes, flipping halfway, until golden and cooked through. Skip baking directly on the sheet pan, as that will make the chicken bottoms soggy.
4.How do I keep the chicken crispy after tossing it in the sesame sauce? ▾
Two simple tricks lock in that crunch: First, make sure your sauce is hot and fully thickened right before you toss, so it coats in a thin glossy layer instead of pooling and soaking the crust. Second, don’t let fried chicken sit longer than 2-3 minutes before tossing, and only toss right before serving—never let chicken soak in sauce ahead of time, as that softens the crust fast.
5.What temperature should the canola oil be for frying to avoid greasy chicken? ▾
Heat your neutral canola oil to 350°F for the first fry, which cooks the chicken through without burning the coating, then raise it to 375°F for a quick 1-minute second fry to crisp up the exterior. Use a clip-on candy thermometer to track temperature: too-cold oil makes chicken absorb excess grease, while too-hot oil burns the crust before the chicken cooks through.
6.Can I prep components of this sesame chicken ahead for quick weeknight meals? ▾
You can prep the coated chicken up to 4 hours ahead: Cut your thighs, dip in beaten egg, coat in the cornstarch-flour mix, then arrange in a single layer on a wire rack set over a plate, covered loosely, in the fridge. Don’t pile coated chicken in a bowl, as that will make the coating turn gummy. Wait to fry and make sauce until right before eating for best texture.
7.Why isn’t my sesame sauce sticking to the chicken to make that glossy takeout coating? ▾
This almost always stems from two easy-to-fix issues: Either your sauce is too thin, or your chicken crust is too smooth. Simmer the sauce just long enough to reach a syrup-like consistency that coats the back of a spoon, and give fried chicken a light toss right out of the fryer to rough up craggy crust edges—those bits grab and hold sauce perfectly, just like restaurant versions.

Comments (9)

2 hours ago

OMG this was SO good! My kids usually turn their noses up at any chicken that isn’t dinosaur-shaped nuggets, but they devoured every last bite of this sesame chicken and asked for seconds. The crispy coating stayed crunchy even after I tossed it in the sauce, total game changer for weeknight family dinners! Didn’t change a single thing in the recipe, perfect as written.

1 hour ago

Same here! My 7 year old said this is better than the takeout we get down the street, I couldn’t believe it. I was worried the cornstarch coating would get soggy but it stays so crispy!

30 minutes ago

That makes us so happy to hear! Letting the coated chicken rest for 5 minutes before frying is the secret to keeping that crunch even after saucing, so glad it worked out for your family!

yesterday

Really solid recipe! Tastes just like the sesame chicken from my go-to takeout spot, though I added a tiny extra pinch of red pepper flakes for a little heat, which worked great. Only reason it’s not 5 stars is I wish the sauce was a little thicker, but I’ll just add a touch more cornstarch slurry next time.

20 hours ago

Great call on the red pepper flakes! If you want a thicker sauce, just simmer it an extra 2-3 minutes after adding the cornstarch slurry, that’ll help it coat the chicken perfectly next time. Thanks for the feedback!

3 days ago

Added this to my weekly meal prep rotation! I made a big batch on Sunday, portioned it out with rice and steamed broccoli, and it held up amazing all week for work lunches. The chicken didn’t get soggy in the fridge at all, which is always my biggest concern with sauced dishes. 10/10, will make again and again.

1 week ago

Bro. I used to drop $15 every Friday on sesame chicken from the place down the road, and this recipe is dead identical — if not better! And it cost me like $5 total to make enough for two servings. Wild how easy it was too, I’m a terrible cook and I pulled it off first try with zero issues.

5 days ago

Wait this is such a win for my budget! I’ve been wasting so much money on takeout lately, I’m definitely making this this weekend. Quick question for anyone who’s made this — does it work better with chicken breast or do I need to grab thighs?

3 days ago

Great question! Both work perfectly for this recipe — boneless skinless thighs will give you that extra juicy, rich takeout-style texture, but breast works great if you prefer white meat, just be careful not to overcook it so it doesn’t dry out!

5 days ago

Brought this to my neighborhood potluck last weekend and people were hounding me for the recipe all night! I doubled the batch and it was completely gone in 20 minutes, even beat out my famous chocolate chip cookies for most popular dish. 10/10, will be making this for every gathering from now on.

4 days ago

Wait I was at that potluck!!! I had three servings of this chicken, no joke it was the best thing there. So glad you posted the recipe link in the neighborhood group chat, I’m making it for my family tonight!

2 days ago

As someone who can barely make mac and cheese without burning it, this recipe was so easy to follow! Cook time was exactly 35 minutes like it said, no fancy ingredients needed, and my roommates lost their minds when they tried it. We already bought more chicken to make it again this weekend.

1 day ago

Love to hear that! This recipe is designed to be super approachable for new cooks, so we’re thrilled it worked out for you and your roommates. Enjoy round two this weekend!

30 minutes ago

Tasted great! Only note is that I used low-sodium soy sauce because regular is too salty for me, and it turned out perfectly. The sesame flavor comes through so nice, and the crunch is unreal for a home-cooked version. Will definitely be making this again soon.

2 weeks ago

As a single dad with two kids in sports, I’m always looking for fast, tasty weeknight meals that don’t require a million ingredients. This was perfect — 35 minutes total, minimal cleanup, and my kids ate every bite without complaining. Even my picky 10 year old who hates all Asian food asked for seconds. Total win.

1 week ago

Fellow sports parent here! I’m always scrambling between soccer practice and homework time on weeknights, so I’m adding this to next week’s menu. Sounds like exactly what my crew needs.

5 minutes ago

Made this gluten free by swapping the regular soy sauce for tamari, and it turned out absolutely perfect! I’ve been missing takeout sesame chicken since going GF a year ago, and this hit every single craving. The crispy coating didn’t get soggy at all, the sauce was perfectly sweet and savory, I cannot recommend this enough.



