
shrimp pasta recipes red sauce

title 1
shrimp pasta recipes red sauce
⏱️ cook time 20 minutes
🍽️ servings 4
⚡ Difficulty easy

intro

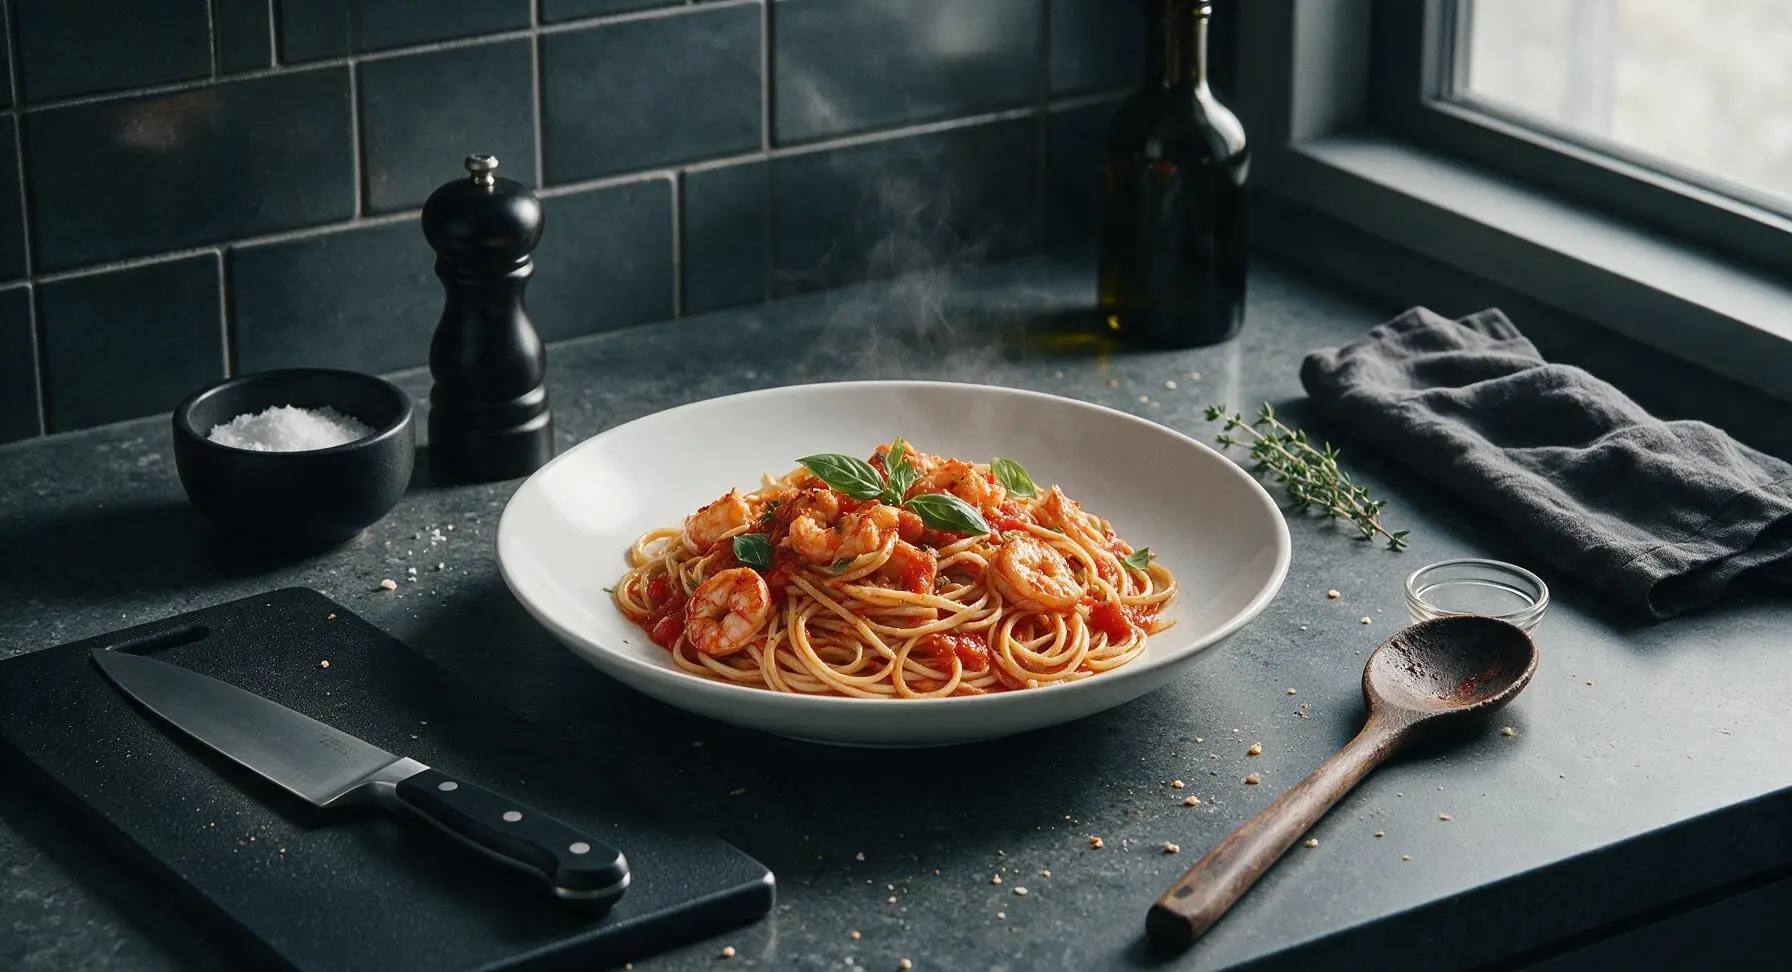
Juicy plump shrimp tangled in al dente linguine, coated in bright garlicky tomato red sauce with fresh basil—simple, satisfying, and ready in just 30 minutes.

Ingredients
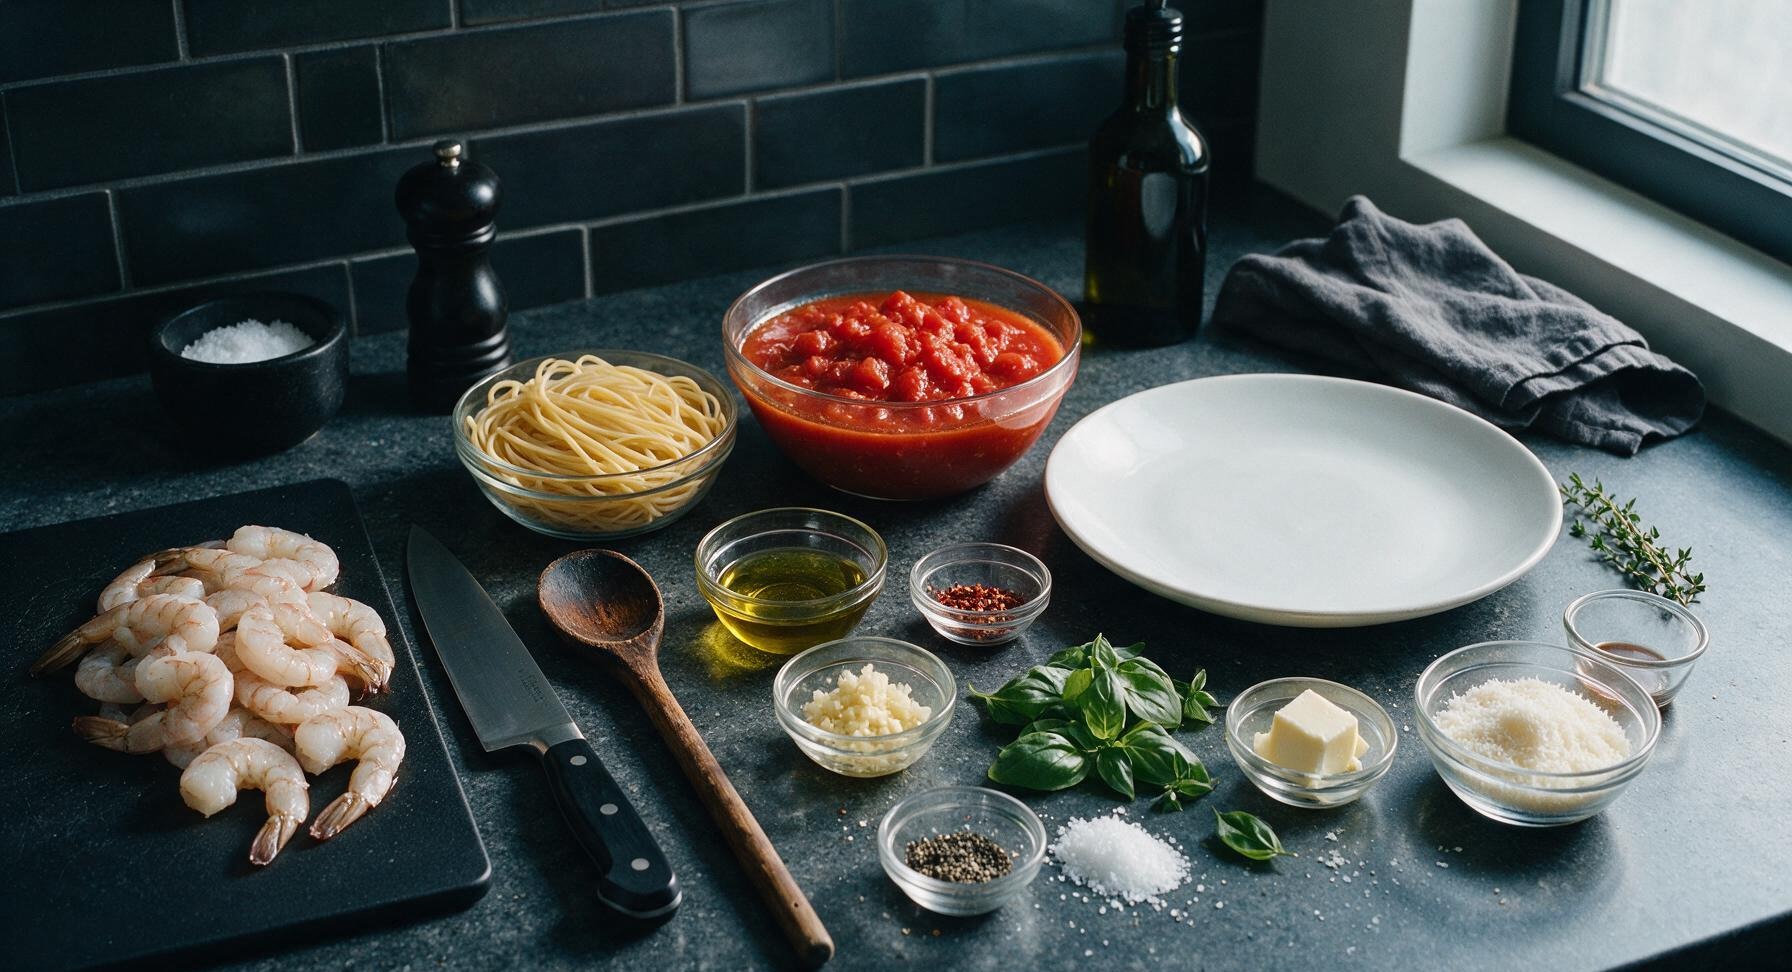
Large raw shrimp (16/20 count, peeled, deveined, tails on) 450g (1 lb)
Dry linguine pasta 340g (12 oz)
Crushed San Marzano tomatoes 800g (2 x 400g cans)
Extra virgin olive oil 3 tbsp
Garlic cloves, minced 4 cloves (12g)
Red pepper flakes 1/4 tsp
Kosher salt 1 tbsp + 1 tsp
Freshly ground black pepper 1/2 tsp
Fresh basil leaves 1/2 cup loosely packed, plus sprigs for garnish
Unsalted butter 2 tbsp
Parmigiano-Reggiano cheese, grated 1/4 cup, plus extra for serving

Steps

1

Prep and season shrimp

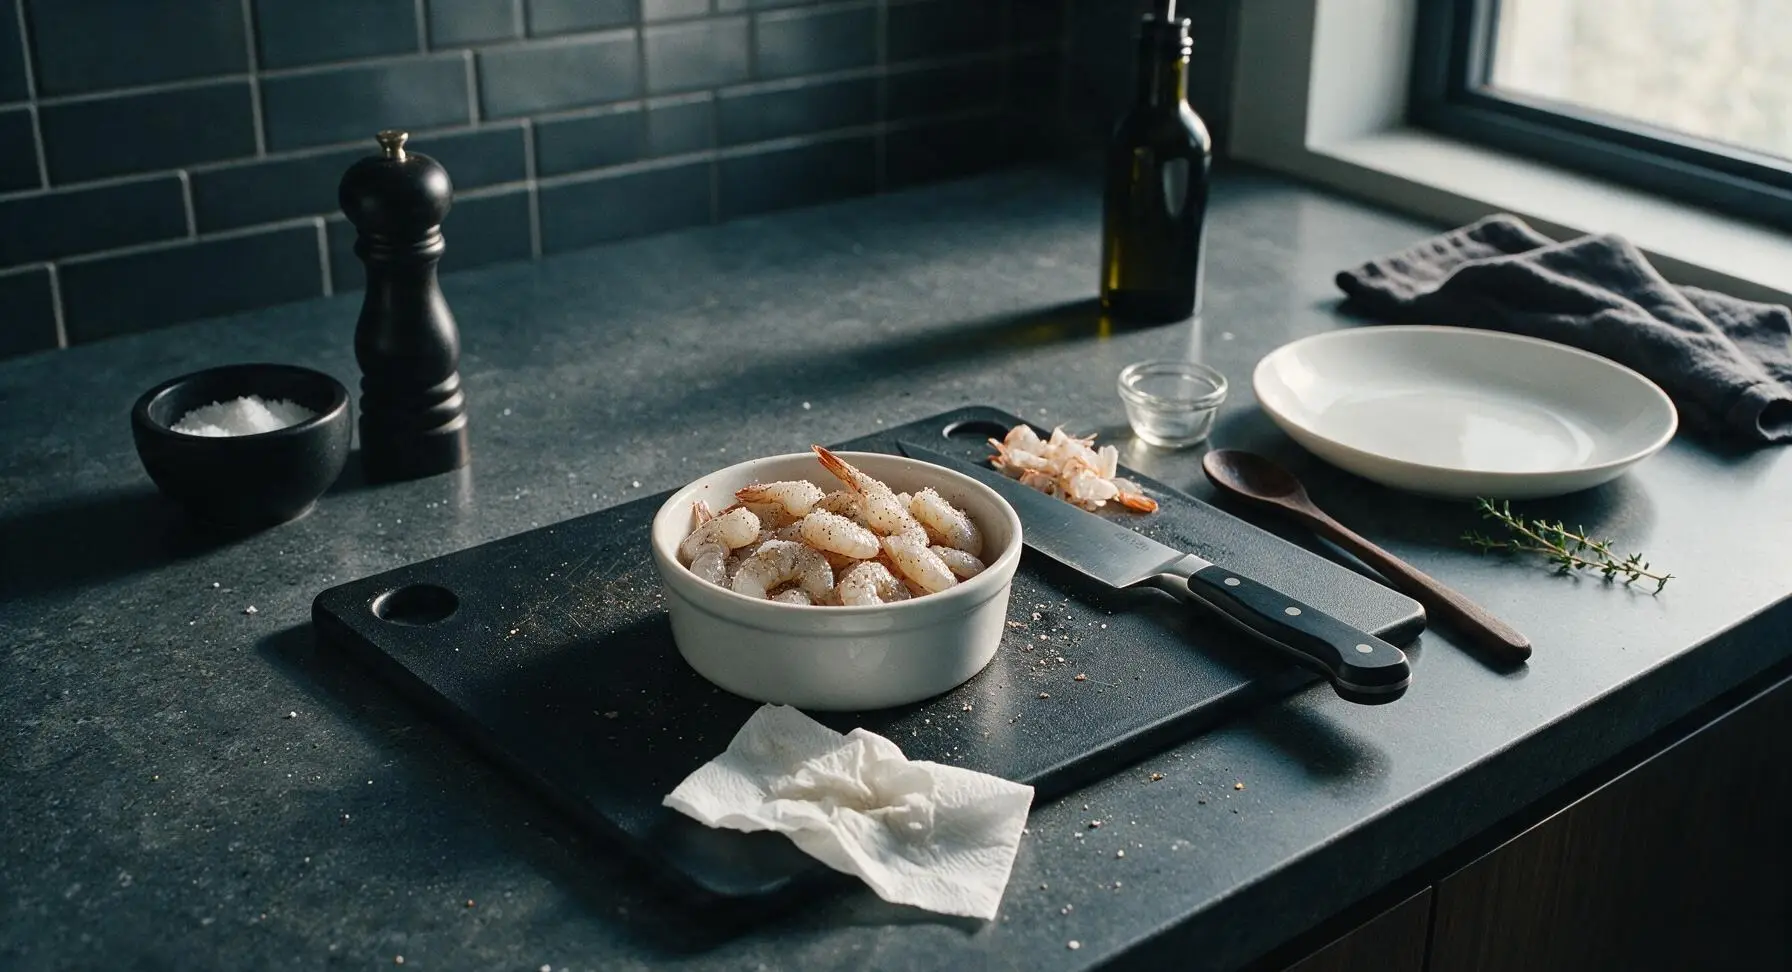
Pat the 450g peeled, deveined shrimp completely dry with paper towels, then place on the maple cutting board. Season with 1/2 tsp kosher salt and 1/4 tsp black pepper, toss lightly to coat evenly. Transfer seasoned shrimp to a matte white ramekin and set aside while prepping remaining ingredients; shrimp should feel dry to the touch, not slick with moisture, to ensure a proper sear.
Step 1
step1:Prep and season shrimp
2

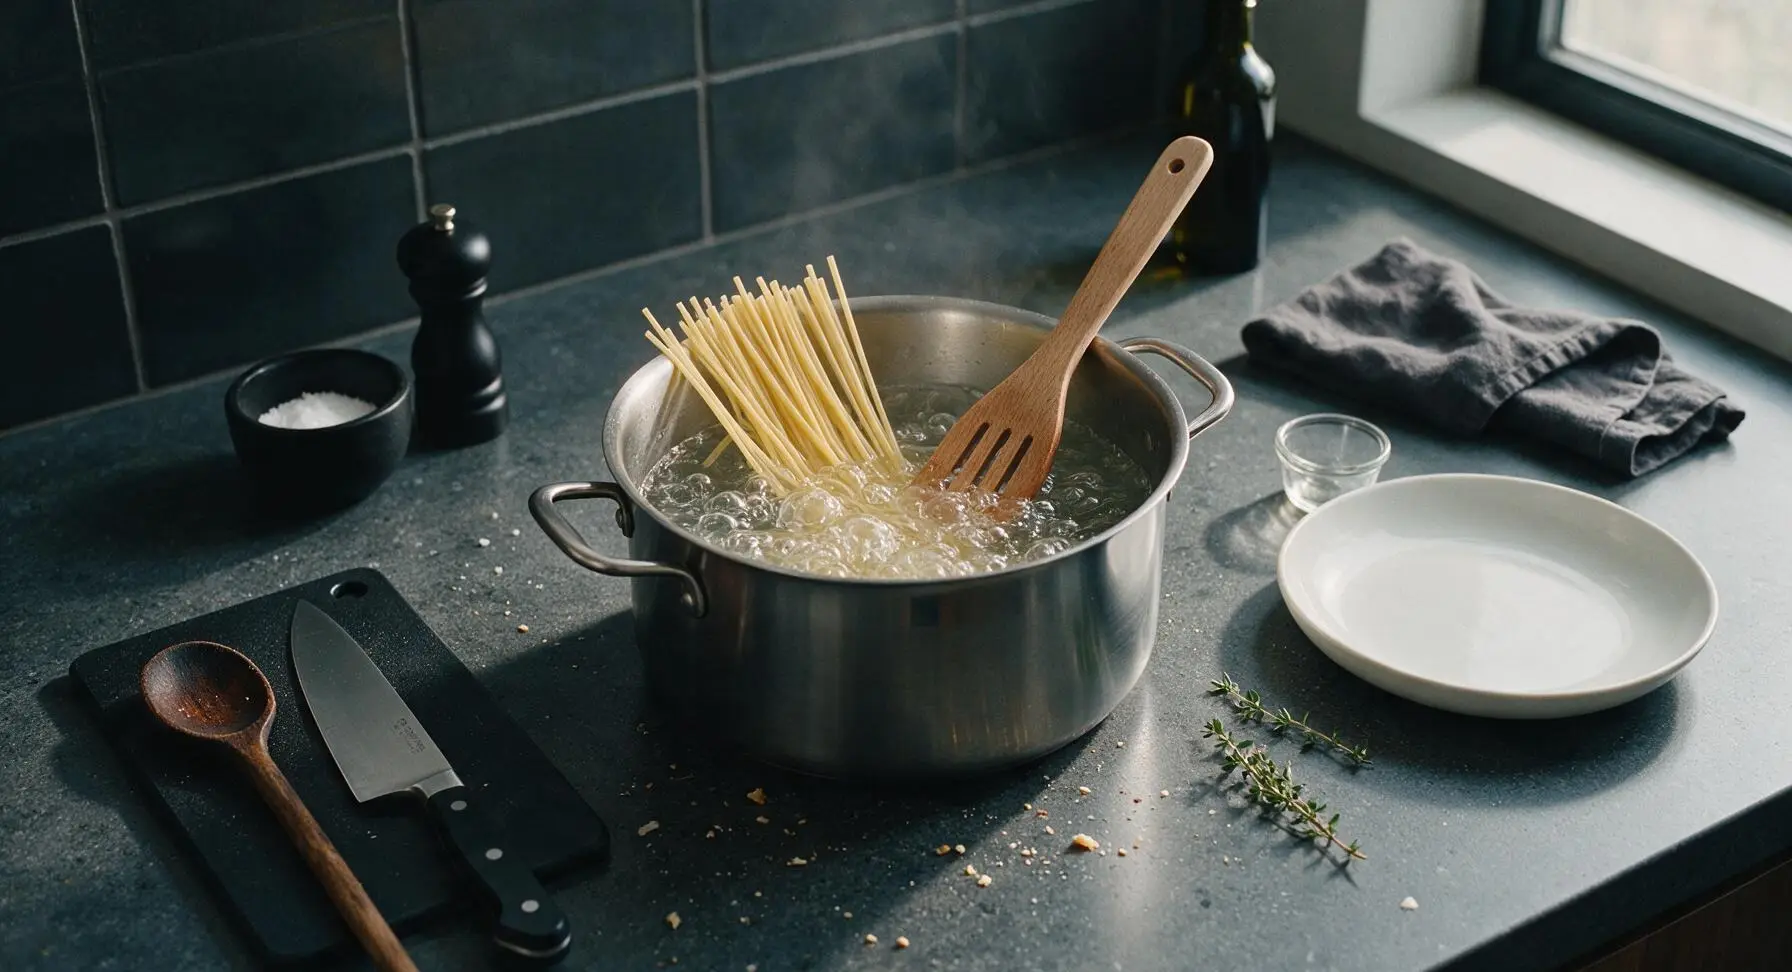
Boil pasta water

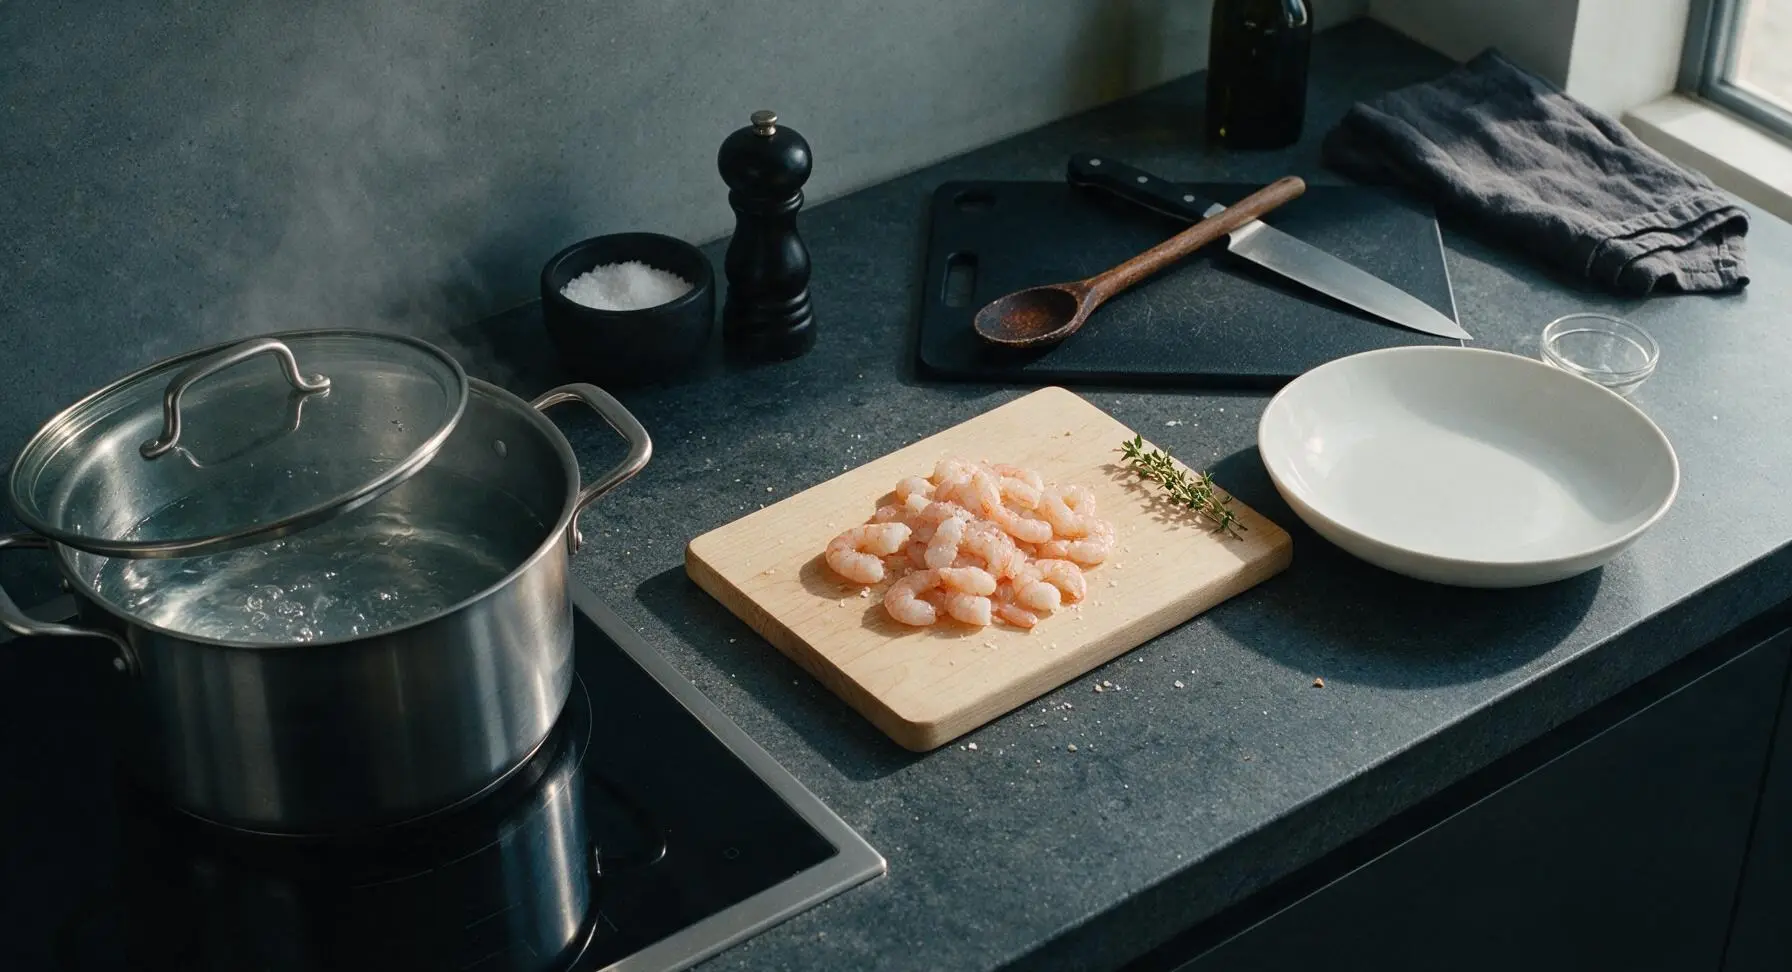
Fill the 6-liter stainless steel stock pot with 4 liters of cold water, place on the left induction burner set to high heat. Add 1 tbsp kosher salt to the water — it should taste as salty as seawater. Cover with the glass lid and bring to a rolling boil, approximately 8 minutes.
Step 2
step2:Boil pasta water
3

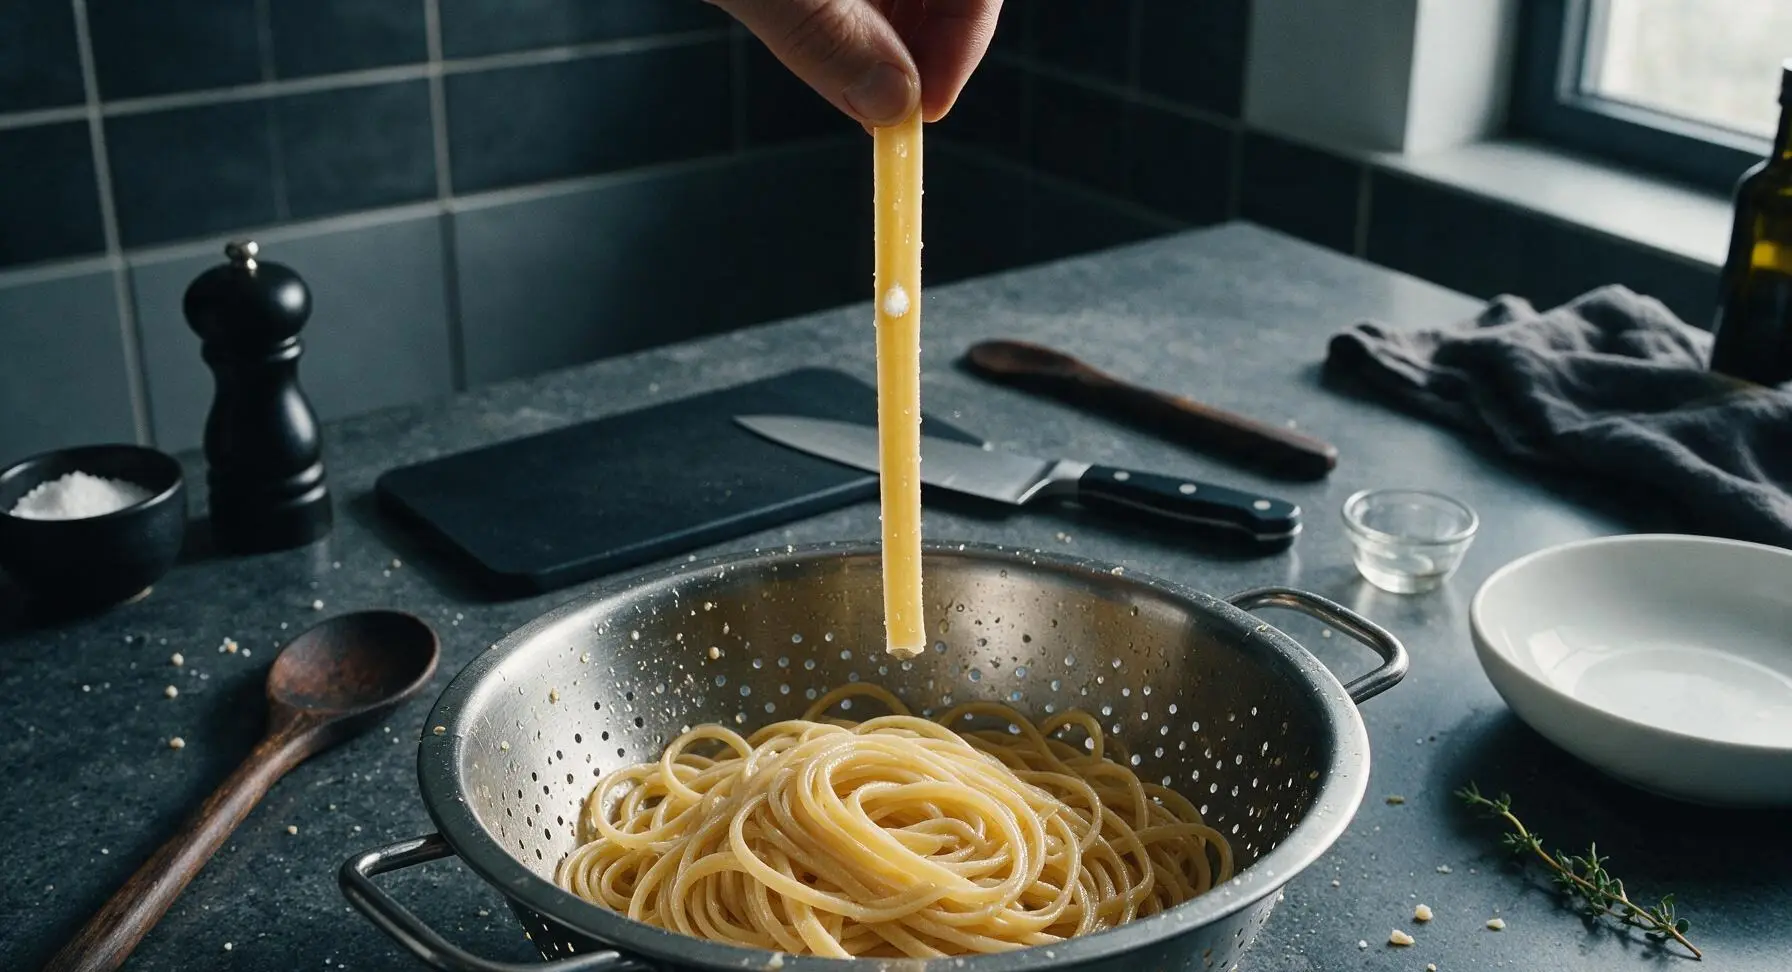
Cook linguine al dente

Once water reaches a rolling boil, add the 340g dry linguine, stirring immediately with the beechwood slotted spoon to prevent noodles from sticking to the pot bottom. Cook for 9 minutes (2 minutes less than the package’s recommended al dente time); the pasta will be firm to the bite, with a tiny white uncooked core visible in the center when a strand is bitten into. Reserve 1/2 cup of starchy pasta water, then drain pasta in the stainless steel colander. Do not rinse the pasta, as residual starch helps the sauce adhere.
Step 3
step3:Cook linguine al dente
Step 3
step3:Cook linguine al dente
4

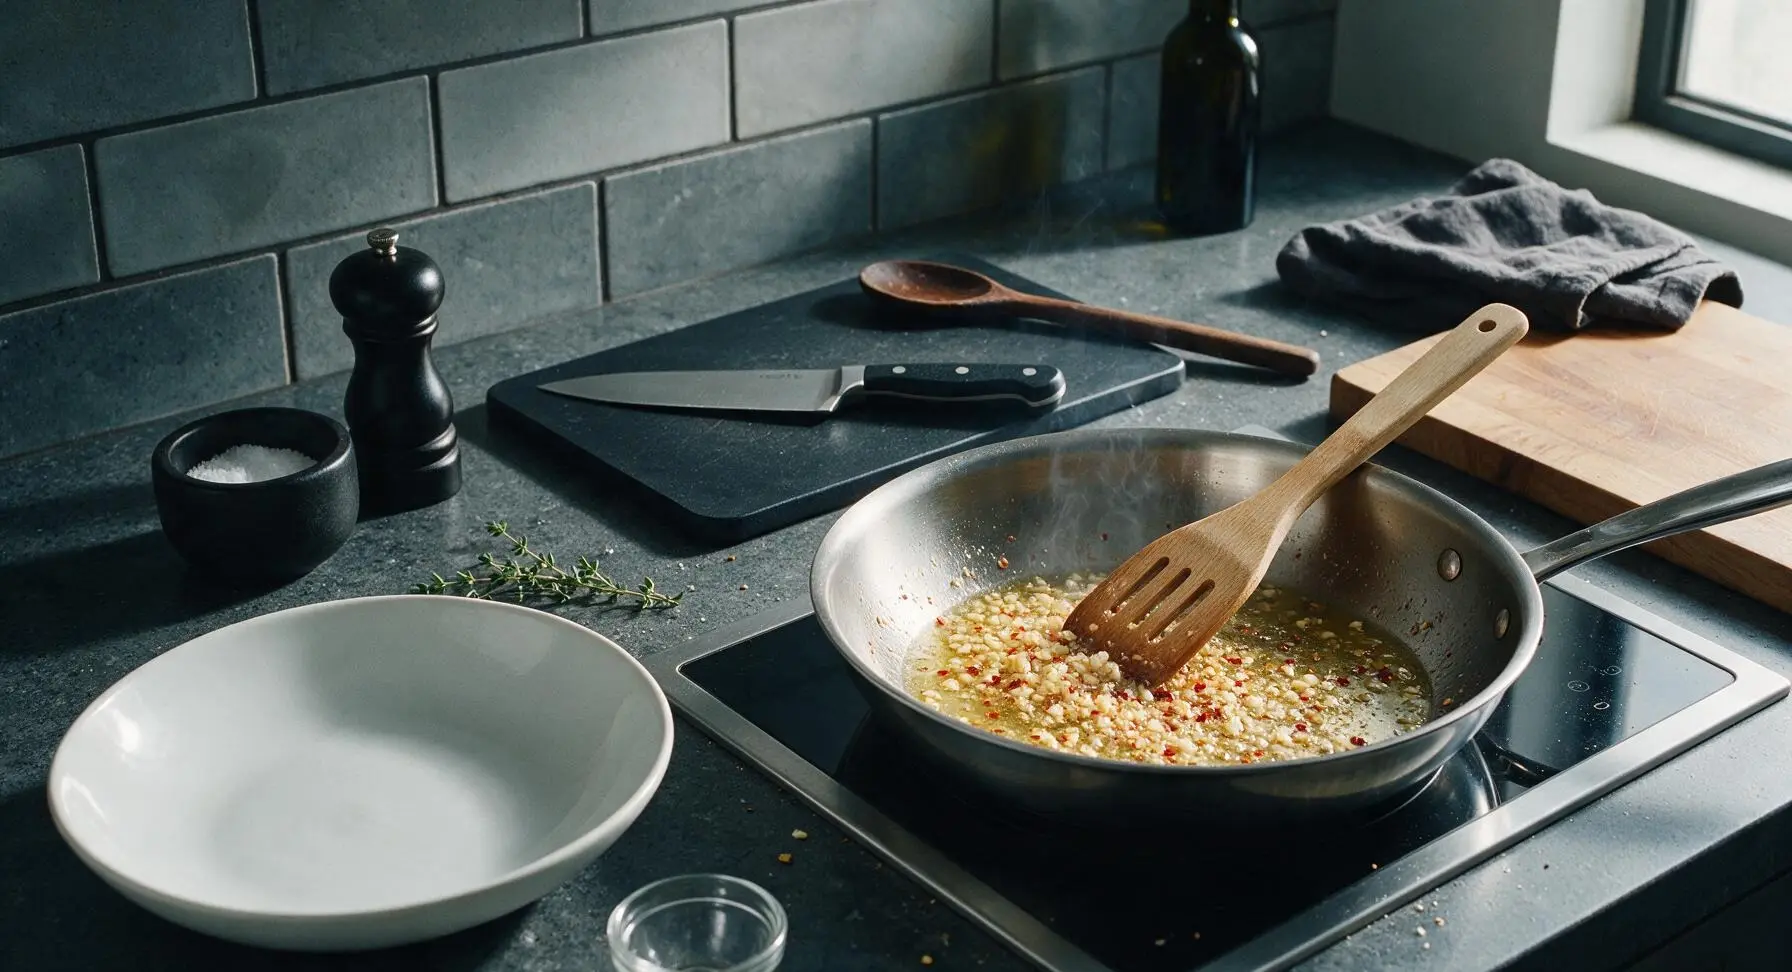
Sauté garlic aromatics

While pasta cooks, place the 12-inch stainless steel skillet on the right induction burner over medium heat. Add 3 tbsp extra virgin olive oil, then add minced garlic and 1/4 tsp red pepper flakes. Sauté for 30 seconds, stirring constantly with the beechwood slotted spoon, until garlic is fragrant and pale golden. Do not let garlic turn dark brown, as it will develop a bitter, burnt taste.
Step 4
step4:Sauté garlic aromatics
5

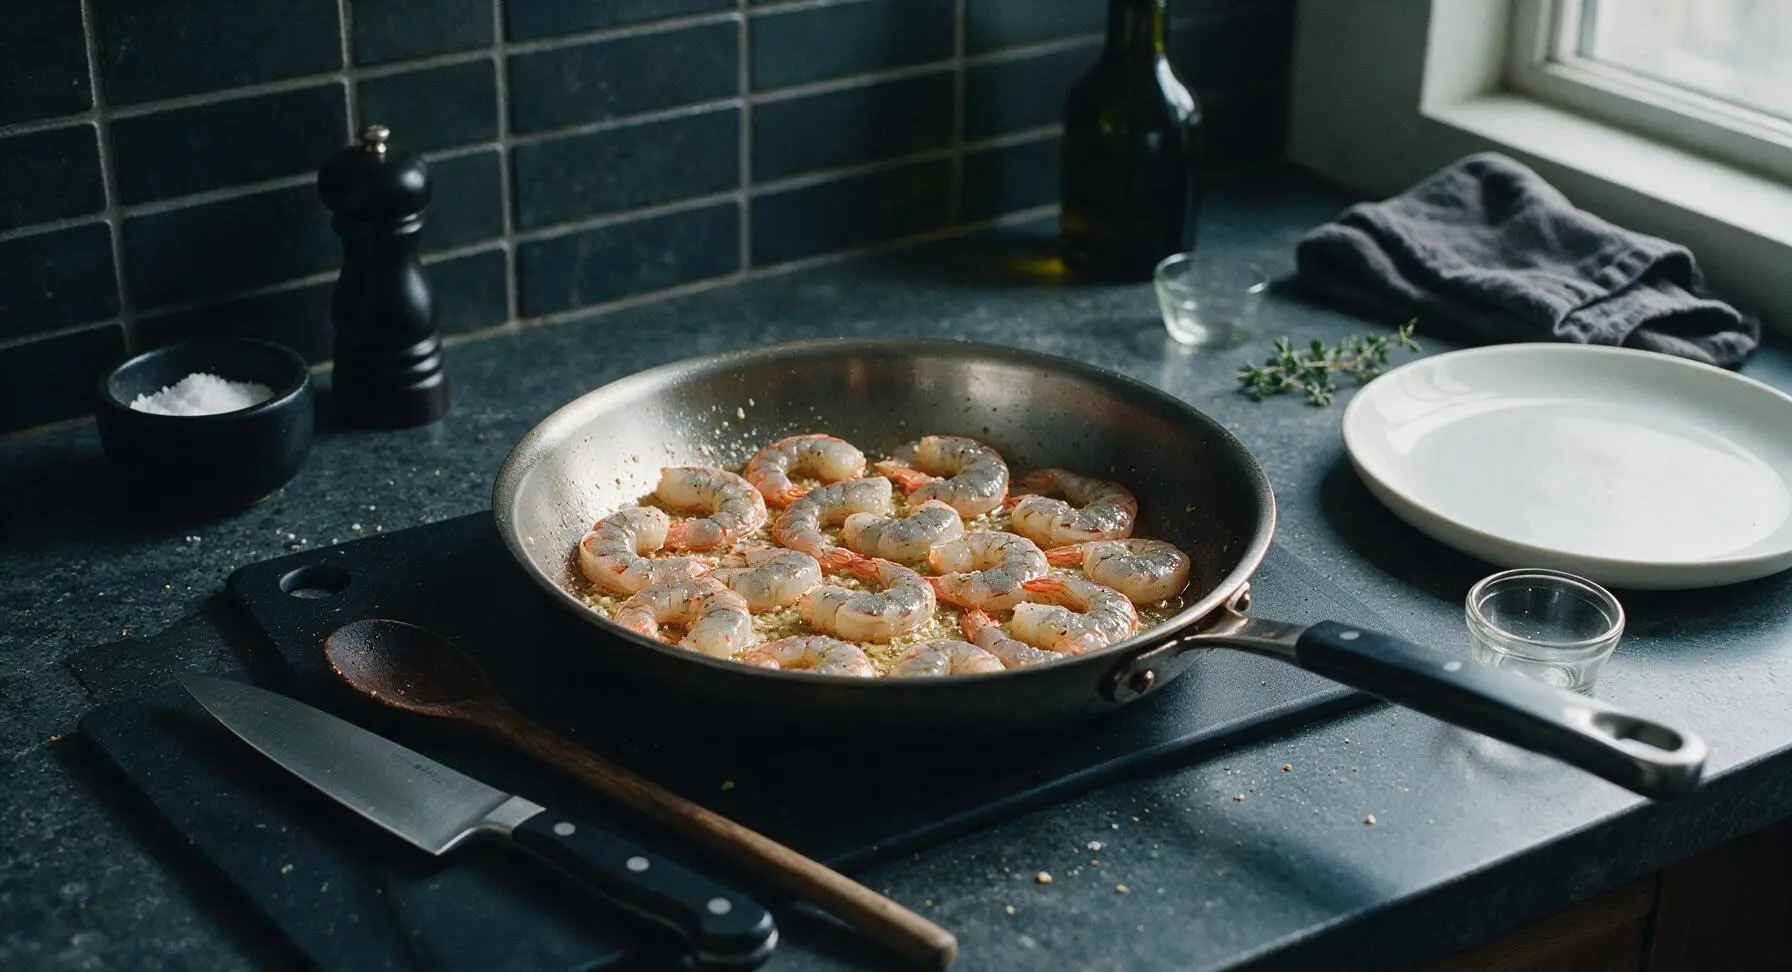
Sear seasoned shrimp

Increase skillet heat to medium-high. Add the seasoned shrimp to the skillet in a single, uncrowded layer. Cook for 1.5 minutes per side, until shrimp are bright pink with light golden seared edges, just opaque all the way through. Use the slotted spoon to transfer seared shrimp to a clean matte white ramekin and set aside; do not overcook, as shrimp will continue to cook gently when added back to the warm sauce.
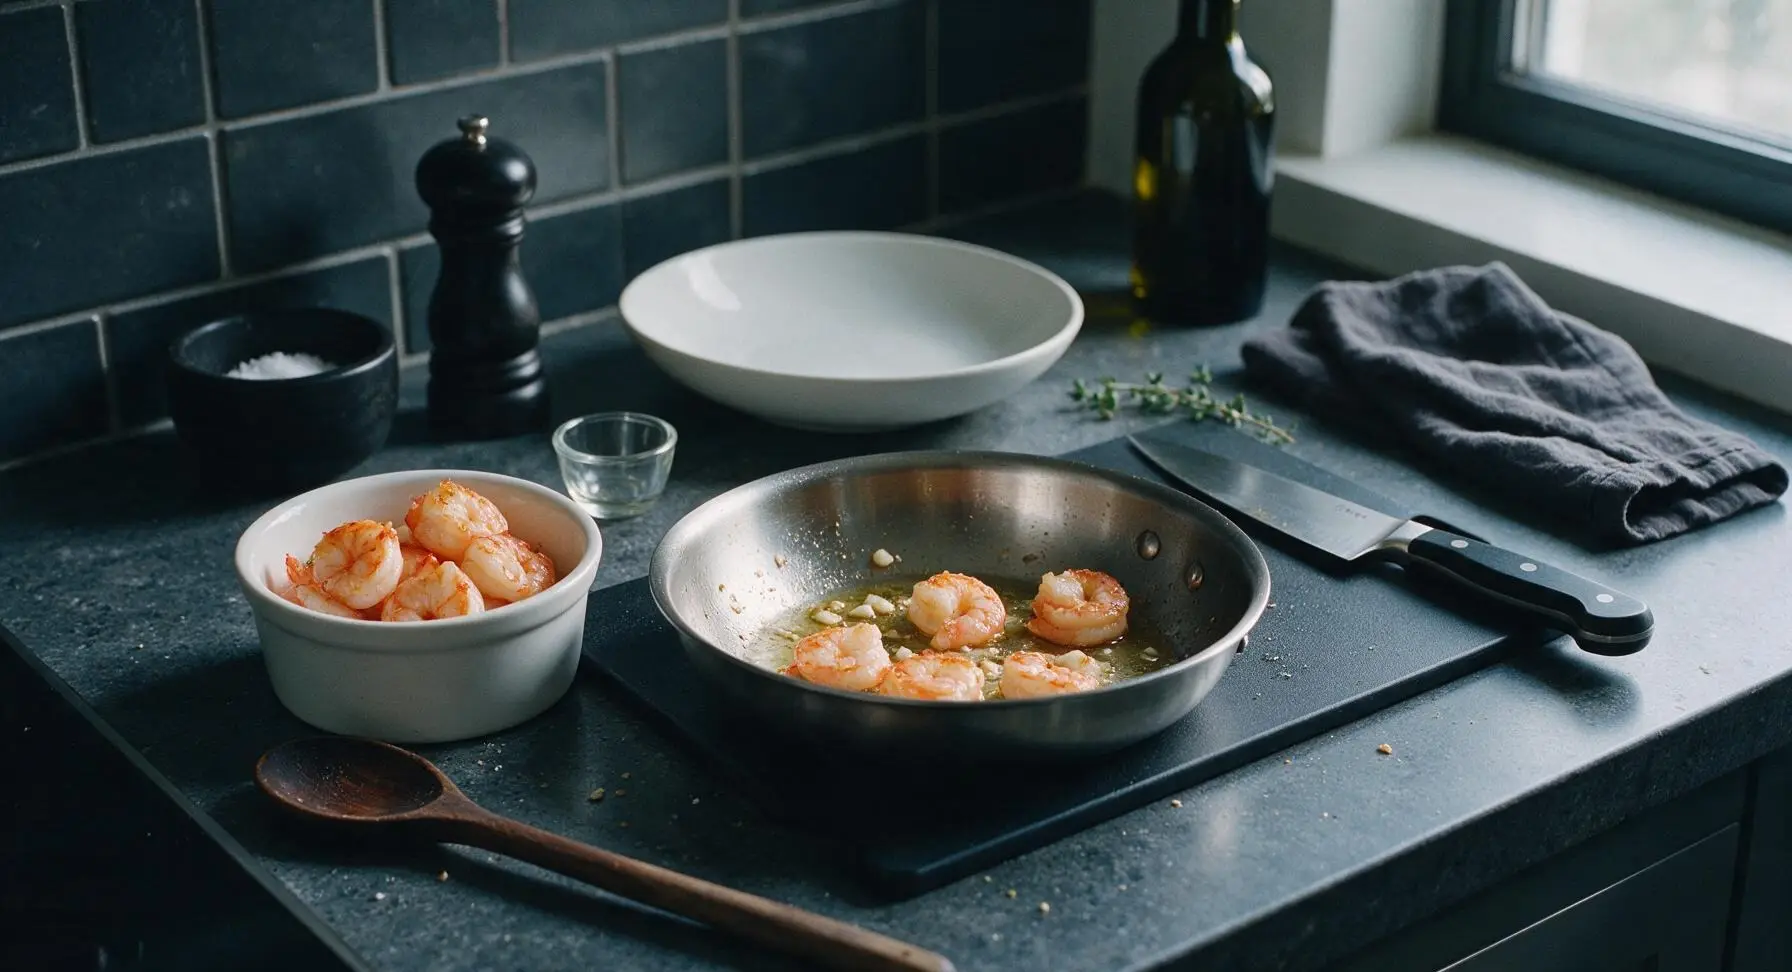
Step 5
step5:Sear seasoned shrimp
Step 5
step5:Sear seasoned shrimp
6

Simmer red sauce

Reduce skillet heat to medium-low. Pour the 800g crushed San Marzano tomatoes into the remaining garlic oil in the skillet, stir to combine. Season with 1/2 tsp kosher salt and 1/4 tsp black pepper. Simmer for 5 minutes, stirring occasionally, until the sauce thickens slightly and the raw metallic tomato taste cooks off, deepening to a rich, bright red color.
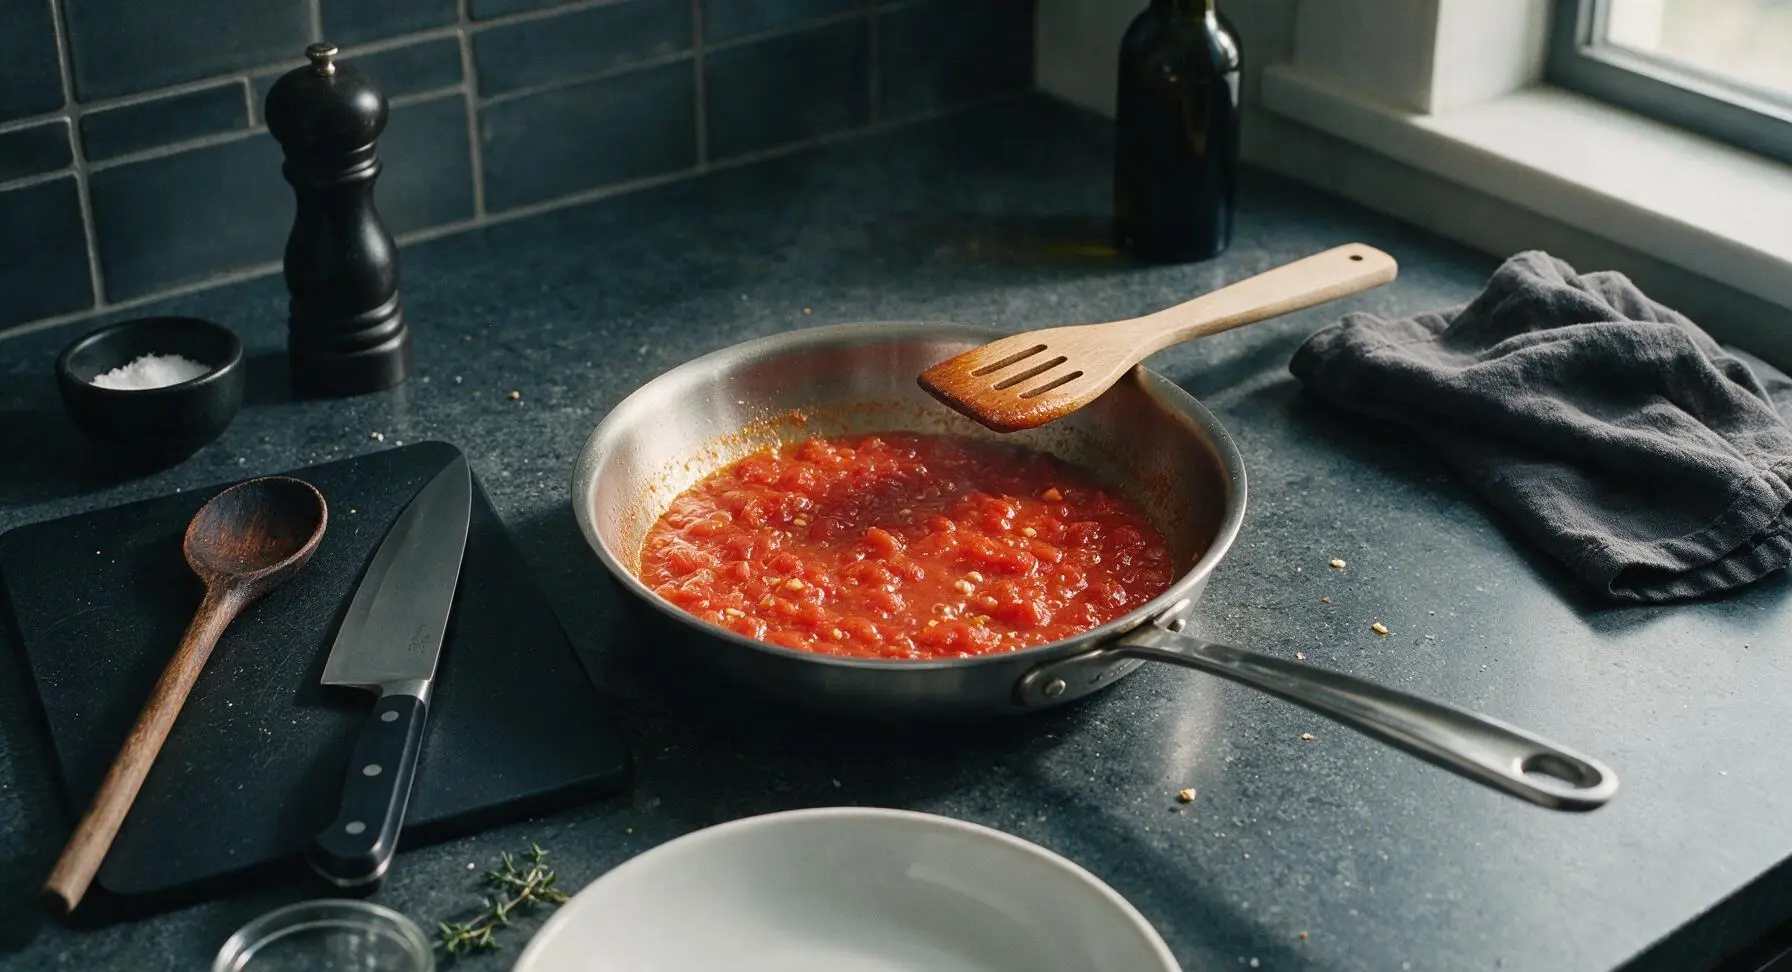
Step 6
step6:Simmer red sauce
7

Toss pasta in sauce

Add the drained al dente linguine directly to the skillet with the simmering sauce, along with 2 tbsp unsalted butter and 1/4 cup grated Parmigiano-Reggiano. Add 1/4 cup of reserved starchy pasta water, then toss vigorously with the slotted spoon for 1 minute, adding extra pasta water 1 tbsp at a time if needed, until the sauce emulsifies into a glossy coating that clings evenly to every pasta strand.
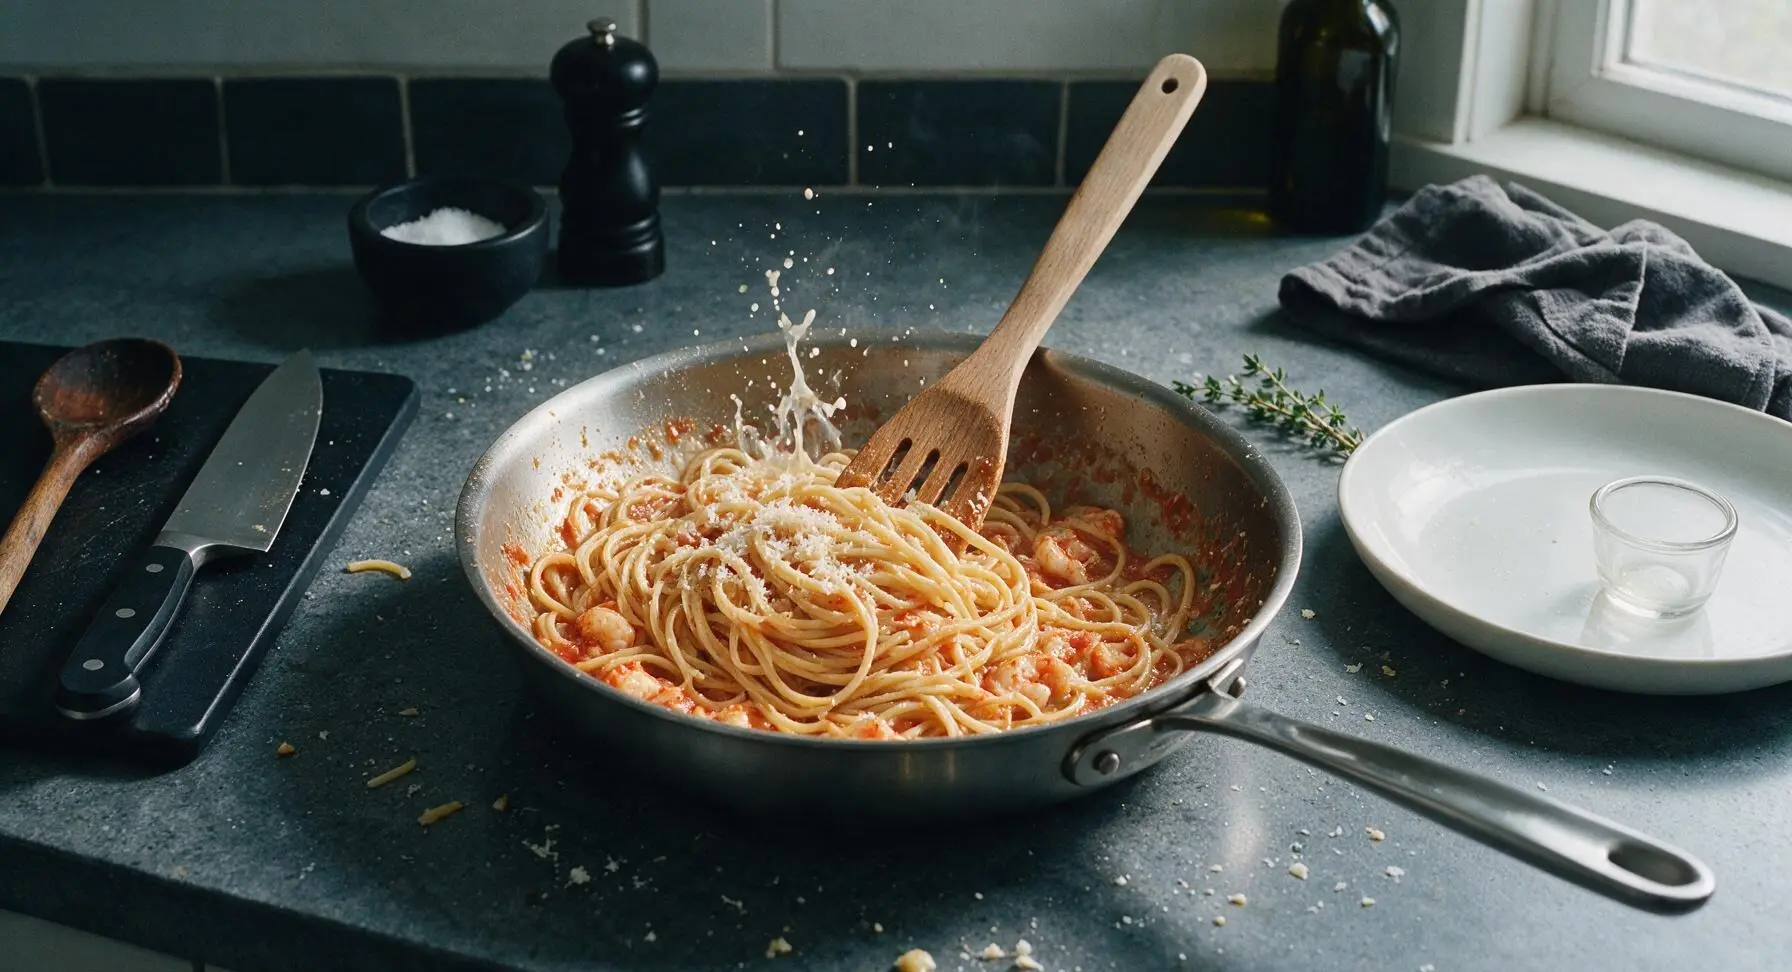
Step 7
step7:Toss pasta in sauce
8

Add shrimp and basil

Add the seared shrimp back to the skillet, along with 1/2 cup loosely packed torn fresh basil leaves. Toss gently for 30 seconds to warm the shrimp through and distribute the basil evenly. Remove the skillet from heat immediately to prevent overcooking the shrimp or wilting the basil too much.
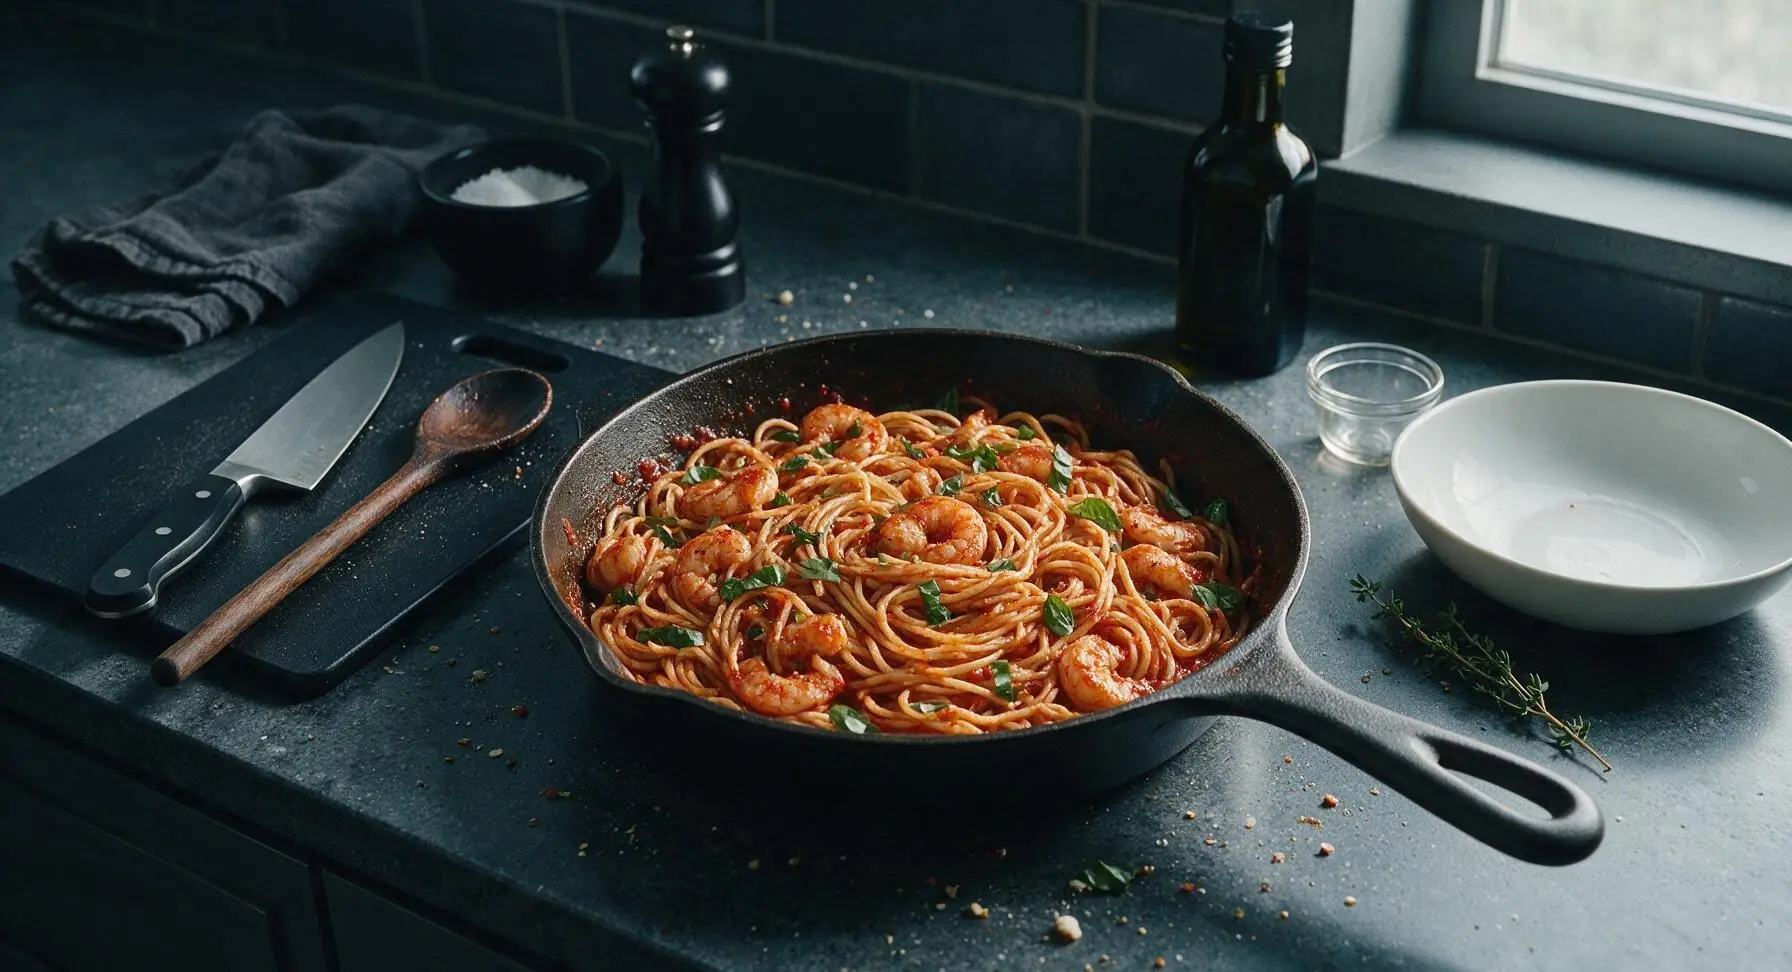
Step 8
step8:Add shrimp and basil

Tips

1.Never rinse pasta after draining: the starchy coating on cooked pasta emulsifies with tomato sauce, butter, and cheese to create a smooth, evenly clinging sauce instead of a watery, separated texture that slides off noodles.
2.Pat shrimp completely dry before seasoning and searing: excess surface moisture will cause shrimp to steam instead of developing a light golden savory sear, which adds deep, rich flavor to the final dish.
3.Cook pasta 2 minutes less than package instructions: the noodles will finish cooking directly in the simmering sauce, absorbing tomato and garlic flavor as they soften, instead of turning mushy from overcooking before being tossed.


✨ You May Also Like

Main Course
🍜 United Kingdom

A showstopping classic of tender seared beef, savory mushroom duxelles, and crisp prosciutto wrapped in flaky golden puff pastry, baked to juicy perfection.

⏱️ 2 hours 1Main Course ★ 4.7
Main Course
🍜 India

Tender charred marinated chicken simmered in a rich, spiced creamy tomato sauce, this iconic Anglo-Indian curry pairs perfectly with basmati rice or warm naan.

⏱️ 50 minuteMain Course ★ 4.6
Main Course
🍜 Thailand

Classic tangy, sweet, and savory Thai stir-fried rice noodles with shrimp, tofu, and crunchy garnishes, balancing all five core Thai flavor profiles.

⏱️ 30 minuteMain Course ★ 4.5
Main Course
🍜 United Kingdom

Crispy golden beer-battered cod and fluffy double-fried chips, served with tangy tartar sauce and malt vinegar: the timeless, beloved British pub comfort classic.

⏱️ 45 minuteMain Course ★ 4.7
Main Course
🍜 Mexico

Smoky, chile-marinated pork tacos with caramelized pineapple, fresh cilantro, and lime: a beloved classic Mexican street food perfect for casual summer gatherings.

⏱️ 1 hour 45Main Course ★ 4.8
Main Course
🍜 United States

Crunchy Fritos corn chips layered with savory beef chili and melted cheddar, topped with cool, zesty fixings for a beloved, cozy Tex-Mex comfort food.

⏱️ 35 minuteMain Course ★ 4.8

shrimp pasta recipes red sauce:Frequently Asked Questions

1.Can I use smaller shrimp instead of the 16/20 count the recipe calls for? ▾
You absolutely can! 16/20 count shrimp stay extra juicy and plump with a quick sear, but smaller sizes like 31/40 count work fine—just cut their cook time by 30 seconds per side to avoid rubbery texture. Pat them fully dry first for a nice light sear, and remove tails if you prefer no-fuss eating.
2.Do I have to use San Marzano crushed tomatoes, or will regular canned crushed tomatoes work? ▾
San Marzano tomatoes have a naturally sweet, low-acid, bright flavor that’s perfect for this quick sauce, but regular canned crushed tomatoes work too. If your regular tomatoes taste extra tart, add a tiny pinch of sugar to balance it, and skip seasoned canned varieties so the garlic and fresh basil stay the star flavors.
3.How do I keep my shrimp from turning rubbery when I cook them? ▾
The two biggest tricks are to avoid overcooking and to pat shrimp completely dry with paper towels first so they sear instead of steam. Cook them over medium-high heat just 1 to 1.5 minutes per side until opaque pink with a faint golden edge, then pull them out of the pan while you make the sauce to prevent overcooking.
4.Can I make this recipe gluten-free for family members with dietary restrictions? ▾
Absolutely! Swap the dry linguine for your favorite gluten-free pasta—rice or chickpea-based varieties hold their al dente texture best here. Cook the pasta 1 minute less than the package directions, and double-check that your canned crushed tomatoes don’t have hidden gluten-containing additives if you’re strictly avoiding gluten.
5.Why does my garlic always burn when I make tomato pasta sauce? ▾
Burnt garlic turns unpleasantly bitter fast, so cook your minced garlic over medium (not high) heat in olive oil for just 30 to 45 seconds, until it smells fragrant and turns pale golden. Immediately pour in your crushed tomatoes to stop the cooking process before the garlic turns dark brown and acrid.
6.Should I leave shrimp tails on, or can I remove them before cooking? ▾
Leaving tails on adds subtle briny, seafood depth to the sauce as shrimp cook, and they look nice for serving, but you can absolutely peel them completely for easier eating. If you remove tails, save the shells to simmer in the sauce for 5 minutes (then strain out) for an extra boost of rich shrimp flavor.
7.How do I get the sauce to stick to my pasta instead of sliding right off? ▾
Reserve ½ cup of starchy, salty pasta water right before you drain the linguine, and never rinse pasta after draining—that washes off the sticky starch that binds to sauce. Toss hot pasta directly in the simmering sauce, adding splashes of reserved pasta water as needed to create a silky, evenly clinging coating.
8.Can I add extra veggies to this pasta to make it more filling? ▾
Totally! Toss in ½ cup of sautéed diced bell pepper, fresh spinach, or sliced mushrooms right after you cook the garlic, before adding the tomatoes. You can also stir in halved cherry tomatoes during the last 2 minutes of sauce cooking for extra fresh texture—just don’t overload the pan so the sauce stays light and garlicky.
9.Is this recipe spicy? My kids don’t tolerate heat well. ▾
The base recipe has zero added heat—it’s bright, garlicky, and tomato-forward, perfect for sensitive palates. If you want a little kick for adult eaters, stir a pinch of red pepper flakes in with the garlic, or serve red pepper flakes on the side so everyone can add as much or as little as they like.
10.How long do leftovers keep in the fridge, and what’s the best way to reheat them? ▾
Stored in a sealed airtight container, this pasta stays good for 3 to 4 days in the fridge. Reheat it gently in the microwave or in a skillet over low heat, adding a tiny splash of water or chicken broth to loosen the sauce back up, since pasta absorbs a lot of sauce as it sits in the fridge.
11.Can I use frozen shrimp instead of fresh for this recipe? ▾
Frozen shrimp works perfectly here, as long as you thaw it completely first and pat it extremely dry before cooking. Thaw it overnight in the fridge, or sub the sealed bag in cold water for 15 minutes for a quick thaw—avoid thawing in hot water, which makes shrimp mushy on the outside before fully defrosted.
12.I don’t have linguine on hand—what other pasta shapes work well here? ▾
Any long, sturdy pasta is a fantastic swap: spaghetti, fettuccine, or bucatini all pair beautifully with the smooth garlic-tomato sauce. Short shapes like penne or rigatoni work too if that’s what you have, just keep extra pasta water on hand to help sauce stick to all the nooks and crannies.
13.Should I season the shrimp separately before cooking them? ▾
Yes! Give shrimp a light sprinkle of kosher salt and black pepper right before searing to build flavor from the start. Don’t salt them more than 10 minutes ahead of cooking, though—salting too early draws out excess moisture, which keeps you from getting that nice, light golden sear on the shrimp exterior.
14.When should I add the fresh basil so it doesn’t turn brown and mushy? ▾
Toss most of your torn fresh basil in right at the very end, after you’ve tossed the pasta and shrimp with the sauce and turned off the heat. Save a handful of small, whole basil leaves to garnish the top of each serving for a pop of bright color and fresh, peppery flavor that doesn’t get cooked out.
15.The recipe says it’s ready in 30 minutes—how do I time everything so nothing gets cold? ▾
Start your pasta water boiling first, since that takes the longest, then prep your garlic, shrimp, and tomatoes while the water heats up. Drop the pasta when you start searing the shrimp, then build the sauce while the pasta cooks, so everything finishes at nearly the same time and goes straight to plates hot.
16.Can I use pre-minced jarred garlic instead of fresh garlic cloves? ▾
Fresh garlic gives the best bright, sharp garlicky flavor this recipe is named for, but pre-minced jarred garlic works in a pinch. Use about 1.5 times the called-for amount, since jarred garlic has a milder, slightly muted flavor, and watch it extra closely when cooking, as it tends to burn faster than fresh minced.

Comments (5)

3 days ago

OMG this was SO good!!! Threw this together last night for my family dinner after work and everyone cleaned their plates. The cook time is actually 20 minutes no cap, I was shocked how fast it came together. Used frozen shrimp I had in the freezer and it still tasted restaurant quality. 10/10 will be adding this to my weekly meal prep rotation!

2 days ago

Wait did you thaw the shrimp first or toss em in frozen? I always forget to thaw mine ahead of time lol

2 days ago

So glad your family loved it! If you're using frozen shrimp, just make sure to pat them dry really well once they thaw quickly in a cold water bath — they'll sear perfectly that way! You can also toss them in straight from frozen if you add 2-3 extra minutes of cook time, just watch to make sure they don't overcook.

5 days ago

Made this for a potluck at my apartment complex this weekend and people were asking me for the recipe left and right! I added a little red pepper flakes for a kick and it was *chef's kiss*. Only complaint is I wish I made double because there were zero leftovers lmao

3 days ago

Red pepper flakes are such a great add for heat! So happy it was a hit at your potluck — next time definitely double the batch, people always go back for seconds of this one 😉

1 week ago

Absolute game changer for my sad weeknight dorm meals. I'm a super basic cook who almost exclusively burns microwave mac and cheese and this was totally foolproof — the 'easy' difficulty rating is NOT a lie, trust me. The garlicky flavor is not overpowering at all, even when I accidentally dumped way too much garlic in because I was distracted by my roommate's story. Already made it twice this week, and my roommate keeps begging me to make it again.

yesterday

My kids loved it!!! I was worried the garlic would be too strong for my picky 7 year old but she asked for a second helping. I used whole wheat pasta instead of regular to make it a little healthier and nobody even noticed. Will absolutely make this again on busy school nights.

30 minutes ago

Whole wheat swap is genius! I've been trying to sneak more whole grains into my kids' meals without them complaining, definitely trying that next time I make this

2 weeks ago

Really solid recipe, but I found the sauce a little thin for my taste when I followed the measurements exactly. Anyone else have that issue? I ended up simmering it an extra 5 minutes and adding a tiny bit of tomato paste to thicken it up, which fixed it, just wondering if I did something wrong?

1 week ago

I had the same thing happen! I think my canned tomatoes were extra watery — the tomato paste trick works perfect, I do that every time now too

5 days ago

Thanks for the honest feedback! The thickness can vary a bit depending on the brand of canned tomatoes you use — if you grab a no-salt-added or fire-roasted variety they sometimes have extra liquid. Simmering a little longer and adding a spoonful of tomato paste is exactly the fix we recommend! We'll add that note to the recipe tips to help other folks out.



