
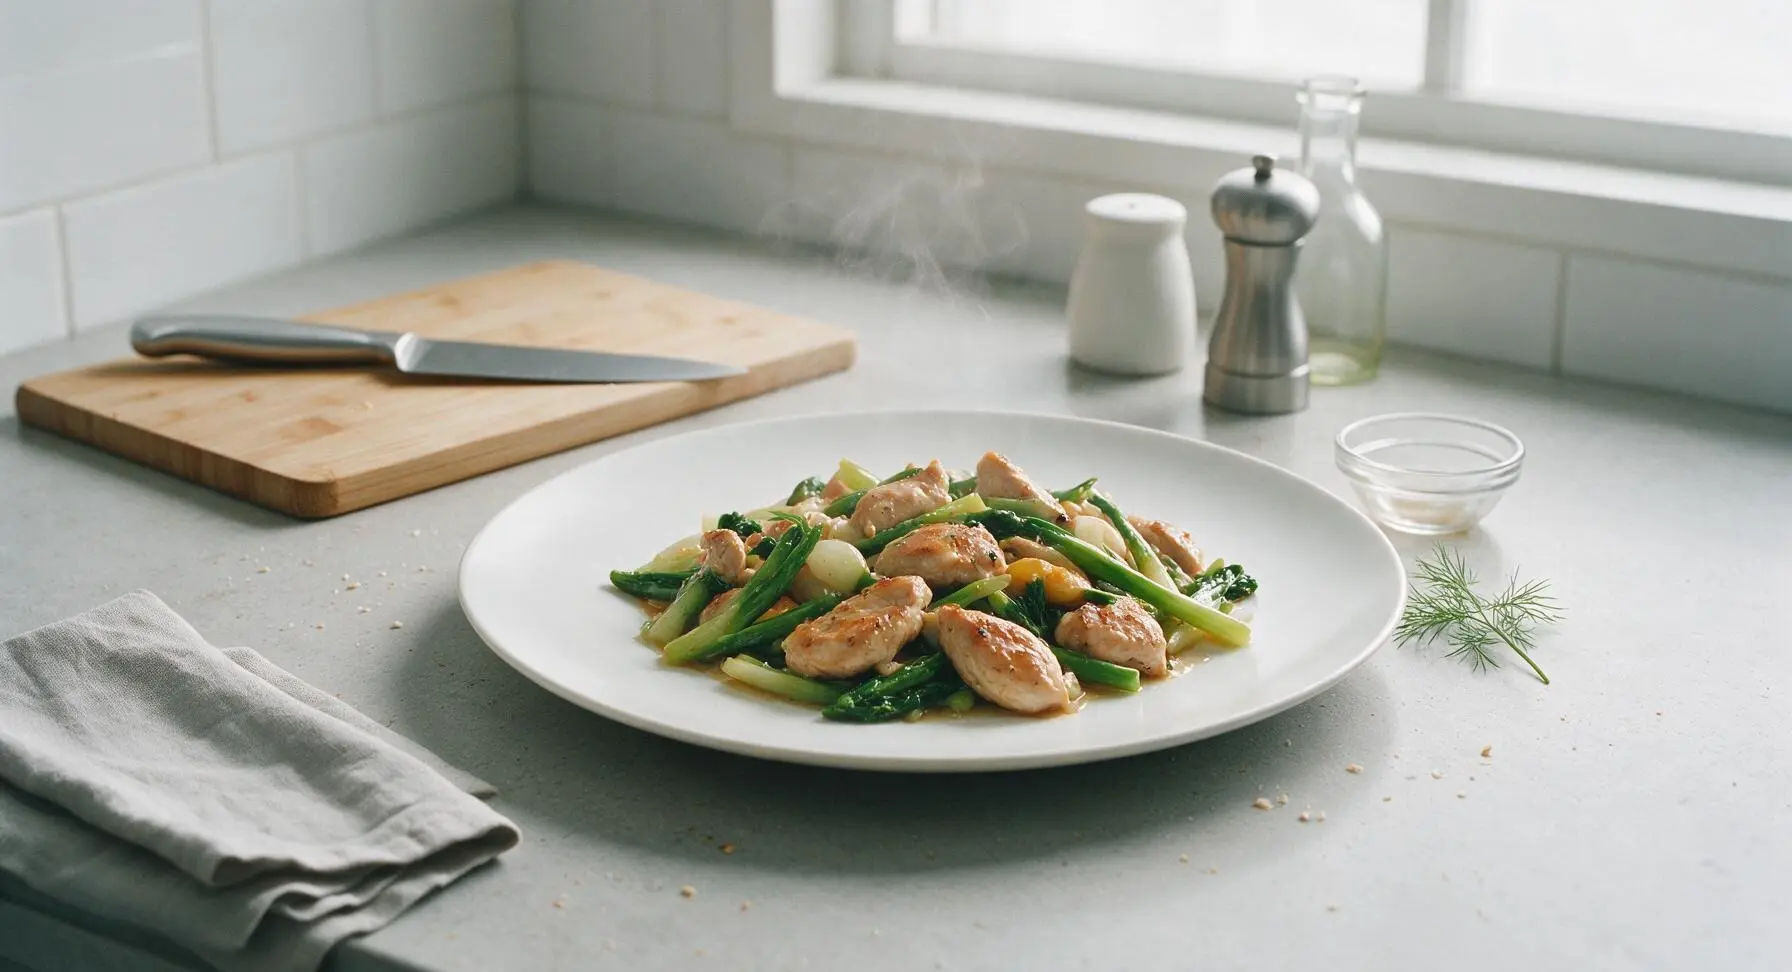
simple stir fry

title 1
simple stir fry
⏱️ cook time 10 minutes
🍽️ servings 4
⚡ Difficulty easy

intro

This bright, flavorful Cantonese-style simple stir fry pairs tender seared chicken with crisp-tender spring vegetables in a light glossy sauce, ready in 20 minutes for busy weeknights.

Ingredients
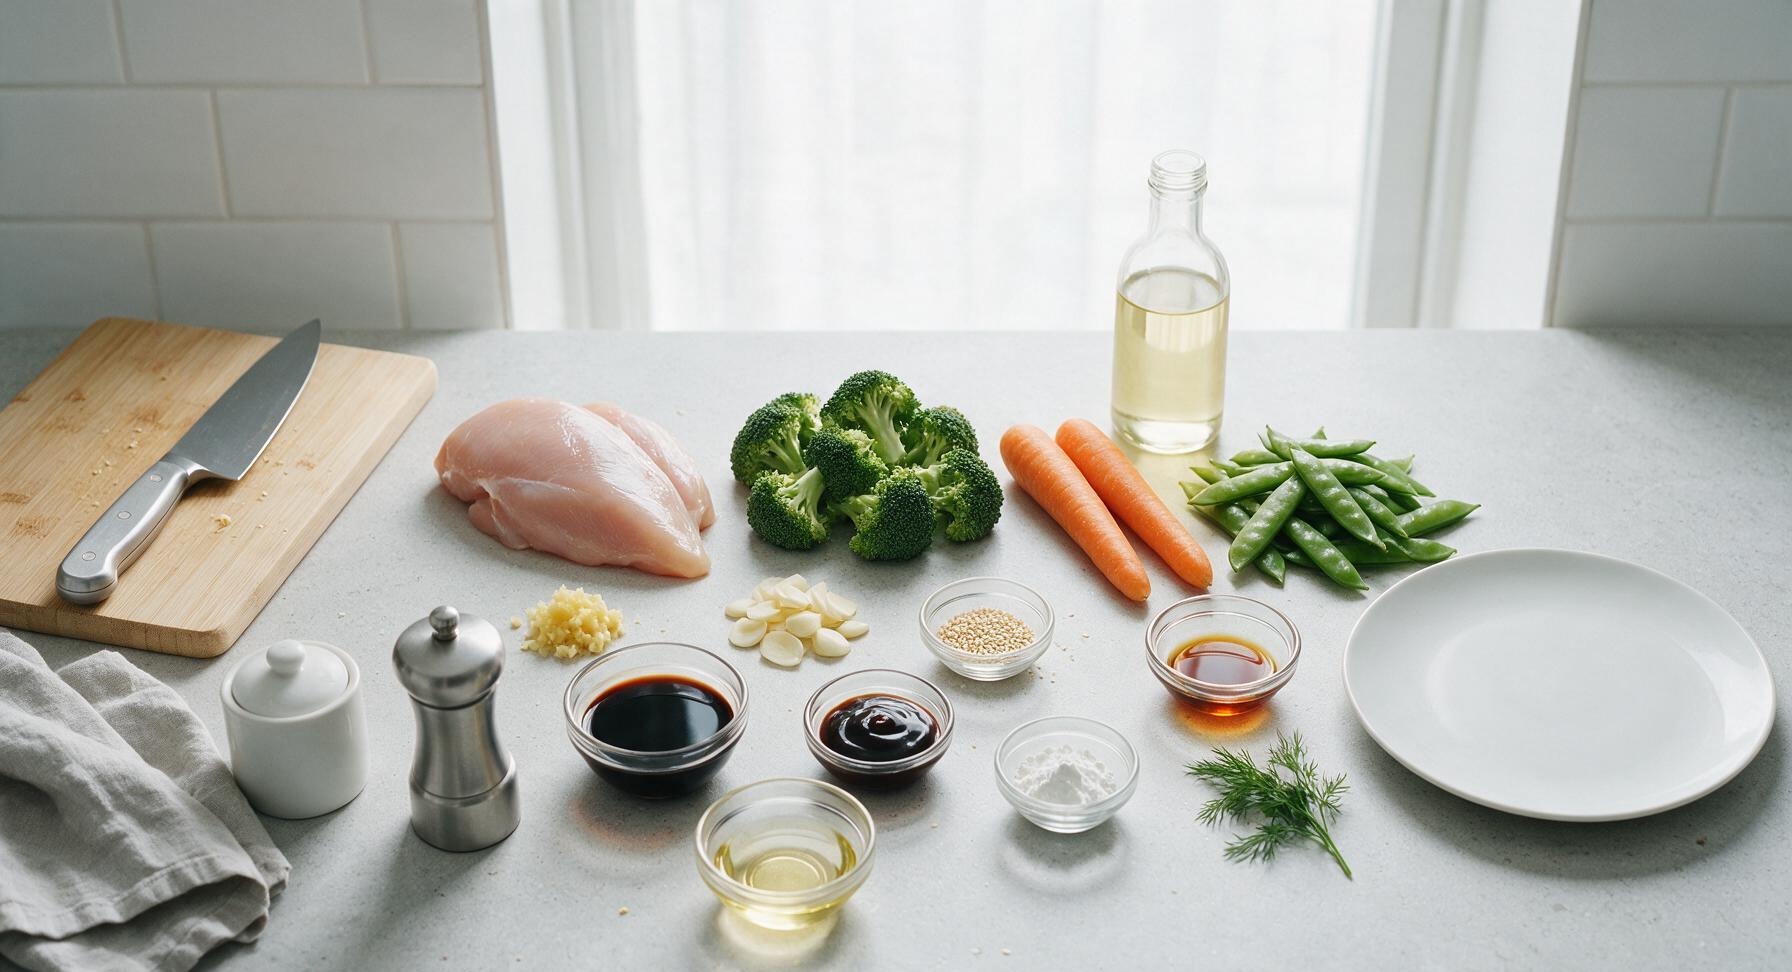
Boneless skinless chicken breast 450g
Broccoli florets 3 cups (300g)
Carrots 2 medium (150g)
Sugar snap peas 1 cup (100g), trimmed
Garlic 3 cloves, thinly sliced
Fresh ginger 1 tbsp (15g), minced
Low-sodium soy sauce 3 tbsp
Oyster sauce 1 tbsp
Toasted sesame oil 1 tsp
Cornstarch 1 tsp
Neutral canola oil 2 tbsp
Toasted white sesame seeds 1 tsp, for garnish

Steps

1

Cut and season chicken

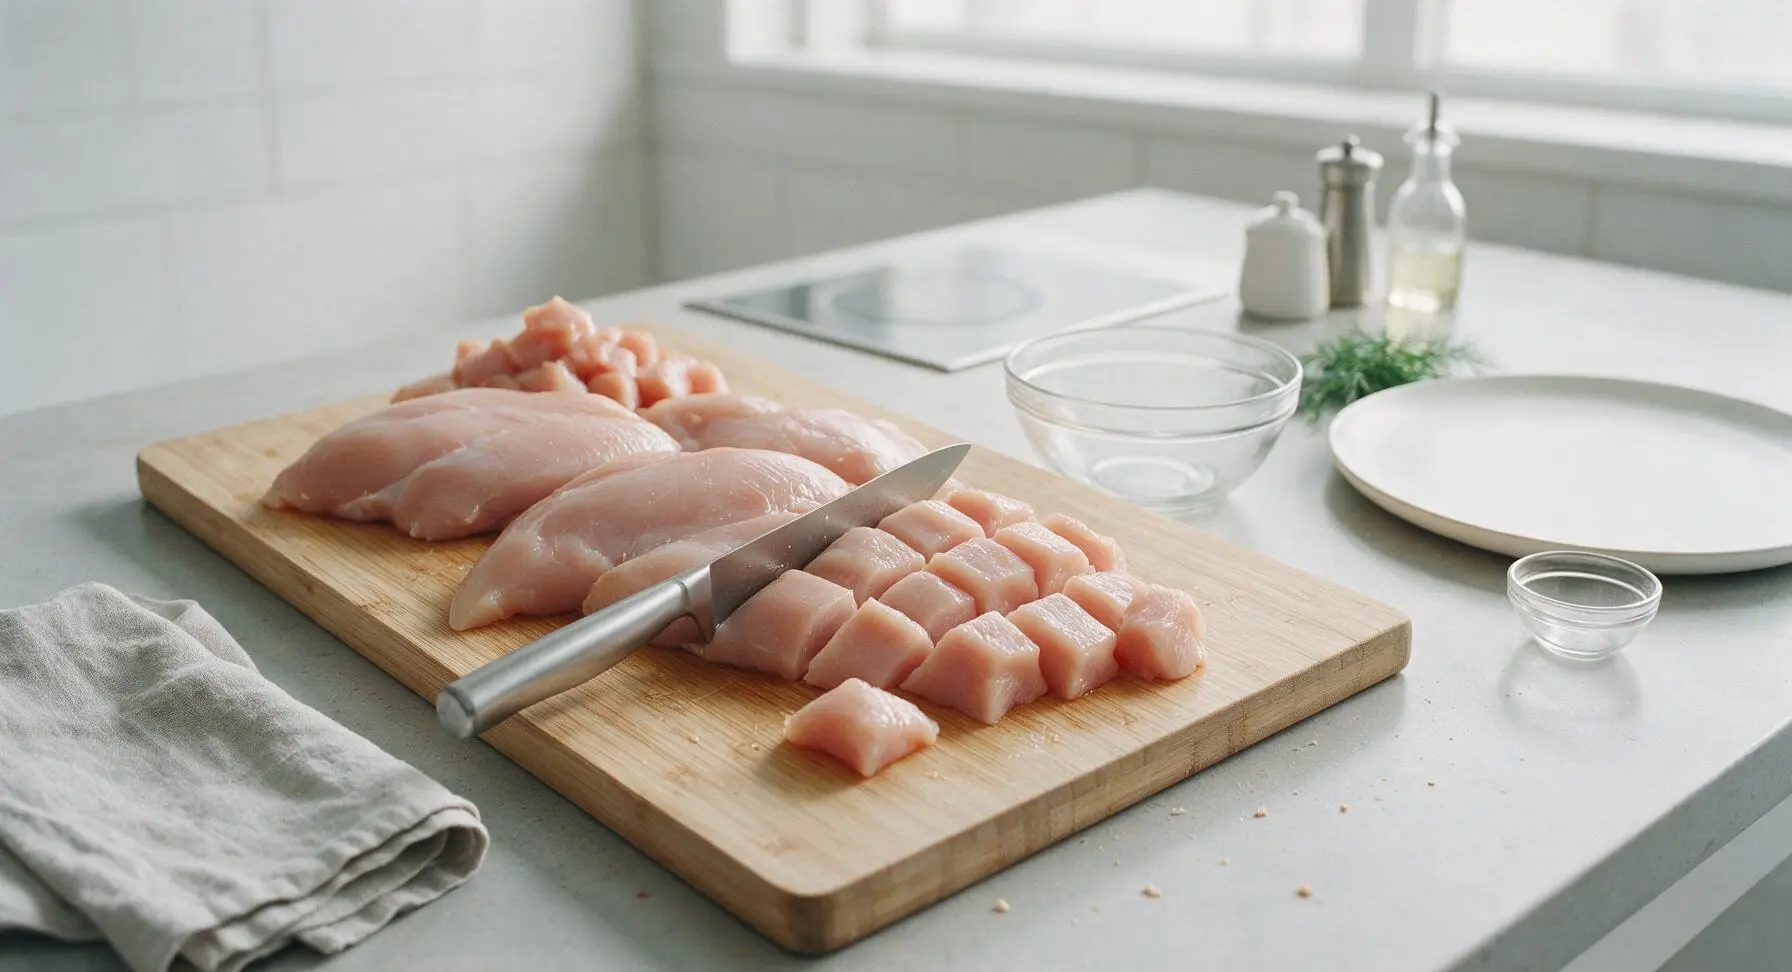
Place the boneless, skinless chicken breasts on the light grey cutting board. Use the 8-inch chef knife to trim any visible silver skin or hard fat, then cut into uniform 2.5cm (1-inch) cubes. Transfer cubed chicken to one of the small clear glass prep bowls, toss with 1 teaspoon of the measured soy sauce and 1/4 teaspoon freshly ground black pepper, set aside to rest for 5 minutes. Uniform cube size ensures even cooking without overdone edges or raw centers.
Step 1
step1:Cut and season chicken
2

Chop stir-fry vegetables

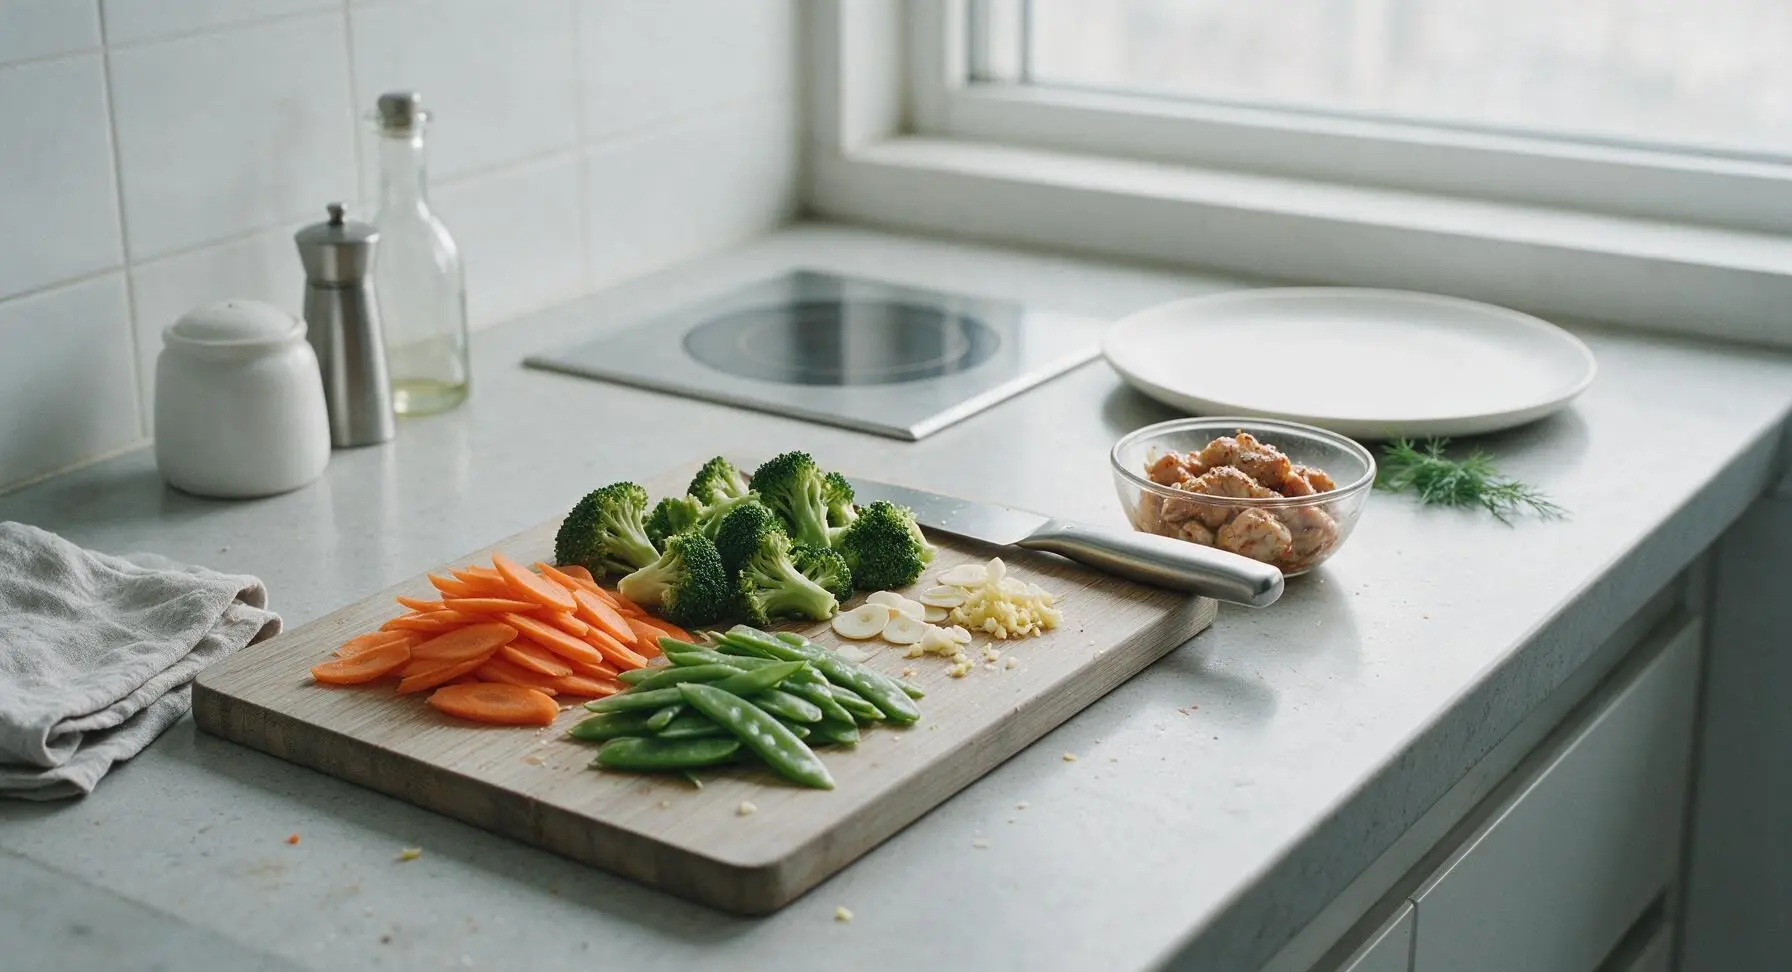
On the same light grey cutting board, cut the broccoli into bite-sized 3cm florets, peel carrots and slice diagonally into 0.5cm thick ovals, trim the tough stringy ends off sugar snap peas, thinly slice garlic cloves, and mince ginger. Keep harder, slower-cooking vegetables (broccoli, carrots) separate from softer, faster-cooking ingredients (snap peas, garlic, ginger) to stage cooking properly and avoid mushy veggies.
Step 2
step2:Chop stir-fry vegetables
3

Mix savory sauce

In the second small clear glass prep bowl, stir together the remaining 2 tablespoons + 2 teaspoons low-sodium soy sauce, 1 tablespoon oyster sauce, 1 teaspoon toasted sesame oil, 1 teaspoon cornstarch, and 2 tablespoons cold water until completely smooth, with no visible white cornstarch lumps. Pre-mixing the sauce eliminates last-minute scrambling and ensures even, consistent coating on all stir-fry ingredients.
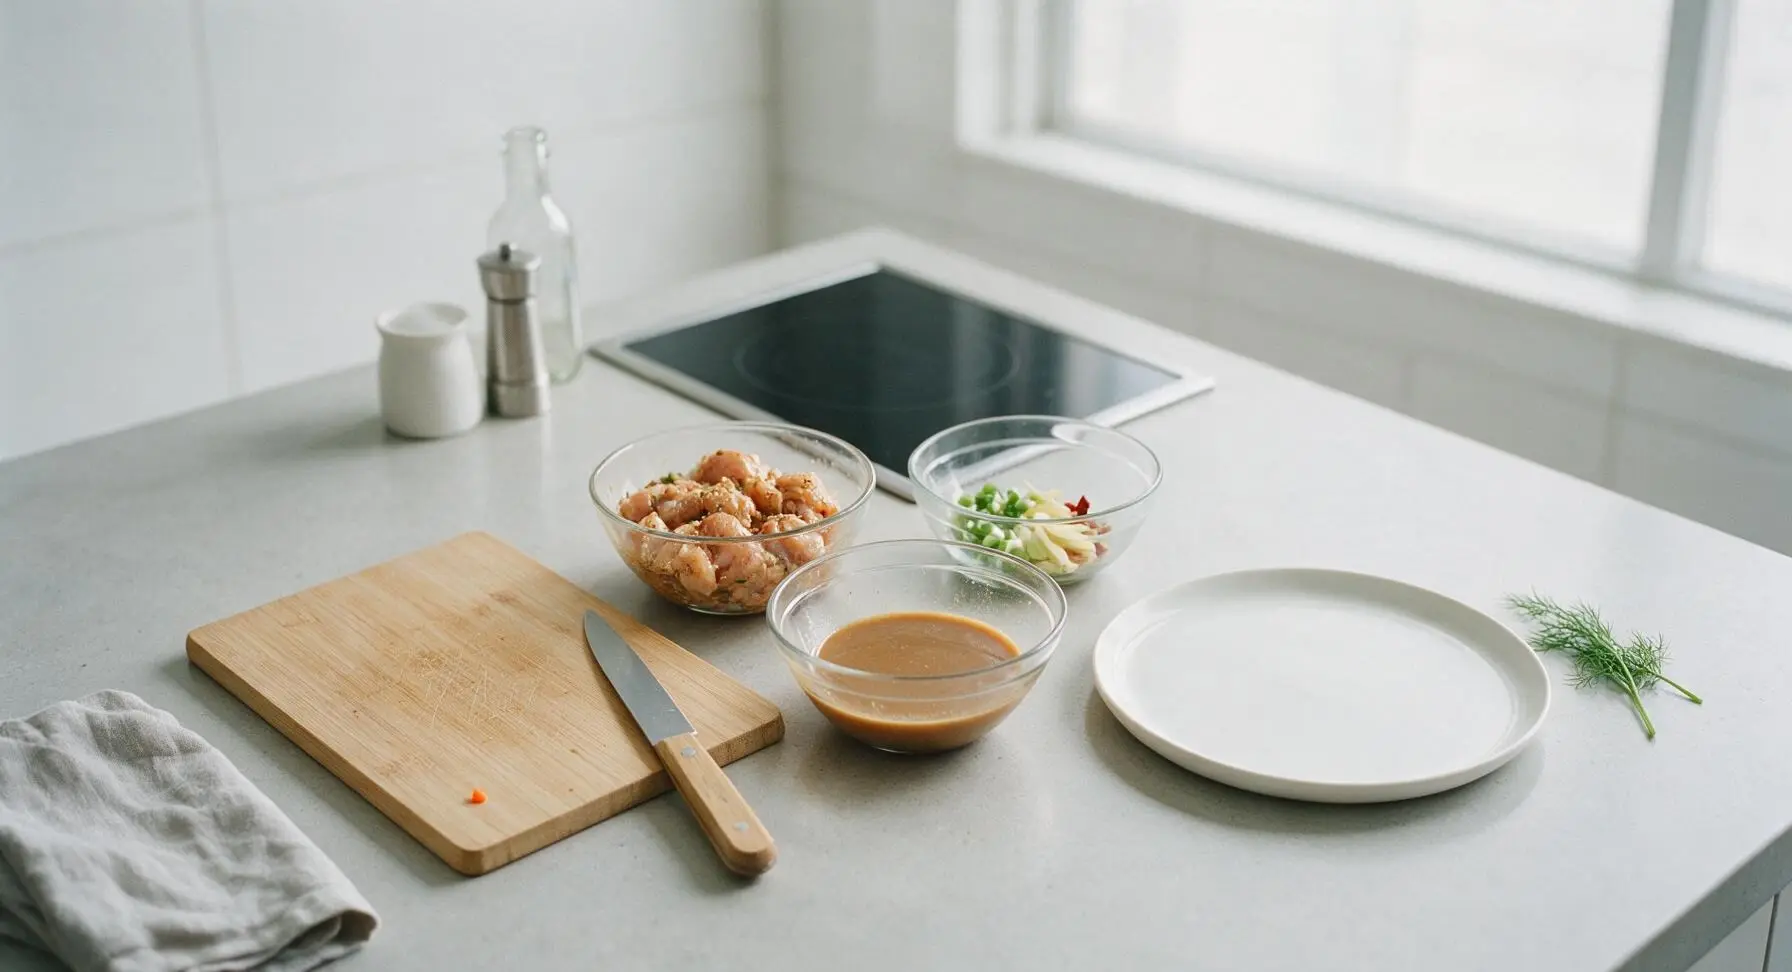
Step 3
step3:Mix savory sauce
4

Preheat the wok

Place the 30cm seasoned carbon steel wok on the center-back induction burner, set the terracotta spoon rest to the right of the burner with the silicone spatula on top, turn heat to medium-high, and add 1 tablespoon of neutral canola oil. Heat for 1-2 minutes until the oil shimmers across the wok surface and just begins to send up a thin, wispy curl of smoke. A properly preheated wok creates the signature light sear (wok hei) without food sticking to the pan surface.
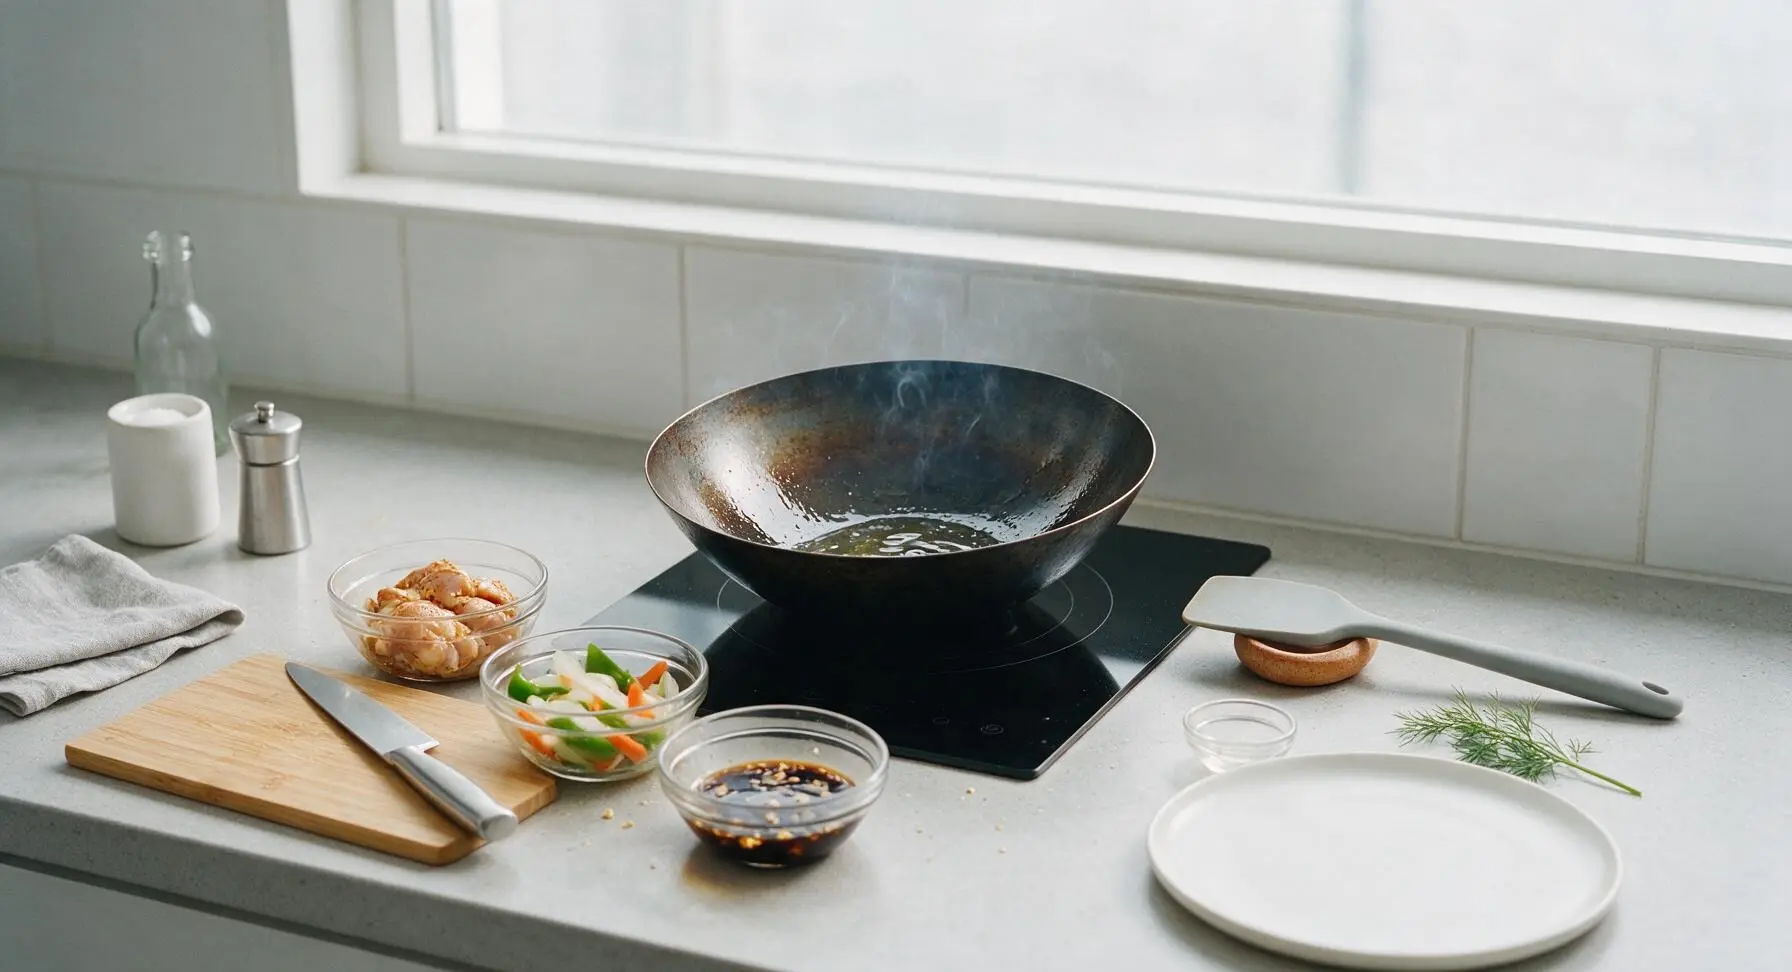
Step 4
step4:Preheat the wok
5

Sear chicken until golden

Carefully add the seasoned cubed chicken to the hot wok in a single layer, leaving 5mm of space between pieces to avoid steaming. Let cook undisturbed for 2 minutes until deep golden on the first side, then use the silicone spatula to toss and cook for another 1-2 minutes until chicken is 80% cooked: pale golden on all sides, with a faint pink center visible when a piece is cut open. Transfer the partially cooked chicken back to its prep bowl and set aside.
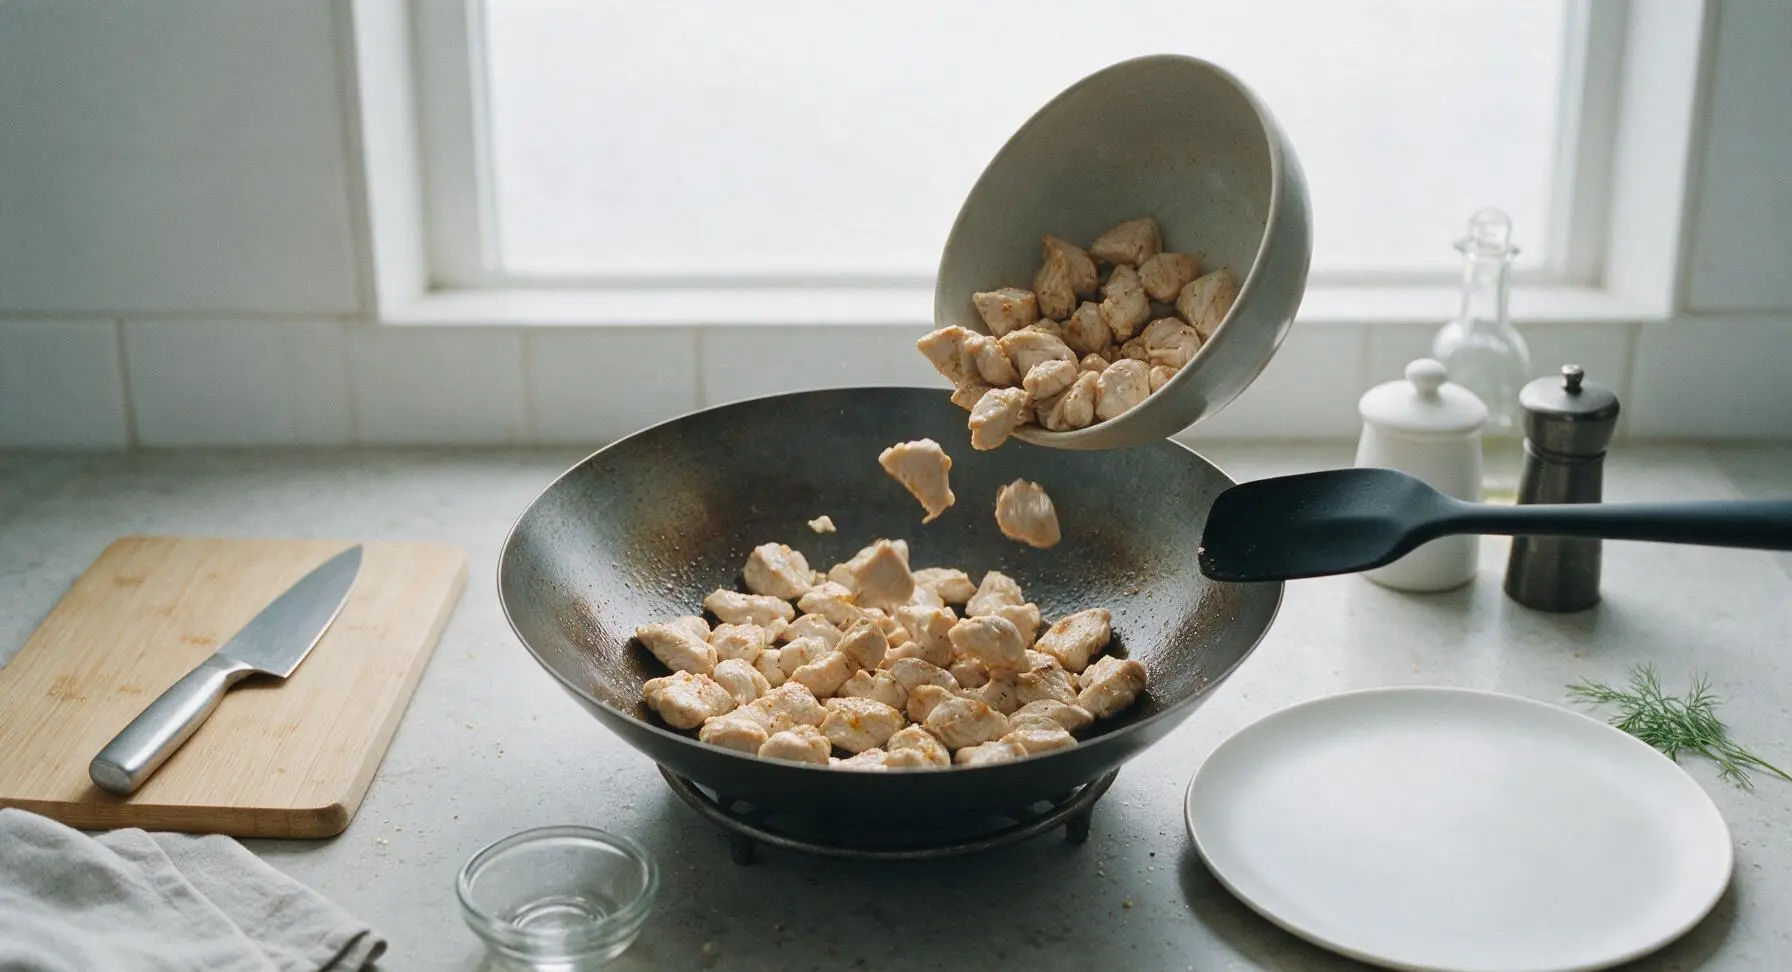
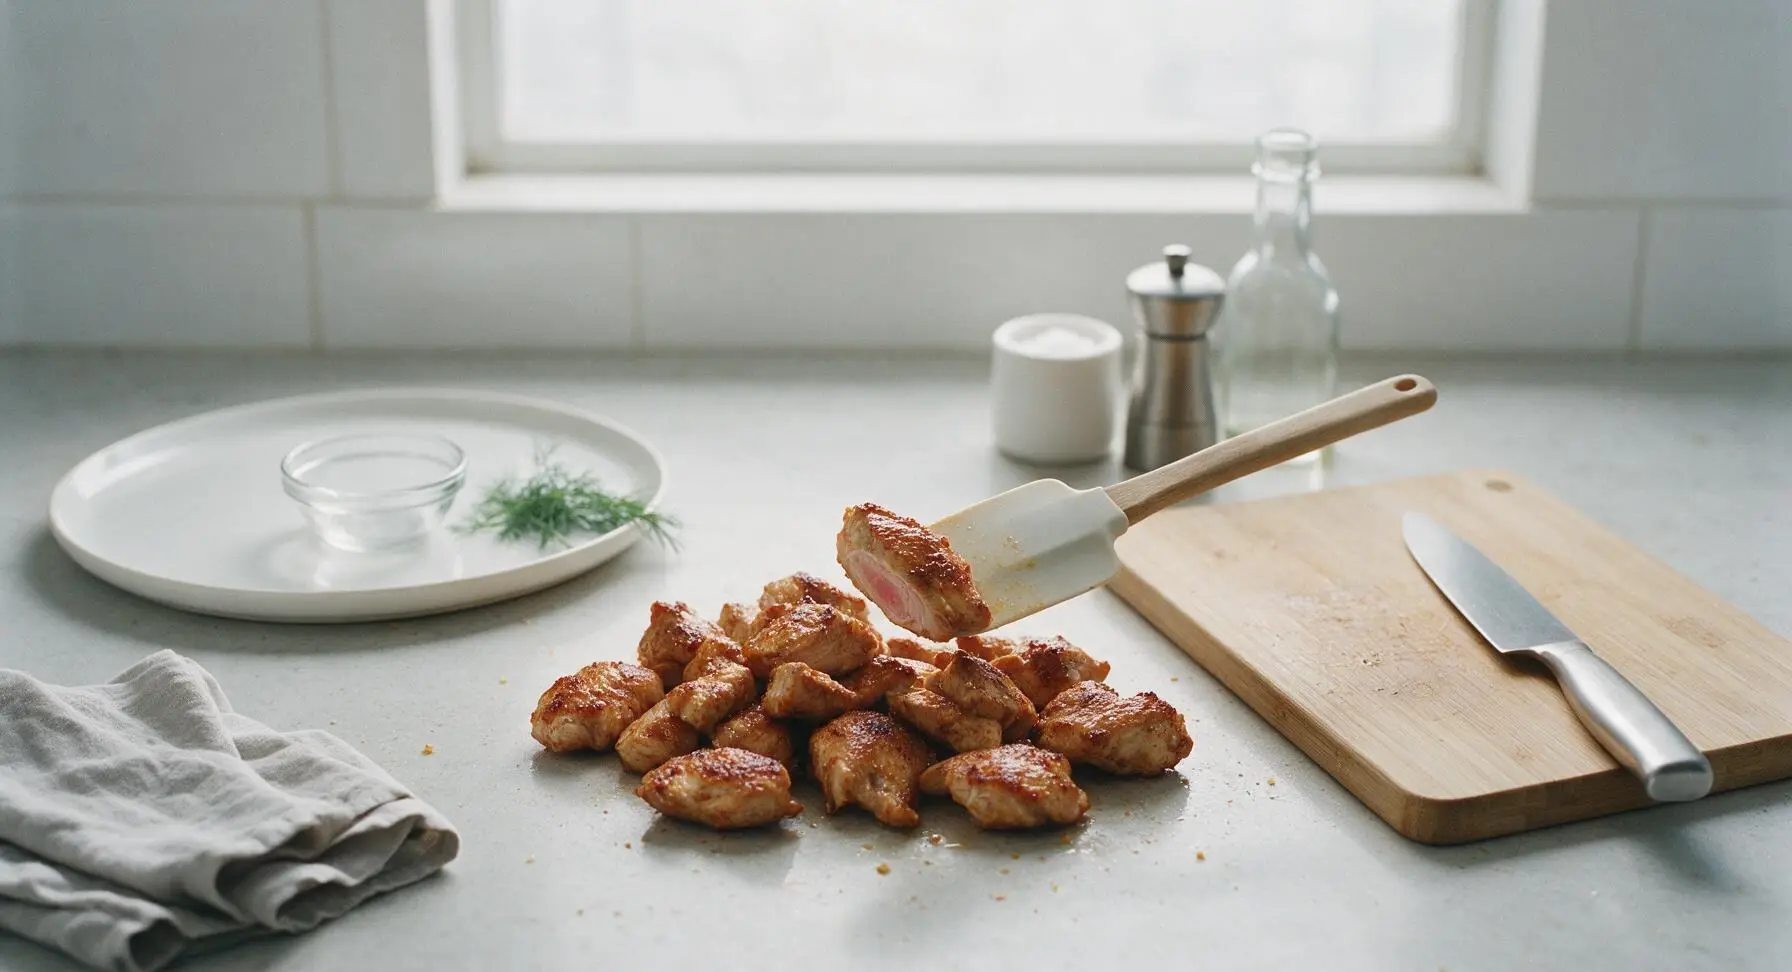
Step 5
step5:Sear chicken until golden
Step 5
step5:Sear chicken until golden
6

Stir-fry hardy veggies

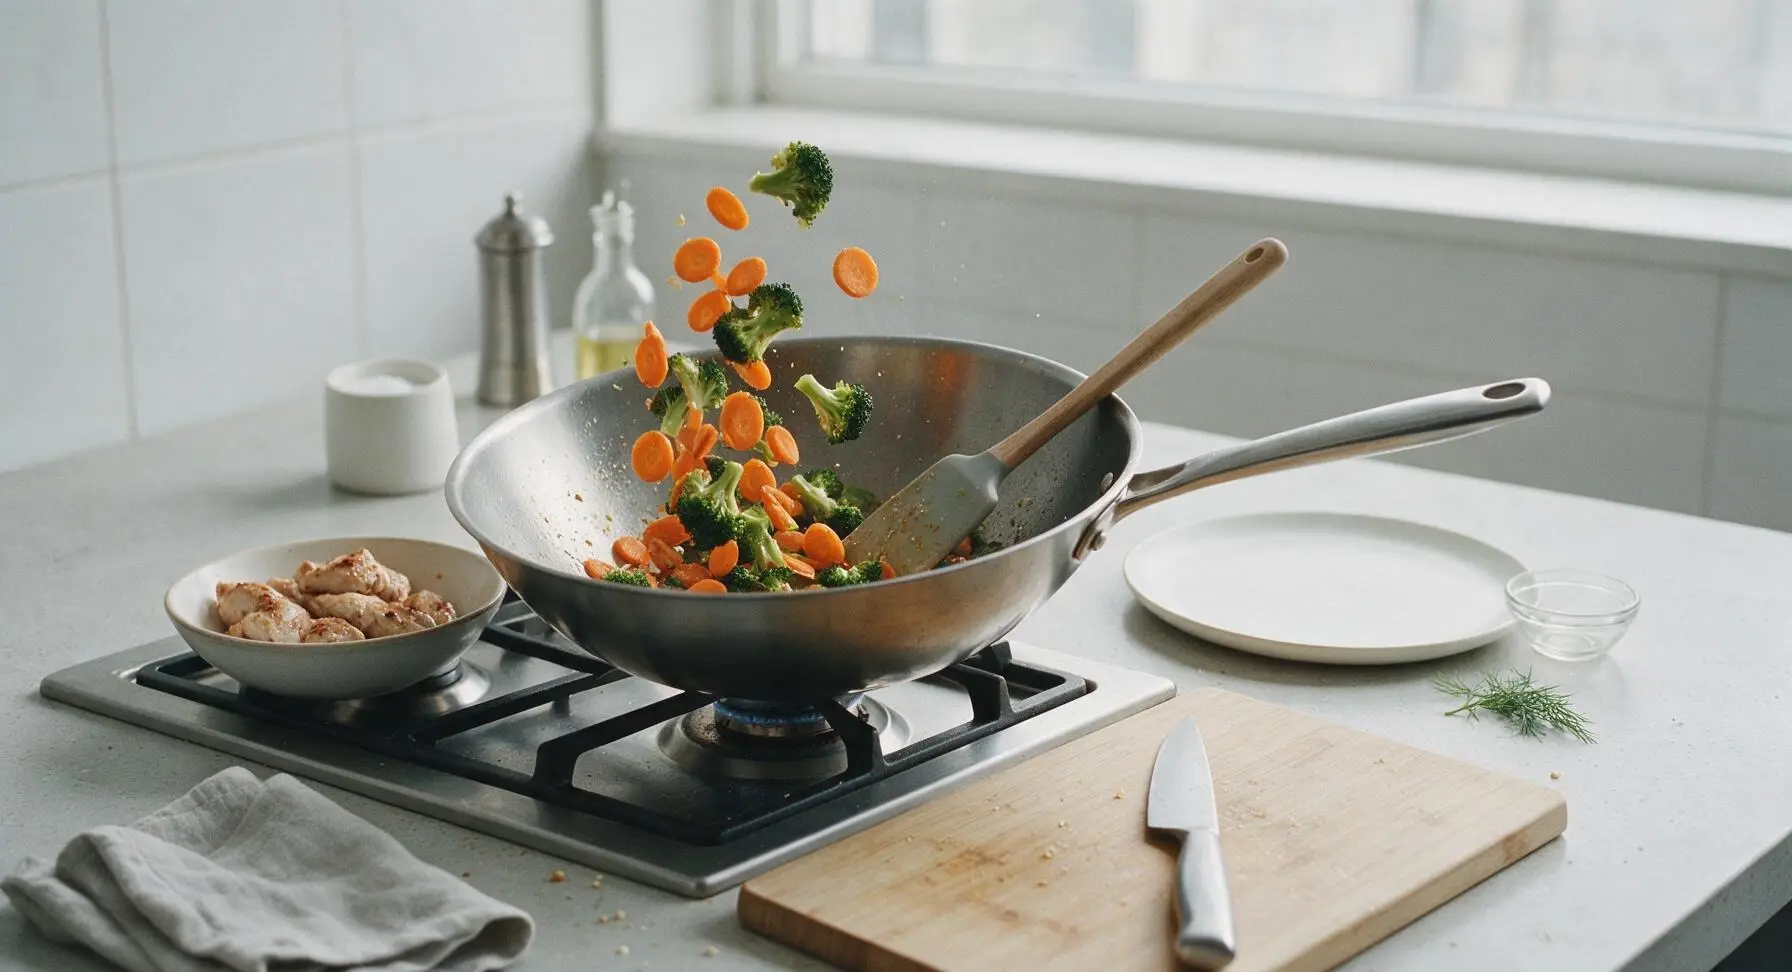
Add the remaining 1 tablespoon of neutral canola oil to the wok, then toss in the carrot slices and broccoli florets. Stir-fry continuously with the silicone spatula for 3 minutes, until vegetables turn bright, saturated in color and are crisp-tender when pierced with the tip of the chef knife, with tiny slightly charred edges from the hot wok surface.
Step 6
step6:Stir-fry hardy veggies
7

Add quick-cooking ingredients

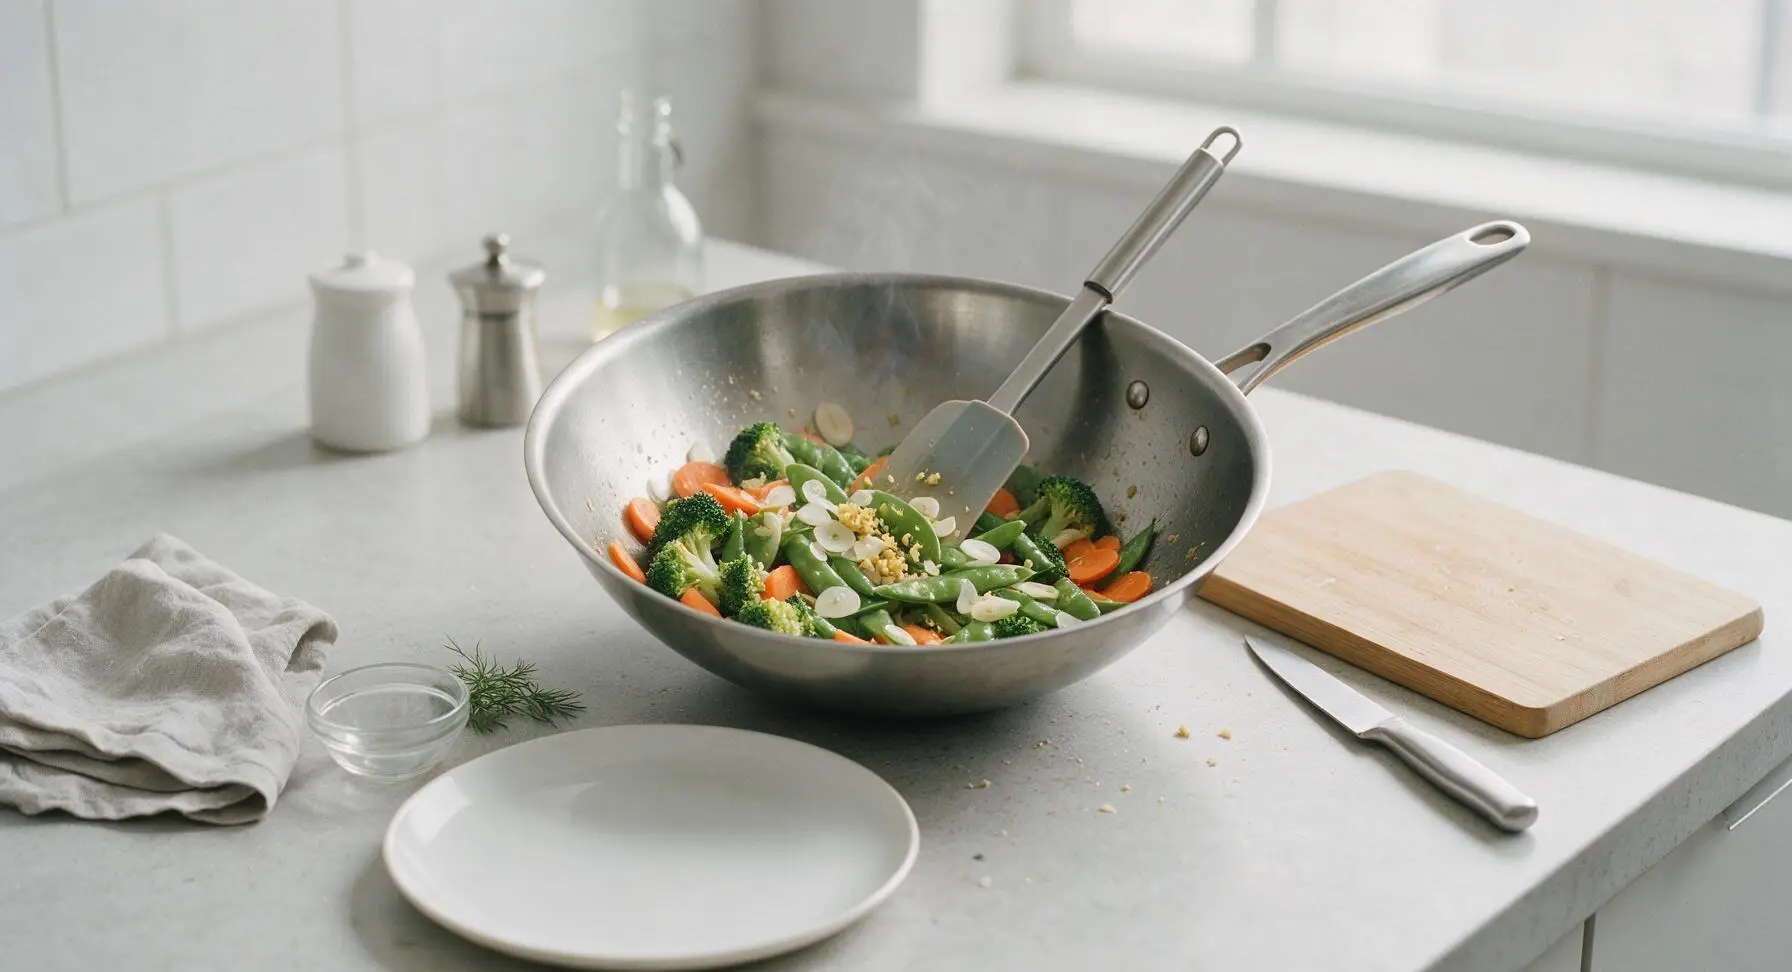
Add the minced ginger, sliced garlic, and trimmed sugar snap peas to the wok with the carrots and broccoli. Stir-fry constantly for 30 seconds, until the garlic and ginger release a strong, warm, fragrant aroma—take care not to burn the garlic, as it will turn bitter and acrid in under a minute at high heat.
Step 7
step7:Add quick-cooking ingredients
8

Toss all with sauce

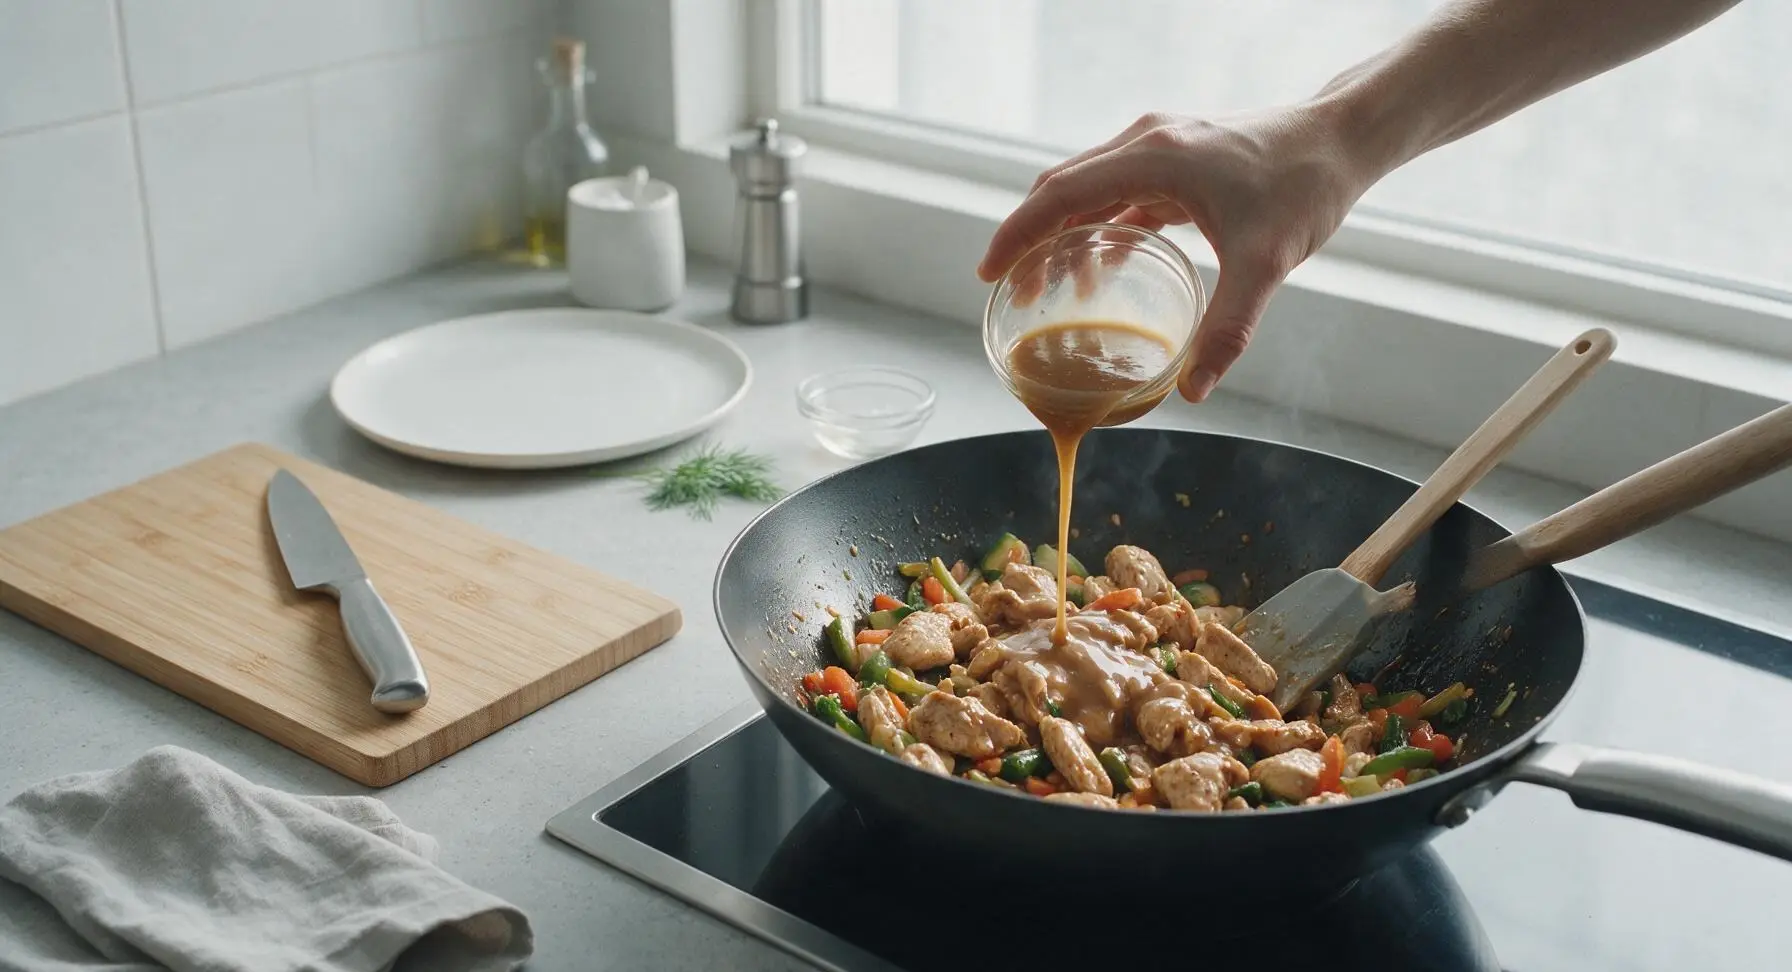
Return the partially cooked chicken to the wok, pour the pre-mixed stir-fry sauce over all ingredients, and toss continuously with the silicone spatula for 1-2 minutes, until the sauce thickens to a glossy, light coating that clings to every piece of chicken and vegetable, and the chicken is cooked through to an internal temperature of 75C (165F), with no pink remaining.
Step 8
step8:Toss all with sauce
Step 8
step8:Toss all with sauce
9

Plate and garnish

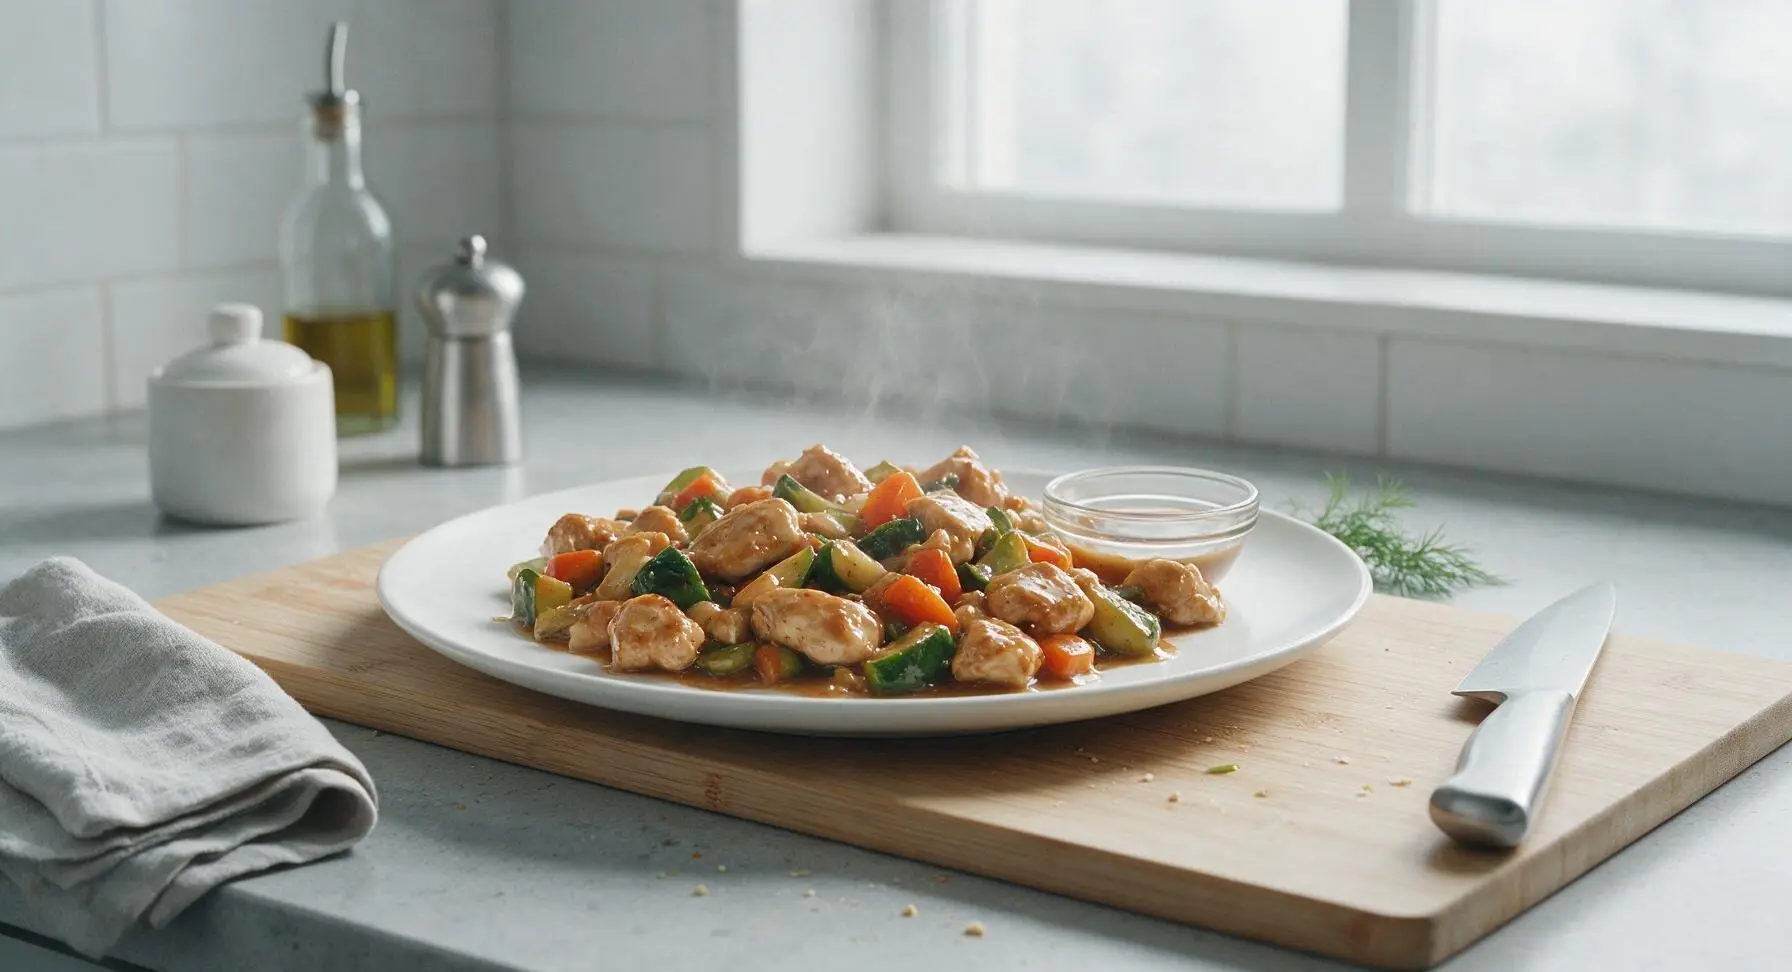
Turn off the heat, transfer the finished stir fry to the waiting matte warm white ceramic dinner plate, piling it gently in the center. Sprinkle 1 teaspoon of toasted white sesame seeds over the top, and snip one small sprig of fresh chives from the countertop potted plant for a bright green garnish. Serve immediately while hot for the best crisp-tender texture.
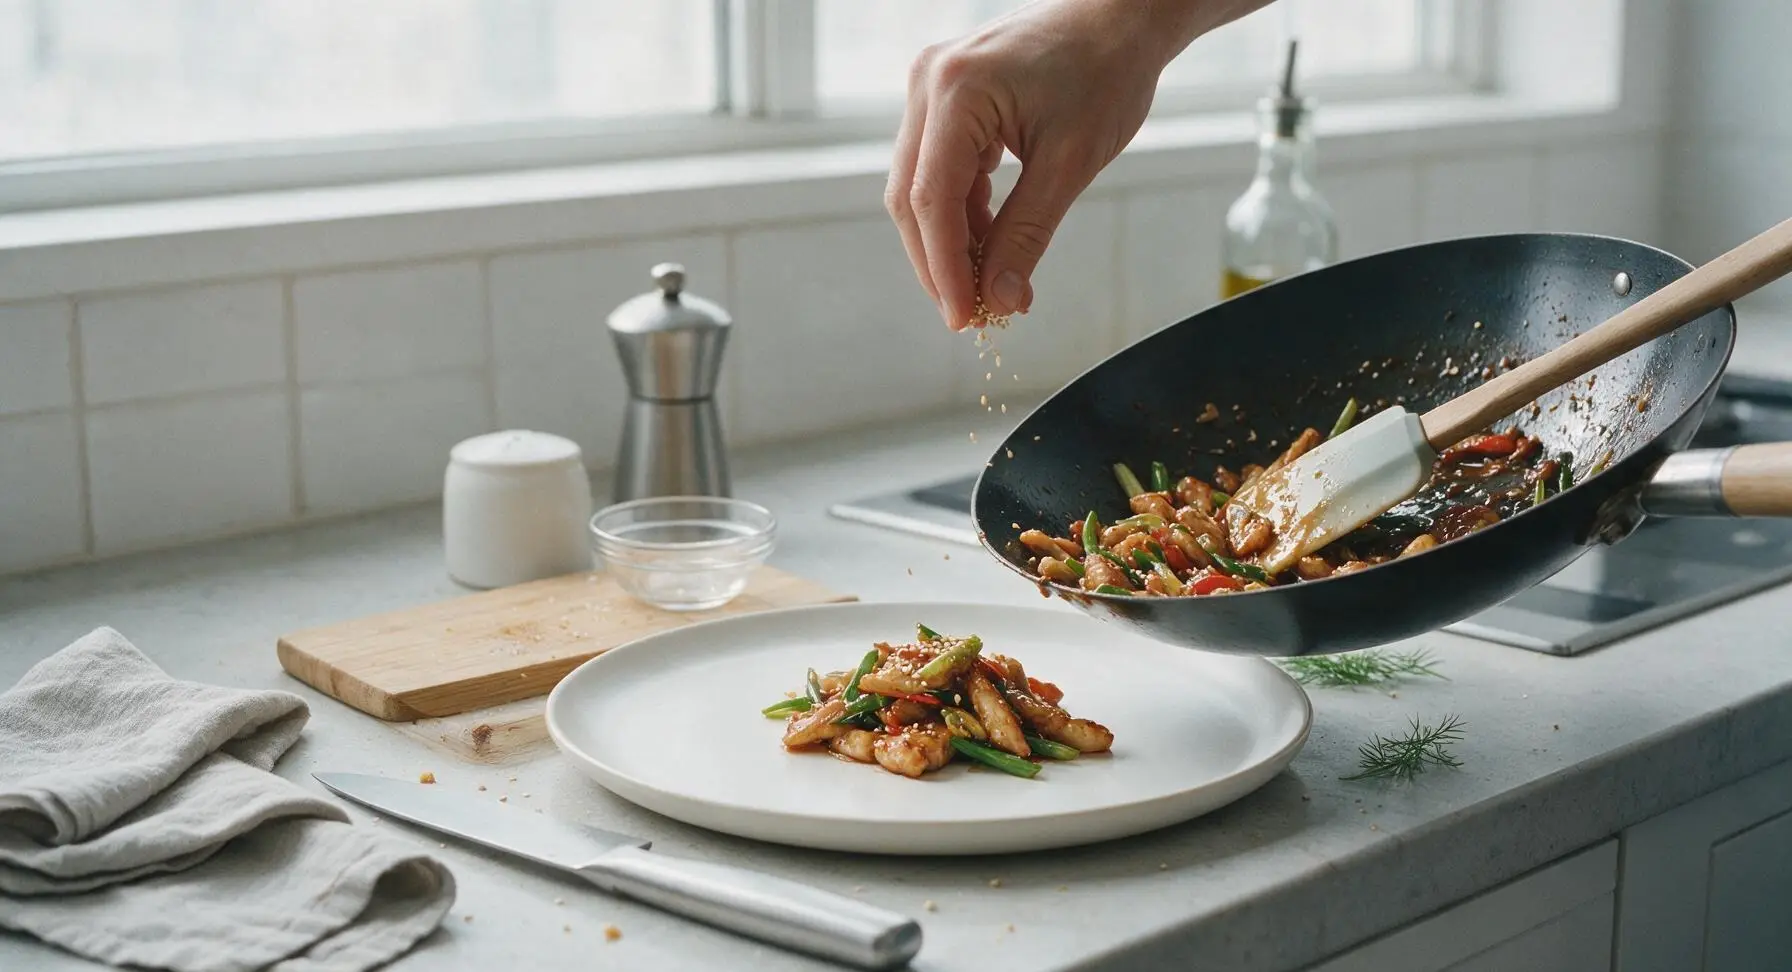
Step 9
step9:Plate and garnish

Tips

1.Prep all ingredients completely before heating the wok: stir-frying happens at very high heat with constant movement, so there is no time to chop or measure once cooking starts, preventing burnt food and missed steps.
2.Do not overcrowd the wok: if your pan is too small to hold chicken in a single layer with space between pieces, sear the chicken in two separate batches. Overcrowding drops the pan temperature rapidly, leading to steamed, soggy food instead of crisp, seared pieces with deep flavor.
3.Add garlic and ginger only in the last 30 seconds of vegetable cooking: these delicate aromatics burn in less than 60 seconds at high wok temperatures, turning bitter and ruining the balanced flavor of the dish if added too early.


✨ You May Also Like

Main Course
🍜 United Kingdom

A showstopping classic of tender seared beef, savory mushroom duxelles, and crisp prosciutto wrapped in flaky golden puff pastry, baked to juicy perfection.

⏱️ 2 hours 1Main Course ★ 4.7
Main Course
🍜 India

Tender charred marinated chicken simmered in a rich, spiced creamy tomato sauce, this iconic Anglo-Indian curry pairs perfectly with basmati rice or warm naan.

⏱️ 50 minuteMain Course ★ 4.6
Main Course
🍜 Thailand

Classic tangy, sweet, and savory Thai stir-fried rice noodles with shrimp, tofu, and crunchy garnishes, balancing all five core Thai flavor profiles.

⏱️ 30 minuteMain Course ★ 4.5
Main Course
🍜 United Kingdom

Crispy golden beer-battered cod and fluffy double-fried chips, served with tangy tartar sauce and malt vinegar: the timeless, beloved British pub comfort classic.

⏱️ 45 minuteMain Course ★ 4.7
Main Course
🍜 Mexico

Smoky, chile-marinated pork tacos with caramelized pineapple, fresh cilantro, and lime: a beloved classic Mexican street food perfect for casual summer gatherings.

⏱️ 1 hour 45Main Course ★ 4.8
Main Course
🍜 United States

Crunchy Fritos corn chips layered with savory beef chili and melted cheddar, topped with cool, zesty fixings for a beloved, cozy Tex-Mex comfort food.

⏱️ 35 minuteMain Course ★ 4.8

simple stir fry:Frequently Asked Questions

1.Can I use chicken thighs instead of boneless skinless chicken breast for this stir fry? ▾
Absolutely! Boneless, skinless chicken thighs are a fantastic swap if you prefer extra juicy, richer-tasting chicken. Cut them into the same ½-inch bite-sized pieces as the breast, and you won’t need major cook time adjustments—just sear until they hit 165°F internal temperature for safe eating, same as you would for breast meat.
2.How do I keep the chicken breast tender instead of tough and rubbery? ▾
The key is two simple steps: first, cut the chicken against the grain into uniform ½-inch pieces so it doesn’t seize up while cooking. Second, don’t overcrowd the pan when searing—cook in a single layer over high heat for 2-3 minutes total, then set it aside while you cook veggies to avoid overcooking.
3.What’s in the classic light glossy Cantonese sauce for this stir fry? ▾
This simple home-style Cantonese sauce is balanced, not heavy or cloying: mix 1 tablespoon low-sodium soy sauce, 1 teaspoon oyster sauce, ½ teaspoon sugar, ¼ teaspoon white pepper, 2 tablespoons low-sodium chicken broth, and 1 teaspoon cornstarch slurry to get that perfect thin, shiny coat on every ingredient.
4.How do I make sure my veggies stay crisp-tender instead of mushy? ▾
First, cut all your veggies (broccoli florets, carrot slices, sugar snap peas) into uniform, bite-sized pieces so they cook evenly. Stir fry over the highest heat for 2-3 minutes max, and don’t cover the pan—trapped steam will turn veggies soggy and dull. Blanch firmer veggies for 30 seconds first if you want to speed up cook time.
5.Can I prep ingredients for this stir fry ahead to make weeknight dinners faster? ▾
Absolutely! Chop your broccoli, carrots, and sugar snap peas, mince the garlic, and cut your chicken up to 3 days ahead, storing each in separate airtight containers in the fridge. You can even pre-mix the sauce in a sealed jar for up to a week, so all you have to do at dinnertime is toss everything in the hot pan.
6.Do I need a traditional wok to make this stir fry, or will a regular skillet work? ▾
You don’t need a wok to nail this recipe! A large, heavy-bottomed stainless steel or cast iron skillet works perfectly—just make sure it gets fully hot before adding oil, and don’t overcrowd the pan, which drops the temperature too much to get that classic stir fry sear. Nonstick skillets work too, just use medium-high heat to avoid coating damage.
7.How do I prep sugar snap peas so they aren’t tough and stringy? ▾
To remove the tough fibrous string from sugar snap peas, hold the pod with one hand, pinch off the very tip of the stem end, and pull the thin string running down the flat edge of the pod all the way off. Leave pods whole for a nice snappy crisp bite, or slice them in half on a diagonal if you prefer smaller pieces.
8.Can I swap or add other vegetables if I don’t have all the listed ones? ▾
Of course! Cantonese home-style stir fries are designed to be flexible, using whatever produce you have on hand. Great swaps or additions include bell peppers, baby corn, bok choy, cremini mushrooms, or snow peas—just add firmer veggies first and delicate, leafy veggies last to keep that ideal crisp-tender texture across all ingredients.
9.Why does my garlic always burn when I make stir fry? ▾
Burnt garlic happens when it’s added to too-hot oil for too long before other ingredients go in. For this recipe, add your minced garlic to the pan right after searing the chicken, when you’re ready to cook veggies, and stir it constantly for just 10-15 seconds until fragrant—don’t let it turn dark brown, as that creates a harsh, bitter flavor.
10.How thick should I cut carrots so they cook at the same rate as other veggies? ▾
Since carrots are much denser than broccoli or sugar snap peas, cut them into thin ¼-inch diagonal slices, or thin matchsticks, so they cook quickly without needing extra time that would turn softer veggies mushy. If you cut them thicker, blanch them for 1 minute in boiling water first to soften slightly before stir frying.
11.Is this stir fry gluten-free? If not, how can I adapt it to be? ▾
The base recipe is not gluten-free if you use regular soy sauce and traditional oyster sauce, since both contain wheat. To make it fully gluten-free, swap regular soy sauce for tamari, and use certified gluten-free oyster sauce (or mushroom-based vegetarian stir fry sauce) to keep that classic savory Cantonese flavor profile without gluten.
12.What’s the best oil to use for this high-heat Cantonese stir fry? ▾
For Cantonese stir fry, use an oil with a high smoke point so it doesn’t burn or turn bitter at the high temperatures needed for a good sear. Neutral options like avocado oil, canola oil, or refined peanut oil work best—save toasted sesame oil for a tiny finishing drizzle if you like, as it has too low a smoke point for initial cooking.
13.How do I get that light glossy sauce instead of a thick, gloopy mess? ▾
The trick is to use a small amount of cornstarch—just 1 teaspoon mixed with 1 teaspoon cold water to make a slurry—rather than heaping spoonfuls. Toss the hot cooked chicken and veggies with the sauce over medium heat for 30 to 60 seconds, until it bubbles and thickens just enough to lightly coat each piece, with no excess pooling in the pan.
14.Can I adapt this stir fry to be fully vegan? ▾
You can absolutely make a vegan version that still tastes authentic! Swap the chicken for pressed extra-firm tofu, seitan, or plant-based chicken strips, replace oyster sauce with vegetarian mushroom stir fry sauce, and use vegetable broth instead of chicken broth in the sauce. Keep all veggie prep and cooking steps exactly the same for great results.
15.What should I serve with this stir fry for a complete weeknight meal? ▾
This stir fry pairs perfectly with plain steamed white rice, the classic Cantonese accompaniment that soaks up the light savory sauce beautifully. If you want a lower-carb option, serve it over cauliflower rice or quinoa, or add a quick side of wonton soup for a takeout-style meal that comes together faster than delivery.
16.My stir fry always turns out watery—how do I fix that? ▾
Watery stir fry almost always comes from overcrowding the pan, which makes veggies steam instead of sear and release excess moisture. Cook chicken in batches if your pan is small, make sure all veggies are fully dry after washing before adding them to the pan, and stick to the 2 tablespoons of broth in the sauce to avoid extra liquid.

Comments (10)

2 days ago

OMG this stir fry is a total weeknight game changer! 10 minute cook time is no joke, I threw this together last night after my kid’s soccer practice and even my picky 7 year old asked for seconds. Used frozen mixed veggies since I didn’t have fresh on hand and it still slapped. 10/10

1 day ago

Wait frozen veggies work?! I’ve been stressing about hitting the grocery store after work this week, I’m definitely trying that hack tonight!

1 day ago

So glad it was a hit with your kid! Frozen veggies work perfectly here—just pat them dry a little before tossing in the wok to avoid excess moisture, no extra trip to the store needed!

1 week ago

Added this to my Sunday meal prep rotation! Super easy, holds up great in the fridge for 3 days, I pair it with jasmine rice and a little extra soy sauce for my work lunches. Way cheaper and tastier than takeout, no cap.

6 days ago

Love that this works for your meal prep! Pro tip: store the stir fry and rice separately if you can to keep the veggies crisp for even longer.

3 days ago

Brought this to my neighborhood potluck last weekend and people were begging for the recipe! It’s so versatile, I added some sliced shiitake mushrooms and a sprinkle of sesame seeds at the end and it looked fancy as hell even though it took me 10 minutes to make. SO good.

2 hours ago

Wait I’m a total beginner who can barely boil pasta and this actually turned out? Only thing I messed up was turning the heat too high at first so a little bit of the garlic burned, but even then it was still tasty. Will be making this again for sure.

30 minutes ago

Pro tip for next time: toss the garlic in right after the ginger, don’t let it sit in the hot oil for more than 30 seconds! I burned mine my first try too, now it comes out perfect every time.

2 weeks ago

I grew up eating Cantonese stir fry at my grandma’s dinner table and this tastes just like home! The light sauce doesn’t overpower the veggies, which is exactly how it’s supposed to be, not the gloopy overly sweet stuff you get at most fast casual takeout spots. Absolute perfection.

1 week ago

Right?! I’ve been looking for a recipe that doesn’t douse everything in that thick sugary sauce forever, this sounds exactly what I’ve been craving.

1 week ago

That means so much to hear! Classic Cantonese stir fry is all about letting the fresh ingredients shine with a light, balanced sauce, so I’m thrilled it hit that nostalgic note for you.

yesterday

Made this for my partner last night for our at-home date night, swapped the regular soy sauce for low-sodium and added some shrimp for extra protein. We both cleared our plates, will be making this a regular weeknight date staple!

18 hours ago

The shrimp addition sounds delicious! So glad you two enjoyed it for your date night—low-sodium soy sauce is a great swap to cut back on salt without losing any umami flavor.

5 minutes ago

I’m usually the guy who overcomplicates every stir fry with 15 different sauces and spices, but keeping it simple like this? Game. Changer. The whole family loved it, even my teen who turns his nose up at anything with veggies. Will be ditching my overcomplicated recipe for this one.

5 days ago

Made this as a vegan version using tamari instead of oyster sauce and added extra bok choy and broccoli, it came out so flavorful! Super easy to tweak for different diets without losing that classic Cantonese taste. 10/10 would recommend to all my plant-based friends.

3 days ago

Oh the tamari swap is genius! I’m gluten free and I’ve been missing good stir fry, I can’t wait to try this this weekend.

3 days ago

So happy the vegan swaps worked out so well for you! Tamari is a perfect 1:1 swap for the sauce, and extra bok choy is always a great call in my book.

30 minutes ago

Wait how do people get that perfect wok hei flavor at home without a giant restaurant wok? I made this in my regular nonstick pan and it was good but I know it could be better, any tips?

10 minutes ago

Great question! You don’t need a fancy wok to get that great stir fry flavor—just make sure your pan is ripping hot before you add ingredients, cook in small batches so you don’t overcrowd the pan, and don’t stir too constantly so the veggies get a little char. That’ll get you really close to that classic wok hei taste at home!

just now

Just made this for a quick lunch between work meetings and it’s SO good! I added a little dash of white pepper at the end like my Cantonese neighbor used to recommend and it kicked the flavor up a notch. So easy, I’ll be making this at least once a week from now on.



