
sticky toffee pudding sauce

title 1
sticky toffee pudding sauce
⏱️ cook time 10 minutes
🍽️ servings 8
⚡ Difficulty easy

intro

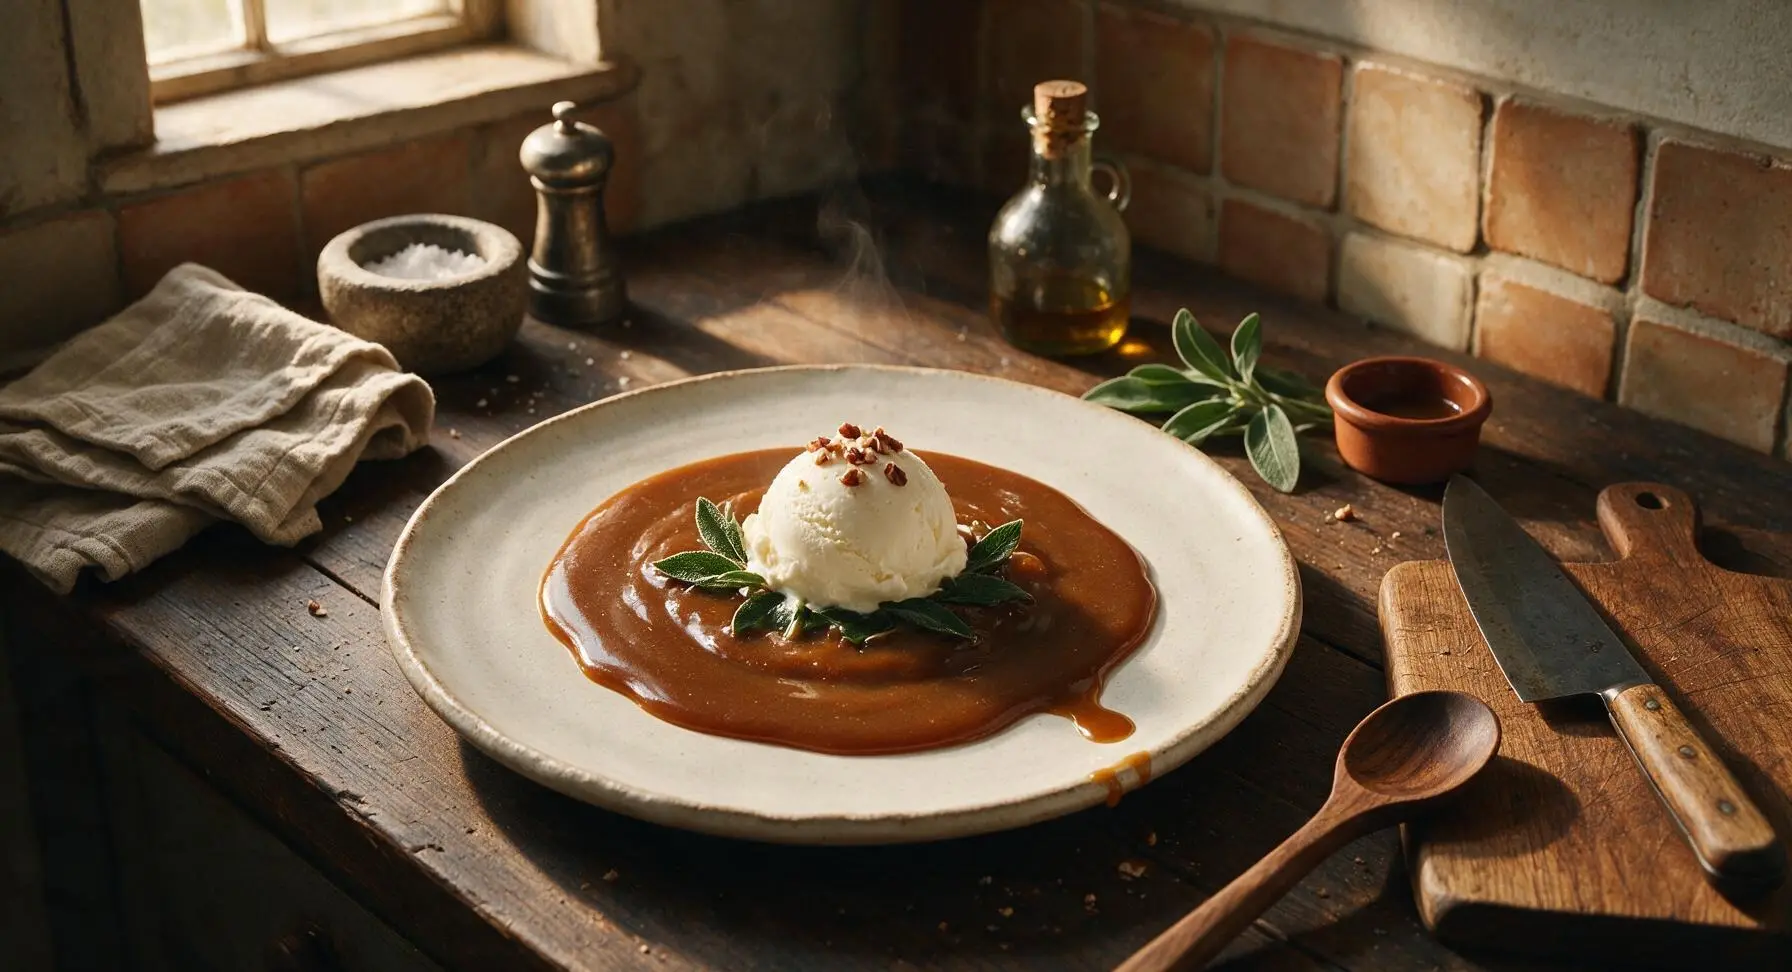
Rich, velvety, deeply caramelized classic British sticky toffee pudding sauce: glossy, buttery, sweet-salty with warm molasses depth, perfect drizzled over warm sponge or ice cream.

Ingredients
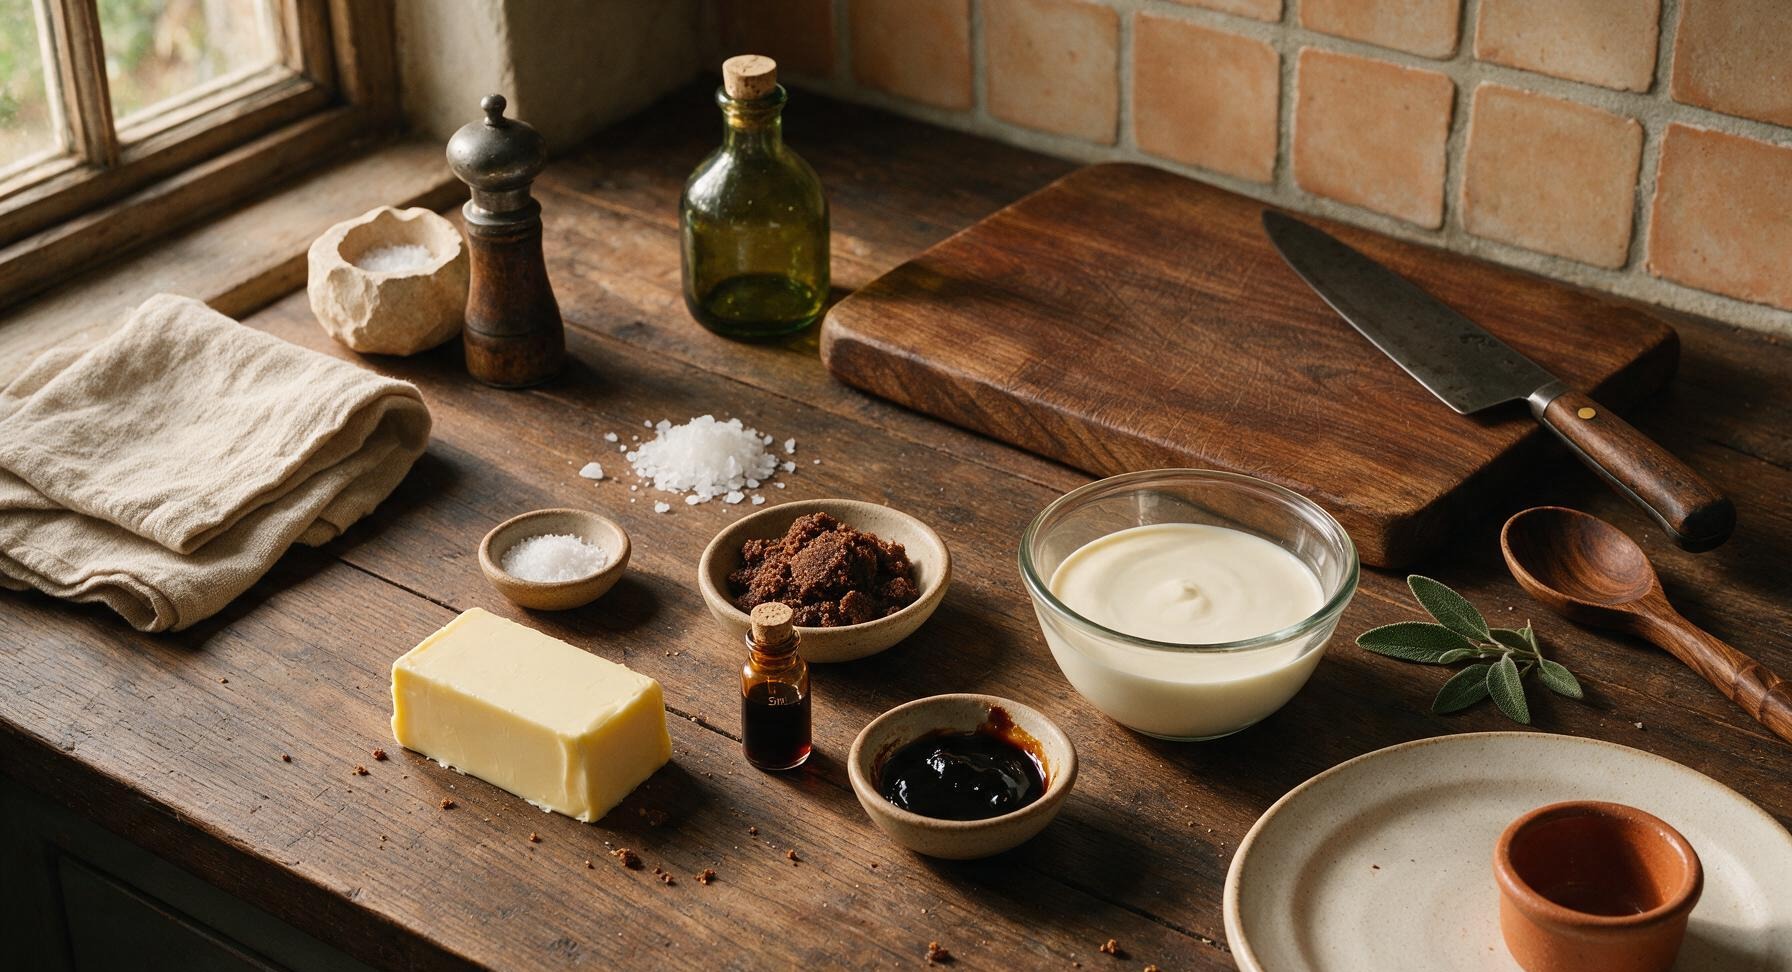
Unsalted butter 113g (1/2 cup / 1 stick)
Dark muscovado sugar, packed 150g (3/4 cup)
Heavy whipping cream (35% fat) 180ml (3/4 cup)
Dark molasses (black treacle) 2 tbsp (30ml)
Pure vanilla extract 1 tsp (5ml)
Fine sea salt 1/4 tsp
Flaky sea salt (for finishing) 1/8 tsp

Steps

1

Melt unsalted butter

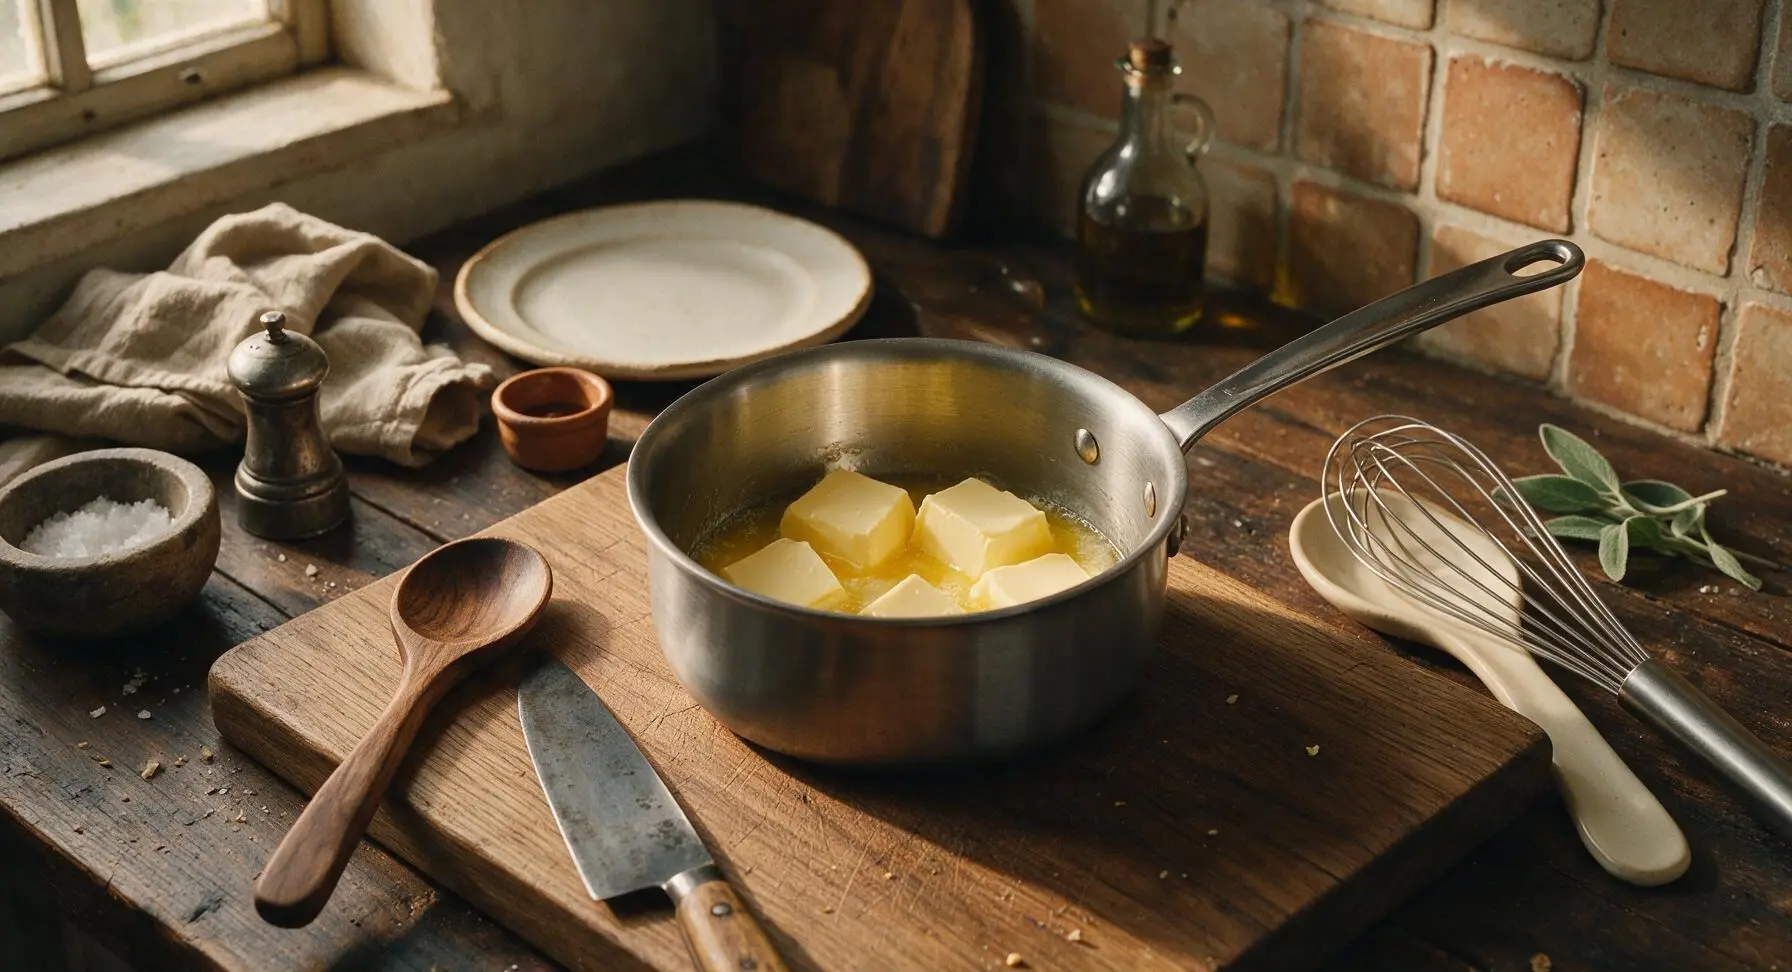
Retrieve the 16cm heavy-bottomed brushed stainless steel saucepan from the lower storage drawer and place it in the center of the cook zone. Cut the 113g unsalted butter into 4 even pieces and add to the pan. Heat over the lowest stovetop setting, swirling the pan occasionally, until butter is fully melted and just starting to foam, about 2 minutes. Do not let the butter turn golden or brown, as this will alter the sauce’s sweet, creamy flavor.
Step 1
step1:Melt unsalted butter
2

Add sugar and molasses

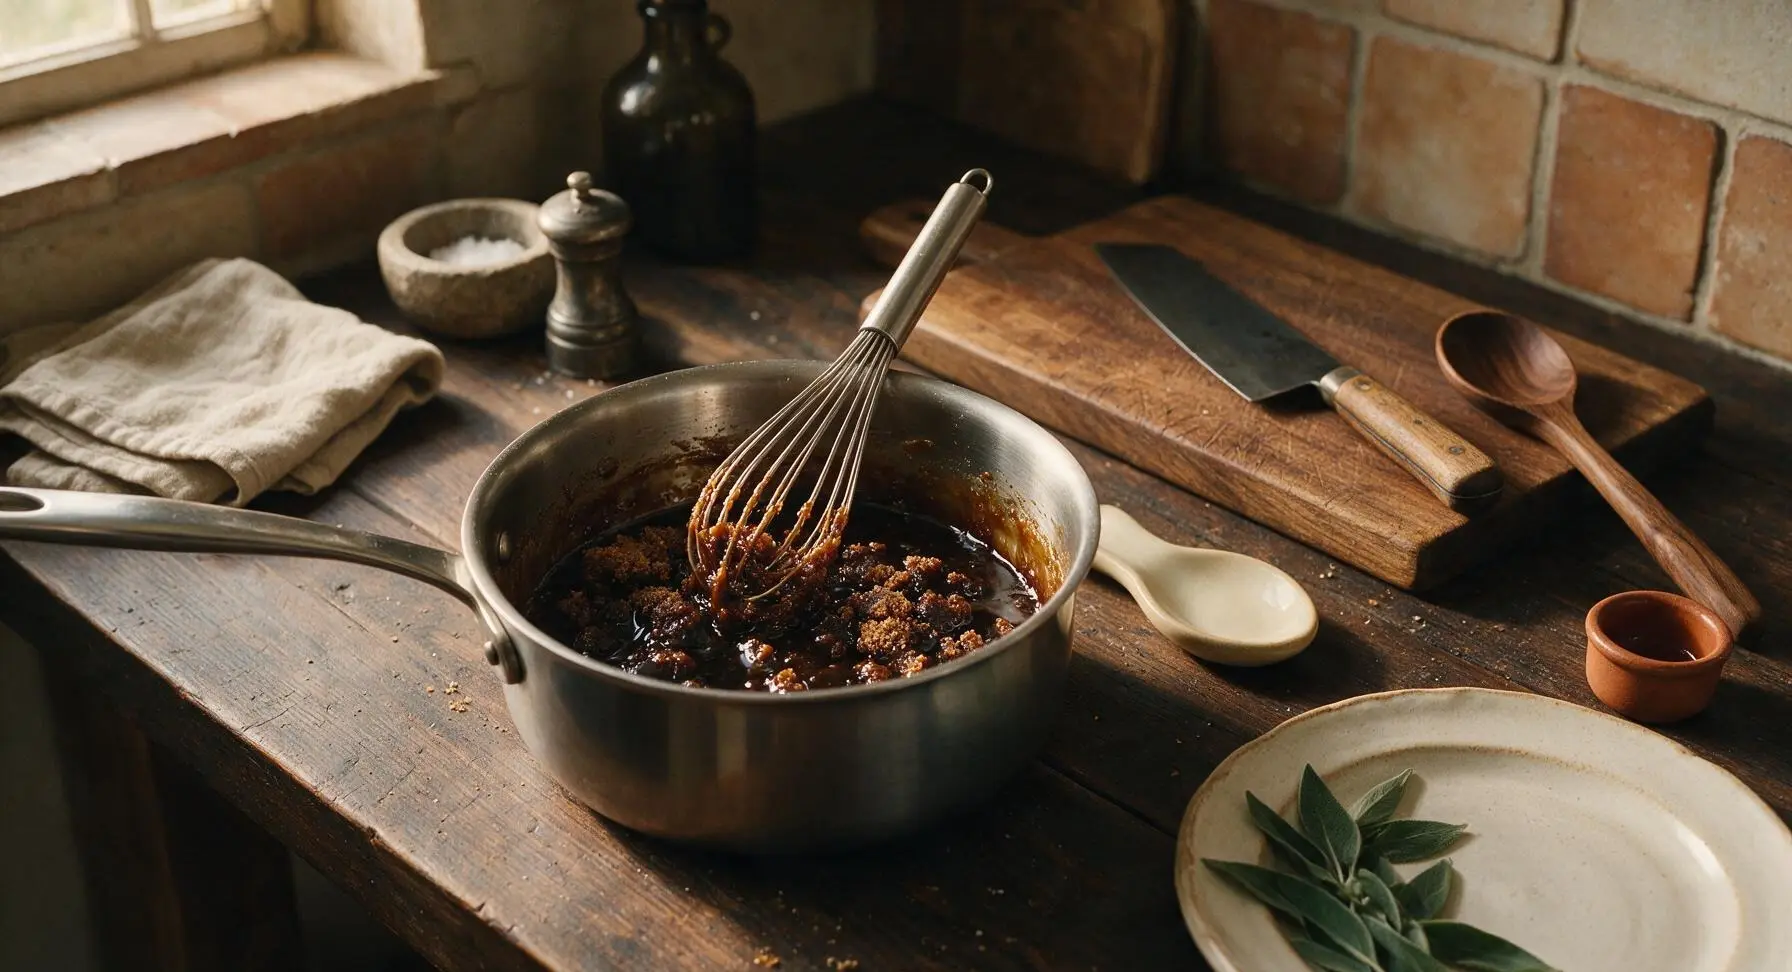
Add the 150g packed dark muscovado sugar and 2 tbsp dark molasses to the fully melted butter. Pick up the stainless steel whisk from the spoon rest and stir the mixture until the sugar is fully moistened, forming a thick, dark brown paste. Scrape down the inner pan sides with the whisk to ensure no dry sugar clings to the edges, about 1 minute of steady stirring.
Step 2
step2:Add sugar and molasses
3

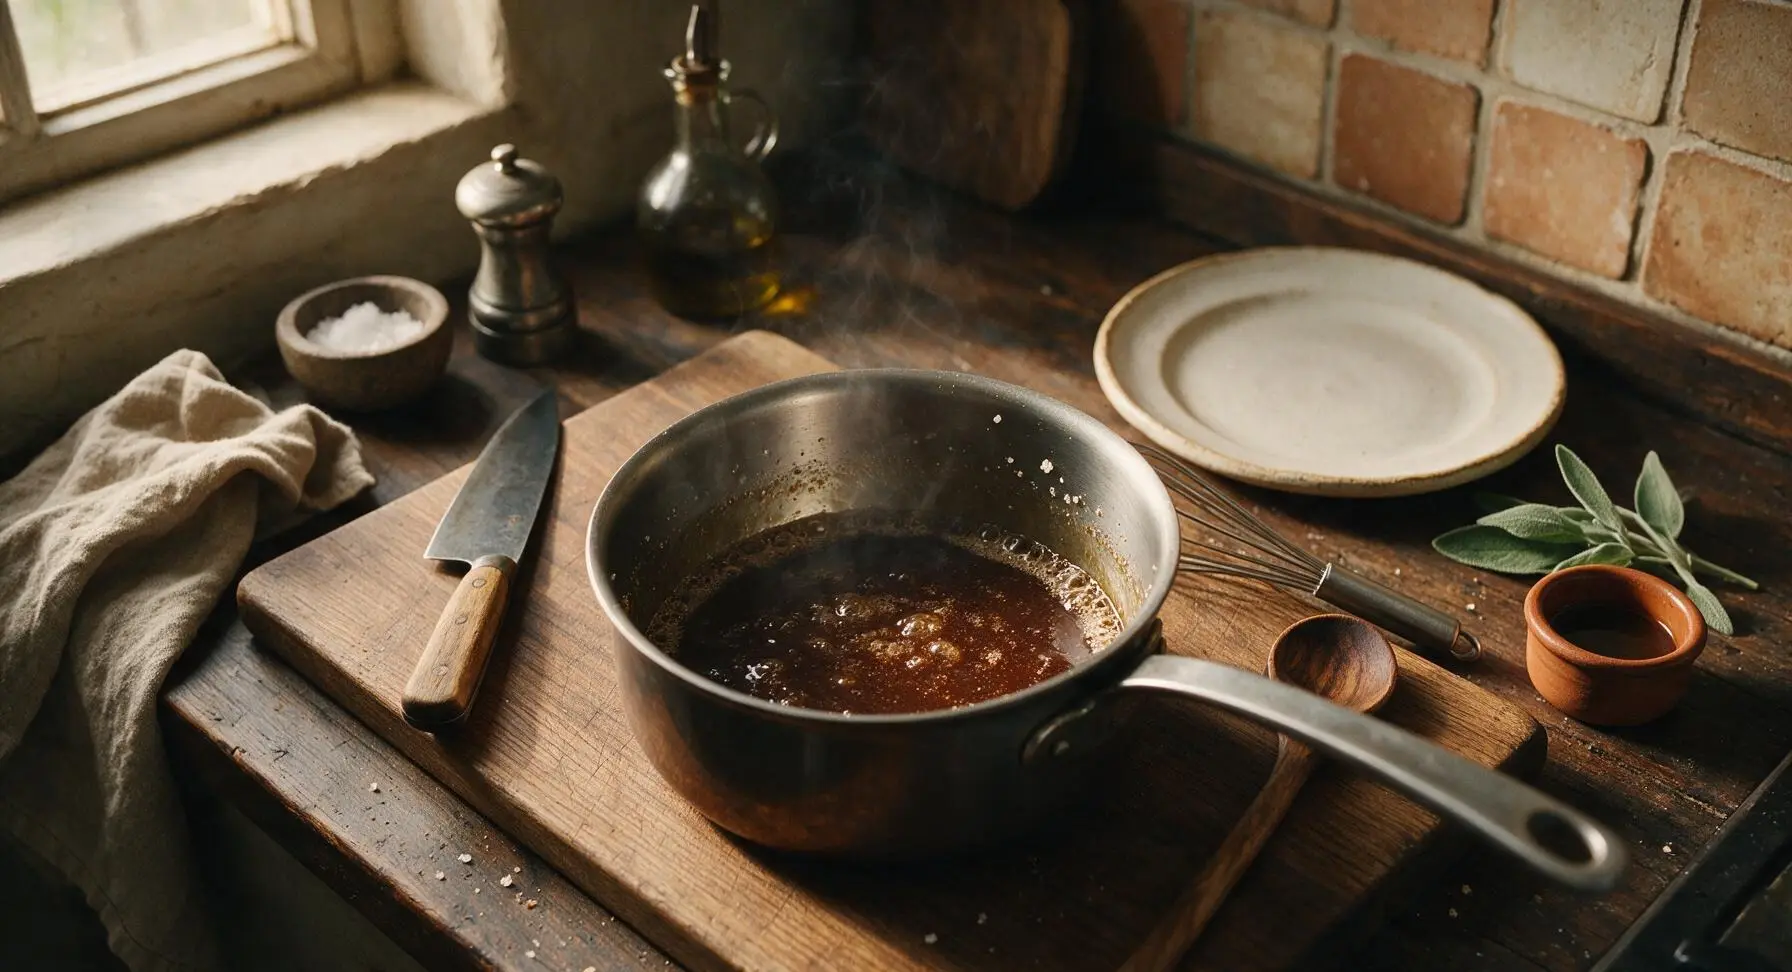
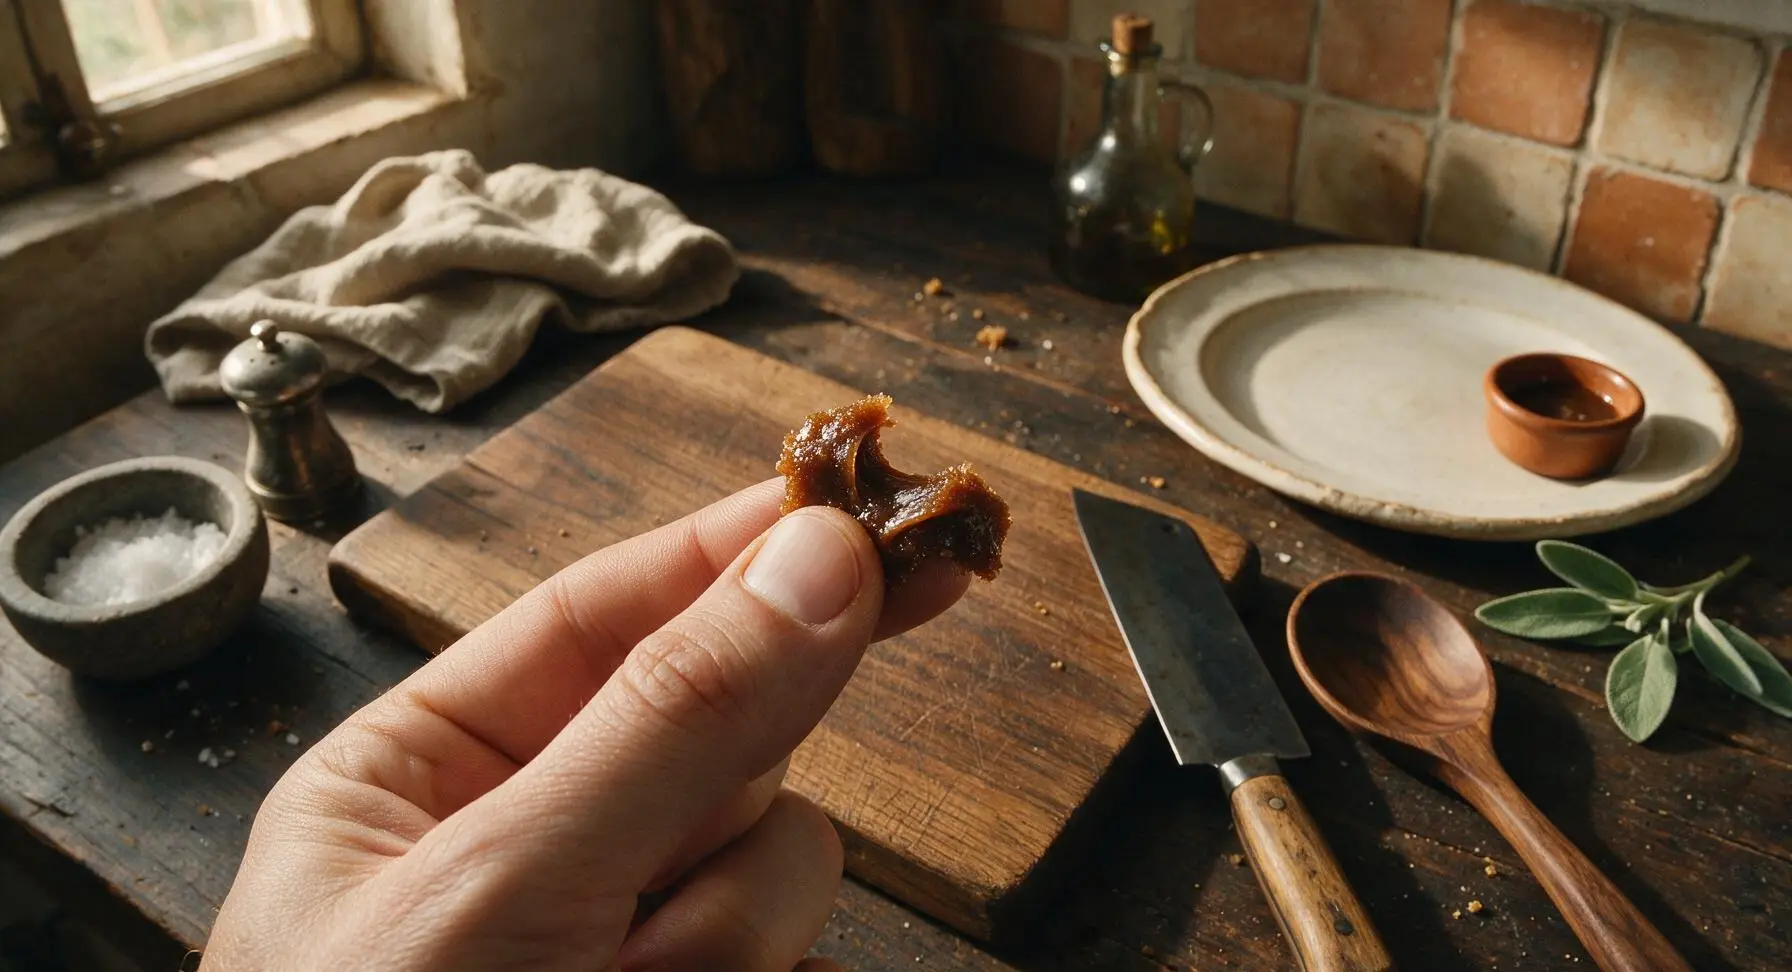
Dissolve sugar fully

Increase stovetop heat to medium-low, stirring the sugar-butter mixture constantly with the whisk. Cook until the sugar is completely dissolved, with no gritty texture when you rub a small dab of the mixture between your fingertips, and small gentle bubbles start to form around the pan edges, about 3 minutes. Do not let the mixture boil rapidly at this stage, as high heat can cause sugar crystals to form and create a grainy sauce.
Step 3
step3:Dissolve sugar fully
Step 3
step3:Dissolve sugar fully
4

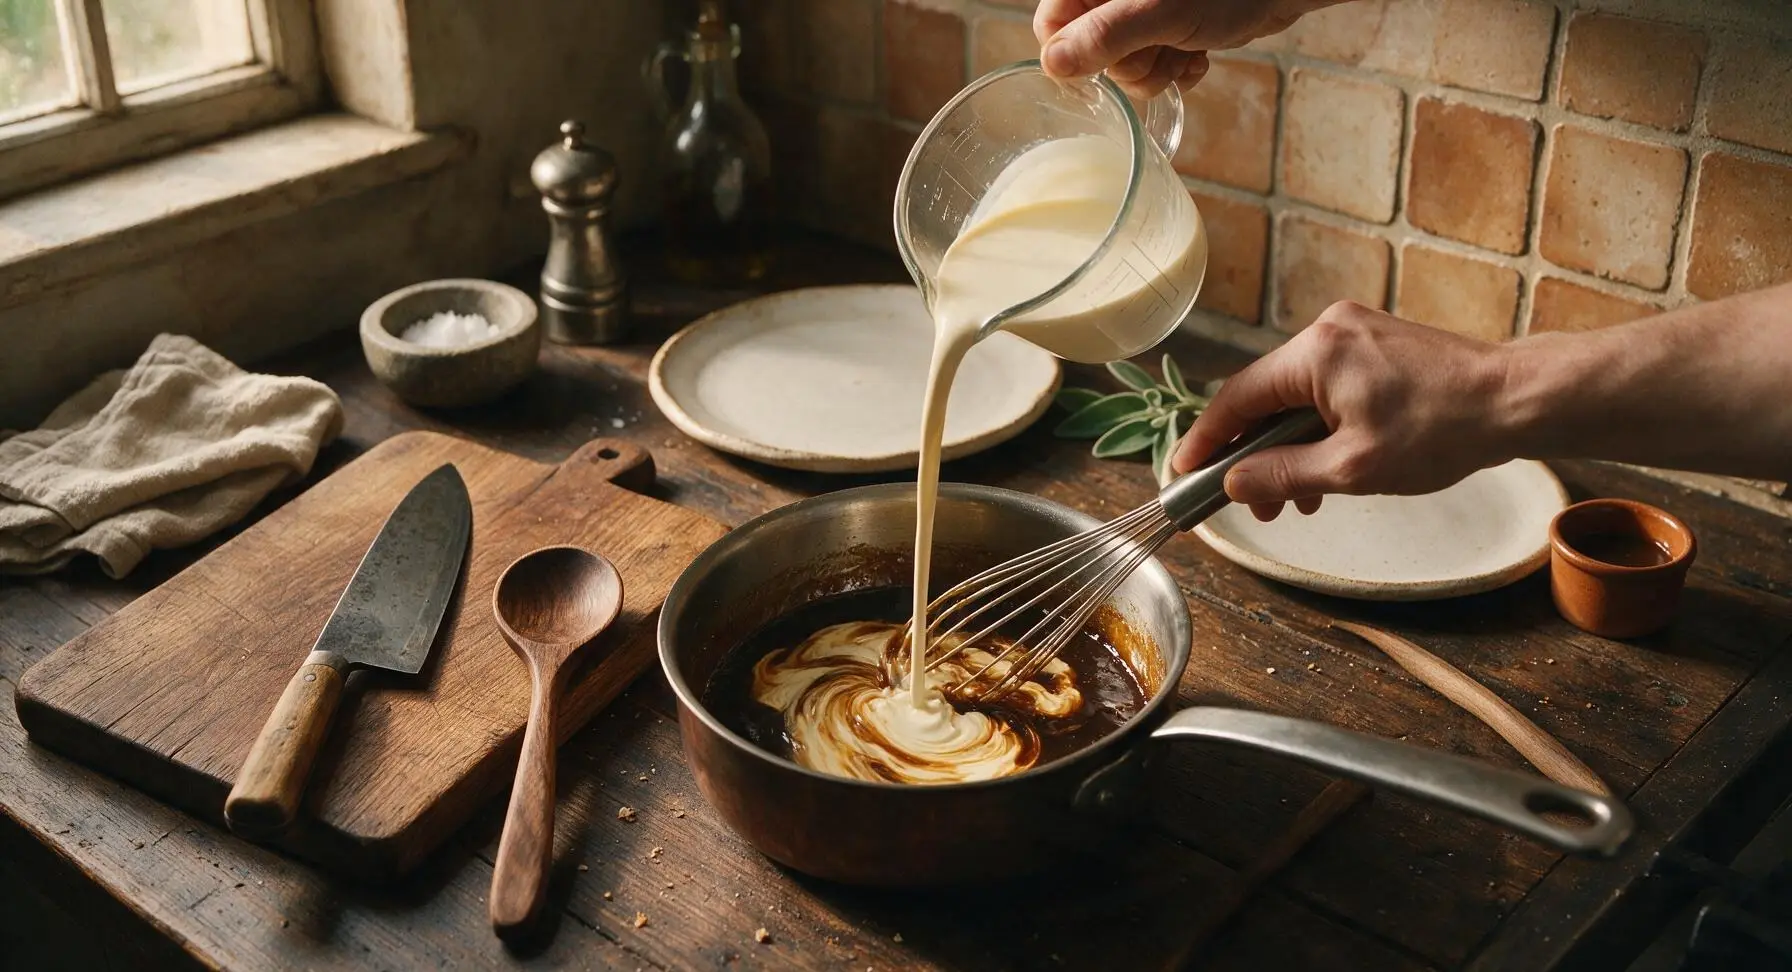
Whisk in heavy cream

Pull the saucepan slightly off the heat to avoid hot sugar splatters. Slowly pour the 180ml cold heavy whipping cream into the sugar mixture in a thin, steady stream, whisking constantly as you pour to fully incorporate the cream and prevent the hot sugar from seizing into lumps. Once all cream is added, return the pan to medium-low heat.
Step 4
step4:Whisk in heavy cream
5

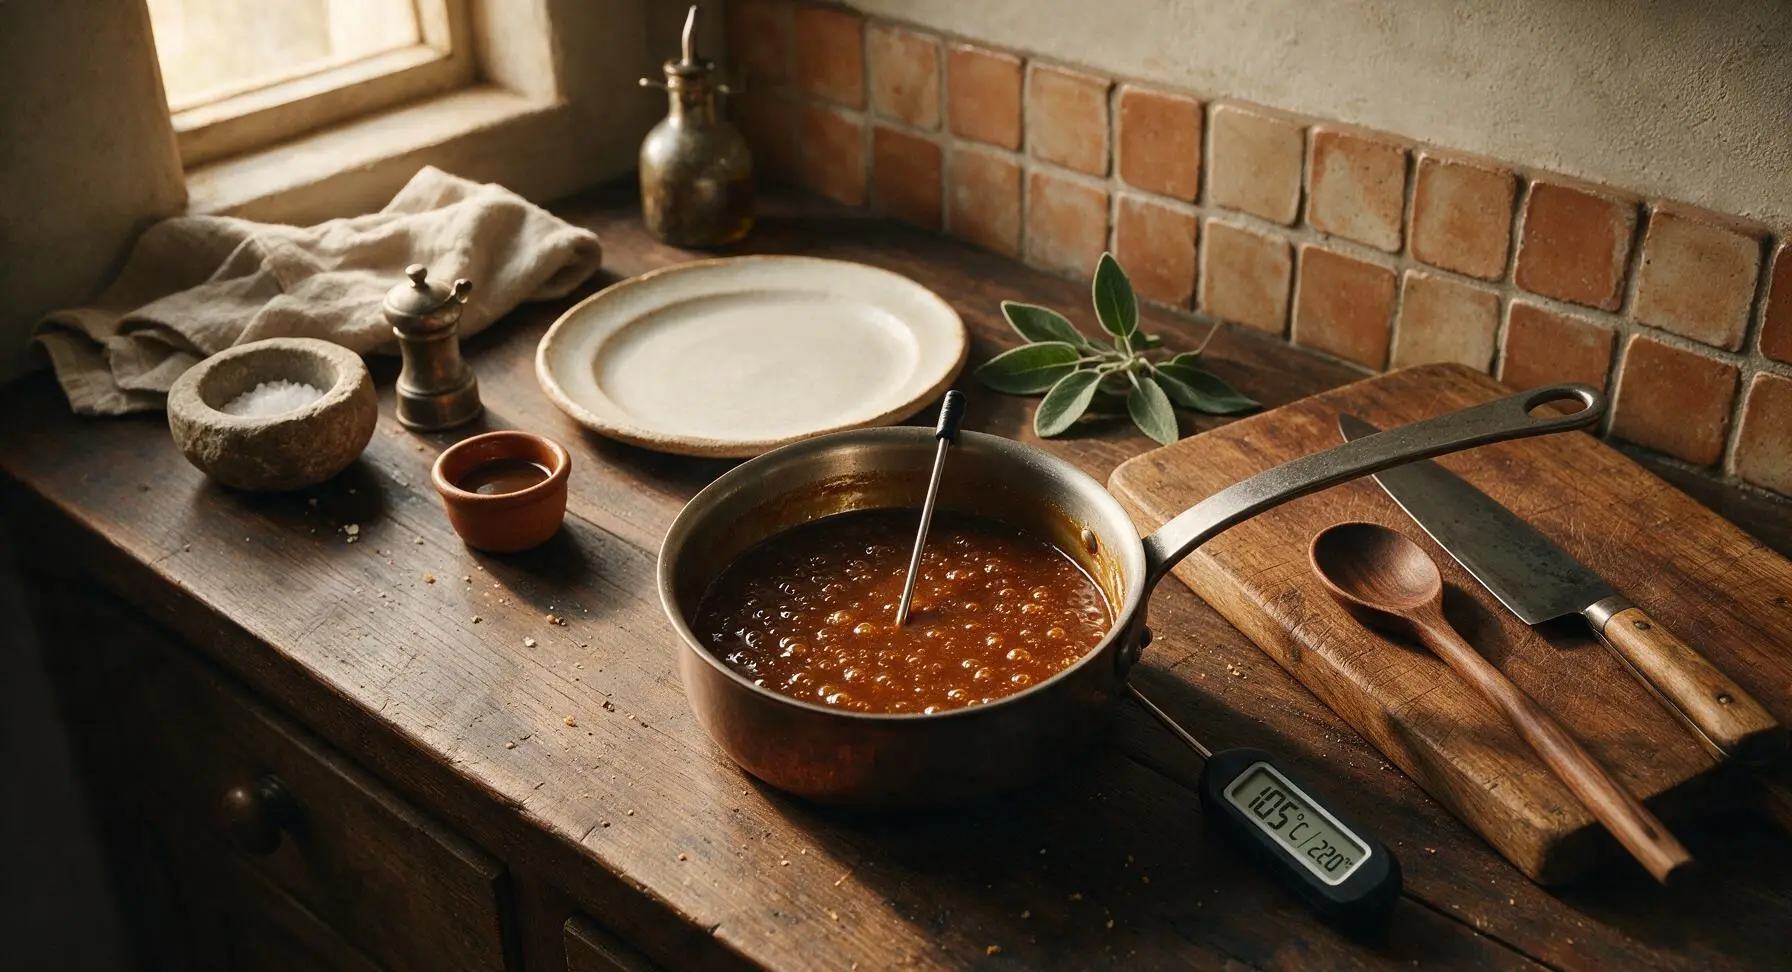
Simmer to thicken

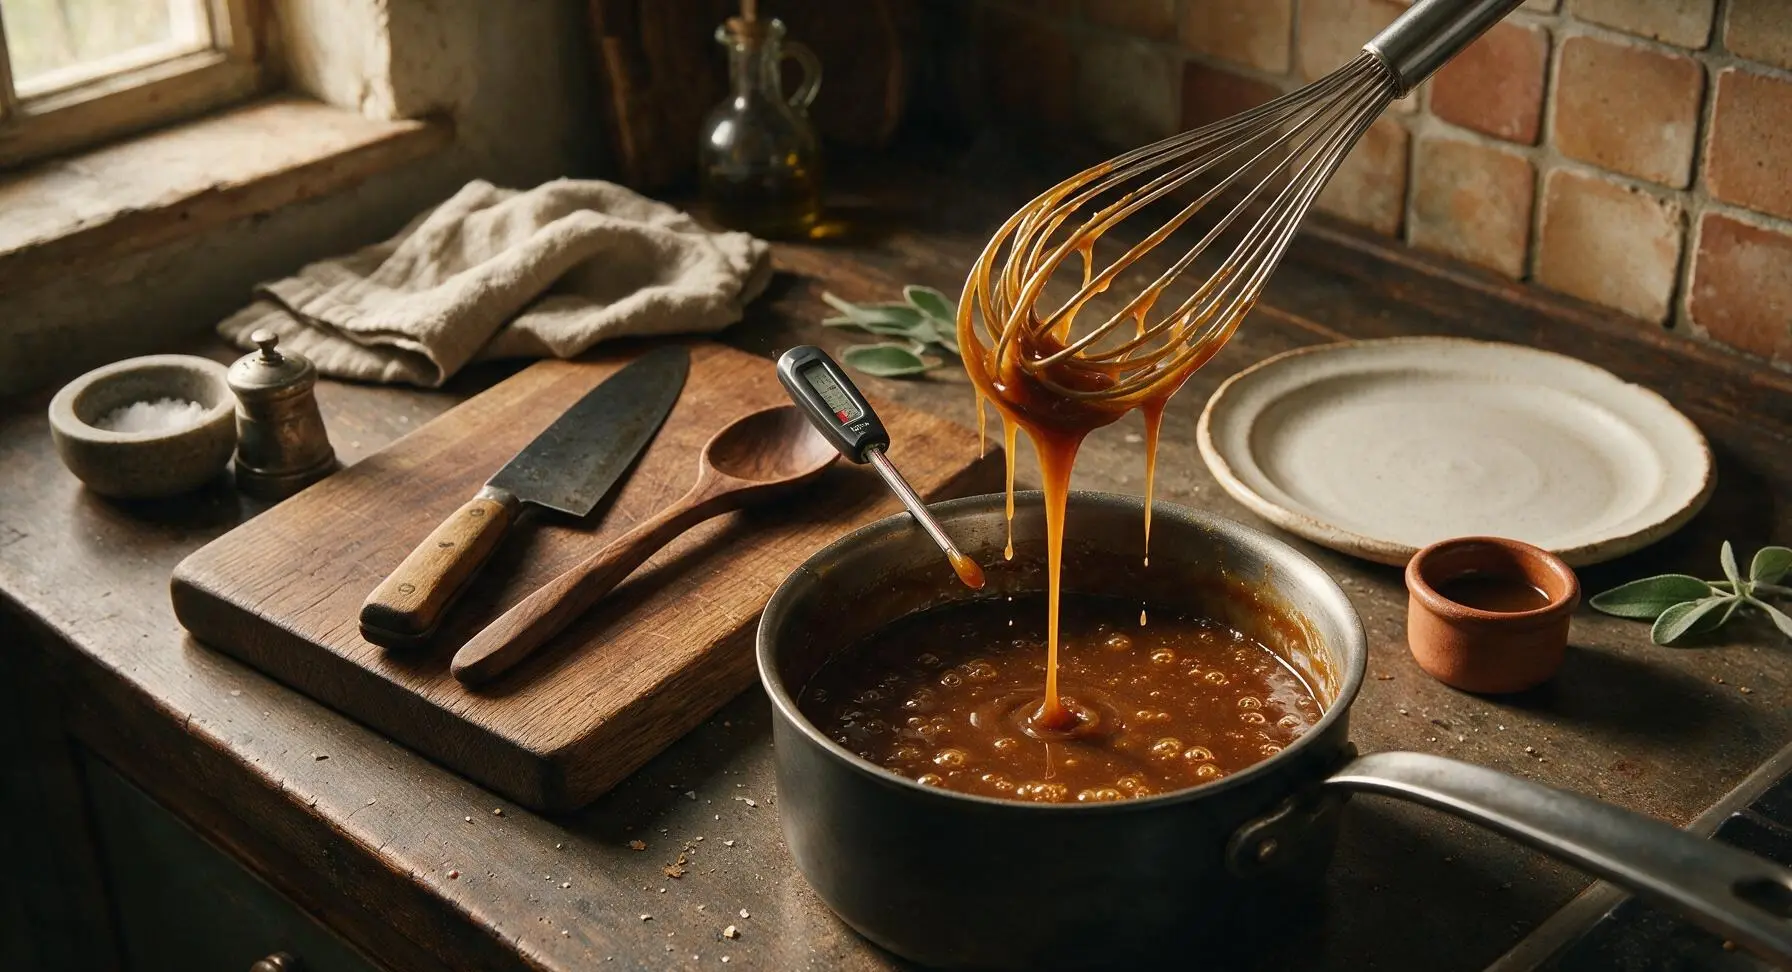
Bring the combined sauce to a gentle, steady simmer, where small continuous bubbles break across the entire surface. Pick up the instant-read thermometer from its back right position to check the temperature: the sauce is ready when it reaches 105C / 220F. Simmer for 3 full minutes, stirring occasionally with the whisk. The sauce will thin slightly when the cream first heats, then thicken to a glossy consistency that coats the back of a spoon.
Step 5
step5:Simmer to thicken
Step 5
step5:Simmer to thicken
6

Season with vanilla and salt

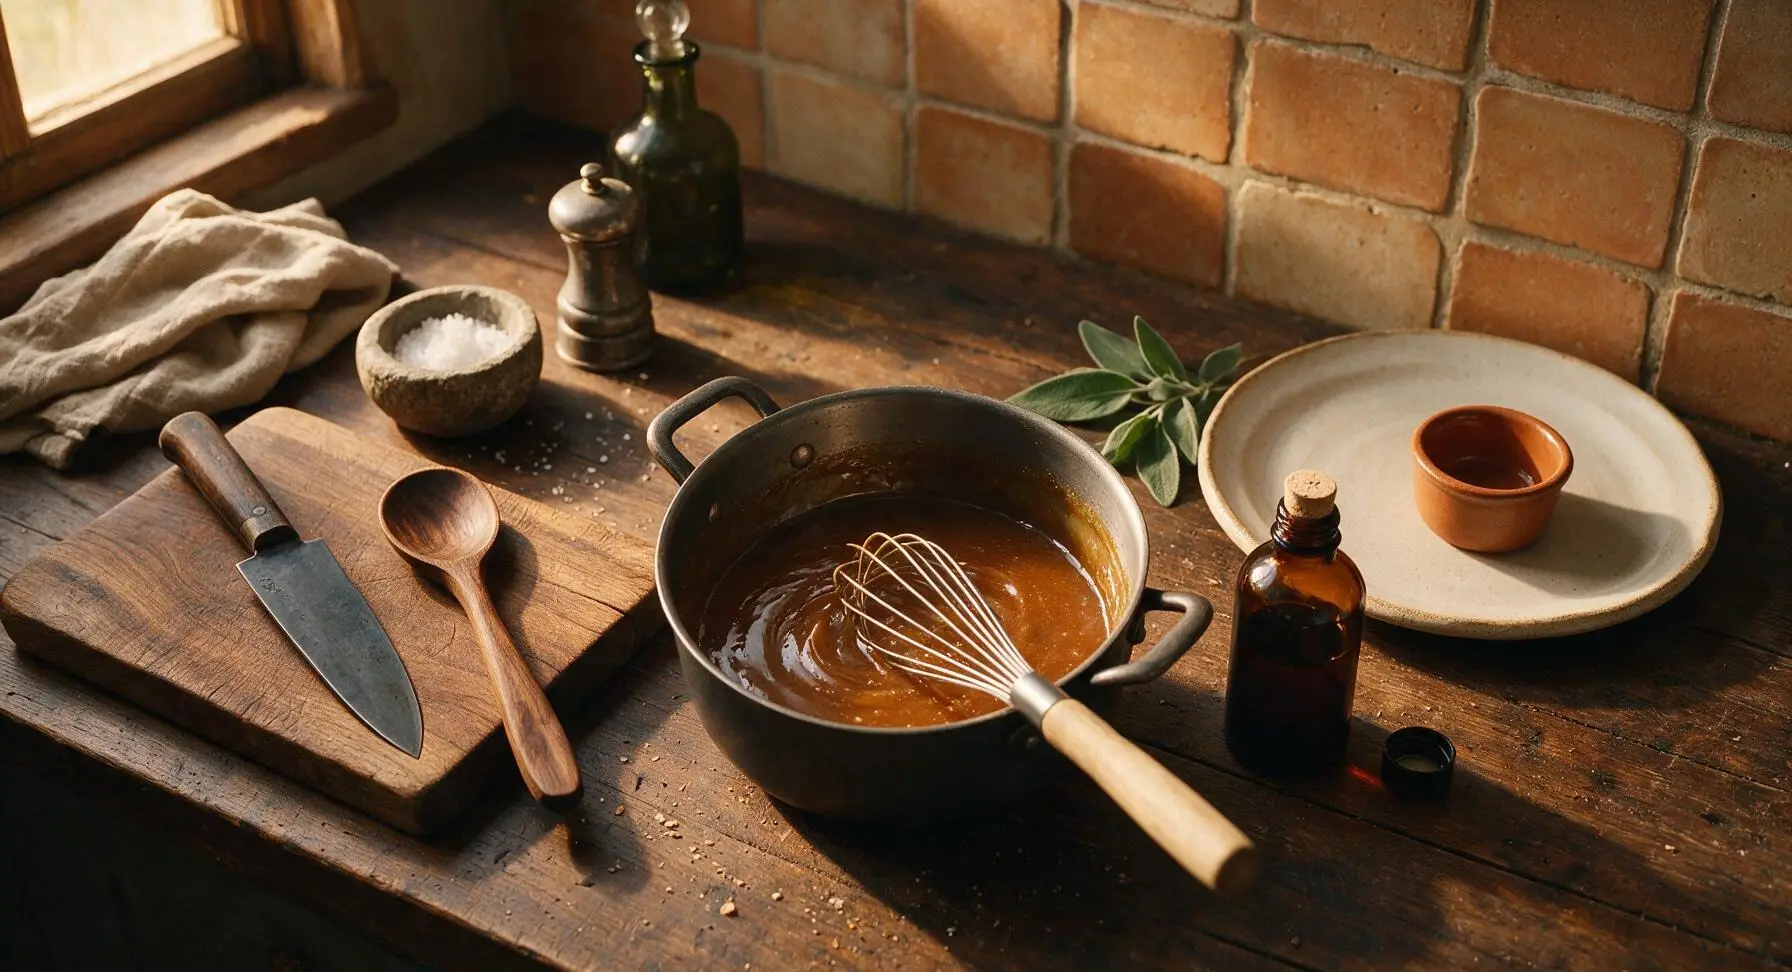
Remove the saucepan from heat entirely. Stir in the 1 tsp pure vanilla extract and 1/4 tsp fine sea salt, whisking until fully combined. Let the sauce sit for 30 seconds, then taste carefully (it will be very hot) and add a pinch more fine salt if needed to balance the intense sweetness.
Step 6
step6:Season with vanilla and salt
7

Pour sauce into jug

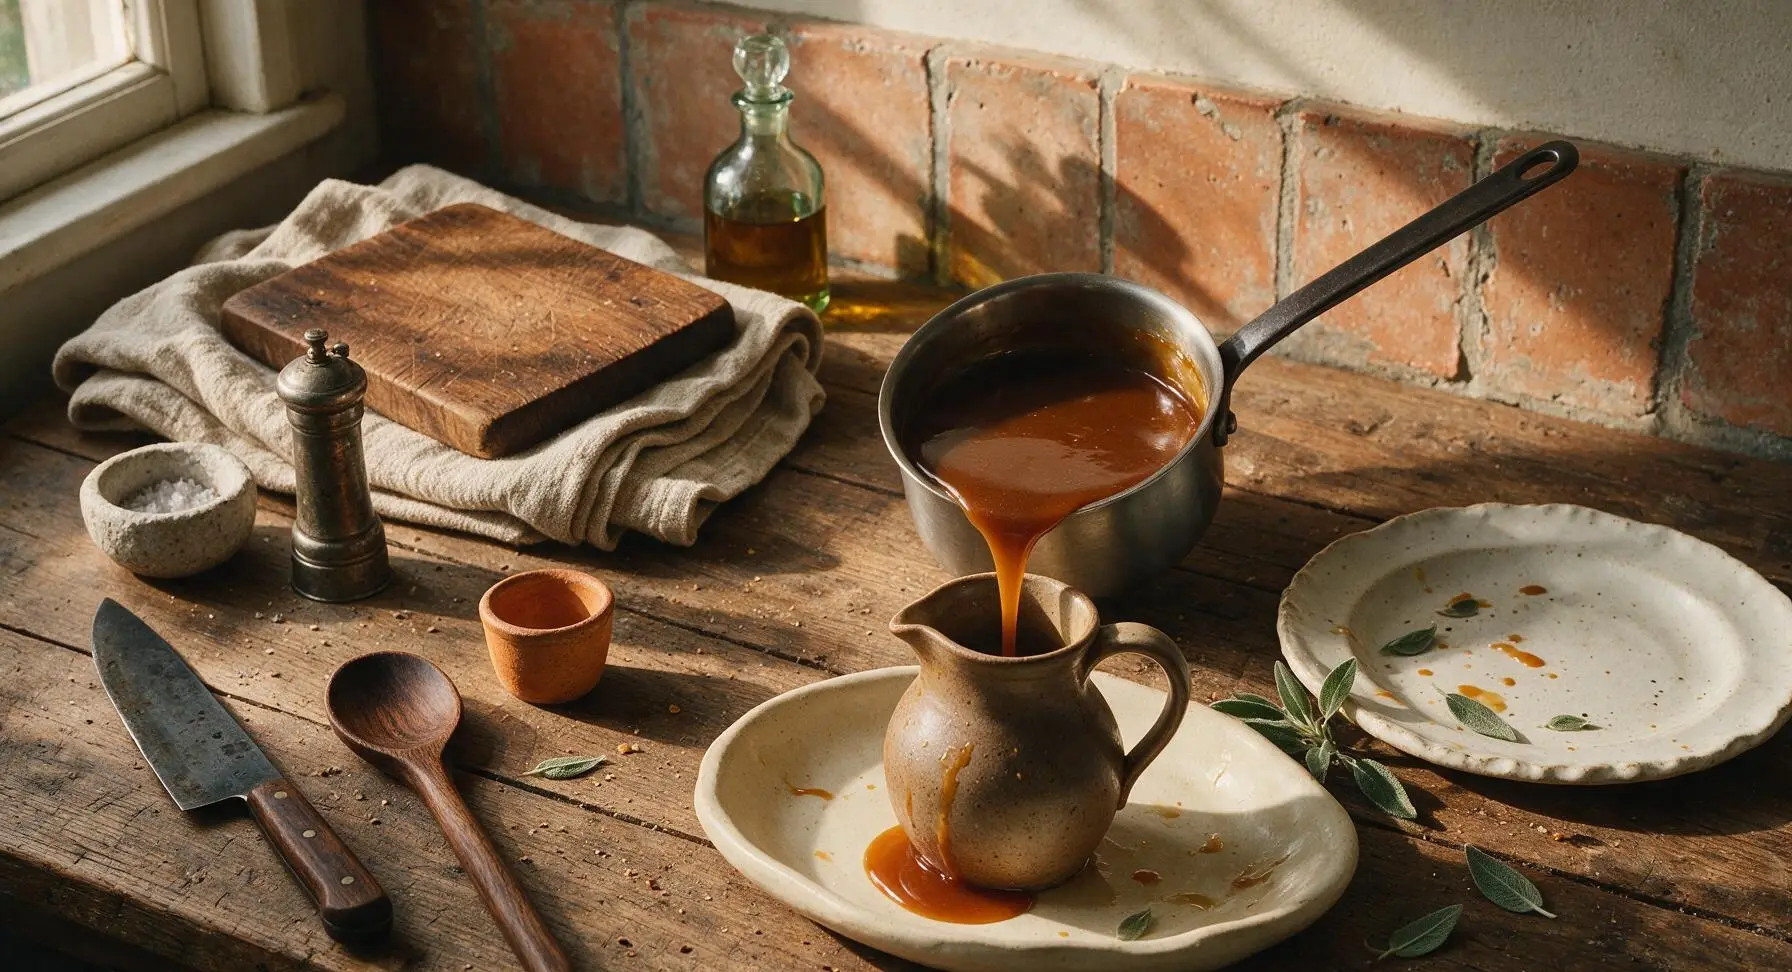
Let the sauce rest for 5 minutes in the pan to cool slightly and thicken further. Skim any tiny pale foam bubbles from the sauce surface with a spoon if you prefer a perfectly smooth finish. Place the matte toffee-brown stoneware sauce jug on the cream ceramic prep plate, then slowly pour the warm sauce into the jug, leaving 1cm of space at the top to avoid overflow.
Step 7
step7:Pour sauce into jug
8

Finish with flaky salt

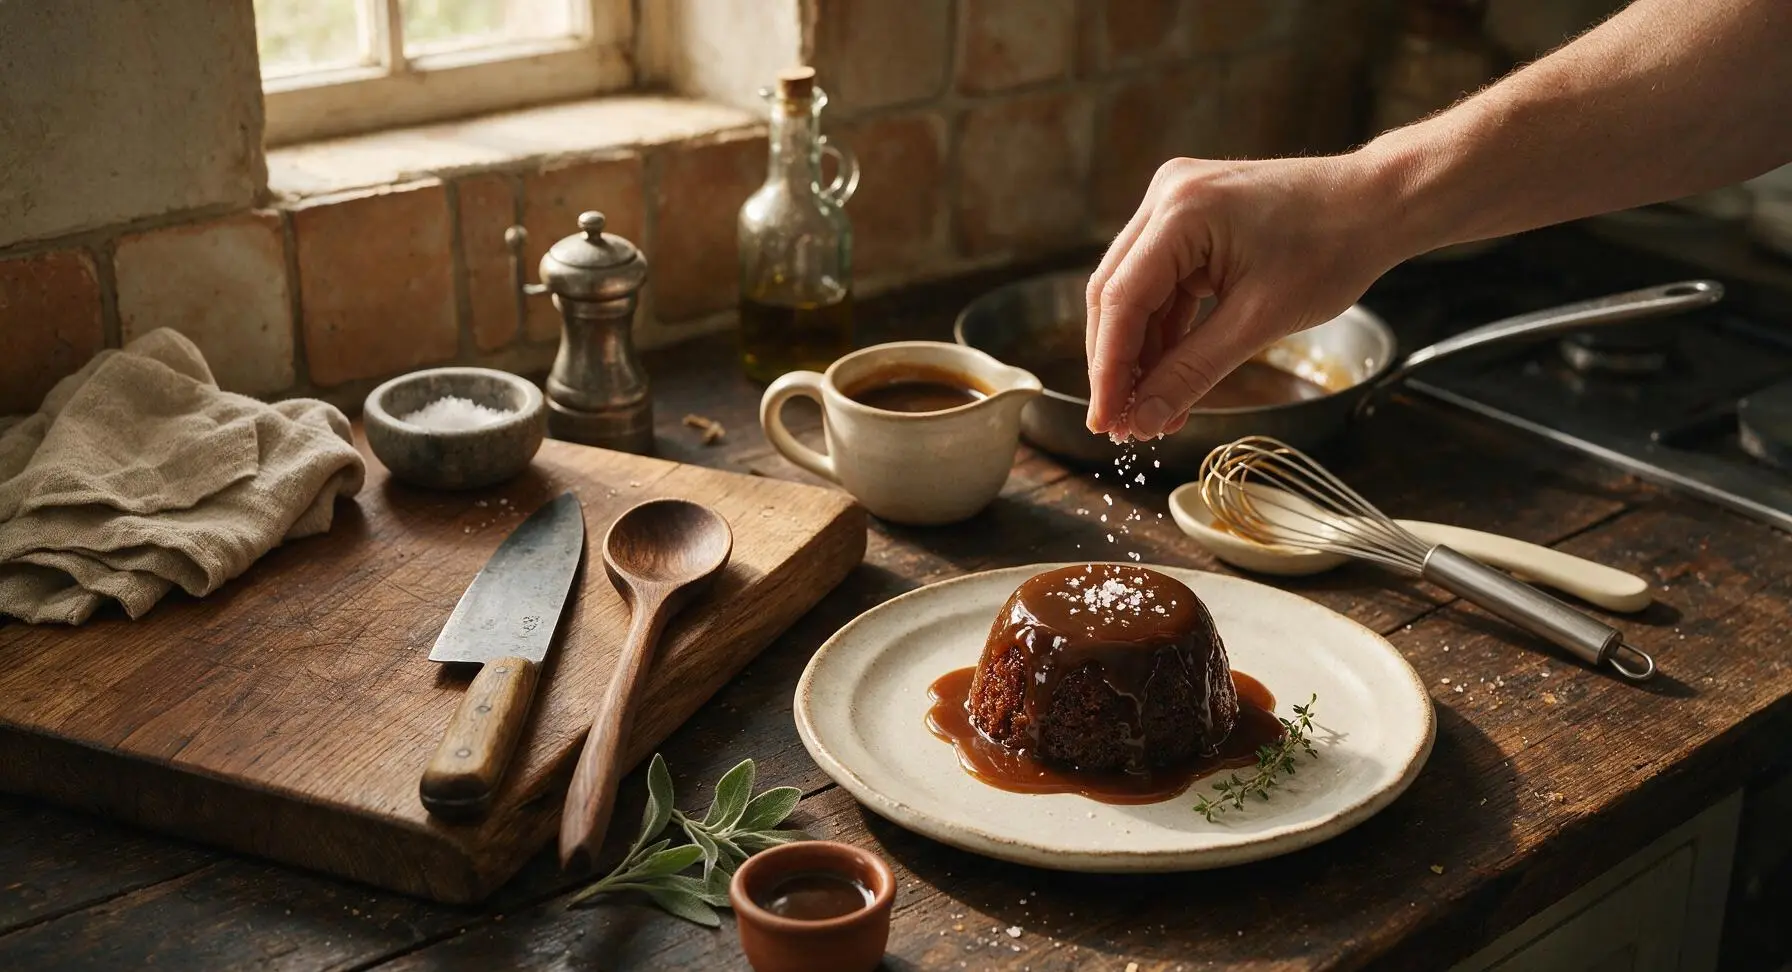
Sprinkle the 1/8 tsp flaky sea salt lightly across the warm sauce surface in the jug—do not stir the salt in, so the crystals remain visible for crunchy texture and bright salty contrast. Tuck a single small thyme sprig against the jug spout for a subtle fresh garnish, if desired. Serve warm, or store for later use.
Step 8
step8:Finish with flaky salt

Tips

1.Opt for dark muscovado sugar rather than standard light brown sugar for authentic flavor: its high natural molasses content creates the signature deep, slightly bitter-sweet toffee taste that defines classic British sticky toffee sauce, instead of a one-note plain caramel flavor. If muscovado is unavailable, substitute dark brown sugar mixed with 1 extra tbsp of molasses to match the depth.
2.Never rush the sauce with high heat: boiling the sugar too quickly before adding cream can cause crystallization (grainy texture), and boiling rapidly after adding cream can cause the dairy to separate, leading to an oily, broken sauce. A low, steady heat and constant stirring when needed guarantees a silky, smooth result.
3.Store leftover sauce in a sealed glass jar in the refrigerator for up to 2 weeks: the sauce will thicken to a spreadable consistency when cold, so reheat it gently in 15-second microwave bursts or over low stovetop heat, stirring between intervals. Add a 1 tsp splash of heavy cream if the sauce thickens too much after reheating to return it to pouring consistency.


✨ You May Also Like

Desserts & Baking
🍜 Italy

Creamy, coffee-kissed classic Northern Italian no-bake dessert, with layers of rum-spiked mascarpone cream, soft ladyfingers, and a rich cocoa dusting.

⏱️ 4 hours 3Desserts & Baking ★ 4.7
Desserts & Baking
🍜 France

Flaky, shatteringly crisp, buttery French croissants with golden exteriors and soft, airy layered interiors, perfect for pairing with coffee for a special morning treat.

⏱️ 12 hours Desserts & Baking ★ 4.5
Desserts & Baking
🍜 United States

Warm, spiced baked apples topped with a fluffy golden biscuit crust, this cozy dessert pairs perfectly with vanilla ice cream for cool-weather comfort.

⏱️ 55 minuteDesserts & Baking ★ 4.6
Desserts & Baking
🍜 United States

A star-spangled classic American blueberry pie with buttery flaky crust and bright sweet-tart filling, perfect for summer patriotic gatherings.

⏱️ 1 hour 25Desserts & Baking ★ 4.7
Desserts & Baking
🍜 United States

A beloved no-bake regional Maine candy with a chewy coconut-potato center coated in rich dark chocolate, a New England holiday staple since the 1870s.

⏱️ 2 hours 3Desserts & Baking ★ 4.8
Desserts & Baking
🍜 France

Luxuriously creamy, floral frozen custard made with aromatic Tahitian vanilla beans, boasting a smooth, rich texture that melts slowly on the tongue.

⏱️ 3 hours 3Desserts & Baking ★ 4.5

sticky toffee pudding sauce:Frequently Asked Questions

1.What makes this sticky toffee sauce different from regular caramel sauce? ▾
Unlike plain caramel made with white granulated sugar, this sauce uses dark muscovado sugar and molasses for deep, warm, slightly earthy sweetness, plus extra butter for that signature velvety, clingy texture that sticks to warm sponge instead of running off. It also has a balanced sweet-salty profile that cuts through richness far better than standard caramel.
2.Can I use light brown sugar instead of dark muscovado if I can’t find it? ▾
You can, but you’ll lose that deep, molasses-kissed depth that makes the sauce a classic. If substituting, add 1 extra tablespoon of dark molasses per cup of light brown sugar to replicate the rich, caramelized flavor, and make sure to pack the sugar tightly just like you would muscovado for consistent sweetness and texture.
3.Do I need a candy thermometer to make this sauce correctly? ▾
Nope, no candy thermometer required! This is a forgiving, no-fuss sauce that comes together in under 10 minutes on the stovetop. You just need to stir consistently as the butter melts, sugar dissolves, and the mixture comes to a gentle rolling bubble—no precise temperature tracking needed for smooth, perfect results.
4.Why is my sauce turning out grainy instead of smooth? ▾
Grainy sauce almost always comes from undissolved sugar crystals stuck to the sides of the pan as it cooks. Fix this by brushing the pan sides down with a wet pastry brush as the mixture simmers to wash crystals back into the sauce, and avoid stirring too vigorously once it simmers to prevent new crystals from forming.
5.Can I make this sauce ahead of time? ▾
Absolutely! This sauce stores beautifully for up to 2 weeks in an airtight container in the fridge, or up to 3 months in the freezer. When you’re ready to use it, reheat gently in the microwave in 20-second bursts, or in a small saucepan over low heat, stirring until it’s smooth and pourable again.
6.What’s the best way to serve this sauce besides over sticky toffee pudding? ▾
It’s incredibly versatile! Drizzle it over vanilla bean ice cream, warm apple pie, bread pudding, pancakes, waffles, or roasted pears. Stir a spoonful into hot coffee or cocoa for a rich twist, or serve it as a dip for churros, shortbread, or sliced fresh apples for a quick, indulgent treat.
7.Can I use salted butter instead of unsalted for this recipe? ▾
You can, just adjust any added salt to account for the salt already in the butter. I recommend unsalted for full control over that perfect sweet-salty balance; if you use salted butter, skip any extra pinch of finishing salt, and taste as you go to avoid ending up with a sauce that’s overly salty.
8.How long does this sauce stay pourable after it cools? ▾
When fully cooled to room temperature, it will thicken to a thick, spreadable fudge-like consistency, which is totally normal. It won’t stay thin and pourable at cool temps, but that’s easy to fix: warm 2–3 tablespoons per serving for 10–15 seconds in the microwave, and it will thin right back to a glossy, drizzle-ready texture.
9.Is there a dairy-free swap that works for this sauce? ▾
Yes! Swap the unsalted butter for an equal amount of vegan baking stick butter (skip spreadable tub kinds, which have too much water) and use full-fat canned coconut cream in place of the heavy whipping cream. Keep all other ingredients the same, and cook exactly as directed for a rich, nearly identical dairy-free version.
10.Why does my sauce separate or look curdled when I add the cream? ▾
That usually happens if the cream is ice cold when it hits the hot sugar-butter mixture, causing sudden temperature shock. Prevent this by taking cream out of the fridge 10 minutes before cooking, or warming it slightly for 20 seconds in the microwave before stirring it in. If it separates, whisk vigorously over low heat for 1–2 minutes until smooth.
11.Can I add extra flavors to this base sauce? ▾
Definitely! This base is super customizable. Stir in a pinch of flaky sea salt at the end for extra depth, a half teaspoon of ground cinnamon or ginger for warm spice, a splash of dark rum or bourbon for a boozy twist, or a tablespoon of smooth peanut butter for a nutty variation that pairs great with chocolate desserts.
12.How thick should the finished sauce be when it’s done cooking? ▾
Right after cooking, when still hot, it should be the consistency of warm maple syrup: thin enough to drizzle easily, but thick enough to coat the back of a spoon without running right off. It will thicken dramatically as it cools, so don’t overcook it while hot, or it will turn rock hard once cooled.
13.Can I use light molasses instead of dark molasses (black treacle) for this? ▾
You can, but light molasses is milder and sweeter, so you’ll lose that slight bitter, deep caramel edge that defines classic sticky toffee sauce. If that’s all you have, use it, but cut the vanilla by 1 teaspoon to keep flavor balanced, and avoid blackstrap molasses, which is too bitter and overpowering.
14.Do I need to stir the sauce constantly while it cooks? ▾
Stir almost constantly as the butter and sugar melt together to prevent sugar from burning on the pan bottom. Once the cream is added and the mixture comes to a gentle simmer, you only need to stir occasionally for 2–3 minutes as it thickens, so you don’t introduce too many air bubbles or trigger sugar crystal formation.
15.My sauce turned out too thick and chewy once it cooled—what did I do wrong? ▾
That means you cooked it 1–2 minutes too long, evaporating too much moisture from the cream and sugar. Fix it by stirring in an extra tablespoon or two of warm heavy cream, a little at a time, while reheating gently over low heat until it thins to your desired consistency. Next time, pull it off heat as soon as it coats a spoon.
16.Can I can this sauce to store it on the pantry shelf? ▾
I don’t recommend home canning for this recipe, since it’s high in dairy fat, which is tricky to can safely at home without risking spoilage or unsafe bacteria growth. Stick to fridge or freezer storage for this sauce—it keeps so well there’s no real need to can it, and reheats in seconds whenever you want it.
17.What’s the difference between this sauce and toffee dip for apples? ▾
Classic apple toffee dip is usually much thicker, often made with condensed milk, and has a milder, sweeter flavor without molasses depth. This sauce is silkier, more pourable when warm, has signature dark muscovado and molasses warmth, and is balanced to cut through rich sticky toffee sponge rather than being thick enough to scoop.
18.Should I add salt to this sauce? ▾
A tiny pinch of fine sea salt, stirred in right at the end of cooking, makes a huge difference in making the caramel and molasses flavors pop, rather than tasting flat or cloyingly sweet. You only need about 1/8 of a teaspoon for a full batch—you won’t taste the salt itself, just notice the sauce tastes richer and more balanced.
19.Can I reheat this sauce multiple times without ruining it? ▾
It’s best to only reheat the amount you plan to use each time, rather than reheating the whole batch over and over. Repeated heating and cooling can cause sugar to crystallize over time, or make the sauce separate. Just scoop out what you need into a small bowl, warm it, and keep the rest stored tightly in the fridge for best texture.
20.My sauce has a slightly burnt taste—how can I prevent that next time? ▾
Burnt flavor happens when sugar cooks too fast over high heat, or sits too long on the pan bottom without stirring. Next time, cook the sauce over medium-low heat instead of high, stir consistently as the sugar melts, and pull it off heat as soon as it reaches that smooth, bubbly, spoon-coating stage, no extra cooking needed.

Comments (20)

2 days ago

OMG this sauce is a total game changer! I whipped it up last night for our family dinner to pour over store-bought vanilla ice cream and my kids begged for seconds. It only took 10 minutes like the recipe said, no fancy ingredients needed. SO good, I’m already making another batch for our neighborhood potluck this weekend!

yesterday

So glad your family loved it! It works perfectly over ice cream, cake, or even warm brownies – hope it’s a hit at the potluck!

1 week ago

Drizzled this over my grilled peaches at the cookout last weekend and people lost their minds. Who knew a 10 minute sauce could make simple fruit taste like a fancy restaurant dessert? Will absolutely keep this in my regular rotation.

3 days ago

Super easy recipe even for someone like me who burns toast half the time! The only thing I messed up was stirring too fast at first and got a tiny lump, but it smoothed out once I turned the heat down a little. Tastes exactly like the sticky toffee pudding I had on my trip to London last year!

2 days ago

Pro tip for no lumps: warm your cream a little before pouring it in! I did that last time and it came out perfectly smooth every time.

5 days ago

Wait, can I make this ahead of time and reheat it? I’m prepping for a big work potluck and don’t want to be stuck stirring sauce right before I have to leave. Would it keep in the fridge for a couple days?

5 days ago

Great question! You can absolutely make this 3-4 days ahead, store it in an airtight container in the fridge, and reheat it gently on the stovetop or in 30 second bursts in the microwave, stirring between each. It thickens as it cools, so a tiny splash of cream when reheating helps get the perfect consistency back.

3 days ago

I made this a full 3 days ahead for my kid’s birthday party and it was just as good as fresh! Reheated in the microwave and no one could tell I didn’t make it day of.

2 weeks ago

I swapped the heavy cream for full fat coconut cream and the butter for vegan butter to make this dairy free for my sister, and it still turned out insanely good! Rich, sticky, perfectly sweet, no weird coconut aftertaste at all. 10/10 for easy swaps.

1 week ago

Is there a way to make this a little less sweet? I love the toffee flavor but my partner isn’t a huge fan of super sugary desserts. Would cutting the brown sugar by a quarter ruin the texture?

5 days ago

You can absolutely cut the brown sugar by 2-3 tablespoons without ruining the texture! I’d recommend adding a tiny pinch of flaky salt at the end too – it cuts the sweetness and makes the toffee flavor pop even more.

3 days ago

I did exactly that! Cut the sugar by 3 tbsp and added a pinch of flaky sea salt, and my husband who hates overly sweet desserts went back for thirds over bread pudding. Highly recommend.

yesterday

Game. Changer. I used this to top my sticky toffee cupcakes for my book club meeting and everyone asked for the recipe. The glossy, thick texture is so fancy looking for how little effort it takes. I even added a splash of bourbon at the end like I do with my caramel, chef’s kiss.

30 minutes ago

The bourbon addition sounds incredible – I’ll have to try that next time I make a batch for a grown-up gathering! So glad your book club loved it.

2 hours ago

Help! I turned my back for 2 seconds and the sugar got a little too dark and tastes slightly burnt. Did I just ruin the whole batch, or is there a way to fix it? It’s my first time making toffee sauce and I’m so frustrated 😭

30 minutes ago

Oh no, I did that my first time too! If it’s only slightly burnt you can stir in a tiny bit of extra cream and a dash of vanilla to mellow it out, but if it smells super acrid it’s better to start over – since this only takes 10 minutes it’s not a huge time loss!

5 minutes ago

Jake is totally right! Burnt sugar can get bitter fast, so if it’s just a little dark on the edge the extra cream trick works, but don’t be hard on yourself if you need to restart – even experienced cooks burn sugar sometimes when they’re juggling other kitchen tasks!

3 days ago

Made this for our weekly book club dessert night, served it warm over gingerbread, and everyone was scraping their plates clean. I love that it doesn’t require a candy thermometer – that’s always my least favorite part of making caramel sauces.

5 days ago

This is now my go-to quick dessert hack for busy weeknights! I keep a jar in the fridge and when the kids are begging for a treat, I warm up a little and pour it over apple slices, ice cream, whatever we have lying around. It’s so much better than the store-bought caramel sauce with all the weird additives.

2 days ago

Same! I stopped buying the grocery store stuff entirely after trying this. It tastes way richer and I know exactly what’s in it for my kids.

30 minutes ago

Wait, does this harden up when it cools like regular caramel? I want to drizzle it over a layer cake and need it to stay soft and sticky, not turn into a crunchy shell that cracks when you cut a slice.

5 minutes ago

Great question! This sauce stays soft, thick, and sticky even when cooled – it won’t harden into a crunchy shell like traditional caramel, so it’s perfect for drizzling over cakes, ice cream, or bread pudding. It will thicken as it sits, though, so if you want a thinner drizzle for cake just warm it slightly before using.

just now

Can confirm! I drizzled this over a chocolate layer cake last weekend and it stayed perfectly gooey for 3 days in the fridge, no crunch at all. Everyone raved about it.

1 week ago

Brought this to a friend’s potluck in a little slow cooker to keep it warm, served with chunks of pound cake and apple slices for dipping, and it was the first empty dish on the table. People were literally hovering over the pot for the last spoonful. So easy, so impressive.

yesterday

Has anyone tried adding a little sea salt to this to make salted toffee sauce? I’m obsessed with salted caramel and feel like this would be even better with that salty-sweet vibe, but I don’t want to overdo it.

2 hours ago

I added 1/4 tsp of flaky sea salt right after taking it off the heat and it was chef’s kiss! Don’t add table salt though, it’s too harsh and will make it too salty. Flaky sea salt is the move.

30 minutes ago

Rob’s spot on! 1/4 tsp of flaky sea salt stirred in at the end makes the most incredible salted toffee sauce – it’s one of my favorite variations. I also like to sprinkle a little extra on top right before serving for a little crunch.

2 weeks ago

I’ve been searching for a sticky toffee sauce recipe that tastes like the one my grandma used to make when I was a kid, and this is EXACTLY it. Rich, buttery, deep toffee flavor, no weird bitter aftertaste. I almost cried when I took the first bite. Thank you for this!

1 week ago

That means so much to hear! I developed this recipe based on my own grandma’s sticky toffee sauce, so I’m thrilled it brought back happy memories for you.

2 days ago

First time ever making any kind of caramel/toffee sauce and I was so nervous I’d mess it up, but the instructions were so straightforward! It came out perfectly on the first try, even with me panicking the whole time that I’d burn it. I poured it over my mom’s birthday bread pudding and she said it was the best dessert she’s ever had.

yesterday

Yay, so proud of you! This recipe is so forgiving for new bakers, I’m sure your mom loved the birthday treat.

yesterday

That makes my day to hear! There’s nothing better than nailing a new recipe for someone you love – happy birthday to your mom!

5 days ago

I don’t usually leave reviews but this sauce is too good not to. It takes literally 10 minutes, uses pantry staples I almost always have on hand, and makes even boring old vanilla ice cream feel like a special treat. I’ve made it three times in the last two weeks, no shame.

1 week ago

I packed a small jar of this (chilled, obviously) on my last backpacking trip to pour over instant oatmeal at camp, and it was the best trail meal I’ve ever had. Lightweight, no refrigeration needed for a day or two, and such a nice morale boost after a long hike.

3 days ago

That is such a genius idea! I’m stealing that for my camping trip next month, my friends are gonna lose their minds.

2 weeks ago

I’ve been making sticky toffee sauce for 40+ years and I have to say, this recipe is just as good as my tried and true version, and half the work. I love that it doesn’t require standing over the stove stirring for 20 minutes – perfect for when my grandkids show up unannounced and want a sweet treat fast.

1 week ago

What a huge compliment coming from someone who’s been making this for decades! I’m so glad it works for those quick, impromptu treat moments with the grandkids.

2 weeks ago

Tried this for Father’s Day dessert, poured it over warm brownies with a scoop of vanilla, and my whole family was raving. My teen son who turns his nose up at every homemade dessert asked if we could have it again this weekend. Total win.

just now

I made the mistake of leaving the finished sauce out on the counter after dinner last night and my partner ate half the jar straight with a spoon. It’s just that good. I’m not even mad, I would’ve done the same if I’d gotten to it first.

just now

LMAO I did the exact same thing the first time I made it! Told myself I was just “tasting it to make sure it was good” and suddenly I’d eaten a quarter of the batch standing over the stove.



