
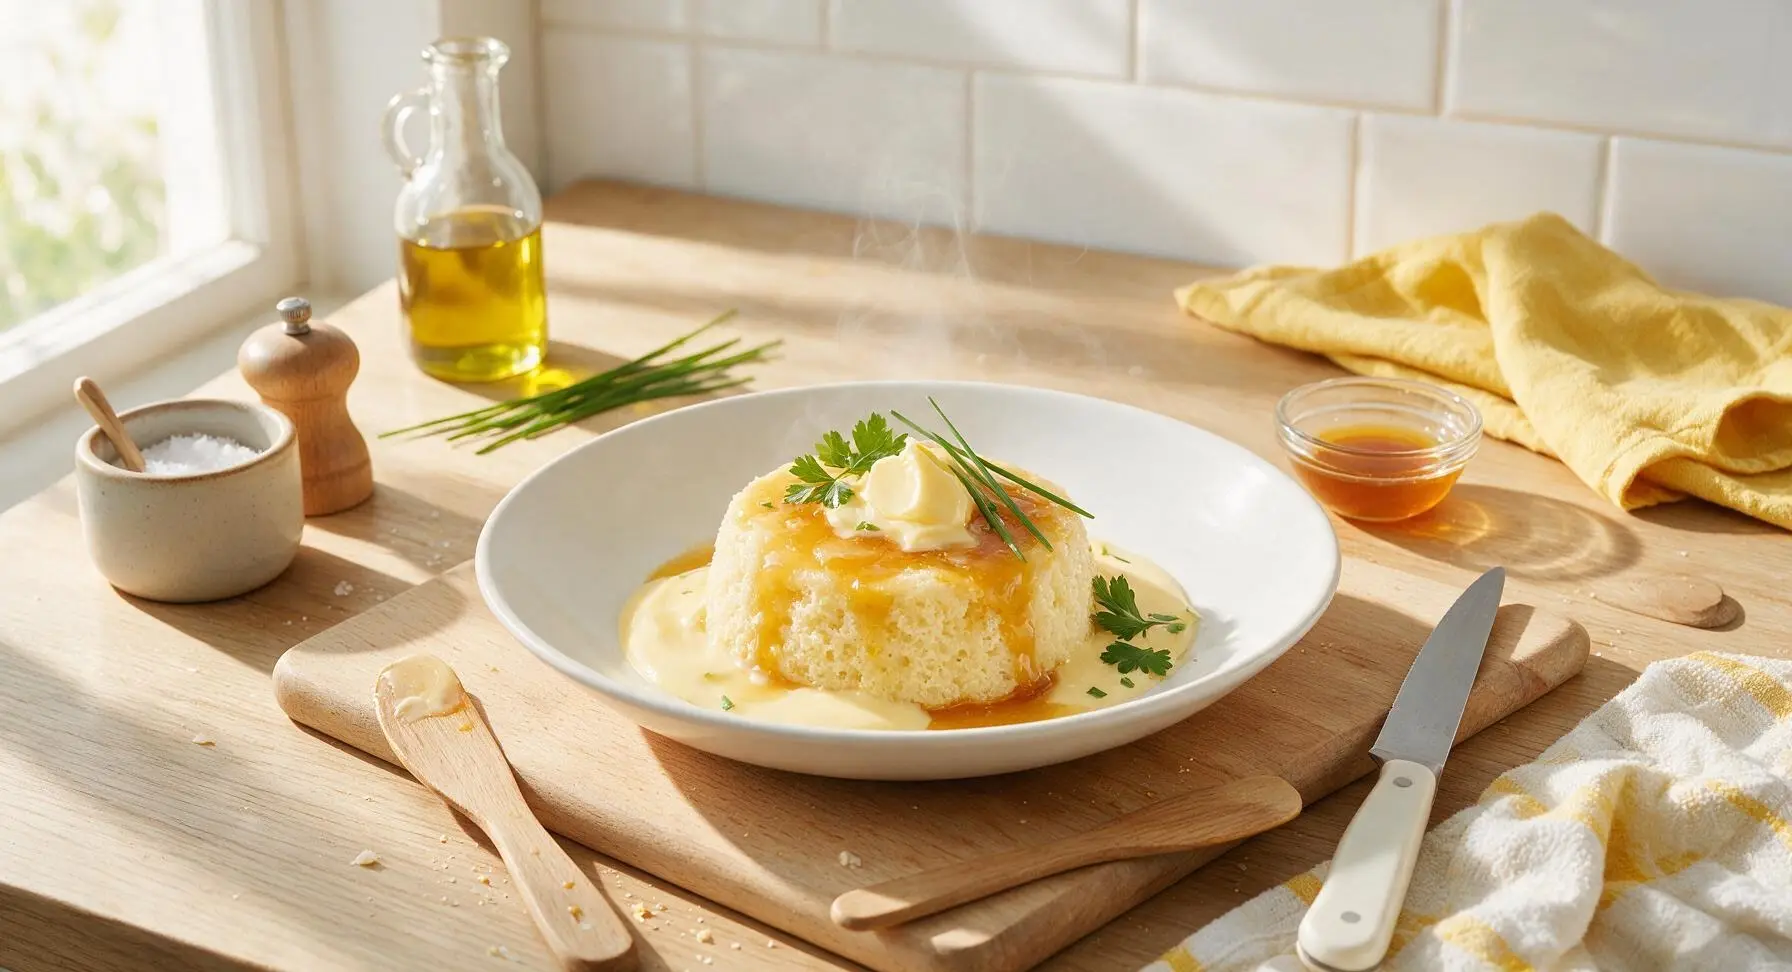
syrup sponge

title 1
syrup sponge
⏱️ cook time 1 hour 30 minutes
🍽️ servings 4
⚡ Difficulty easy

intro

Light, fluffy vanilla steamed sponge oozing with buttery golden syrup, a classic British comfort dessert served warm with creamy custard for cold winter days.

Ingredients
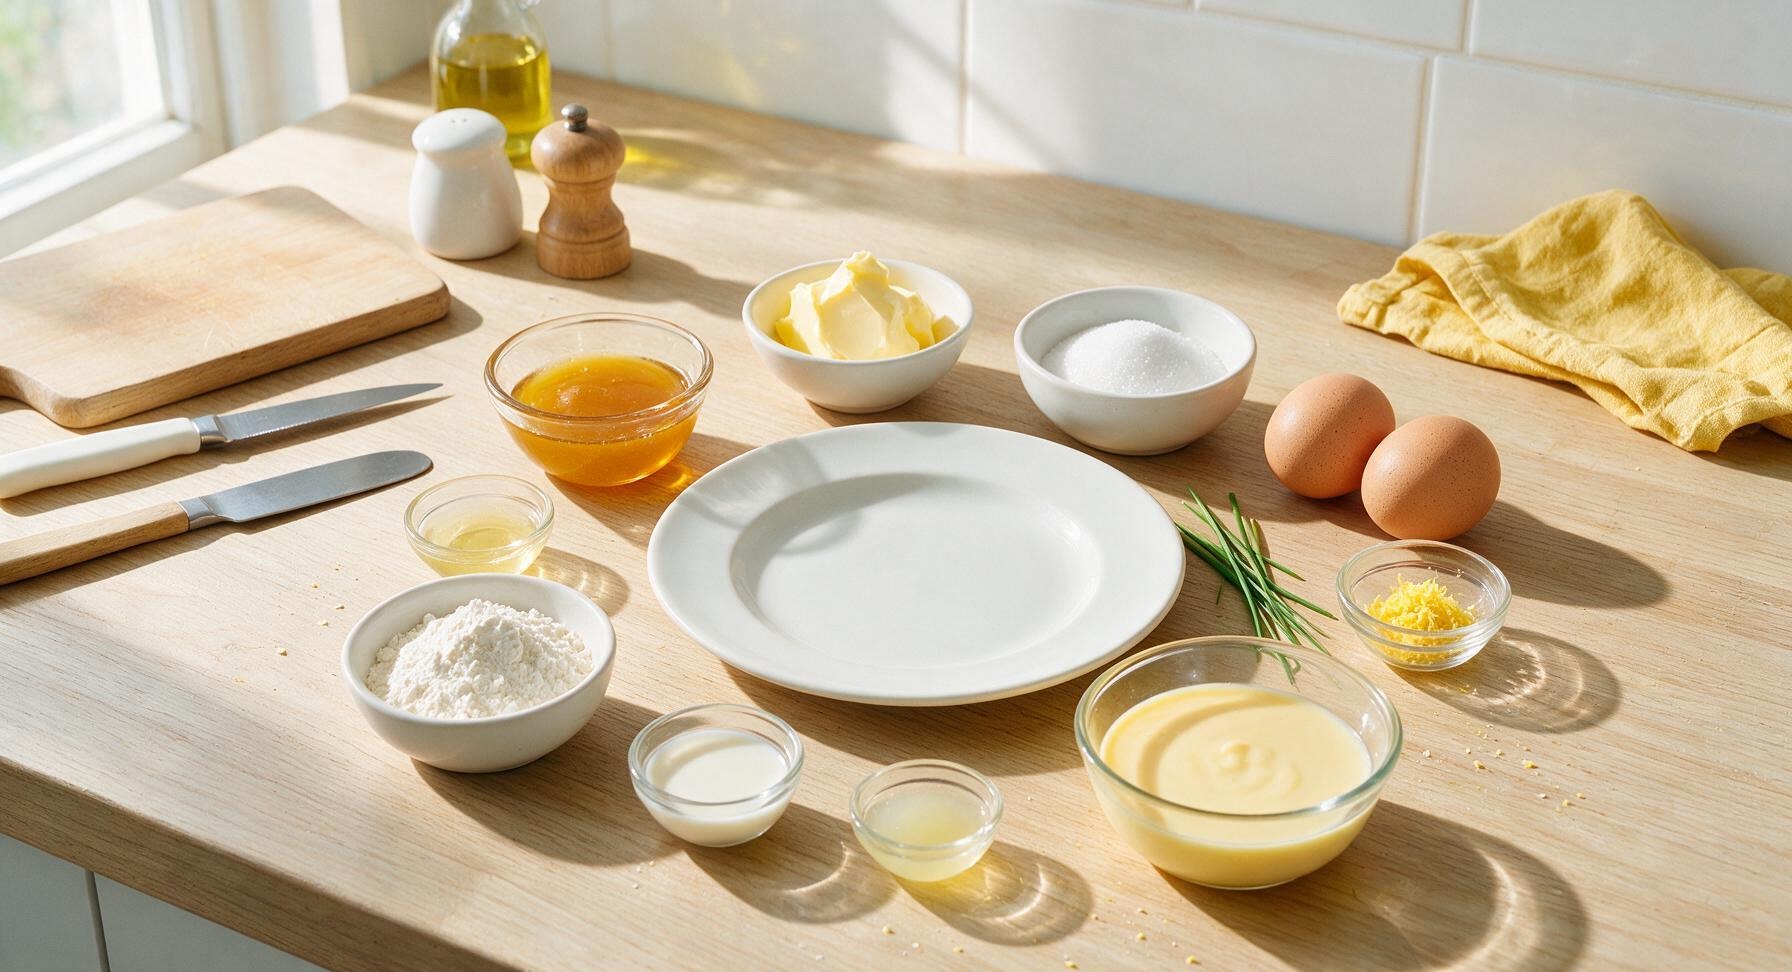
Golden syrup 120ml
Unsalted butter (softened, room temperature) 100g
Caster sugar 100g
Large free-range eggs (room temperature) 2
Vanilla extract 1 tsp
Self-raising flour 100g
Whole milk 2 tbsp
Fresh lemon juice 1 tsp
Vanilla custard (warmed, for serving) 200ml

Steps

1

Prepare Pudding Basin

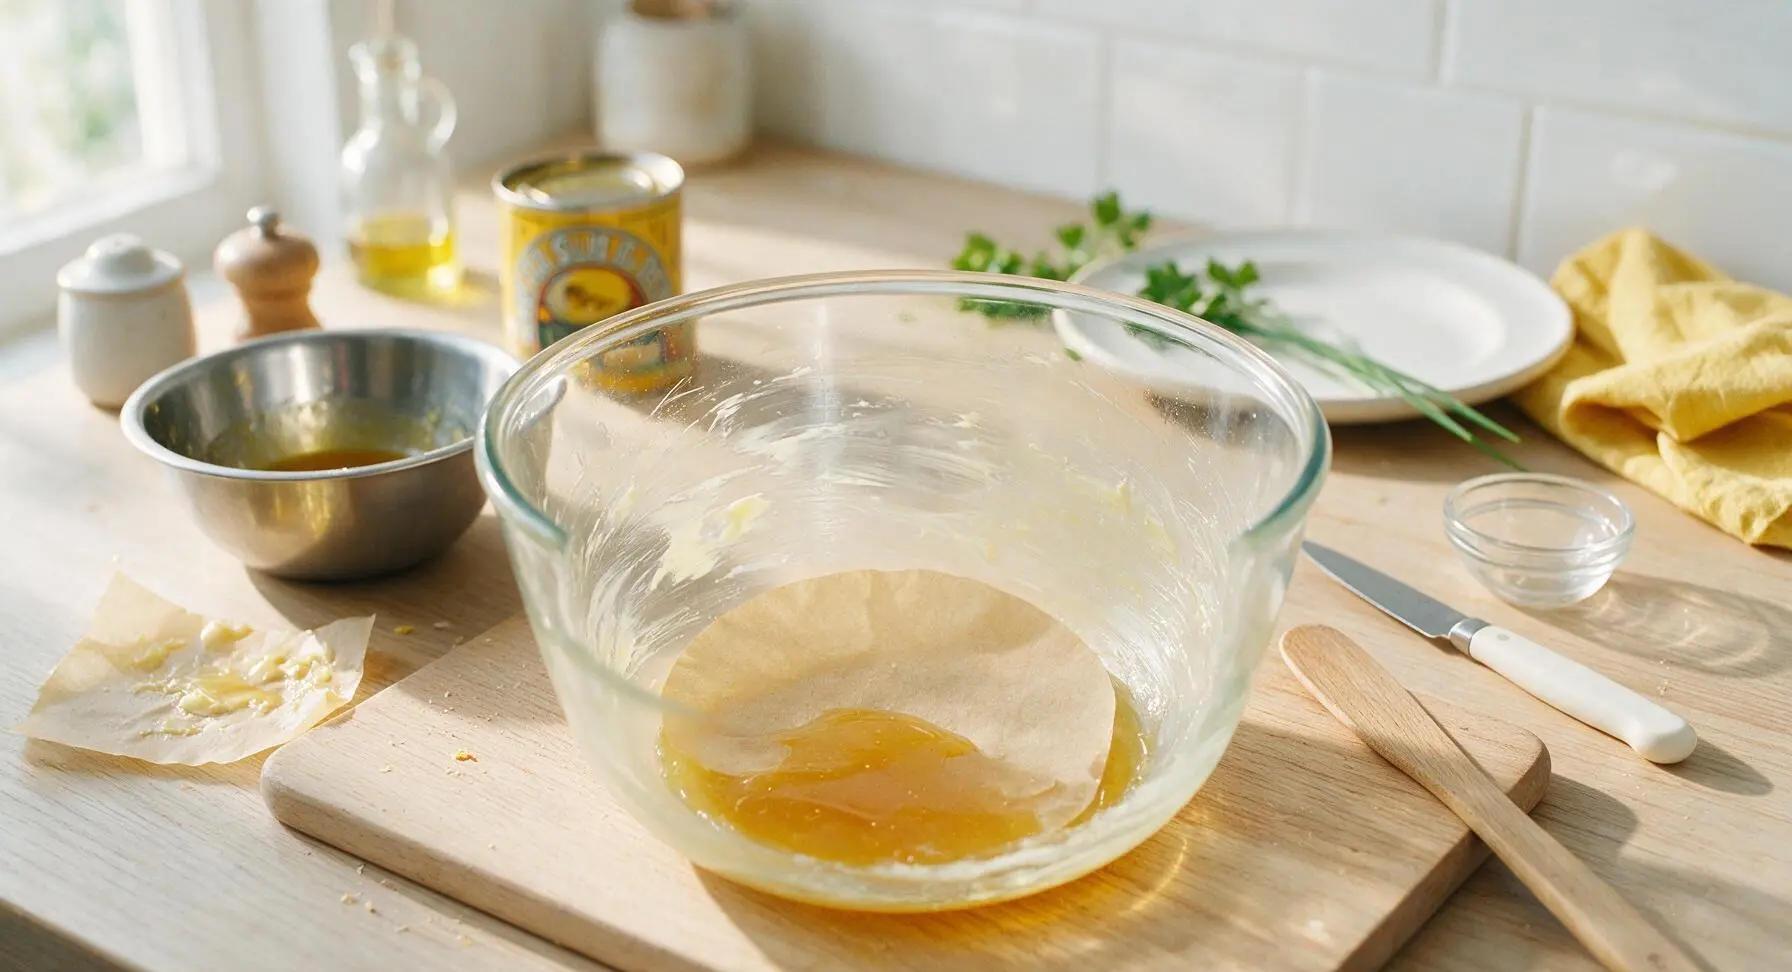
Use a small scrap of parchment to rub 5g of the softened butter all over the inside of the 1.2L clear glass pudding basin, coating the sides and base evenly to prevent sticking. Cut a 15cm circle of unbleached baking parchment and press it flat to the greased basin base. Stir 80ml of the golden syrup together with 1 tsp fresh lemon juice in the small stainless steel mixing bowl, then pour the mixture gently into the bottom of the basin, taking care not to smear it up the greased sides. Set the basin aside on the center of the counter.
Step 1
step1:Prepare Pudding Basin
2

Cream Butter and Sugar

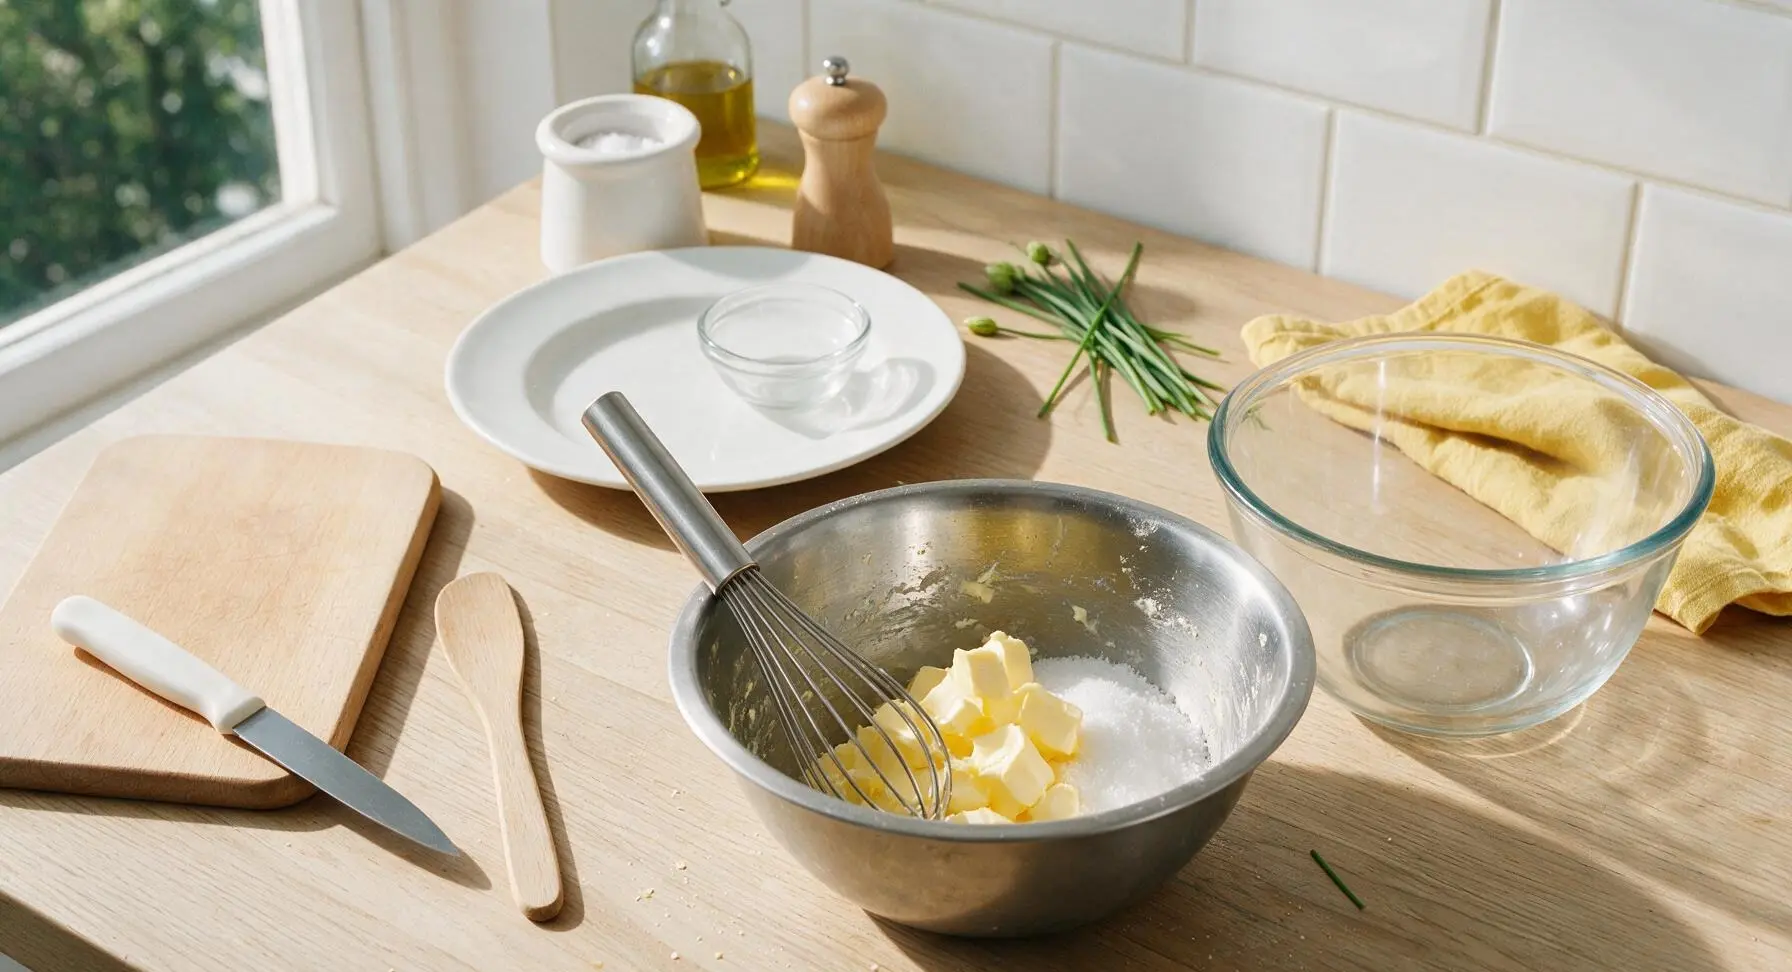
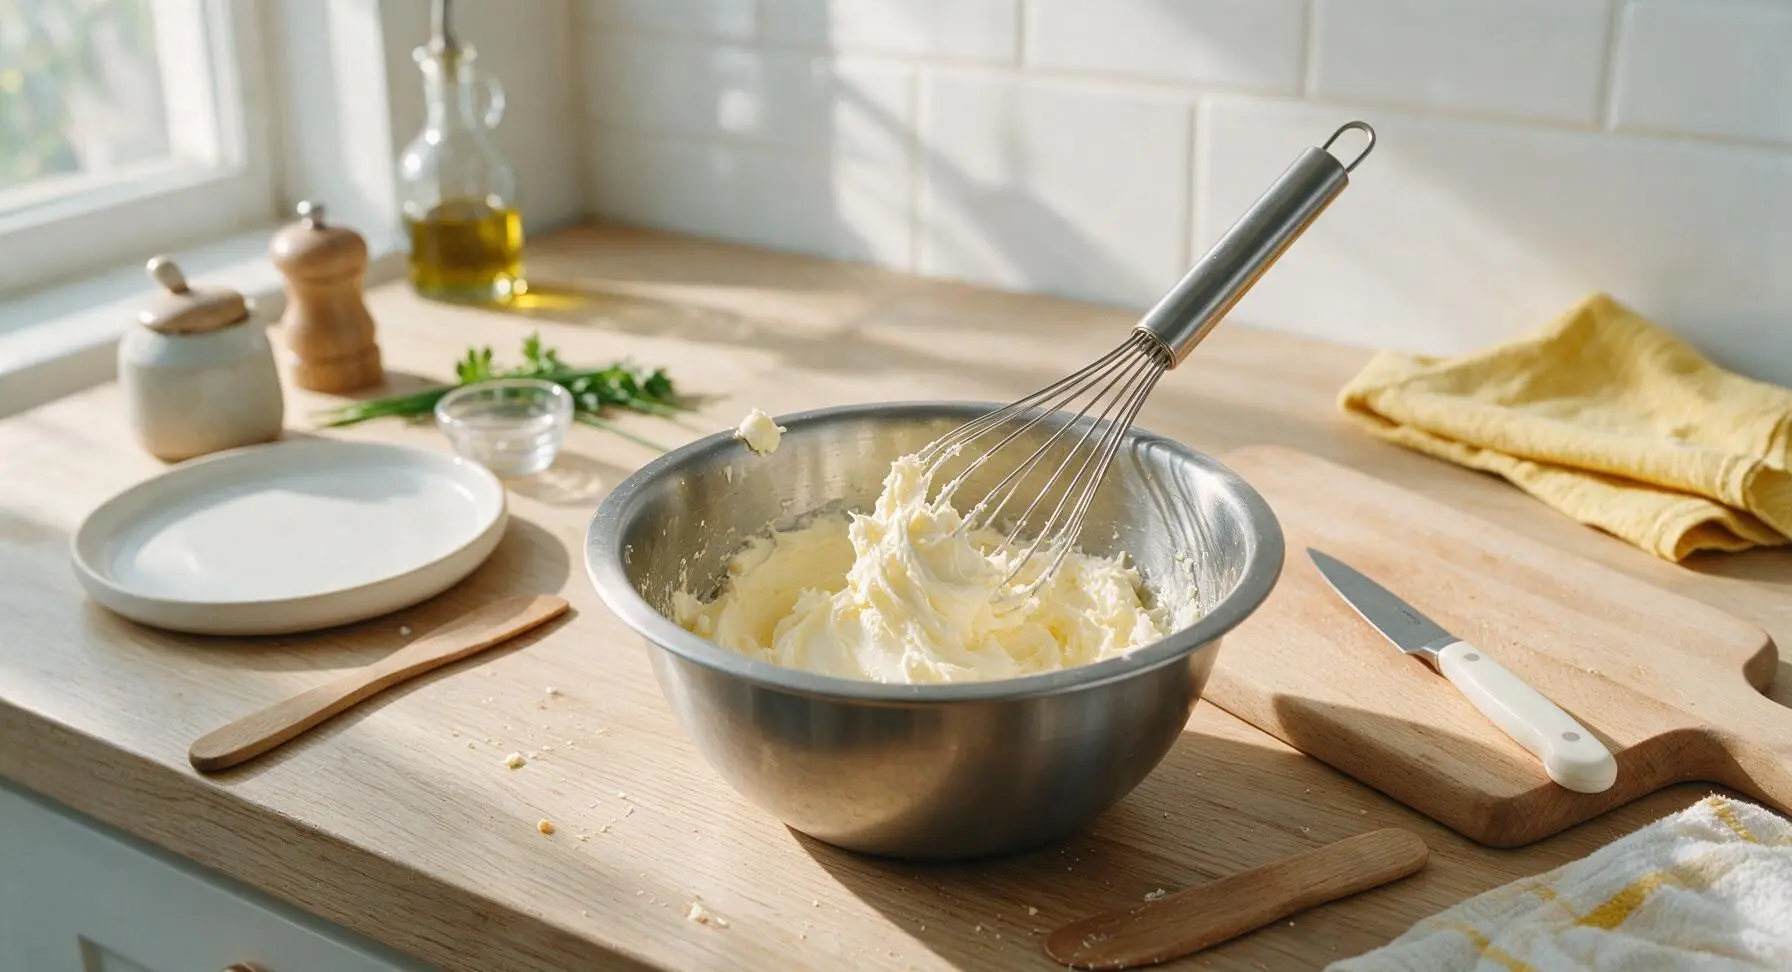
Place the remaining 95g softened unsalted butter and 100g caster sugar into the small stainless steel mixing bowl. Use the stainless steel balloon whisk to beat the mixture for 3-4 minutes until it is pale, fluffy, and light lemon-yellow in color, with no visible grainy sugar bits when you rub a small amount between your fingers. Scrape down the sides of the bowl halfway through with the silicone spatula to ensure even mixing.
Step 2
step2:Cream Butter and Sugar
Step 2
step2:Cream Butter and Sugar
3

Mix in Eggs and Vanilla

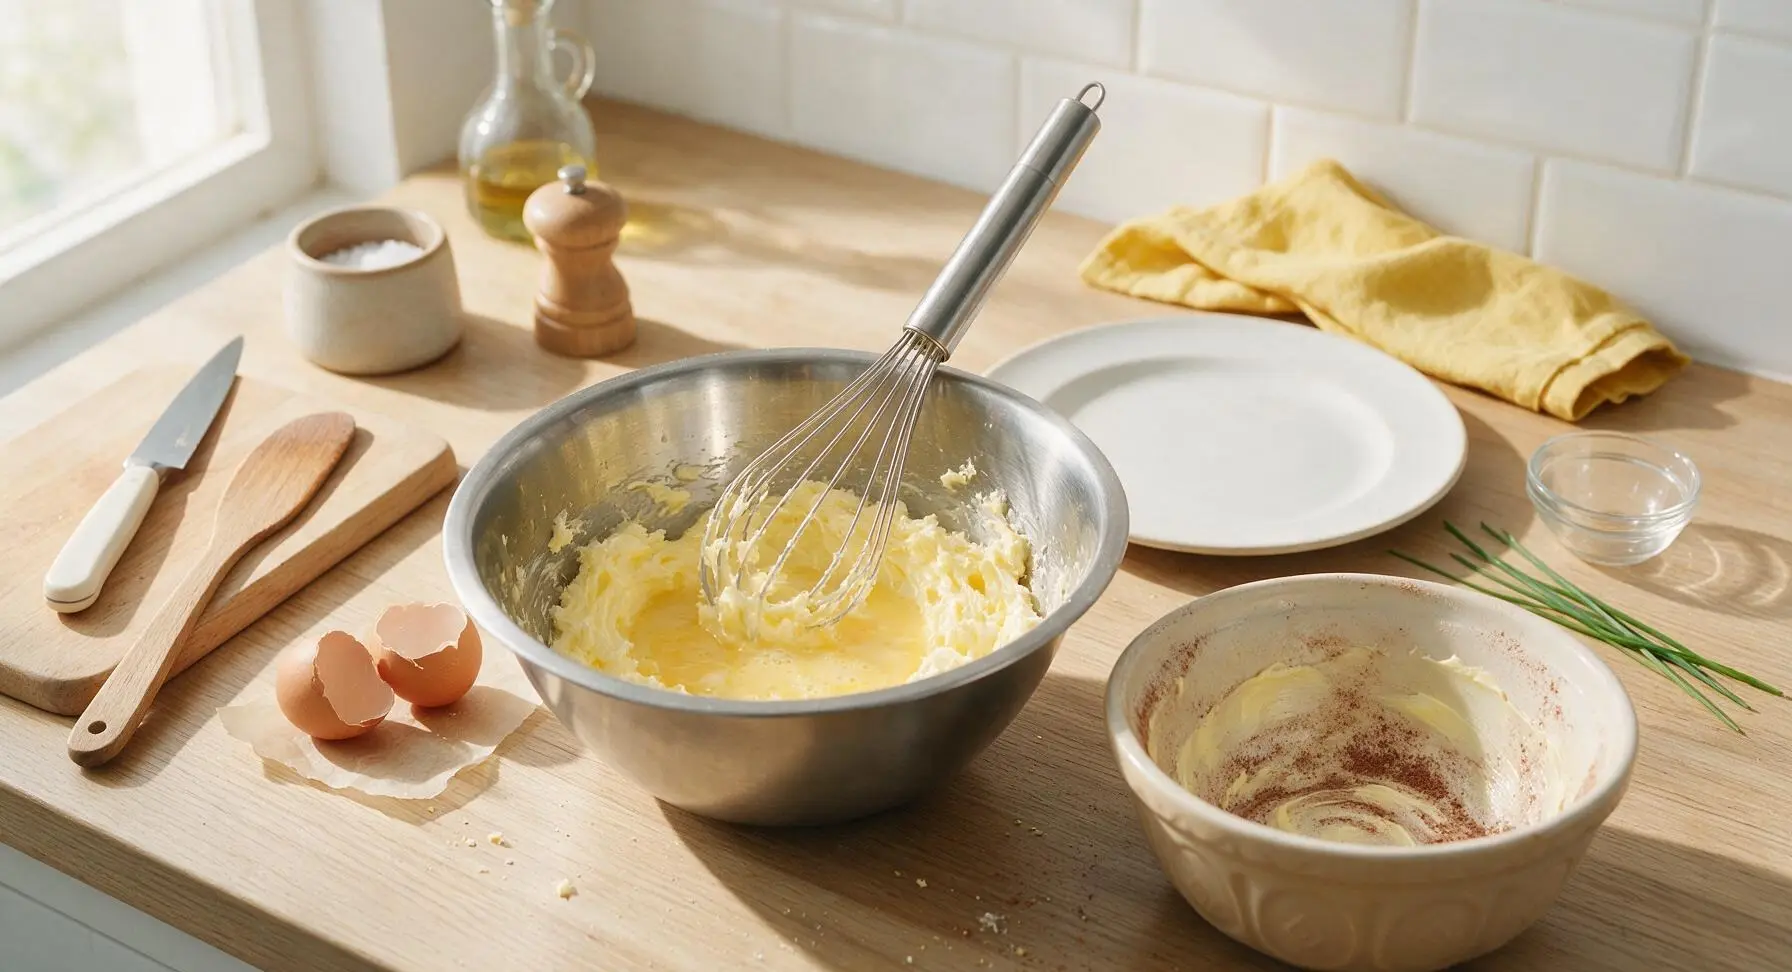
Lightly beat the 2 room-temperature eggs in a small cup, then add them to the creamed butter and sugar 1 tablespoon at a time, beating well with the balloon whisk after each addition to prevent curdling. If the mixture starts to split, add 1 tsp of the measured self-raising flour to bring it back together. Once all egg is fully incorporated, stir in the 1 tsp vanilla extract until evenly mixed.
Step 3
step3:Mix in Eggs and Vanilla
4

Fold Flour and Milk

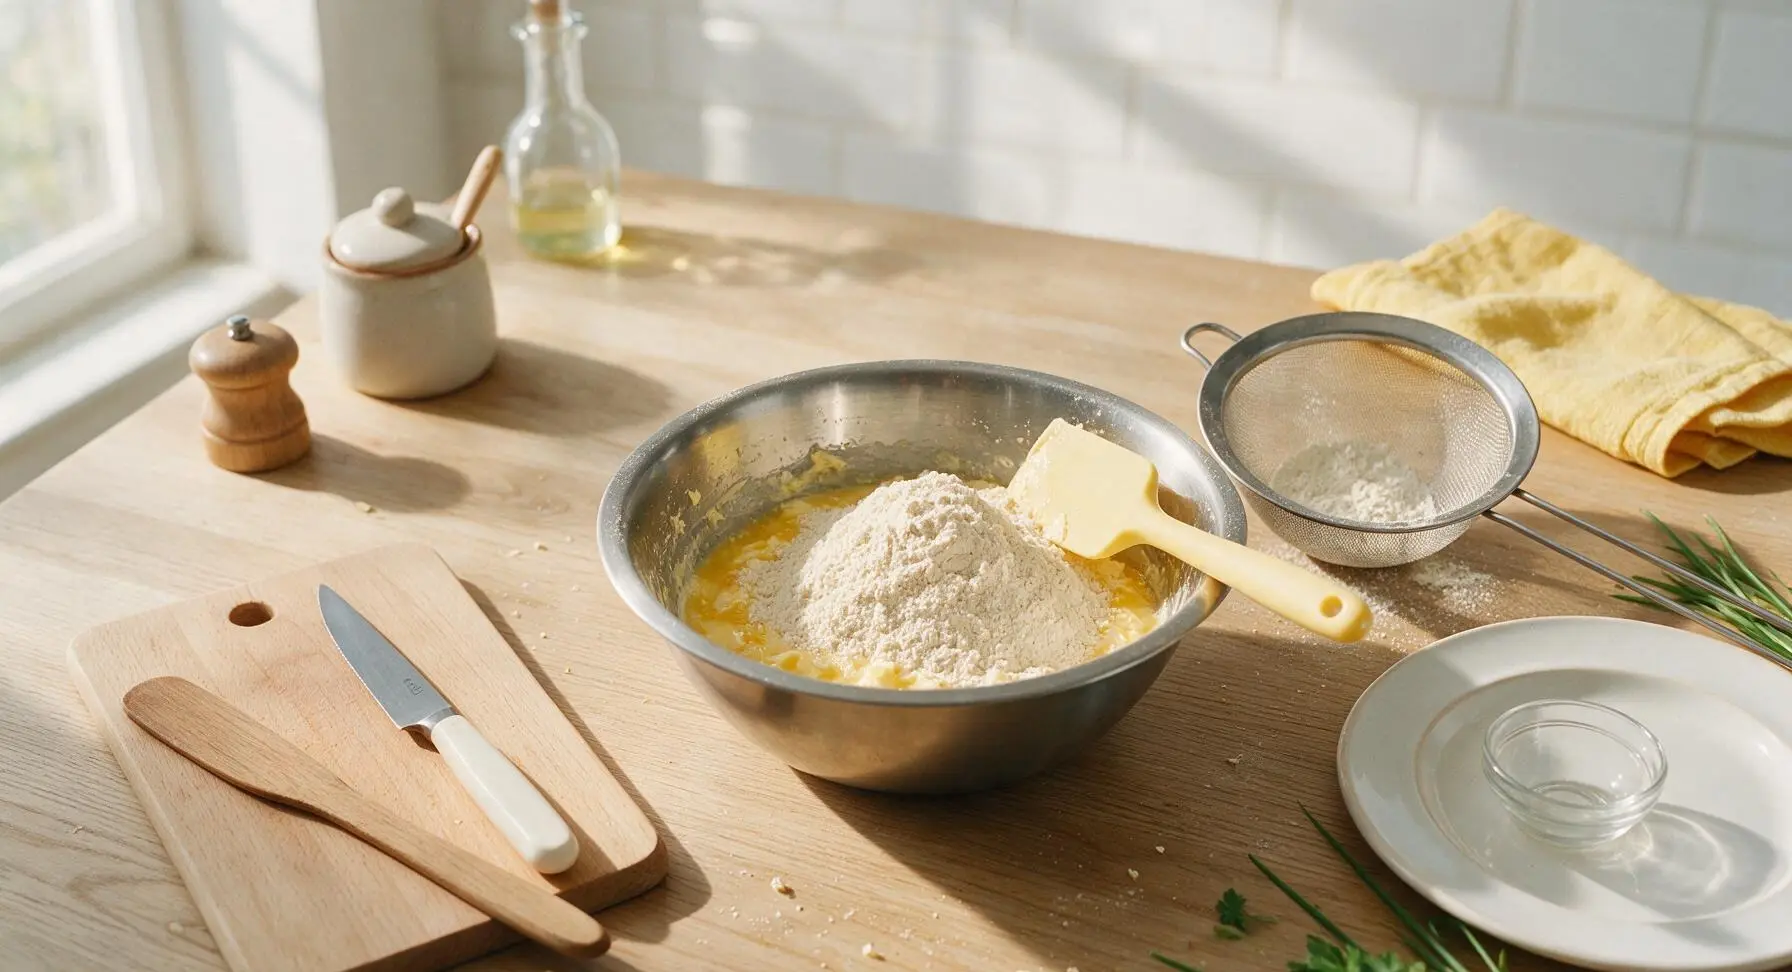
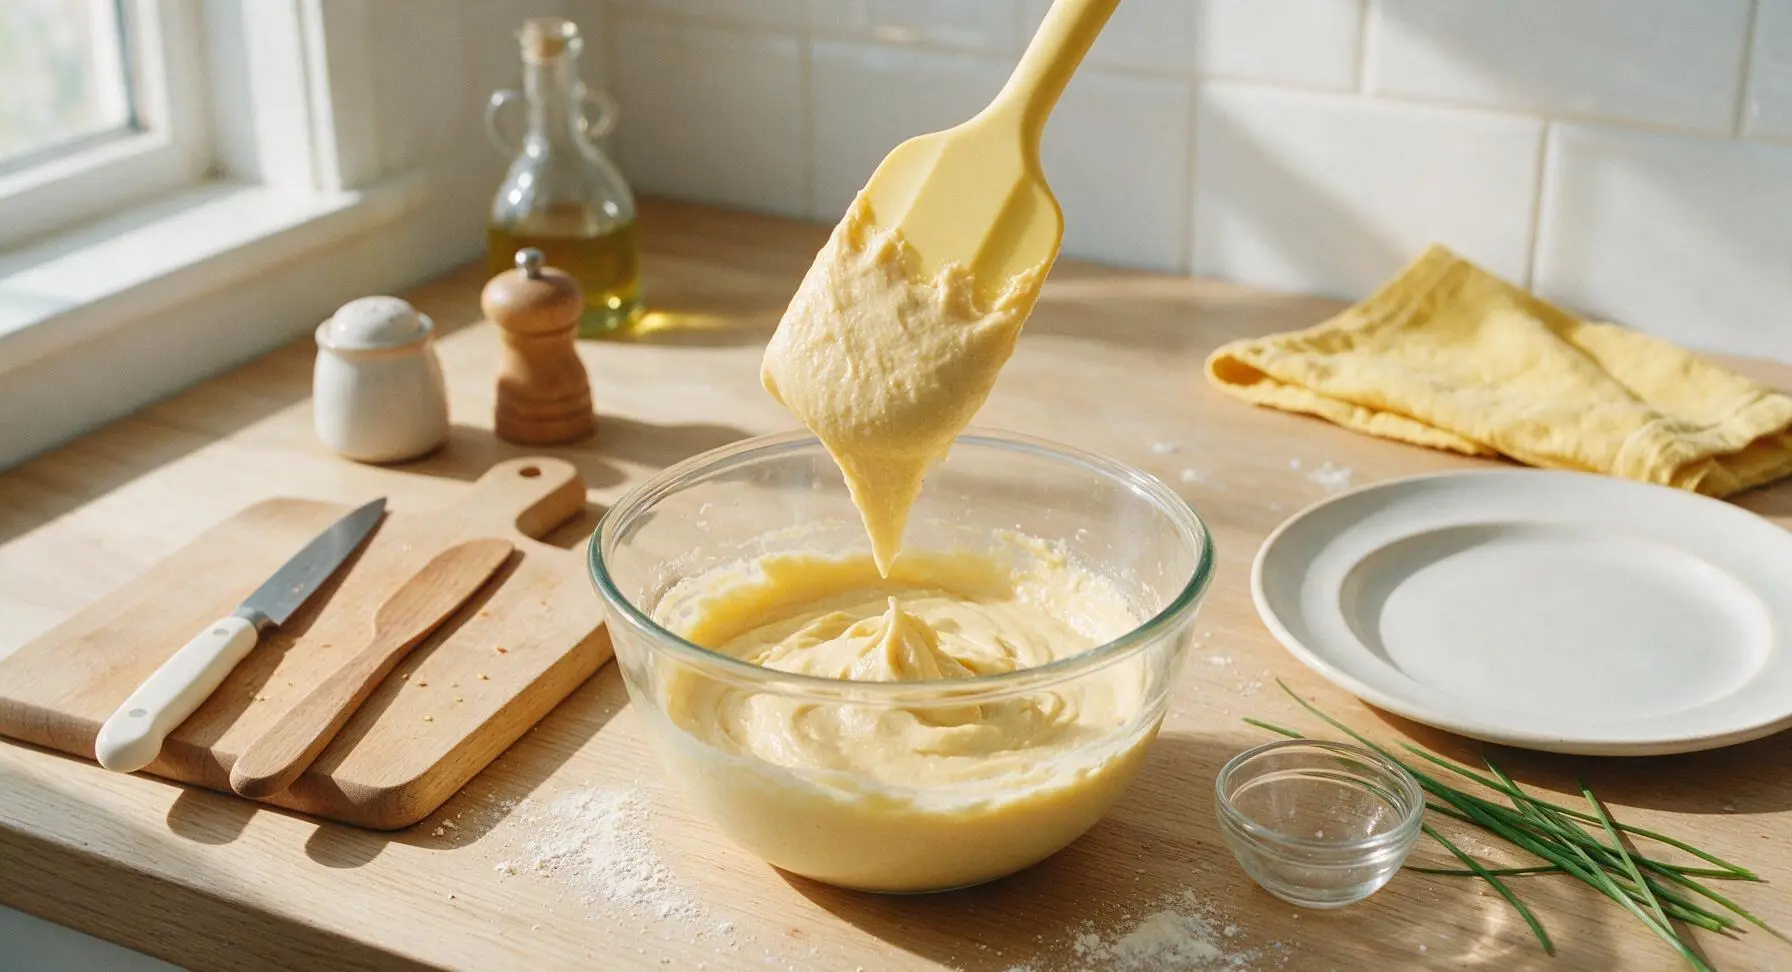
Use the fine-mesh sieve to sift the 100g self-raising flour into the bowl with the wet mixture, then use the pale butter-yellow silicone spatula to gently fold the flour in, cutting through the center and scraping around the bowl edges to avoid knocking out trapped air. Once no dry flour patches remain, stir in the 2 tbsp whole milk to create a soft, dropping consistency – the batter should fall slowly off the spatula when lifted, not run freely or stick in thick clumps.
Step 4
step4:Fold Flour and Milk
Step 4
step4:Fold Flour and Milk
5

Fill and Seal Pudding

Spoon the sponge batter gently on top of the golden syrup layer in the prepared pudding basin, taking care not to disturb the syrup at the bottom. Smooth the top of the batter lightly with the spatula. Cut a 30cm square of unbleached baking parchment and a matching 30cm square of aluminum foil, fold a 5cm pleat down the center of both to allow space for the pudding to rise as it steams. Place the pleated cover over the basin top, parchment side facing down, then tie it tightly around the basin rim with natural cotton kitchen twine, leaving a length of twine across the top to create a handle for lifting.
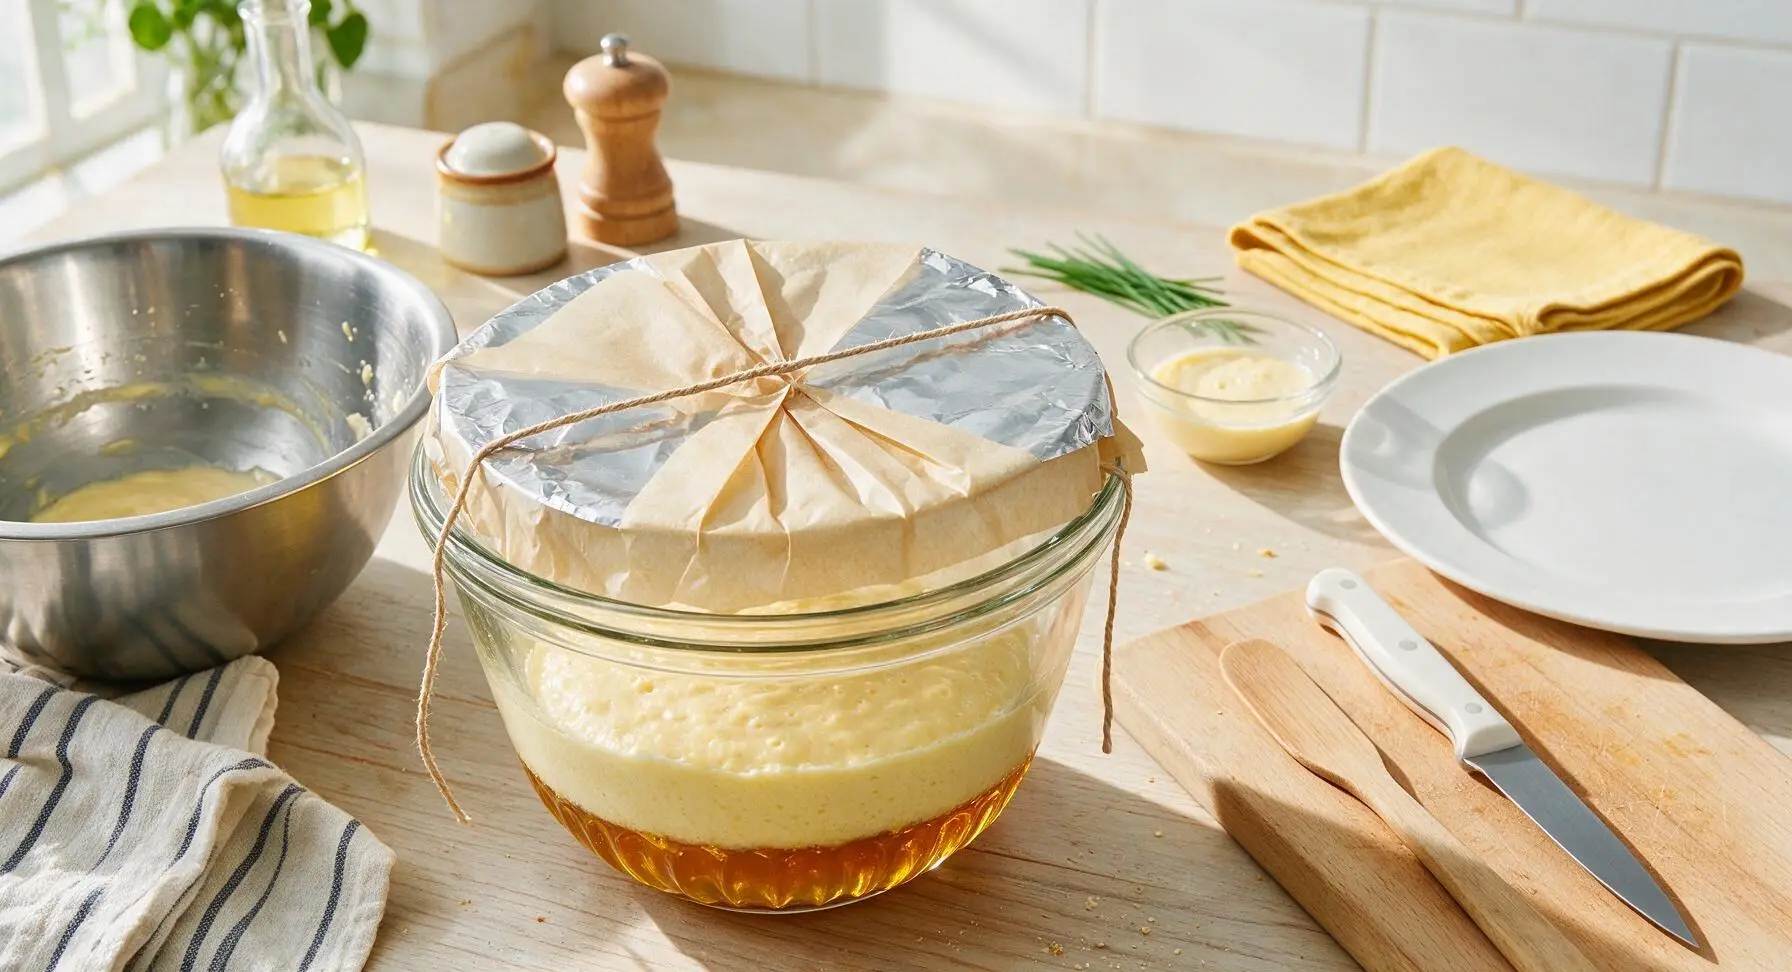
Step 5
step5:Fill and Seal Pudding
6

Steam the Sponge Pudding

Place the stainless steel steamer trivet in the base of the 24cm stainless steel lidded stock pot, then set the sealed pudding basin on top of the trivet. Pour boiling water into the pot until it comes halfway up the sides of the pudding basin, taking care not to get water under the basin cover. Place the lid on the pot, turn the heat to low to maintain a gentle simmer, and steam the pudding for 1 hour 30 minutes. Check the water level every 30 minutes, topping up with extra boiling water as needed to prevent the pot from boiling dry. The pudding is done when a skewer inserted through the center comes out clean, with no wet batter clinging to it.
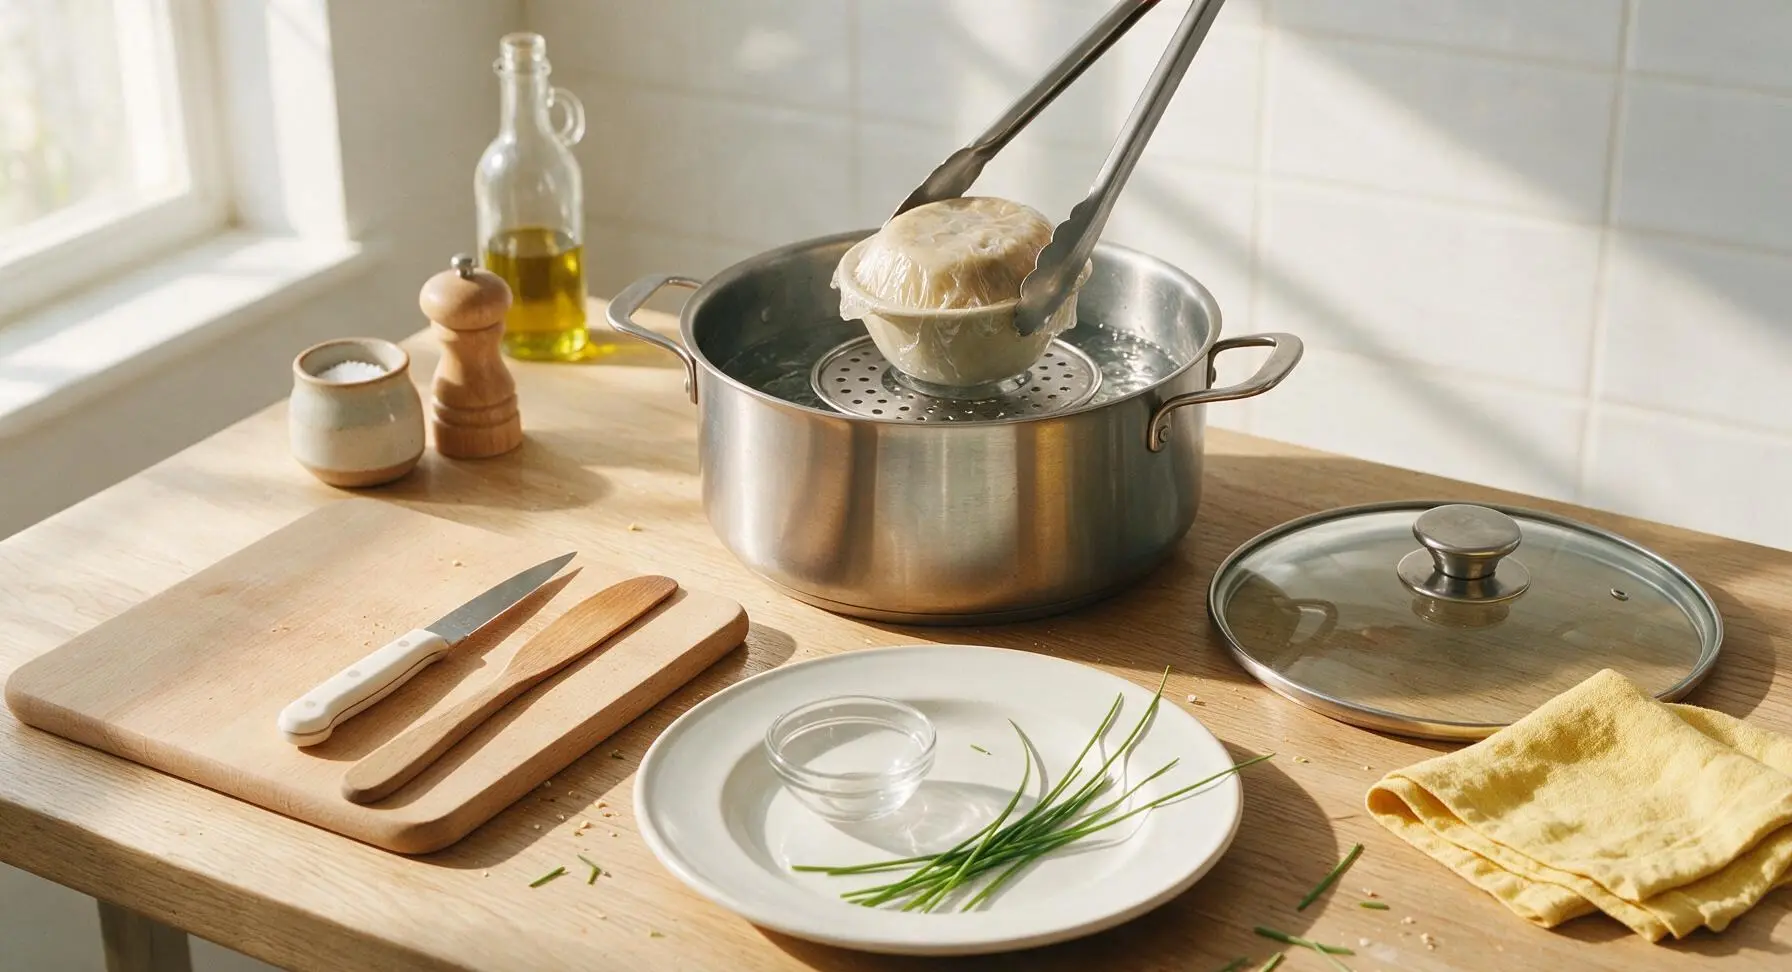
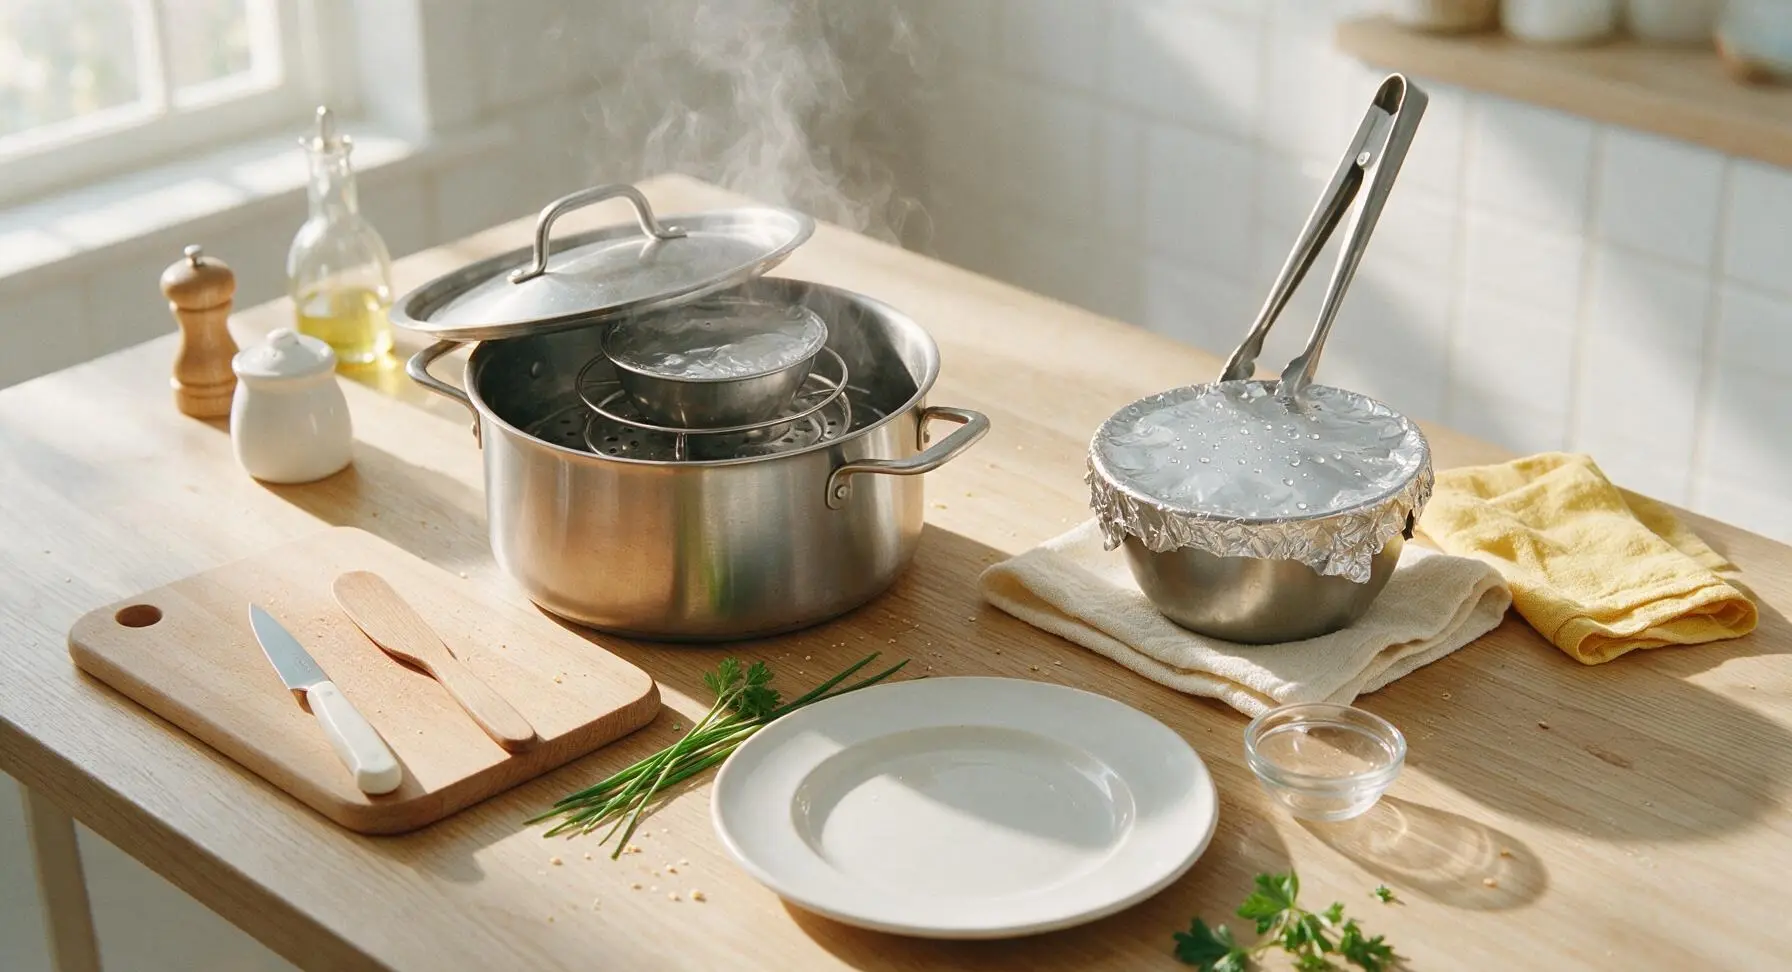
Step 6
step6:Steam the Sponge Pudding
Step 6
step6:Steam the Sponge Pudding
7

Turn Out and Serve

Carefully remove the twine and foil/parchment cover from the hot pudding basin. Run the small stainless steel palette knife around the inside edge of the basin to loosen the sponge. Place the cream white fluted ceramic dessert plate upside down over the top of the basin, then hold the plate and basin firmly together and flip them over in one smooth motion. Lift the basin slowly to reveal the sponge, with the golden syrup running down the sides. Drizzle the remaining 40ml golden syrup over the top of the sponge, then serve warm with warmed vanilla custard.
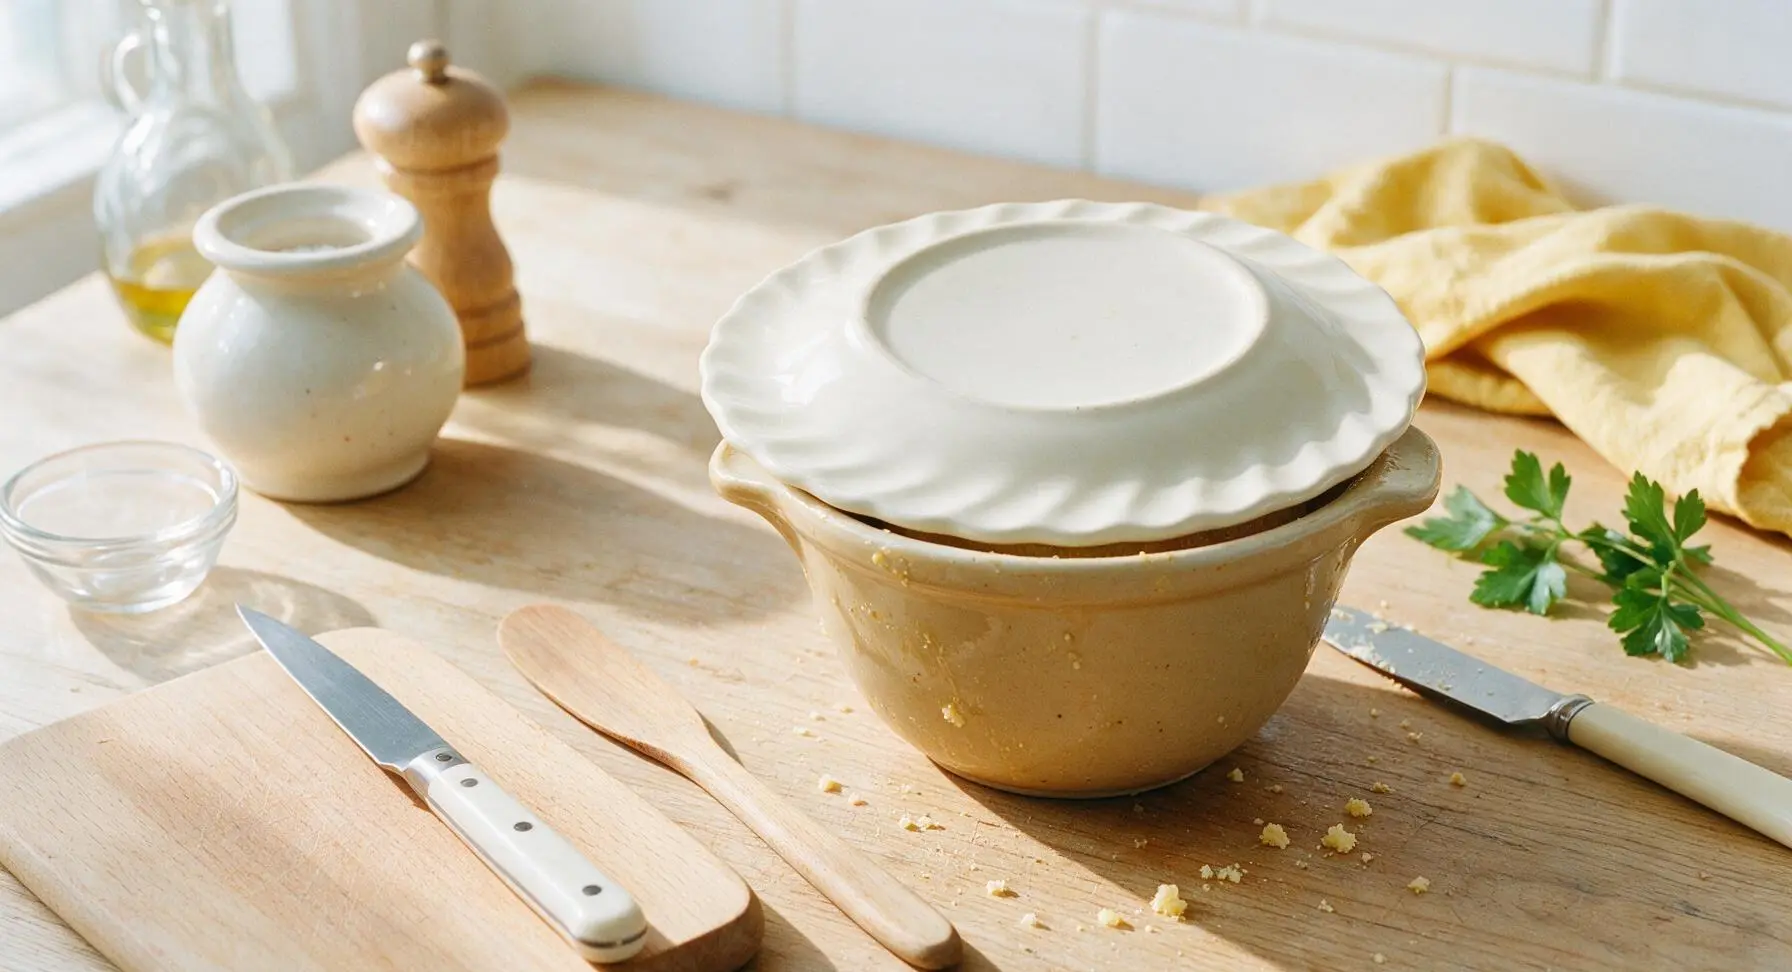
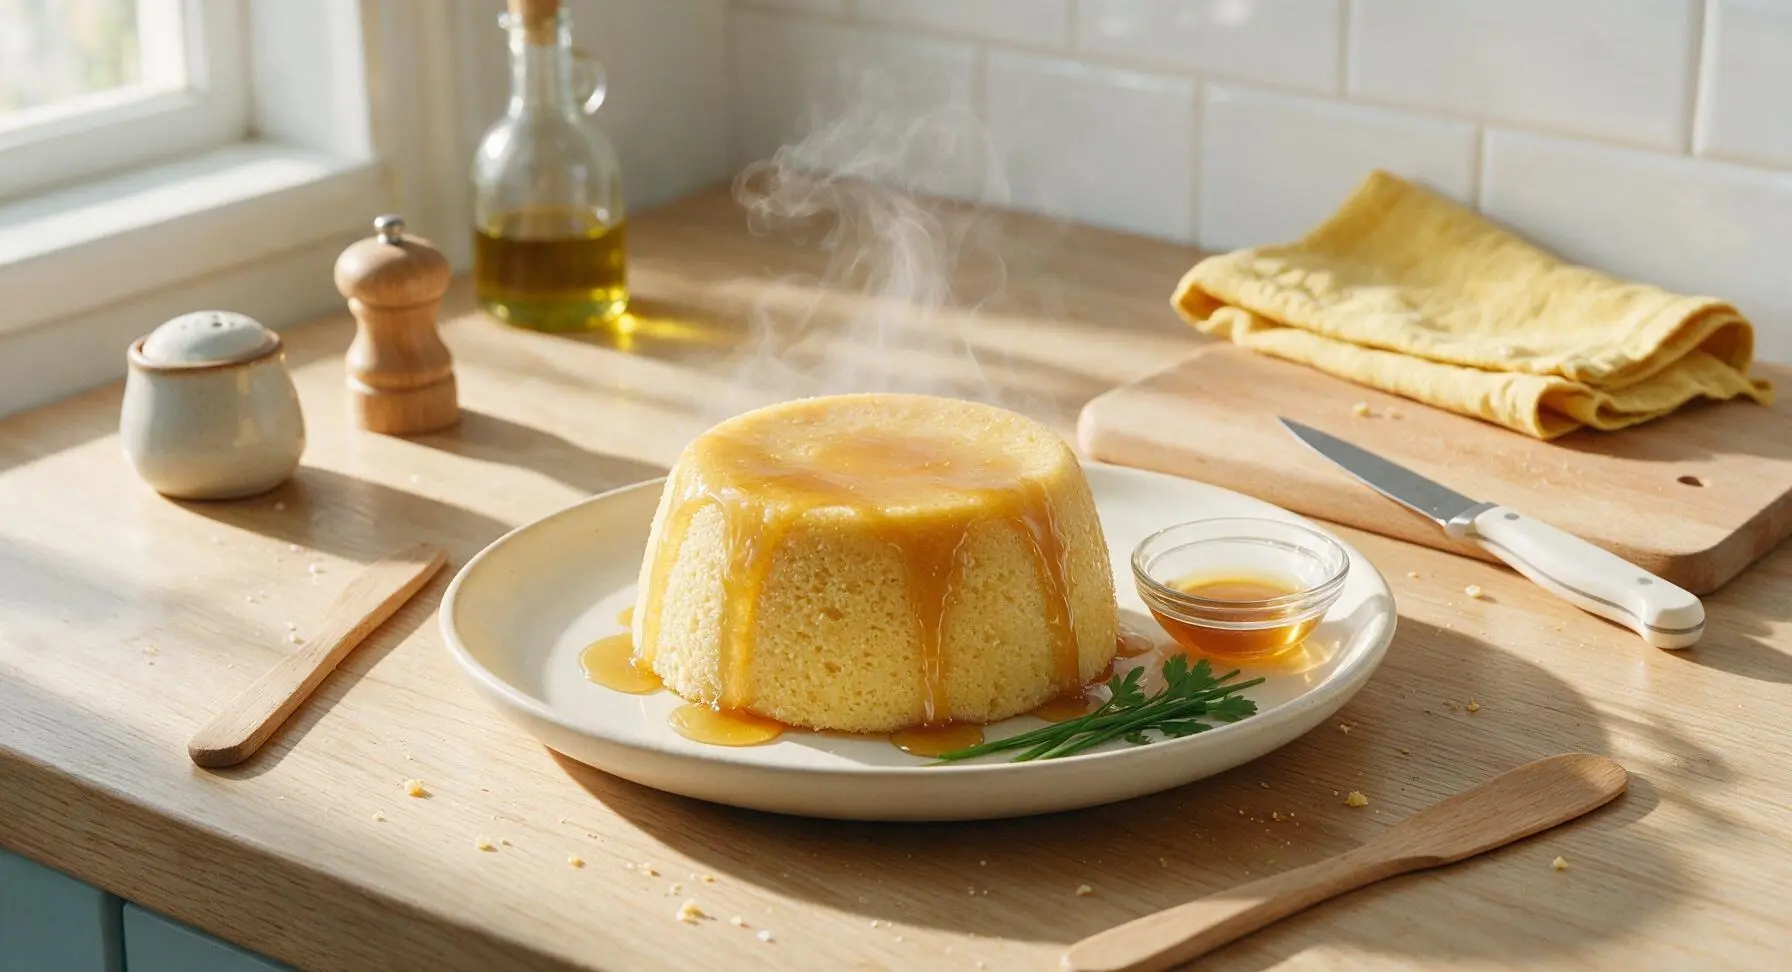
Step 7
step7:Turn Out and Serve
Step 7
step7:Turn Out and Serve

Tips

1.Always use room-temperature butter and eggs for the sponge batter: cold ingredients can cause the creamed mixture to curdle when eggs are added, resulting in a dense, heavy sponge instead of the light, fluffy, tender crumb classic to syrup sponge.
2.Don’t skip the 5cm pleat in your parchment and foil cover: the sponge rises by almost 2cm during steaming, and a tight, unpleated cover will restrict rise, create a dense top, and can cause hot syrup to bubble out over the basin edges into the steaming water.
3.Maintain a gentle steady simmer and top up water levels with boiling water only: a rapid boil will make the sponge tough, while adding cold water drops the pot temperature dramatically, which can cause the partially cooked sponge to sink in the middle.


✨ You May Also Like

Desserts & Baking
🍜 Italy

Creamy, coffee-kissed classic Northern Italian no-bake dessert, with layers of rum-spiked mascarpone cream, soft ladyfingers, and a rich cocoa dusting.

⏱️ 4 hours 3Desserts & Baking ★ 4.7
Desserts & Baking
🍜 France

Flaky, shatteringly crisp, buttery French croissants with golden exteriors and soft, airy layered interiors, perfect for pairing with coffee for a special morning treat.

⏱️ 12 hours Desserts & Baking ★ 4.5
Desserts & Baking
🍜 United States

Warm, spiced baked apples topped with a fluffy golden biscuit crust, this cozy dessert pairs perfectly with vanilla ice cream for cool-weather comfort.

⏱️ 55 minuteDesserts & Baking ★ 4.6
Desserts & Baking
🍜 United States

A star-spangled classic American blueberry pie with buttery flaky crust and bright sweet-tart filling, perfect for summer patriotic gatherings.

⏱️ 1 hour 25Desserts & Baking ★ 4.7
Desserts & Baking
🍜 United States

A beloved no-bake regional Maine candy with a chewy coconut-potato center coated in rich dark chocolate, a New England holiday staple since the 1870s.

⏱️ 2 hours 3Desserts & Baking ★ 4.8
Desserts & Baking
🍜 France

Luxuriously creamy, floral frozen custard made with aromatic Tahitian vanilla beans, boasting a smooth, rich texture that melts slowly on the tongue.

⏱️ 3 hours 3Desserts & Baking ★ 4.5

syrup sponge:Frequently Asked Questions

1.What can I substitute for golden syrup if I can’t find it at my local grocery store? ▾
Great question! Your closest swap is light corn syrup mixed with 1 tablespoon of mild molasses per cup to mimic golden syrup’s rich, buttery caramel note, though it won’t be an exact match. You can also use equal parts pure maple syrup for a nuttier twist, but skip dark corn syrup or strong honey, as those will overpower the sponge’s delicate vanilla flavor.
2.Why do the butter and eggs need to be at room temperature for this recipe? ▾
Room temperature butter creams smoothly with caster sugar to trap tiny air bubbles that give the sponge its signature light, fluffy rise. Cold eggs can curdle the creamed batter, leading to a dense, heavy final texture instead of the soft, tender crumb that makes this dessert so cozy and satisfying.
3.Do I need a special dedicated steamer to make this syrup sponge? ▾
Not at all! You don’t need fancy equipment. All you need is a large, lidded stockpot: set a small metal trivet or folded kitchen towel at the bottom, add enough simmering water to come halfway up your heatproof bowl or pudding mold, and set the covered vessel on top, making sure the lid seals tightly to trap steam.
4.How do I keep condensation and water from getting into the sponge while it steams? ▾
The trick is a tight, pleated lid for your heatproof bowl or pudding mold. Cut a circle of parchment paper and a matching circle of aluminum foil, fold a 1-inch pleat across the middle to let the sponge expand as it cooks, then tie it securely around the rim with kitchen twine to block seeping condensation and water.
5.Can I make this sponge in individual ramekins instead of one large bowl or mold? ▾
Absolutely! Divide the golden syrup and batter evenly between 6 to 8 buttered 6-ounce ramekins, cover each with a small pleated lid made of parchment paper and foil, and steam for 35 to 40 minutes instead of the 1.5 hours needed for a large bowl or mold. They make perfect single servings with no slicing required.
6.Why did my steamed sponge turn out dense and heavy instead of light and fluffy? ▾
The most common culprits are overmixing the batter once you add flour (which develops tough gluten), undercreaming the butter and sugar, not keeping the water at a steady gentle simmer while steaming, or letting the pot run dry partway through, which drops the temperature and stops the rise.
7.How much golden syrup should I add to the bottom of my bowl or mold before adding batter? ▾
For a standard 1.5-liter (6-cup) heatproof bowl or pudding mold, ¼ to ⅓ cup of golden syrup poured into the well-buttered bottom before adding the batter is perfect. That amount creates that signature oozing, syrupy top when you invert the pudding, without making the sponge soggy or overly sweet.
8.Can I add extra mix-ins to the sponge batter? ▾
Of course! A tablespoon of finely grated lemon zest adds a bright, zesty cut through the sweetness, or you can stir in 2 tablespoons of golden raisins or finely chopped candied ginger for extra texture. Just avoid heavy, wet mix-ins that will weigh down the light crumb or sink to the bottom.
9.How do I know when the steamed sponge is fully cooked? ▾
After the recommended steaming time, carefully peel back the foil and parchment paper lid, then insert a wooden skewer into the center of the sponge. It should come out clean, with no wet, sticky batter clinging to it. The top of the sponge should also spring back gently when pressed lightly with a fingertip.
10.What’s the best way to get the sponge out of the bowl or mold in one piece? ▾
Let the steamed sponge rest for 5 minutes after you take it out of the pot—this lets it set slightly and pull away from the bowl or mold sides. Run a thin offset spatula around the inner edge, place a warm serving plate over the top, then hold both tightly and flip in one smooth motion to release the syrup-draped sponge.
11.Can I make this syrup sponge ahead of time? ▾
Yes! Once the sponge is fully steamed and cooled, you can store it covered in the fridge for up to 3 days, or freeze it for up to 3 months. To reheat, wrap it tightly in foil and steam for 20 to 30 minutes (10 minutes for individual portions) until warmed all the way through.
12.Do I have to serve this with custard, or are there other good serving options? ▾
While warm, creamy vanilla custard is the classic pairing, you can also serve it with softly whipped heavy cream, vanilla bean ice cream, a dollop of crème fraîche for a slight tang, or even a drizzle of extra warm golden syrup. Just be sure to serve it warm for the coziest texture.
13.Can I bake this sponge in the oven instead of steaming it on the stovetop? ▾
You can, though it won’t have that uniquely moist, tender steamed crumb. If baking, set the covered bowl or pudding mold in a deep baking dish, pour hot water halfway up the vessel to create a water bath, and bake at 350°F for 1 to 1 ¼ hours, checking doneness with a skewer as usual.
14.What type of flour works best for this recipe? ▾
Stick with standard all-purpose flour for the lightest crumb, measured correctly by spooning it into your measuring cup and leveling it off with a knife, rather than scooping directly from the bag. Avoid self-rising flour unless you adjust leavening, as extra baking powder can give the sponge a slightly soapy, off flavor.
15.How do I keep the steamer pot from boiling dry while the sponge cooks? ▾
First, start with enough simmering water to come halfway up the bowl or pudding mold, and check the water level every 30 minutes during cooking, topping up with boiling water from a kettle as needed. Never add cold water, as that will drop the pot temperature rapidly and cause the sponge to sink mid-cook.
16.Can I use salted butter instead of unsalted butter for this recipe? ▾
You can, just cut out any extra added salt in the recipe to keep the sweetness balanced. Salted butter has slightly variable salt content between brands, so unsalted is preferred for consistent flavor, but using salted won’t ruin the sponge—it adds a nice salty-sweet note that pairs beautifully with golden syrup.

Comments (10)

2 days ago

OMG this was SO good! I made it for our Sunday family dinner last night and even my super picky 7 year old asked for a second helping. The texture is so light and fluffy, not dense like the steamed puddings I tried making before. Total game changer for cold weather desserts!

5 days ago

Wait, total beginner here — do I *have* to use a traditional metal pudding steamer? I only have a regular glass Pyrex bowl that fits in my big stock pot, would that work? I’m nervous I’ll mess it up because I’ve never steamed a dessert before!

3 days ago

I used a Pyrex bowl last week when I made this! Just make sure you cover the top super tight with two layers of greased parchment and foil, tie it with kitchen string so no water gets in, and it turns out exactly the same. No fancy equipment needed!

2 days ago

Great question! A heatproof Pyrex bowl works perfectly as a substitute for a pudding steamer, just like Stan mentioned. Just leave a little pleat in your parchment/foil cover to let the sponge rise as it steams, and keep the water at a gentle simmer instead of a rolling boil. You’ve got this!

1 week ago

Brought this to my neighborhood potluck on Saturday and people were scraping the bowl clean! I added a little extra drizzle of golden syrup on top right before serving and paired it with fresh whipped cream, zero leftovers. 10/10 will be making this again for our Thanksgiving dessert spread.

5 days ago

That extra syrup drizzle and fresh whipped cream sounds absolutely dreamy! So thrilled it was a hit at the potluck — thanks so much for sharing how you made it your own, Kari!

1 week ago

Super easy recipe even for a guy who barely knows how to boil water lmao. I didn’t have golden syrup so I used a mix of maple syrup and a tiny bit of light corn syrup and it still slapped. Made my whole dorm smell amazing, my roommates kept hovering by the stove waiting for it to be done. 10/10 no notes.

1 week ago

Has anyone tried making this with a 1:1 gluten free all purpose flour blend? My son has celiac so I’m always looking for easy classic desserts I can adapt for him without him feeling like he’s getting a “special” version.

5 days ago

I made this with Bob’s Red Mill 1:1 GF flour last weekend for my daughter and you literally could not tell the difference! It was just as soft and fluffy as the regular version, my whole family ate it and no one guessed it was GF. Just make sure your flour blend has xanthan gum in it!

3 days ago

So glad to hear the GF swap worked out! We’ve tested this recipe with a few 1:1 gluten free flour blends and had fantastic results too — just stick to blends with xanthan gum like the one mentioned, and you’ll get that perfect tender crumb every time. Hope your son loves it!

yesterday

Made this last night for my kids after soccer practice and they went crazy for it! I thought 90 minutes cook time sounded long but it’s 90% hands off, so I was able to help with homework and pack lunches while it steamed. Game changer for busy weeknights when we want a cozy treat.

30 minutes ago

Oh this is such a good idea! I’m always scrambling for hands-off treats on practice nights too, I’m adding this to next week’s meal plan for sure. Did you serve it with custard like the recipe note says?

2 hours ago

Wait, I overcooked mine a little the first time and the edges were a tiny bit chewy — if I cut the cook time down by 10 minutes would that fix it? I loved the flavor so much I want to get the texture perfect next time!

30 minutes ago

Sorry to hear the edges were a little chewy your first go! If your stove runs hot or you’re using a smaller bowl, checking for doneness at 1 hour 15 minutes with a skewer (it should come out clean with no wet batter attached) is totally fine. Also double check that your water level doesn’t drop too low during steaming, that can cause uneven cooking too!

2 weeks ago

This tastes exactly like the syrup sponge my nan used to make when I was a kid growing up in the UK! I’ve been chasing that flavor for years and every other recipe I tried was too dry or too sweet. This one is spot on. Served it with warm vanilla custard and I almost cried, it was so nostalgic. SO good.

3 days ago

How well does this keep in the fridge? I’m trying to prep a few treats ahead for my kid’s birthday party next weekend and I don’t want to be stuck cooking all day Friday!

2 days ago

I made this 4 days ahead for my book club last month! I kept it tightly wrapped in the fridge and just reheated individual slices in the microwave for 30 seconds with an extra drizzle of syrup, it tasted just as fresh as the day I made it. It freezes really well too!

yesterday

Bella is exactly right! This sponge will keep for up to 5 days tightly covered in the fridge, or up to 3 months in the freezer. When you’re ready to serve, you can reheat the whole thing by steaming it for 10-15 minutes, or zap individual slices in the microwave for a quick warm treat. Perfect for party prep!

5 minutes ago

Just pulled this out of the pot 5 minutes ago and had to immediately leave a review! The syrup at the bottom is so gooey and perfect, the sponge is so light it almost melts in your mouth. I was worried steaming would be a huge hassle but it was so easy even for a lazy baker like me. 10/10.

just now

Right?! I was so intimidated by steamed desserts too before I tried this recipe, now I make it once a week. Wait till you try it with a scoop of vanilla ice cream on top, the melty ice cream with the warm syrup is chef’s kiss



