
tater tot hotdish instant pot

title 1
tater tot hotdish instant pot
⏱️ cook time 30 minutes
🍽️ servings 6
⚡ Difficulty easy

intro

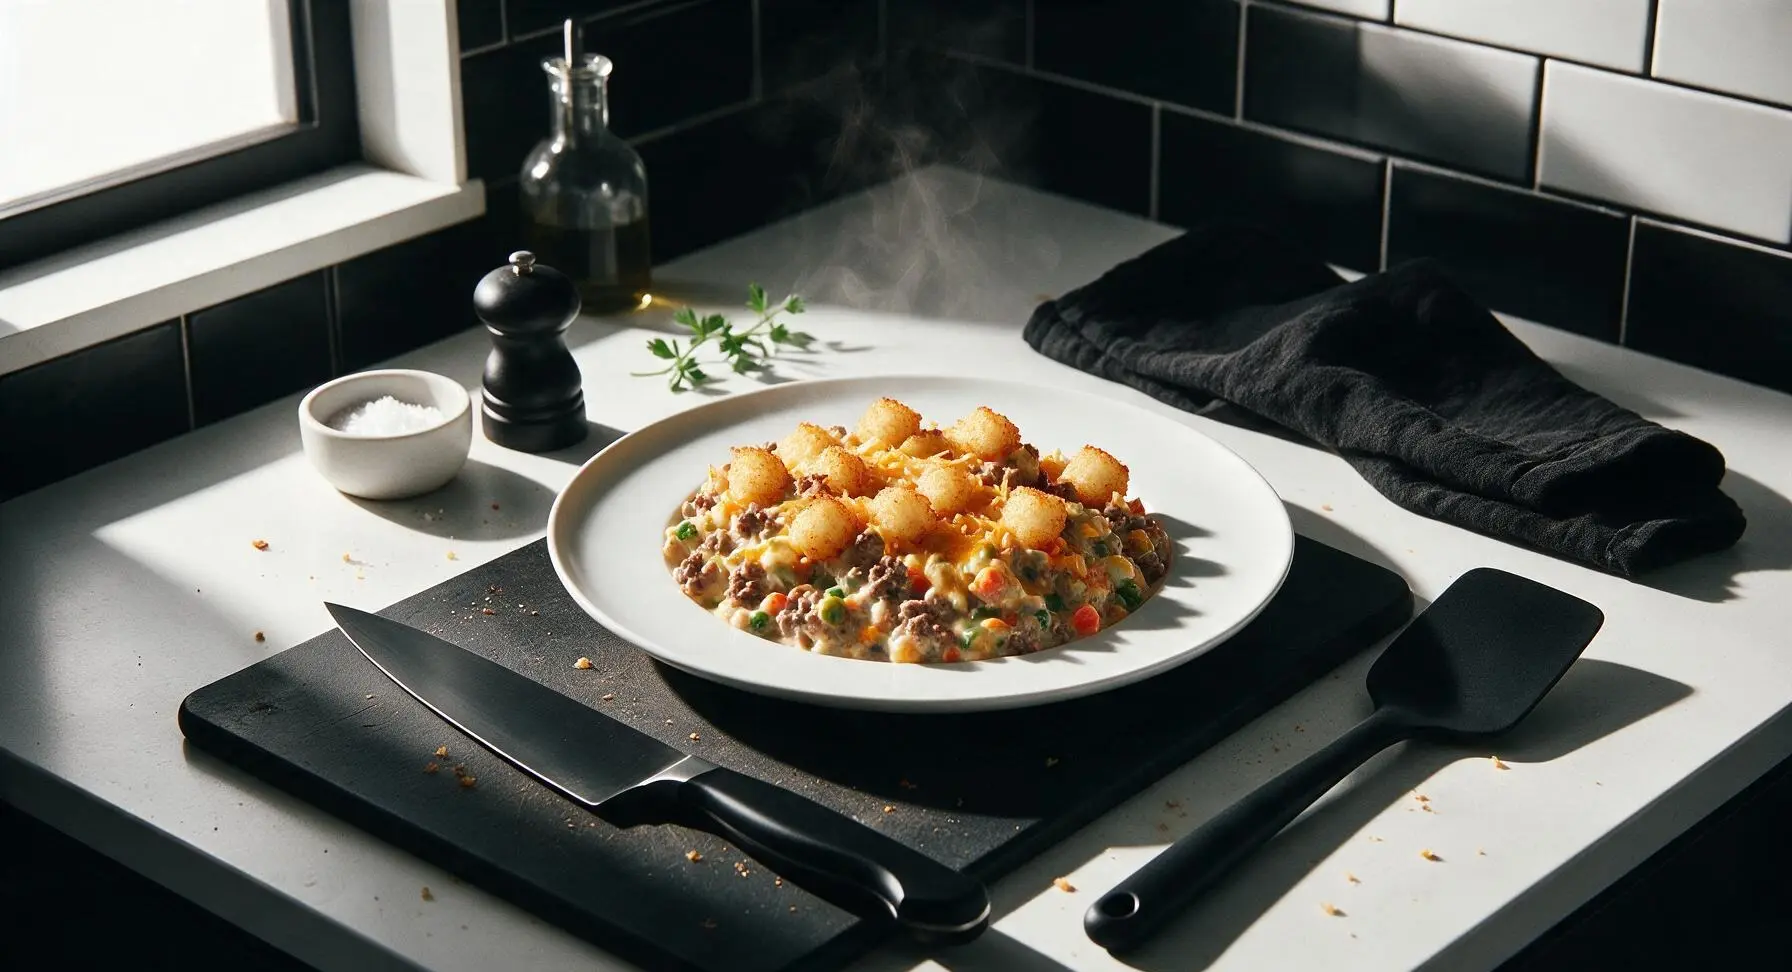
Creamy, savory Instant Pot tater tot hotdish is the ultimate Midwestern comfort food—loaded with ground beef, veggies, melted cheese, and crispy tots, ready in a fraction of traditional oven time.

Ingredients
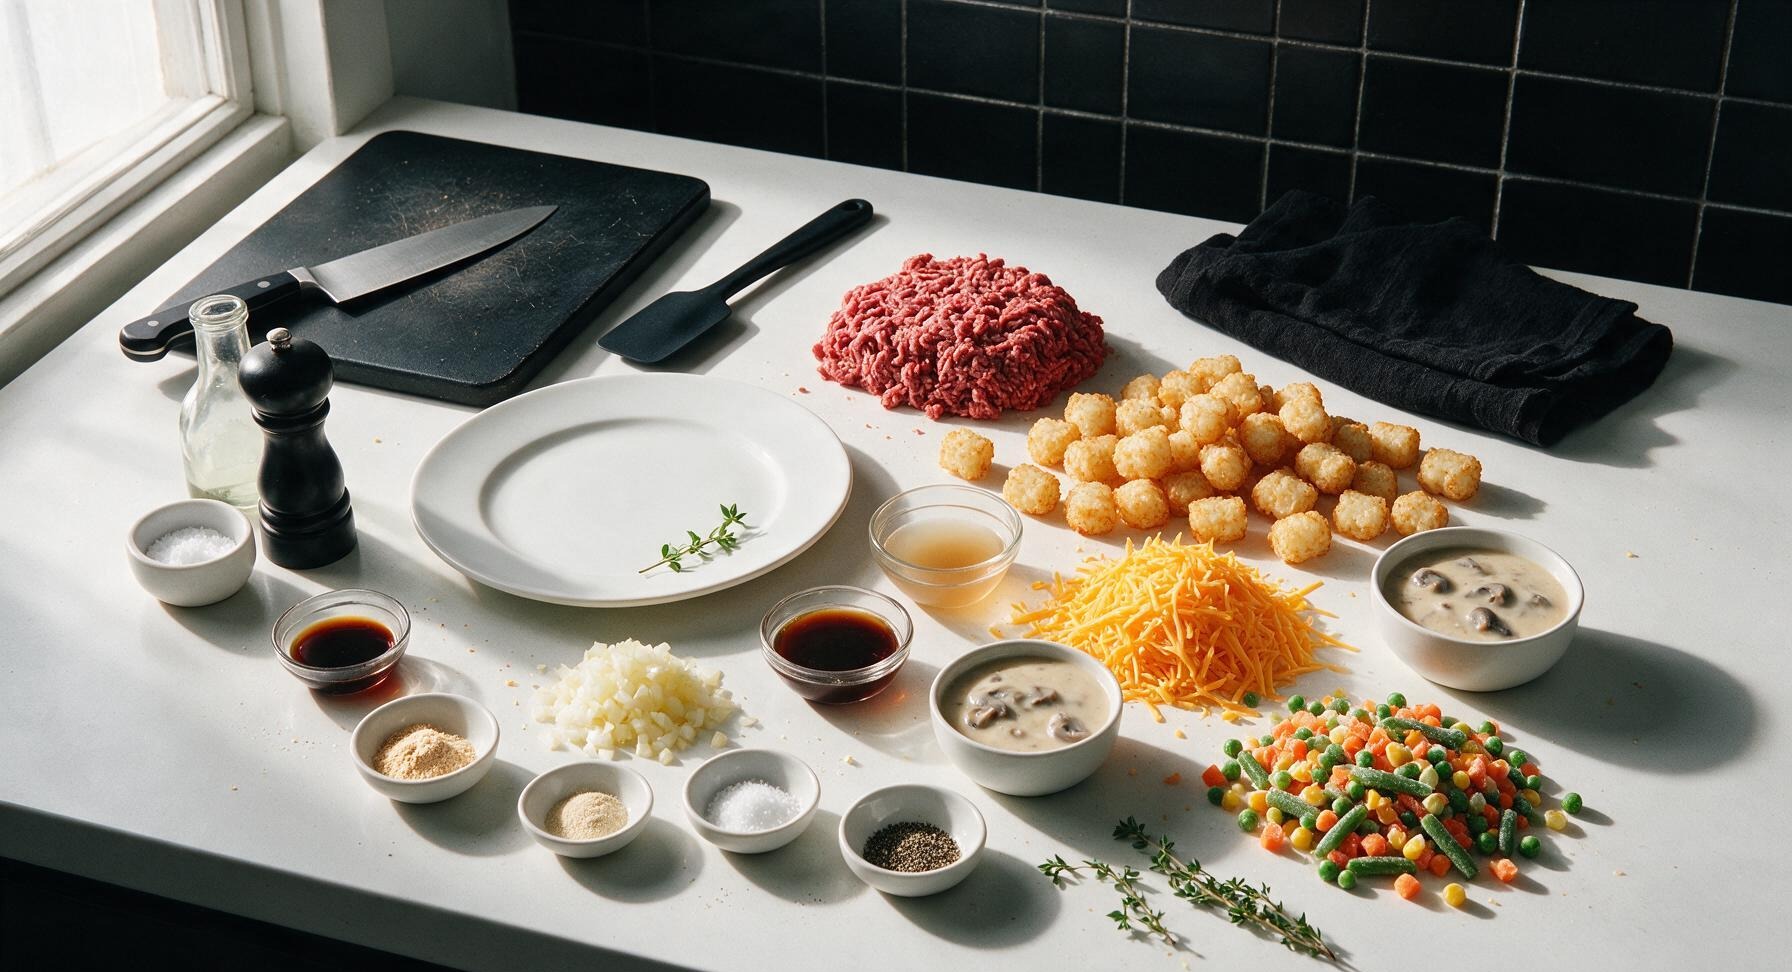
80/20 ground beef 450g (1 lb)
Frozen tater tots 900g (32 oz bag)
Shredded sharp cheddar cheese 220g (2 cups)
Frozen mixed vegetables (peas, carrots, corn, green beans) 200g (1.5 cups)
Condensed cream of mushroom soup 2 cans (295g / 10.5 oz each)
Low-sodium beef broth 60ml (1/4 cup)
Yellow onion 1 small (110g, finely diced)
Worcestershire sauce 15ml (1 tbsp)
Garlic powder 1 tsp
Onion powder 1/2 tsp
Kosher salt 1/2 tsp
Freshly ground black pepper 1/2 tsp
Fresh thyme sprigs 2 (for garnish)

Steps

1

Brown Beef and Aromatics

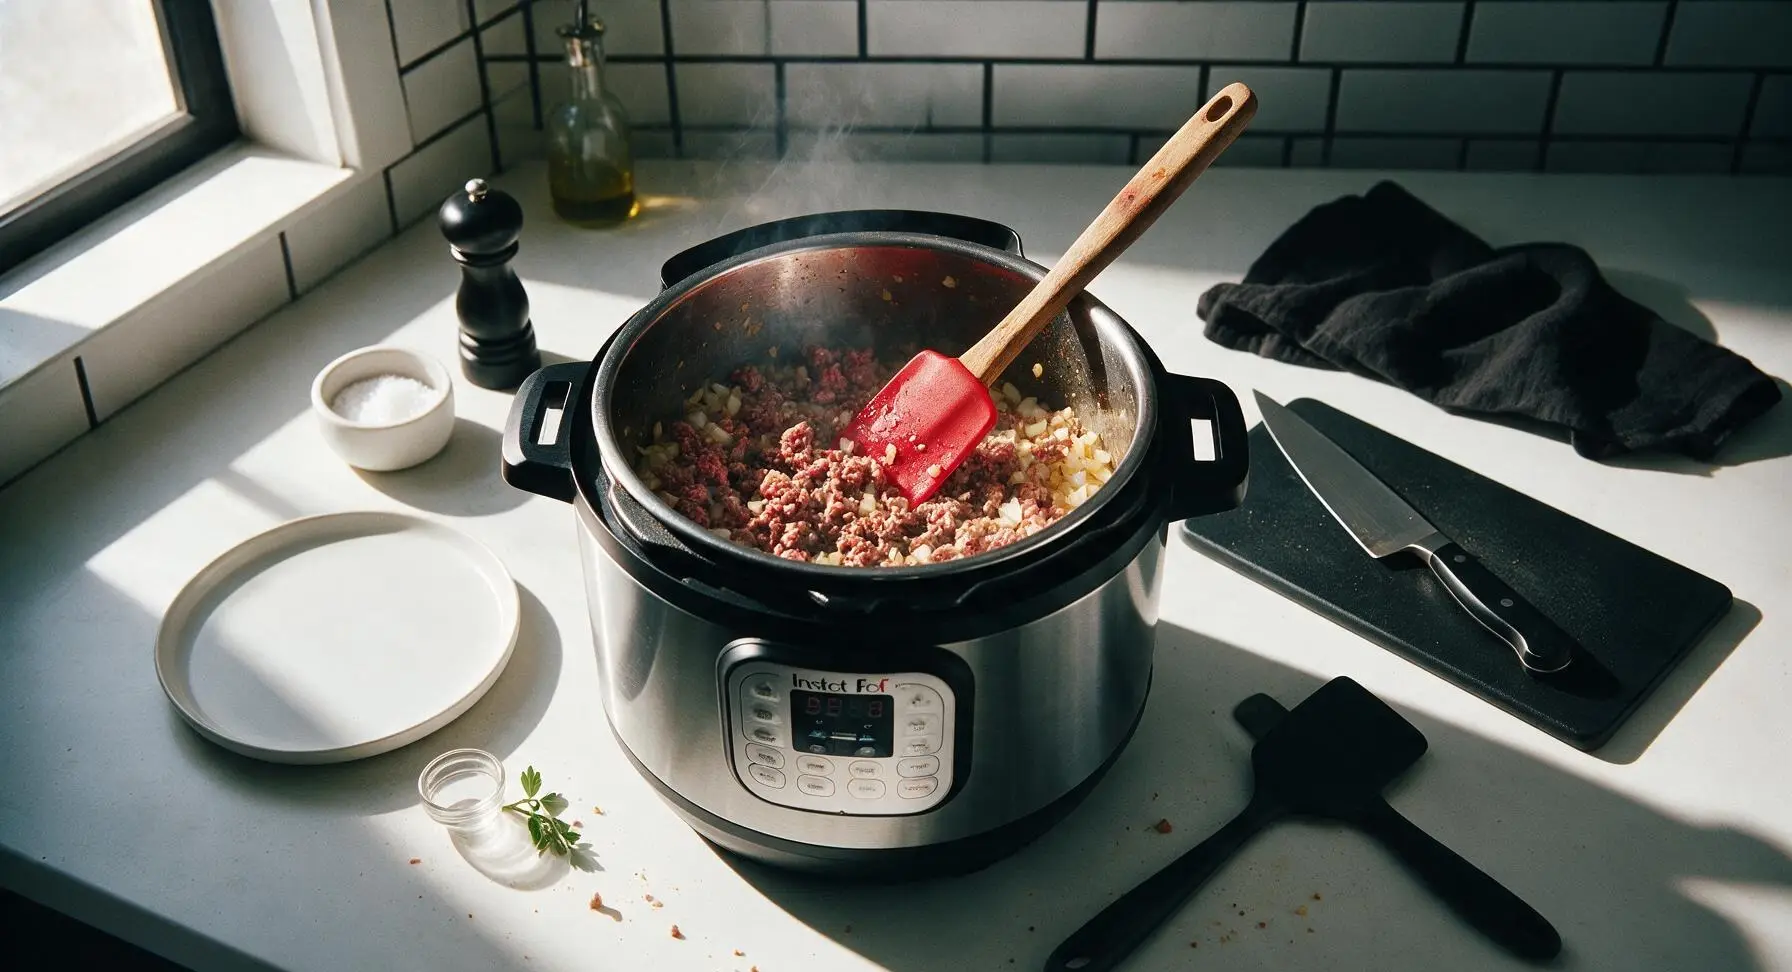
Turn your 6-quart Instant Pot to the high Sauté setting and allow it to preheat for 2 minutes. Add the 450g (1lb) 80/20 ground beef and finely diced small yellow onion to the stainless steel inner pot. Use the red silicone and wood spatula to break the beef into small crumbles as it cooks, for 5 minutes total, until no pink remains on the beef and the onion is soft and translucent. Carefully drain any excess grease from the pot, leaving roughly 1 teaspoon of grease to carry flavor.
Step 1
step1:Brown Beef and Aromatics
2

Add Seasonings and Soup

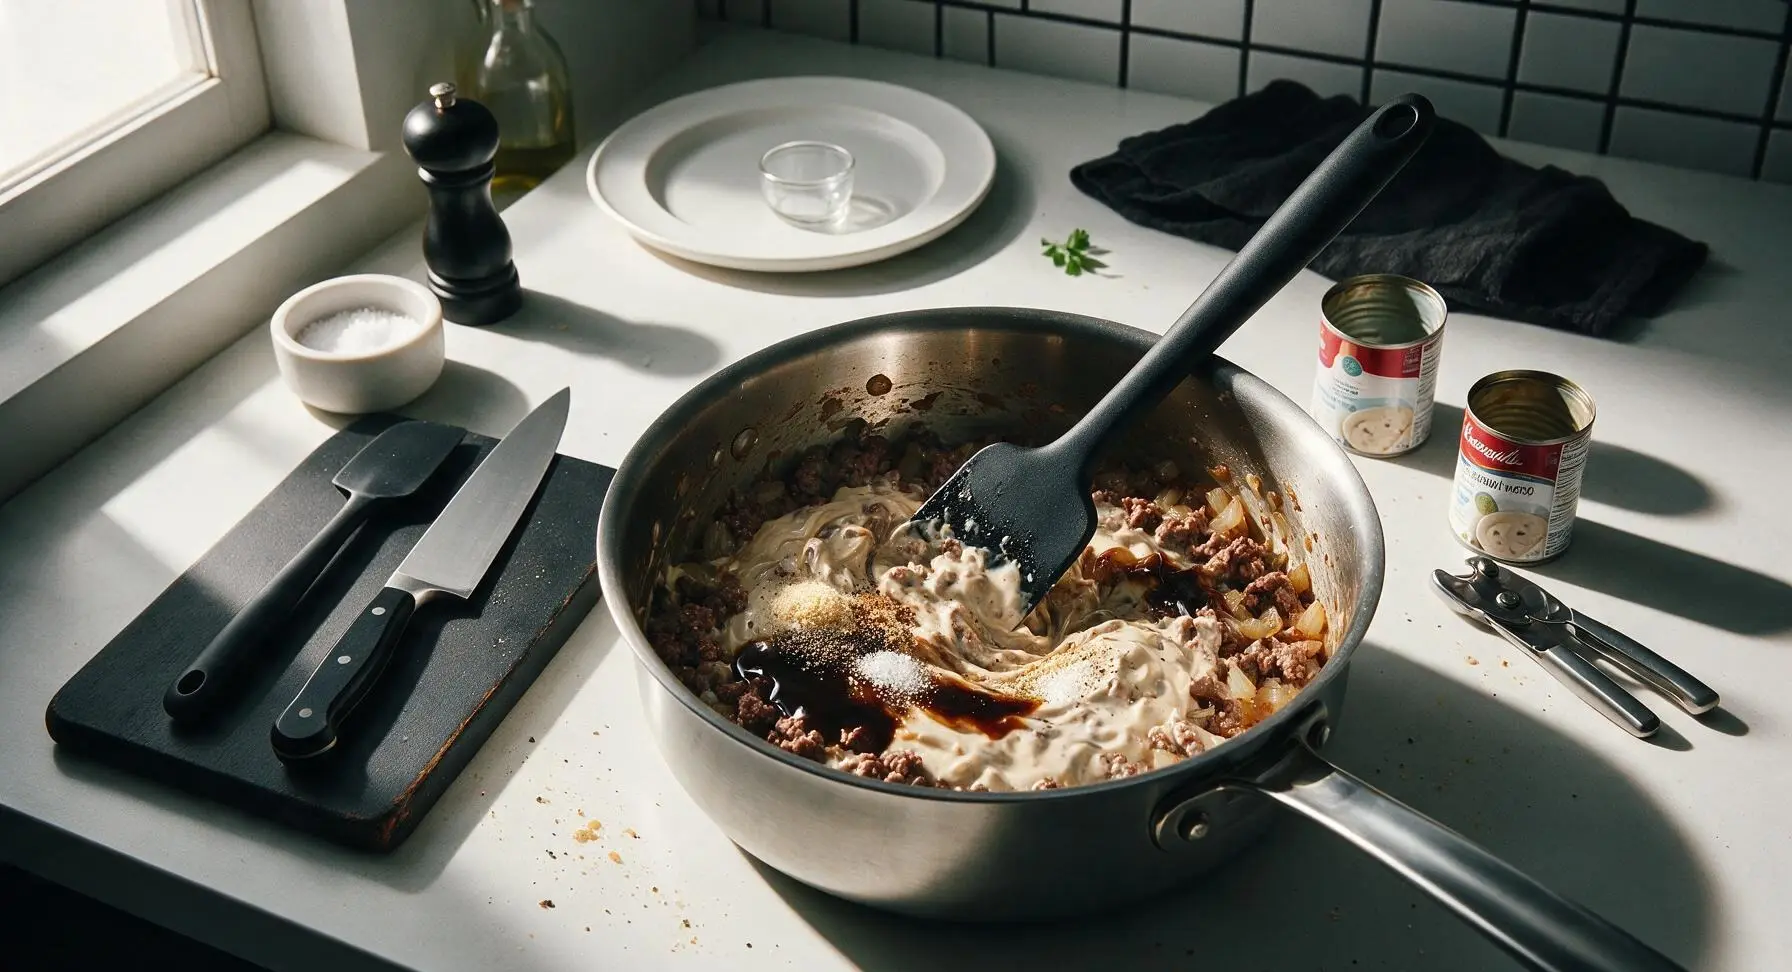
Stir the 15ml (1 tbsp) Worcestershire sauce, 1 tsp garlic powder, 1/2 tsp onion powder, 1/2 tsp kosher salt, 1/2 tsp black pepper, 60ml (1/4 cup) low-sodium beef broth, and 2 cans condensed cream of mushroom soup into the browned beef and onion. Mix thoroughly with the silicone spatula until all ingredients are evenly combined into a smooth, creamy base, about 1 minute. Turn off the Sauté setting.
Step 2
step2:Add Seasonings and Soup
3

Layer Veggies and Tater Tots

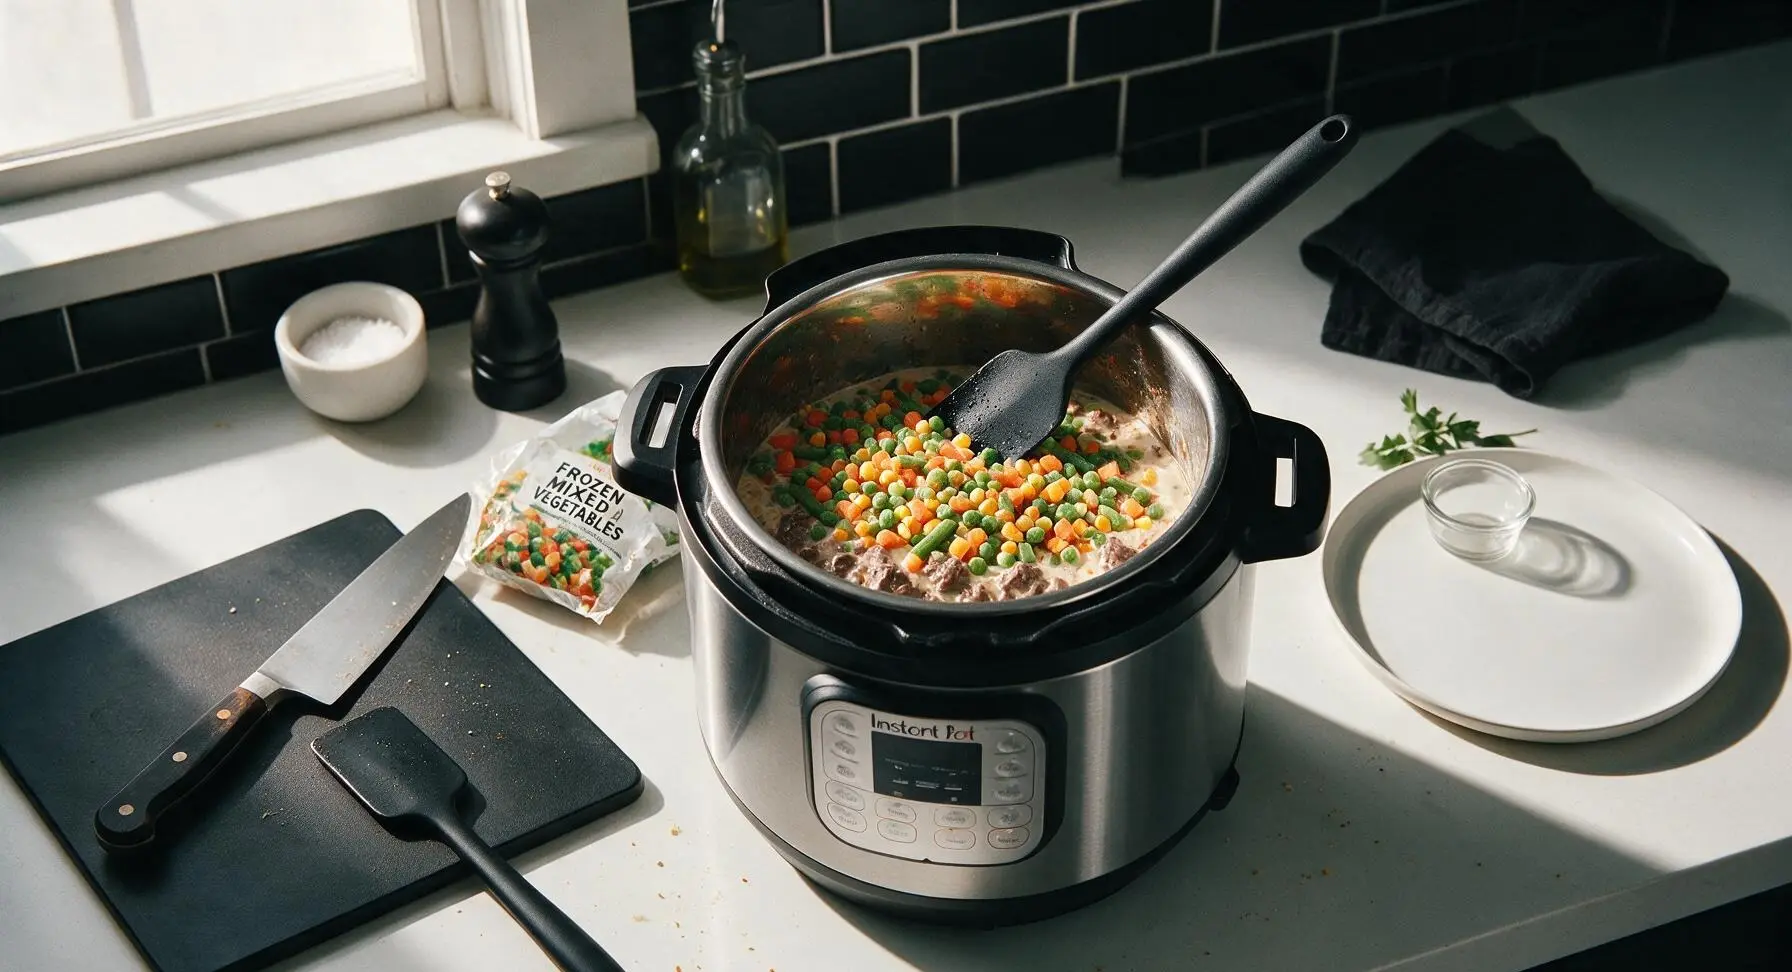
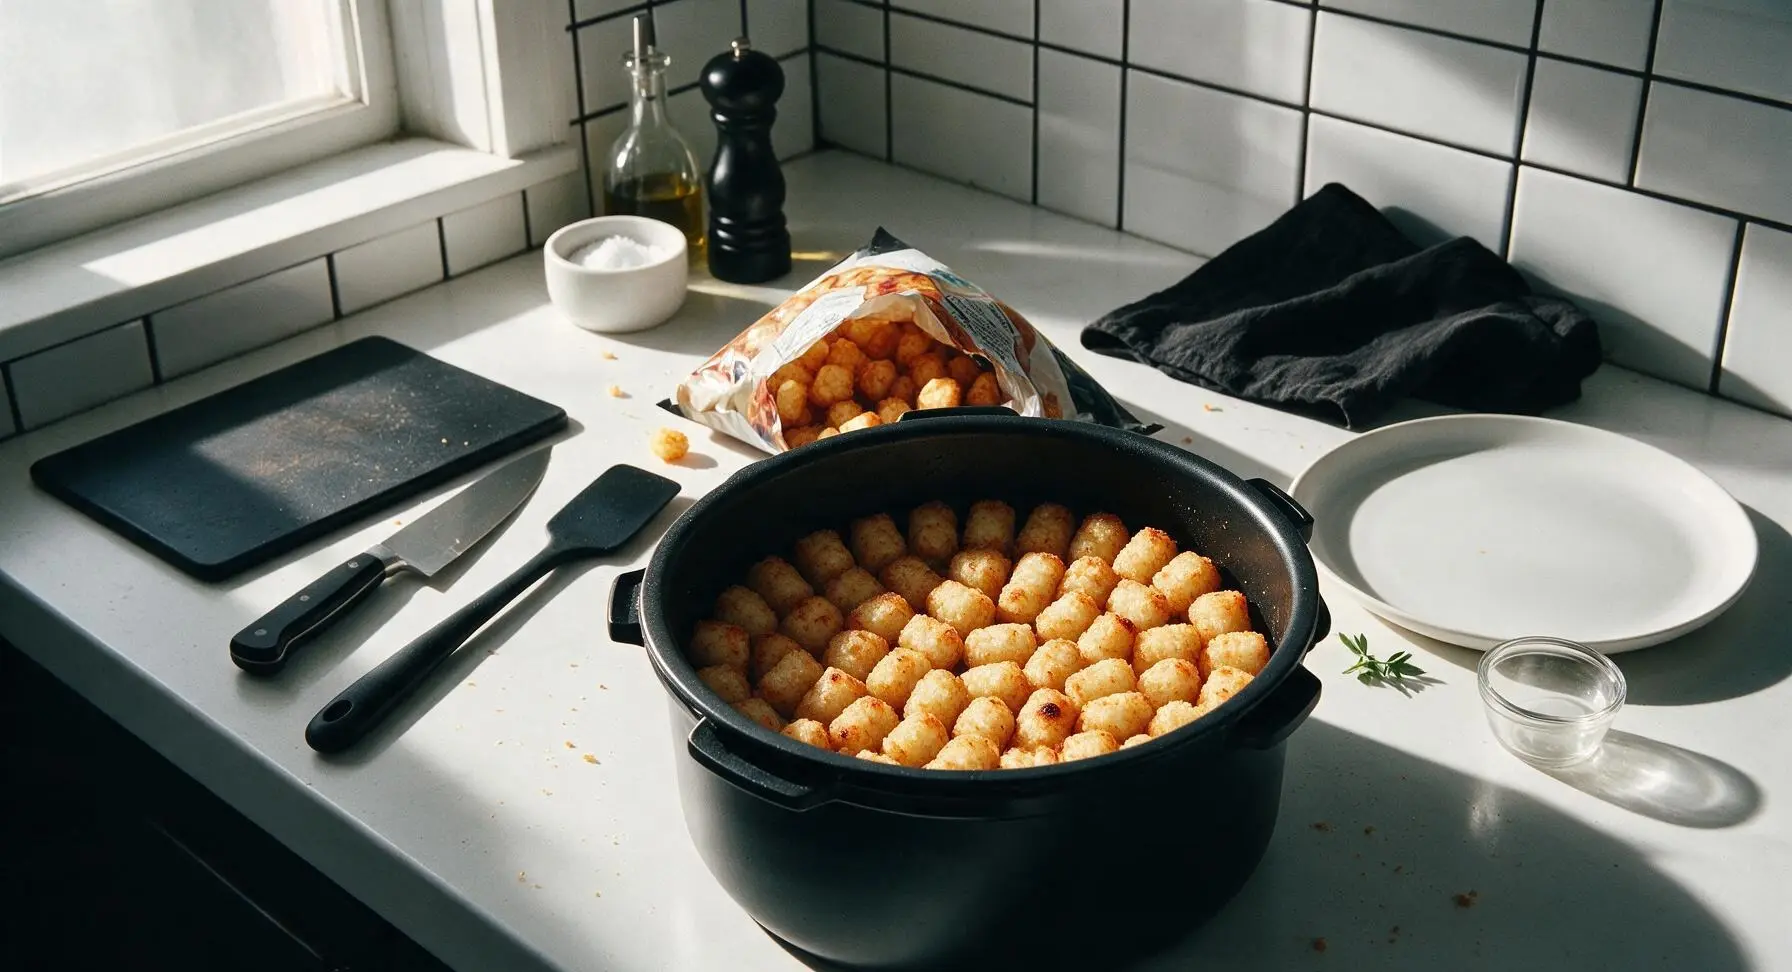
Spread the 200g (1.5 cups) frozen mixed vegetables evenly over the top of the creamy beef base in an even layer—do not stir. Next, arrange the frozen tater tots in a single tight, overlapping layer over the vegetables, covering the entire surface of the pot (you may not use every last tot, but aim for full coverage to prevent sogginess). Do not press the tots down into the filling.
Step 3
step3:Layer Veggies and Tater Tots
Step 3
step3:Layer Veggies and Tater Tots
4

Pressure Cook Hotdish

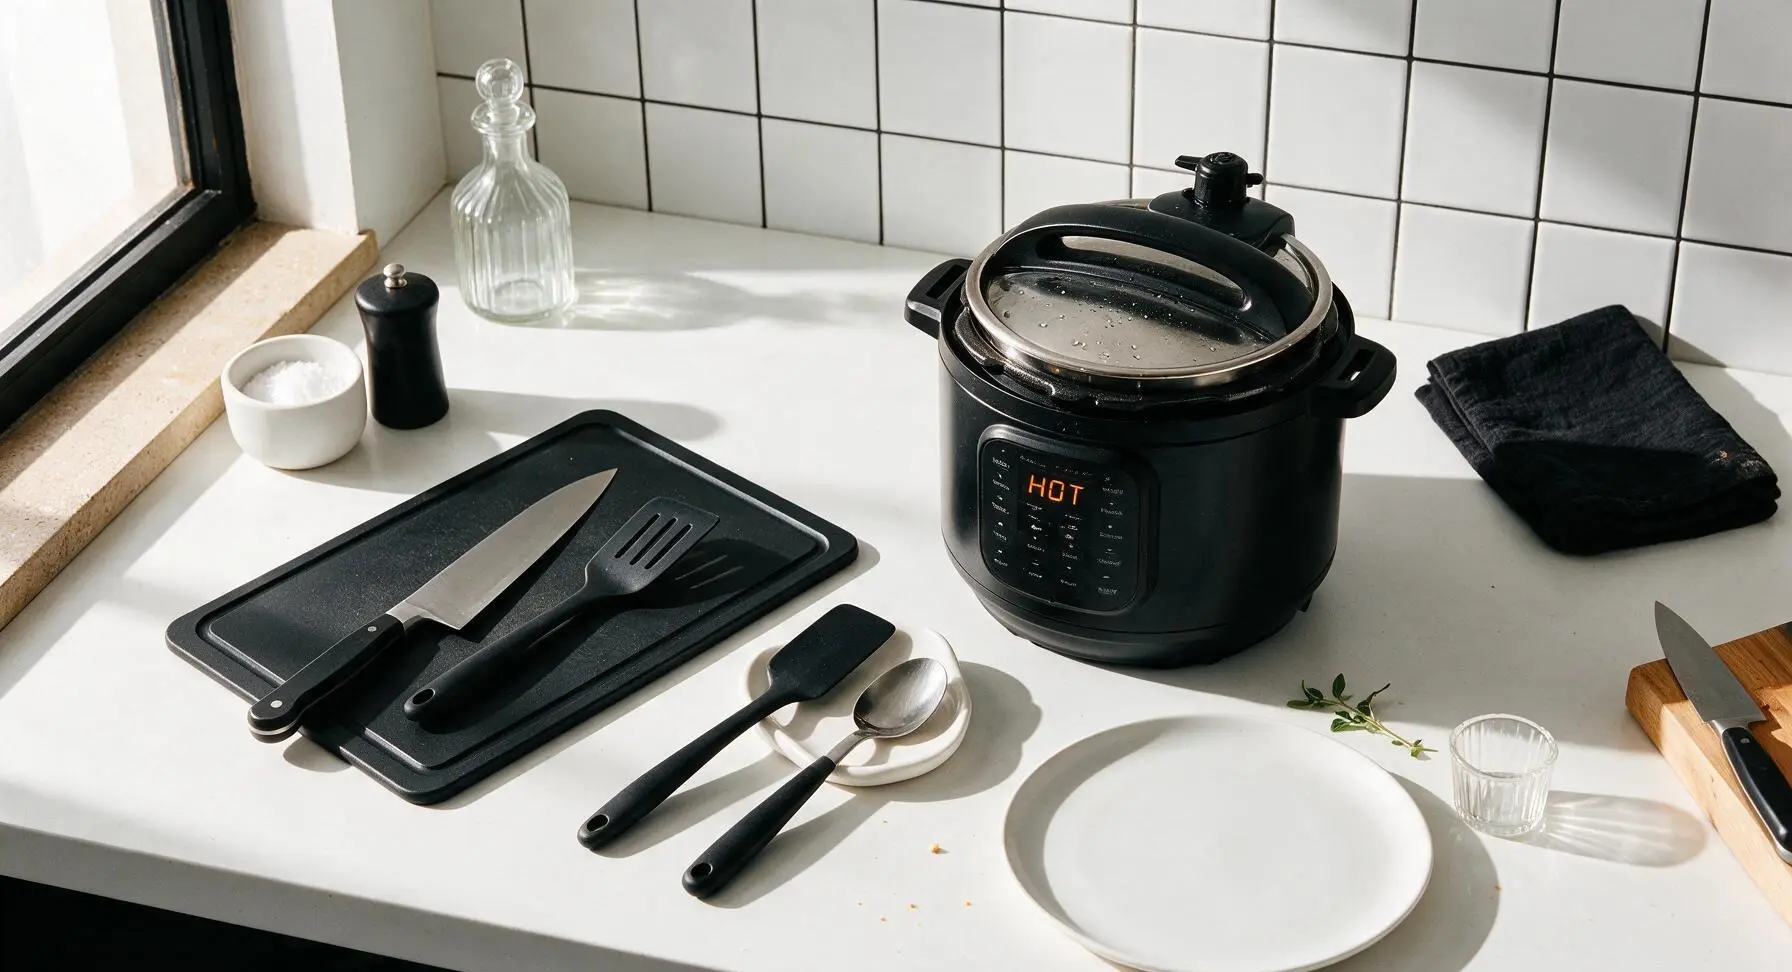
Seal the Instant Pot lid, ensuring the pressure release valve is set to the Sealing position. Cook on high pressure for 5 minutes (the pot will take 5-7 minutes to come up to pressure before the countdown begins). Once the cook time ends, perform a quick pressure release by carefully turning the valve to Venting (use a long spoon to avoid steam burns), waiting until all pressure is released and the float valve drops before opening the lid, about 3 minutes.
Step 4
step4:Pressure Cook Hotdish
5

Crisp Tots and Melt Cheese

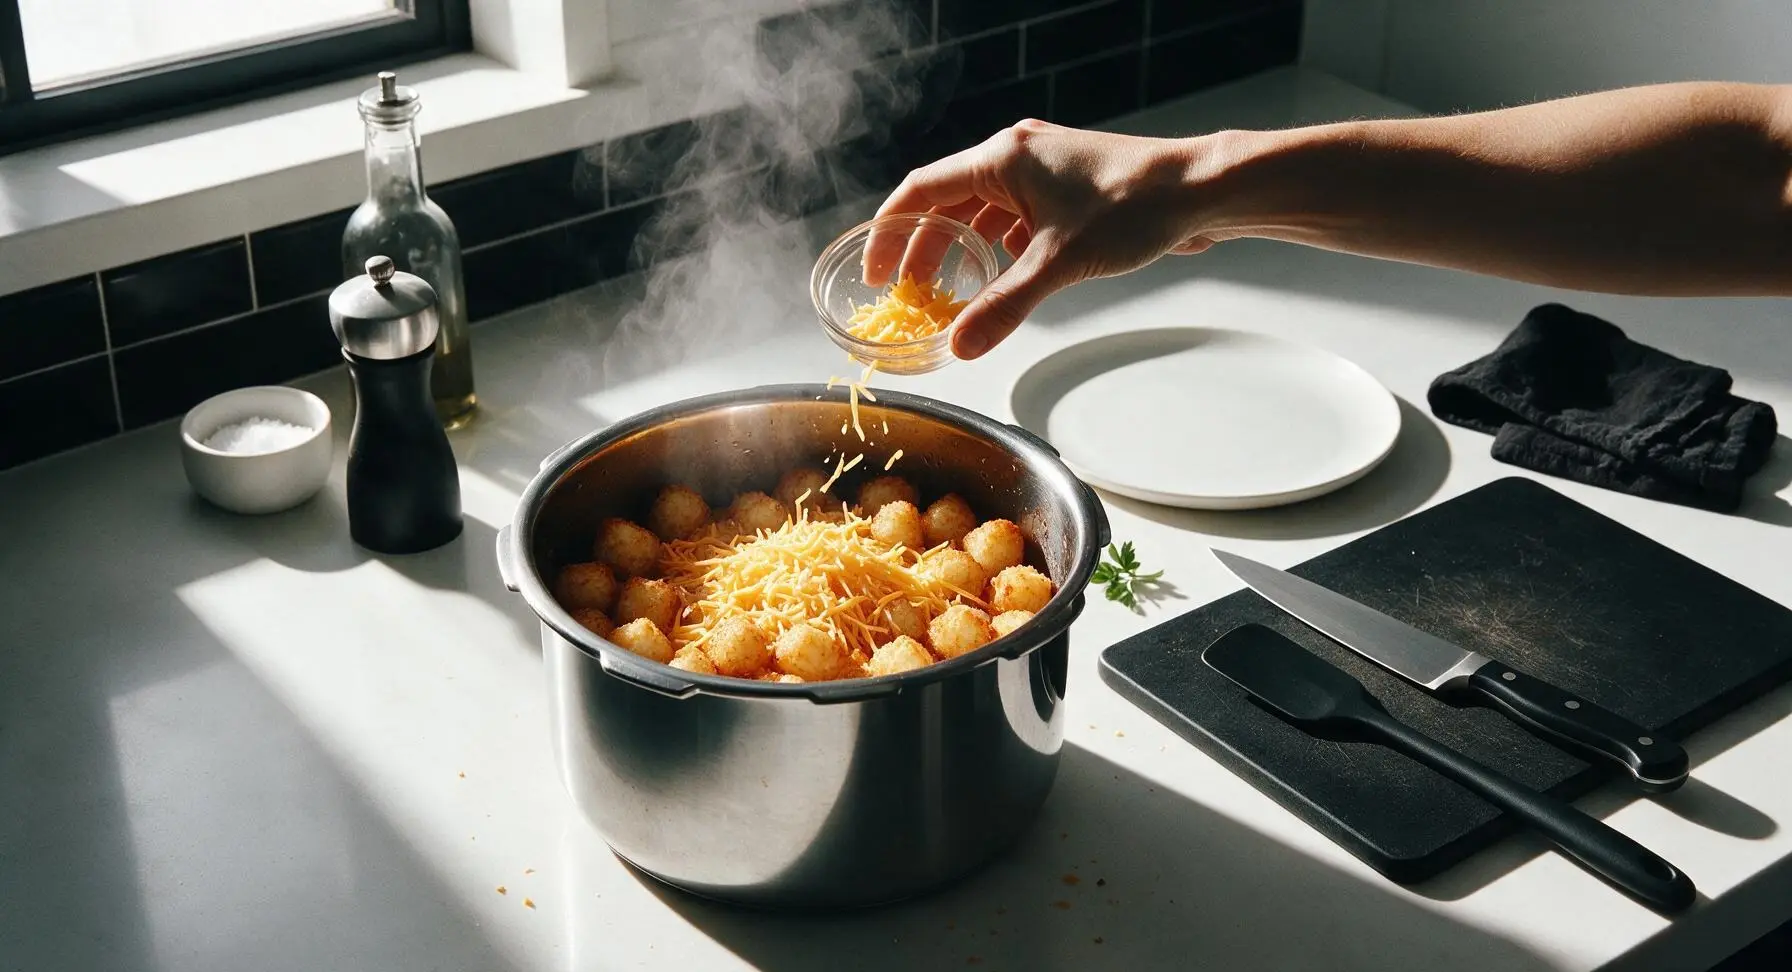
Carefully open the Instant Pot lid, angling it away from your face to avoid steam burns. Sprinkle all 220g (2 cups) of the shredded sharp cheddar cheese evenly over the top of the tater tots. Attach the Instant Pot air fryer crisp lid, set to 400°F (200°C), and cook for 7 minutes, until the tater tots are golden and crispy on the edges and the cheese is fully melted, bubbly, and slightly browned in spots.
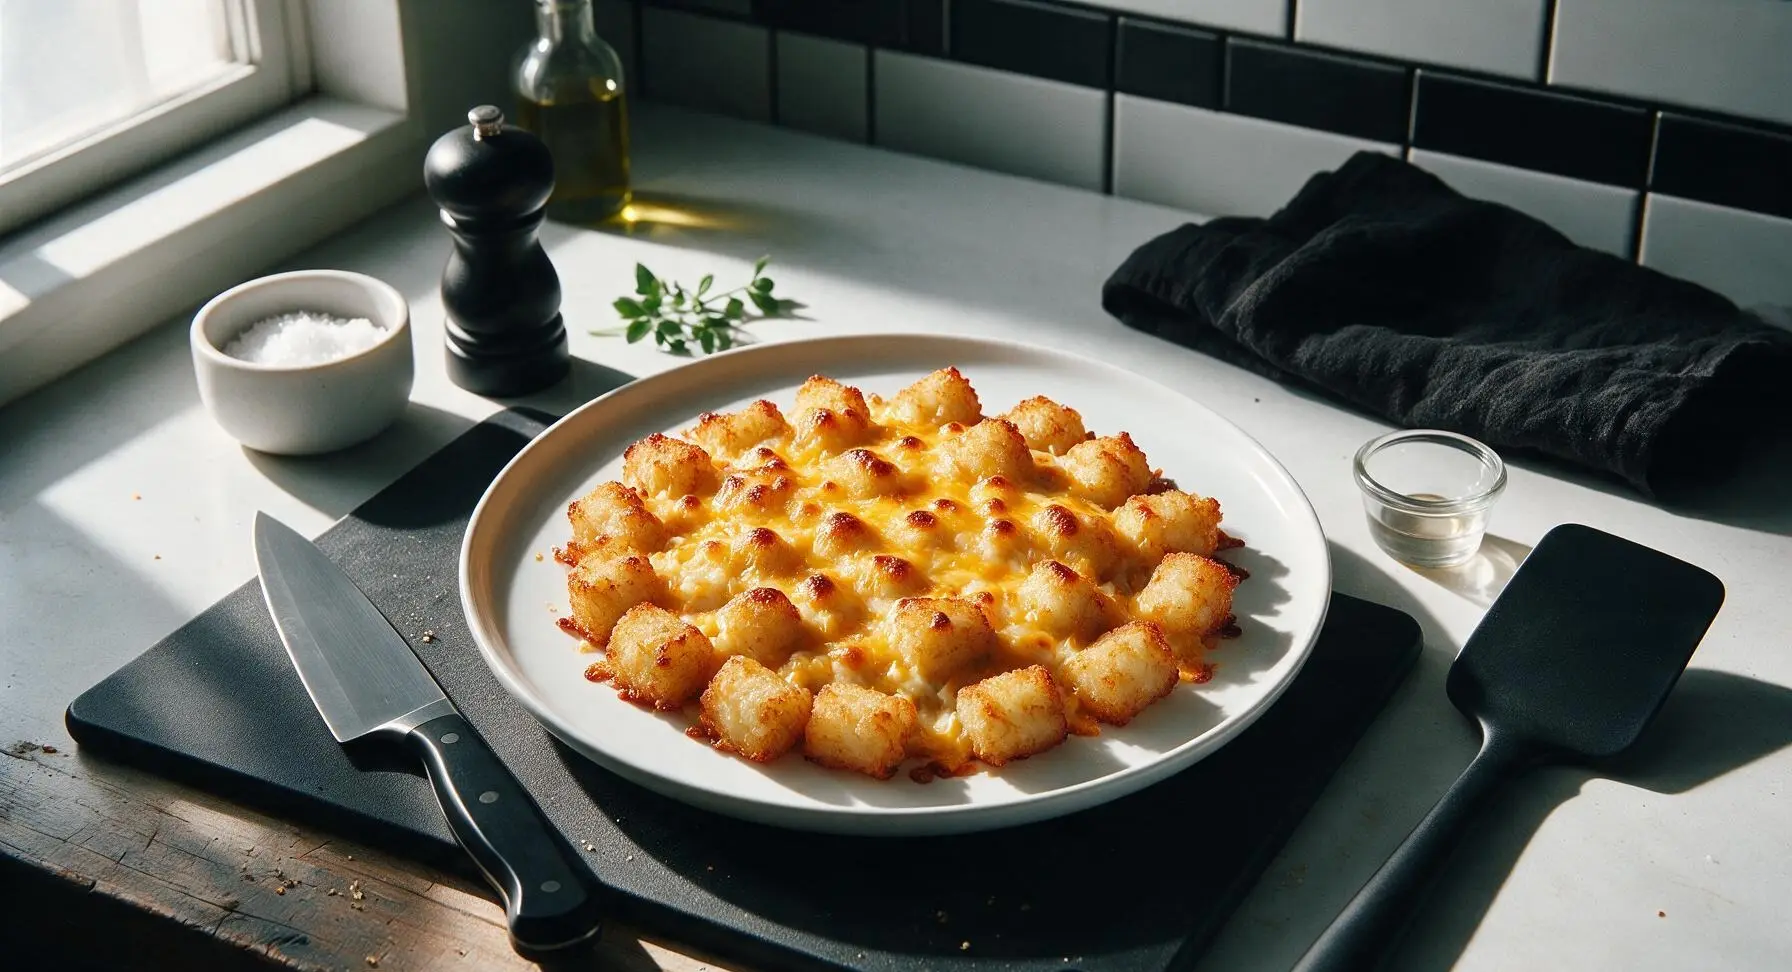
Step 5
step5:Crisp Tots and Melt Cheese
Step 5
step5:Crisp Tots and Melt Cheese
6

Rest and Plate Hotdish

Turn off the Instant Pot, remove the crisp lid, and let the hotdish rest for 5 minutes to allow the filling to set (this prevents it from being runny when scooped). Use the large stainless steel serving spoon to scoop a generous portion onto the matte cream white ceramic dinner plate, making sure each scoop gets crispy tots, melted cheese, and creamy beef filling. Garnish with a small sprig of fresh thyme.
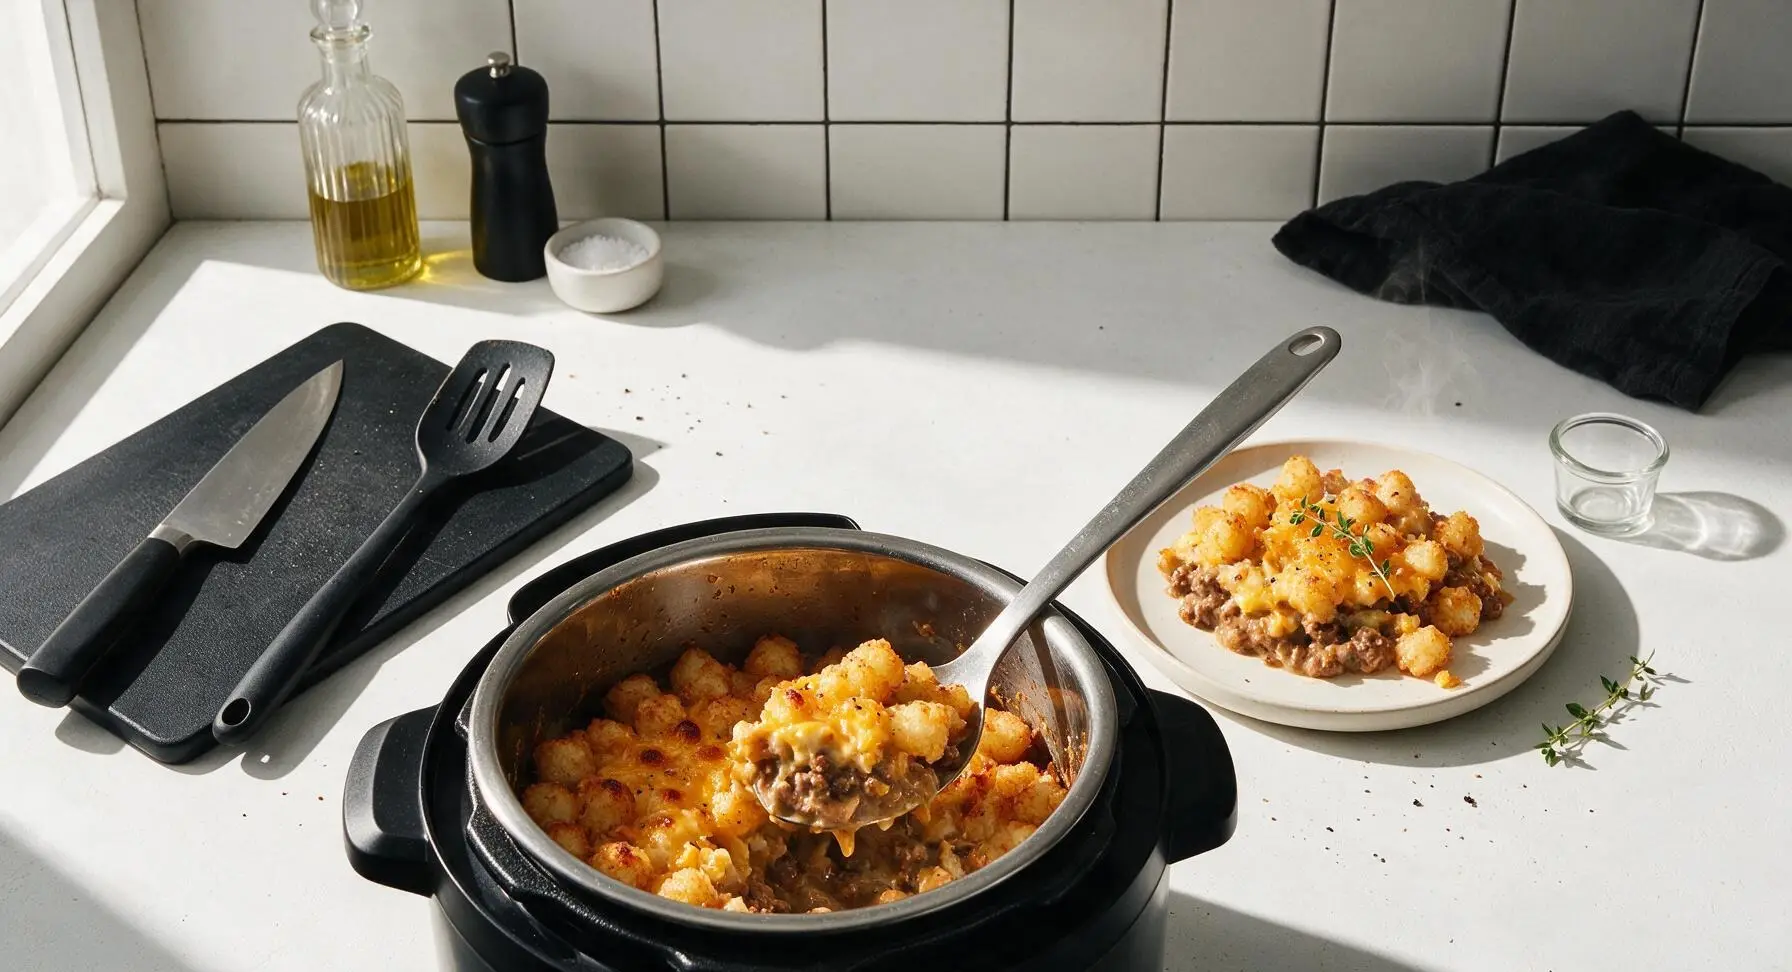
Step 6
step6:Rest and Plate Hotdish

Tips

1.Keep tater tots in a single, loose layer on top of the filling and never stir them in or press them down. This allows steam to circulate evenly during pressure cooking, preventing soggy, mushy tots and ensuring they crisp up properly under the air fryer lid.
2.Use 80/20 ground beef rather than extra-lean blends. The small ratio of fat adds rich, savory depth to the creamy soup base, and prevents the filling from turning dry and crumbly after pressure cooking.
3.Let the hotdish rest for a full 5 minutes after crisping before serving. The filling will be very loose and runny immediately after cooking, and the short rest allows the soup and meat juices to thicken so each scoop holds its clean shape on the plate.


✨ You May Also Like

Main Course
🍜 United Kingdom

A showstopping classic of tender seared beef, savory mushroom duxelles, and crisp prosciutto wrapped in flaky golden puff pastry, baked to juicy perfection.

⏱️ 2 hours 1Main Course ★ 4.7
Main Course
🍜 India

Tender charred marinated chicken simmered in a rich, spiced creamy tomato sauce, this iconic Anglo-Indian curry pairs perfectly with basmati rice or warm naan.

⏱️ 50 minuteMain Course ★ 4.6
Main Course
🍜 Thailand

Classic tangy, sweet, and savory Thai stir-fried rice noodles with shrimp, tofu, and crunchy garnishes, balancing all five core Thai flavor profiles.

⏱️ 30 minuteMain Course ★ 4.5
Main Course
🍜 United Kingdom

Crispy golden beer-battered cod and fluffy double-fried chips, served with tangy tartar sauce and malt vinegar: the timeless, beloved British pub comfort classic.

⏱️ 45 minuteMain Course ★ 4.7
Main Course
🍜 Mexico

Smoky, chile-marinated pork tacos with caramelized pineapple, fresh cilantro, and lime: a beloved classic Mexican street food perfect for casual summer gatherings.

⏱️ 1 hour 45Main Course ★ 4.8
Main Course
🍜 United States

Crunchy Fritos corn chips layered with savory beef chili and melted cheddar, topped with cool, zesty fixings for a beloved, cozy Tex-Mex comfort food.

⏱️ 35 minuteMain Course ★ 4.8

tater tot hotdish instant pot:Frequently Asked Questions

1.Do I need to thaw frozen tater tots or mixed veggies before making this recipe? ▾
No, you don’t need to thaw either ingredient! Toss frozen mixed veggies straight in with your browned ground beef, and arrange frozen tots in an even top layer right before pressure cooking. Thawing leads to mushy veggies and soggy tots, so keeping them frozen locks in better texture and cuts down on total prep time too.
2.Why do you recommend 80/20 ground beef instead of a leaner blend? ▾
The 20% fat content in 80/20 ground beef adds rich, savory depth without extra added oil, and keeps the filling moist during pressure cooking. Leaner blends like 90/10 can come out dry and bland, missing that classic hearty hotdish texture. If you only have lean beef on hand, add 1 tablespoon of butter when browning to make up for the missing fat.
3.How do I keep tater tots from getting soggy in the Instant Pot? ▾
First, arrange tots in a single, even layer on top of the creamy filling—never press them down into the mixture. After pressure cooking, pop the broiler-safe inner pot under your oven broiler for 2 to 3 minutes to crisp the tot tops, just like traditional oven-baked hotdish. Avoid stacking tots too thick, as trapped steam will make them mushy.
4.Can I substitute the condensed cream of mushroom soup? ▾
Absolutely! Swap in an equal amount of condensed cream of chicken, cream of celery, or even a thick homemade creamy mushroom sauce if you prefer to skip canned soup. If using homemade, make sure it matches the thick consistency of condensed soup so the filling doesn’t turn runny, and skip adding extra broth to the base to keep that classic creamy texture.
5.Do I need to use a trivet or pot-in-pot method for this hotdish? ▾
No special setup is required! You can brown the ground beef directly in the Instant Pot insert using the sauté function, then layer the rest of the filling and tots right on top. Just be sure to add 1 cup of water to the insert before sealing to build proper steam, and don’t fill the pot past its marked max fill line.
6.When should I add the shredded cheddar to avoid rubbery, grainy cheese? ▾
Save the sharp cheddar to add right after pressure cooking! Sprinkle it evenly over the cooked tot layer when you finish quick-releasing pressure, then pop the lid back on for 2 to 3 minutes to let residual heat melt the cheese into a smooth, gooey layer. Adding cheese before pressure cooking exposes it to too much high heat, which causes separation and a rubbery texture.
7.How do I store leftovers, and what’s the best way to reheat them? ▾
Leftovers will keep in an airtight container in the fridge for 3 to 4 days, or in the freezer for up to 3 months. For the best texture, reheat portions in the oven or air fryer at 375°F for 10 to 12 minutes to crisp the tots back up. You can use the microwave for speed, just note the tots will come out softer rather than crispy.

Comments (18)

2 days ago

OMG this Instant Pot Tater Tot Hotdish is a total weeknight game changer! I got home late from work yesterday, threw all the ingredients in, and we had a hot, cozy dinner on the table in 30 minutes. My husband and two boys devoured it—even my super picky 8 year old who turns his nose up at 90% of what I cook asked for thirds. The creamy beef and veggie filling paired with crispy tater tots? *Chef’s kiss* No extra pans to wash either, which is a huge win. 10/10, will be making this for our next potluck too!

yesterday

So glad this was a hit with your family, Liz! It really is perfect for those busy weeknights when you don’t want a pile of dishes. Hope it’s a hit at your potluck too!

3 days ago

Made this last night for dinner and it was SO good! I added a little extra shredded cheddar on top before serving and it hit the spot. Super easy to follow directions even for someone who’s still pretty new to using their Instant Pot. No burnt bits, no mushy tots, perfect texture all around.

5 days ago

This looks so good! Quick question before I make it this weekend—do I need to thaw the tater tots first, or can I toss them in straight from frozen? I don’t want to end up with mushy tots if I can avoid it lol. Also, has anyone tried adding a little crumbled bacon on top? Thinking that might be a tasty add-in.

3 days ago

I made this last week and tossed the tots straight in frozen, no thaw needed! They came out perfectly crispy on top, no mush at all. I added bacon too, it was chef’s kiss, highly recommend.

2 days ago

Great question! No need to thaw the tater tots at all—adding them frozen helps them hold their shape and get that perfect crispy top in the Instant Pot. Bacon is such a fun add-in, I’ve tried it myself and it adds such a great salty crunch!

1 week ago

Wow, this recipe is perfect for Sunday meal prep! I made a big batch yesterday and portioned it out for lunches this week, and it reheats like a dream. The flavors hold up so well, and it’s so filling I don’t end up hitting the vending machine at 3pm anymore. Love that it’s such an easy, no-fuss recipe that doesn’t require a ton of fancy ingredients.

5 days ago

Oh great call reheating this for lunches! I never thought to use it for meal prep, I’ve only made it for weeknight dinners. Gonna make a double batch this Sunday to portion out too!

2 weeks ago

Took this recipe camping with us last weekend and made it in our portable Instant Pot, and it was such a hit with the whole group! We were all tired after a long day of hiking and a hot, cheesy, hearty meal was exactly what we needed. Way easier than cooking over a campfire for a group of 6, and everyone asked for the recipe before we left the campground.

1 week ago

I was so nervous to make this because my kids hate mixed veggies, but I decided to give it a shot anyway. I swapped the mixed veggies for just corn because that’s the only veggie they’ll eat, and it turned out amazing! Even my husband who says hotdish is “too midwest” went back for seconds. Only note is I wish I’d added a little more salt, but that’s an easy fix next time.

5 days ago

I swapped the mixed veggies for green beans last time I made it and it was so good! Love that this recipe is super customizable to what your family likes. I also add a dash of garlic powder for extra flavor, game changer.

3 days ago

Wait as a fellow Georgia girl I was skeptical of a midwest hotdish too, but this one converted my whole family! I add a little cajun seasoning to the beef for a tiny kick, it’s chef’s kiss.

3 days ago

Y’all, I just got my Instant Pot for Christmas and this is the third recipe I’ve tried, and it’s by far the best one! I was so worried I’d mess up the pressure settings or burn something, but the directions were so clear and easy to follow, even for a total newbie like me. Turned out perfect on the first try, I felt like a real chef lol.

2 days ago

That makes us so happy to hear! We love writing recipes that are approachable for new Instant Pot users, no fancy skills required. So glad your first hotdish turned out perfectly!

1 week ago

Brought this to my office potluck last week and it was GONE in 10 minutes. People were hovering over the Instant Pot insert asking who brought it, and I must have passed the recipe out to 8 different coworkers. Who knew something so simple would be such a crowd favorite? 10/10, will be bringing this to every potluck from now on.

30 minutes ago

I was so excited to make this, but my tater tots came out super soggy on the bottom? Did I do something wrong? The flavor was still amazing, but I missed that crispy tot texture I love so much. Any tips for next time?

5 minutes ago

Oh no, sorry to hear the tots were soggy! A quick fix for next time is to make sure you’re layering the tots on top of the filling without pressing them down into the creamy mixture, and you can pop the lid off and broil for 2-3 minutes at the end if your Instant Pot has that function to crisp up the top!

just now

I had the same issue my first time! The broil trick works so well, I do that every time now and the tots come out just as crispy as if I made them in the oven. Don’t give up on it, it’s worth it!

2 days ago

This recipe is so budget friendly! I already had most of the ingredients in my pantry and freezer, so I only had to pick up ground beef and sour cream from the store, total cost was like $12 to feed a family of four. That’s way cheaper than takeout, and way tastier too. Will definitely be making this on repeat on tight grocery weeks.

yesterday

Right?! I calculated it out and it’s less than $3 per serving, which is unbeatable for a hearty, filling meal. I also stock up on ground beef when it’s on sale and freeze it so I can make this even cheaper!

2 weeks ago

Made a vegetarian version of this for my meat-free household by swapping the ground beef for cooked lentils and using veggie broth instead of beef broth, and it turned out INCREDIBLE. Even my meat-loving brother who was visiting for the weekend said he couldn’t tell it didn’t have beef in it. Such a flexible base recipe, love that I can tweak it to fit our diet!

1 week ago

Oh thank you for sharing the lentil swap! I’ve been looking for a vegetarian hotdish recipe that actually tastes like the one I grew up eating, can’t wait to try your version.

5 days ago

Love that modification! The lentil swap sounds delicious—we’re always happy to hear when people adjust our recipes to fit their dietary preferences, we’ll have to test that version ourselves soon!

5 days ago

Made this when we were snowed in last week during that big Colorado snowstorm, and it was the perfect comfort food. We couldn’t get to the grocery store, so I used what we had in the freezer and pantry, and it turned out perfect. Warm, cheesy, filling, exactly what we needed while we were stuck inside watching the snow fall. 10/10 snow day meal.

3 days ago

There’s nothing better than a cozy hot meal when you’re snowed in! So glad this worked out with what you had on hand—this recipe is perfect for using up pantry and freezer staples.

yesterday

I added extra sharp cheddar and a handful of mozzarella to the filling, and it was so cheesy and gooey, exactly how I like my hotdish. The cook time is so fast too, I’m used to baking hotdish in the oven for an hour, so 30 minutes in the Instant Pot feels like magic. Will never make my old oven version again.

2 weeks ago

Made this for our Super Bowl watch party this year, and it was the most popular snack on the table! Everyone was grabbing spoonfuls between plays, and I didn’t have any leftovers to take home, which is always the sign of a good recipe. Super easy to make before guests arrive too, I didn’t have to stress about cooking while everyone was over.

1 week ago

I made this for my college football watch party last fall and had the same experience! It’s the perfect game day food, hearty and easy to eat while you’re yelling at the TV lol.

2 hours ago

Okay, I’m 22 and just moved into my first apartment, and this is the first real meal I’ve ever cooked for myself that didn’t come out of a microwave or a takeout box. It was so easy! I was so proud of myself, and it actually tasted really good. My roommate even asked if I could make it again next week lol.

30 minutes ago

This makes my heart so happy! What a great first meal to master, you’re gonna be making this for years to come. Great job!

5 minutes ago

Dude same! I made this in my dorm last semester with my mini Instant Pot and it was a game changer for late night study sessions. So easy even a college kid can pull it off.

3 days ago

I was so happy I could easily adapt this to be gluten free! I used gluten free cream of mushroom soup and made sure my tater tots were GF, and it turned out exactly like the classic hotdish I grew up eating, no weird texture or off flavors. It’s so hard to find easy comfort food recipes that don’t require a million GF swaps, so this is a new staple for me.

2 days ago

We’re so glad this worked for your gluten free diet! It’s such an adaptable recipe, and those simple swaps make it accessible for so many different dietary needs. Thanks for sharing how it turned out!

just now

The leftovers are even better the next day! I had a bowl for lunch today after making it last night, and the flavors had melded together so much more, it was even tastier than it was fresh. I love recipes that taste good as leftovers because I hate cooking every single night, so this is perfect.

5 minutes ago

This is great as written, but I added a can of diced green chiles and a teaspoon of hot sauce to the beef mixture to give it a little kick, and it was chef’s kiss. If you like a little heat in your comfort food, I highly recommend trying that add-in. It doesn’t make it too spicy, just adds a nice little zing that cuts through the richness of the cheese and cream.

just now

Oh that sounds amazing! I’m always adding hot sauce to everything, so I’m definitely gonna throw some green chiles in when I make this this weekend. Thanks for the tip!

just now

Love that spicy twist! We’ve had a few people test that green chile add-in and it’s such a fun way to change up the classic flavor. Thanks for sharing the tip!



