
Tortellini

title 1
Tortellini
⏱️ cook time 1 hour 15 minutes
🍽️ servings 4
⚡ Difficulty medium

intro

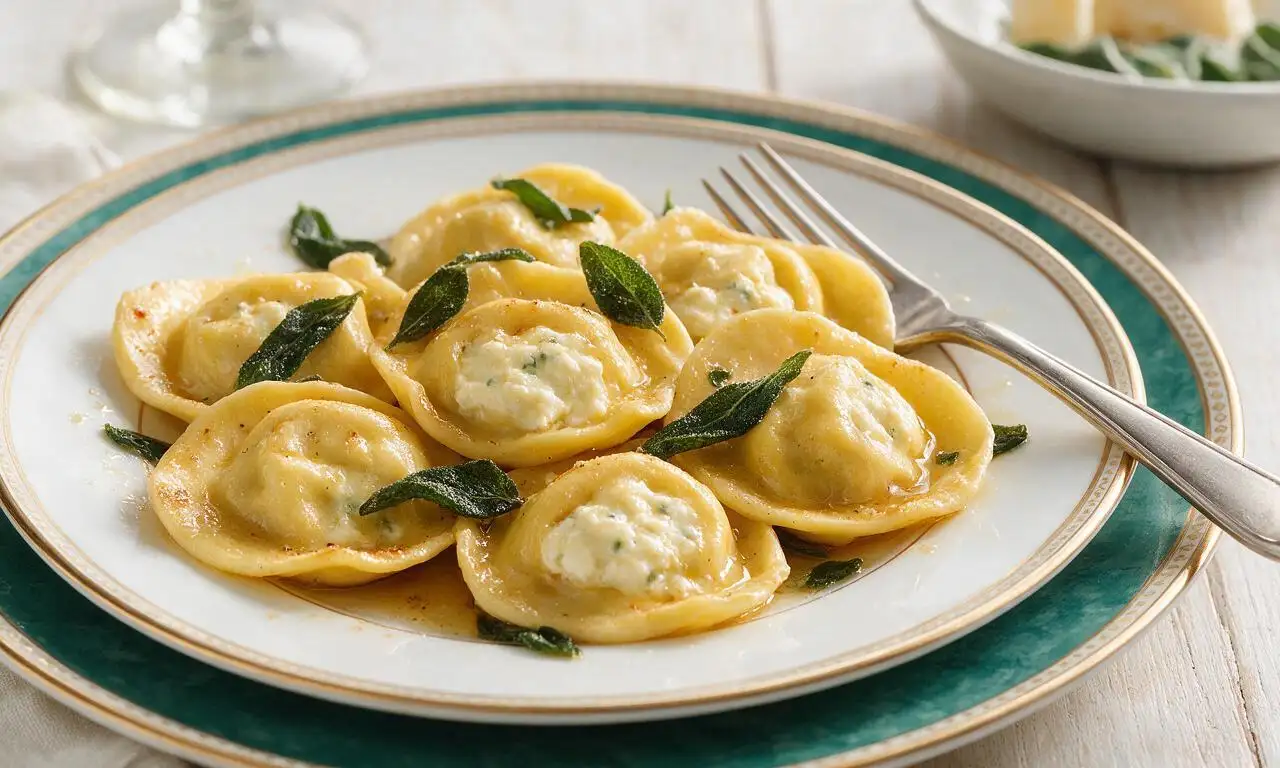
Silky stuffed pasta parcels filled with creamy ricotta and parmesan, tossed in nutty brown butter and crispy sage, a classic Northern Italian comfort staple.

Ingredients

00 pasta flour 200 grams
Large eggs 2 (100 grams, room temperature)
Whole milk ricotta cheese 250 grams, thoroughly drained
Parmigiano-Reggiano cheese 100 grams, finely grated
Unsalted butter 8 tablespoons (113 grams)
Fresh sage leaves 15 whole leaves
Fine sea salt 1 tablespoon + 1 teaspoon
Freshly grated nutmeg 1/4 teaspoon
Freshly cracked black pepper 1/2 teaspoon

Steps

1

Make pasta dough

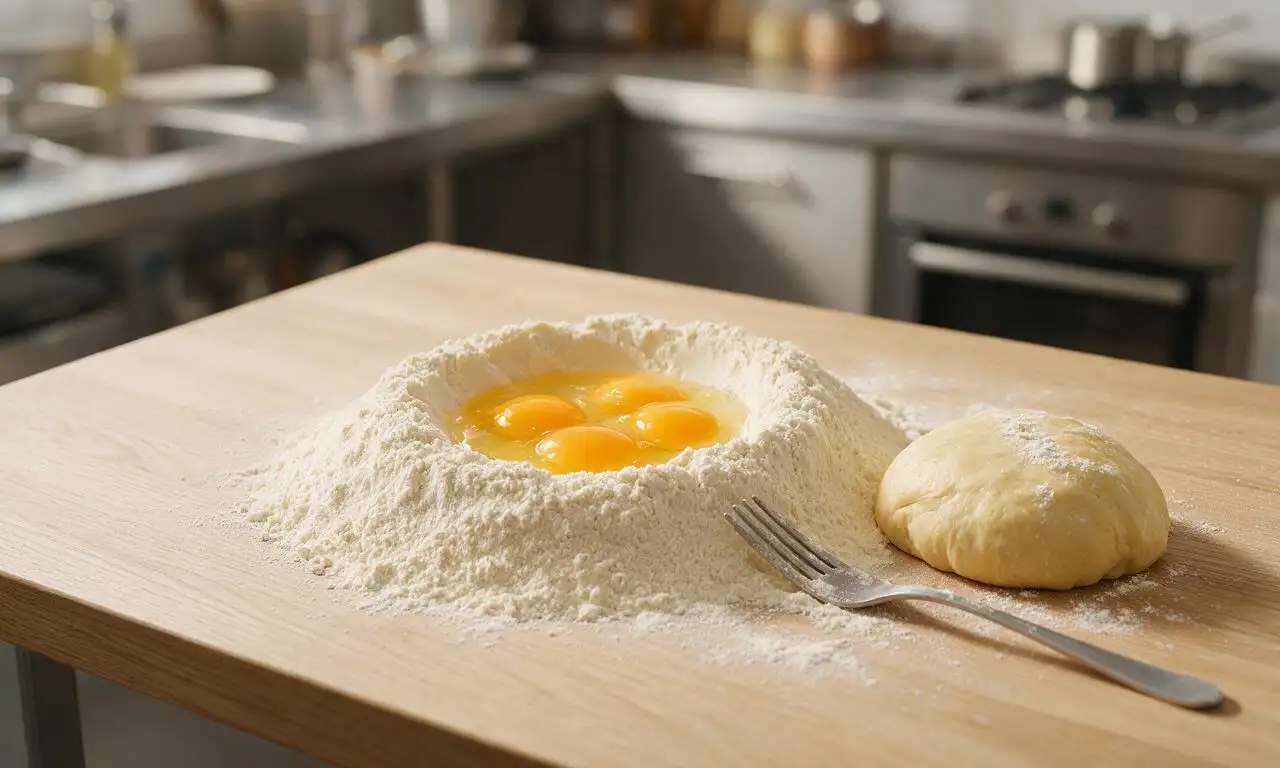
Mound 200 grams of 00 pasta flour on a clean wooden work surface, then create a deep well in the center of the mound. Crack 2 room-temperature large eggs into the well, beat gently with a fork, and gradually incorporate flour from the well edges until a shaggy dough forms. Knead the dough for 8–10 minutes with steady, medium hand pressure until it is smooth, elastic, and pale golden yellow. Wrap tightly in plastic wrap and let rest at room temperature for 30 minutes to relax the gluten.
Step 1
step1:Make pasta dough
2

Mix cheese filling

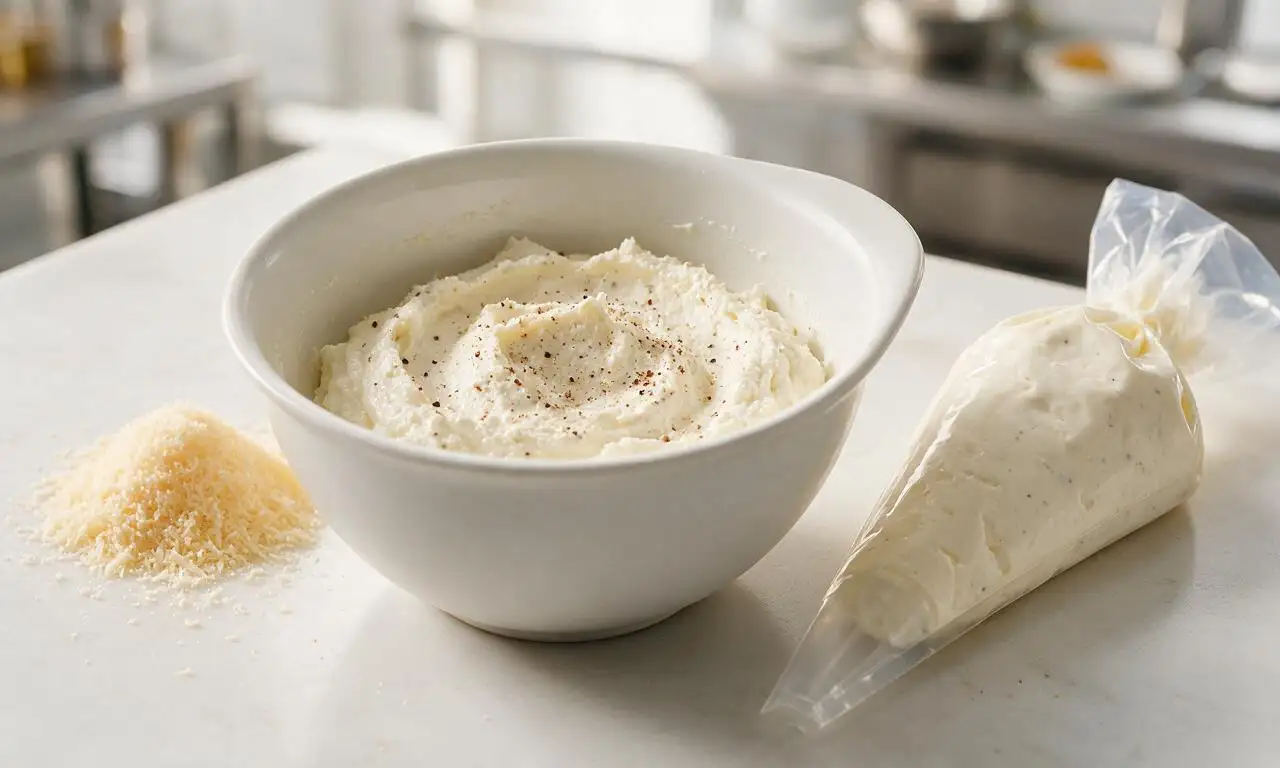
In a medium mixing bowl, combine 250 grams of drained whole milk ricotta, 80 grams of the grated Parmigiano-Reggiano, 1/4 teaspoon freshly grated nutmeg, 1 teaspoon fine sea salt, and 1/2 teaspoon cracked black pepper. Stir until completely smooth, then transfer the filling to a piping bag or sealable plastic bag with a 1/4-inch corner cut off. Set the filled bag in the refrigerator to chill until ready to use.
Step 2
step2:Mix cheese filling
3

Roll pasta sheets

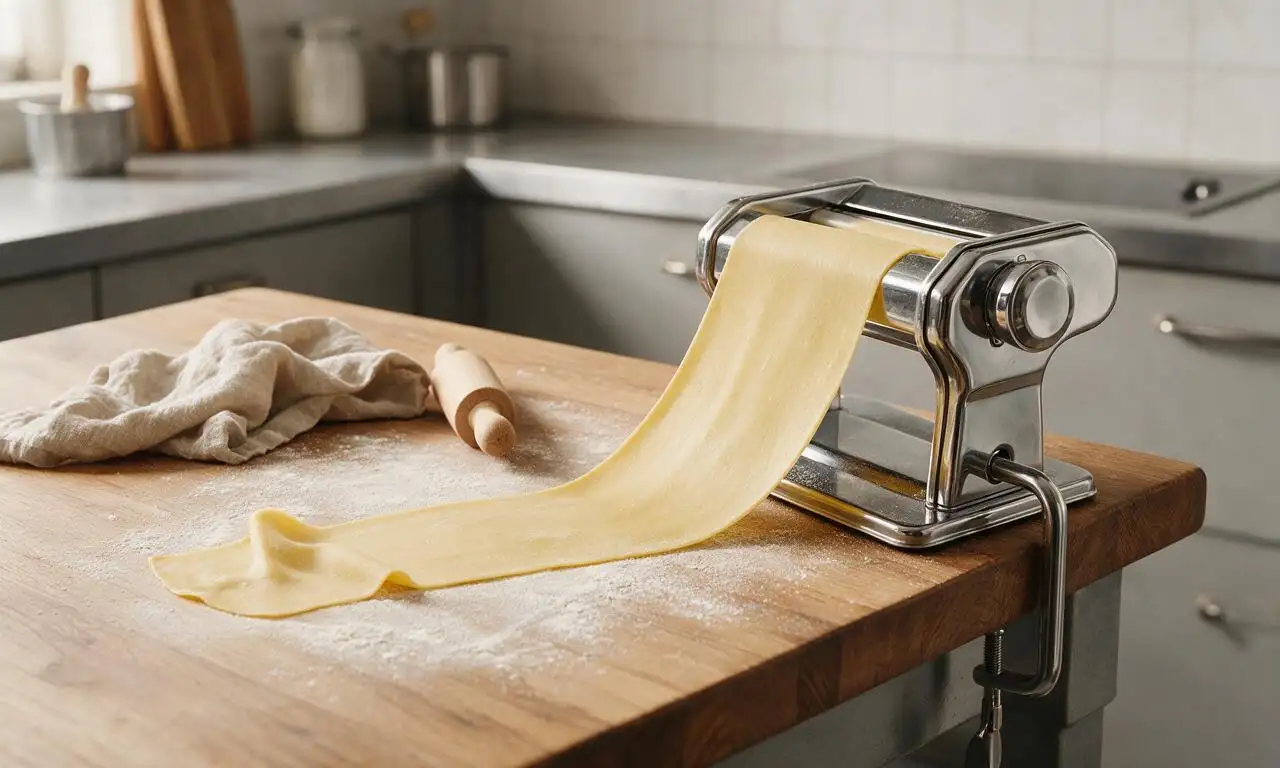
Unwrap the rested dough, cut it into 4 equal portions, and flatten each portion to 1/4-inch thickness with a rolling pin. Run each portion through a manual pasta machine starting at the widest setting, folding and rerolling 3 times per setting before narrowing the roller gap incrementally, until you reach a 1/16-inch (2mm) thin sheet (setting 5 on most standard home pasta machines). Lay rolled sheets on a lightly floured work surface, covering with a clean linen tea towel to prevent drying.
Step 3
step3:Roll pasta sheets
4

Cut and fill pasta

Use a 2-inch (5cm) round fluted cookie cutter to cut uniform circles from the rolled pasta sheets. Pipe a 1/2-teaspoon dollop of chilled cheese filling directly in the center of each round—do not overfill, as this will cause tortellini to burst during cooking. Lightly brush the edge of each circle with a tiny amount of cold water to create a tight seal when folded.
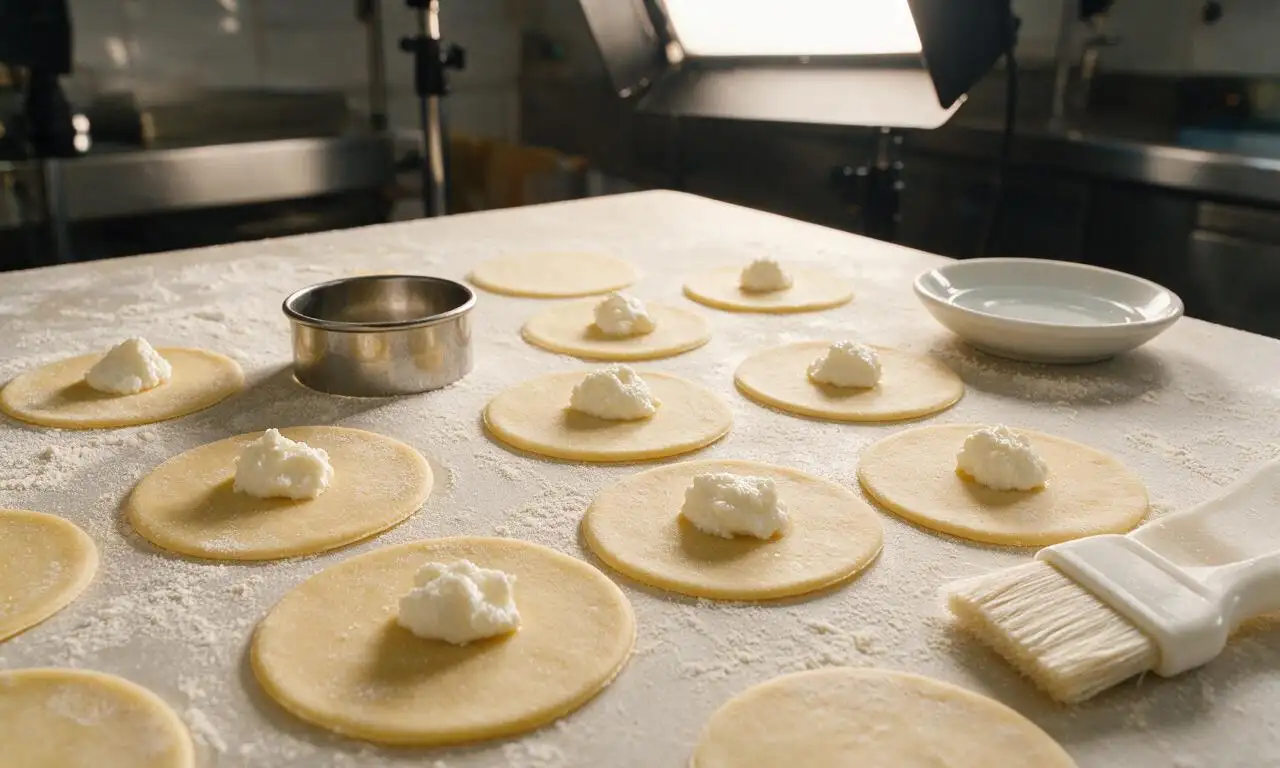
Step 4
step4:Cut and fill pasta
5

Shape tortellini

Fold each pasta circle in half over the filling to create a half-moon shape, pressing firmly along the curved edge to squeeze out any trapped air and create a tight, gap-free seal. Bring the two pointed corners of the half-moon together, overlapping them by 1/4 inch, and press firmly to adhere, forming the signature navel shape of traditional tortellini. Set shaped tortellini on a lightly floured baking sheet, and repeat until all dough and filling is used.
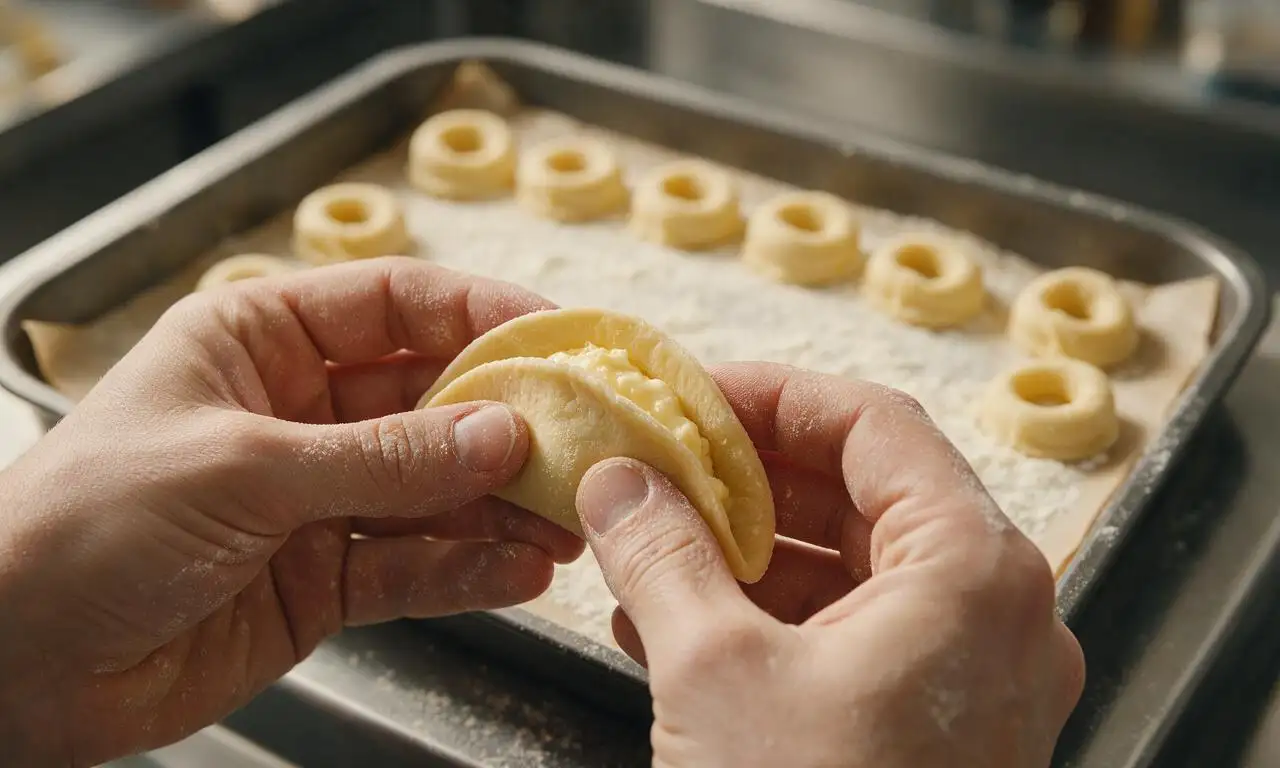
Step 5
step5:Shape tortellini
6

Cook pasta and sauce

Bring 4 liters of cold water to a rolling boil over high heat, then add 1 tablespoon of fine sea salt (the water should taste as salty as seawater). Add tortellini in small batches to avoid crowding the pot, cooking for 3–4 minutes until they float to the surface, indicating they are al dente. While pasta cooks, melt 8 tablespoons of unsalted butter in a large skillet over medium heat, add 15 fresh sage leaves, and cook for 2–3 minutes until the butter turns golden, nutty brown and the sage is crispy. Use a slotted spoon to transfer cooked tortellini directly from the boiling water to the brown butter skillet, tossing for 1 minute over low heat to coat evenly.
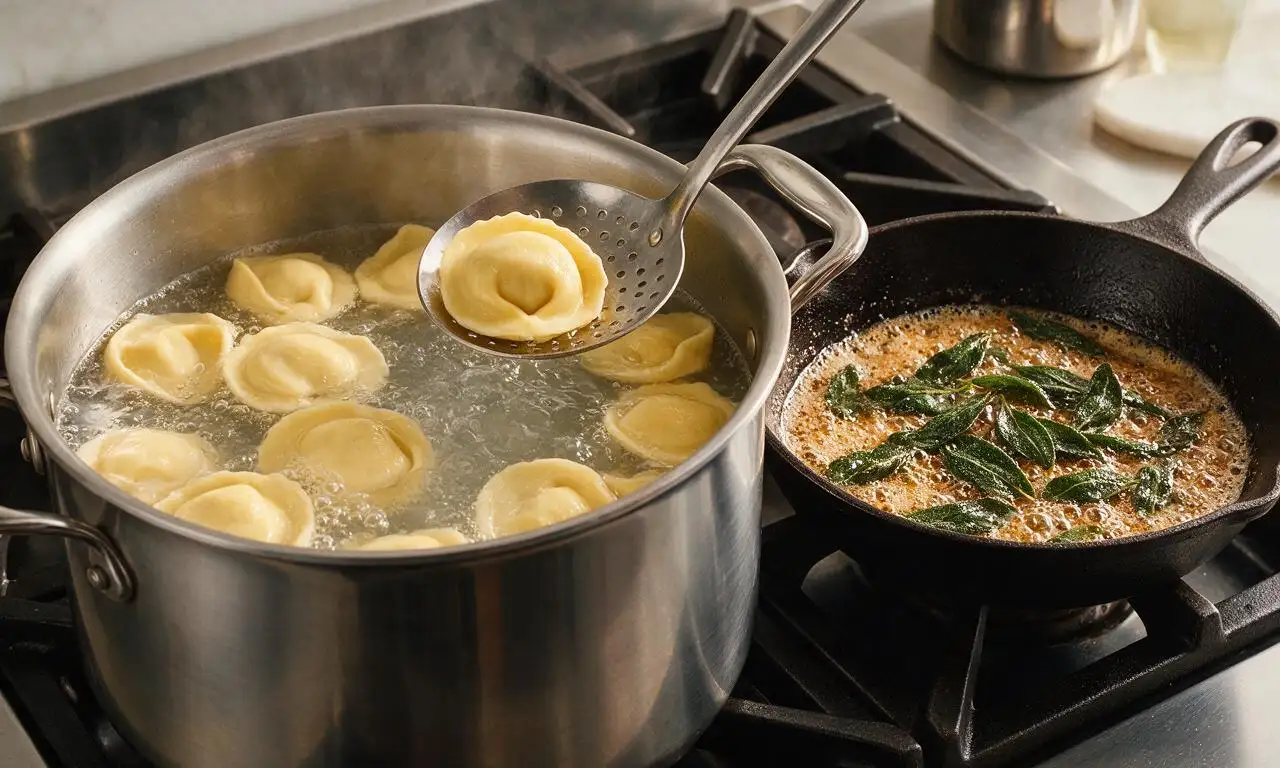
Step 6
step6:Cook pasta and sauce
7

Plate and serve

Divide the butter-coated tortellini evenly between 4 warm pasta bowls, top with the remaining 20 grams of grated Parmigiano-Reggiano, a few crispy sage leaves from the skillet, and a light crack of extra black pepper if desired. Serve immediately while hot, before the sauce cools and thickens.
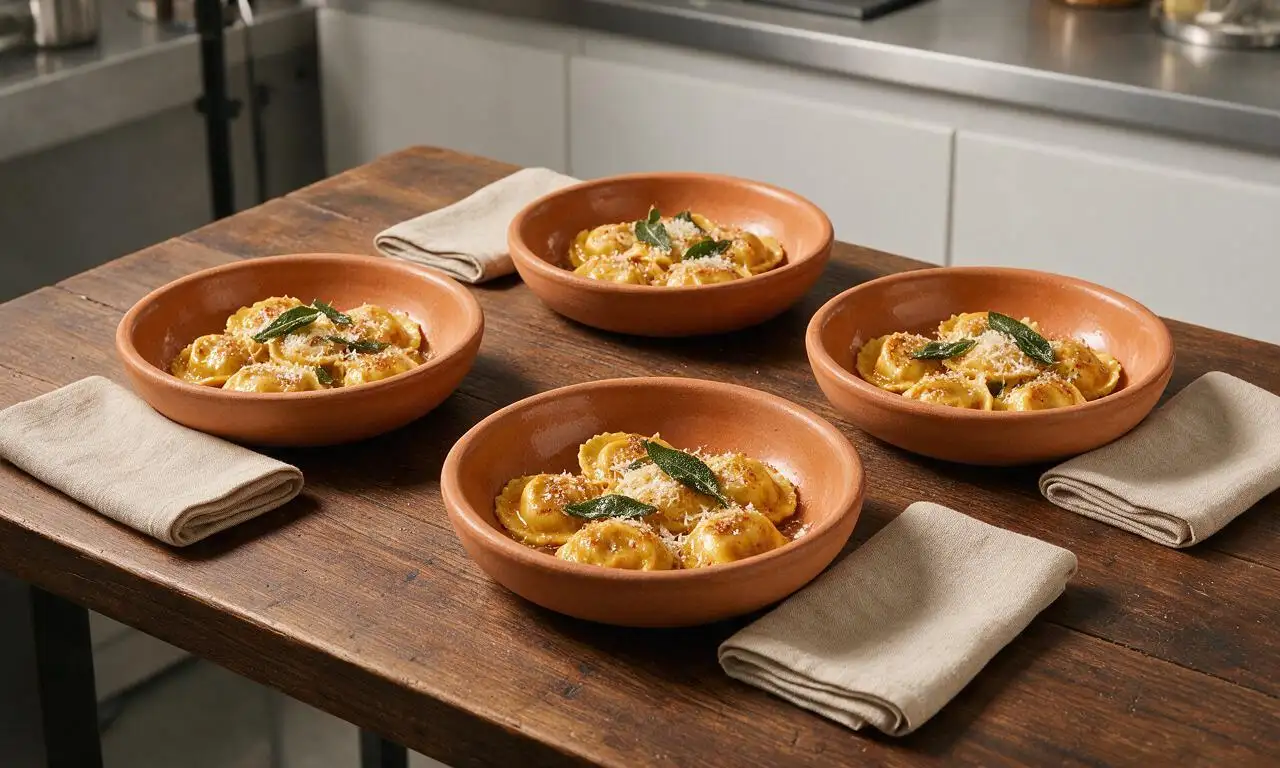
Step 7
step7:Plate and serve

Tips

1.Thoroughly drain ricotta for 2–4 hours (or overnight in the fridge) before mixing the filling; excess moisture will make tortellini soggy and cause them to burst during boiling.
2.Never skip the 30-minute dough rest: relaxed gluten makes rolling far easier and prevents pasta from shrinking back as you cut and shape tortellini.
3.Do not rinse cooked tortellini after draining; starchy residual pasta water helps the brown butter sauce cling smoothly to each pasta parcel.


✨ You May Also Like

Main Course
🍜 United Kingdom

A showstopping classic of tender seared beef, savory mushroom duxelles, and crisp prosciutto wrapped in flaky golden puff pastry, baked to juicy perfection.

⏱️ 2 hours 1Main Course ★ 4.7
Main Course
🍜 India

Tender charred marinated chicken simmered in a rich, spiced creamy tomato sauce, this iconic Anglo-Indian curry pairs perfectly with basmati rice or warm naan.

⏱️ 50 minuteMain Course ★ 4.6
Main Course
🍜 Thailand

Classic tangy, sweet, and savory Thai stir-fried rice noodles with shrimp, tofu, and crunchy garnishes, balancing all five core Thai flavor profiles.

⏱️ 30 minuteMain Course ★ 4.5
Main Course
🍜 United Kingdom

Crispy golden beer-battered cod and fluffy double-fried chips, served with tangy tartar sauce and malt vinegar: the timeless, beloved British pub comfort classic.

⏱️ 45 minuteMain Course ★ 4.7
Main Course
🍜 Mexico

Smoky, chile-marinated pork tacos with caramelized pineapple, fresh cilantro, and lime: a beloved classic Mexican street food perfect for casual summer gatherings.

⏱️ 1 hour 45Main Course ★ 4.8
Main Course
🍜 United States

Crunchy Fritos corn chips layered with savory beef chili and melted cheddar, topped with cool, zesty fixings for a beloved, cozy Tex-Mex comfort food.

⏱️ 35 minuteMain Course ★ 4.8

Tortellini:Frequently Asked Questions

1.Can I use all-purpose flour instead of 00 flour for the tortellini dough? ▾
You absolutely can, though 00 flour delivers that signature silky, tender fresh pasta bite. If swapping, use the same weight of unbleached all-purpose flour, and add 1 extra teaspoon of olive oil to the dough to offset AP’s slightly higher protein content, which can make pasta chewier if overworked during kneading.
2.How do I keep my ricotta filling from being watery and making tortellini burst? ▾
Watery ricotta is the top cause of split, leaky tortellini! Drain whole milk ricotta in a fine-mesh sieve lined with cheesecloth set over a bowl for at least 4 hours (or overnight in the fridge) before mixing, and wait to add salt to the filling until right before stuffing to avoid drawing out extra moisture.
3.Is resting the pasta dough really a necessary step? ▾
Yes, that rest step is non-negotiable for easy rolling and tight-sealed tortellini that don’t split while cooking. Wrap kneaded dough tightly in plastic wrap and let it sit at room temperature for 30 minutes; this relaxes gluten so the dough won’t shrink back when rolled thin, creating a smooth, even texture.
4.How thin should I roll my pasta sheets for tortellini? ▾
Aim for pasta sheets thin enough to just see the outline of your hand through when held up to light—usually the second-thinnest setting on most countertop pasta machines. Sheets that are too thick make doughy, heavy tortellini, while sheets that are too thin will tear easily when you stuff and fold the parcels.
5.Can I make the tortellini ahead of time for meal prep or a dinner party? ▾
Absolutely! Freeze uncooked, stuffed tortellini in a single layer on a parchment-lined baking sheet until solid, then transfer to a sealed freezer bag for up to 3 months. Cook them straight from frozen (no thawing needed) in salted simmering water for 1 to 2 minutes longer than fresh, until they float to the surface.
6.How do I stop tortellini from bursting open while they cook? ▾
First, press out all trapped air around the filling when sealing each tortellini, and crimp edges tightly to lock in cheese. Don’t cook them in a violent, rolling boil—keep water at a gentle, steady simmer, and avoid stirring aggressively for the first 2 minutes so the pasta seals have time to fully set.
7.How do I know when brown butter is done, so I don’t burn it? ▾
Watch closely once the butter melts and starts foaming—it’s done when it turns a deep golden amber color, smells intensely nutty, and you see tiny, toasty milk solids settling at the pan bottom. This only takes 3 to 4 minutes total, so pull it off heat immediately, as it burns in just seconds.
8.Why does my fried sage turn bitter instead of light and crispy? ▾
Bitter sage happens when you cook it at too high a heat, or leave it in the hot butter too long. Add whole sage leaves to melting butter over medium-low heat, and fry them for just 10 to 15 seconds per side until bright green and crisp. Fish them out with a slotted spoon to drain on paper towels right away.
9.Can I use pre-shredded parmesan for the filling and sauce to save time? ▾
I don’t recommend it! Pre-shredded Parmigiano-Reggiano is coated in potato starch and powdery anti-caking agents that keep it from melting smoothly, leaving your cheese filling grainy and your finished sauce dull. Grate fresh parmesan right before using on a small box grater or microplane for the best rich, creamy, cohesive texture.
10.How salty should my pasta cooking water be? ▾
Your pasta water should taste as salty as seawater—roughly 1 tablespoon of kosher salt per 4 quarts of water. This is your only chance to season the pasta itself from the inside out; unsalted water will leave even the richest brown butter sauce tasting flat, no matter how much extra cheese you add on top.
11.Can I mix extra add-ins into the cheese filling? ▾
Absolutely! Just stick to low-moisture mix-ins to avoid watery, leaky filling: a pinch of freshly grated nutmeg, a tablespoon of finely chopped, fully squeezed fresh spinach, a tiny bit of lemon zest, or a sprinkle of cracked black pepper all pair beautifully with the ricotta and parmesan base.
12.If my tortellini are floating to the top, does that mean they’re fully done? ▾
Floating is a reliable first sign that the pasta has cooked through and trapped air inside has expanded, but don’t pull them out of the water immediately. Let them float for 30 extra seconds, then bite into one: the pasta should be tender with a slight al dente bite, and the filling should be hot all the way through.
13.What simple sides pair well with this dish to make it a full meal? ▾
Keep sides light to let the rich, nutty pasta shine: a simple arugula salad tossed with lemon vinaigrette, roasted garlic broccoli, or a platter of thinly sliced prosciutto and cantaloupe all work beautifully. Finish each plate with an extra sprinkle of parmesan and black pepper, and skip heavy, creamy sides that weigh the dish down.

Comments (20)

2 days ago

OMG this tortellini is SO good! I made it for my Sunday family dinner last weekend and everyone went back for seconds. The brown butter sage sauce is a total game changer — I never thought browned butter could taste that nutty and perfect with the cheesy filling. 10/10 will be making this monthly!

1 week ago

Tried this for my wife’s birthday dinner and she swore I ordered takeout from our favorite Italian spot! The only tweak I made was adding a tiny pinch of red pepper flakes to the sauce for a little kick. Took me about an hour and 20 minutes total since I’m slow at folding tortellini, but worth every second.

5 days ago

Love the red pepper flake addition! That little pop of heat cuts through the richness of the butter and cheese so well. Don’t worry about the folding speed — even seasoned pasta makers take time to get those tortellini sealed tight!

3 days ago

Wait, has anyone tried making the filling a day ahead for meal prep? I want to make this for a potluck at work next week but don’t have time to do all the steps the night before.

2 days ago

I did this last month! Made the cheese filling, stored it in an airtight container in the fridge for 2 days before assembling, and it tasted totally fresh. Just make sure you don’t overfill the tortellini when you fold them so they don’t burst while boiling.

yesterday

Great tip from PastaQueen1990! You can also freeze the assembled, uncooked tortellini for up to a month if you want to prep even further ahead — no need to thaw before boiling, just add 1-2 minutes to the cook time.

yesterday

My kids are SO picky about pasta and they devoured this! I was worried the sage would be too strong for them, but the mellow, nutty flavor from browning the butter made it a total hit. Even my 7 year old asked for thirds, which never happens.

5 days ago

Medium difficulty is no joke, y’all — my first batch of tortellini had half the filling leak out while boiling because I didn’t crimp the edges hard enough. Tasted amazing anyway, just looked a little messy lmao

3 days ago

Same thing happened to me the first time! I started brushing a tiny bit of water on the edges of the pasta circles before folding and they sealed perfectly every time after that. Game changer for messy pasta makers like us.

2 weeks ago

I swapped the regular ricotta for whipped ricotta in the filling and OH MY GOD it was so fluffy and light. Highly recommend that little swap if you want an extra luxe filling!

1 week ago

Wait that sounds incredible! Did you drain the whipped ricotta first at all? I’ve had issues with runny filling making my tortellini burst before.

1 week ago

I did! Let it sit in a fine sieve over a bowl for about an hour in the fridge before mixing with the parm and seasonings, no runniness at all!

30 minutes ago

How thin do I need to roll the pasta dough for the tortellini? I don’t have a pasta machine, just a rolling pin, and I’m worried I’ll make it too thick and chewy.

5 minutes ago

Great question! You want to roll the dough thin enough that you can just barely see your hand through it when you hold a sheet up to the light. If rolling by hand, take your time and rotate the dough often to keep it even — it’s a little arm workout, but totally doable without a machine!

1 week ago

Made this for my book club potluck and every single person asked for the recipe! The brown butter sage sauce smells like absolute heaven when it’s cooking, my whole house smelled cozy for hours after. Even the person who swears they 'don’t like stuffed pasta' had two helpings.

2 hours ago

Wait, can I use dried store-bought tortellini for this if I don’t have time to make homemade? I know that’s cheating but the sauce sounds too good to wait for a free afternoon to make pasta from scratch.

30 minutes ago

No such thing as cheating when you’re making a good meal! Store-bought cheese tortellini works perfectly here — just cook it according to the package directions and toss it in the brown butter sage sauce, it’ll still taste incredible.

5 minutes ago

I did this last week with the refrigerated tortellini from the grocery store and my family had zero clue it wasn’t homemade pasta. The sauce is the real star of the show tbh!

2 days ago

I added some toasted walnuts and a sprinkle of crispy prosciutto on top and it was restaurant level. So rich, so flavorful, I can’t stop thinking about it. Already bought the ingredients to make it again this weekend.

yesterday

The crispy prosciutto addition is genius! I bet that salty crunch pairs so perfectly with the nutty butter. Stealing that idea for my next batch!

1 week ago

Meal prepped a double batch of these on Sunday and ate them for lunch all week. They reheat so well! I just stored the sauce separate from the cooked tortellini and tossed them together when I was ready to eat, zero sogginess. 10/10 for work lunches.

yesterday

I think I burned my butter when I tried making the sauce last night 😭 it got all dark and bitter instead of that nutty golden brown I see in the photos. Any tips for getting it right next time?

yesterday

Oh no, sorry that happened! Brown butter goes from perfect to burnt really quickly — next time, keep the heat on medium, stir constantly, and as soon as you see golden specks at the bottom of the pan and smell that nutty aroma, take it off the heat immediately and toss in the sage to stop the cooking process. You’ve got this next time!

5 days ago

Made this for date night with my partner and they said it’s the best meal I’ve ever cooked for them. We paired it with a crisp pinot noir and it was the perfect cozy night in. 100% adding this to our regular date night rotation.

3 days ago

What a perfect date night pick! Did you serve anything on the side? I’m making this for my anniversary next week and trying to plan the full menu.

2 days ago

Love that this was a date night hit! A simple arugula salad with a light lemon vinaigrette is the perfect side — the bright, peppery arugula cuts through the richness of the pasta perfectly, and it comes together in 5 minutes so you don’t have to spend all night in the kitchen.

just now

I’m a total beginner at making fresh pasta and I was intimidated by the medium difficulty rating, but the instructions were so clear and easy to follow! My tortellini were a little wonky shaped, but they tasted just as good as the ones from the fancy Italian place downtown. So proud of myself!

3 days ago

Pro tip: don’t walk away from the butter when it’s browning. I stepped away to answer a work call for 45 seconds and almost burned mine to a crisp. Managed to save it at the last second though, and it still slapped.

2 days ago

Oh my gosh that was me too! I thought I could multi-task while the butter melted and came back to smoke coming out of the pan. Had to dump the first batch and start over, totally worth it though.

2 weeks ago

How long do these need to boil once they’re assembled? I’ve made fresh ravioli before but never tortellini, and I don’t want to undercook them or make them mushy.

1 week ago

Great question! Once you drop them in boiling salted water, they only need about 3-4 minutes — they’ll float to the top when they’re almost done, so let them cook for about 30 seconds after they float and they’ll be perfectly al dente!

1 week ago

Can confirm! I made these last weekend and timed it exactly that way, they were perfect. No mushy pasta, no raw dough, just chewy fresh pasta goodness.

1 week ago

I used a mix of parmesan and asiago for the cheese filling and it was so tangy and delicious! Way more depth of flavor than just parm alone, I highly recommend trying it if you have asiago in the fridge.

5 days ago

That asiago swap sounds incredible! The nutty, sharp flavor of asiago pairs so beautifully with the brown butter and sage, we might have to test that variation for the recipe notes — thanks for the great idea!

2 days ago

My teenager who hates all 'fancy food' went back for three servings of this last night. I was shocked! He said the butter sauce tastes 'like fancy movie theater popcorn but better' which is the highest compliment he can give, honestly. Win for mom!

5 days ago

I added a little squeeze of fresh lemon juice to the sauce right before tossing the pasta in and it brightened the whole thing up so much! Cuts through that rich butter flavor so you don’t feel weighed down after eating a big bowl.

3 days ago

I do this with every brown butter sauce I make! That little hit of acid makes all the difference, I don’t know why more recipes don’t mention it. So glad you tried it!

1 week ago

Hosted a fall dinner party last weekend and served this as the main course, and it was the star of the whole menu. The smell of the sage and brown butter hit people as soon as they walked in the door, it was so cozy and perfect for crisp fall weather.

5 days ago

This is exactly what I was planning to make for my Halloween dinner party next weekend! Did you serve it with any bread to soak up the extra sauce?

3 days ago

I served it with garlic sourdough bread and it was chef’s kiss. Everyone was wiping their plates clean with the bread, no sauce left behind!



