
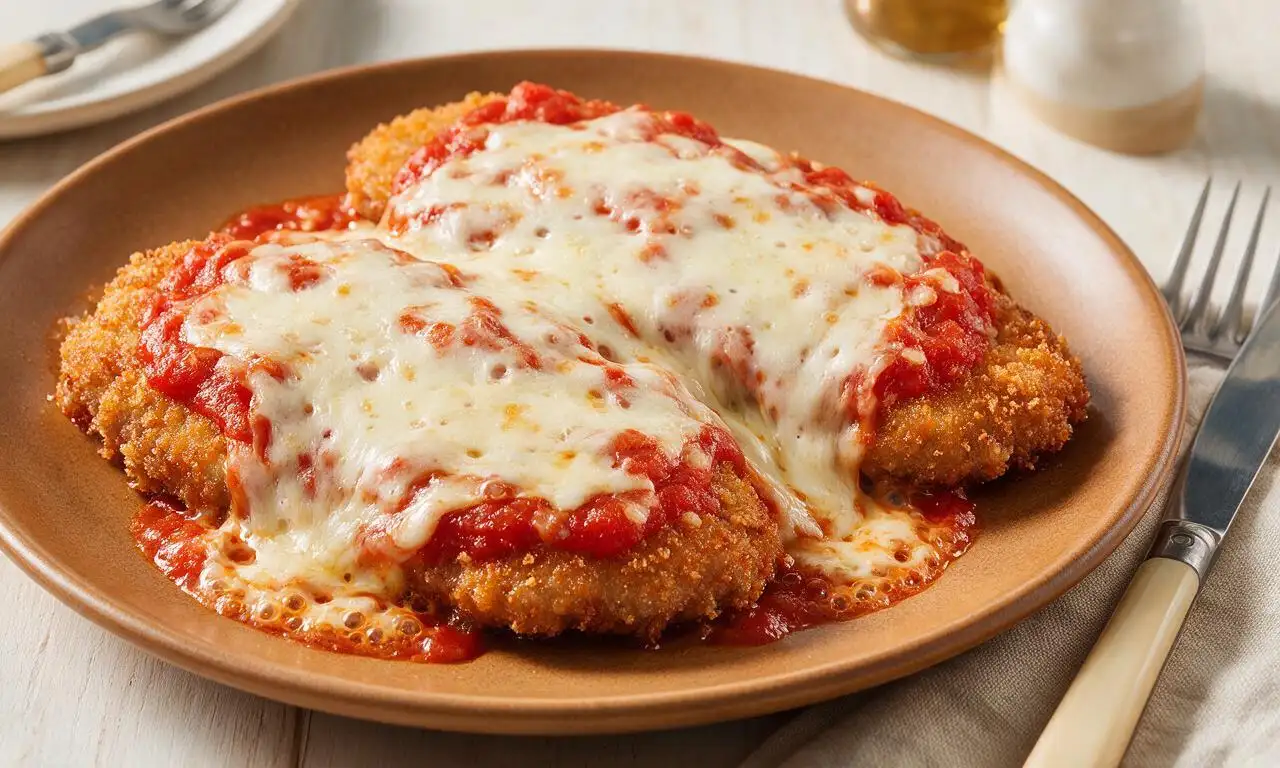
Veal Parmesan

title 1
Veal Parmesan
⏱️ cook time 50 minutes
🍽️ servings 4
⚡ Difficulty medium

intro

Crispy breaded veal cutlets layered with bright marinara and melted gooey cheese, baked to bubbly perfection for a beloved Italian-American comfort food classic.

Ingredients

Thin veal cutlets 450g (4 pieces, ~115g each)
All-purpose flour 80g
Large eggs 2, beaten
Whole milk 60ml
Italian-seasoned panko breadcrumbs 120g
Parmigiano-Reggiano cheese 60g, grated (divided)
Low-moisture mozzarella cheese 225g, sliced ½cm thick
Marinara tomato sauce 500ml
Kosher salt 1 teaspoon
Freshly ground black pepper ½ teaspoon
Garlic powder 1 teaspoon
Neutral frying oil (avocado or canola) 120ml
Fresh basil leaves 10g, for garnish

Steps

1

Pound and Season Veal

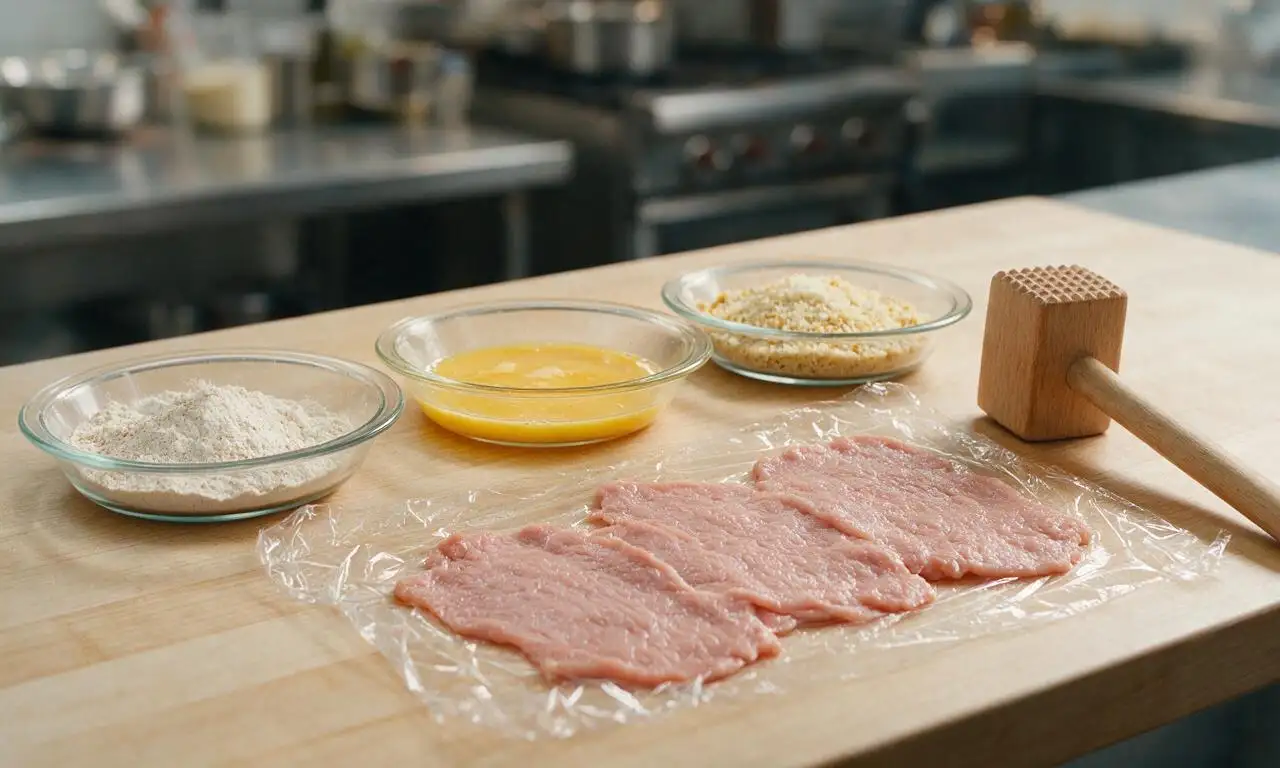
Place veal cutlets between two sheets of plastic wrap, and pound with a flat meat mallet to a uniform 6mm thickness. Season both sides of the pounded veal with ½ teaspoon kosher salt and ¼ teaspoon black pepper. Set up a three-station breading line in shallow dishes: the first dish holds 80g all-purpose flour mixed with ½ teaspoon garlic powder and remaining ¼ teaspoon black pepper; the second dish holds 2 beaten eggs whisked together with 60ml whole milk; the third dish holds 120g panko breadcrumbs mixed with 30g of the grated Parmigiano-Reggiano and remaining ½ teaspoon garlic powder.
Step 1
step1:Pound and Season Veal
2

Bread the Veal Cutlets

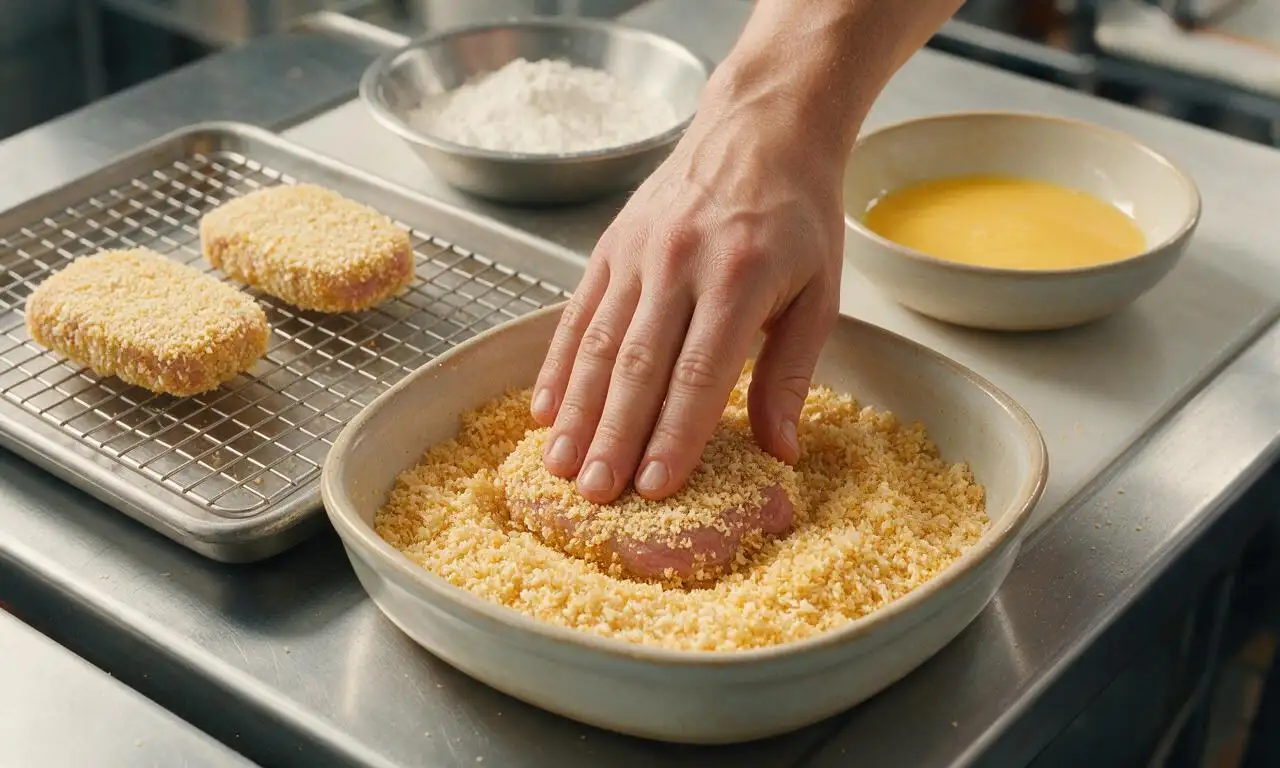
Working with one cutlet at a time, dredge veal first in the seasoned flour, shaking off all excess to leave only a thin, even coating. Next, dip the floured cutlet fully in the egg wash, holding it above the dish for 5 seconds to let excess egg drip off. Finally, press the cutlet firmly into the panko mixture on both sides to ensure breadcrumbs adhere completely, with no bare spots visible. Place breaded cutlets on a wire rack set over a baking sheet, and let rest 10 minutes at room temperature to set the breading.
Step 2
step2:Bread the Veal Cutlets
3

Heat Oil and Fry Cutlets

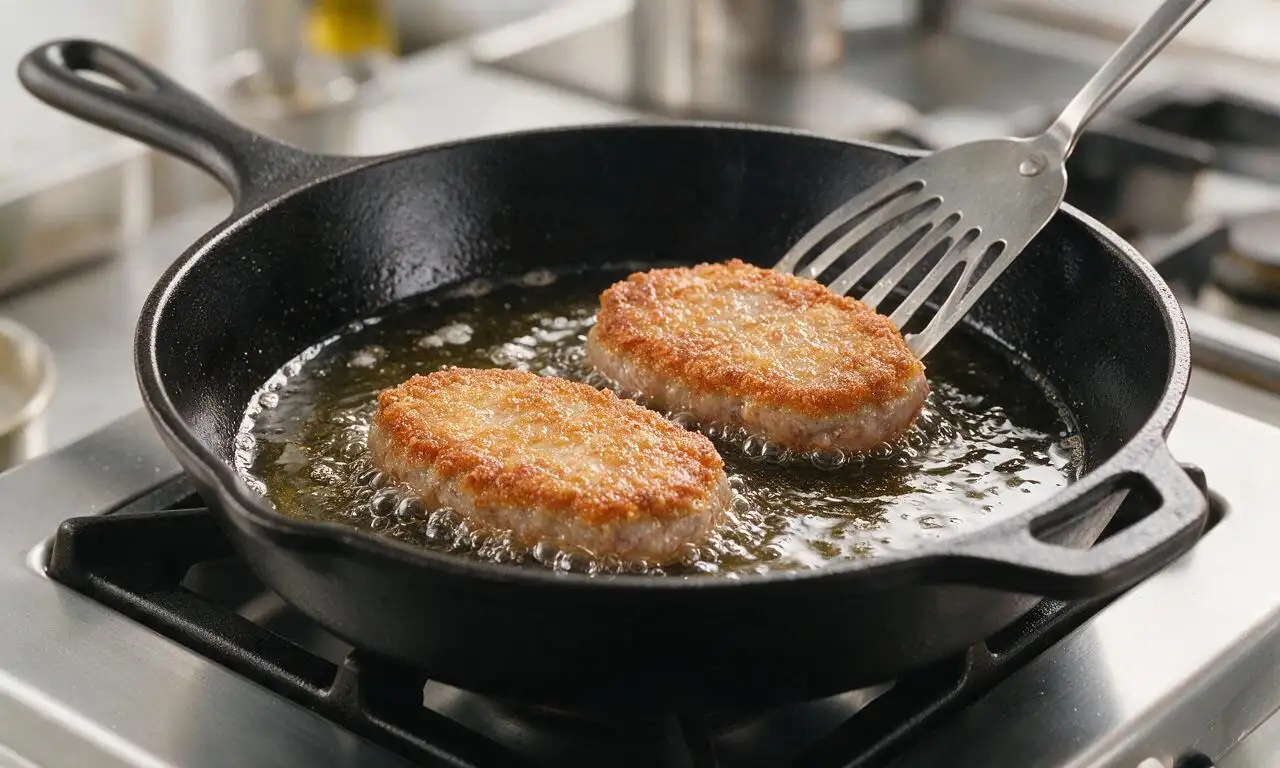
Heat 120ml neutral frying oil in a large heavy-bottomed skillet over medium heat, until the oil reaches 175°C (350°F) — test by dropping one panko crumb: it should sizzle immediately and turn golden in 10 seconds. Fry cutlets in batches of 2 (do not crowd the pan, as this drops oil temperature and makes breading soggy) for 2 minutes per side, until the coating is deep golden brown and crispy. Transfer fried cutlets back to the wire rack, and sprinkle immediately with the remaining ½ teaspoon kosher salt.
Step 3
step3:Heat Oil and Fry Cutlets
4

Layer Sauce and Veal

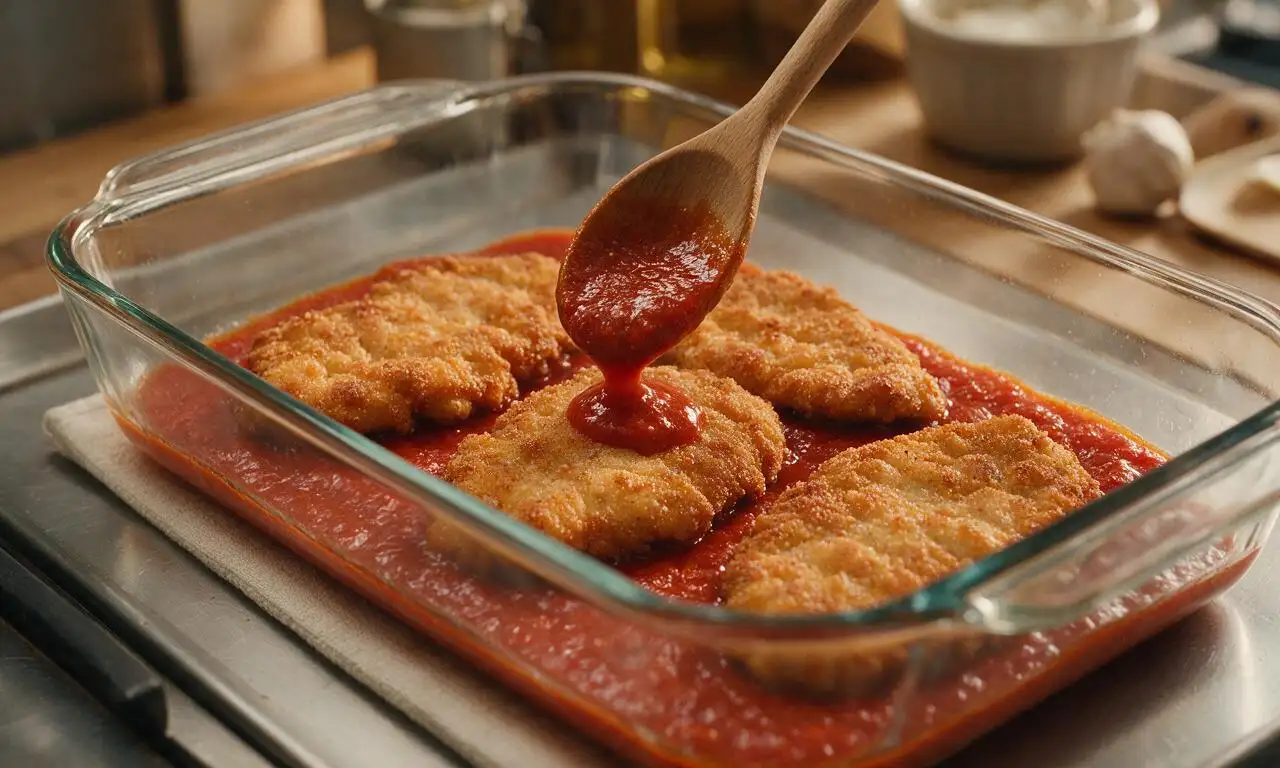
Preheat your oven to 200°C (400°F). Spread 200ml of the marinara sauce evenly across the bottom of a 23x33cm (9x13 inch) glass baking dish. Arrange the fried veal cutlets in a single layer over the sauce, leaving 1cm gaps between each cutlet for air flow. Spoon 2 tablespoons of marinara sauce only over the center of each cutlet — do not fully cover the cutlet with sauce, to keep the breaded edges crispy.
Step 4
step4:Layer Sauce and Veal
5

Top with Cheese and Bake

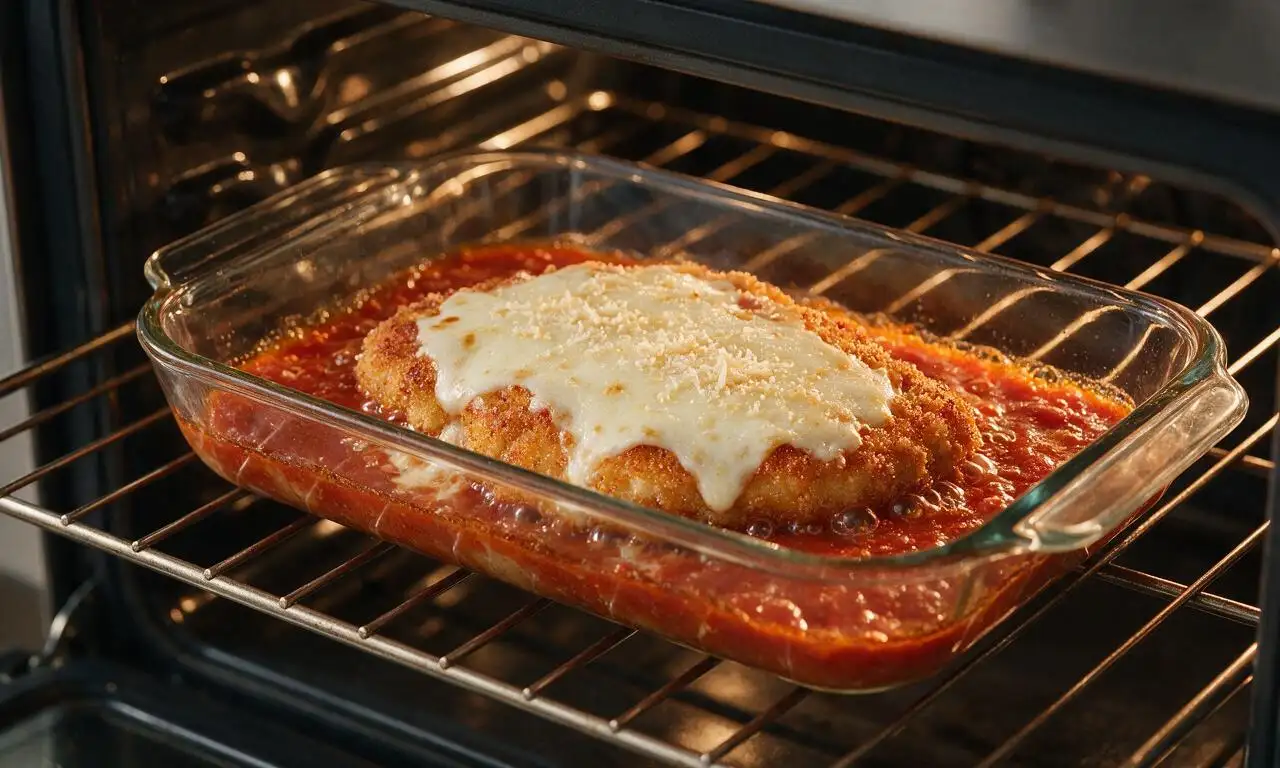
Top each sauced cutlet with an equal portion of sliced low-moisture mozzarella (~55g per cutlet), then sprinkle the remaining 30g of grated Parmigiano-Reggiano evenly over all the cheese. Bake on the middle oven rack for 15 minutes, until the cheese is fully melted, bubbly, and just starting to turn golden at the edges, and the internal temperature of the veal reaches a food-safe 63°C (145°F).
Step 5
step5:Top with Cheese and Bake
6

Rest, Garnish, and Serve

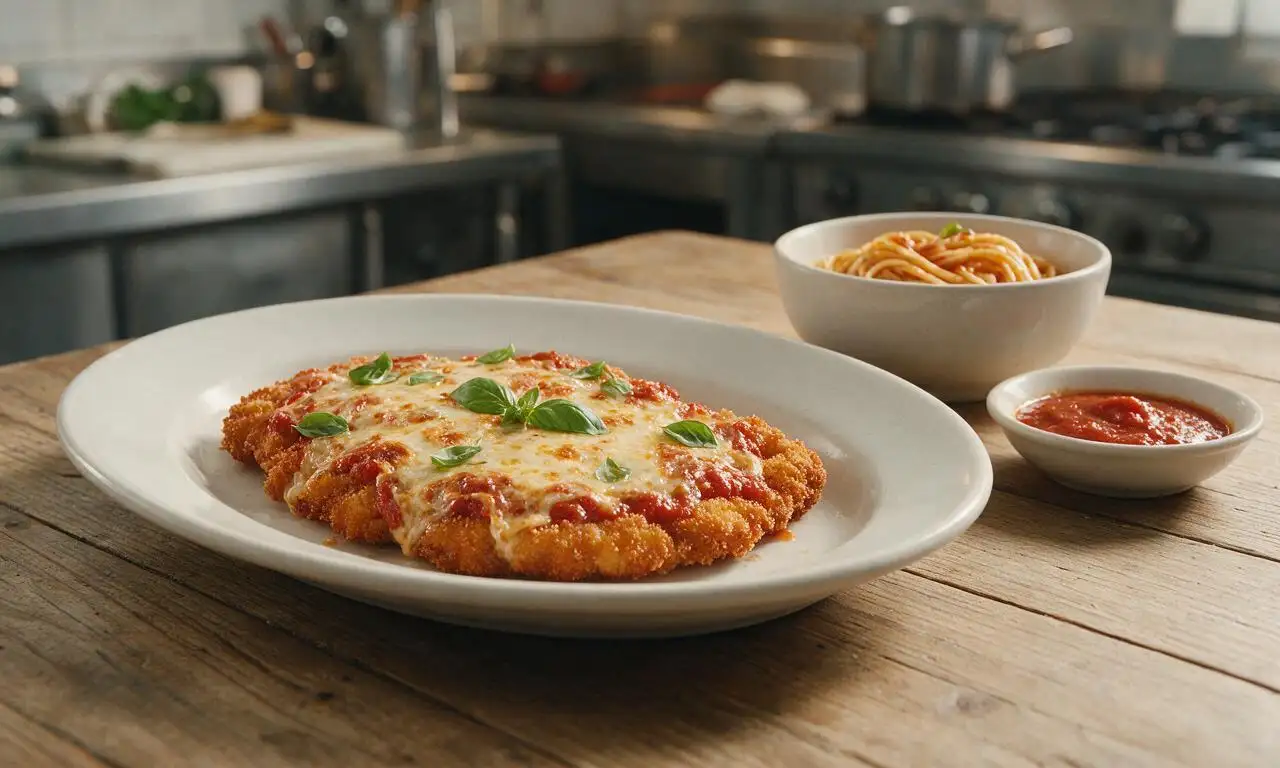
Remove the baking dish from the oven, and let the veal parmesan rest for 5 minutes to allow the cheese to set and juices to redistribute. Garnish with fresh basil leaves before serving, paired with al dente spaghetti or crusty garlic bread if desired.
Step 6
step6:Rest, Garnish, and Serve

Tips

1.Avoid pounding veal cutlets thinner than 6mm, as overly thin cutlets will overcook quickly and become tough; uniform thickness ensures even cooking without dry, chewy edges.
2.Letting breaded cutlets rest for 10 minutes before frying allows the breading layers to adhere securely, so crumbs won’t slide off during frying or baking.
3.Use low-moisture mozzarella for the best melt: fresh mozzarella releases excess water as it bakes, which will make the crispy breading soggy if not thoroughly patted dry first.


✨ You May Also Like

Main Course
🍜 United Kingdom

A showstopping classic of tender seared beef, savory mushroom duxelles, and crisp prosciutto wrapped in flaky golden puff pastry, baked to juicy perfection.

⏱️ 2 hours 1Main Course ★ 4.7
Main Course
🍜 India

Tender charred marinated chicken simmered in a rich, spiced creamy tomato sauce, this iconic Anglo-Indian curry pairs perfectly with basmati rice or warm naan.

⏱️ 50 minuteMain Course ★ 4.6
Main Course
🍜 Thailand

Classic tangy, sweet, and savory Thai stir-fried rice noodles with shrimp, tofu, and crunchy garnishes, balancing all five core Thai flavor profiles.

⏱️ 30 minuteMain Course ★ 4.5
Main Course
🍜 United Kingdom

Crispy golden beer-battered cod and fluffy double-fried chips, served with tangy tartar sauce and malt vinegar: the timeless, beloved British pub comfort classic.

⏱️ 45 minuteMain Course ★ 4.7
Main Course
🍜 Mexico

Smoky, chile-marinated pork tacos with caramelized pineapple, fresh cilantro, and lime: a beloved classic Mexican street food perfect for casual summer gatherings.

⏱️ 1 hour 45Main Course ★ 4.8
Main Course
🍜 United States

Crunchy Fritos corn chips layered with savory beef chili and melted cheddar, topped with cool, zesty fixings for a beloved, cozy Tex-Mex comfort food.

⏱️ 35 minuteMain Course ★ 4.8

Veal Parmesan:Frequently Asked Questions

1.What cut of veal works best for classic crispy veal parmesan? ▾
Opt for thin veal scallopini cut from the leg, ideally ¼-inch thick for even, fast cooking. If your cutlets are thicker, pound them evenly between two sheets of plastic wrap with a flat meat mallet. This uniform thickness prevents undercooked thick spots or dried-out, overcooked thin edges, and helps the breading stick consistently across the whole cutlet.
2.How do I keep the breading from falling off the veal while cooking? ▾
Stick to the standard three-step breading station order: flour first, then egg and milk wash, then panko, and let breaded cutlets rest on a wire rack for 10 minutes before cooking. Don’t press the panko too hard into the cutlet, and make sure your oil is fully hot before adding veal to avoid the breading sliding off during searing.
3.Can I use regular breadcrumbs instead of Italian-seasoned panko? ▾
You can, but you won’t get that signature light, shatteringly crisp crust. If you only have plain regular breadcrumbs, mix in 1 teaspoon of dried Italian seasoning, ¼ teaspoon of garlic powder, and a pinch of salt to match the seasoned profile. Note the final crust will be denser and less crunchy than the panko version.
4.Why does my veal turn out tough and chewy instead of tender? ▾
Tough veal almost always stems from two issues: cutlets that are too thick, or overcooking. Veal is very lean, so it only needs 1-2 minutes per side to sear to golden crispness before baking, and should reach an internal temp of 145°F. Pounding cutlets to an even ¼-inch thickness also eliminates tough, chewy uneven spots.
5.What type of cheese gives the best melt for the topping? ▾
Stick to a mix of low-moisture, part-skim mozzarella for that classic stretchy, gooey melt, plus a small handful of freshly grated Parmigiano-Reggiano for nutty, salty depth. Avoid fresh mozzarella packed in water unless you pat it extremely dry first—it releases too much moisture and will make your crispy breading soggy during baking.
6.Do I have to bake the veal after searing it? ▾
Searing alone cooks the thin veal through, but baking lets you layer on marinara and cheese so everything melts into that bubbly, cohesive classic dish. You only need 8-10 minutes in a 400°F oven, just long enough to heat the marinara through and melt the cheese completely, so you won’t lose that crispy breading texture.
7.Can I prep components of this dish ahead of time for busy weeknights? ▾
You can bread the raw veal cutlets and store them on a wire rack-lined tray in the fridge for up to 24 hours before searing, but wait to add sauce and cheese until right before baking. Pre-breaded cutlets actually hold their crust even better after a short rest, making this a great low-fuss prep step for busy nights or dinner parties.
8.How do I keep the dish from getting soggy under the marinara? ▾
Skip the urge to douse cutlets in thick layers of marinara. Spoon just 2-3 tablespoons of warm, thick marinara over each seared cutlet right before adding cheese and baking, and make sure your marinara isn’t watery—simmer it for a few extra minutes to thicken if it looks runny, as excess moisture is the top cause of soggy veal parm.
9.What’s a good non-dairy swap for the egg wash and milk? ▾
For the egg wash, whisk ½ cup unsweetened oat milk with 2 tablespoons cornstarch to create a sticky base that helps breading adhere just as well as egg. Swap the whole milk for extra oat milk, and use dairy-free low-moisture mozzarella and a sprinkle of nutritional yeast in place of Parmesan for a satisfying dairy-free version.
10.What oil should I use to sear the veal cutlets? ▾
Use a neutral, high-smoke-point oil like canola, avocado, or light olive oil, heated to 350°F before adding the cutlets. Avoid extra-virgin olive oil, which has a low smoke point that will burn and leave a bitter taste on your crust, and don’t overcrowd the pan—cook in batches to keep oil temperature consistent.
11.Can I substitute chicken or eggplant for veal in this recipe? ▾
Absolutely! For a chicken parm swap, pound thin chicken breast cutlets to the same ¼-inch thickness as the veal, and add 1 minute per side of searing time since chicken is denser. For eggplant parm, slice eggplant into ½-inch rounds, salt them for 30 minutes to draw out moisture, then bread and cook the same way for a vegetarian take.
12.What internal temperature should veal reach to be safe to eat? ▾
The USDA recommends cooking veal cutlets to a minimum internal temperature of 145°F, measured with an instant-read thermometer inserted into the thickest part of the cutlet, followed by a 3-minute rest. These thin cutlets hit that temp quickly during searing and the short bake, so temping correctly helps you avoid dry, overcooked meat.
13.How do I get that extra-shatteringly crisp panko crust? ▾
Toast your Italian panko in a dry skillet for 2-3 minutes over medium heat, stirring often, until it’s light golden brown before you use it for breading. This pre-toasting step adds an extra layer of crunch that holds up better against marinara and cheese, so you won’t end up with a soft, mushy crust even after baking.
14.How should I store leftovers, and how long do they keep? ▾
Let leftover cutlets cool completely, then store them in an airtight container in the fridge for up to 3 days. For the best texture when reheating, place cutlets on a wire rack over a baking sheet and warm in a 375°F oven for 10-12 minutes, until cheese is bubbly and crust re-crisps—skip the microwave, which turns breading soggy and chewy.
15.What side dishes pair best with classic veal parmesan? ▾
Stick to traditional Italian-American pairings that cut through the rich, cheesy, saucy flavors: buttery garlic bread, al dente spaghetti tossed in a little extra marinara, a crisp Caesar salad, or roasted broccoli with a squeeze of lemon. Skip heavy, overly creamy sides, which will make the meal feel too dense and rich.
16.Do I need to season each step of the breading process? ▾
Yes! For the most flavorful, well-balanced crust, add a pinch of salt and black pepper to the flour, a small pinch to the egg and milk mixture, and a light pinch to the seasoned panko. If you only season the final breadcrumb layer, the crust will taste flat, and the veal won’t pick up any rounded seasoning as it cooks.

Comments (13)

2 days ago

OMG this veal parm was a total game changer for our Sunday family dinner! My kids devoured every bite and asked for seconds before I even sat down. The crust stayed so crispy even after topping with sauce and cheese, I’ll never use my old breading recipe again. SO good!!

3 days ago

Tasted amazing, but I struggled to get the veal to cook evenly without burning the breading. Any tips for keeping the heat just right on a cast iron skillet? I ended up with a couple pieces that had super dark crust before the center was done.

2 days ago

I had the same issue first try! Turn your heat down to medium-low instead of medium, and let the pan preheat for a full 5 minutes before you add the veal. No more burnt edges for me after that!

1 day ago

Great question! I always recommend medium-low heat for cast iron when breading proteins, as cast iron holds heat really well. You can also pound your veal to an even 1/4 inch thickness across the whole cutlet so it cooks at the same rate, no raw centers!

1 week ago

Made this for a little potluck with my neighbors last weekend and everyone was begging for the recipe! I prepped the breaded veal cutlets the night before and fried them up right before guests arrived, it worked like a charm. The crispy panko crust is *chef’s kiss*.

5 days ago

So glad the prep-ahead trick worked for you! Storing breaded cutlets uncovered on a wire rack in the fridge overnight actually helps the breading adhere even better, which is why they turned out so crispy. Thanks for bringing this to your potluck!

2 weeks ago

I was intimidated to make veal parm at home because I thought it’d be too fancy for my weeknight cooking skill level, but this recipe was so straightforward! 50 minute cook time was totally accurate, I had it on the table right when my partner got home from work. 10/10.

1 week ago

That’s what we love to hear! Classic veal parm doesn’t have to be restaurant-only, so I’m stoked you gave it a shot for a weeknight meal. Next time try adding a little sprinkle of fresh basil on top right before serving for an extra pop of flavor!

2 hours ago

Used gluten free panko for this because of my celiac and it came out just as crispy as the regular version! Served it over zucchini noodles for a lower carb dinner and I didn’t even miss the pasta. Will absolutely be adding this to my monthly meal prep rotation.

5 days ago

Flavor was incredible, but I found the recipe a little salty when I used pre-shredded parmesan from the grocery store. Did I do something wrong? I followed the measurements exactly otherwise.

3 days ago

Oh I learned that the hard way too! Pre-shredded parm has added salt and anti-caking agents that make it saltier than freshly grated. I switched to grating my own right before breading and it fixed the salt issue completely.

2 days ago

Great catch! Pre-shredded cheese does tend to have higher sodium content, so if you use it I recommend cutting the added salt in the breading mix by about half. Freshly grated parmesan will always give you the best melt and flavor balance, too!

yesterday

My grandma used to make veal parm for family holidays when I was a kid, and this is the first recipe that’s come even close to how hers tasted! The crispy crust, the tangy marinara, the melty mozzarella… it brought back so many good memories. Thank you for this recipe!

2 hours ago

That means the absolute world to me! Family recipe nostalgia is the best compliment I could get. I’m so glad this version lived up to your grandma’s classic, that’s what cooking is all about.

30 minutes ago

Just pulled this out of the oven and WOW, my whole apartment smells like an Italian restaurant! I added a little extra mozzarella because I’m a cheese fiend, and it’s perfectly melty and stringy exactly how I like it. Can’t wait to dig in.

5 minutes ago

The extra mozzarella move is genius, I do that every time too! Wait till you take the first bite, that crispy crust is unreal. I’ve made this three times in the last month and it never disappoints.

1 week ago

Meal prepped this on Sunday and ate portions for lunch all week, it held up so much better than I thought it would! I stored the veal and sauce separate so the crust didn’t get soggy, and just heated it up in the toaster oven at work. 10/10 for meal prep wins.

3 days ago

This was my first time ever cooking veal, I was so nervous I’d mess it up! The recipe said medium difficulty and I’d agree, I definitely had to take my time with the breading station, but it turned out pretty good! Only issue was my mozzarella didn’t get that nice bubbly brown top like in the photos. What did I do wrong?

2 days ago

Oh I had that problem my first go round! You have to make sure your oven broiler is on for the last 2-3 minutes of baking, just keep a close eye on it so it doesn’t burn. That gives you that perfect golden bubbly cheese top every time.

1 day ago

Congrats on cooking veal for the first time, that’s such a win! Bev is totally right about the broiler trick — I finish mine under the broiler for 2 minutes max to get that melty, browned cheese top. Just make sure your oven rack is 6 inches from the broiler so it melts evenly without scorching.

5 days ago

Made these as sliders for our college football watch party last weekend and they were a HIT! I cut the veal cutlets into smaller 3 inch pieces before breading, put them on little brioche buns with a dollop of marinara, and people went back for thirds. Will absolutely be making these for every game day now.

3 days ago

The veal parm slider idea is genius! I never thought to portion them for game day, that’s such a fun crowd-pleasing twist. Thanks for sharing that hack, I’m definitely going to try that for my next watch party.

just now

I used to order veal parm every time we went out for Italian because I thought it was too hard to make at home, but this recipe proved me wrong! The double breading step is the secret to that perfect crisp that doesn’t get soggy under the sauce, I’m never ordering takeout veal parm again.

2 weeks ago

I added a 1/4 teaspoon of red pepper flakes to the breading mix and a little sprinkle on top of the cheese before baking for a tiny kick, and it was chef’s kiss! My husband who hates “fancy restaurant food” even said this is better than the veal parm at our local Italian spot. Win for weeknight dinners!

1 week ago

The red pepper flake hack sounds amazing, I’m definitely trying that next time! I added a little garlic powder to the breading last time I made this and it was so flavorful, love that you can tweak the seasonings to fit your taste.

5 days ago

Love that spicy twist! Red pepper flakes in the breading adds such a nice subtle heat that cuts through the richness of the cheese and fried veal. I’ll have to add that as a variation tip on the recipe, thanks for sharing!



