
vegetarian burrito casserole

title 1
vegetarian burrito casserole
⏱️ cook time 35 minutes
🍽️ servings 6
⚡ Difficulty easy

intro

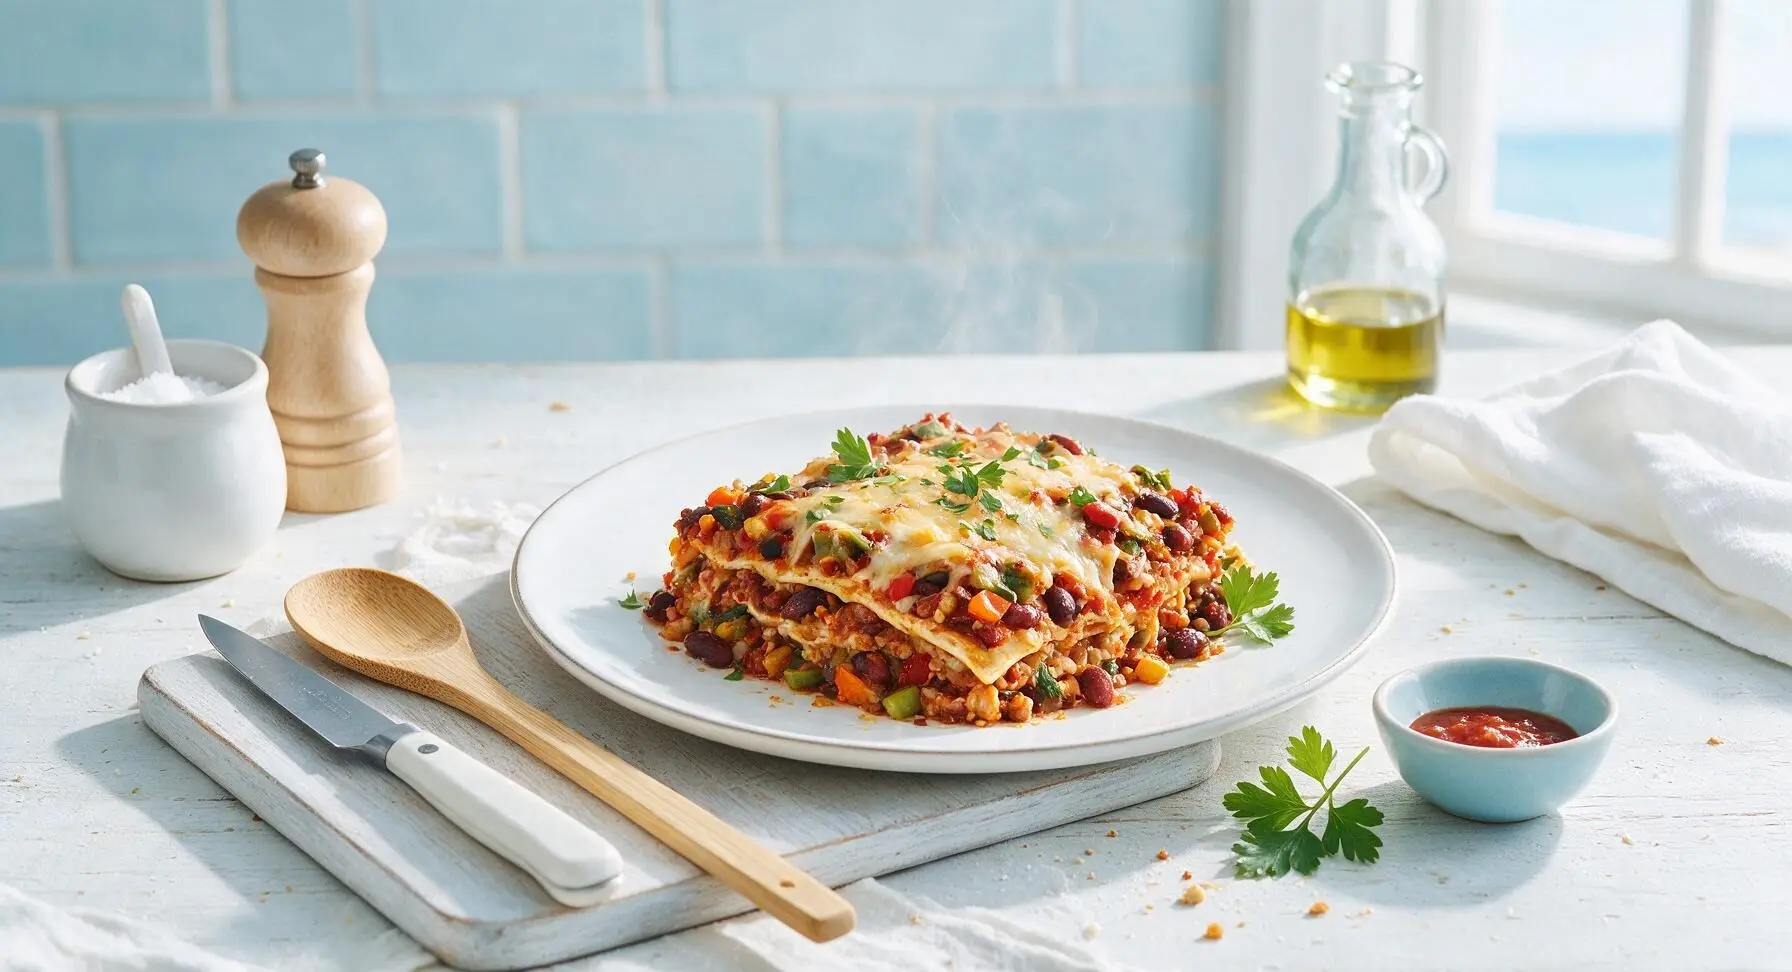
Hearty layered Tex-Mex bake packed with beans, veggies, melted cheese, and bold burrito flavors—no rolling required, ready in under an hour for cozy, satisfying weeknight meals.

Ingredients
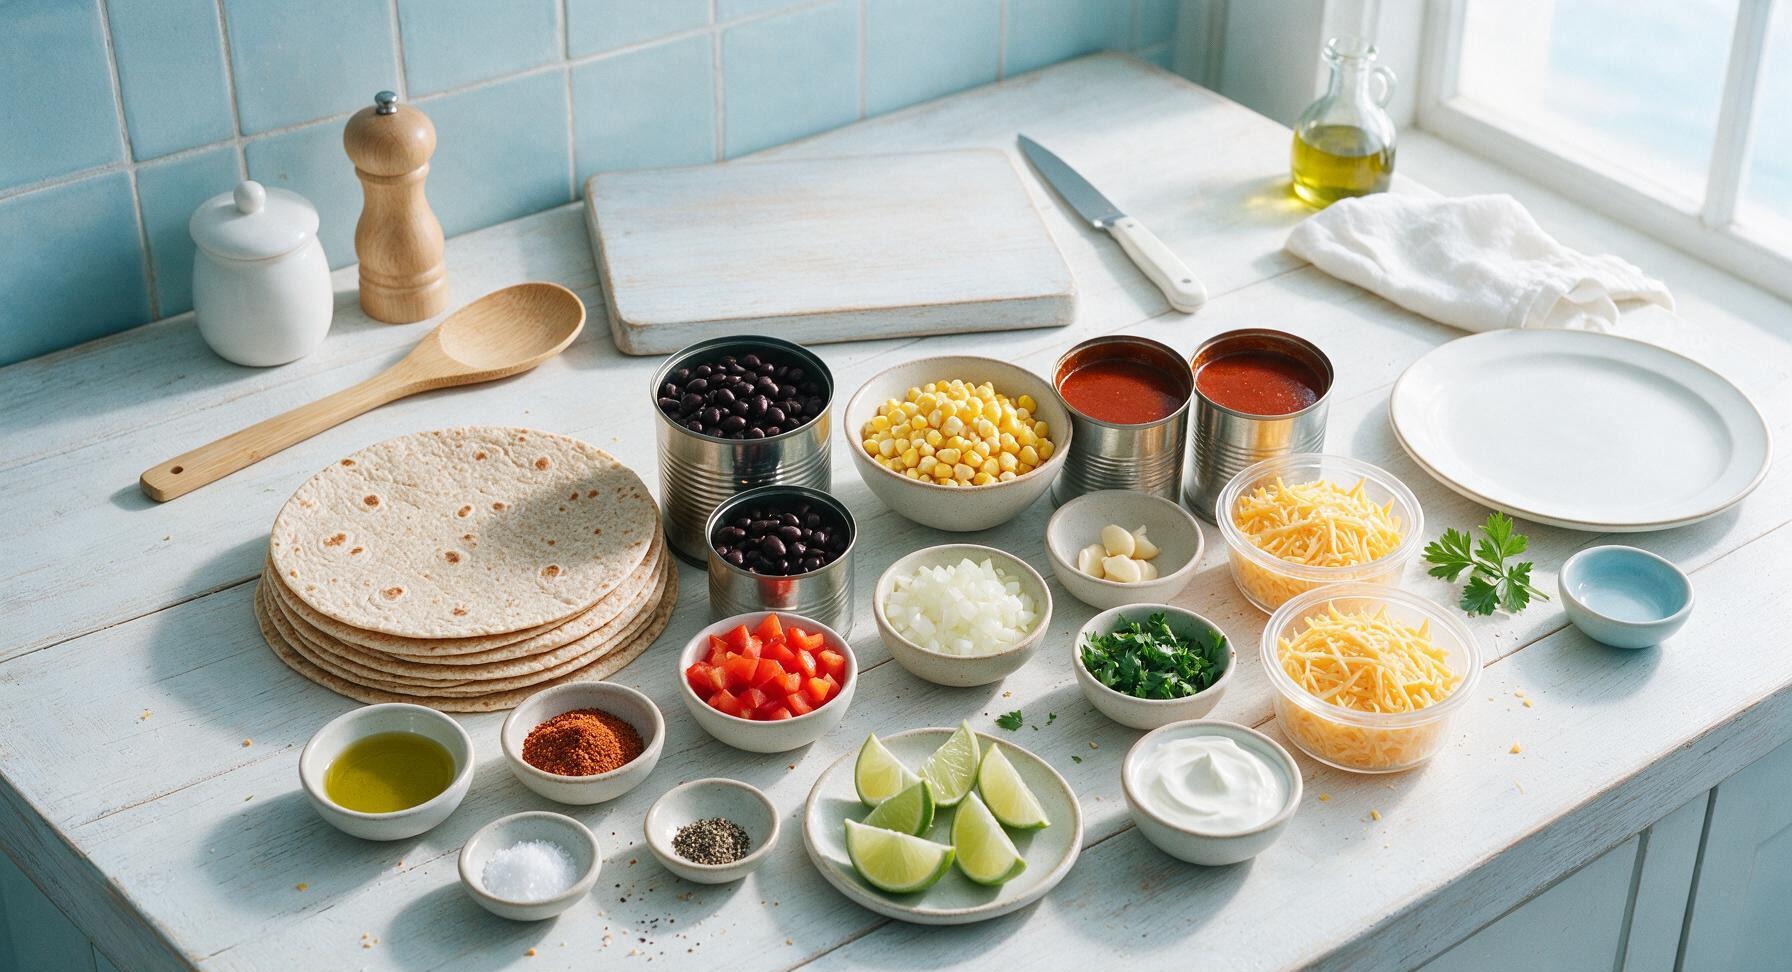
8-inch whole wheat flour tortillas 6 each
Canned black beans, rinsed and drained 2 (15oz) cans
Frozen sweet corn, thawed 1 cup
Mild red enchilada sauce 2 (10oz) cans
Shredded sharp cheddar cheese, divided 1.5 cups
Medium red bell pepper, diced 1 each
Small yellow onion, diced 1 each
Garlic cloves, minced 3 each
Taco seasoning blend 2 tablespoons
Extra virgin olive oil 1 tablespoon
Kosher salt 1/2 teaspoon
Ground black pepper 1/4 teaspoon
Fresh cilantro, chopped (for garnish) 1/4 cup
Lime, cut into wedges (for garnish) 1 each
Sour cream (for garnish) 1/2 cup

Steps

1

Sauté Base Vegetables

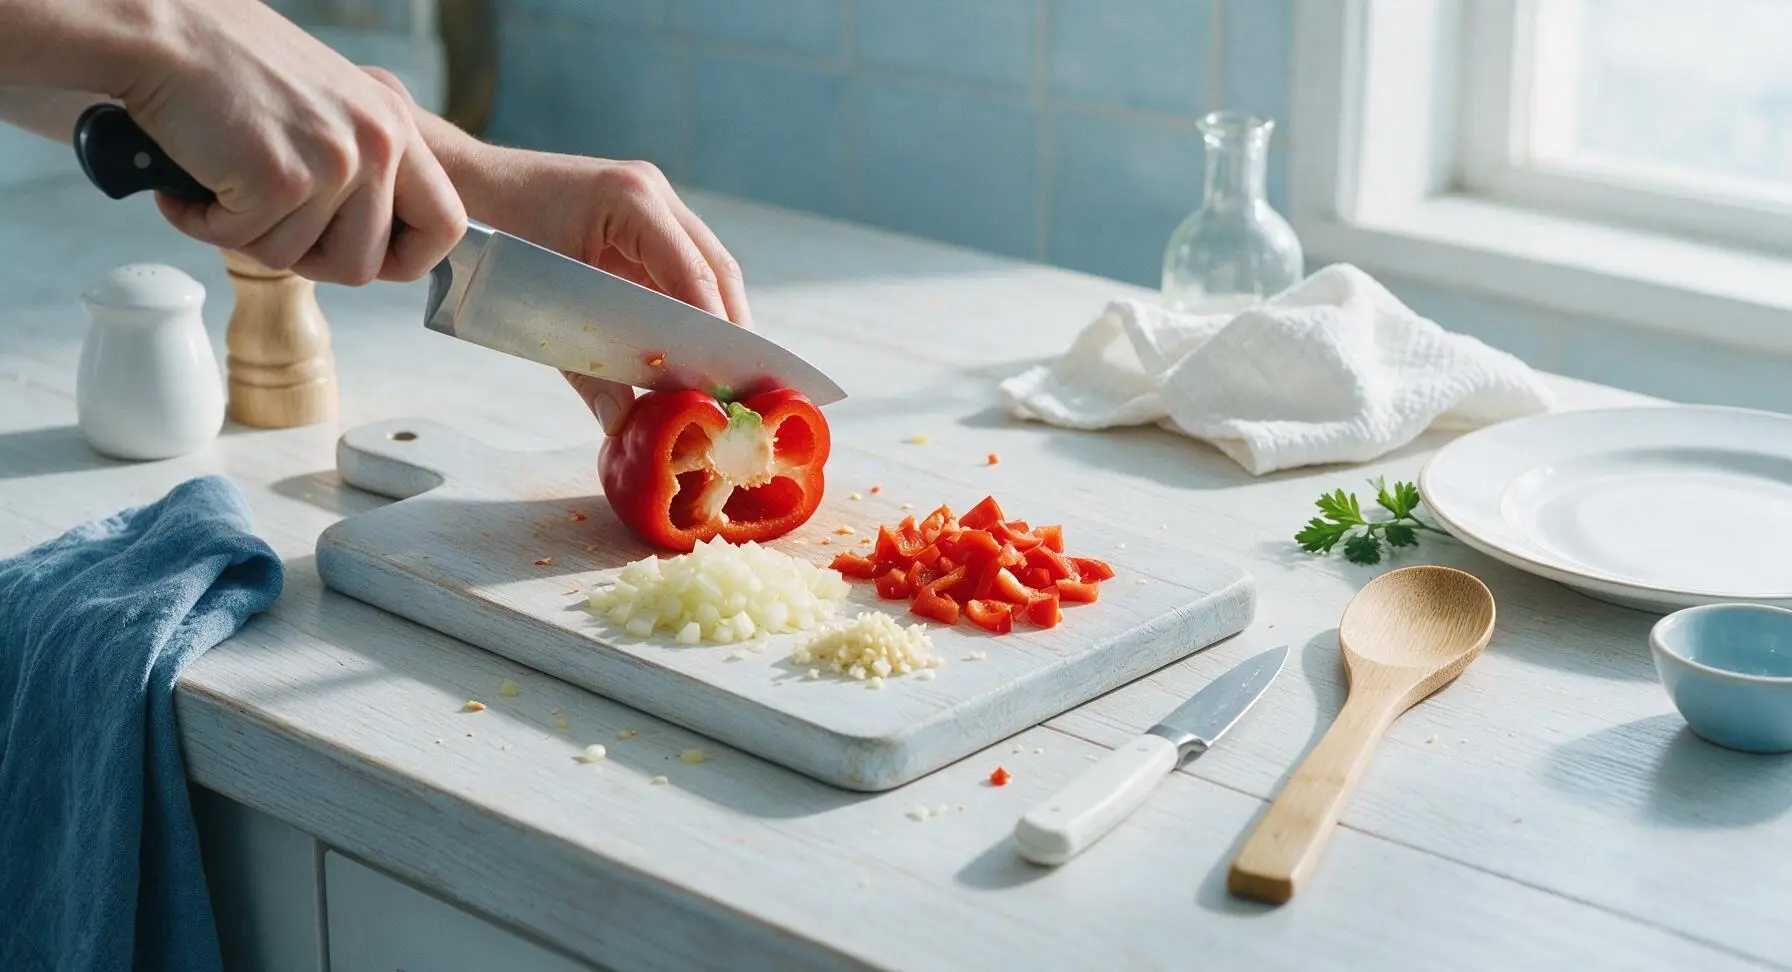
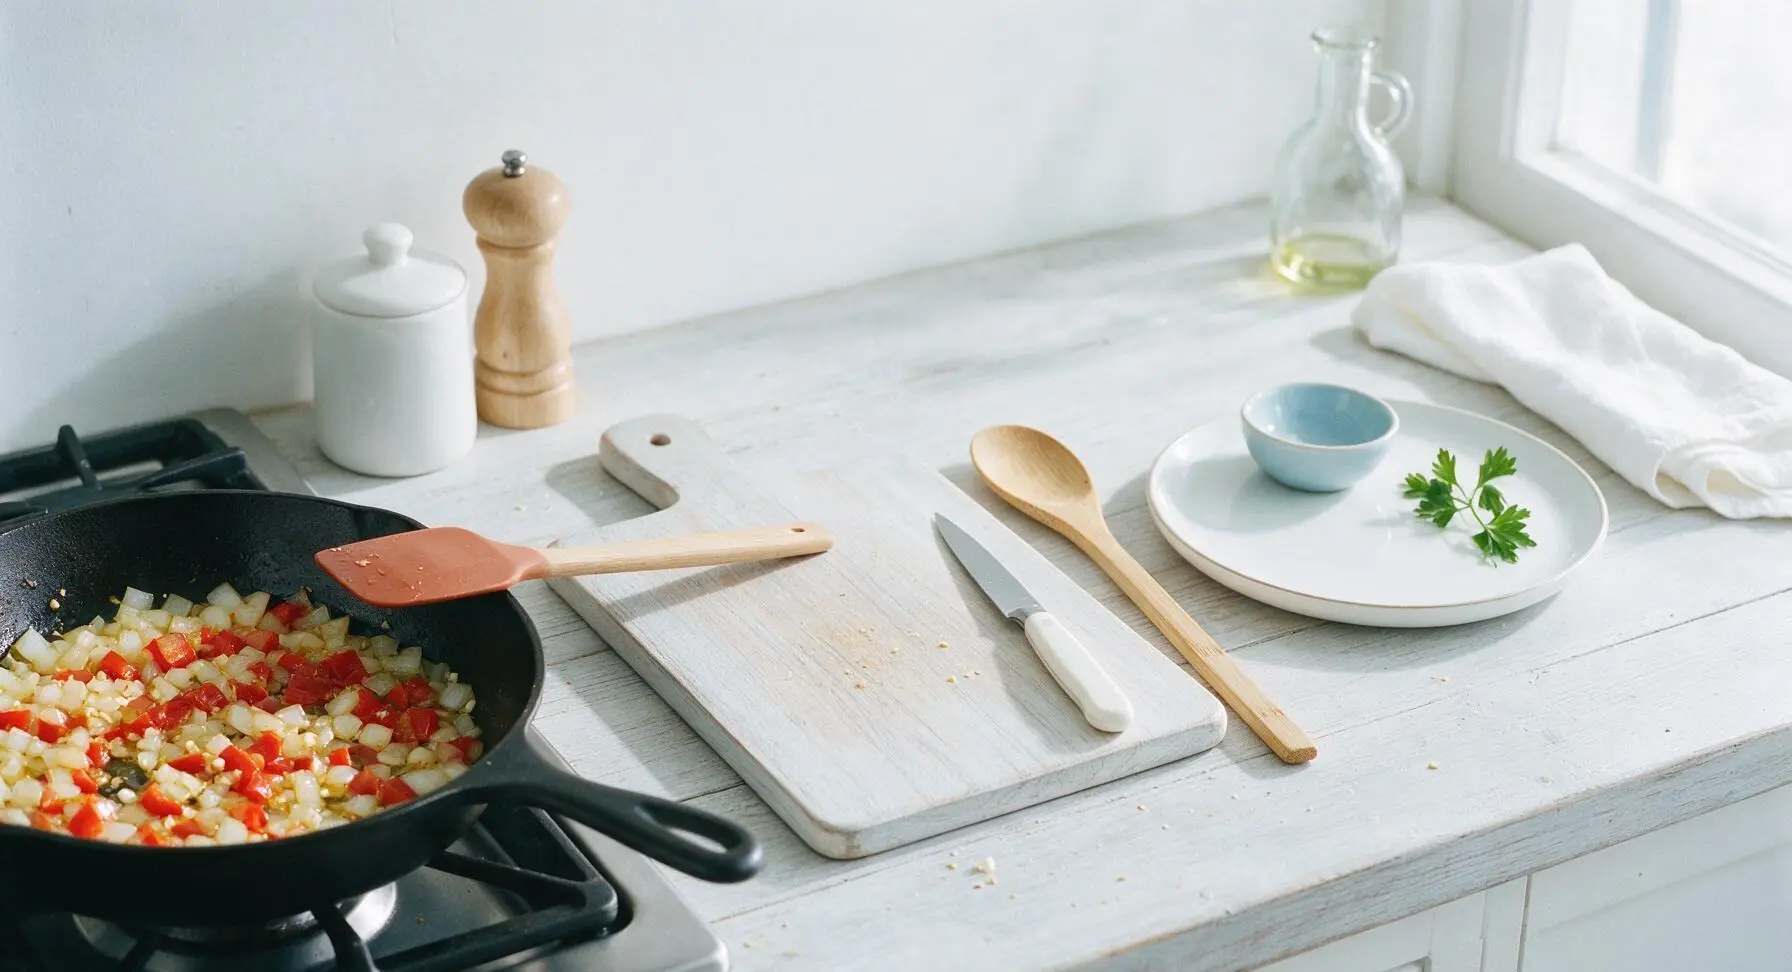
Preheat oven to 375°F (190°C). Pull the bamboo cutting board and chef’s knife to center-left of the counter. Dice the small yellow onion and red bell pepper into uniform 1/2-inch pieces, mince the 3 garlic cloves. Heat 1 tablespoon olive oil in the 10-inch carbon steel skillet over medium heat. Add diced onion and bell pepper, sauté for 5 minutes until soft and slightly translucent, then add garlic and cook 30 seconds more until fragrant. Season with 1/2 teaspoon kosher salt and 1/4 teaspoon black pepper.
Step 1
step1:Sauté Base Vegetables
Step 1
step1:Sauté Base Vegetables
2

Mix Bean Filling

Pull the clear glass mixing bowl to the counter center. Add the rinsed, drained black beans, thawed sweet corn, cooked onion-pepper-garlic mixture, 2 tablespoons taco seasoning, and 1.5 cups of the red enchilada sauce. Stir thoroughly with the silicone spatula until all ingredients are evenly coated in sauce and seasoning, with no dry clumps of taco seasoning remaining.
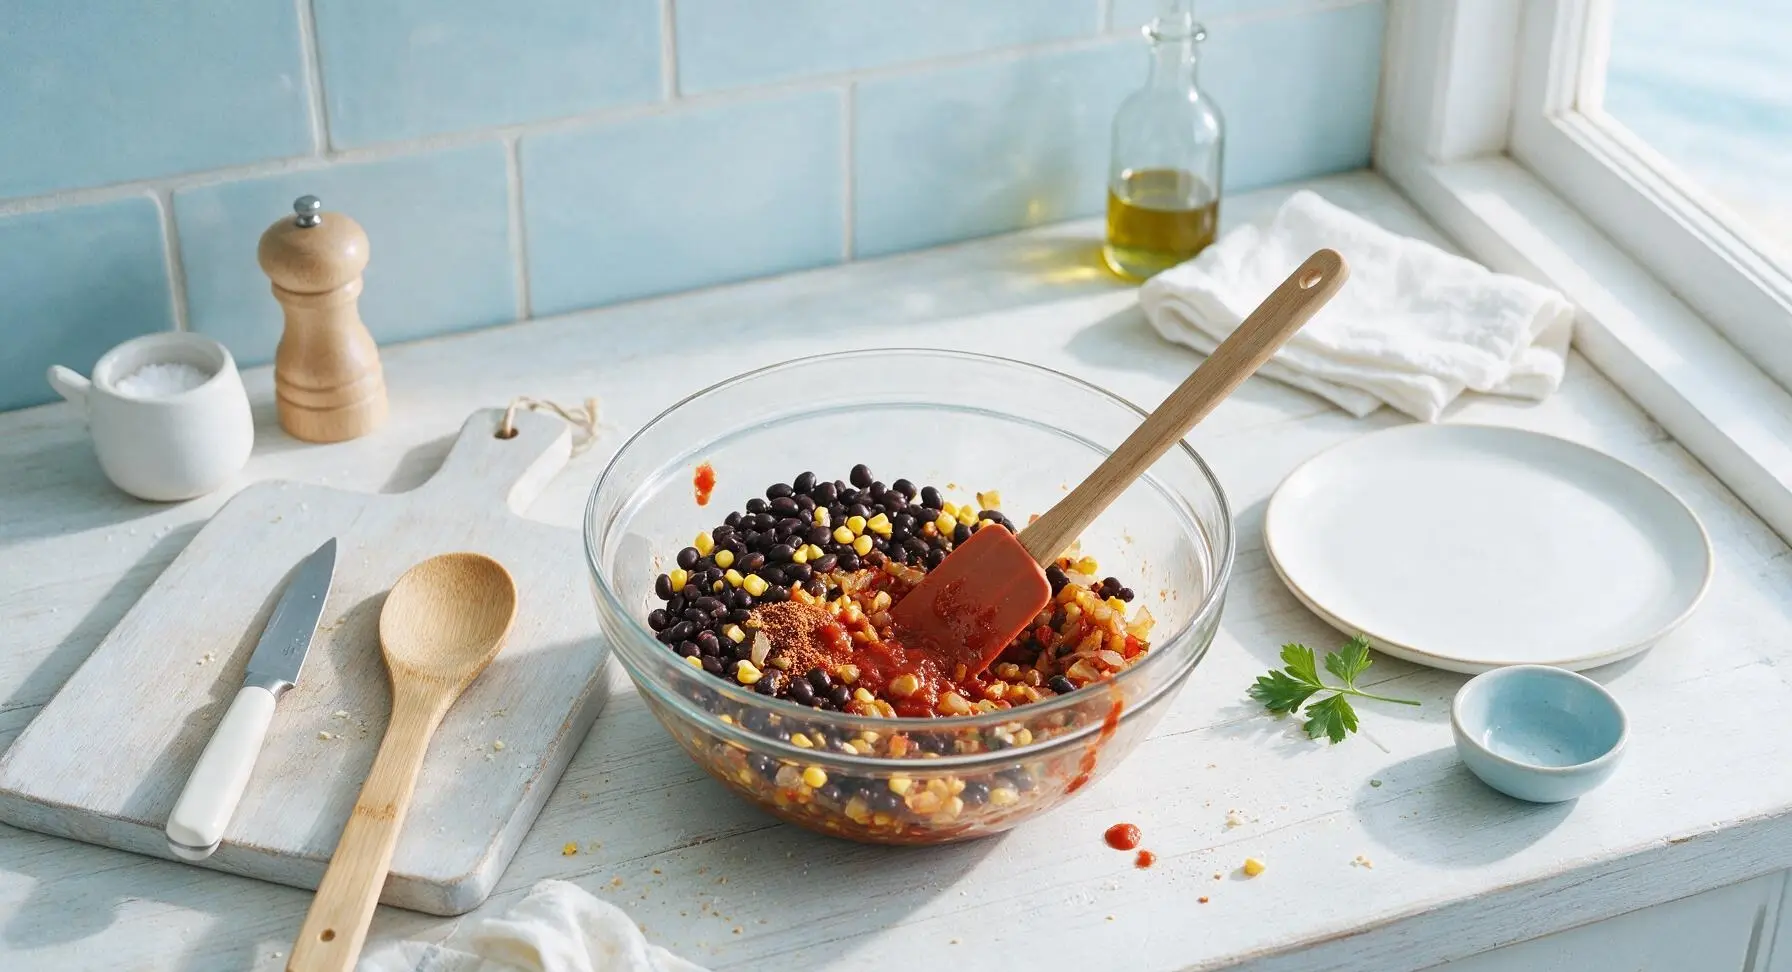
Step 2
step2:Mix Bean Filling
3

Prep Baking Dish Layers

Pull the 9x13 inch matte white ceramic baking dish from the lower cabinet to the counter center. Pour 1/2 cup of remaining enchilada sauce across the bottom of the dish, spreading it in a thin even layer with the silicone spatula to prevent tortillas from sticking. Tear 3 of the 8-inch whole wheat tortillas into halves, arranging them in a single overlapping layer over the sauce to fully cover the dish bottom.
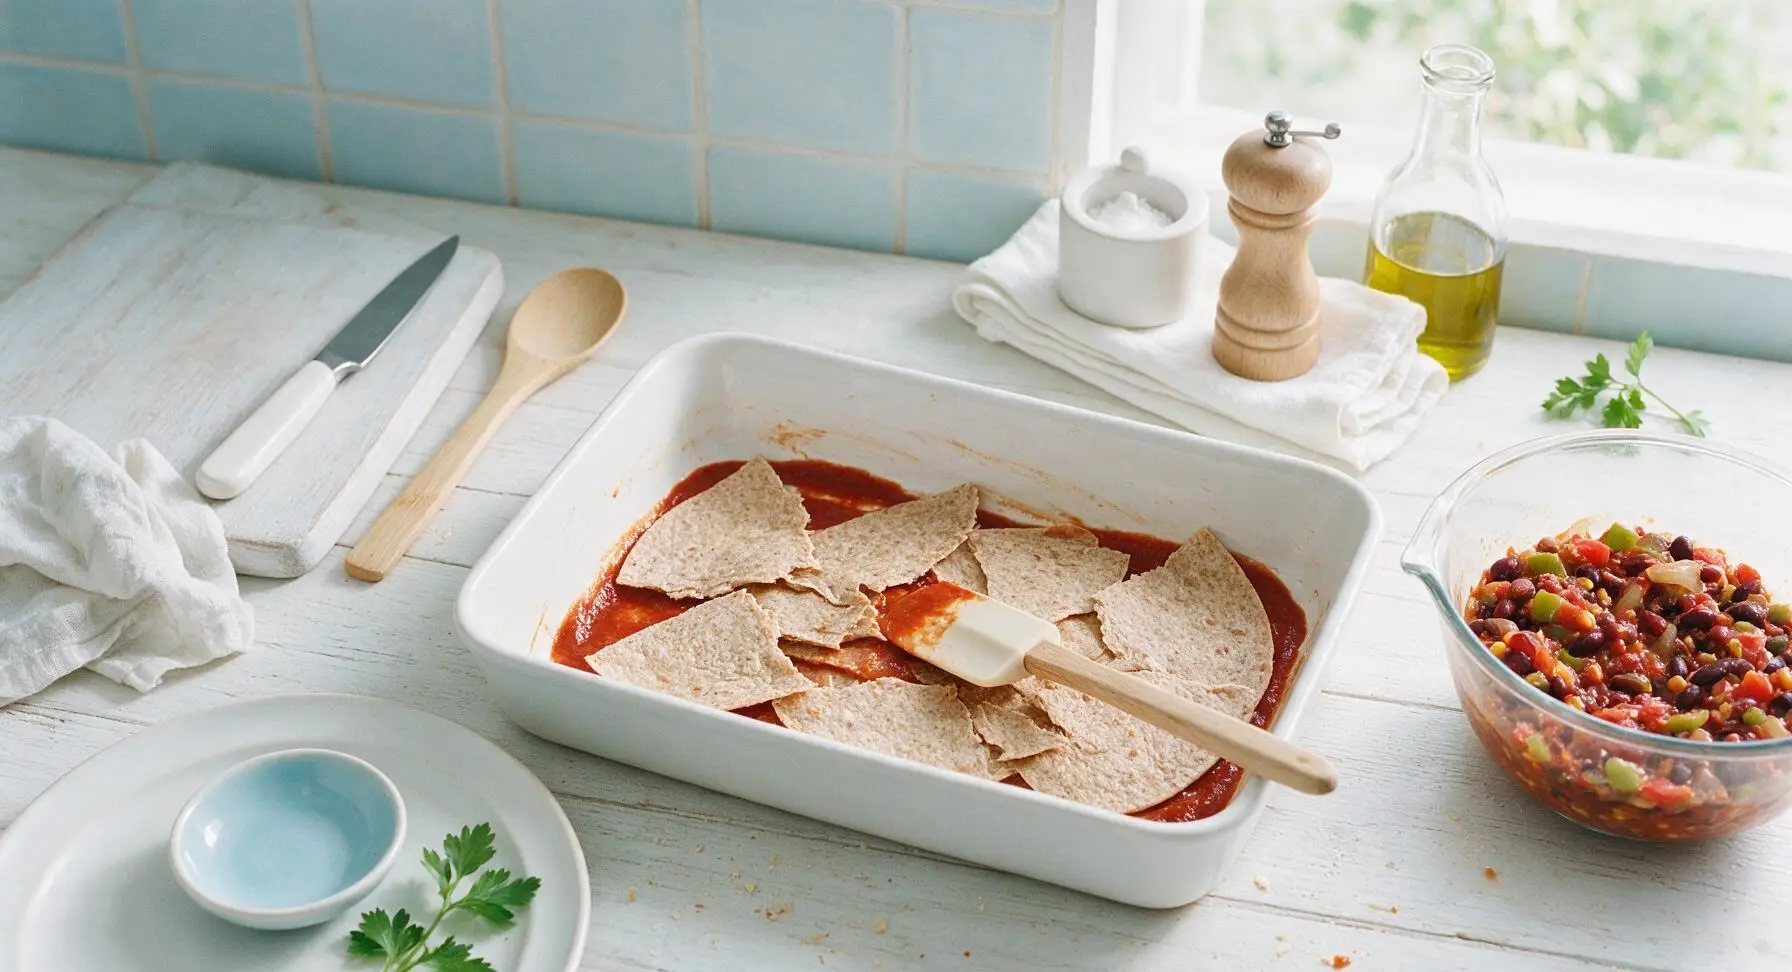
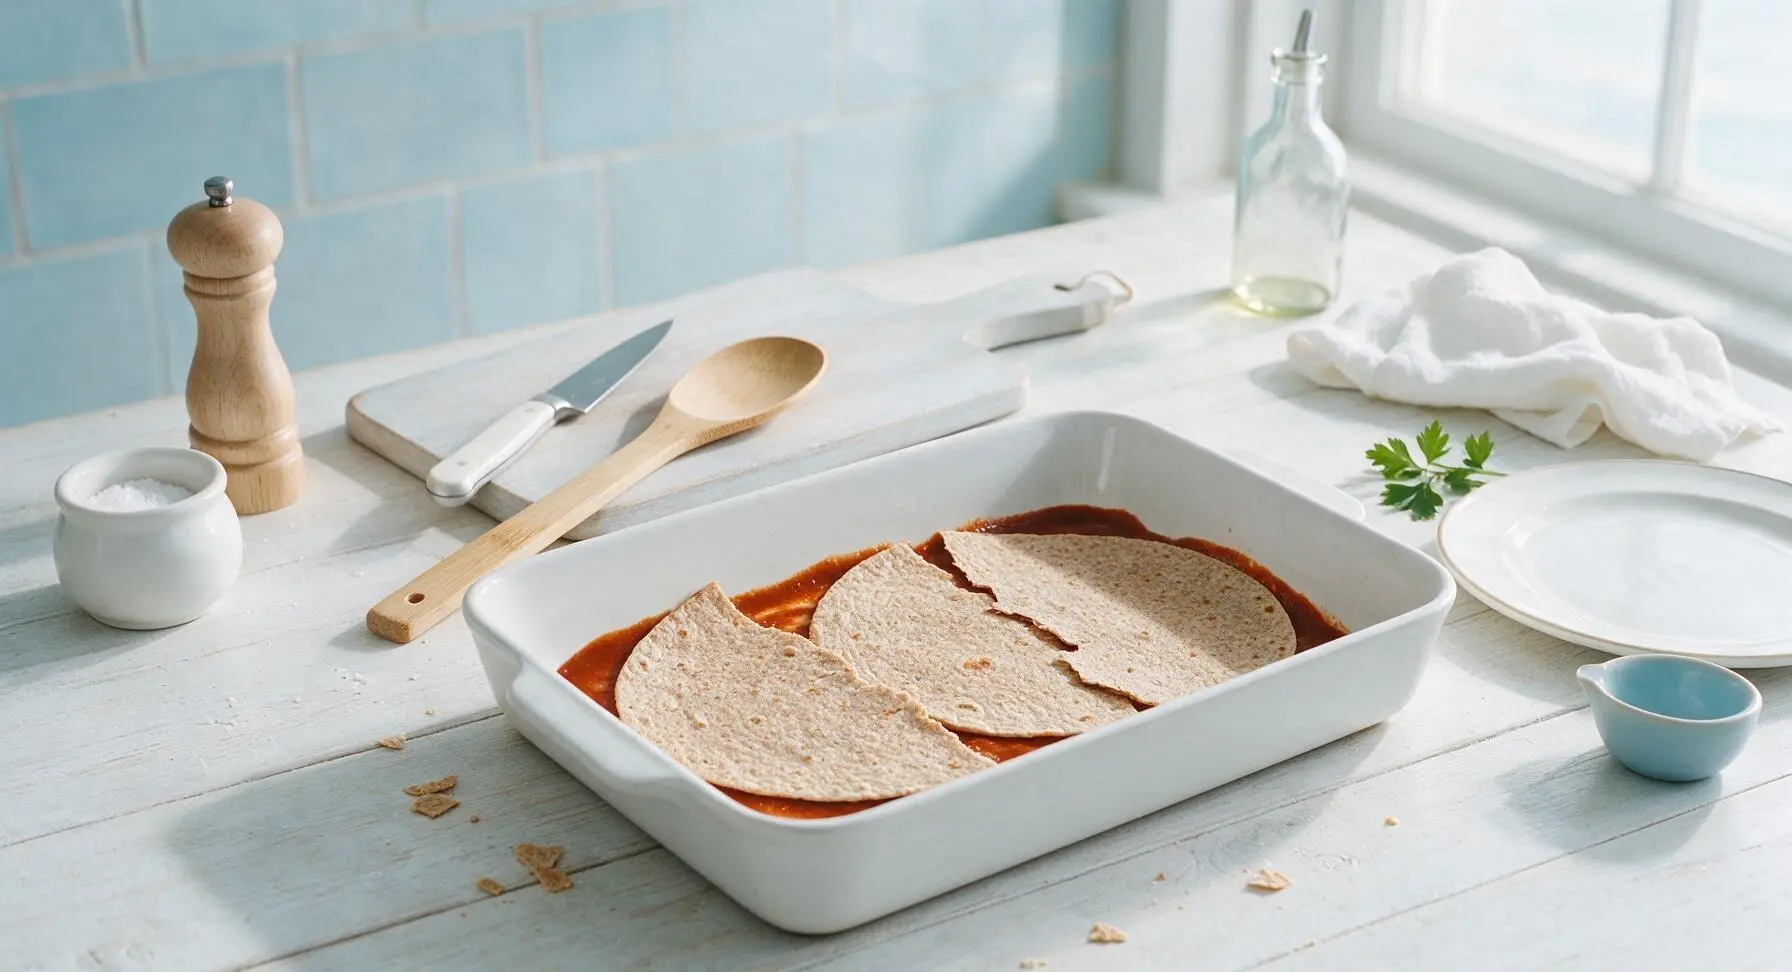
Step 3
step3:Prep Baking Dish Layers
Step 3
step3:Prep Baking Dish Layers
4

Layer Filling and Cheese

Scoop half of the bean and vegetable mixture evenly over the tortilla layer, spreading it smooth with the spatula. Sprinkle 1/2 cup of shredded cheddar cheese evenly over the bean layer. Repeat the layering sequence: add another overlapping layer of torn tortilla halves (using the remaining 3 tortillas), top with the rest of the bean mixture, and another 1/2 cup of cheddar cheese.
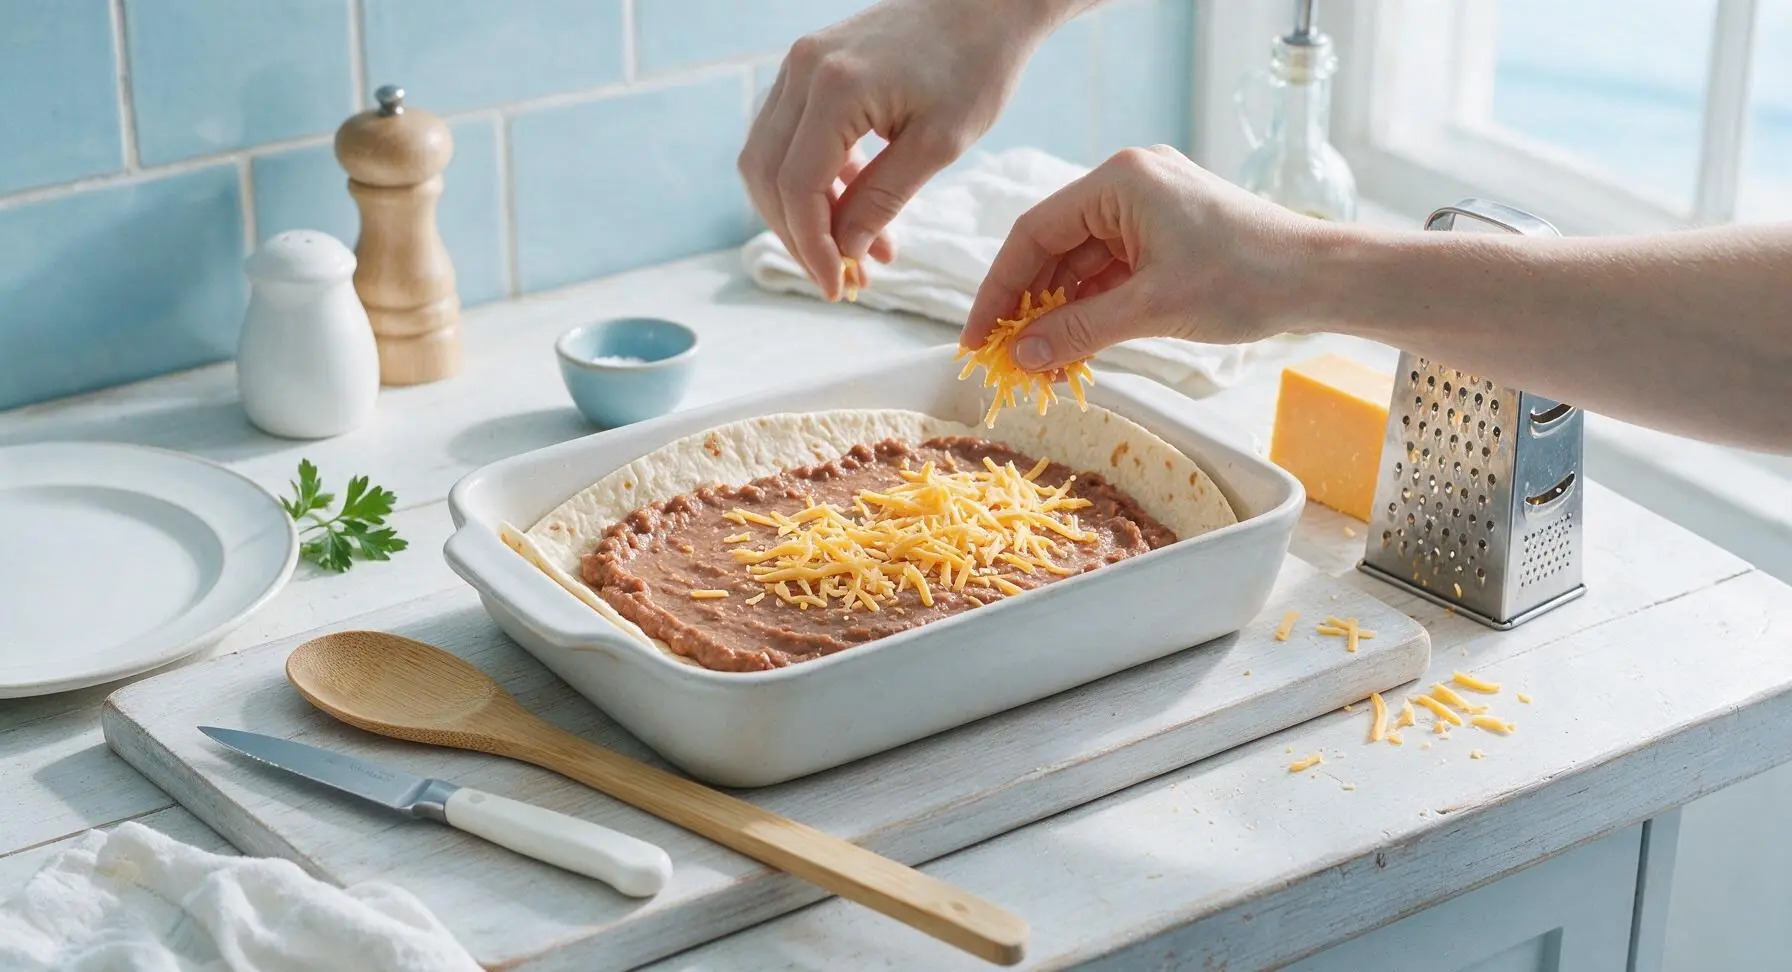
Step 4
step4:Layer Filling and Cheese
5

Top and Bake Covered

Pour the remaining 1/2 cup enchilada sauce over the top cheese layer, spreading it gently to cover the surface. Sprinkle the last 1/2 cup of shredded cheddar evenly over the sauce. Cover the baking dish tightly with aluminum foil, crimping the edges to seal in steam. Place on the middle oven rack, bake for 25 minutes covered.
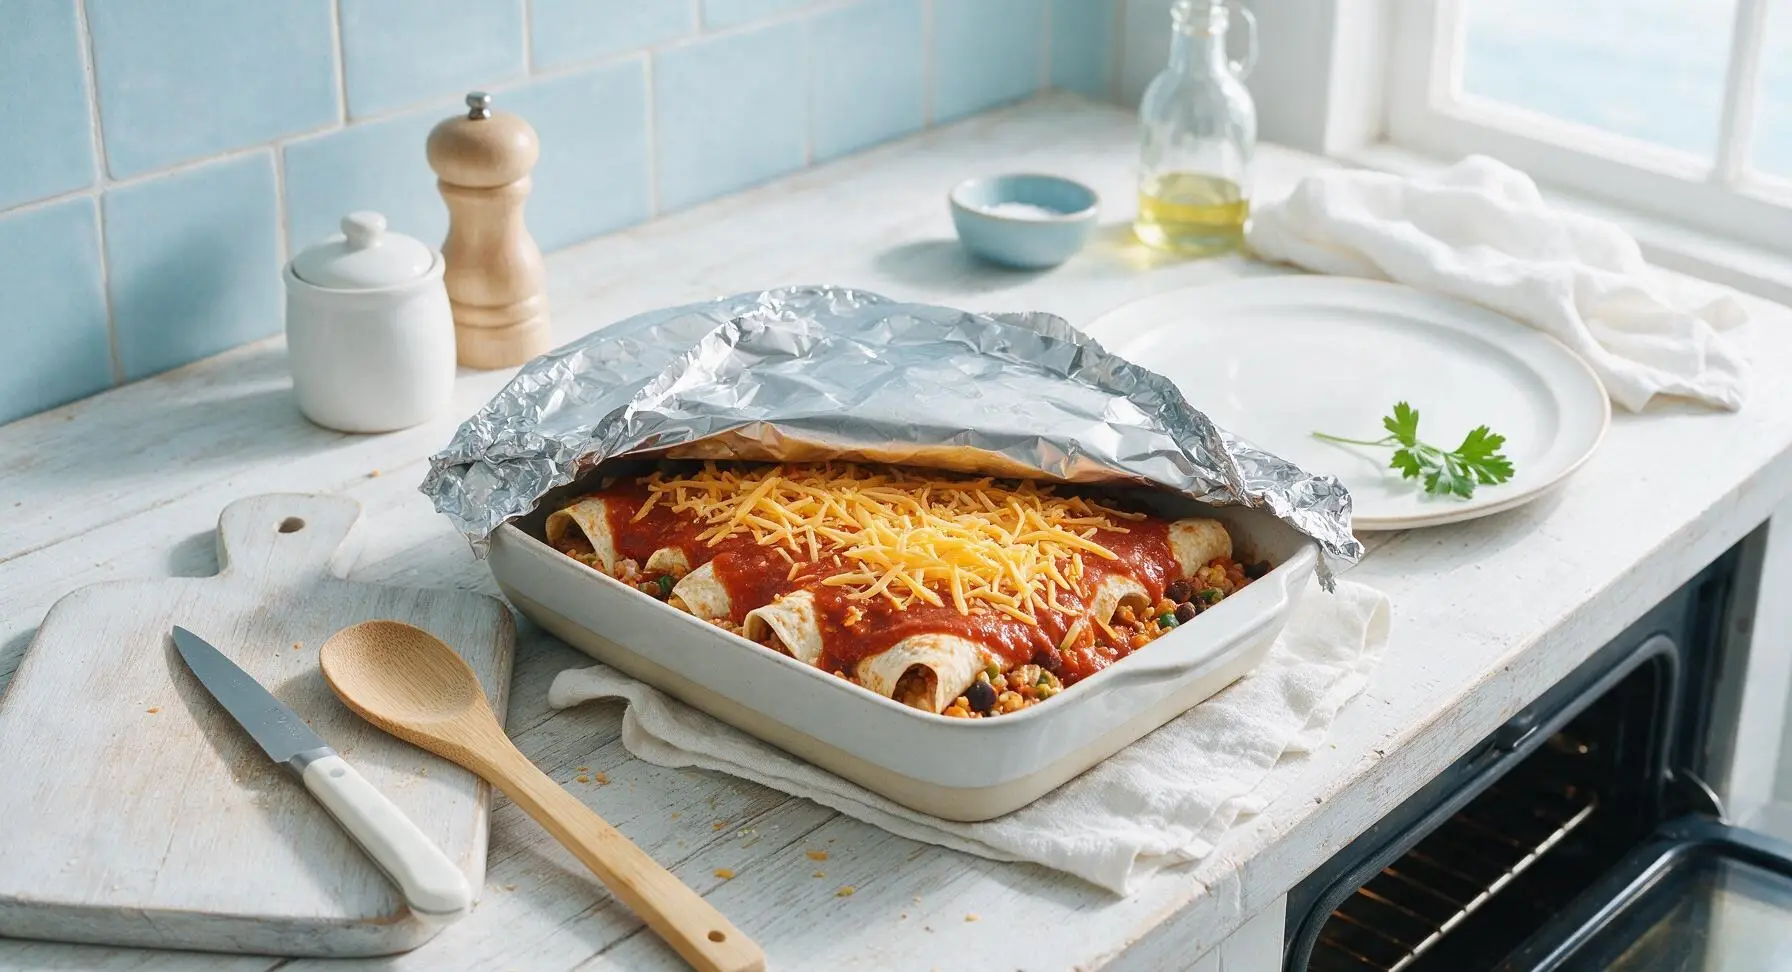
Step 5
step5:Top and Bake Covered
6

Finish Baking Uncovered

After 25 minutes of covered baking, carefully pull the dish from the oven (use oven mitts!) and remove the aluminum foil. Return the dish to the oven, bake uncovered for an additional 10 minutes, until the cheese on top is fully melted, bubbly around the edges, and just starting to turn golden brown in spots. Remove from the oven and let rest for 10 minutes before slicing—this helps the layers set so slices hold their shape.
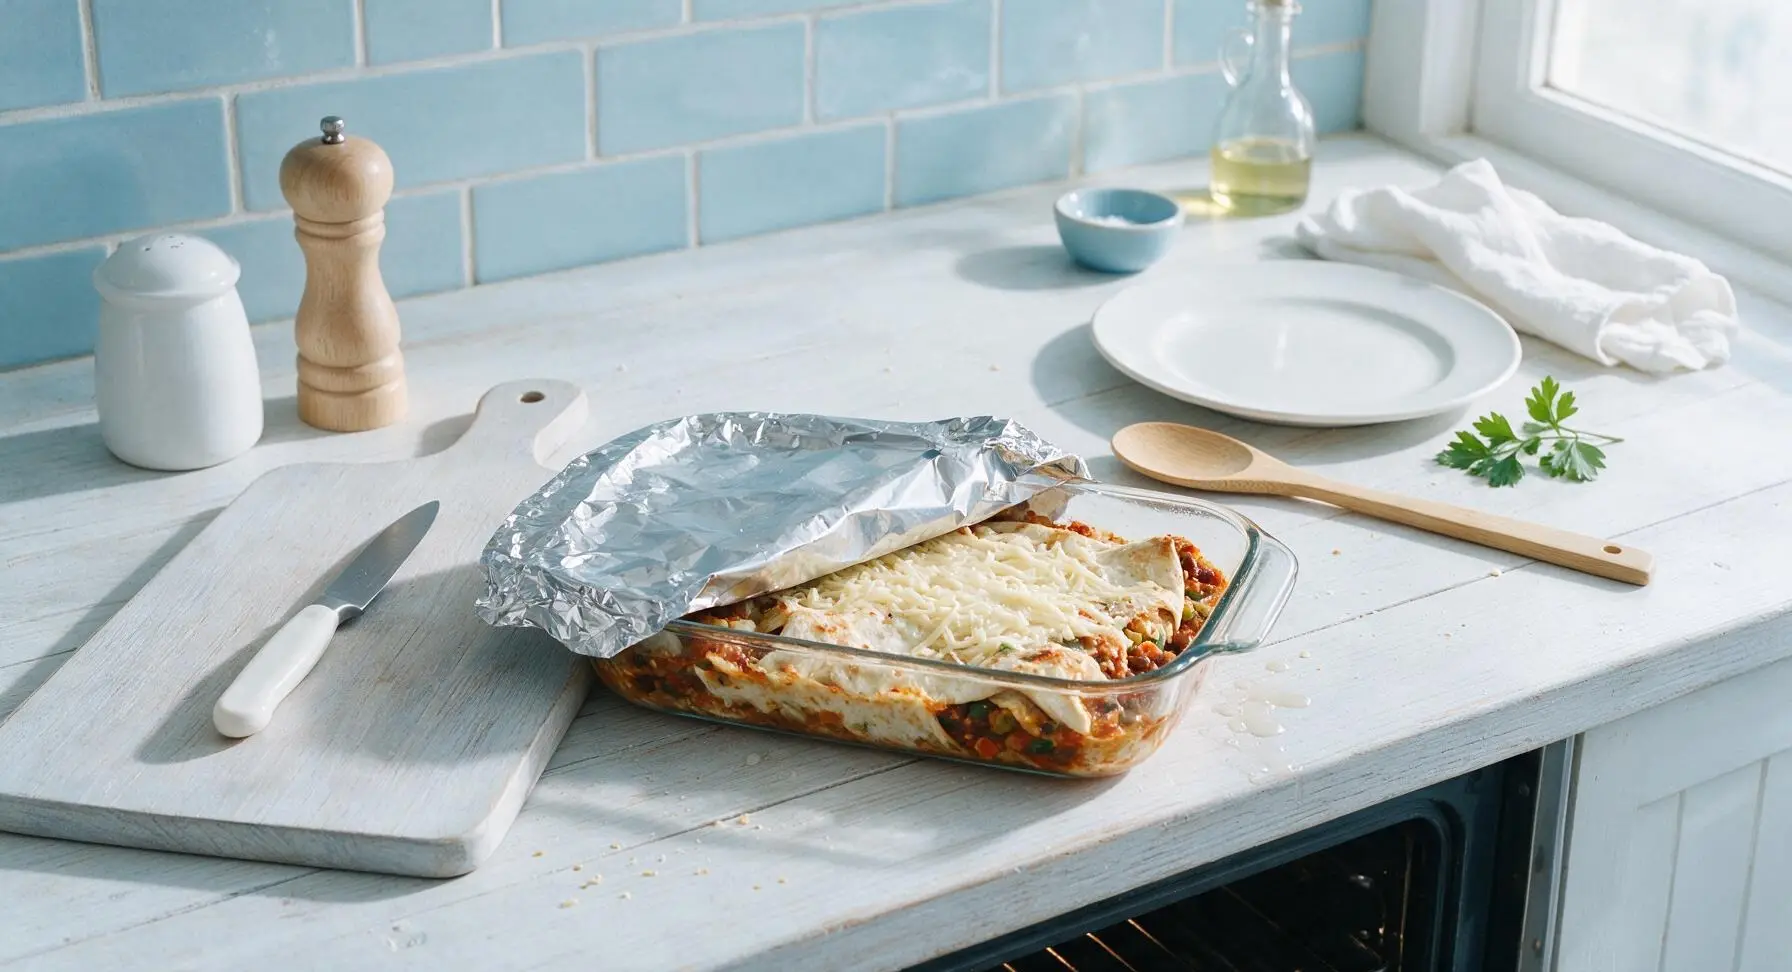
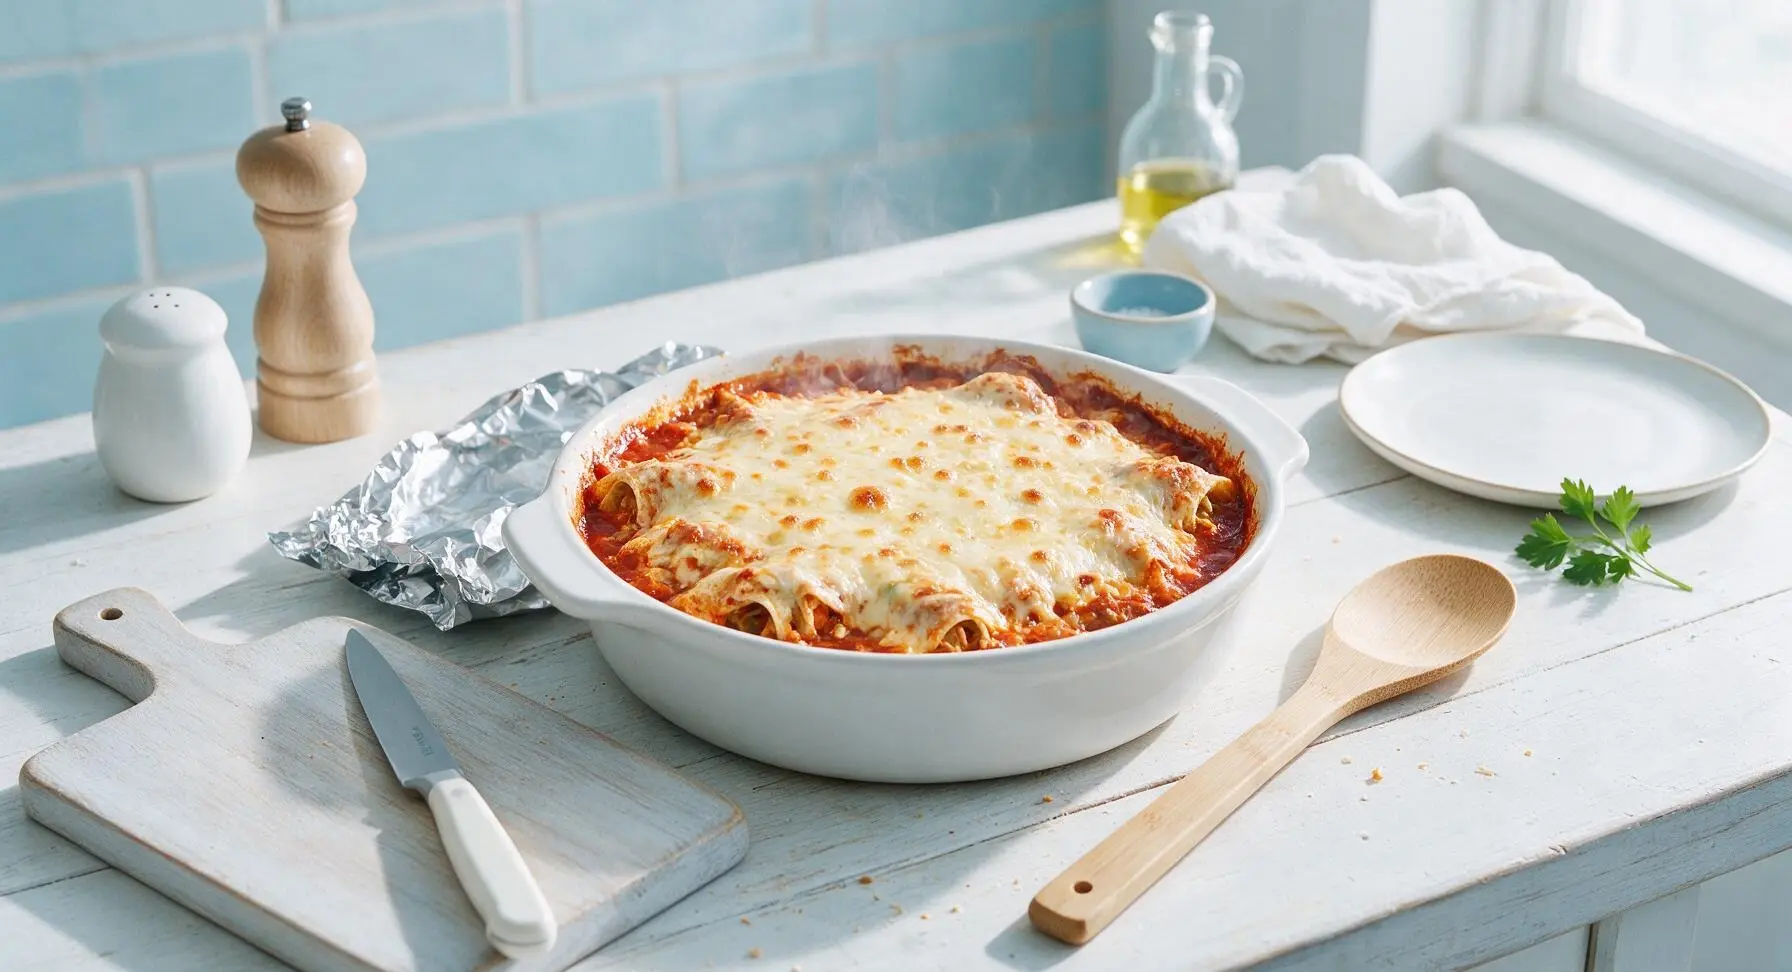
Step 6
step6:Finish Baking Uncovered
Step 6
step6:Finish Baking Uncovered
7

Plate and Garnish

Slice the rested casserole into 6 equal square portions. Use the silicone spatula to lift one portion onto the top matte cream dinner plate from the stack. Top with a dollop of sour cream, a sprinkle of chopped fresh cilantro, and serve with a lime wedge on the side.
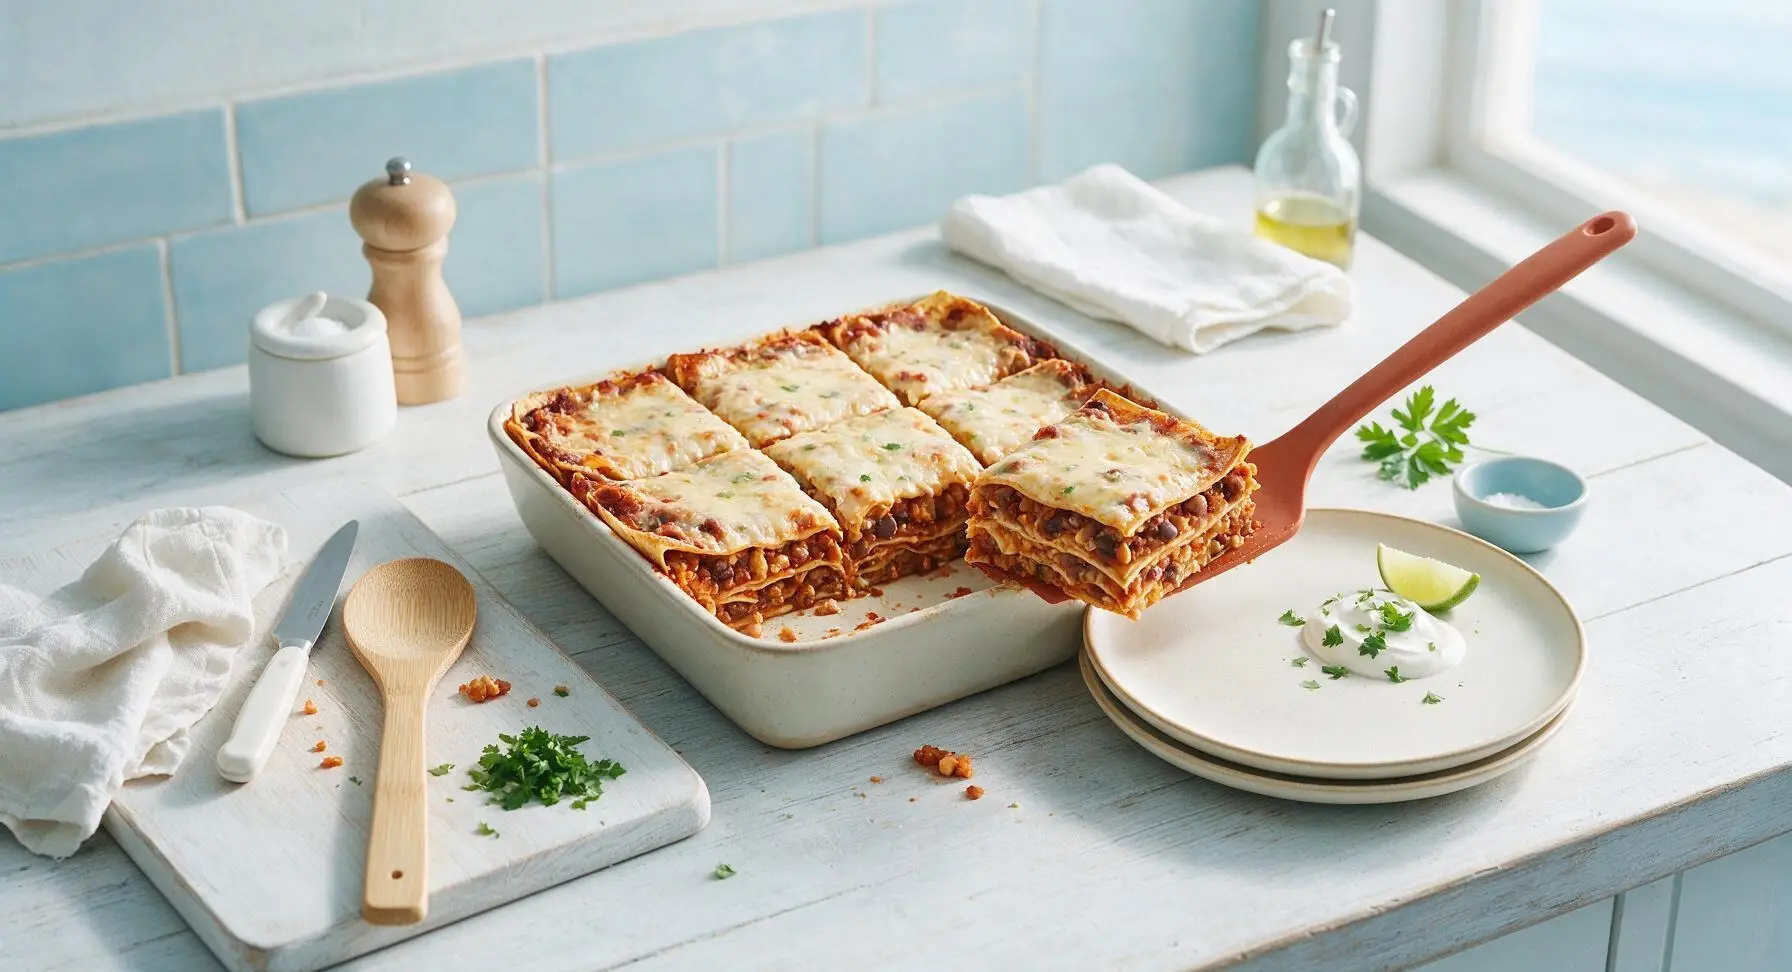
Step 7
step7:Plate and Garnish

Tips

1.Always rinse canned black beans under cool water before adding them to the filling: this washes away starchy, salty canning liquid that would make the casserole soggy, and cuts added sodium by roughly 30%.
2.Grate sharp cheddar from a block instead of using pre-shredded cheese: pre-shredded cheese is coated in potato starch to prevent clumping, which stops it from melting into a smooth, gooey, evenly distributed layer.
3.Let the baked casserole rest for 10 full minutes before slicing: cutting into it immediately will cause hot layers to slide apart and filling to spill, while resting allows cheese and sauce to set for clean, neat slices that hold their shape.


✨ You May Also Like

Main Course
🍜 United Kingdom

A showstopping classic of tender seared beef, savory mushroom duxelles, and crisp prosciutto wrapped in flaky golden puff pastry, baked to juicy perfection.

⏱️ 2 hours 1Main Course ★ 4.7
Main Course
🍜 India

Tender charred marinated chicken simmered in a rich, spiced creamy tomato sauce, this iconic Anglo-Indian curry pairs perfectly with basmati rice or warm naan.

⏱️ 50 minuteMain Course ★ 4.6
Main Course
🍜 Thailand

Classic tangy, sweet, and savory Thai stir-fried rice noodles with shrimp, tofu, and crunchy garnishes, balancing all five core Thai flavor profiles.

⏱️ 30 minuteMain Course ★ 4.5
Main Course
🍜 United Kingdom

Crispy golden beer-battered cod and fluffy double-fried chips, served with tangy tartar sauce and malt vinegar: the timeless, beloved British pub comfort classic.

⏱️ 45 minuteMain Course ★ 4.7
Main Course
🍜 Mexico

Smoky, chile-marinated pork tacos with caramelized pineapple, fresh cilantro, and lime: a beloved classic Mexican street food perfect for casual summer gatherings.

⏱️ 1 hour 45Main Course ★ 4.8
Main Course
🍜 United States

Crunchy Fritos corn chips layered with savory beef chili and melted cheddar, topped with cool, zesty fixings for a beloved, cozy Tex-Mex comfort food.

⏱️ 35 minuteMain Course ★ 4.8

vegetarian burrito casserole:Frequently Asked Questions

1.Do I need to roll individual burritos to make this casserole? ▾
No, that’s the biggest time-saving perk of this recipe! Instead of rolling, you’ll layer whole or torn 8-inch whole wheat tortillas like lasagna noodles, alternating with beans, corn, enchilada sauce, and cheese. It cuts prep time by 15+ minutes, minimizes mess, and delivers classic stuffed burrito flavor in every bite, perfect for busy weeknights.
2.Can I use a different type of tortilla if I don’t have whole wheat? ▾
Absolutely! Regular white flour tortillas work as a 1:1 swap, and corn tortillas are a great gluten-free option if you pick certified gluten-free varieties to avoid cross-contamination. Note corn tortillas have a chewier, more rustic texture, so tear them into smaller pieces for easier layering, and add 2-3 minutes of bake time if they’re extra thick.
3.How do I keep the casserole from turning out soggy? ▾
The easiest fix for sogginess is to pat rinsed black beans and thawed frozen corn completely dry with paper towels before layering. You can also toast tortillas in a dry skillet for 30 seconds per side to build a sturdier base, and reserve 1/3 of your enchilada sauce to pour over the top instead of drenching every middle layer.
4.Can I add extra veggies to the base recipe? ▾
Definitely—this recipe is extremely flexible for extra produce! Great mix-ins include diced bell peppers, squeezed-dry sautéed spinach, roasted zucchini, diced roasted sweet potato, or pickled jalapeños for a little heat. Keep total added veggie volume to around 1.5 cups to avoid overcrowding layers, and cook firm veggies first to prevent crunchy, underdone bites.
5.Can I assemble this casserole ahead for meal prep? ▾
Yes, it’s ideal for advance meal prep! You can fully assemble the unbaked casserole, cover it tightly with plastic wrap and foil, and store it in the fridge for up to 3 days before baking. If baking straight from the fridge, add 8-10 minutes to the covered bake time, and confirm the center hits 165°F on a food thermometer before adding the final cheese topping.
6.What can I use if I don’t have mild red enchilada sauce? ▾
You have a couple of easy, reliable swaps! If you only have spicy red enchilada sauce, mix it with 2 tablespoons of plain tomato sauce to mellow the heat for mild preferences. If you have no enchilada sauce at all, mix 1 cup tomato sauce with 1 teaspoon chili powder, ½ teaspoon cumin, ¼ teaspoon garlic powder, and a pinch of salt for a quick stand-in.
7.Can I adapt this recipe to be vegan? ▾
You can easily make this vegan with two simple swaps! Replace the shredded sharp cheddar with a plant-based cheddar-style shred formulated for melting and baking for the creamiest result, and double-check that your enchilada sauce has no hidden dairy or animal products—most storebought mild red enchilada sauces are already accidentally vegan.
8.How long do leftovers last, and what’s the best way to reheat them? ▾
Leftovers stay fresh in an airtight container in the fridge for up to 4 days, or frozen for up to 3 months. For the best texture, reheat individual portions in the microwave for 60-90 seconds, or reheat the whole casserole covered in a 350°F oven for 15-20 minutes. Add a tiny splash of enchilada sauce before reheating if portions feel dry.
9.Do I need to cover the casserole while it bakes? ▾
Yes, for the first 20 minutes of baking, cover the dish tightly with aluminum foil to trap steam, heat layers evenly, and prevent the tortillas from drying out or cheese from burning too fast. Remove the foil for the last 8-10 minutes of baking, sprinkle on your reserved shredded cheddar, and bake until the cheese is melted and bubbly around the edges.
10.Can I add extra protein to make the casserole more filling? ▾
Absolutely! For extra staying power that stays vegetarian, add 1 cup of cooked seasoned TVP (textured vegetable protein), crumbled seasoned tempeh, or cooled scrambled tofu crumbles between layers. If you eat meat, shredded cooked chicken or browned, drained ground turkey works too—just be sure to drain excess grease from cooked meat to avoid soggy layers.
11.What size baking dish works best for this recipe? ▾
A standard 9x13-inch baking dish is ideal for this layered casserole, as it gives you room to stack 3 even layers of tortillas and fillings without overflow as it bakes. If you only have a 9x9-inch square dish, cut the recipe in half, or expect slightly thicker layers that will need an extra 5-7 minutes of covered bake time to heat all the way through.

Comments (10)

2 days ago

OMG this was such a game changer for our weekly Meatless Monday dinner! I threw in an extra can of black beans and some frozen corn I had in the freezer, and the whole family devoured it. So easy to throw together after work too, that 35 minute cook time is no joke — I didn’t even have to stress about a ton of messy prep. 10/10 will make again!

yesterday

So glad this worked for your Meatless Monday, Mia! Adding extra black beans and corn is such a tasty call — that’s my go-to swap too when I have random leftover veggies in the fridge. Thanks for the kind review!

1 week ago

Made this for our neighborhood potluck last weekend and people were coming back for seconds! Even the self-proclaimed “I hate vegetarian food” guy at the party asked for the recipe. Only tweak I made was adding a little extra taco seasoning on top before baking, gave it such a nice zesty kick.

5 days ago

Wait how much extra taco seasoning did you add? I’m obsessed with extra spice, planning to make this for my roommates this weekend!

3 days ago

Great question! If you love extra spice, 1 extra teaspoon of your favorite taco seasoning works perfectly without overpowering the other flavors. Jake’s spicy tweak is easily one of our most popular fan modifications!

3 days ago

My kids are so picky about veggie meals but they went crazy for this! I let them sprinkle their own shredded cheese on top before serving and they felt like little chefs helping out. Already added the ingredients to my regular meal prep rotation, it reheats like a dream.

2 days ago

Oh the kid sprinkle trick is genius! My 6 year old turns her nose up at everything with beans, I’m definitely trying that next time I make this!

2 hours ago

SO good! I was worried a vegetarian casserole would be bland and mushy but the texture is perfect — the layers of tortilla and bean filling are chef’s kiss. Super easy even for someone who burns toast half the time, trust me, you can’t mess this up.

yesterday

Wait has anyone tried making this with vegan cheese to make it fully dairy free? My partner is lactose intolerant so I’m trying to tweak it for our date night in this week, would love to know if it holds up!

2 hours ago

I made it with dairy-free cheddar shreds last month! It melts great, just make sure you get the shreds not the pre-sliced stuff — I made that mistake the first time and it was weirdly clumpy. Turned out amazing the second go around!

30 minutes ago

Great question, Sam! The dairy-free shred swap works perfectly, as Nora mentioned. You can also swap the regular sour cream for cashew sour cream if you want to make the whole dish fully vegan too, it’s delicious!

2 weeks ago

Total meal prep win! I divided this into 5 individual containers on Sunday and ate it for lunch all week, it didn’t get soggy at all even after microwaving at the office. The portion sizes are perfect, I didn’t end up hungry an hour later like I do with most veggie lunches.

1 week ago

That makes us so happy to hear, Nora! We designed this recipe specifically to hold up well for meal prep, so it’s awesome to know it worked for your work lunches. Thanks for sharing!

30 minutes ago

Made this last night when my friends came over for game night and it was gone in 15 minutes. I set out a little topping bar with pickled jalapeños, extra salsa, and a dollop of guac so people could customize their slices, and it paired so well with cold beer. Will absolutely be making this for our next football watch party.

5 days ago

This was so easy I almost thought I messed it up, lol! I’ve never made a casserole before because they always seem like so much work, but this came together in like 10 minutes of prep and then the oven did all the work. My only note is I wish there was a little more cheese, but that’s just my personal cheese obsession.

3 days ago

Girl I feel you on the cheese! I added an extra half cup of shredded Mexican blend on top the last time I made it, game over, so cheesy and perfect. No judgment on extra cheese ever.

2 days ago

Love that you gave this a try even if you’re new to casseroles, Jess! If you’re a cheese lover, feel free to add an extra ½ to ¾ cup of shredded cheese on top before baking — we won’t tell, there’s no such thing as too much cheese around here.

5 minutes ago

Finally made this last night after asking about the extra taco seasoning last week, and wow! I added a full extra teaspoon like Chef Admin suggested, and it was the perfect amount of spice. Served it with a side of tortilla chips and queso, and my roommates are already begging me to make it again next week.

just now

Took the tip about letting kids add their own toppings and made this for my family last night! My 6 year old who hates beans ate two whole servings because she got to load her piece up with sour cream and olives. I did think the tortilla layers were a little hard to cut through straight out of the oven, but letting it rest 5 minutes fixed that right up.

just now

So glad the kid topping trick worked for your family, Zoe! That tip about letting it rest 5 minutes before cutting is such an important one I almost forgot to call out in the recipe — it helps everything set so slices come out clean every time. Thanks for sharing your experience!



