
wicked kitchen burrito

title 1
wicked kitchen burrito
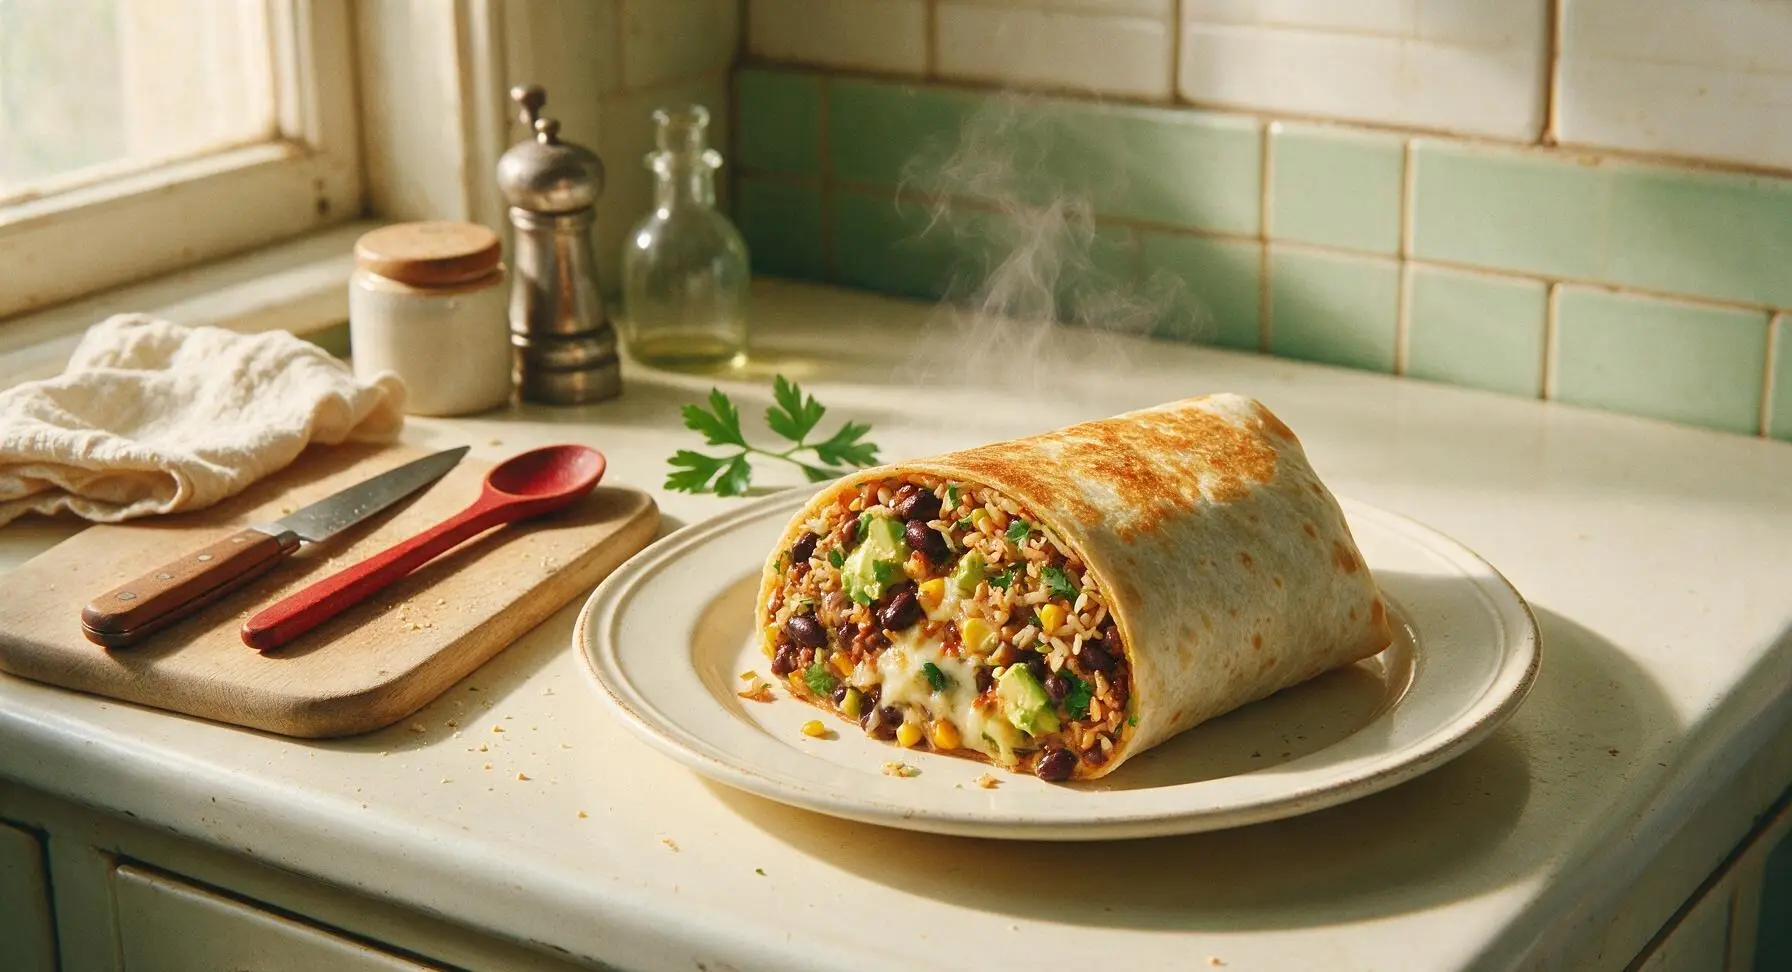
⏱️ cook time 20 minutes
🍽️ servings 4
⚡ Difficulty easy

intro

Loaded with spiced black beans, zesty cilantro-lime rice, smoky corn, creamy avocado, and melted cheese, this bold, hearty burrito delivers big Tex-Mex flavor with minimal weeknight fuss.

Ingredients
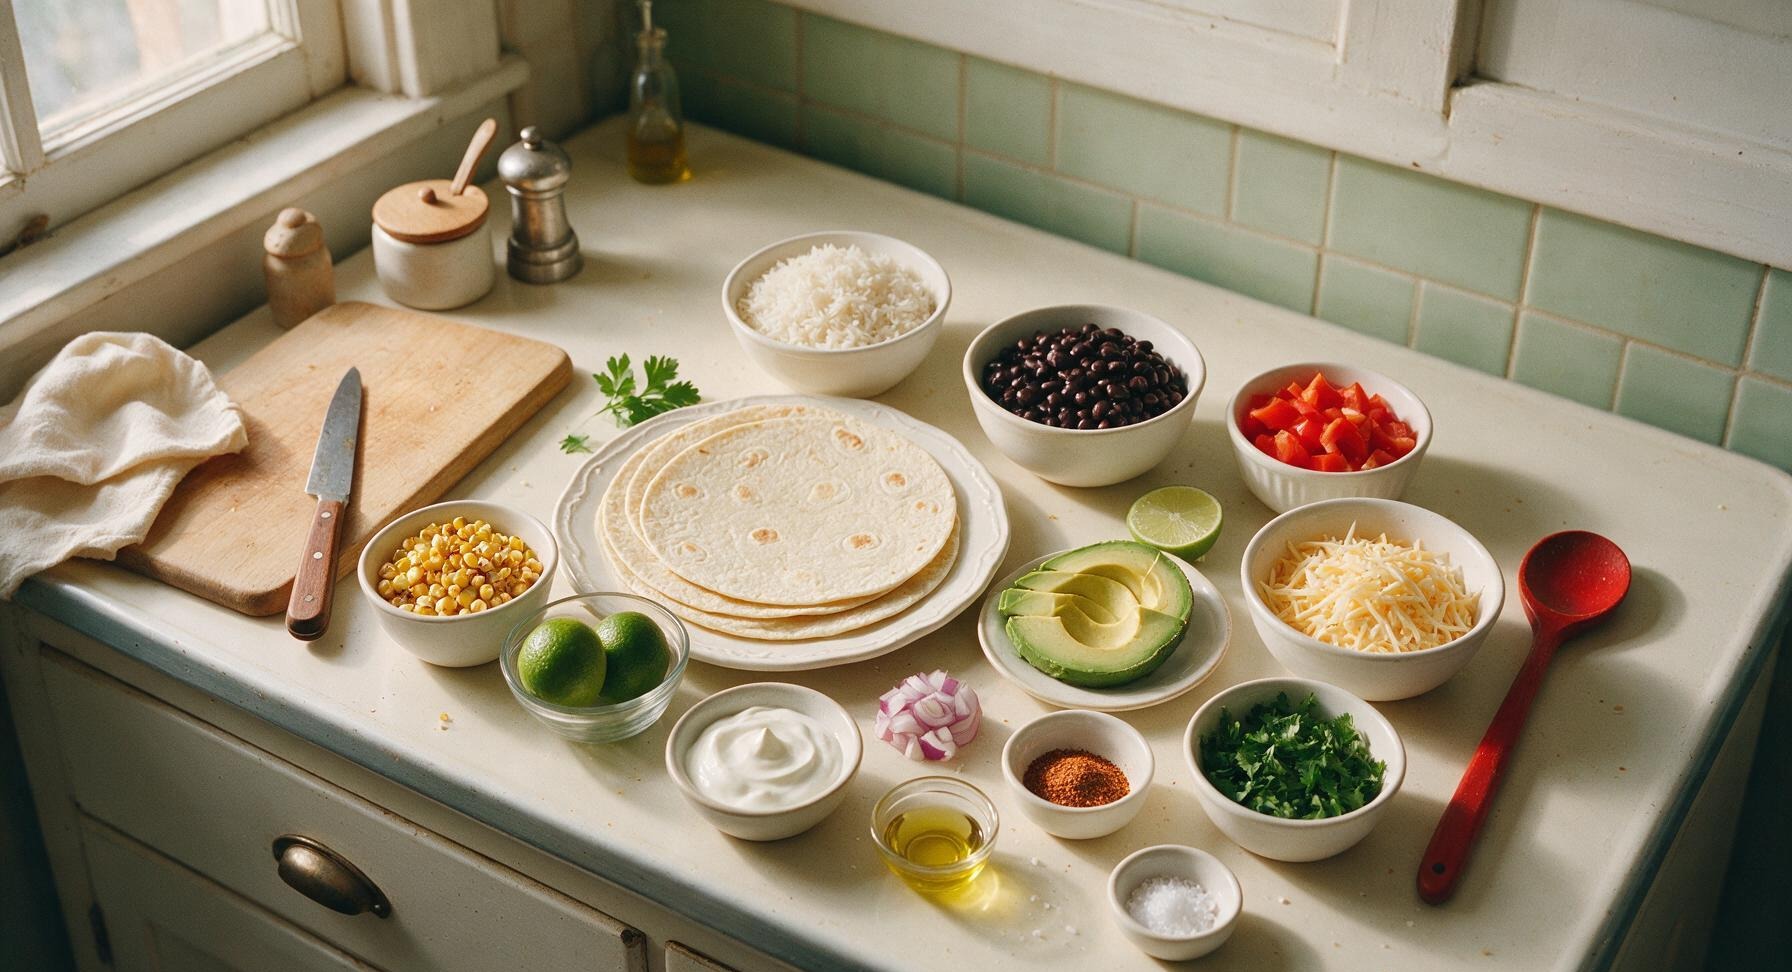
10-inch large flour tortillas 4 each
Cooked long-grain white rice 2 cups
Canned black beans, drained and rinsed 400g (1 can)
Frozen roasted corn 1 cup
Medium red bell pepper, diced 1 each (150g)
Small red onion, diced 1 each (100g)
Large ripe avocado, sliced 1 each
Shredded pepper jack cheese 1 cup (110g)
Fresh cilantro, chopped 1/4 cup
Fresh limes 2 each
Taco seasoning blend 2 tbsp
Sour cream 1/2 cup
Neutral sunflower oil 1 tbsp
Flaky sea salt 1 tsp

Steps

1

Season Cilantro Lime Rice

Place 2 cups of cooked warm long-grain white rice in the small matte brushed stainless steel mixing bowl. Add 2 tbsp chopped fresh cilantro, 1 tbsp fresh lime juice, and 1/4 tsp flaky sea salt. Toss gently with the off-white silicone spatula until evenly mixed; the rice will be pale white flecked with bright green, with a light, bright citrus aroma. Set the bowl aside while cooking the veggie filling.
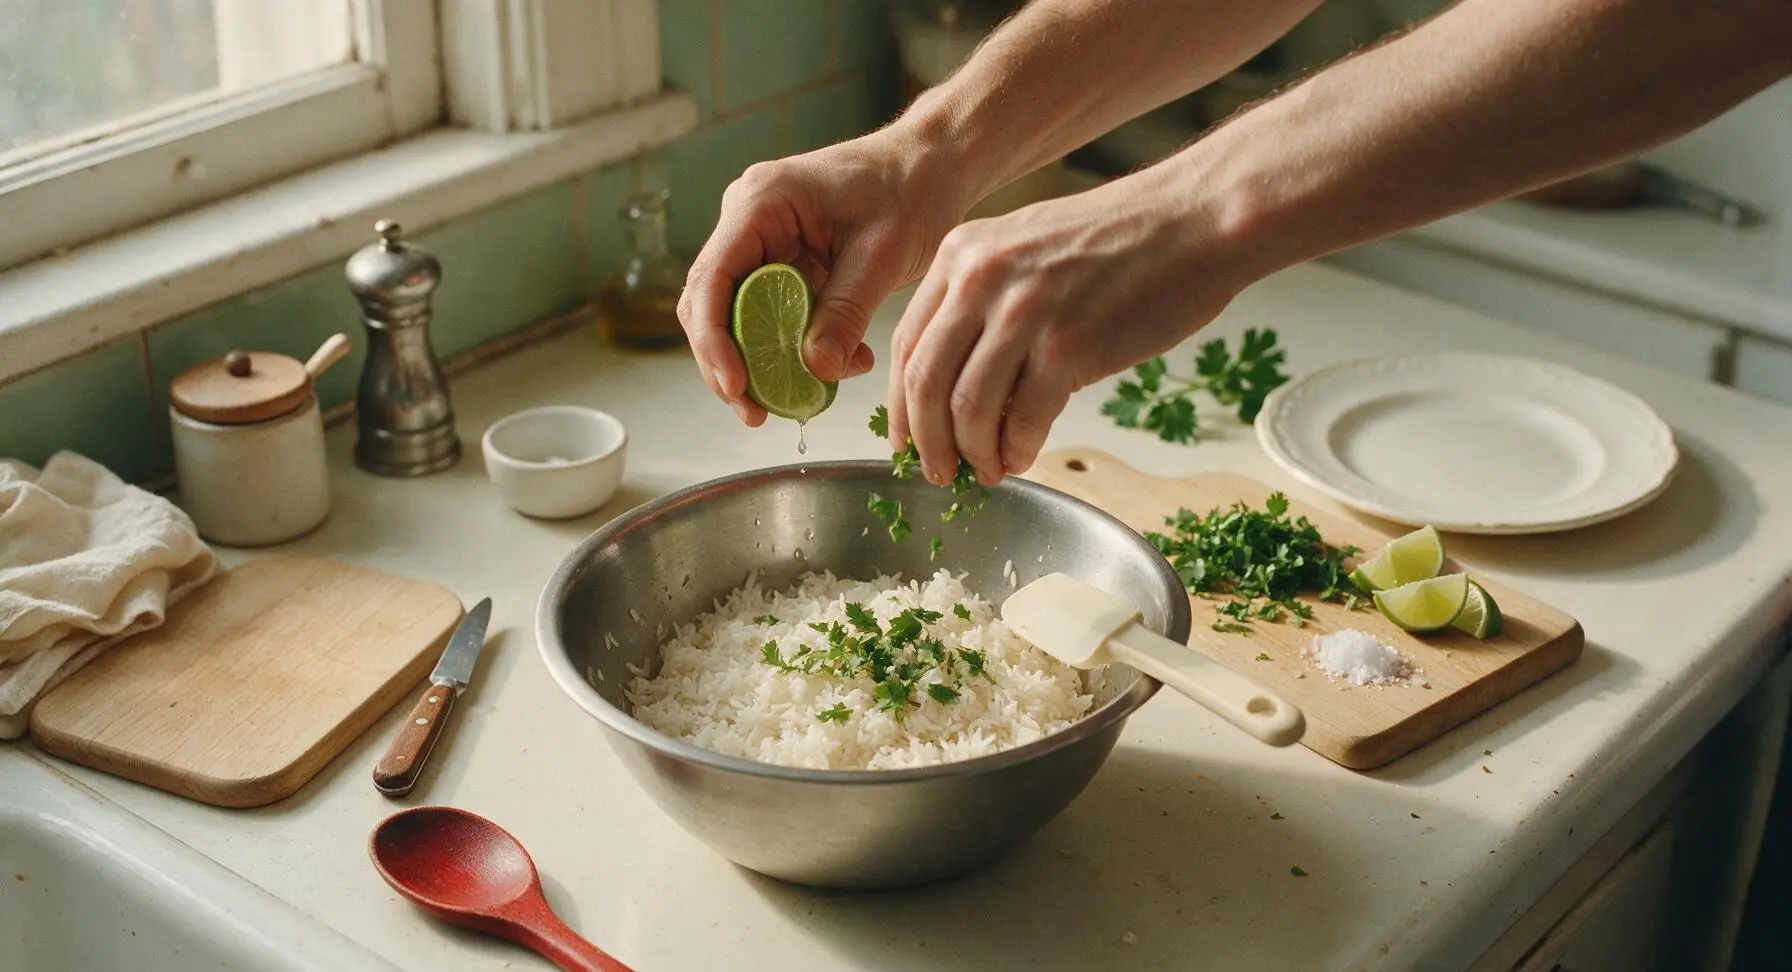
Step 1
step1:Season Cilantro Lime Rice
2

Sauté Veggie Base

Heat 1 tbsp neutral sunflower oil in the 12-inch matte black carbon steel frying pan over medium heat (350°F / 175°C) for 1 minute until the oil shimmers across the pan surface. Add diced red onion and diced red bell pepper, sauté for 3 minutes, stirring occasionally with the silicone spatula, until vegetables are soft and slightly caramelized at the edges.
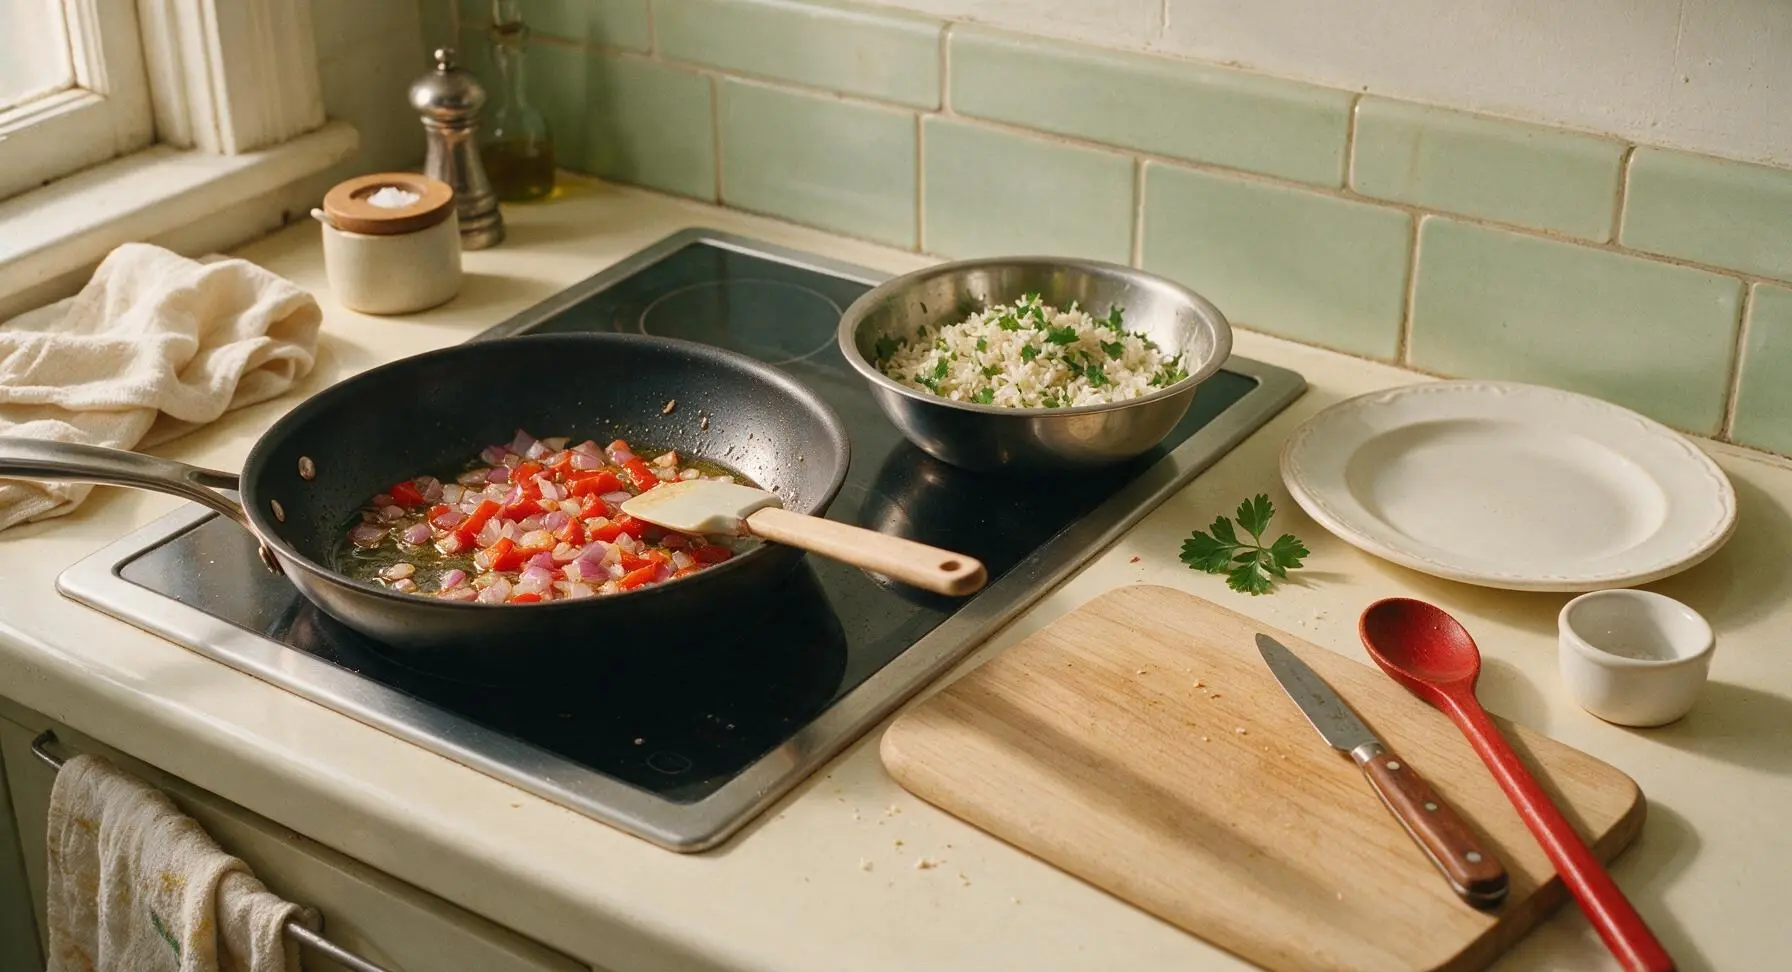
Step 2
step2:Sauté Veggie Base
3

Warm Beans and Corn

Add the drained rinsed black beans, frozen roasted corn, and 2 tbsp taco seasoning blend to the frying pan with the sautéed veggies. Stir to coat all ingredients evenly in spice, then cook for 4 minutes until beans are fully heated through and corn kernels have light charred edges, stirring once per minute. Taste and add up to 1/2 tsp flaky sea salt if needed; the finished mixture should be fragrant with warm spice, with no excess liquid pooling at the bottom of the pan.
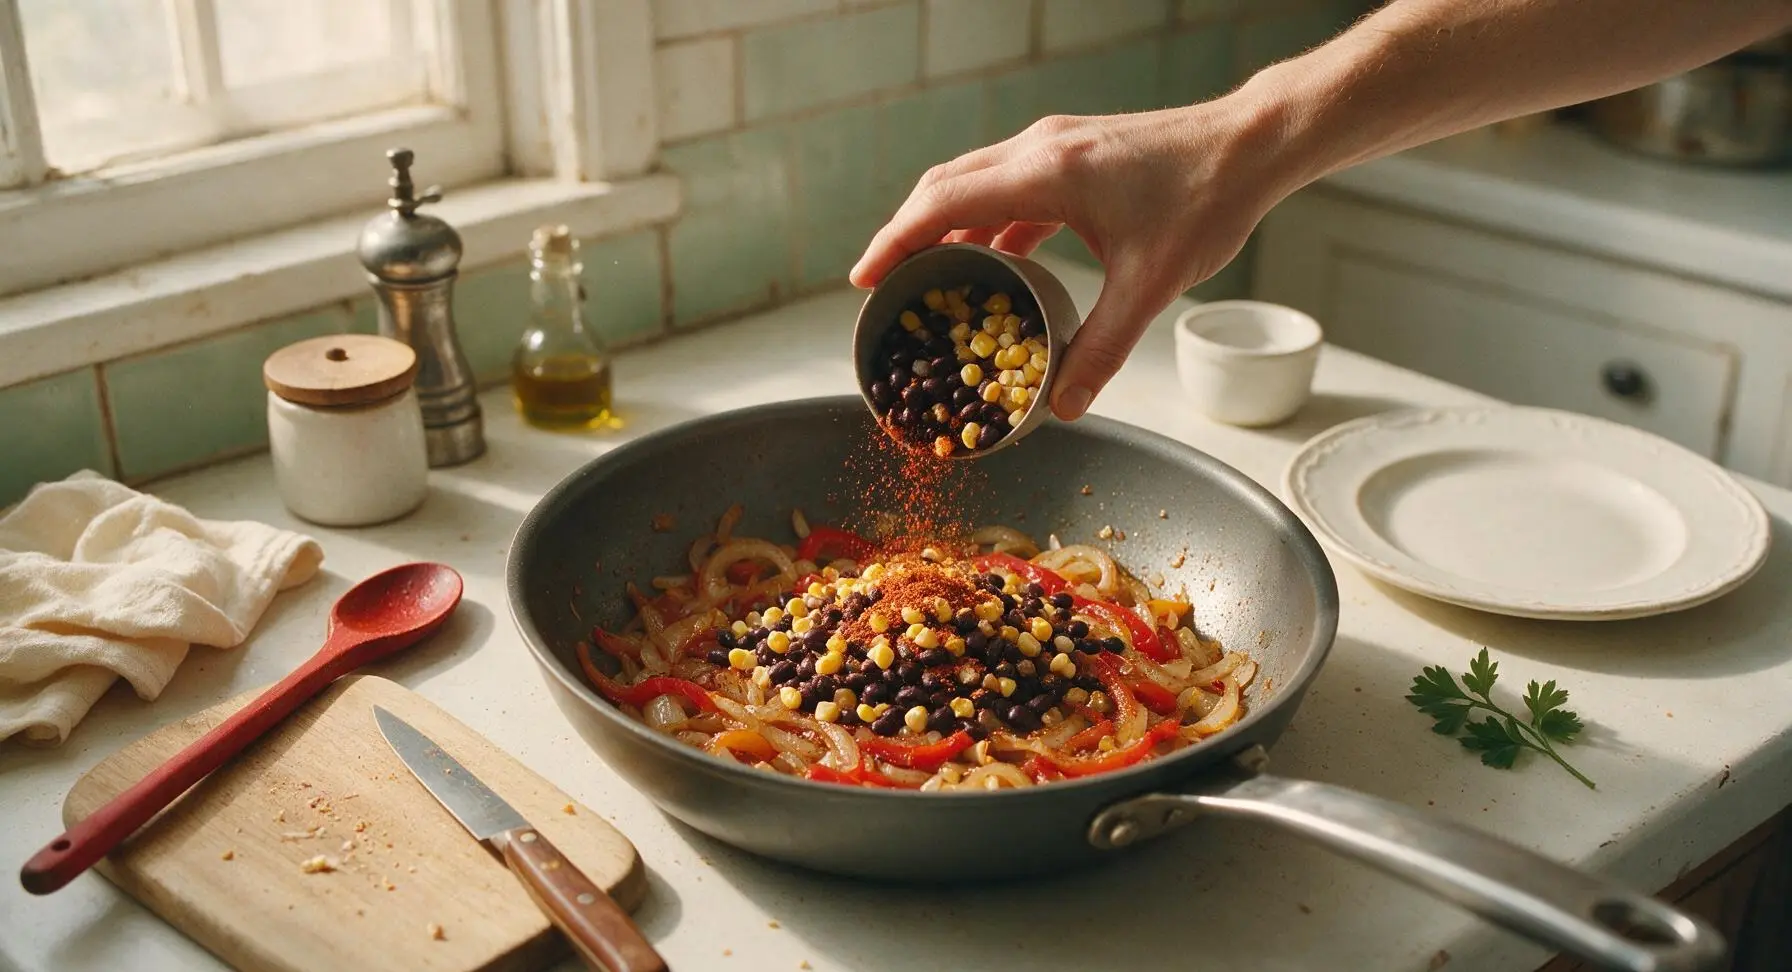
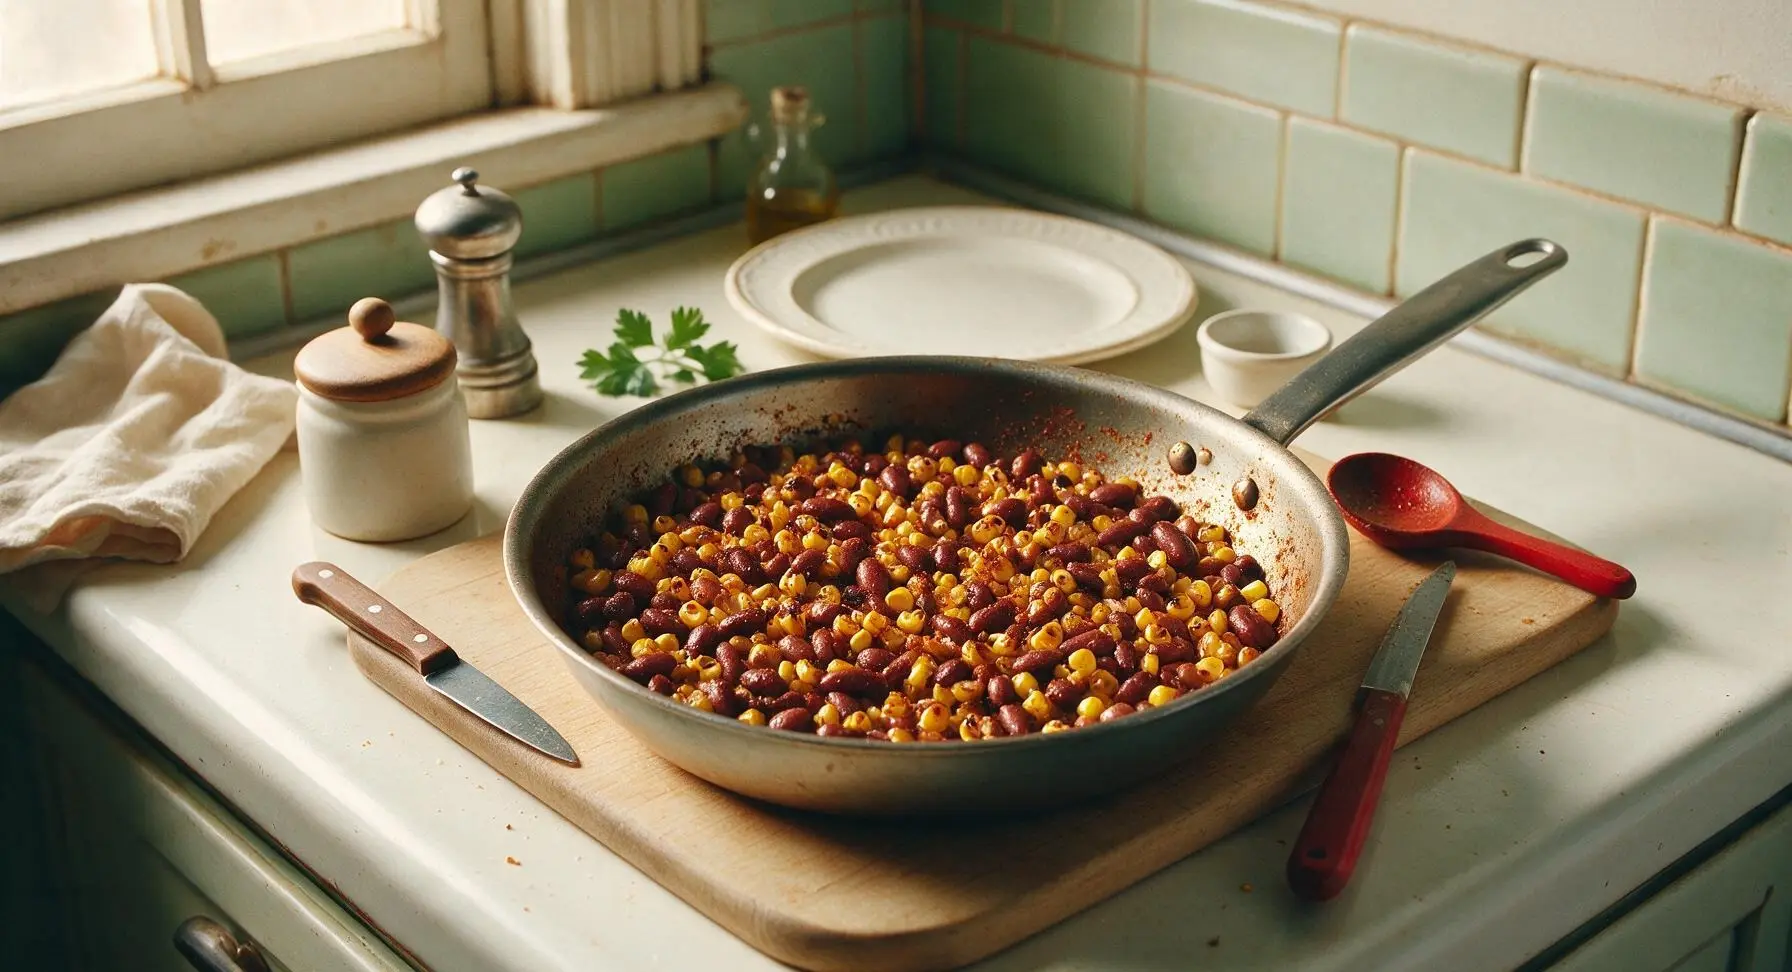
Step 3
step3:Warm Beans and Corn
Step 3
step3:Warm Beans and Corn
4

Warm Flour Tortillas

Turn the stovetop heat to low. Stack the 4 flour tortillas directly on top of the warm bean mixture in the pan, cover with a metal lid, and let warm for 1 minute until tortillas are soft and pliable. Warming tortillas this way prevents cracking during rolling, unlike microwaving which can make tortillas gummy. Remove tortillas to the birch cutting board, and cover loosely with the linen napkin to retain heat.
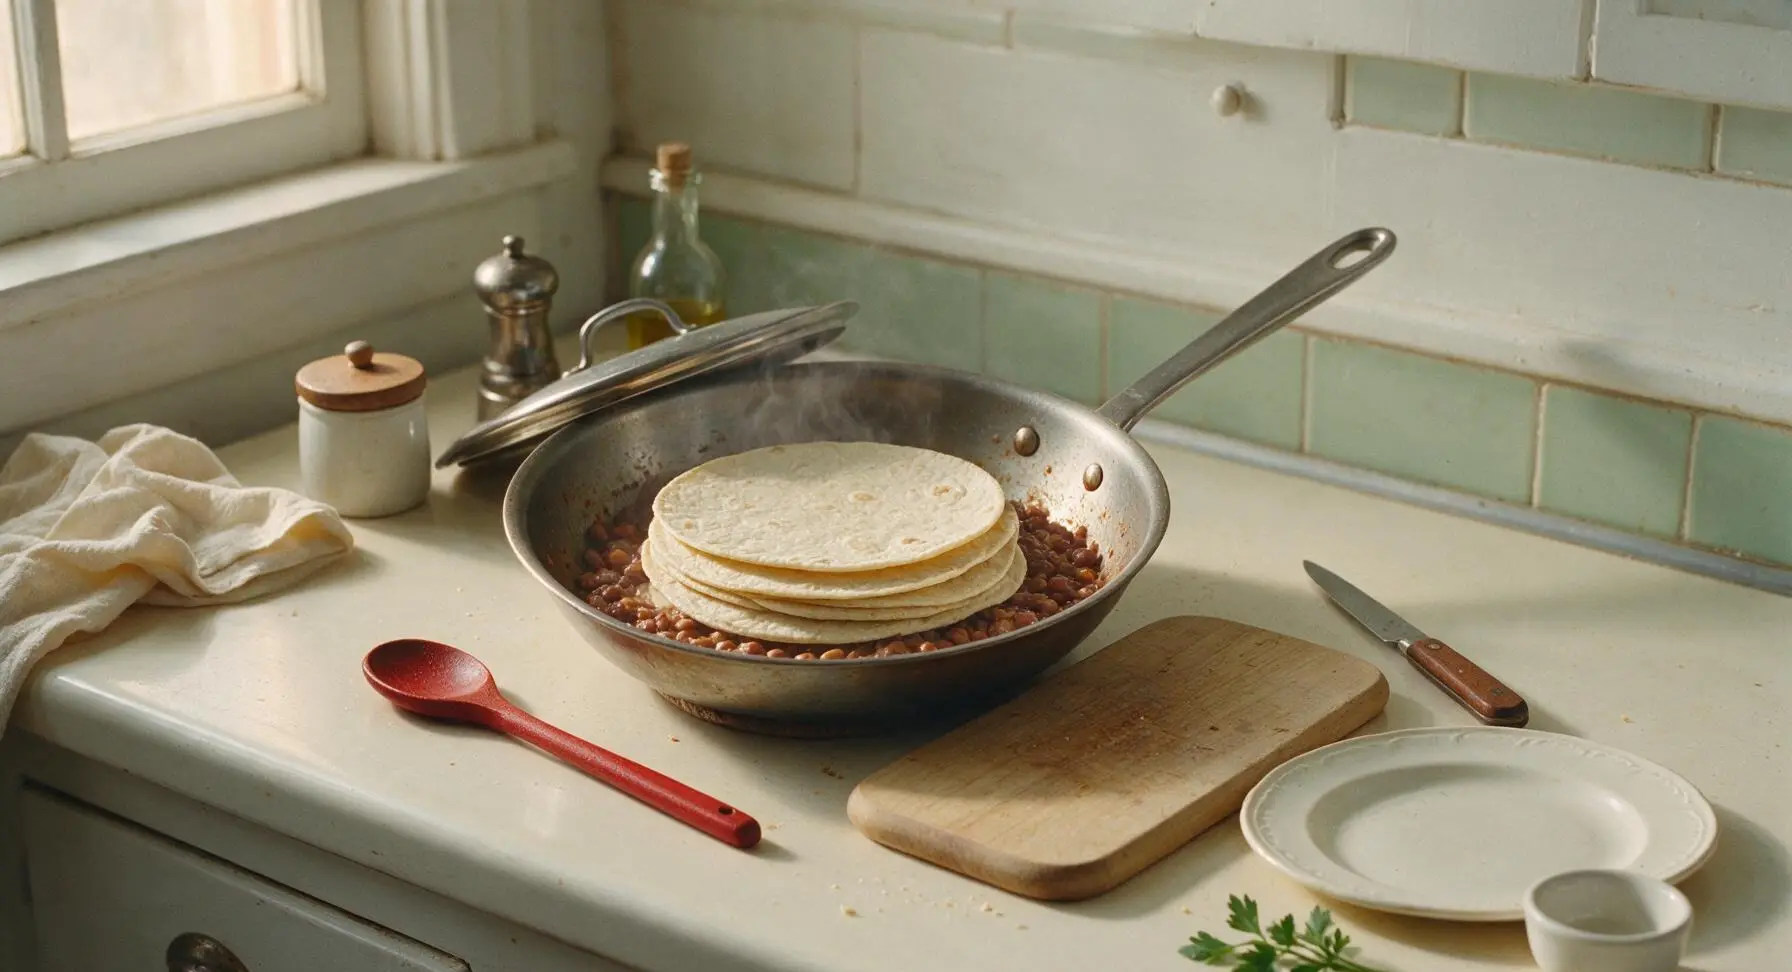
Step 4
step4:Warm Flour Tortillas
5

Layer Burrito Fillings

Lay one warm tortilla flat on the light birch cutting board. Spread 1/2 cup of cilantro-lime rice in a 4-inch wide strip down the center of the tortilla, leaving 2 inches of empty space at the top and bottom edges to make rolling easier. Top the rice with 1/2 cup of the spiced bean and veggie mixture, 2 tbsp shredded pepper jack cheese, 3-4 thin slices of fresh avocado, and 1 tsp sour cream. Squeeze a tiny dash of fresh lime juice over the fillings, then repeat the layering process for the remaining 3 tortillas.
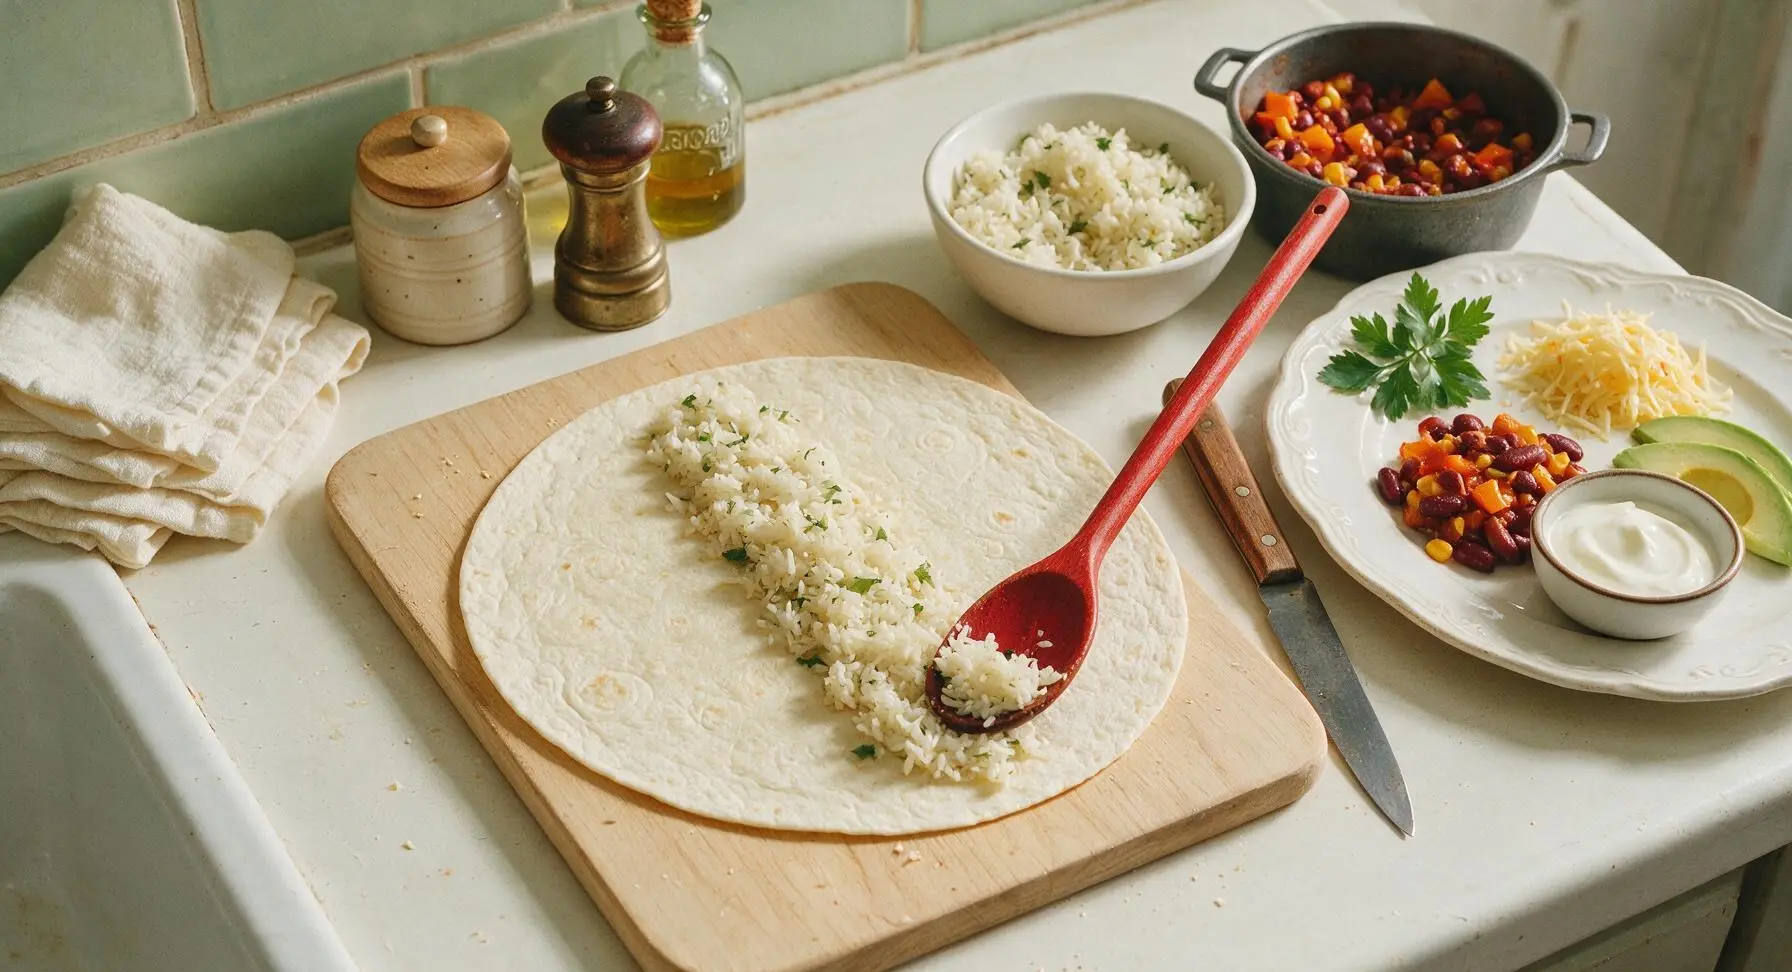
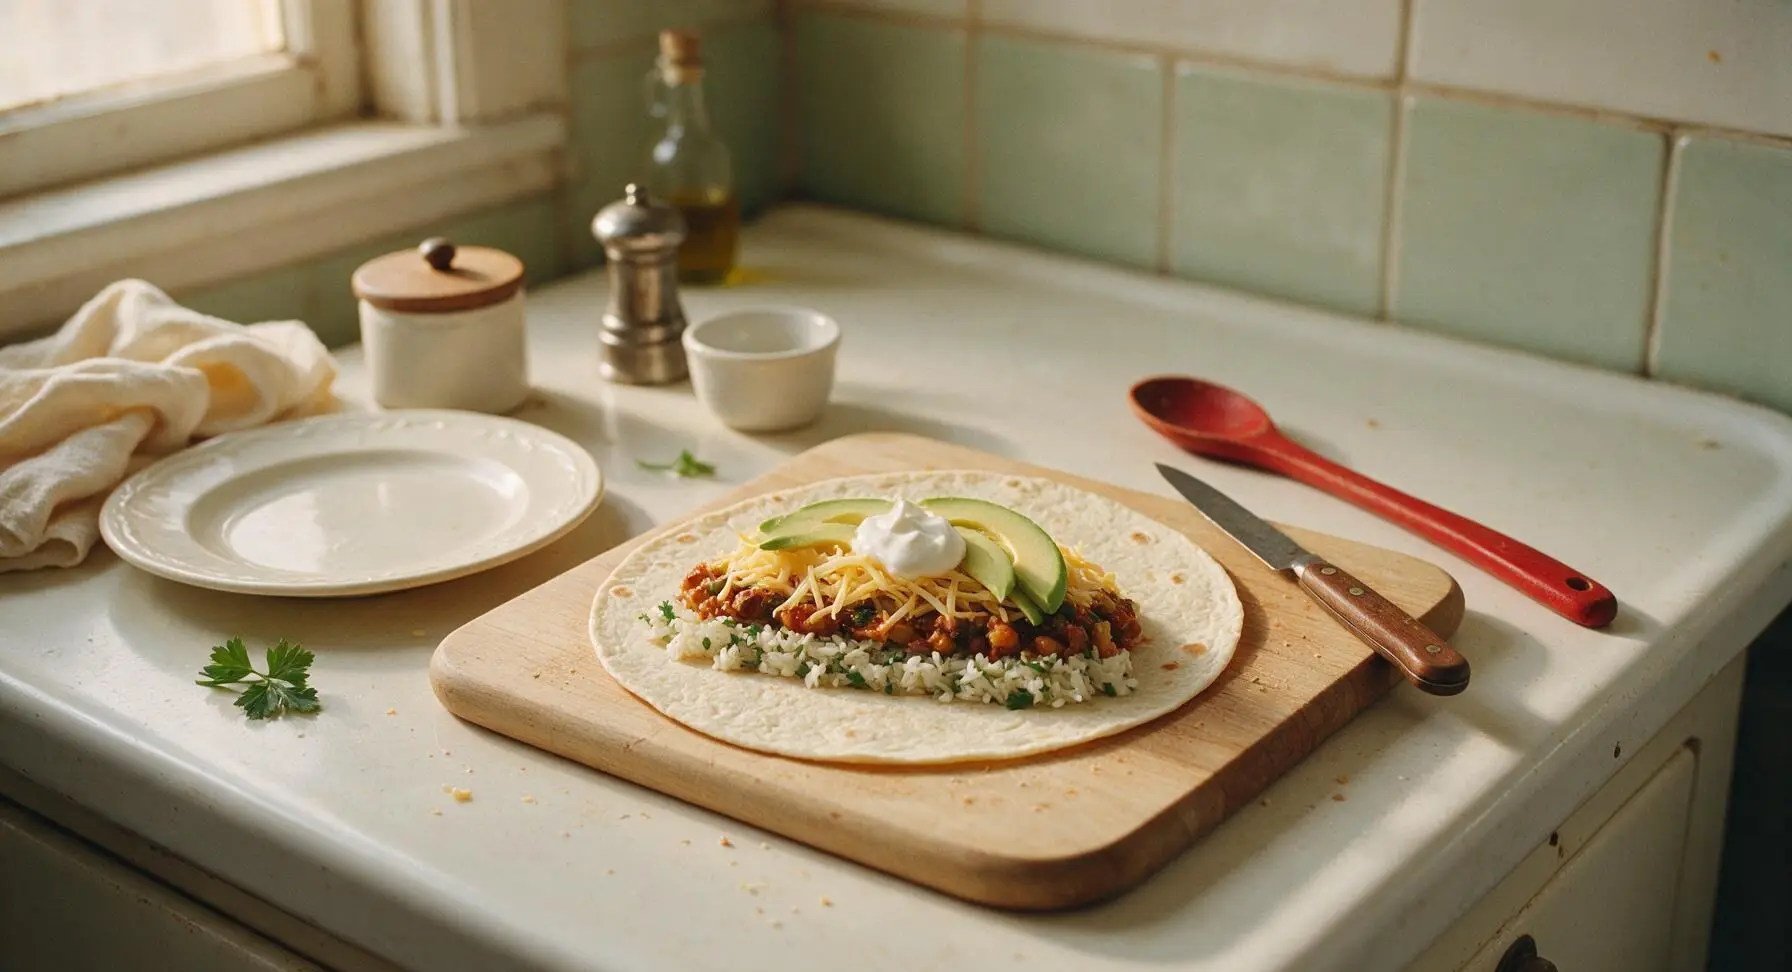
Step 5
step5:Layer Burrito Fillings
Step 5
step5:Layer Burrito Fillings
6

Roll Tight Burritos

Fold the 2-inch top and bottom tortilla edges inward over the fillings to seal the ends. Hold the folded edges in place, then roll the tortilla tightly from one long side to the other, tucking fillings in as you roll to create a firm, sealed cylinder. A tight roll prevents fillings from falling out while eating. Repeat the rolling process for all 4 filled tortillas.
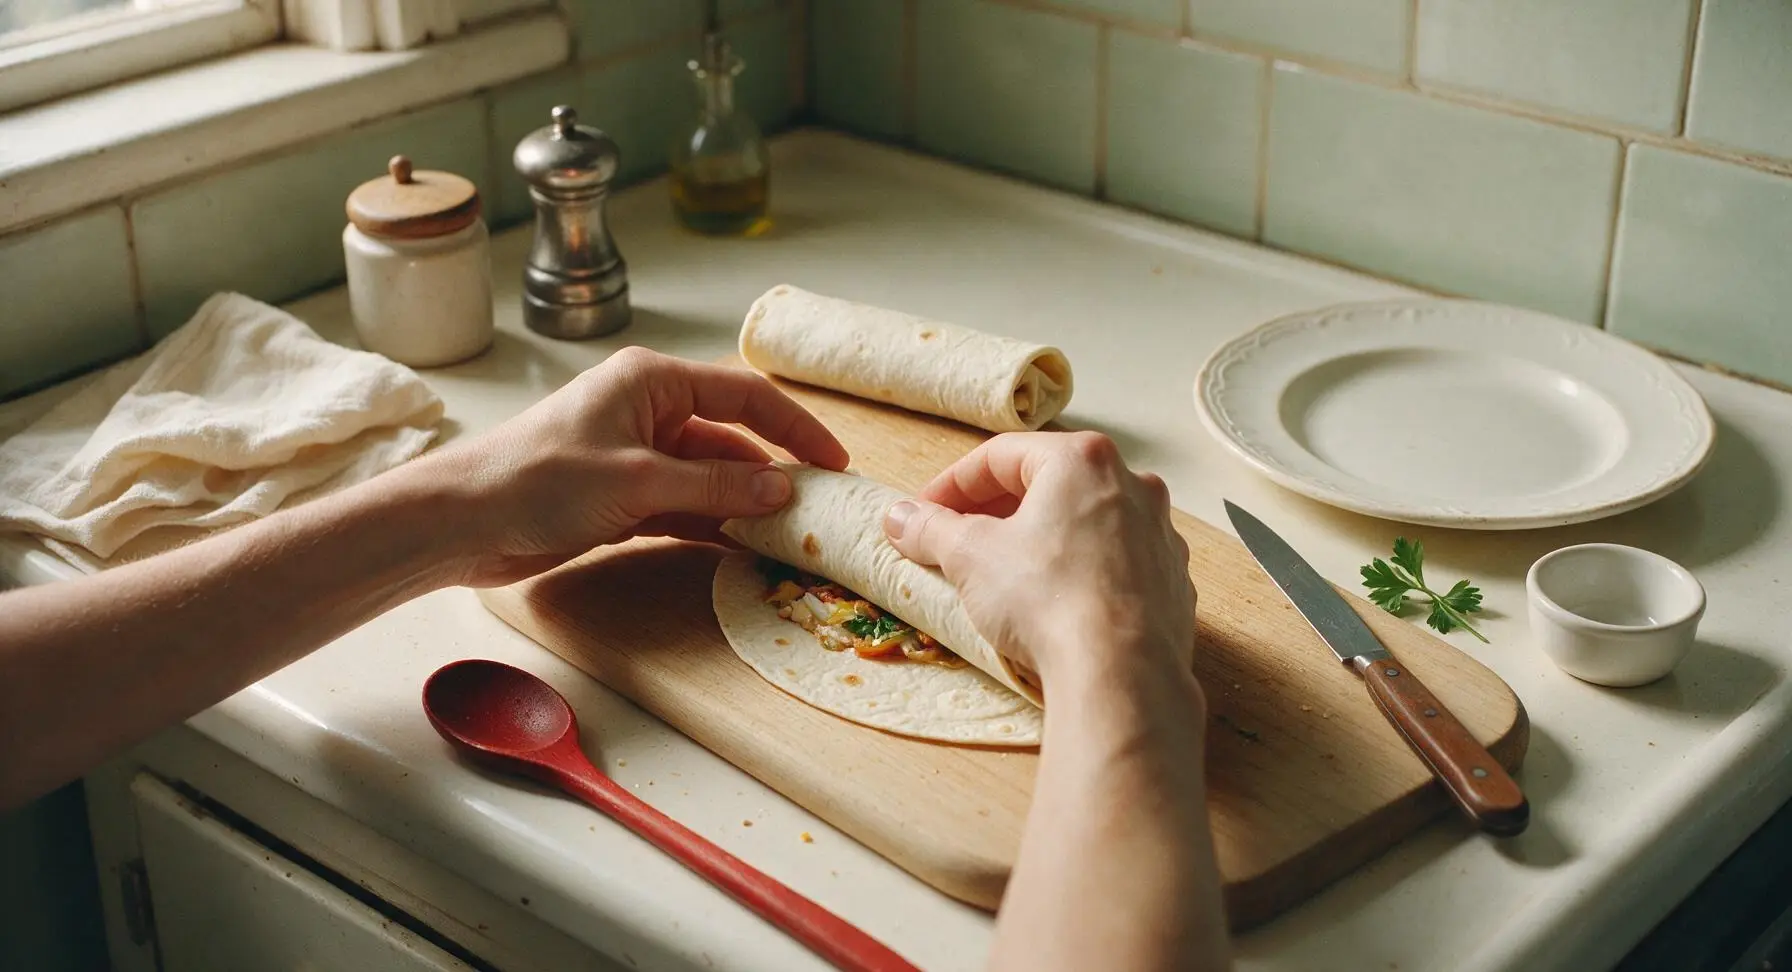
Step 6
step6:Roll Tight Burritos
7

Sear Burrito Seams

Place the rolled burritos seam-side down in the now-empty frying pan over medium-low heat. Sear for 1 minute per side until the tortilla exterior is lightly golden and crisp at the seams, and the shredded cheese inside is fully melted. Press gently on the burritos with the silicone spatula to ensure even contact with the hot pan surface.
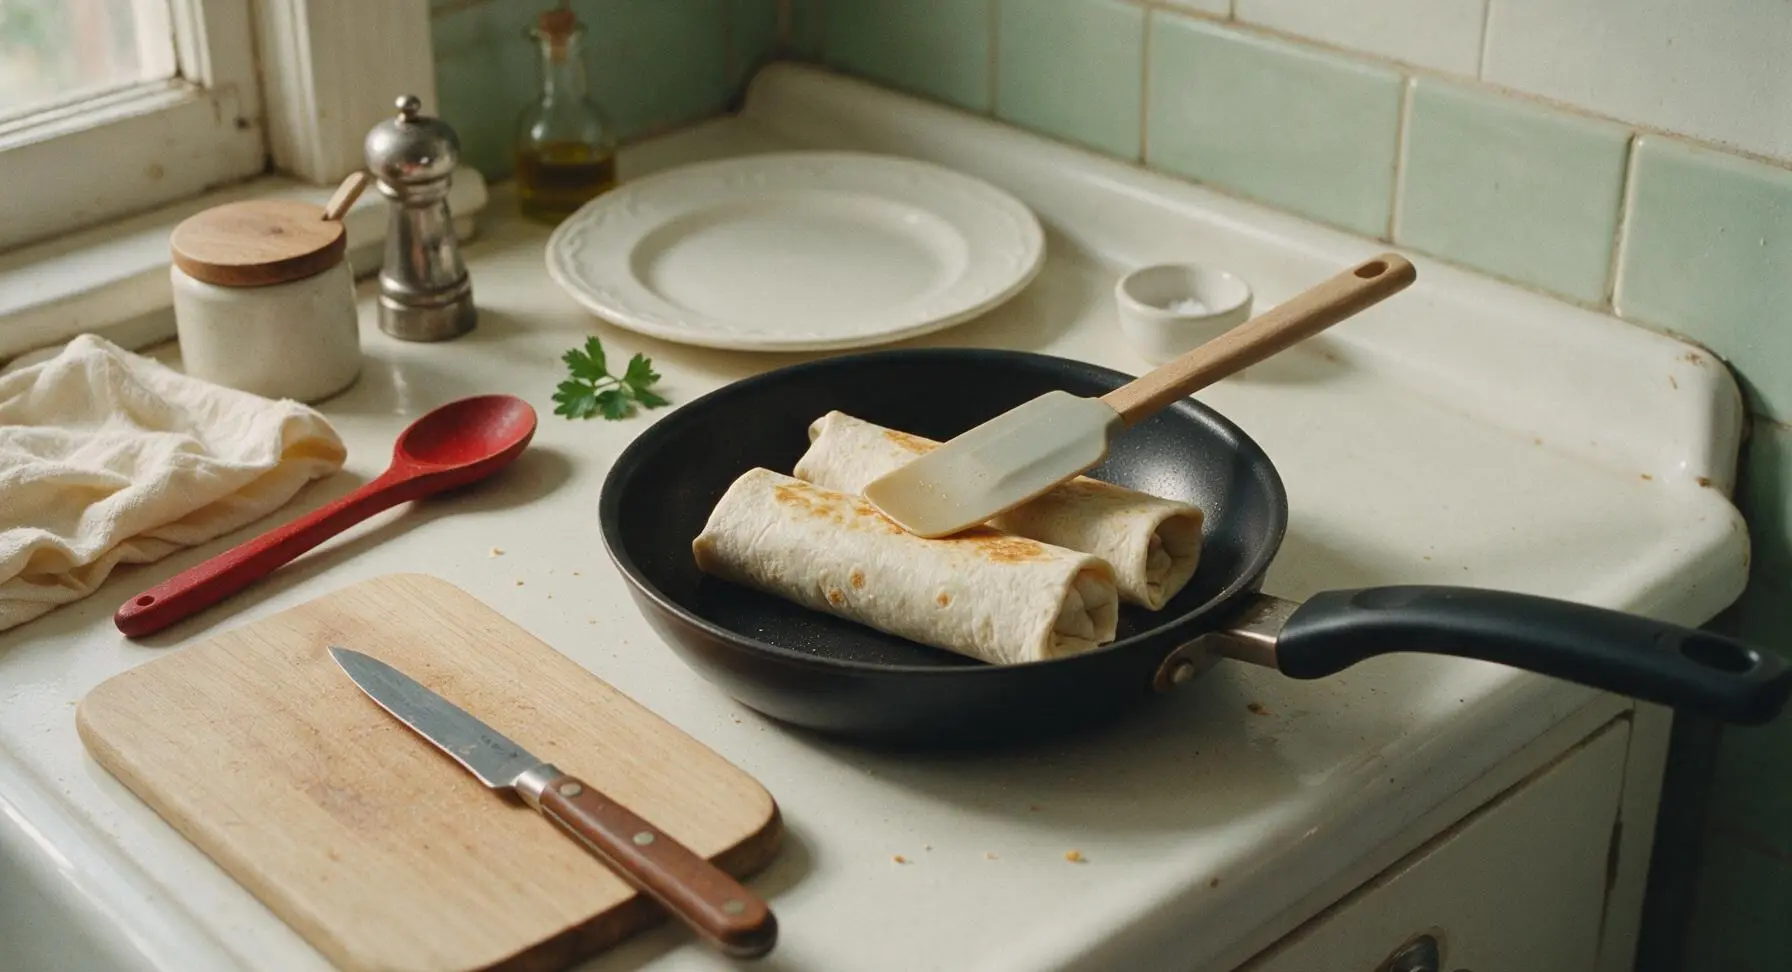
Step 7
step7:Sear Burrito Seams
8

Plate and Garnish

Transfer two seared burritos to the off-white matte ceramic round dinner plate. Cut each burrito diagonally in half with the santoku knife to expose the colorful layered filling. Tuck a fresh lime wedge on the side of the plate, add a small dollop of sour cream, and sprinkle a pinch of remaining chopped cilantro over top for garnish. Serve immediately while warm.
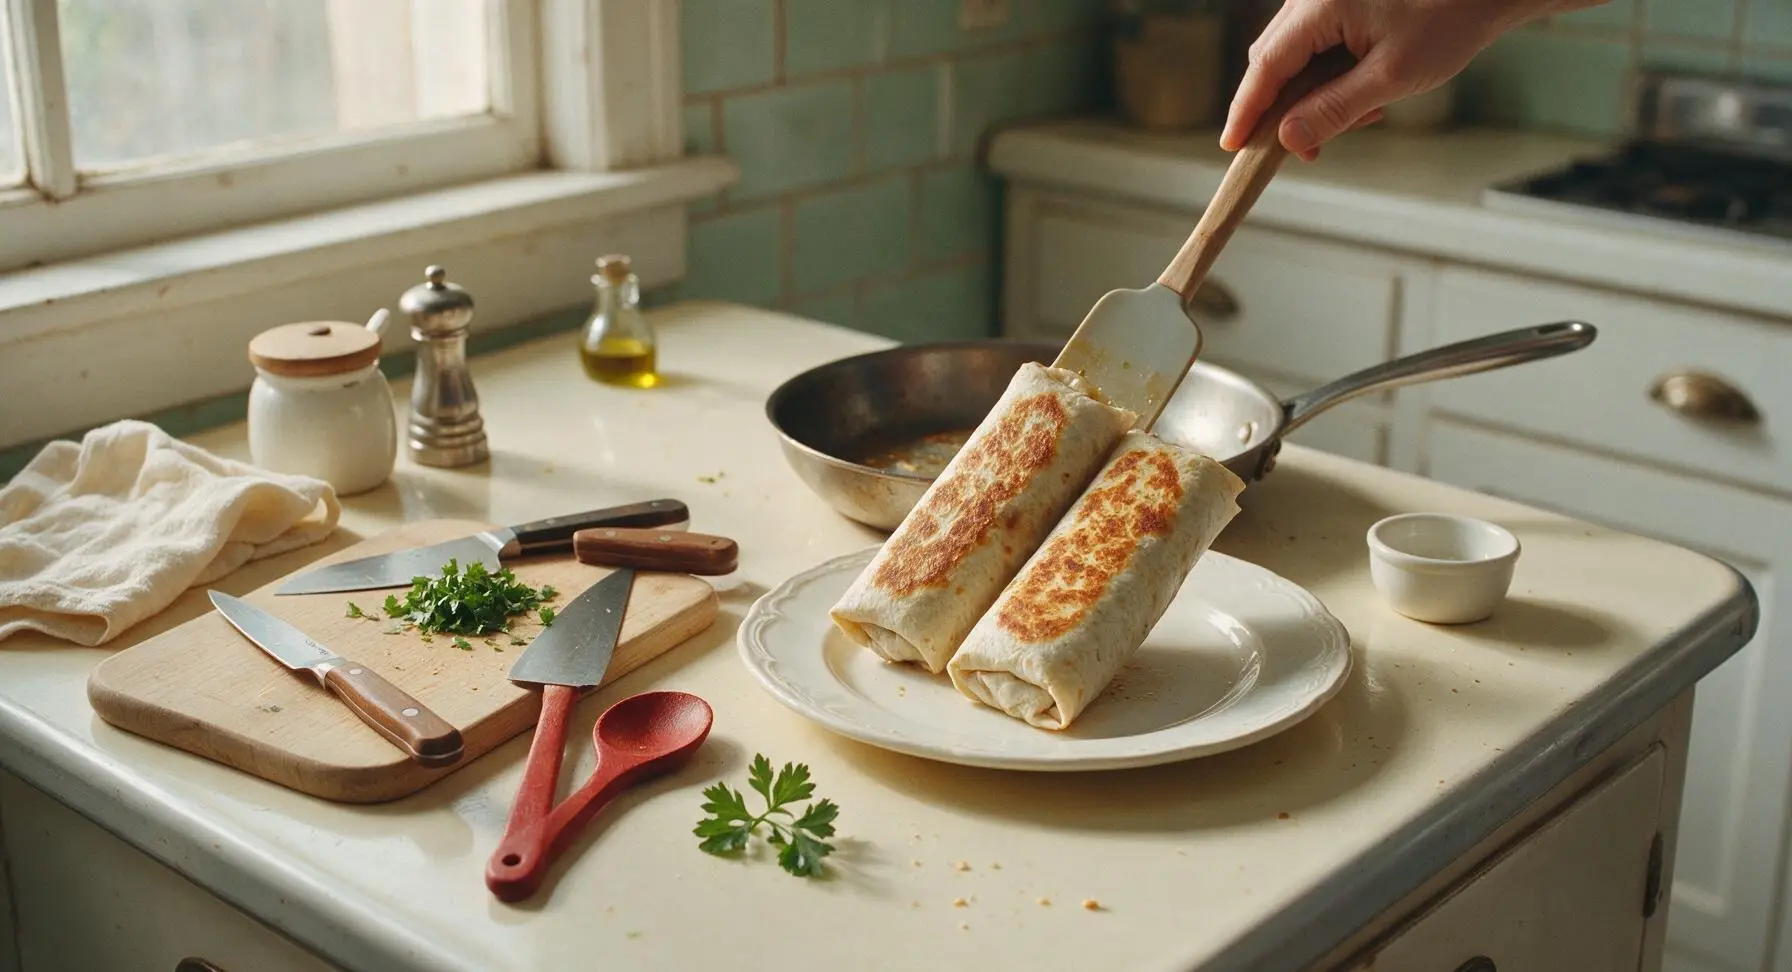
Step 8
step8:Plate and Garnish

Tips

1.Warm tortillas directly over the hot bean mixture instead of using a microwave or dry pan: the savory steam softens tortillas evenly without making them gummy or dry, drastically reducing cracking during rolling.
2.Stick to the measured filling amounts per tortilla: overstuffing is the most common cause of burrito blowouts during rolling or searing, which leads to leaking filling and a messy eating experience.
3.For quick weeknight prep, cook the cilantro-lime rice and spiced bean mixture up to 3 days in advance and store in airtight containers in the fridge; assemble, sear, and serve in under 10 minutes on busy nights.


✨ You May Also Like

Main Course
🍜 United Kingdom

A showstopping classic of tender seared beef, savory mushroom duxelles, and crisp prosciutto wrapped in flaky golden puff pastry, baked to juicy perfection.

⏱️ 2 hours 1Main Course ★ 4.7
Main Course
🍜 India

Tender charred marinated chicken simmered in a rich, spiced creamy tomato sauce, this iconic Anglo-Indian curry pairs perfectly with basmati rice or warm naan.

⏱️ 50 minuteMain Course ★ 4.6
Main Course
🍜 Thailand

Classic tangy, sweet, and savory Thai stir-fried rice noodles with shrimp, tofu, and crunchy garnishes, balancing all five core Thai flavor profiles.

⏱️ 30 minuteMain Course ★ 4.5
Main Course
🍜 United Kingdom

Crispy golden beer-battered cod and fluffy double-fried chips, served with tangy tartar sauce and malt vinegar: the timeless, beloved British pub comfort classic.

⏱️ 45 minuteMain Course ★ 4.7
Main Course
🍜 Mexico

Smoky, chile-marinated pork tacos with caramelized pineapple, fresh cilantro, and lime: a beloved classic Mexican street food perfect for casual summer gatherings.

⏱️ 1 hour 45Main Course ★ 4.8
Main Course
🍜 United States

Crunchy Fritos corn chips layered with savory beef chili and melted cheddar, topped with cool, zesty fixings for a beloved, cozy Tex-Mex comfort food.

⏱️ 35 minuteMain Course ★ 4.8

wicked kitchen burrito:Frequently Asked Questions

1.Can I prep components of this Wicked Kitchen Burrito ahead for quick weeknight meals? ▾
Absolutely! You can cook the cilantro-lime rice, spiced black beans, and smoky roasted corn up to 3 days in advance, storing each component in sealed airtight containers in the fridge. Hold off on dicing avocado until right before assembly to prevent browning, and keep tortillas stored at room temperature so they don’t crack when rolling. Total assembly time drops to just 10 minutes on busy nights.
2.My flour tortillas always crack when I try to roll a tight burrito—what am I doing wrong? ▾
That almost always comes down to using cold, stiff tortillas! Warm your 10-inch flour tortillas for 10 seconds per side on a dry medium-heat skillet, or 30 seconds in the microwave wrapped in a damp paper towel, right before rolling. Warming makes them flexible enough to fold tight without cracking, and be careful not to overstuff fillings to avoid splits.
3.I don’t have frozen roasted corn on hand—what’s a good substitute? ▾
No need for a special grocery run! Regular frozen or drained canned sweet corn works perfectly as a swap. Just toast it in a dry skillet over medium-high heat for 5 minutes, stirring occasionally, until you see golden charred spots, and toss with a tiny pinch of smoked paprika to replicate that signature smoky roasted corn flavor.
4.Can I make this burrito fully vegan without losing that bold, classic Tex-Mex flavor? ▾
It’s already vegetarian as written! For a fully vegan version, swap the melted dairy cheese for a melty vegan cheddar or pepper jack, use olive oil instead of any dairy-based fat to sauté your red bell pepper and beans, and confirm your flour tortilla is lard-free (most mainstream store-bought options are). You won’t lose any of that bold, zesty Tex-Mex punch.
5.How do I get that classic zesty cilantro-lime rice flavor just right? ▾
It’s super simple to nail that bright flavor! Right after your long-grain white rice finishes cooking, fluff it gently with a fork while it’s still warm, then toss in finely chopped fresh cilantro, 1–2 tablespoons of fresh lime juice, a pinch of lime zest, and a light sprinkle of kosher salt. Avoid over-stirring to keep the rice light and fluffy, not mushy.
6.How do I season the canned black beans so they don’t taste bland straight from the can? ▾
Canned beans are easy to amp up so they don’t taste flat! After draining and rinsing them well, sauté the black beans for 3–4 minutes over medium heat with a pinch of ground cumin, mild chili powder, garlic powder, and a tiny splash of vegetable broth to help spices adhere. Lightly mash about 1/4 of the beans as they cook for a creamy texture that keeps fillings from falling out.
7.Can I freeze these burritos for quick grab-and-go meals later? ▾
Absolutely! Assemble burritos as written, but hold off on adding fresh avocado, which gets mushy and brown when frozen. Wrap each burrito tightly in plastic wrap followed by a layer of aluminum foil, then freeze for up to 3 months. Reheat straight from frozen at 375°F for 25 minutes, or microwave for 2 minutes then crisp on a skillet for 1 minute for a crunchy exterior.
8.I don’t have long-grain white rice—can I use brown rice or a lower-carb rice substitute instead? ▾
Of course! Cooked long-grain brown rice is a fantastic swap, with a nuttier, chewier texture and extra fiber that pairs perfectly with the Tex-Mex seasonings. For a lower-carb option, use cilantro-lime seasoned riced cauliflower, just be sure to squeeze out all excess moisture from the cooked cauliflower rice first to avoid a soggy burrito.
9.How much filling should I add per burrito to avoid it bursting open when I roll it? ▾
For a standard 10-inch flour tortilla, stick to roughly 3/4 cup of total combined fillings, arranged in a narrow line across the lower third of the tortilla (the edge closest to you). Piling fillings too high or spreading them across the entire tortilla surface makes it impossible to fold tight, leading to splits and filling spilling out mid-bite.
10.What add-ins work well if I want to boost the protein in these burritos? ▾
There are tons of easy, flavor-matching protein boosts! Tuck in seasoned grilled chicken, sautéed ground turkey or plant-based crumbles, softly scrambled eggs for a breakfast-style twist, or a scoop of creamy refried beans for extra plant-based protein. Just pat any added protein dry of excess moisture first to keep your tortilla from getting soggy.
11.Do I need any special equipment to make these burritos on a busy weeknight? ▾
Nope, no fancy specialty gear is required! All you need is a basic skillet to warm your beans, corn, and diced red bell pepper, a small pot to cook rice (or use pre-cooked leftover rice to skip that step entirely), plus a standard cutting board and knife for prepping produce. The whole recipe comes together with everyday kitchen tools most home cooks already have.
12.How do I get that perfect melted cheese pull every time I make these burritos? ▾
The trick is all in cheese choice and placement! Shred your own cheese from a block instead of using pre-shredded options, which are coated in anti-caking agents that prevent smooth melting. Layer the shredded cheese directly against the warm tortilla or right next to the hot rice and beans when assembling; residual heat from the fillings will melt it into that perfect stretchy, gooey pull.
13.My burritos always get soggy by the time I serve them—how do I fix that? ▾
Sogginess almost always traces back to excess moisture in your fillings! Make sure to drain rinsed black beans thoroughly, pat cooked corn dry of any excess cooking liquid, and avoid tucking watery add-ins like runny salsa or sour cream inside the burrito (serve those on the side for dipping instead). Assemble and serve immediately after rolling for the best, crisp, non-soggy bite.

Comments (7)

2 hours ago

OMG this Wicked Kitchen Burrito is such a game changer for weeknight dinners! I threw it together in 18 minutes flat even with my toddler hanging on my leg begging for snacks, and my whole family devoured it. My kids loved it so much they asked for seconds before they even finished their first serving. Already adding this to our weekly meal prep rotation!

30 minutes ago

Same! I made these for my teen son’s post-soccer practice dinner last night and he ate three of them. Zero complaints, which is basically a miracle in my house.

5 minutes ago

Love hearing this is a hit for the whole family! Pro tip: make a double batch and freeze the wrapped burritos for up to 3 months for super quick grab-and-go meals.

2 days ago

Took this to my neighborhood potluck last weekend and people were hounding me for the recipe all night! It’s so easy to scale up for a crowd, and the flavor is SO good even without adding any extra fancy toppings. Will definitely be making this again for our next game day get-together.

yesterday

Wait, I’m a total beginner in the kitchen and I was worried I’d mess this up, but it was actually so straightforward? Cook time was right at 20 minutes for me, no fancy skills required. I added a little extra hot sauce because I love spice, and it hit perfectly. Great easy recipe!

2 hours ago

So glad it worked out for a new cook! The recipe is super forgiving for customizations, so load up on all your favorite toppings or heat levels however you like.

5 days ago

I meal prepped these on Sunday for my work lunches this week, and I’m not even mad that I’m eating the same thing four days in a row? They reheat so well in the microwave, no soggy tortilla nightmare like other burrito recipes I’ve tried. 10/10.

3 days ago

Wait do you wrap them in paper towel when you reheat? I’ve had soggy burrito issues before and I’m curious if that helps!

1 week ago

Made these for my partner who’s super picky about burritos (he swears only the taco truck down the street makes good ones) and he said these are actually better? Wild. Used the leftover filling to make taco salads for lunch the next day too, zero waste. Obsessed.

5 days ago

That’s the highest compliment coming from a burrito snob, love that! The filling is super versatile, it works great for bowls, salads, even nachos too.

3 days ago

Wait I did the nacho thing last week! Topped it with a little queso and it was chef’s kiss. Can confirm the filling works for literally everything.

2 weeks ago

Great base recipe! I swapped in black beans instead of pinto because that’s what I had in the pantry, added a little corn and diced avocado on top, and it came out amazing. Super easy to tweak to whatever you have on hand, which is perfect for nights I don’t feel like running to the grocery store.

30 minutes ago

Wait why is this called Wicked Kitchen Burrito? The flavor is insane, I get the wicked part! I made these for my roommate’s birthday dinner and she said it’s the best home cooked meal she’s had all year. No cap, this is going in my permanent recipe binder.

just now

The name comes from how bold and packed with flavor every bite is—so happy you and your roommate loved it! If you’re feeling extra adventurous, try adding a dollop of our spicy lime crema on top next time.



