
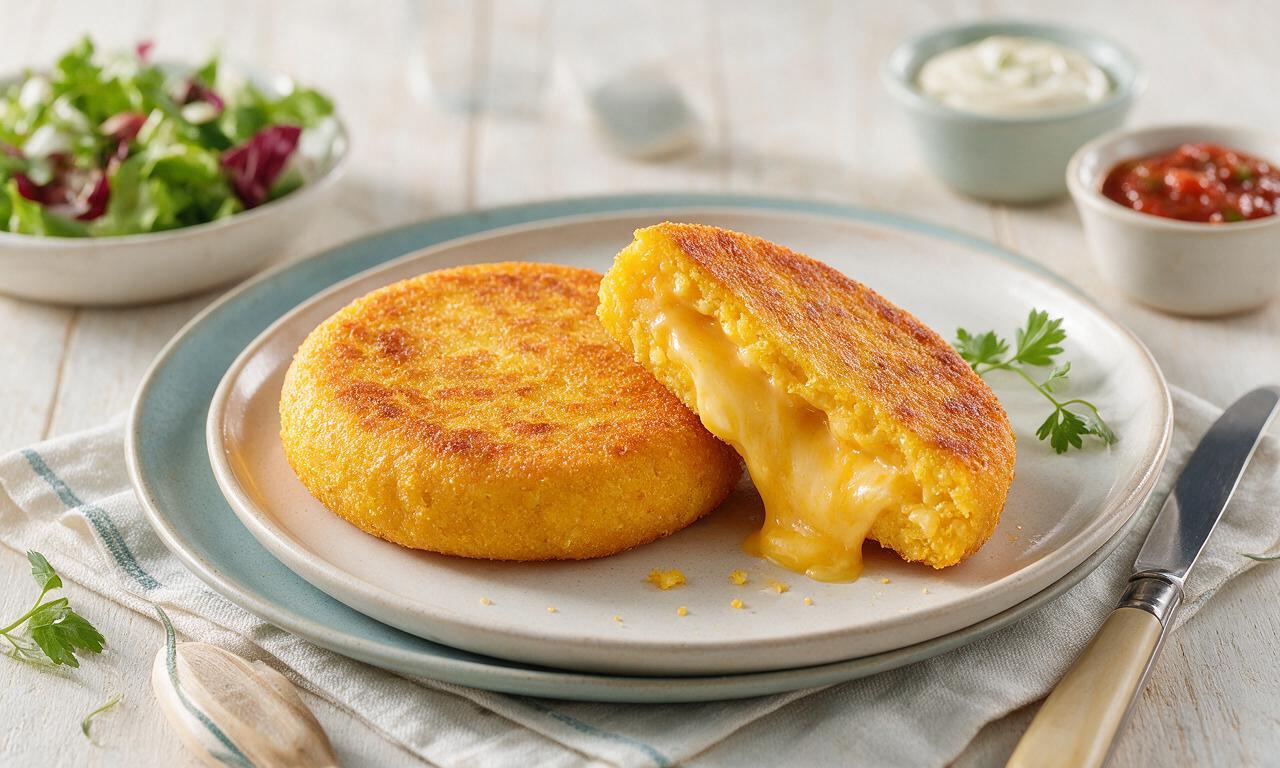
Arepa

Arepa
⏱️ cook time 30 minutes
🍽️ servings 4
⚡ Difficulty easy

intro

Crisp on the outside, soft and gooey with melted cheese inside, these classic cornmeal arepas are a gluten-free, satisfying staple perfect for fast weeknight meals.

Ingredients

Pre-cooked white cornmeal (masarepa) 2 cups (240g)
Warm water 2.5 cups (600ml)
Fine sea salt 1 teaspoon (5g)
Unsalted butter, melted 2 tablespoons (28g)
Shredded queso blanco (or low-moisture mozzarella) 1 cup (113g)
Neutral vegetable oil (avocado or canola) 1 tablespoon (15ml)

Steps

1

Mix arepa dough base

In a large mixing bowl, whisk together 2 cups (240g) pre-cooked white cornmeal (masarepa) and 1 tsp (5g) fine sea salt to evenly distribute the salt. Stir in 2 tbsp (28g) melted unsalted butter, then slowly pour in 2 ½ cups (600ml) warm (43°C/110°F) water, mixing continuously to eliminate lumps. Let the dough rest for 5 minutes, until it is soft, pliable, and does not stick to clean palms.
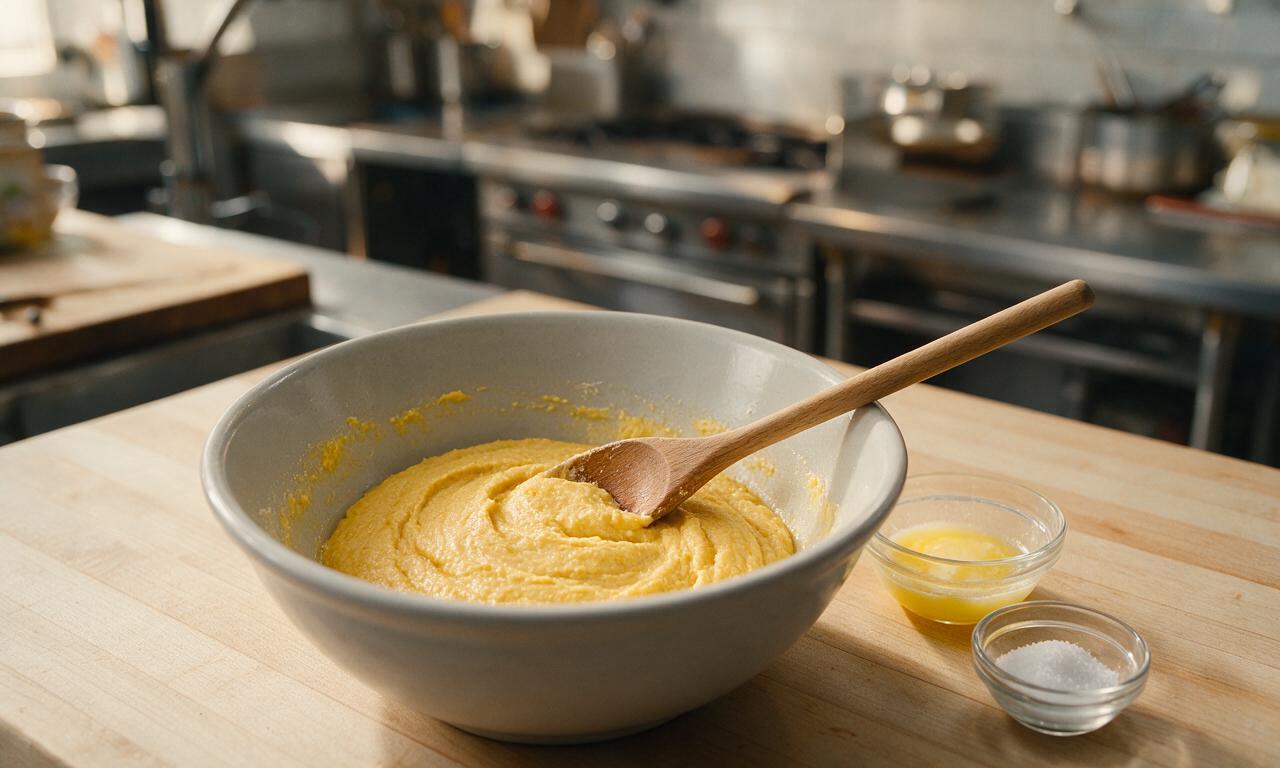
Step 1
step1:Mix arepa dough base
2

Portion and shape patties

Divide the rested dough into 8 equal portions, each weighing roughly 100g. Roll each portion between your palms to form a tight, smooth ball, then press evenly between your hands to create a flat patty that is 1cm (½-inch) thick and 10cm (4-inches) wide. Smooth any cracked edges with a damp fingertip to prevent splitting during cooking.
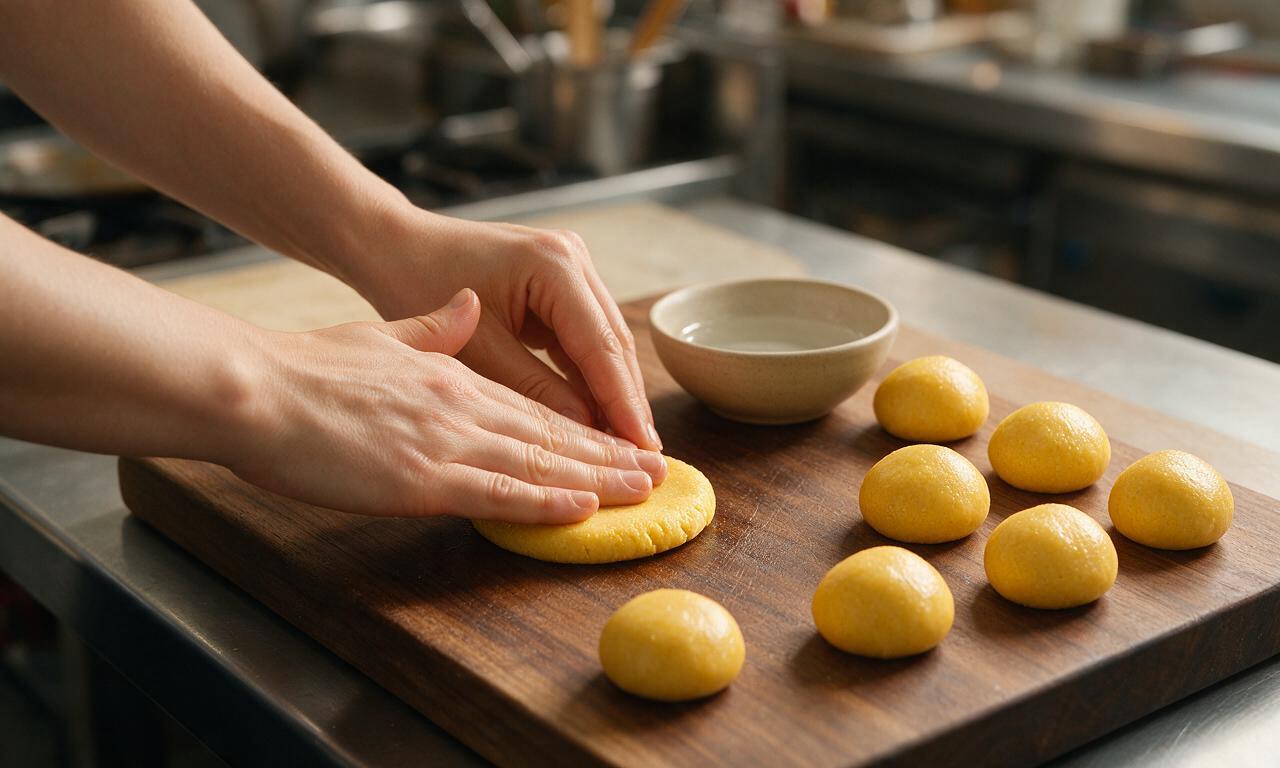
Step 2
step2:Portion and shape patties
3

Preheat cast iron griddle

Place a cast iron griddle or heavy non-stick skillet over medium heat (175°C/350°F). Add 1 tbsp (15ml) neutral avocado or canola oil, and spread it into a thin, even layer across the surface with a crumpled paper towel. Let the griddle preheat for 3 full minutes, so arepas sizzle on contact and do not stick.
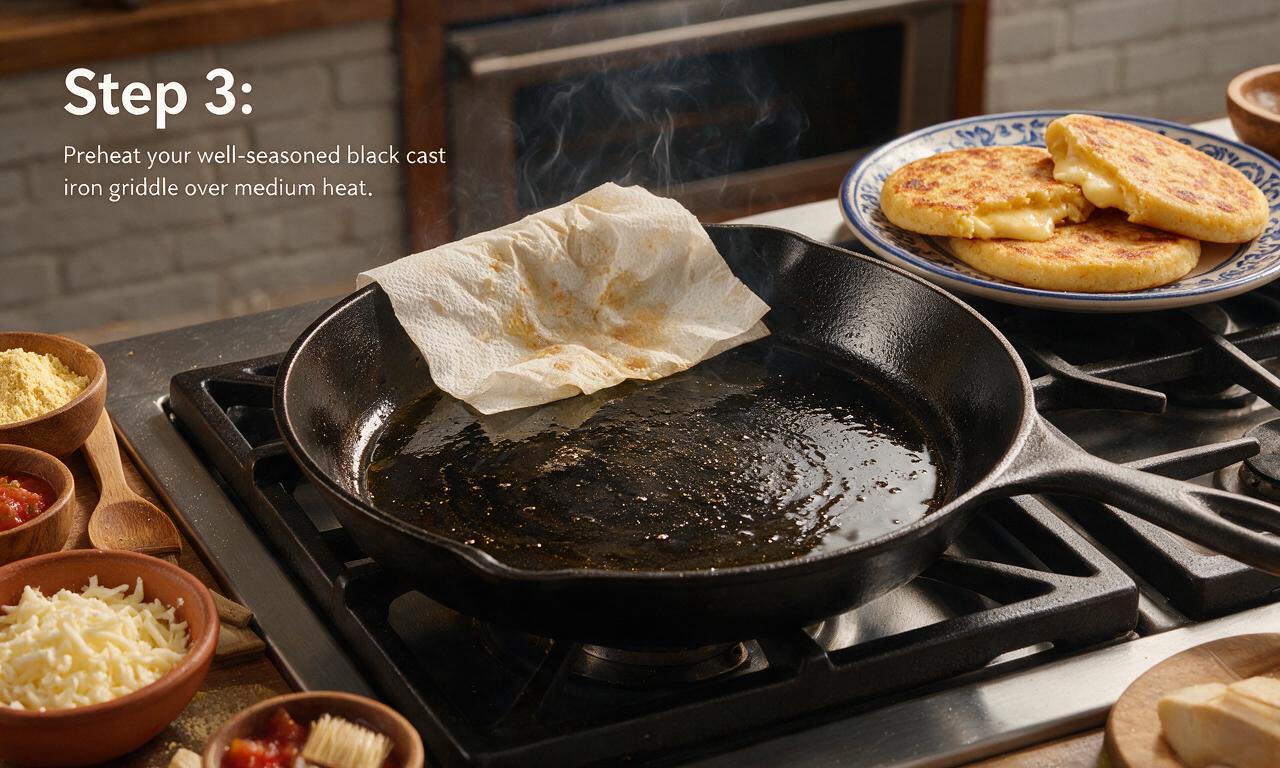
Step 3
step3:Preheat cast iron griddle
4

Sear first arepa side

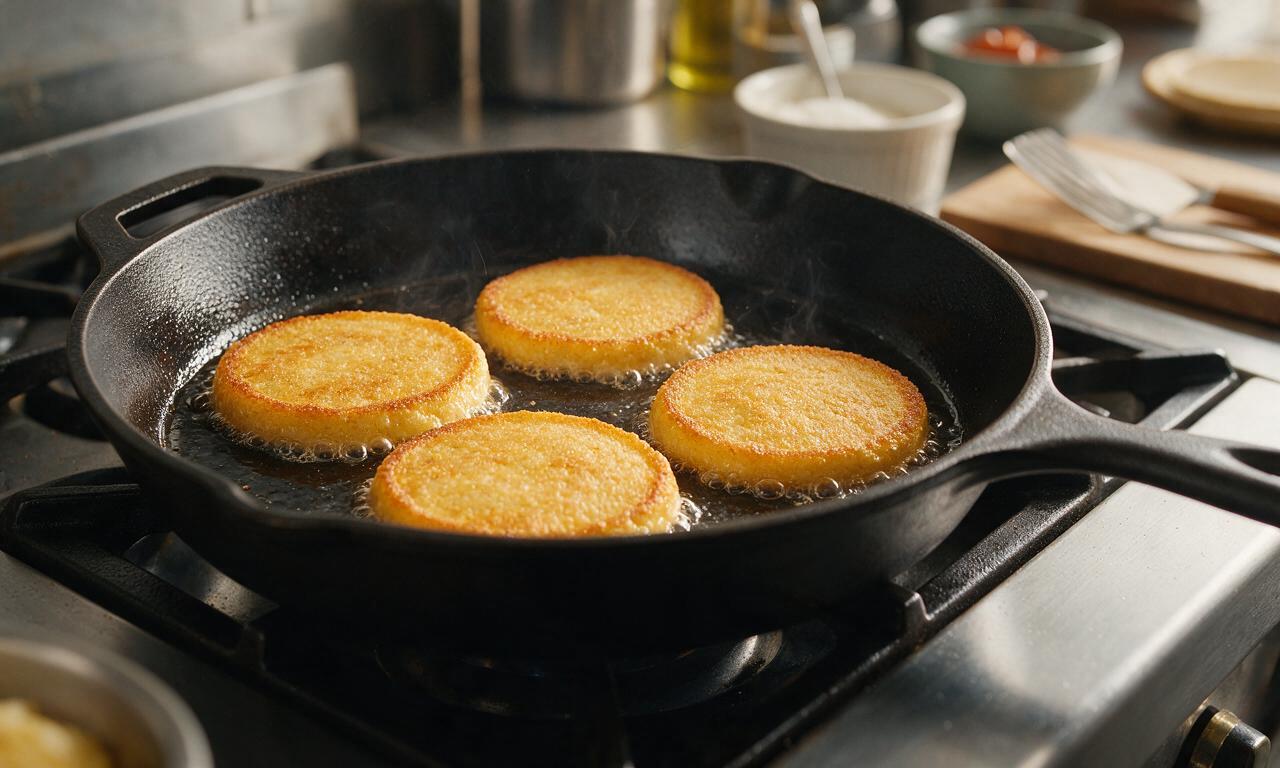
Place the shaped arepa patties on the preheated griddle in a single layer, leaving 2cm (1-inch) of space between each patty for even air circulation. Cook undisturbed for 7 minutes, until the bottom surface forms a deep golden, crisp crust that releases easily from the griddle when nudged with a spatula.
Step 4
step4:Sear first arepa side
5

Flip and cook second side

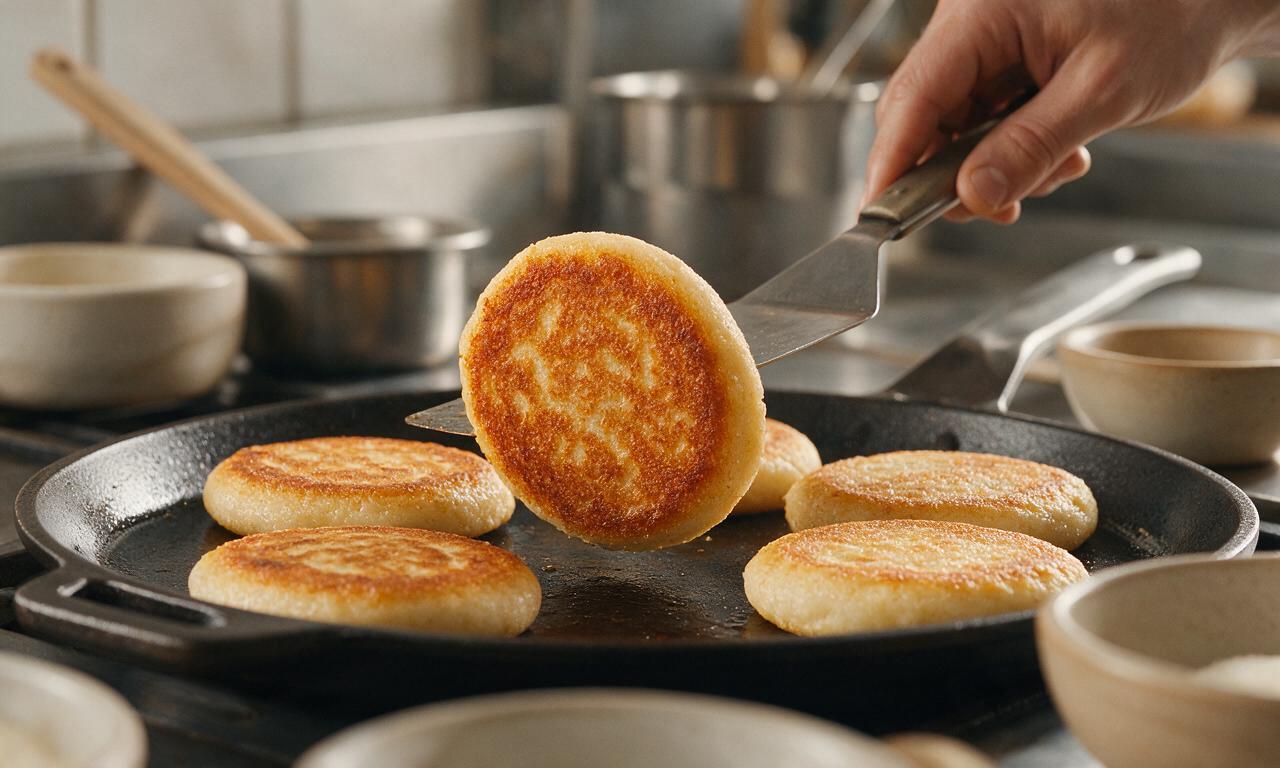
Use a thin, flexible spatula to carefully flip each arepa to its uncooked side. Cook for an additional 6 minutes without moving, until the second side develops a matching crisp golden crust, and the arepa sounds hollow when tapped lightly with the spatula, indicating the interior is fully cooked.
Step 5
step5:Flip and cook second side
6

Stuff and melt cheese

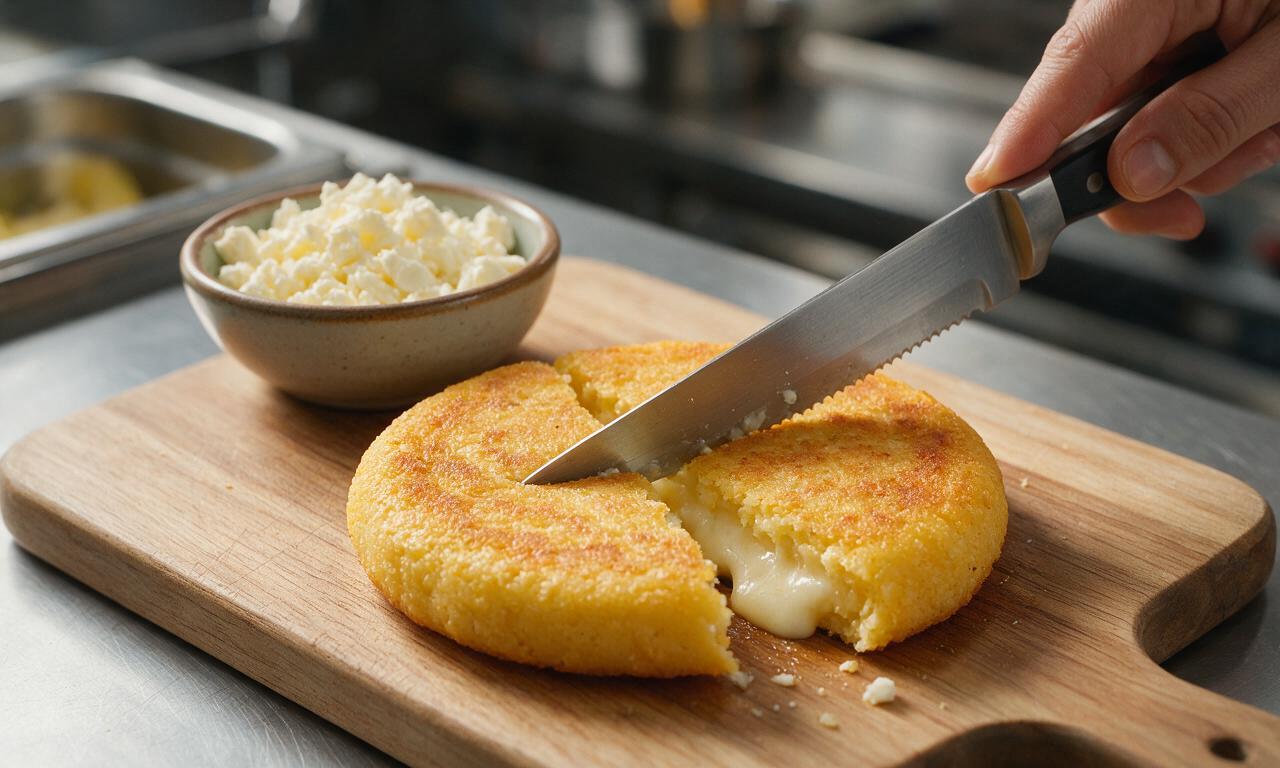
Transfer cooked arepas to a cutting board and let them rest for 2 minutes to cool slightly. Hold each arepa with a folded kitchen towel to protect your hands, then use a small serrated knife to slice horizontally through the edge, cutting ¾ of the way through to create a deep pocket. Stuff each pocket with 2 tbsp (21g) shredded queso blanco, pressing the arepa gently closed for 30 seconds to let residual heat melt the cheese into a gooey filling before serving.
Step 6
step6:Stuff and melt cheese

Tips

1.Only use pre-cooked masarepa (such as the P.A.N. brand) for this recipe; regular cornmeal or corn flour will create a gritty, crumbly texture instead of the signature soft, tender arepa interior.
2.Adjust dough consistency as needed after resting: mix in 1 extra tablespoon of masarepa if the dough is too sticky to handle, or 1 extra tablespoon of warm water if the dough cracks easily when shaped into patties.
3.For extra melty cheese and extra crisp crust, place stuffed arepas back on the warm griddle for 1 minute per side after adding cheese, to toast the exterior and fully melt the filling.


✨ You May Also Like

Main Course
🍜 United Kingdom

A showstopping classic of tender seared beef, savory mushroom duxelles, and crisp prosciutto wrapped in flaky golden puff pastry, baked to juicy perfection.

⏱️ 2 hours 1Main Course ★ 4.7
Main Course
🍜 India

Tender charred marinated chicken simmered in a rich, spiced creamy tomato sauce, this iconic Anglo-Indian curry pairs perfectly with basmati rice or warm naan.

⏱️ 50 minuteMain Course ★ 4.8
Main Course
🍜 Thailand

Classic tangy, sweet, and savory Thai stir-fried rice noodles with shrimp, tofu, and crunchy garnishes, balancing all five core Thai flavor profiles.

⏱️ 30 minuteMain Course ★ 4.6
Main Course
🍜 United Kingdom

Crispy golden beer-battered cod and fluffy double-fried chips, served with tangy tartar sauce and malt vinegar: the timeless, beloved British pub comfort classic.

⏱️ 45 minuteMain Course ★ 4.9
Main Course
🍜 Mexico

Smoky, chile-marinated pork tacos with caramelized pineapple, fresh cilantro, and lime: a beloved classic Mexican street food perfect for casual summer gatherings.

⏱️ 1 hour 45Main Course ★ 4.7
Main Course
🍜 United States

Crunchy Fritos corn chips layered with savory beef chili and melted cheddar, topped with cool, zesty fixings for a beloved, cozy Tex-Mex comfort food.

⏱️ 35 minuteMain Course ★ 4.9

Arepa:Frequently Asked Questions

1.Can I use regular cornmeal instead of pre-cooked masarepa for these arepas?
Unfortunately, regular raw cornmeal won’t work as a direct swap—it has a gritty, crumbly texture that won’t form the smooth, pliable dough you need for arepas. If you can’t find pre-cooked white masarepa, fine-ground instant polenta is the closest substitute, though you’ll need to let the dough rest 10 extra minutes to fully hydrate before shaping.
2.Why do my arepas crack or fall apart when I’m shaping them?
Cracking almost always comes down to dough hydration. If your dough feels dry and crumbly, knead in 1–2 extra tablespoons of warm water at a time until it’s the consistency of soft playdough. Don’t skip letting the dough rest 5 minutes after mixing, either—this gives the cornmeal time to absorb moisture so it doesn’t split while you form patties.
3.What’s the best cheese to use if I can’t find queso blanco?
Low-moisture, part-skim mozzarella is the most widely available swap, as it melts into that perfect gooey, stringy pull without making arepas soggy. You can also use shredded Oaxaca, panela, or a 50/50 mix of mozzarella and mild feta for subtle tang, just avoid high-moisture fresh cheeses that will leak out while cooking.
4.How do I keep the cheese from oozing out while the arepas cook?
The key is to fully seal the cheese inside the dough so there are no thin spots or gaps. When shaping, split a dough ball into two thin patties, pile cheese in the center of one, top with the second patty, crimp edges tightly to seal, and smooth out the seam. Don’t overstuff—¼ cup of cheese per arepa is the ideal amount.
5.Can I make these arepas ahead of time for meal prep?
Absolutely! You can shape uncooked, cheese-stuffed arepas, layer them between sheets of parchment paper, and store them in an airtight container in the fridge for up to 3 days, or freeze them for up to 3 months. Cook them straight from the fridge or freezer—just add 2–3 minutes of cook time if frozen, no thawing needed.
6.My arepas are burnt on the outside but still raw in the middle—what am I doing wrong?
That almost always means your cooking heat is too high. Arepas need medium-low heat to cook all the way through without scorching the exterior. Cook them 7–8 minutes per side in a lightly buttered skillet; if they’re still doughy in the center, pop them in a 350°F oven for 5 minutes to finish evenly without burning.
7.Are these arepas actually gluten-free, or do I need special ingredients?
When made with authentic pre-cooked masarepa, these arepas are 100% gluten-free, as masarepa is milled purely from corn with no added wheat fillers. Just double-check labels on your cornmeal and shredded cheese to avoid hidden gluten-containing anti-caking agents or cross-contamination if cooking for someone with a severe gluten allergy.
8.What are good toppings or sides to serve with these cheese-stuffed arepas?
These arepas are delicious on their own, but you can top them with a dollop of guacamole, salsa, sour cream, or pickled red onions for extra brightness. They pair perfectly with black beans, scrambled eggs, or shredded roasted chicken for a heartier meal, or alongside a simple arugula salad for a light weeknight dinner.
9.Can I bake these arepas instead of pan-frying them for a lower-fat option?
You can! Preheat your oven to 400°F, place shaped, stuffed arepas on a parchment-lined baking sheet, brush tops lightly with melted butter or oil, and bake for 15 minutes, flip, then bake 12–15 more minutes until golden and crisp. They won’t have the same deep, crispy crust as pan-fried arepas, but they’re still tender and cheesy inside.

Comments (9)

2 hours ago

OMG these cheese-stuffed arepas are a GAME CHANGER! I’ve been intimidated to make arepas at home forever but this recipe was so easy, even my terrible cooking skills didn’t mess it up. Used queso blanco like the tip said and it oozed out perfectly when I bit into it. My kids devoured 2 each before I even sat down for dinner. 10/10 will be making these weekly for meal prep!

30 minutes ago

Wait did you use masarepa? I accidentally bought regular cornmeal last time I tried arepas and they turned out so crumbly 😅

5 minutes ago

So glad your family loved them, Mia! Pro tip for Jake too: you definitely want pre-cooked masarepa (like PAN brand) for that perfect soft inside, crispy outside texture — regular cornmeal won’t give you the same result!

yesterday

Made these for a potluck at work yesterday and people were begging me for the recipe! I added a little bit of shredded mozzarella mixed with the queso for extra gooeyness, and they were chef’s kiss. Only took me 30 minutes total which was perfect because I ran home on my lunch break to make them. SO good, will absolutely make again.

2 hours ago

Love the mozzarella mix hack, Lila! So glad they were a potluck hit — arepas are such a crowd pleaser for exactly that reason, quick to make and everyone loves that cheesy center.

3 days ago

Solid easy recipe, turned out great on my first try. I did cook them a tiny bit longer on each side to get that extra crispy crust, which I personally prefer. Paired mine with some black beans and avocado for a quick weeknight dinner, no complaints at all. Will be adding this to my regular rotation.

5 days ago

Wait a second, I’ve been paying $8 for arepas at my local food truck for years??? This recipe is so cheap and easy I could cry. I stuffed mine with pepper jack because that’s what I had in the fridge, and the little kick was *chef’s kiss*. My roommate already asked if we can make these every Sunday from now on.

3 days ago

Pepper jack is such a good call! I did half cheddar half pepper jack last week and it was amazing, way better than the food truck ones tbh

1 week ago

Took me a couple tries to get the patty thickness right — my first couple were too thin and all the cheese leaked out while cooking. Once I got them to about half an inch thick they turned out perfect though! Great easy recipe, just don’t make them too thin like I did at first lmao.

5 days ago

Great tip, Brian! The ½-inch thickness is key to keeping that cheese locked in while they crisp up — so glad you stuck with it and got them to turn out!

2 weeks ago

Made these for my partner’s birthday dinner since he’s been missing arepas from his trip to Colombia, and he said they tasted exactly like the ones he had there! I served them with a side of ají sauce and it was such a perfect cozy night in. Super straightforward recipe, no fancy ingredients needed, which I love.

2 days ago

Meal prep win! I made a big batch of these on Sunday, kept them in the fridge, and reheated them in the toaster oven all week for quick lunches. The cheese still gets all melty when you reheat them, no sogginess at all. Saved me so much money on takeout this week, will absolutely be doing this every other week.

yesterday

How long do they keep in the fridge for? I’ve been looking for new meal prep ideas that actually hold up all week!

2 hours ago

So stoked these worked for your meal prep, Marcus! To answer Tasha’s question: stored in an airtight container, these will stay good for 3-4 days in the fridge, and reheat perfectly in a toaster oven or skillet like you did. Great call!

5 minutes ago

I’m a total beginner cook and I was so nervous these would be hard, but they were literally so easy? The instructions were super clear, no weird steps, and I only messed up one arepa out of the whole batch (ate it while I cooked the rest, no shame). The cheesy center is so satisfying, this is going to be my go-to snack for movie nights from now on.

just now

Pro tip for next time: throw a little garlic butter on the outside right before they finish cooking, it’s insane. I do that every time now

30 minutes ago

Tried these last night with my 10 year old, he loved helping mix the dough and stuff the cheese! It was such a fun little cooking activity, and the end result was delicious. We dipped ours in salsa and it was the perfect quick weeknight meal. Will definitely be making these again with the kiddo, such a fun easy recipe.



