
asian chicken breast

title 1
asian chicken breast
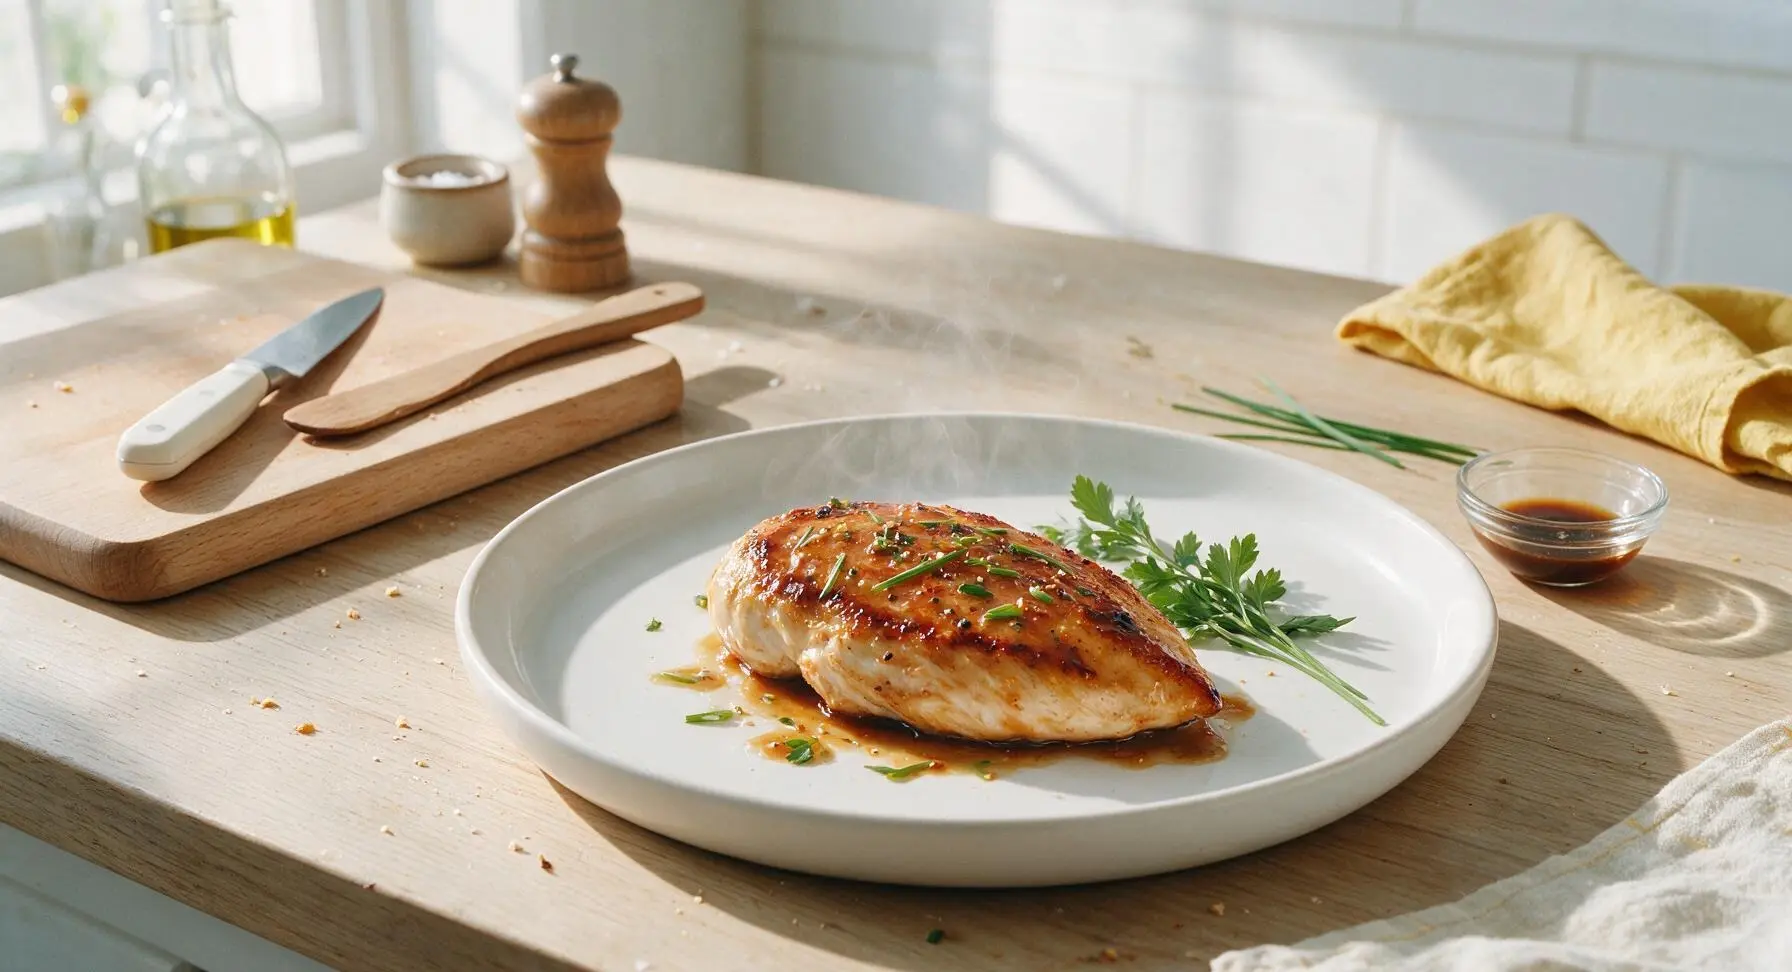
⏱️ cook time 15 minutes
🍽️ servings 4
⚡ Difficulty easy

intro

Juicy, tender chicken breast coated in a sticky umami soy glaze, seared to golden perfection with a subtle caramelized edge. Quick, high-protein, and packed with bright, balanced Asian flavor.

Ingredients
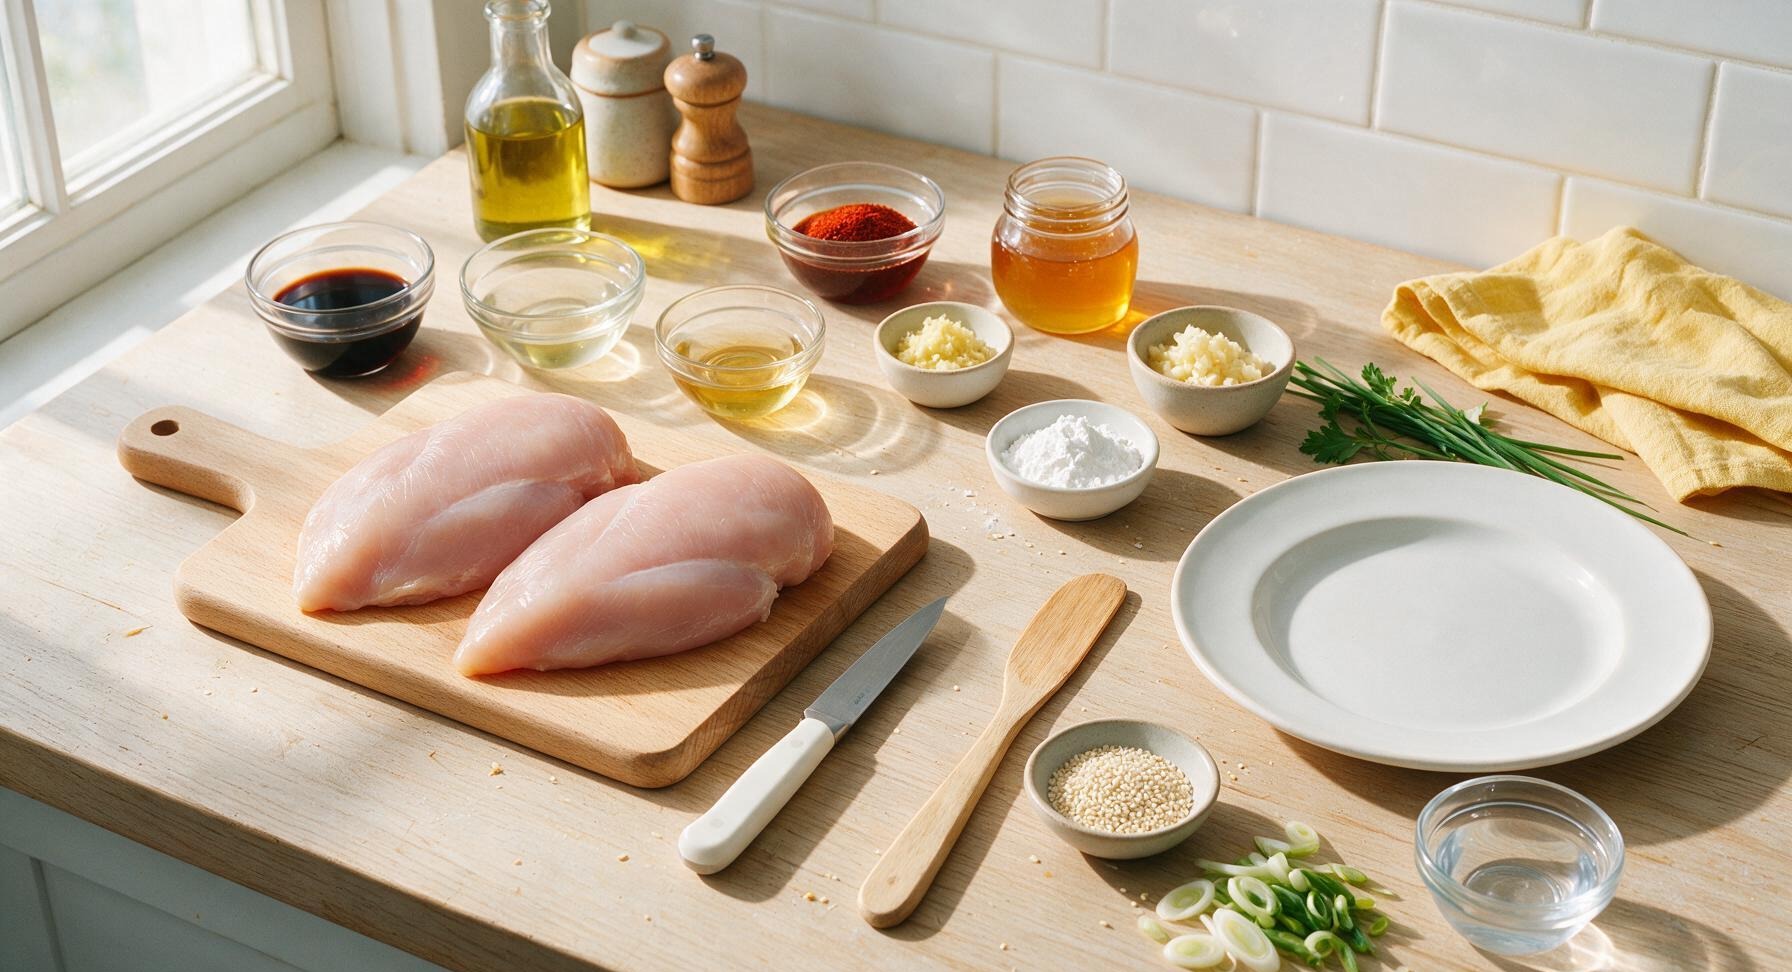
Boneless, skinless chicken breast 680g (2 large breasts, trimmed of excess fat)
Low-sodium soy sauce 3 tablespoons
Raw honey 1 tablespoon
Unseasoned rice vinegar 1 tablespoon
Toasted sesame oil 1 teaspoon
Fresh ginger 1 teaspoon (finely grated)
Garlic cloves 2 (finely minced)
Gochugaru (Korean red pepper flakes) 1/4 teaspoon
Cornstarch 1 teaspoon
Cold water 2 tablespoons
Fresh scallions 2 stalks (thinly sliced, green and white parts separated)
Toasted white sesame seeds 1 teaspoon
Neutral high-smoke-point oil (avocado or canola) 1 teaspoon

Steps

1

Prep Chicken Breasts

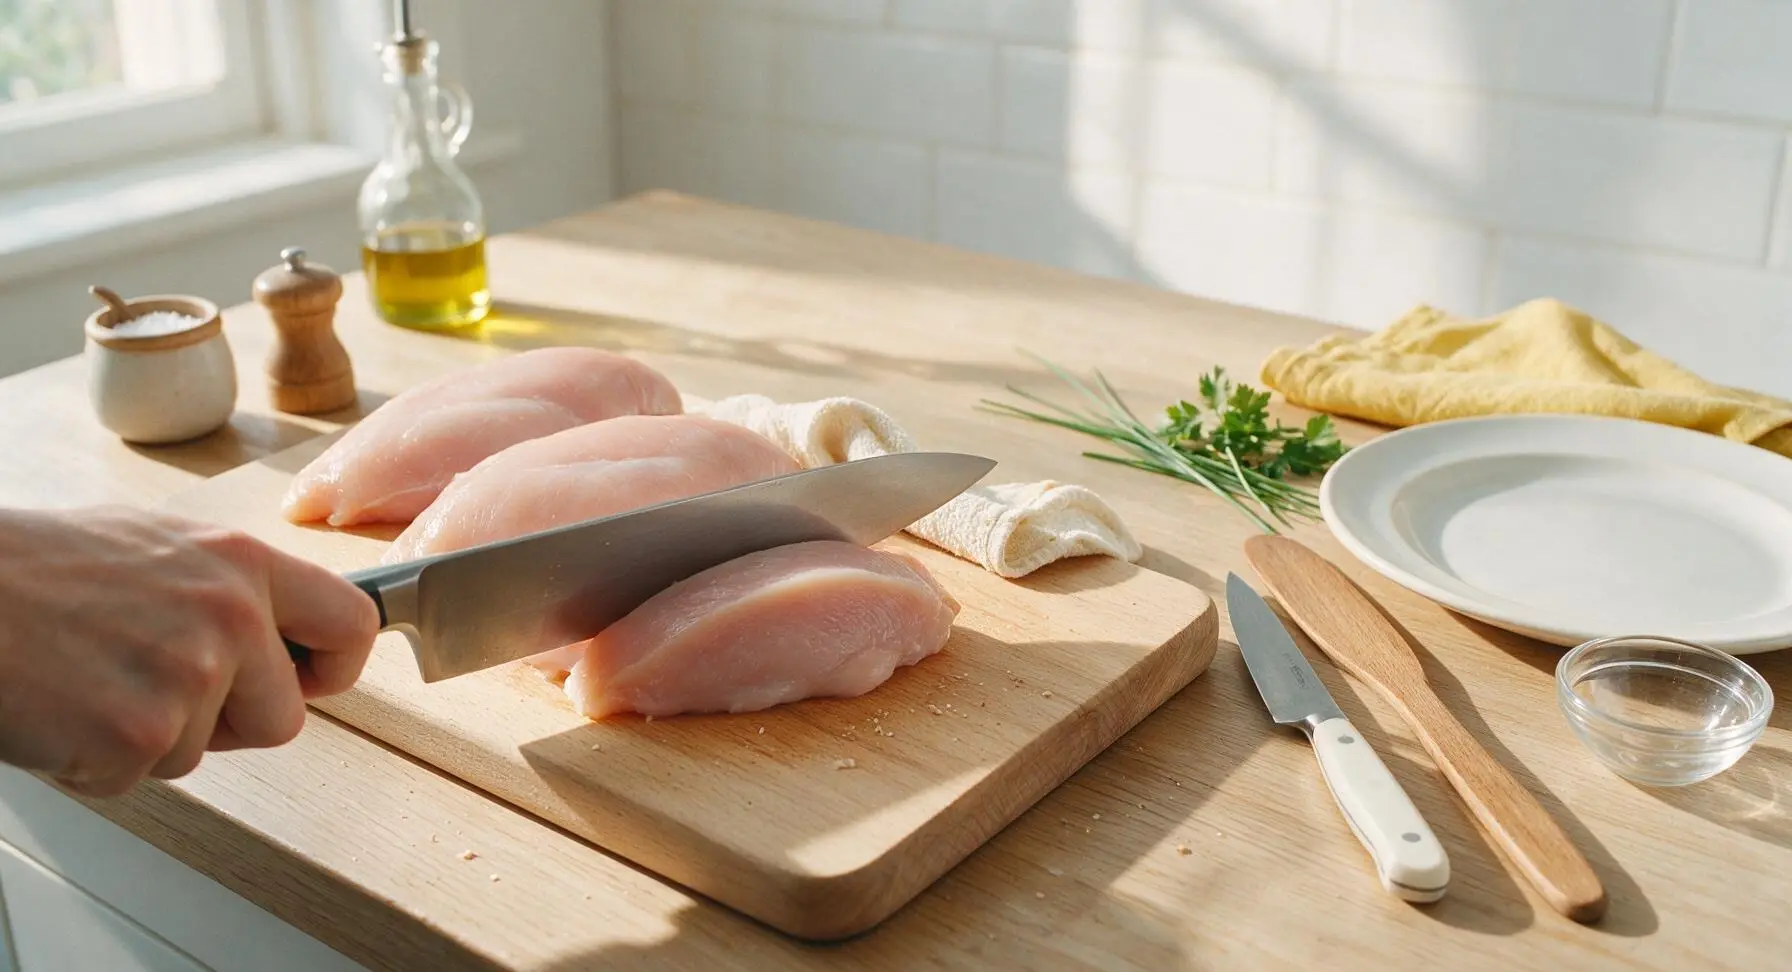
Place trimmed chicken breasts on the maple cutting board. Hold the chef knife parallel to the board and slice each thick breast horizontally into two even 1.5cm thick cutlets, so all pieces cook at the same rate. Lightly pound the thickest edges with the flat side of the knife to create uniform thickness across every cutlet. Pat both sides completely dry with a corner of the cream cotton towel; a dry surface is critical for a crisp, golden sear.
Step 1
step1:Prep Chicken Breasts
2

Whisk Asian Glaze

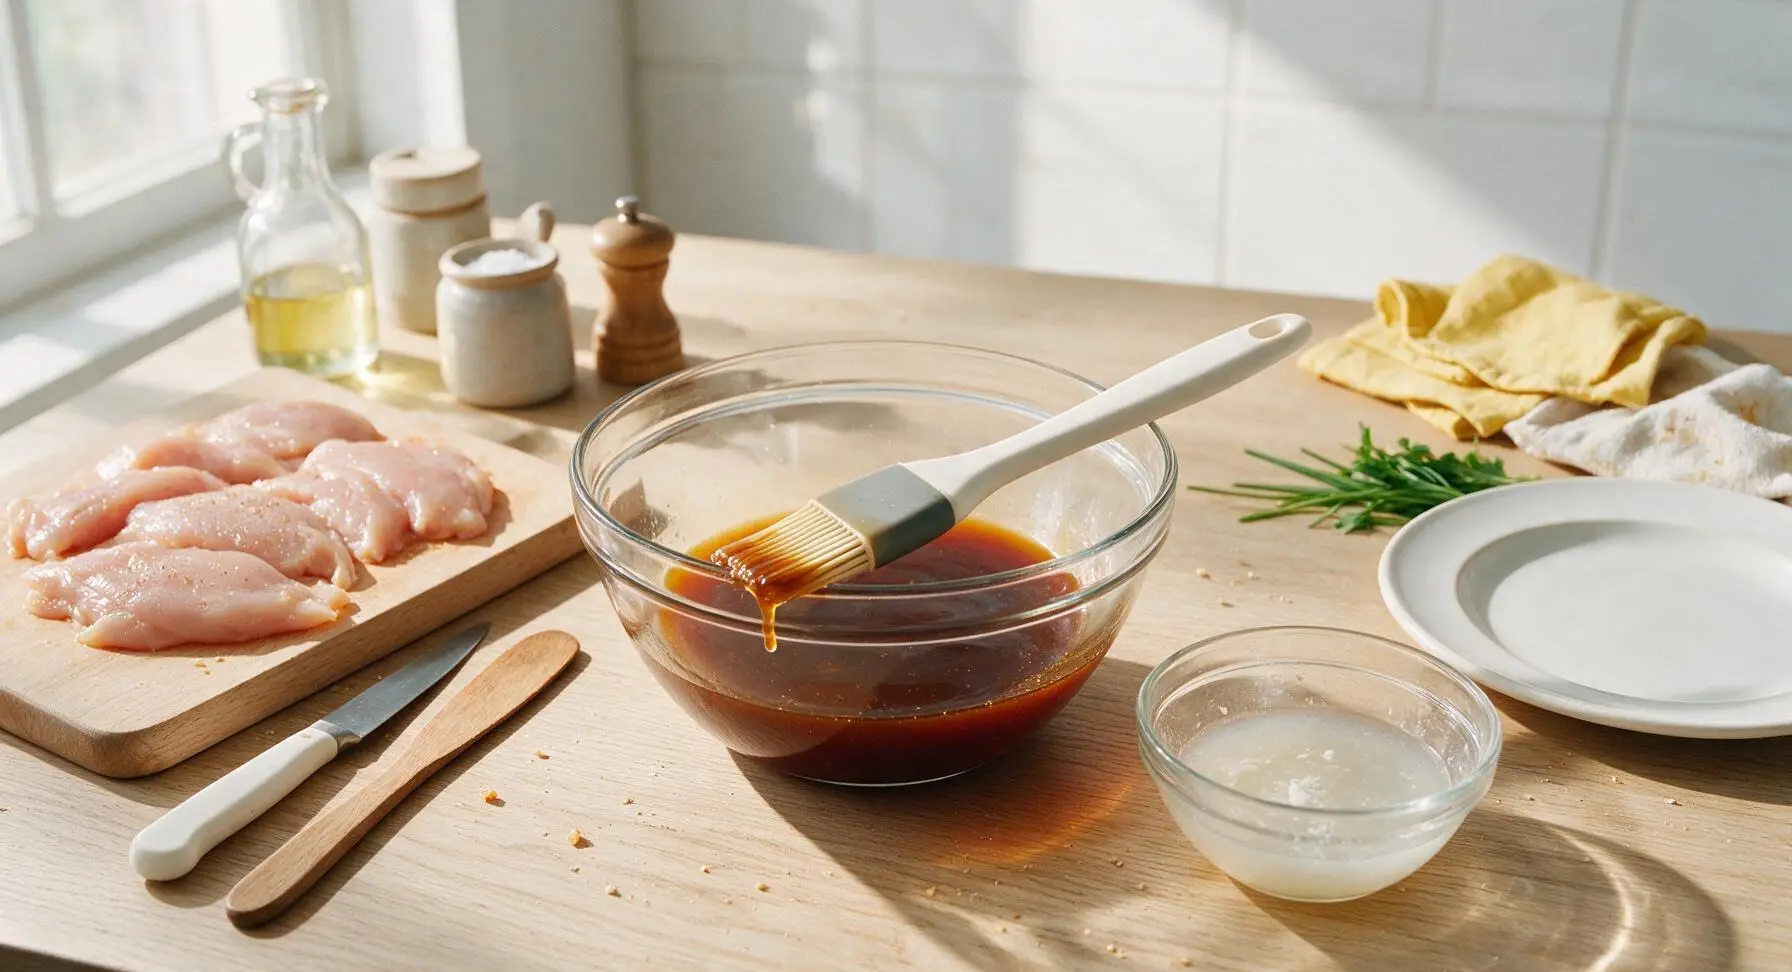
In the clear glass mixing bowl, combine 3 tablespoons low-sodium soy sauce, 1 tablespoon honey, 1 tablespoon rice vinegar, 1 teaspoon toasted sesame oil, 1 teaspoon grated ginger, 2 minced garlic cloves, 1/4 teaspoon gochugaru, and the white parts of the sliced scallions. Whisk with the handle end of the basting brush until honey is fully dissolved and the mixture is smooth, with no honey clumps at the bottom of the bowl. In the small off-white pinch bowl, stir 1 teaspoon cornstarch with 2 tablespoons cold water to make a smooth slurry, set aside.
Step 2
step2:Whisk Asian Glaze
3

Heat Skillet for Searing

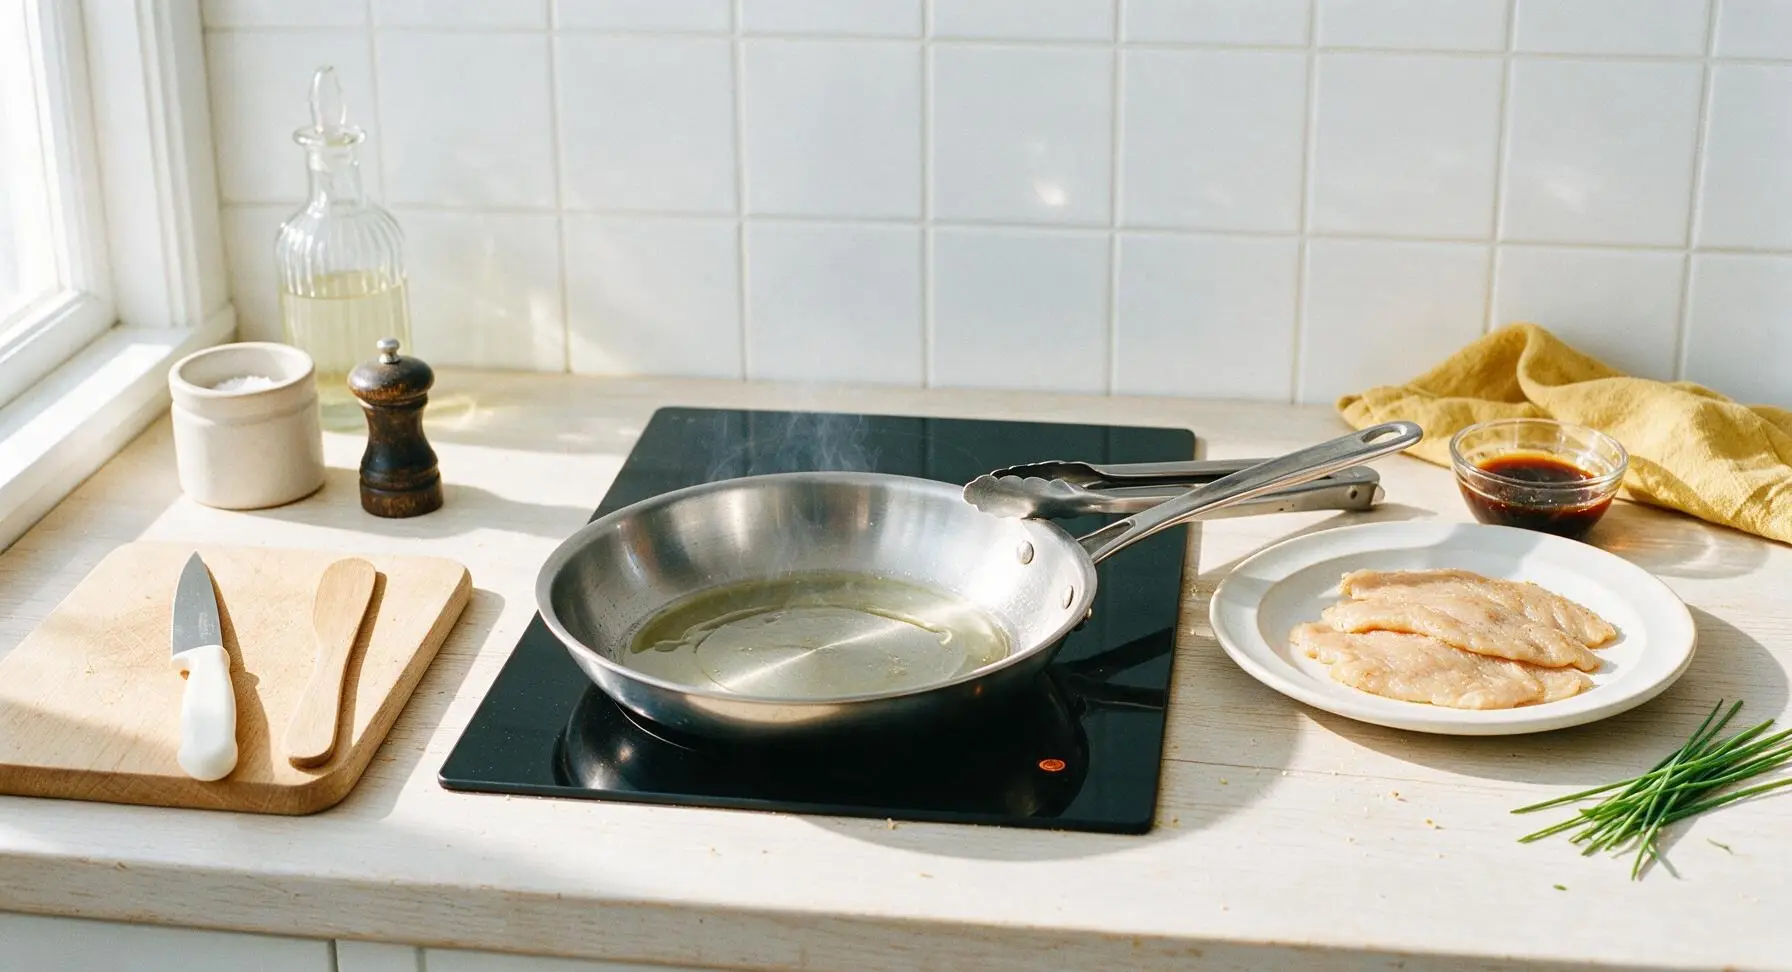
Move the 10-inch stainless steel skillet from its back right storage spot to the center burner of the induction cooktop. Add 1 teaspoon neutral oil, and heat over medium-high heat until the oil shimmers and just begins to send up faint wispy smoke, about 2 minutes. Do not let the oil burn; it should move easily across the pan surface when tilted.
Step 3
step3:Heat Skillet for Searing
4

Sear Chicken Cutlets

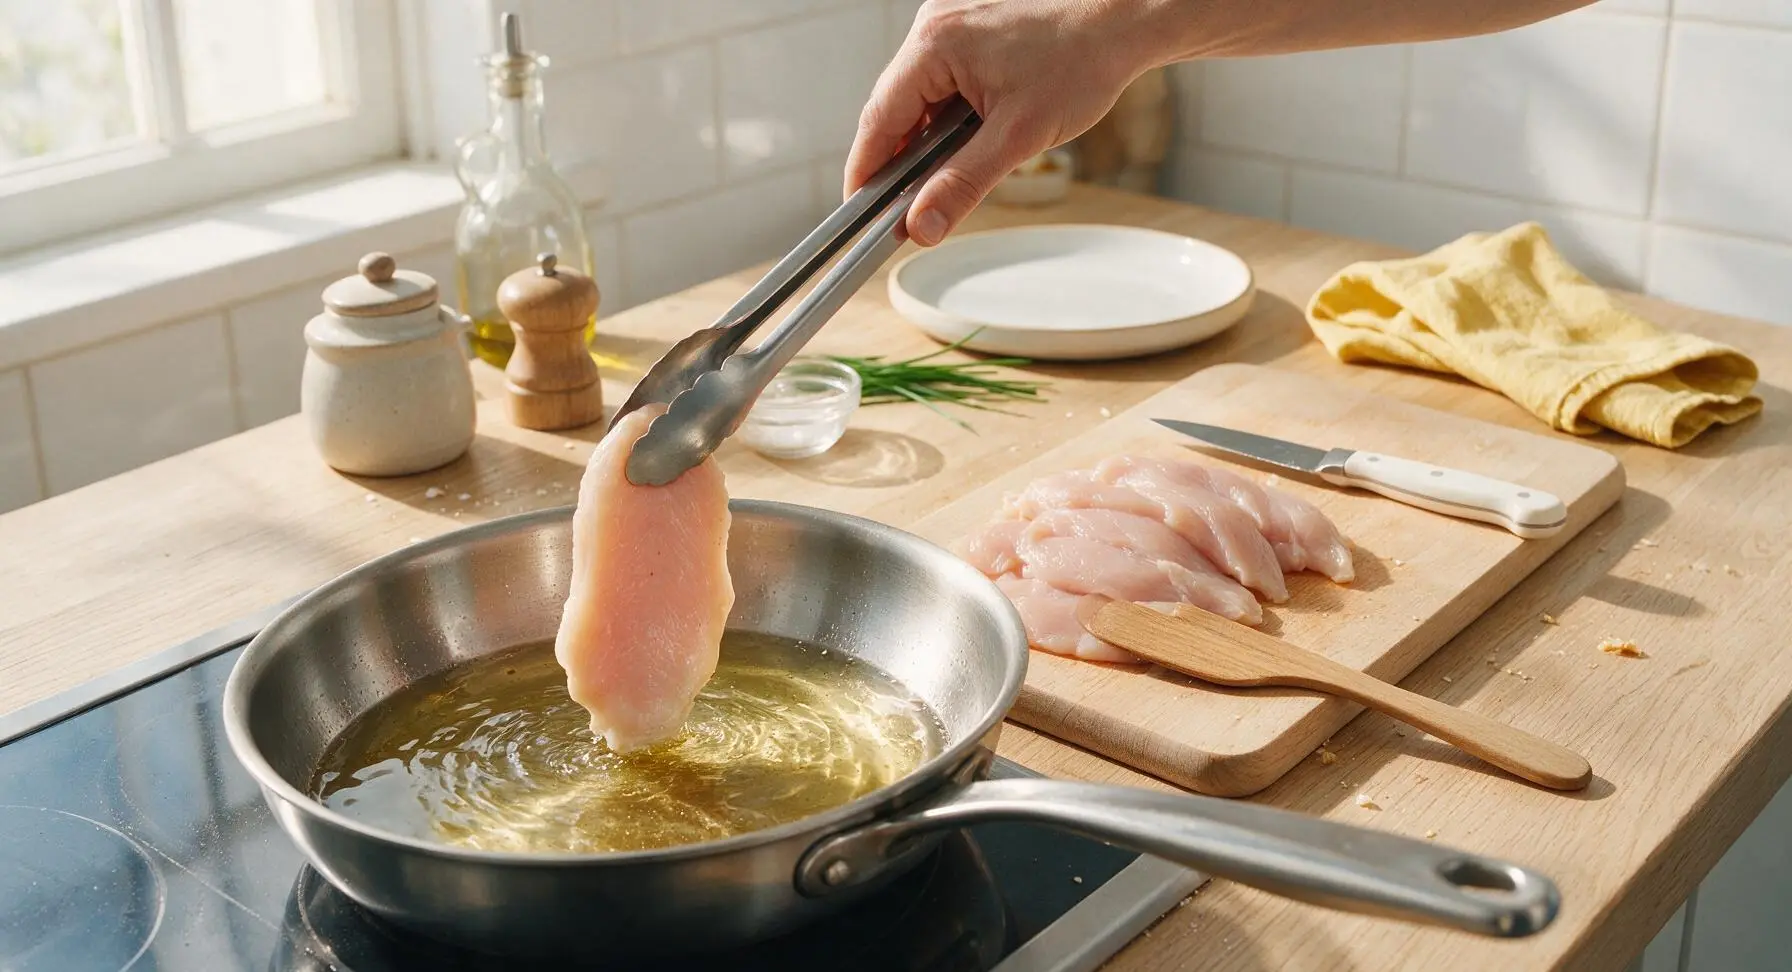
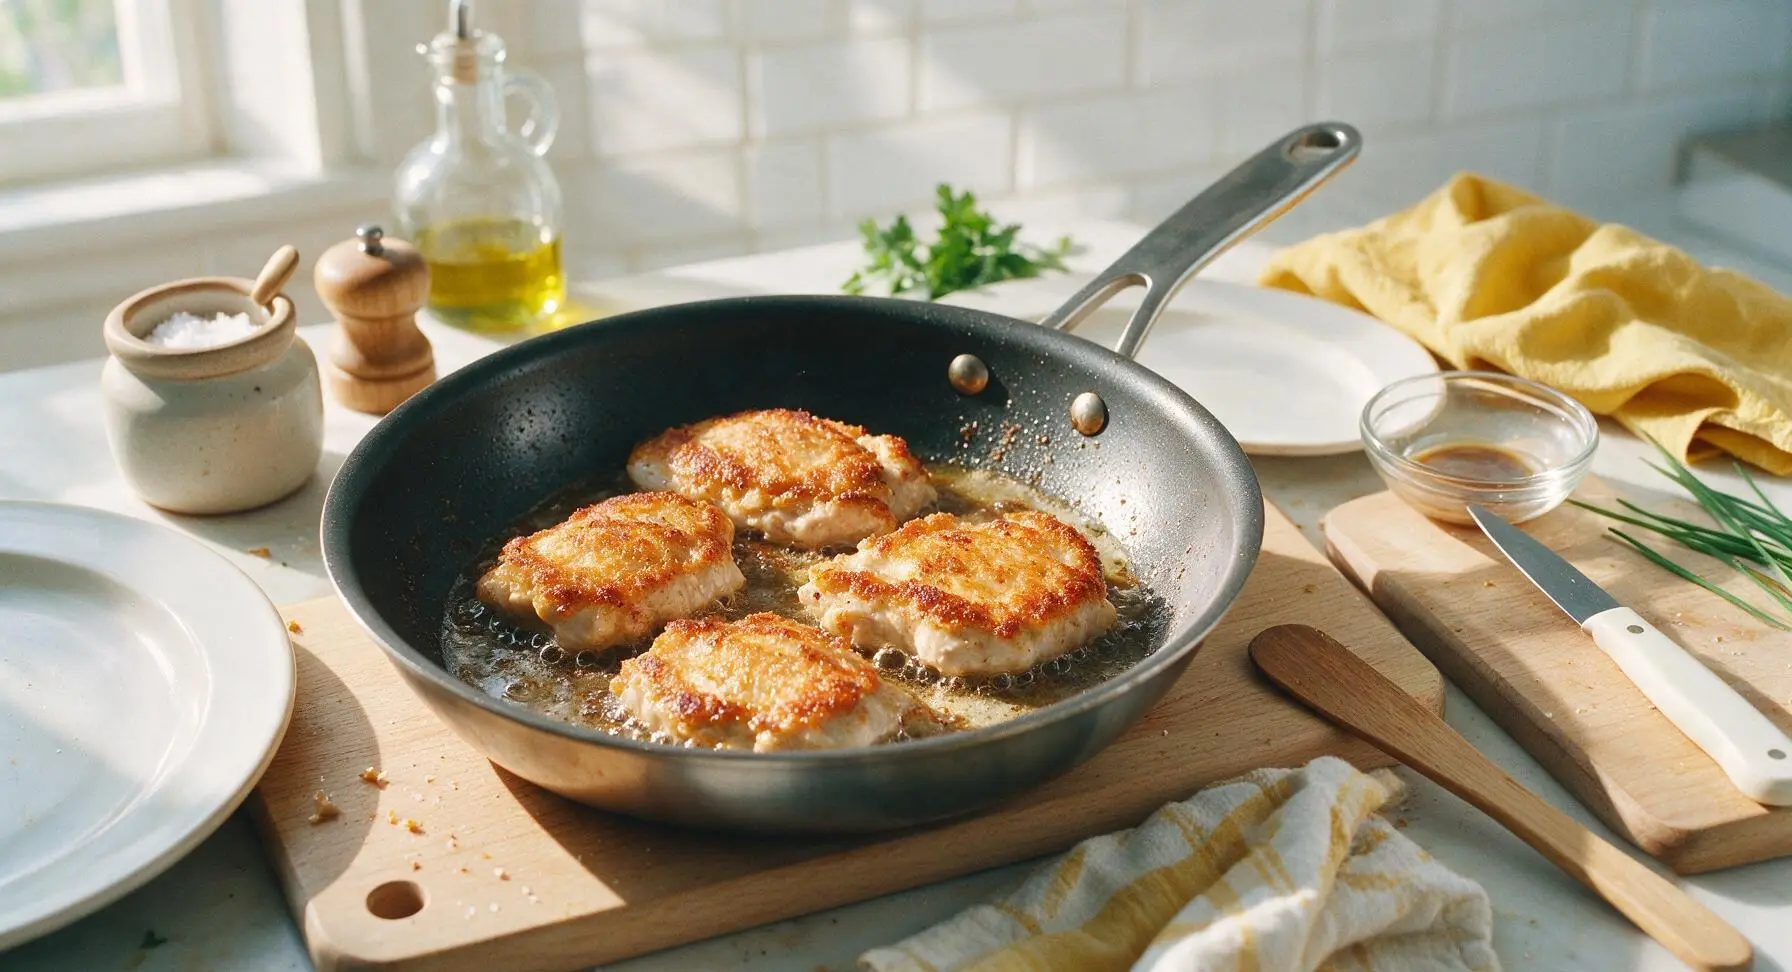
Carefully lay the dried chicken cutlets in the hot skillet in a single layer, working in two batches if needed to avoid crowding the pan (crowding causes steaming instead of searing). Sear undisturbed for 4 minutes, until the bottom side develops a deep golden brown, slightly crisp crust. Do not move the chicken during this time to build a proper sear.
Step 4
step4:Sear Chicken Cutlets
Step 4
step4:Sear Chicken Cutlets
5

Flip and Baste Chicken

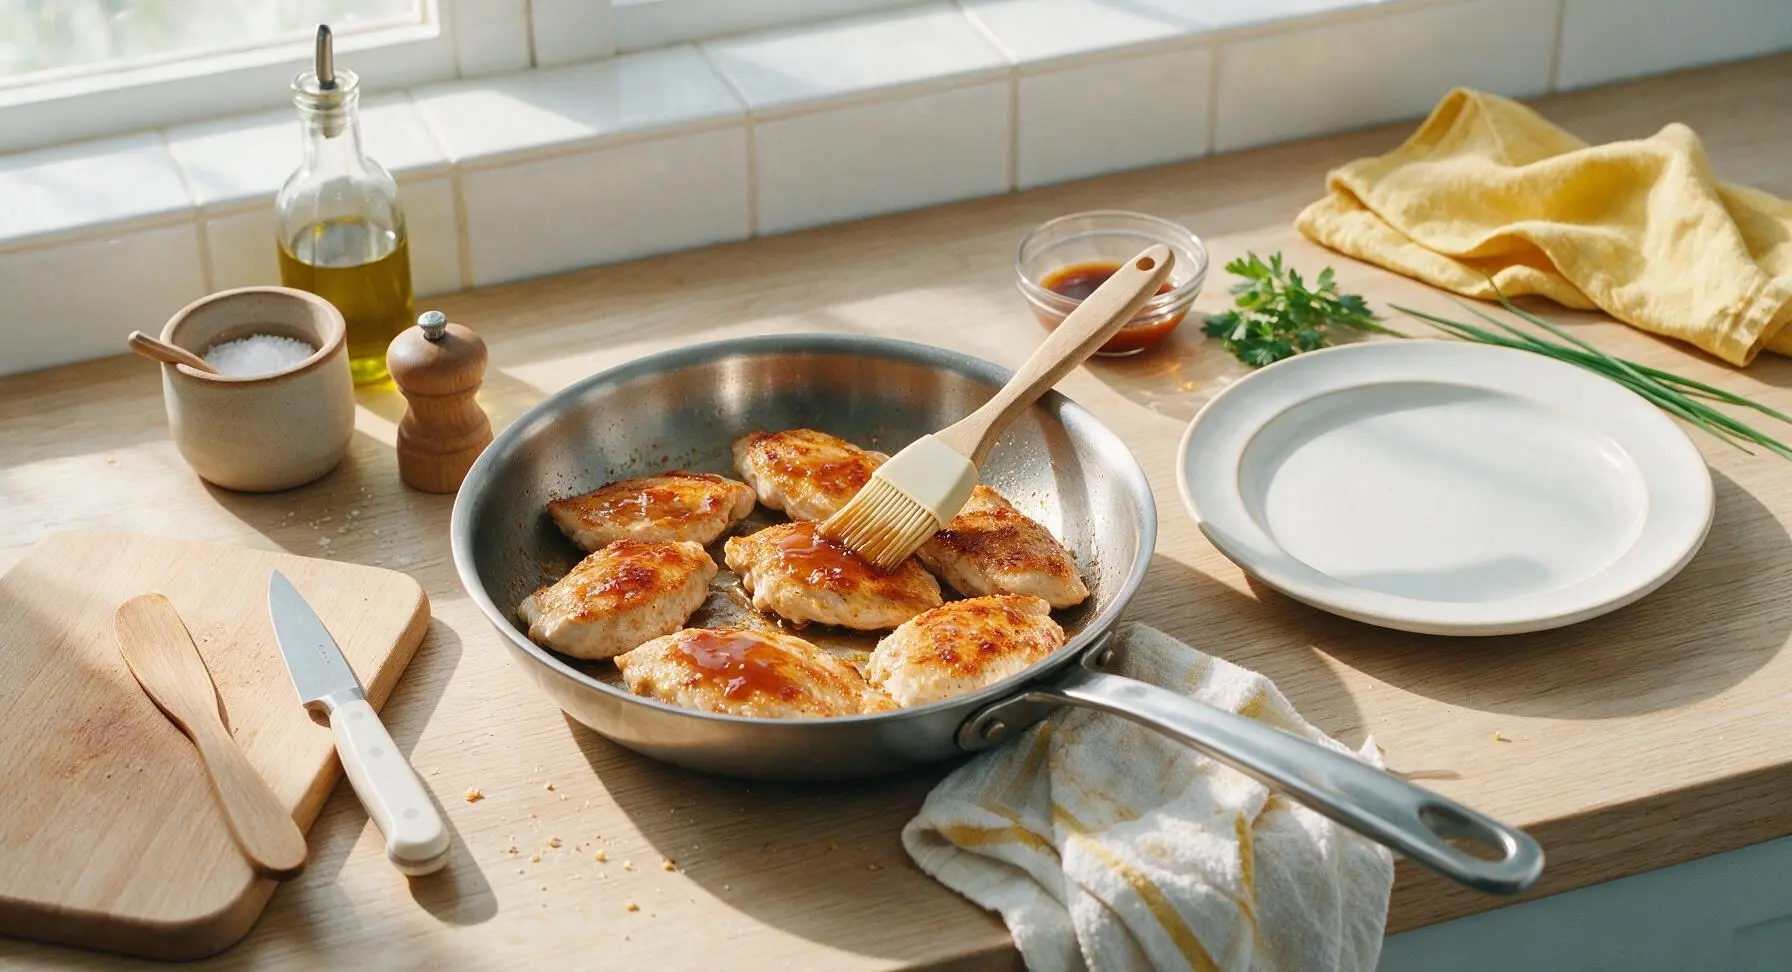
Use the stainless steel tongs to flip each chicken cutlet to the second side. Immediately brush the top seared surface with half of the glaze mixture using the silicone basting brush. Cook for another 3 minutes, then check internal temperature with the digital meat thermometer: chicken is done when it reaches 74C (165F) at the thickest point, with no pink remaining in the center.
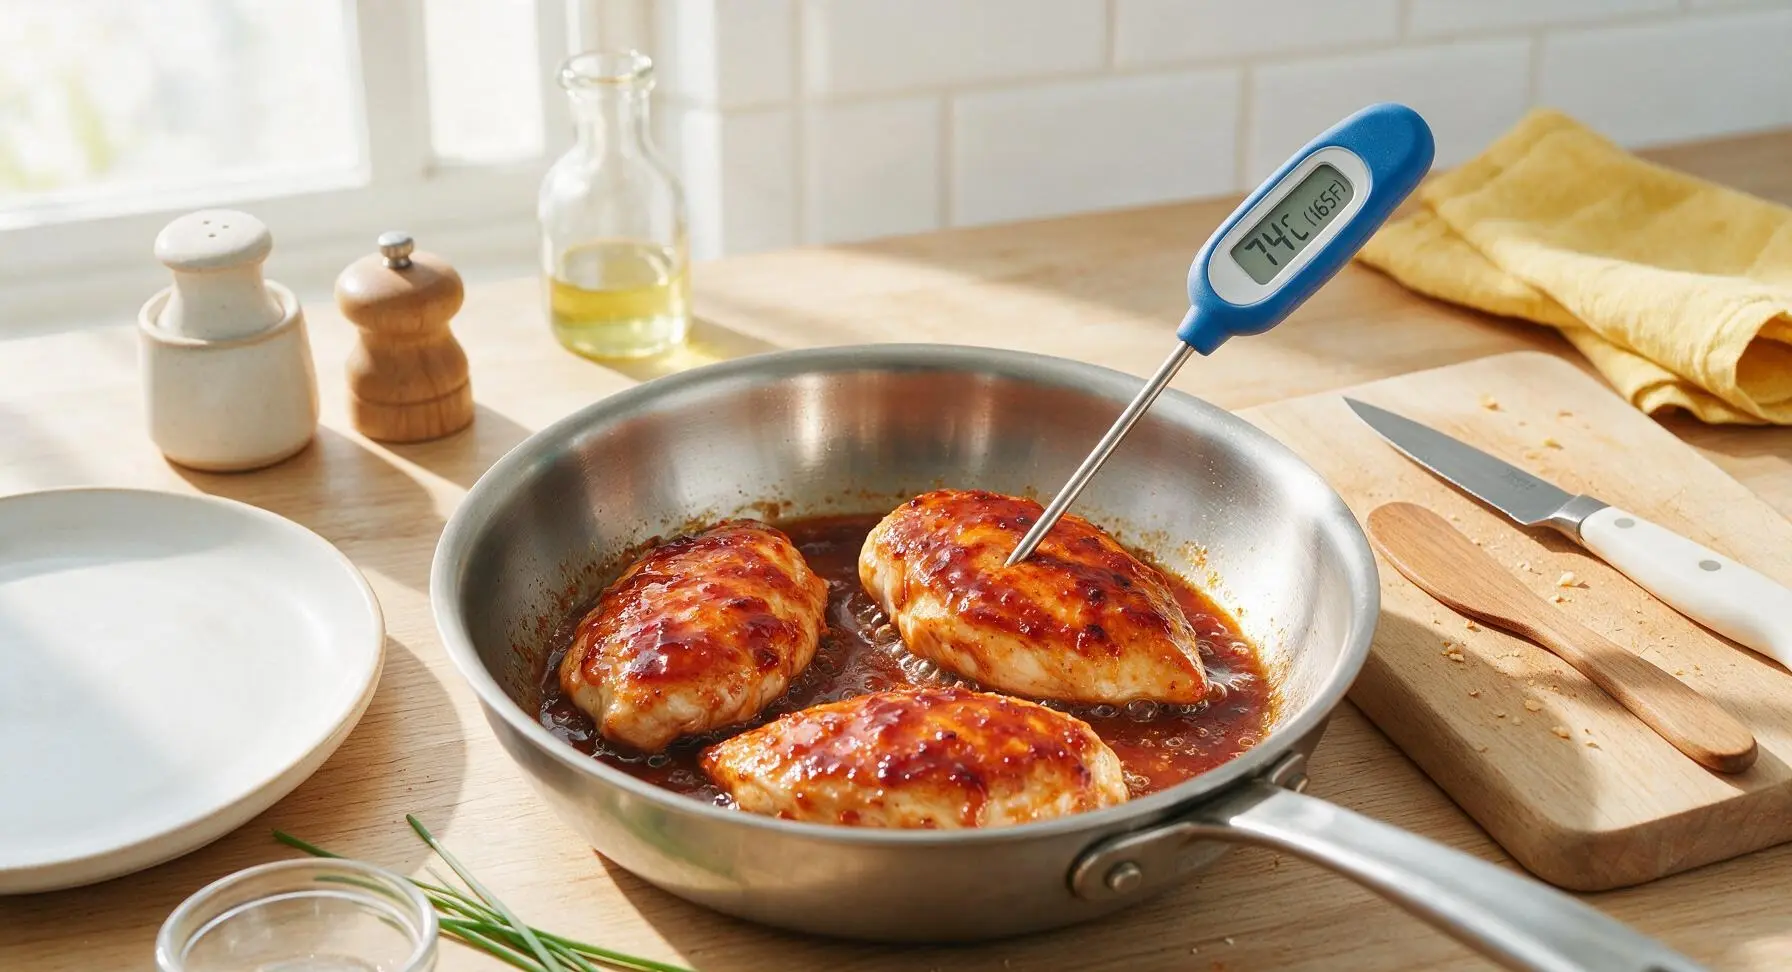
Step 5
step5:Flip and Baste Chicken
Step 5
step5:Flip and Baste Chicken
6

Thicken Pan Glaze

Pour the remaining glaze mixture into the skillet around the chicken, then stir in the reserved cornstarch slurry. Bring the liquid to a gentle simmer, tilting the pan to coat all sides of the chicken cutlets as the glaze thickens, about 1 minute. The glaze will turn shiny and sticky, coating the back of a spoon when ready. Turn off the heat.
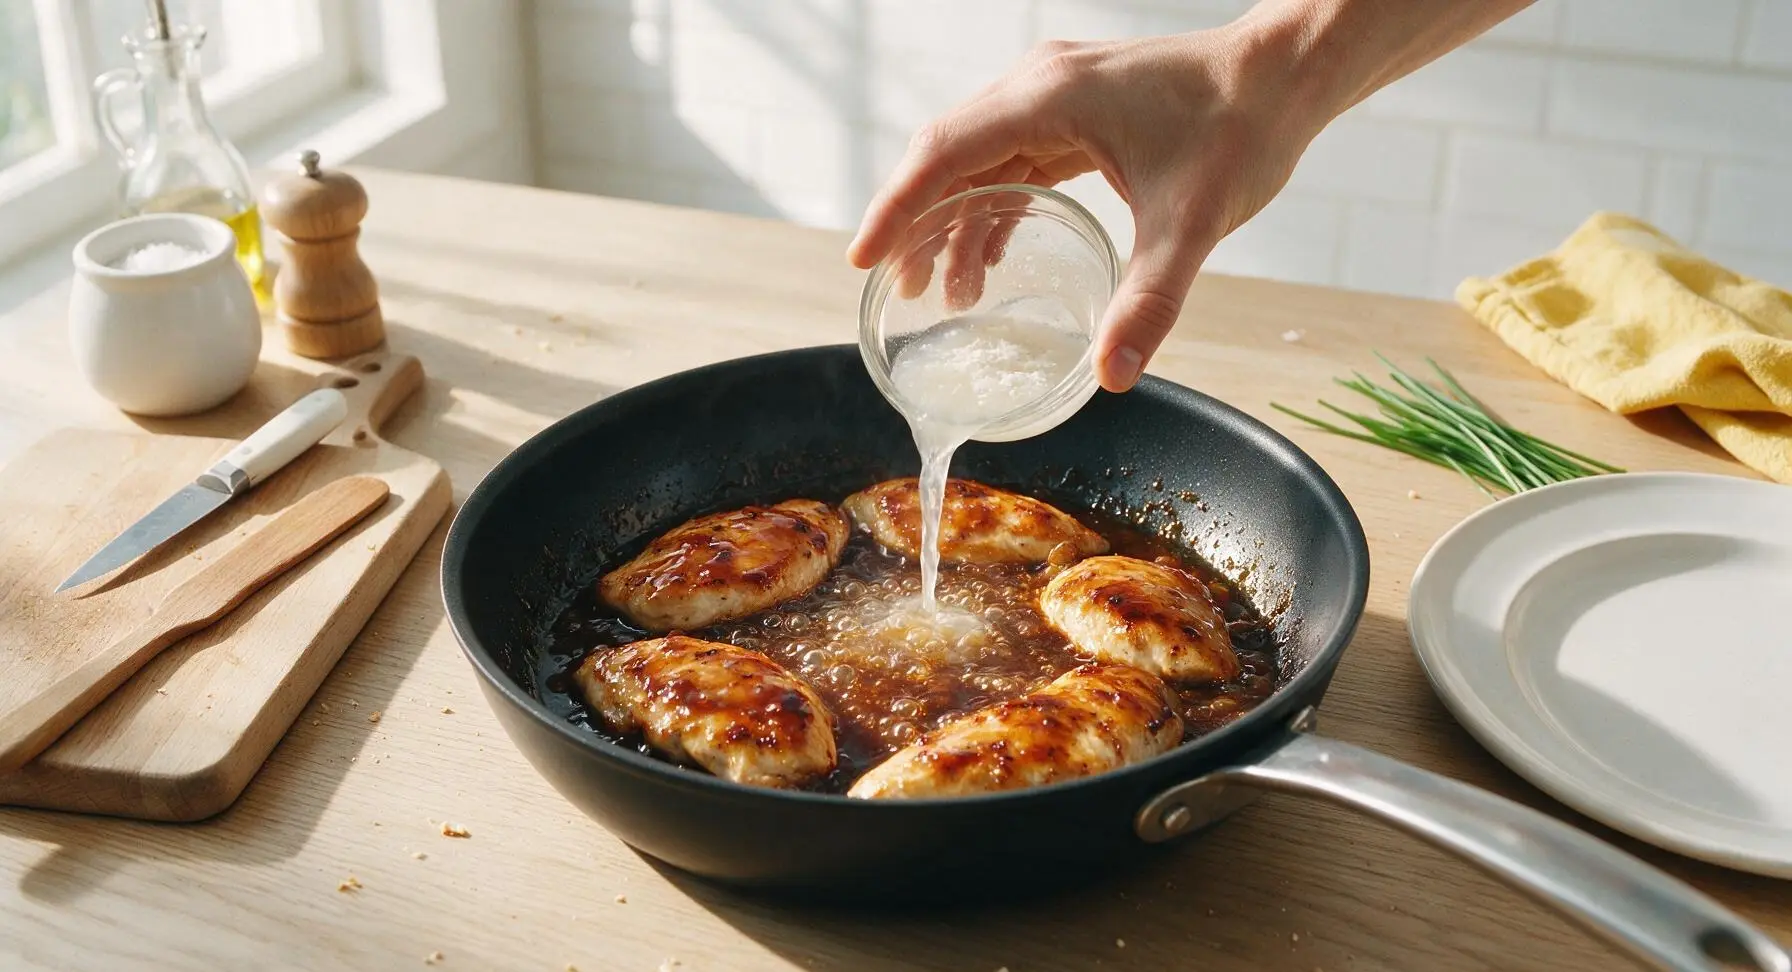
Step 6
step6:Thicken Pan Glaze
7

Rest and Slice Chicken

Use tongs to transfer the glazed chicken cutlets back to the maple cutting board. Let rest for 3 minutes to allow juices to redistribute, so they do not run out when sliced. Hold the chef knife at a 45-degree angle to slice the chicken into 1cm thick slices, cutting against the grain for maximum tenderness.
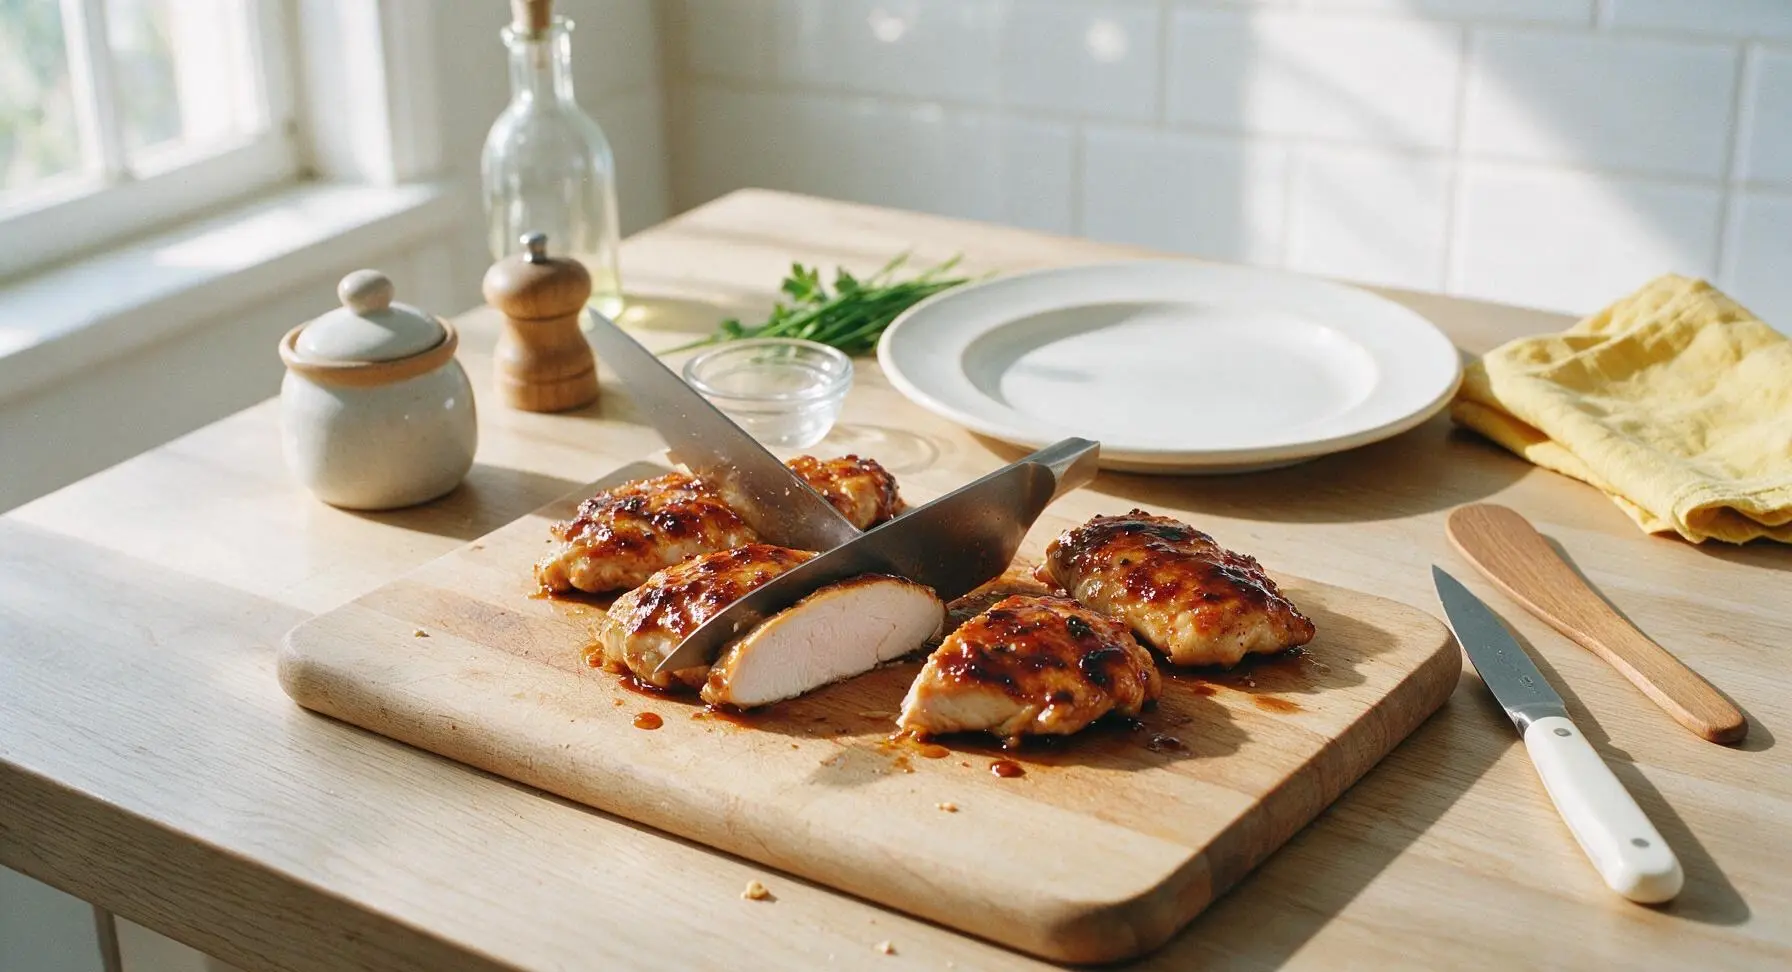
Step 7
step7:Rest and Slice Chicken
8

Plate and Garnish

Arrange the sliced chicken in a gentle fan across the center of the matte sage green stoneware dinner plate. Drizzle any remaining thickened glaze from the skillet over the top of the slices. Sprinkle with 1 teaspoon toasted sesame seeds and the reserved green scallion tops for garnish. Serve immediately.
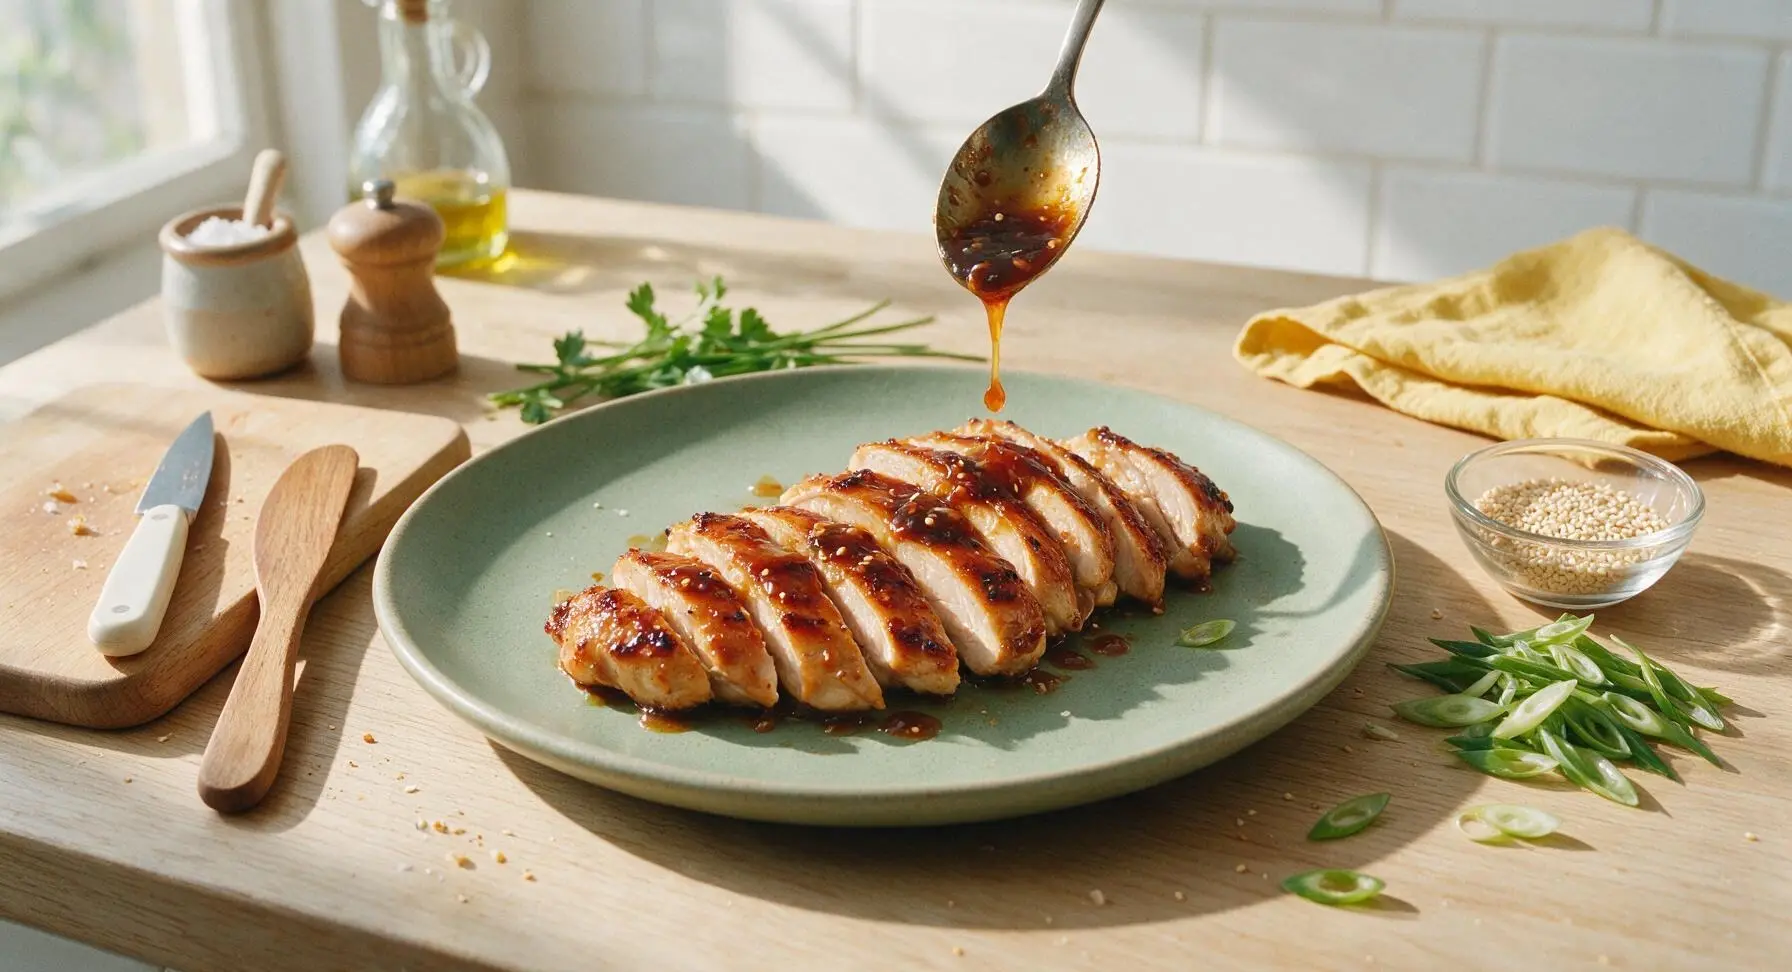
Step 8
step8:Plate and Garnish

Tips

1.Pat chicken completely dry with the kitchen towel before searing: excess surface moisture causes steaming instead of crisp, golden searing, which prevents the sticky glaze from adhering properly to the meat.
2.Slice cooked chicken against the grain at a 45-degree angle: this shortens the long, tough muscle fibers, making even lean chicken breast feel tender rather than stringy with every bite.
3.Pull chicken from the pan the instant the thickest part reads 74C (165F) on an instant-read thermometer: residual heat will continue to cook the meat as it rests, preventing the dry, tough texture that often ruins chicken breast dishes.


✨ You May Also Like

Main Course
🍜 United Kingdom

A showstopping classic of tender seared beef, savory mushroom duxelles, and crisp prosciutto wrapped in flaky golden puff pastry, baked to juicy perfection.

⏱️ 2 hours 1Main Course ★ 4.7
Main Course
🍜 India

Tender charred marinated chicken simmered in a rich, spiced creamy tomato sauce, this iconic Anglo-Indian curry pairs perfectly with basmati rice or warm naan.

⏱️ 50 minuteMain Course ★ 4.6
Main Course
🍜 Thailand

Classic tangy, sweet, and savory Thai stir-fried rice noodles with shrimp, tofu, and crunchy garnishes, balancing all five core Thai flavor profiles.

⏱️ 30 minuteMain Course ★ 4.5
Main Course
🍜 United Kingdom

Crispy golden beer-battered cod and fluffy double-fried chips, served with tangy tartar sauce and malt vinegar: the timeless, beloved British pub comfort classic.

⏱️ 45 minuteMain Course ★ 4.7
Main Course
🍜 Mexico

Smoky, chile-marinated pork tacos with caramelized pineapple, fresh cilantro, and lime: a beloved classic Mexican street food perfect for casual summer gatherings.

⏱️ 1 hour 45Main Course ★ 4.8
Main Course
🍜 United States

Crunchy Fritos corn chips layered with savory beef chili and melted cheddar, topped with cool, zesty fixings for a beloved, cozy Tex-Mex comfort food.

⏱️ 35 minuteMain Course ★ 4.8

asian chicken breast:Frequently Asked Questions

1.How do I keep the chicken breast from drying out when pan-searing it? ▾
Start by pounding your chicken breasts to a uniform 1-inch thickness so they cook evenly without thin, overcooked edges. Sear over medium-high heat without moving the chicken for 4–5 minutes per side to lock in juices, then pull it when it hits 160°F internally—carryover cooking will bring it to a safe 165°F as it rests 5 minutes before slicing.
2.Can I use regular soy sauce instead of low-sodium soy sauce for the glaze? ▾
You absolutely can, but you’ll want to adjust ratios to avoid an overly salty glaze. If using full-sodium regular soy sauce, cut the soy amount by 25% and add a splash more rice vinegar and honey to balance the saltiness, and skip any added salt when seasoning chicken before searing. Taste the glaze first to tweak balance before adding it to the pan.
3.Is there a substitute for raw honey if I don’t have any on hand? ▾
Pure maple syrup makes the closest 1:1 swap, with a similar rich, sweet depth that caramelizes beautifully just like honey. Packed light brown sugar works too—use ¾ the amount of honey called for, and stir it a little longer to fully dissolve into the glaze. Avoid granulated white sugar, as it lacks the subtle depth to balance the salty, tangy glaze components.
4.Why does my glaze burn instead of caramelizing on the chicken? ▾
Glaze burns fast because of its high honey and sugar content, so timing and heat control are key. Don’t add the glaze until the chicken is almost fully cooked, then turn the heat down to medium-low once you pour it in. Toss the chicken constantly for 1–2 minutes as the glaze thickens, and pull the pan off heat the second the glaze turns sticky and glossy.
5.Can I use bone-in, skin-on chicken breast instead of boneless, skinless? ▾
You sure can, just adjust your cook time to account for the bone and skin. Start by searing the skin side down for 6–7 minutes over medium heat to render fat and get crispy skin, then flip and cook another 7–9 minutes until almost done before adding the glaze. Aim for the same 160°F internal temp before resting for juicy results.
6.Is there a gluten-free swap for the soy sauce in this recipe? ▾
Absolutely—swap the low-sodium soy sauce 1:1 for low-sodium tamari to keep the exact same umami depth without any gluten. Double check that your rice vinegar and toasted sesame oil are labeled gluten-free too, as some brands add hidden wheat-based additives, and you’ll have a fully gluten-free version that tastes identical to the original.
7.How long should I let the chicken marinate in the glaze for extra flavor? ▾
For the best flavor without mushy texture, marinate chicken breasts in half the glaze for 30 minutes to 2 hours in the fridge. Don’t marinate longer than 2 hours, because the acid from the rice vinegar will start to break down chicken proteins and make the surface mealy. Reserve the other half of the glaze to toss with chicken at the end of cooking.
8.What’s the best pan to use for getting a perfect golden sear on the chicken? ▾
A heavy-bottomed stainless steel or cast iron skillet works best, because it holds consistent high heat without hot spots that cause uneven searing. Avoid non-stick pans if you can, as they don’t get hot enough to create that deep, golden crispy crust without overcooking the chicken. Make sure your pan is fully preheated before adding chicken to prevent sticking.
9.Can I make this recipe ahead for meal prep? ▾
This recipe is ideal for weekly meal prep! Let the cooked, glazed chicken cool completely, then store it in an airtight container in the fridge for up to 4 days. Reheat slices gently in a skillet over low heat with a tiny splash of water to loosen the glaze, or in the microwave at 50% power to avoid drying out the chicken or burning the sticky coating.
10.What if I don’t have unseasoned rice vinegar? What can I use instead? ▾
If you don’t have unseasoned rice vinegar, use 1 part apple cider vinegar mixed with ¼ part water and a tiny pinch of sugar to mimic its mild, slightly sweet tang. Avoid plain white vinegar or balsamic vinegar—white vinegar is too sharp and harsh, while balsamic is too dark and sweet, throwing off the glaze’s bright, balanced flavor.
11.How do I get that sticky, glossy glaze coating instead of a runny mess? ▾
After searing the chicken, push it to one side of the pan and pour the glaze into the empty side, letting it bubble for 30–60 seconds to thicken slightly before tossing it with the chicken. The natural juices from the chicken will thin it just enough, and the bubbling will concentrate sugars to create that perfect sticky, clingy coating that doesn’t pool on your plate.
12.Can I add extra veggies to this pan to make it a one-pan meal? ▾
Absolutely! Quick-cooking veggies like broccoli florets, sliced bell peppers, snap peas, or sliced bok choy work perfectly here. Sear the veggies for 3–4 minutes first in the pan before setting them aside, then cook the chicken as directed. Toss the veggies back in with the chicken and glaze during the final minute of cooking to coat everything evenly.
13.Is toasted sesame oil really necessary, or can I use a different oil in the glaze? ▾
Toasted sesame oil adds that signature nutty, warm Asian flavor that ties the whole glaze together, so it’s worth using if you have it. If you only have light, untoasted sesame oil, use double the amount to get a similar flavor, or swap in a pinch of toasted sesame seeds for nuttiness if you have no sesame oil. Skip olive oil in the glaze, as its strong flavor clashes.
14.What internal temperature should I cook the chicken to for juicy, not rubbery, results? ▾
Pull your chicken from the pan the second an instant-read thermometer inserted into the thickest part reads 160°F. As it rests for 5 minutes off the heat, carryover cooking will raise the temp to the FDA-recommended 165°F, which keeps the meat tender and juicy. If you cook it all the way to 165°F in the pan, it will end up dry and rubbery by serving time.
15.Can I make this recipe spicier? What add-ins work well with the glaze? ▾
Absolutely! Add a pinch of red pepper flakes, a teaspoon of chili garlic sauce, or a thin slice of fresh ginger to the glaze for a warm, spicy kick that pairs beautifully with the sweet-savory base. You can also add a minced garlic clove to the pan 30 seconds before adding the glaze for extra aromatic depth, just don’t let it burn or it will turn bitter.
16.Why does my chicken stick to the pan when I try to sear it? ▾
Chicken sticks when the pan isn’t hot enough, or if you try to flip it too early. Preheat your pan over medium-high heat until a drop of water dances across the surface, then add a thin layer of high-smoke-point oil before laying the chicken down. Let it sear undisturbed for 4 minutes—once the crust is fully formed, it will release easily without sticking.
17.What side dishes pair best with this pan-seared glazed chicken? ▾
This chicken pairs beautifully with fluffy jasmine rice, which soaks up extra sticky glaze perfectly, plus quick stir-fried veggies or a crisp cucumber salad for a fresh, bright contrast. It also works great sliced over rice bowls, tossed with soba noodles, or served alongside roasted broccoli and steamed edamame for a well-rounded, high-protein weeknight meal.
18.Can I freeze the cooked glazed chicken for later use? ▾
Yes, you can freeze fully cooked, cooled glazed chicken for up to 3 months. Wrap individual portions tightly in plastic wrap, then store in a labeled freezer bag to prevent freezer burn. Thaw overnight in the fridge before reheating gently over low heat in a covered skillet with a splash of water to refresh the glaze and keep chicken from drying out.

Comments (15)

yesterday

OMG this recipe is a total game changer! I’ve been struggling to find quick weeknight dinners my whole family will eat, and this 15 minute pan-seared chicken was devoured in 10 minutes flat. The glaze is perfectly sweet-savory, not too salty, and even my 7 year old asked for seconds. I paired it with roasted broccoli and rice for our family dinner last night, 10/10 will make again!

2 hours ago

Wait did you use low-sodium soy sauce or regular? I’m trying to cut back on salt for my husband’s diet and don’t want it to be too bland!

30 minutes ago

Great question! You can absolutely swap regular soy sauce for low-sodium, and if you want extra depth of flavor, add a tiny pinch of white pepper to the glaze. It’ll still taste perfectly balanced without the extra salt!

2 days ago

SO good. I was skeptical that a 15 minute chicken breast wouldn’t be dry, but the pan-sear method locks in all the juice and the glaze is chef’s kiss. Made this for meal prep this week and it held up perfectly in the fridge for 3 days so far. No sad dry chicken here!

3 days ago

Wait how do you get the glaze to stick so nicely? Mine kept sliding off the chicken when I tried to make it last night, it tasted good but looked nothing like the photo 😅

2 days ago

Hi there! The trick is to pat your chicken breasts completely dry with paper towels before searing, and let the glaze simmer for 1-2 minutes in the pan after adding the chicken back in so it thickens up and coats every piece. Give that a try next time!

5 days ago

Made this for my neighborhood potluck this past weekend and everyone was begging for the recipe! I doubled the glaze because I knew people would want to drizzle extra over their rice, and I swear I sent this link to 6 different people before the night was over. So easy, so flavorful, zero complaints.

3 days ago

Did you use bone-in or boneless breasts for this? I usually only do thighs but want to try this for a cookout next week!

2 days ago

I used boneless, skinless just like the recipe says! They cooked super evenly even when I doubled the batch, just make sure you don’t overcrowd the pan so they get that nice crispy sear.

1 week ago

This is my new go-to post-gym dinner! High protein, super quick to throw together after a long workout, and the flavor is way better than plain grilled chicken I usually make. I added a little extra sriracha to the glaze for a kick, *chef's kiss*

5 days ago

Oh the sriracha add is genius! I did a dash of chili flakes last time I made it and it was perfect, will have to try sriracha next round!

2 weeks ago

I’ve literally never cooked chicken that didn’t turn out rubbery before, and this recipe was foolproof! So easy to follow, the instructions were super clear, and my roommate thought I ordered takeout lol. Will 100% be making this again soon.

1 week ago

Is there a gluten free swap for the soy sauce? I have celiac so I can’t have regular soy, but this glaze sounds too good to pass up!

5 days ago

Absolutely! You can swap the soy sauce for tamari (make sure it’s labeled certified gluten free) in equal measurement, and the glaze will turn out exactly the same — no flavor loss at all! I make it that way for my gluten free family members all the time.

3 days ago

15 minute cook time? Sign me up. I’m a single dad with two kids in after school sports, so weeknights are chaotic and I never have time for fancy meals. Made this last night with some frozen stir fry veggies, kids cleaned their plates without complaining. Win in my book.

2 days ago

Same boat here! Three kids with back to back practices, I’m always hunting for fast meals that don’t taste like fast food. Can’t wait to try this tomorrow night!

yesterday

Pro tip: mix the glaze up the night before and keep it in a jar in the fridge, cuts down on prep time even more! I did that this week and it took me literally 12 minutes from fridge to plate.

2 days ago

I used to order Asian glazed chicken from my local takeout spot at least once a week, and this recipe is honestly better. Way less greasy, I can control how much sugar goes in the glaze, and it’s cheaper too. Game changer for my wallet and my waistline lol

yesterday

Right?! I stopped getting takeout once I found this recipe too, I save like $15 every time I make it at home and it tastes fresher.

1 week ago

Made this for date night with my boyfriend last week and he was convinced I spent hours in the kitchen. Little did he know it took me 15 minutes, paired it with some jasmine rice and sautéed bok choy, and we had a fancy restaurant quality meal for a fraction of the price. He’s already asked me to make it again this weekend!

5 days ago

Wait, do I need to pound the chicken breasts to an even thickness first? My chicken always cooks unevenly where the thick part is underdone and the thin part is dry, so I wanna make sure I get this right.

3 days ago

Great question! I do recommend pounding the thicker end of the chicken breast to a roughly 1-inch uniform thickness before searing — it helps it cook all the way through evenly without drying out the thinner edges. If you don’t have a meat mallet, the bottom of a heavy skillet works just as well!

2 weeks ago

How long does this keep in the fridge for meal prep? I want to make a batch on Sunday for my work lunches all week, but I don’t want it to go bad or get soggy.

1 week ago

I make this every Sunday for lunches! It keeps great for 4 days in an airtight container, I just reheat it in the microwave for 90 seconds and it’s still juicy, no sogginess at all.

5 days ago

That’s spot on! Stored properly in an airtight container, this chicken will stay good for 3-4 days in the fridge. I don’t recommend freezing it once glazed, as the texture of the sauce can change a bit when thawed, but it’s perfect for weekly meal prep!

30 minutes ago

The glaze on this is INSANE. I licked the pan clean after making it, no shame. I added a tiny bit of fresh grated ginger at the end and it elevated it even more, will be putting this glaze on everything from salmon to veggies from now on.

2 hours ago

Has anyone tried making this in the air fryer instead of pan-searing? I hate cleaning up oil splatters from my stovetop, but this recipe looks too good to skip.

30 minutes ago

I did it last week! Sprayed the basket with oil, cooked the chicken at 375°F for 10 minutes flipping halfway, brushed the glaze on the last 2 minutes, and it turned out perfect! No splatters at all.

5 minutes ago

My husband swears he hates all chicken breast that isn’t fried, but he went back for a third piece of this last night. I don’t know what magic is in that glaze, but I’ll be making it weekly from now on. Even my teen who only eats pizza and chips said it was “bussin” so that’s a 5 star review in itself.



