
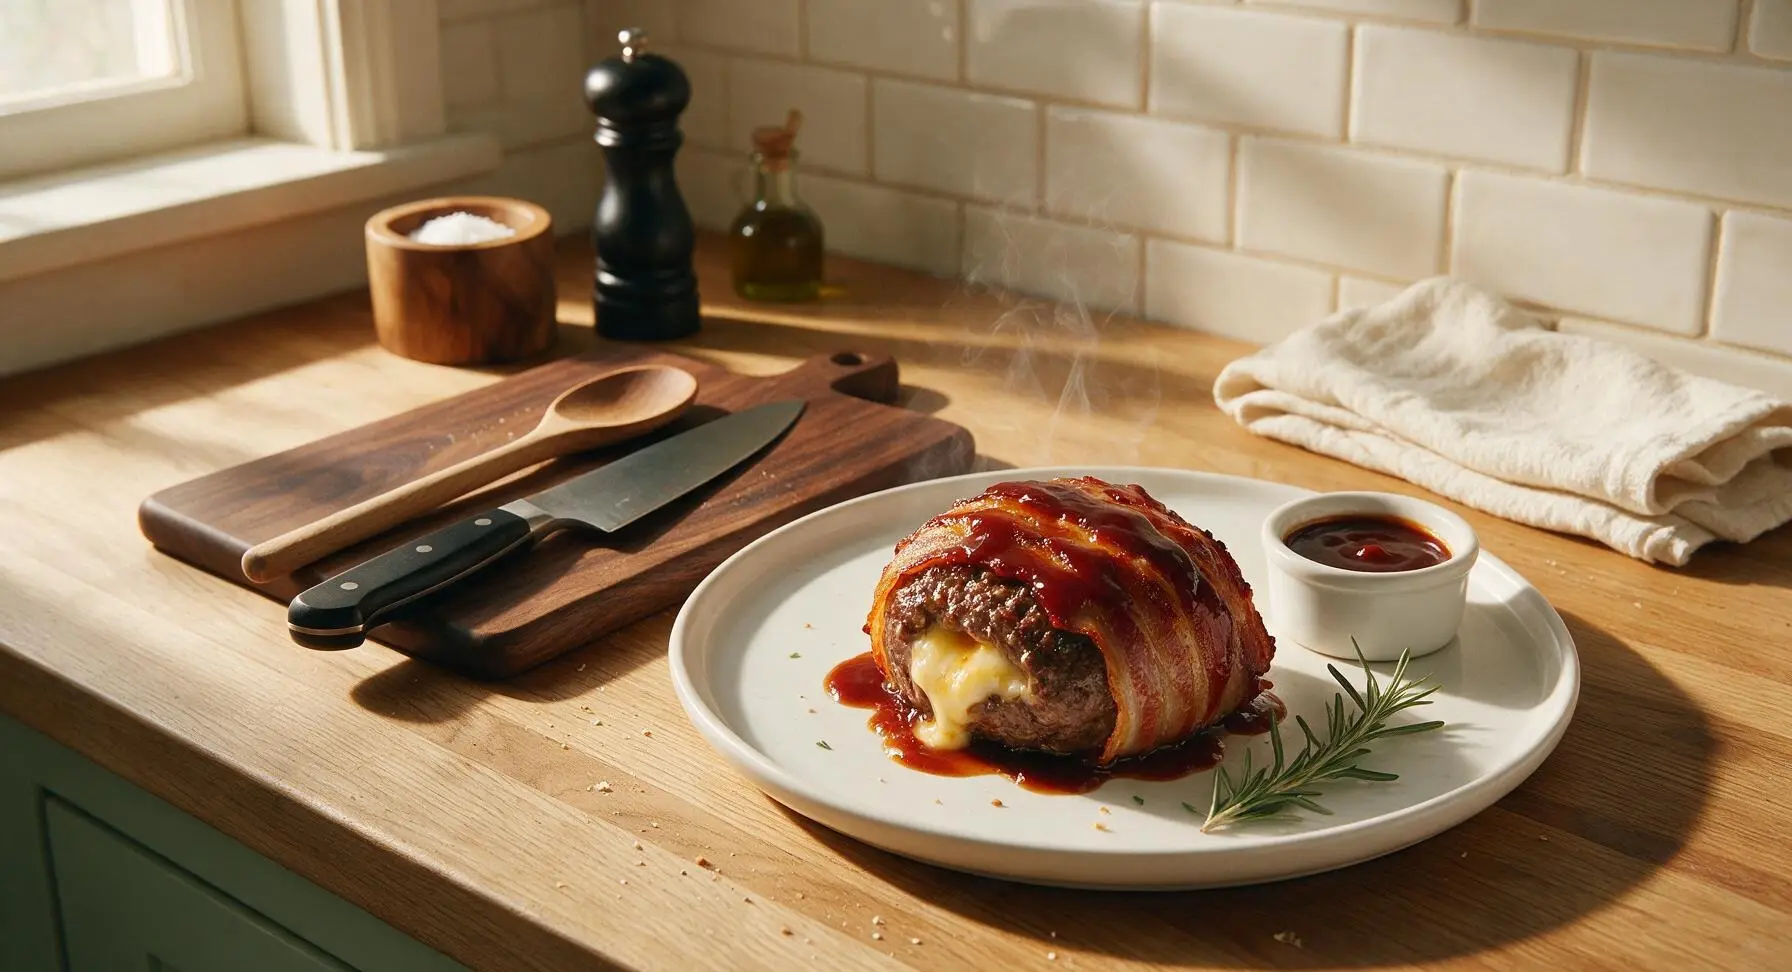
bacon bomb recipe

title 1
bacon bomb recipe
⏱️ cook time 1 hour
🍽️ servings 6
⚡ Difficulty medium

intro

Juicy, cheese-stuffed ground beef wrapped in crispy bacon, slathered in tangy caramelized BBQ sauce—this indulgent, savory bomb is the ultimate summer BBQ showstopper.

Ingredients
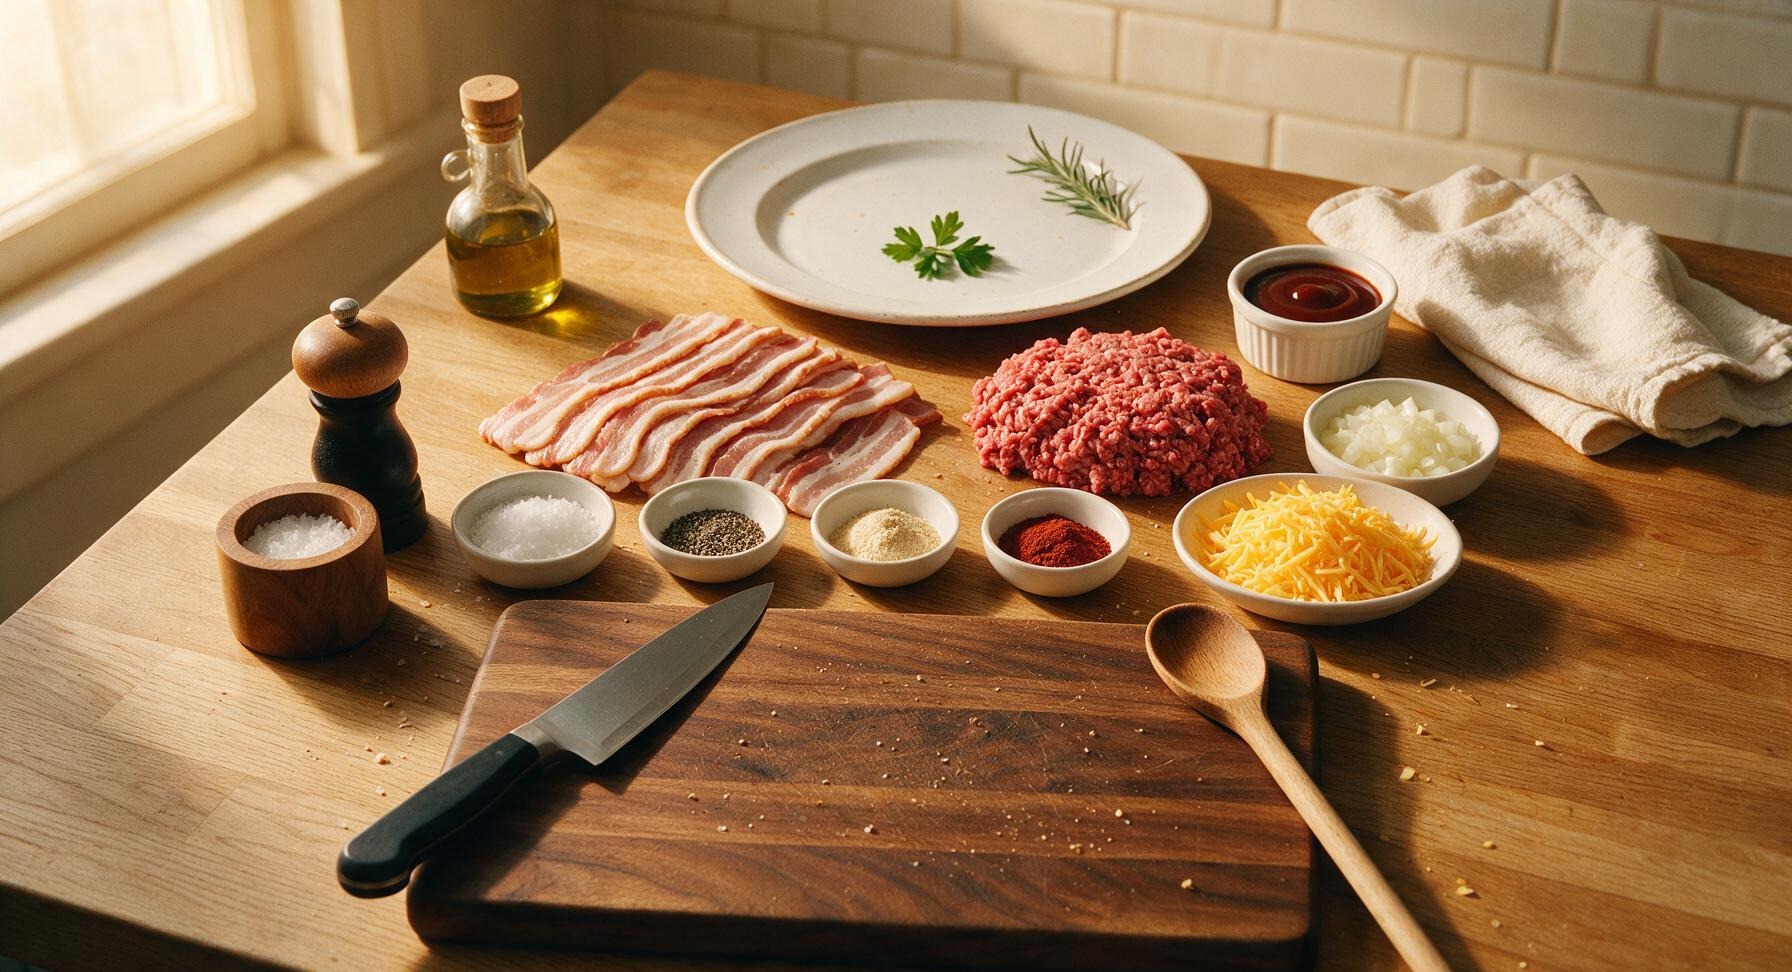
Thick-cut bacon 12 strips (340g)
80/20 ground beef 500g
Shredded sharp cheddar cheese 120g
Hickory BBQ sauce 120ml (divided)
Kosher salt 1 tbsp
Freshly ground black pepper 1 tsp
Garlic powder 1 tsp
Smoked paprika 1 tsp
Finely diced yellow onion 50g (1/4 small onion)

Steps

1

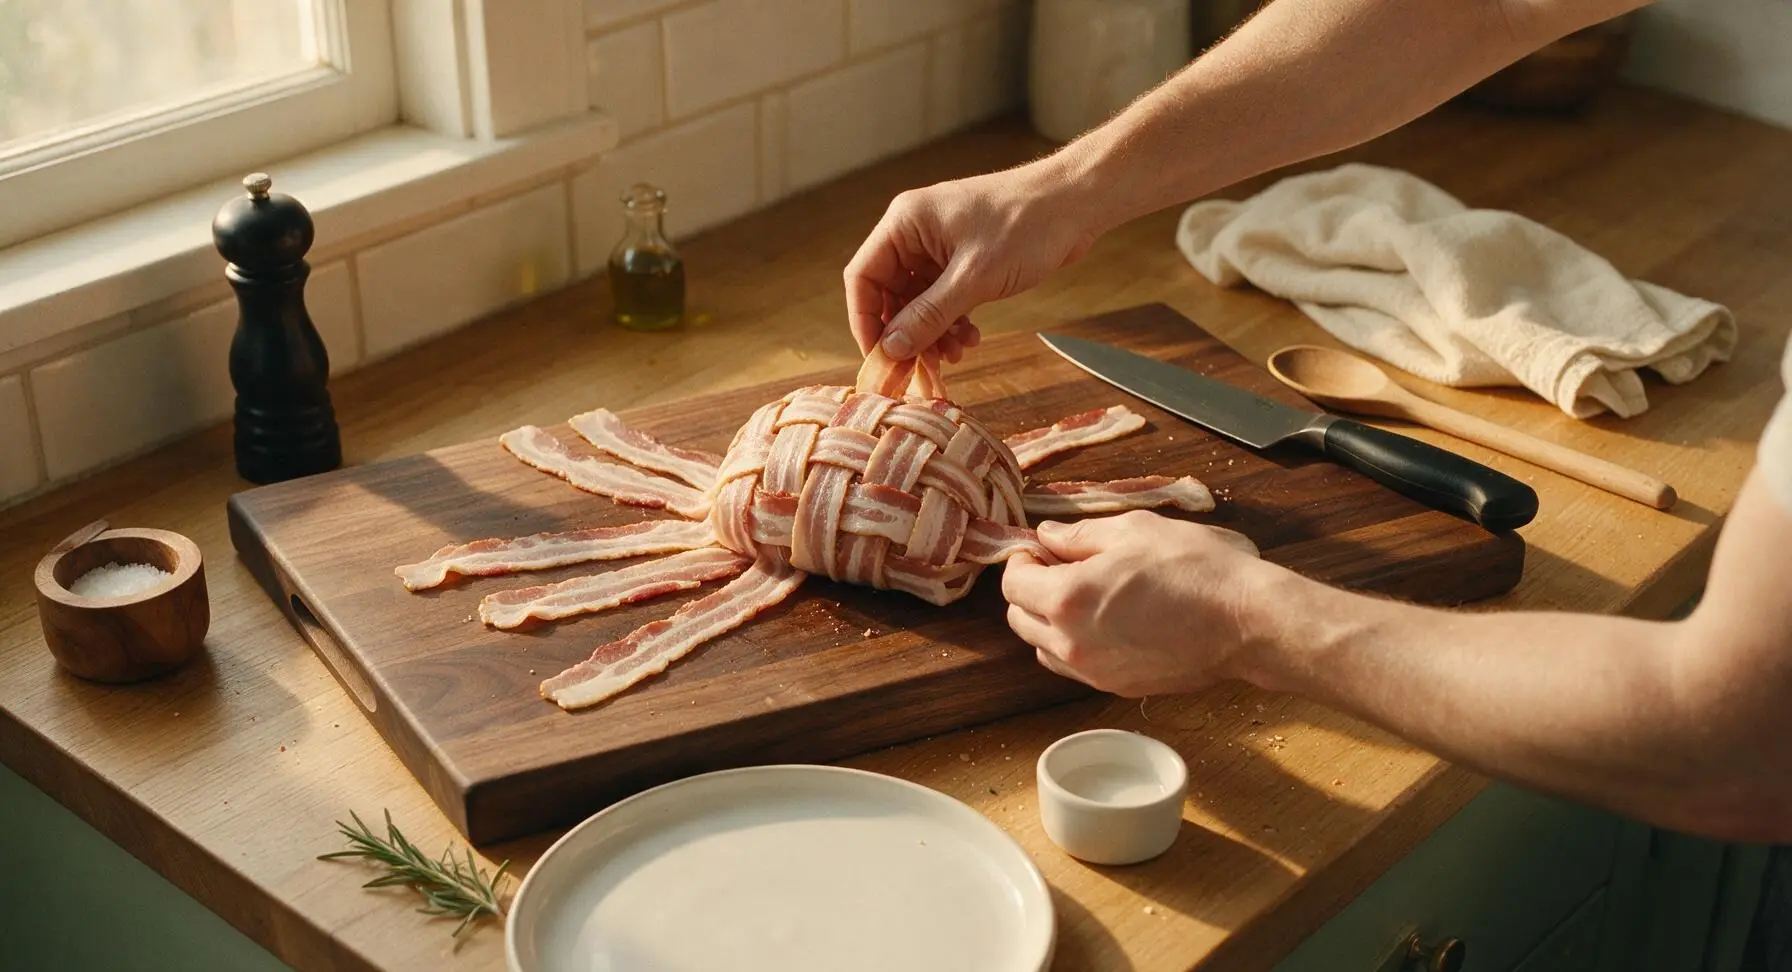
Weave bacon lattice wrap

Lay 6 strips of thick-cut bacon parallel to each other on the center of the light maple cutting board, edges touching but not overlapping, with no gaps between strips. Fold every other strip back halfway along its length, then lay one bacon strip perpendicular across the remaining flat strips, and unfold the folded strips over top to lock it in place. Repeat this alternating fold pattern with the remaining 5 bacon strips to create a tight, gap-free 6x6 bacon weave, roughly 22cm square. Press the weave gently with your palm to seal any small gaps; this forms the crispy, leak-proof outer shell of the bomb.
Step 1
step1:Weave bacon lattice wrap
2

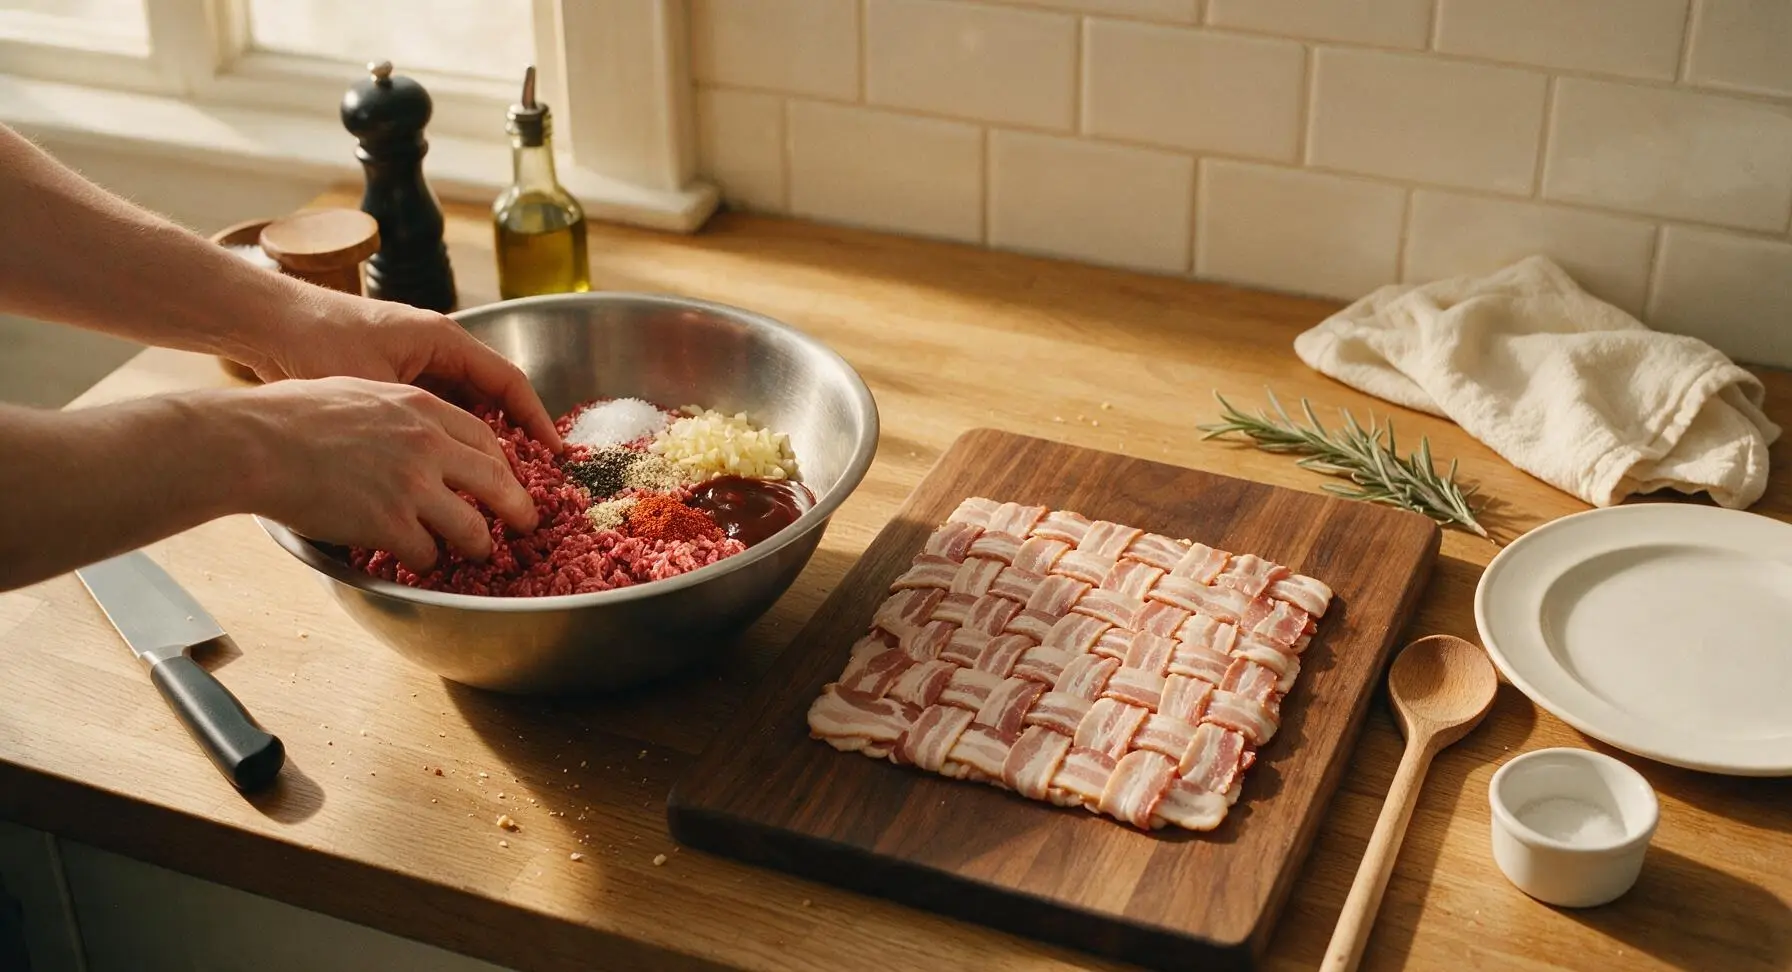
Season and shape beef

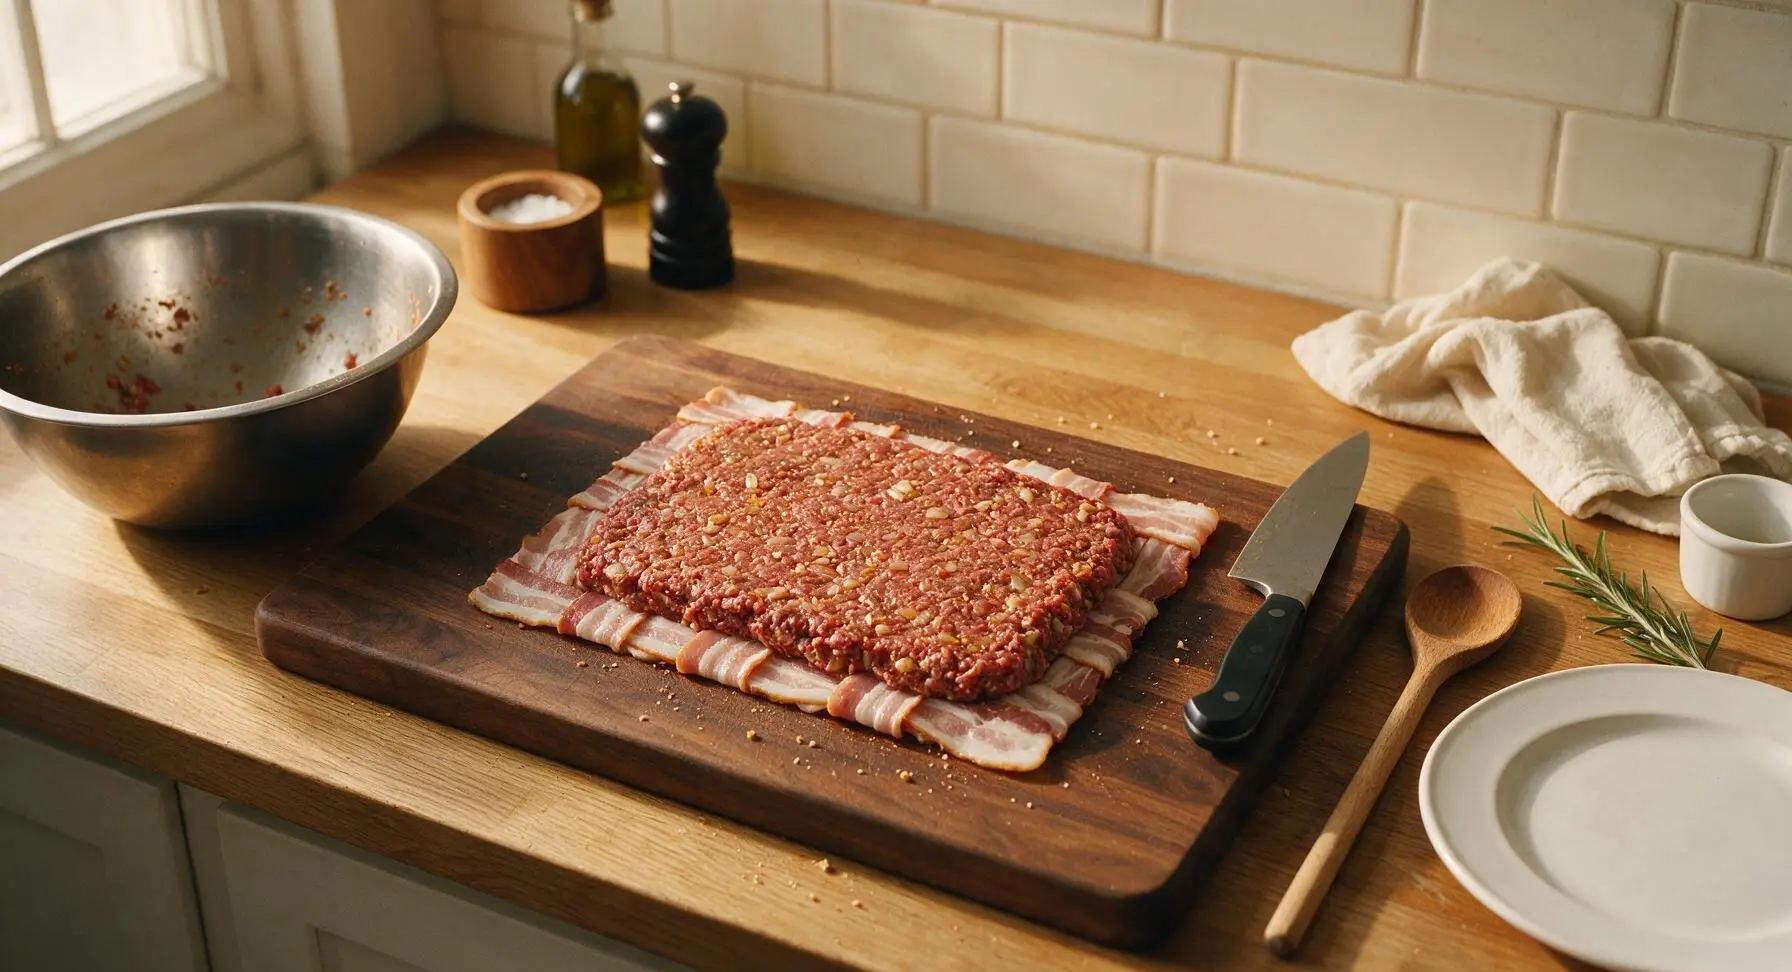
Place 500g of 80/20 ground beef into the large brushed stainless steel mixing bowl. Add 1 tbsp kosher salt, 1 tsp freshly ground black pepper, 1 tsp garlic powder, 1 tsp smoked paprika, 50g finely diced yellow onion, and 60ml of hickory BBQ sauce. Gently fold the ingredients together with your hands until just evenly combined—do not overmix or squeeze the meat tightly, as this will result in a tough, dense final texture. Press the seasoned beef into an even 1cm-thick rectangle centered directly on top of the finished bacon weave, leaving a 2cm border of exposed bacon around all edges to create a tight seal when rolled.
Step 2
step2:Season and shape beef
Step 2
step2:Season and shape beef
3

Add cheese filling center

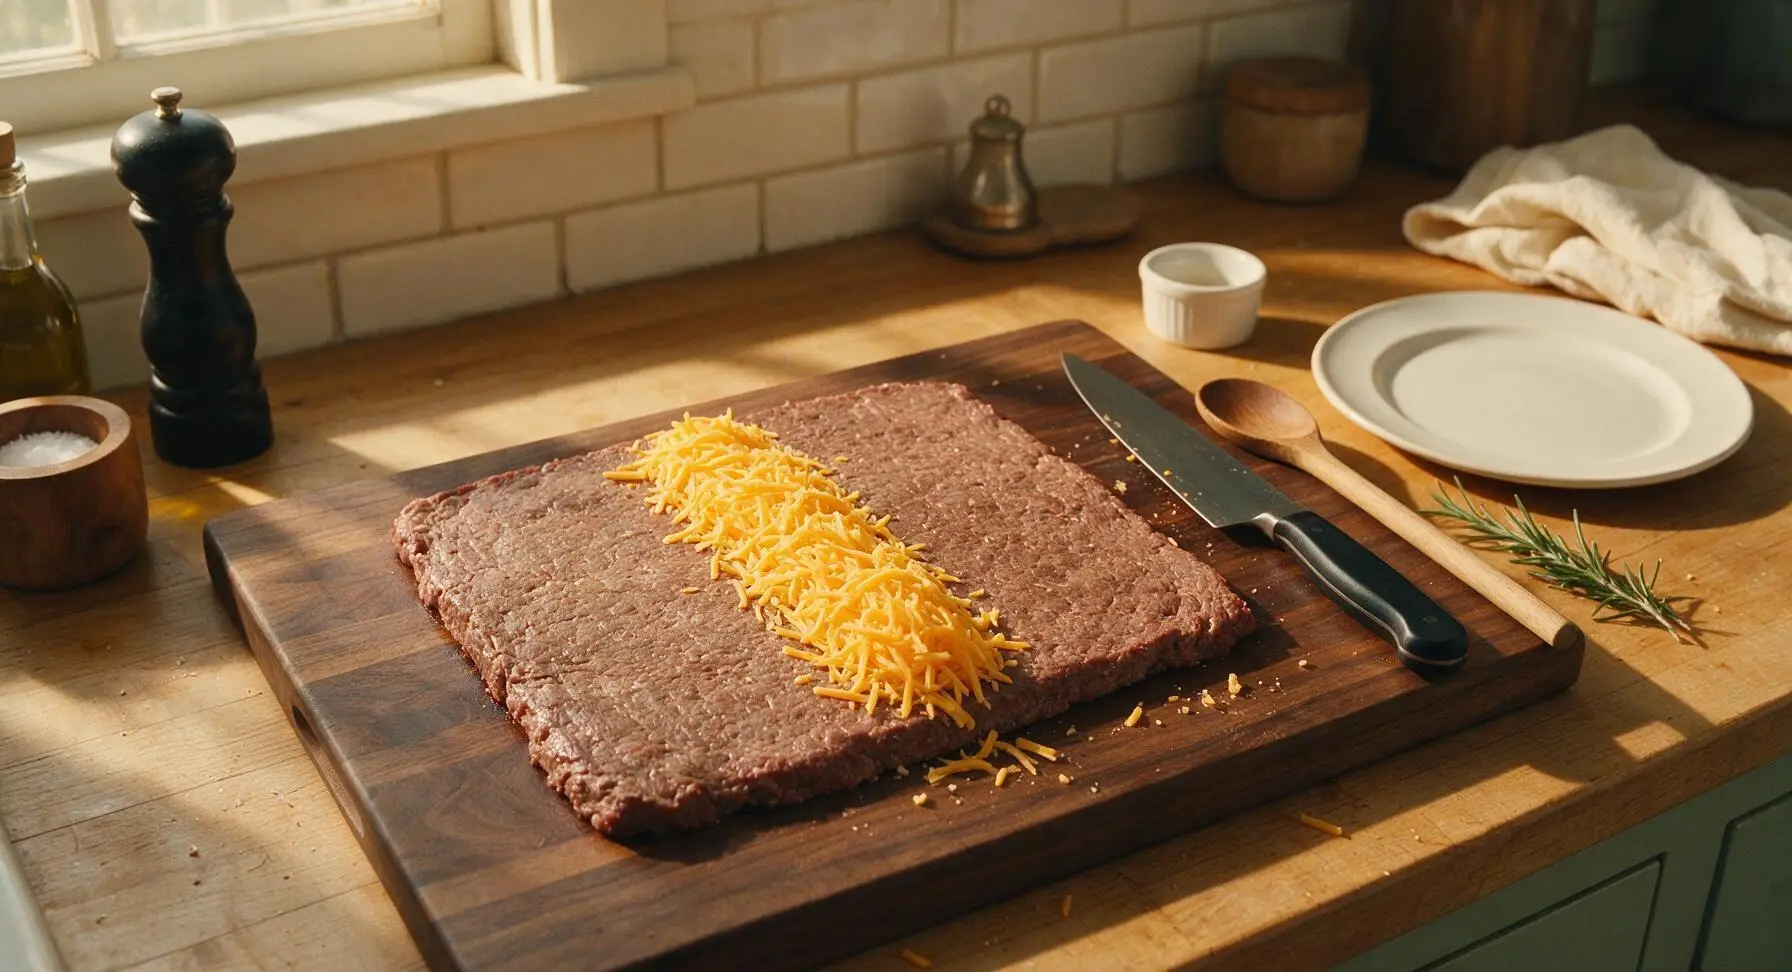
Mound 120g of shredded sharp cheddar cheese in a tight, narrow 5cm-wide line running down the exact longitudinal center of the pressed beef rectangle. Do not spread the cheese to the edges of the beef; keeping the cheese compact in the center prevents it from leaking out during cooking and ensures every slice has a gooey, melted cheese core.
Step 3
step3:Add cheese filling center
4

Roll and seal tightly

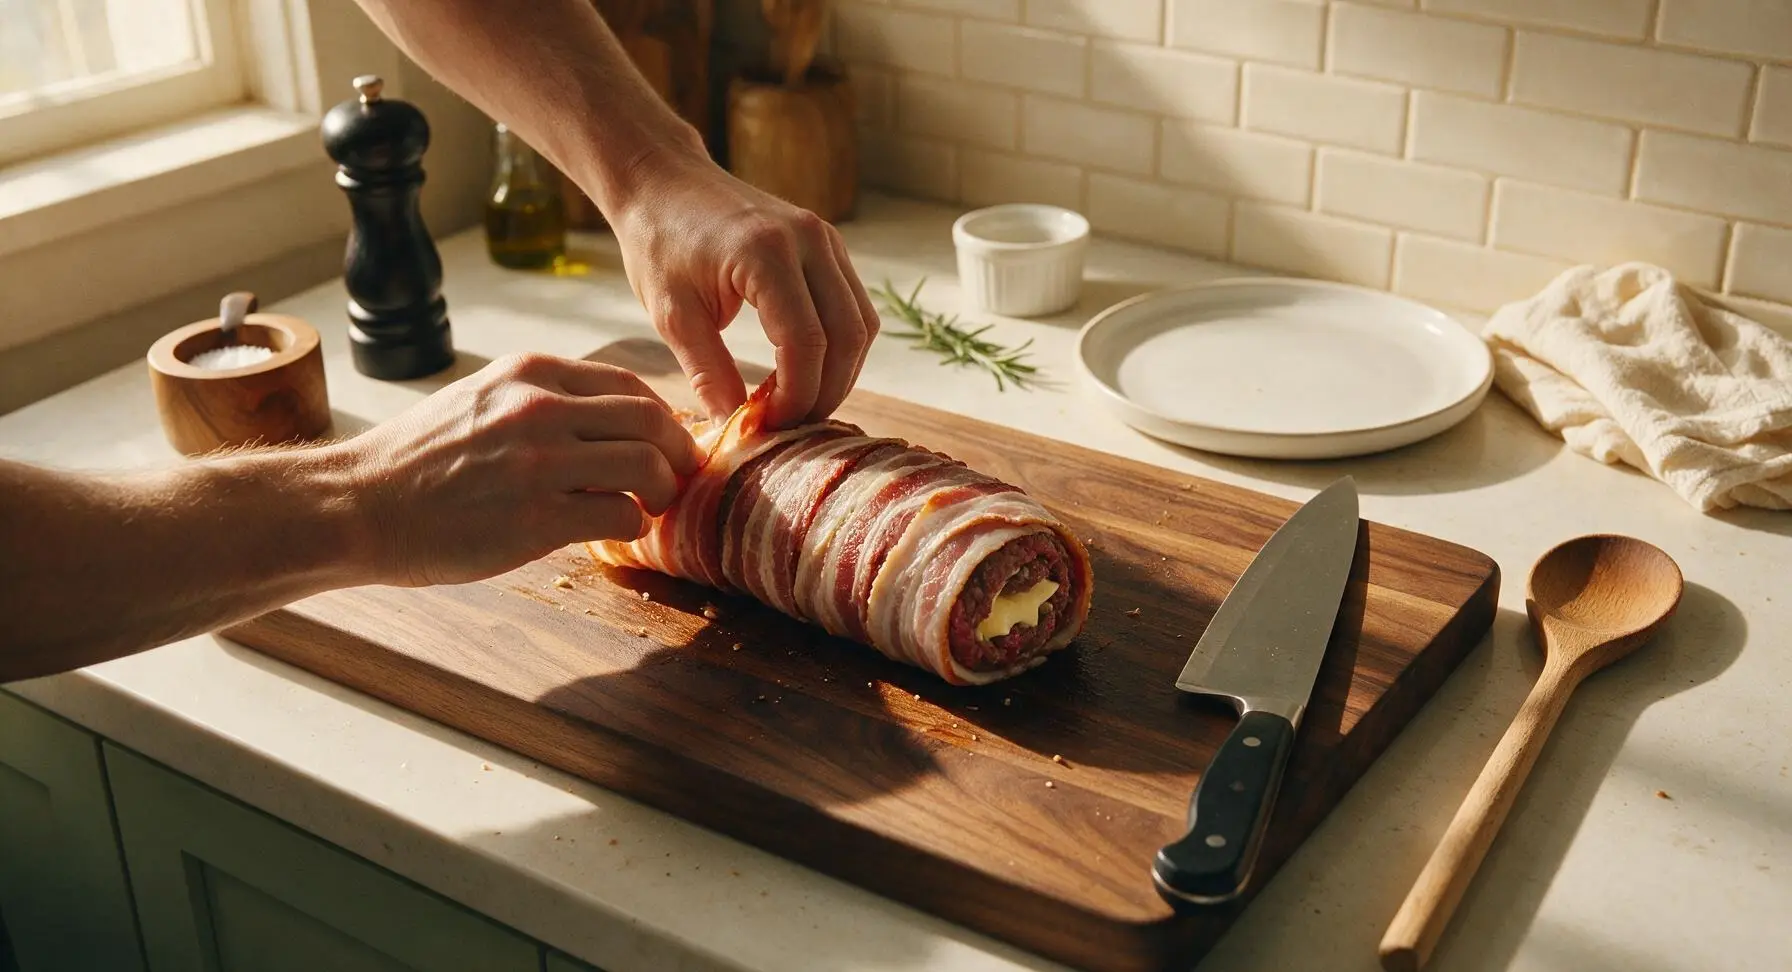
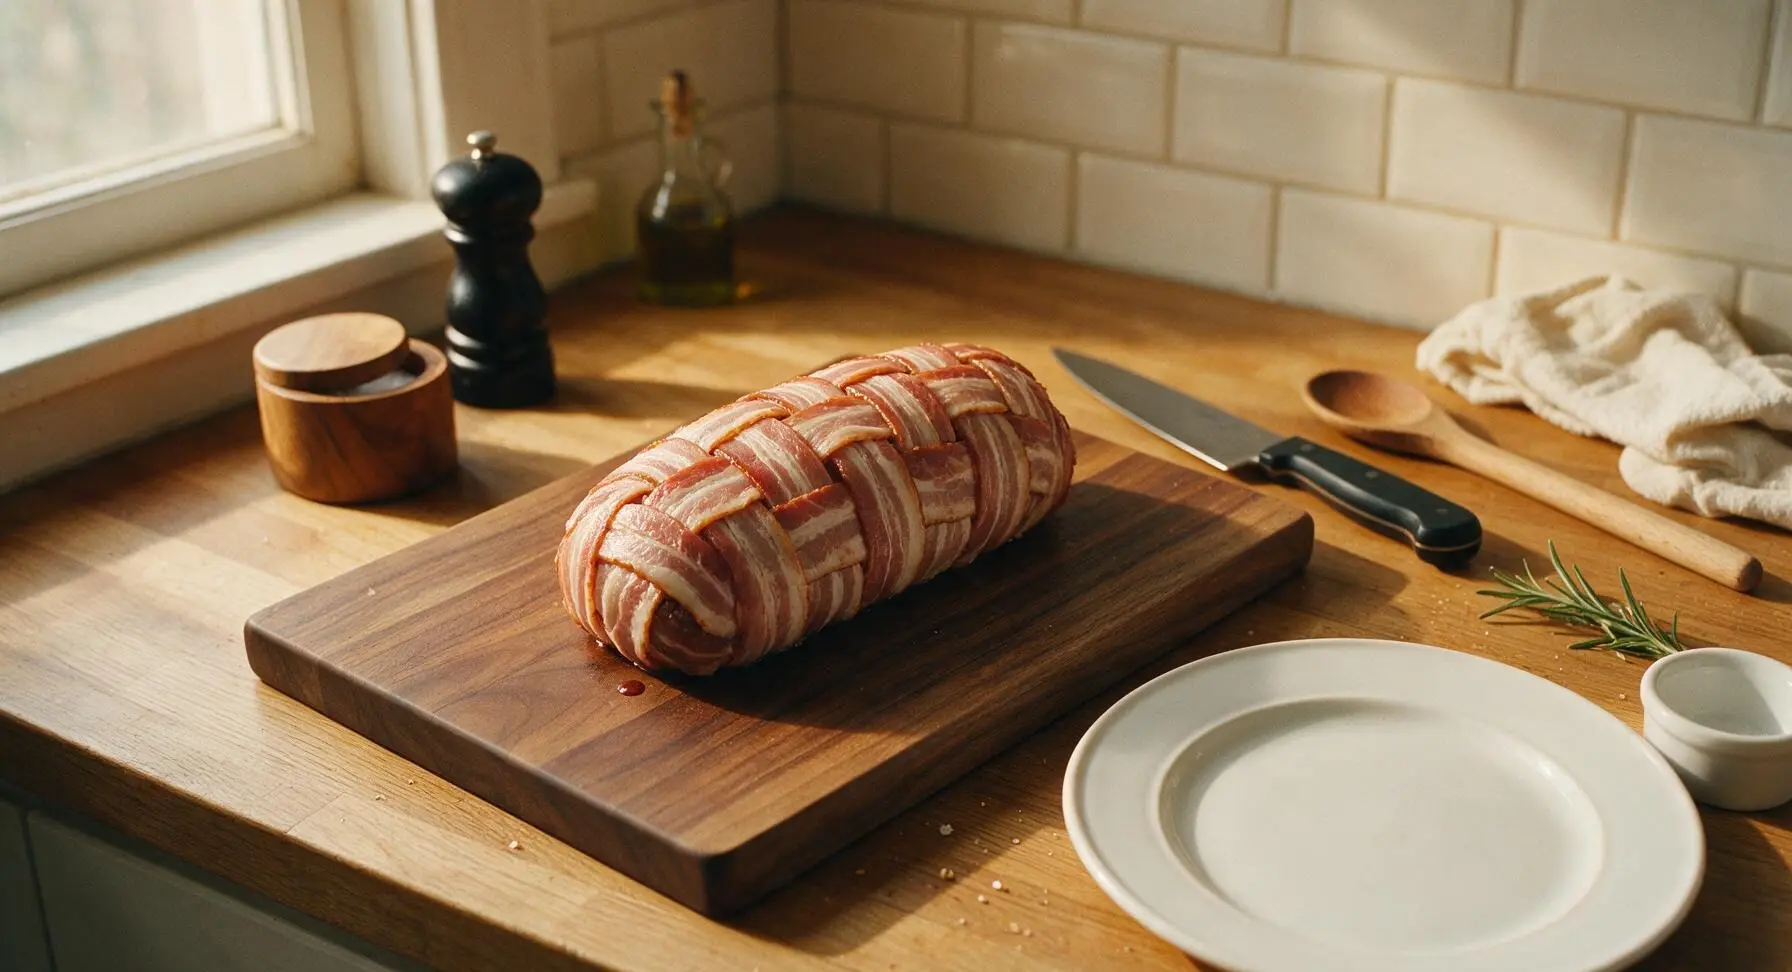
Using the edge of the cutting board for support, lift one long edge of the bacon weave and beef layer, rolling it tightly over the cheese center to form a thick, even log shape. Lift the exposed bacon edges up and over the log to fully enclose the beef and cheese, pressing firmly to seal any small gaps where cheese might bubble out during cooking. Pinch the ends of the log closed, tucking any loose bacon strips under the log so the seam side faces down on the board. The finished sealed log should be roughly 18cm long and 8cm thick, with no exposed beef visible through the bacon wrap.
Step 4
step4:Roll and seal tightly
Step 4
step4:Roll and seal tightly
5

Cook and glaze evenly

Preheat your grill or oven to 175C (350F) for indirect heat (heat source positioned to one side, food placed on the unheated side for even, gentle cooking). Pull the small aluminum drip tray from under the cutting board, line it with a sheet of unbleached parchment torn from the countertop roll, and set the sealed bacon bomb on the tray to carry it to the grill. Cook seam-side down on the grill grates (or a wire rack set inside a rimmed baking sheet for oven cooking) for 45 minutes, then pull the bomb (on the tray) back to the kitchen counter to glaze. Use the boar bristle pastry brush to coat the entire outer surface of the bomb with the remaining 60ml of BBQ sauce, then return it to the heat to cook for 15 more minutes, until the bacon is deep crispy mahogany, the sauce is sticky and caramelized, and the internal temperature of the beef reaches 71C (160F) when checked with the digital meat thermometer.
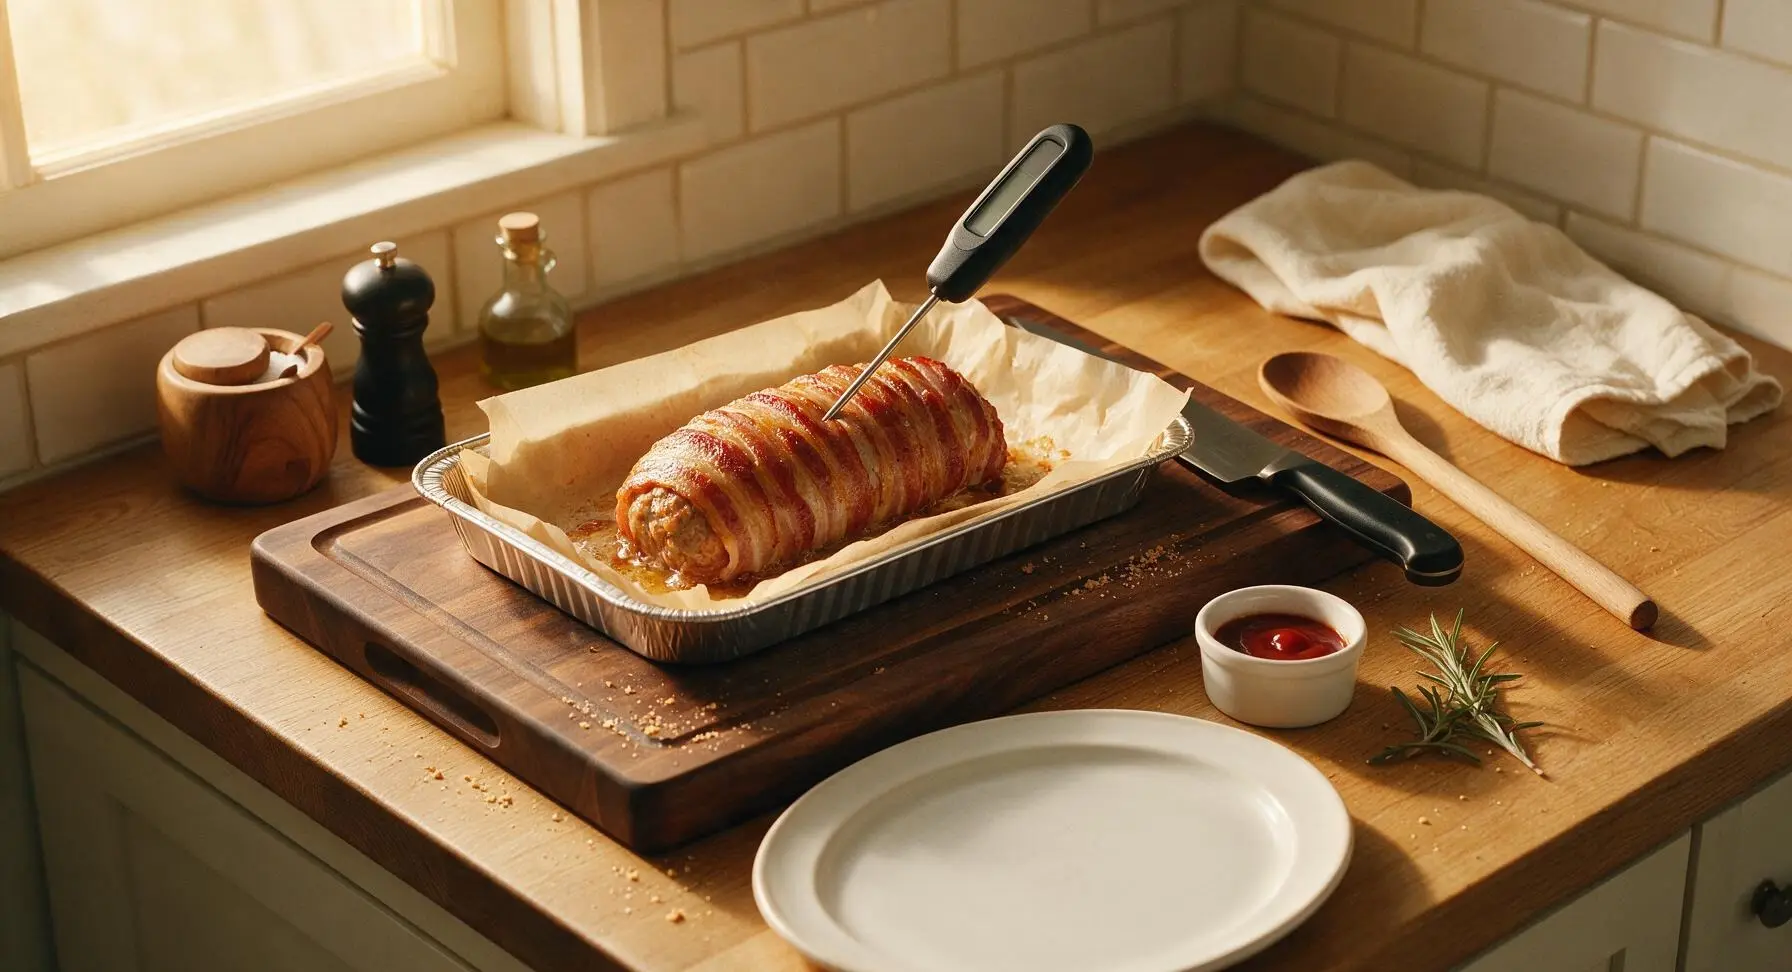
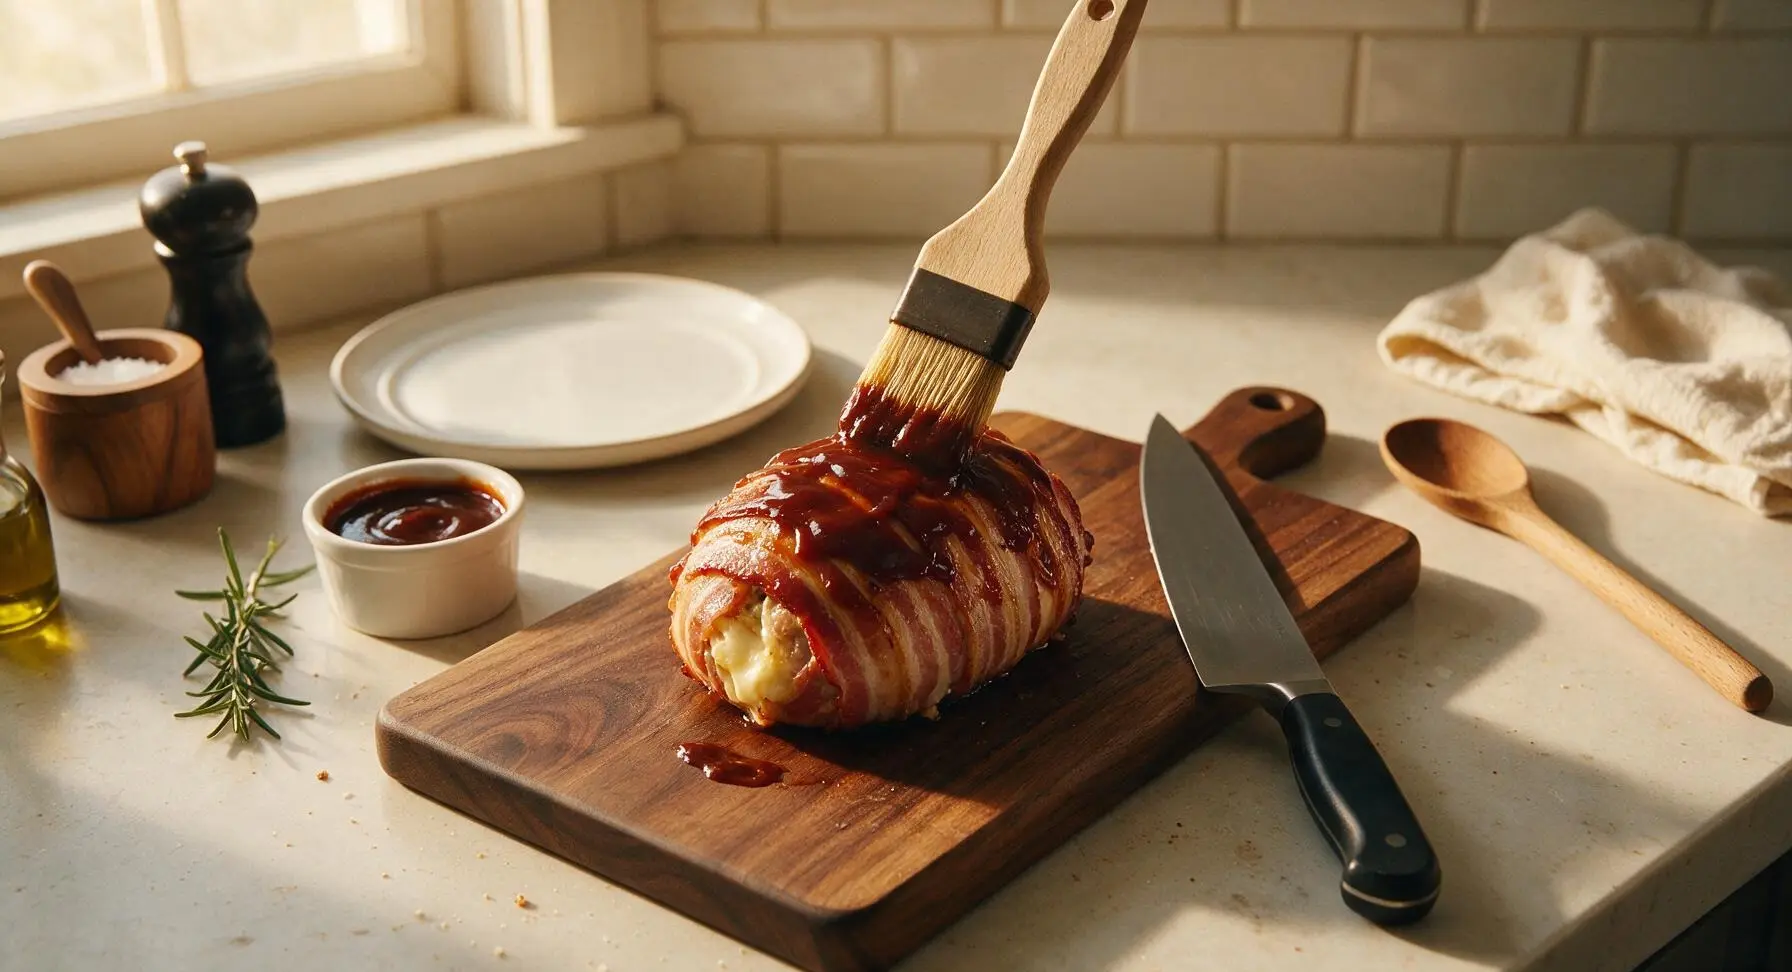
Step 5
step5:Cook and glaze evenly
Step 5
step5:Cook and glaze evenly
6

Rest bomb 10 minutes

Once the bomb reaches 71C (160F) internal temp and the bacon is fully crisp, transfer it back to the maple cutting board on the kitchen counter. Loosely tent the bomb with the faded red cotton kitchen towel to hold in heat, and let it rest for 10 full minutes. Resting allows the meat juices to redistribute through the ground beef so they do not run out when sliced, and gives the melted cheese time to set slightly so it does not gush out immediately when cut.
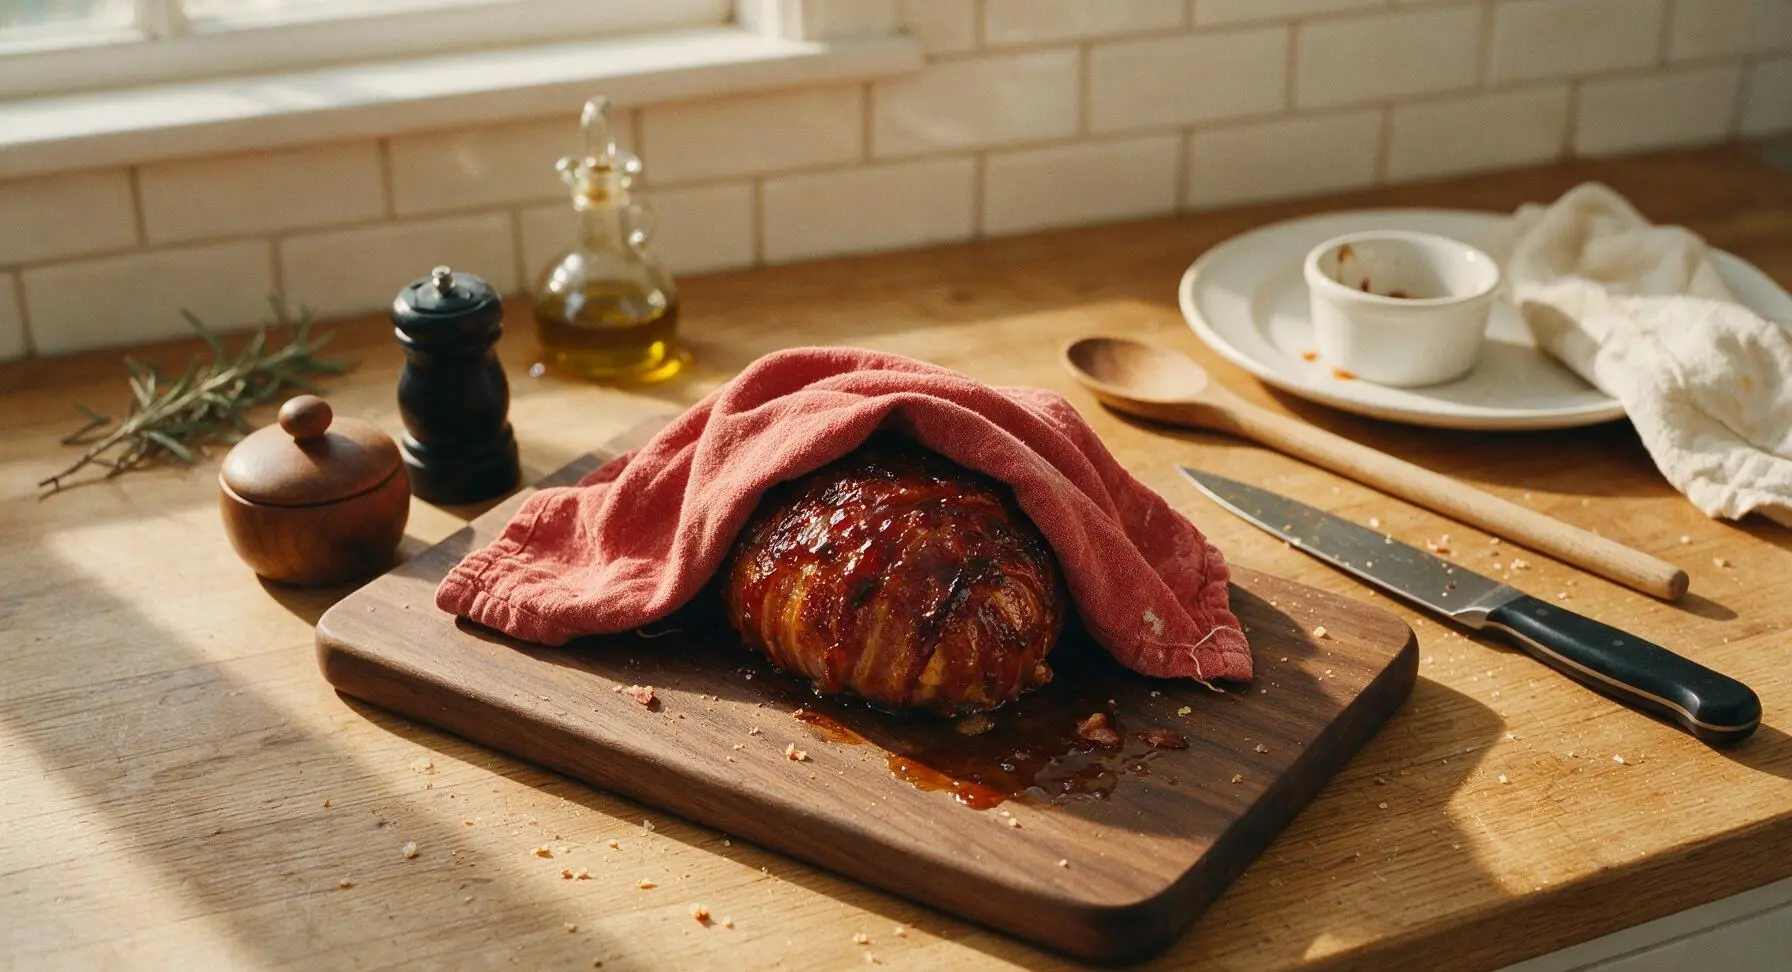
Step 6
step6:Rest bomb 10 minutes
7

Slice and plate to serve

After resting, transfer the bacon bomb to the matte dark gray ceramic serving platter. Use the 8-inch chef knife to cut the log into 3cm thick slices, wiping the knife blade on the edge of the kitchen towel between cuts for clean, smooth edges. Garnish with a few torn leaves of fresh flat-leaf parsley plucked from the fixed parsley bunch, and serve with extra BBQ sauce on the side if desired.
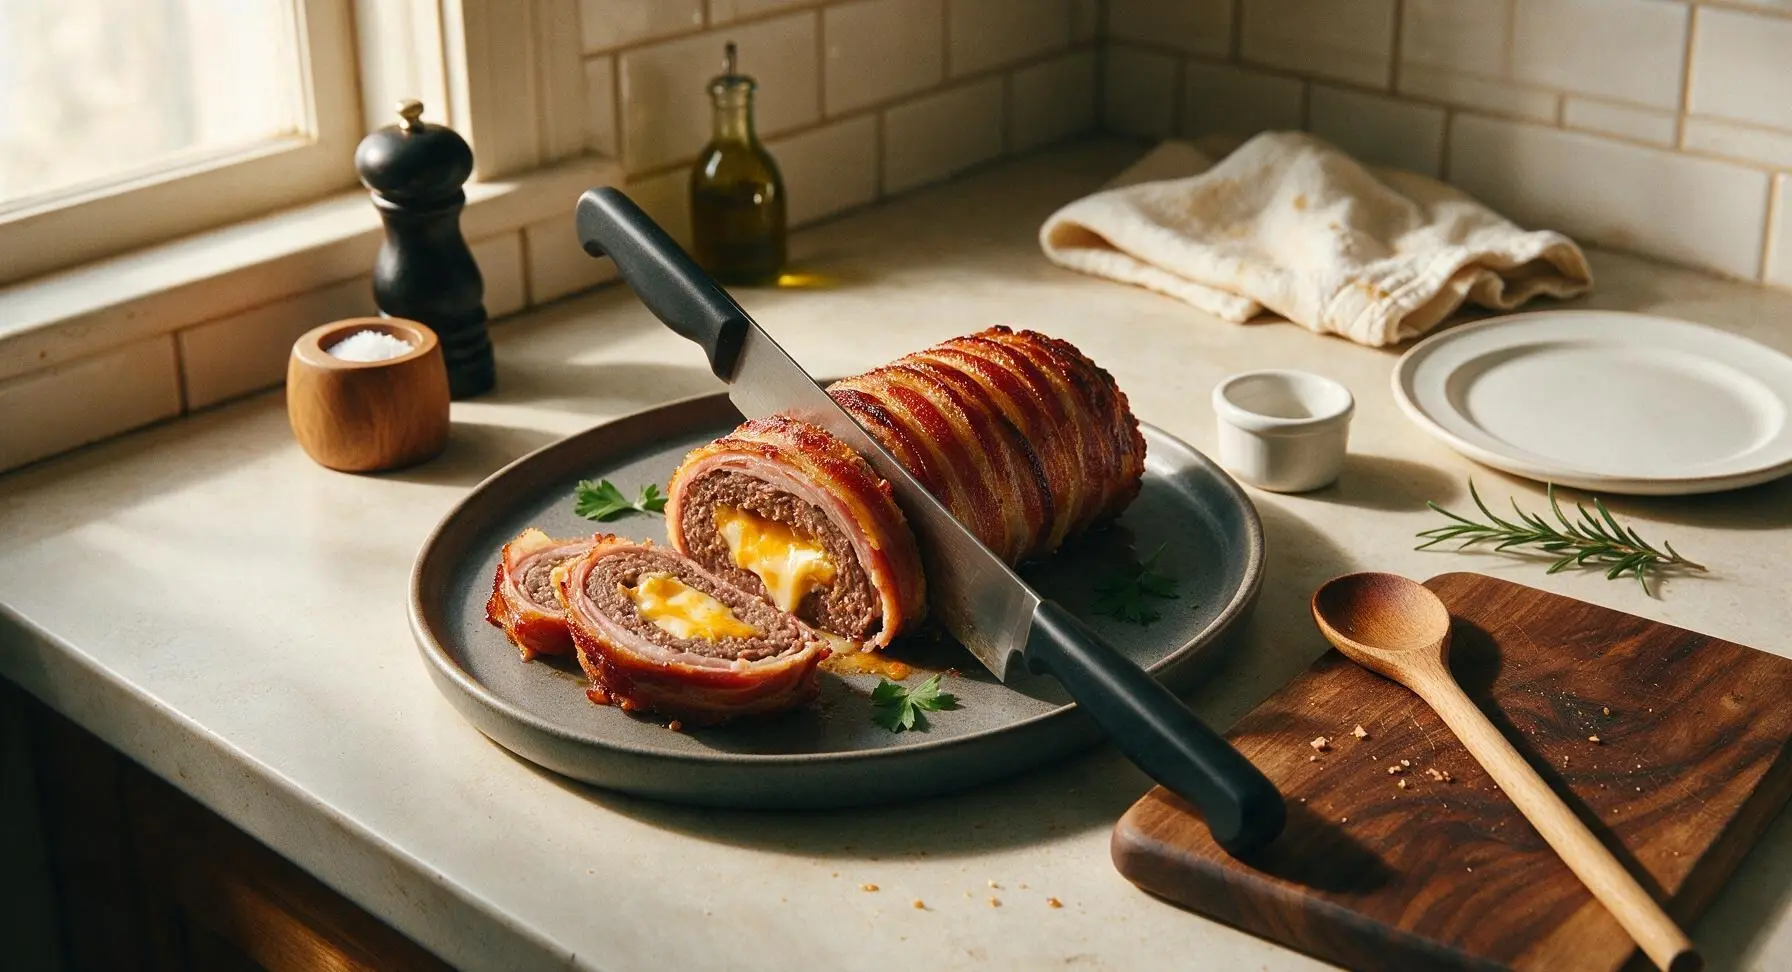
Step 7
step7:Slice and plate to serve

Tips

1.Use 80/20 ground beef for the best texture: The 20% fat content keeps the meat juicy during cooking, while leaner blends will turn dry and crumbly even if cooked to the correct temperature.
2.Press the bacon weave tightly to seal all gaps: Open spaces in the lattice will allow melted cheese and rendered beef fat to leak out during cooking, causing grill flare-ups and leaving less gooey filling in every slice.
3.Let the bomb rest a full 10 minutes before slicing: Cutting into it immediately will cause hot cheese and meat juices to run out onto the platter, leaving the beef dry and the filling messy instead of evenly distributed.


✨ You May Also Like

BBQ & Grilling
🍜 United States

Tender, melt-in-your-mouth beef brisket with a crisp, spiced bark, slow-smoked to deep smoky perfection, the iconic centerpiece of Texas backyard barbecue.

⏱️ 12 hours BBQ & Grilling ★ 4.4
BBQ & Grilling
🍜 Korea

Tender, sweet-savory marinated beef short ribs, a beloved Korean BBQ staple with caramelized, slightly charred edges and deep umami flavor, perfect for outdoor summer gatherings.

⏱️ 4 hours 2BBQ & Grilling ★ 4.8
BBQ & Grilling
🍜 United States

Juicy grilled beef patties topped with smoky homemade chili, melted cheddar, and tangy pickles on toasted brioche buns for a hearty, flavor-packed handheld meal.

⏱️ 40 minuteBBQ & Grilling ★ 4.7
BBQ & Grilling
🍜 United States

A sweet, smoky, tangy BBQ sauce brightened with peak-season dark cherries, ideal for glazing grilled ribs, chicken, pork, or summer roasted veggies.

⏱️ 35 minuteBBQ & Grilling ★ 4.7
BBQ & Grilling
🍜 United States

Rich, smoky, slightly sweet homemade bourbon BBQ sauce with deep caramel notes, ideal for glazing grilled ribs, chicken, and burgers at cookouts.

⏱️ 25 minuteBBQ & Grilling ★ 4.7
BBQ & Grilling
🍜 United States

Iconic Alabama-style BBQ featuring tender hickory-smoked chicken slathered in tangy creamy white sauce, a beloved regional Southern cookout staple.

⏱️ 3 hoursBBQ & Grilling ★ 5

bacon bomb recipe:Frequently Asked Questions

1.Why is 80/20 ground beef the best choice for this recipe instead of leaner ground beef? ▾
Leaner ground beef (like 90/10) dries out far too quickly during the longer cook time needed to crisp the bacon wrap. The 20% fat content renders slowly to baste the inner meat, locks in juiciness, and adds that rich, savory depth lean blends can’t deliver. You’ll end up with a dry, crumbly filling if you swap for a leaner grind, so stick to 80/20 for best results.
2.Do I have to use thick-cut bacon, or will regular thin bacon work? ▾
Thin bacon cooks too fast and will burn long before the ground beef filling reaches a safe internal temperature, plus it’s prone to tearing when you wrap the bomb. Thick-cut bacon holds its shape during wrapping, renders evenly to get that perfect shatteringly crisp exterior, and creates a sturdy, flavorful wrap that won’t fall apart on the grill or in the oven.
3.How do I keep the cheese from oozing out while the bacon bomb cooks? ▾
The number one trick is to fully seal the shredded sharp cheddar inside the ground beef layer with no thin spots. Press the beef into an even ½-inch thick patty, pile cheese in the center, then fold beef edges up and over to seal tightly, pinching gaps closed. Avoid poking the bomb too much while cooking, which creates holes for melted cheese to leak out.
4.Can I use a different cheese instead of sharp cheddar for the stuffing? ▾
Absolutely, though sharp cheddar pairs perfectly with hickory BBQ sauce and smoky bacon. Great swaps include pepper jack for a spicy kick, smoked gouda for extra smokiness, or low-moisture mozzarella for that ultra-gooey cheese pull. Skip high-moisture cheeses like fresh mozzarella, which release too much water and make the beef filling soggy.
5.What internal temperature should I cook the bacon bomb to for food safety? ▾
Pull the bomb off heat when the thickest part of the ground beef filling hits 160°F on an instant-read thermometer, and the bacon is deeply golden and crisp. Don’t rely on cook time alone—grill and oven temperatures vary wildly, so a quick temp check is the only surefire way to avoid undercooked beef or burnt, bitter bacon.
6.Is it better to cook this bacon bomb on a grill or in the oven? ▾
Both methods work great, but a charcoal or gas grill gives that classic smoky summer BBQ flavor that pairs perfectly with the hickory sauce and bacon. If cooking indoors, bake it on a wire rack set over a rimmed baking sheet at 375°F to let air circulate all around, so bacon gets crisp on every side instead of getting soggy sitting in grease.
7.When should I brush the hickory BBQ sauce on the bomb? ▾
Wait until the last 10 to 15 minutes of cook time to slather on the hickory BBQ sauce. If you add it too early, the high sugar content in the sauce will burn and turn bitter long before the bacon is crisp and the beef is cooked through. Brush on a thick first coat, let it caramelize 5 minutes, then add a second coat for that sticky, tangy outer layer.
8.How much kosher salt do I actually need to season the ground beef? ▾
For 2 pounds of 80/20 ground beef, you’ll want about 1 teaspoon of kosher salt to season the meat evenly before forming it around the cheese. Don’t over-salt—remember, the bacon and hickory BBQ sauce both have plenty of sodium already, so a light, even seasoning on the beef is all you need to amp up savoriness without making the dish too salty.
9.How do I wrap the bacon around the beef so it doesn’t unravel while cooking? ▾
Lay your thick-cut bacon strips in a crisscross weave on a sheet of parchment paper first, set the sealed beef and cheese ball in the center, then fold the bacon ends up and over the top, overlapping slightly to cover every spot. Tuck any loose ends under the bomb, and the weight of the meat as it cooks will hold the weave in place with no toothpicks needed.
10.Can I prep this bacon bomb ahead of time for a cookout? ▾
Definitely! You can assemble the entire bomb (sealed beef, cheese filling, bacon wrap) up to 24 hours ahead of time, wrap it tightly in plastic wrap, and store it in the fridge until you’re ready to cook. Just hold off on adding the hickory BBQ sauce until the final 15 minutes of cook time, so the sauce doesn’t make the bacon soggy as it sits.
11.Why is my bacon coming out chewy instead of crispy all over? ▾
Chewy bacon almost always happens when the bomb is cooked directly on a solid baking sheet or grill grate with no air flow underneath, so it sits in rendered grease as it cooks. Set the bomb on a wire rack over a baking sheet (for oven cooking) or an elevated grill rack to let hot air circulate 360 degrees around the bacon for even crispness.
12.What size should I make the bacon bomb for even cooking? ▾
Aim for a roughly 6-inch diameter ball when you form the beef around the cheese, which works out to about 2 pounds of 80/20 ground beef stuffed with 1 cup of shredded sharp cheddar, wrapped in 12 to 14 strips of thick-cut bacon. Any larger, and bacon burns before the center cooks; any smaller, and beef overcooks before bacon crisps.
13.Do I need to let the bacon bomb rest after cooking before slicing? ▾
Yes! Let it rest for 10 minutes on a cutting board tented loosely with foil after you pull it off the heat. This lets the hot, melted cheese and meat juices redistribute back through the filling instead of gushing out all over your cutting board when you slice, so every bite stays juicy and cheese stays trapped in the center.
14.Can I add extra mix-ins to the ground beef filling? ▾
Absolutely! Finely diced caramelized onions, a teaspoon of smoked paprika, a pinch of garlic powder, or a handful of cooked, crumbled sausage all mix beautifully into the 80/20 beef without throwing off cook time. Just avoid adding too many wet mix-ins, like extra sauce or high-moisture raw veggies, which can make beef soggy and break the cheese seal.
15.What are the best sides to serve with this bacon bomb? ▾
It pairs perfectly with classic summer BBQ sides—think creamy coleslaw, grilled corn on the cob, crispy dill potato salad, sweet and smoky baked beans, or buttery garlic bread. The tangy, rich, smoky flavors of the bomb cut through creamy, starchy sides beautifully, and you can set out extra hickory BBQ sauce on the side for dipping.
16.How do I store leftover bacon bomb, and how long does it keep? ▾
Let any leftover slices cool completely, then store them in an airtight container in the fridge for up to 4 days. To reheat, place slices on a wire rack in a 350°F oven for 10 to 12 minutes until bacon is crisp again and cheese is melted—skip the microwave, which turns bacon rubbery and makes the beef texture grainy.
17.If cheese leaks out while cooking, did I ruin the whole dish? ▾
Not at all! A little cheese oozing out is totally normal, and those leaked bits of sharp cheddar will cook into crispy, salty cheese frico around the base of the bomb that’s absolutely delicious to snack on. Just make sure to seal any obvious thin spots in the beef before cooking next time to cut down on leakage, but small amounts won’t ruin the dish.
18.Can I make smaller, individual-sized bacon bombs instead of one large one? ▾
Definitely! Divide the ground beef into 4-ounce portions, stuff each with a cube of sharp cheddar, seal tightly, then wrap each mini bomb with 2 strips of thick-cut bacon. Cook them at the same 375°F temperature, but start checking internal temp at the 25-minute mark, since they’ll cook much faster, and add sauce in the last 10 minutes.
19.Do I need to use toothpicks to hold the bacon in place while it cooks? ▾
If you use the crisscross bacon weave method and tuck the loose ends under the bomb before cooking, you won’t need any toothpicks at all—the bacon will shrink as it renders and adhere tightly to the beef as it cooks. If you’re extra worried about unraveling, you can use a couple of wooden toothpicks to secure loose ends, just remember to remove them before serving.

Comments (3)

2 days ago

OMG, made this for my weekend backyard cookout and everyone lost their minds! I smoked it on my pellet grill instead of finishing it in the oven and that wood-fired flavor paired so well with the crispy bacon and oozing cheese center? Total game changer. I added a little pickled jalapeño to the cheese mix for a kick and it was chef’s kiss. Already had three neighbors bang on my door asking for the recipe. SO good!

yesterday

So glad this was such a smash hit at your cookout! Smoking it on the pellet grill and adding pickled jalapeños are both such genius twists — I’ll have to test that variation for the site next week. Thanks for sharing the great tip!

3 days ago

Made this for our Sunday family dinner and my kids loved it — they asked for seconds before they even finished their first plates! I paired it with roasted broccoli and baked mac and cheese for a total comfort food feast. I was worried the 1 hour cook time would make it too fussy for busy nights, but it was totally easy to prep ahead for weekly meal prep too. My only tiny note is I wish I’d left mine in the oven a few extra minutes to get that next-level crisp on the bacon, but the flavor was absolutely 10/10 otherwise.

1 week ago

Brought this to my office potluck last week and it was the first dish completely wiped off the table — people were literally scraping the serving platter to get the last crumbs of crispy bacon! I used a mix of sharp cheddar and pepper jack for the cheese stuffing and it had the perfect amount of zing to cut through the rich bacon. I did struggle a little to keep my bacon weave tight when rolling it up, though — does anyone have tips to keep it from coming loose while it cooks?

5 days ago

Total pro tip: Par-cook your bacon strips for 4-5 minutes in the oven before you weave them! It cuts down on all that shrinkage so the weave stays tight when you roll and bake. I learned that the hard way after my first bacon bomb completely fell apart mid-cook, total greasy mess lol. Game changer once I figured that out!

3 days ago

Great question! Jake’s par-cooking tip is 100% spot on — I also recommend tucking the loose ends of the bacon weave under the stuffed log when you set it on the baking sheet to help it hold its shape as it cooks. So stoked this was such a fan favorite at your potluck!



