
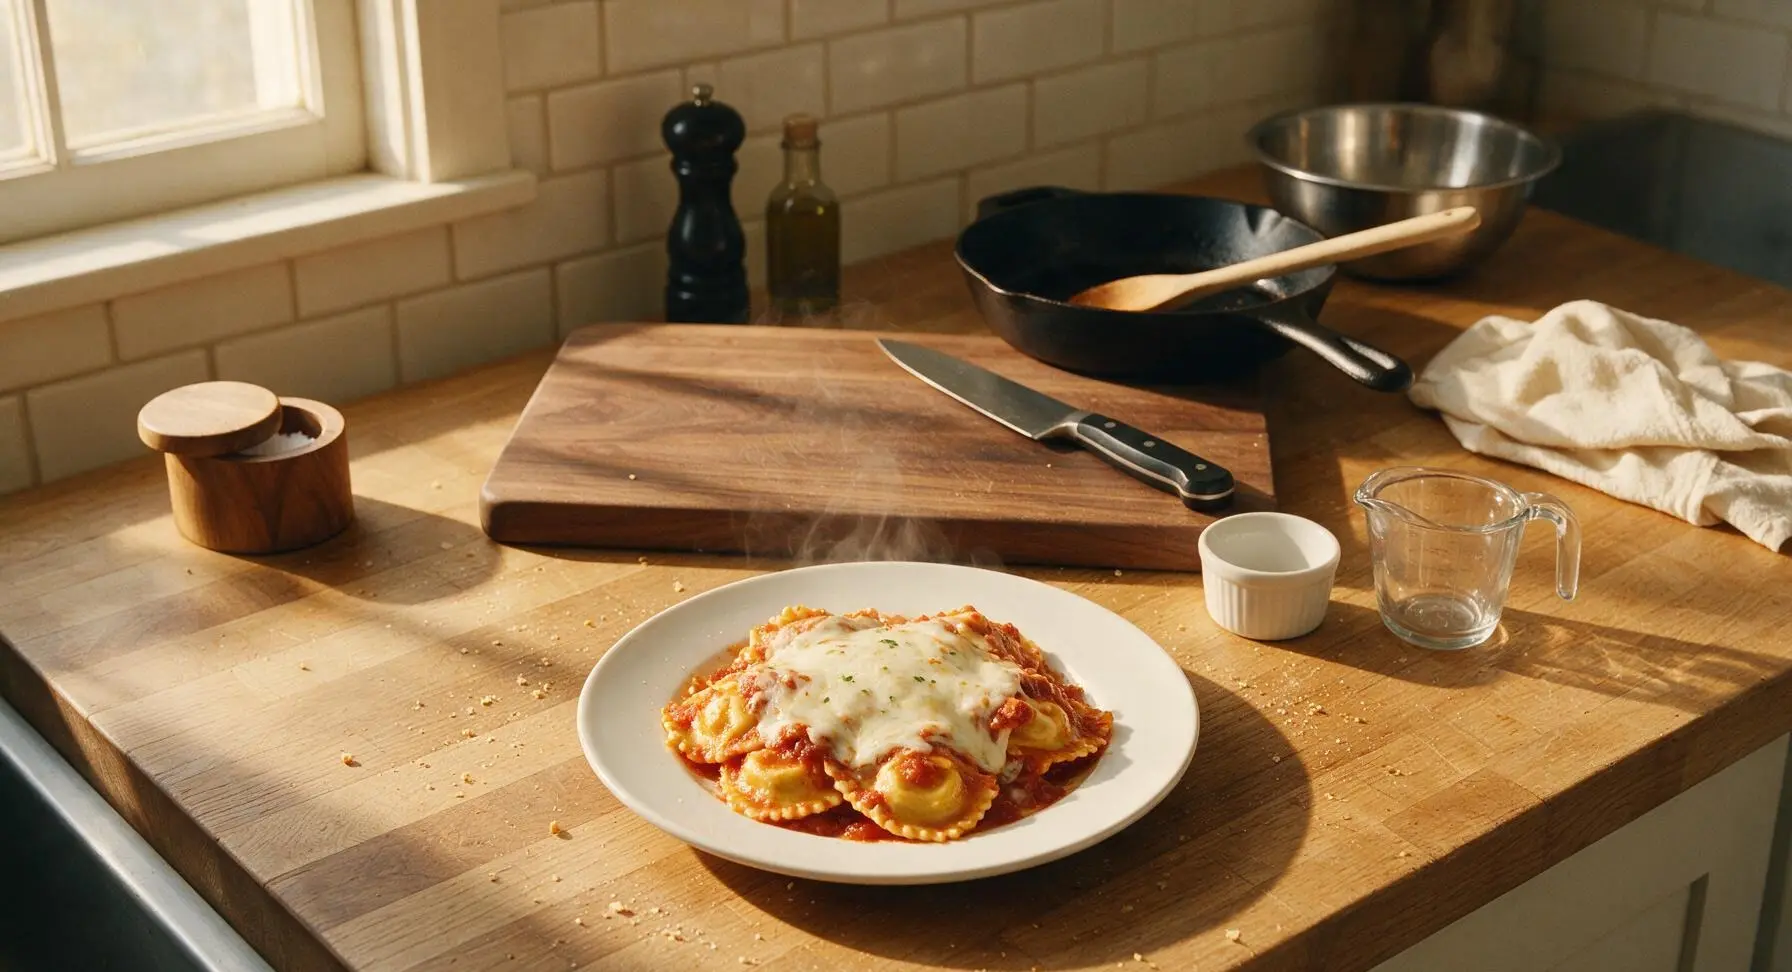
Baked Ravioli

title 1
Baked Ravioli
⏱️ cook time 40 minutes
🍽️ servings 6
⚡ Difficulty easy

intro

Cheesy, saucy no-boil baked ravioli layered with rich marinara and melted mozzarella—low-fuss comfort food that delivers cozy, satisfying flavor with minimal prep.

Ingredients
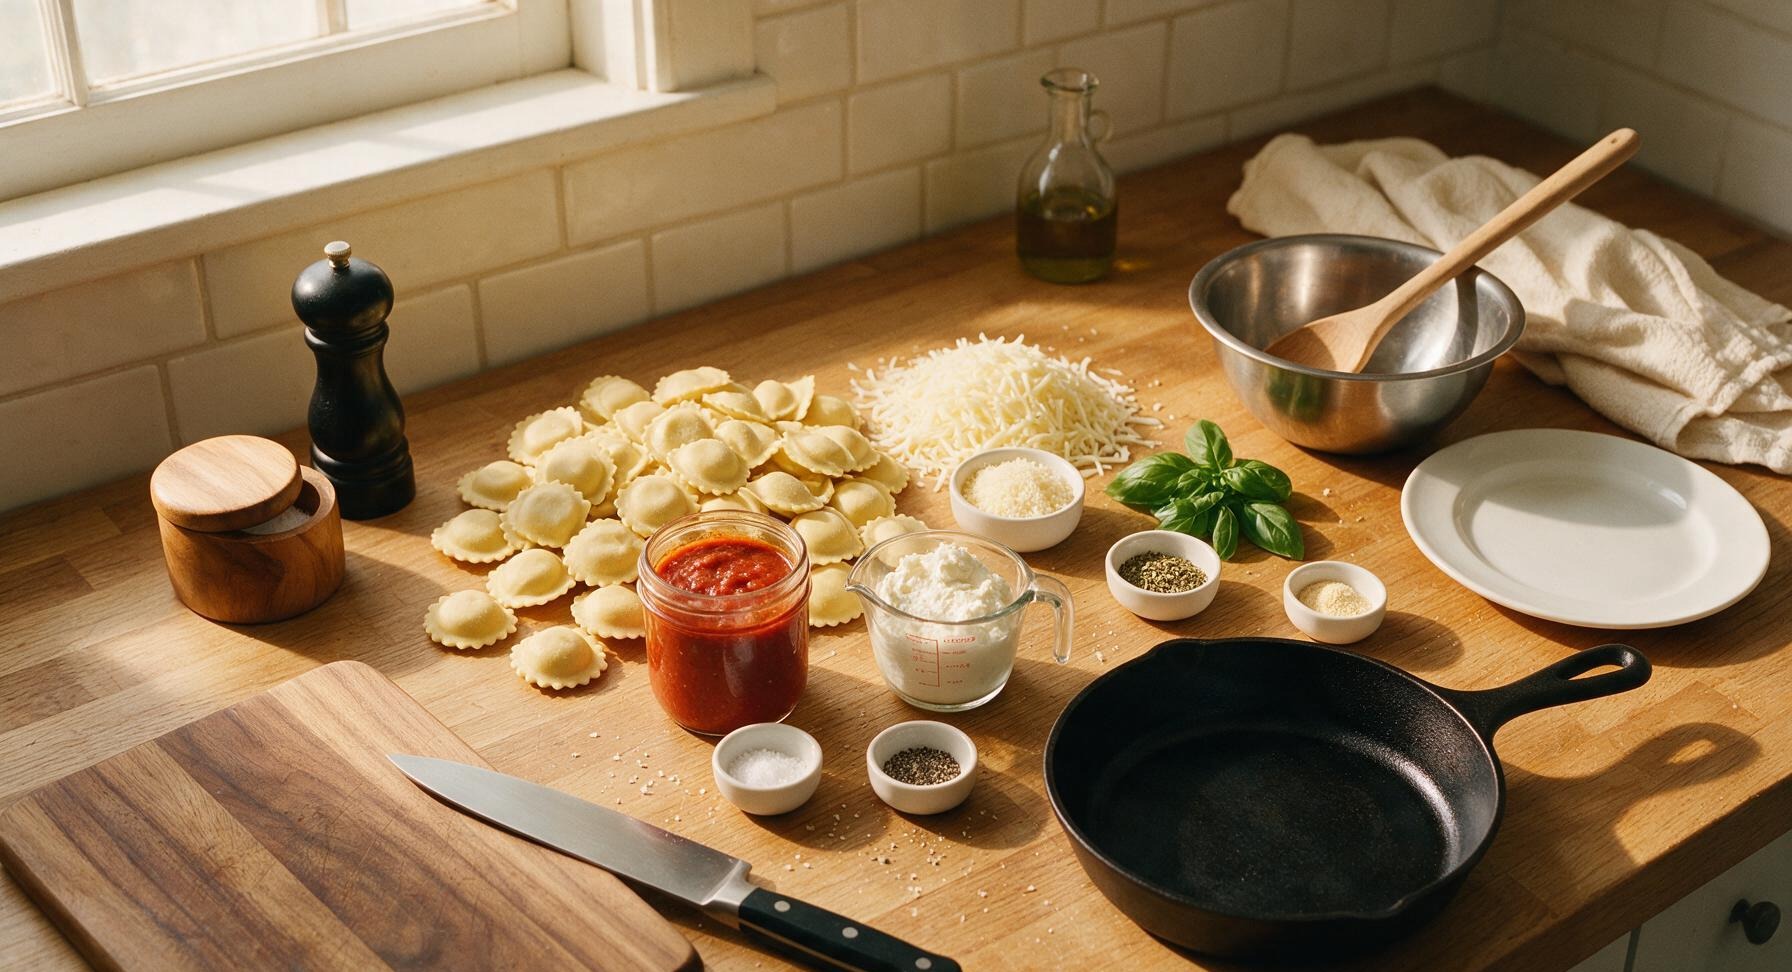
Frozen cheese ravioli (unthawed) 720g (1.6lb)
Marinara sauce 700g (24oz jar)
Shredded low-moisture part-skim mozzarella cheese 225g (2 cups)
Whole milk ricotta cheese 113g (1/2 cup)
Grated parmesan cheese 30g (1/3 cup)
Italian seasoning 1 teaspoon
Garlic powder 1/2 teaspoon
Kosher salt 1/4 teaspoon
Freshly ground black pepper 1/4 teaspoon
Fresh basil 1 small bunch (8-10 leaves)

Steps

1

Preheat and Mix Cheeses

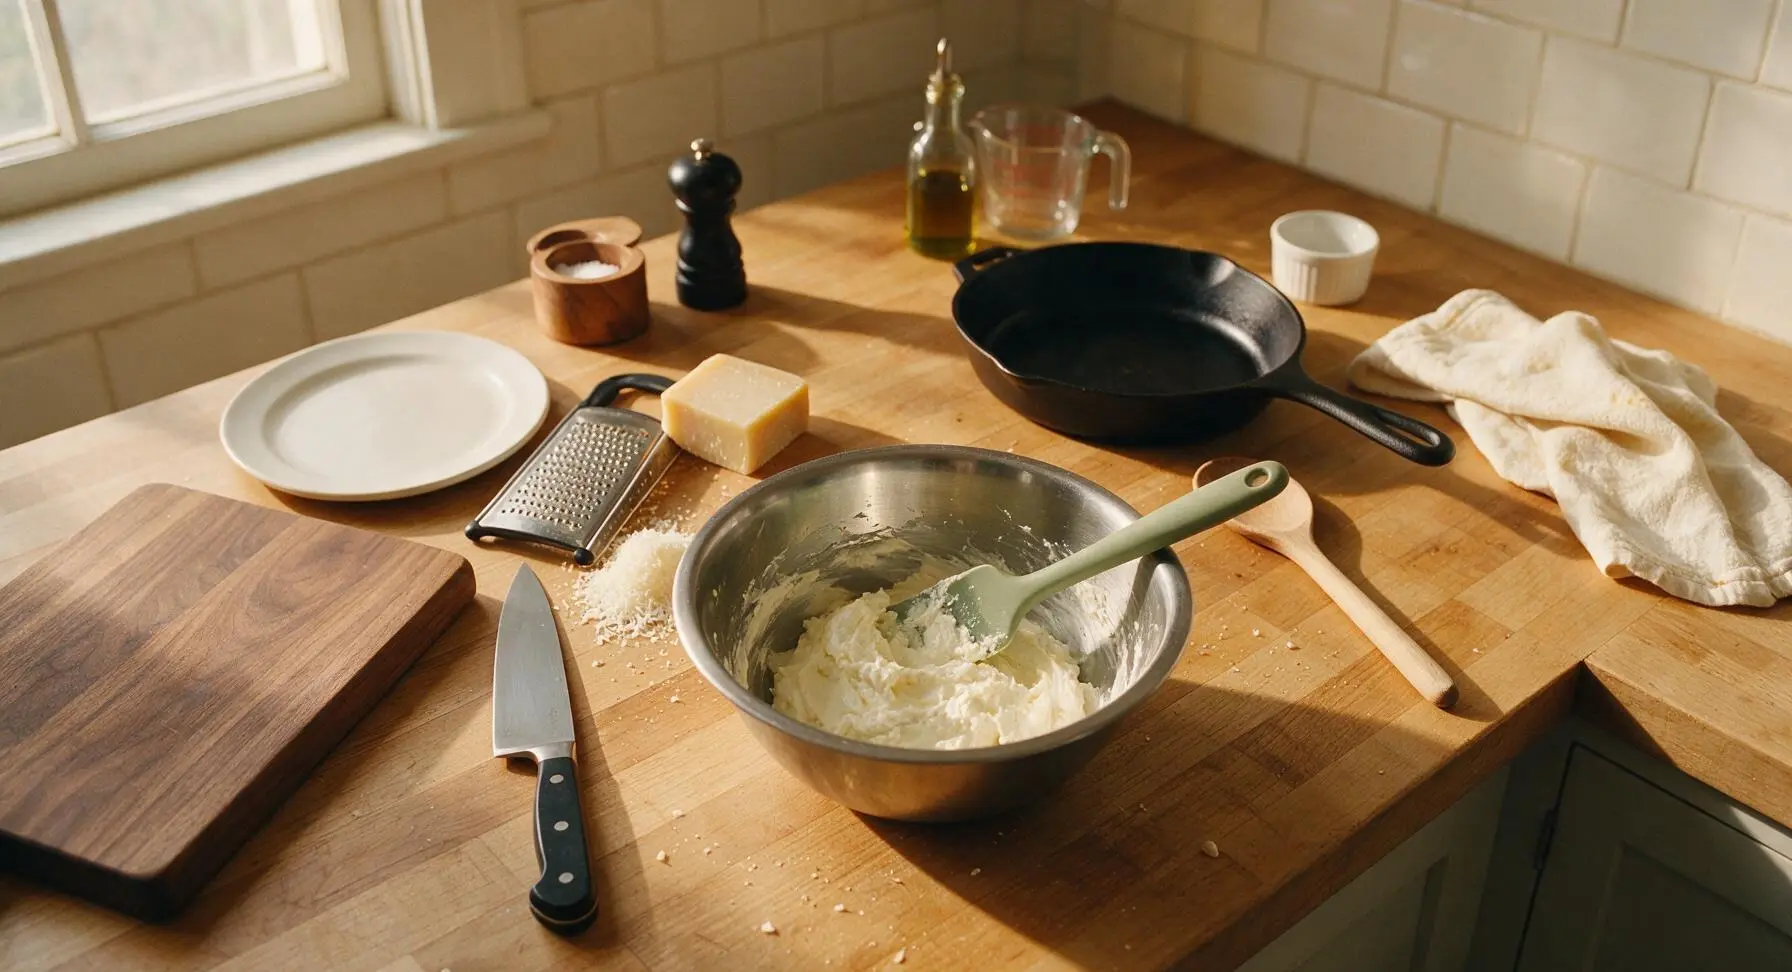
Preheat your oven to 375°F (190°C) with a rack positioned in the middle. Use the box grater to grate the parmesan cheese if using a block. In the medium stainless steel mixing bowl, combine 113g (1/2 cup) whole milk ricotta, 15g (2 tablespoons) grated parmesan, 1 teaspoon Italian seasoning, 1/2 teaspoon garlic powder, 1/4 teaspoon kosher salt, and 1/4 teaspoon freshly ground black pepper. Stir with the muted sage green silicone spatula until fully combined into a smooth, spreadable texture; set aside.
Step 1
step1:Preheat and Mix Cheeses
2

Spread Base Sauce Layer

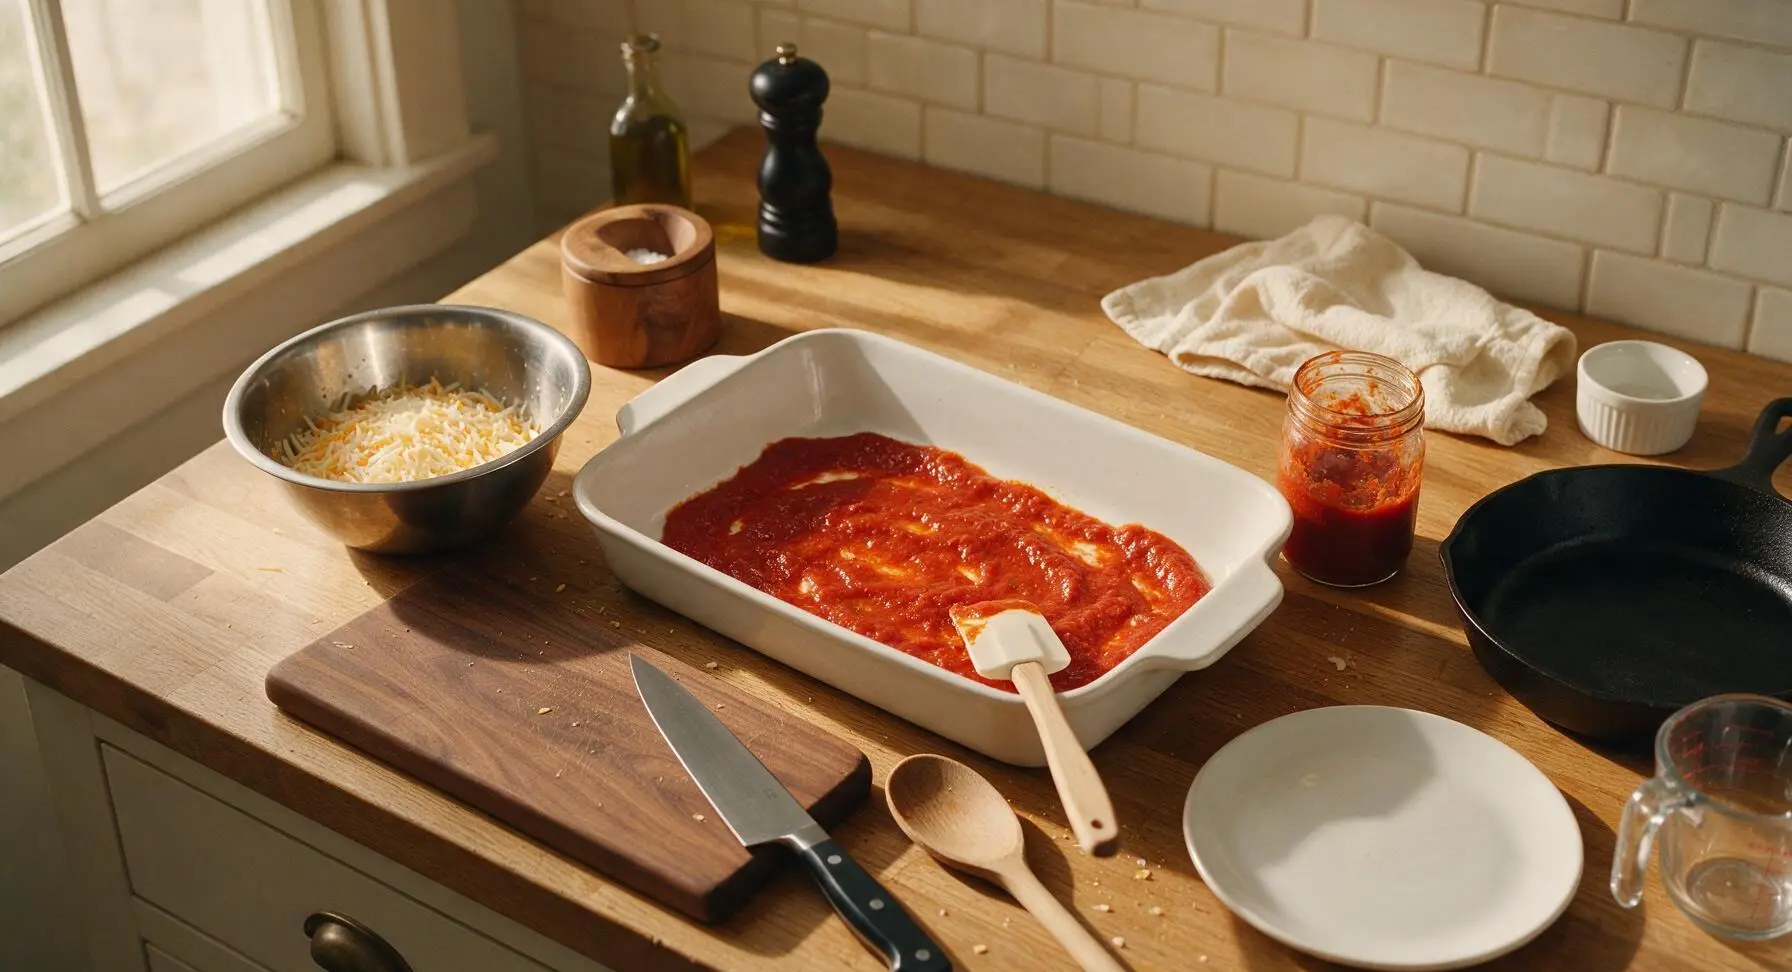
Scoop 1/3 of the marinara sauce (approximately 230g) into the bottom of the 9x13 inch matte white ceramic baking dish. Use the silicone spatula to spread the sauce in an even, thin layer across the entire bottom of the dish, ensuring no bare ceramic spots remain to prevent ravioli from sticking during baking.
Step 2
step2:Spread Base Sauce Layer
3

Layer Ravioli and Cheese

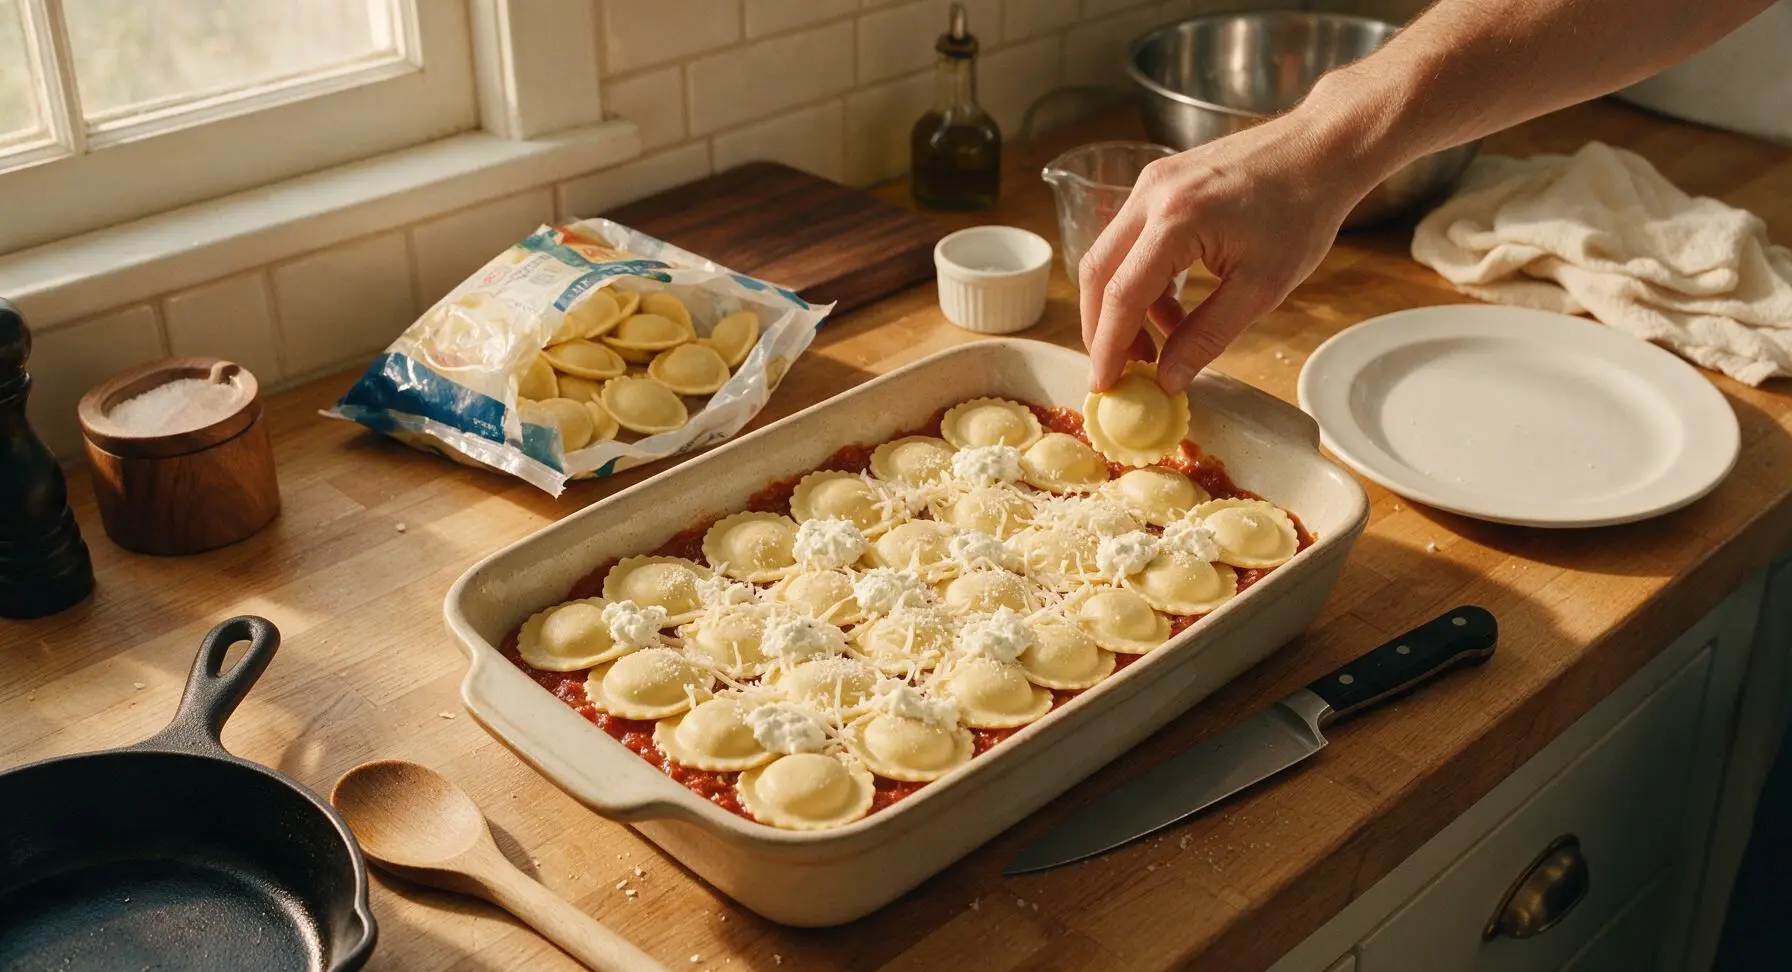
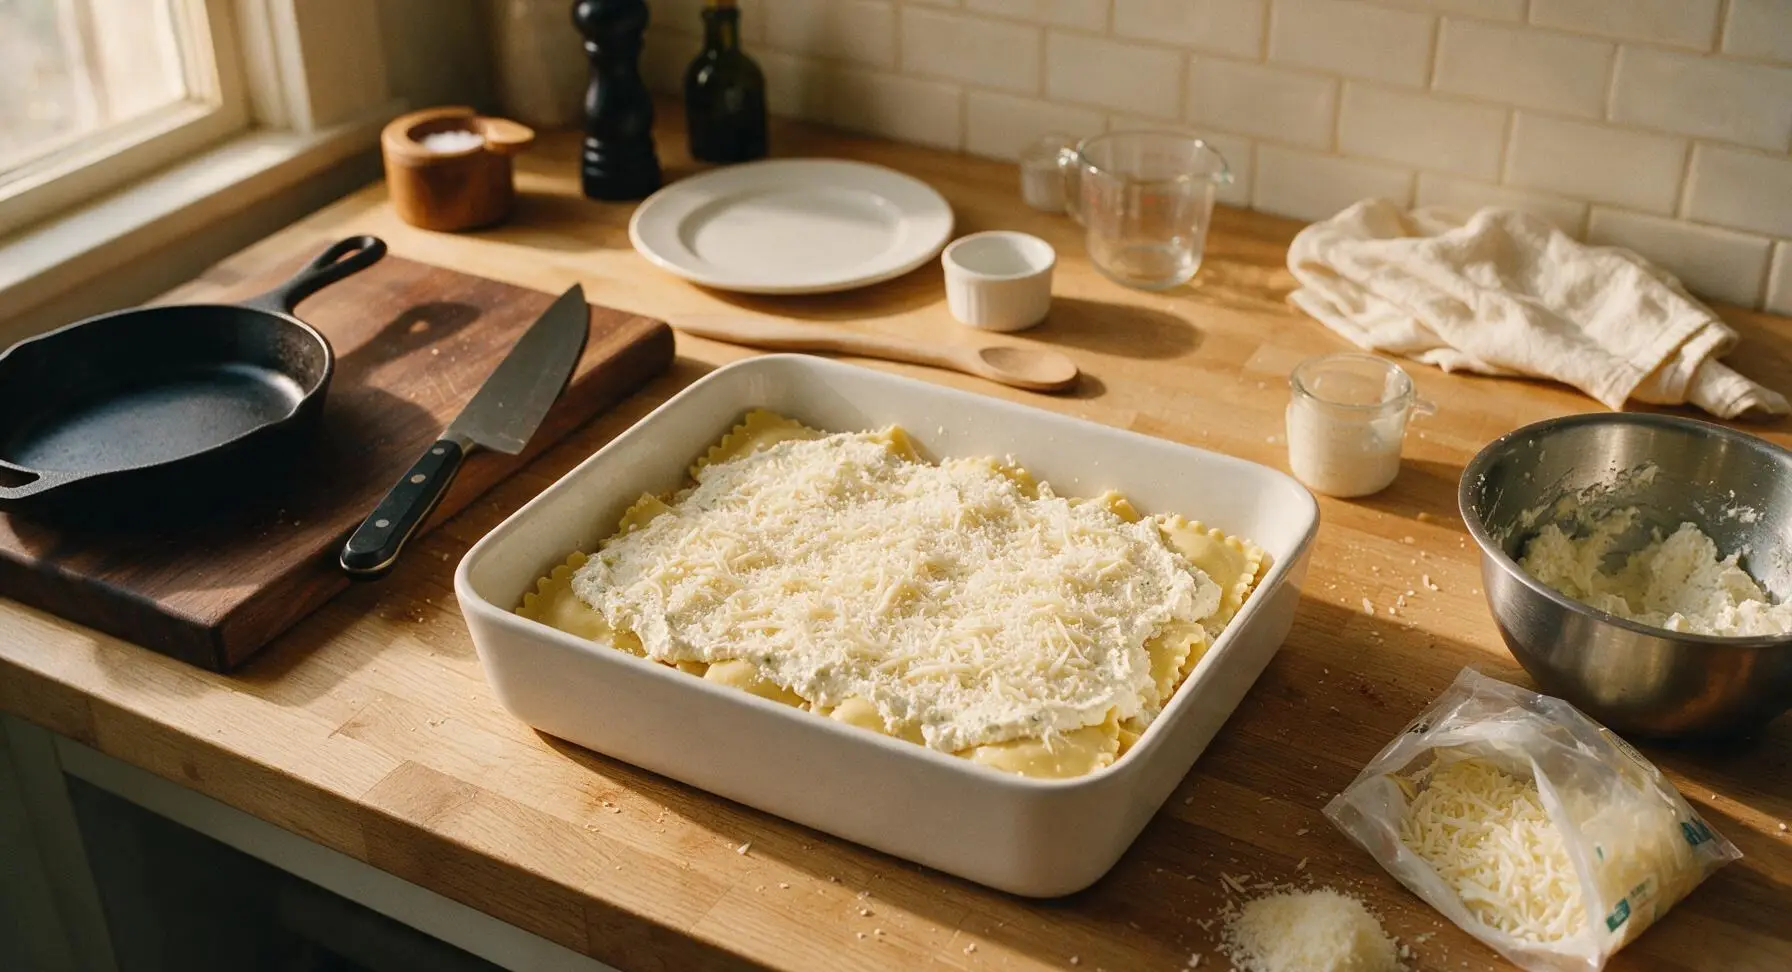
Arrange half of the unthawed frozen ravioli (360g) in a single, slightly overlapping layer over the base marinara sauce. Dollop half of the ricotta cheese mixture in small spoonfuls across the ravioli, then spread gently into an even layer. Top the ricotta with 1/3 of the shredded mozzarella (about 75g) and 1 teaspoon (5g) of the remaining grated parmesan.
Step 3
step3:Layer Ravioli and Cheese
Step 3
step3:Layer Ravioli and Cheese
4

Repeat Layered Stack

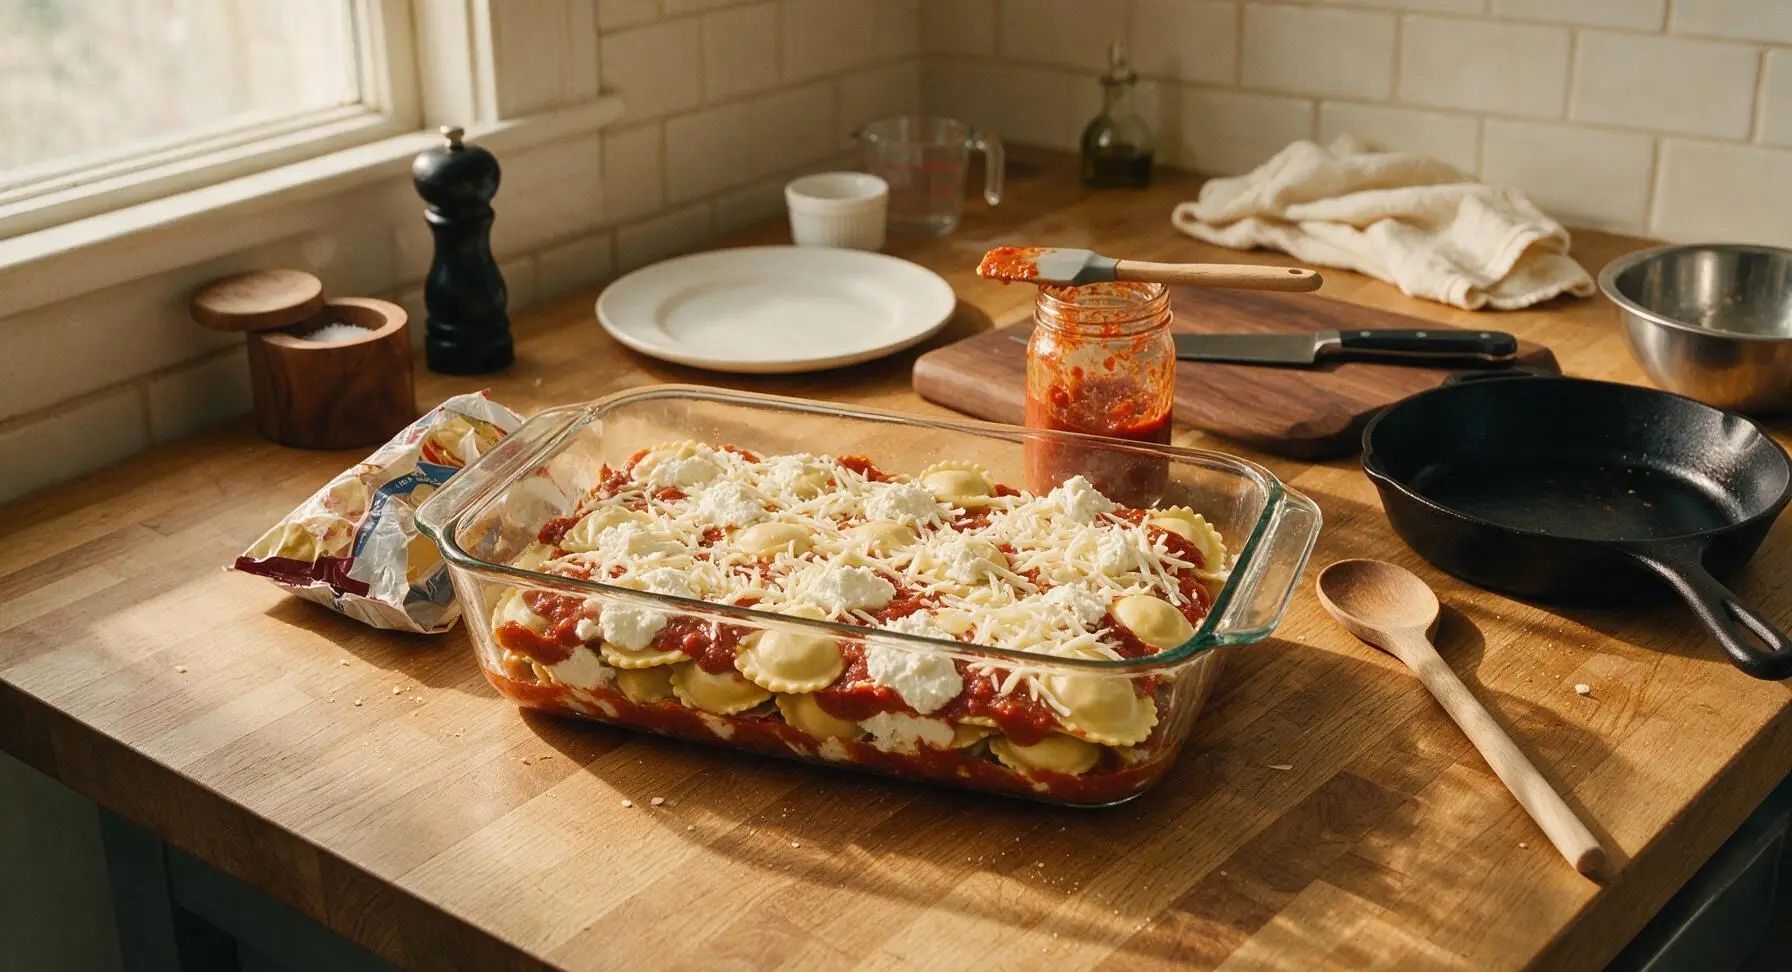
Repeat the layering sequence to build the second stack: spread another 1/3 of the marinara sauce (approximately 230g) evenly over the first cheese layer, top with the remaining 360g of frozen ravioli in a single slightly overlapping layer, dot with the remaining ricotta mixture, and sprinkle with another 1/3 of the shredded mozzarella (75g). Layers should sit 1cm below the dish rim to prevent bubbling over during baking.
Step 4
step4:Repeat Layered Stack
5

Top and Cover for Baking

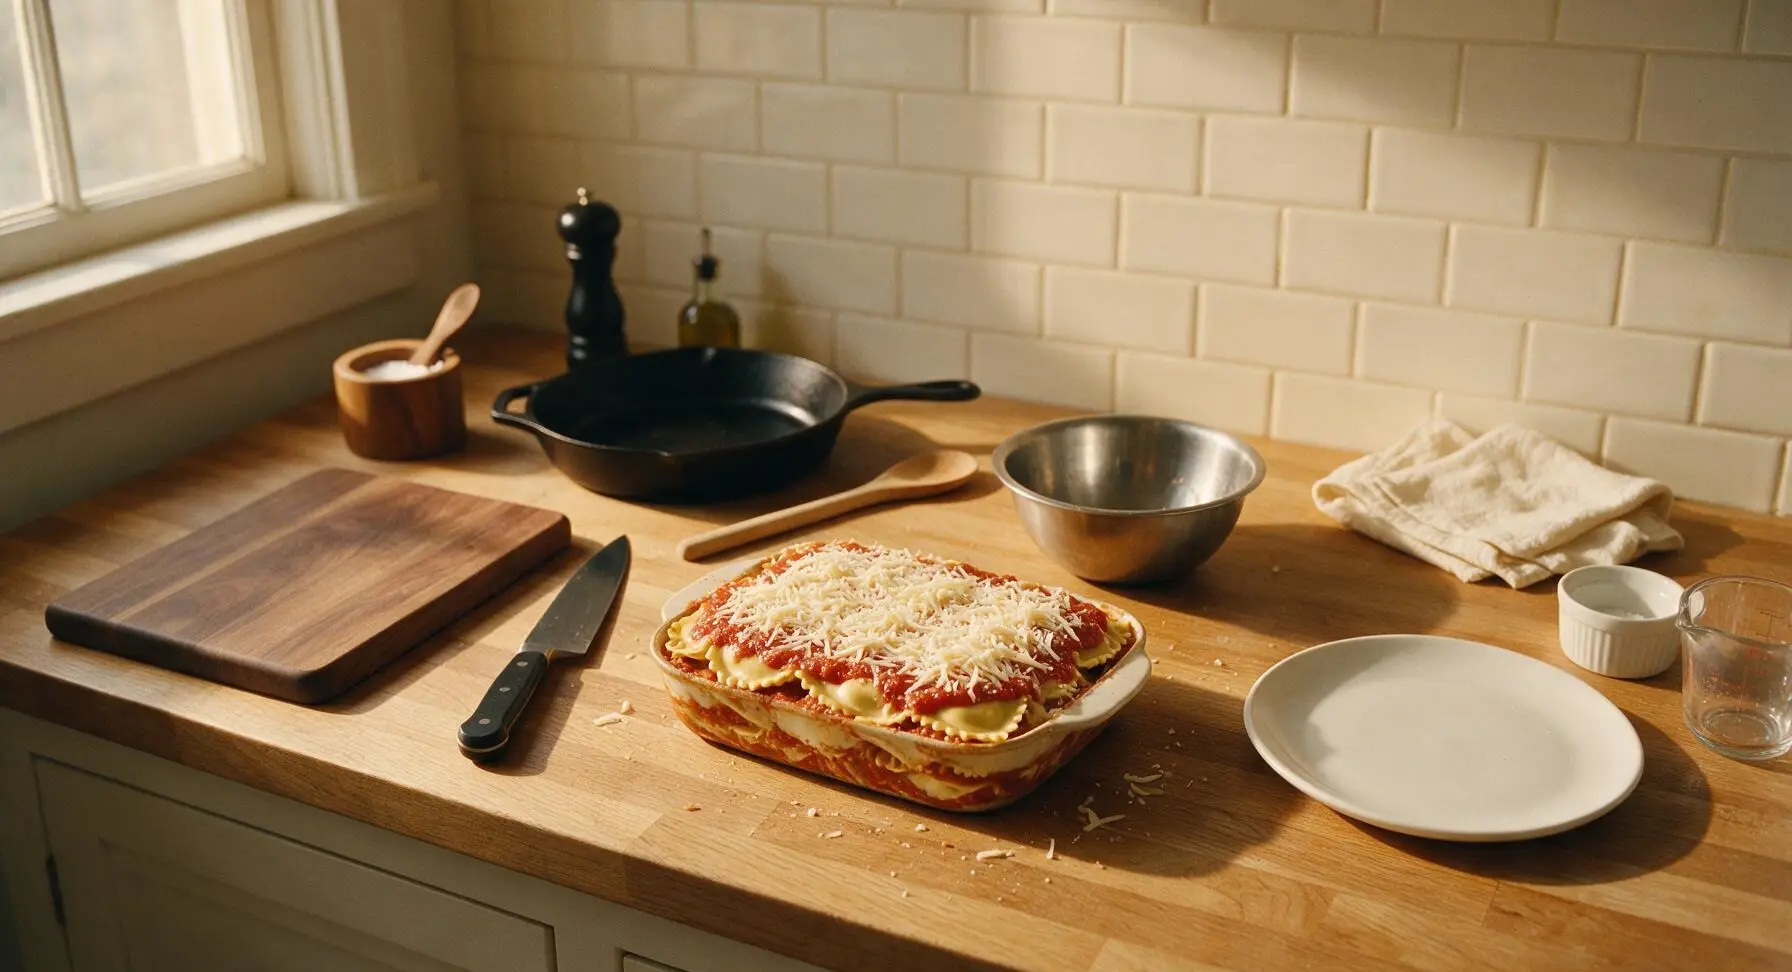
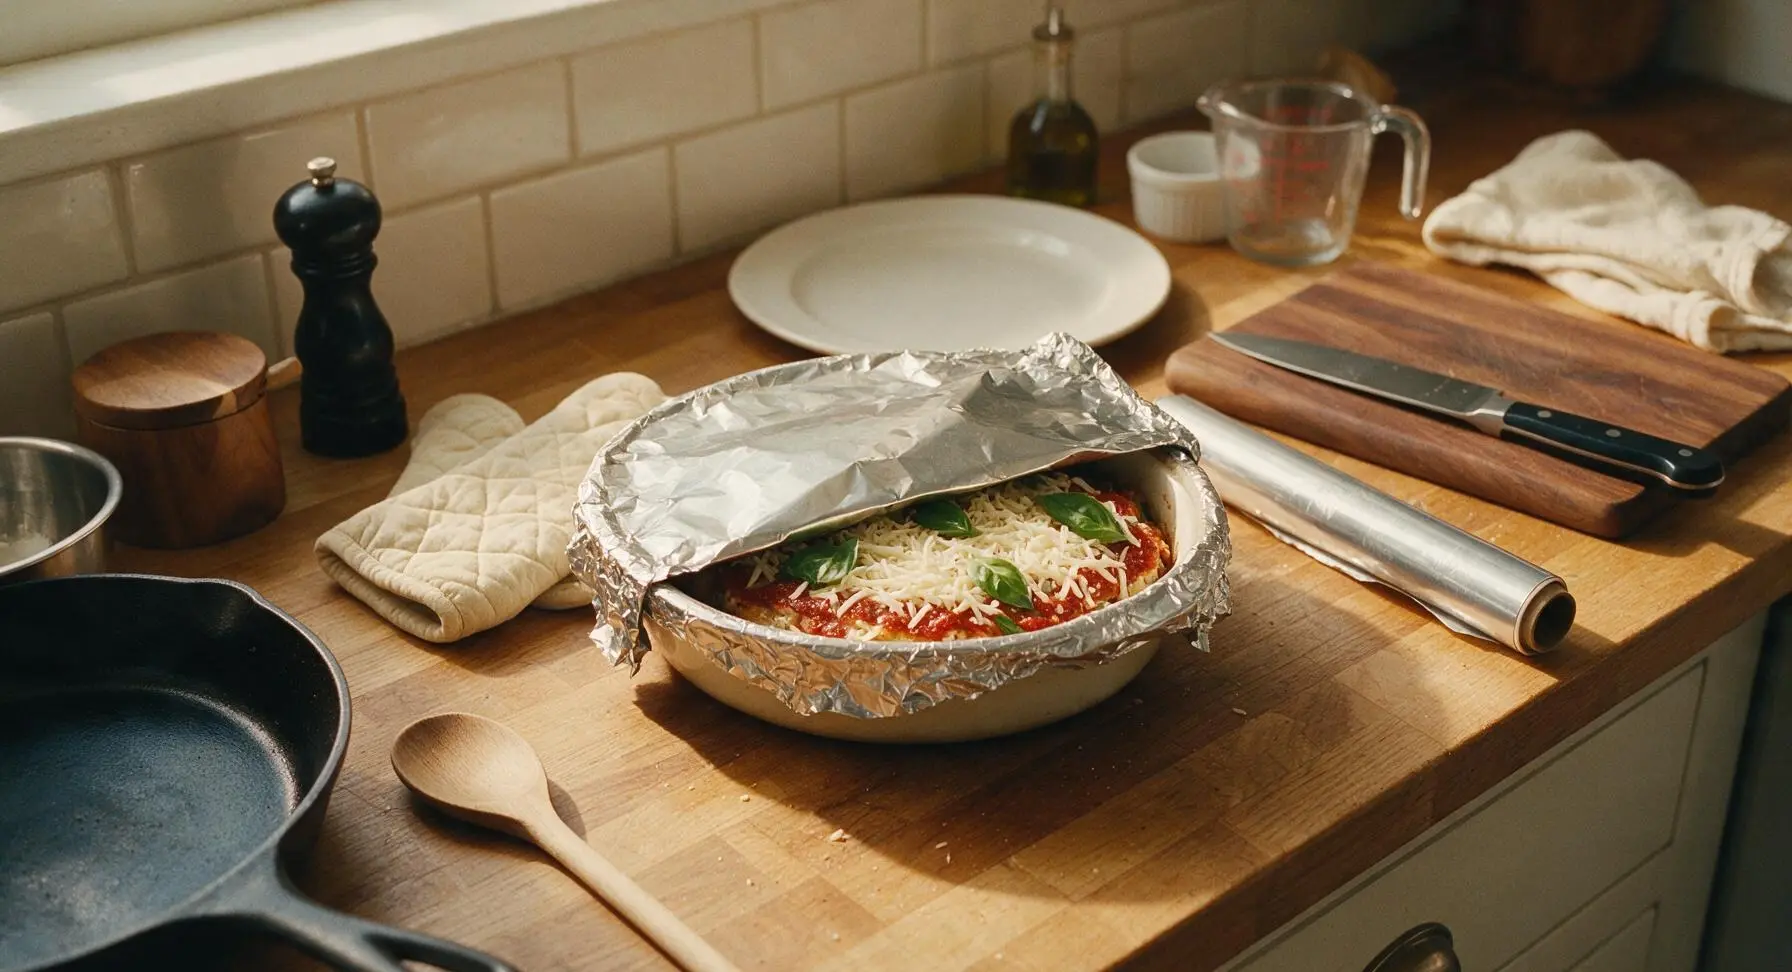
Spread the final 1/3 of marinara sauce (approximately 240g) over the top ravioli layer, making sure every ravioli is covered with sauce to prevent it from drying out. Sprinkle the remaining 1/3 of shredded mozzarella (75g) and last 10g (2 tablespoons) of parmesan evenly over the top. Tear off a 40cm sheet of aluminum foil from the roll, stretch it tightly over the dish, and crimp the edges firmly around the rim to create an airtight seal that traps steam for cooking the ravioli.
Step 5
step5:Top and Cover for Baking
Step 5
step5:Top and Cover for Baking
6

Bake Until Golden Bubbly

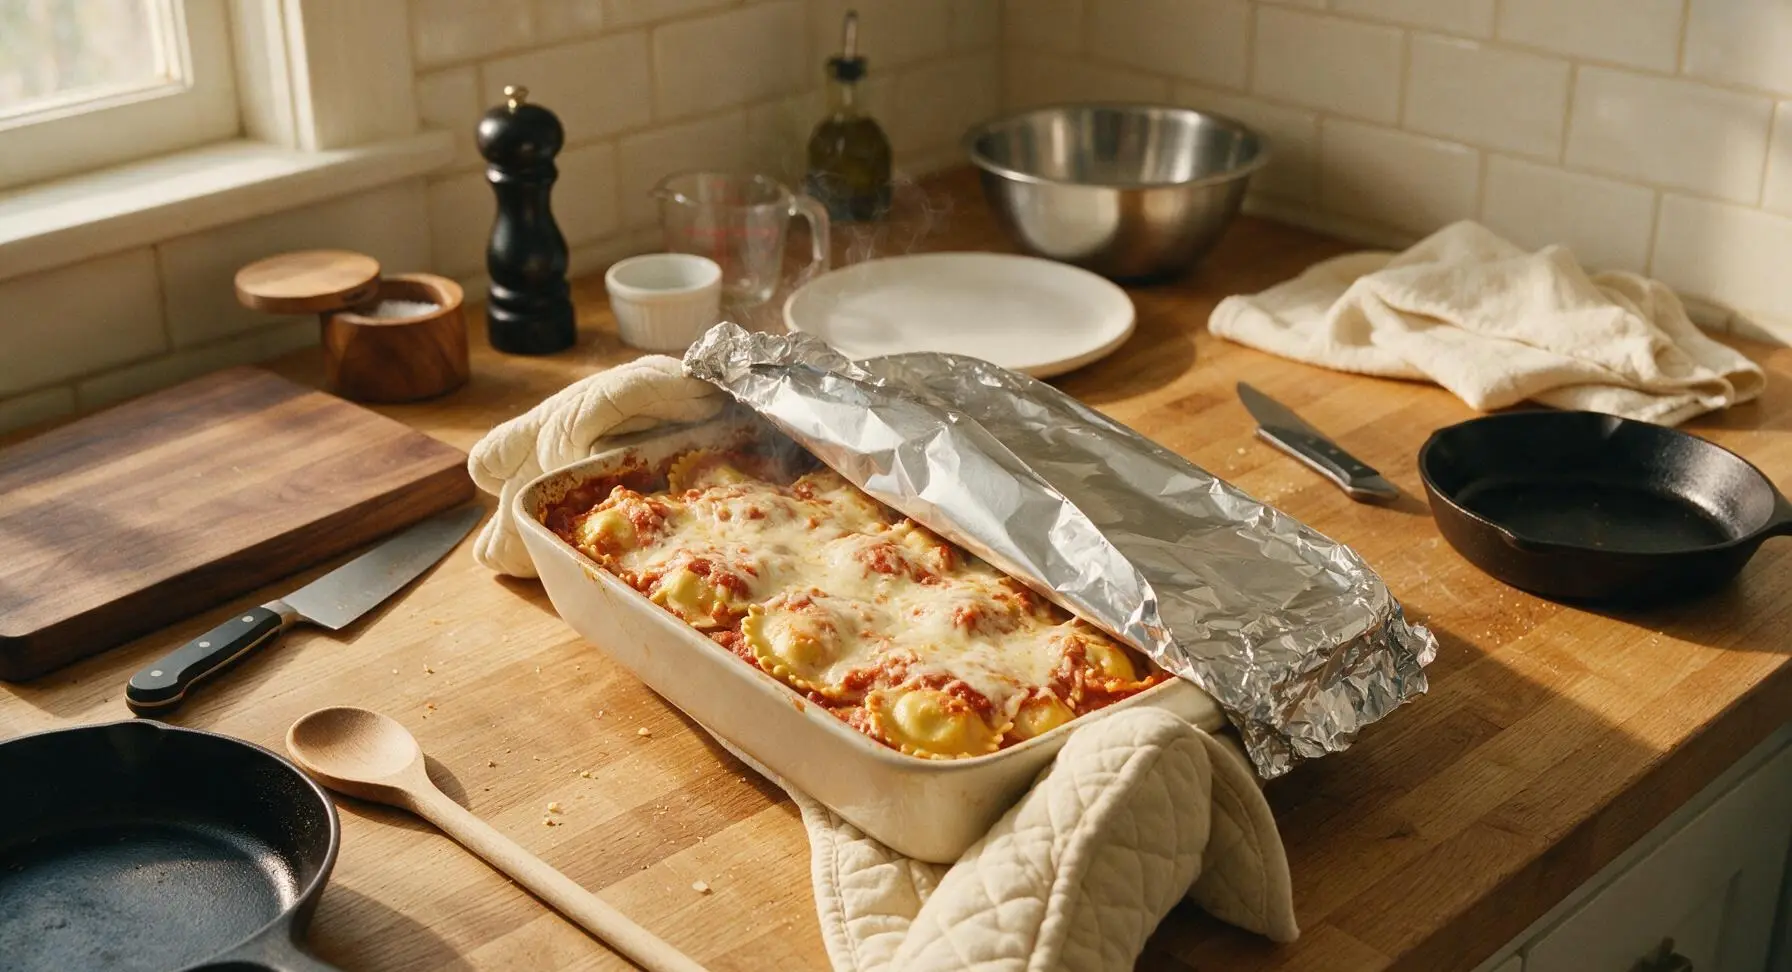
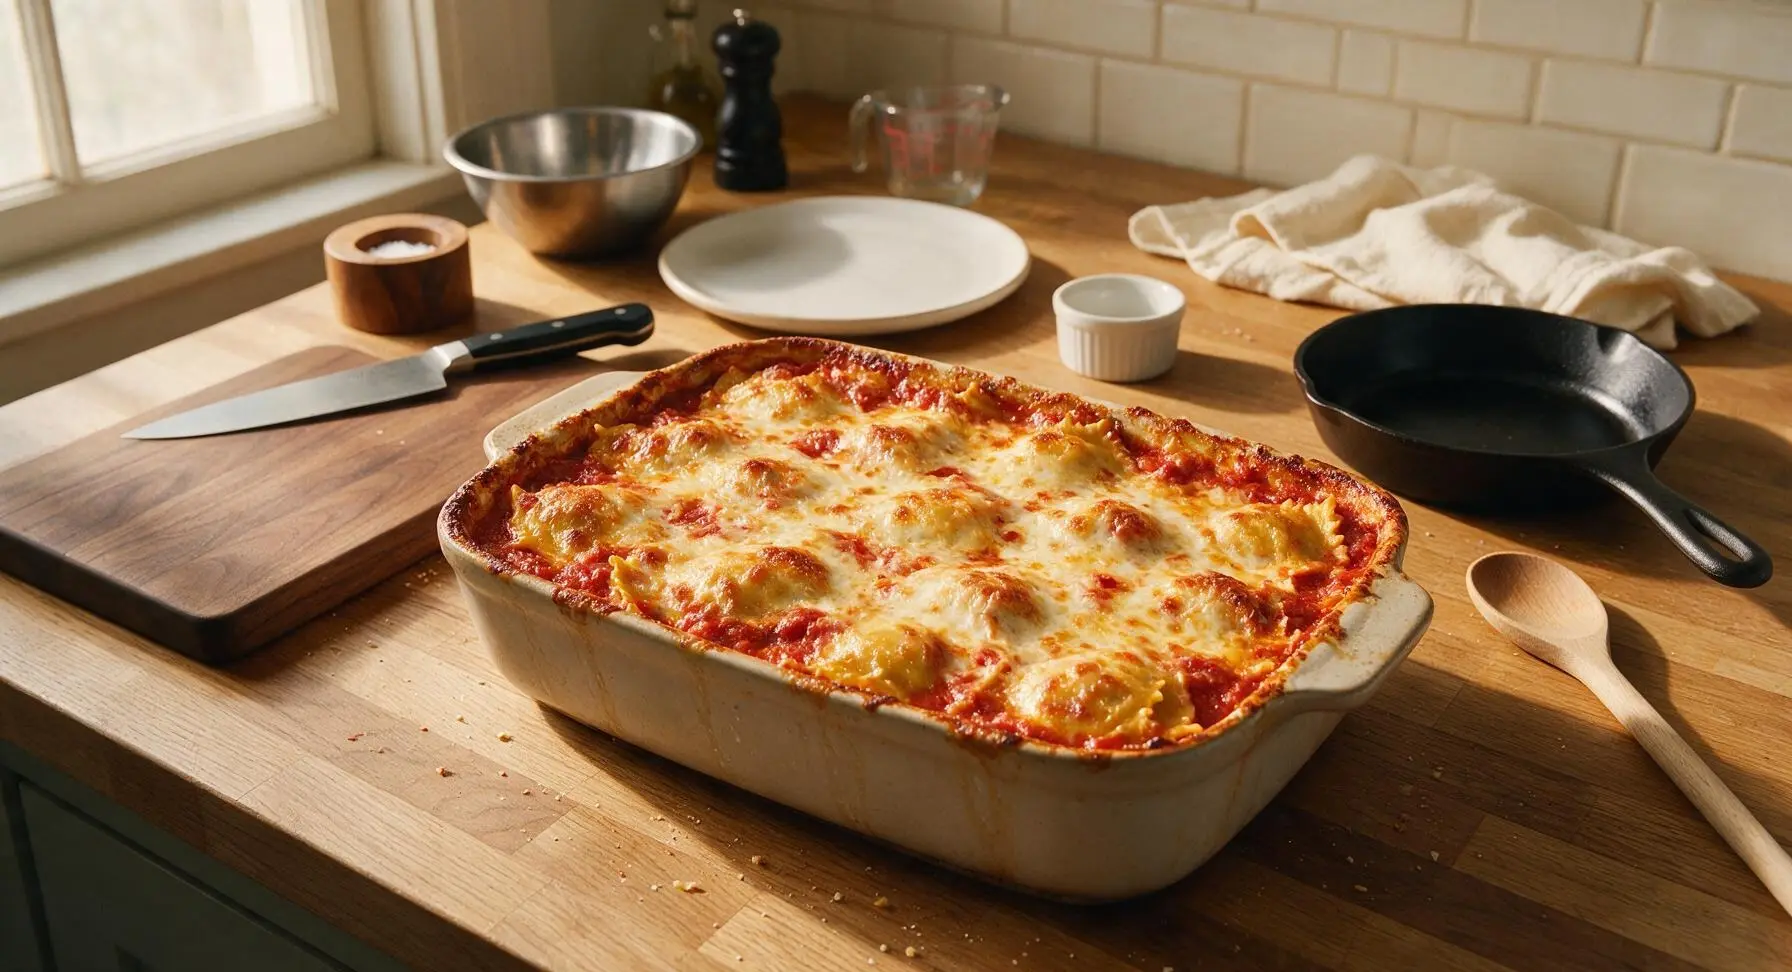
Place the covered baking dish on the middle oven rack and bake for 30 minutes at 375°F (190°C). After 30 minutes, use the oven mitts to carefully pull the dish out, peel off and set aside the foil cover, then return the dish to the oven to bake uncovered for an additional 10 minutes. The dish is done when the top cheese is fully melted, deep golden brown around the edges, and marinara sauce is bubbling vigorously around the sides of the dish. Total bake time is 40 minutes.
Step 6
step6:Bake Until Golden Bubbly
Step 6
step6:Bake Until Golden Bubbly
7

Rest and Garnish

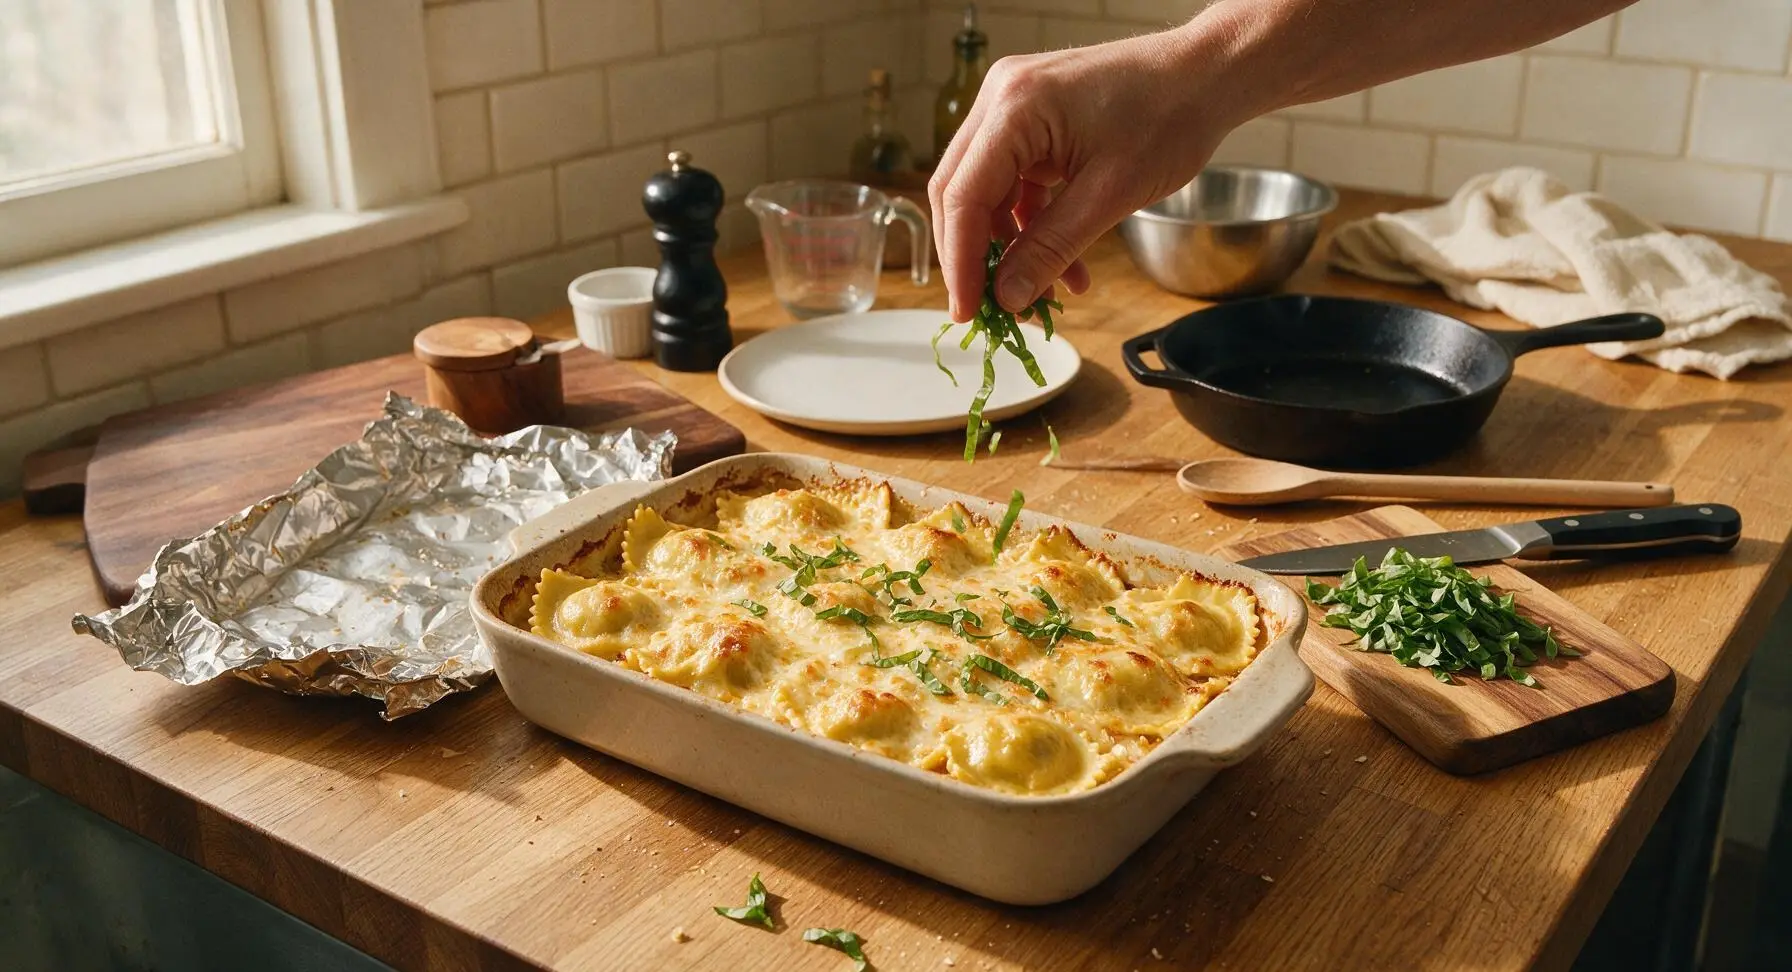
Let the baked ravioli rest for 5 minutes at room temperature to allow the layers to set, which makes scooping easier and prevents runny, sliding layers when serving. While it rests, stack 5-6 fresh basil leaves on the small acacia wood cutting board, slice into thin strips with the paring knife, and sprinkle evenly over the top of the hot dish.
Step 7
step7:Rest and Garnish

Tips

1.Do not thaw frozen ravioli before baking: using still-frozen ravioli prevents it from becoming mushy during the bake, as the trapped steam under the foil cooks it perfectly al dente without pre-boiling.
2.Ensure all top-layer ravioli is fully covered in sauce and cheese before sealing with foil: exposed ravioli will dry out and turn hard and chewy, as there is no boiling water to keep it moist during baking.
3.Let the dish rest for the full 5 minutes after baking: straight from the oven, the melted cheese and hot sauce are very loose and will run across the plate if scooped immediately; resting allows layers to set for clean, neat servings that hold their shape.


✨ You May Also Like

Main Course
🍜 United Kingdom

A showstopping classic of tender seared beef, savory mushroom duxelles, and crisp prosciutto wrapped in flaky golden puff pastry, baked to juicy perfection.

⏱️ 2 hours 1Main Course ★ 4.7
Main Course
🍜 India

Tender charred marinated chicken simmered in a rich, spiced creamy tomato sauce, this iconic Anglo-Indian curry pairs perfectly with basmati rice or warm naan.

⏱️ 50 minuteMain Course ★ 4.6
Main Course
🍜 Thailand

Classic tangy, sweet, and savory Thai stir-fried rice noodles with shrimp, tofu, and crunchy garnishes, balancing all five core Thai flavor profiles.

⏱️ 30 minuteMain Course ★ 4.5
Main Course
🍜 United Kingdom

Crispy golden beer-battered cod and fluffy double-fried chips, served with tangy tartar sauce and malt vinegar: the timeless, beloved British pub comfort classic.

⏱️ 45 minuteMain Course ★ 4.7
Main Course
🍜 Mexico

Smoky, chile-marinated pork tacos with caramelized pineapple, fresh cilantro, and lime: a beloved classic Mexican street food perfect for casual summer gatherings.

⏱️ 1 hour 45Main Course ★ 4.8
Main Course
🍜 United States

Crunchy Fritos corn chips layered with savory beef chili and melted cheddar, topped with cool, zesty fixings for a beloved, cozy Tex-Mex comfort food.

⏱️ 35 minuteMain Course ★ 4.8

Baked Ravioli:Frequently Asked Questions

1.Do I really not need to boil the ravioli before making this bake? ▾
Yep, no boiling required at all! The fully frozen, unthawed ravioli cooks straight through as it bakes, absorbing moisture from the marinara and trapped steam under the tightly covered dish. You’ll get perfectly tender, not mushy, ravioli every time without the extra work of waiting for a boiling pasta pot or draining noodles.
2.Can I use meat-filled frozen ravioli instead of cheese ravioli? ▾
Absolutely! Frozen meat ravioli—whether beef, Italian sausage, or chicken mozzarella filled—works exactly the same as cheese ravioli here, with no adjustments to cook time or temperature. Just keep it fully frozen when you layer it, just like the cheese version, to avoid overcooking or sogginess as it bakes.
3.Why do you recommend low-moisture part-skim mozzarella over fresh mozzarella? ▾
Low-moisture part-skim mozzarella melts into that perfect stretchy, gooey texture without releasing excess water that can make your bake soggy. Fresh mozzarella has a much higher water content, so if you do use it, pat it very dry first and cut it into thin slices to avoid a watery final dish.
4.What temperature and bake time do I need for perfectly cooked ravioli? ▾
Bake the dish covered tightly with aluminum foil at 375°F for 40 minutes, then uncover and bake 10 to 15 more minutes until the cheese is bubbly and edges are lightly golden. The sealed, steamy environment under the foil is what cooks the frozen ravioli all the way through without pre-boiling.
5.Can I prep this dish ahead of time and refrigerate it before baking? ▾
You can prep the full layered dish up to 24 hours ahead, covered tightly, and store it in the fridge. The ravioli will thaw slightly as it chills, so add 5 to 7 minutes to the initial covered bake time if baking straight from the fridge to ensure the ravioli cooks evenly all the way through.
6.Should I thaw the frozen ravioli first before layering it? ▾
Definitely don’t thaw the ravioli first! Thawed ravioli will get mushy, stick together, and overcook as it bakes. Keep it fully frozen right up until you’re ready to layer it into the baking dish—this ensures it holds its shape and cooks to the perfect tender texture as it steams under the foil.
7.Can I add ground beef or Italian sausage for a heartier dish? ▾
Of course! Brown 1 pound of ground beef or crumbled Italian sausage fully, drain off excess grease, then stir it into your marinara sauce before layering. This adds extra savory, hearty flavor without changing the cook time at all, since the meat is already fully cooked before going into the bake.
8.What size baking dish works best for this recipe? ▾
A standard 9x13 inch glass or ceramic baking dish is ideal for this recipe, giving you enough room to create even layers of ravioli, sauce, and cheese without overflow as it bubbles. If you use a deeper, smaller dish, add 5 minutes to the covered bake time to ensure the center cooks through.
9.Can I use homemade marinara instead of jarred sauce? ▾
Homemade marinara works beautifully here! Just make sure it’s a fairly loose, not overly thick sauce, since the ravioli needs some moisture from the sauce to cook through. If your homemade marinara is extra thick, stir in ¼ cup of water or vegetable broth to thin it slightly before layering.
10.Why is my ravioli sometimes crunchy or undercooked in the center? ▾
That almost always means your foil wasn’t sealed tight enough to trap steam, or you didn’t use enough sauce. Make sure to press the foil firmly around the edges of the baking dish to lock in steam, and spread sauce evenly over every layer of ravioli so no pieces are left dry as they bake.
11.Can I freeze this baked ravioli to eat later? ▾
Absolutely! You can freeze either the prepped unbaked bake (wrapped tightly in two layers of foil) for up to 3 months, or freeze leftover baked portions in airtight containers. Bake frozen, covered, for 1 hour 10 minutes at 375°F before uncovering to brown the cheese on top.
12.Do I have to include the whole milk ricotta cheese in the layers? ▾
Whole milk ricotta adds that rich, creamy layer classic to baked pasta dishes, but you can skip it if you don’t have it on hand or prefer a different texture. If you skip it, add an extra ½ cup of shredded mozzarella to make up for volume, and keep sauce layers generous to keep the dish moist.
13.What’s the best way to reheat leftover baked ravioli? ▾
Reheat individual portions in the microwave for 1 to 2 minutes, or reheat a larger batch in the oven covered with foil at 350°F for 15 to 20 minutes until heated through. Add a tiny splash of marinara or water to portions before reheating to keep the pasta from drying out.
14.Can I use a different cheese instead of grated parmesan? ▾
Grated pecorino Romano makes a great direct swap for parmesan here, adding a similar salty, umami kick. You can also use shredded asiago, or skip the hard grated cheese entirely—just add a small pinch of extra salt to your sauce layers to make up for the missing savory, nutty flavor.
15.Will this no-boil method work with gluten-free frozen ravioli? ▾
Yes! Gluten-free frozen ravioli works exactly the same as regular wheat-based ravioli in this recipe, with no cook time adjustments needed. Just make sure it’s fully frozen when you layer it, and keep the foil tightly sealed during the initial bake to get perfectly tender gluten-free pasta.
16.How do I keep the top layer of cheese from burning while baking? ▾
Keep the dish fully covered for the first 40 minutes of baking, only removing the foil for the final 10 to 15 minutes to melt and brown the top cheese. If you notice the cheese browning too fast during that uncovered stretch, tent a loose piece of foil over the top for the remaining bake time.
17.Do I need to grease my baking dish before adding the layers? ▾
A light coating of nonstick spray or a thin wipe of olive oil on the bottom and sides of your baking dish is a smart quick step to prevent cheese and sauce from sticking as it bakes. It only takes 10 seconds, and it makes serving clean, neat slices way easier once the dish is done resting.
18.How long should I let the ravioli rest after taking it out of the oven? ▾
Let it rest for 8 to 10 minutes after you pull it out of the oven before scooping or slicing. This short rest lets the cheese set slightly and the sauce thicken up, so your portions hold their shape instead of sliding apart into a runny mess when you serve them to family or guests.
19.Can I add vegetables to this bake for extra nutrition and flavor? ▾
Definitely! Thinly sliced spinach, sautéed bell peppers, roasted zucchini, or caramelized onions all make great additions. Just make sure any high-moisture veggies like zucchini or fresh spinach are cooked and drained well first, so excess water doesn’t make your final bake soggy.

Comments (10)

2 days ago

OMG this no-boil ravioli is a total weeknight game changer! I threw it together right after my kids’ soccer practice last night, zero messy pots to boil pasta, and every single person at the table cleaned their plate. Even my super picky 7-year-old asked for seconds! SO good.

1 week ago

I brought this to our neighborhood block party potluck last weekend and people were hounding me for the recipe the whole time! I added a little extra Italian sausage crumbles between layers, and it was chef’s kiss. Only question – can I assemble this the night before and bake it the next day for meal prep?

5 days ago

So glad it was a potluck hit! You absolutely can assemble it the night before – just keep it covered in the fridge, and add 5-7 minutes to the bake time if it’s cold going in the oven. Enjoy!

3 days ago

Wait, no boiling the ravioli first? I was super skeptical at first but this worked perfectly! The ravioli got perfectly tender as it baked, no weird gummy texture at all. I used frozen cheese ravioli from the grocery store and a jar of my go-to marinara, so prep took like 10 minutes tops.

2 days ago

Same! I was convinced I’d end up with crunchy undercooked ravioli so I almost boiled them first, so glad I trusted the recipe. Turned out amazing for our family dinner last night.

2 days ago

Love that you gave it a shot! The key is making sure there’s enough sauce to cover the ravioli so they steam as they bake, which keeps them from getting crunchy. So happy it worked out for you!

5 days ago

I swapped the regular ravioli for frozen gluten-free cheese ravioli and this still came out incredible! My husband didn’t even notice it was GF until I told him after he polished off two helpings. Will absolutely be adding this to our weekly dinner rotation.

30 minutes ago

As someone who barely knows how to boil water, this recipe was so easy even I couldn’t mess it up! 40 minutes total cook time, minimal cleanup, and it tastes like something from a fancy Italian restaurant. 10/10 would make again.

5 minutes ago

Same! I made this in my dorm’s tiny toaster oven last week and it worked perfectly. Pro tip: sprinkle a little extra parm on top the last 5 minutes for a crispy cheese crust.

1 week ago

I made a big pan of this on Sunday to portion out for weekday lunches, and it reheats like a dream! No soggy noodles, the cheese is still gooey when you warm it up in the microwave. Only thing I’d change next time is adding a layer of spinach for some extra veggies.

5 days ago

I added spinach and a layer of sliced mushrooms last time I made it! It was so good, the veggies cooked down perfectly while it baked so you don’t even have to sauté them first.

3 days ago

Great call adding veggies! Spinach, mushrooms, or even diced bell peppers work perfectly layered in without extra prep. So happy this works for your weekly meal prep routine!

yesterday

Made this for a casual date night in with my partner and they thought I spent hours cooking! Paired it with a little garlic bread and a side salad, and we had the coziest dinner. The no-boil method is total genius, why have I never thought of this before?

2 hours ago

I’m so excited to try this! I grabbed fresh ravioli from the refrigerated section instead of frozen by accident – did I mess this up? It’s in the oven right now, fingers crossed it comes out okay! The recipe looked too good not to try even with my little mix-up.

30 minutes ago

No need to worry! Fresh refrigerated ravioli works great for this recipe – just check it about 5 minutes earlier than the recipe states, since fresh pasta cooks faster than frozen. It’ll turn out delicious!

2 weeks ago

I’ve been making baked ravioli for 30 years and always boiled the noodles first – let me tell you, this no-boil method is so much easier and tastes just as good, if not better! My grandkids went crazy for it when they came over for Sunday dinner. I sprinkled a little dried basil and oregano on top for extra flavor.

1 week ago

That’s such a good call adding extra herbs! I did the same with some red pepper flakes for a little kick, and it elevated the whole dish so much.

1 week ago

We love hearing that from a seasoned home cook! Adding extra dried herbs is such a simple way to amp up the flavor, we’ll have to note that for other readers. So glad your grandkids enjoyed it!

5 minutes ago

I’m usually not a fan of leftover pasta because it gets all mushy, but this? I ate the leftovers cold straight from the fridge last night and it was still chef’s kiss. No mushy noodles, the sauce soaked in just right. Who knew no-boil ravioli would be this good?

just now

LMAO I’ve done the exact same thing with the leftovers! Cold baked ravioli hits different, no judgment at all. I may or may not have had a slice for breakfast this morning too.



