
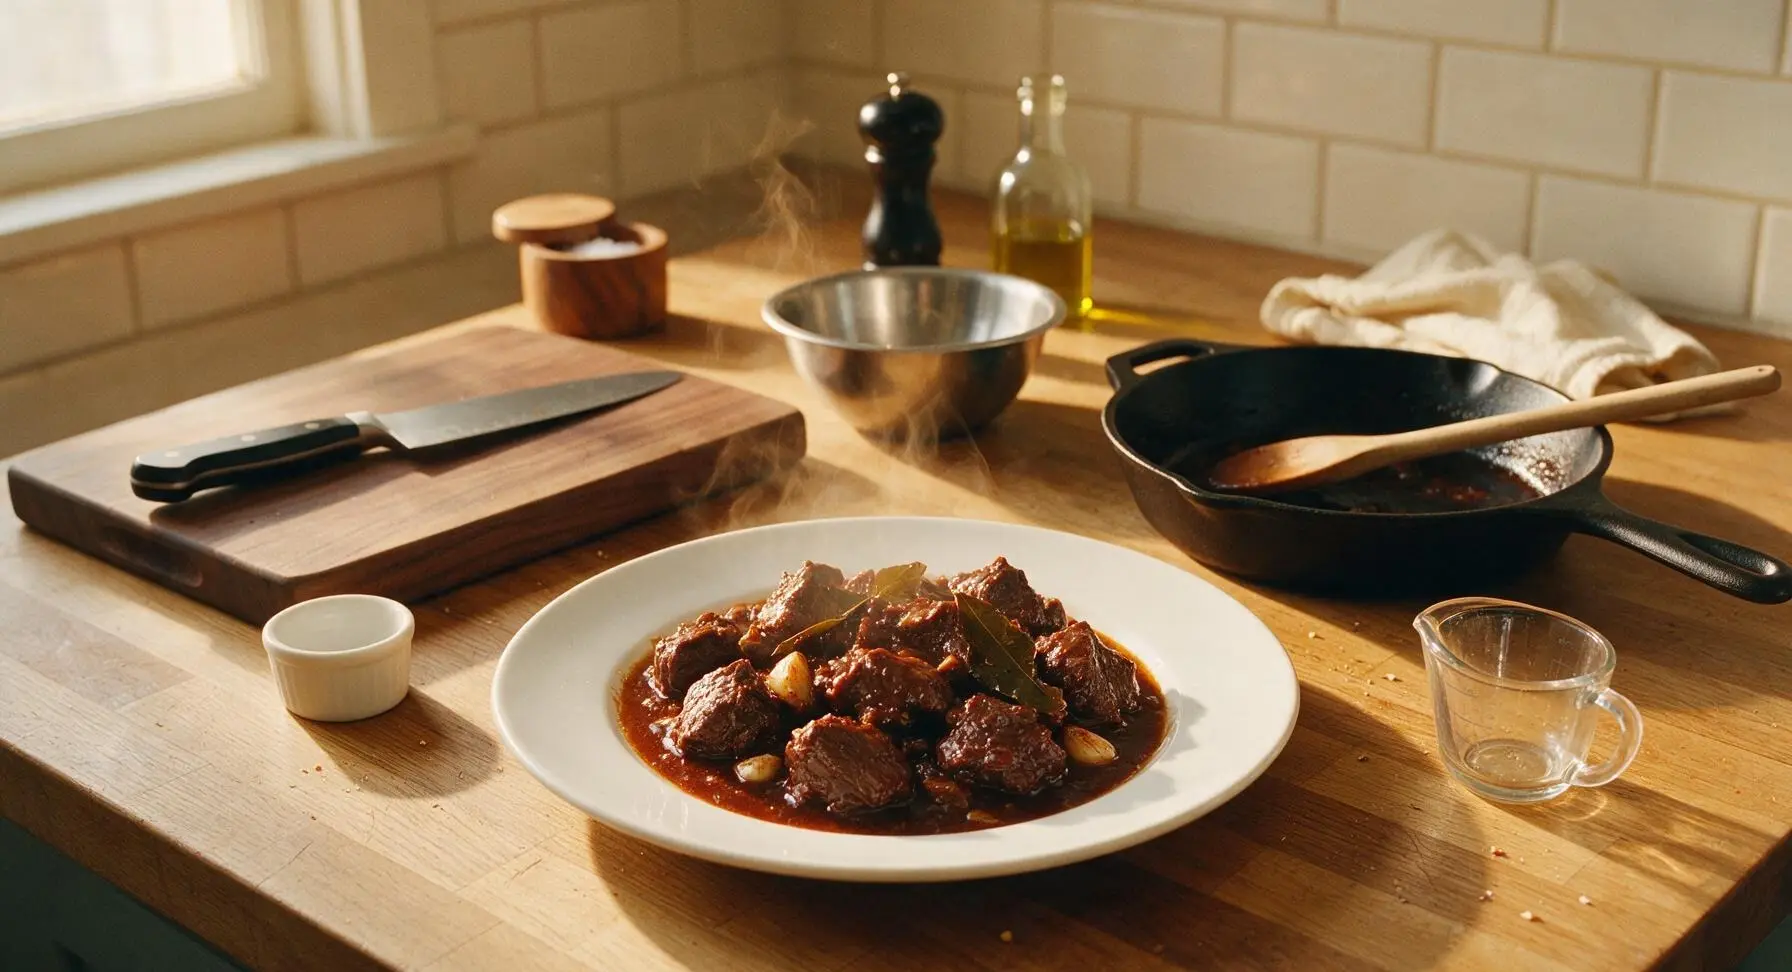
Beef Adobo

title 1
Beef Adobo
⏱️ cook time 1 hour 20 minutes
🍽️ servings 4
⚡ Difficulty easy

intro

This iconic Filipino braised beef features tender chunks simmered in tangy vinegar, savory soy, garlic, and bay leaves, with a rich, glossy sauce perfect for spooning over steamed rice.

Ingredients
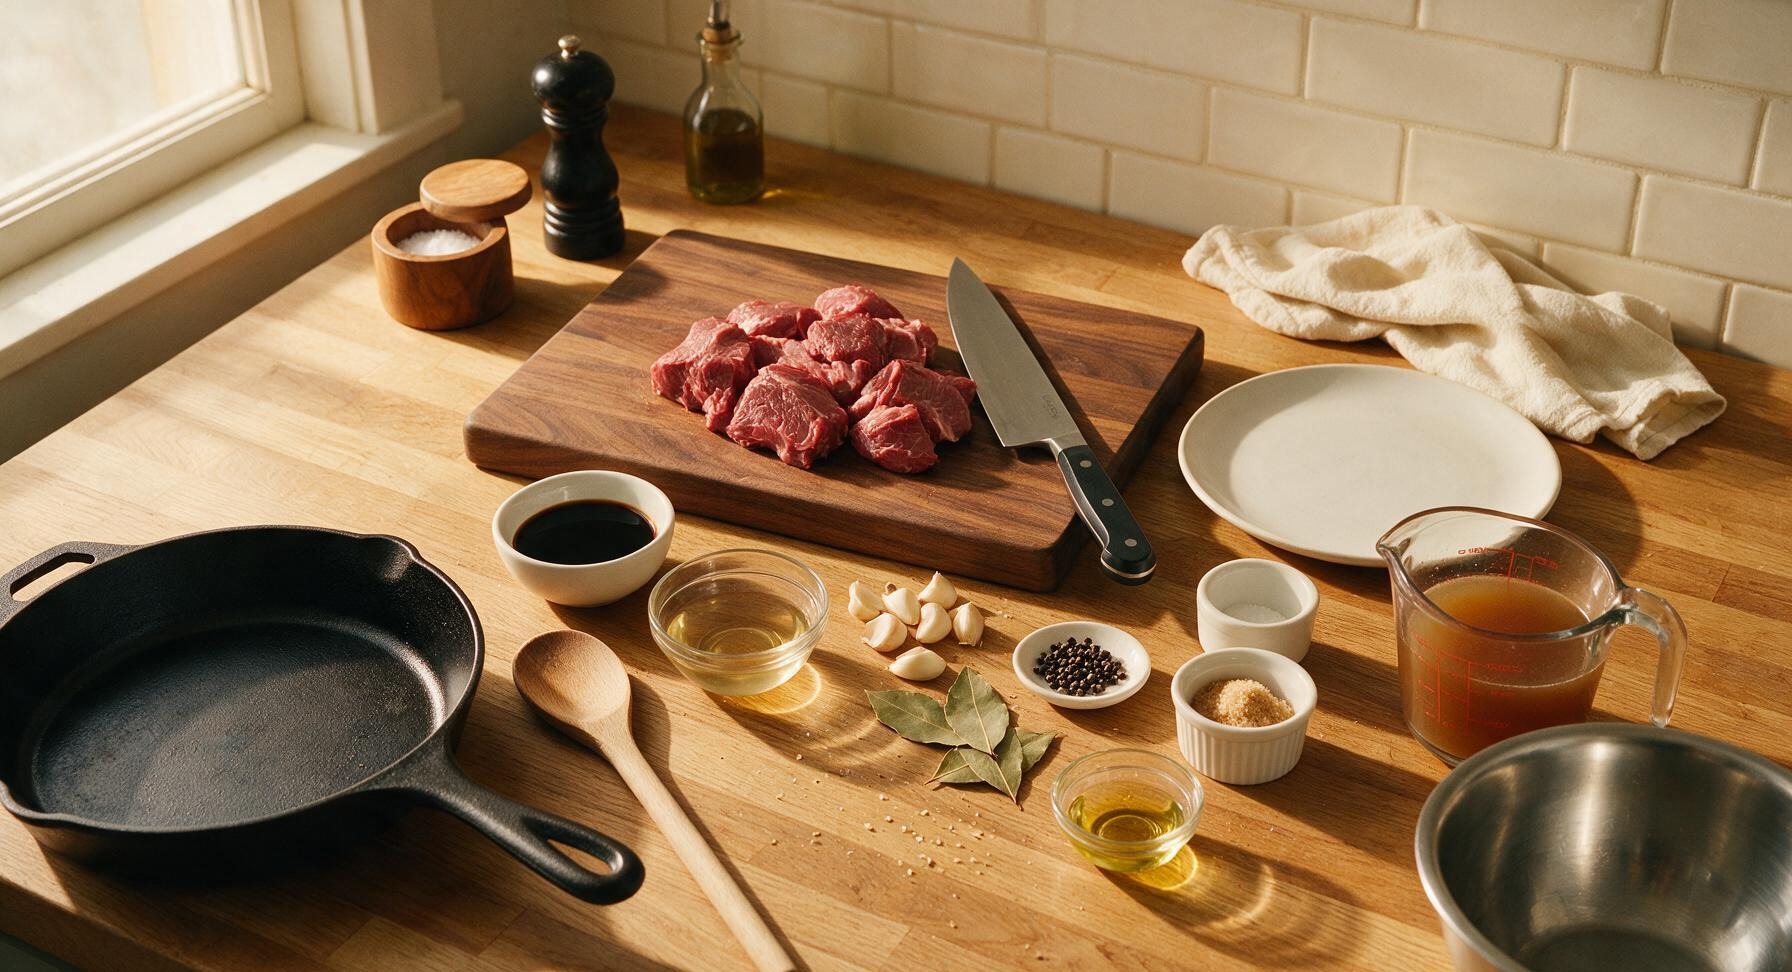
Boneless beef chuck 1kg (2.2 lbs)
Soy sauce 120ml (1/2 cup)
Cane vinegar 80ml (1/3 cup)
Garlic cloves, lightly crushed 8 cloves
Dried bay leaves 3 pieces
Whole black peppercorns, slightly cracked 1 teaspoon
Light brown sugar 1 tablespoon
Beef broth 240ml (1 cup)
Neutral cooking oil (canola/vegetable) 2 tablespoons

Steps

1

Prep Beef Chunks

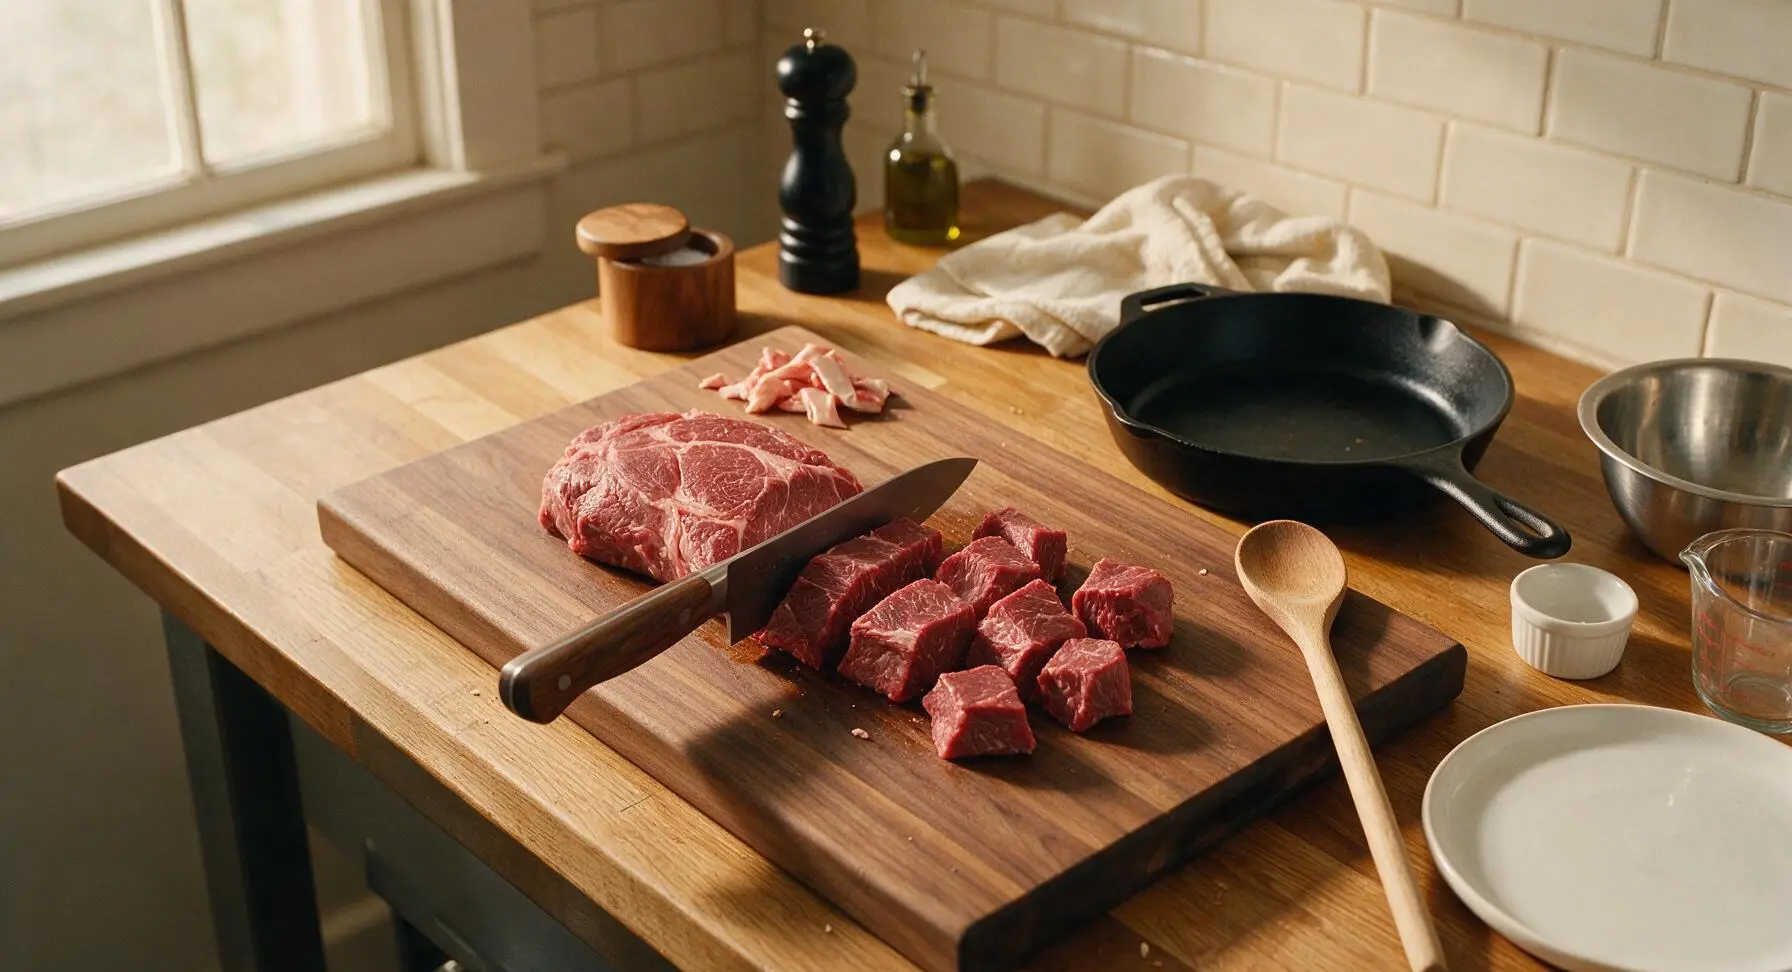
Place the whole boneless beef chuck on the acacia wood cutting board. Use the walnut-handled chef knife to trim away thick, hard silver skin and large chunks of external hard fat, then cut the beef into uniform 5cm (2-inch) chunks. Pat all beef pieces completely dry with a corner of the striped cotton towel; dry surface moisture ensures even, deep browning instead of steaming during searing.
Step 1
step1:Prep Beef Chunks
2

Mix Adobo Marinade

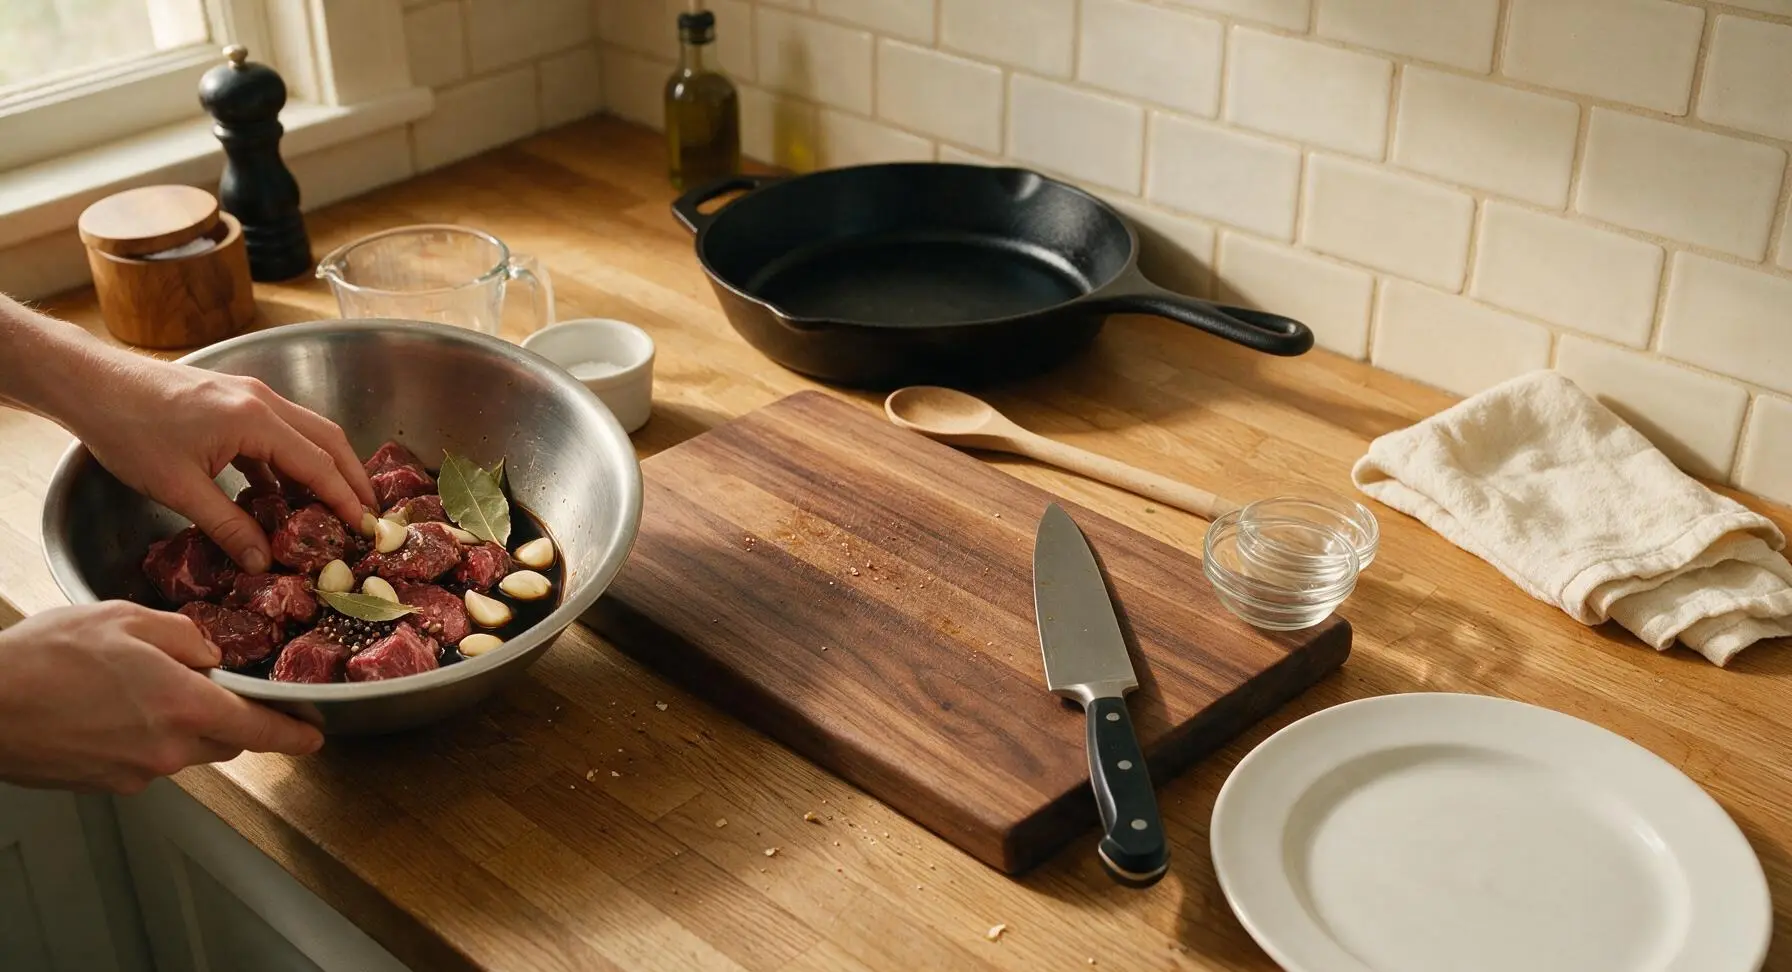
Transfer the cut beef chunks to the medium brushed stainless steel mixing bowl. Pour in 120ml soy sauce, add the 8 lightly crushed garlic cloves, 3 dried bay leaves, and 1 teaspoon cracked black peppercorns. Toss thoroughly to coat every piece of beef in marinade, then let rest at room temperature for 15 minutes to absorb initial savory flavor.
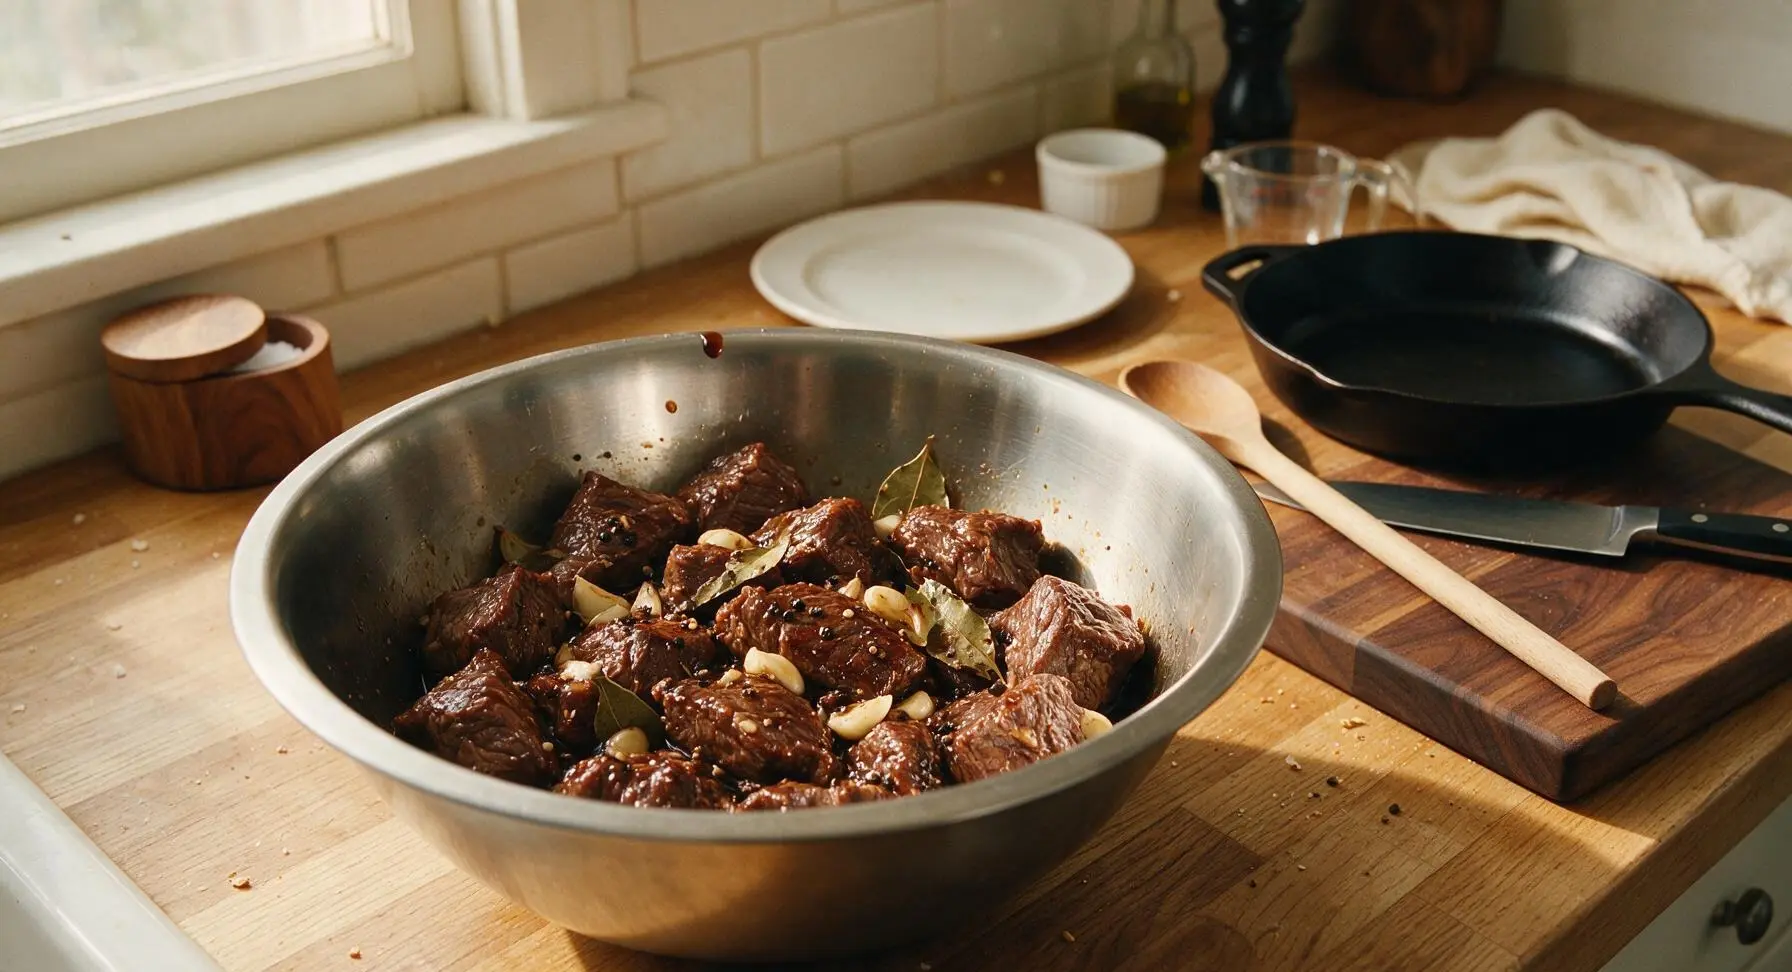
Step 2
step2:Mix Adobo Marinade
Step 2
step2:Mix Adobo Marinade
3

Sear Beef Until Browned

Place the matte charcoal enameled Dutch oven in the center of the counter over medium heat, add 2 tablespoons neutral cooking oil. Once the oil shimmers (approximately 2 minutes of heating), use the silicone-tipped tongs to lift beef chunks from the marinade (reserve all leftover marinade and aromatics in the mixing bowl) and arrange in a single layer in the pot, working in 2 batches to avoid crowding. Sear for 3 minutes per side until a deep golden-brown crust forms on all edges. Transfer seared beef to the stainless steel temporary plate and set aside.
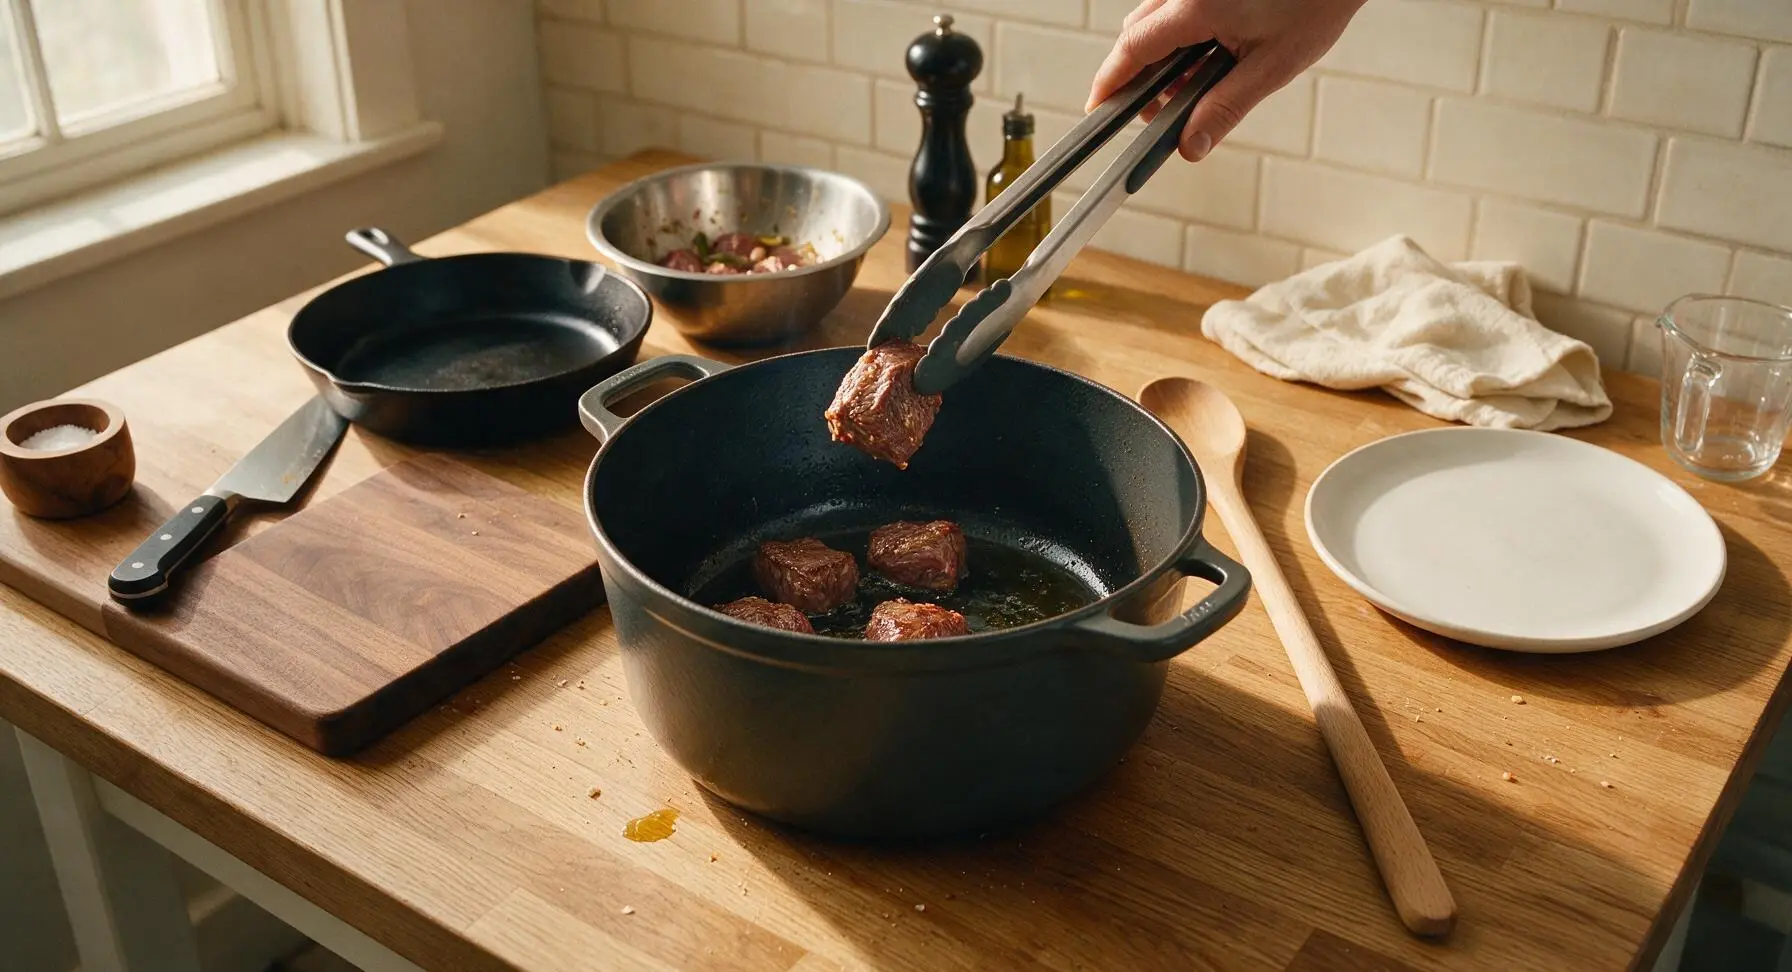
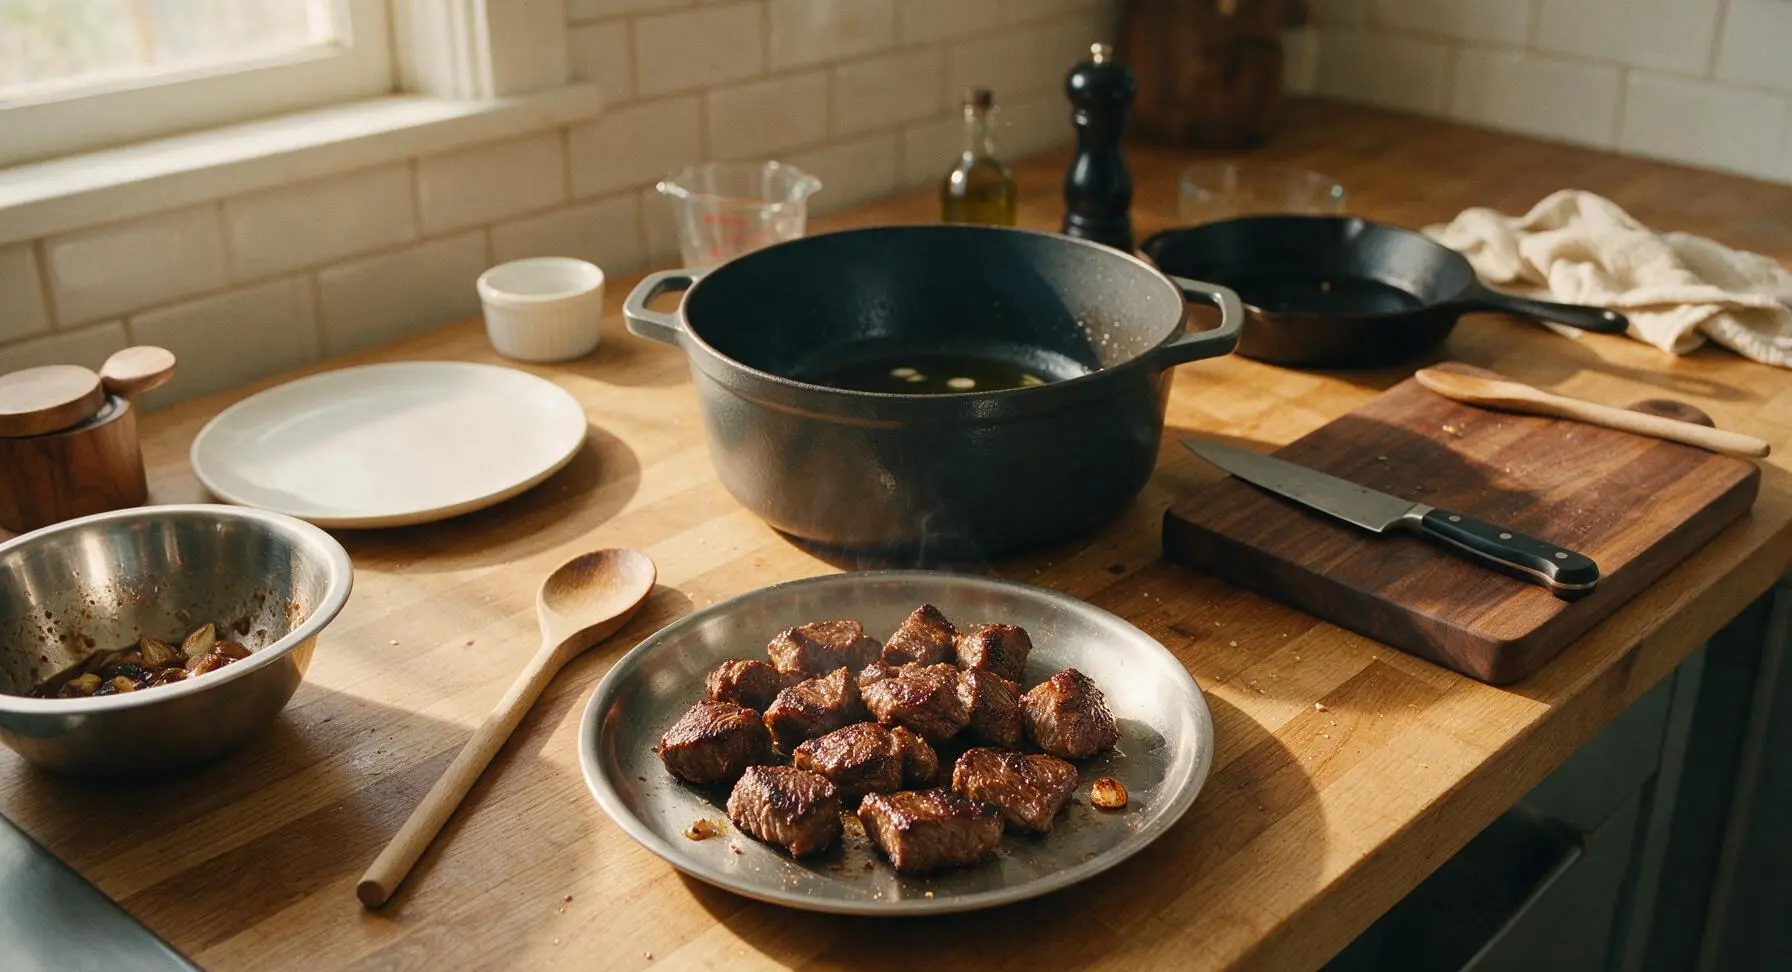
Step 3
step3:Sear Beef Until Browned
Step 3
step3:Sear Beef Until Browned
4

Sauté Garlic Aromatics

Leave the rendered beef fat and oil in the Dutch oven, reduce heat to medium-low. Add the reserved garlic, bay leaves, and peppercorns from the marinade. Sauté for 1 minute, stirring constantly with the beech wood cooking spoon, until the garlic turns pale golden and releases a rich, nutty aroma. Do not let the garlic burn, as burnt garlic will impart a bitter taste to the finished dish.
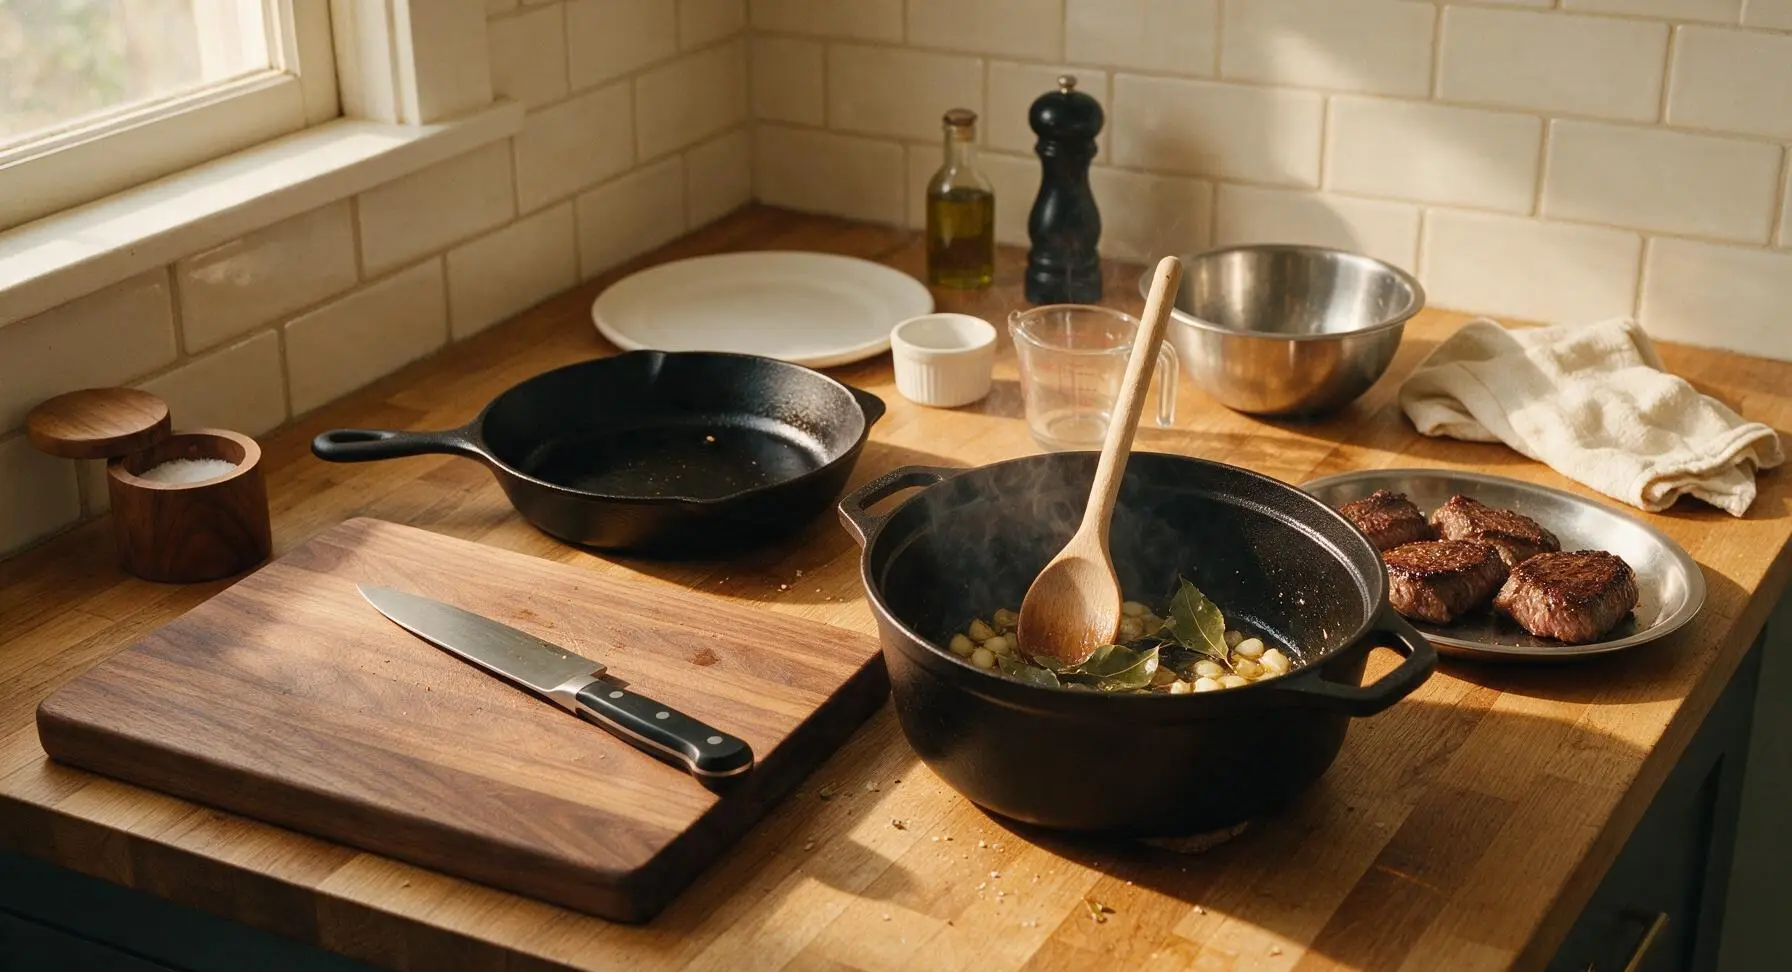
Step 4
step4:Sauté Garlic Aromatics
5

Deglaze and Braise Beef

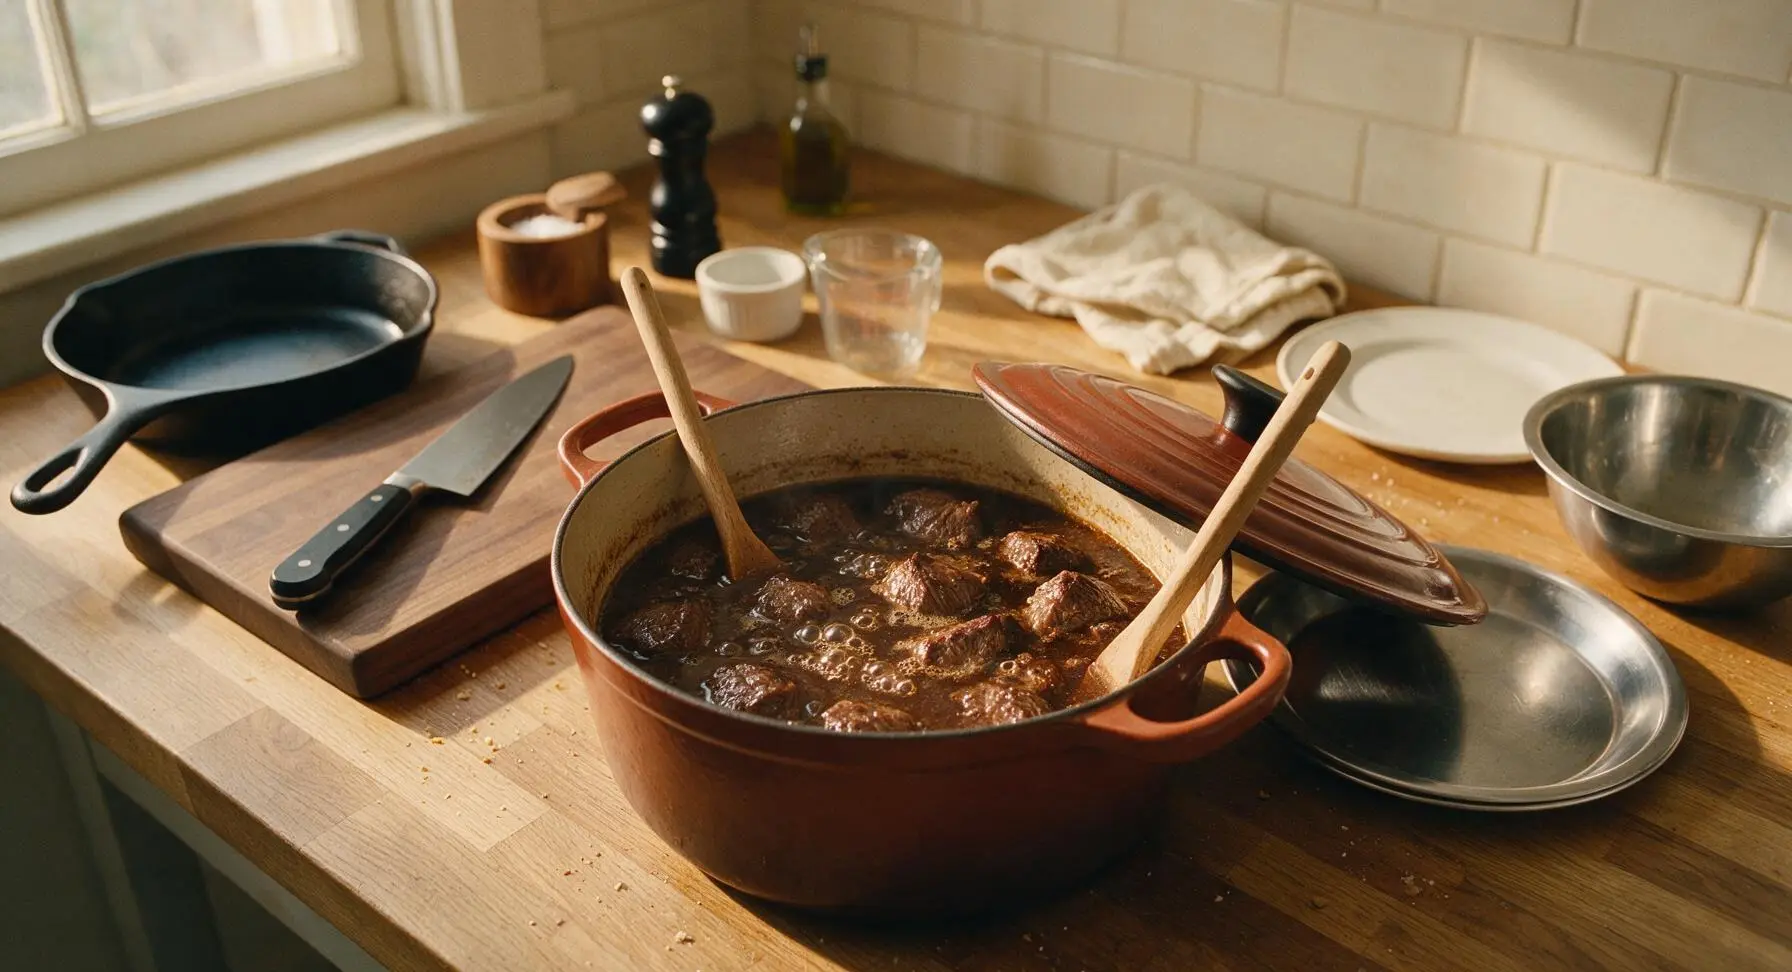
Pour the reserved leftover marinade, 80ml cane vinegar, 1 tablespoon light brown sugar, and 240ml beef broth into the Dutch oven. Stir with the wooden spoon to combine, scraping up all browned fond bits from the bottom of the pot to incorporate their rich flavor. Return all seared beef chunks to the pot, bring the liquid to a gentle steady boil (small bubbles breaking consistently across the surface), then turn heat to the lowest setting, cover with the tight-fitting lid, and simmer for 1 hour. Do not stir the beef for the first 20 minutes of simmering to allow the vinegar to mellow properly.
Step 5
step5:Deglaze and Braise Beef
6

Check Beef Tenderness

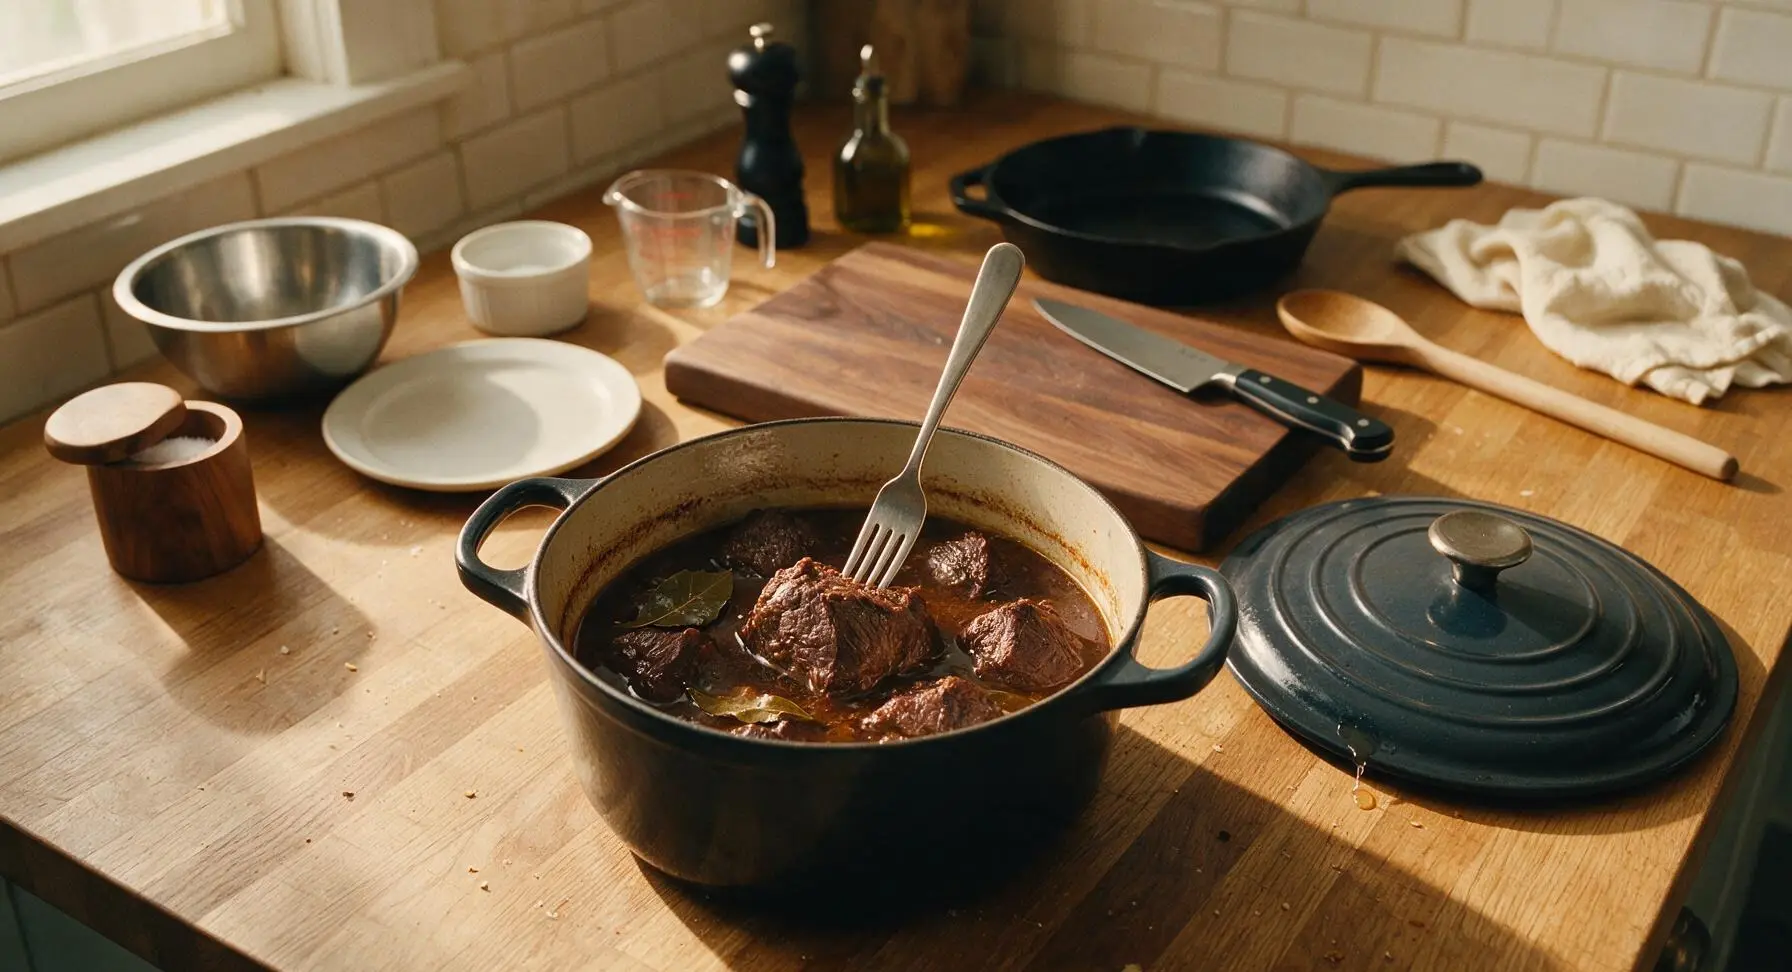
After 1 hour of covered simmering, lift the lid from the Dutch oven and set it on the counter to the right. Pierce the largest beef chunk with the stainless steel dinner fork: the fork should slide into the meat with gentle pressure, with no tough resistance at the center. If the meat is still tough, replace the lid and simmer for an additional 10 minutes before rechecking.
Step 6
step6:Check Beef Tenderness
7

Reduce Sauce to Coat

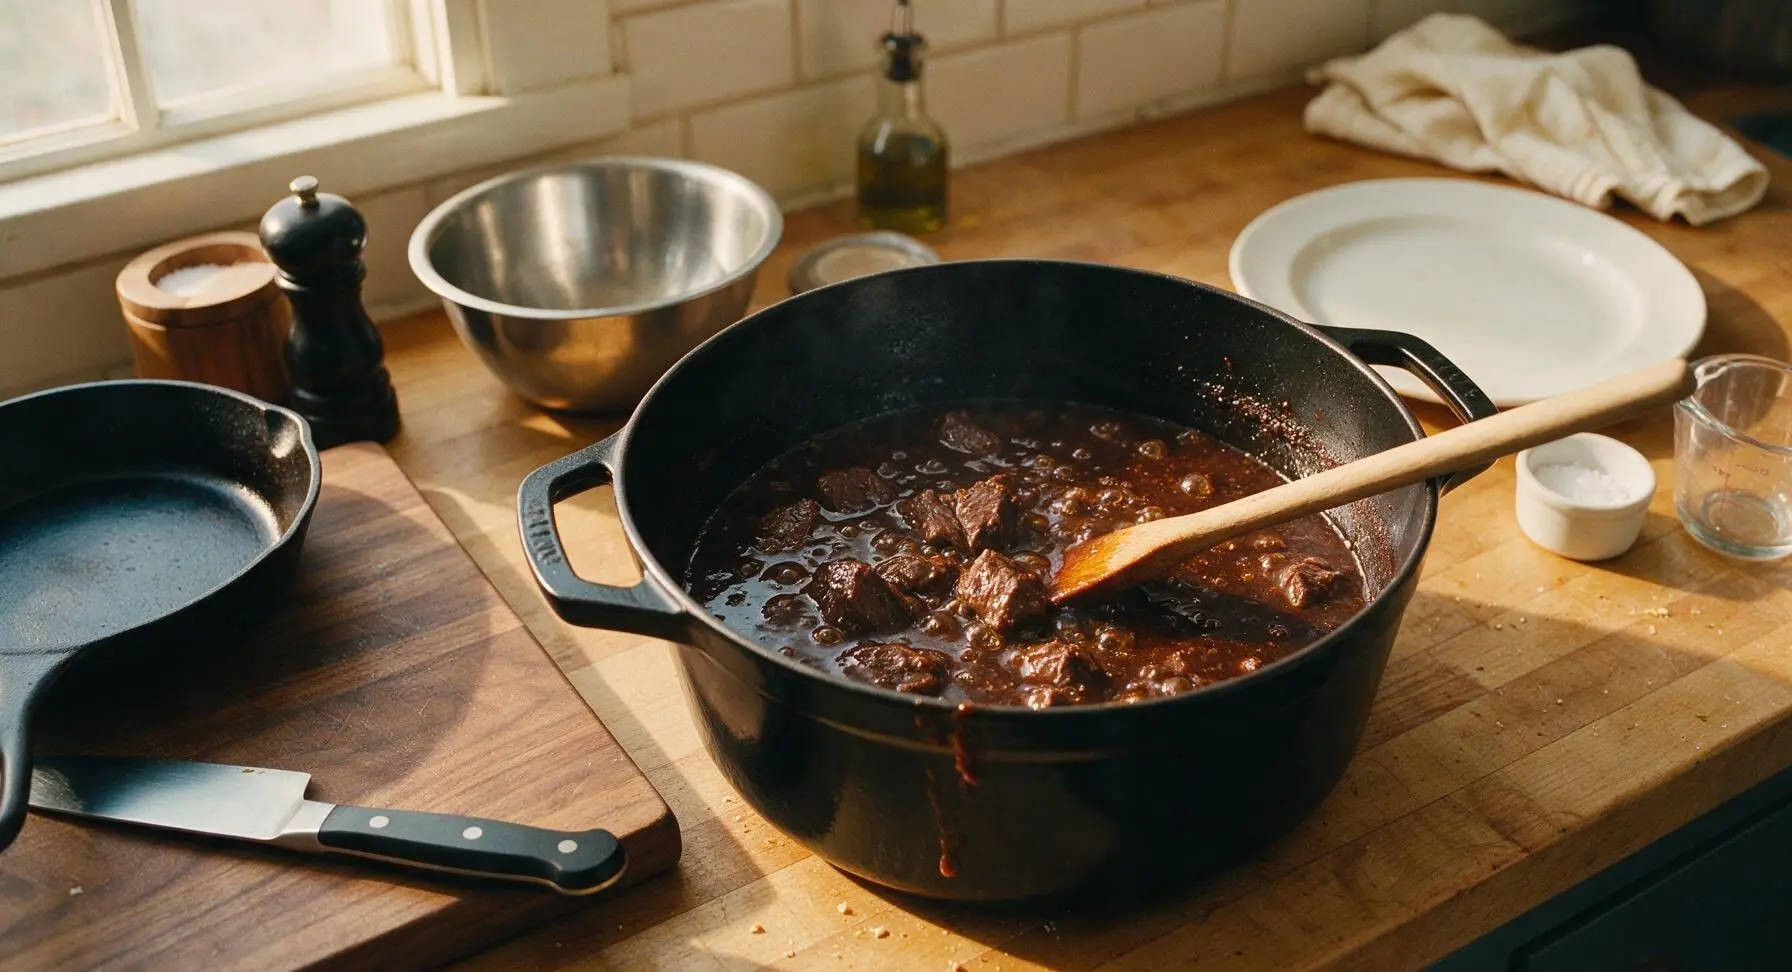
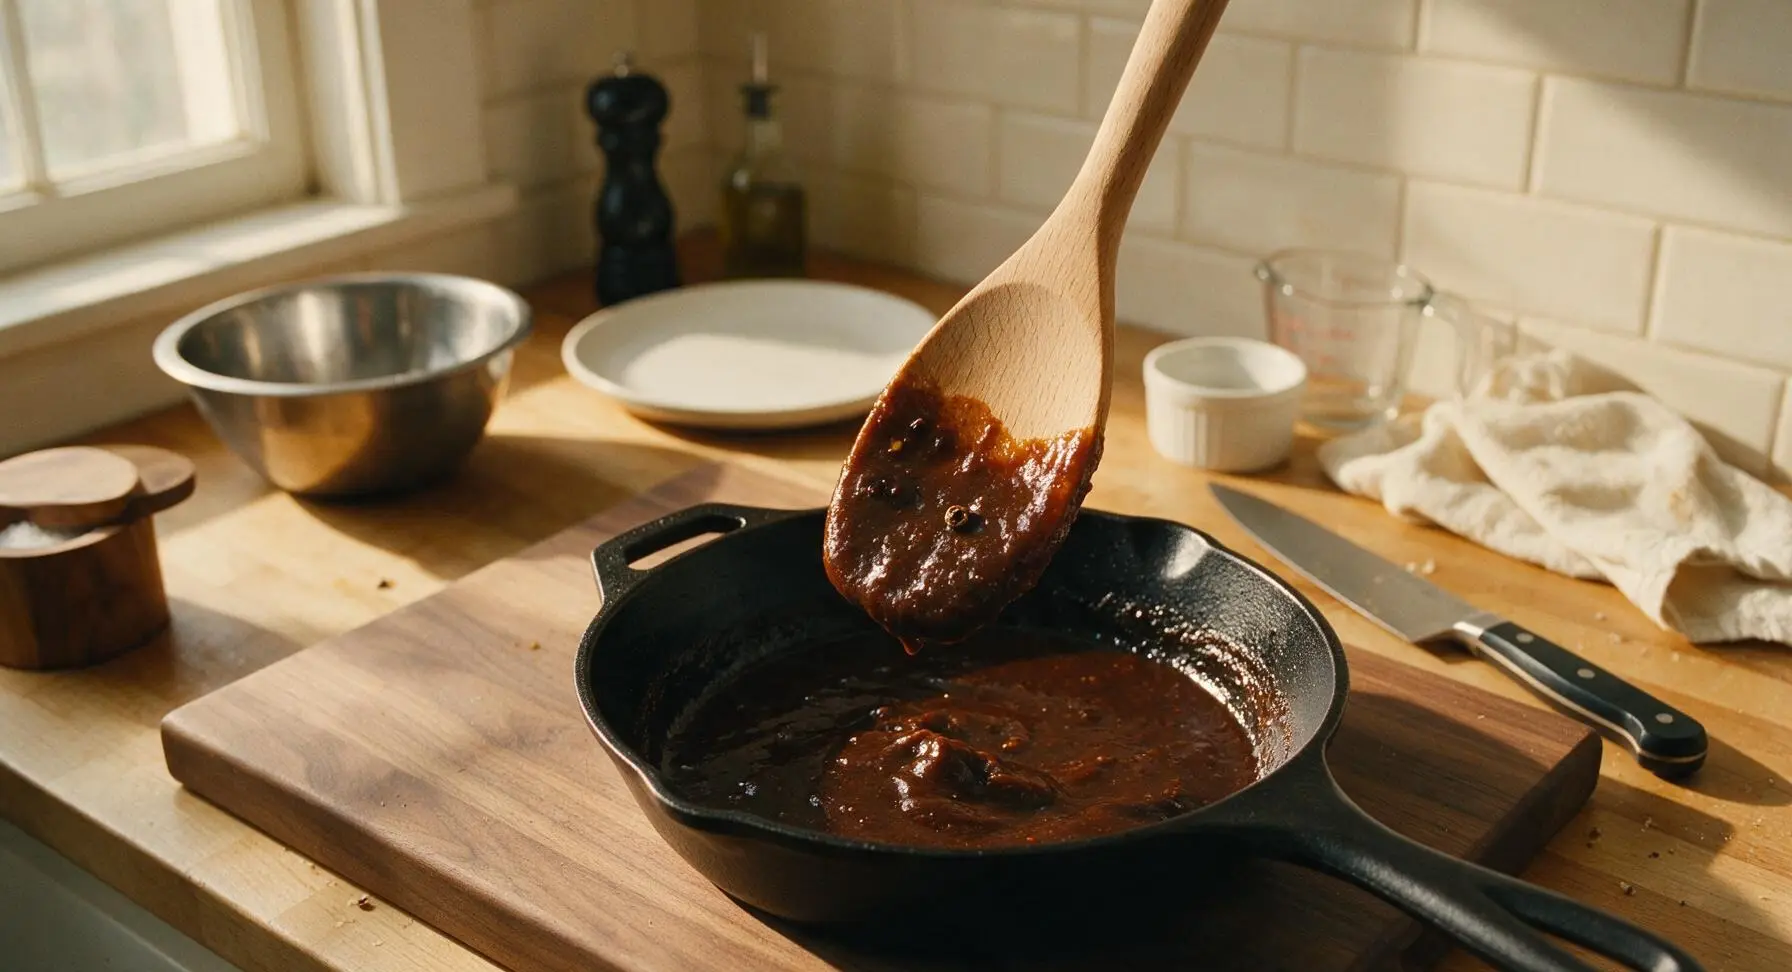
Once the beef is fully tender, turn heat up to medium, and simmer uncovered for 8-10 minutes, stirring occasionally with the wooden spoon, until the sauce thickens enough to evenly coat the back of the spoon. Taste and adjust seasoning if needed: add a pinch more brown sugar if the vinegar taste is too sharp, or a splash more beef broth if the sauce is over-reduced and too salty.
Step 7
step7:Reduce Sauce to Coat
Step 7
step7:Reduce Sauce to Coat

Tips

1.Choose well-marbled beef chuck over lean cuts like sirloin or round: the connective tissue and fat break down during slow braising to create melt-in-your-mouth tender beef, while lean cuts will turn tough and dry even with long cooking.
2.Avoid stirring the adobo for the first 20 minutes after adding vinegar: this allows the sharp, acidic raw vinegar taste to mellow gently with heat; stirring too early can leave a harsh, unbalanced sour note in the finished sauce.
3.Pat beef completely dry before searing: excess surface moisture will cause the meat to steam instead of forming a deep, caramelized crust, which adds critical rich, savory flavor to the braising liquid.


✨ You May Also Like

Main Course
🍜 United Kingdom

A showstopping classic of tender seared beef, savory mushroom duxelles, and crisp prosciutto wrapped in flaky golden puff pastry, baked to juicy perfection.

⏱️ 2 hours 1Main Course ★ 4.7
Main Course
🍜 India

Tender charred marinated chicken simmered in a rich, spiced creamy tomato sauce, this iconic Anglo-Indian curry pairs perfectly with basmati rice or warm naan.

⏱️ 50 minuteMain Course ★ 4.6
Main Course
🍜 Thailand

Classic tangy, sweet, and savory Thai stir-fried rice noodles with shrimp, tofu, and crunchy garnishes, balancing all five core Thai flavor profiles.

⏱️ 30 minuteMain Course ★ 4.5
Main Course
🍜 United Kingdom

Crispy golden beer-battered cod and fluffy double-fried chips, served with tangy tartar sauce and malt vinegar: the timeless, beloved British pub comfort classic.

⏱️ 45 minuteMain Course ★ 4.7
Main Course
🍜 Mexico

Smoky, chile-marinated pork tacos with caramelized pineapple, fresh cilantro, and lime: a beloved classic Mexican street food perfect for casual summer gatherings.

⏱️ 1 hour 45Main Course ★ 4.8
Main Course
🍜 United States

Crunchy Fritos corn chips layered with savory beef chili and melted cheddar, topped with cool, zesty fixings for a beloved, cozy Tex-Mex comfort food.

⏱️ 35 minuteMain Course ★ 4.8

Beef Adobo:Frequently Asked Questions

1.What’s the best cut of beef to use for Filipino Beef Adobo? ▾
Boneless beef chuck is the ideal pick, no question. It has the perfect ratio of lean meat, fat marbling, and thin connective tissue that melts into the sauce during slow braising, leaving you with ultra-tender, juicy chunks that don’t dry out. Skip extra-lean cuts like sirloin or eye of round, as they’ll turn tough and stringy even with long cooking.
2.Can I use regular white vinegar instead of cane vinegar for this recipe? ▾
You can absolutely substitute in a pinch, but cane vinegar has a milder, slightly sweet, less sharp tang that defines adobo’s signature flavor. If you use plain white vinegar, cut it with 1 teaspoon of white sugar per ¼ cup of vinegar, and reduce the total amount by 1 tablespoon to avoid an overly harsh, sour bite.
3.Do I need to marinate the beef before cooking adobo? ▾
Marinating is optional, but it does amp up flavor depth if you have time. Toss your beef chunks with the soy sauce, crushed garlic, and bay leaves, then let them rest in the fridge for 1 to 4 hours before braising. Skip marinating longer than 8 hours, though—the acid in vinegar can break down the meat’s surface too much and make it mushy.
4.Why do so many adobo recipes warn against stirring while the vinegar cooks? ▾
That classic cooking tip exists to let the vinegar mellow out properly as it simmers. If you stir too early, before the raw vinegar sharpness cooks off, you can end up with a harsh, unbalanced sour taste that doesn’t meld with the soy and garlic. Let it come to a gentle uncovered simmer for the first 10 minutes before stirring.
5.How do I get that thick, glossy sauce that clings to the beef chunks? ▾
After the beef is fully tender, fish the chunks out with a slotted spoon and crank the heat to medium-high to reduce the remaining braising liquid for 5 to 7 minutes, until it coats the back of a spoon. Toss the beef back in to coat, and you’ll get that rich, shiny sauce perfect for rice, no extra cornstarch needed.
6.Can I make this beef adobo in a slow cooker? ▾
Definitely! Sear the beef chunks first for extra depth, then toss them in the slow cooker with the soy, vinegar, garlic, and bay leaves. Cook on low for 6 to 7 hours, or high for 3 to 3.5 hours, until the beef is fork-tender. Finish by reducing the sauce on the stovetop for 10 minutes to get that classic glossy texture.
7.How much garlic should I actually use for a standard batch of adobo? ▾
Traditional adobo is pretty garlic-forward, so plan for 8 to 10 lightly crushed cloves for a 2-pound batch of beef. Lightly crushing them (instead of mincing fine) releases their aromatic flavor without making the sauce gritty, and you can fish out any overly browned bits before serving if you prefer a smoother sauce.
8.Do I really need dried bay leaves, or can I leave them out entirely? ▾
Dried bay leaves add that subtle, earthy, almost tea-like depth that balances tangy vinegar and salty soy, so I don’t recommend skipping them entirely. If you don’t have dried bay leaves, use 2 fresh bay leaves (fresh is milder, so you’ll need a bit more) or a tiny pinch of dried oregano as a last-minute substitute.
9.Why is my beef adobo tough even after simmering for a full hour? ▾
That almost always means you cooked it at too high a boil, rather than a low, gentle simmer. Vigorous boiling tightens up meat fibers and makes them chewy, instead of letting connective tissue break down slowly. Turn the heat so only tiny bubbles break the surface, cover, and give it another 30 to 45 minutes for tender chuck.
10.Is Filipino beef adobo supposed to have an intensely sour flavor? ▾
No, a well-balanced adobo has tang as a core note, but it shouldn’t make your mouth pucker. The sourness from vinegar should be mellowed by savoriness from soy, warmth from garlic, and richness from the beef. If yours comes out too sharp, stir in a pinch of brown sugar or splash of broth to round it out.
11.Can I add mix-ins like potatoes or onions to this adobo? ▾
Absolutely! Adobo is super flexible, so add cubed Yukon gold potatoes, thick onion wedges, or whole black peppercorns during the last 25 minutes of cooking so they get tender without turning mushy. Just don’t overload the pot, or you’ll throw off the braising liquid ratio and dilute that classic adobo flavor.
12.How should I store leftover beef adobo, and how long does it keep? ▾
Store cooled adobo in an airtight container in the fridge for up to 4 days, or freeze it for up to 3 months. Many Filipino home cooks say adobo tastes even better the next day, as the flavors meld deeper as it chills. Just reheat gently on the stovetop with a splash of water if the sauce thickens too much.
13.What’s the main difference between pork adobo and beef adobo? ▾
The core braising base of vinegar, soy, garlic, and bay leaves is identical, but beef adobo uses tough, marbled chuck that needs a slightly longer braising time than pork shoulder. Beef adobo also tends to have a richer, deeper, less fatty flavor profile, and its sauce usually reduces to a slightly glossier finish.
14.Should I sear the beef before braising it for adobo? ▾
Searing isn’t strictly traditional in every regional adobo recipe, but I highly recommend it. Pat the beef chunks dry first, then sear them in a hot pot in batches until deep golden brown on all sides before adding liquid. That Maillard reaction adds a huge layer of savory, toasty depth you can’t get from boiling meat straight in sauce.
15.Can I adjust this recipe to make low-sodium beef adobo? ▾
Yes, easily! Swap regular soy sauce for low-sodium soy sauce, and taste as you go—you can always add a pinch of salt at the end if it needs more savoriness, but you can’t take excess salt out. Skip extra salty seasonings like fish sauce, and lean into a tiny extra splash of vinegar and black pepper to boost flavor without salt.
16.Why do people say adobo doesn’t spoil easily? ▾
That long-held wisdom comes from the high vinegar content in the braising liquid, which lowers the dish’s pH and slows bacterial growth. Before widespread refrigeration, that made adobo an ideal travel and workday meal. That said, you still need to refrigerate leftovers within 2 hours of cooking to keep it food safe—don’t leave it out overnight.
17.What should I serve with Filipino beef adobo? ▾
Steamed white jasmine rice is non-negotiable for sopping up that glossy, tangy sauce—it’s the classic pairing. For a simple side, add a quick cucumber and tomato salad tossed in a little vinegar and salt to cut the richness, or some sautéed bok choy. Skip heavy, creamy sides, since they’ll compete with adobo’s bright, bold flavor.
18.Do I need to add sugar to traditional beef adobo? ▾
Sugar isn’t a required ingredient in classic beef adobo, especially if you’re using mild cane vinegar, which has a natural subtle sweetness. It’s totally optional—add a teaspoon or two of brown sugar only if you prefer a slightly sweeter, more rounded flavor, or if you’re using sharper white vinegar as a cane vinegar substitute to cut its bite.
19.Can I use a pressure cooker to make beef adobo faster? ▾
Absolutely, a pressure cooker cuts braising time down drastically. Sear the beef first, add all your braising ingredients, then cook on high pressure for 25 minutes with a quick pressure release. After opening, simmer the sauce uncovered for 5 minutes to thicken it up, and you’ll have tender, flavorful adobo in a fraction of the stovetop time.

Comments (8)

2 days ago

OMG this beef adobo was a total game changer for our weekly family dinner! I was nervous to try Filipino food for the first time but the recipe was so easy to follow, even with my chaotic weeknight schedule. The meat was fall-apart tender after that simmer time, my kids ate seconds and thirds and asked when I’m making it again. I served it over jasmine rice like the recipe suggested, 10/10 would bring this to our next neighborhood potluck for sure!

1 day ago

Wait did you use regular soy sauce or the low-sodium kind? I’ve had adobo at restaurants before that was way too salty and I don’t wanna mess this up!

1 day ago

Great question! I recommend using low-sodium soy sauce if you’re sensitive to salt, and make sure to taste the sauce as you simmer to adjust. If it ends up too salty, a tiny splash of rice vinegar and a pinch of brown sugar will balance it right out!

1 week ago

Made a double batch of this for my weekly meal prep and WOW, it’s even better on day 3 when the flavors have time to meld. So easy to throw together on a Sunday afternoon, 1 hour 20 minutes total is totally manageable even when I’m juggling laundry and football on TV. Only tweak I made was adding a couple extra bay leaves because I love that earthy note. SO good, this is going into my regular rotation for sure.

6 days ago

So happy to hear this works for your meal prep! You’re totally right that the flavors deepen as it sits, it’s one of those rare dishes that tastes better leftover. Extra bay leaves are a fantastic call!

3 days ago

As someone who grew up eating my lola’s adobo, I was skeptical of an easy online version, but this hit SO close to home! The balance of soy, vinegar, and garlic was spot on, no weird extra ingredients that don’t belong. I used chuck roast like recommended and it came out perfectly tender. My roommates were hovering over the pot the whole time it simmered begging for a plate. Will absolutely make this again.

5 days ago

Tried this last night and I have a quick question — my sauce didn’t thicken up as much as the photos show? It was still super tasty, just a little runnier than I expected. Did I do something wrong? I followed all the measurements exactly as written!

4 days ago

I had the same issue my first time! I just turned the heat up to medium for the last 10 minutes and left the lid off, it thickened right up. Hope that helps!

4 days ago

Great tip from MidwestMamaK! If your sauce is too thin, simmering uncovered at the end for 5-10 minutes will reduce it to that perfect glossy consistency. Sometimes stovetops run at different temps, so that little extra simmer time makes all the difference. So glad it still tasted good for you!

yesterday

Brought this to my office potluck today and people were literally asking me for the recipe before they even finished their first bite. I added a handful of whole black peppercorns like my buddy’s Filipino mom taught me, and it gave the best little kick. So easy to make, no fancy skills required. 10/10, zero leftovers to bring home which is always the sign of a hit.

30 minutes ago

Wait I was at that potluck!!! This was the best dish there by a mile, I was going to ask who made it! Saving this recipe to make for my partner this weekend, he’s obsessed with adobo.

2 hours ago

First time making adobo ever, and I was shocked how easy this was! I’m usually a terrible cook, I burn even frozen pizza half the time, but this came out perfect. The beef was so juicy, the sauce is tangy and savory, my wife said it tasted like it came from a restaurant. Only thing I forgot was the bay leaf, oops, but it was still amazing. Can’t wait to make this again next week.

30 minutes ago

That’s so awesome to hear, especially if you’re new to cooking! You don’t have to be a pro to make great adobo, it’s such a forgiving dish. Next time throw that bay leaf in, but even without it I’m glad it turned out so well for you and your wife!

just now

Added a few sliced Thai chilis to the simmer for extra heat and wow, that was the best call I’ve made all week. The spice cuts through the rich savoriness of the sauce so perfectly. This recipe is so easy to tweak to your taste without messing it up, which is my favorite kind of recipe. Already sent the link to my whole family group chat.

5 minutes ago

Made this for my husband for our first married Sunday dinner and he is already begging me to add it to our monthly meal rotation! I was worried it would be too complicated for a beginner cook, but the steps were so straightforward and the cook time went by fast while we watched our favorite show. The only issue is we ate almost the whole pot in one sitting, oops! Quick question — can I use pork instead of beef for this next time, or will that change the cook time a lot?

2 minutes ago

Pork adobo is amazing! I usually use pork shoulder and it takes about the same cook time, just make sure you cut it into similar sized chunks so it cooks evenly. It comes out so tender with the fat rendered a little, chef’s kiss.

1 minute ago

Yay, so glad this was a hit for your first Sunday married dinner! Pork works beautifully here — pork shoulder or pork belly are both great choices, and the cook time is almost identical, just check for tenderness at the 1 hour mark like you would with the beef. Enjoy!



