
chicken breast in oven

title 1
chicken breast in oven
⏱️ cook time 18 minutes
🍽️ servings 4
⚡ Difficulty easy

intro

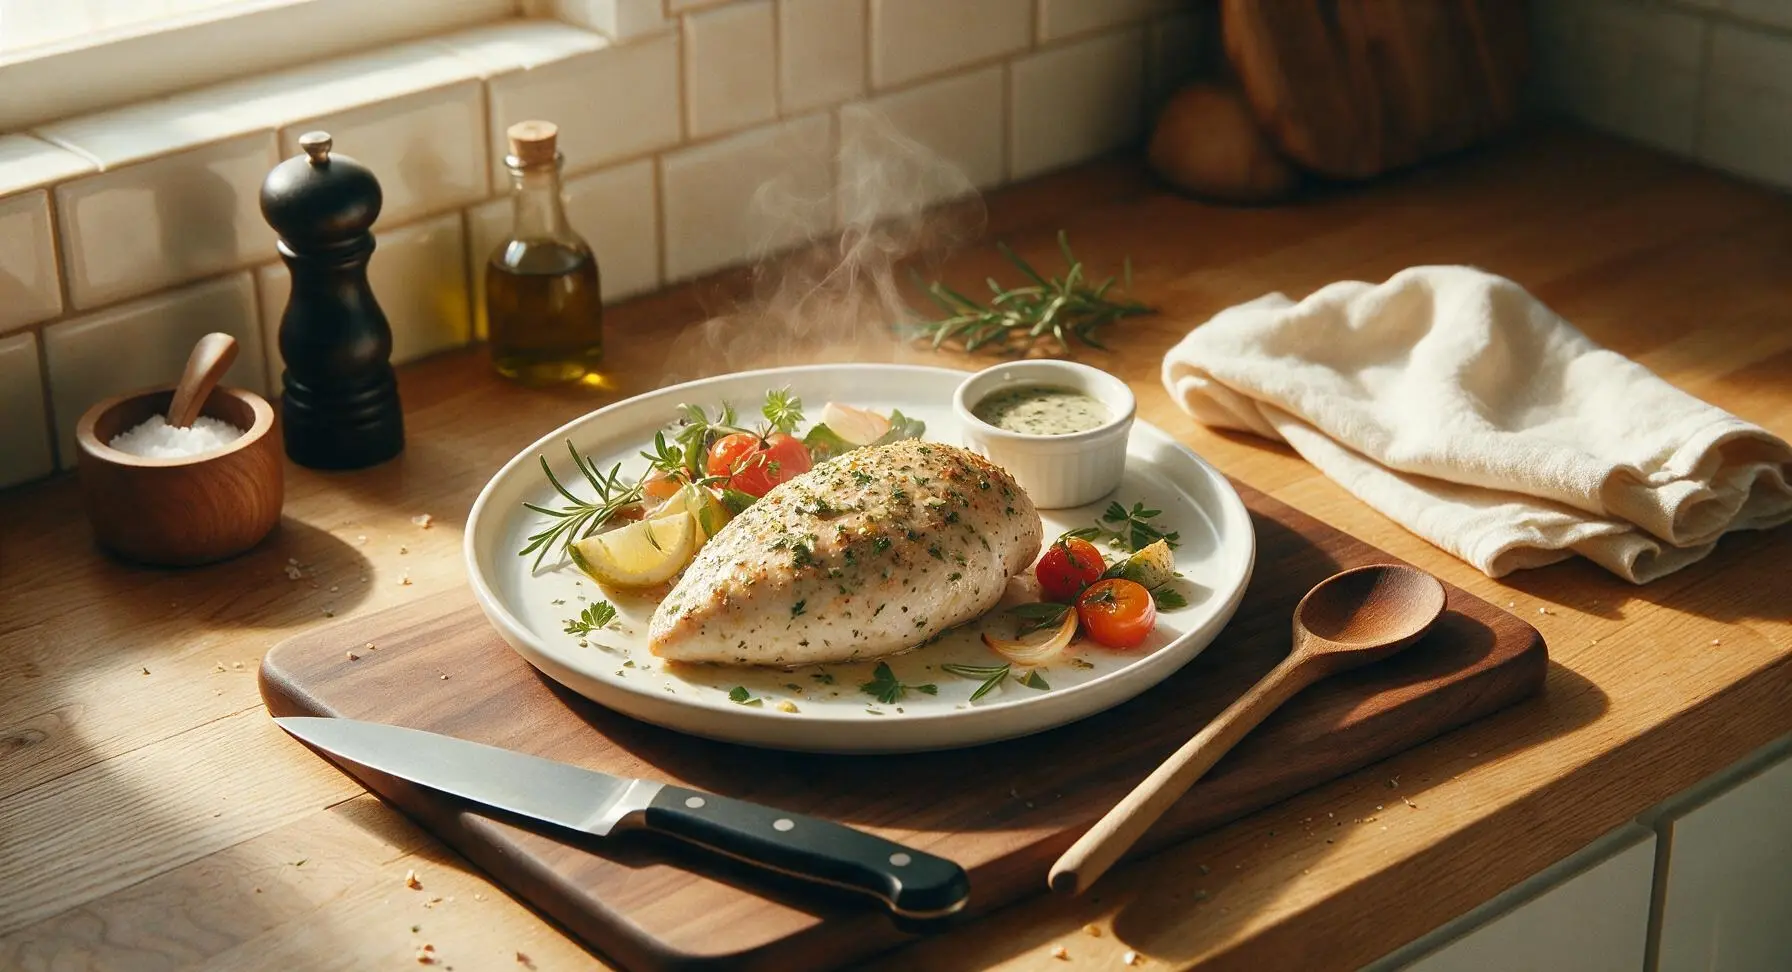
Juicy, evenly seasoned oven-baked chicken breast with a light herbed crust—no dry, rubbery results, perfect for fast weeknight dinners and weekly meal prep.

Ingredients
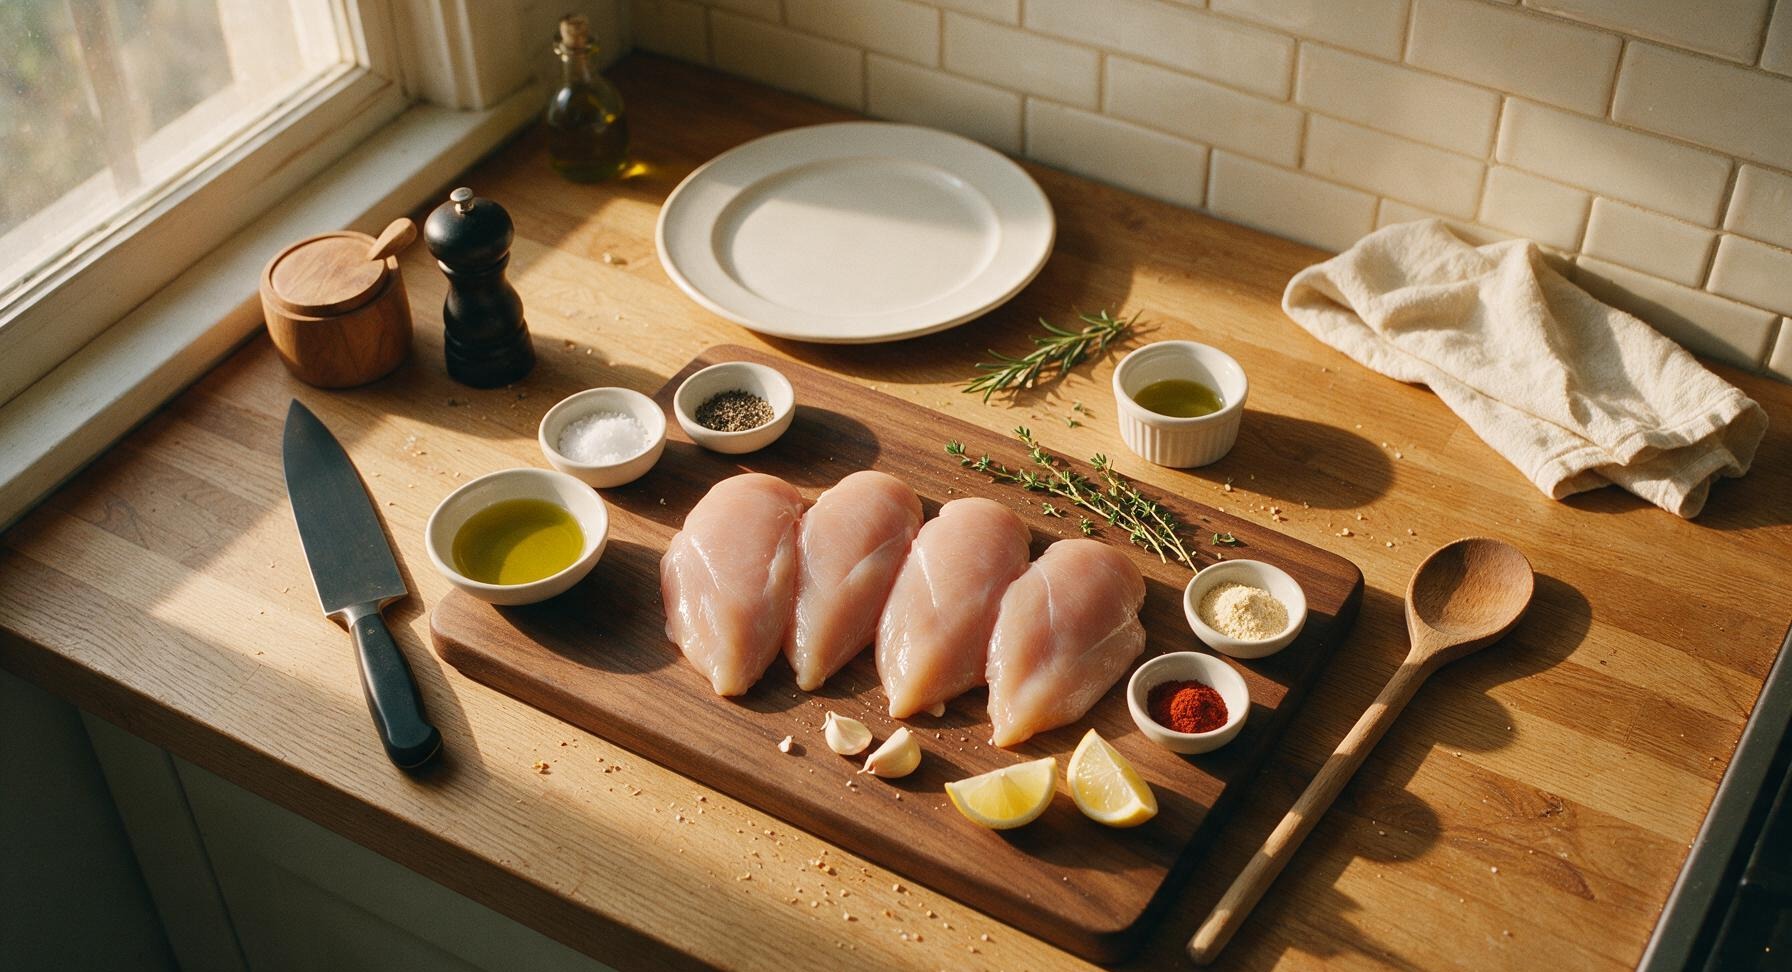
Boneless skinless chicken breasts 4 pieces (170g each, ~680g total)
Extra-virgin olive oil 1 tablespoon
Kosher salt 1 teaspoon
Freshly ground black pepper 1/2 teaspoon
Garlic powder 1/2 teaspoon
Smoked paprika 1/4 teaspoon
Fresh thyme 3 sprigs (1 teaspoon leaves picked, plus extra for garnish)
Garlic cloves 2 whole, lightly crushed
Small lemon 1, cut into wedges for serving

Steps

1

Pound Chicken Evenly

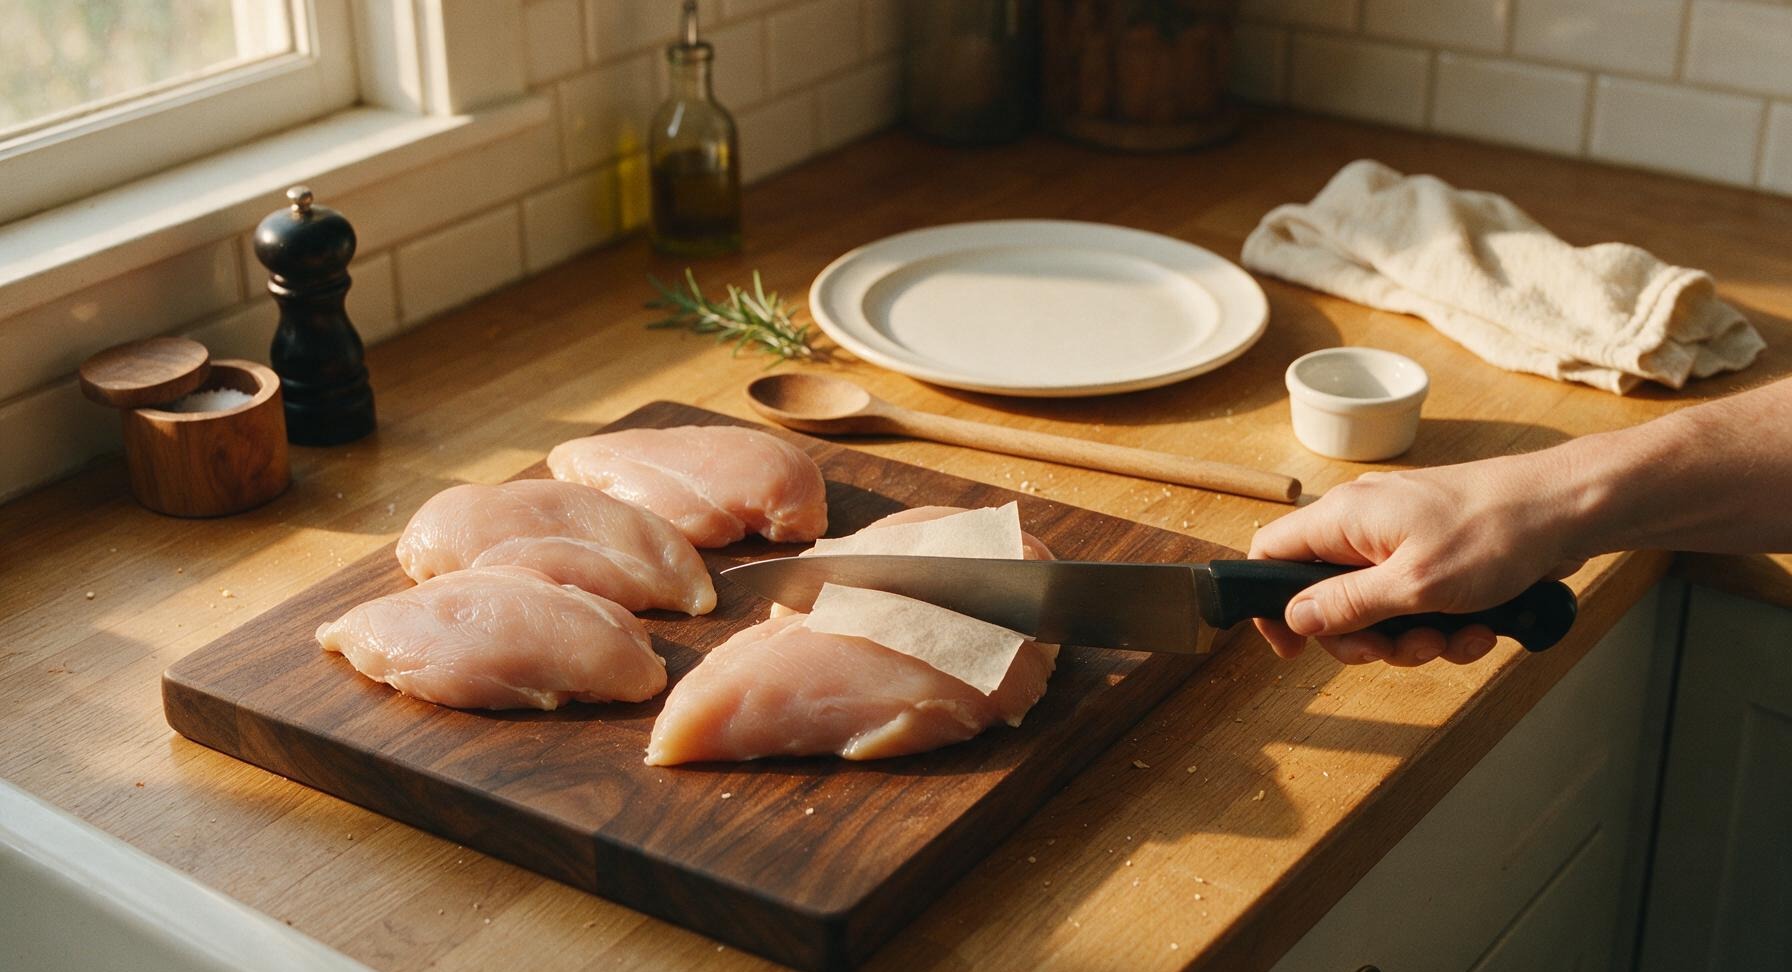
Place one chicken breast at a time on the acacia wood cutting board, cover loosely with a small square of parchment paper to avoid tearing the meat. Gently pound the thicker tapered end of each breast with the flat side of the chef knife until the entire breast is a uniform 2.5cm (1 inch) thick across its whole surface. This eliminates thin, overcooked edges and ensures even doneness from edge to center.
Step 1
step1:Pound Chicken Evenly
2

Pat Chicken Dry

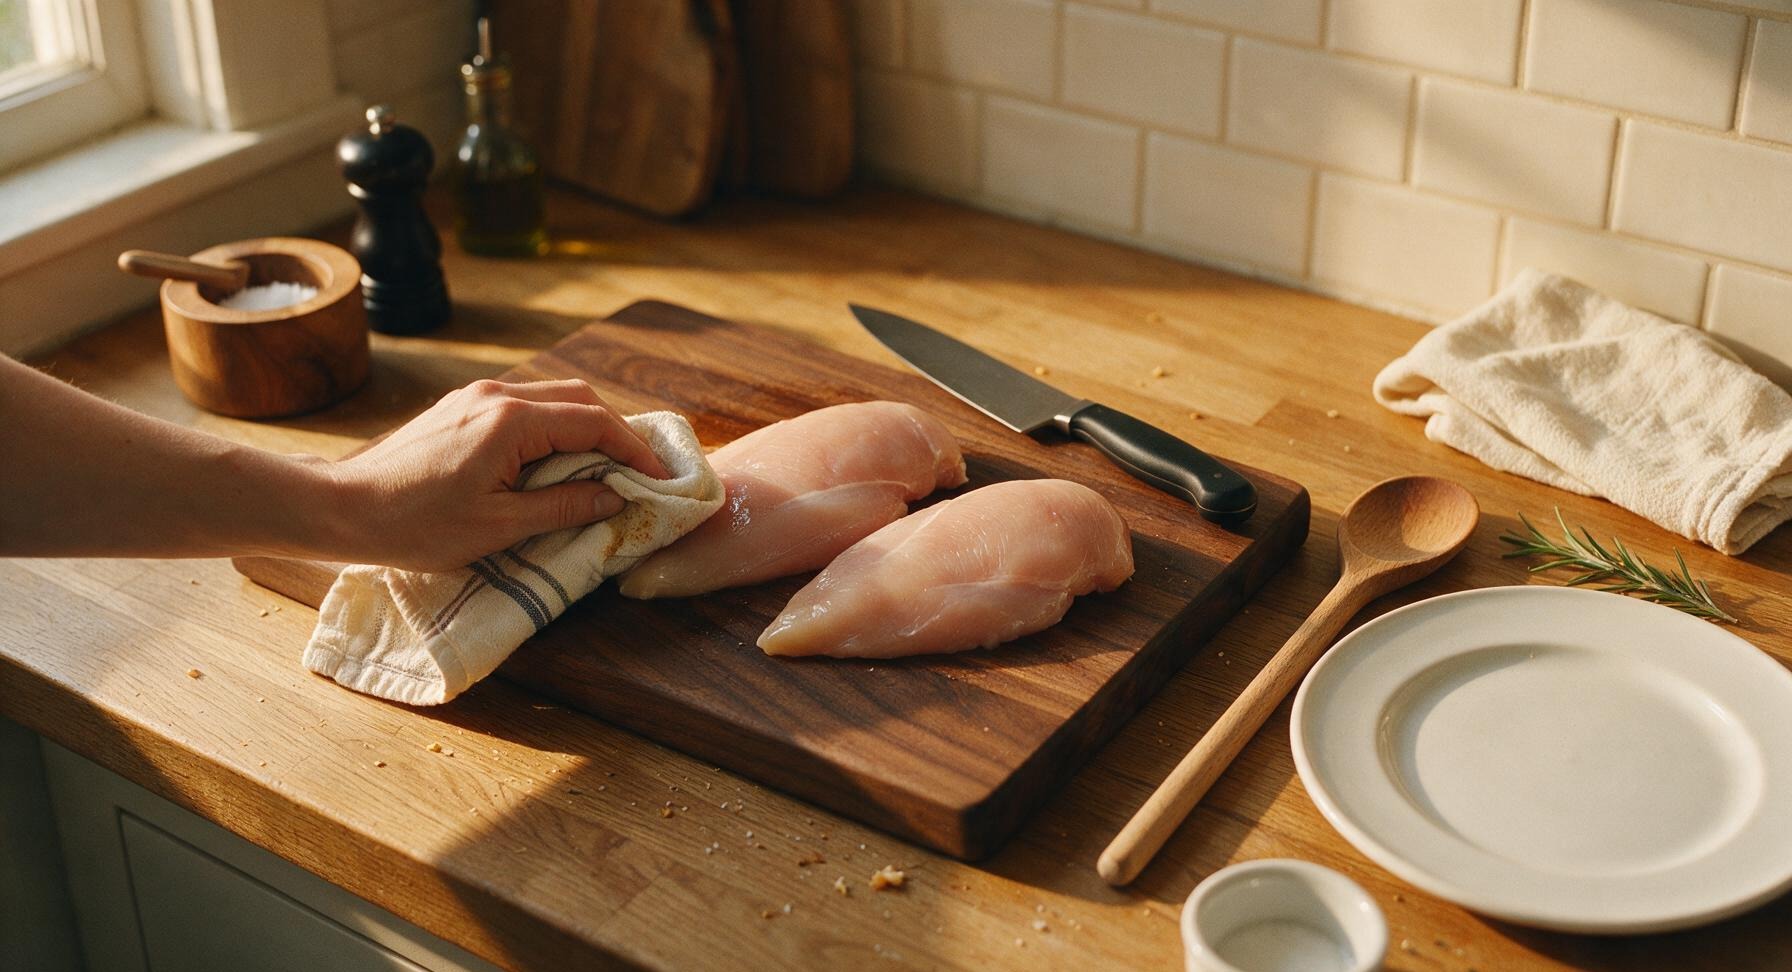
Use a corner of the cream cotton kitchen towel to firmly pat every surface of each pounded chicken breast completely dry. Brush away any small bits of loose tissue or moisture from the cutting board. A fully dry surface is critical to forming a light, crisp seasoned crust instead of steamed, rubbery chicken.
Step 2
step2:Pat Chicken Dry
3

Mix Seasoning Blend

In the matte light grey ceramic mixing bowl, combine 1 teaspoon kosher salt, 1/2 teaspoon black pepper, 1/2 teaspoon garlic powder, 1/4 teaspoon smoked paprika, and 1 teaspoon of picked fresh thyme leaves. Stir with the tip of the chef knife to evenly blend the spices, until no single clump of paprika or garlic powder remains.
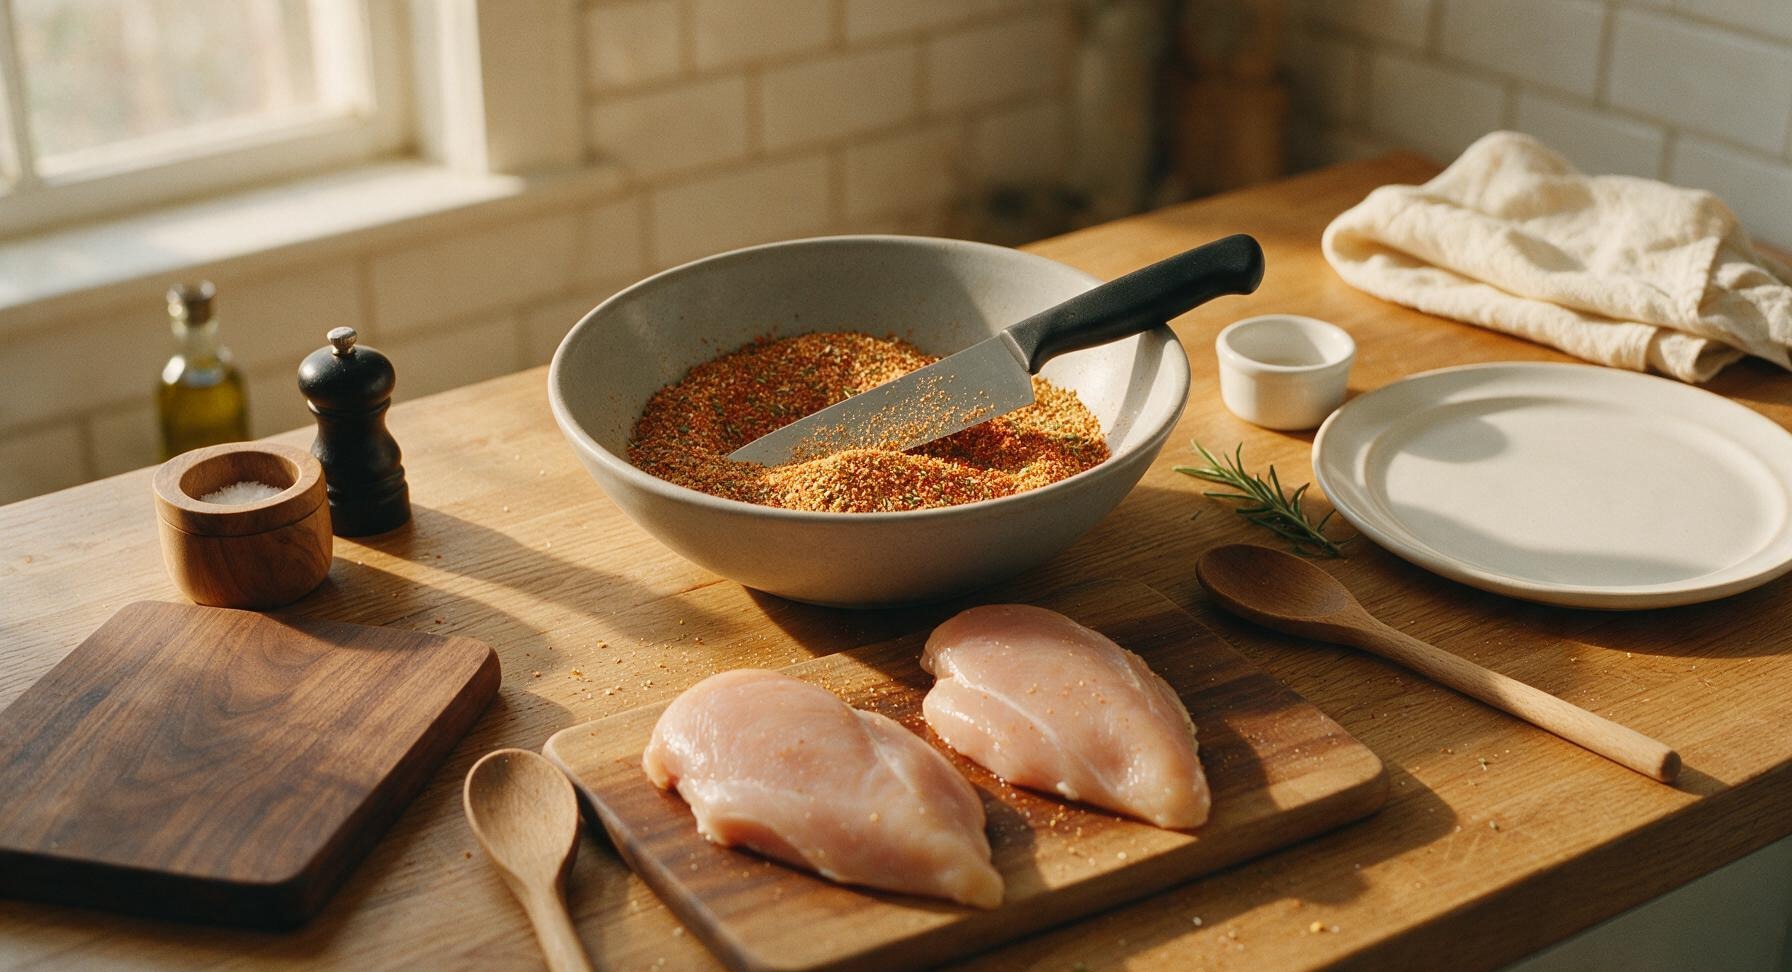
Step 3
step3:Mix Seasoning Blend
4

Coat Chicken Evenly

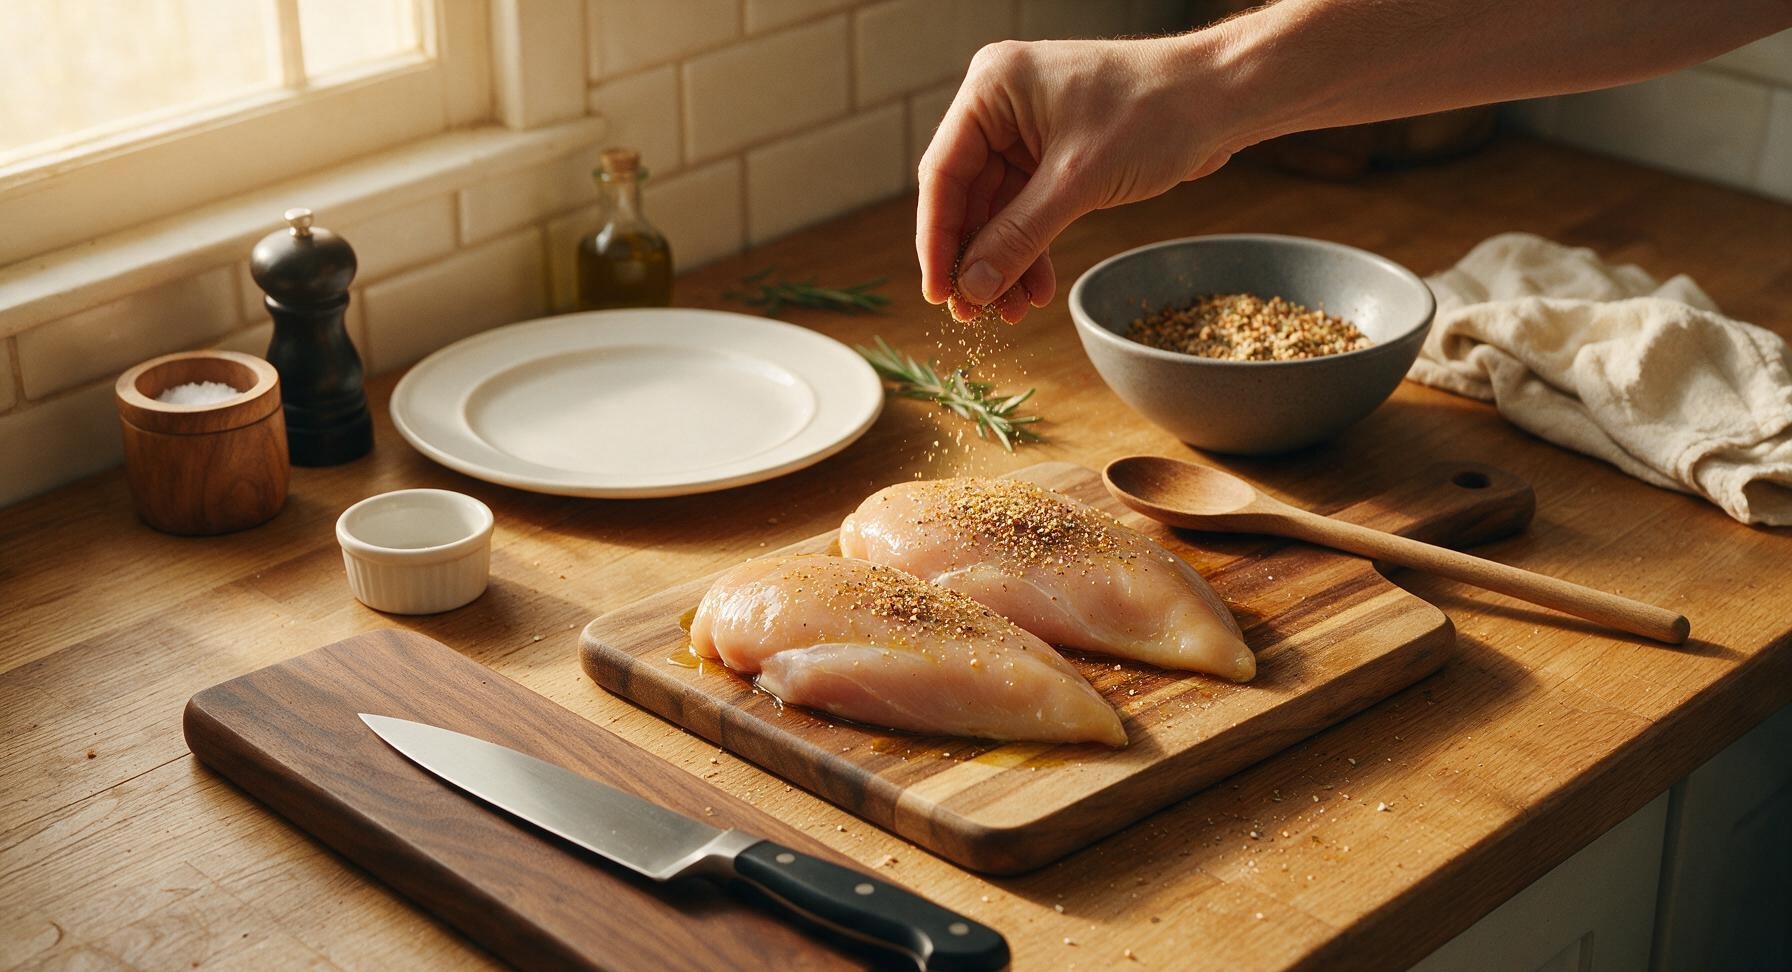
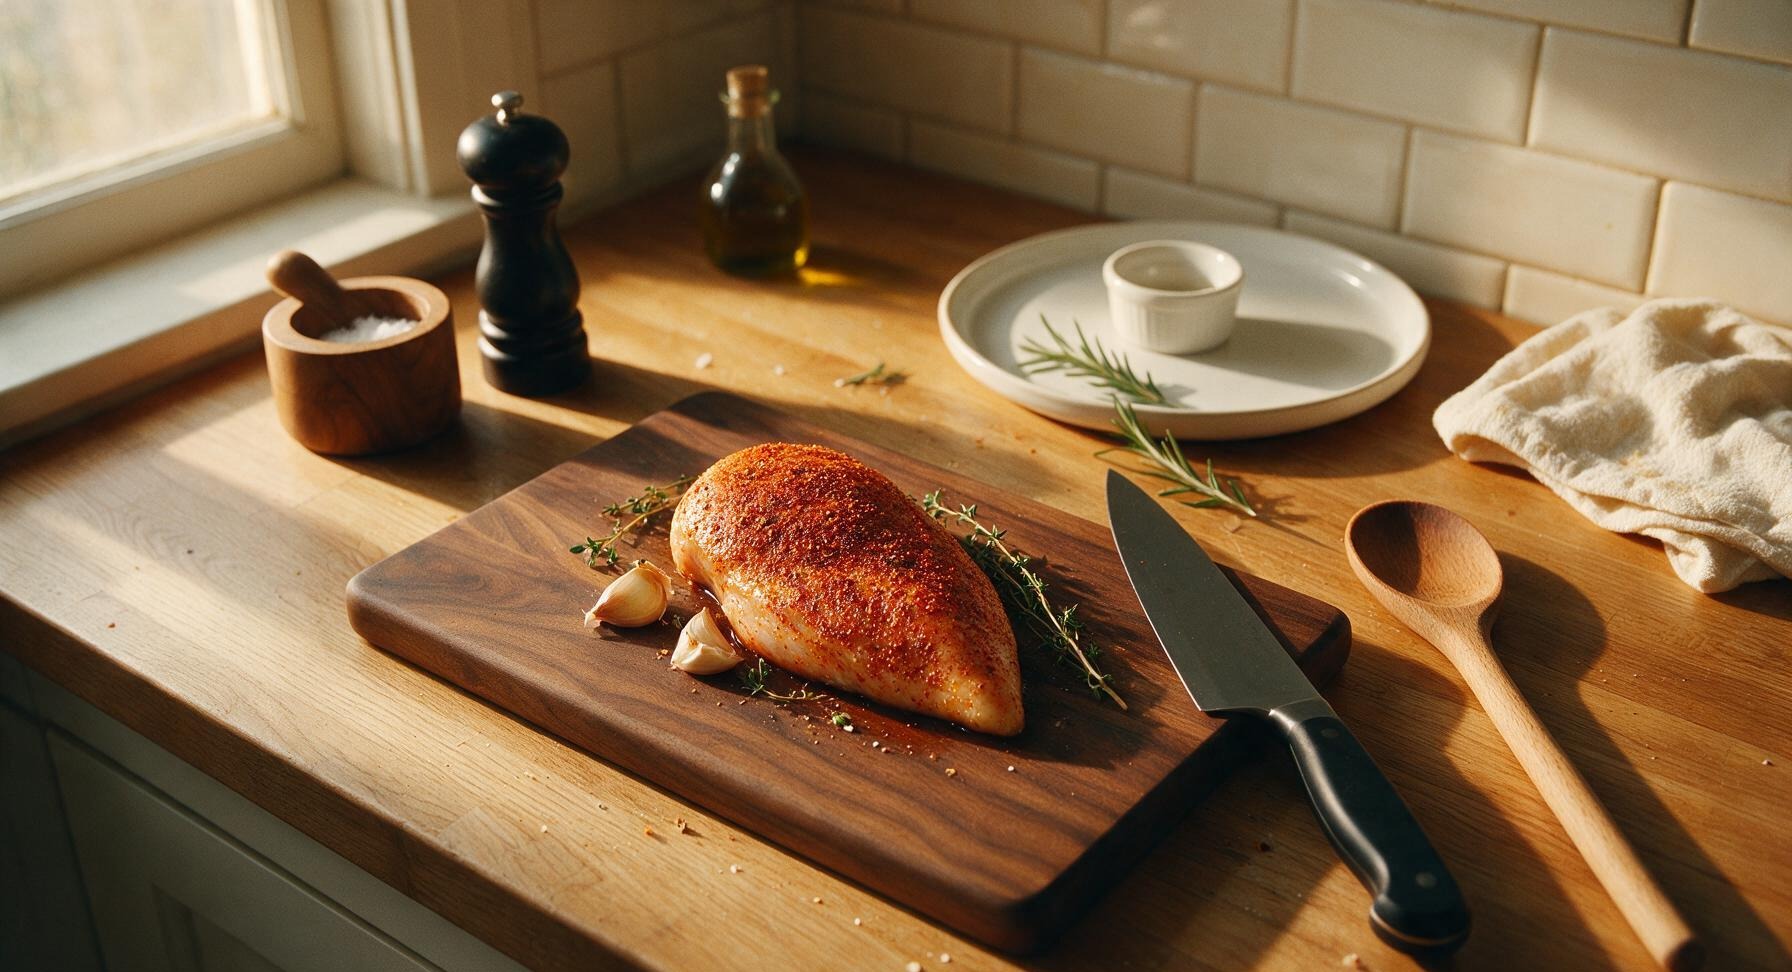
Drizzle 1 tablespoon of extra-virgin olive oil over all surfaces of the dried chicken breasts, using clean fingers to rub the oil into a thin, even coat across every side. Sprinkle the pre-mixed seasoning blend evenly over the top, bottom, and narrow edges of each breast, pressing lightly with your fingertips to help the spices adhere to the oil. Tuck the two lightly crushed garlic cloves and remaining thyme sprigs alongside the chicken to infuse flavor as they cook.
Step 4
step4:Coat Chicken Evenly
Step 4
step4:Coat Chicken Evenly
5

Arrange on Baking Sheet

Line the rimmed aluminized steel baking sheet with unbleached parchment paper, then arrange the seasoned chicken breasts in a single layer on the sheet, leaving 2cm of space between each piece to allow hot oven air to circulate. Do not crowd the pan, as this will cause steaming instead of roasting. Place the crushed garlic and thyme sprigs on the sheet between the chicken pieces, not directly under the breasts where they might burn.
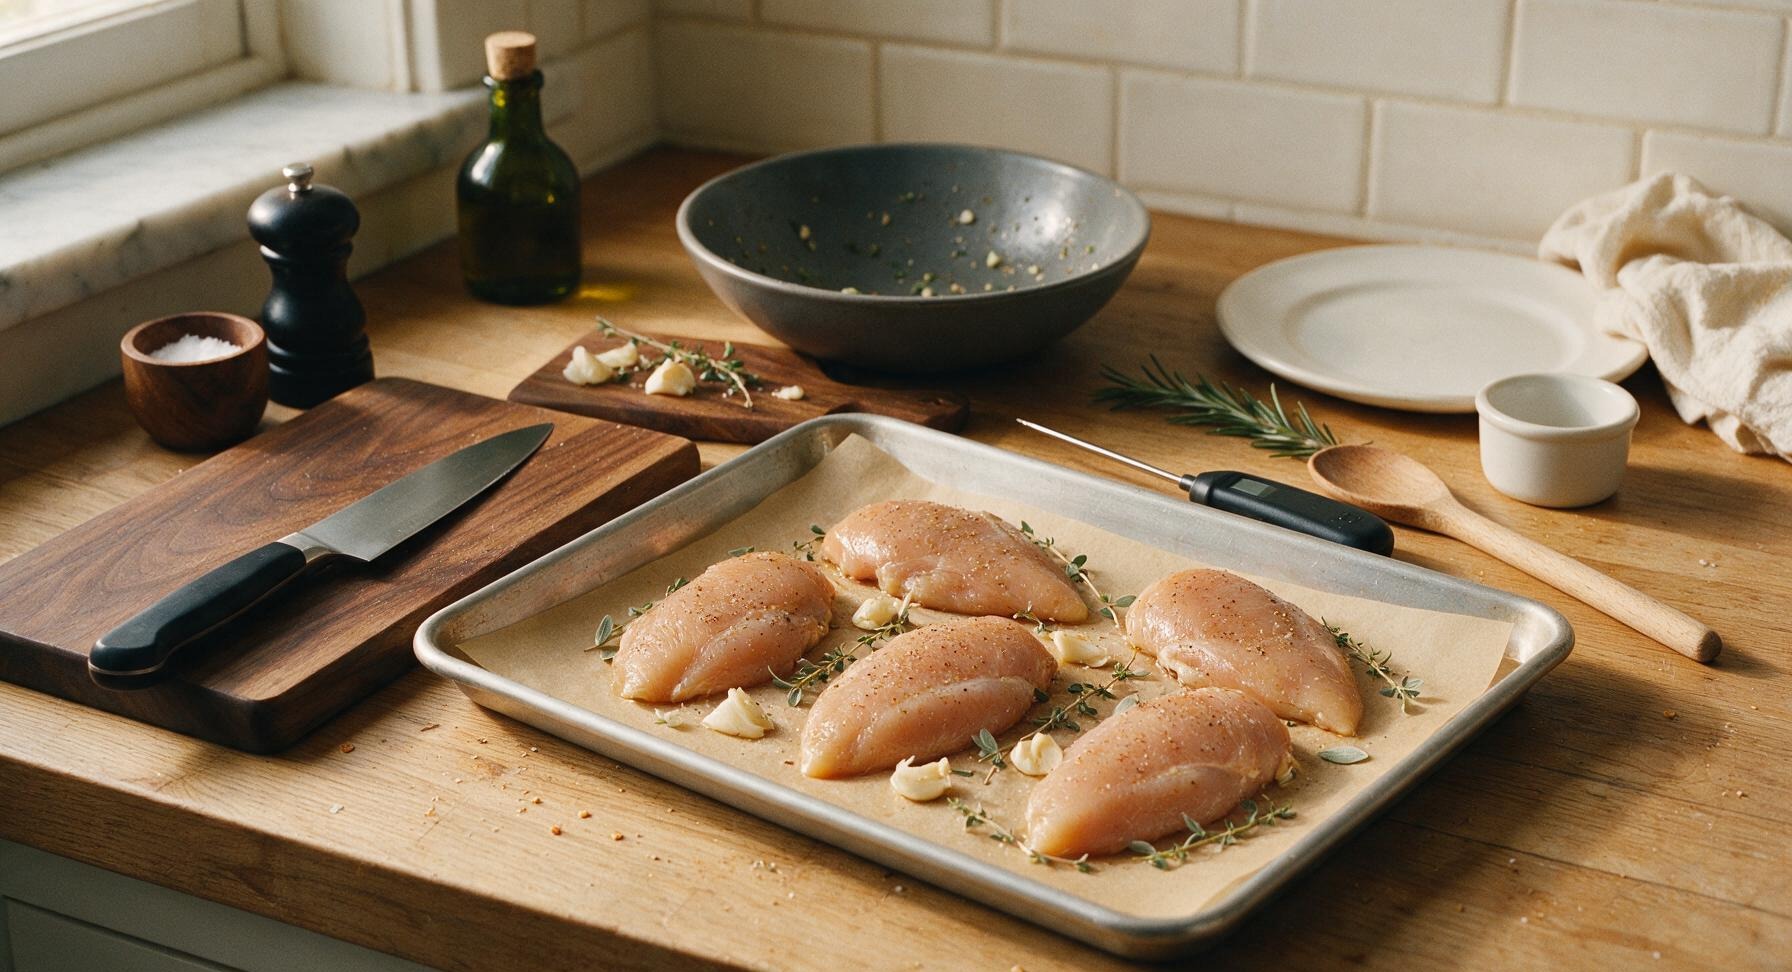
Step 5
step5:Arrange on Baking Sheet
6

Bake to Correct Doneness

Place the baking sheet on the middle rack of a preheated 220°C (425°F) oven. Bake for 15-18 minutes, until the internal temperature of the thickest part of each breast reads 72°C (162°F) when checked with the digital meat thermometer. The chicken will have a light golden seasoned crust, with clear (not pink) juice visible when pierced.
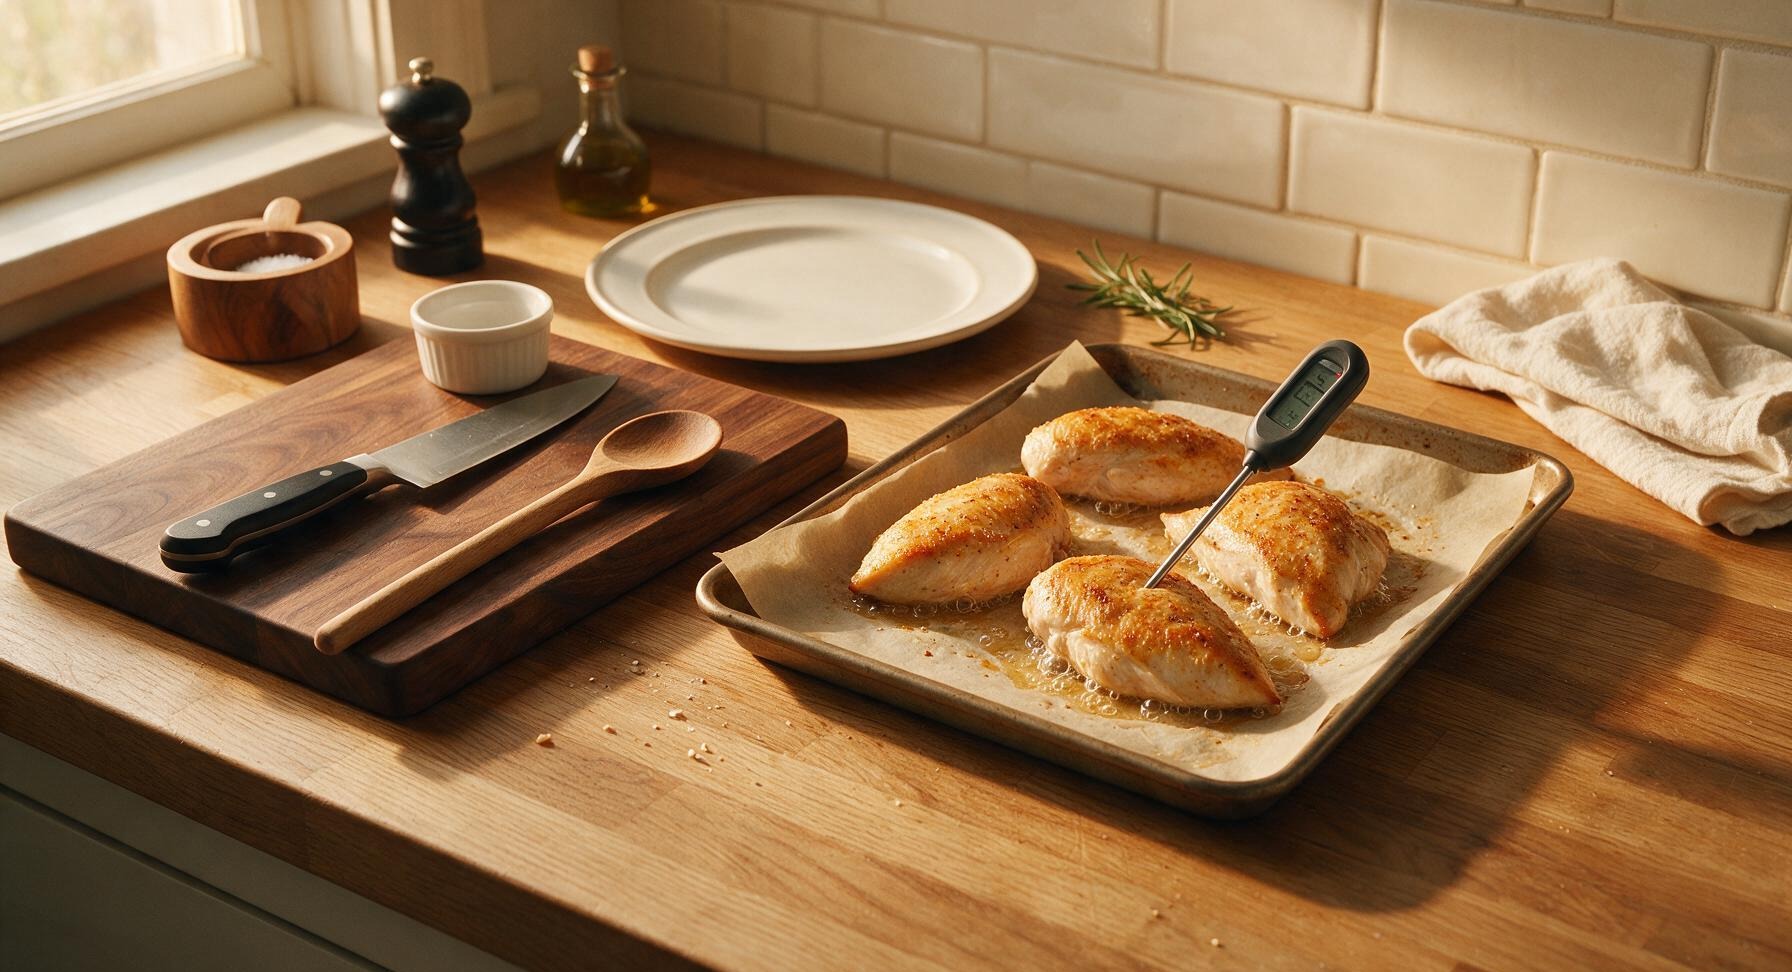
Step 6
step6:Bake to Correct Doneness
7

Rest Chicken Before Slicing

Loosely tent the chicken on the baking sheet with a small piece of aluminum foil, and let rest for 5 full minutes at room temperature. Resting allows the muscle fibers to relax and reabsorb juices, so every bite is juicy instead of having all liquid run out onto the plate when sliced.
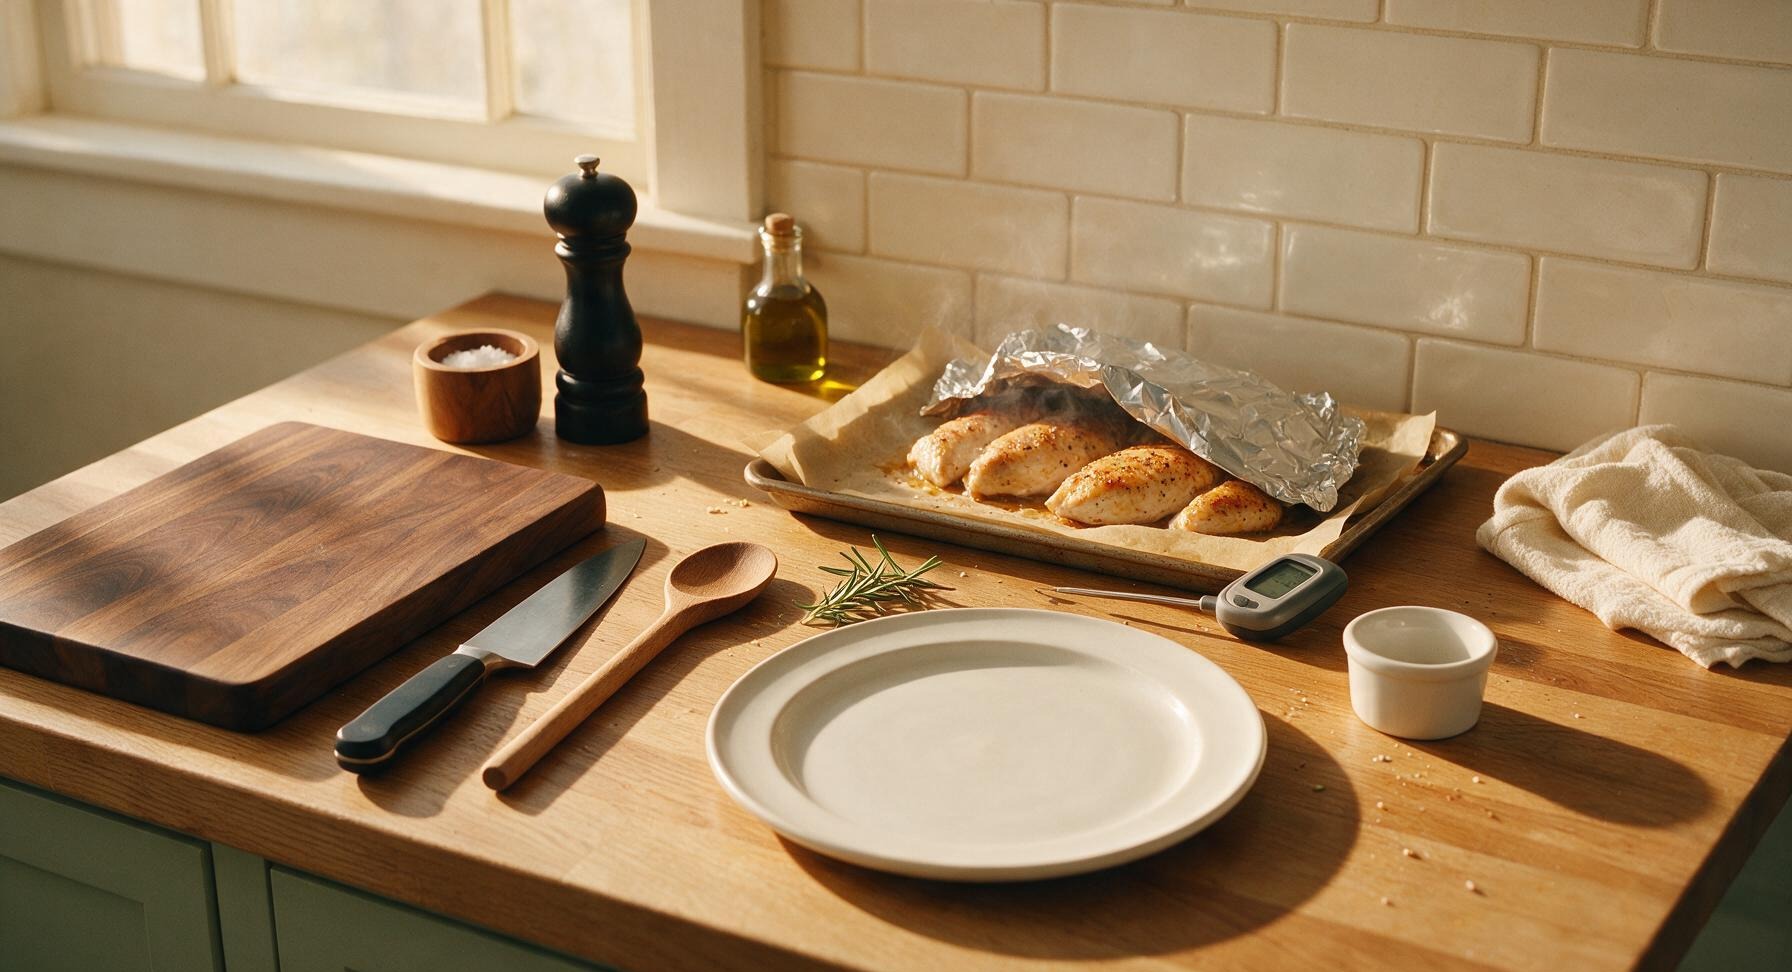
Step 7
step7:Rest Chicken Before Slicing
8

Slice and Plate Chicken

After the 5-minute rest, transfer one chicken breast at a time back to the acacia wood cutting board. Slice against the grain into 1cm thick slices using smooth, even cuts with the chef knife. Arrange the sliced chicken in a gentle fan on the matte warm white ceramic dinner plate, drizzle with collected pan juices from the parchment, and garnish with fresh thyme leaves and a lemon wedge.
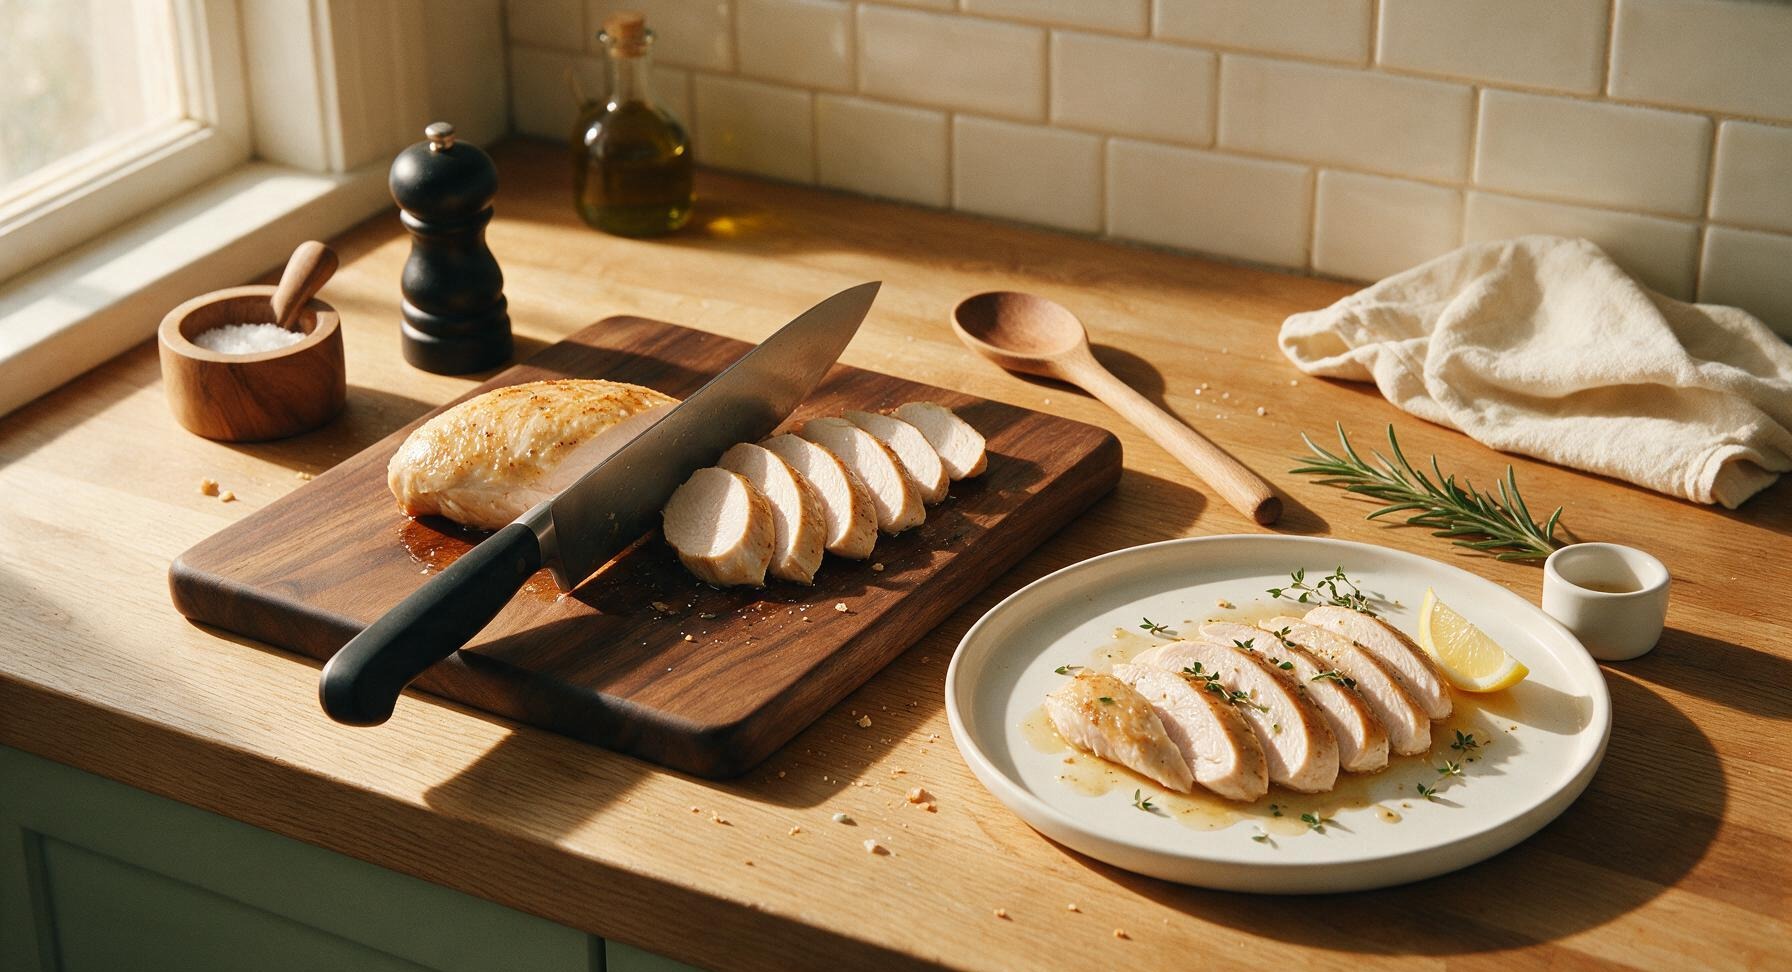
Step 8
step8:Slice and Plate Chicken

Tips

1.Pound chicken to a uniform 1-inch thickness before cooking: the narrow tapered end of a raw breast cooks 30% faster than the thickest section, leading to dry, overcooked edges before the center reaches a safe temperature.
2.Pat chicken completely dry with a towel before adding oil and seasoning: excess surface moisture creates steam in the oven, preventing a light, flavorful seasoned crust from forming and resulting in rubbery, bland meat.
3.Pull chicken from the oven when the thickest part reads 162°F (72°C), not 165°F (74°C): residual carryover heat will raise the internal temperature 3 degrees during the 5-minute rest, ensuring juicy meat without overcooking.


✨ You May Also Like

Main Course
🍜 United Kingdom

A showstopping classic of tender seared beef, savory mushroom duxelles, and crisp prosciutto wrapped in flaky golden puff pastry, baked to juicy perfection.

⏱️ 2 hours 1Main Course ★ 4.7
Main Course
🍜 India

Tender charred marinated chicken simmered in a rich, spiced creamy tomato sauce, this iconic Anglo-Indian curry pairs perfectly with basmati rice or warm naan.

⏱️ 50 minuteMain Course ★ 4.6
Main Course
🍜 Thailand

Classic tangy, sweet, and savory Thai stir-fried rice noodles with shrimp, tofu, and crunchy garnishes, balancing all five core Thai flavor profiles.

⏱️ 30 minuteMain Course ★ 4.5
Main Course
🍜 United Kingdom

Crispy golden beer-battered cod and fluffy double-fried chips, served with tangy tartar sauce and malt vinegar: the timeless, beloved British pub comfort classic.

⏱️ 45 minuteMain Course ★ 4.7
Main Course
🍜 Mexico

Smoky, chile-marinated pork tacos with caramelized pineapple, fresh cilantro, and lime: a beloved classic Mexican street food perfect for casual summer gatherings.

⏱️ 1 hour 45Main Course ★ 4.8
Main Course
🍜 United States

Crunchy Fritos corn chips layered with savory beef chili and melted cheddar, topped with cool, zesty fixings for a beloved, cozy Tex-Mex comfort food.

⏱️ 35 minuteMain Course ★ 4.8

chicken breast in oven:Frequently Asked Questions

1.Why does my baked chicken breast always turn out dry and rubbery? ▾
That almost always comes down to three common mistakes: uneven breast thickness, overcooking, and skipping post-bake rest. For this recipe, pound breasts to a uniform 1-inch thickness, pull them at 160°F internal temp, and let them rest 5 minutes so juices redistribute—you’ll never get that tough, rubbery texture again.
2.What oven temperature gives the juiciest baked chicken breast? ▾
Preheat to 425°F for this recipe. That high, dry heat sears the chicken’s exterior quickly to lock in natural juices, builds that light herbed crust, and cuts down on total cook time. Lower oven temperatures make chicken sit and release excess moisture as it cooks, leading to bland, dry results.
3.Is pounding chicken breasts to even thickness really necessary? ▾
It’s non-negotiable for consistent, juicy results. Most raw breasts are thick on one tapered end and paper-thin on the other, so the thin edge overcooks to rubber long before the thick end reaches a safe temperature. Pound to a 1-inch thickness with a meat mallet or heavy pan between plastic wrap for even cooking.
4.What internal temperature means chicken is done without being overcooked? ▾
Pull your chicken from the oven the second the thickest part hits 160°F on an instant-read thermometer. Residual carryover cooking will bring it up to the FDA-recommended 165°F as it rests. Cooking it all the way to 165°F in the oven is the number one cause of dry, chalky chicken breast.
5.Can I use regular table salt instead of kosher salt here? ▾
You can, but you’ll need to adjust the amount to avoid over-salting. Table salt is much denser and sharper-tasting than flaky kosher salt, so use half the measured amount if that’s all you have. Sprinkle it evenly across every surface of the chicken to avoid salty patches or bland, unseasoned spots.
6.How long should I rest chicken after baking, and why does that matter? ▾
Let it rest 5 full minutes, tented loosely with a small piece of foil, after pulling it from the oven. As chicken cooks, muscle fibers tighten and push juices to the center; resting lets fibers relax and reabsorb that moisture, so juices stay in the meat instead of running all over your cutting board when you slice.
7.Can I add extra seasonings beyond the salt, pepper, and garlic powder? ▾
Absolutely—this base recipe is a super versatile blank canvas. Try adding smoked paprika, dried thyme, oregano, a pinch of cayenne, or a light sprinkle of parmesan for extra crust flavor. Just skip heavy, wet seasonings that will make the exterior soggy instead of developing that light, crisp herbed crust.
8.Is extra-virgin olive oil safe to use at this recipe’s baking temperature? ▾
Yes, it works perfectly here. We bake at 425°F, which is well within the safe heat range for high-quality extra-virgin olive oil. The thin oil coating helps seasoning stick, locks in surface moisture, and encourages that light golden crust without burning or creating bitter, off-flavors in your finished chicken.
9.How long does this chicken take to bake all the way through? ▾
At 425°F, 1-inch thick evenly pounded breasts will take 18 to 22 minutes total, depending on your oven’s actual calibration and exact breast size. Always rely on an instant-read thermometer instead of a timer alone—home ovens can run 25 to 50°F off their labeled temp, leading to accidental overcooking.
10.Can I make this recipe with frozen chicken breasts? ▾
I don’t recommend baking frozen chicken directly for this recipe. As frozen chicken thaws in the oven, it releases tons of excess moisture that leaves you with a soggy crust, uneven cooking, and dry, overcooked edges. Thaw fully in the fridge first, pat dry completely, then follow the recipe as written for best results.
11.Why do I need to pat chicken dry before seasoning and baking? ▾
Patting the chicken completely dry with paper towels is a non-negotiable step for that light, crisp herbed crust. Any leftover surface moisture from the packaging will steam instead of sear in the hot oven, leaving you with a pale, soggy exterior and washing seasoning off before it can stick to the meat.
12.How long does this chicken stay fresh for weekly meal prep? ▾
Stored in an airtight container in the fridge, this chicken stays juicy and fresh for 3 to 4 days, making it perfect for weekly meal prep. Let it cool fully to room temperature within 2 hours of baking before sealing it up, and slice it only right before eating to help it retain moisture longer.
13.Can I use bone-in, skin-on chicken breasts with this method? ▾
You can, but you’ll need to adjust the cook time. Bone-in, skin-on breasts are much thicker, so they’ll take 30 to 35 minutes at 425°F to hit that 160°F pull temp. Pat the skin extra dry before adding oil and seasoning to get perfectly crispy skin instead of a rubbery, chewy exterior.
14.Why does my chicken always stick to the baking sheet? ▾
Sticking usually happens for one of three reasons: you try to move the chicken too early, you used too little oil, or your oven wasn’t fully preheated. Give chicken 10 to 12 minutes of baking before flipping; the crust will release naturally once seared. Lining your sheet with parchment also guarantees zero sticking for easy cleanup.
15.Should I cover the chicken with foil while baking to keep it juicy? ▾
Skip the foil cover for this recipe! Covering the pan traps steam, which makes chicken braise instead of bake, leading to a soft, soggy exterior instead of that light herbed crust and uneven cooking. The even 1-inch thickness, correct oven temp, and post-bake rest are all you need for perfectly juicy results.
16.Can I marinate the chicken ahead of time for extra flavor? ▾
Absolutely! You can marinate pounded, dried chicken in olive oil, salt, pepper, garlic powder, and add-ins like lemon zest or a splash of apple cider vinegar for up to 24 hours in the fridge. Just pat the surface lightly dry before baking to avoid a steamed exterior and get that nice light crust.
17.Do I need to flip the chicken halfway through baking? ▾
It’s not strictly required, but I recommend flipping at the 12-minute mark for even browning on both sides. If you prefer a crispier top crust only, you can leave it top-side up the whole time—just position your oven rack in the middle so the bottom doesn’t burn before the top develops that nice golden color.
18.How do I reheat leftover chicken without it turning dry? ▾
The gentlest method is to reheat slices in a covered skillet over low heat with 1 tablespoon of water or chicken broth; the light steam warms chicken through without drying it out. If you use a microwave, cover the chicken with a damp paper towel and heat in 30-second bursts to avoid rubbery, tough meat.
19.How much seasoning should I use per chicken breast? ▾
For a standard 6 to 8 ounce boneless, skinless breast pounded to 1-inch thickness, use 1 teaspoon of olive oil, ¼ teaspoon of kosher salt, 3 to 4 grinds of black pepper, and ⅛ teaspoon of garlic powder per side. That ratio gives even, well-balanced flavor without being too salty or overpowering.
20.Can I freeze leftover baked chicken breast for later use? ▾
Yes! Let cooked chicken cool completely, then wrap individual portions tightly in plastic wrap and store them in a freezer-safe bag for up to 3 months. Thaw in the fridge overnight before adding to salads, wraps, or pasta, and avoid overheating during reheating to keep the texture nice and juicy.

Comments (14)

2 days ago

OMG this is a total game changer! I’ve messed up so many dry chicken breasts for weeknight meal prep and I was this close to giving up. Followed the temp tip exactly, 18 minutes in the oven and it was perfectly juicy, no weird brining hacks required? My kids ate seconds without even dousing it in ranch, that’s how good it is.

yesterday

Wait did you pound yours to even thickness first? I tried it last night and the thick end was still a little pink, wondering if I skipped a step!

yesterday

Great question! Pounding to a uniform 1-inch thickness makes a huge difference for even cooking, and don’t forget to let it rest 5 minutes after pulling it out too! So glad your crew loved it, MomOf3Boys!

1 week ago

Made this for my neighborhood potluck last weekend and people kept asking who brought the chicken! Only reason I knocked a star is I added way too much salt on my first batch, but that was 100% my bad, not the recipe. Super easy even for a guy who usually burns toast.

5 days ago

LOL same! I over-salted mine too, next time I’m sticking to the exact 1/2 tsp the recipe calls for instead of eyeballing. The chicken was still juicy enough that no one complained though.

3 days ago

So happy it was a potluck hit! Salt levels can be so personal, definitely adjust to your taste next time, and thanks for the honest feedback!

3 days ago

SO good! I eat chicken breast literally 5 days a week for my macro goals and I’ve been baking it wrong this whole time? 18 minutes, no fuss, comes out juicy every single time. No more sad rubbery chicken for my work lunches, thank you!!

2 days ago

Fr, I used to do 30 minutes at 400 and it was like chewing a tire. Tried this last night and couldn’t believe how much flavor it had even with just basic seasonings.

2 days ago

Thrilled this works for your meal prep routine! The high heat quick cook is the secret to locking in that moisture instead of drying it out over longer cook times.

2 weeks ago

Made this for our Sunday family dinner last night and even my picky 7-year-old granddaughter asked for more! I used a little paprika and garlic powder like the recipe suggested and it had the perfect amount of flavor without being too spicy for the kids. Will be making this on repeat.

1 week ago

I added a sprinkle of parmesan the last 2 minutes of cook time and it was chef’s kiss! Grandkids went crazy for it too.

1 week ago

Love that parmesan hack, GrandmaLovesCooking! So happy this was a hit with your family dinner crew, SundayDinnerGram – nothing beats a meal the whole table enjoys!

5 minutes ago

Wait this is so easy?? I only have a tiny dorm oven and I was convinced I couldn’t make good chicken without a fancy air fryer. Threw this together between study sessions and it came out perfect, no dry bits at all. 10/10 for broke college students.

just now

Love that this works in dorm ovens too! No fancy equipment needed, just a sheet pan and an oven – perfect for quick study break meals. Thanks for giving it a try!

30 minutes ago

Made this for date night with my boyfriend last night and he thought I spent hours on dinner! Only tiny issue is my oven runs hot so it was done a couple minutes early, but I just checked the temp with a meat thermometer like the note said and it was fine. Will definitely make again.

5 minutes ago

Great call using a meat thermometer! Oven temps can vary so much, so checking for that 165F internal temp is always the safest bet. So happy date night was a success!

2 hours ago

Cooked this in my tiny RV oven on our cross-country road trip and it turned out amazing! I was worried the wonky oven temp would mess it up but the 18 minute cook time was spot on even in my little rig. Served it with roasted broccoli and it was the perfect easy camp dinner.

30 minutes ago

Adding this to my RV meal list now! I’ve been relying on fast food way too much on our cross-country trip, this looks way easier than the complicated foil packet meals I’ve been trying.

yesterday

18 minutes cook time? Sign me UP. I get home at 6 every night and have zero time for complicated recipes. This was on the table by 6:30 with a side of salad and mac and cheese for the kids, zero complaints from anyone. Absolute weeknight staple now.

yesterday

That’s exactly what we love to hear! Quick, minimal cleanup, and crowd-pleasing – perfect for those busy weeknights when you don’t have extra time to spend in the kitchen.

5 days ago

Taste was great, but my chicken stuck really bad to the baking sheet? I sprayed it with cooking spray but I still lost half the crust when I tried to flip it. Did I do something wrong?

3 days ago

So sorry about the sticking! Lining your sheet with parchment paper or using a wire rack on top of the sheet makes a huge difference for easy flipping, and also helps air circulate for more even browning. Give that a try next time!

1 week ago

Sliced this up for chicken sliders at our football tailgate last weekend and it was a home run! So juicy even after sitting in the cooler for a couple hours, everyone was raving. I tossed it in a little buffalo sauce after slicing and it was chef’s kiss.

5 days ago

Buffalo chicken sliders with this recipe? That’s genius, I’m stealing that for our next tailgate. Thanks for the idea!

just now

I added a little cayenne and cumin to the seasoning blend and this chicken was so flavorful I didn’t even need a sauce! Juicy, tender, cooked perfectly in exactly 18 minutes like the recipe said. Will be adding this to my weekly rotation.

2 days ago

First time ever cooking chicken breast by myself and I didn’t burn it!! It was a tiny bit less juicy than the photos looked but I think I forgot to let it rest, oops. Still way better than the frozen pre-cooked stuff I usually buy, so I’m counting that as a win.

3 days ago

Made a big batch of this Sunday for the week and it’s holding up so good in the fridge! Usually reheated chicken gets all rubbery but if you zap it for 45 seconds with a damp paper towel over it, it’s almost as juicy as when it came out of the oven. 10/10 for meal prep.

5 days ago

Was looking for an easy chicken recipe to make for my girlfriend when she came over for dinner and this did not disappoint. She said it was the best chicken she’s ever had, so now I look like a cooking genius. Win win tbh.



