
best meat for pot roast

title 1
best meat for pot roast
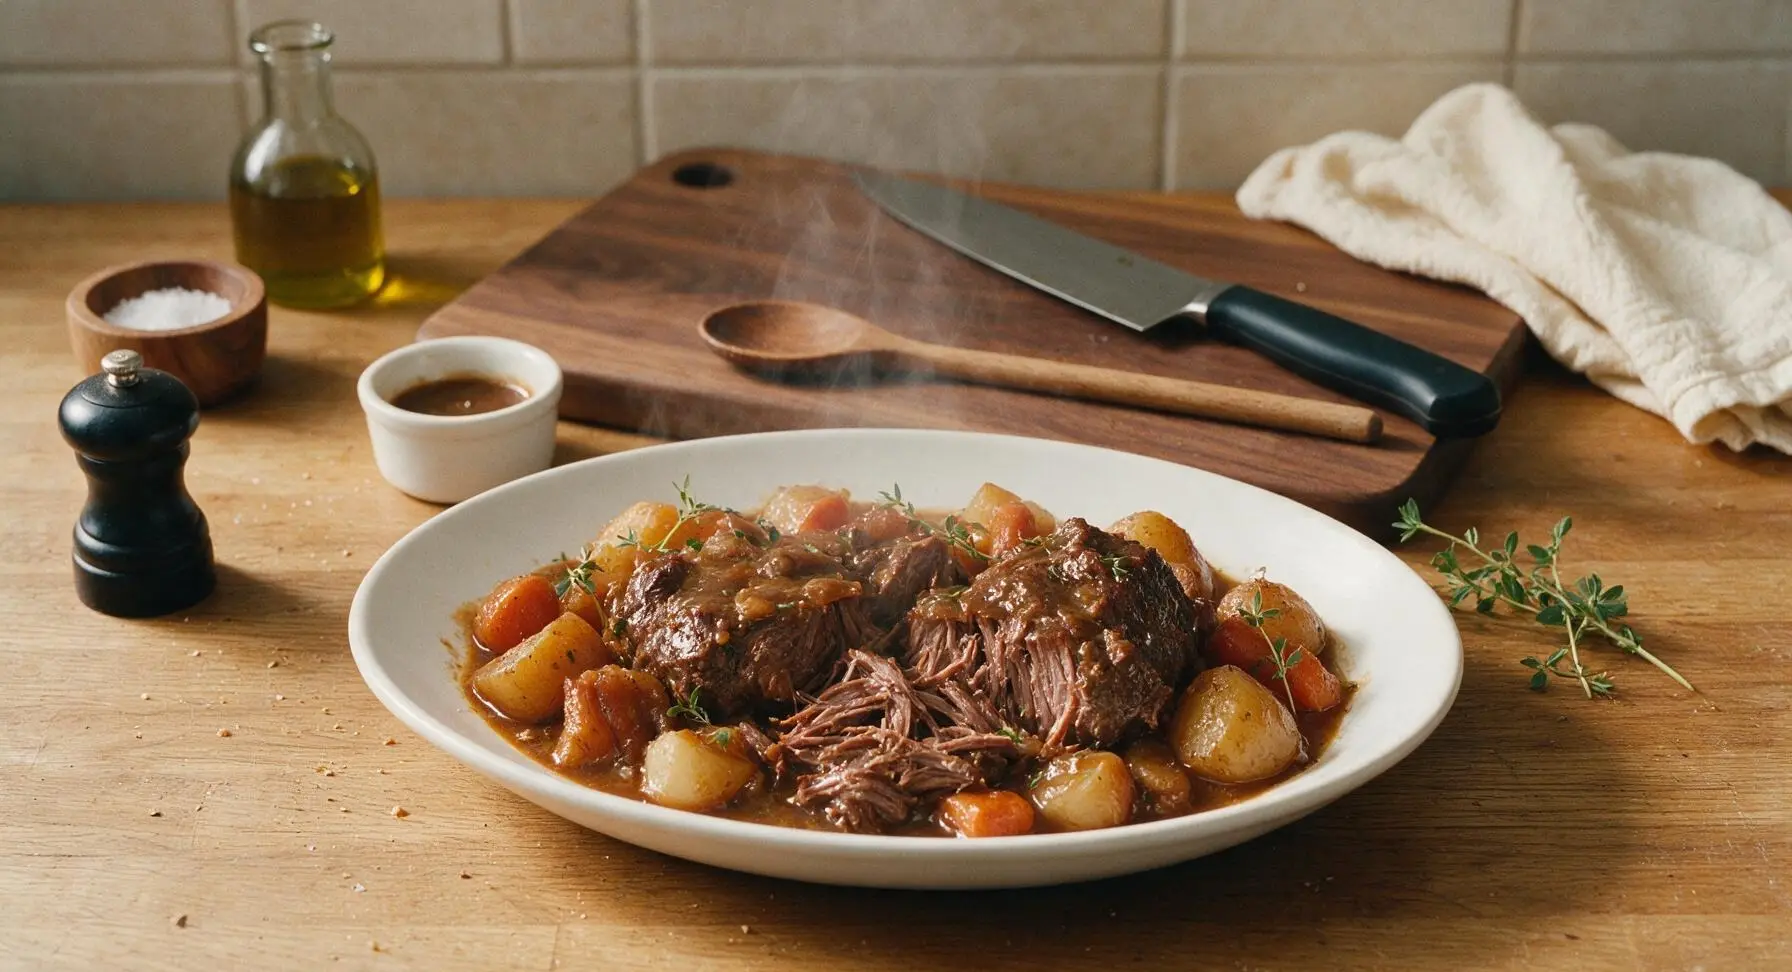
⏱️ cook time 3 hours 30 minutes
🍽️ servings 6
⚡ Difficulty easy

intro

Slow-braised to melt-in-your-mouth tenderness, this classic pot roast uses marbled beef chuck, root vegetables, and rich gravy for the ultimate cozy, nostalgic winter family meal.

Ingredients
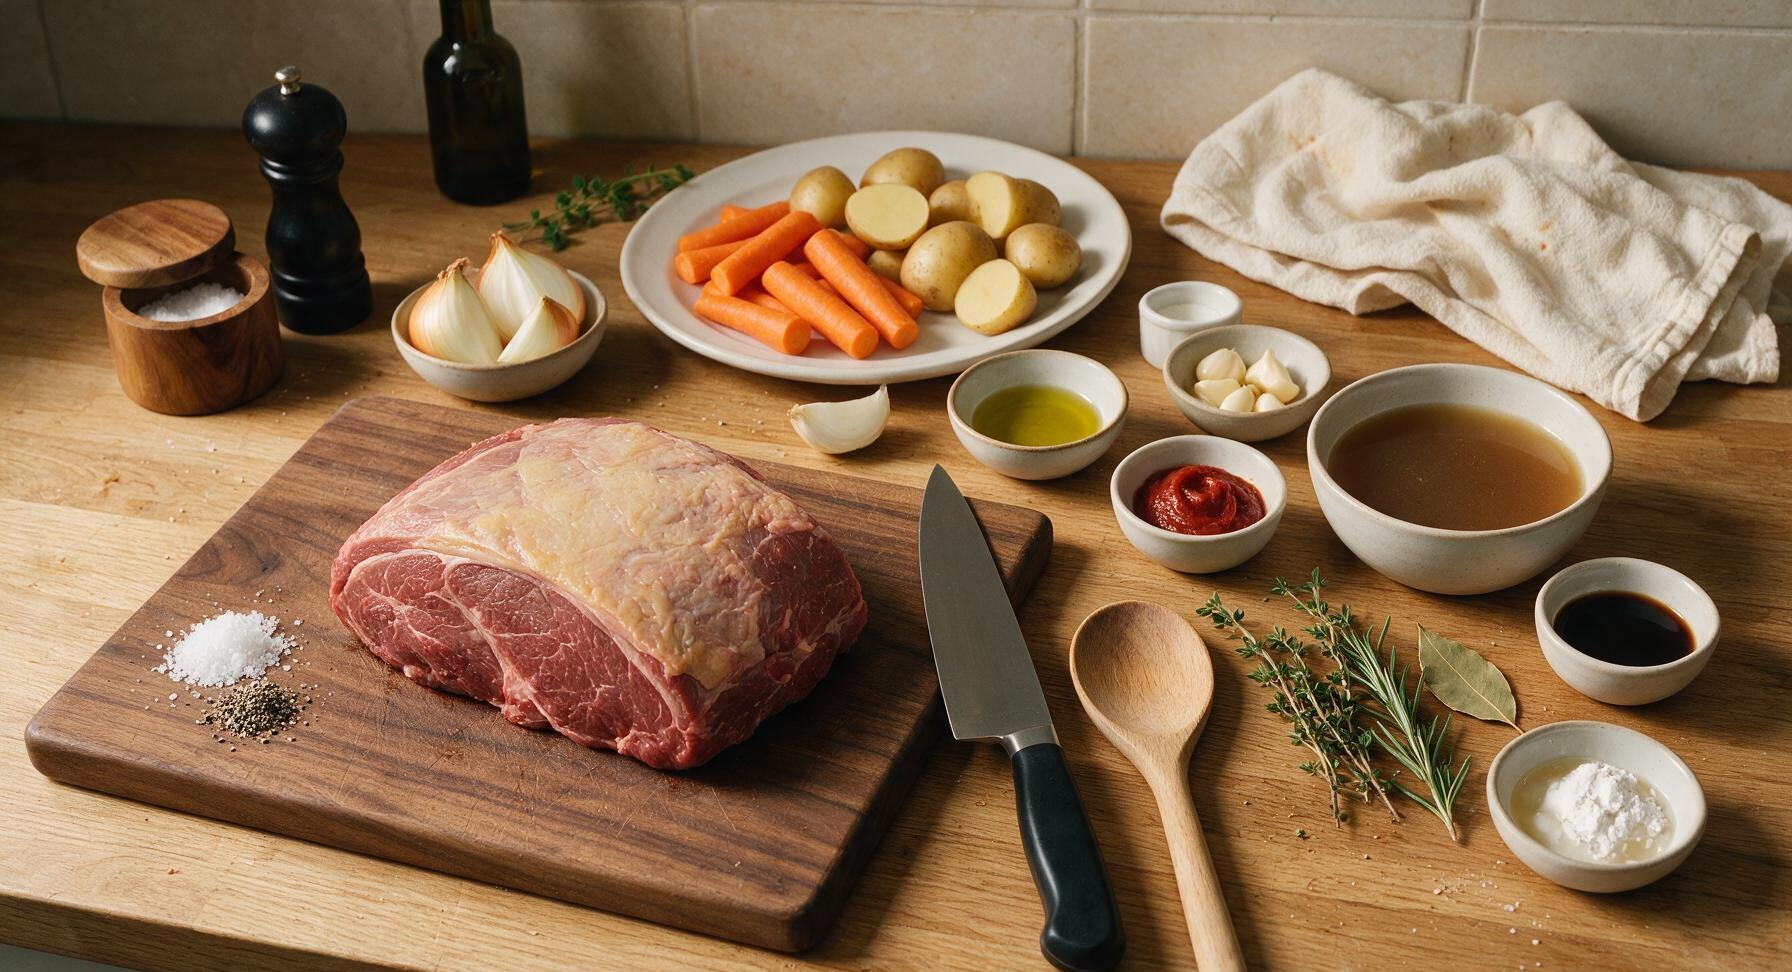
Boneless beef chuck roast 1.8kg (4lb), 2.5-5cm thick fat cap
Kosher salt 2 tbsp
Freshly cracked black pepper 1 tsp
Extra-virgin olive oil 2 tbsp
Yellow onion 2 large, cut into 5cm wedges
Carrots 4 medium, cut into 5cm chunks
Yukon Gold potatoes 6 medium, halved
Garlic cloves 6, crushed
Tomato paste 2 tbsp
Low-sodium beef broth 500ml (2 cups)
Fresh thyme 4 sprigs
Fresh rosemary 1 sprig
Bay leaf 1 dried
Worcestershire sauce 1 tbsp
Cornstarch (optional, for gravy) 1 tbsp, mixed with 2 tbsp cold water

Steps

1

Prep and Season Roast

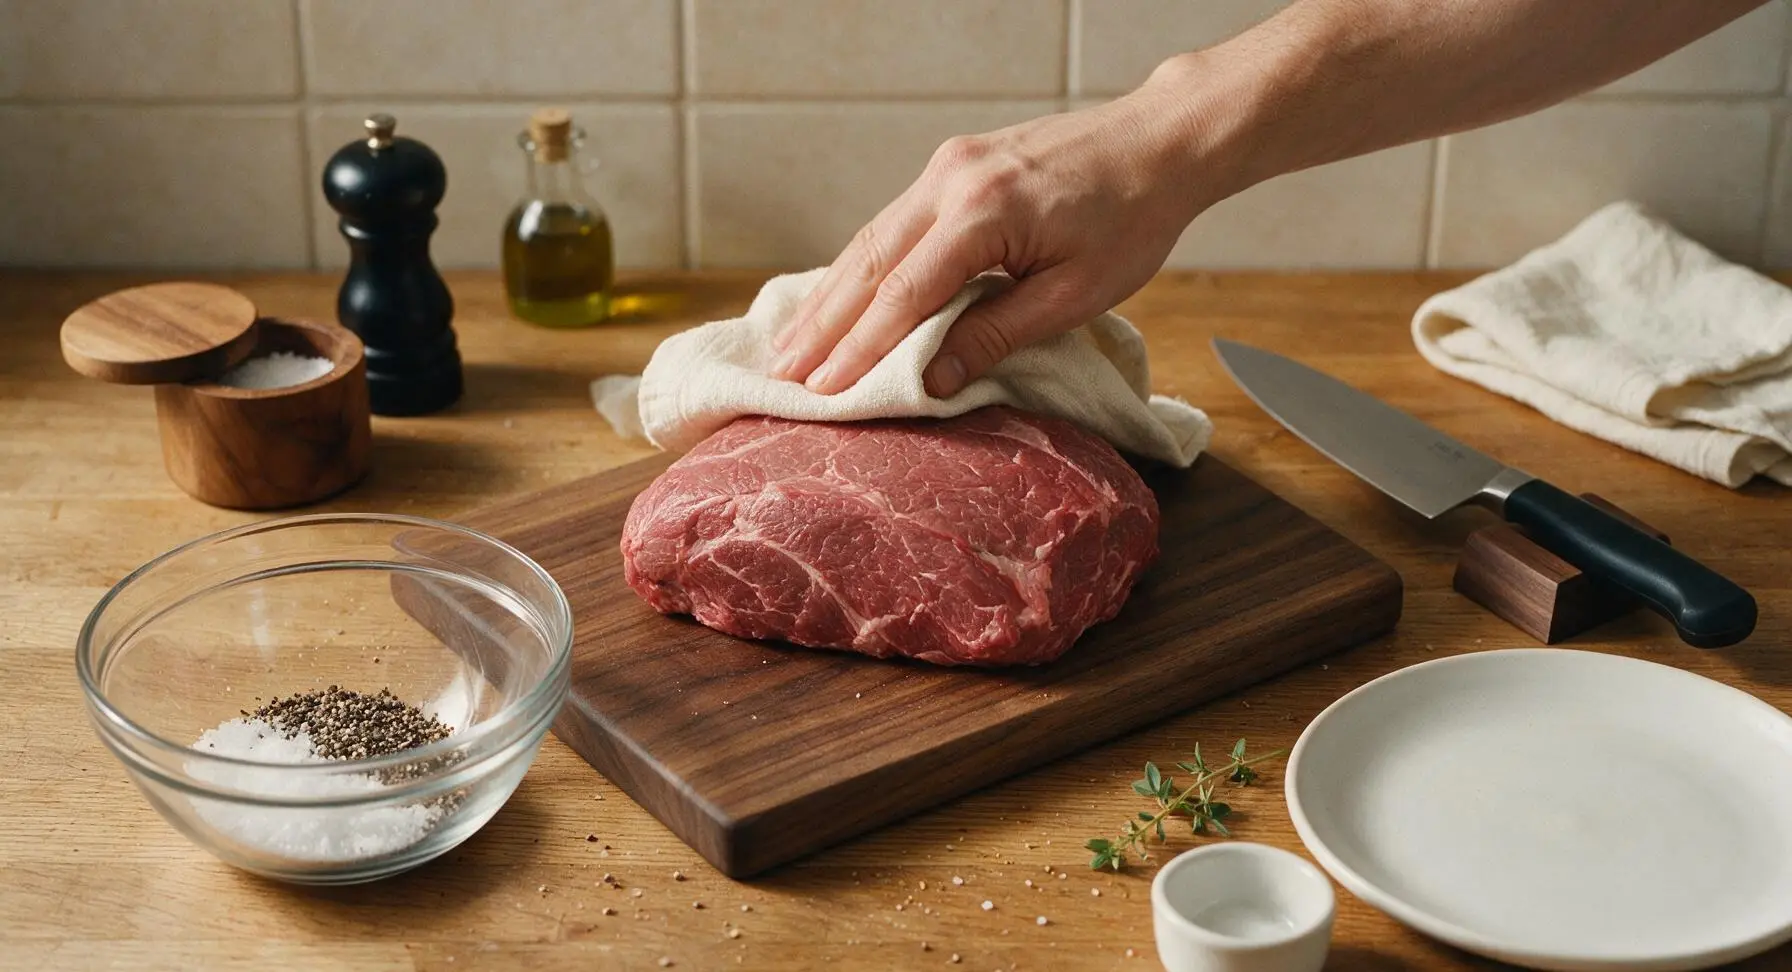
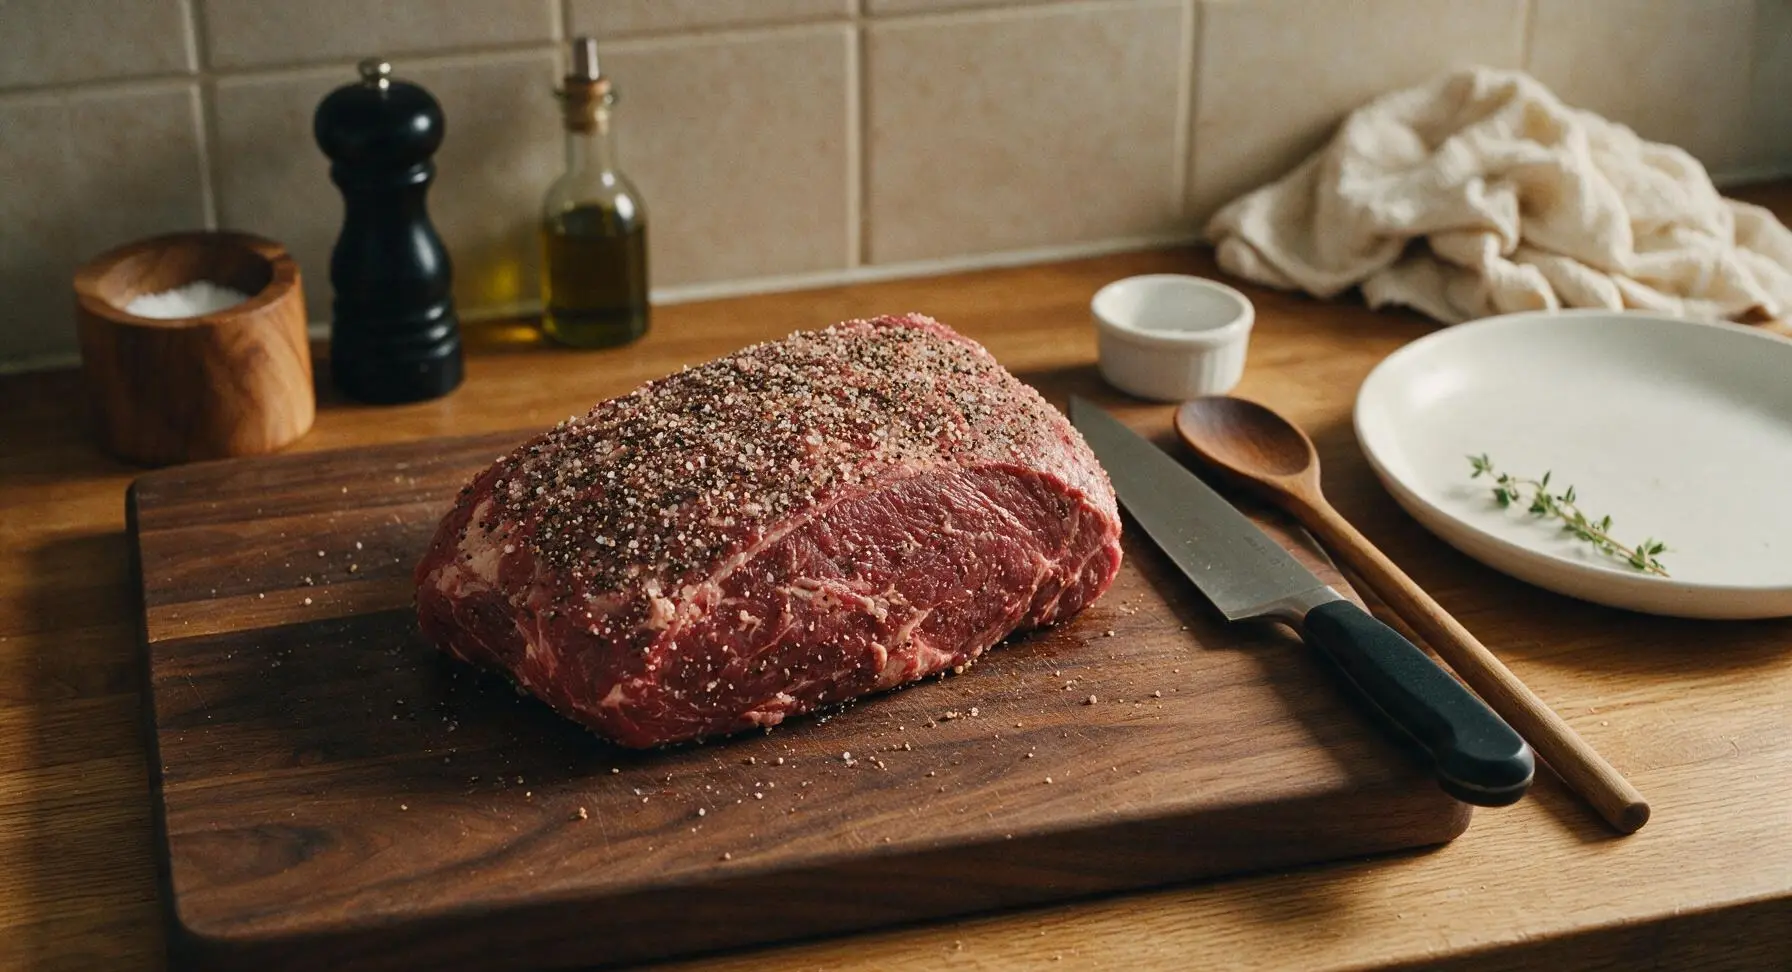
Pat the boneless beef chuck roast completely dry on all sides using the corner of the linen tea towel; a fully dry surface is critical for building a crisp, deep sear. Season every surface generously with 1.5 tbsp kosher salt and all the cracked black pepper, pressing the seasoning firmly into the meat to adhere. Let the roast rest at room temperature for 15 minutes while you prep vegetables to ensure even cooking.
Step 1
step1:Prep and Season Roast
Step 1
step1:Prep and Season Roast
2

Sear Roast on All Sides

Place the enameled cast iron Dutch oven over medium-high heat, add the measured olive oil. Once the oil is shimmering (not smoking), use the stainless steel tongs to lower the seasoned roast into the pot. Sear for 3-4 minutes per side, including the narrow edges, until a deep golden-brown crust forms on every surface. Avoid moving the roast while searing each side to build a thick, flavor-packed crust. Once fully seared, lift the roast with tongs and set it temporarily back on the maple cutting board.
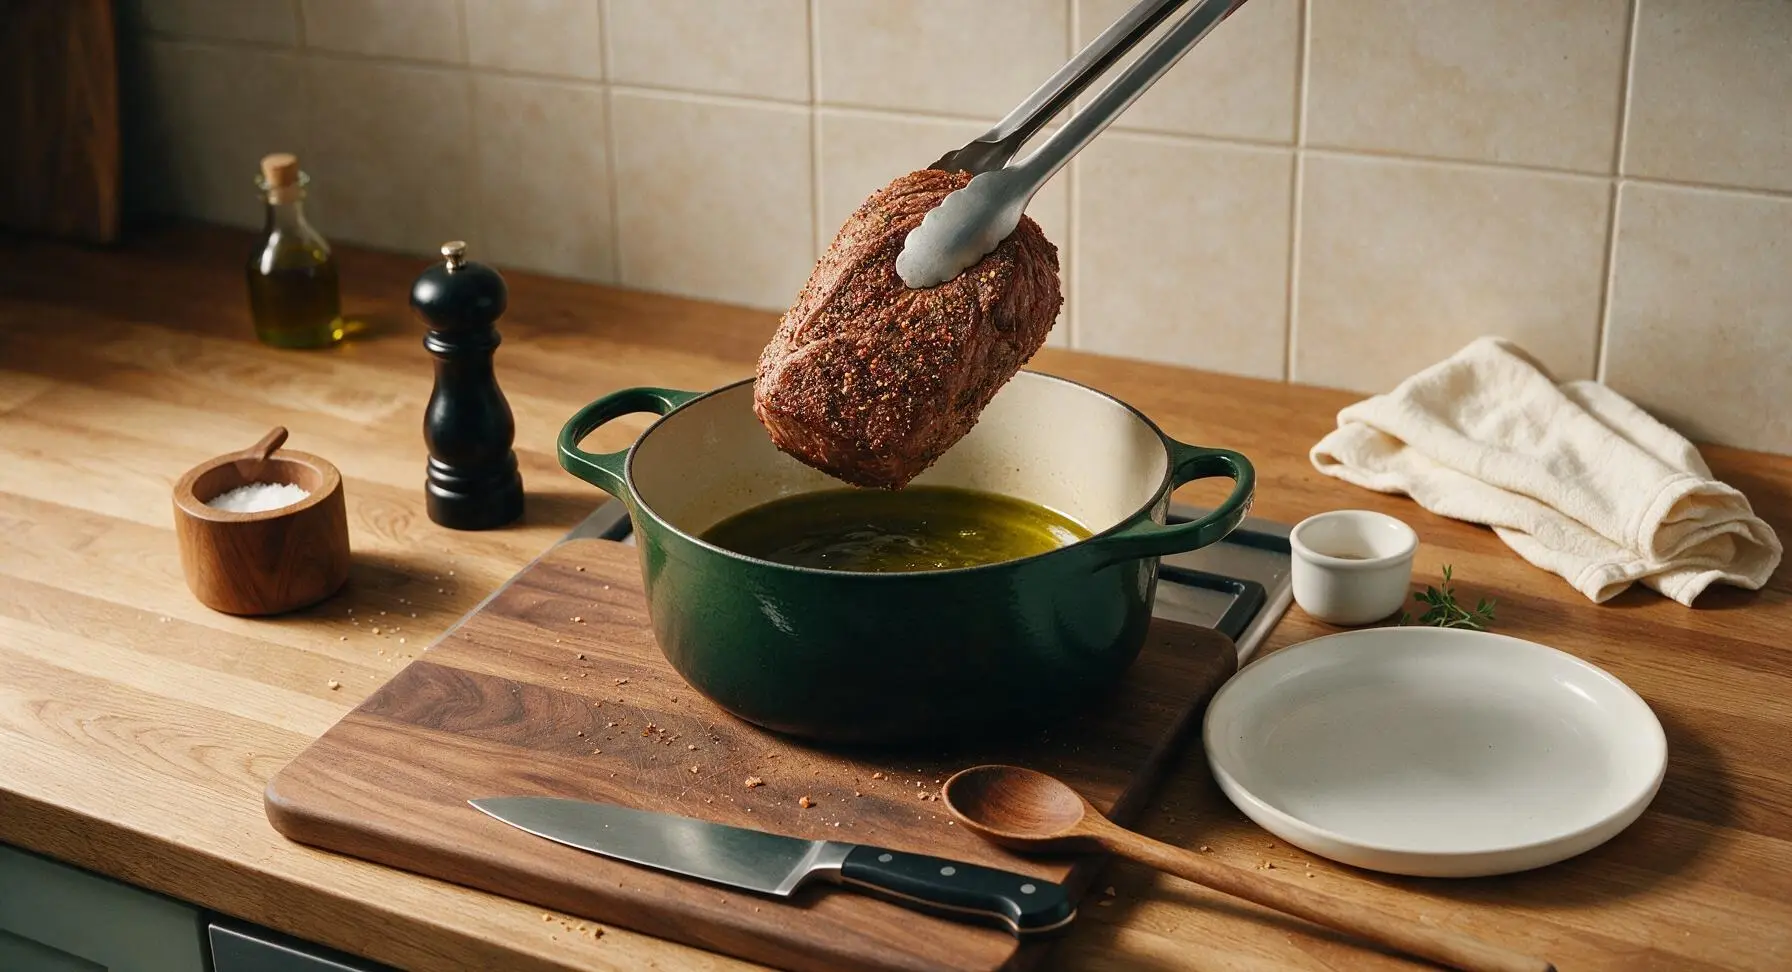
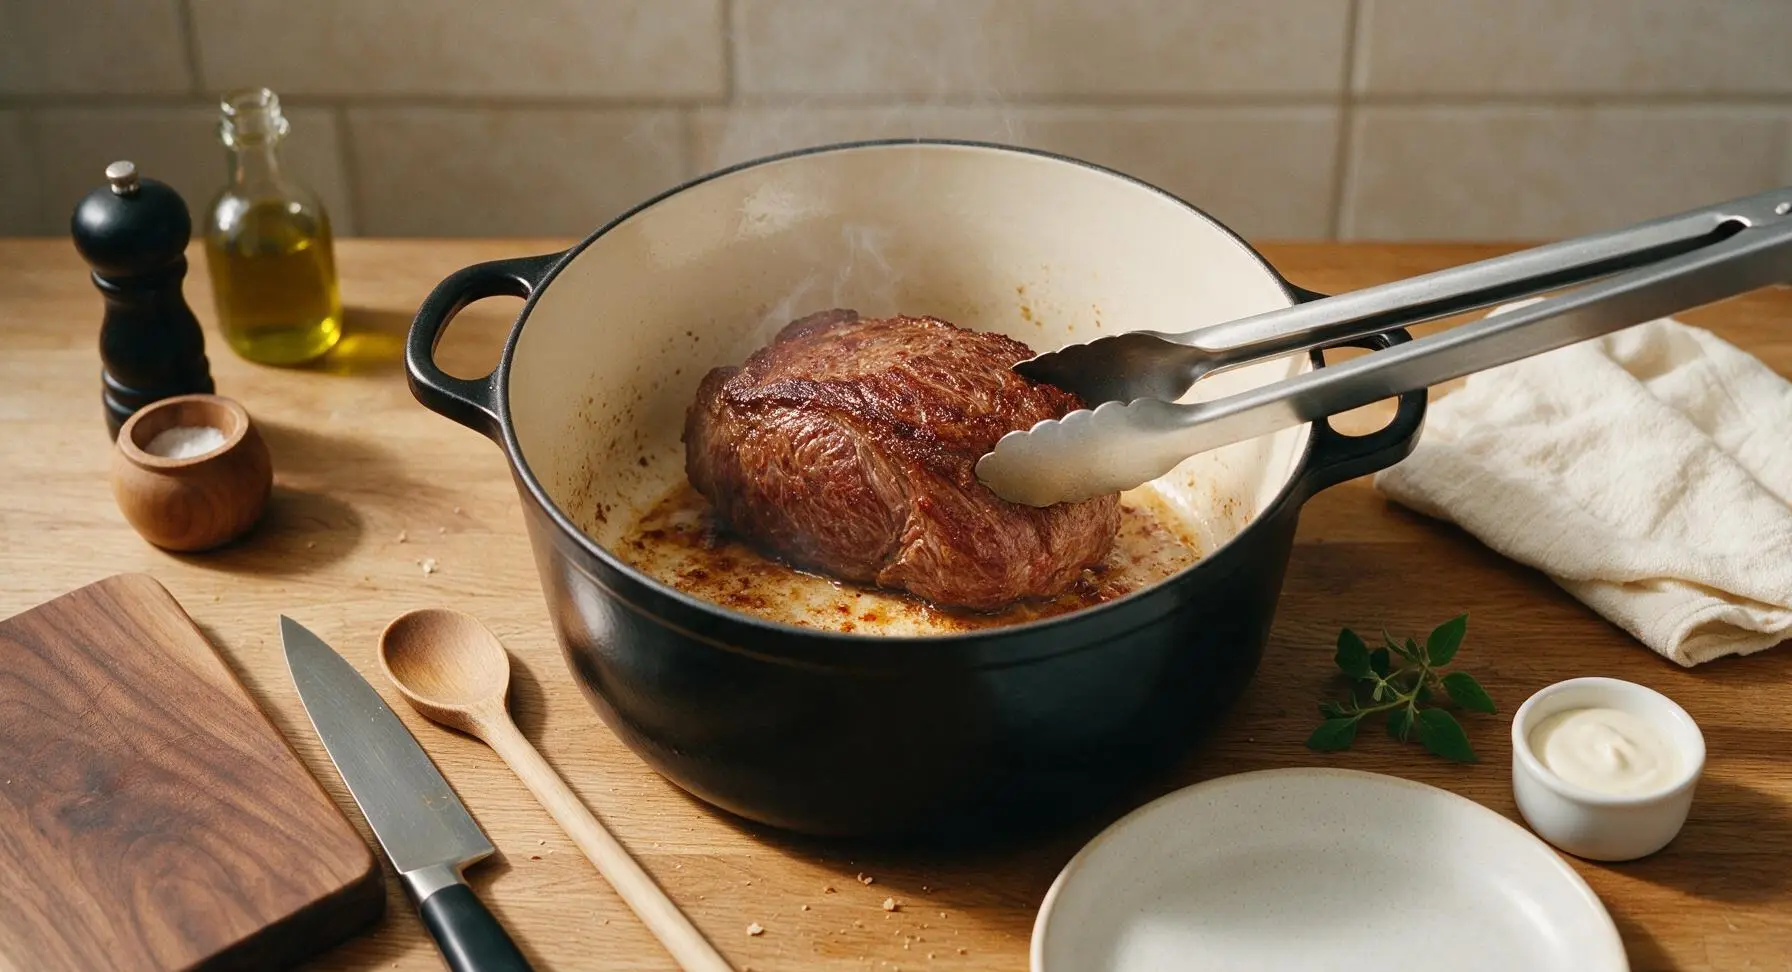
Step 2
step2:Sear Roast on All Sides
Step 2
step2:Sear Roast on All Sides
3

Sauté Aromatic Vegetables

Reduce heat to medium, leaving the rendered beef fat and fond in the Dutch oven. Add the onion wedges and crushed garlic, sauté for 3 minutes until soft and slightly caramelized at the edges. Stir in the tomato paste, cooking for 1 minute until it darkens to a deep rust color and smells fragrant, scraping up the browned fond from the pot bottom with the slotted stainless steel turner.
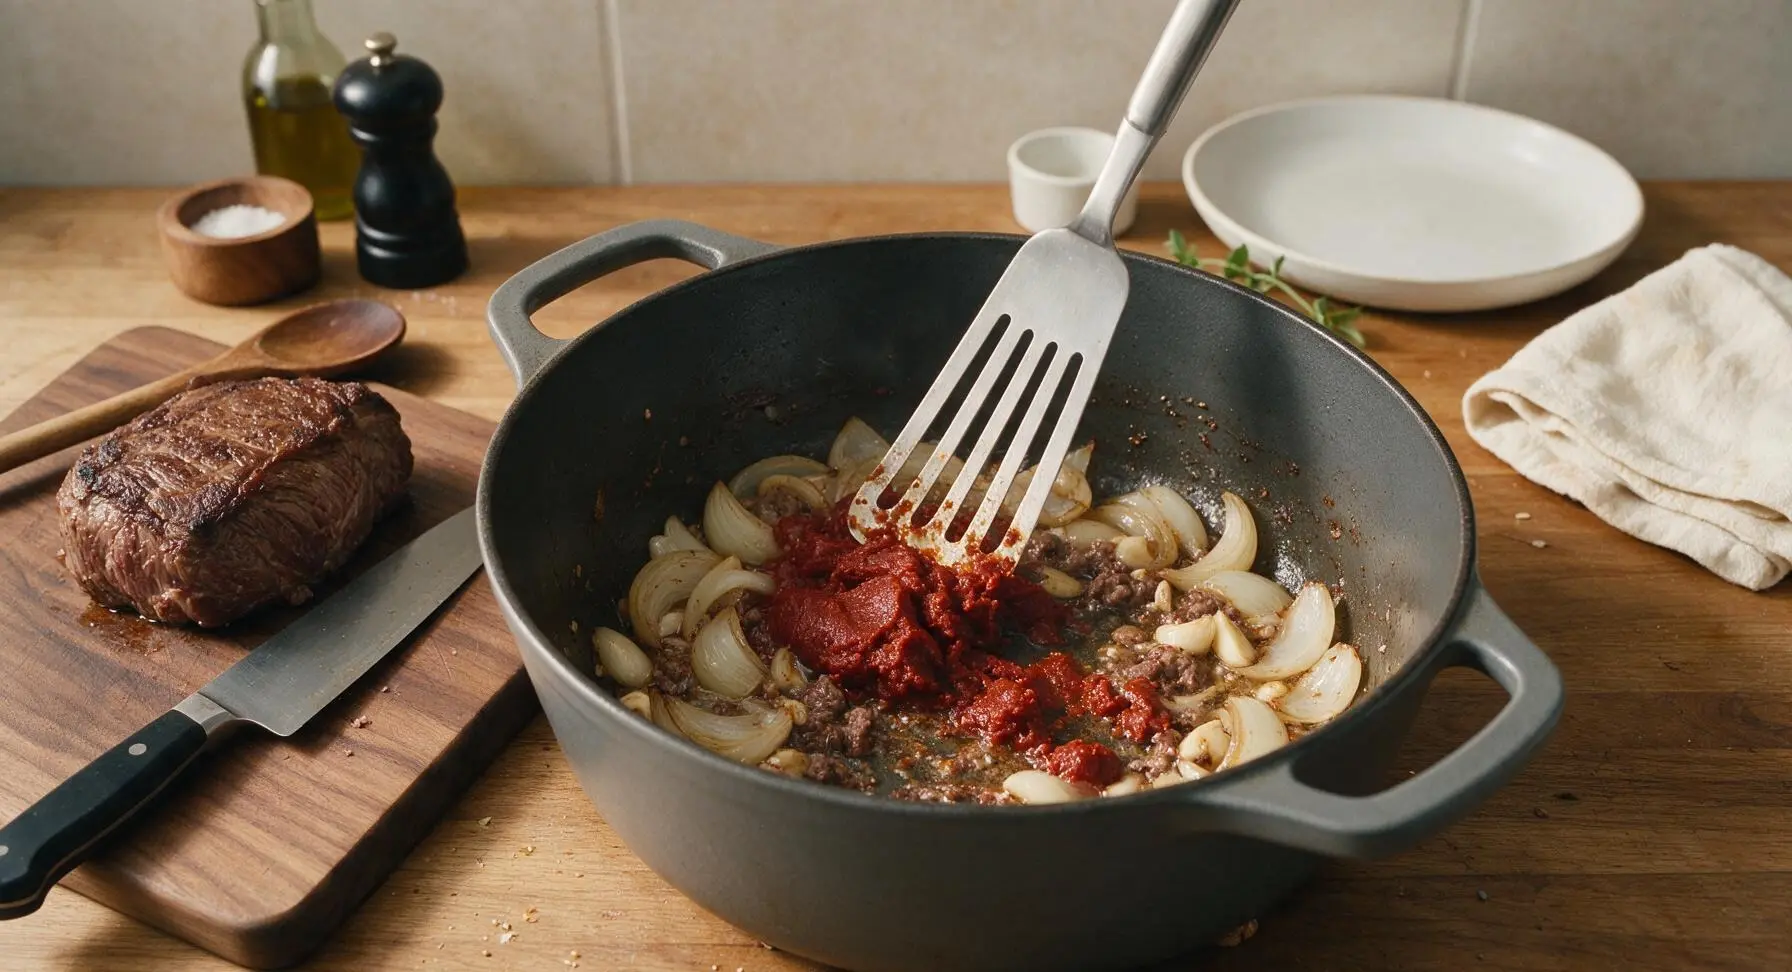
Step 3
step3:Sauté Aromatic Vegetables
4

Braise Roast Low and Slow

Return the seared roast to the Dutch oven, nestling it on top of the sautéed aromatic mixture. Pour in the beef broth and Worcestershire sauce, then add the thyme sprigs, rosemary sprig, and bay leaf. Bring the liquid to a gentle simmer, then cover the Dutch oven tightly with its lid. Transfer to a preheated 160C (325F) oven, and cook for 2 hours 45 minutes, until the roast is tender when prodded with a fork but not yet falling apart.
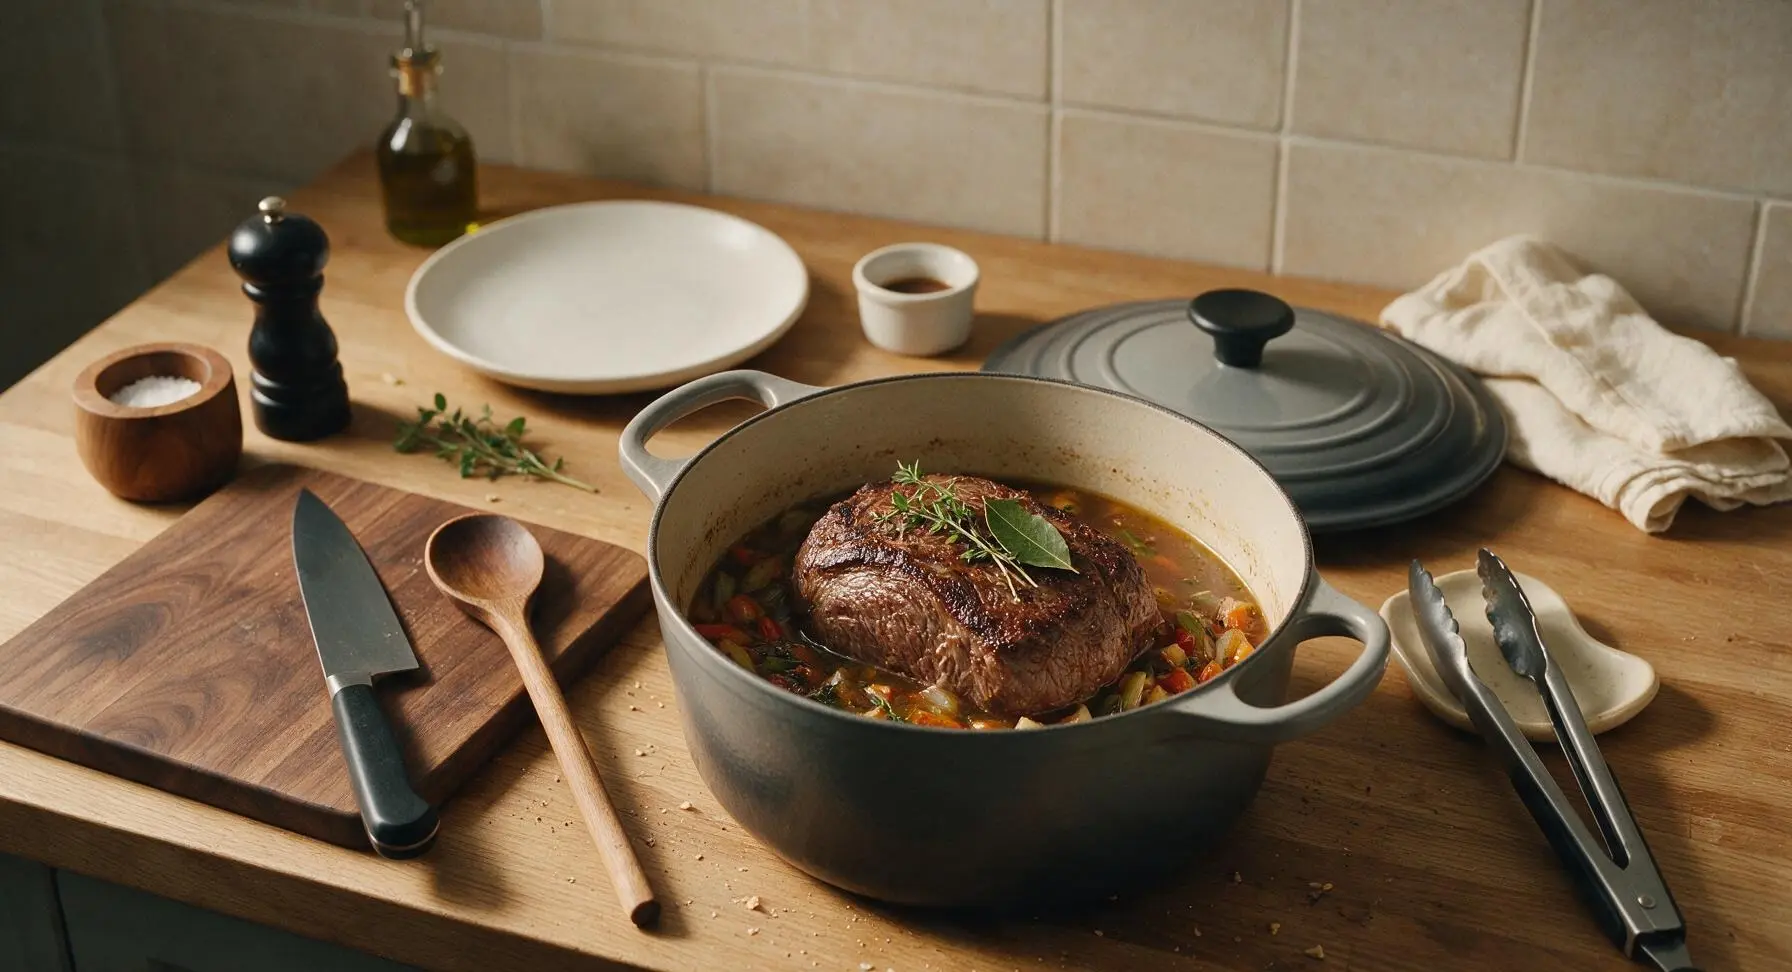
Step 4
step4:Braise Roast Low and Slow
5

Add Root Vegetables

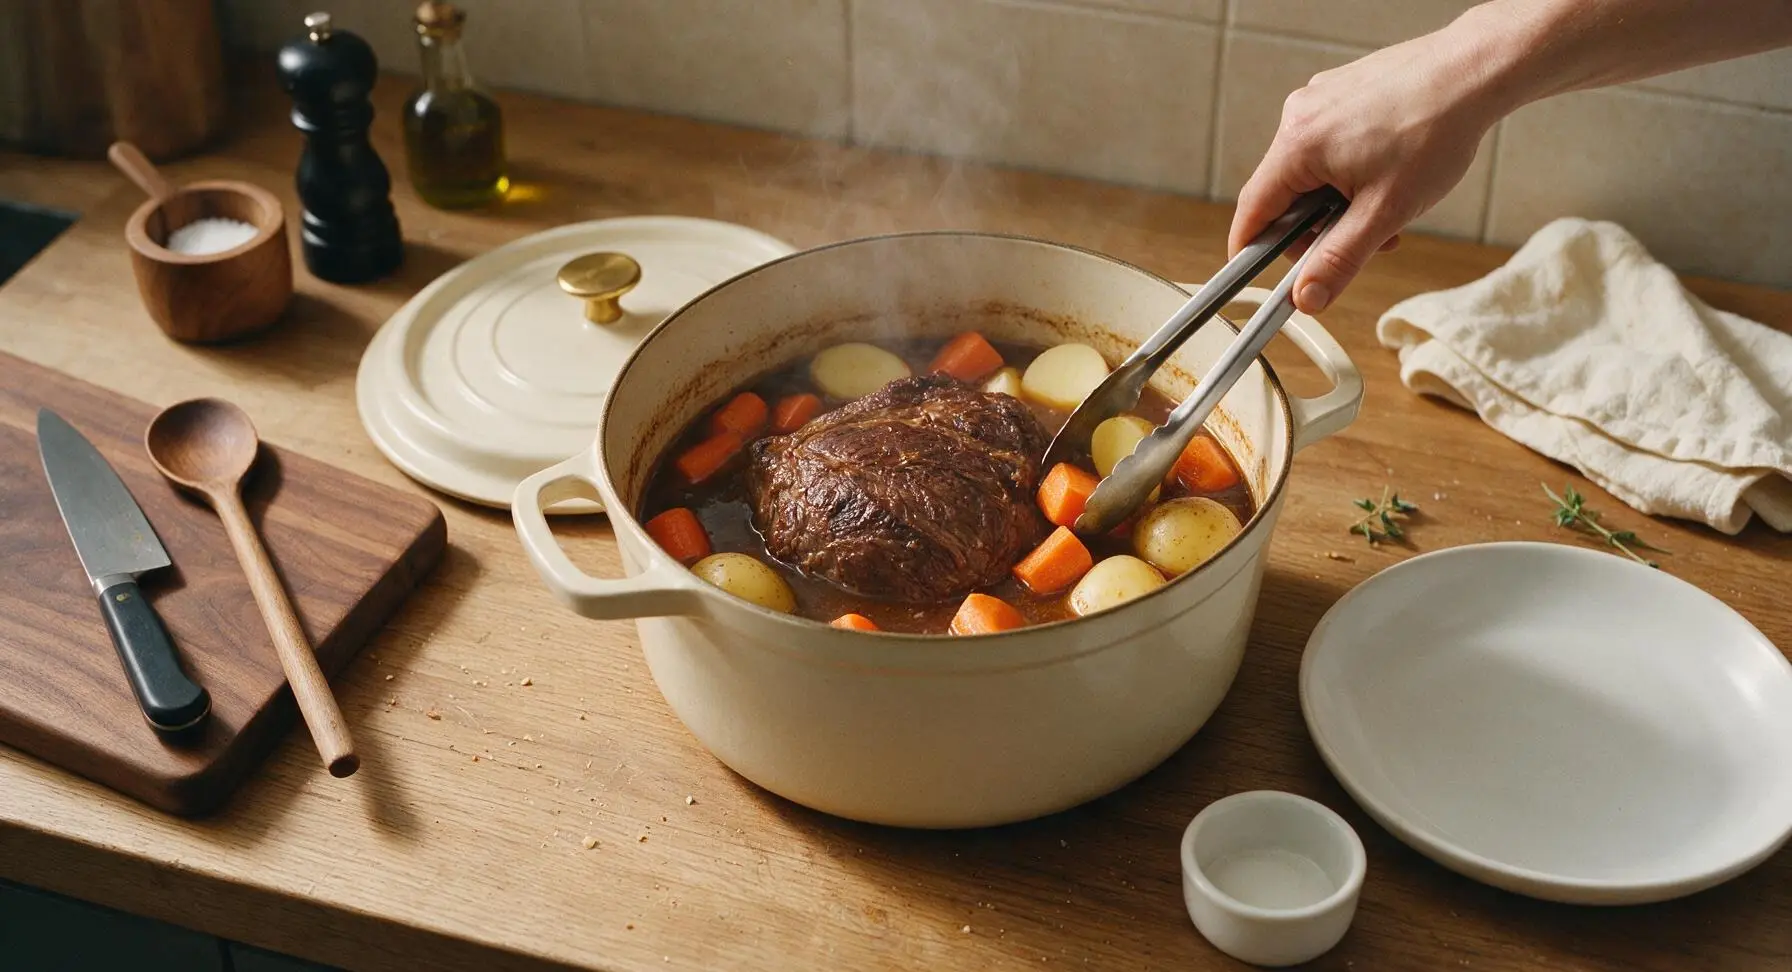
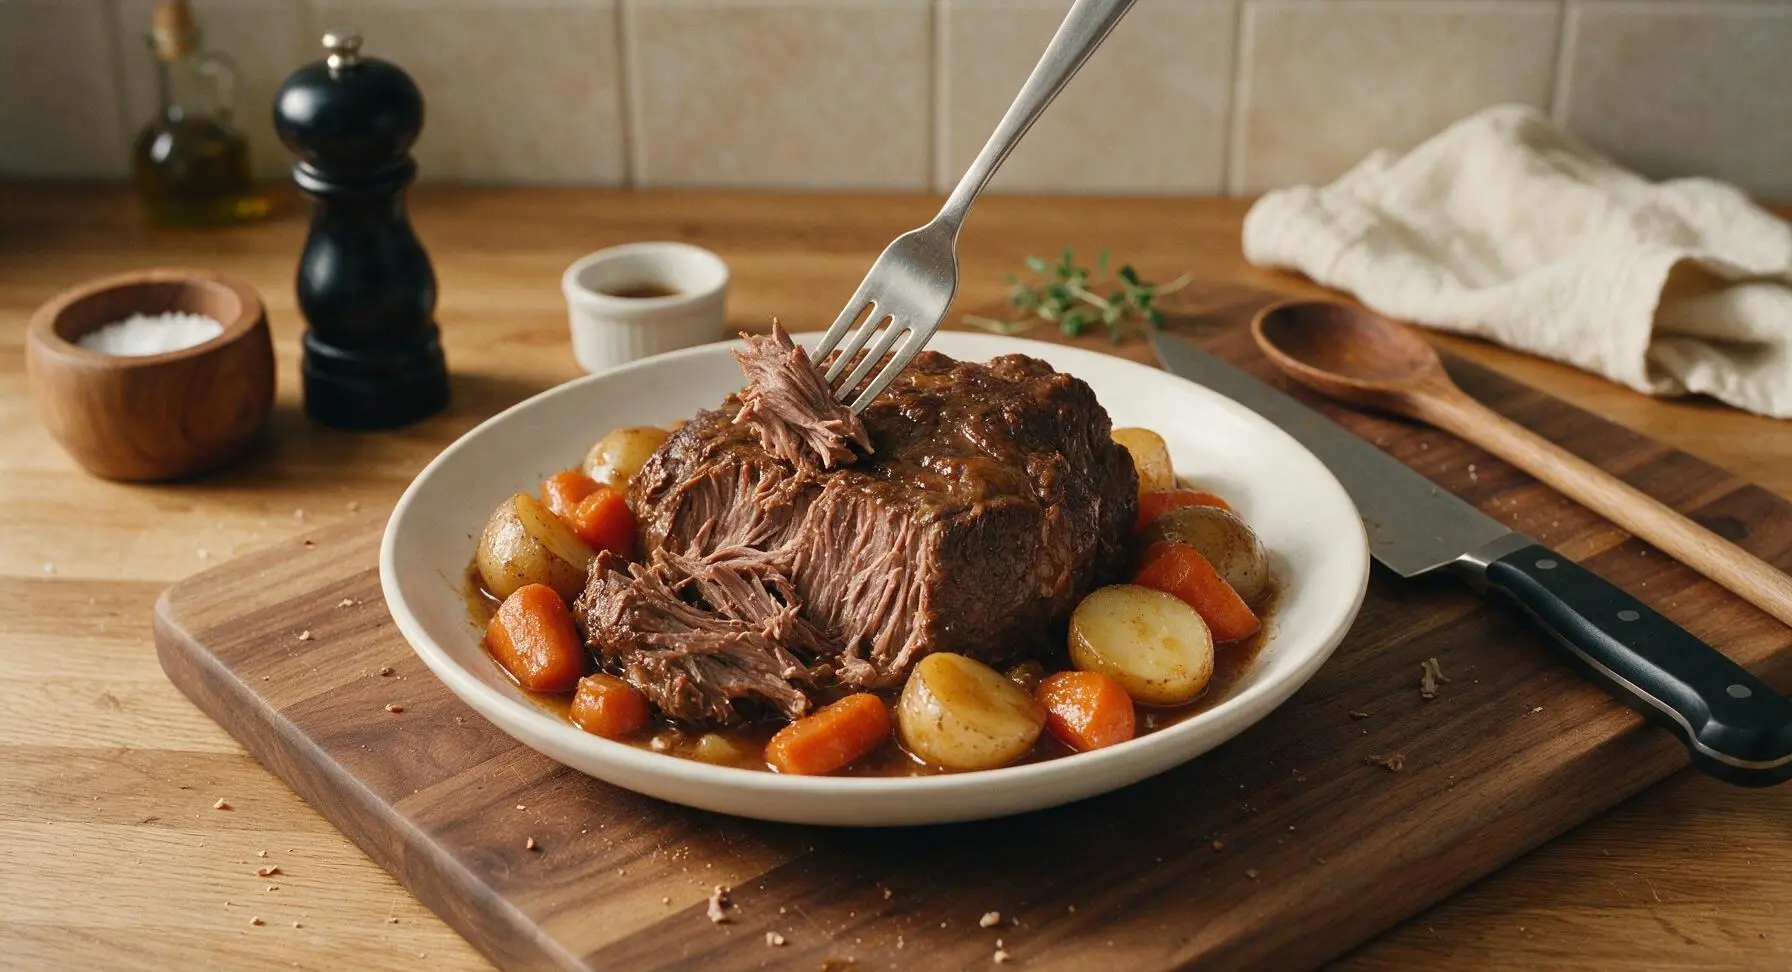
After 2 hours 45 minutes of braising, carefully remove the Dutch oven from the oven (use oven mitts, as handles will be very hot). Tuck the carrot chunks and potato halves into the braising liquid around the roast, turning them with tongs to coat fully in liquid. Season the vegetables with the remaining 0.5 tbsp kosher salt. Replace the lid, return to the oven, and cook for an additional 30 minutes until vegetables are fork-tender and the roast pulls apart easily with no resistance.
Step 5
step5:Add Root Vegetables
Step 5
step5:Add Root Vegetables
6

Rest Roast, Thicken Gravy

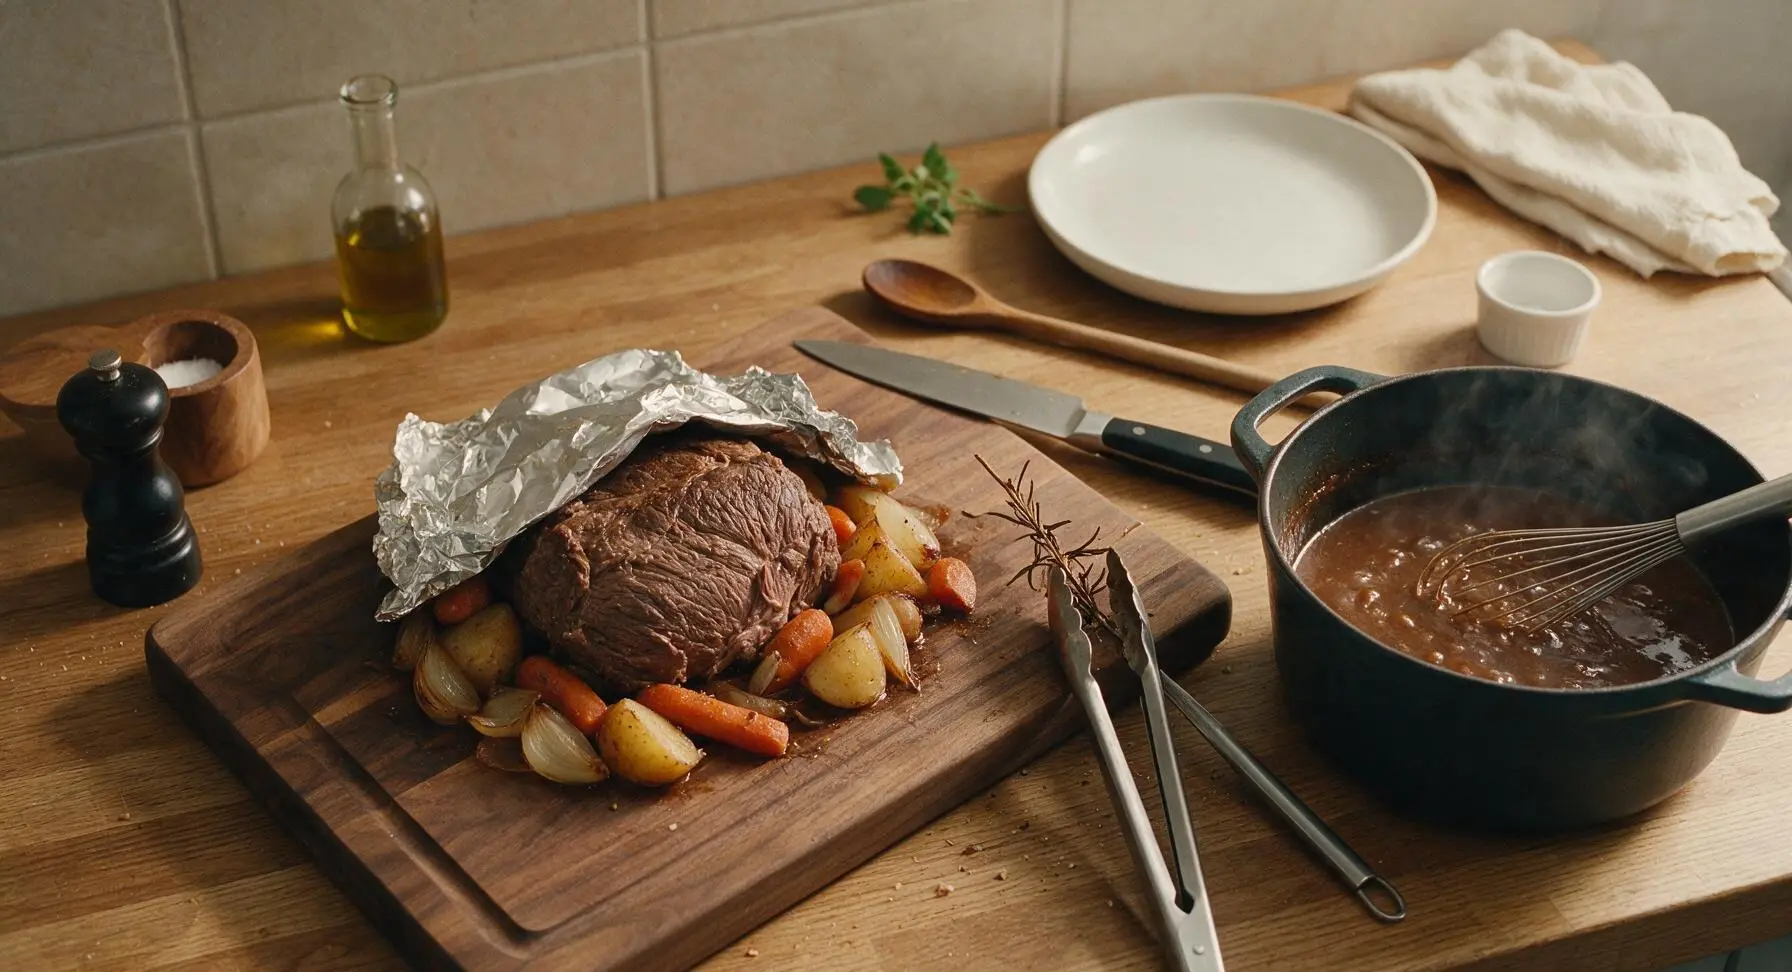
Use tongs to transfer the cooked roast and vegetables to the maple cutting board, tent loosely with a small sheet of aluminum foil to rest for 15 minutes. While the roast rests, place the Dutch oven on the stovetop over medium heat, bringing the braising liquid to a gentle simmer. If using, stir in the cornstarch slurry, whisking constantly with the stainless steel whisk for 2-3 minutes until the gravy thickens to a smooth consistency that coats the back of a spoon. Fish out and discard the spent herb stems and bay leaf.
Step 6
step6:Rest Roast, Thicken Gravy
7

Slice and Plate Roast

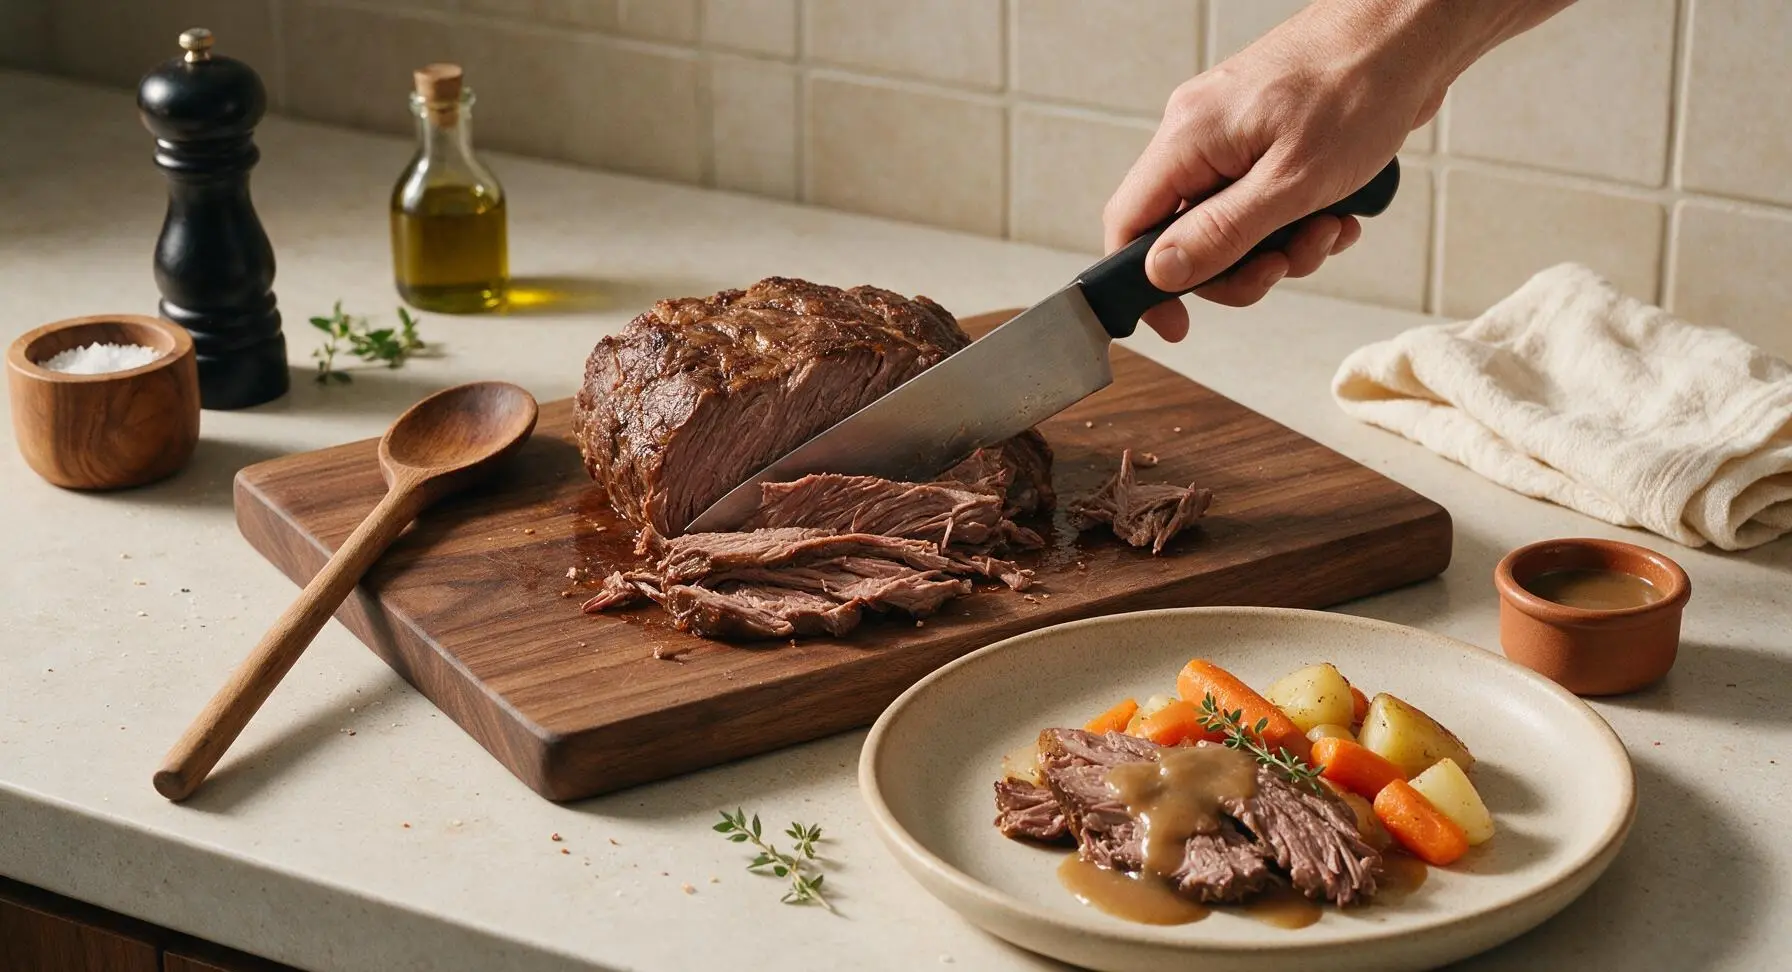
After resting, use the chef knife to slice the roast against the grain into 1.5cm thick slices, or pull into large chunks if it is exceptionally tender. Arrange slices on the matte oat stoneware dinner plate, spoon carrot and potato pieces alongside the meat, then drizzle thickened gravy over the top. Garnish with a small fresh sprig of thyme, and serve extra gravy in the unglazed terracotta ramekin on the side.
Step 7
step7:Slice and Plate Roast

Tips

1.Always select boneless beef chuck roast (with a 2.5-5cm fat cap) as your pot roast cut: the dense intramuscular marbling and connective tissue breaks down over low, slow heat to create melt-in-your-mouth tender meat and rich, flavorful cooking liquid, while leaner cuts like eye of round or rump will turn tough and dry even with extended braising.
2.Pat the roast completely dry with a linen or paper towel before searing: excess surface moisture causes steaming instead of Maillard browning, which creates the deep, savory crust and browned fond at the bottom of the pot that forms the flavor base of your gravy. Skipping this step leads to pale, less flavorful meat and thin, weak gravy.
3.Let the cooked roast rest for 15 minutes before slicing against the grain: this pause allows muscle fibers to reabsorb their juices, so meat stays moist instead of leaking all its flavorful liquid onto the cutting board when sliced. Cutting against the grain shortens long muscle fibers for the most tender, easy-to-chew bite.


✨ You May Also Like

Main Course
🍜 United Kingdom

A showstopping classic of tender seared beef, savory mushroom duxelles, and crisp prosciutto wrapped in flaky golden puff pastry, baked to juicy perfection.

⏱️ 2 hours 1Main Course ★ 4.7
Main Course
🍜 India

Tender charred marinated chicken simmered in a rich, spiced creamy tomato sauce, this iconic Anglo-Indian curry pairs perfectly with basmati rice or warm naan.

⏱️ 50 minuteMain Course ★ 4.6
Main Course
🍜 Thailand

Classic tangy, sweet, and savory Thai stir-fried rice noodles with shrimp, tofu, and crunchy garnishes, balancing all five core Thai flavor profiles.

⏱️ 30 minuteMain Course ★ 4.5
Main Course
🍜 United Kingdom

Crispy golden beer-battered cod and fluffy double-fried chips, served with tangy tartar sauce and malt vinegar: the timeless, beloved British pub comfort classic.

⏱️ 45 minuteMain Course ★ 4.7
Main Course
🍜 Mexico

Smoky, chile-marinated pork tacos with caramelized pineapple, fresh cilantro, and lime: a beloved classic Mexican street food perfect for casual summer gatherings.

⏱️ 1 hour 45Main Course ★ 4.8
Main Course
🍜 United States

Crunchy Fritos corn chips layered with savory beef chili and melted cheddar, topped with cool, zesty fixings for a beloved, cozy Tex-Mex comfort food.

⏱️ 35 minuteMain Course ★ 4.8

best meat for pot roast:Frequently Asked Questions

1.Why is beef chuck considered the best cut for pot roast, instead of leaner options like round or sirloin? ▾
Beef chuck is ideal because it has even, rich marbling and tough connective tissue that breaks down into silky, flavorful gelatin during slow braising. Leaner cuts like sirloin or eye of round turn dry, tough, and stringy even with long cooking, since they lack that fat and collagen to create that signature melt-in-your-mouth, fall-apart texture.
2.How do I get my pot roast to actually fall apart, instead of turning out tough and chewy? ▾
Start with a well-marbled chuck roast, sear it thoroughly first, then braise it low and slow—325°F in the oven, or the low setting on a slow cooker—for 3 to 4 hours, half-submerged in flavorful liquid. Don’t rush it at high heat, which makes meat seize up and stay chewy. It’s ready when a fork slides in with zero resistance.
3.Do I really need to sear the roast before braising, or can I skip that step to save time? ▾
Don’t skip searing! Searing over medium-high heat creates a deep, caramelized crust on the roast that adds layers of nutty, savory flavor you can’t get from slow cooking alone. It also leaves browned, flavor-packed bits (called fond) in the pan that form the base of your rich, complex gravy.
4.Can I make this pot roast in a slow cooker instead of a Dutch oven? ▾
Absolutely! After searing the roast and sautéing your onions, transfer everything to your slow cooker, add braising liquid and root veggies, and cook on LOW for 7 to 8 hours, or HIGH for 3.5 to 4 hours. Avoid lifting the lid too often while cooking, as that lets heat escape and extends required cook time.
5.Why did my chuck pot roast turn out dry, even though I used the right cut? ▾
Dry chuck roast usually stems from one of three common missteps: you cooked it at too high a temperature, you didn’t add enough braising liquid, or you pulled it out before connective tissue fully broke down. Keep oven temp at 325°F or lower, keep the roast half-submerged, and cook until a fork twists easily in the meat.
6.When should I add root vegetables so they don’t turn into mushy slop? ▾
Wait to add firmer root veggies like carrots, potatoes, parsnips, and turnips until the last 60 to 75 minutes of cook time. If you add them at the start with the roast, they’ll overcook and break down into mushy, flavorless bits by the time the beef reaches perfect fall-apart tenderness. Toss them with a pinch of salt before adding.
7.Can I prep this pot roast the night before to make weeknight dinners easier? ▾
You bet! Season the roast generously with kosher salt and freshly cracked black pepper, wrap it tightly, and store it in the fridge overnight. You can also chop your yellow onion and root veggies ahead and keep them in sealed containers. Wait to sear the roast and start the braise until the day you serve, for the best texture and flavor.
8.How do I make smooth, lump-free gravy from the pot roast drippings? ▾
Once you pull the roast and veggies out of the pot, set the pan over medium heat, skim off excess fat (leave about 2 tablespoons for richness), and whisk in a smooth slurry of 2 tablespoons cornstarch and ¼ cup cold water. Simmer 3 to 5 minutes, whisking constantly, until thickened, then strain if you want extra silkiness.
9.What internal temperature should I aim for to get perfectly tender pot roast? ▾
Unlike tender steaks that are perfect at 135°F medium-rare, pot roast needs to reach an internal temp of 200°F to 205°F to fully break down its tough connective tissue. At that temp, collagen melts into rich gelatin, and the meat will pull apart easily with a fork without being chewy or dry.
10.How long do leftovers keep, and what’s the best way to reheat pot roast without drying it out? ▾
Stored in a sealed airtight container with leftover gravy, pot roast keeps well for 3 to 4 days in the fridge, or up to 3 months in the freezer. Reheat it gently in a covered pot over low stovetop heat, or in a 300°F oven, with a splash of beef broth if gravy has thickened too much.
11.The recipe calls for extra-virgin olive oil—won’t that smoke when I sear the roast? ▾
Extra-virgin olive oil works perfectly here, since we’re searing over medium-high (not blazing high) heat, and fat from the chuck will render as it cooks to slightly raise the smoke point. If you prefer, swap in avocado oil or light olive oil, but avoid butter or toasted sesame oil, which burn too quickly for high-heat searing.
12.Can I add red wine to the braising liquid for extra depth, or will that ruin the classic flavor? ▾
Red wine is a fantastic, traditional addition to pot roast! Use ½ cup of dry, fruity red like Cabernet Sauvignon or Pinot Noir to deglaze the pan after searing the roast and sautéing onions, before adding beef broth. It adds bright, deep complexity that cuts through richness without overpowering that cozy, nostalgic pot roast flavor.

Comments (16)

2 days ago

OMG this pot roast was a total game changer for our Sunday family dinner! I’ve tried so many chuck roast recipes that came out tough, but this one literally fell apart when I poked it with a fork. My 3 kids went back for seconds and even asked for leftovers in their school lunches tomorrow. Worth every minute of the cook time!

yesterday

Same! My picky husband who swears he hates pot roast ate two huge servings last night. I added extra carrots and potatoes per his request and it worked perfectly

yesterday

So happy to hear the whole family loved it, Sarah! Adding extra root veggies is such a smart call—they soak up all that delicious beef flavor so well

3 days ago

Made this for my weekly meal prep and it held up amazing all week! The meat was so tender, and the gravy that forms while it cooks is chef’s kiss. I portioned it out with mashed cauliflower and roasted green beans and didn’t get bored of it once for lunch. Will be on repeat all fall and winter.

yesterday

This roast was SO good when I made it last weekend! Quick question—can I sear the meat the night before to save time next time I make it? I host my extended family for dinner every weekend and I’m always looking for little prep hacks to cut down on day-of work.

2 hours ago

Great question, Lisa! You absolutely can sear the meat the night before—just store it in an airtight container in the fridge until you’re ready to pop it in the oven, and don’t forget to save all those browned bits from the searing pan for extra flavor!

1 week ago

I was skeptical that a recipe this easy could produce such a good pot roast, but wow. Used my Dutch oven like the recipe said, didn’t rush the searing step, and it came out perfect. Brought half of it to my neighborhood potluck last night and people were begging for the recipe.

5 days ago

I brought this to my office potluck last month too! I had three people email me asking for the link by the end of the lunch break, it’s insane how much of a crowd pleaser it is.

30 minutes ago

Wait, has anyone tried making this in a slow cooker instead of the oven? I don’t have a Dutch oven big enough for a 3lb chuck roast right now and I’m really craving this for dinner this week.

5 minutes ago

I did it! I cooked it on low for 8 hours in my slow cooker, seared the meat first like the recipe says, and it was just as fall-apart tender as when I make it in the oven. 10/10 would recommend

just now

Erin is totally right! The slow cooker works beautifully for this recipe—just keep the sear step to lock in flavor, and cook on low for 7-8 hours until the meat pulls apart easily with a fork. Hope you love it!

2 weeks ago

Finally, a recipe that explains why chuck is the best cut for pot roast! I’ve wasted money on round roast before trying to make pot roast and it always came out dry and chewy. Followed this recipe exactly, used chuck, and it was melt-in-your-mouth tender. No more wasted grocery money for me!

5 minutes ago

How long do the leftovers keep in the fridge, and do they freeze well? I want to make a double batch next time so I can stock my freezer for busy weeknights when I don’t have time to cook.

just now

Great question! Leftovers will stay good in an airtight container in the fridge for 3-4 days, and they freeze perfectly for up to 3 months. I recommend storing the meat and veggies with a little of the cooking liquid so they don’t dry out when you reheat!

1 week ago

My grandma used to make pot roast exactly like this when I was a kid, and I’ve spent years trying to replicate that flavor. This recipe is the first one that’s come even close! The whole house smelled amazing while it was cooking, it gave me all the cozy fall vibes.

5 days ago

Oh I feel that! I’ve been chasing my mom’s pot roast recipe for years too, and this one is spot on. I added a little extra thyme like she used to and it took me right back to childhood Sunday dinners

3 days ago

That makes my day to hear, Jenny! There’s nothing quite like that cozy, nostalgic pot roast smell filling the house on a cool fall day. Adding extra thyme is such a lovely touch

3 days ago

Made this last night for date night in with my partner, and we both ate way too much. The meat was so tender we didn’t even need a knife to cut it. Served it over buttery mashed potatoes and roasted Brussels sprouts, and we’ve already decided we’re making it again for our Friendsgiving next month.

2 days ago

This is such an affordable meal to make for a crowd! Chuck roast is always reasonably priced at my local grocery store, and the veggies are super cheap too. I fed 6 people for under $20 last night, which is unheard of these days.

yesterday

Right?! I calculated it out last time I made it and it was like $2.50 a serving, way cheaper than takeout and way tastier too. Perfect for when you have a bunch of people over and don’t want to blow your grocery budget

2 hours ago

Help! I made this yesterday and the meat was still a little tough after 3 and a half hours. Did I do something wrong? I used a 3.5lb chuck roast, seared it like the recipe said, cooked it at 325 like instructed.

30 minutes ago

Oh no, sorry to hear that Jess! The most common reason for tough roast is not cooking it quite long enough—larger roasts closer to 3.5-4lb often need an extra 20-30 minutes in the oven, until a fork slides in and twists easily without resistance. Next time, just give it a little extra time and it’ll fall right apart!

5 days ago

As a dad who’s always in charge of Sunday dinners, this recipe is now a permanent part of my rotation. It’s so low effort once you get it in the oven, which means I can watch the football game while it cooks instead of slaving away in the kitchen. 10/10, no notes.

1 week ago

I upped the veggie ratio so much in this—added parsnips, turnips, celery, and whole mushrooms along with the carrots and potatoes, and everything came out perfectly. The veggies soak up all that savory beefy flavor so they don’t even taste like veggies, my toddler ate three servings of carrots!

5 days ago

Oh that’s genius! My twins refuse to eat any veggies that aren’t tater tots, I’m definitely loading this up with extra veggies next time to see if they fall for it

3 days ago

I added wild mushrooms I foraged last weekend to mine and it was insane, the earthy flavor paired so well with the beef and gravy. Highly recommend if you have access to fresh mushrooms

just now

Super embarrassing question, but how do you know when the sear is good enough? I’m a totally new cook and I’ve never seared meat before, I don’t want to mess this up because I’m making it for my girlfriend’s birthday dinner next week.

just now

No need to be embarrassed at all, that’s a great question! You want to sear each side of the roast over medium-high heat for 3-4 minutes per side, until it’s a deep, golden brown all over. Don’t move it around while it sears—let it get that nice crust, that’s where all the flavor is! You’ve got this

2 weeks ago

This is the exact fall recipe I’ve been searching for! I made it on the first rainy day of the season, had a glass of red wine while it cooked, and it was the perfect cozy night in. The meat was juicy, the gravy was rich, it’s everything I want in a pot roast.

3 days ago

What’s your favorite way to use up leftover pot roast? I always end up with a little extra and I’m tired of just eating it the same way with mashed potatoes. Looking for fun ideas to switch it up!

2 days ago

I make pot roast sliders with the leftovers! Pile the shredded meat on little Hawaiian rolls, add a slice of provolone, a little au jus, and bake them for 10 minutes. Absolute game day staple in my house

2 days ago

Love that idea, Stan! My go-to leftover hack is to shred the beef, mix it with a little of the gravy, and use it to top crispy hash browns for a decadent weekend breakfast, or toss it into a pot pie with extra veggies. Endless options!



