
best way to cook chicken sausage

title 1
best way to cook chicken sausage
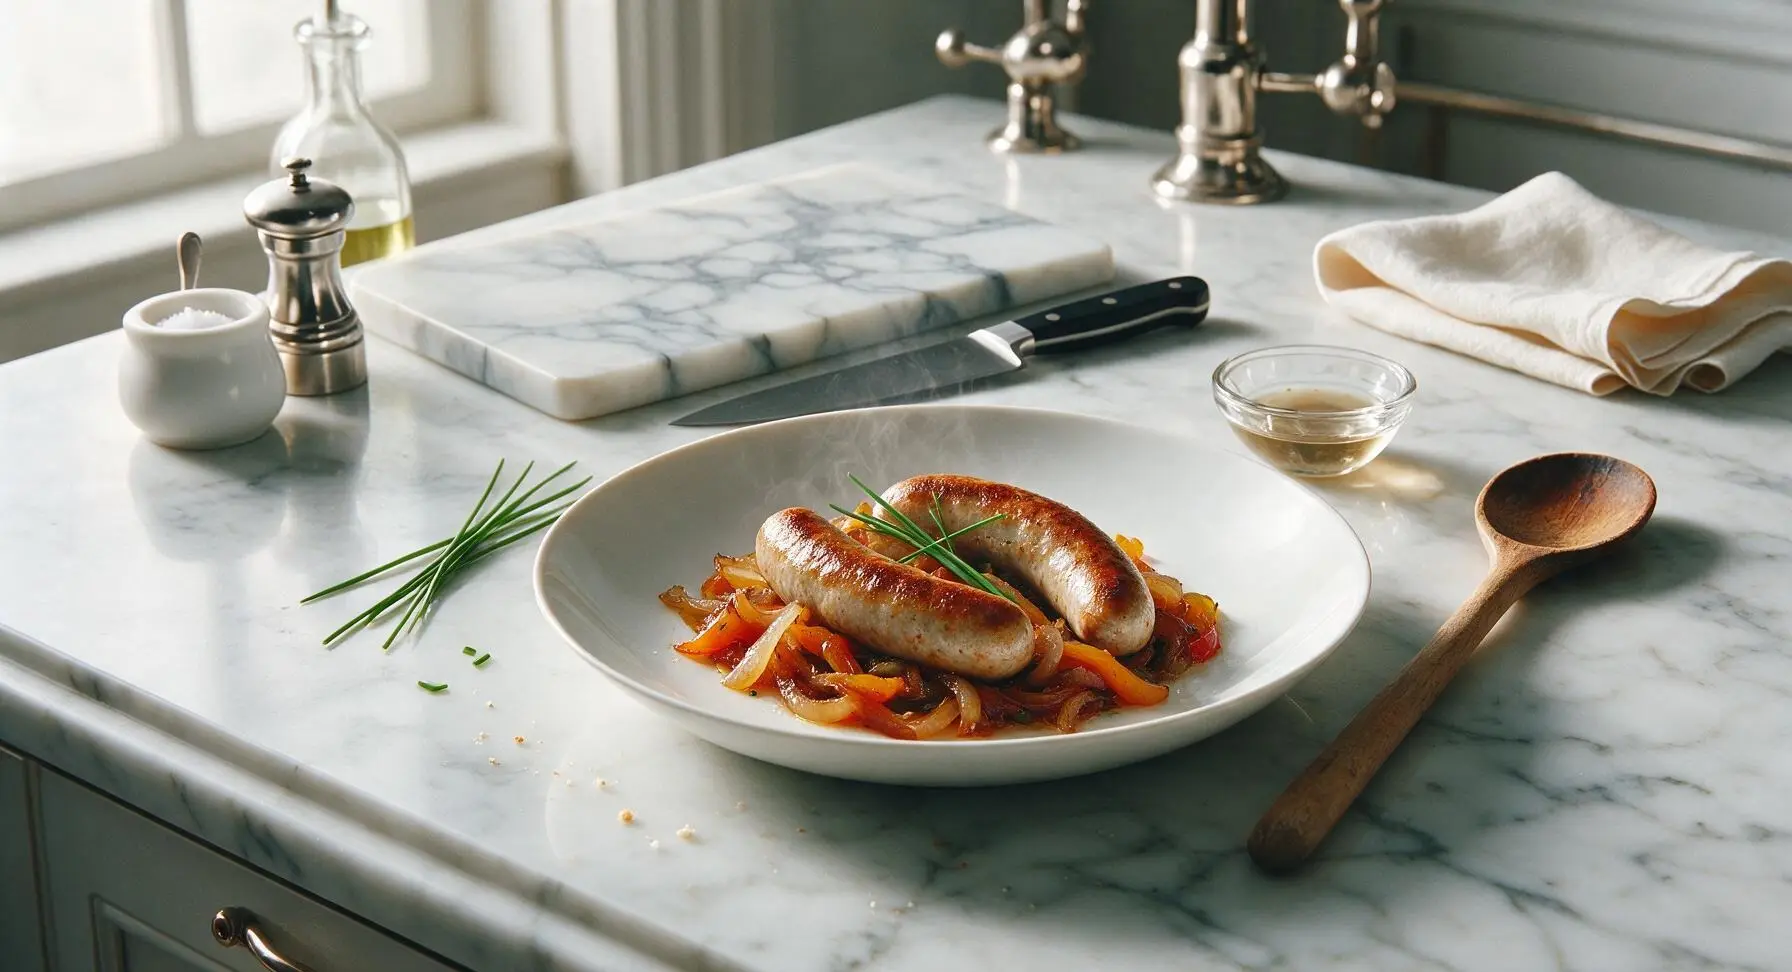
⏱️ cook time 20 minutes
🍽️ servings 4
⚡ Difficulty easy

intro

Snappy, golden-crusted chicken sausage cooked to juicy perfection without split casings or dry meat, paired with tender caramelized peppers and onions for a fast, satisfying one-pan meal.

Ingredients
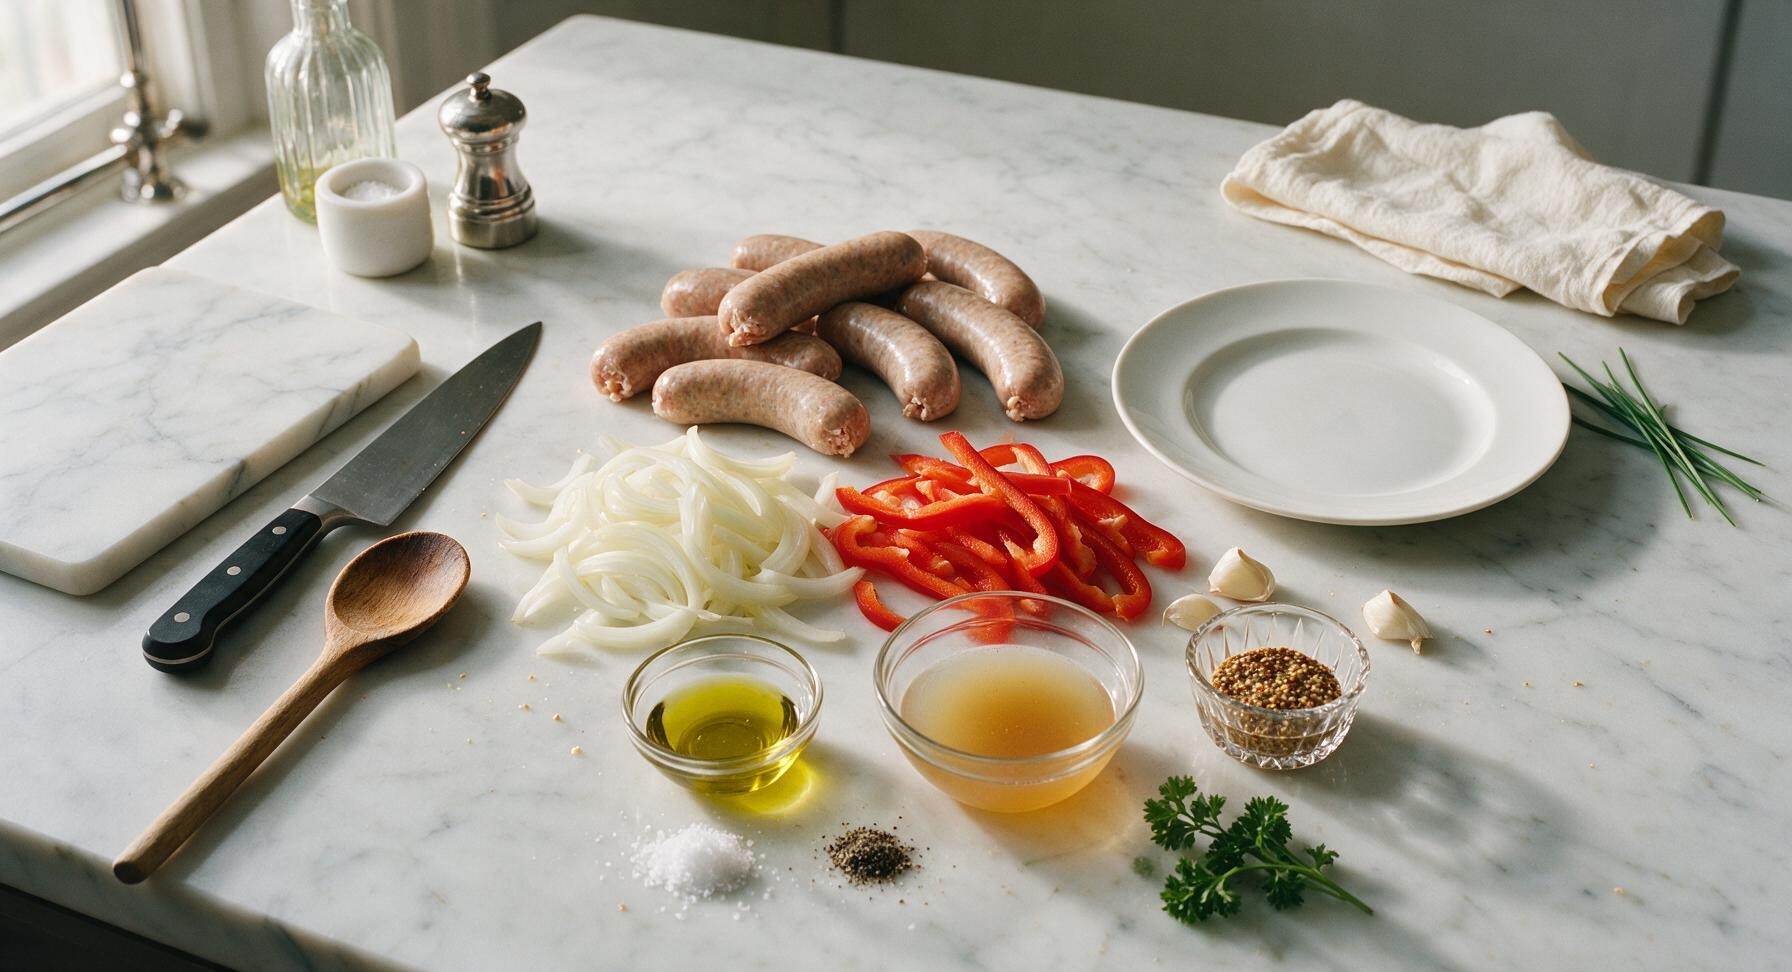
Mild Italian-style chicken sausage (natural casings) 8 links (680g / 1.5lbs)
Extra-virgin olive oil 1 tbsp
Large yellow onion 1, sliced into 1/2-inch strips
Large red bell pepper 1, seeded, sliced into 1/2-inch strips
Garlic cloves 2, lightly crushed
Low-sodium chicken broth 1/4 cup
Flaky sea salt 1/2 tsp
Freshly cracked black pepper 1/4 tsp
Whole grain mustard 2 tbsp, for serving
Fresh curly parsley 1 sprig, for garnish

Steps

1

Prep Sausages and Vegetables

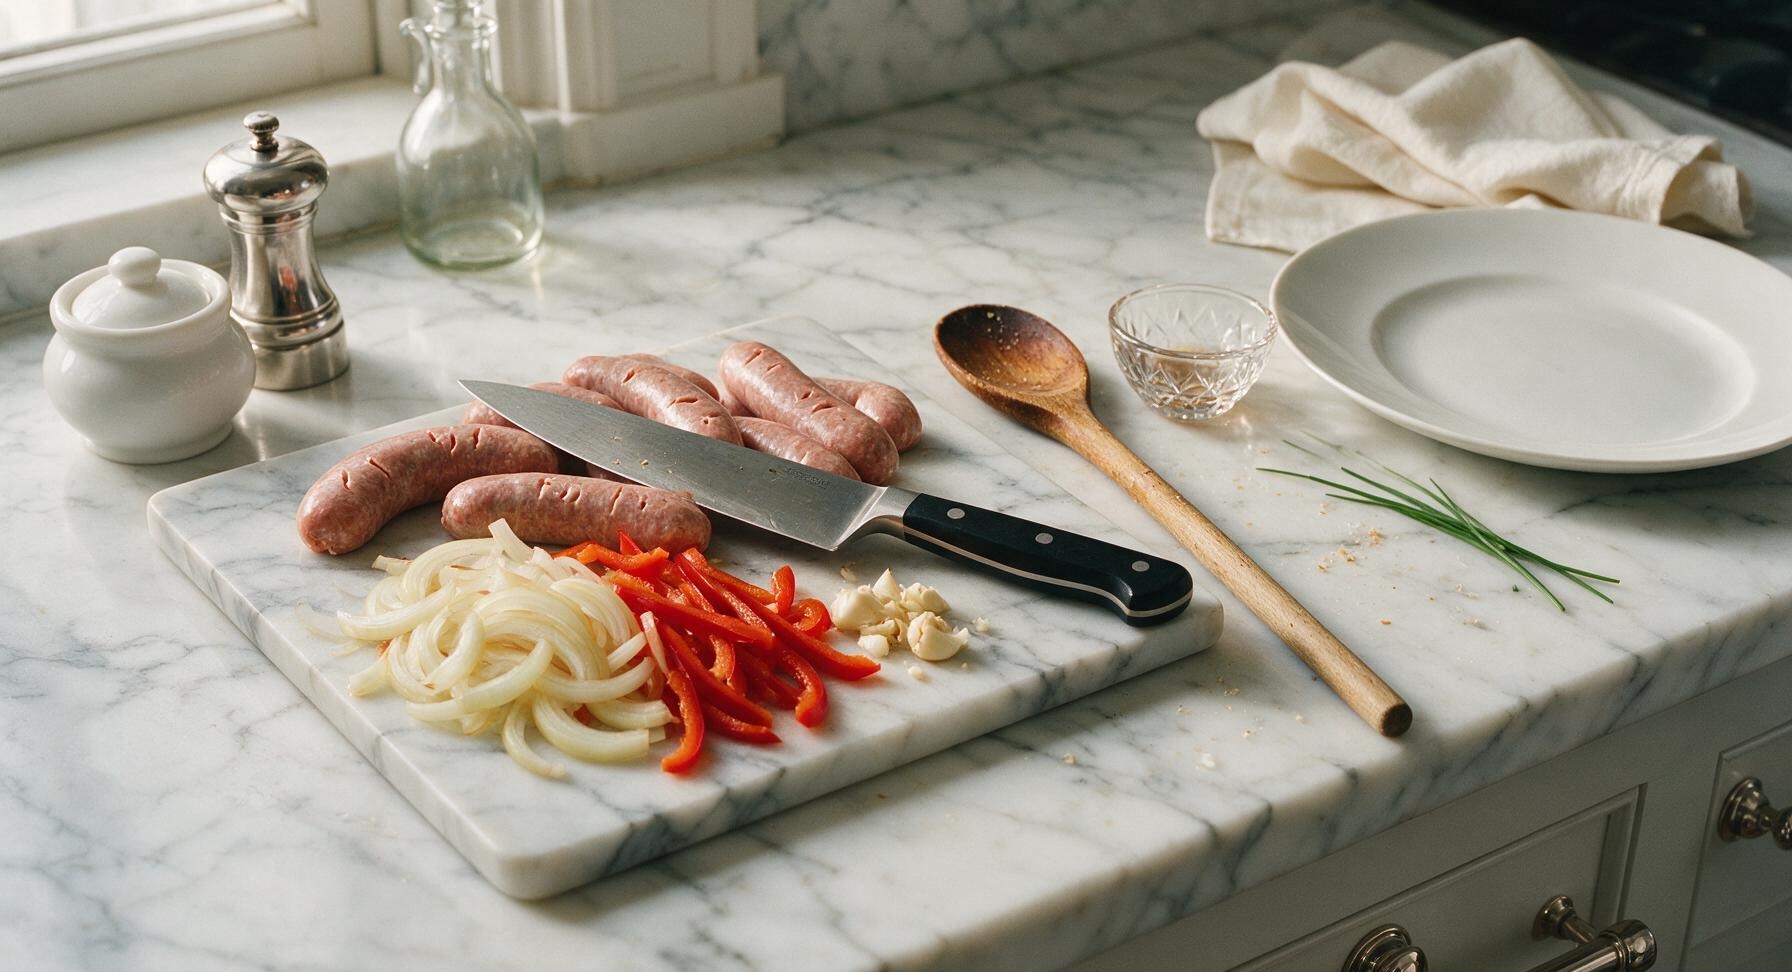
Place the honey-oak cutting board center-left on the counter. Use the 6-inch walnut-handle chef’s knife to slice the yellow onion and red bell pepper into uniform 1/2-inch strips, lightly crush the garlic cloves (no fine mince needed), and set vegetables aside on the board. Use the tip of the knife to prick each chicken sausage 2-3 shallow times on all sides—this prevents casings from splitting as steam builds during cooking. Do not prick deeply, or juicy fat will leak out during cooking.
Step 1
step1:Prep Sausages and Vegetables
2

Heat Pan and Oil

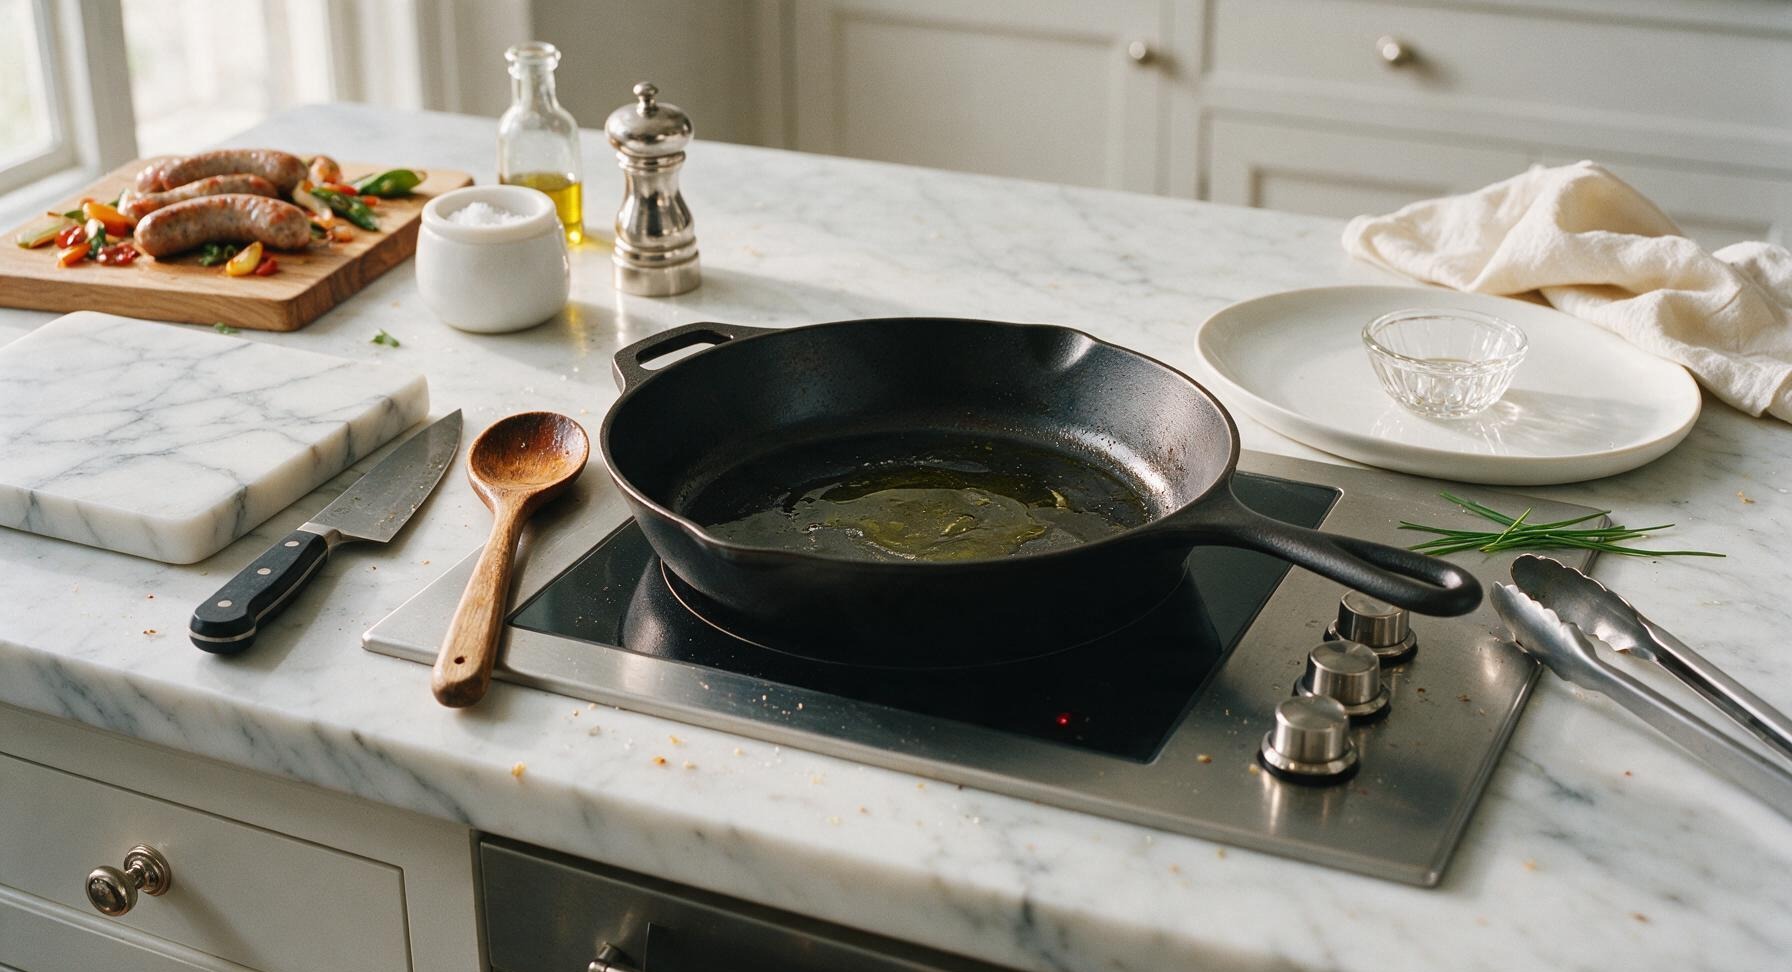
Place the 12-inch matte black carbon steel skillet on the central induction cooktop zone, set heat to medium (350°F / 175°C). Add 1 tablespoon of extra-virgin olive oil, and heat for 1-2 minutes until the oil shimmers and flows easily across the pan surface, but does not smoke. Move the cutting board with prepped ingredients to the back left counter to clear space for searing.
Step 2
step2:Heat Pan and Oil
3

Sear Sausage Casings

Use the stainless steel kitchen tongs to place the pricked chicken sausages in a single layer in the hot skillet, leaving 1/2-inch space between each link. Do not move the sausages for 3 minutes, until the first side is deep golden brown and crispy. Use tongs to rotate each sausage a quarter turn, searing for 2 minutes per side (9 minutes total searing time) until all sides have a crisp, evenly browned exterior. Sausages will not be fully cooked through at this stage.
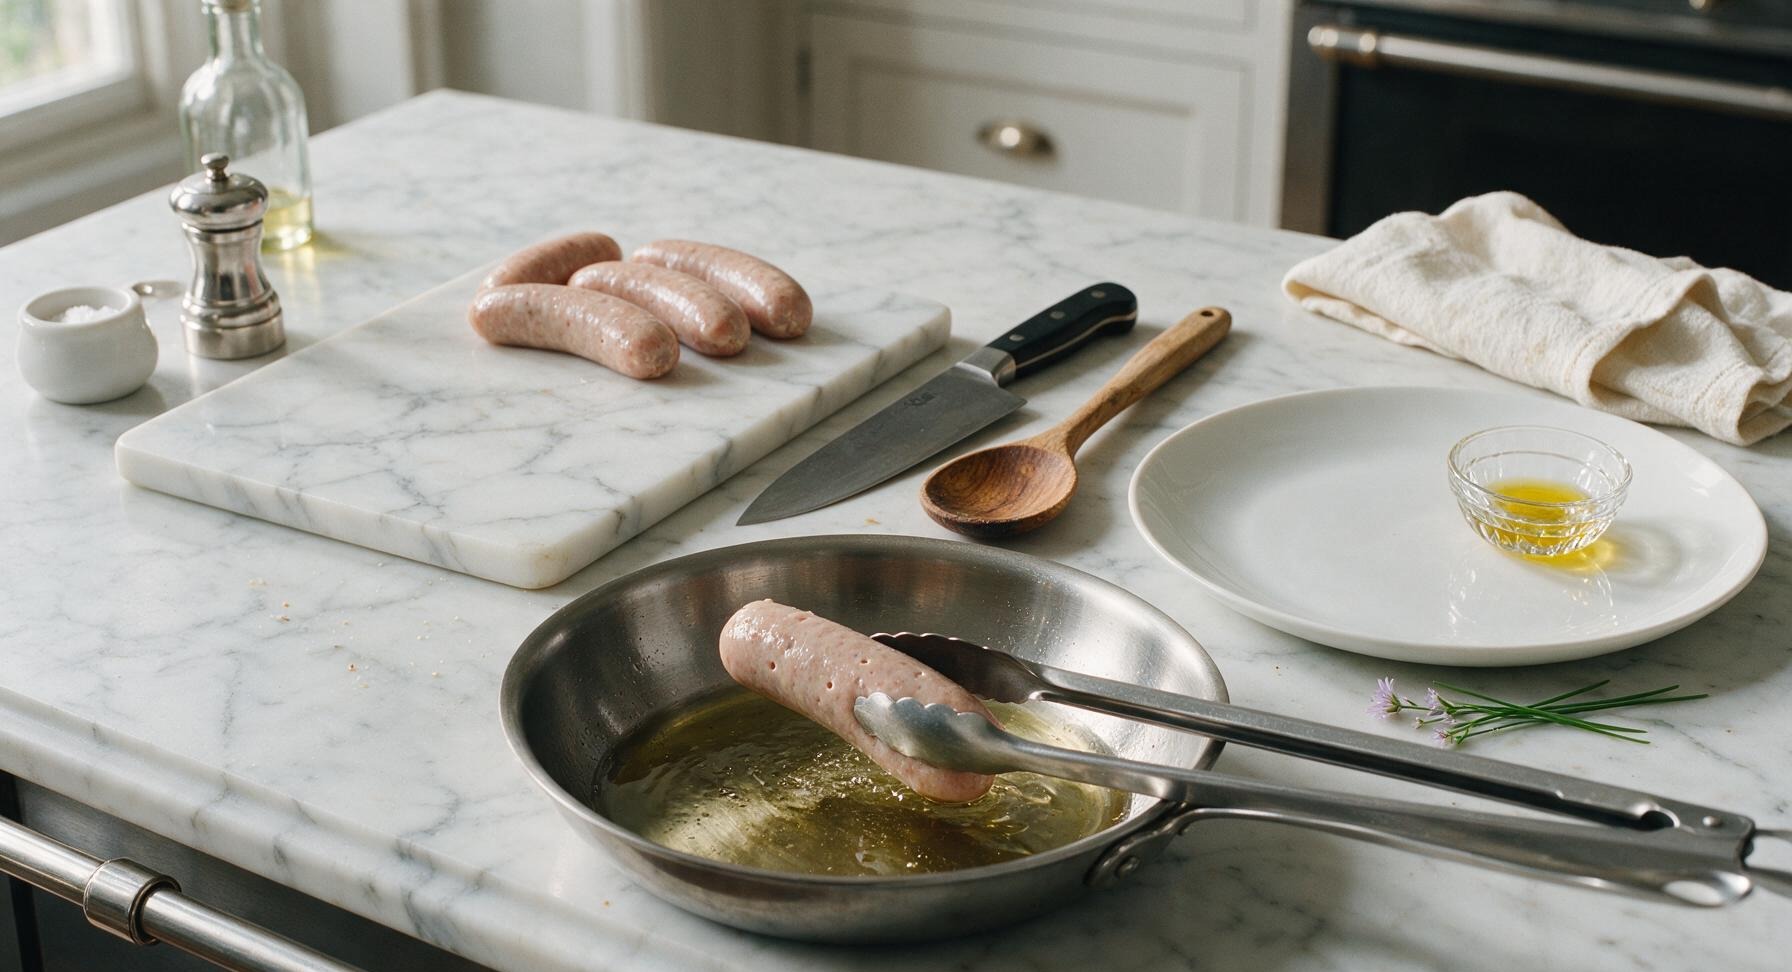
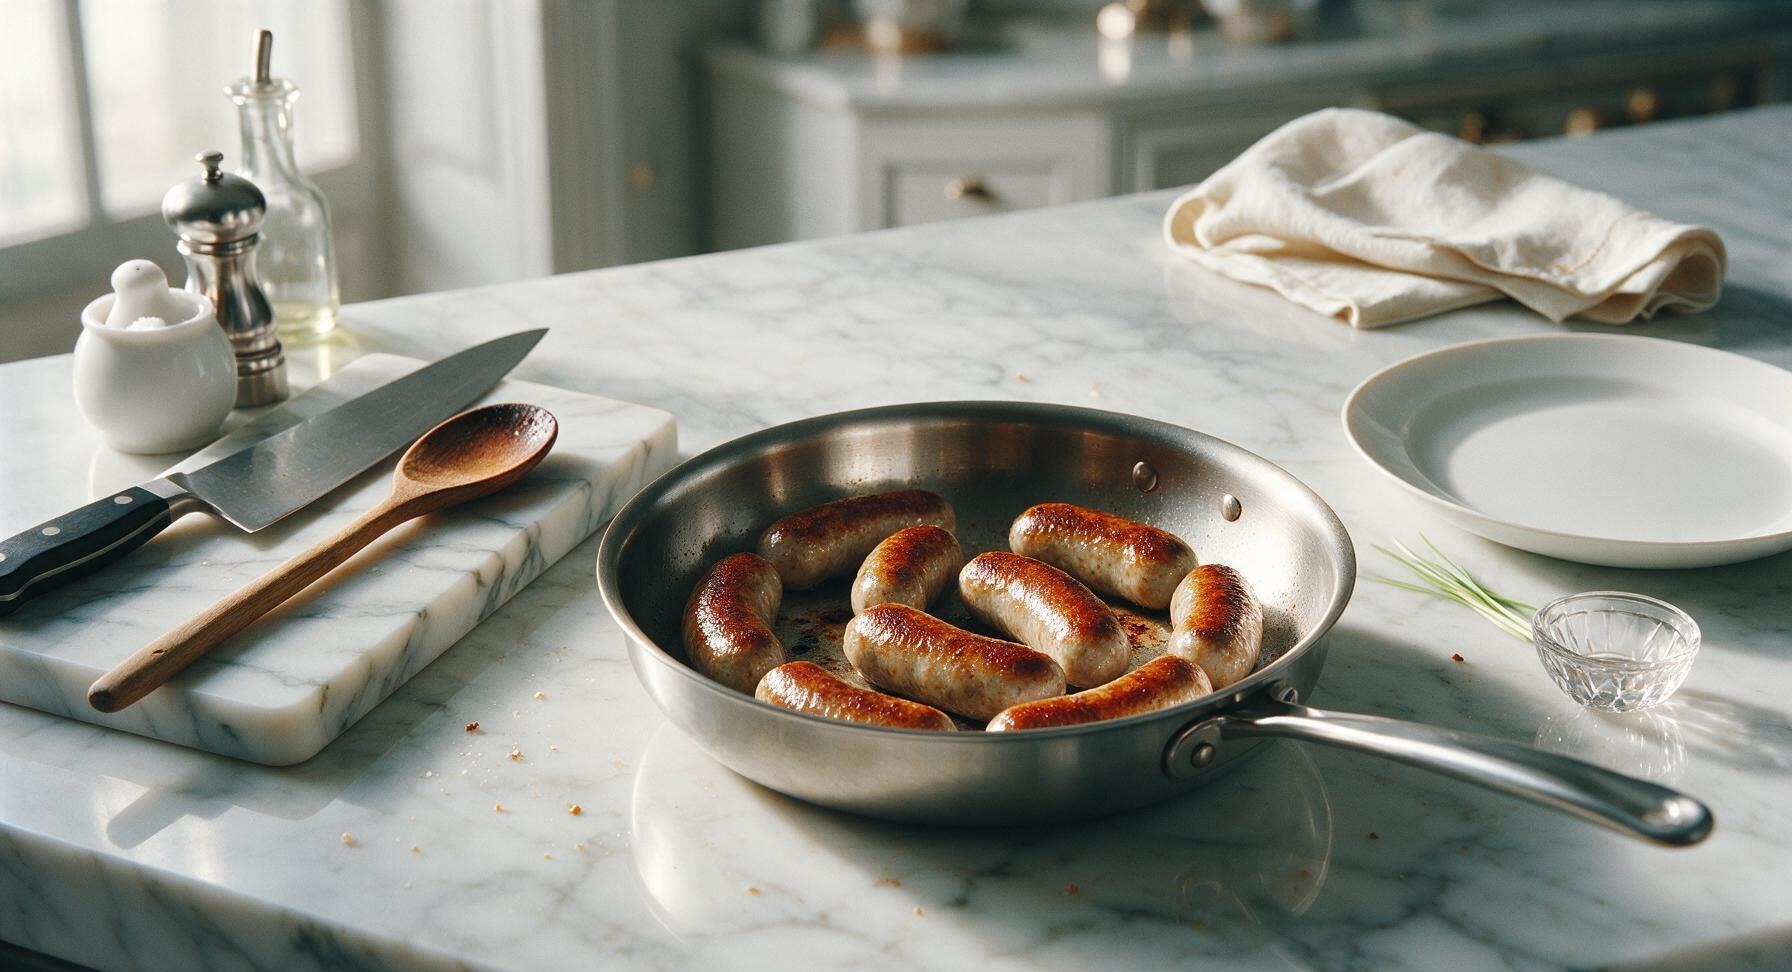
Step 3
step3:Sear Sausage Casings
Step 3
step3:Sear Sausage Casings
4

Sauté Onions and Peppers

Push the seared sausages to the outer edges of the skillet using tongs. Add the sliced onion, bell pepper, and crushed garlic to the empty center of the pan. Season with 1/2 teaspoon flaky sea salt and 1/4 teaspoon freshly cracked black pepper. Sauté for 3 minutes, stirring occasionally with the tongs, until vegetables start to soften and develop light golden edges.
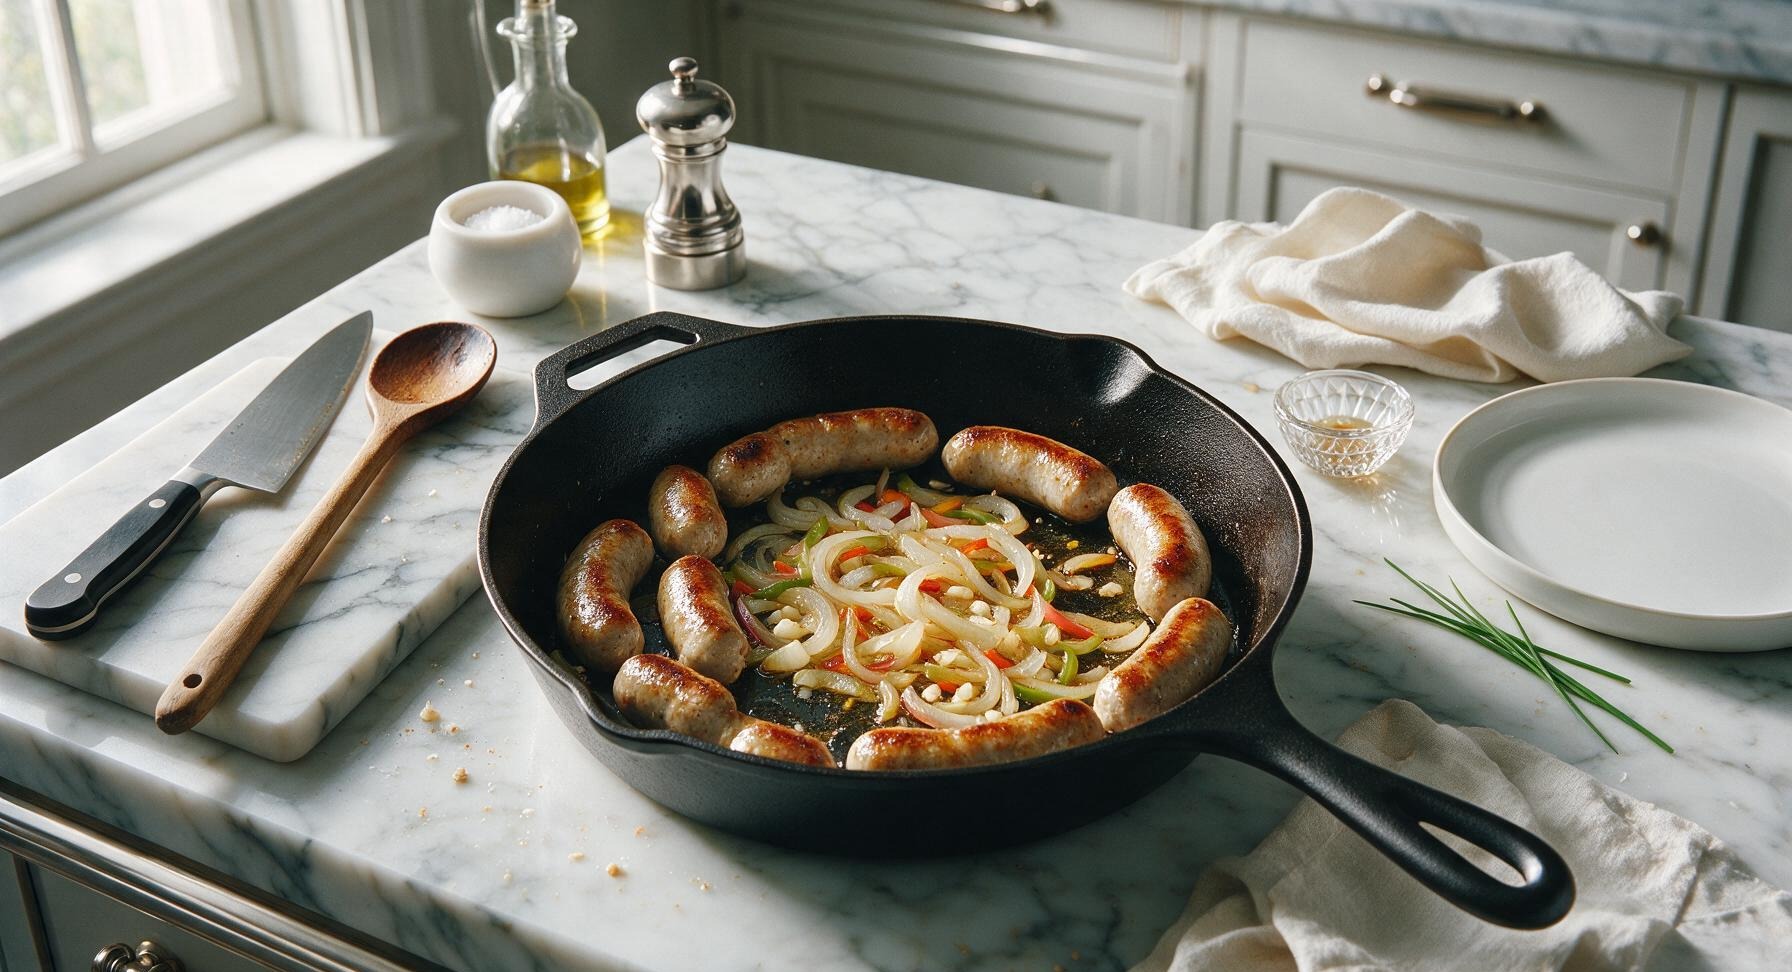
Step 4
step4:Sauté Onions and Peppers
5

Steam to Cook Through

Pour 1/4 cup low-sodium chicken broth into the hot skillet—it will sizzle immediately and create billowing steam. Reduce heat to medium-low (300°F / 150°C), cover the skillet with its tight-fitting matte black lid, and cook for 5 minutes. This gentle steam cooks the sausage interior evenly without burning the casings or drying out the meat, and prevents sudden casing splits.
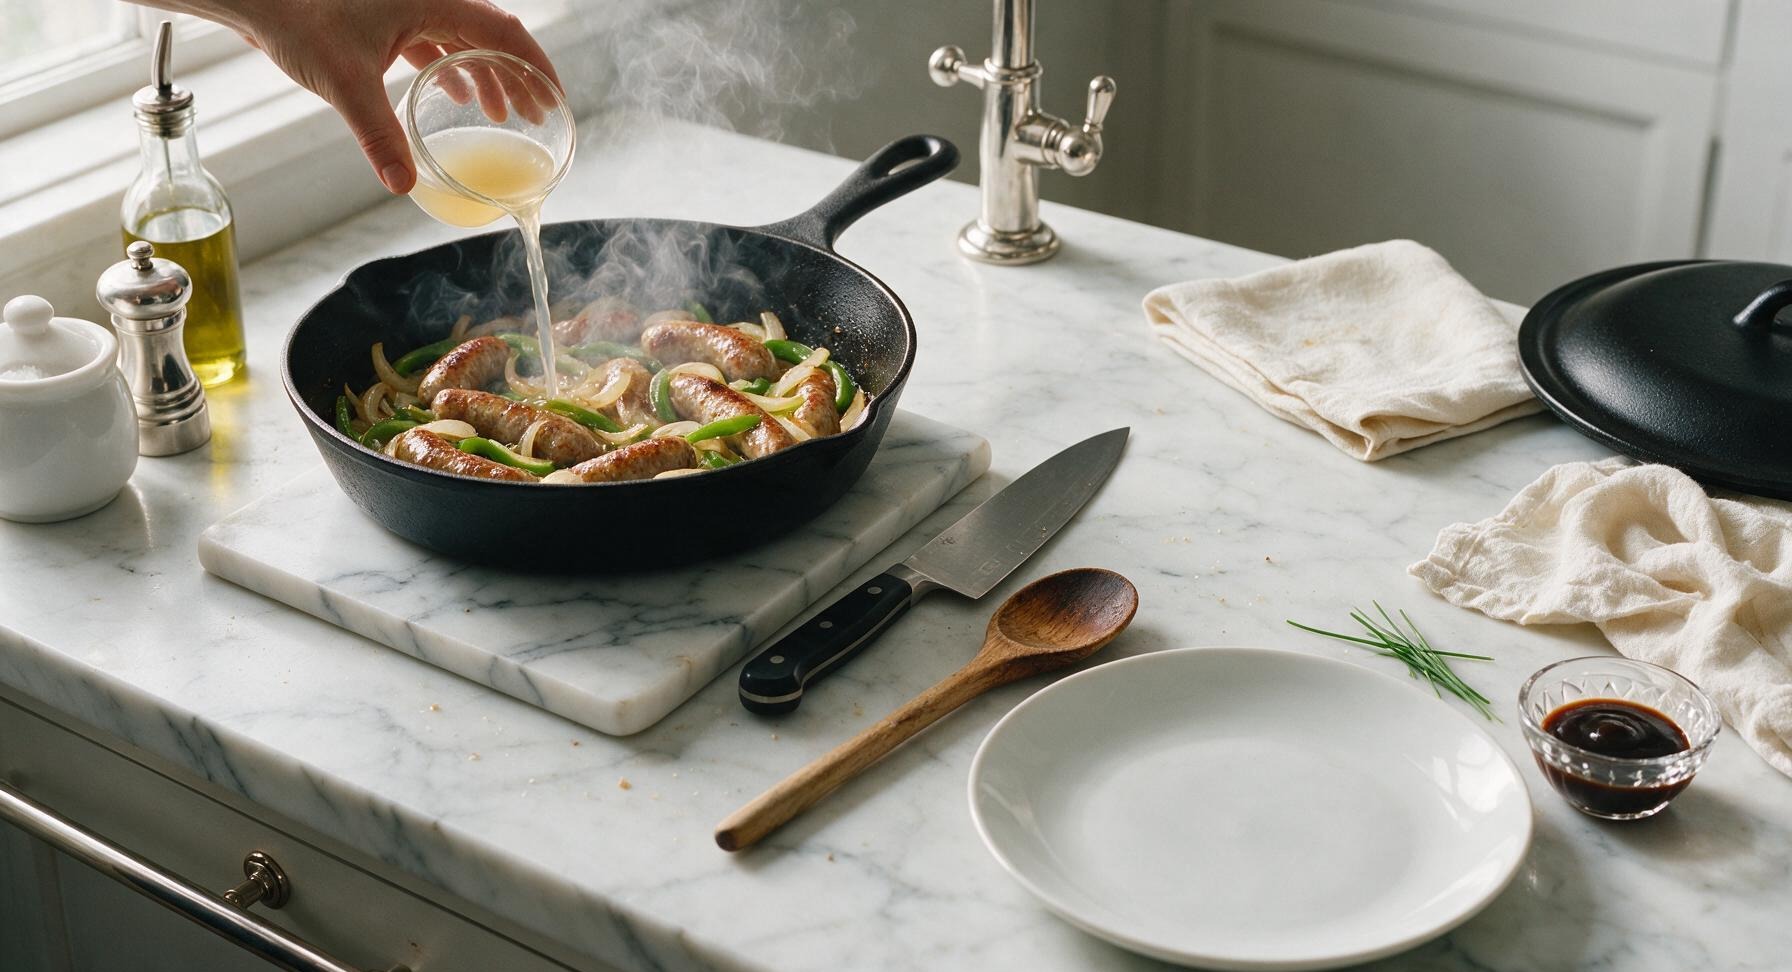
Step 5
step5:Steam to Cook Through
6

Verify Doneness Temp

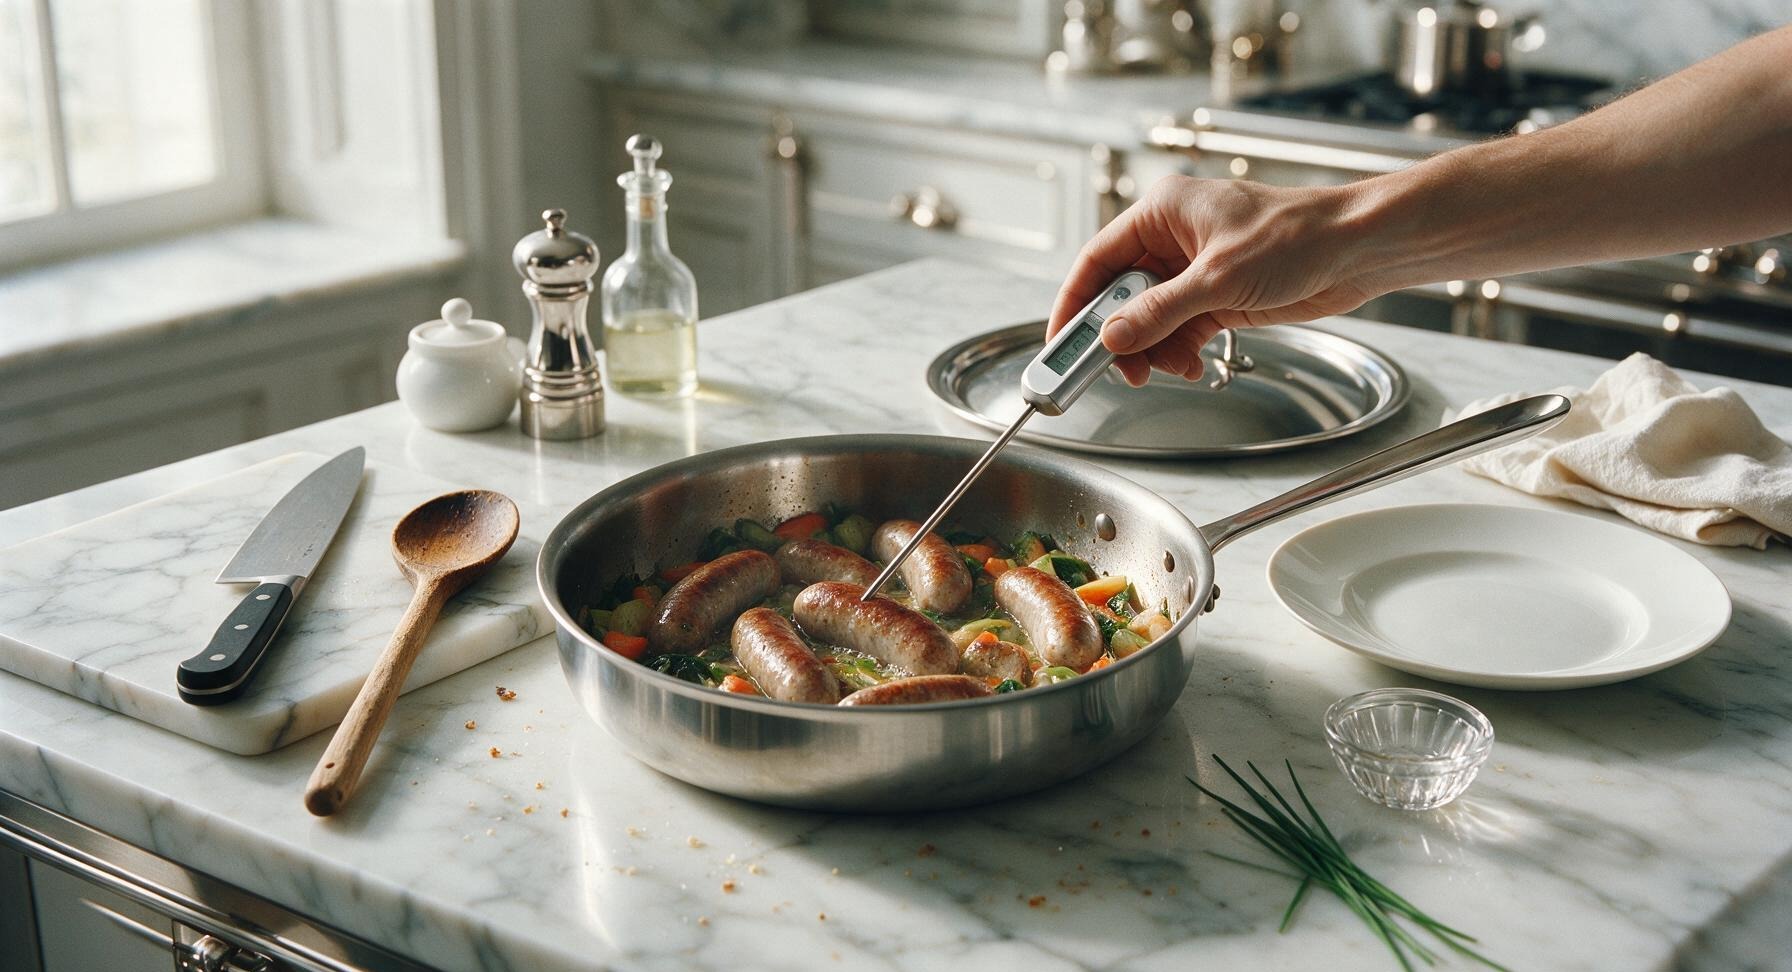
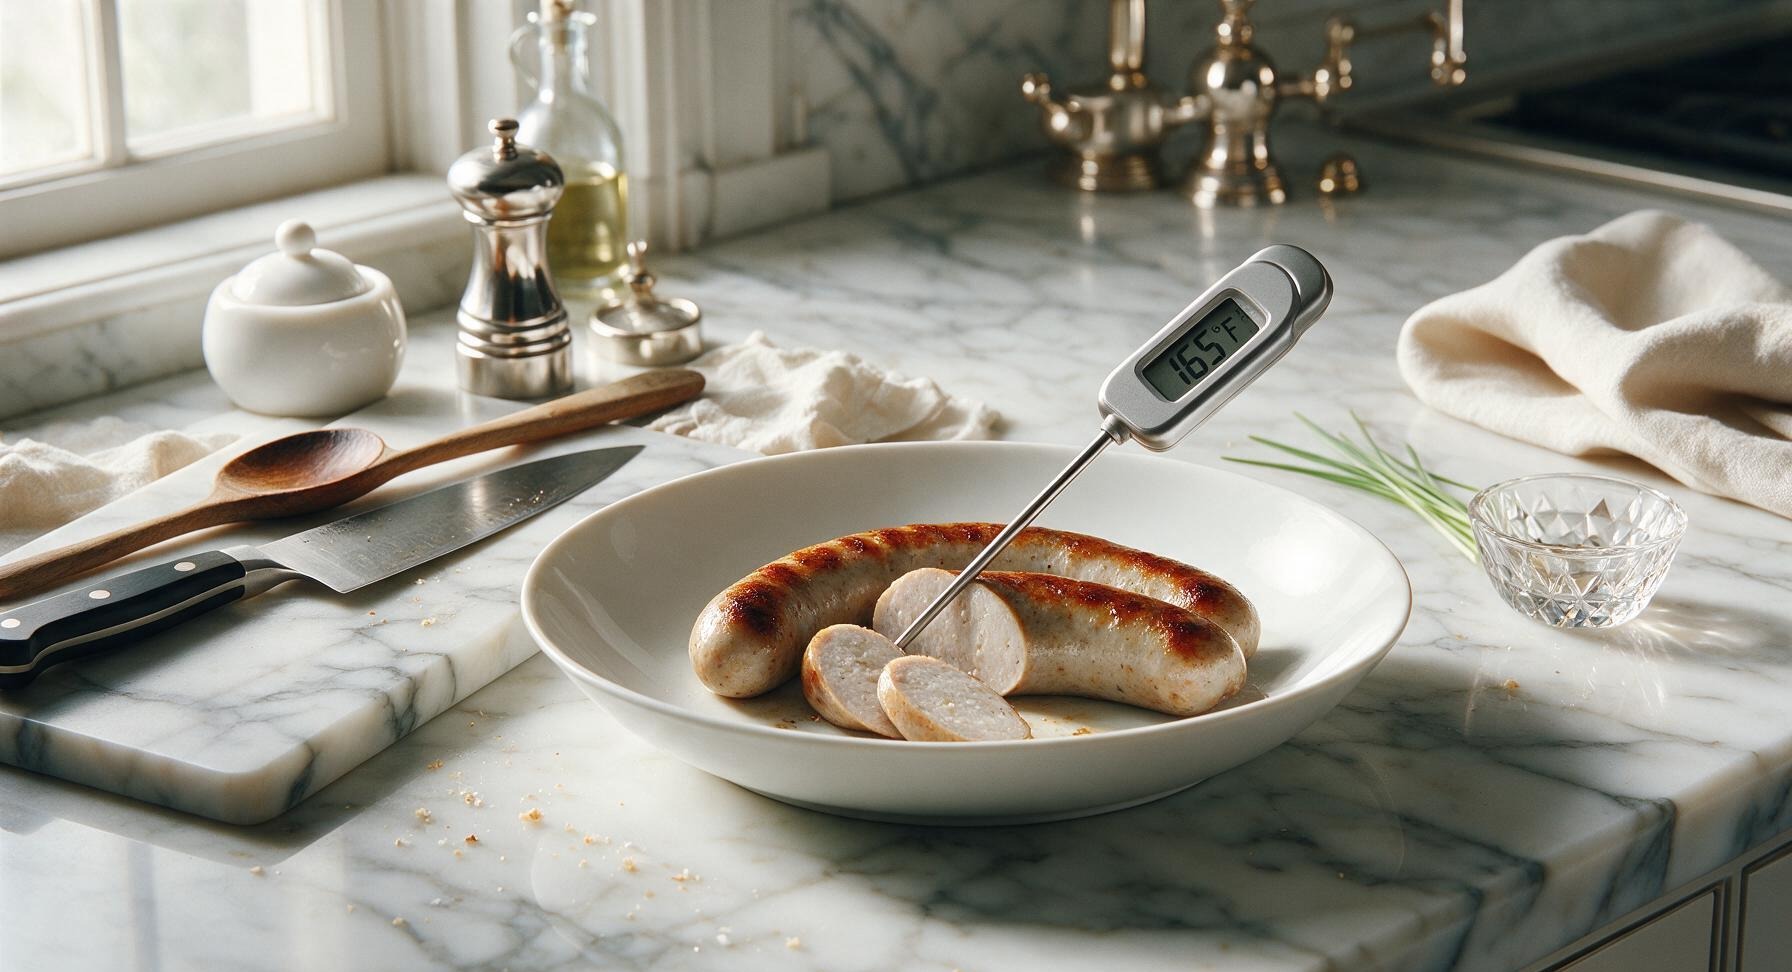
After 5 minutes of steaming, remove the skillet lid—most of the broth will have evaporated, and vegetables will be fork-tender. Use the silver instant-read meat thermometer to check the internal temperature of the thickest part of each sausage: it should read 165°F / 74°C to meet food safety standards. If the temperature is lower, cover and cook for 1-2 more minutes before rechecking.
Step 6
step6:Verify Doneness Temp
Step 6
step6:Verify Doneness Temp
7

Re-Crisp and Rest Links

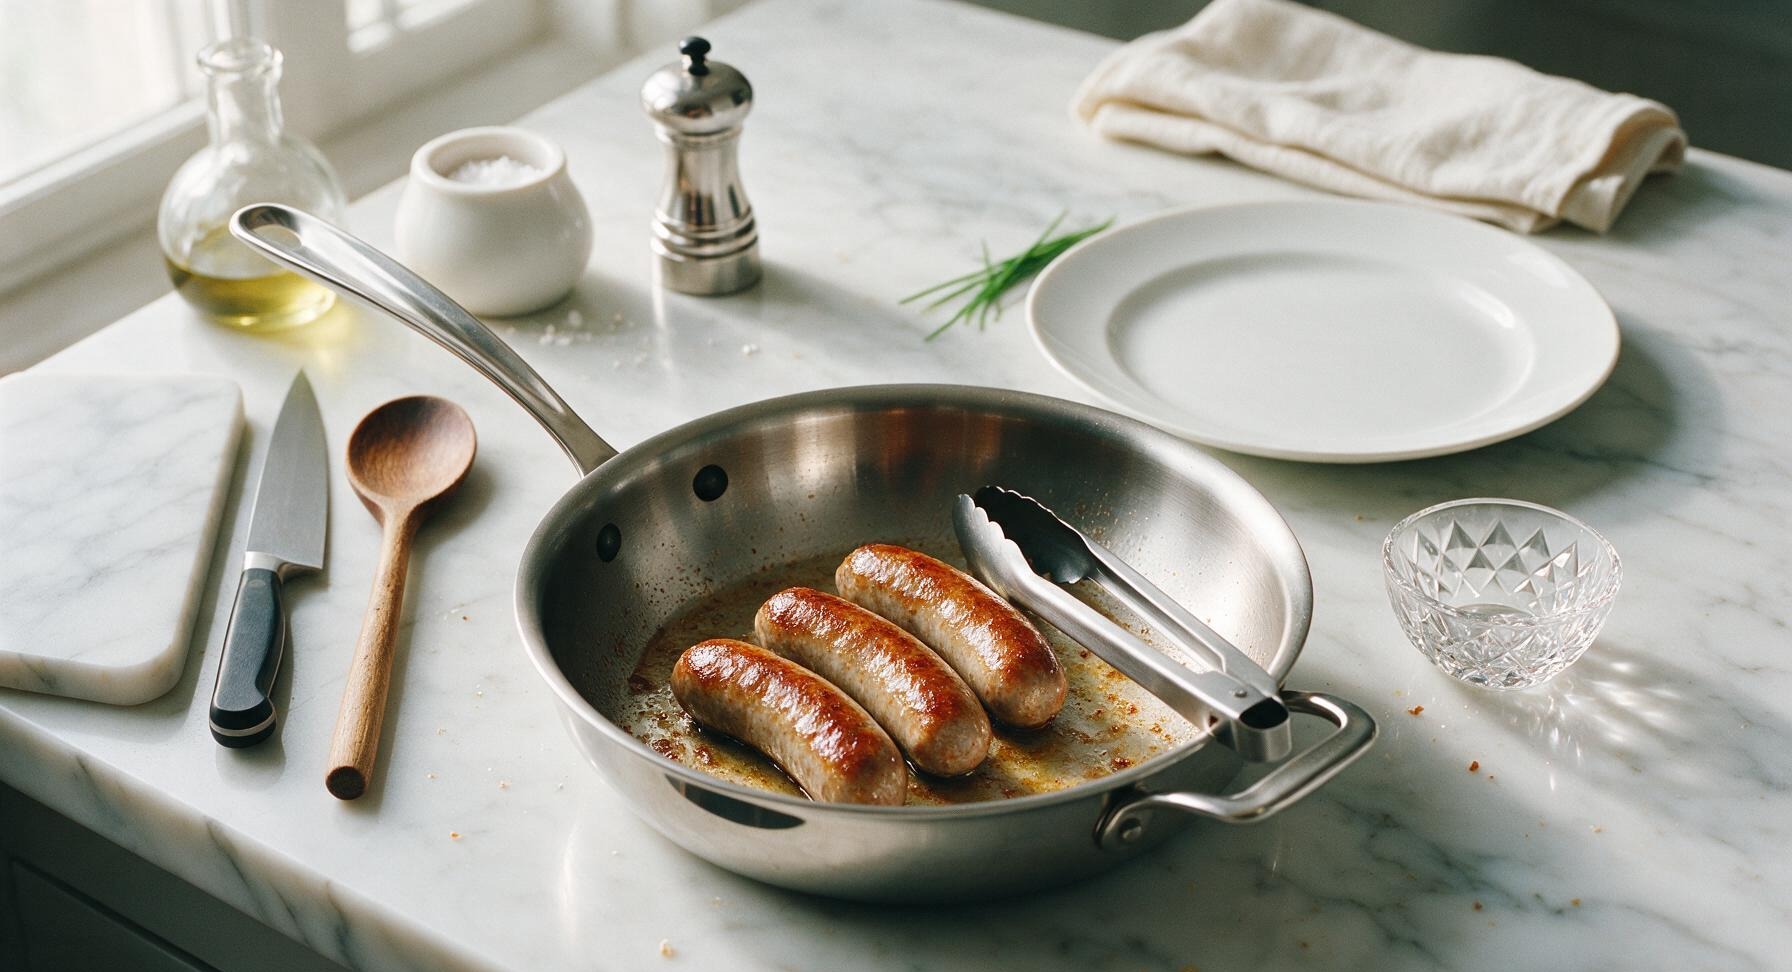
Turn heat back up to medium, and cook the sausages uncovered for 2 final minutes, turning once with tongs, to re-crisp the casings softened by steam. Turn off heat, transfer sausages and vegetables to the cream white stoneware dinner plate, and let rest for 3 minutes before slicing or serving. Resting allows juices to redistribute, so every bite is juicy instead of running out when cut.
Step 7
step7:Re-Crisp and Rest Links
8

Plate and Garnish

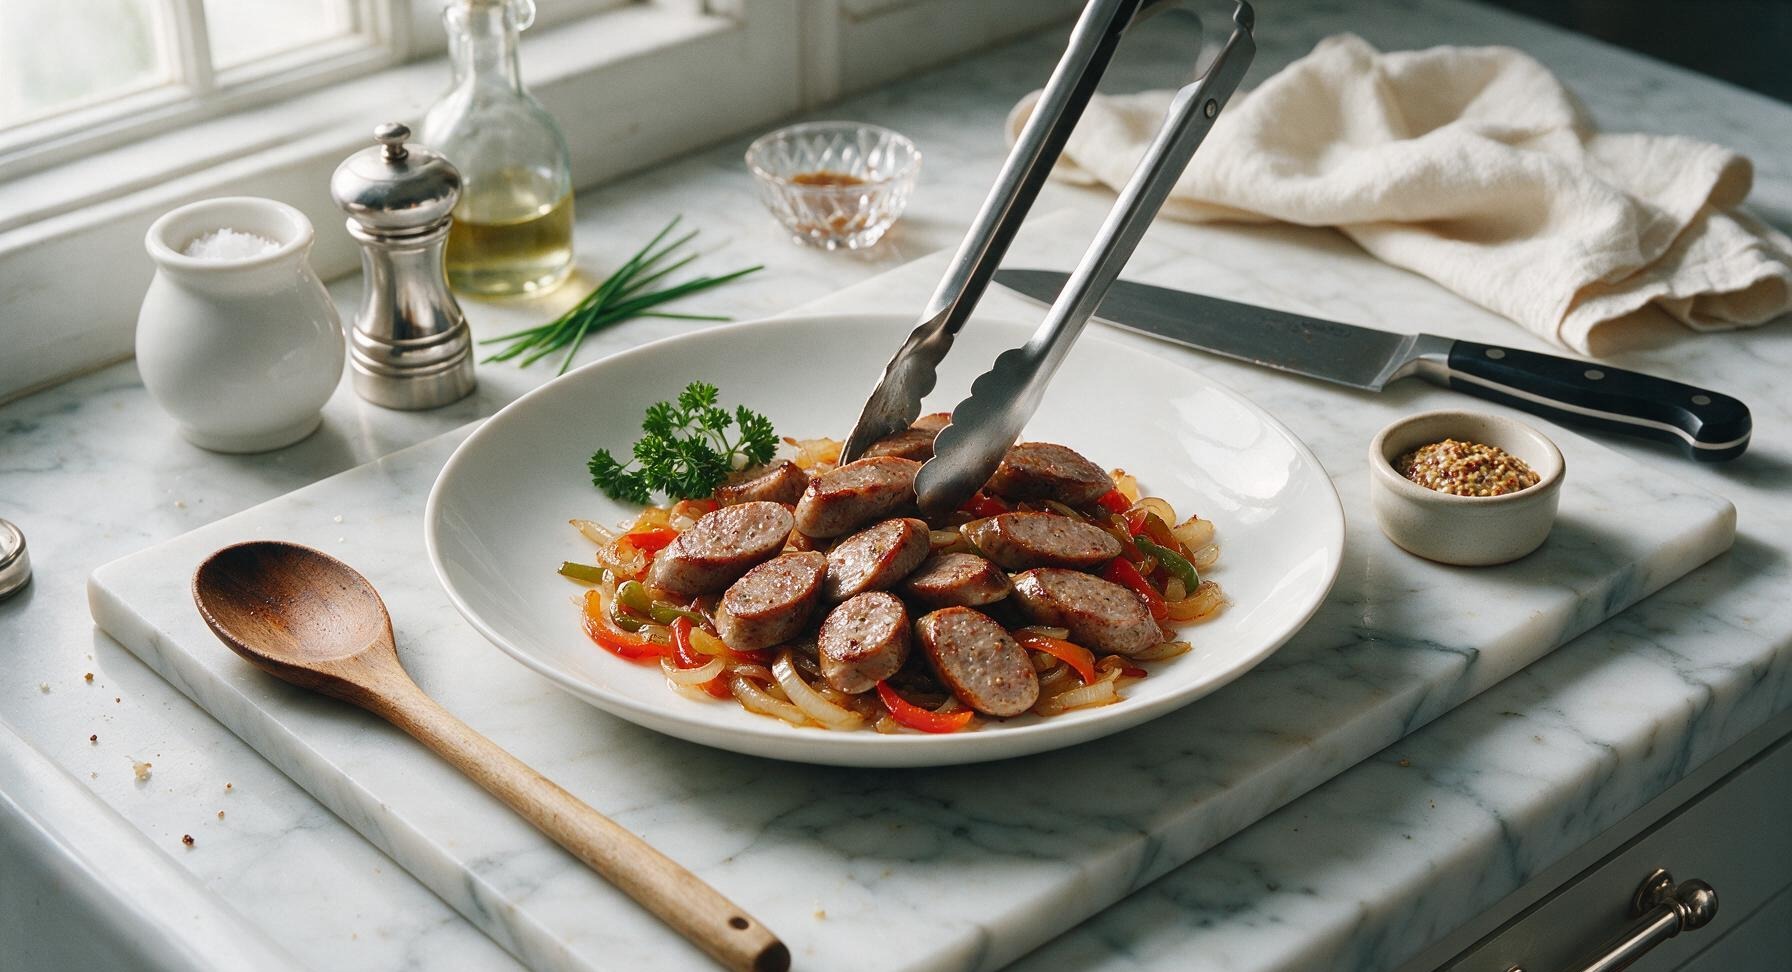
After resting, slice sausages on a 1/2-inch bias for easy eating, and fan them across the center of the plate over the bed of sautéed onions and peppers. Drizzle any remaining pan juices over the top, tuck a small sprig of fresh curly parsley as garnish, and place the small cream ramekin of whole grain mustard on the plate edge for serving.
Step 8
step8:Plate and Garnish

Tips

1.Avoid cooking chicken sausage over constant high heat: high temperatures cause casings to split rapidly, burn the exterior before the interior cooks through, and force flavorful fat out of the links leading to dry, rubbery meat. The sear-steam-sear method guarantees snappy casings and juicy, evenly cooked centers every time.
2.Only prick sausages 2-3 shallow times per link before cooking: this lets small amounts of built-up steam escape slowly to prevent sudden casing splits, which cause far more juice and flavor loss than the tiny pricks. Never prick deeply, or excess fat will drain out during cooking.
3.Let cooked sausages rest for 3 full minutes before slicing: as with other cuts of meat, heat tightens protein fibers and pushes juices to the center of the links during cooking. Resting lets fibers relax and reabsorb juices, so every bite stays moist instead of leaving a puddle of liquid on your plate.


✨ You May Also Like

Main Course
🍜 United Kingdom

A showstopping classic of tender seared beef, savory mushroom duxelles, and crisp prosciutto wrapped in flaky golden puff pastry, baked to juicy perfection.

⏱️ 2 hours 1Main Course ★ 4.7
Main Course
🍜 India

Tender charred marinated chicken simmered in a rich, spiced creamy tomato sauce, this iconic Anglo-Indian curry pairs perfectly with basmati rice or warm naan.

⏱️ 50 minuteMain Course ★ 4.6
Main Course
🍜 Thailand

Classic tangy, sweet, and savory Thai stir-fried rice noodles with shrimp, tofu, and crunchy garnishes, balancing all five core Thai flavor profiles.

⏱️ 30 minuteMain Course ★ 4.5
Main Course
🍜 United Kingdom

Crispy golden beer-battered cod and fluffy double-fried chips, served with tangy tartar sauce and malt vinegar: the timeless, beloved British pub comfort classic.

⏱️ 45 minuteMain Course ★ 4.7
Main Course
🍜 Mexico

Smoky, chile-marinated pork tacos with caramelized pineapple, fresh cilantro, and lime: a beloved classic Mexican street food perfect for casual summer gatherings.

⏱️ 1 hour 45Main Course ★ 4.8
Main Course
🍜 United States

Crunchy Fritos corn chips layered with savory beef chili and melted cheddar, topped with cool, zesty fixings for a beloved, cozy Tex-Mex comfort food.

⏱️ 35 minuteMain Course ★ 4.8

best way to cook chicken sausage:Frequently Asked Questions

1.Why do my chicken sausage casings always split when I pan-sear them? ▾
Great question! Split casings almost always come from too-high heat and cold sausages hitting a scorching pan, which makes the casing contract faster than the interior can expand. Start with medium-low heat, take sausages out of the fridge 10 minutes before cooking, and skip pricking casings to lock in juice and prevent blowouts.
2.Do I need to prick chicken sausage casings before searing? ▾
Skip pricking entirely! Unlike high-fat pork sausage that can leak excess grease, natural-casing chicken sausage stays juiciest when casings stay fully intact. Pricking lets all the flavorful, moisture-rich rendered fat escape, leading to dry, bland sausage instead of that snappy, juicy bite this recipe is designed for.
3.What heat setting is best to get juicy, not dry, pan-seared chicken sausage? ▾
Stick to consistent medium-low heat for the entire sausage cook time. High heat will burn the outside before the center cooks through, while too-low heat will leave casings tough and rubbery. You want a gentle, steady sizzle when sausages hit the pan—no loud, spattering crackle, which signals the pan is too hot.
4.How do I know when the chicken sausage is fully cooked without overcooking it? ▾
The most reliable method is to use an instant-read thermometer: stick it into the thickest part of a link, avoiding contact with the pan, and look for an internal temperature of 165°F. Without a thermometer, cut into the thickest link—juices should run clear, with no pink in the center, and casings will be snappy, deep golden.
5.Can I use pre-cooked chicken sausage for this recipe instead of raw? ▾
Absolutely! Pre-cooked chicken sausage works perfectly here, you’ll just cut total sausage cook time down to 6-8 minutes total, turning occasionally, until links are heated through and develop that golden, crisp outer crust. Keep heat at medium-low so you don’t dry out pre-cooked links while building that nice sear.
6.Why does my chicken sausage turn out dry even when I don’t overcook it? ▾
Dry sausage usually comes from two common missteps: cooking on too-high heat that drives out moisture too fast, or moving sausages too often so they don’t develop a moisture-sealing crust. Let links sit undisturbed for 3-4 minutes per side to build that crust, and avoid cranking heat to rush the process.
7.Should I cover the pan while searing the sausages? ▾
Cover the pan for the first 6 minutes of cooking the sausages! The gentle trapped steam helps links cook evenly all the way through without burning casings, then uncover for the last 4-5 minutes of cook time to crisp casings to that perfect snappy, golden texture, and let excess steam escape so nothing gets soggy.
8.When do I add the peppers and onions to the pan so they don’t burn or turn mushy? ▾
Once you’ve seared sausages on all sides and they’re about 5 minutes from being fully done, push them to the cooler edge of the pan, add a tiny extra splash of olive oil if needed, then toss in sliced onions and peppers. Cook them 8-10 minutes, stirring occasionally, until tender and caramelized at the edges, not mushy.
9.Can I use spicy Italian chicken sausage instead of mild for this recipe? ▾
Of course! Spicy Italian chicken sausage swaps in perfectly if you like a little kick—you won’t need to adjust any cook times or other ingredients. The sweet, caramelized peppers and onions balance the heat from spicy sausage beautifully, so it’s a really tasty swap that requires zero extra work to pull off.
10.What’s the best way to slice the onions and peppers for even cooking? ▾
Slice both your onion and bell pepper into uniform ¼-inch thick strips. Thicker slices will stay crunchy and undercooked by the time the sausage is done, while paper-thin slices will burn quickly before they can caramelize. Uniform cuts mean every piece cooks at the same rate for that perfect tender, sweet texture.
11.When do I add the garlic so it doesn’t burn? ▾
Add your minced or sliced garlic during the last 60 seconds of cooking the peppers and onions. Garlic burns extremely fast, turning bitter and unpleasant if it sits on hot pan surfaces for more than a minute or two. Toss it with softening veggies right at the end until you smell that bright, nutty garlic aroma, then pull the pan off heat.
12.Can I make this recipe ahead for meal prep? ▾
Definitely! This dish holds up really well for 3-4 days stored in an airtight container in the fridge. Let the sausage and veggies cool completely before sealing, and reheat gently in a skillet over low heat or in the microwave in 30-second bursts to avoid drying out links. Skip freezing, though, as pepper and onion texture turns mushy when thawed.
13.My sausages stick to the pan no matter what I do—how do I fix that? ▾
First, make sure your pan is properly preheated for 2-3 minutes over medium-low before adding oil and sausages. Don’t move links too early! They will release naturally from the pan once that golden crust forms; if you try to flip them too soon, the casing will tear and stick. A thin, even layer of olive oil also helps prevent sticking.
14.What kind of pan works best for this recipe? ▾
A heavy-bottomed stainless steel or cast iron skillet works best here, because it distributes heat evenly to prevent hot spots that burn casings or leave uneven sear marks. A good nonstick pan works too, just note you won’t get quite as deep of a caramelized crust on veggies and sausage as you would with cast iron or stainless steel.
15.Can I add other seasonings to this dish without overpowering the sausage? ▾
Absolutely! A pinch of red pepper flakes, a light sprinkle of dried oregano or basil, or a tiny splash of balsamic vinegar tossed in with the peppers and onions works beautifully. Go light on added salt, though—chicken sausage is usually pre-seasoned, so taste first before adding extra salt to avoid over-seasoning the whole dish.
16.What should I serve with this pan-seared chicken sausage and peppers? ▾
This one-pan meal pairs great with buttery mashed potatoes, creamy polenta, crusty artisan bread to soak up the pan juices, or a simple side salad for a lighter meal. You can also tuck the sausage and peppers into hoagie rolls with a little melted provolone for a quick, satisfying weeknight sandwich.
17.Chicken needs to reach 165°F to be food safe—won’t that make the sausage dry? ▾
It won’t if you cook it low and slow and keep casings intact! Unlike lean chicken breast that gets dry at high heat, the gentle medium-low cook, trapped steam from the covered pan start, and sealed casings keep all rendered fat and moisture locked in so sausage stays juicy even when it hits that safe 165°F internal temp.

Comments (17)

3 days ago

SO good! I made a big batch of these yesterday for my weekly meal prep and they held up perfectly all week in the fridge. No sad dry sausage here! I tossed them with peppers and onions for easy lunch bowls, and even my picky roommate stole a link off my plate when she walked through the kitchen. 10/10 will be making this on repeat.

2 days ago

Wait do you reheat them in the pan or the microwave? I hate when reheated sausage gets that weird rubbery texture!

2 days ago

Great question! For best results when reheating, toss them in a hot pan for 1-2 minutes with a tiny splash of water, or use the microwave at 50% power for 30 seconds to keep them juicy!

yesterday

Made these for our family taco night last night, swapped them in for ground beef in sausage tacos and everyone went crazy! So much juicier than the pre-cooked links I usually just nuke, and it barely took any extra effort. My 7 year old said it’s the “best taco meat ever” and that’s the highest praise I can get tbh.

30 minutes ago

Love that taco swap idea! We’re totally stealing that for our next taco Tuesday, so glad your kiddo approved 😊

5 minutes ago

Perfect for my tiny dorm kitchen! I only have one little pan and no fancy equipment, and these turned out amazing. Way cheaper and tastier than getting takeout sausage from the diner down the street, and it took less time than waiting for delivery. Will be a staple for me this semester.

1 week ago

Brought these to our neighborhood block party potluck last weekend and they were the first appetizer gone! People kept asking me for the recipe all night, I felt like a fancy chef. I cut them into slices and served them with honey mustard dip, chef’s kiss.

5 days ago

Oh the honey mustard dip idea is genius! Did you make your own or use store bought? I need to make these for my book club next week!

3 days ago

We love serving these with a quick homemade honey mustard (equal parts honey, dijon, and a splash of apple cider vinegar) but your favorite store bought brand works perfectly too for a low-effort potluck pick!

2 hours ago

Game changer for my high protein meal plan! Most chicken sausage recipes leave them so dry I have to douse them in hot sauce to choke them down, but these were juicy all on their own. 20 minutes from fridge to plate, no fancy steps, perfect for post-gym dinners when I’m starving and don’t want to cook for long.

30 minutes ago

Right?! I’ve been eating these post-lift all week, I add a side of roasted broccoli and it hits every macro goal without tasting like diet food.

2 days ago

Made these for a casual date night with my partner last night, served over creamy polenta and they were so impressive! They thought I spent way longer cooking than I actually did, I didn’t even tell them the whole thing took 20 minutes. 10/10 for low effort, high reward date night food.

2 weeks ago

I was skeptical because I’ve always cooked my sausage on the grill, but it was pouring rain last weekend so I gave this pan method a shot. I’ll admit it, these were juicier than the grilled ones I make half the time. Don’t tell my BBQ buddies I said that though, they’ll kick me out of the cookout group.

1 week ago

Your secret’s safe with us! 😉 Pan-searing locks in so much moisture, we won’t tell your grill crew if you don’t. Next time you can finish them with a quick brush of BBQ sauce in the pan for that familiar grilled flavor!

5 days ago

So happy I found this! My youngest has a bunch of food allergies so we make a lot of our meals from scratch, and this method works perfectly with the homemade chicken sausage we mix up. No weird added ingredients, super juicy, even the baby loved gnawing on a cut up link for dinner.

3 days ago

Wait do you have a recipe for your homemade chicken sausage? I’m always looking for gluten free, no filler sausage recipes that don’t cost a fortune at the grocery store!

2 days ago

I do! I just mix ground chicken with garlic, paprika, fennel, a little maple syrup and salt, stuff it into casings or make patties if I’m feeling lazy. Super easy!

30 minutes ago

I’m the worst at cooking meat, I always either undercook it or burn it to a crisp. This recipe was foolproof! I followed the timings exactly and every link was perfectly golden on the outside, juicy in the middle, no charred mess, no raw middle. My wife was shocked I didn’t set off the smoke alarm for once, haha.

5 minutes ago

That’s what we love to hear! This method is designed to be totally foolproof for even the newest cooks, so glad you pulled off a perfect batch without the smoke alarm going off 😂

1 week ago

Made these for brunch last Sunday, sliced them up and added them to our breakfast spread with scrambled eggs, hash browns, and pancakes. So much better than the sad frozen breakfast links I usually buy, everyone commented on how juicy and flavorful they were. Will be a brunch staple from now on!

3 days ago

Chicken sausage is such a cheap protein option but I always thought it was boring until I tried this recipe. The crust you get from searing it adds so much flavor, you don’t even need a ton of fancy seasonings. I fed my whole family of 4 for under $10 last night, you can’t beat that.

2 days ago

Right?! I stock up on chicken sausage when it goes on sale at the grocery store, this recipe makes it taste like a fancy restaurant meal for pennies.

2 weeks ago

This is a great base recipe! I added a little cajun seasoning to the pan while the sausages seared and tossed them with sautéed peppers and onions for a quick po’ boy sandwich. It was absolutely insane, so juicy, the perfect amount of crunch on the outside. 10/10 will be experimenting with more seasonings next time.

1 week ago

That cajun po’ boy twist sounds incredible! We love how versatile this recipe is, you can swap the seasonings to match whatever meal you’re making. Great call!

5 days ago

Oh that po’ boy idea is chef’s kiss, I’m making that this weekend! Do you toast the hoagie rolls first?

2 hours ago

I didn’t have chicken sausage on hand so I used turkey sausage links with this method and it worked perfectly! Still so juicy, no dryness, that sear was perfect. I love when a recipe is flexible enough for last minute swaps when I don’t feel like running to the grocery store.

30 minutes ago

So glad the turkey sausage swap worked out! This searing method works for just about any pre-cooked or fresh sausage link, so feel free to use whatever you have in the fridge next time.

1 week ago

Made these for the football watch party at my place last Sunday, served them on a platter with different dipping sauces and they were a total hit. Everyone was grabbing them between plays, we polished off two whole packs before halftime. Way easier than making wings, and way less messy too.

yesterday

First time ever cooking sausage on the stove and I didn’t mess it up! I was so worried I’d undercook it, but the timing guide in the recipe was spot on. They were so juicy I couldn’t believe I made them myself. Served them with mashed potatoes and green beans for a cozy little dinner, felt like a real adult.

2 hours ago

Same! I was so nervous I’d burn them, but the step by step directions are so easy to follow, I made them last week too and they were perfect. Welcome to the adult cooking club!

5 days ago

I chopped these up and tossed them into pasta with roasted zucchini and tomato sauce last night, and my kids ate every bite without complaining about the veggies! Win for mom. The sausage added so much flavor I barely had to add any extra seasoning to the pasta, it was perfect for a quick weeknight meal.

3 days ago

That’s the best kind of weeknight win! Sneaking veggies into meals is a parent superpower, so glad the whole family cleaned their plates 😊

2 days ago

I did the same thing last week! Added some spinach too and my toddler didn’t even notice, he just kept asking for more “sausage noodles.” Total game changer for picky eaters.

2 days ago

Love how quick this is! I hate making meals that create a ton of dishes, and this only uses one pan, so cleanup is a total breeze. I just wipe out the pan after searing the sausage and use it to cook a quick side of veggies too, less water wasted, less time scrubbing dishes after dinner. Perfect for low-fuss weeknights.



