
bisquick fried chicken

title 1
bisquick fried chicken
⏱️ cook time 30 minutes
🍽️ servings 4
⚡ Difficulty easy

intro

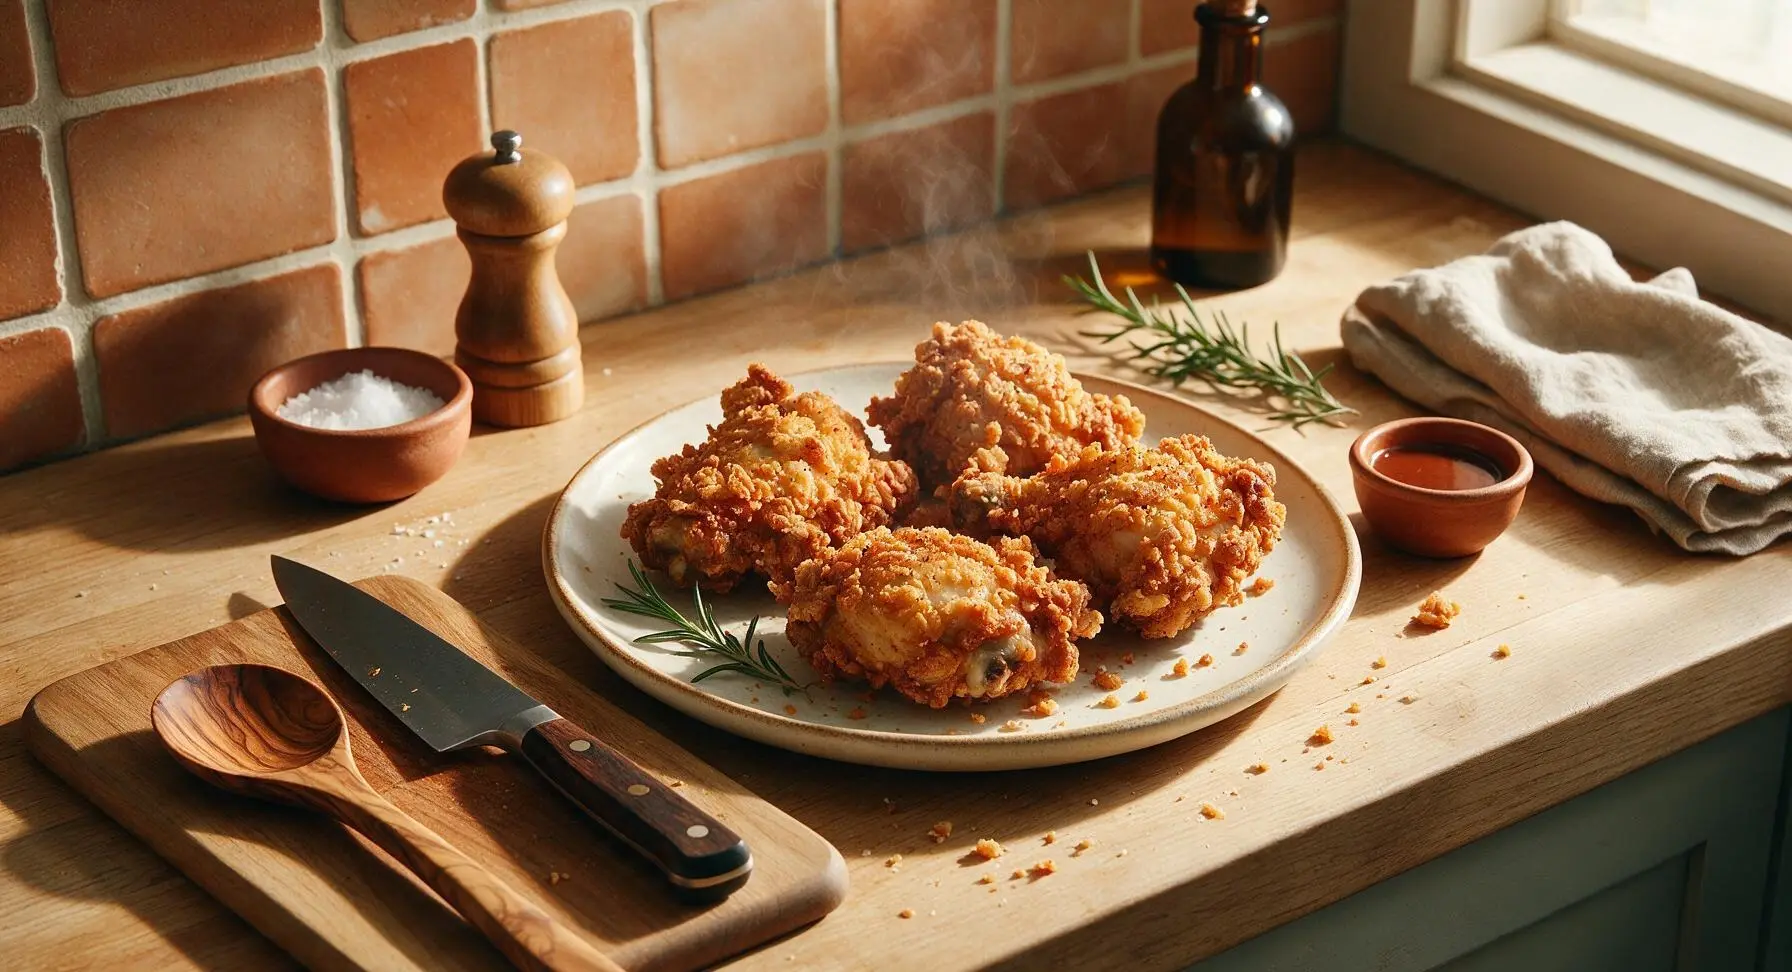
Shatteringly crisp, seasoned Bisquick crust clinging to juicy, tender bone-in chicken, this easy comfort food delivers classic fried chicken flavor with half the prep work.

Ingredients
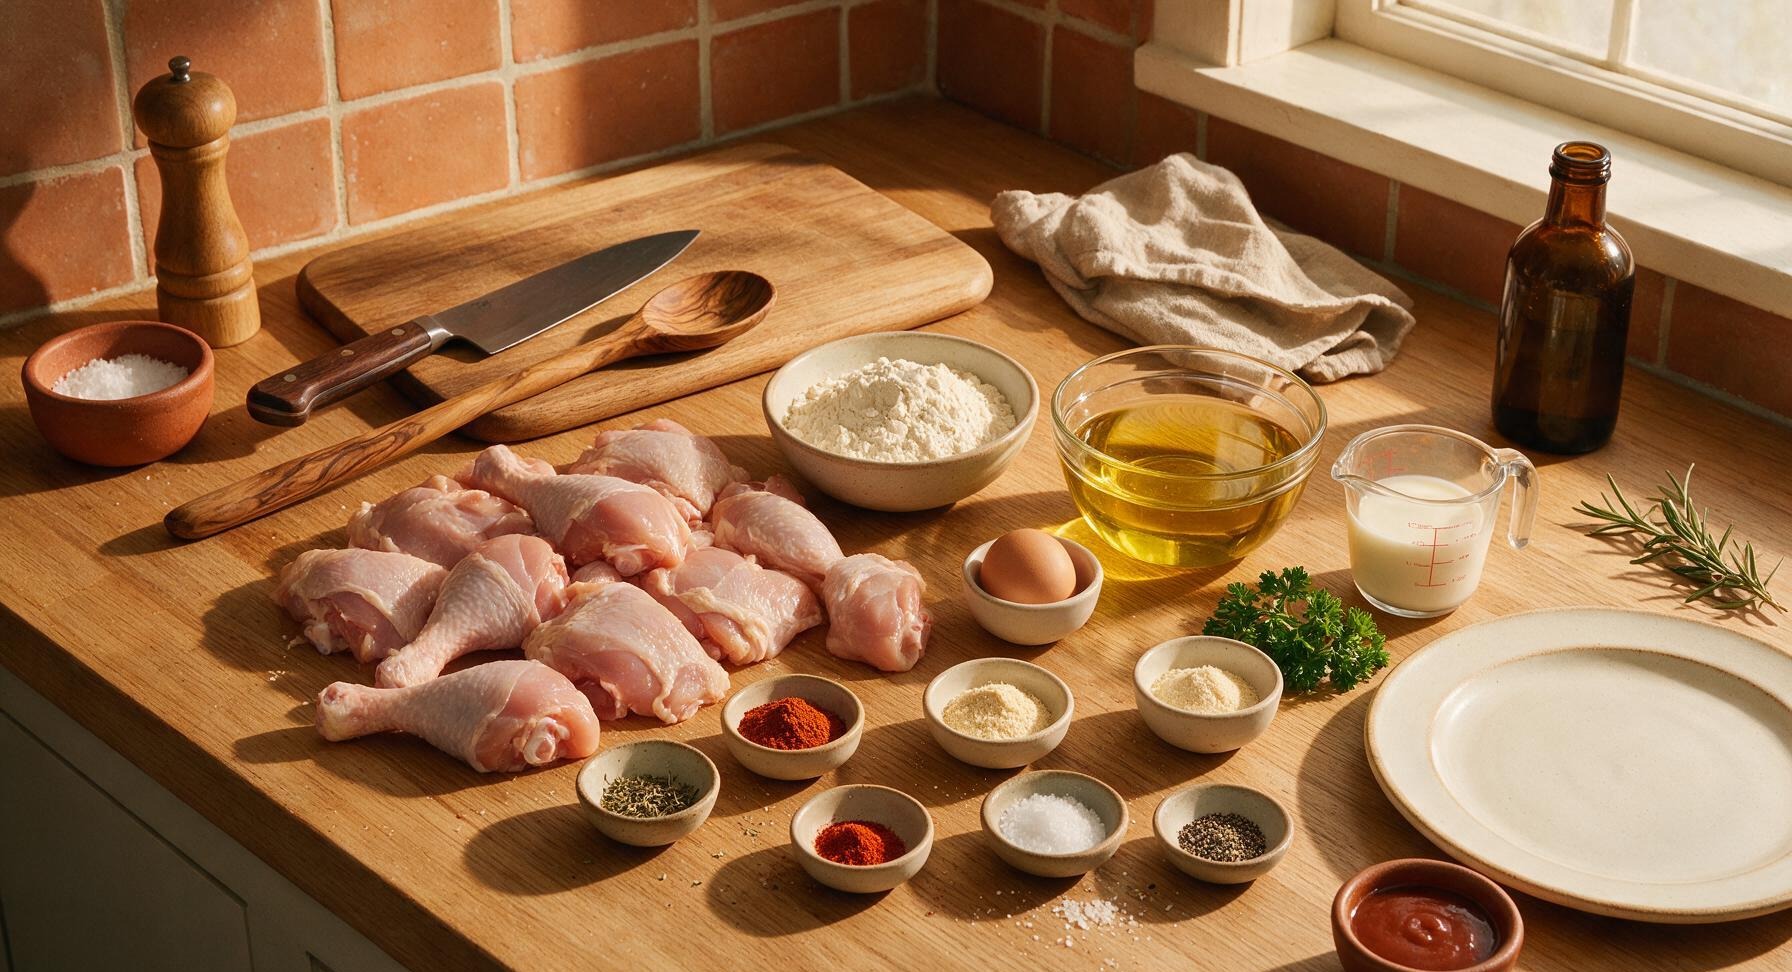
Bone-in, skin-on chicken pieces (drumsticks, thighs, tenders) 1.2 kg (2.6 lbs)
Original Bisquick baking mix 1.5 cups (180g)
Canola oil (for frying) 4 cups (960ml)
Large egg 1 unit
Whole milk ¼ cup (60ml)
Paprika 1 tbsp (7g)
Garlic powder 1 tsp (3g)
Onion powder 1 tsp (3g)
Dried thyme ½ tsp (1g)
Cayenne pepper ¼ tsp (0.5g)
Kosher salt 1.5 tsp (9g), plus extra for finishing
Freshly ground black pepper 1 tsp (2g)
Fresh curly parsley (for garnish) 1 small bunch

Steps

1

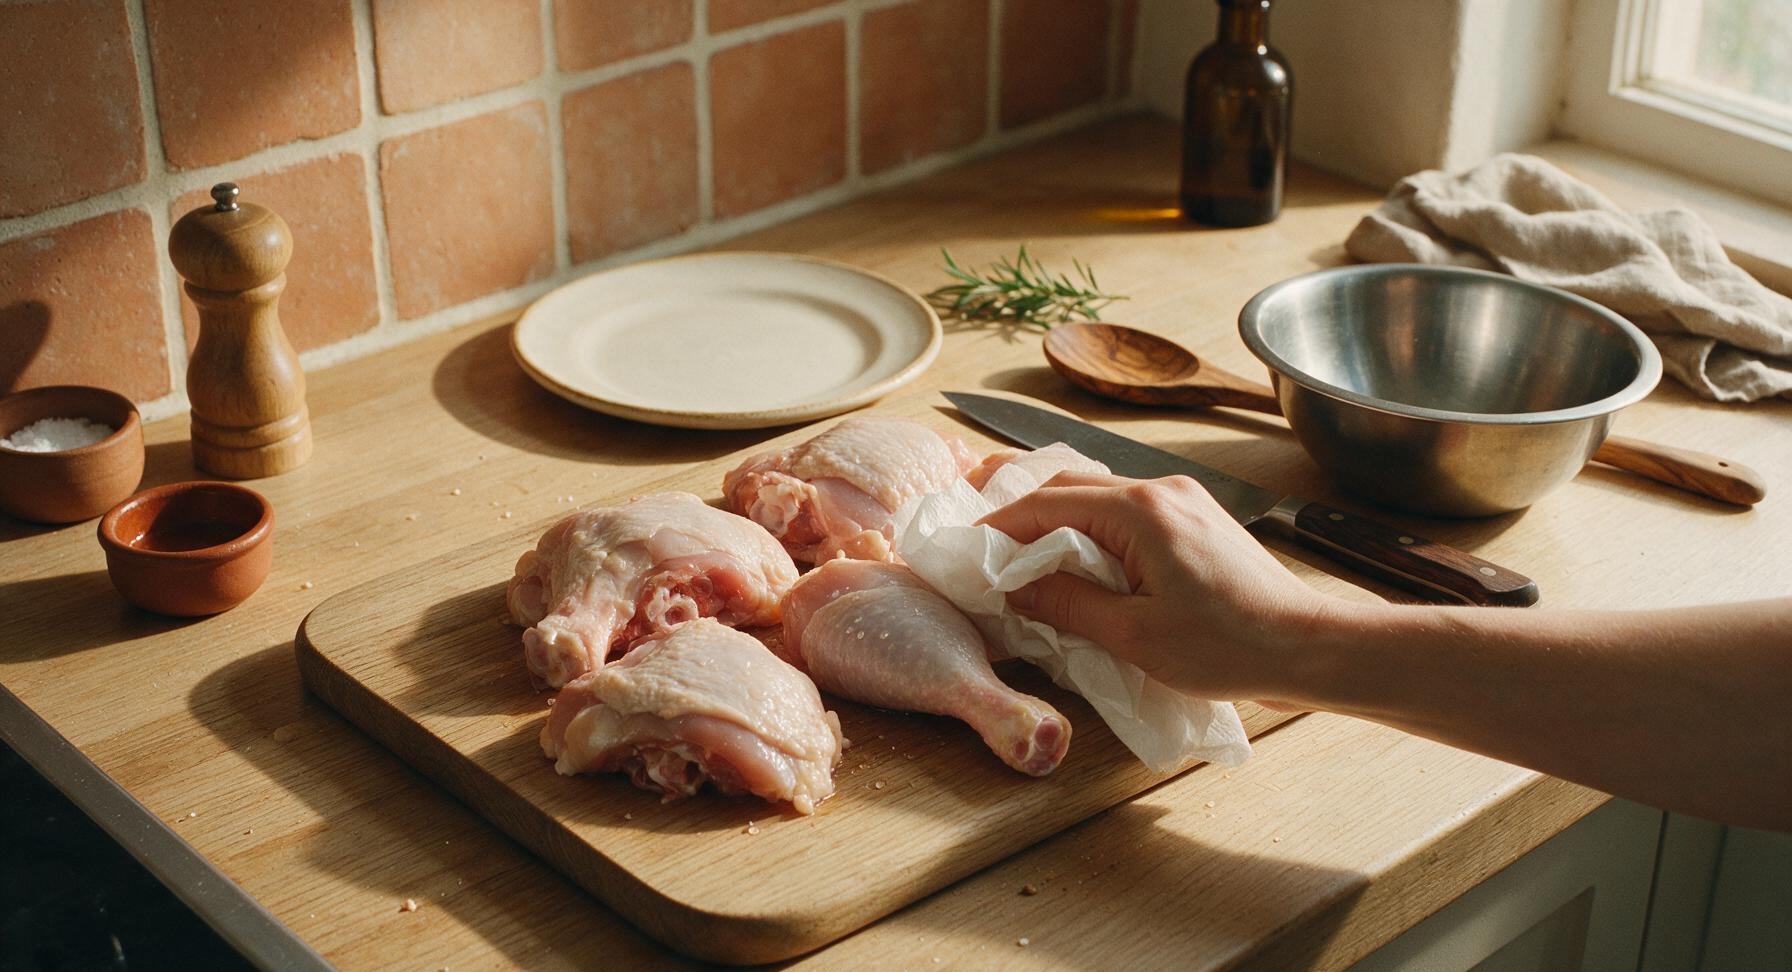
Pat Chicken Dry

Remove 1.2kg of bone-in, skin-on chicken pieces from packaging, arrange them on the light maple cutting board. Pat every surface thoroughly dry with paper towels, paying extra attention to the skin and crevices around bones. Dry chicken will help the coating adhere tightly and prevent dangerous oil splattering during frying; the skin should feel fully matte, not slick or damp, to the touch when finished.
Step 1
step1:Pat Chicken Dry
2

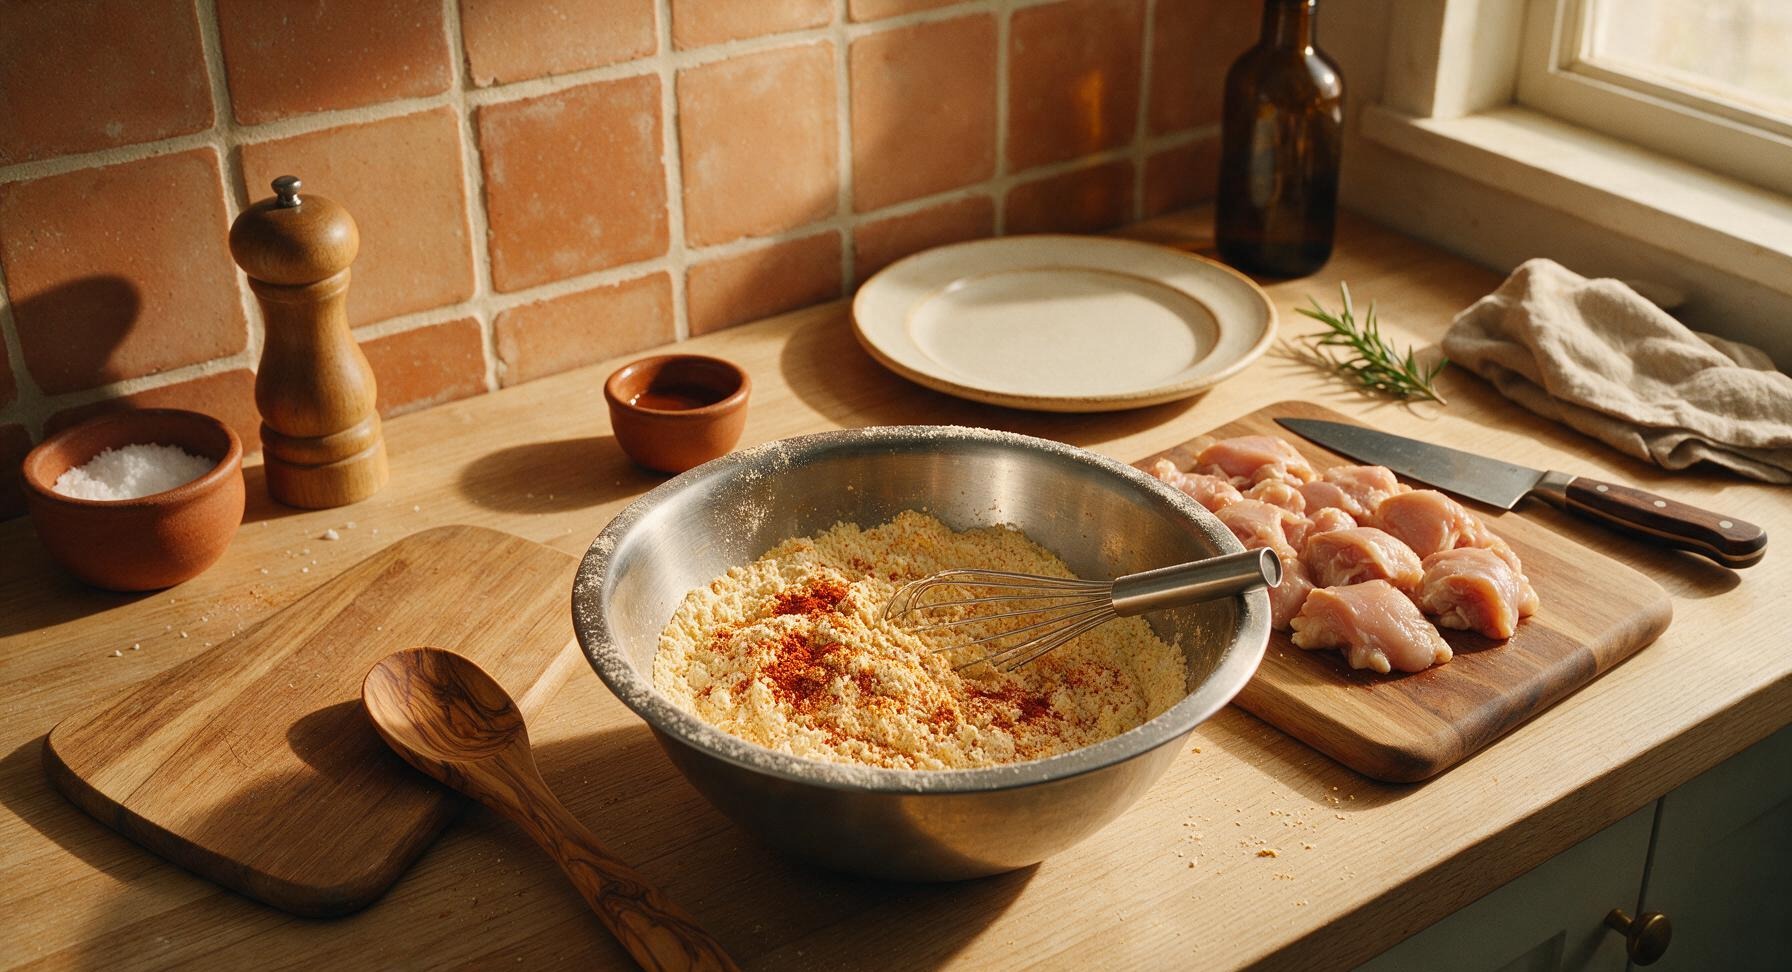
Mix Seasoned Coating

Pour 1.5 cups original Bisquick baking mix into the stainless steel mixing bowl. Add 1 tbsp paprika, 1 tsp garlic powder, 1 tsp onion powder, ½ tsp dried thyme, ¼ tsp cayenne pepper, 1.5 tsp kosher salt, and 1 tsp freshly ground black pepper. Use the stainless steel whisk to stir thoroughly for 30 seconds until all spices are evenly distributed through the pale Bisquick, with no dark clumps of concentrated spice remaining.
Step 2
step2:Mix Seasoned Coating
3

Make Egg Wash

Crack 1 large egg into the shallow cream ceramic egg dish, add ¼ cup whole milk, and whisk with a fork until fully combined, with no streaks of separate egg white remaining. The finished wash should be a uniform pale yellow, thin enough to coat chicken without forming thick clumps.
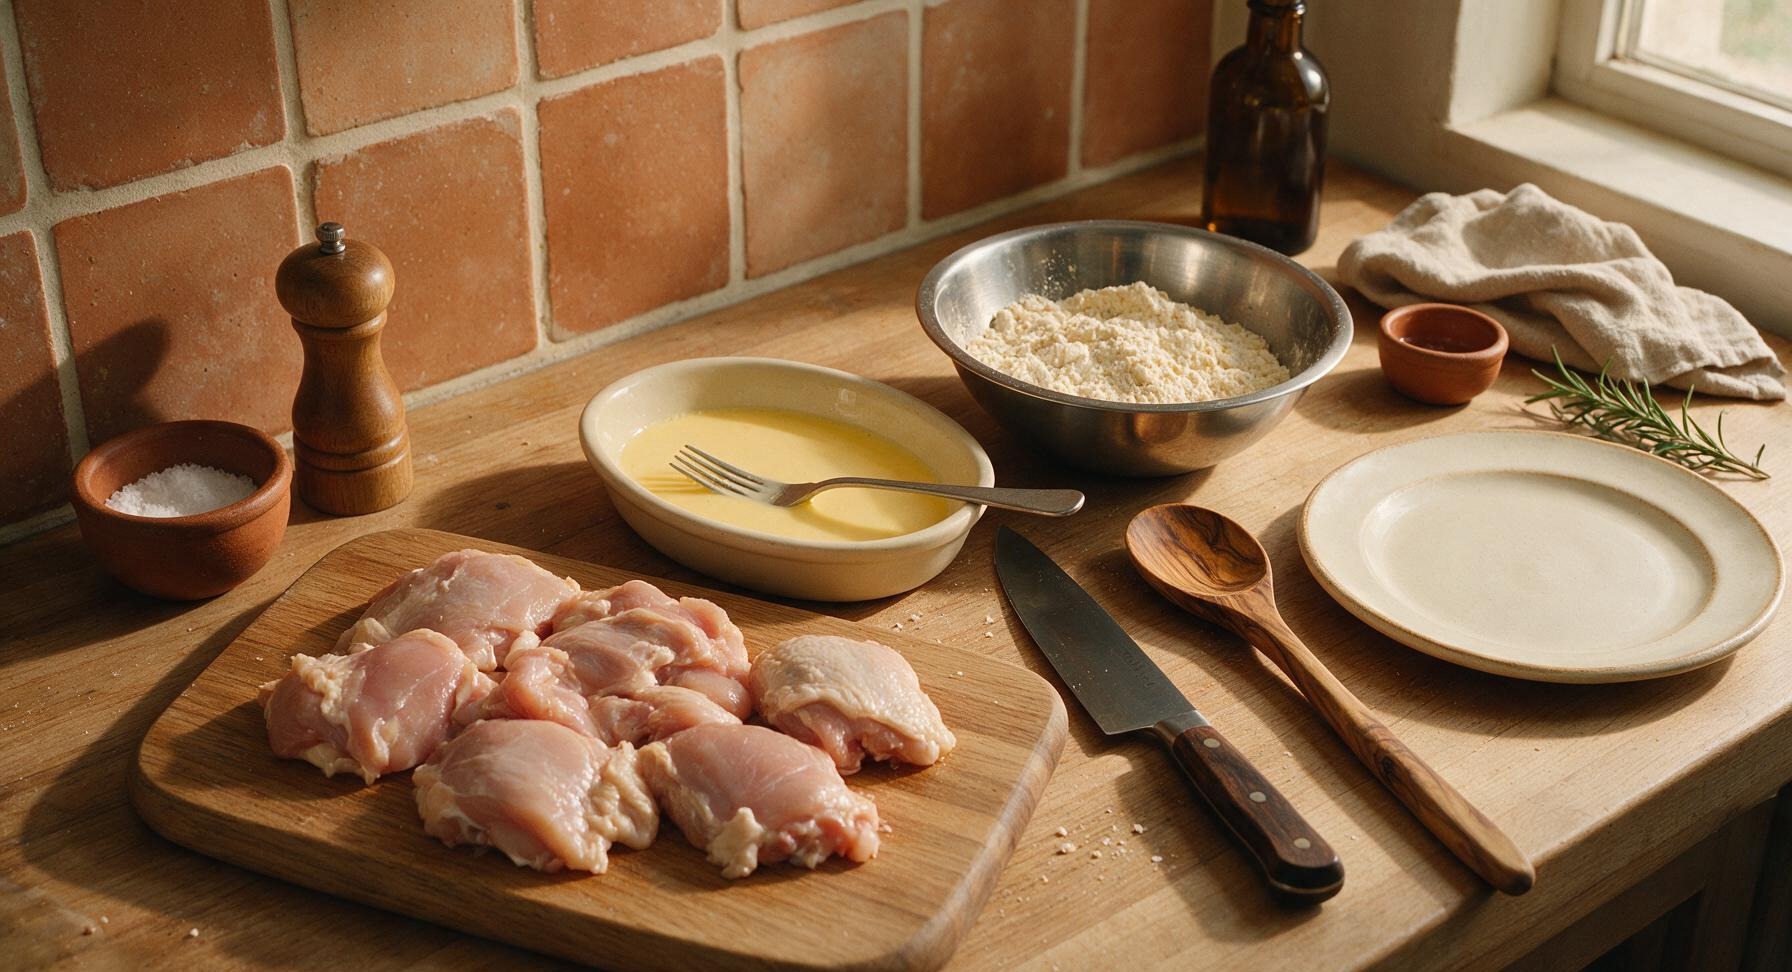
Step 3
step3:Make Egg Wash
4

Coat Chicken Pieces

Working one piece at a time, dip a chicken piece fully into the egg wash, letting excess drip off for 2 seconds, then drop it into the seasoned Bisquick mixture. Toss to coat fully, pressing the Bisquick firmly onto every surface of the chicken, including under loose skin flaps, to create a thick, craggy coating. Set coated pieces on a clean section of the cutting board, and let rest for 5 minutes to allow the coating to set—this prevents it from falling off during frying.
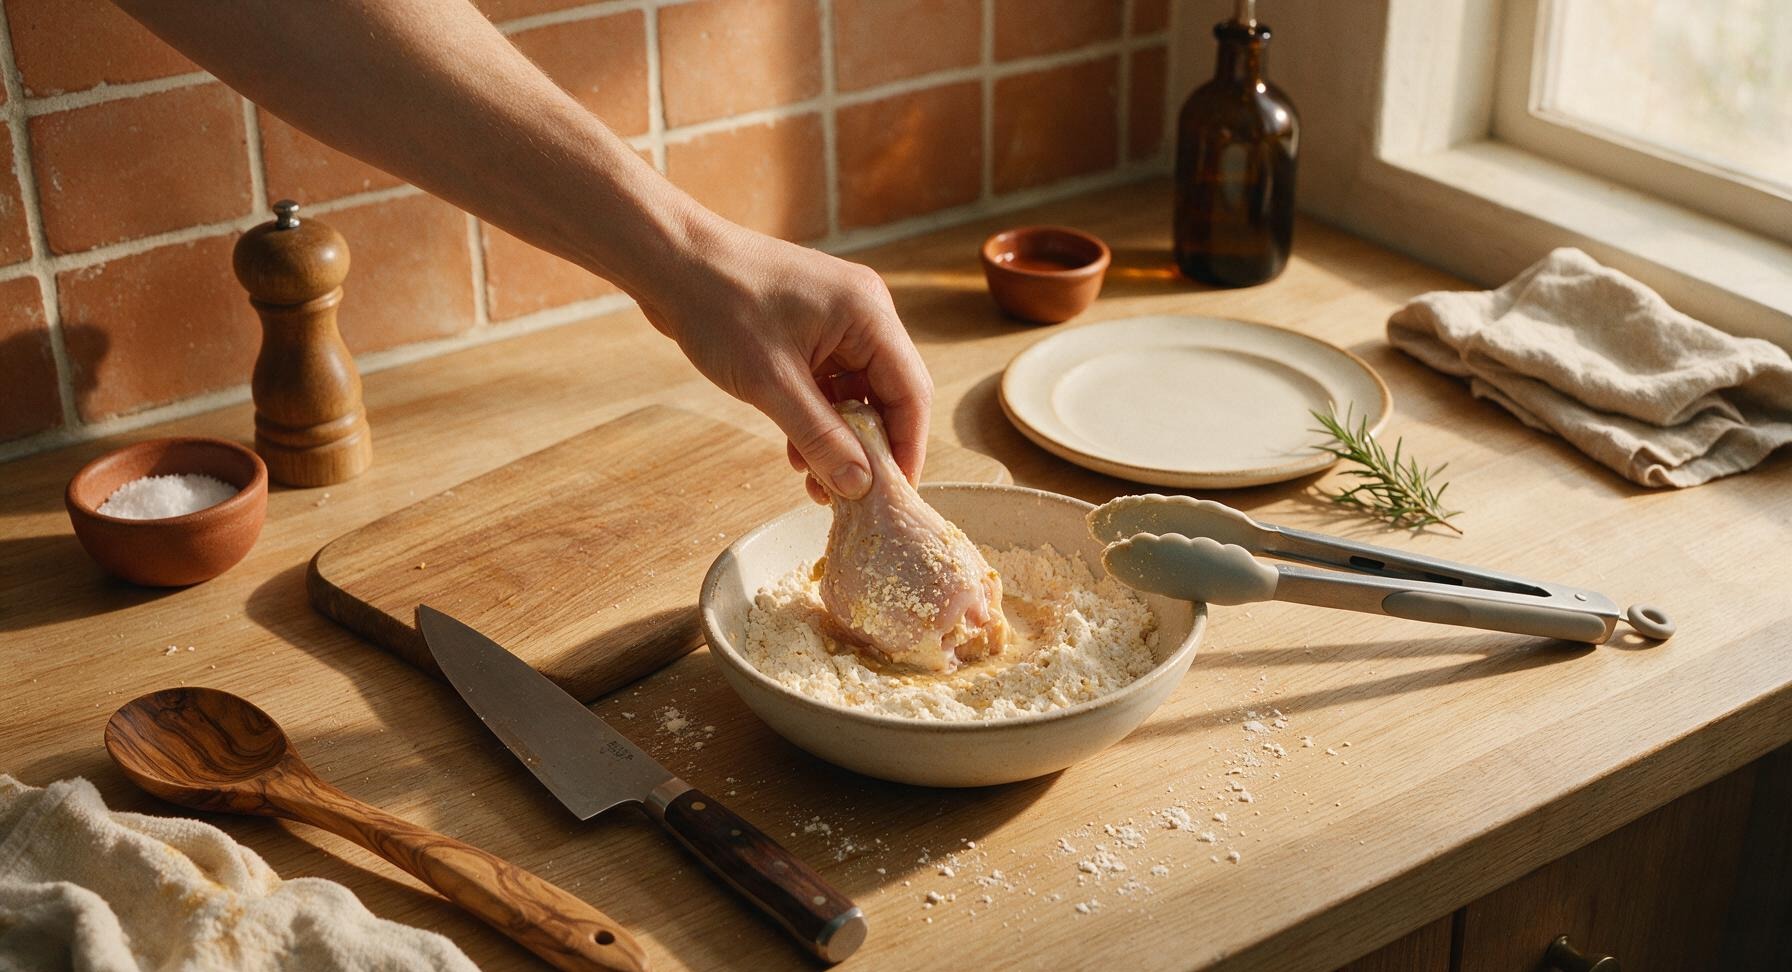
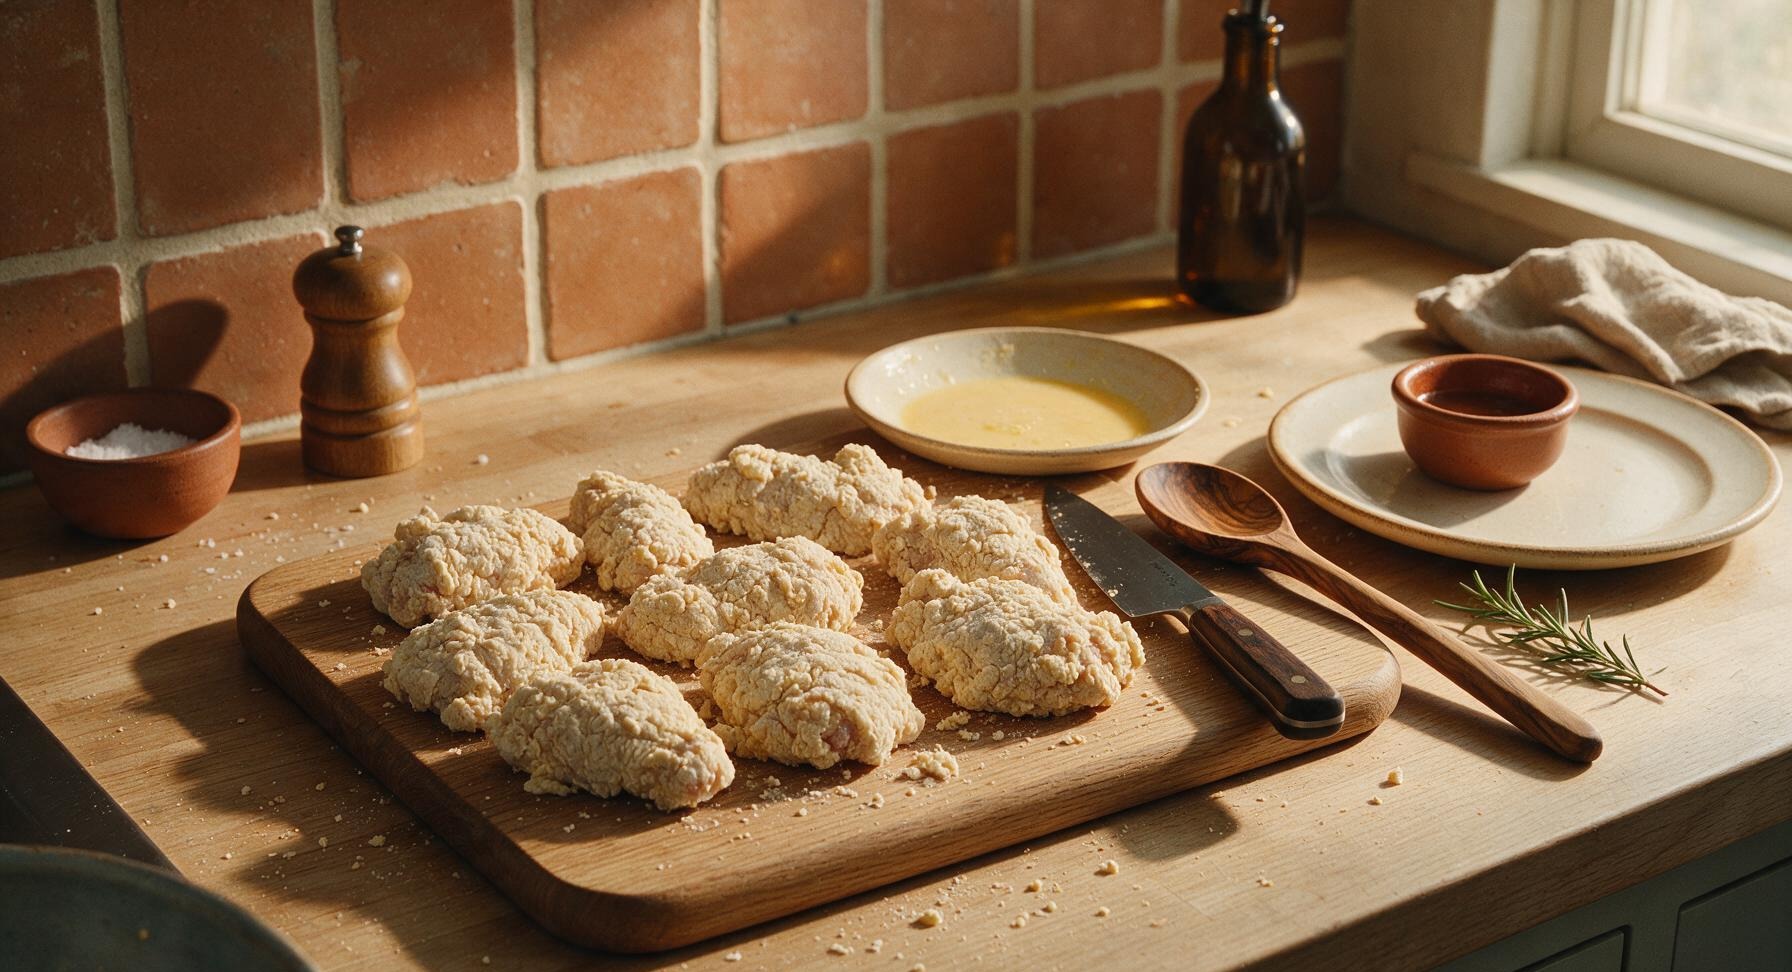
Step 4
step4:Coat Chicken Pieces
Step 4
step4:Coat Chicken Pieces
5

Heat Frying Oil

Place the pre-seasoned 12-inch cast iron skillet on the rear stovetop burner. Pour 4 cups canola oil into the skillet, until oil reaches exactly 1 inch depth up the sides of the pan. Heat oil over medium heat until it reaches 350°F (175°C), measured with the instant-read thermometer. Do not let oil exceed 375°F, as this will burn the Bisquick coating before the chicken cooks through.
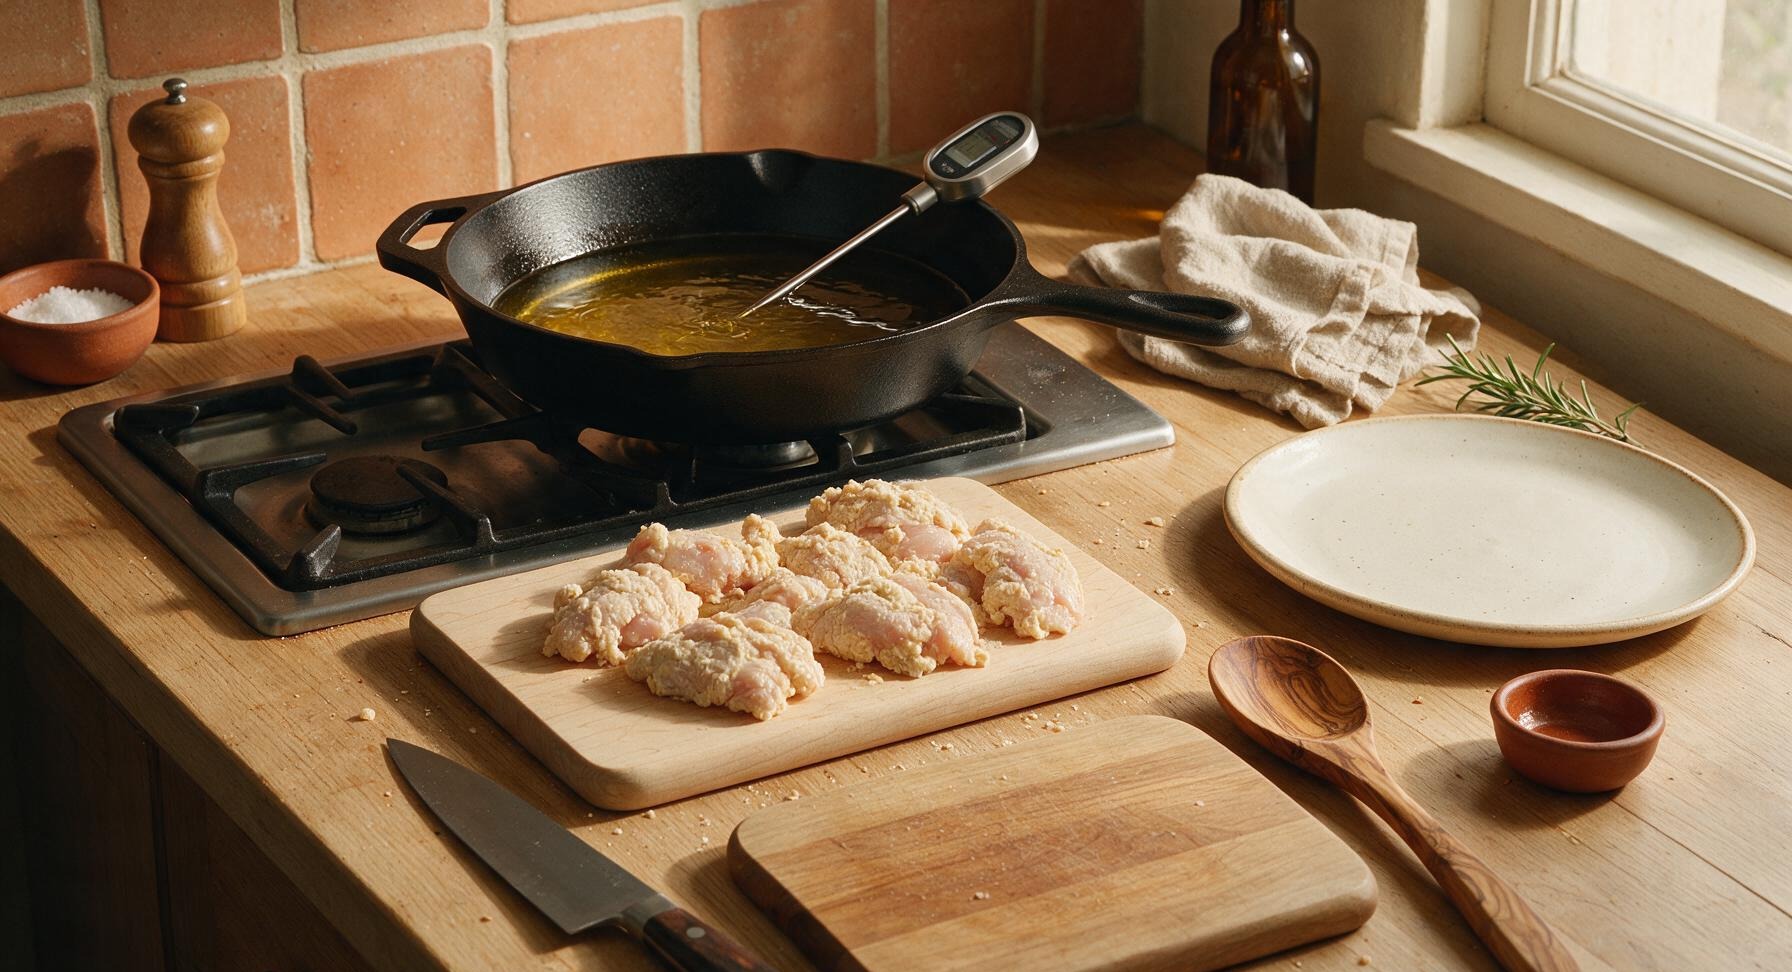
Step 5
step5:Heat Frying Oil
6

Fry Chicken Batches

Using the silicone-tipped tongs, carefully lower 3-4 chicken pieces into the hot oil, making sure not to overcrowd the pan (overcrowding drops oil temperature and makes chicken soggy). Fry for 12-14 minutes total, turning pieces every 3-4 minutes, until the coating is a deep golden brown, crisp, and the internal temperature of the thickest part of the chicken reaches 165°F (74°C) on the instant-read thermometer. Adjust stovetop heat as needed to maintain a steady 350°F oil temperature throughout frying.
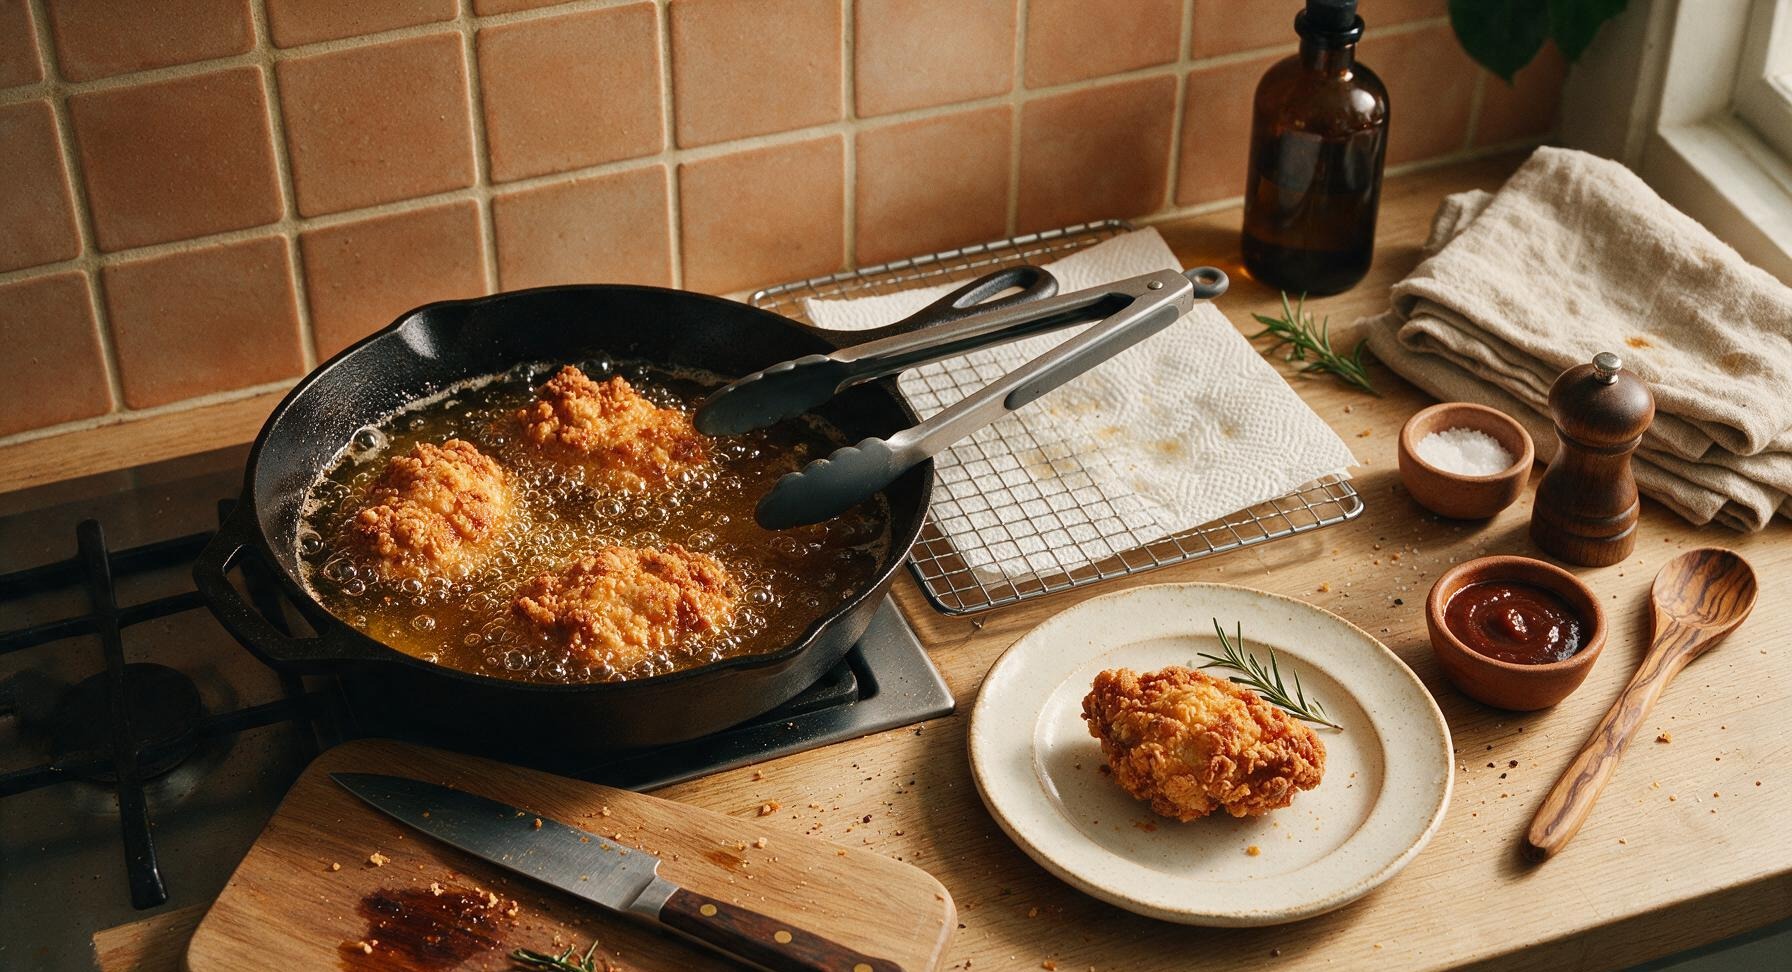
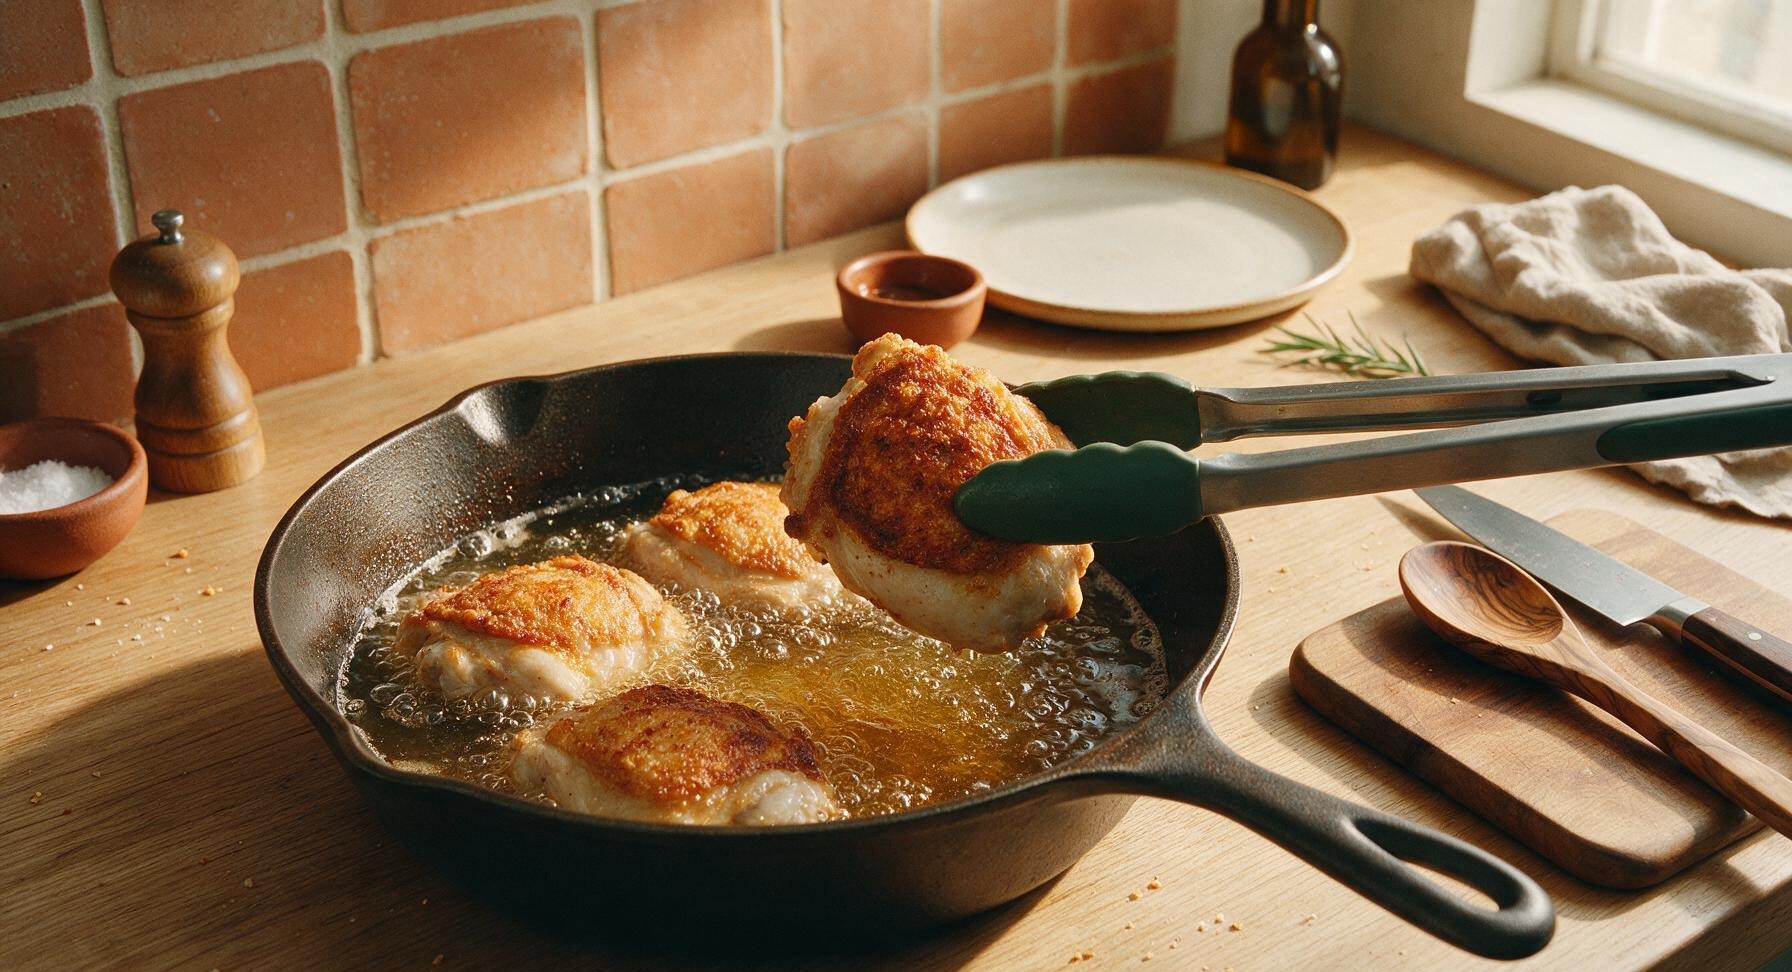
Step 6
step6:Fry Chicken Batches
Step 6
step6:Fry Chicken Batches
7

Drain and Season

As each batch finishes frying, use tongs to lift chicken pieces from the oil, letting excess oil drip back into the skillet for 2 seconds, then transfer pieces to the paper-towel lined wire cooling rack. Lightly season the hot chicken with a pinch of extra kosher salt immediately after removing from oil, then let rest for 5 minutes to allow juices to redistribute—do not stack pieces, as this will trap steam and make the crust soggy.
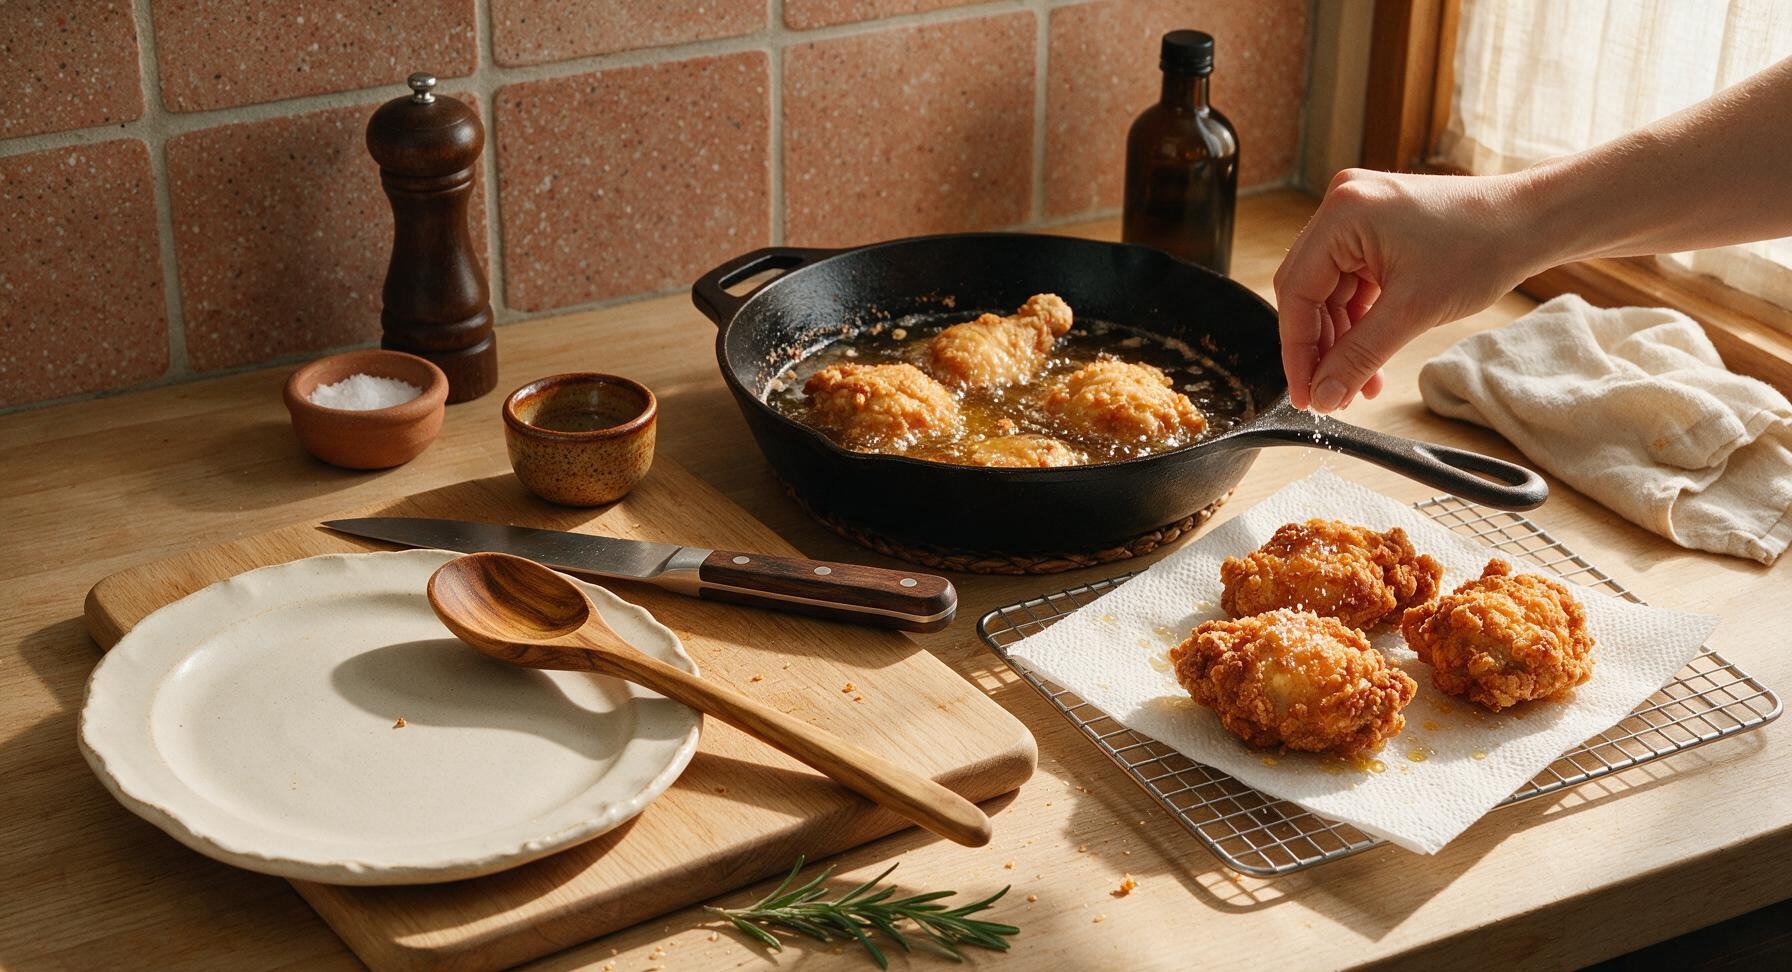
Step 7
step7:Drain and Season
8

Plate and Serve

Arrange the rested fried chicken pieces loosely on the matte cream ceramic dinner plate, tuck a small sprig of fresh curly parsley between pieces for garnish. Serve warm, or let cool completely for picnic service—this chicken stays crisp for up to 2 hours at room temperature, making it ideal for outdoor meals.
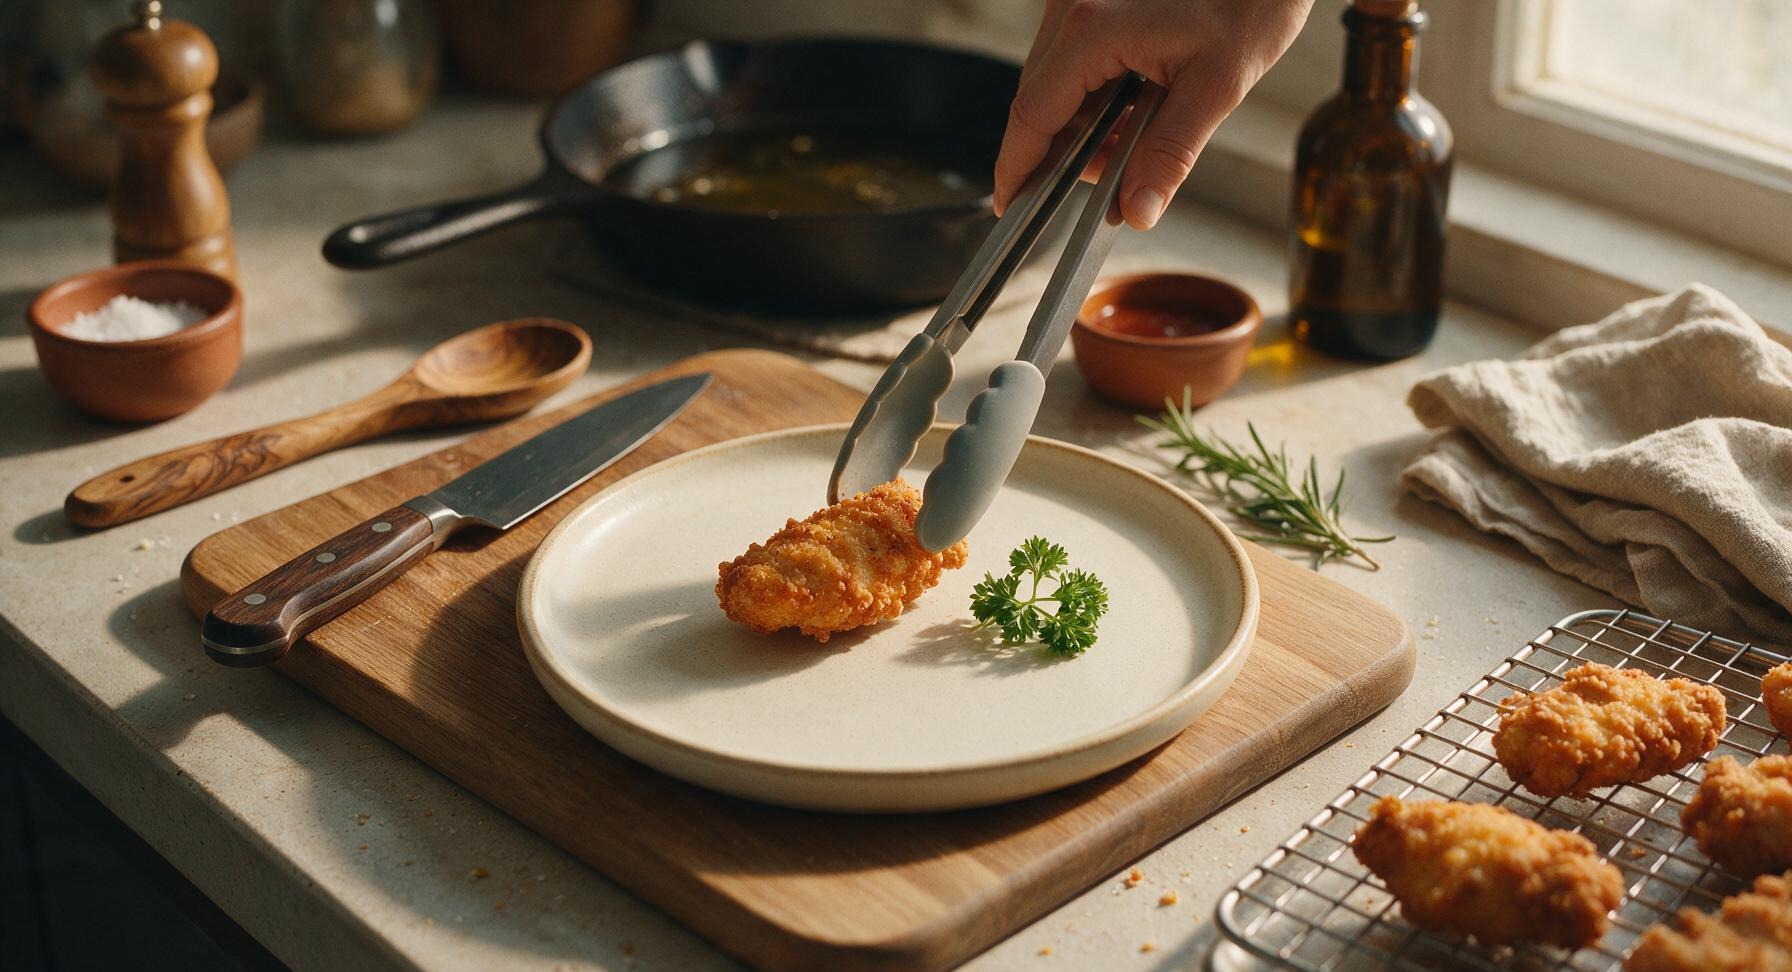
Step 8
step8:Plate and Serve

Tips

1.Do not skip the 5-minute rest after coating the chicken: this allows the Bisquick to absorb moisture from the egg wash, creating a craggy, extra-crisp crust that adheres tightly to the chicken, rather than a thin, flimsy coating that slides off into the frying oil.
2.Maintain a steady 350°F oil temperature by frying in small batches: if oil drops below 325°F, the chicken will absorb excess oil and turn greasy, while oil over 375°F will burn the subtly sweet Bisquick coating to a dark brown before the chicken cooks through to the bone.
3.Drain fried chicken on a wire rack rather than piling it directly on a thick stack of paper towels: air circulation under the chicken keeps the crust crisp on all sides, while sitting directly on pooled absorbed oil on paper towels will turn the bottom crust soggy in seconds.


✨ You May Also Like

Main Course
🍜 United Kingdom

A showstopping classic of tender seared beef, savory mushroom duxelles, and crisp prosciutto wrapped in flaky golden puff pastry, baked to juicy perfection.

⏱️ 2 hours 1Main Course ★ 4.7
Main Course
🍜 India

Tender charred marinated chicken simmered in a rich, spiced creamy tomato sauce, this iconic Anglo-Indian curry pairs perfectly with basmati rice or warm naan.

⏱️ 50 minuteMain Course ★ 4.6
Main Course
🍜 Thailand

Classic tangy, sweet, and savory Thai stir-fried rice noodles with shrimp, tofu, and crunchy garnishes, balancing all five core Thai flavor profiles.

⏱️ 30 minuteMain Course ★ 4.5
Main Course
🍜 United Kingdom

Crispy golden beer-battered cod and fluffy double-fried chips, served with tangy tartar sauce and malt vinegar: the timeless, beloved British pub comfort classic.

⏱️ 45 minuteMain Course ★ 4.7
Main Course
🍜 Mexico

Smoky, chile-marinated pork tacos with caramelized pineapple, fresh cilantro, and lime: a beloved classic Mexican street food perfect for casual summer gatherings.

⏱️ 1 hour 45Main Course ★ 4.8
Main Course
🍜 United States

Crunchy Fritos corn chips layered with savory beef chili and melted cheddar, topped with cool, zesty fixings for a beloved, cozy Tex-Mex comfort food.

⏱️ 35 minuteMain Course ★ 4.8

bisquick fried chicken:Frequently Asked Questions

1.Can I use boneless, skinless chicken instead of bone-in, skin-on pieces for this recipe? ▾
You absolutely can, though bone-in, skin-on cuts stay juicier during frying for that classic, succulent fried chicken texture. If using boneless, skinless cuts, reduce fry time by 3-4 minutes to avoid dryness, pat chicken extra dry before dredging to help the Bisquick crust stick, and confirm a 165°F internal temp at the thickest point.
2.Why is my Bisquick crust falling off the chicken when I fry it? ▾
This almost always traces back to excess moisture on the chicken or skipping the post-dredge resting step. Pat chicken completely dry before dipping in the egg-milk wash, coat evenly in Bisquick, then let pieces rest on a wire rack for 10 minutes before frying so the crust sets and adheres instead of sliding off in the hot oil.
3.What oil temperature do I need to get that shatteringly crisp crust without burning? ▾
Heat your canola oil to a steady 350°F before adding any chicken, using a clip-on candy thermometer to track temp consistently. Don’t overcrowd the pan, which drops oil temp too fast and leads to soggy, greasy crust. If you don’t have a thermometer, a pinch of Bisquick should sizzle and turn golden in 10 seconds when oil is ready.
4.Can I bake this Bisquick fried chicken instead of deep frying to cut down on oil? ▾
Absolutely! For a lighter baked version, preheat your oven to 425°F, place coated chicken on a greased wire rack set over a baking sheet, and spritz lightly with canola oil. Bake for 35-40 minutes, flipping halfway, until the crust is golden and chicken hits 165°F internally. The crust won’t be quite as shatter-crisp as fried, but it’s still delicious.
5.Do I need to add extra seasoning to plain Original Bisquick for the coating? ▾
Plain Original Bisquick works in a pinch, but adding a few simple seasonings kicks the flavor up to match classic fried chicken. I recommend mixing in 1 tsp paprika, ½ tsp garlic powder, ½ tsp black pepper, ¼ tsp cayenne, and 1 tsp kosher salt per cup of Bisquick to avoid that flat, plain baking mix taste on the crust.
6.How long should I fry chicken pieces to make sure they’re cooked through but not overdone? ▾
Fry time varies by cut: drumsticks and thighs take 12-15 minutes total, while smaller tenders only take 6-8 minutes. Always verify doneness with an instant-read thermometer stuck into the thickest part of the cut, not touching bone—you’re looking for 165°F internal temp, with a deep golden, crisp crust. Rest 5 minutes before serving.
7.Can I use a different frying oil instead of canola oil for this recipe? ▾
You can swap canola for any neutral, high-smoke-point oil you have on hand, including vegetable oil, peanut oil, or light refined olive oil. Avoid strongly flavored oils like toasted sesame oil or extra-virgin olive oil, which have low smoke points and will either burn easily or leave an off, overpowering taste on your finished chicken.
8.Why is my finished crust coming out soggy instead of shatteringly crisp? ▾
Soggy crust usually comes from oil that’s too cold, overcrowding the fry pan, or improper draining after frying. Keep oil steady at 350°F, fry in small batches so pieces don’t touch, and drain finished chicken on a wire rack instead of paper towels, which trap steam and turn the bottom of the crust soft as it rests.
9.Can I prep this Bisquick fried chicken ahead of time for a party or potluck? ▾
You can prep the coated, uncooked chicken on a wire rack in the fridge for up to 4 hours before frying for seamless party prep. For leftover cooked chicken, reheat pieces on a wire rack in a 400°F oven for 10-12 minutes to crisp the crust back up. Skip the microwave, which turns the Bisquick crust rubbery and soggy fast.
10.What ratio of egg to milk works best for the wash to get an even, adherent crust? ▾
For this recipe, 1 large egg whisked with ½ cup whole milk creates the perfect sticky, thin wash that grabs the Bisquick coating without making the crust thick or gummy. Don’t make the wash too thick with extra egg or too watery with extra milk, as both lead to patchy, uneven crust that slides off during frying.

Comments (17)

1 week ago

OMG, game changer! I’ve been making fried chicken for years and never thought to use Bisquick for the coating. It got so perfectly crispy without that heavy, greasy feel you get with some batter recipes. Made this for Sunday dinner with mashed potatoes and green beans, and my husband said it’s better than the fast food fried chicken we get on road trips. Total win for an easy 30 minute meal!

3 days ago

As someone who can barely boil water without messing it up, this recipe was so forgiving! I had a box of Bisquick in my dorm pantry from making pancakes last month, grabbed some chicken thighs from the campus grocery store, and air fried them at 400 for 20 minutes and they came out insane. Crispy, juicy, no fancy ingredients. 10/10.

2 days ago

So glad it worked out for you, Jake! Love the air fryer hack — that’s such a great way to cut down on oil while still getting that crispy coating everyone loves. Thanks for sharing the tip!

2 weeks ago

Brought this to my neighborhood potluck last weekend and I swear every single person asked me for the recipe! People couldn’t believe the coating was just Bisquick and a few simple seasonings. I added a little extra cayenne for a tiny kick, and it was perfect. Will absolutely be making this again for our next block party.

1 week ago

How much cayenne did you add? I love a little heat but don’t want to make it too spicy for my kids who can’t handle much!

1 week ago

Just a 1/4 teaspoon for the whole batch! It gives it a little warm zing but no real burn, my 6 and 8 year old ate it with no complaints. If you want more heat you can bump it up to 1/2 tsp, but 1/4 is super family friendly!

5 days ago

This is my new go-to meal prep staple for the work week! It reheats so much better than I thought it would — the coating doesn’t get soggy in the microwave like regular breaded chicken does. I make a big batch on Sunday, portion it out with roasted veggies and rice, and I’ve got lunch for 4 days. Total time saver, and it’s easy enough that I don’t dread cooking on Sunday evenings.

30 minutes ago

Quick question — does this work with boneless skinless chicken breasts? I have a pack in the fridge I need to use up, but I usually only make fried chicken with bone-in pieces. Don’t want it to dry out!

5 minutes ago

Great question! Boneless skinless breasts work perfectly here — just pound them to an even 1-inch thickness first so they cook evenly, and keep an eye on the internal temp (pull them when they hit 165°F) so they don’t dry out. Enjoy!

yesterday

Wait, this is SO good. I was skeptical because Bisquick is for pancakes and biscuits, right? But that little bit of leavening in the mix makes the coating so light and crispy, not heavy at all. I dipped mine in honey mustard and it tasted exactly like the fried chicken my grandma used to make. Wild.

yesterday

Right?! My grandma used Bisquick for fried chicken back in the 70s and 80s, everyone thought she was crazy until they tried it. It’s such an underrated hack!

2 hours ago

Love that nostalgia! It really is a classic trick that’s been passed around for generations — the leavening in Bisquick is the secret to that perfectly light, shattery crust. So glad it brought back good memories for you two!

2 days ago

Made this last night for my three kids after soccer practice and it was a home run. 30 minutes start to finish, minimal cleanup, no fancy ingredients I had to run to the store for. I served it with mac and cheese and apple slices, and my kids loved it so much all three asked to have it again next week. That’s the highest possible praise in my book.

yesterday

Adding this to next week’s meal plan! My kids are so sick of my usual frozen chicken nugget routine, this sounds like the perfect upgrade that doesn’t take a ton of extra work.

2 hours ago

Pro tip: Let the chicken rest on a wire rack for 5 minutes after coating it in the Bisquick mix before frying. It helps the coating stick way better so you don’t have bits falling off in the oil. Total game changer for getting that perfect, even crunch all over every piece.

3 days ago

Uh oh, I think I messed this up? My coating came out a little splotchy and not as crispy as the pictures look. I used chicken drumsticks, fried them in vegetable oil for the time the recipe said, but parts of the coating slid off and some spots were softer than others. Any idea what I did wrong?

2 days ago

Did you pat your chicken dry before coating it? If the chicken is too wet the coating won’t stick right, and it’ll get soggy instead of crispy. I made that same mistake my first time too!

2 days ago

Holly is exactly right! Patting the chicken completely dry with paper towels before dipping is key for getting the coating to stick and crisp up properly. Also, make sure your oil is fully up to 350°F before adding the chicken — if it’s too cool, the coating will absorb excess oil and slide off. Give it another try, I bet it comes out perfect next time!

yesterday

Made these for our football watch party yesterday and they were gone in 10 minutes. I cut boneless thighs into nugget sized pieces, tossed them in the Bisquick mix with some paprika and garlic powder, fried em up, and served with a bunch of dipping sauces. Way better than ordering takeout wings, and way cheaper too.

2 hours ago

The nugget-sized game day version is such a great call! Perfect for grabbing between plays, and you can customize the seasonings to match whatever flavor vibe you’re going for. So glad it was a hit at your watch party!

5 days ago

Wait, does this work with the gluten free Bisquick? My daughter has celiac so I can’t use the regular mix, but this looks so good and I’d love to make it for our family dinner if it works!

3 days ago

I made it with gluten free Bisquick last week and it worked perfectly! Same crispy texture, no weird aftertaste, my whole family (even the non-gluten free folks) loved it.

1 week ago

Leftovers of this make the BEST fried chicken sandwiches the next day. Toast a bun, add a little mayo, pickles, a slice of cheese, and a piece of this cold chicken (or warm it up for 30 seconds in the air fryer) and it’s better than any fast food chicken sandwich I’ve ever had. Trust me on this.

2 weeks ago

Y’all, I was born and raised in Alabama and I’ve made a lot of fried chicken in my day. I tried this recipe on a whim when I ran out of all purpose flour mid-cook last week, and I’m not even kidding — it might be my new go-to coating. That subtle buttery flavor from the Bisquick takes it over the top. Who knew?!

1 week ago

As someone who’s never been able to get fried chicken right no matter what recipe I try, this gives me so much hope! If a Southern cook approves of Bisquick fried chicken, I know I can make it work too.

1 week ago

Honey, if I can make it and you follow the recipe, you’ve got this! Don’t overcomplicate it, just make sure your oil is hot enough and don’t crowd the pan while frying. You’ll be golden (pun intended)!

5 minutes ago

I almost skipped this because I thought fried chicken was too messy and time consuming for a weeknight, but 30 minutes is no joke! I didn’t even have to set up a fancy dredging station, just tossed the chicken and Bisquick mix in a Ziploc bag, shook it up, and fried it. Cleanup was so easy too. 10/10 for busy weeknights.

just now

The Ziploc bag shake method is our favorite low-mess trick too! No messy bowls to wash, every piece gets evenly coated, and it’s even fun to get the kids involved shaking the bag. So glad it made your weeknight dinner a little easier!

3 days ago

I thought the seasoning in the base recipe was a little bland for my taste, so I added a teaspoon of smoked paprika, half a teaspoon of garlic powder, half a teaspoon of onion powder, and a little black pepper to the Bisquick mix, and it was chef’s kiss. Don’t get me wrong, the base recipe is good, but a little extra seasoning took it to the next level for me.

2 days ago

Love those seasoning additions! Smoked paprika is such a great call for that deep, smoky flavor that pairs so well with crispy chicken. We designed the base recipe to be super customizable so everyone can tweak it to their own taste preferences.

yesterday

Tried your exact seasoning blend last night and you were so right! It added so much flavor without overpowering that nice crispy Bisquick crust. Thanks for the tip!

2 days ago

I live in a tiny studio apartment with no fancy deep fryer, and I made this in my 10 inch cast iron skillet with just an inch of oil and it worked perfectly! You don’t need any fancy equipment to make really good fried chicken, who knew? It came out just as crispy as the fried chicken I get at my local diner, for a fraction of the price.

1 week ago

Made this for our family picnic over the weekend and it held up so well even after sitting out for an hour! I was worried the coating would get soggy once it cooled down, but it stayed crispy the whole time. Even my cousin who swears he ‘hates anything made with baking mix’ went back for a third piece. Total win!

5 days ago

This is exactly what I was looking for! I need something to bring to our company picnic next week that won’t get soggy in the cooler, I’m definitely adding this to the menu.



