
budget bytes breakfast burrito

title 1
budget bytes breakfast burrito
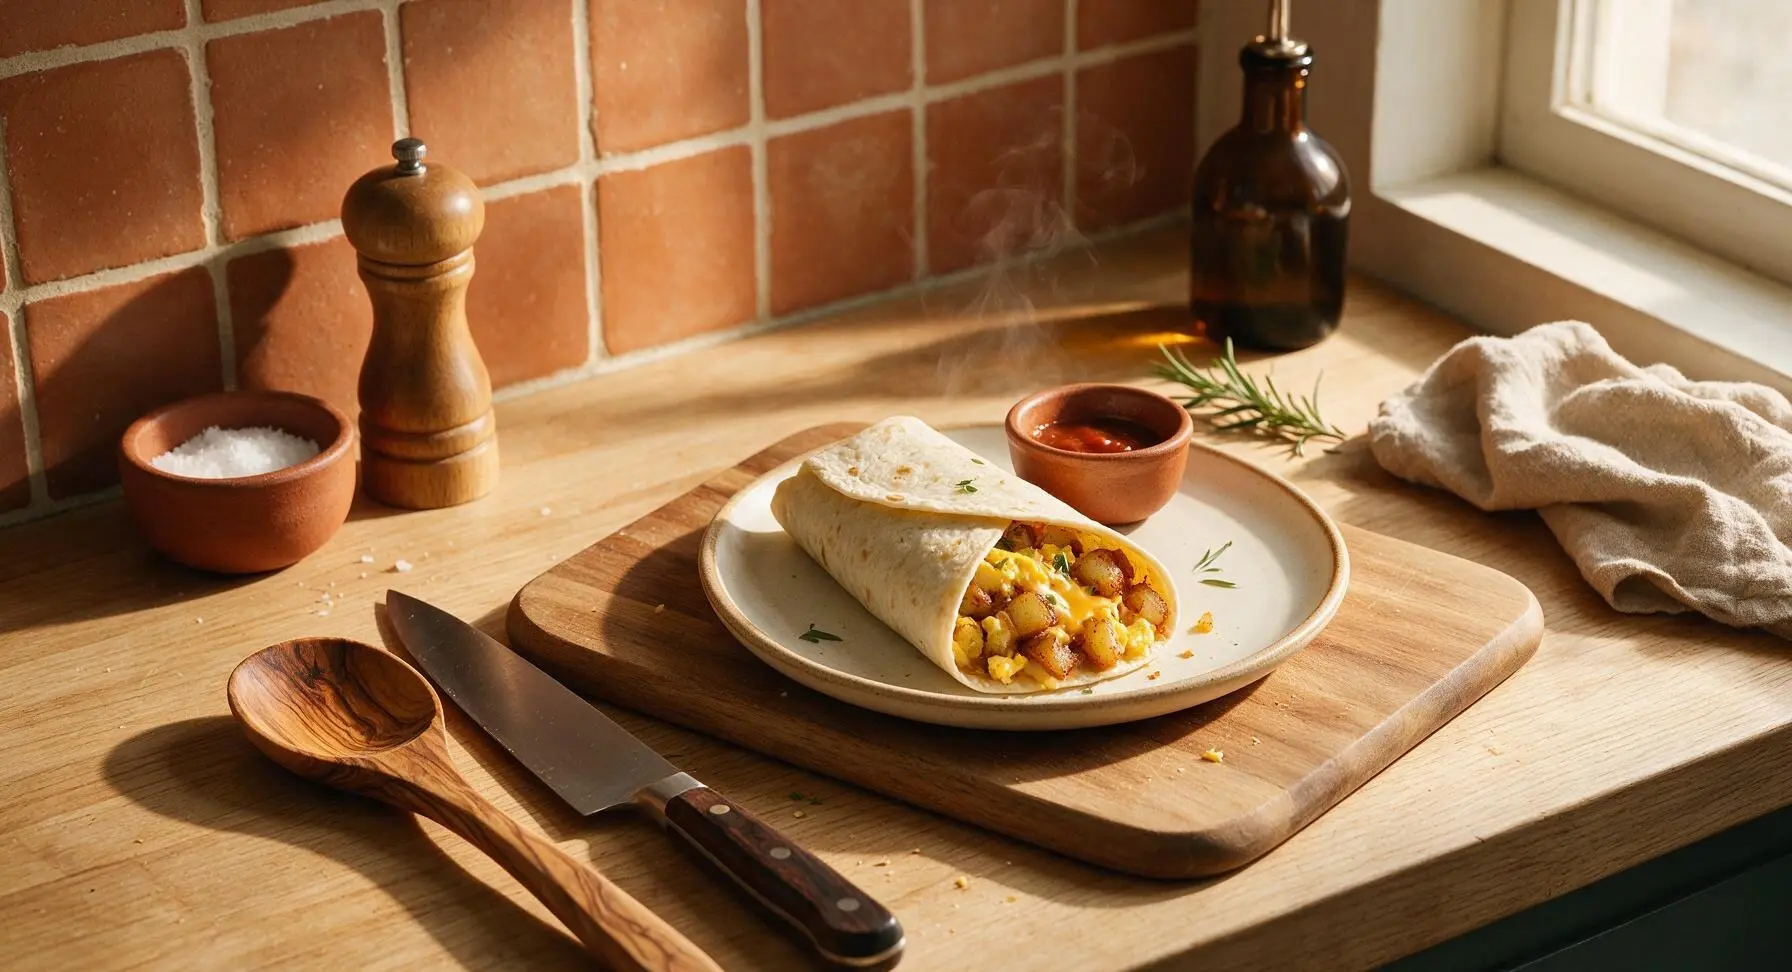
⏱️ cook time 20 minutes
🍽️ servings 4
⚡ Difficulty easy

intro

Hearty, ultra-budget, freezer-friendly breakfast burritos loaded with crispy potatoes, soft eggs, and melted cheese—perfect for busy, no-fuss mornings or quick weeknight meals.

Ingredients
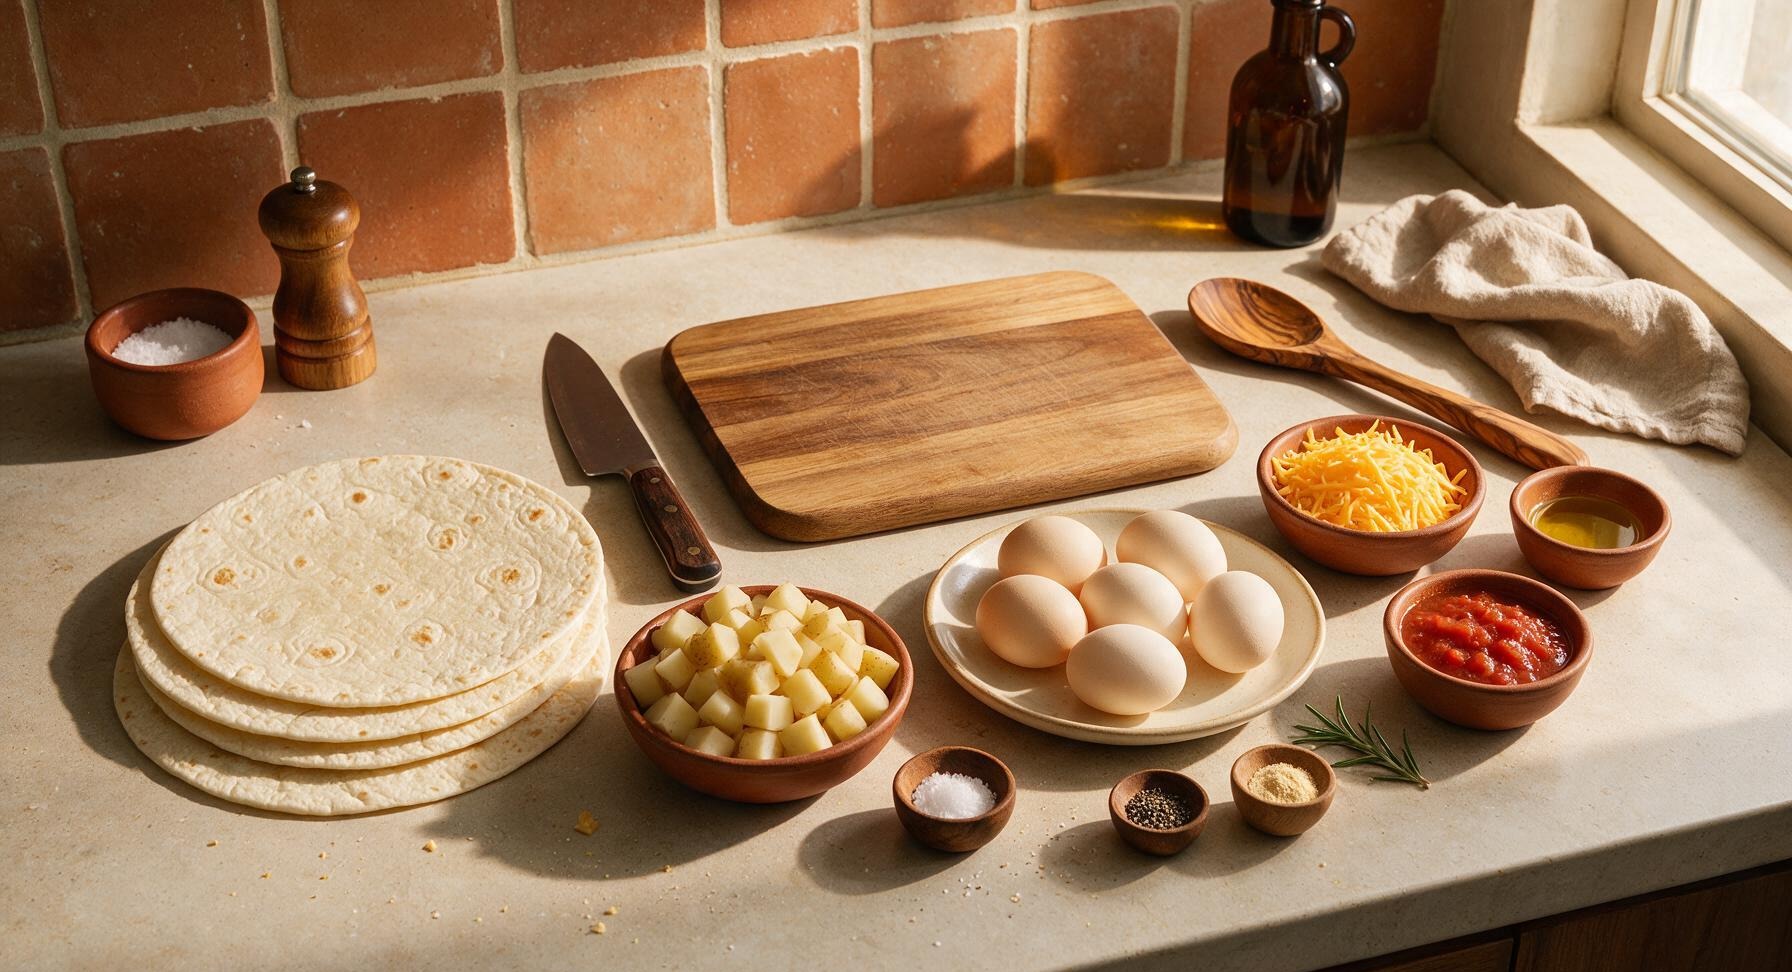
10-inch large flour tortillas 4 each
Russet potatoes 400g (2 medium, diced into 1cm cubes)
Large eggs 6 each
Sharp cheddar cheese 110g (1 cup, shredded)
Mild red salsa 120g (1/2 cup)
Neutral cooking oil 1 tablespoon
Kosher salt 1/2 teaspoon
Ground black pepper 1/4 teaspoon
Garlic powder 1/2 teaspoon

Steps

1

Dice the Potatoes

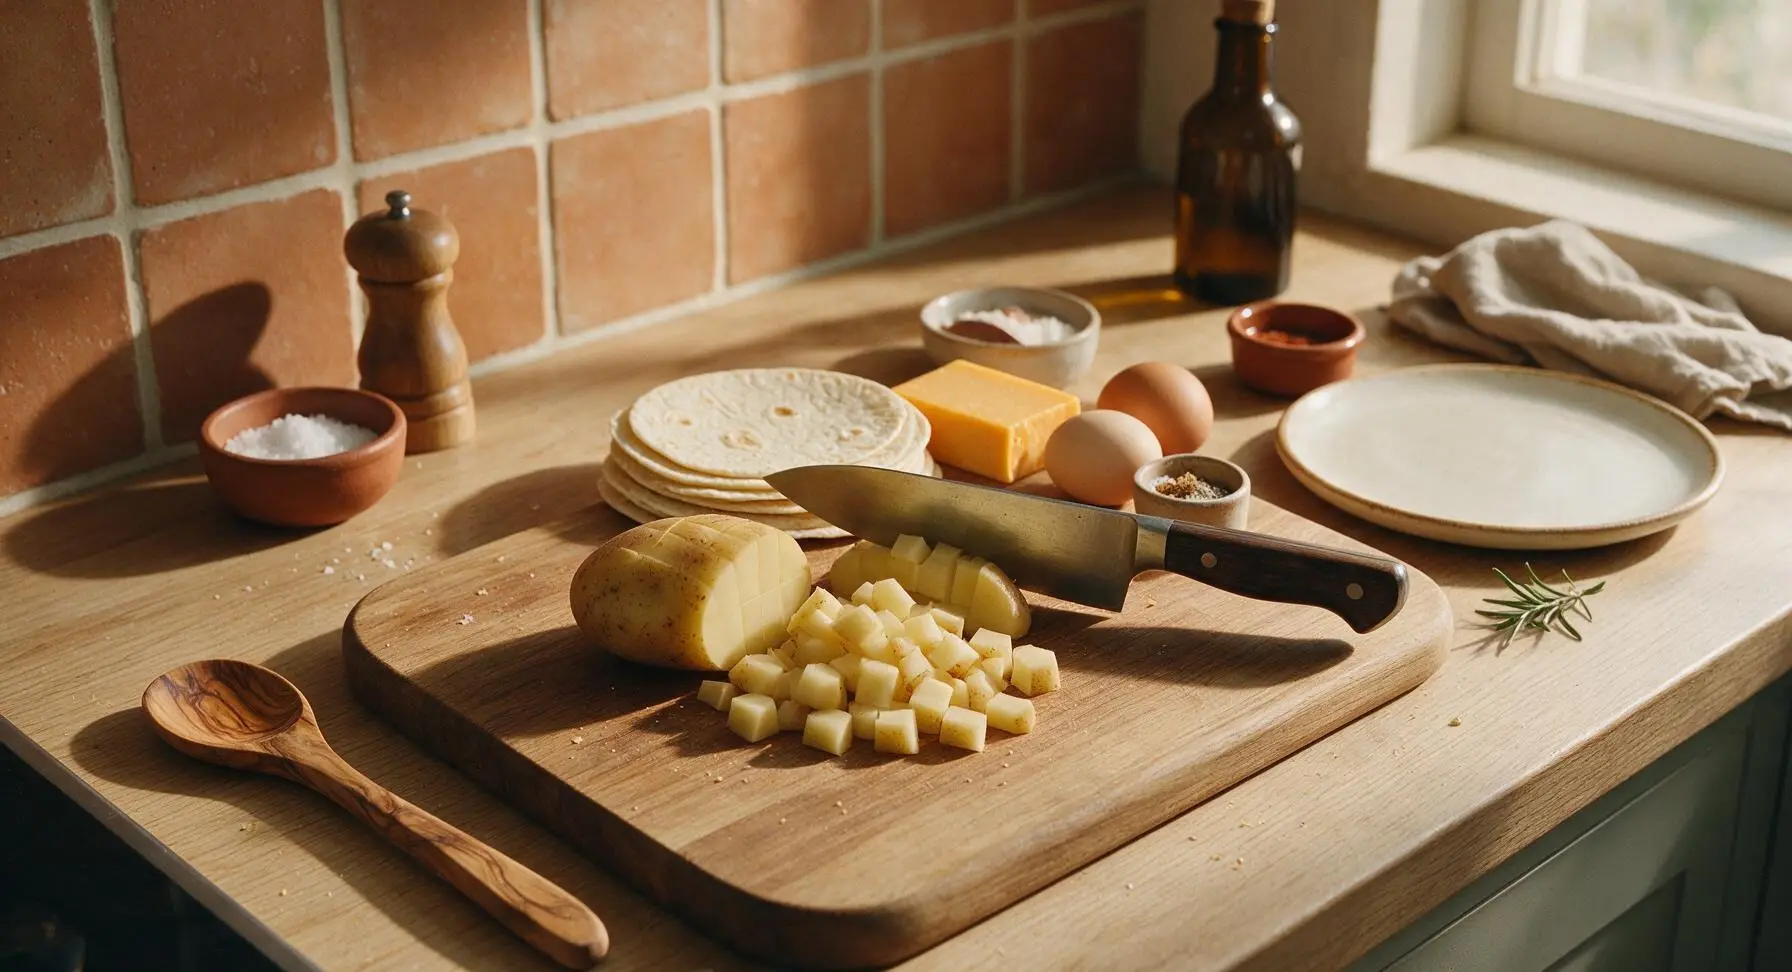
Place the whole russet potatoes on the light beech wood cutting board. Using the chef's knife, peel potatoes if desired (leaving skins on cuts down on prep time and adds extra fiber and nutrients) and dice into uniform 1cm cubes. Uniform cube size ensures even cooking, with no burnt edges or raw, hard centers. Transfer diced potatoes to a clear prep bowl, toss with 1/4 teaspoon kosher salt, 1/4 teaspoon garlic powder, and all the ground black pepper to coat evenly.
Step 1
step1:Dice the Potatoes
2

Sauté Potato Cubes

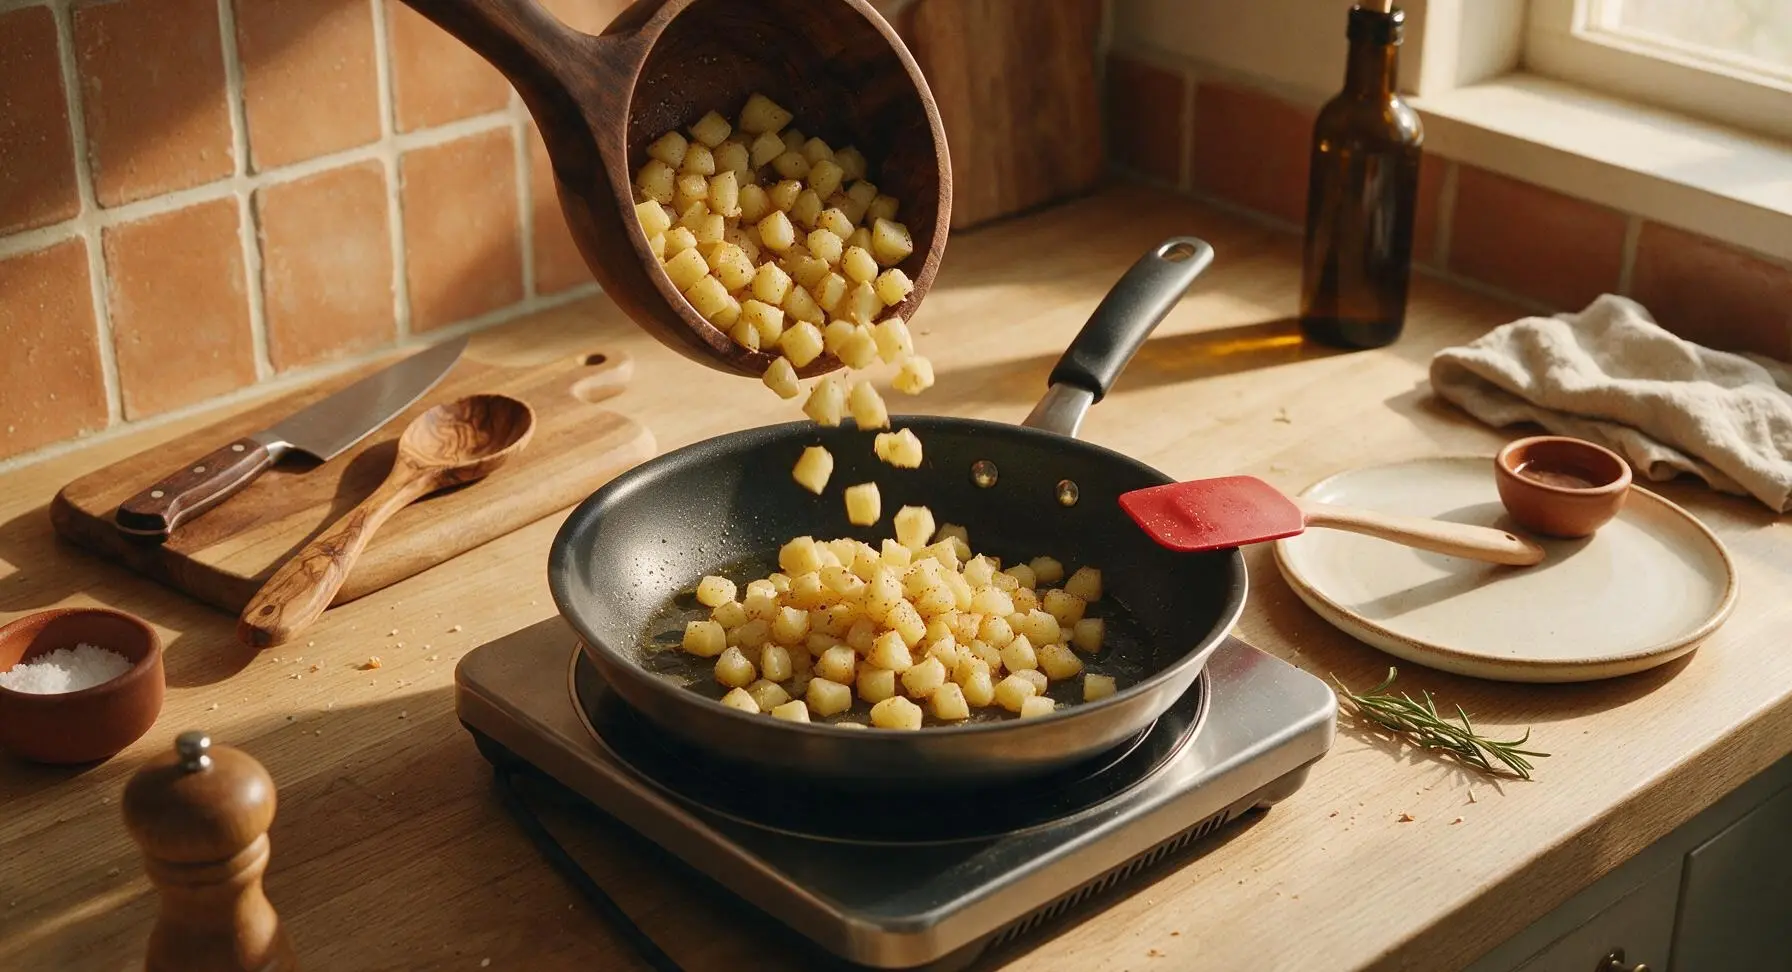
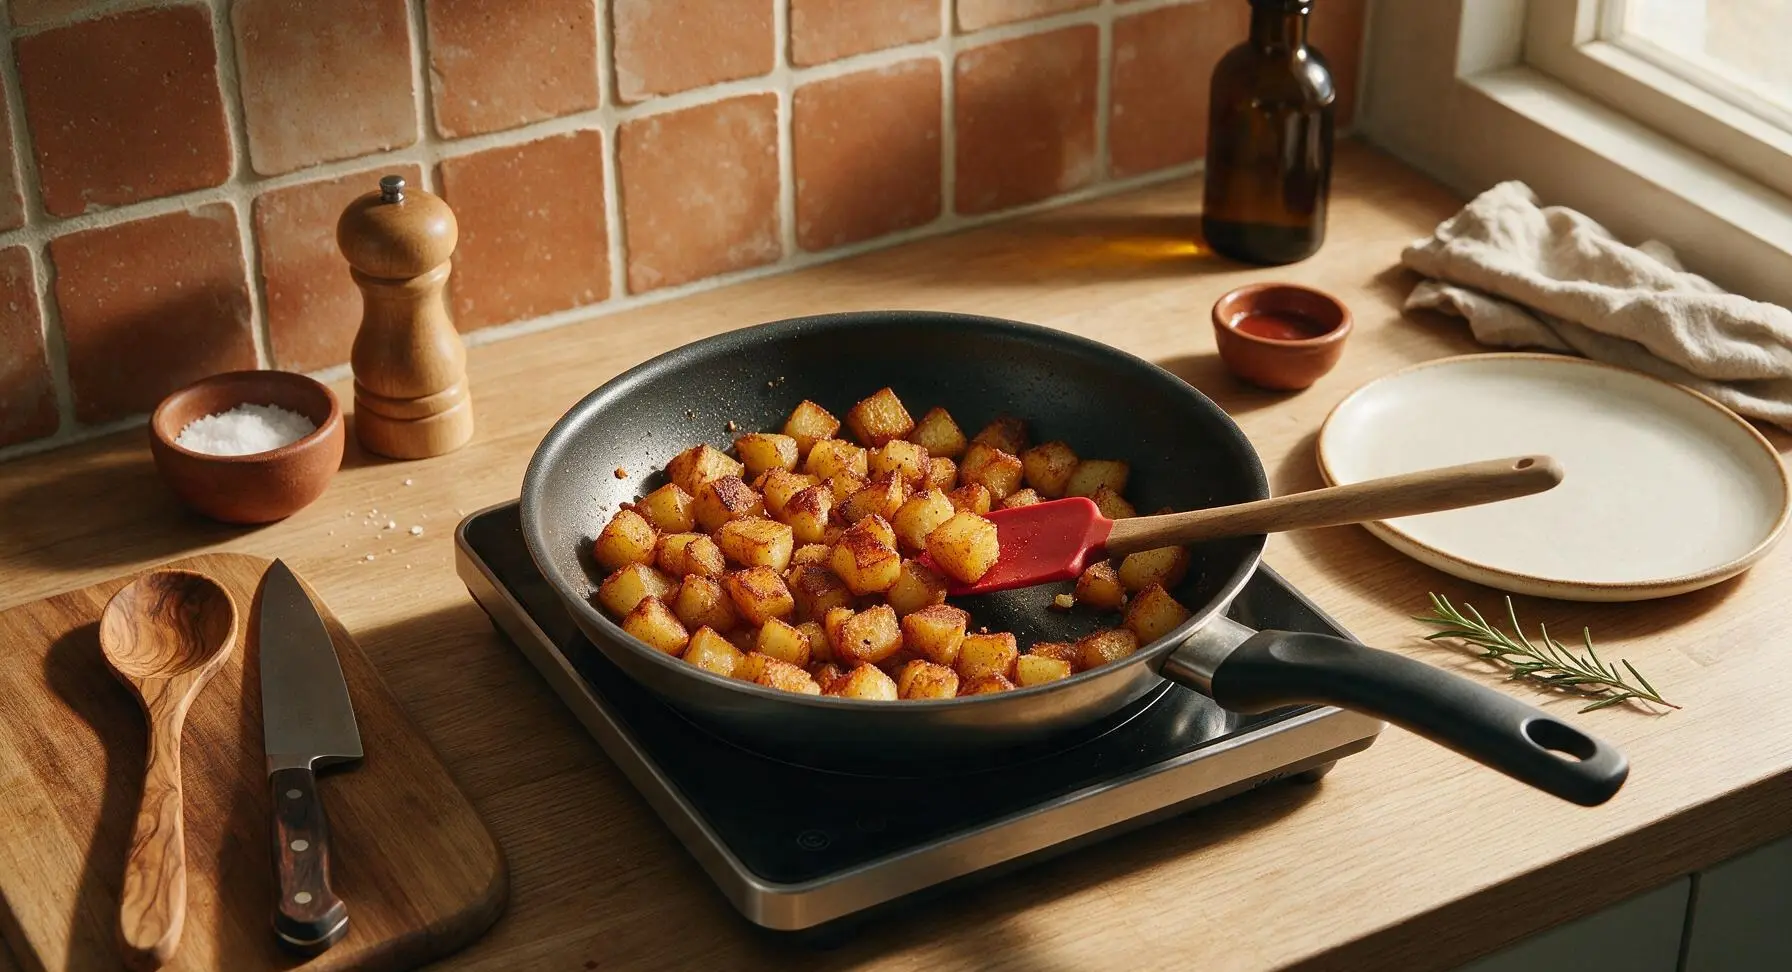
Place the 20cm non-stick skillet on the fixed portable induction burner, add 1 tablespoon neutral cooking oil, and heat over medium heat (induction setting 5) for 1 minute. Add the seasoned diced potato cubes in a single even layer. Cook for 10 minutes total, stirring every 2 minutes with the red silicone spatula, until potatoes are deep golden brown and crispy on all sides, tender when pierced with the tip of the chef’s knife. Do not stir too frequently, as this prevents crispy edges from forming.
Step 2
step2:Sauté Potato Cubes
Step 2
step2:Sauté Potato Cubes
3

Whisk the Eggs

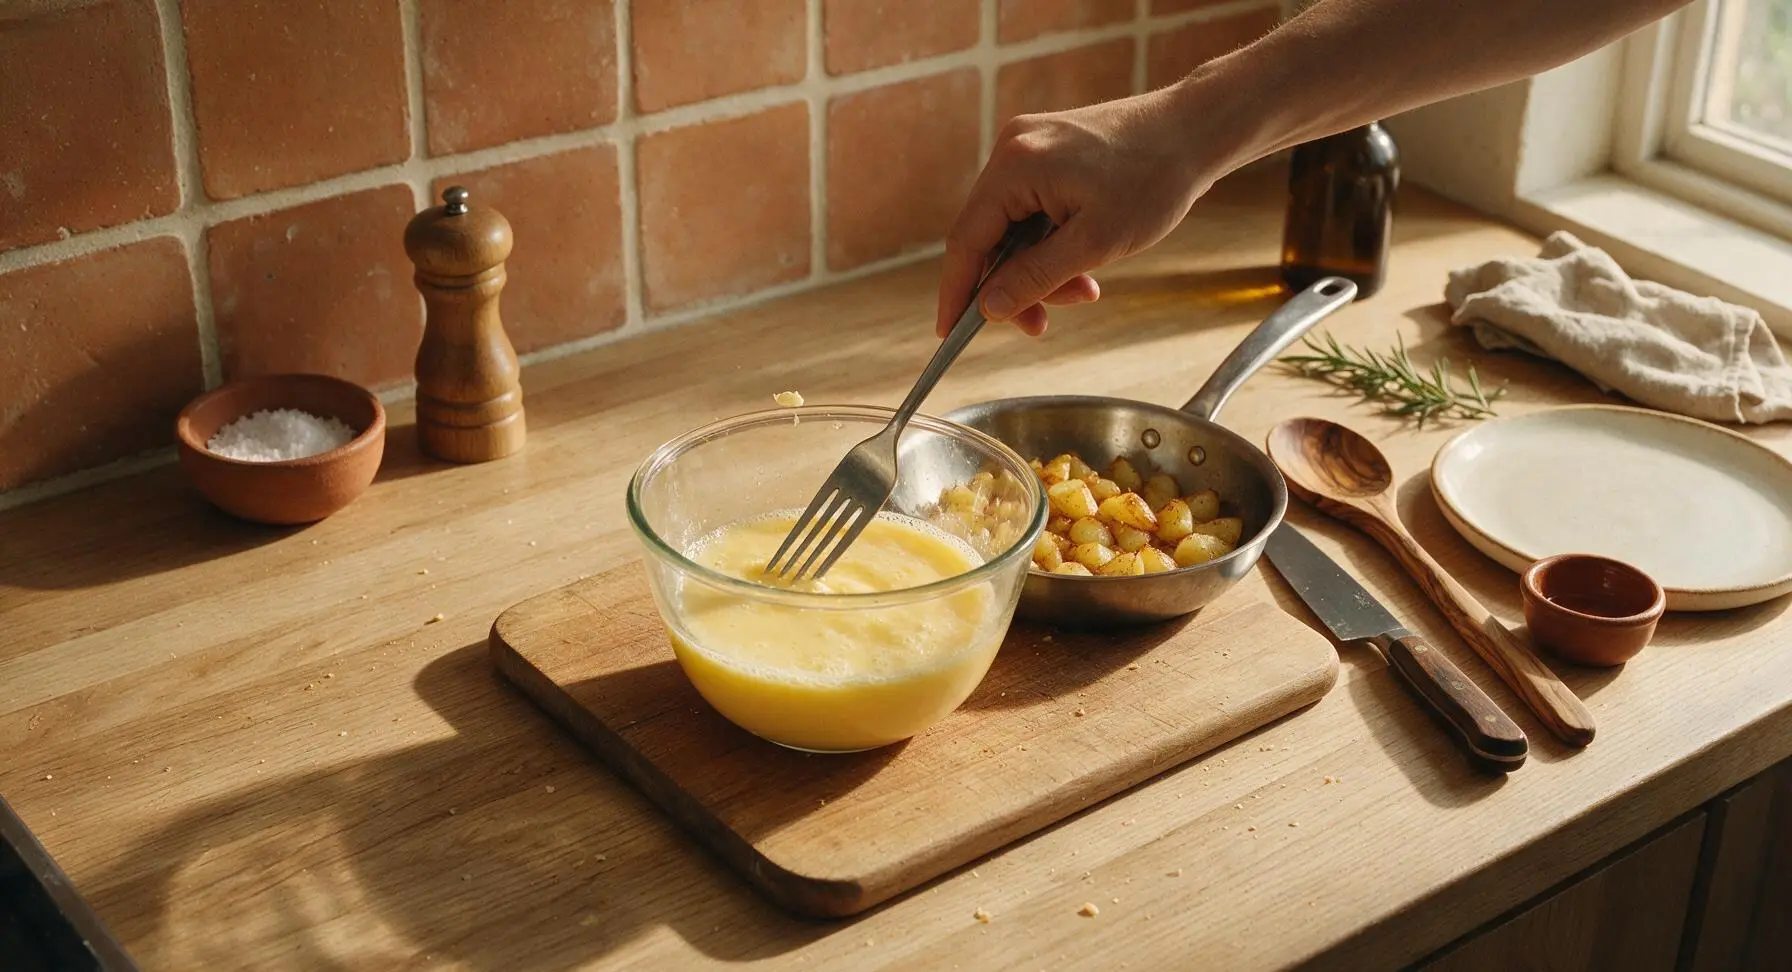
While the potatoes cook, crack all 6 large eggs into a second clear prep bowl. Add the remaining 1/4 teaspoon kosher salt and 1/4 teaspoon garlic powder. Whisk vigorously with the stainless steel dinner fork for 30 seconds, until yolks and whites are fully combined with no streaks of clear egg white remaining, and the mixture is pale yellow with a light froth on the surface.
Step 3
step3:Whisk the Eggs
4

Scramble Egg Mixture

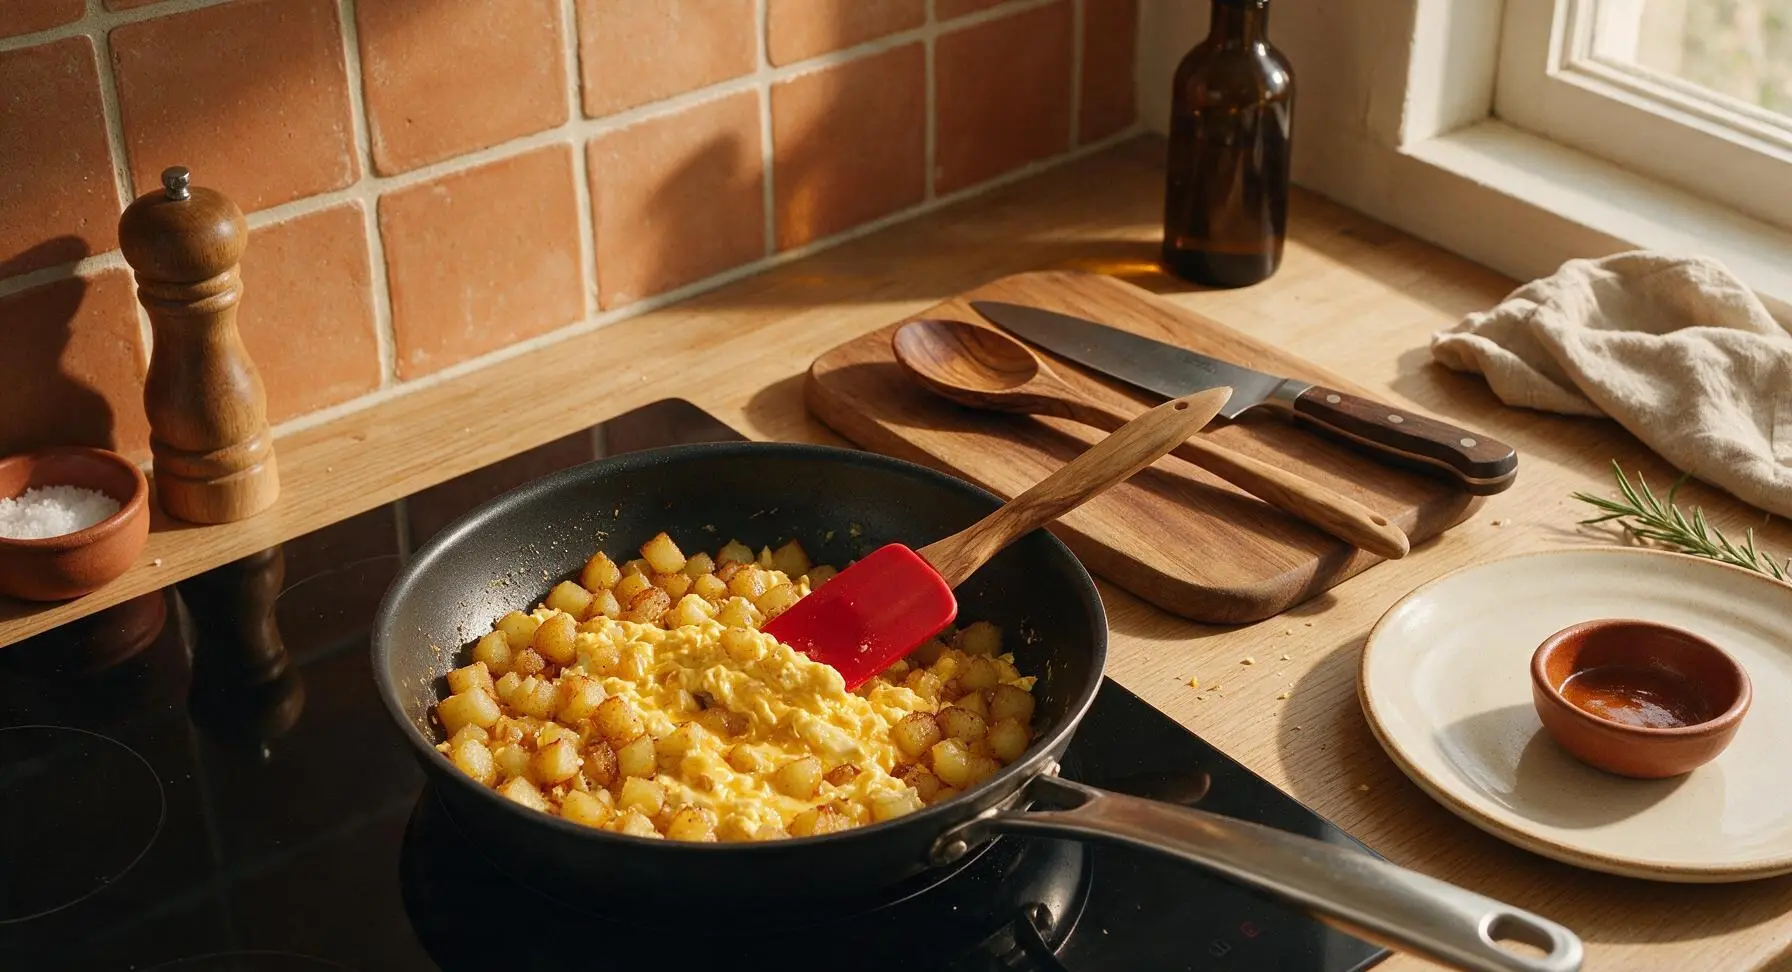
Once potatoes are fully cooked and crispy, reduce the induction burner heat to medium-low (setting 3). No extra oil is needed, as residual oil from the potatoes will prevent eggs from sticking. Pour the whisked egg mixture directly over the potatoes in the skillet. Let sit undisturbed for 30 seconds, then gently scrape the bottom and sides of the pan with the red silicone spatula, folding soft egg curds together with the potato cubes. Cook for 3-4 minutes total, stirring gently every 30 seconds, until eggs are just set, soft and slightly glossy, with no dry, browned spots. Remove the skillet from the burner immediately to prevent overcooking.
Step 4
step4:Scramble Egg Mixture
5

Fold in Shredded Cheddar

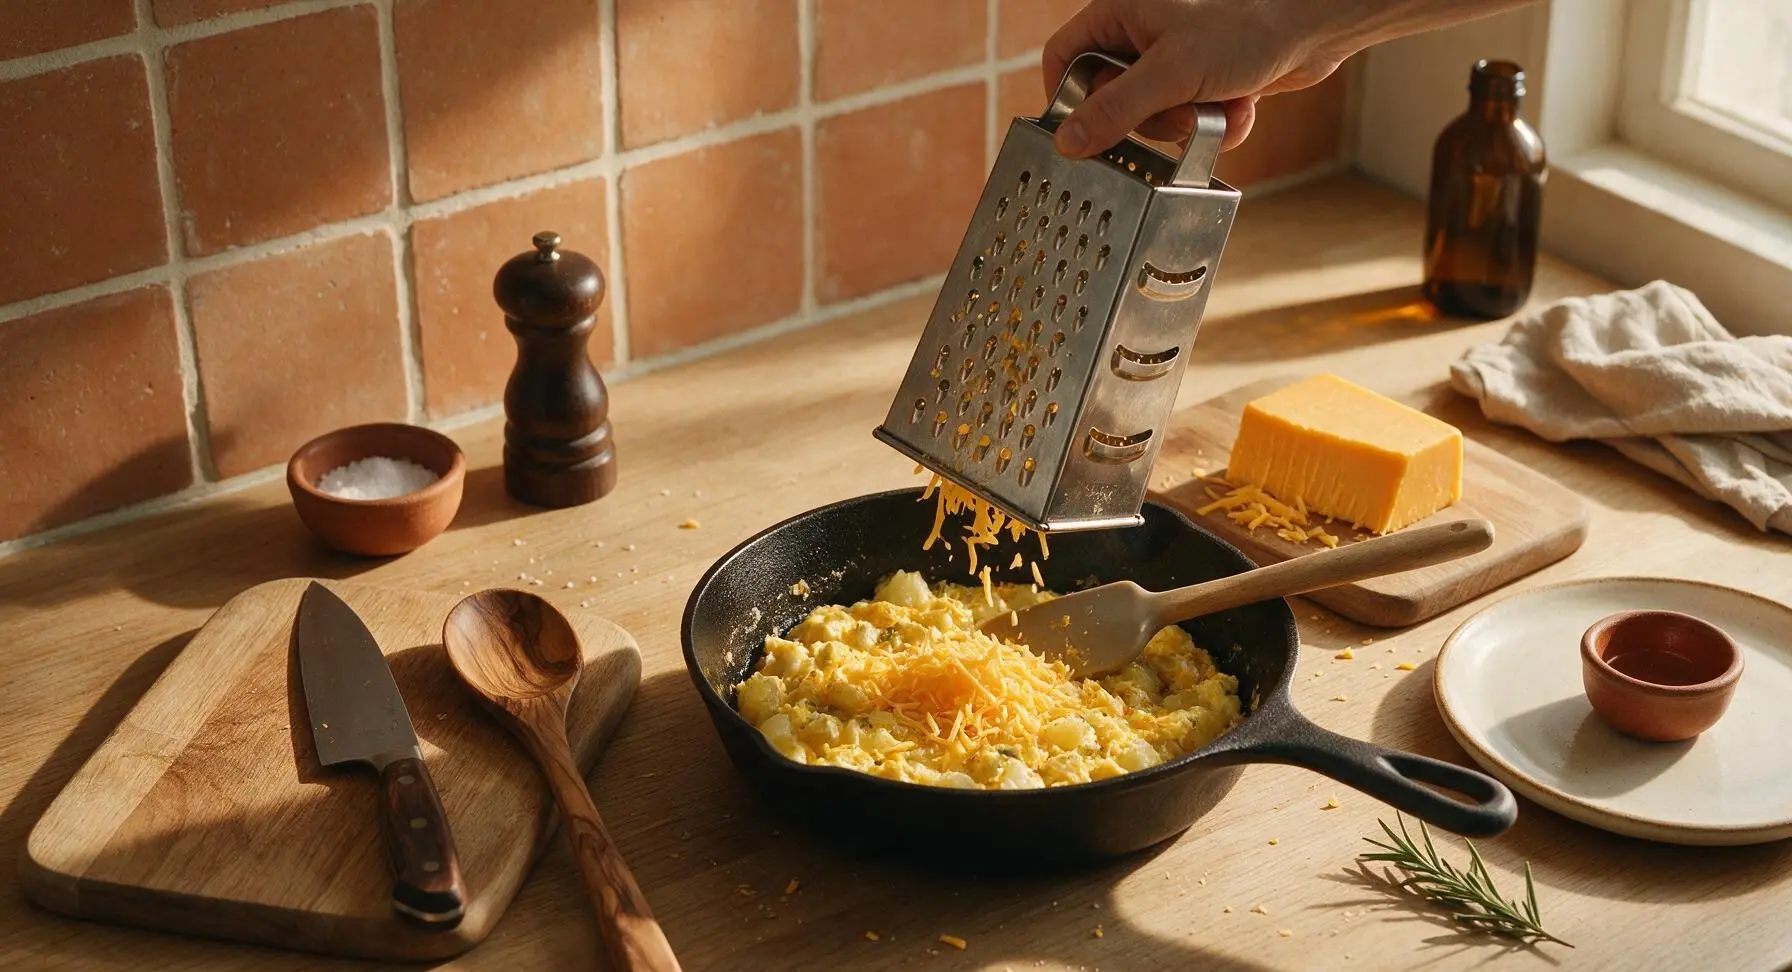
While the egg and potato mixture is still warm in the off-heat skillet, hold the 4-sided stainless steel box grater over the pan and shred the block of sharp cheddar cheese directly over the filling. Gently fold the shredded cheese into the warm mixture with the silicone spatula, then let sit for 1 minute to allow the cheese to melt fully into creamy, stretchy strands throughout the filling.
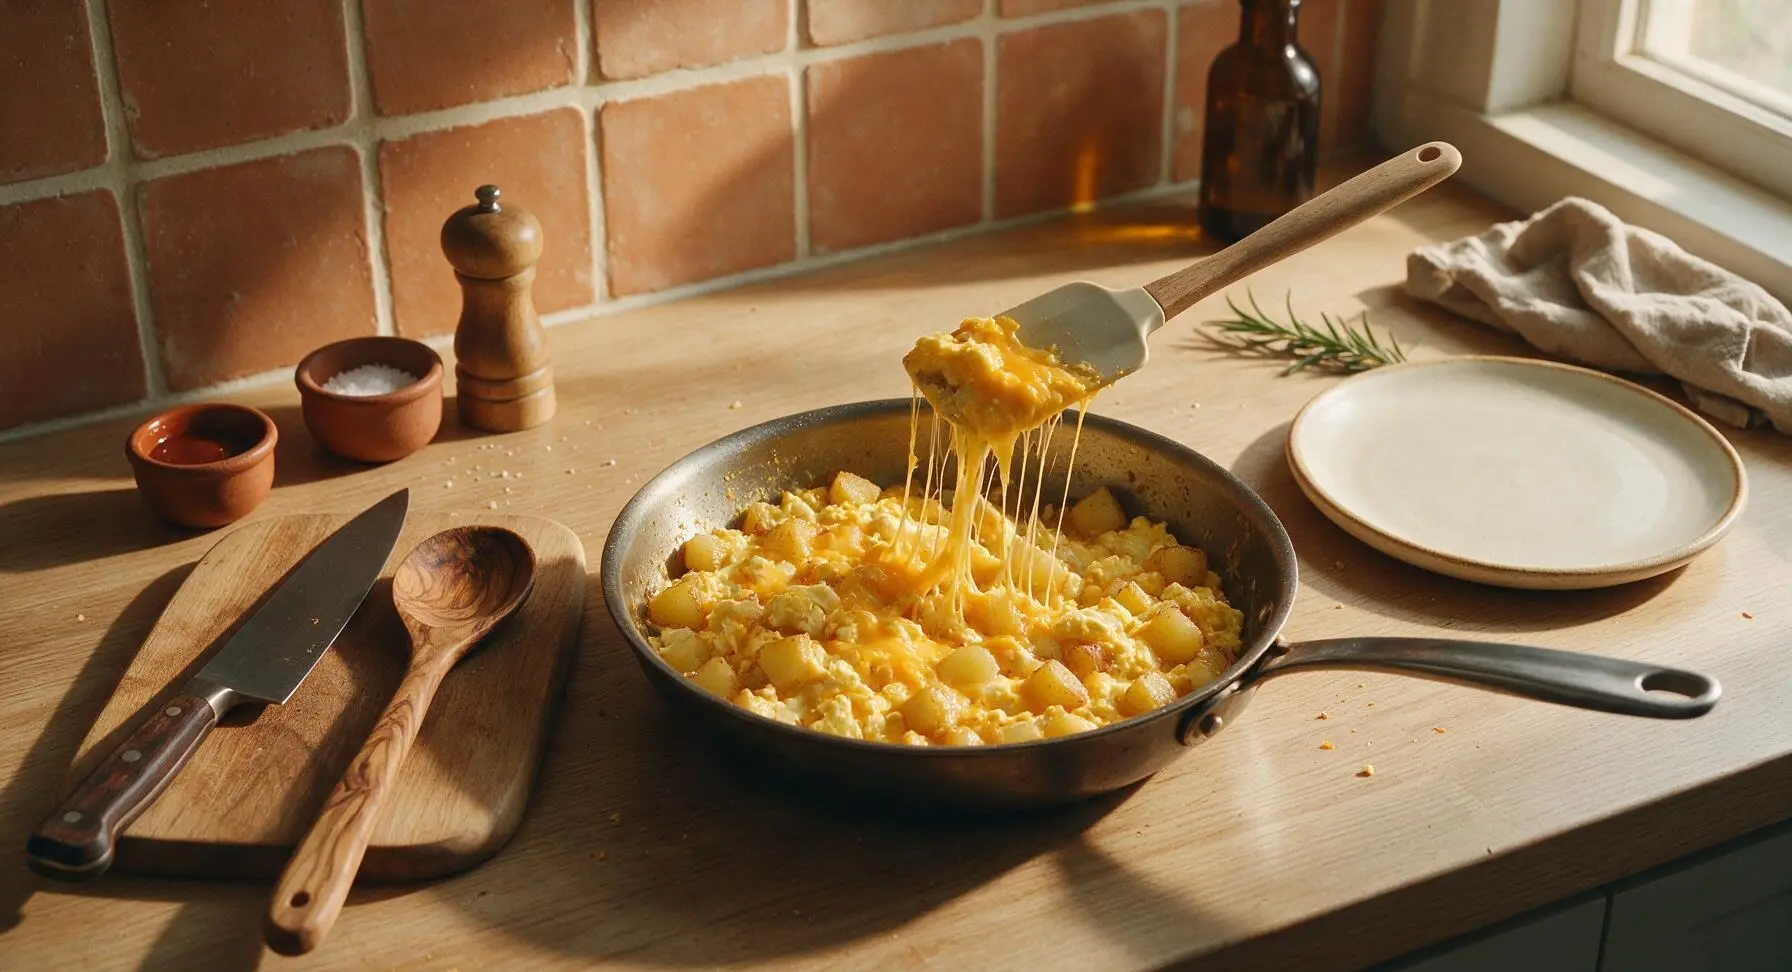
Step 5
step5:Fold in Shredded Cheddar
Step 5
step5:Fold in Shredded Cheddar
6

Warm the Tortillas

Stack the 4 flour tortillas on a sheet of household aluminum foil, wrap loosely, and set on the edge of the warm induction burner (turned off, holding residual heat) for 2 minutes to warm through. Warm tortillas are soft and flexible, so they will not crack or tear when rolling, a common beginner mistake that causes filling to leak out. For extra softness, warm each tortilla for 10 seconds directly on the warm skillet surface.
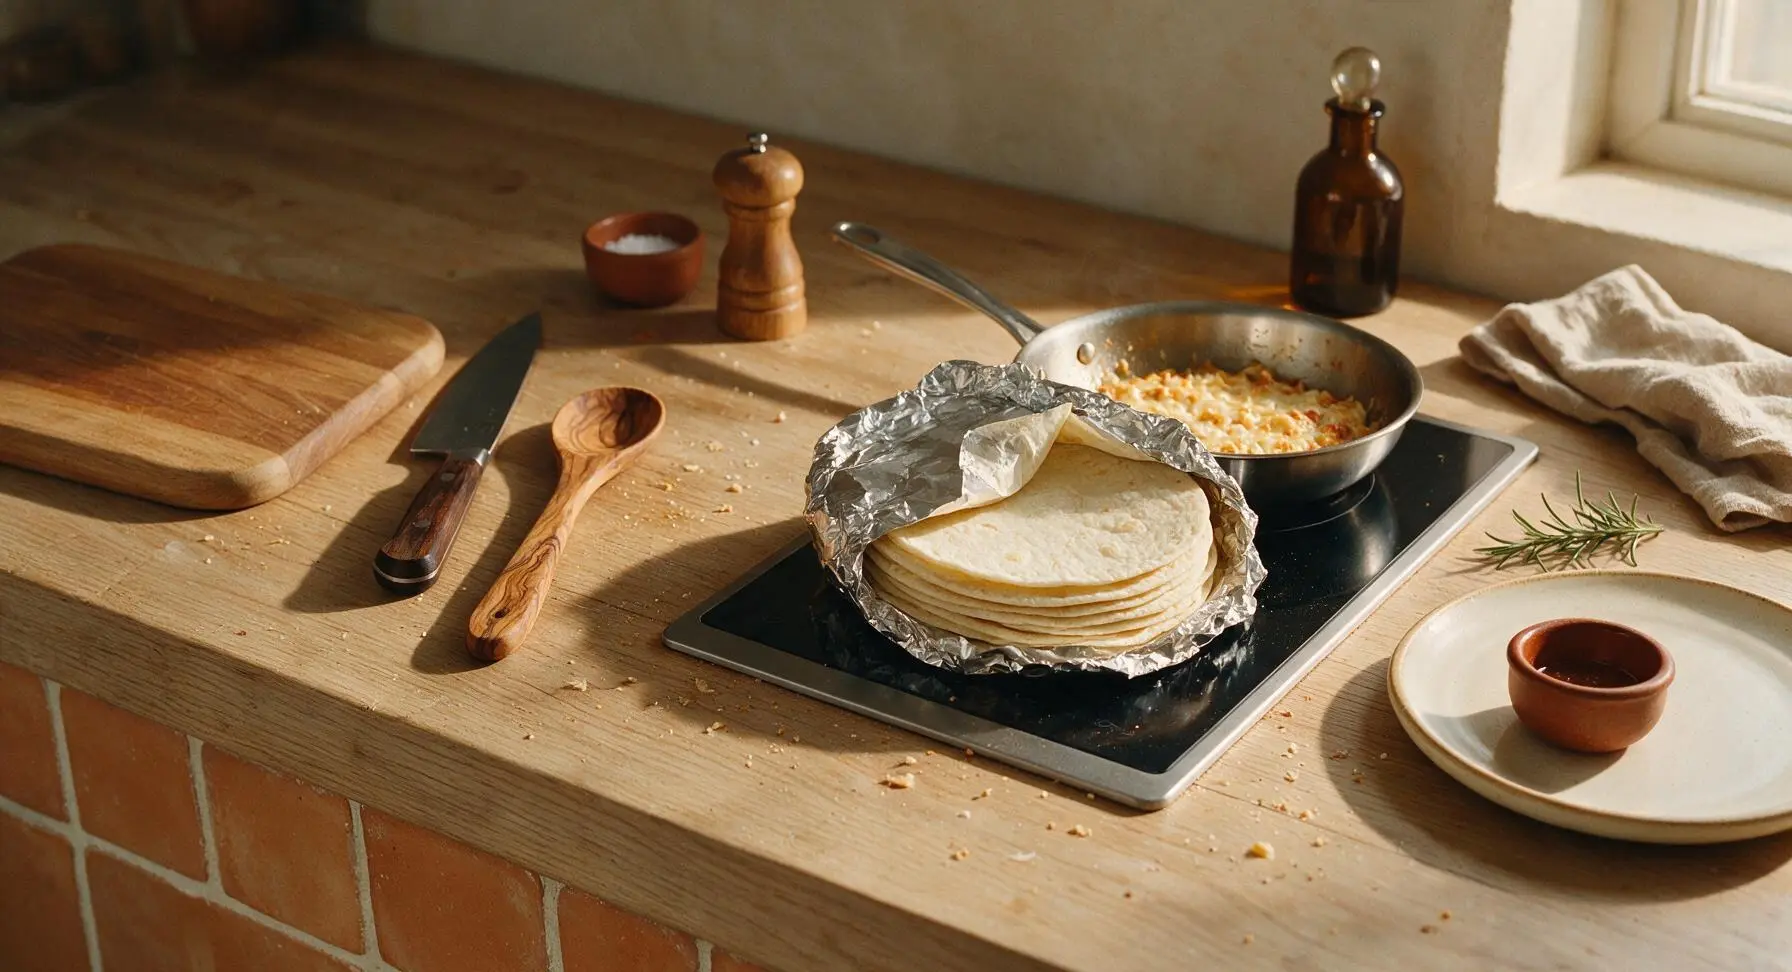
Step 6
step6:Warm the Tortillas
7

Fill and Roll Burritos

Lay one warm tortilla flat on the beech wood cutting board. Scoop 1/4 of the egg-potato-cheese filling in a straight horizontal line across the lower third of the tortilla, leaving a 2cm clear border on the left and right edges. Top the filling with 1 tablespoon of mild red salsa. Fold the left and right edges of the tortilla inward over the filling, then roll tightly from the bottom edge up to form a firmly sealed burrito. Repeat with the remaining tortillas and filling.
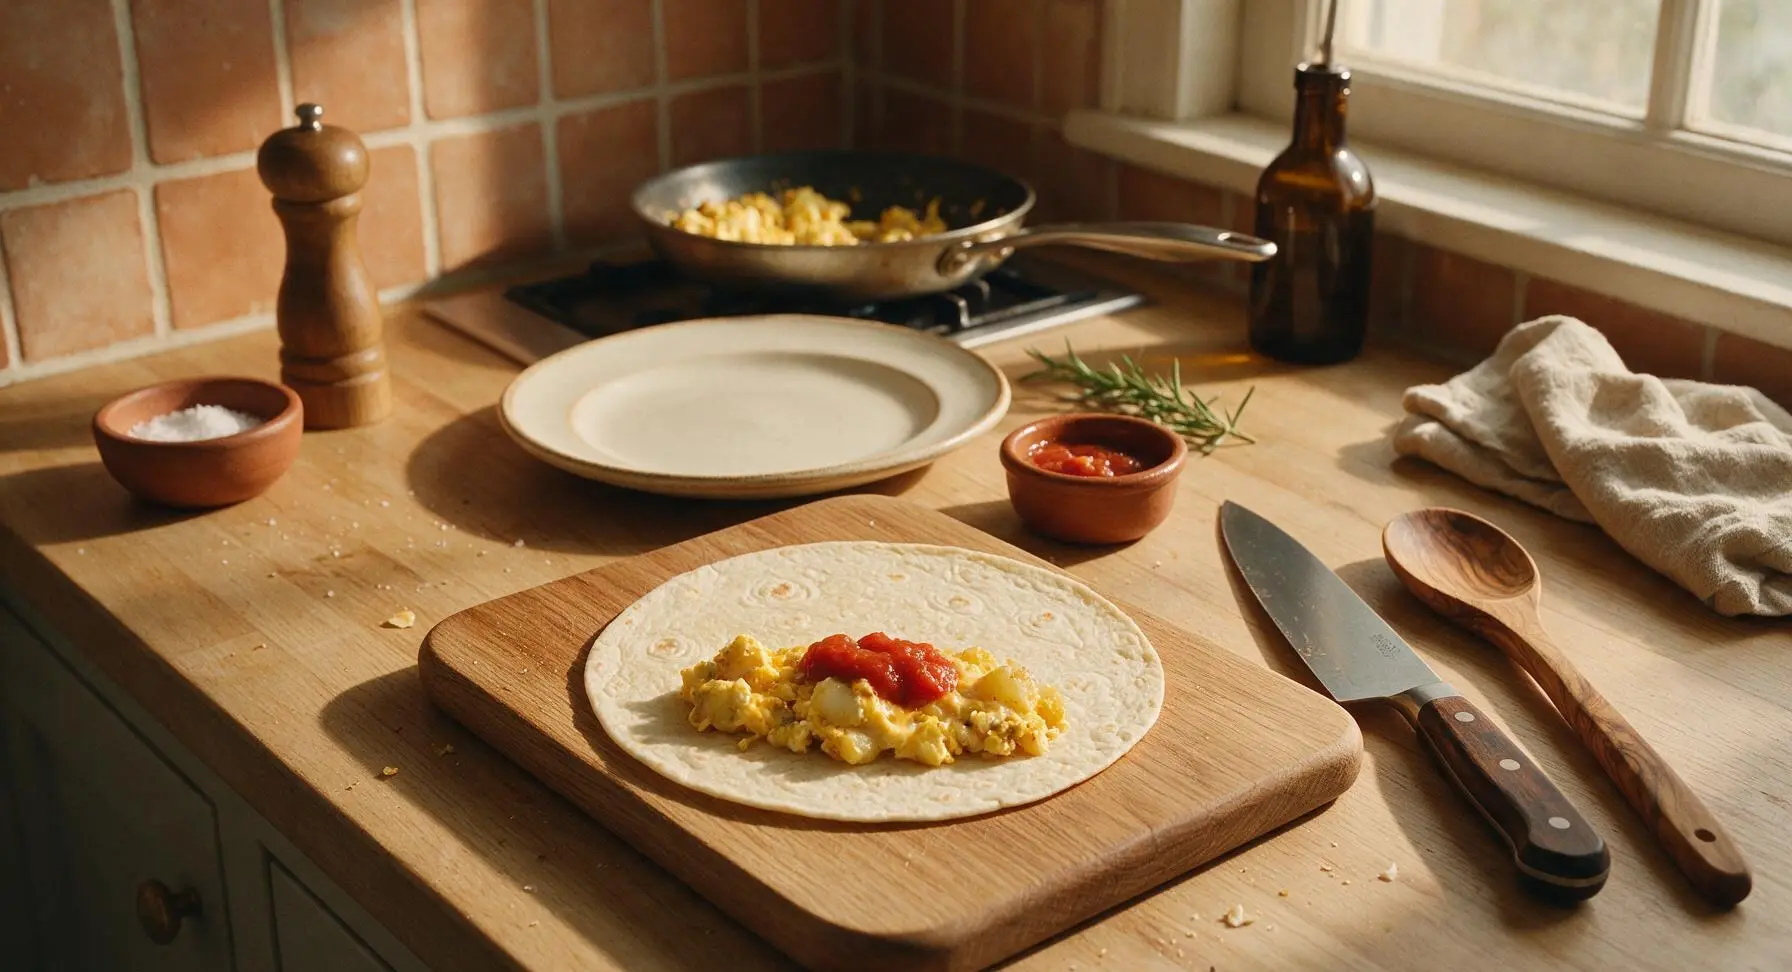
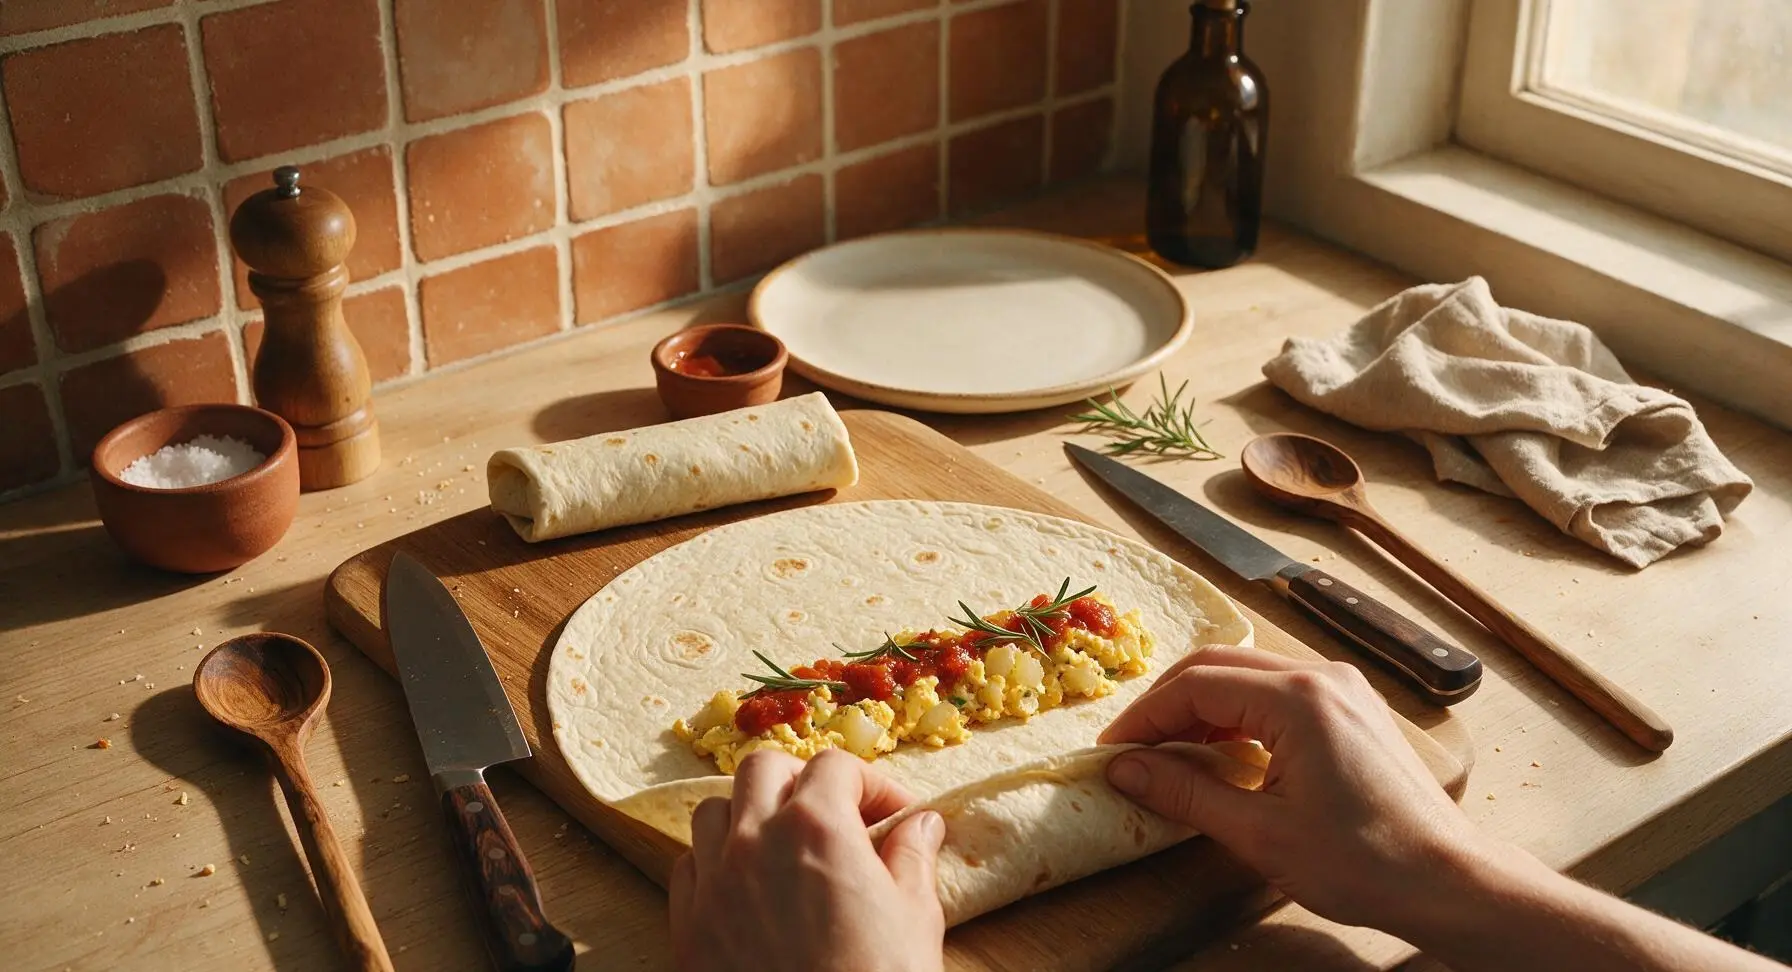
Step 7
step7:Fill and Roll Burritos
Step 7
step7:Fill and Roll Burritos
8

Toast Sealed Burritos

Return the rolled burritos seam-side down to the warm dry skillet over low heat (induction setting 2) for 1 minute per side, until the tortilla is lightly golden brown and the seam is sealed shut. This light toast prevents the burrito from unrolling when picked up, and adds a subtle crisp texture to the tortilla exterior. Transfer finished burritos to the matte off-white ceramic dinner plate to serve.
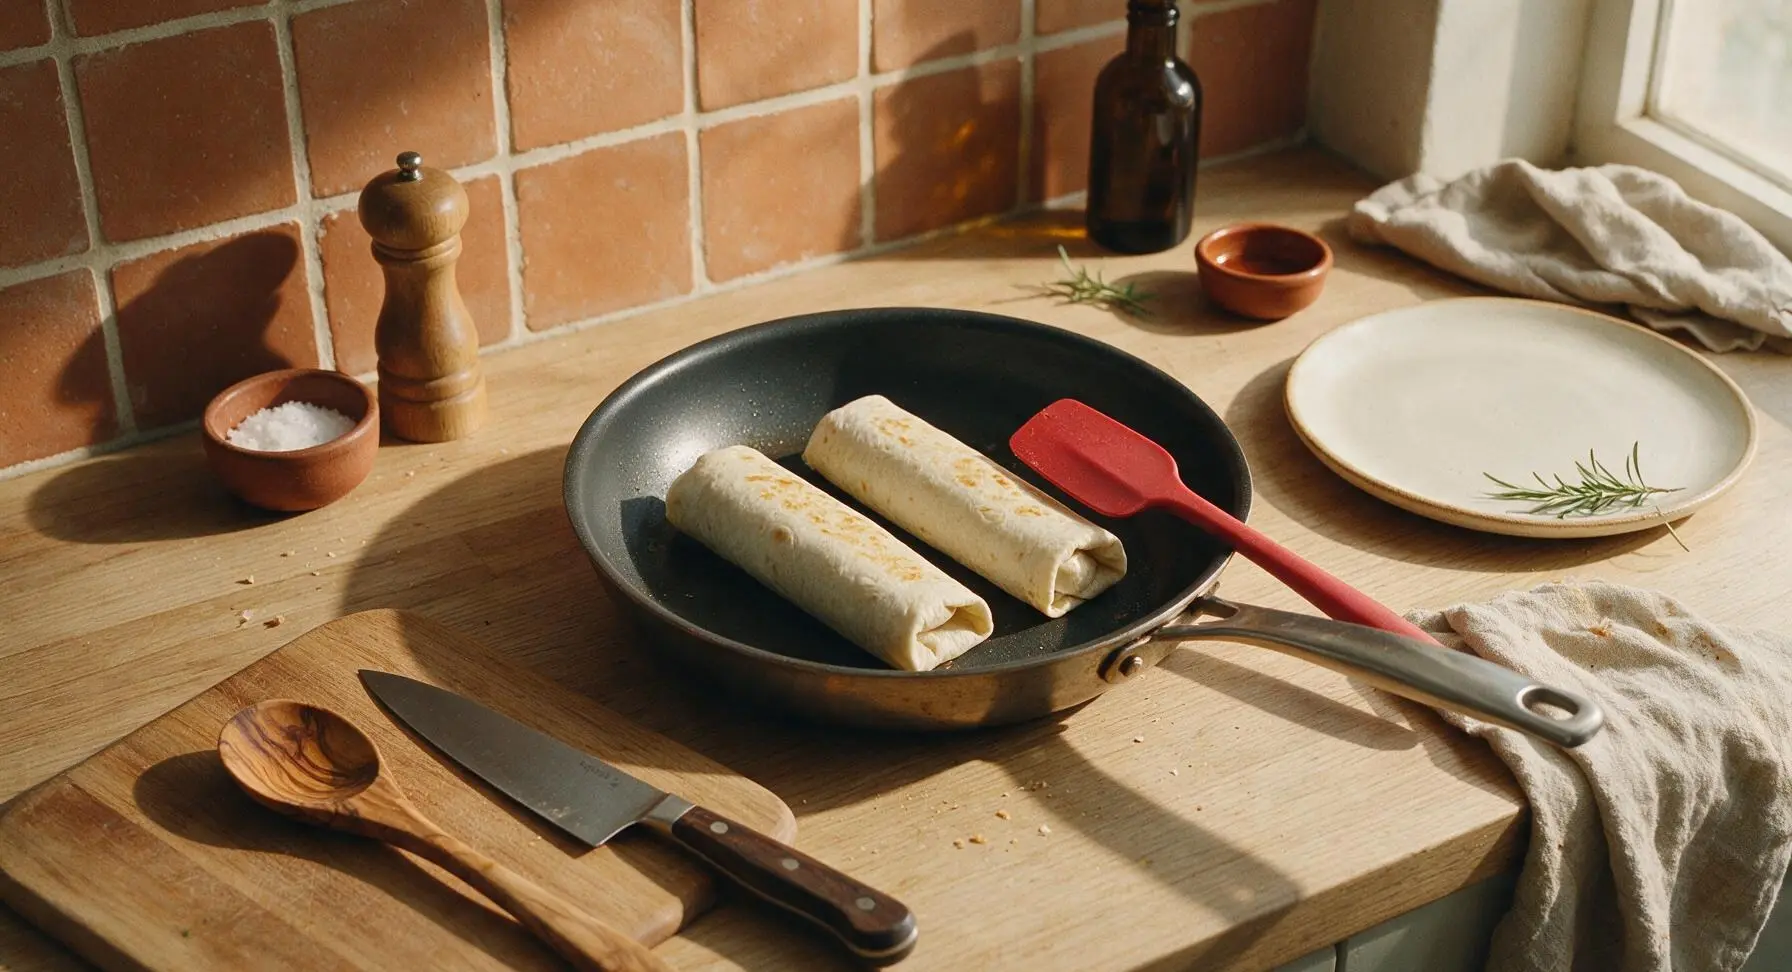
Step 8
step8:Toast Sealed Burritos

Tips

1.Freeze extra burritos for quick meals: Let cooked burritos cool completely for 5 minutes, then wrap individually in aluminum foil and store in the freezer for up to 3 months. Reheat directly from frozen in the microwave for 2 minutes, or in a 350°F (175°C) oven for 20 minutes. Cooling first prevents condensation that causes soggy tortillas.
2.Skip pre-shredded cheese to cut costs: Block sharp cheddar is 30-40% cheaper per ounce than pre-shredded cheese, and melts smoother because pre-shredded cheese is coated in potato starch and anti-caking agents that prevent even, creamy melting.
3.Don’t over-stir the potatoes: Letting potato cubes sit undisturbed for 2 minutes between stirs allows a crispy, golden crust to form on the edges. Constant stirring leads to soft, mushy potatoes with no crispy texture, even after 10 minutes of cooking.


✨ You May Also Like

Breakfast
🍜 United States

Crisp-edged, fluffy lard griddle cakes are a nostalgic homestyle staple, with rich savoriness from rendered lard, perfect topped with maple syrup or savory gravy.

⏱️ 25 minuteBreakfast ★ 4.8
Breakfast
🍜 United States

Flaky, buttery homemade buttermilk biscuits smothered in creamy, peppery pork sausage gravy: a beloved, hearty Southern American comfort food classic.

⏱️ 35 minuteBreakfast ★ 4.8
Breakfast
🍜 United States

Golden, custardy brioche stuffed with sweet cream cheese and fresh berries, pan-fried to crisp perfection. An indulgent, cozy breakfast perfect for slow weekend mornings.

⏱️ 30 minuteBreakfast ★ 4.7
Breakfast
🍜 United States

Flaky, buttery Southern-style biscuits stuffed with savory salty country ham, a portable, satisfying classic perfect for casual on-the-go meals.

⏱️ 25 minuteBreakfast ★ 4.8
Breakfast
🍜 United States

Iconic puffy baked pancake popularized in Seattle, with crisp golden edges and soft custardy center, served warm with classic sweet toppings.

⏱️ 35 minuteBreakfast ★ 4.6
Breakfast
🍜 United States

Fluffy, golden pancakes studded with juicy peak-summer mixed berries, drizzled with maple syrup for a bright, comforting, crowd-pleasing family breakfast.

⏱️ 25 minuteBreakfast ★ 4.7

budget bytes breakfast burrito:Frequently Asked Questions

1.Can I freeze these breakfast burritos, and how do I reheat them without soggy tortillas? ▾
Absolutely—these burritos are designed for easy freezer storage! Wrap each fully cooled burrito tightly in plastic wrap then foil, and freeze for up to 3 months. To reheat, unwrap, wrap in a damp paper towel, and microwave for 2–3 minutes flipping halfway, or crisp in a 350°F oven for 15 minutes for a firmer, less soft tortilla.
2.What’s the best way to get crispy potato filling without wasting expensive oil? ▾
Dice your Russet potatoes into uniform ¼-inch cubes so they cook evenly. Toss with just 1 tablespoon of oil, a pinch of salt and pepper, and spread in a single layer on a preheated baking sheet. Don’t stir them for the first 15 minutes of baking at 425°F—that undisturbed pan contact builds a perfect crispy crust without extra oil cost.
3.Can I swap the sharp cheddar for a different cheese I already have at home? ▾
Of course! Sharp cheddar is picked for its bold, rich flavor that goes a long way on a tight budget, but any meltable cheese works great. Try Monterey Jack, pepper Jack for a little kick, or a pre-shredded Mexican blend—just skip crumbly cheeses like feta that won’t melt smoothly into the warm filling.
4.Why do my scrambled eggs turn rubbery when I make burrito filling? ▾
Rubbery eggs happen when they’re cooked too fast over high heat, or overcooked before assembly. Cook your eggs over medium-low heat, stirring gently, and pull them off the stove when they’re just softly set. They’ll keep cooking a little from residual heat as you build the burritos, staying tender instead of tough.
5.Do I have to use 10-inch flour tortillas, or will smaller tortillas work? ▾
Stick to 10-inch large flour tortillas for the easiest, least messy assembly, especially if you plan to freeze batches. Smaller 8-inch tortillas won’t hold all the potato, egg, cheese, and salsa without splitting or leaking when rolled. If you only have smaller tortillas, just portion a little less filling per wrap to avoid mess.
6.How do I keep the red salsa from making my burritos soggy, especially in the freezer? ▾
Sogginess happens when excess salsa moisture seeps into the tortilla. First, drain any extra watery liquid off your mild red salsa before adding it to filling, and don’t overstuff each burrito. For extra protection, layer cheese as a barrier between the tortilla and salsa to lock moisture away from the wrap.
7.How can I add extra protein to these burritos without going over my budget? ▾
It’s easy to bulk these up cheaply! Mix in drained, rinsed canned black beans (usually around 50 cents a can) or cooked, crumbled bulk breakfast sausage you find on sale. Even diced, sautéed onion or bell pepper from your crisper drawer adds fiber and volume without adding much cost to the full batch.
8.How long do these burritos last in the fridge for weekly meal prep? ▾
When stored in an airtight container or tightly wrapped in plastic, fully assembled burritos stay fresh in the fridge for 3–4 days. Wait until your filling is fully cooled before rolling to cut down on condensation, which causes soggy tortillas and shortens their shelf life. Reheat them for half the time you’d use for frozen burritos.
9.Can I make these burritos gluten-free for family or friends with dietary restrictions? ▾
Yes, with one simple swap! Replace regular 10-inch flour tortillas with certified gluten-free large tortillas made from rice, corn, or oat flour, and double-check that your mild red salsa has no hidden gluten-containing additives. All the core fillings—potatoes, eggs, cheddar, and plain salsa—are naturally gluten-free as written.

Comments (4)

3 days ago

OMG these breakfast burritos are a total game changer for my weekday meal prep! I spent 20 minutes total on Sunday making a batch, and now I don’t have to skip breakfast when I’m rushing to drop the kids off at school. My 7 year old even asked for a second one this morning, no complaints at all! I added a little extra diced bell pepper because I had some leftover in the fridge, and it was chef’s kiss. SO good, will be making these every other week for sure.

2 days ago

Wait do these freeze well? I’ve been looking for freezer-friendly breakfasts I can grab on my way to the gym before work, and these look perfect.

2 days ago

So glad you and your family love them, Mia! These freeze beautifully for up to 3 months – just wrap them tightly in foil or plastic wrap, and reheat in the microwave for 1-2 minutes when you’re ready to eat. The extra bell pepper addition sounds delicious, thanks for sharing that tip!

5 days ago

As someone living on a super tight college budget, this recipe was made for me! All the ingredients were cheap, I didn’t need any fancy equipment, and it came together so fast even when I was half asleep before my 8am lecture. I was worried it’d be bland because there’s no fancy meat or artisanal cheese, but the simple seasoning is perfect. 10/10, already told all my roommates about it.

3 days ago

Love hearing this! That’s exactly what we designed this recipe for – delicious, filling food that doesn’t break the bank. So stoked it’s working out for your busy class schedule, feel free to toss in any leftover veggies or cheap add-ins you have on hand to switch it up!

1 week ago

Made these for our neighborhood weekend potluck last week and they were gone in 10 minutes flat! People kept coming up to ask me for the recipe, I couldn’t believe how big of a hit they were. I set up a little topping bar with salsa, sour cream, and guac on the side so people could customize theirs, which was chef’s kiss. Easy, cheap, crowd-pleasing – can’t ask for better than that.

2 hours ago

Okay I’m literally the worst cook ever, I burn toast 90% of the time, and I managed to nail these on the first try! The steps were so straightforward, no weird complicated techniques, and the total cook time was actually 20 minutes like it said (I timed it, because I’m famous for taking twice as long as recipe directions say). I did skip the onions because I hate them, and it still tasted amazing, though I added a dash of hot sauce to mine for a little extra kick. Will absolutely be making these again.

30 minutes ago

Fellow terrible cook here, this comment just convinced me to try these this weekend! I also skip onions in literally every recipe, so glad to hear that works without messing up the flavor.



