
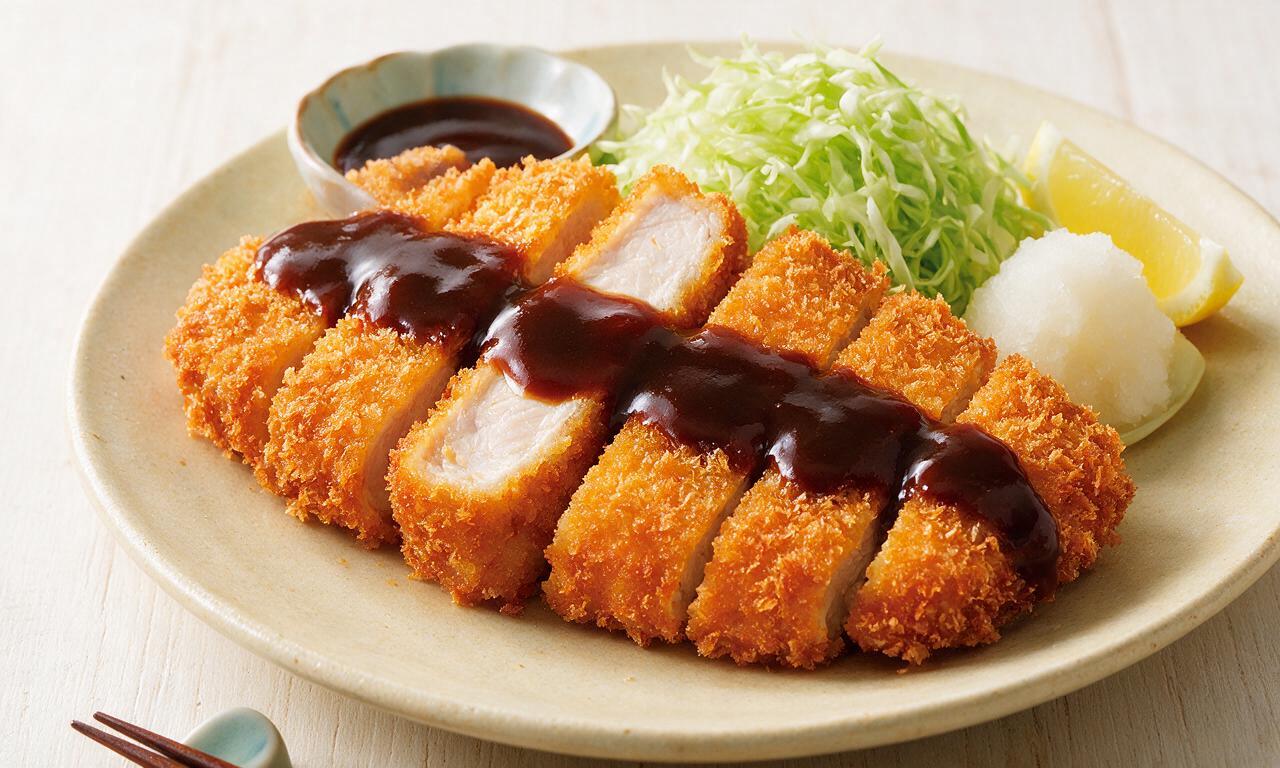
Chicken Katsu

Chicken Katsu
⏱️ cook time 30 minutes
🍽️ servings 4
⚡ Difficulty easy

intro

Crispy, juicy panko-breaded fried chicken cutlets, a beloved Japanese yoshoku comfort food served with tangy tonkatsu sauce for a satisfying crunch.

Ingredients

Boneless, skinless chicken breasts 600g (4 x 150g cutlets)
Panko breadcrumbs 150g (1.5 cups)
All-purpose flour 80g (2/3 cup)
Large eggs 2, beaten
Whole milk 30ml (2 tbsp)
Fine table salt 5g (1 tsp)
Ground black pepper 1g (1/2 tsp)
Garlic powder 1.5g (1/2 tsp)
Neutral cooking oil (canola/vegetable) 500ml
Tonkatsu sauce 80ml (1/3 cup)
Finely shredded green cabbage 200g

Steps

1

Prep chicken cutlets

Place each 150g chicken breast between two sheets of parchment paper, then use a meat mallet or heavy rolling pin to pound to an even 1.5cm thickness. Season both sides evenly with 1 tsp salt, 1/2 tsp ground black pepper, and 1/2 tsp garlic powder, then set aside to rest for 5 minutes at room temperature.
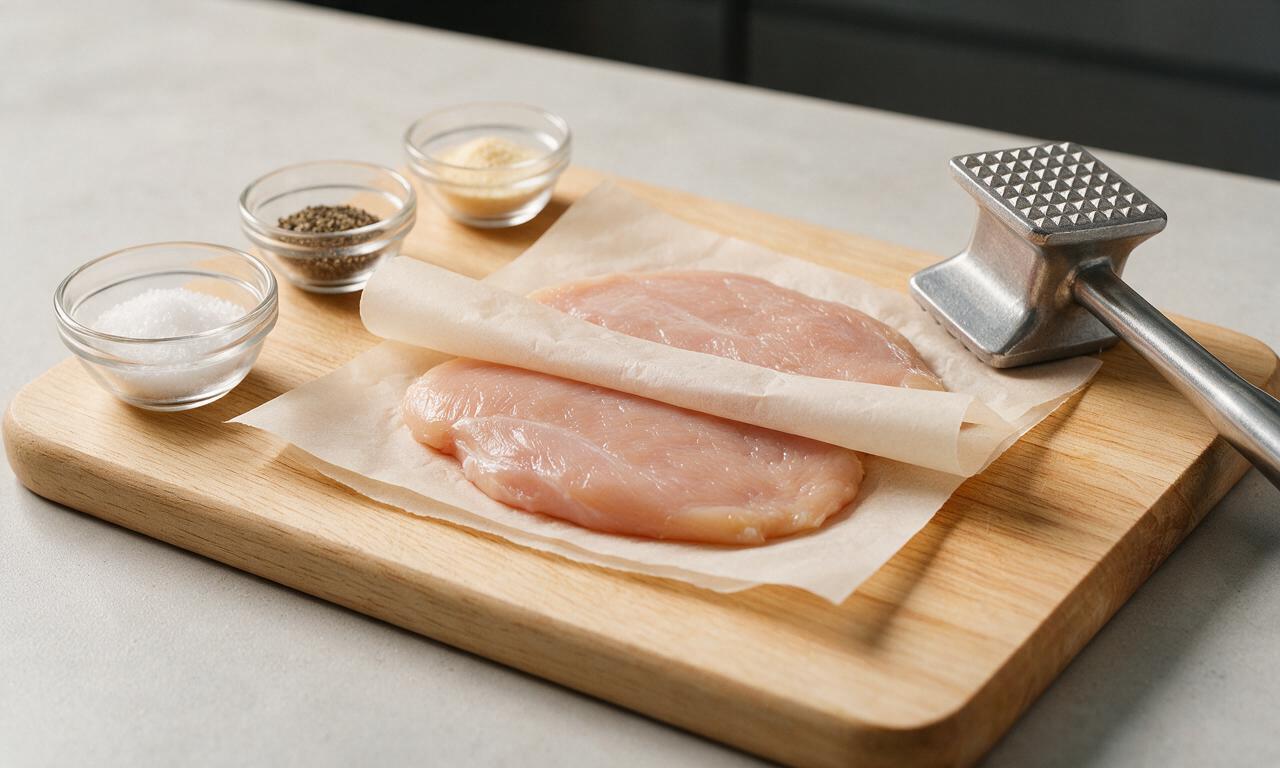
Step 1
step1:Prep chicken cutlets
2

Set up breading station

Arrange three shallow dishes in a straight line on your counter: the first holds 80g all-purpose flour, the second holds 2 beaten eggs whisked together with 2 tbsp whole milk, and the third holds 150g panko breadcrumbs. Lightly pat the rested chicken cutlets to ensure seasoning adheres before breading.
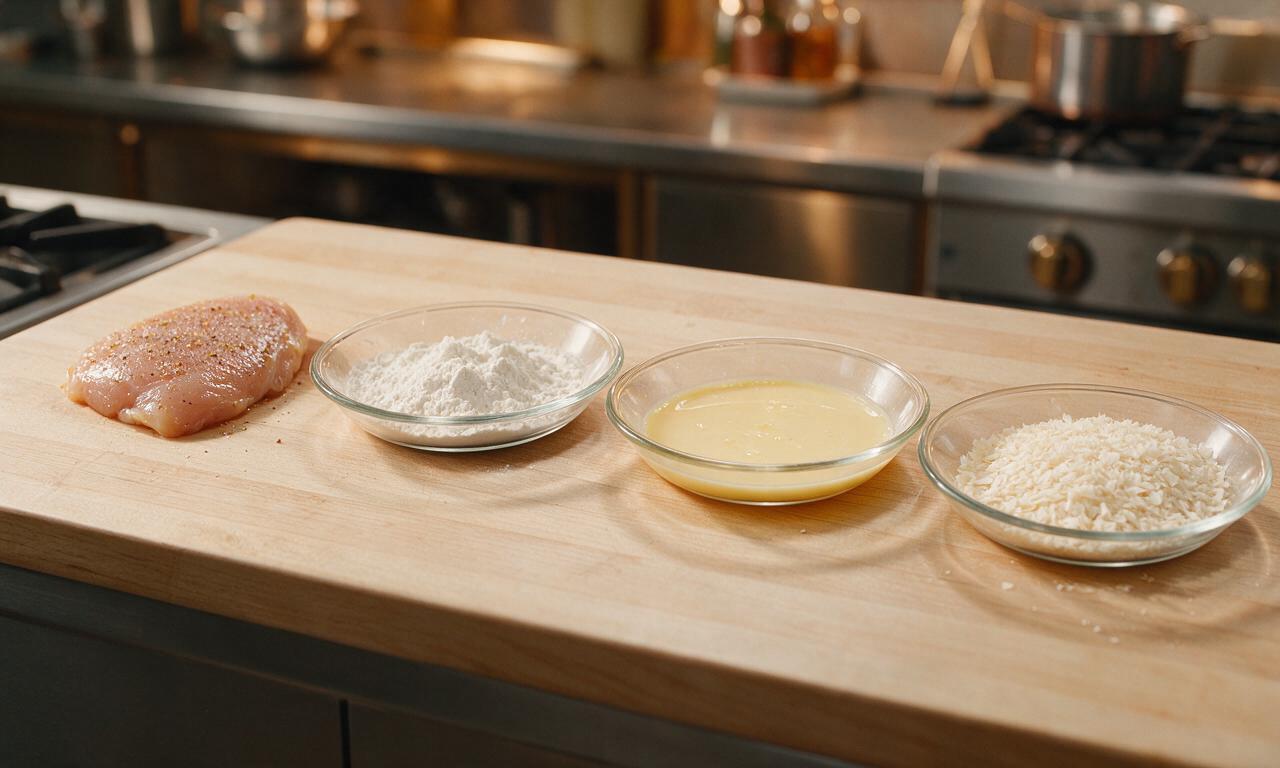
Step 2
step2:Set up breading station
3

Bread chicken cutlets

Working with one cutlet at a time, dredge fully in flour, shaking off all excess for 2 seconds to leave a thin, even coat. Next, dip completely in the egg wash, letting excess drip off for 3 seconds. Finally, press firmly into panko breadcrumbs on all sides, coating every surface, and press gently to help crumbs adhere. Place breaded cutlets on a clean plate and let rest for 5 minutes to let the coating set before frying.
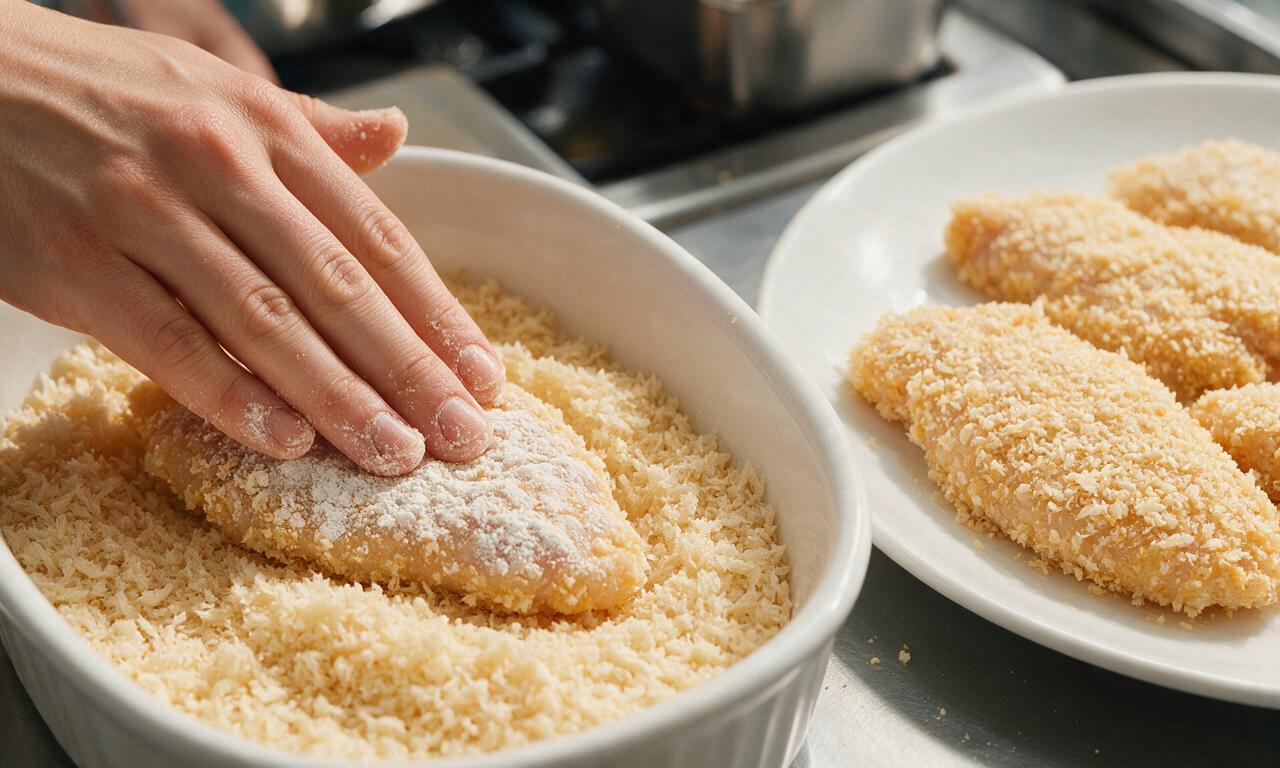
Step 3
step3:Bread chicken cutlets
4

Heat frying oil

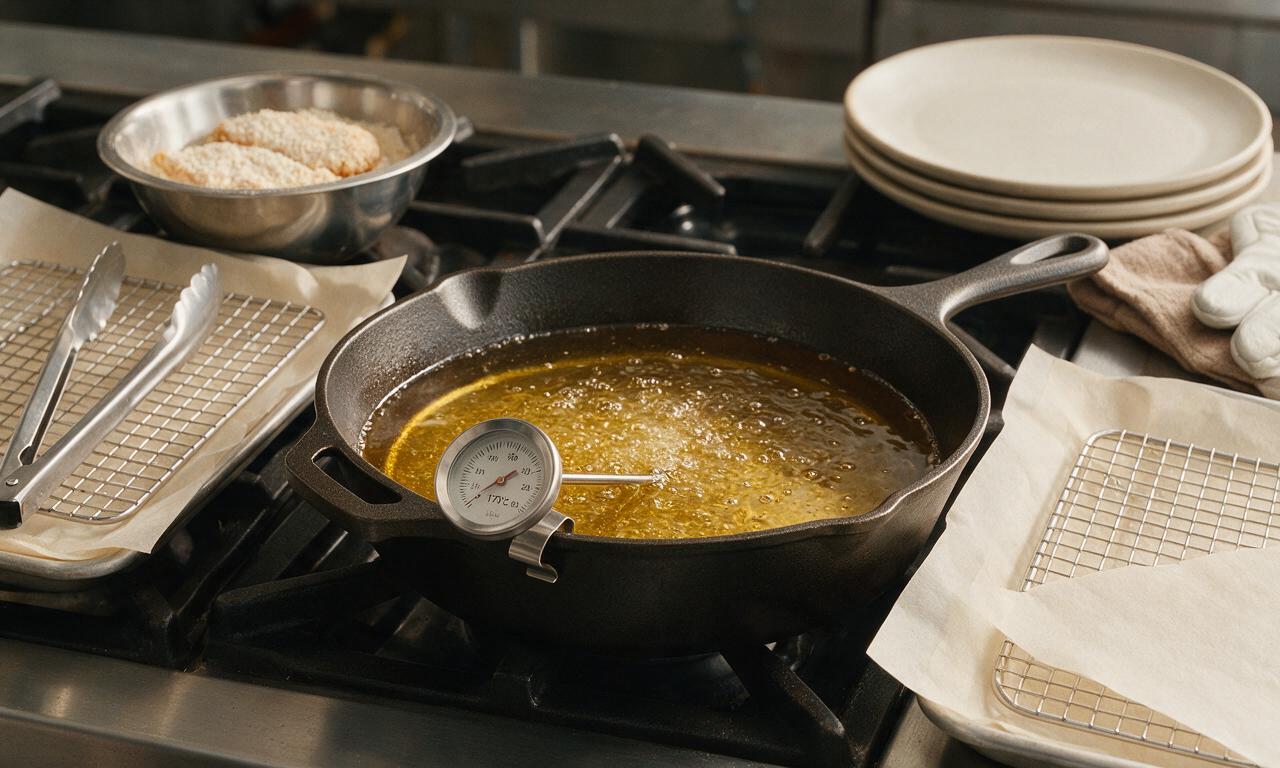
Pour 500ml neutral cooking oil into a deep, heavy-bottomed skillet or Dutch oven, then heat over medium heat until the oil reaches a steady 170°C (340°F), measured with a clip-on candy thermometer. Do not let the oil smoke, as this will burn the panko coating before the chicken cooks through.
Step 4
step4:Heat frying oil
5

Fry chicken katsu

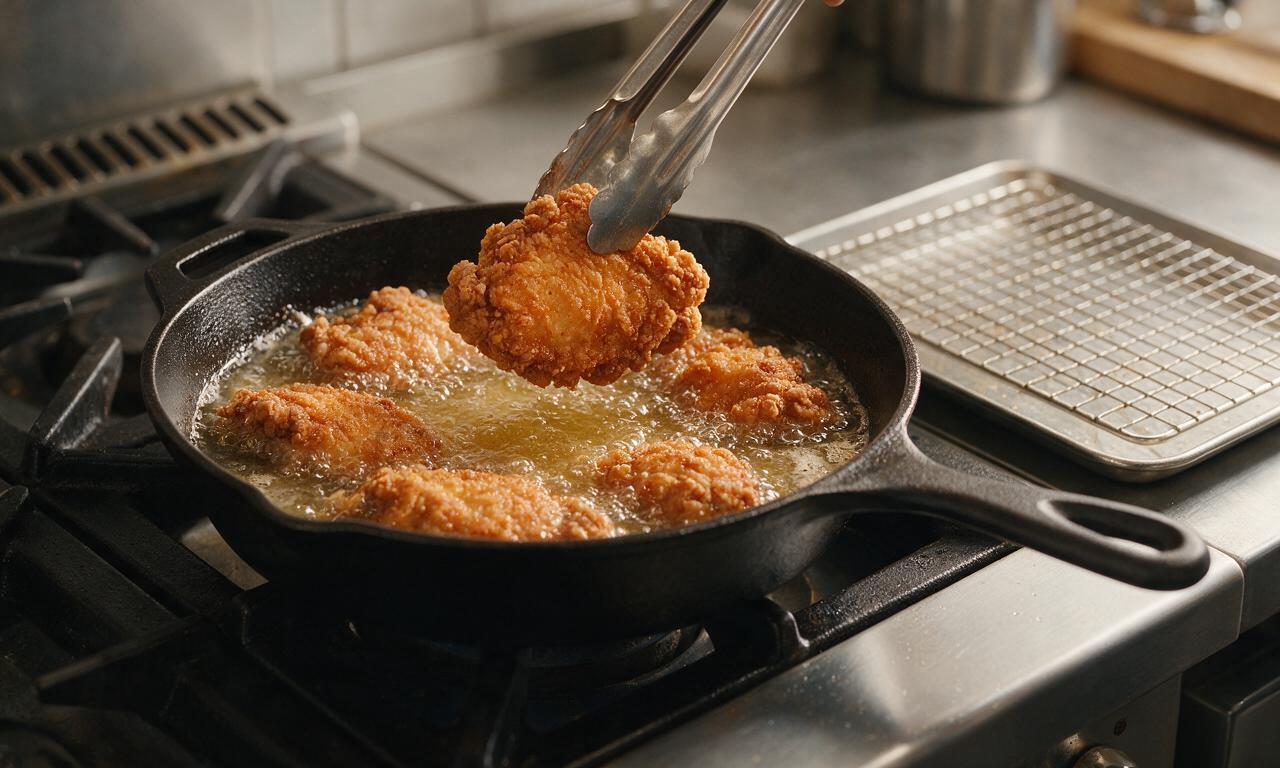
Carefully lower 1-2 breaded cutlets into the hot oil at a time to avoid overcrowding the pan, which drops oil temperature and leads to greasy crusts. Fry for 3 minutes on the first side until deep golden brown, then flip carefully with tongs and fry for 2-3 minutes on the second side, until chicken reaches an internal temperature of 75°C (165°F). Remove cooked katsu from oil and place on a wire rack set over a baking sheet to drain for 2 minutes; avoid paper towels, which trap moisture and make crust soggy.
Step 5
step5:Fry chicken katsu
6

Slice and serve

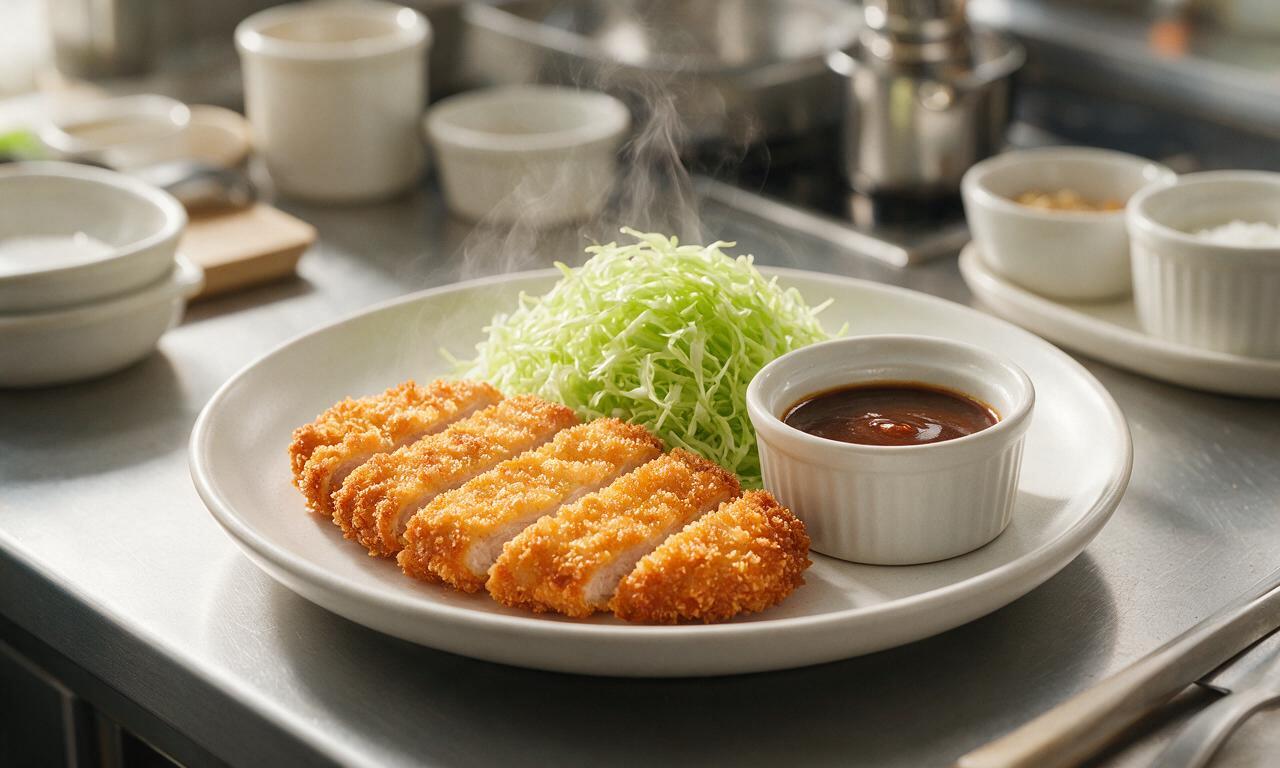
Let drained katsu rest for 2 minutes, then slice each cutlet into 2cm wide strips, cutting against the grain for tender bites. Arrange sliced katsu on plates, alongside 50g finely shredded green cabbage per serving, with 20ml tonkatsu sauce per person in a small ramekin for dipping.
Step 6
step6:Slice and serve

Tips

1.Pounding chicken to a uniform 1.5cm thickness eliminates thick spots that stay undercooked and thin edges that overcook and dry out, for perfectly juicy katsu every time.
2.Letting breaded cutlets rest for 5 minutes before frying allows the flour, egg, and panko to bind together, so the crispy crust does not fall off into the oil during cooking.
3.Never stack hot katsu or drain it on paper towels—trapped condensation will quickly turn the crunchy panko coating soft and soggy, so always use an elevated wire rack for draining.


✨ You May Also Like

Main Course
🍜 United Kingdom

A showstopping classic of tender seared beef, savory mushroom duxelles, and crisp prosciutto wrapped in flaky golden puff pastry, baked to juicy perfection.

⏱️ 2 hours 1Main Course ★ 4.7
Main Course
🍜 India

Tender charred marinated chicken simmered in a rich, spiced creamy tomato sauce, this iconic Anglo-Indian curry pairs perfectly with basmati rice or warm naan.

⏱️ 50 minuteMain Course ★ 4.8
Main Course
🍜 Thailand

Classic tangy, sweet, and savory Thai stir-fried rice noodles with shrimp, tofu, and crunchy garnishes, balancing all five core Thai flavor profiles.

⏱️ 30 minuteMain Course ★ 4.6
Main Course
🍜 United Kingdom

Crispy golden beer-battered cod and fluffy double-fried chips, served with tangy tartar sauce and malt vinegar: the timeless, beloved British pub comfort classic.

⏱️ 45 minuteMain Course ★ 4.9
Main Course
🍜 Mexico

Smoky, chile-marinated pork tacos with caramelized pineapple, fresh cilantro, and lime: a beloved classic Mexican street food perfect for casual summer gatherings.

⏱️ 1 hour 45Main Course ★ 4.7
Main Course
🍜 United States

Crunchy Fritos corn chips layered with savory beef chili and melted cheddar, topped with cool, zesty fixings for a beloved, cozy Tex-Mex comfort food.

⏱️ 35 minuteMain Course ★ 4.9

Chicken Katsu:Frequently Asked Questions

1.Why does my chicken katsu turn out soggy instead of light and crispy?
Soggy katsu almost always traces to three common missteps: frying in oil that’s too cool (aim for a steady 350°F), overcrowding the pan which drops oil temp fast, or resting fried cutlets directly on paper towels that trap steam. Press panko firmly to the chicken before frying, and rest finished katsu on a wire rack to lock in that signature crunch.
2.Can I swap boneless, skinless chicken thighs for the chicken breasts called for in the recipe?
Absolutely! Boneless, skinless chicken thighs are a fantastic swap if you prefer extra rich, juicy katsu with a little extra fat and deeper savoriness. Just pound them to the same even ½-inch thickness you would use for breasts, follow the exact same breading and frying steps, and add 1-2 minutes of cook time to reach a safe 165°F internal temp.
3.Is it really necessary to pound the chicken breasts before breading and frying?
It’s non-negotiable for evenly cooked, tender katsu! Un-pounded breasts are thick on one end and paper-thin on the other, so the thin end overcooks and dries out long before the thick end cooks through. Pound breasts to a uniform ½-inch thickness with a meat mallet or heavy pan between plastic wrap to cut down on mess.
4.How do I keep the panko breading from sliding off the chicken while it fries?
Stick to the dry-wet-dry breading order for a tight, long-lasting bond: first pat chicken completely dry, coat fully in all-purpose flour and shake off excess, dip in the egg and whole milk mixture to coat evenly, then press panko firmly onto every surface. Let breaded cutlets rest 10 minutes before frying to help the coating set.
5.Can I bake this chicken katsu instead of deep frying it for a lighter meal?
You absolutely can, though it won’t have the exact same shatteringly crisp crunch as the deep-fried version. Arrange breaded cutlets on a wire rack over a rimmed baking sheet, spritz both sides generously with neutral cooking oil, and bake at 425°F for 20-25 minutes, flipping halfway, until golden and cooked to 165°F internal temp.
6.I don’t have pre-made tonkatsu sauce—can I make a quick version at home?
You can whip up a near-perfect tonkatsu substitute in 2 minutes with common pantry staples! Mix ¼ cup ketchup, 2 tablespoons Worcestershire sauce, 1 tablespoon soy sauce, 1 teaspoon granulated sugar, and ½ teaspoon garlic powder, then stir until completely smooth. It has that same tangy, sweet-savory balance that pairs perfectly with crispy, juicy katsu.

Comments (4)

2 weeks ago

OMG this chicken katsu is SO good!!! My kids absolutely loved it at our family dinner last night — even my super picky 6 year old asked for thirds, which never happens. I was worried it’d be too much work for a busy weeknight, but 30 minutes total cook time? Total game changer. Served it with sticky rice and roasted broccoli, and I’m already planning to make a double batch this Sunday for meal prep. 10/10 no notes!

1 week ago

Took this to a neighborhood potluck last weekend and people were literally lining up to get a piece. The panko crust stayed perfectly crispy even after I drove 20 minutes to the host’s house, which never happens with my usual fried chicken recipes. Super easy to follow, no weird fancy ingredients I had to run to three stores to find. Absolute home run.

5 days ago

No way, I brought this to my office potluck last month and had the exact same experience! Everyone kept asking where I ordered it from, couldn’t believe I made it at home.

yesterday

Quick question for anyone who’s made this — can I bread the chicken cutlets ahead of time and freeze them? I do a big Sunday meal prep for the week and this seems like the perfect easy protein to have on hand for quick dinners after work.

2 hours ago

Great question! You can absolutely bread the cutlets ahead of time and freeze them in a single layer on a baking sheet before transferring to an airtight freezer bag for up to 3 months. No need to thaw when you’re ready to cook — just add 2-3 minutes to the cook time to make sure they crisp up perfectly and cook all the way through. Hope they become a meal prep staple for you!

3 days ago

I was low-key terrified to try making any kind of pan-fried chicken for the first time, but this recipe was so easy to follow even for a total newbie like me! The crust came out shatteringly crispy with zero soggy spots, which I was convinced I’d mess up. I didn’t have pre-made tonkatsu sauce so I mixed up a quick hack with ketchup, soy sauce, Worcestershire, a pinch of garlic powder and a tiny bit of sugar, and it tasted exactly like the sauce from our local takeout spot. So impressed!

2 days ago

That homemade sauce hack sounds insane! I never remember to buy the pre-made katsu sauce when I’m at the grocery store, so I’m 100% stealing that ratio when I make this for my girlfriend tomorrow night.

yesterday

Love that homemade sauce hack — it sounds delicious! So proud of you for nailing that crispy crust on your first try, that’s exactly why we love keeping this recipe simple and approachable for home cooks of all skill levels. Enjoy!



