
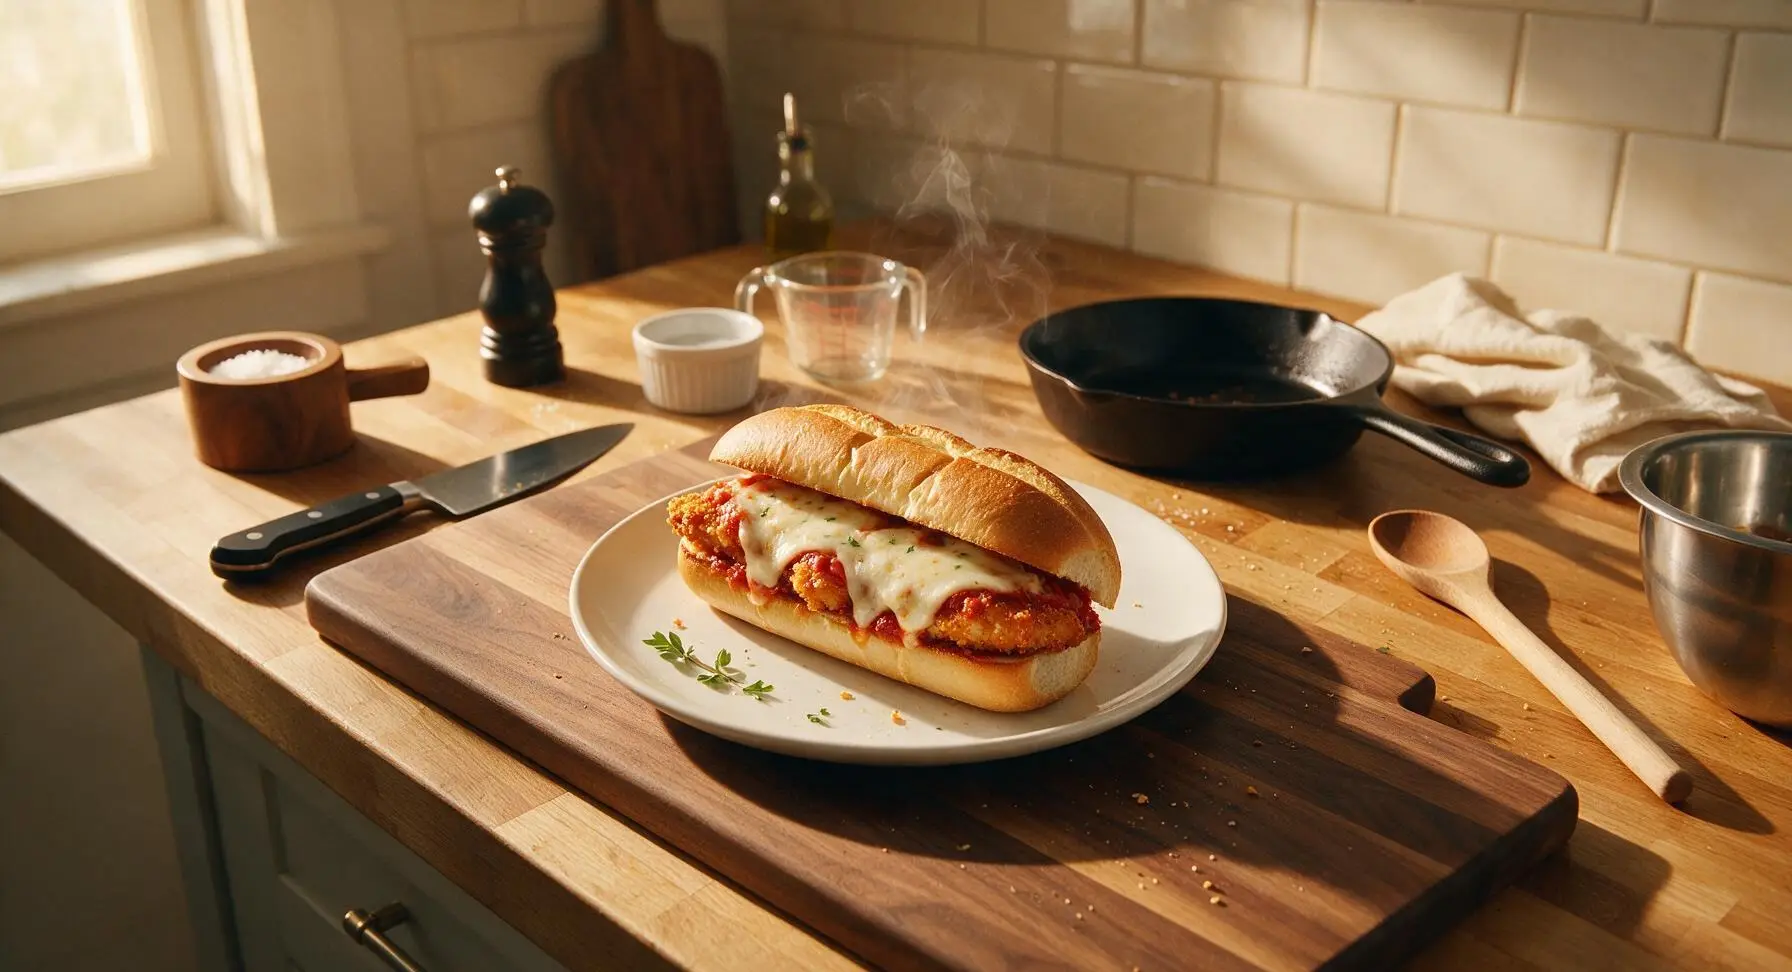
Chicken Parm Sub

title 1
Chicken Parm Sub
⏱️ cook time 25 minutes
🍽️ servings 4
⚡ Difficulty easy

intro

Crispy breaded chicken, tangy marinara, and oozing melted mozzarella on a toasty hoagie roll make this Italian-American sub a cozy, crowd-pleasing comfort food.

Ingredients
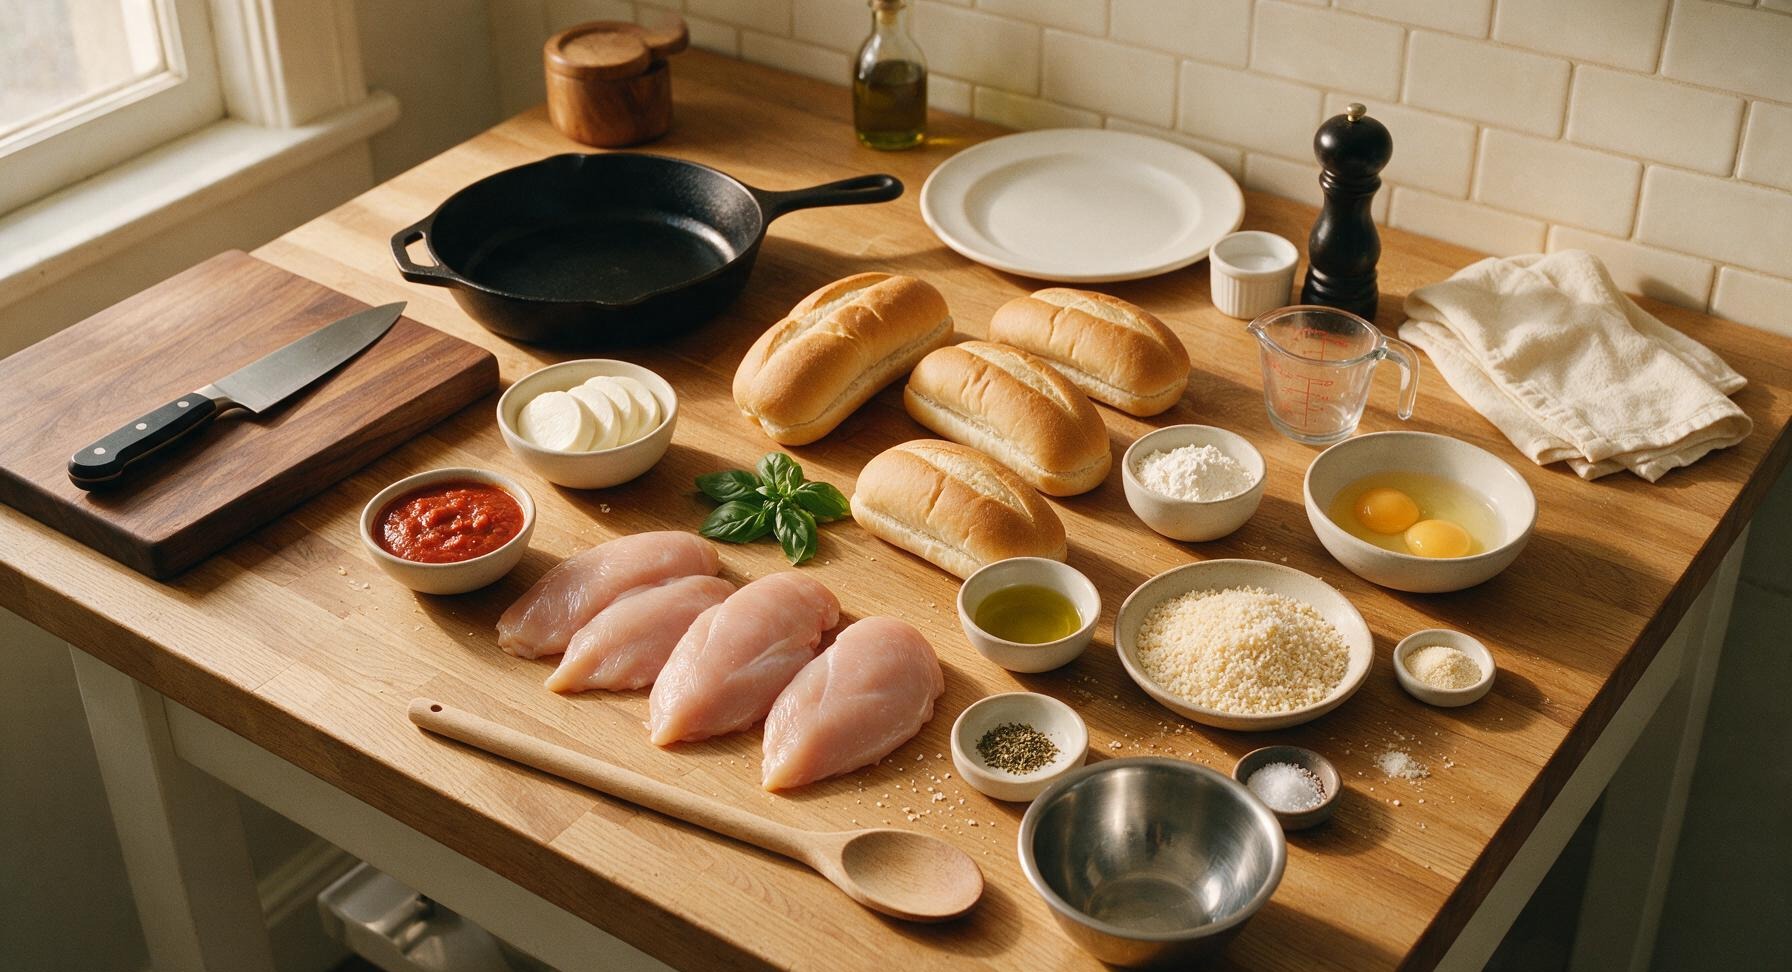
Boneless, skinless chicken breasts 680g (4 pieces, pounded to 1cm thickness)
Soft Italian hoagie rolls 4 (15cm long)
Whole milk mozzarella cheese 220g, sliced 0.5cm thick
Marinara sauce 360ml
All-purpose flour 80g
Large eggs 2
Panko breadcrumbs 120g
Grated Parmesan cheese 40g, plus extra for serving
Olive oil 60ml, for frying
Fresh basil leaves 15g
Dried oregano 1 tsp
Garlic powder 1 tsp
Kosher salt 1.5 tsp
Freshly ground black pepper 0.5 tsp

Steps

1

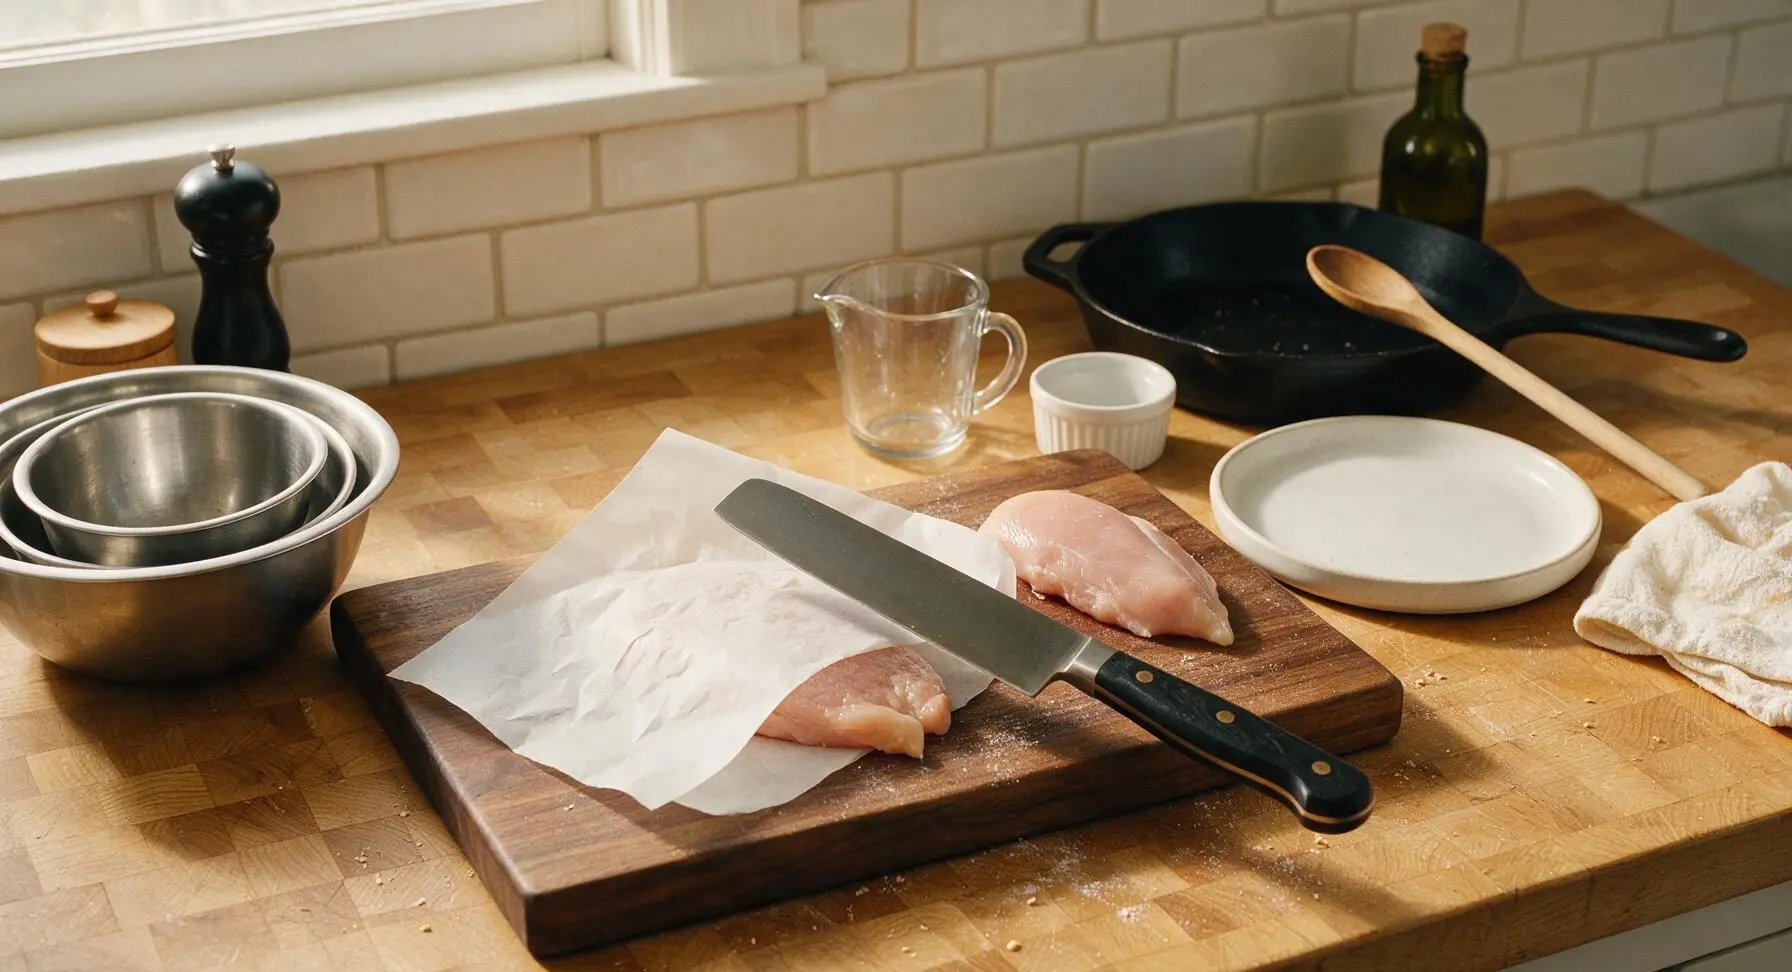
Pound Chicken Cutlets

Place chicken breasts on the maple cutting board, set each between sheets of parchment paper, then use the flat side of the chef knife to gently pound each to an even 1cm (1/2 inch) thickness, sized to match the length of the hoagie rolls. Season both sides lightly with 1/2 tsp kosher salt and 1/4 tsp black pepper. Uniform thickness ensures even cooking without dry, overcooked edges.
Step 1
step1:Pound Chicken Cutlets
2

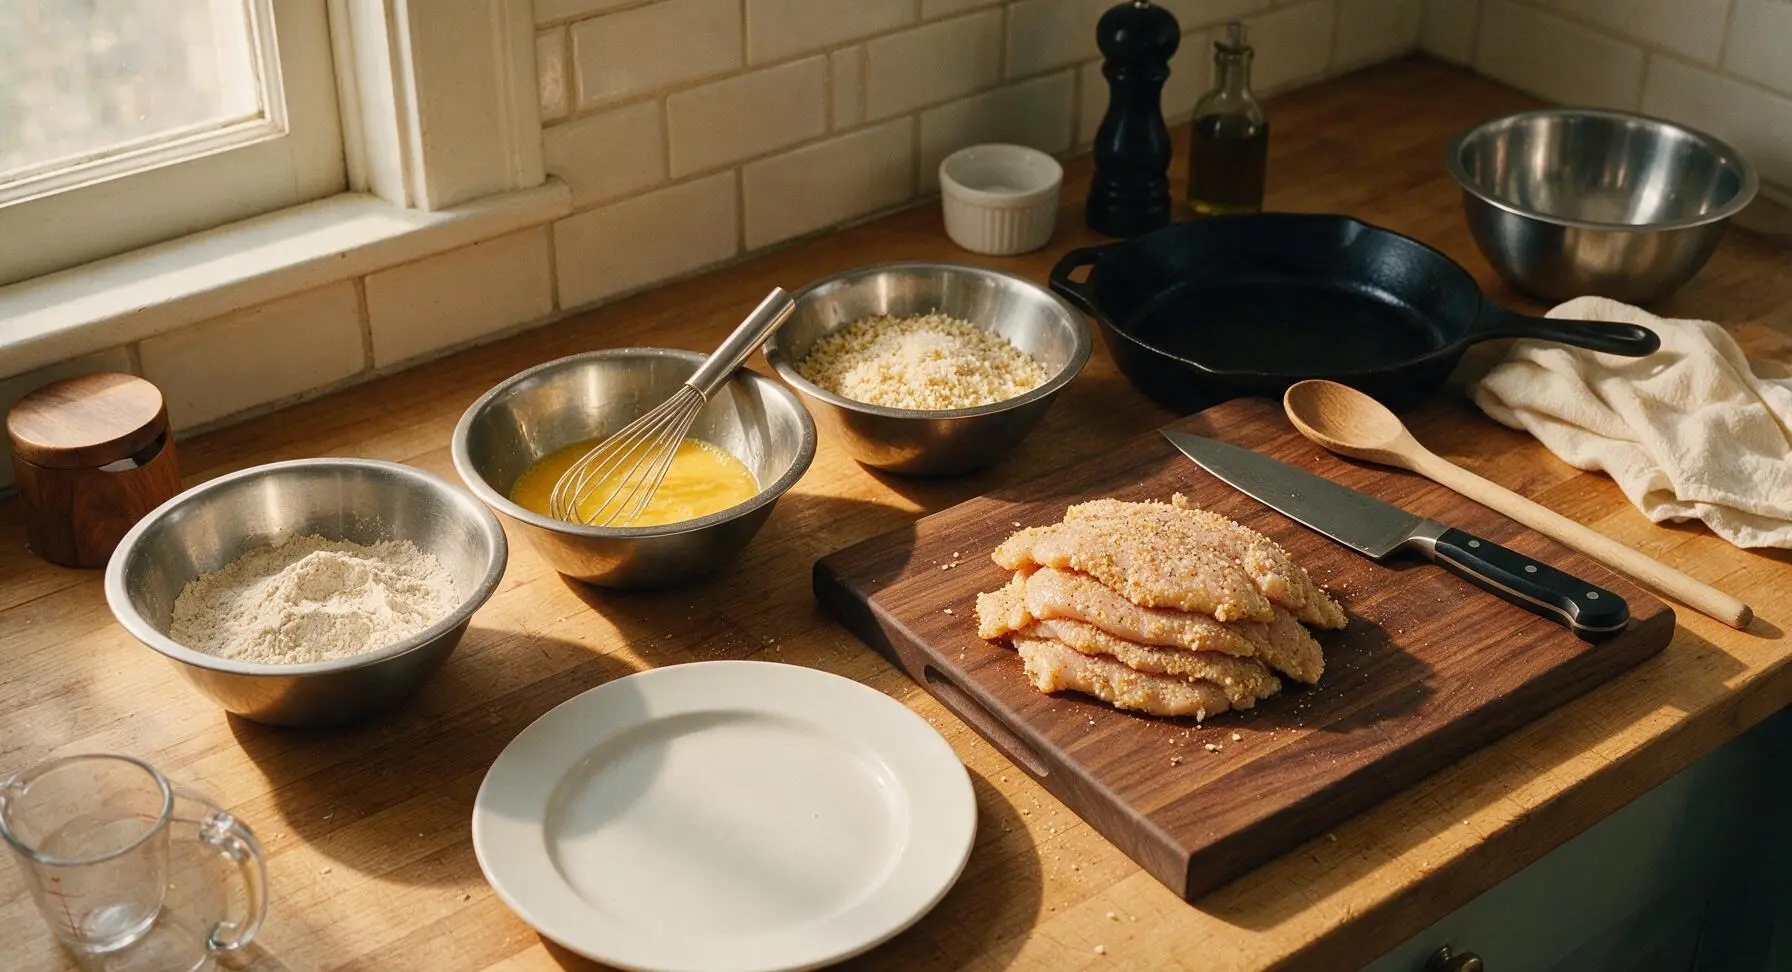
Set Up Breading Station

Unnest the three medium stainless steel mixing bowls and arrange them in a row to the left of the cutting board. Fill the first bowl with all-purpose flour mixed with 1/2 tsp kosher salt, 1/4 tsp black pepper, and garlic powder. Crack eggs into the second bowl, whisk with the wire whisk until fully smooth with no streaks of egg white remaining. In the third bowl, combine panko breadcrumbs, grated Parmesan, and dried oregano, stirring to distribute ingredients evenly.
Step 2
step2:Set Up Breading Station
3

Bread Chicken Cutlets

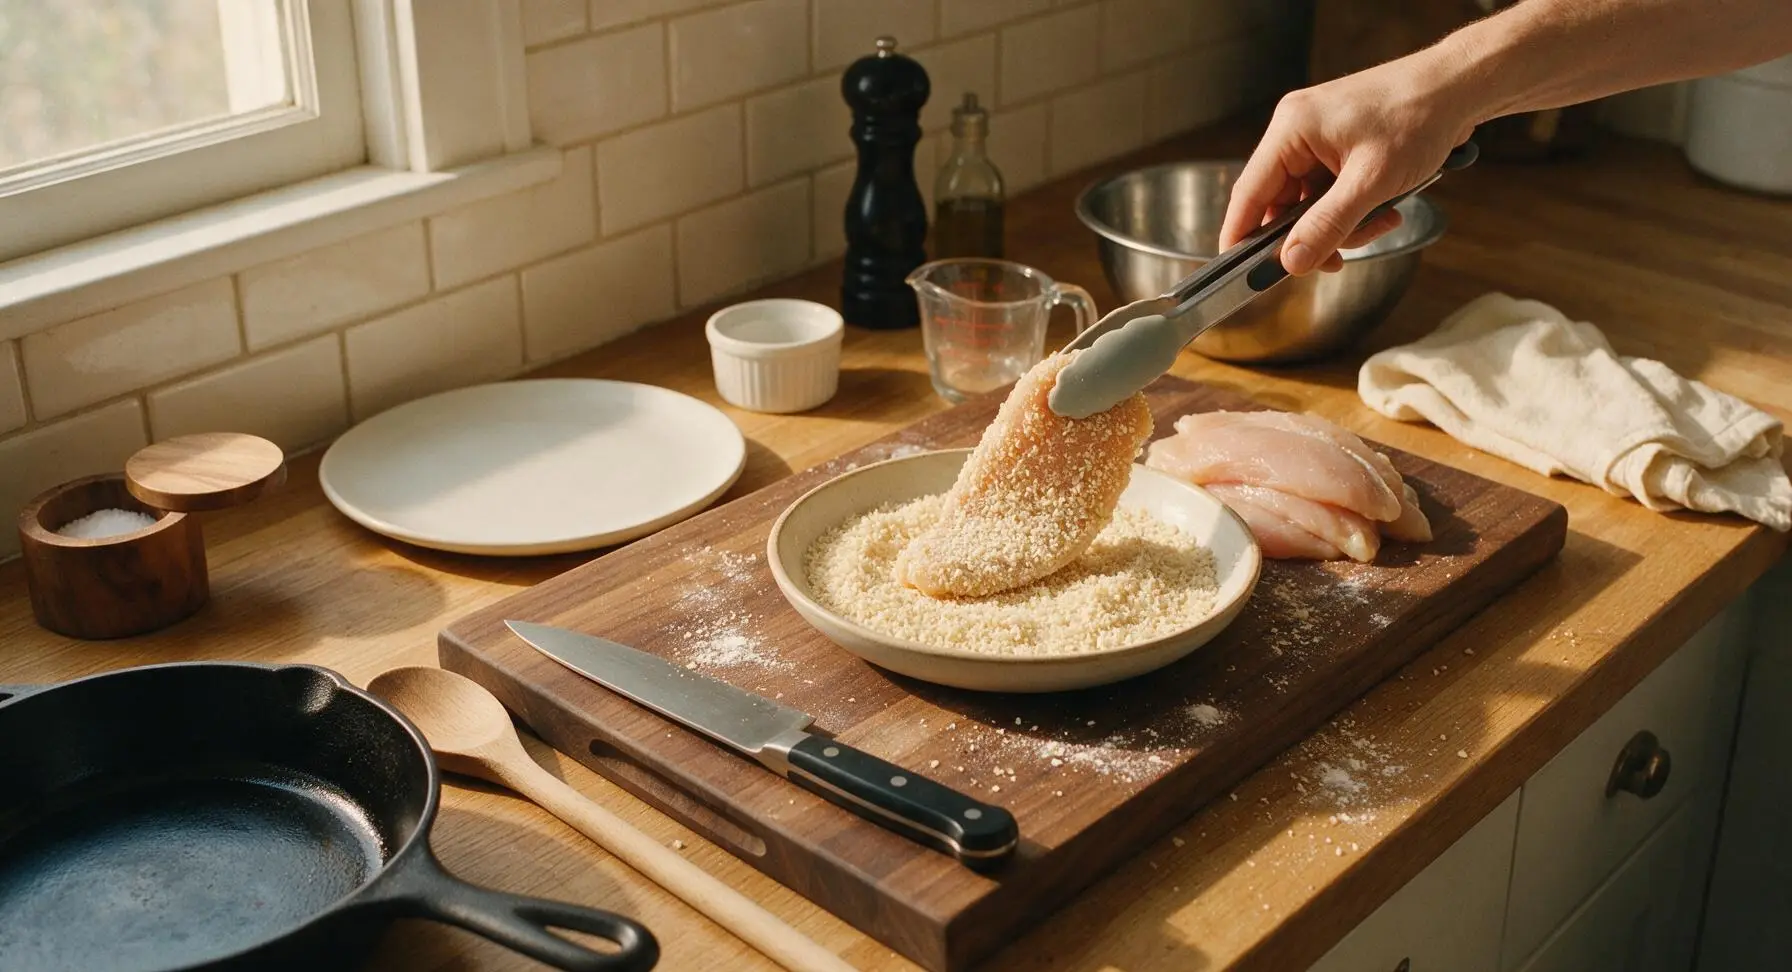
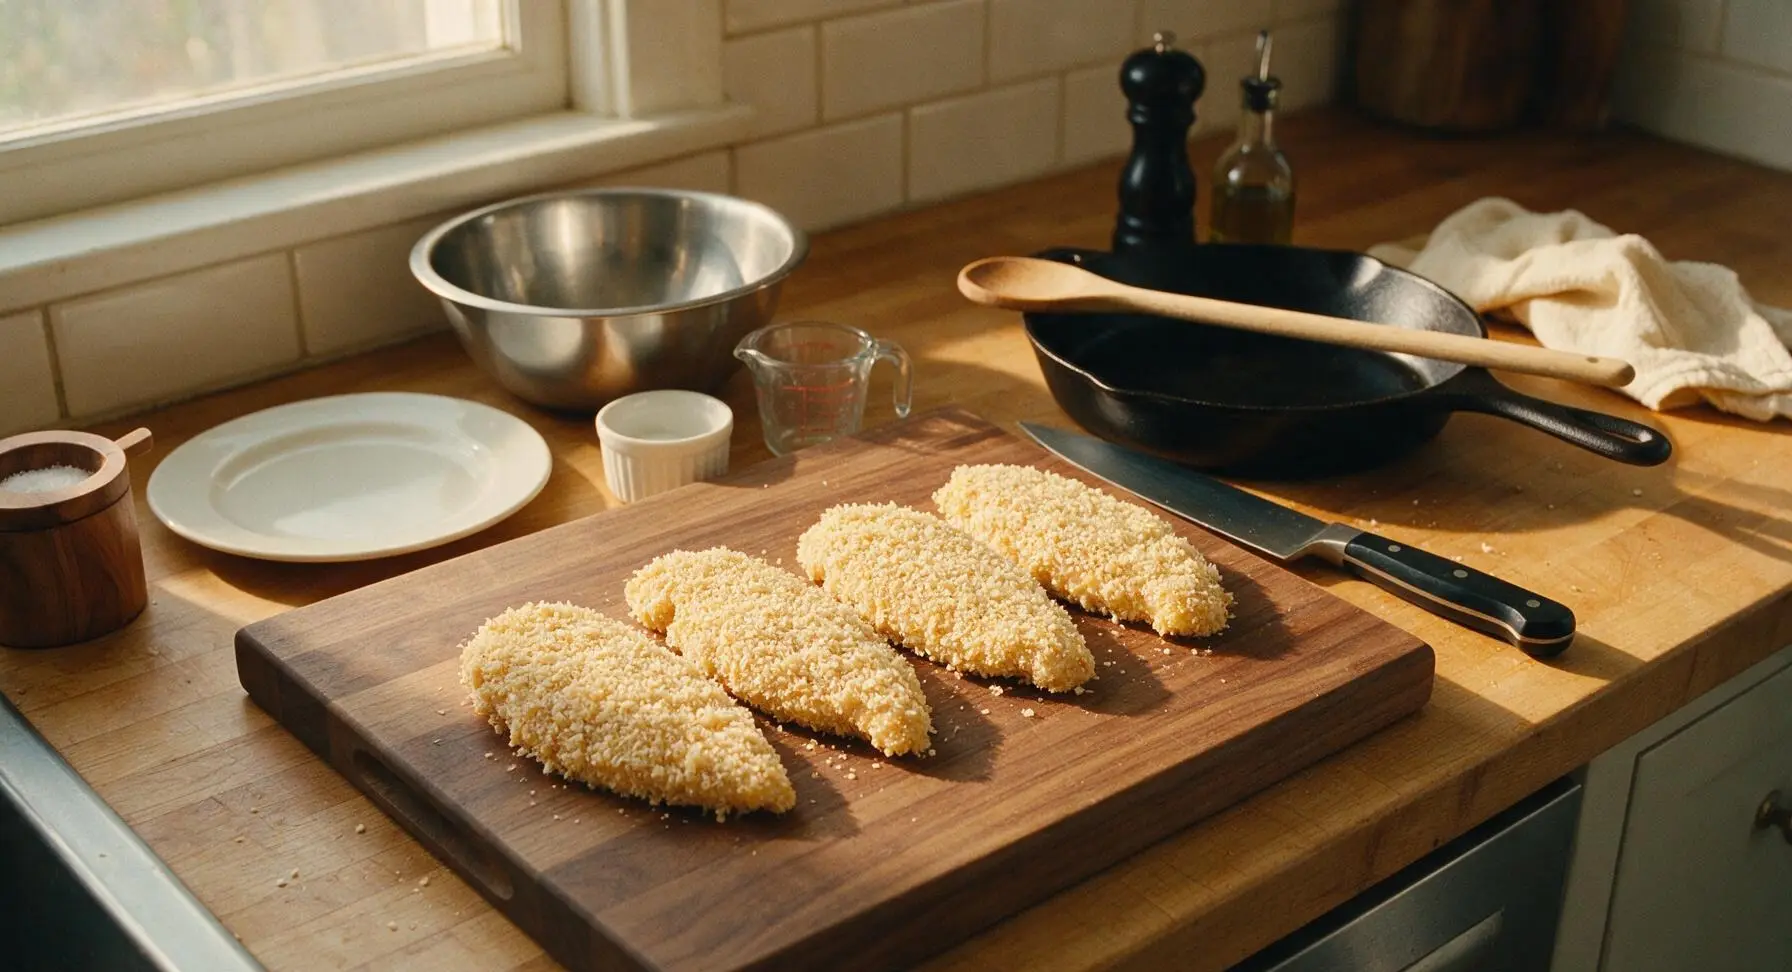
Working one cutlet at a time, use kitchen tongs to dredge each piece first in seasoned flour, shaking off all excess to leave a thin, even coating. Next, dip the floured cutlet fully into beaten egg, letting excess egg drip back into the bowl for 2 seconds. Finally, press the cutlet firmly into the panko mixture, turning to coat both sides completely and pressing crumbs into the chicken to ensure they adhere. Set breaded cutlets on a clean edge of the cutting board; use one hand for dry ingredients and one for wet to avoid clumpy, caked-on fingers.
Step 3
step3:Bread Chicken Cutlets
Step 3
step3:Bread Chicken Cutlets
4

Fry Breaded Cutlets

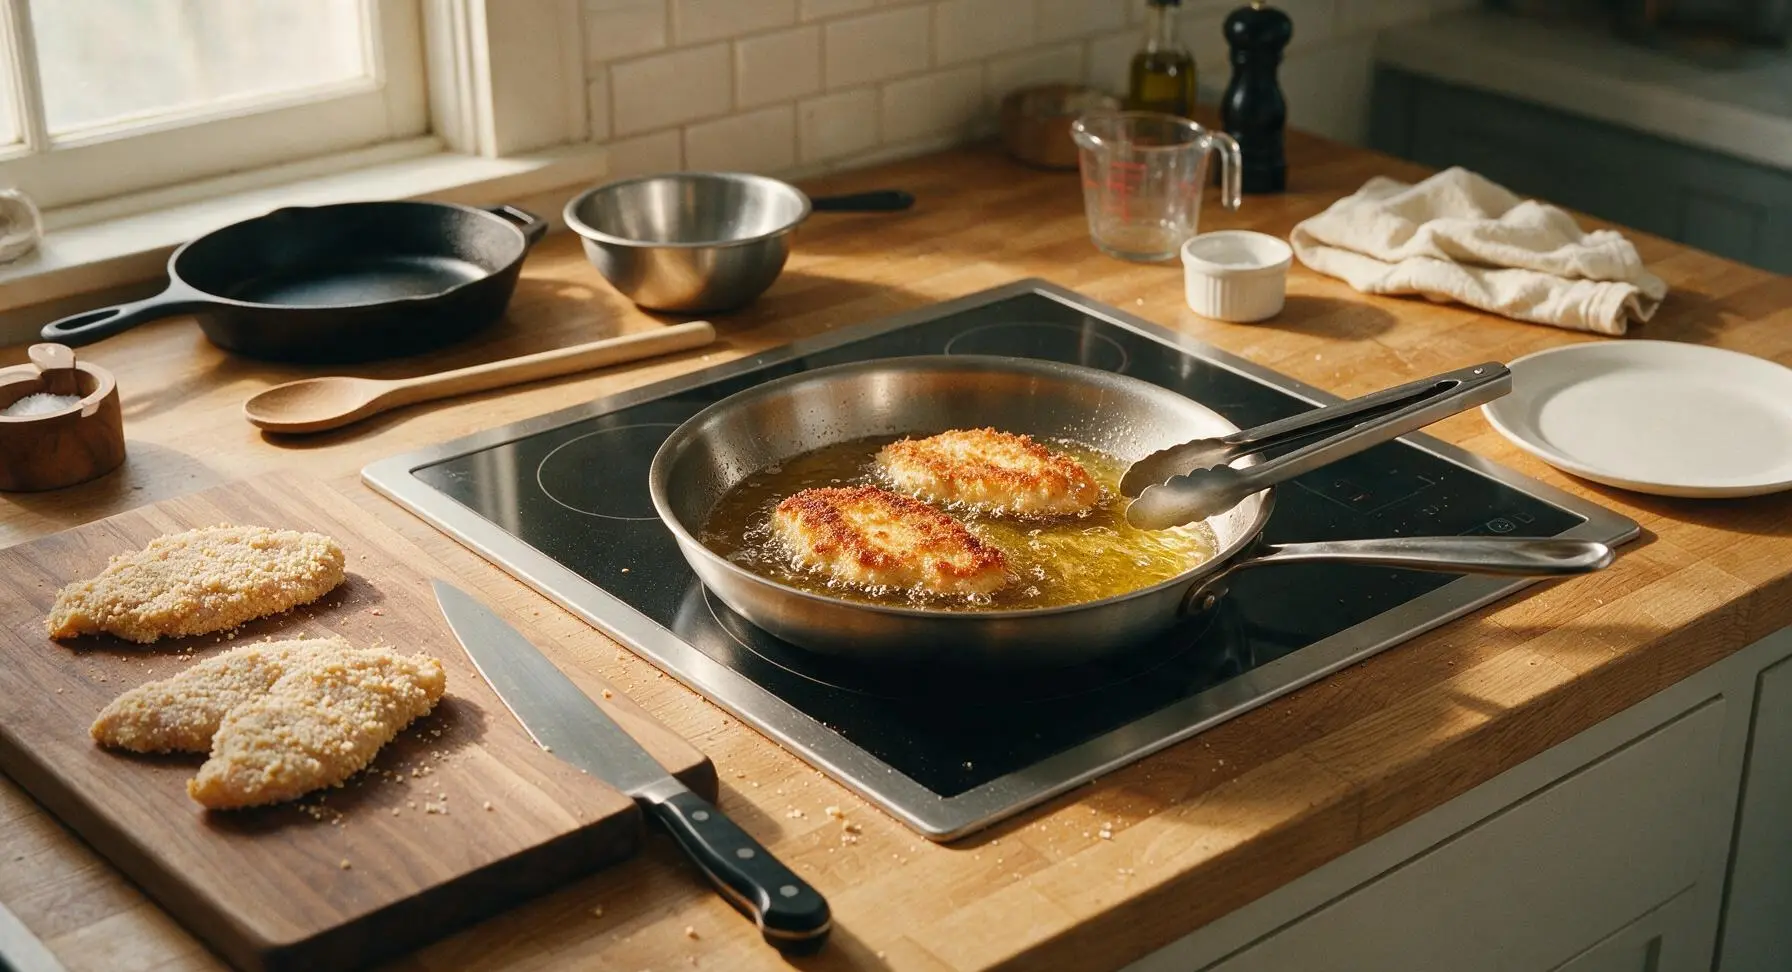
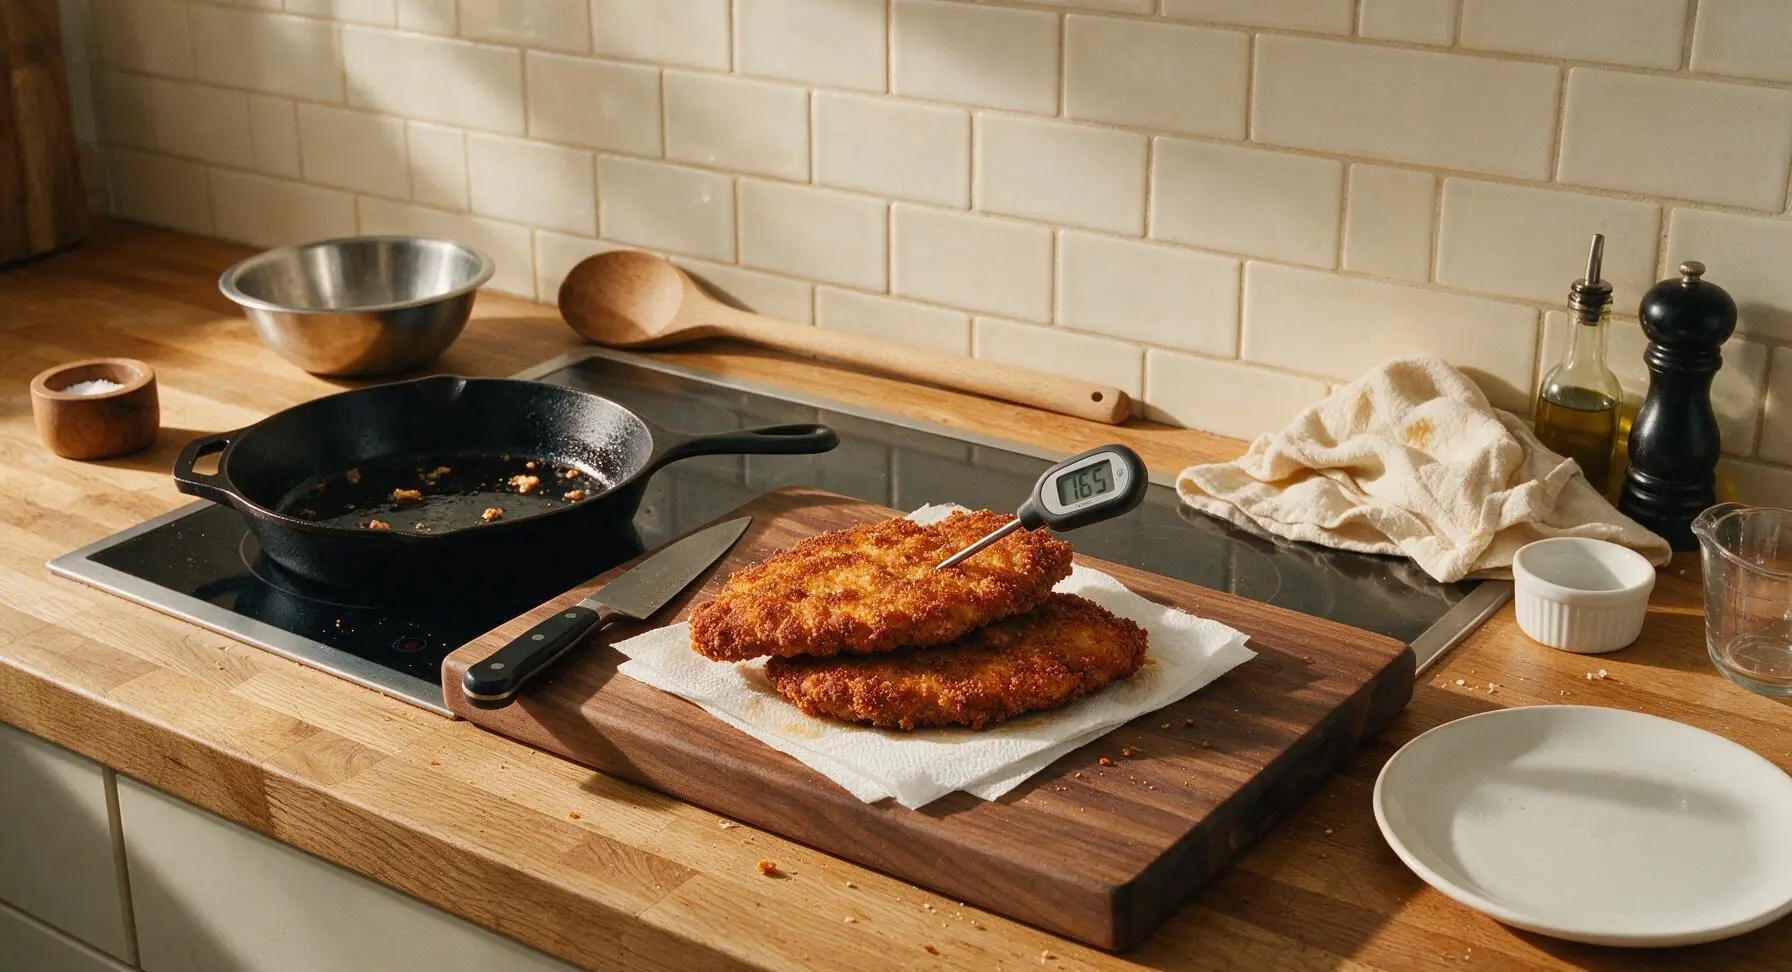
Set the 12-inch stainless steel skillet on the integrated induction stovetop over medium heat, add olive oil, and heat until the oil shimmers (approximately 3 minutes, reaching 175C/350F). Use tongs to carefully place 2 breaded cutlets in the pan, taking care not to crowd the pan (crowding drops oil temperature and leads to soggy, not crispy, crust). Fry for 3-4 minutes per side, until the crust is deep golden brown and crispy, and the internal temperature of the chicken reaches 74C/165F when checked with the instant-read thermometer. Transfer cooked cutlets to a paper-towel lined edge of the cutting board to drain excess oil, then repeat with the remaining two cutlets.
Step 4
step4:Fry Breaded Cutlets
Step 4
step4:Fry Breaded Cutlets
5

Toast Hoagie Rolls

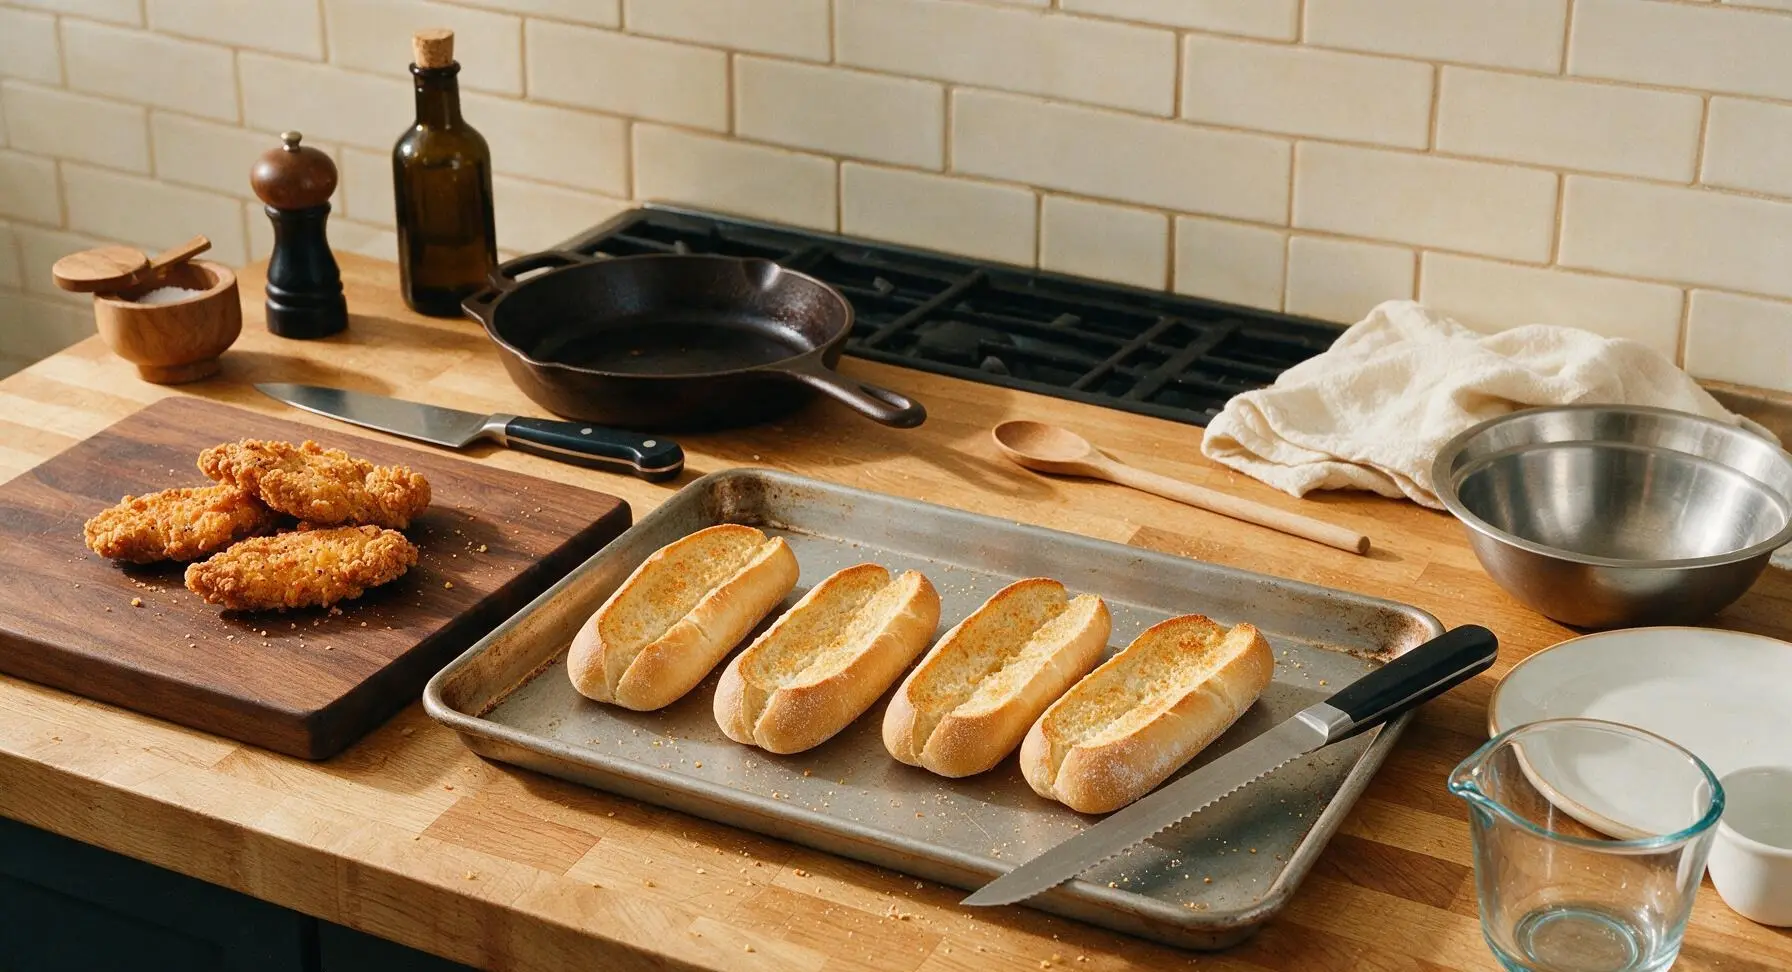
Turn the oven to high broil (260C/500F). Use the serrated bread knife to split the four hoagie rolls lengthwise, leaving a 1cm hinge along one edge so the rolls do not separate fully. Place rolls split-side up on the matte aluminized steel baking sheet, then broil for 1-2 minutes until the cut surface is lightly golden and toasty, watching closely to avoid burning. Remove the baking sheet from the oven, leaving the broiler on.
Step 5
step5:Toast Hoagie Rolls
6

Assemble and Melt Cheese

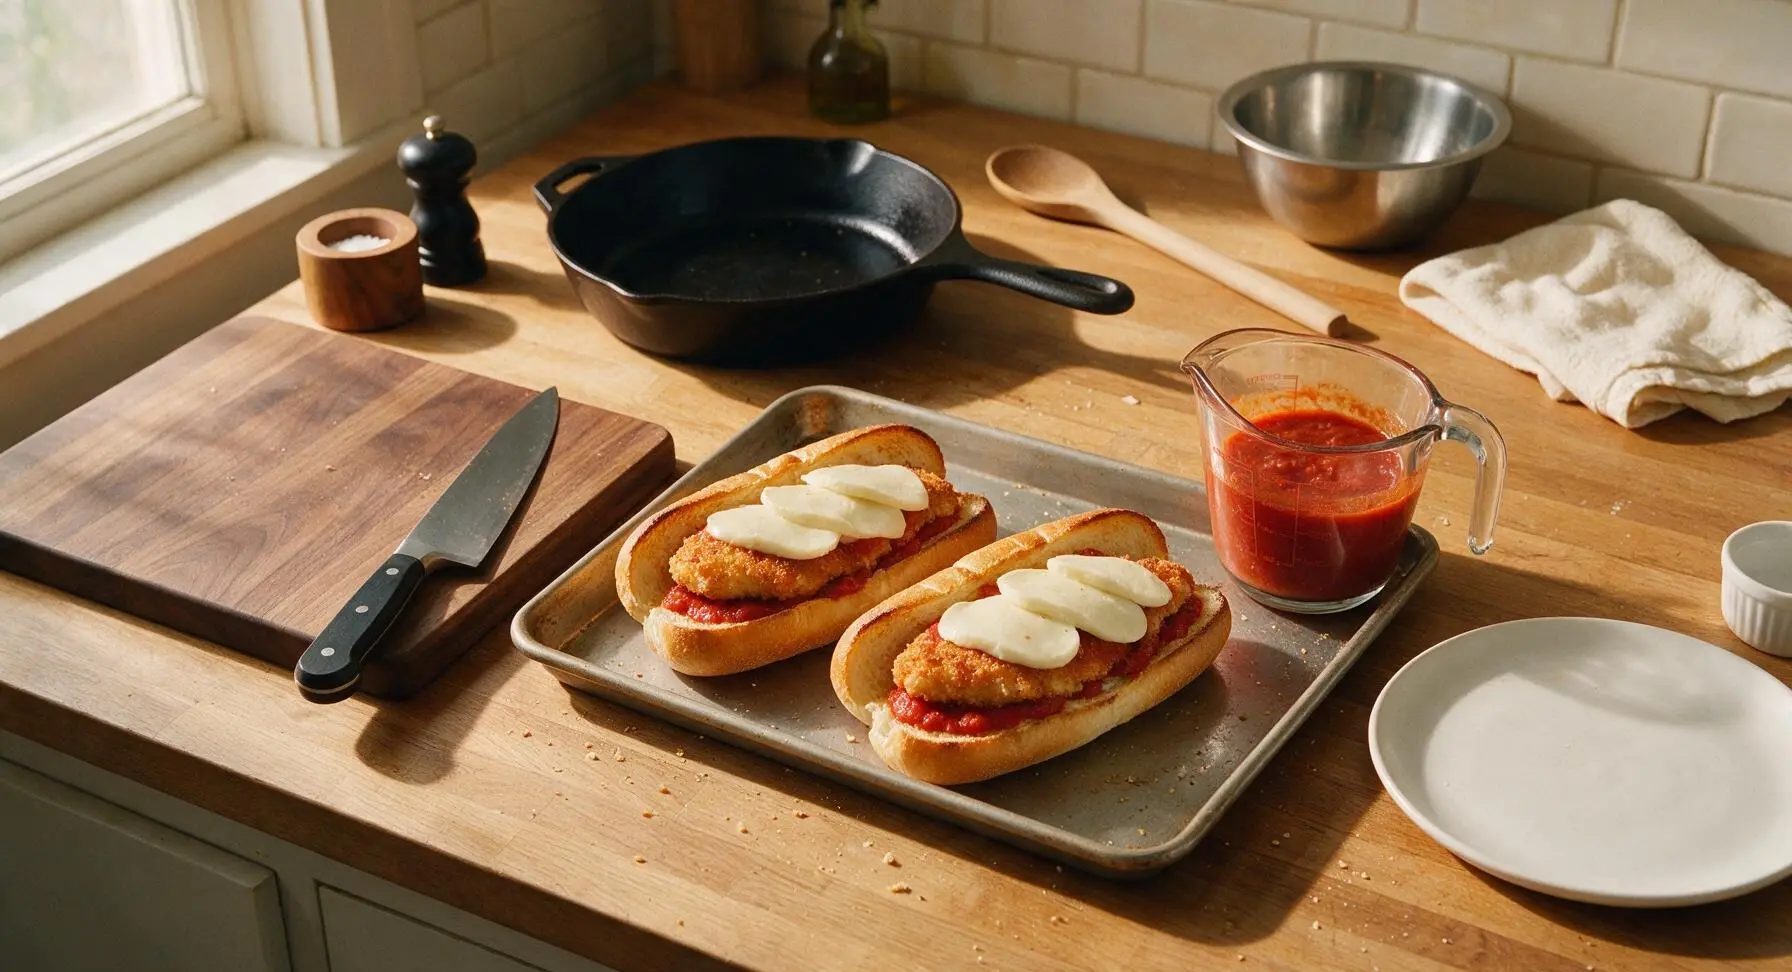
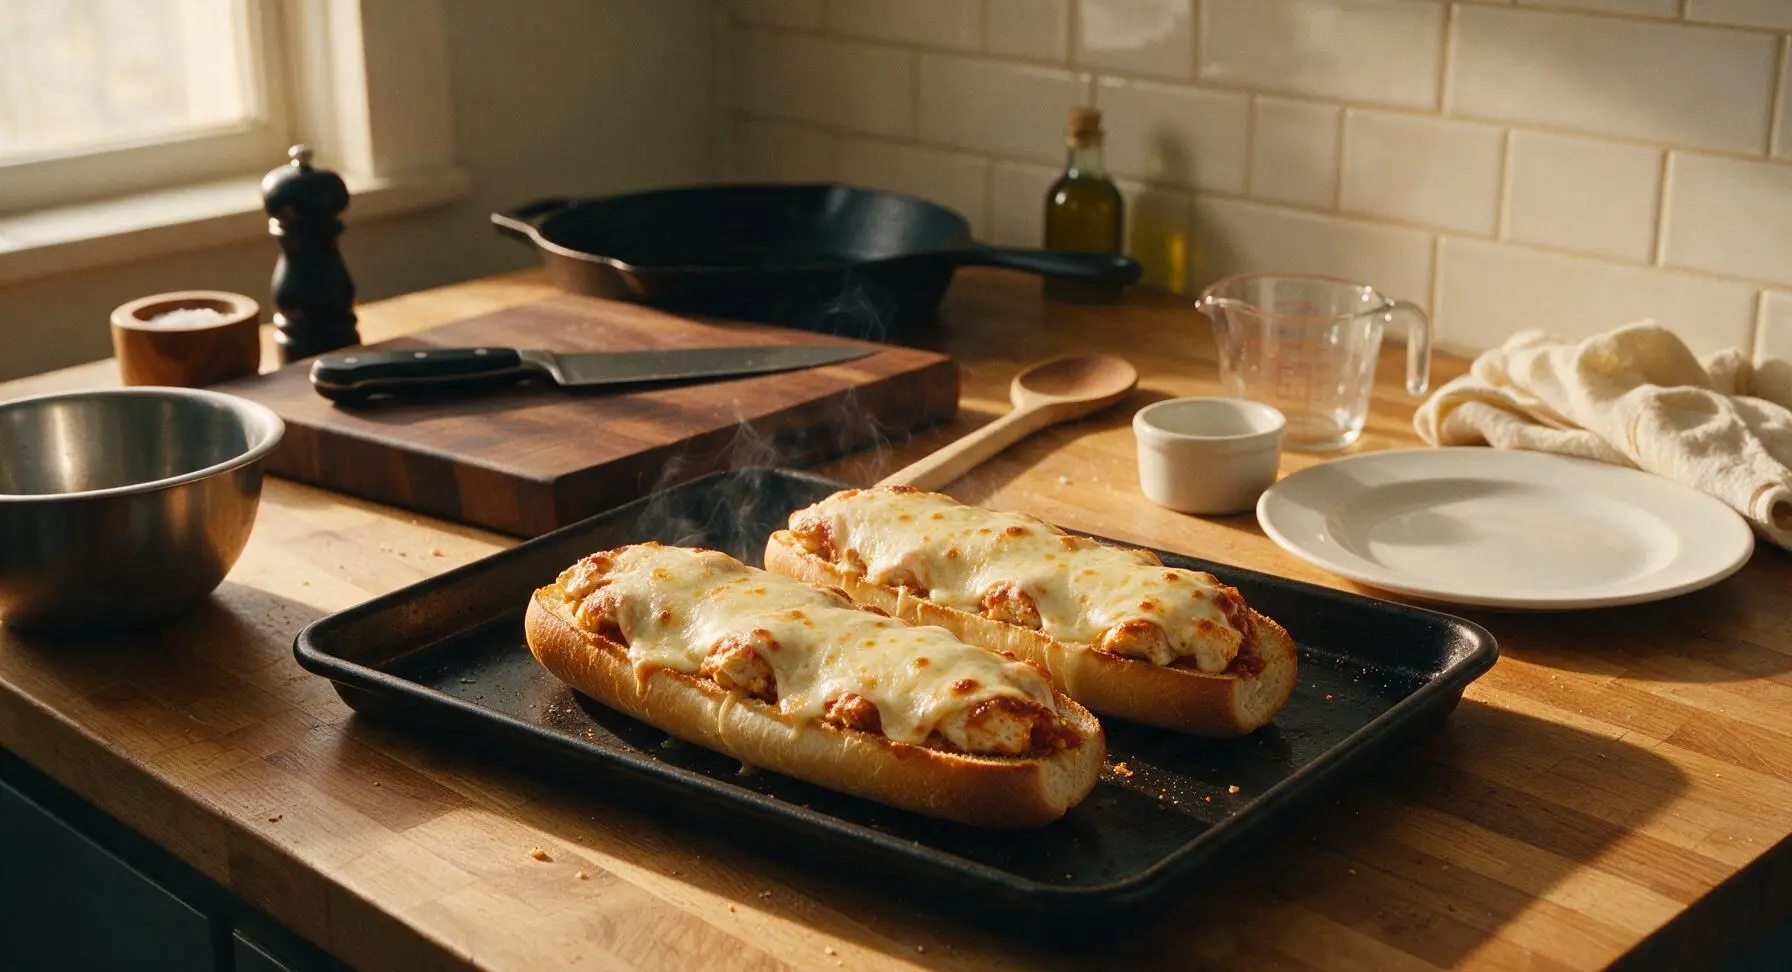
Spoon 1 tablespoon of marinara onto the bottom half of each toasted roll. Place one fried chicken cutlet on each sauced roll, top the chicken with 2 more tablespoons of marinara, then cover with 2-3 slices of fresh mozzarella. Slide the open baking sheet of assembled subs back under the broiler for 1-2 minutes, until the mozzarella is fully melted, bubbly, and just starting to develop light brown spots. Watch constantly, as broiler heat is intense and cheese can burn in seconds.
Step 6
step6:Assemble and Melt Cheese
Step 6
step6:Assemble and Melt Cheese
7

Finish and Plate Subs

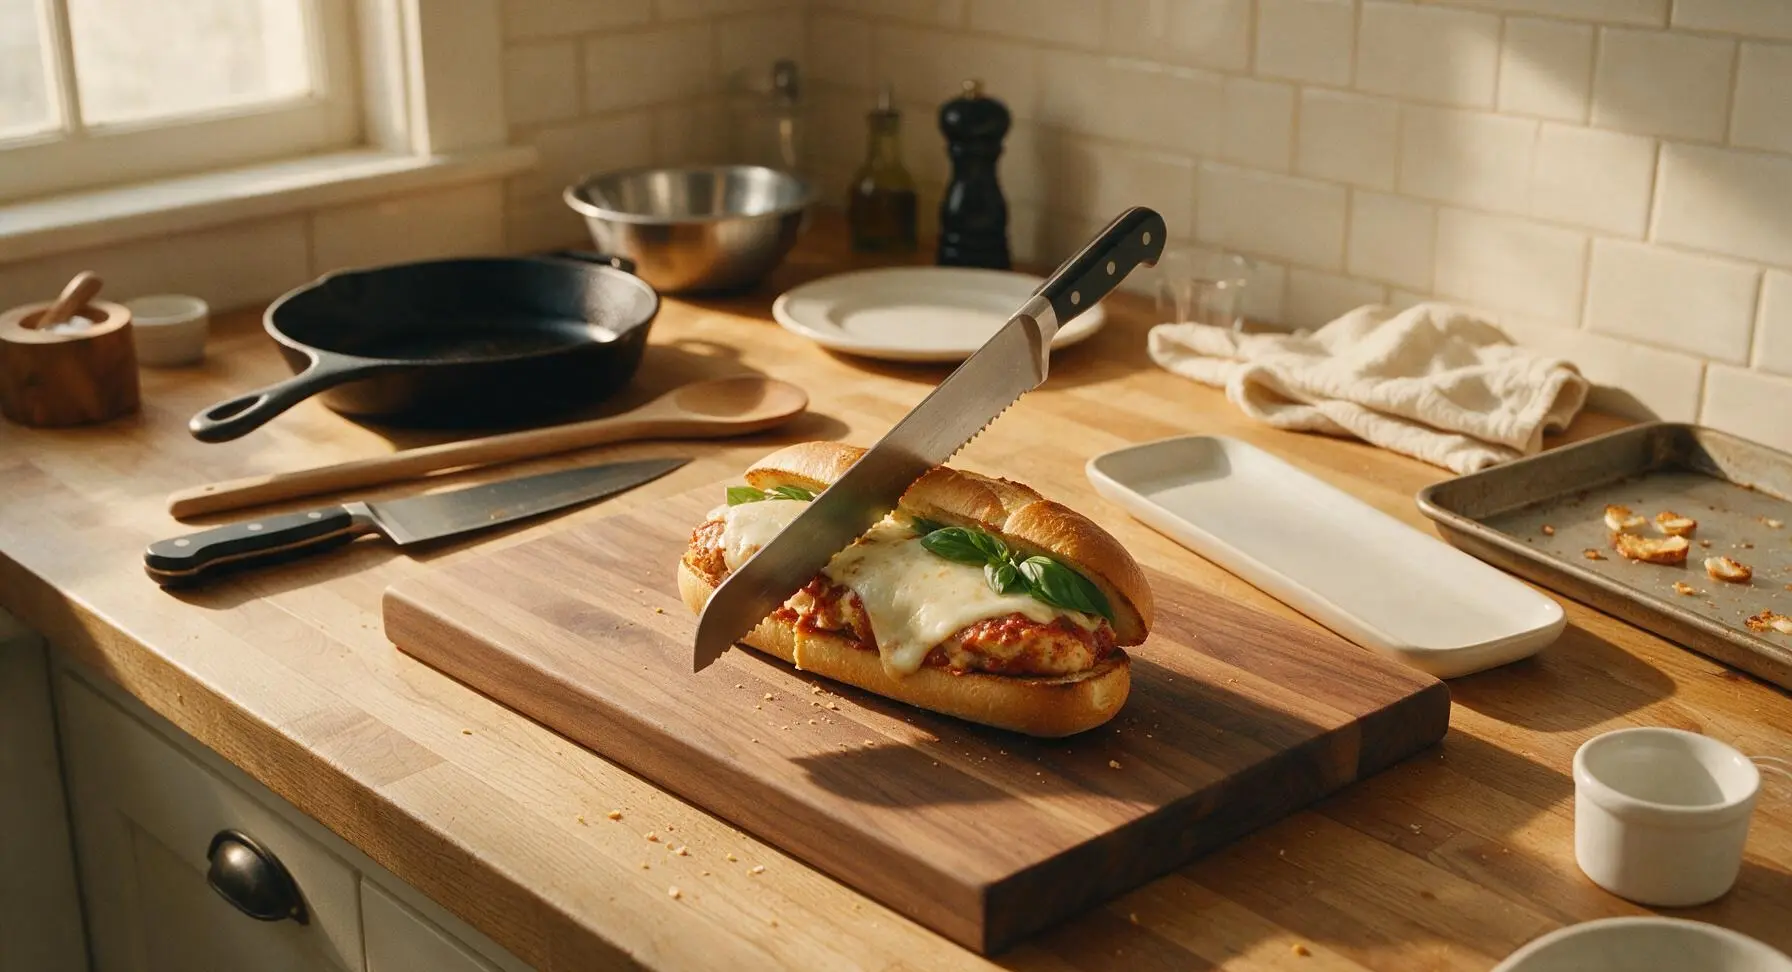
Remove the baking sheet from the broiler. Tuck 2-3 fresh basil leaves into each sub, sprinkle with a light pinch of extra grated Parmesan, then fold the top of the roll down over the filling. Use the serrated bread knife to cut each sub diagonally in half, then arrange on the rectangular matte white ceramic serving platter. Serve immediately while hot, with extra marinara on the side if desired.
Step 7
step7:Finish and Plate Subs

Tips

1.Press panko crumbs firmly into the chicken when breading: Loose crumbs will fall off during frying, burn in the hot oil, and leave bare patches on the cutlet instead of a uniform, crispy crust.
2.Let fried cutlets drain for 2 minutes before assembling subs: This allows excess surface oil to absorb into the paper towel, preventing soggy bread, and lets the chicken rest so juices stay in the meat instead of running into the roll.
3.Crack the oven door slightly when broiling: This prevents the broiler from cycling off and maintains consistent high heat, so cheese melts quickly without over-toasting the rolls or drying out the chicken filling.


✨ You May Also Like

Main Course
🍜 United Kingdom

A showstopping classic of tender seared beef, savory mushroom duxelles, and crisp prosciutto wrapped in flaky golden puff pastry, baked to juicy perfection.

⏱️ 2 hours 1Main Course ★ 4.7
Main Course
🍜 India

Tender charred marinated chicken simmered in a rich, spiced creamy tomato sauce, this iconic Anglo-Indian curry pairs perfectly with basmati rice or warm naan.

⏱️ 50 minuteMain Course ★ 4.6
Main Course
🍜 Thailand

Classic tangy, sweet, and savory Thai stir-fried rice noodles with shrimp, tofu, and crunchy garnishes, balancing all five core Thai flavor profiles.

⏱️ 30 minuteMain Course ★ 4.5
Main Course
🍜 United Kingdom

Crispy golden beer-battered cod and fluffy double-fried chips, served with tangy tartar sauce and malt vinegar: the timeless, beloved British pub comfort classic.

⏱️ 45 minuteMain Course ★ 4.7
Main Course
🍜 Mexico

Smoky, chile-marinated pork tacos with caramelized pineapple, fresh cilantro, and lime: a beloved classic Mexican street food perfect for casual summer gatherings.

⏱️ 1 hour 45Main Course ★ 4.8
Main Course
🍜 United States

Crunchy Fritos corn chips layered with savory beef chili and melted cheddar, topped with cool, zesty fixings for a beloved, cozy Tex-Mex comfort food.

⏱️ 35 minuteMain Course ★ 4.8

Chicken Parm Sub:Frequently Asked Questions

1.How do I keep my Chicken Parm Sub from getting soggy? ▾
Start by patting chicken completely dry before breading to cut down on excess moisture. Cook breaded cutlets until deeply golden, then rest them on a wire rack (not paper towels) for 2 minutes post-cook to preserve crunch. Wait to spoon on marinara until right before adding cheese and assembling to keep bread toasty.
2.Can I use pre-shredded mozzarella instead of grating it fresh? ▾
You can, but know pre-shredded mozz is coated in anti-caking agents that make it melt less smoothly than hand-grated cheese. If you go the pre-shredded route, pick a whole milk variety (not part-skim) and add a layer under and over the chicken for that signature oozing, stretchy cheese pull.
3.How should I prep chicken breasts so they cook evenly for the sub? ▾
Butterfly thick boneless, skinless chicken breasts first, then pound them to an even ¼-inch thickness with a meat mallet or heavy cast-iron skillet. This eliminates undercooked thick centers and overcooked thin edges, so every bite is tender, crisp, and fits perfectly on a hoagie roll.
4.Do I really need to toast the hoagie rolls before assembling? ▾
Absolutely—toasting soft Italian hoagie rolls for 2 to 3 minutes in a 400°F oven or on a griddle creates a subtle crisp barrier that keeps marinara and chicken juices from soaking into the bread. You’ll get a nice toasty outer crunch with a soft, pillowy center that holds all fillings securely.
5.Can I prep components for these subs ahead for parties or meal prep? ▾
You can bread raw chicken cutlets and store them on a wire rack-lined tray in the fridge for up to 24 hours before cooking, which actually helps the breading stick better. Wait to cook chicken, heat marinara, and assemble subs until right before serving to keep textures crisp and fresh.
6.What type of marinara works best to avoid a watery sub? ▾
Skip thin, runny jarred marinara if you can—opt for a thick, slow-simmered variety, or simmer thin marinara for 5 to 7 minutes to reduce excess liquid before using. You only need 2 to 3 tablespoons per cutlet; you want tangy tomato flavor, not a sub drowning in sauce.
7.Do I need extra breading ingredients if all-purpose flour is a listed staple? ▾
Seasoned AP flour works beautifully for breading, but you’ll want a thin binding layer to help it stick: dip dried chicken in beaten egg or buttermilk before coating in flour mixed with salt, garlic powder, and Italian seasoning. Add a handful of panko to the flour for extra crunch if you have it handy.
8.How do I get perfectly melted mozzarella without burning the bread? ▾
After placing cooked chicken on the bottom half of your toasted hoagie, top it with mozzarella and pop it under the broiler for 30 to 45 seconds, watching closely, until the cheese is bubbly and just starting to brown at the edges. Add warm marinara after broiling, then cap with the top roll to avoid sogginess.
9.Can I bake the chicken instead of frying it for a lighter sub? ▾
Absolutely! Place breaded chicken cutlets on a wire rack set over a baking sheet, spritz both sides lightly with olive oil, and bake at 425°F for 15 to 18 minutes, flipping halfway, until golden and crisp. The rack lets air circulate so you don’t get a soggy bottom crust, no deep frying required.
10.What size hoagie roll works best for this recipe? ▾
Stick with 6 to 8-inch soft Italian hoagie rolls that have a slightly chewy crust and soft, airy interior. Avoid overly crusty sourdough rolls that are too tough to bite through, or super soft white hot dog buns that will fall apart under the weight of chicken, sauce, and cheese.
11.Why is whole milk mozzarella recommended over part-skim? ▾
Whole milk mozzarella has a higher fat content than part-skim, which gives it that signature stretchy, creamy, oozing melt when heated, instead of turning rubbery or greasy as it cools. Its mild, milky flavor pairs perfectly with tangy marinara and crispy chicken without overpowering other fillings.
12.How much filling should I add per sub to avoid a messy eat? ▾
Stick to one ¼-inch thick pounded chicken cutlet (trimmed to fit the roll), 2 to 3 tablespoons of warm marinara, and 1 to 1.5 ounces of shredded mozz per 6-inch sub. Piling on extra sauce or overstuffing with chicken will make the sub soggy and impossible to eat without fillings falling out.
13.Can I add extra toppings without ruining the classic Chicken Parm Sub flavor? ▾
Absolutely! Classic, complementary add-ons include a sprinkle of grated Parmesan, a few torn fresh basil leaves, thin-sliced sautéed peppers or onions, or a light garlic butter spread on the toasted roll. Just skip too many wet toppings that will soak through the bread over time.
14.Why does the breading always fall off my chicken when I cook it? ▾
This usually happens if your chicken is too wet when you bread it, or if you move the cutlets too soon after adding them to the pan. Pat chicken fully dry, press the flour coating firmly to adhere, let breaded cutlets rest 5 minutes before cooking, and don’t flip until the first side is deeply golden.
15.Do I need to warm marinara before adding it to the sub? ▾
Warm marinara in a small saucepan over medium-low heat for 3 to 4 minutes, until it’s just gently simmering, before assembling. Cold marinara will drop the sub’s temperature fast and make melted cheese seize up, so this quick step ensures every bite is warm, cohesive, and full of bright tomato flavor.
16.Can I freeze leftover breaded chicken to make quick subs later? ▾
Yes! Let cooked, breaded chicken cutlets cool completely, then layer them between parchment paper in an airtight freezer bag and freeze for up to 3 months. Reheat directly from frozen on a wire rack in a 400°F oven for 10 to 12 minutes until crisp, then assemble your sub as normal.
17.Should I spread marinara on both sides of the hoagie roll? ▾
Skip spreading marinara directly on the bread, because that’s a fast track to soggy rolls. Instead, spoon warm marinara directly on top of the crispy chicken cutlet (right after melting the cheese) so the sauce sits on the chicken, not against the soft bread. Your toasted roll barrier will hold up perfectly this way.
18.What’s the best way to serve these subs for a game day or party crowd? ▾
Keep components separate for easy, fresh assembly: hold cooked crispy chicken warm in a 200°F oven on a wire rack, keep marinara warm in a small slow cooker on low, and have shredded mozz and split, pre-toasted rolls ready. Let guests build their own subs to preserve crunch and avoid sogginess.

Comments (10)

yesterday

OMG this chicken parm sub recipe is SO good! I threw it together last night after soccer practice with the kids and even my super picky 7 year old ate the whole thing without complaining. The crispy chicken, tangy marinara, gooey cheese… 10/10 no notes. So easy I didn’t even have to look at the instructions twice after the first read.

2 hours ago

Wait did you use store bought marinara or homemade? I’ve been trying to cut down on prep time for busy weeknights too!

30 minutes ago

So happy your whole family enjoyed this, Jessie! A good jarred store-bought marinara works perfectly here for quick meals — you don’t need to make sauce from scratch unless you really want to!

3 days ago

Made these for my roommate’s potluck pregame last weekend and they were gone in 10 minutes flat. Everyone was asking for the recipe! The bread got perfectly toasty, no soggy bottom which is my #1 pet peeve with chicken parm subs. Will absolutely be making these on repeat.

1 week ago

Great easy recipe! I prepped the chicken cutlets ahead on Sunday and assembled these for lunches all week. Only note is I’d recommend toasting the buns right before eating so they don’t get soft if you’re meal prepping. So tasty even reheated!

5 days ago

Such a smart meal prep tip! Toasting the buns fresh right before serving definitely keeps that perfect crunch, I’m so glad this worked for your weekly lunches!

2 days ago

Bro this recipe saved my dorm dinner last night. I don’t even have a real oven, just a toaster oven, and it still came out insane. Way better than the sub shop down the street that charges $14 for a soggy chicken parm. 10/10 would make again even when I’m broke.

yesterday

Wait did you use pre-sliced chicken cutlets? I only have a tiny dorm fridge so I can’t store a ton of ingredients!

2 hours ago

Yep! Grabbed a pack of thin-sliced cutlets from the campus market, plus a jar of sauce, pre-shredded mozz, and a pack of sub rolls. Super minimal ingredients, no fancy stuff needed!

5 days ago

SO good! I added a little sprinkle of parmesan and red pepper flakes on top for an extra kick and it was *chef’s kiss*. Cook time was exactly 25 minutes like the recipe said, no surprises, which is exactly what I need after a long work day.

30 minutes ago

Made these on the Blackstone for the family last night and everyone raved. I usually mess up breaded chicken because it gets either burnt or undercooked, but the timing here was spot on. Crispy outside, juicy inside, melty cheese all over. What more could you want?

5 minutes ago

Love that you made these on the Blackstone! So glad the timing worked out for perfectly cooked chicken — nothing beats that crispy, juicy bite!

2 weeks ago

This was so easy to adapt for gluten free! I used GF breadcrumbs and GF sub rolls, followed the recipe exactly otherwise, and my whole family (none of whom eat GF) didn’t even notice a difference. Game changer for our Friday pizza/sub nights!

1 week ago

Oh this is perfect! My son has celiac so I’m always hunting for easy GF meals the whole family will eat. Did you toast the GF rolls the same way the recipe says?

5 days ago

That makes us so happy to hear, Gabi! GF adaptations work beautifully here, and toasting the GF rolls the same way (3-4 minutes until golden around the edges) works perfectly to avoid sogginess!

2 hours ago

Okay this is literally the first thing I’ve ever cooked that didn’t come out burnt or totally bland. My girlfriend was so impressed she thought I ordered takeout lmao. Super easy steps, no fancy skills needed, which is perfect for a total beginner like me.

30 minutes ago

Same! I’m also terrible at cooking and this was the first recipe that didn’t make me feel like I was going to mess it up every step of the way. So good!

1 week ago

Made a big batch of these for our neighborhood block party last weekend and they were such a hit! I cut them into smaller sliders instead of full subs so people could grab them easy, and people kept coming back for seconds (and thirds). Will 100% be adding these to my regular potluck rotation.

5 minutes ago

I added a little extra marinara and a slice of pepperoni on mine for a little extra zing and it was insane. The recipe is so solid as a base you can tweak it however you want without messing it up. 25 minute cook time is no joke, I was sitting down eating before my usual takeout even would have delivered.

just now

Love that customization, Tony! Adding pepperoni is such a fun twist, we’ll have to try that next time we make these. So glad it came together faster than takeout for you!



