
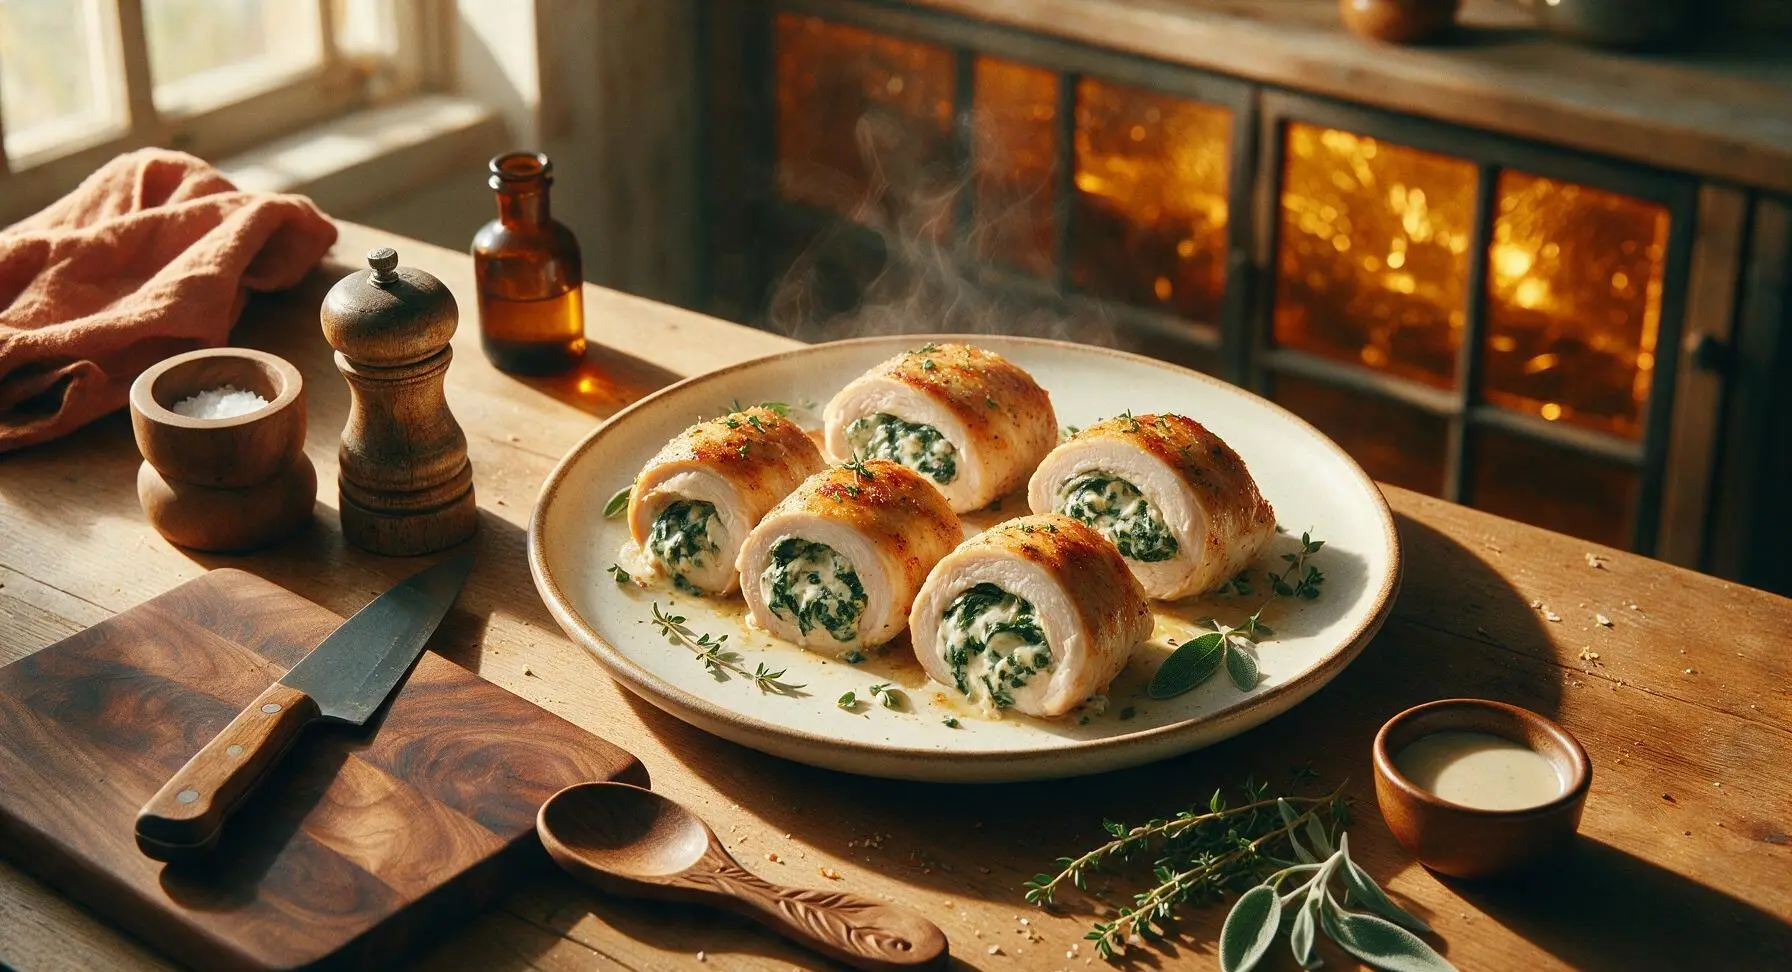
chicken roll ups

title 1
chicken roll ups
⏱️ cook time 25 minutes
🍽️ servings 4
⚡ Difficulty easy

intro

Tender, juicy chicken breasts rolled around creamy spinach-cheese filling, baked to golden perfection for a cozy, satisfying weeknight meal the whole family will love.

Ingredients
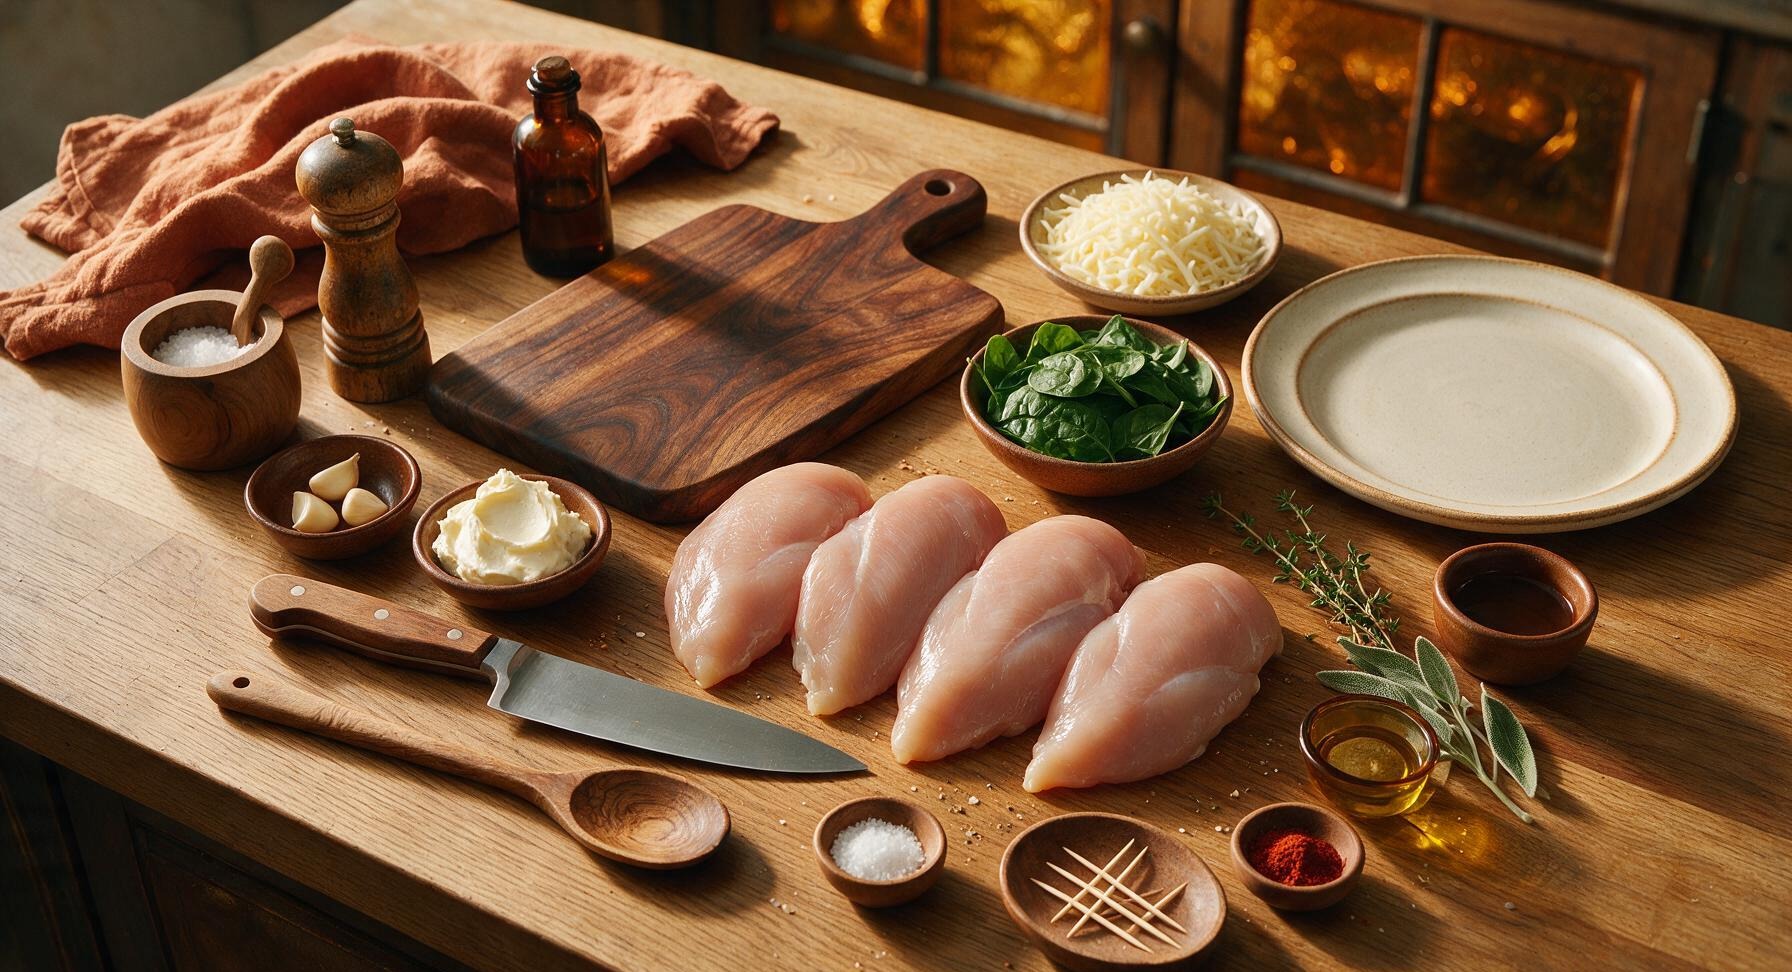
Boneless, skinless chicken breasts 480g (4 pieces, ~120g each)
Full-fat cream cheese, softened 60g
Shredded low-moisture mozzarella cheese 120g
Fresh baby spinach 100g
Garlic cloves, minced 3 (15g total)
Extra-virgin olive oil 2 tablespoons
Kosher salt 1 teaspoon
Freshly ground black pepper 1/2 teaspoon
Garlic powder 1/2 teaspoon
Smoked paprika 1/4 teaspoon, plus extra for topping
Unwaxed wooden toothpicks 8 count

Steps

1

Pound Chicken Thin

Place each boneless, skinless chicken breast between two sheets of unbleached parchment paper on the dark maple cutting board. Use the stainless steel meat pounder to gently tap the thickest section of each breast until the entire breast is an even 1/4-inch thickness. Season both sides of all pounded breasts with 1/2 teaspoon kosher salt and 1/4 teaspoon freshly ground black pepper. Stop when no raised thick spots remain on the chicken, which will lie flat without curling.
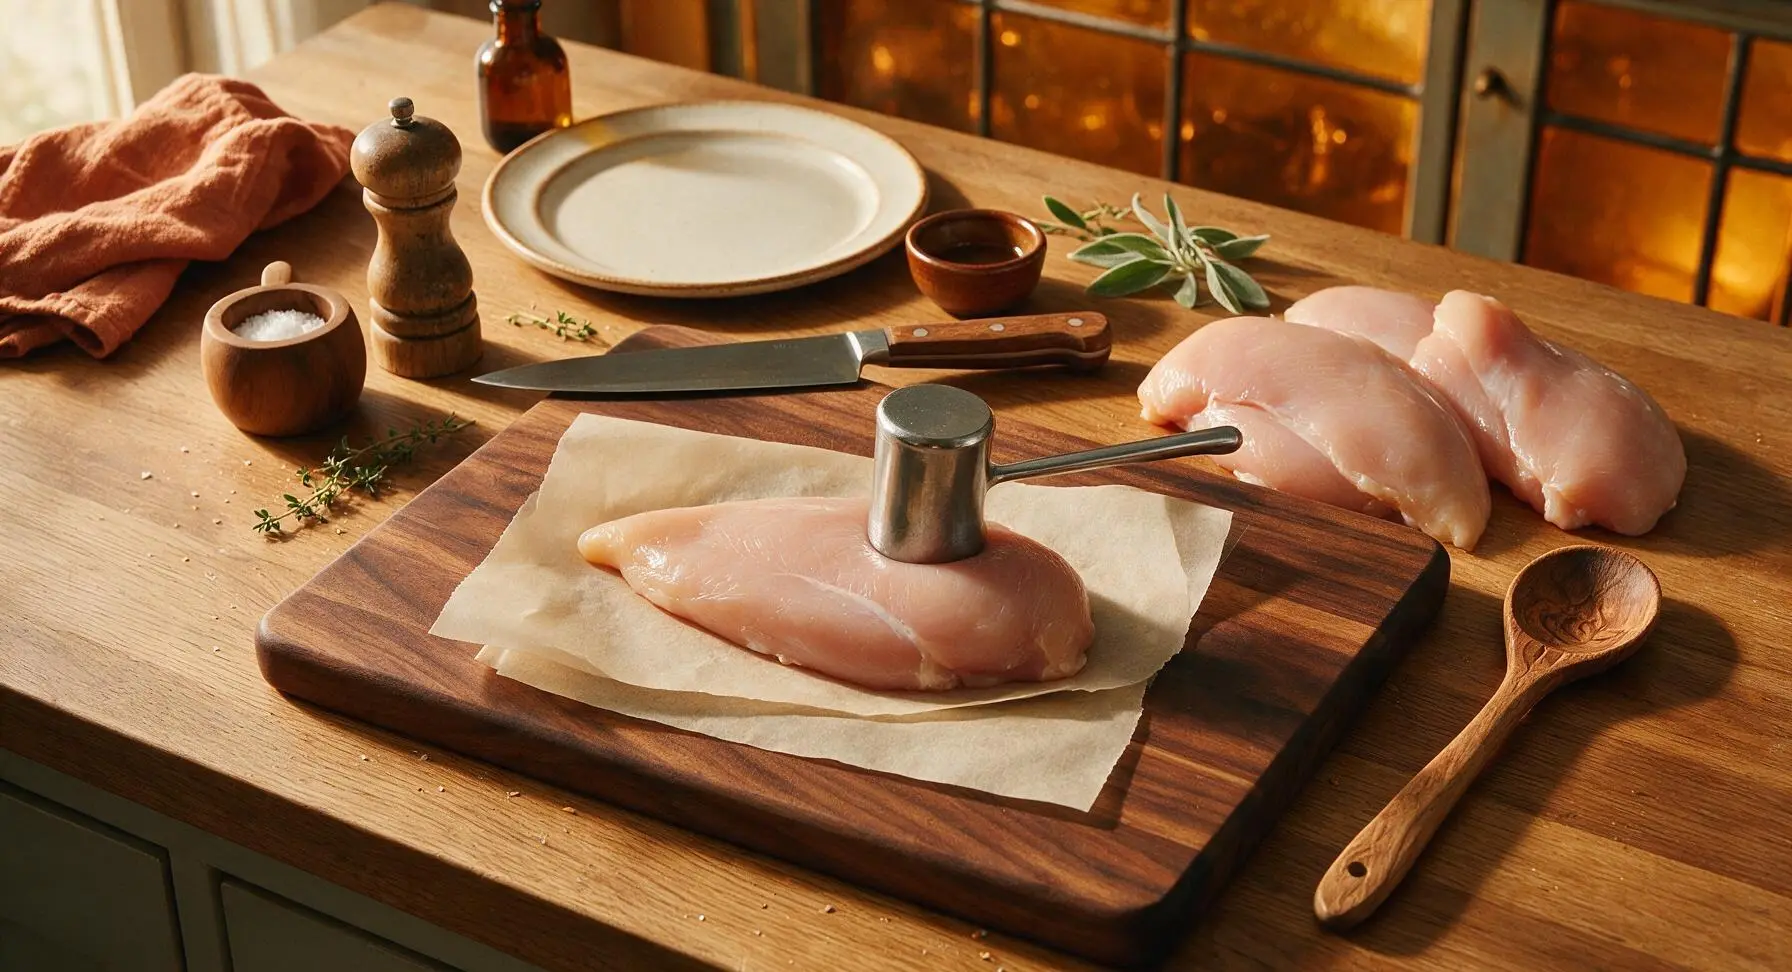
Step 1
step1:Pound Chicken Thin
2

Cook Spinach Filling

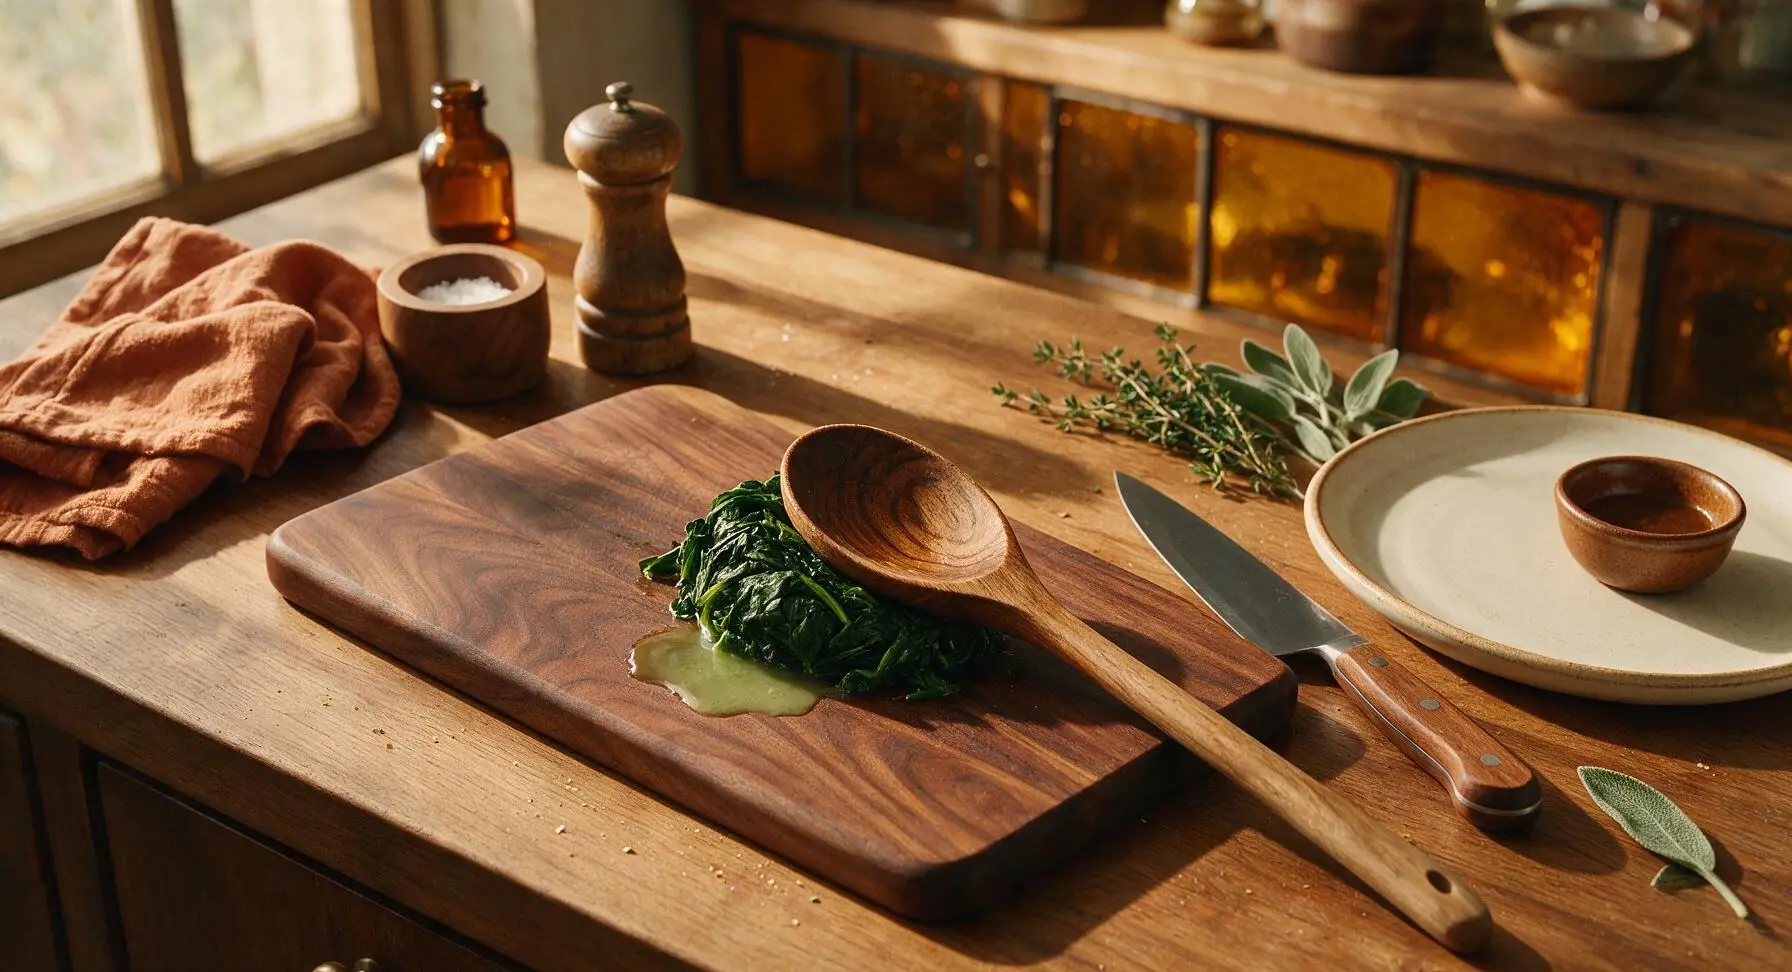
Heat 1 teaspoon of extra-virgin olive oil in the 20cm stainless steel skillet over medium heat (350°F/175°C stovetop temp). Add minced garlic and sauté for exactly 30 seconds until fragrant, taking care not to brown or burn the garlic (burnt garlic will make the filling bitter). Add all baby spinach, stirring constantly with the maple wooden spoon for 2 minutes until leaves are fully wilted and bright dark green. Transfer cooked spinach to the edge of the cutting board, press firmly with the back of the spoon to squeeze out all excess pale green moisture, then let cool for 3 minutes. Squeezed spinach will form a tight, dry ball with no free liquid dripping.
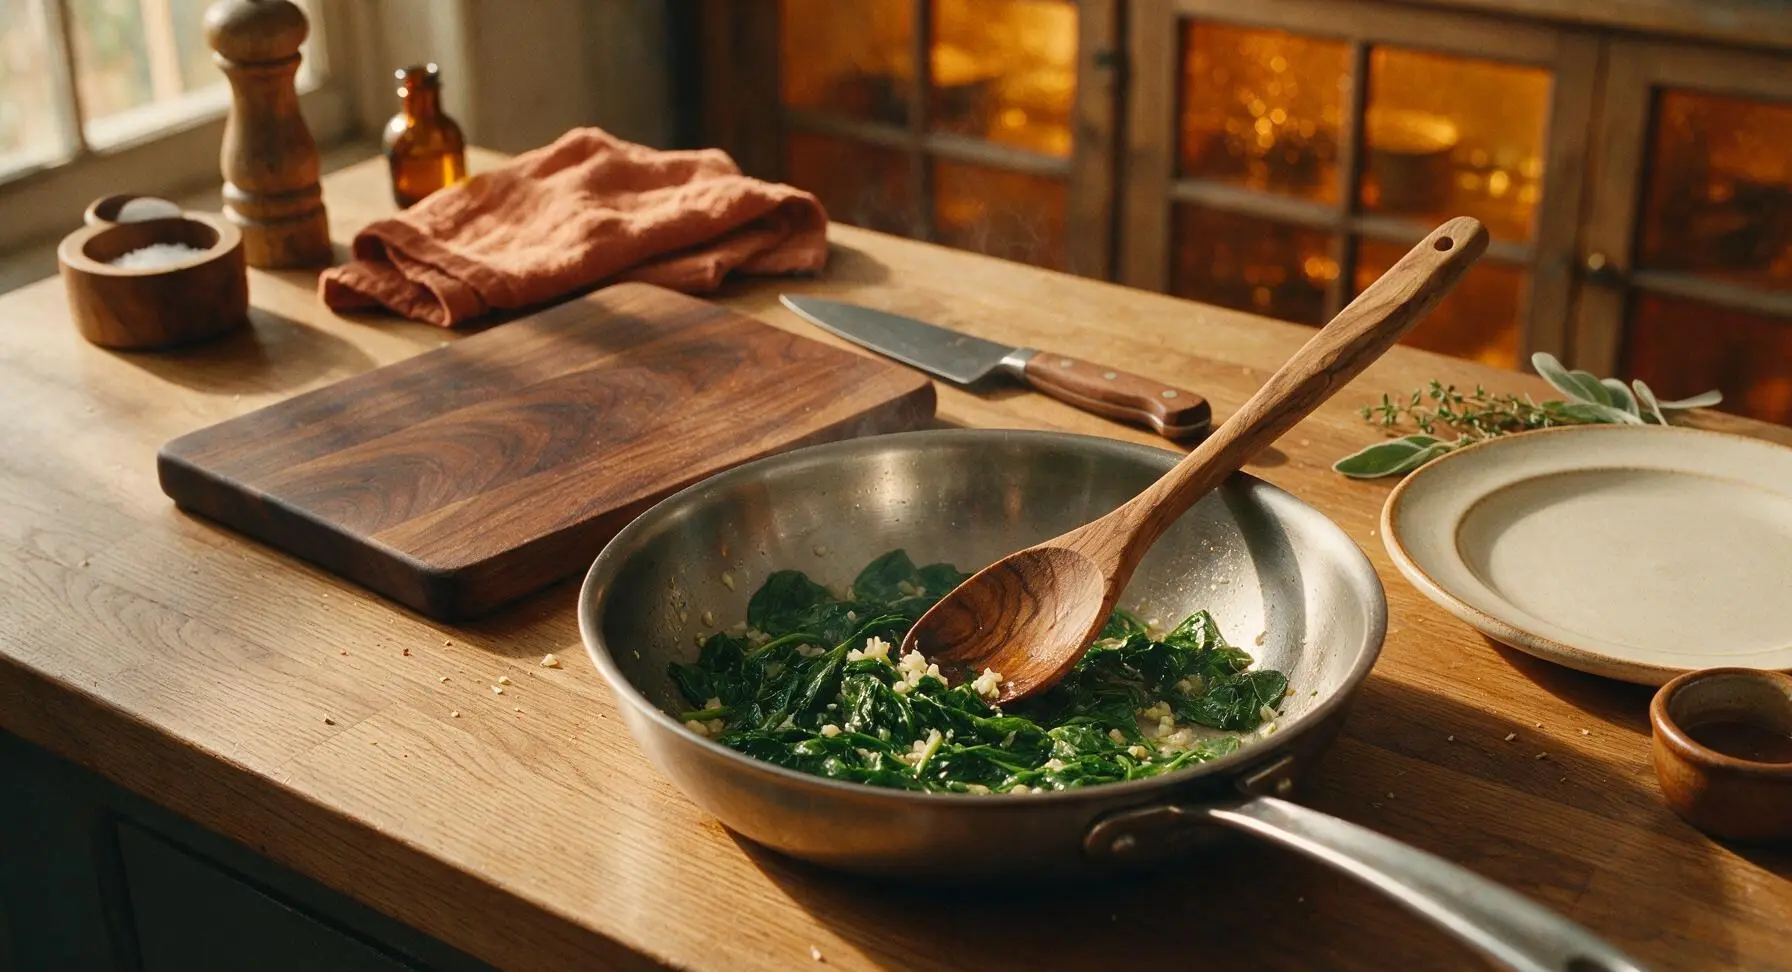
Step 2
step2:Cook Spinach Filling
Step 2
step2:Cook Spinach Filling
3

Mix Cheese Filling

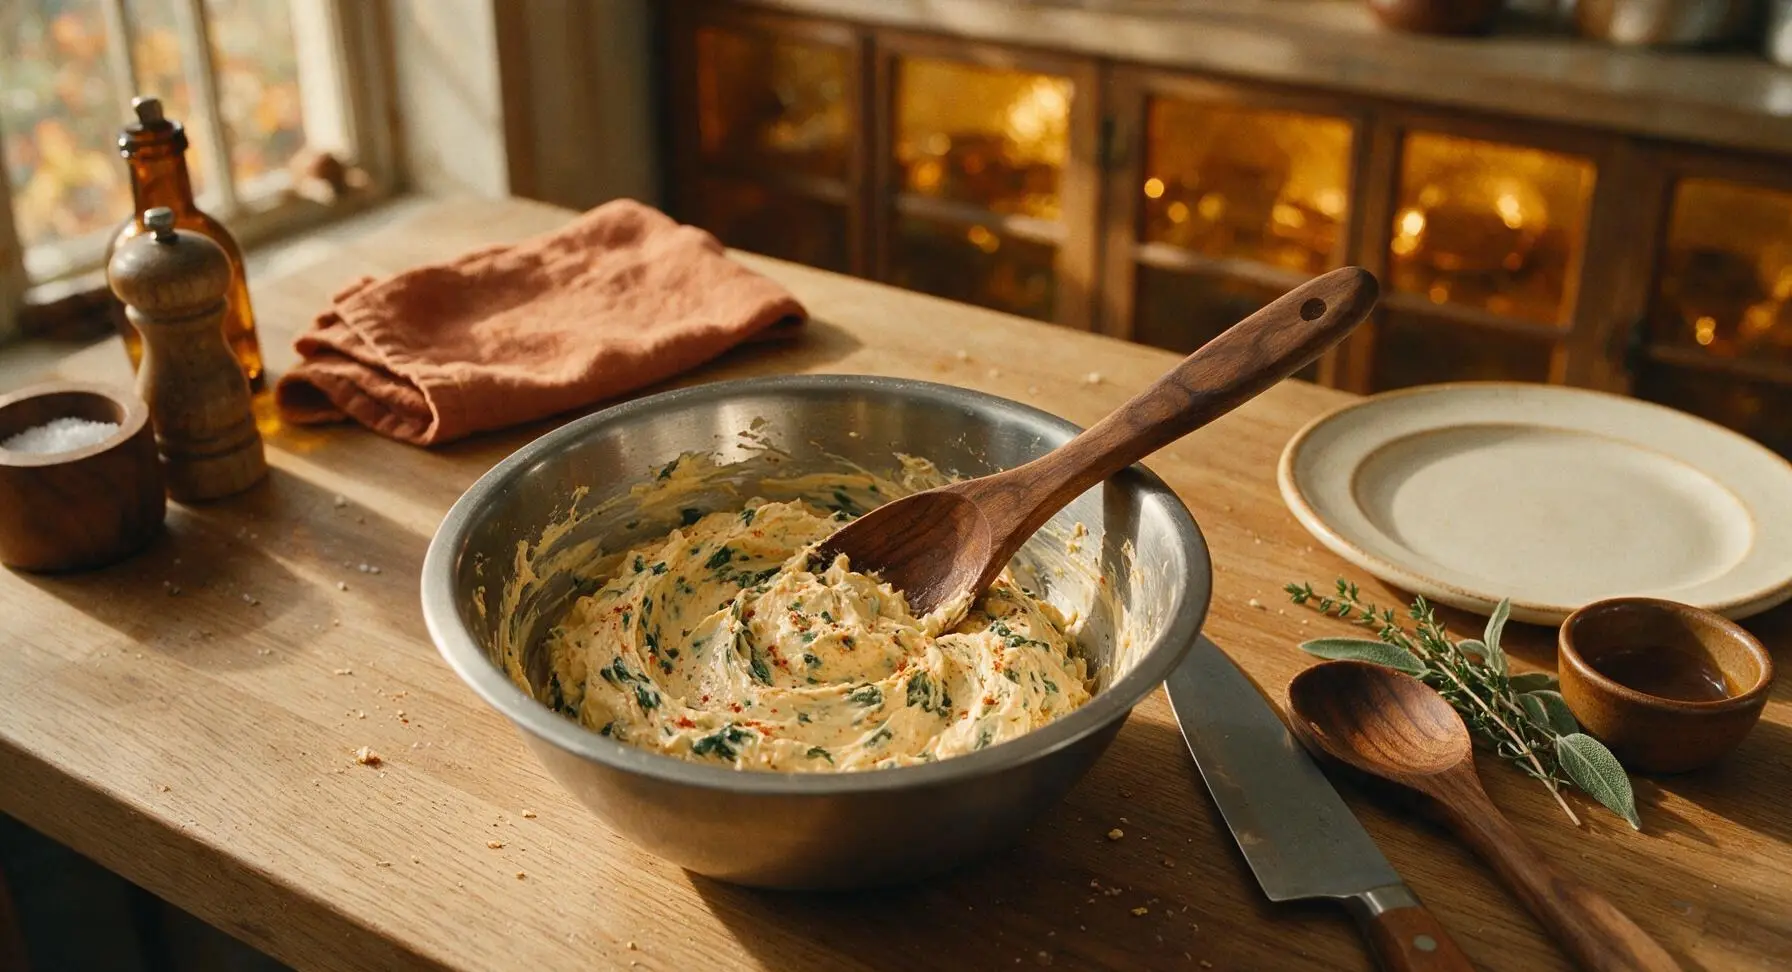
In the small brushed stainless steel mixing bowl, combine the softened full-fat cream cheese, shredded low-moisture mozzarella, cooled squeezed spinach, remaining 1/2 teaspoon kosher salt, remaining 1/4 teaspoon black pepper, garlic powder, and smoked paprika. Stir thoroughly with the maple wooden spoon until the mixture is completely uniform, with no streaks of plain cream cheese and spinach evenly distributed throughout. The filling is ready when it is thick, cohesive, and holds its shape when scooped, with no runny liquid.
Step 3
step3:Mix Cheese Filling
4

Roll Chicken Tightly

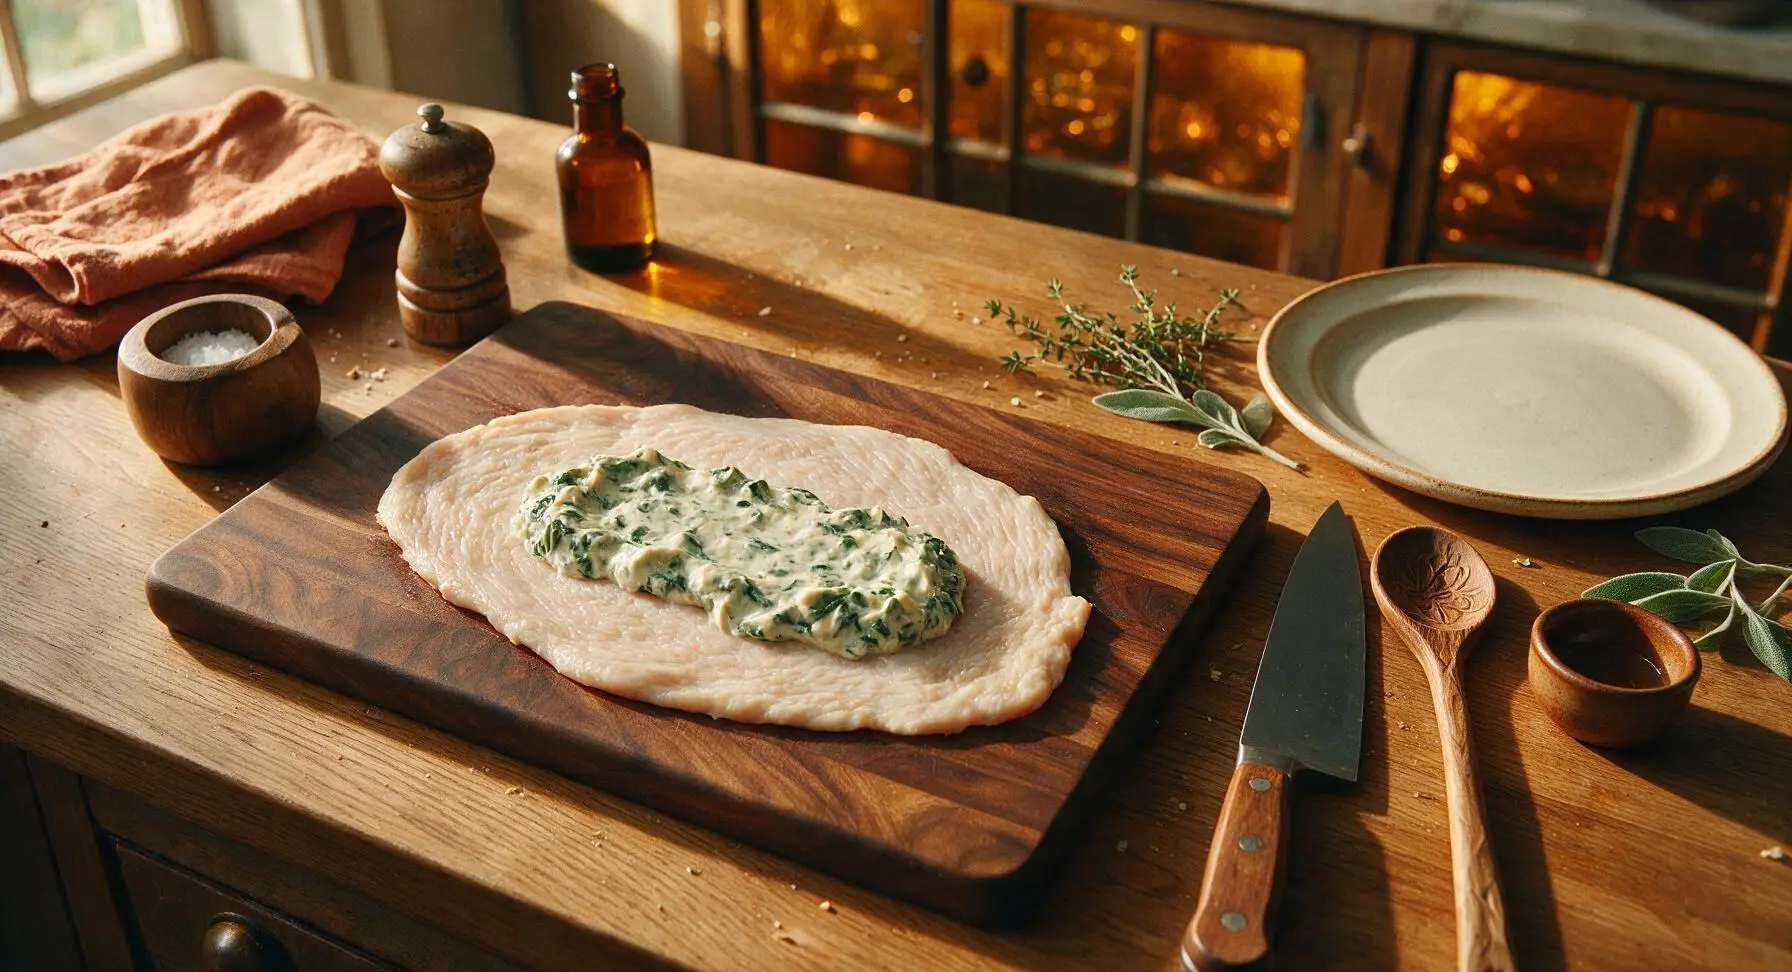
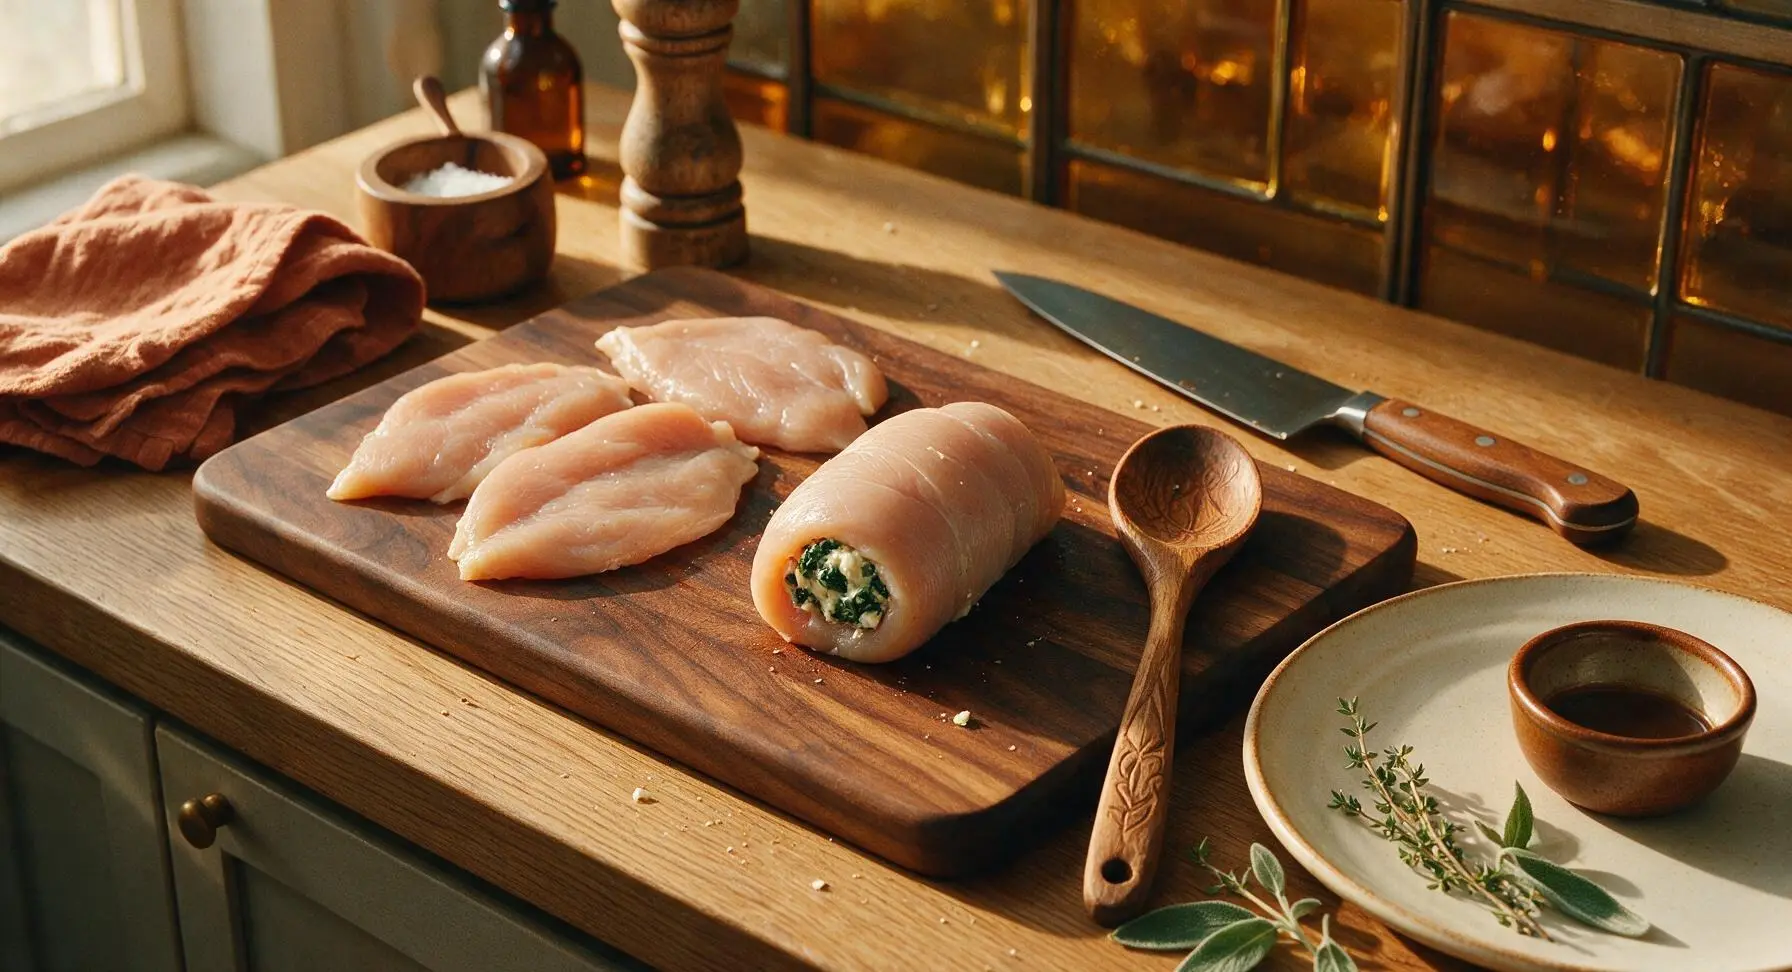
Scoop 1/4 of the cheese-spinach filling (about 45g per breast) across the short center of each pounded chicken breast, leaving a clear 1/2-inch border on all sides to prevent filling from leaking during baking. Starting at the narrowest short end of the chicken, roll the breast tightly around the filling, applying gentle pressure to keep the roll compact. Set each rolled breast seam-side down on the cutting board. Rolls are ready to secure when they are firm and cylindrical, with no large gaps where filling can escape.
Step 4
step4:Roll Chicken Tightly
Step 4
step4:Roll Chicken Tightly
5

Secure Rolls With Picks

Insert 2 unwaxed wooden toothpicks horizontally through the seam of each rolled chicken breast, spacing them 1 inch apart to hold the edge firmly closed during baking. Use the silicone basting brush to coat the entire outer surface of each roll with the remaining 5 teaspoons of olive oil, then sprinkle a light pinch of extra smoked paprika over the top of each roll for golden color. Rolls are properly secured when they do not unroll when gently nudged with a finger.
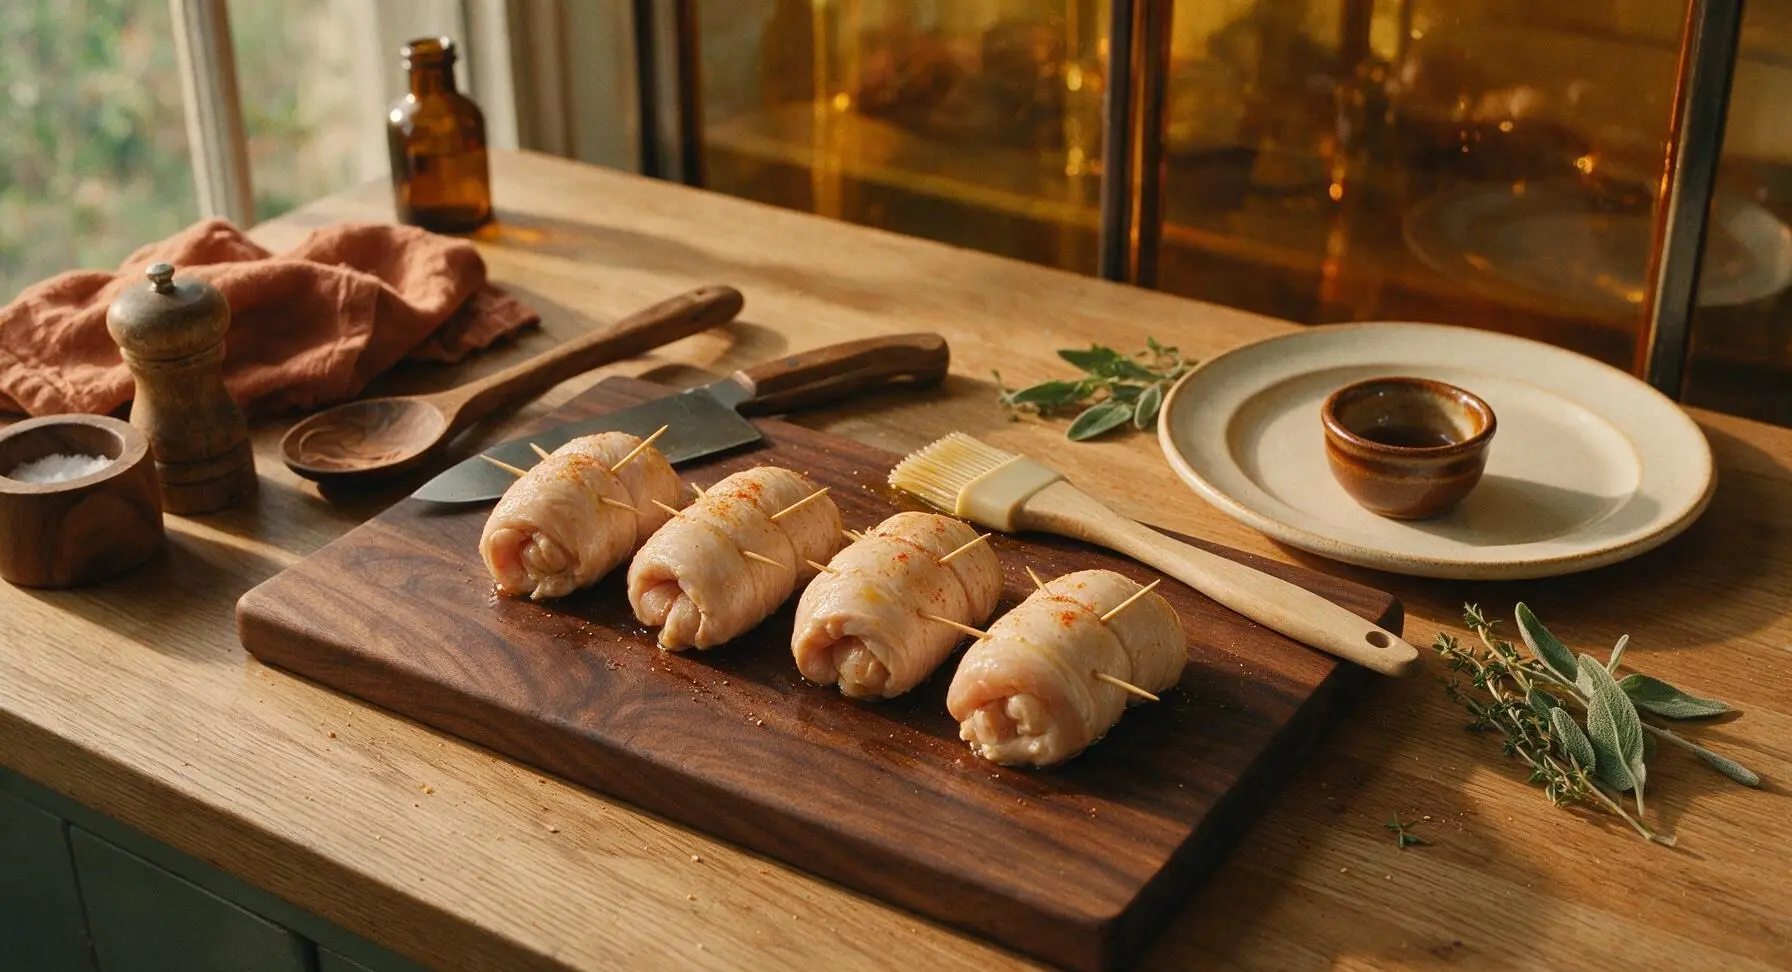
Step 5
step5:Secure Rolls With Picks
6

Place Rolls In Dish

Transfer each secured chicken roll seam-side down into the 9x13 inch matte cream ceramic baking dish, spacing the rolls 1 inch apart to allow hot oven air to circulate evenly around each one. No parchment paper or extra cooking spray is needed for the dish. Adjust rolls as needed so they sit flat in the dish, with no tilting that would cause filling to spill out.
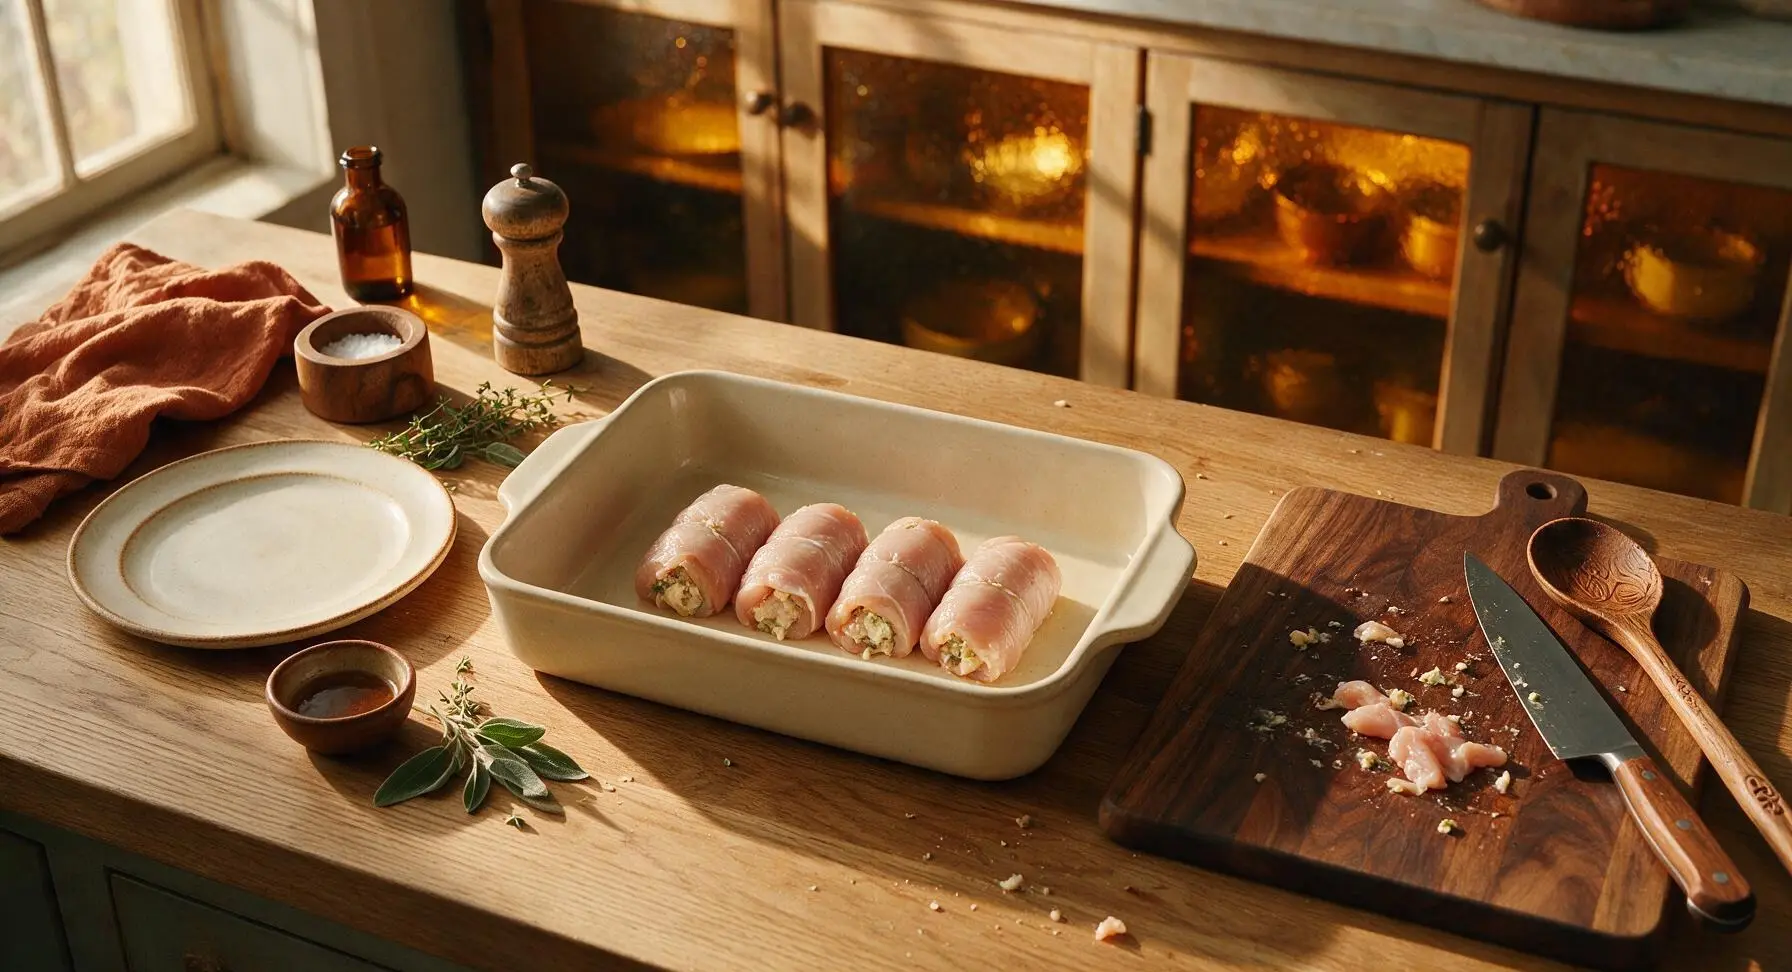
Step 6
step6:Place Rolls In Dish
7

Bake Chicken Rolls

Place the baking dish on the middle rack of a preheated 375°F (190°C) oven. Bake for 25 minutes, until the chicken reaches an internal temperature of 165°F (74°C) measured with the instant-read meat thermometer, the tops are lightly golden brown, and small bubbles of melted cheese peek out from the seams. Carefully remove the dish from the oven and let the rolls rest for 5 full minutes to allow juices to redistribute, then remove all toothpicks. Chicken is done when pierced with a knife and juices run clear with no pink tint.
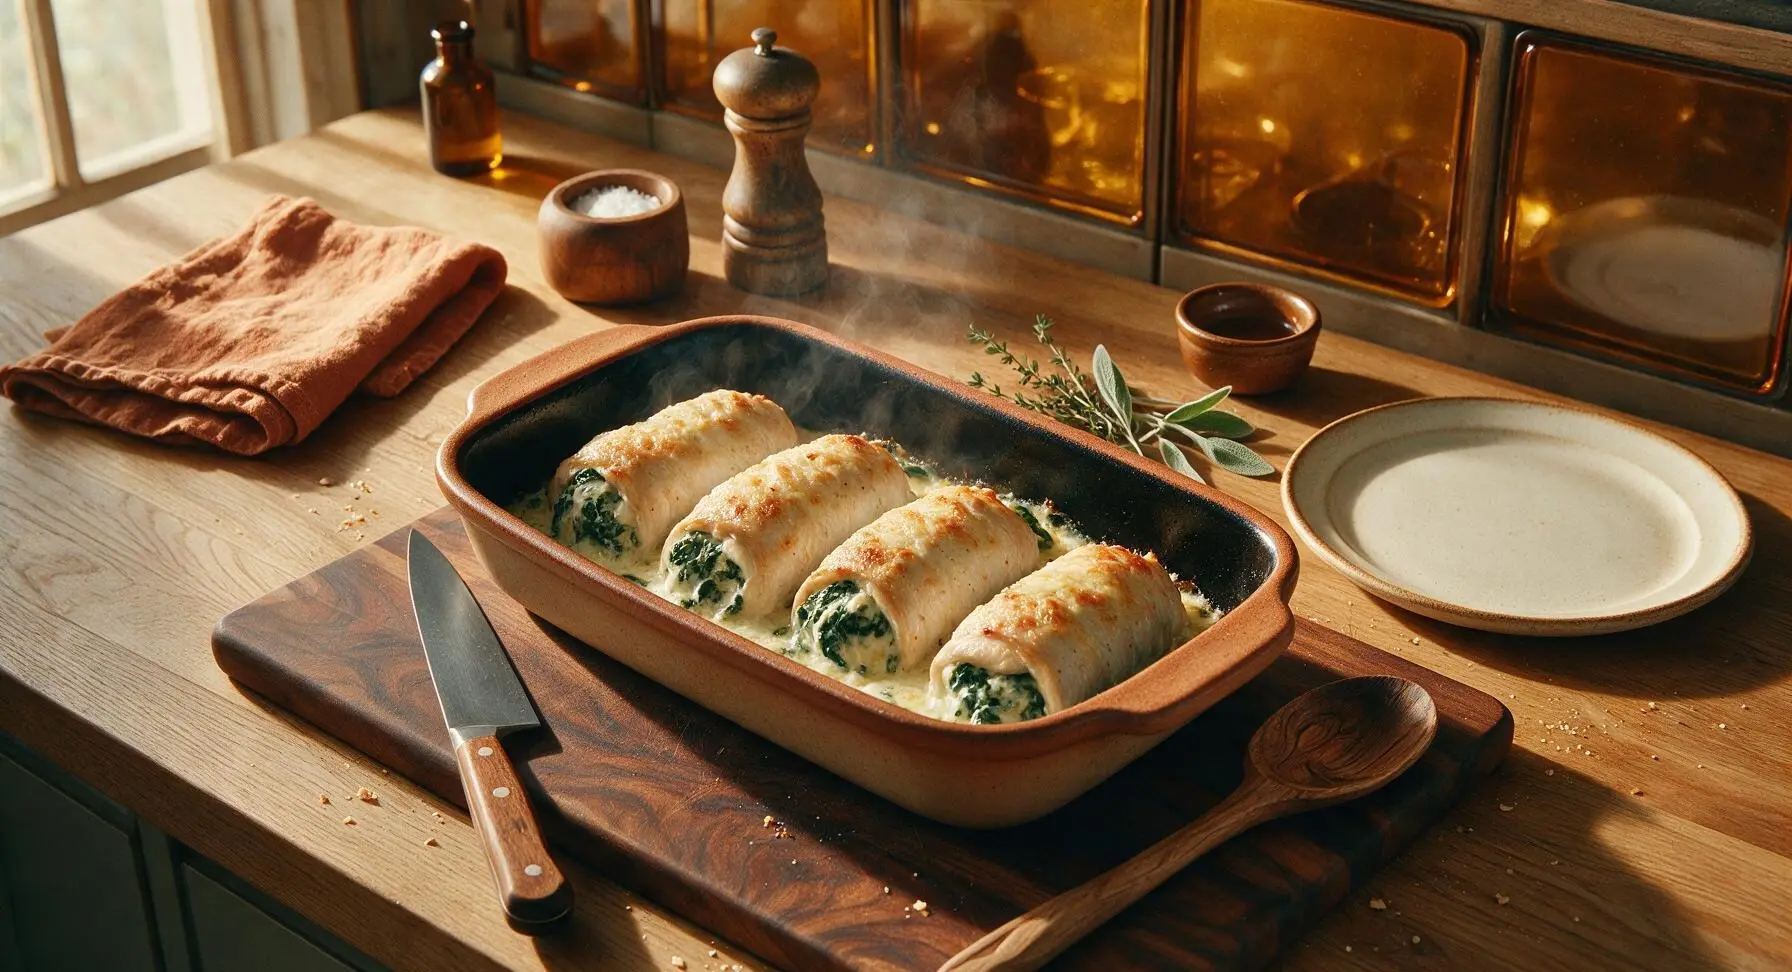
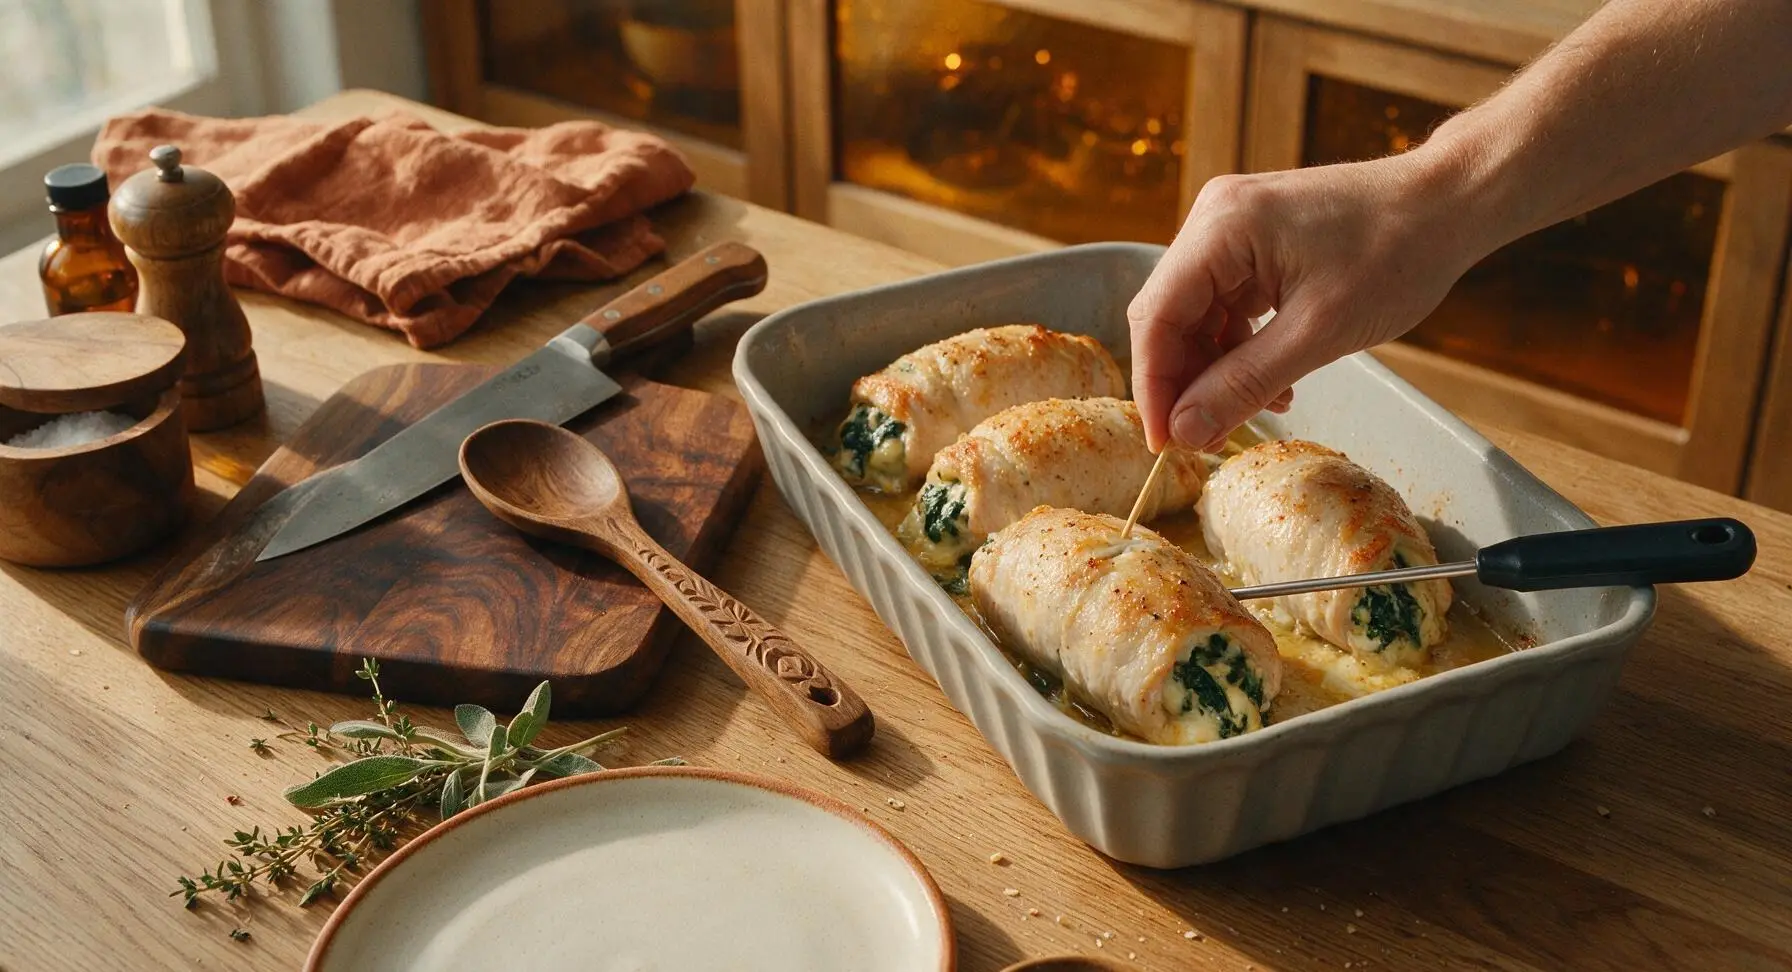
Step 7
step7:Bake Chicken Rolls
Step 7
step7:Bake Chicken Rolls
8

Slice And Serve

Transfer rested, toothpick-free chicken rolls to the cream hand-thrown speckled dinner plate. Use the chef knife to slice each roll diagonally into 2-inch thick pieces, fanning the slices slightly across the center of the plate. Drizzle 1 tablespoon of collected pan juices from the baking dish over the top of the sliced rolls, then garnish with a single fresh sage leaf from the herb bunch. Melted cheese will stretch slightly between slices when cut, and chicken will be opaque white all the way through with no pink.
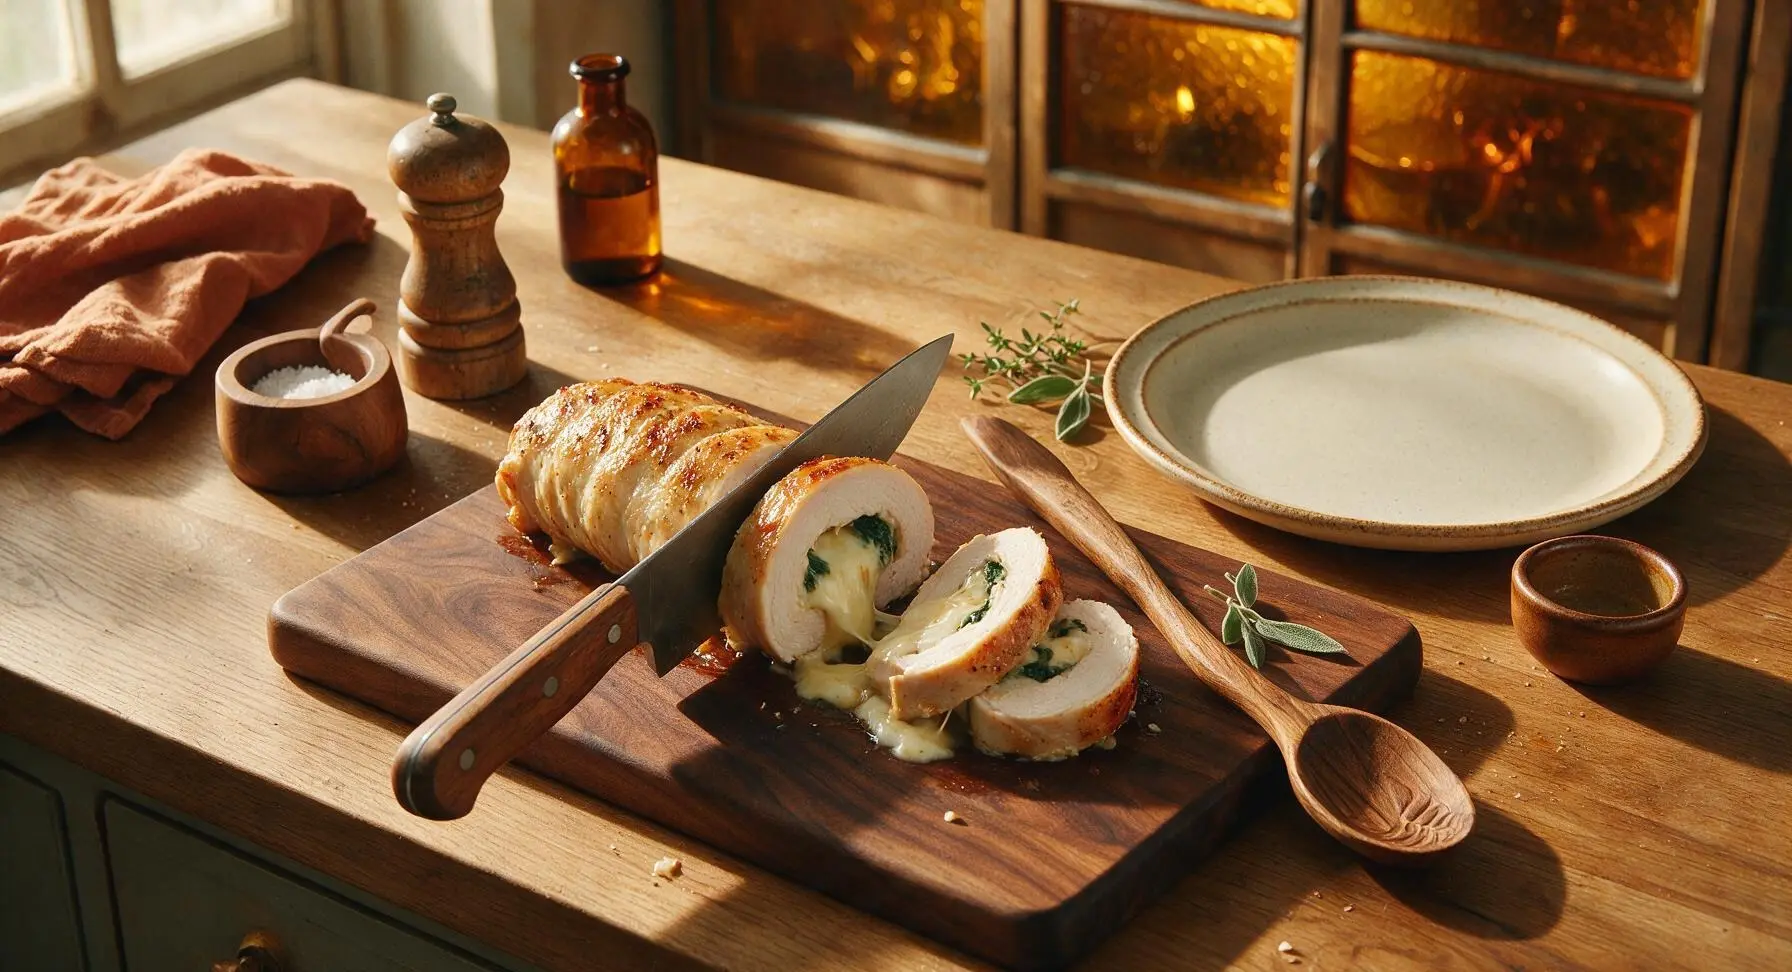
Step 8
step8:Slice And Serve

Tips

1.Squeeze all excess moisture out of cooked spinach before mixing it into the filling: leftover water from wilted spinach will make the filling runny and turn the chicken rolls soggy as they bake.
2.Stick to the 1/2-inch border around the filling when rolling: overstuffing the chicken will cause cheese to bubble out and burn on the bottom of the baking dish, rather than staying trapped inside the roll.
3.Let the baked rolls rest for 5 full minutes before removing toothpicks and slicing: this allows hot cheese and juices to set, so they won’t run out when cut, keeping every bite moist and neat.


✨ You May Also Like

Main Course
🍜 United Kingdom

A showstopping classic of tender seared beef, savory mushroom duxelles, and crisp prosciutto wrapped in flaky golden puff pastry, baked to juicy perfection.

⏱️ 2 hours 1Main Course ★ 4.7
Main Course
🍜 India

Tender charred marinated chicken simmered in a rich, spiced creamy tomato sauce, this iconic Anglo-Indian curry pairs perfectly with basmati rice or warm naan.

⏱️ 50 minuteMain Course ★ 4.6
Main Course
🍜 Thailand

Classic tangy, sweet, and savory Thai stir-fried rice noodles with shrimp, tofu, and crunchy garnishes, balancing all five core Thai flavor profiles.

⏱️ 30 minuteMain Course ★ 4.5
Main Course
🍜 United Kingdom

Crispy golden beer-battered cod and fluffy double-fried chips, served with tangy tartar sauce and malt vinegar: the timeless, beloved British pub comfort classic.

⏱️ 45 minuteMain Course ★ 4.7
Main Course
🍜 Mexico

Smoky, chile-marinated pork tacos with caramelized pineapple, fresh cilantro, and lime: a beloved classic Mexican street food perfect for casual summer gatherings.

⏱️ 1 hour 45Main Course ★ 4.8
Main Course
🍜 United States

Crunchy Fritos corn chips layered with savory beef chili and melted cheddar, topped with cool, zesty fixings for a beloved, cozy Tex-Mex comfort food.

⏱️ 35 minuteMain Course ★ 4.8

chicken roll ups:Frequently Asked Questions

1.How thin do I need to pound my chicken breasts for easy, tear-free rolling? ▾
Aim for a uniform ¼-inch thickness across the entire breast. Place chicken between two sheets of plastic wrap to avoid messy splatter, and use the flat side of a meat mallet or heavy cast iron skillet to pound evenly. This thickness prevents tearing when rolling, keeps filling tucked inside, and ensures even cooking so no sections dry out before the center is done.
2.Can I use frozen spinach instead of fresh baby spinach for the filling? ▾
Absolutely, just make sure you squeeze every last bit of excess moisture out of thawed frozen spinach first—watery spinach will make your filling runny and turn your chicken soggy. Use 1 cup of tightly squeezed, thawed frozen spinach to replace the 3 cups of fresh baby spinach called for, since fresh spinach cooks down dramatically.
3.How do I keep the chicken roll ups from unrolling while they bake? ▾
The easiest no-fuss trick is to place each rolled chicken seam-side down on your baking sheet first, which uses the weight of the chicken to hold the seal closed. For extra security, stick 2-3 short toothpicks horizontally through each roll to hold the edge tight—just remember to remove all toothpicks before serving to avoid accidents.
4.What internal temperature should I cook these to so they’re safe but still juicy? ▾
Cook your roll ups until the thickest part of the chicken (not the cheesy filling!) reaches 165°F on an instant-read thermometer, per official USDA food safety guidelines. The filling will be hot and bubbly at that point too, and pulling them right when they hit temp keeps chicken tender instead of tough and overcooked, so you don’t have to cut into them early to check.
5.Can I make these roll ups ahead of time for meal prep or busy weeknights? ▾
Definitely! You can assemble the stuffed, rolled chicken (hold off on baking) up to 24 hours ahead, store them tightly covered in the fridge, then pop them in the oven when you’re ready to cook. Baked leftovers keep for up to 3 days in an airtight container; reheat in a 350°F oven for 10-12 minutes to avoid rubbery microwaved chicken.
6.Why does my filling leak out while the chicken bakes? ▾
Leaky filling almost always stems from one of two simple mistakes: either you overstuffed the chicken, or you didn’t seal the edges tightly when rolling. Stick to 2-3 tablespoons of filling per breast, leave a ½-inch border around the edges, and tuck the short sides in first before rolling from the long end like a burrito to lock everything in.
7.Can I substitute low-fat cream cheese to cut down on calories? ▾
I don’t recommend it, honestly. Low-fat or fat-free cream cheese has extra stabilizers and higher water content, which will make your filling runny, grainy, and far less rich than the full-fat version. If you want to lighten the dish slightly, cut the cream cheese by 2 ounces and add a handful of extra sautéed spinach instead, without sacrificing that creamy texture.
8.Do I need to sear the chicken before baking it? ▾
Searing is totally optional, but it adds a nice golden, crispy outer layer and extra savory depth if you have 5 extra minutes. If you do sear, heat a tablespoon of olive oil in an oven-safe skillet over medium-high heat, brown the rolls for 1-2 minutes per side, then transfer the whole skillet straight to the oven to finish baking.
9.What should I serve with these chicken roll ups for a complete, balanced meal? ▾
These rich, creamy rolls pair perfectly with lighter, simple sides to balance the meal. Roasted broccoli, garlic roasted potatoes, buttered egg noodles, a crisp green salad with lemon vinaigrette, or steamed white rice all work beautifully. Pick sides that take 25-30 minutes to cook so you can pop them in the oven at the same time for easy, coordinated timing.
10.Can I use garlic powder instead of fresh minced garlic in the filling? ▾
You can, in a pinch! Use ¼ teaspoon of garlic powder for every fresh clove the recipe calls for, and mix it straight into the cream cheese filling so it distributes evenly. That said, fresh minced garlic has a brighter, sharper, more aromatic flavor that pairs perfectly with the creamy cheese and spinach, so I recommend using fresh if you have it on hand.
11.My mozzarella is really watery—how do I fix that so the filling isn’t runny? ▾
If you accidentally picked up high-moisture fresh mozzarella instead of the low-moisture shredded kind called for, pat it completely dry with paper towels and chop it finely before mixing it into the filling. For extra insurance, let shredded mozzarella drain on a stack of paper towels for 15 minutes first, so excess whey doesn’t seep out and make chicken soggy as it bakes.

Comments (4)

2 days ago

OMG these were SO good! I made them for family dinner last night and even my super picky 7 year old asked for seconds. The creamy spinach filling is chef’s kiss, I added a little extra parmesan because we’re cheese obsessed over here. 25 minute cook time is a total game changer for busy weeknights, I’ll definitely be adding this to my regular meal prep rotation!

yesterday

So happy your kiddo approved! Extra parmesan is always a great call—so glad this fits into your busy weeknight routine, thanks for giving it a try!

3 days ago

Made these for my neighborhood potluck this past weekend and they were gone in 10 minutes flat! So many people asked me for the recipe, I lost count. Only thing I did differently was wrap a little piece of bacon around each roll up before baking—chef’s kiss. Easy enough that I didn’t stress prepping while chasing my toddler around, too.

2 days ago

Wait the bacon wrap hack is genius! Do you partially cook the bacon first so it gets crispy all the way around? I’m making these for date night this Friday and definitely want to steal that idea!

yesterday

Great question! If you add bacon, we recommend par-cooking it for 3-4 minutes in the pan first before wrapping so it crisps up perfectly without undercooking or making the chicken soggy. So glad these were a potluck hit!

2 hours ago

As someone who barely knows how to boil pasta without burning it, this recipe was so easy to follow! No fancy ingredients, no weird complicated steps, and it came out looking exactly like the photos. My roommate thought I ordered takeout from that fancy Italian place downtown lmao. 10/10 will make again, probably for my parents when they visit next month.

1 week ago

Perfect high protein meal prep option! I make a batch on Sundays and portion them out with roasted broccoli and quinoa for my work lunches all week. The filling stays creamy even after reheating in the office microwave, which is a huge win—so many stuffed chicken recipes get rubbery or dry when you reheat them. Already recommended this to three people at my gym.

5 days ago

Thanks for the reheating tip! I’ve been scared to try stuffed chicken for meal prep because I hate dry chicken, this makes me way more confident to give it a go this weekend!



