
chicken thigh air fryer boneless skinless

title 1
chicken thigh air fryer boneless skinless
⏱️ cook time 18 minutes
🍽️ servings 4
⚡ Difficulty easy

intro

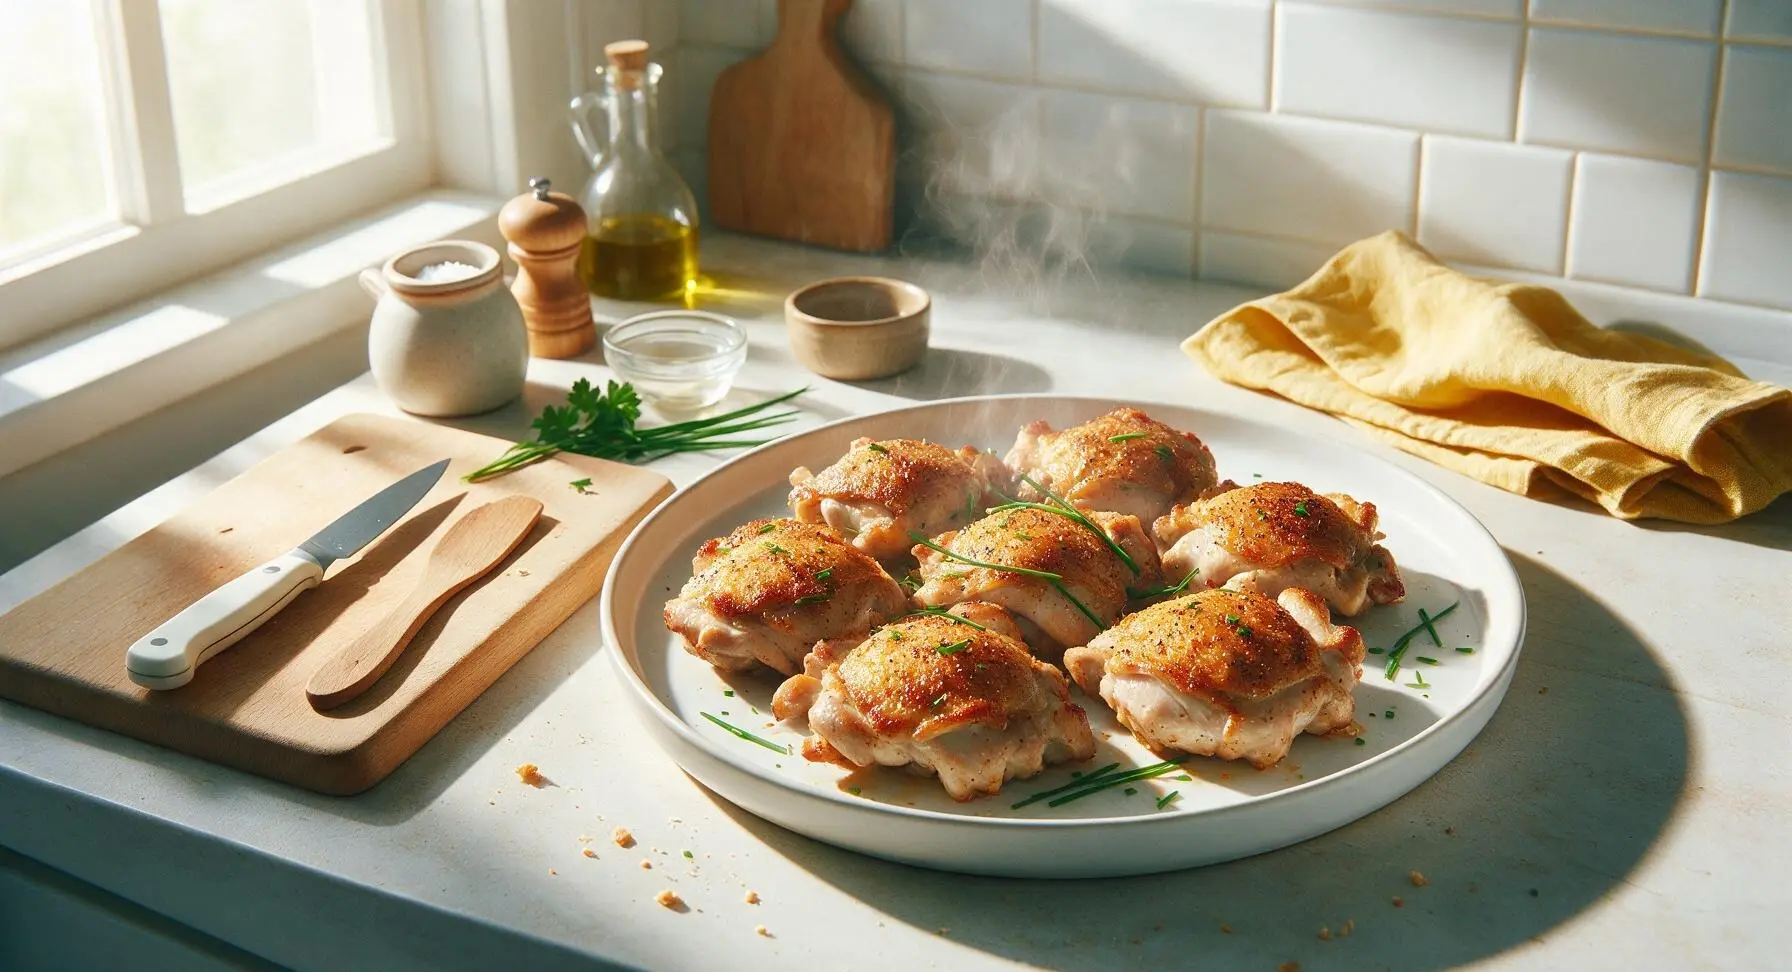
Crisp at the edges, juicy and perfectly seasoned, these air fryer boneless skinless chicken thighs come together in under 30 minutes for zero-fuss, flavorful weeknight meals.

Ingredients
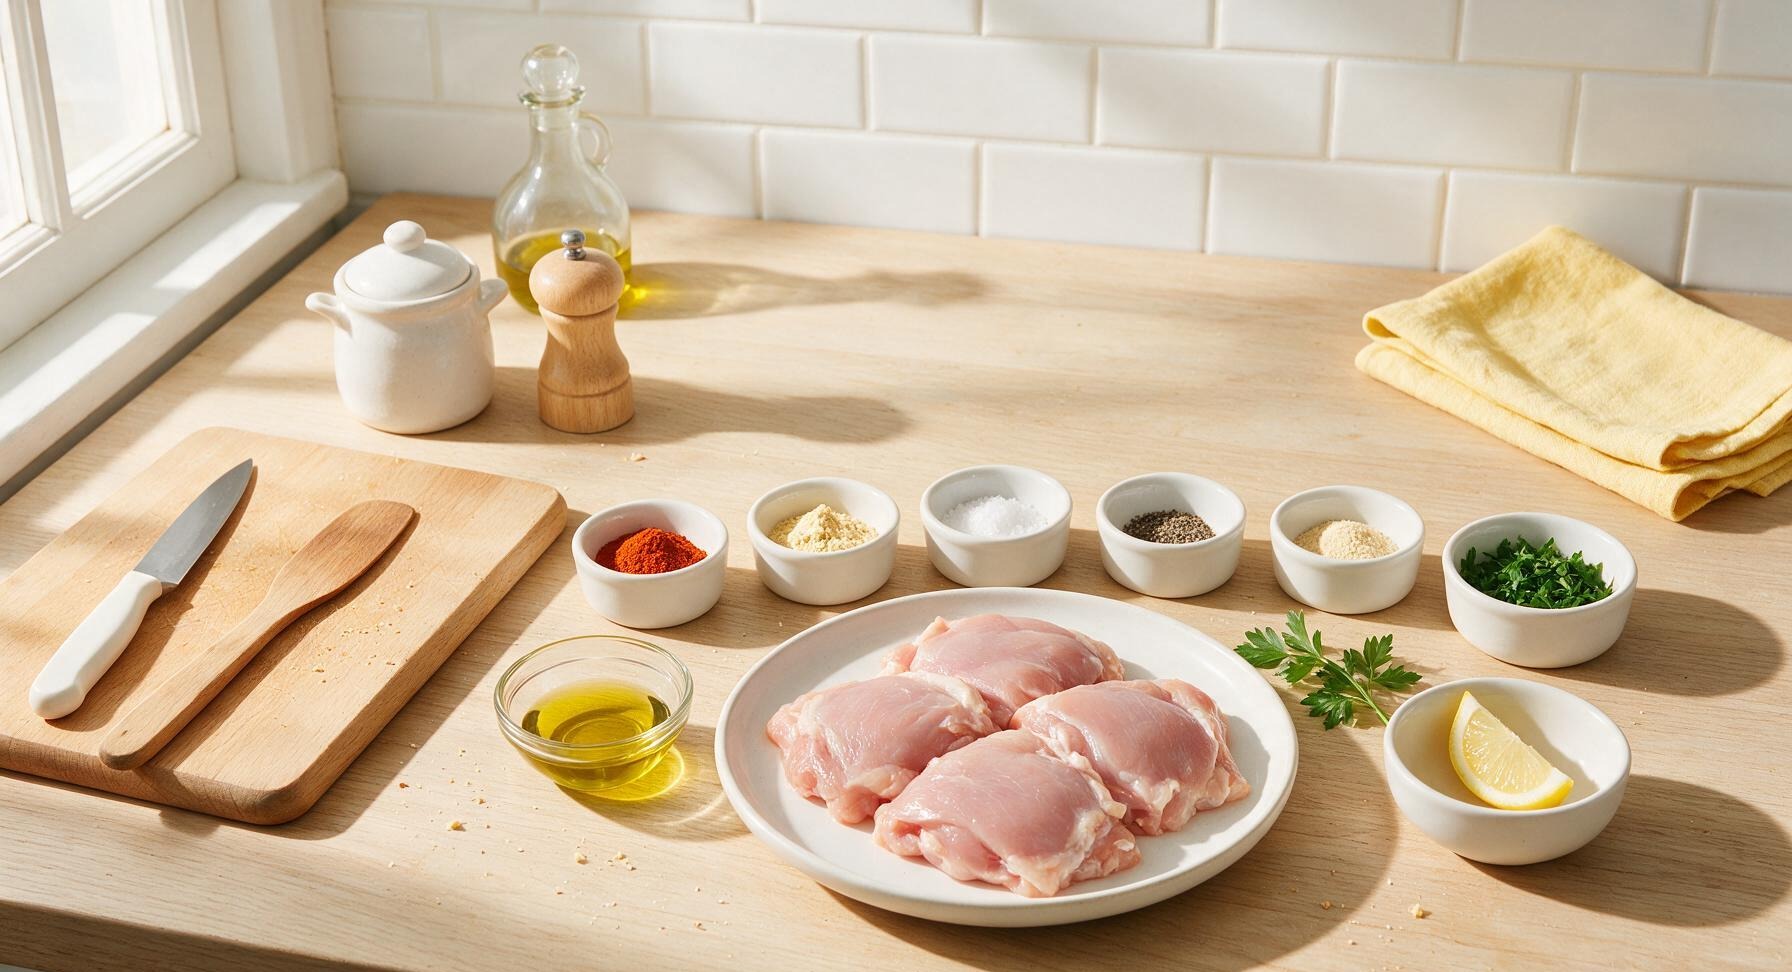
Boneless skinless chicken thighs 4 pieces (680g / 1.5 lbs total)
Extra-virgin olive oil 1 tablespoon
Smoked paprika 1 teaspoon
Garlic powder 1 teaspoon
Kosher salt ¾ teaspoon
Freshly ground black pepper ½ teaspoon
Onion powder ½ teaspoon
Fresh flat-leaf parsley 1 tablespoon, chopped
Lemon wedge 1, for serving

Steps

1

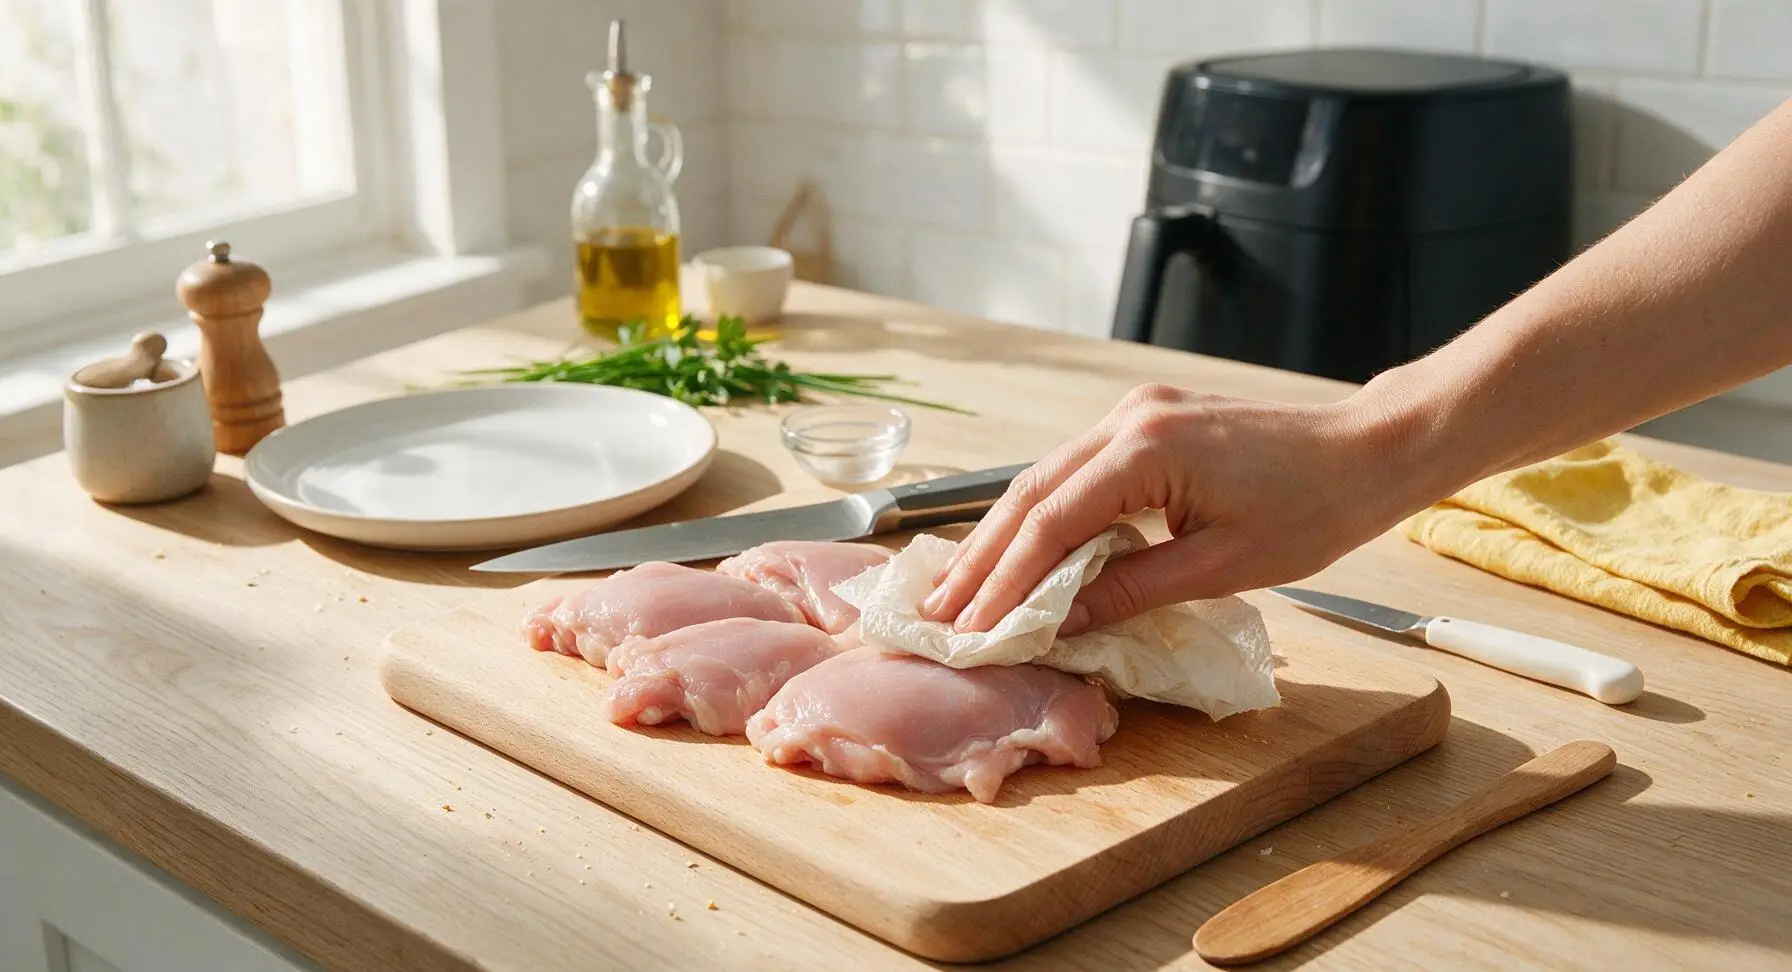
Pat Chicken Thighs Dry

Remove the 4 boneless skinless chicken thighs from packaging, and place them on the light bamboo cutting board. Tear off one sheet of unbleached paper towel, and use it to firmly pat every surface of the chicken completely dry, paying extra attention to folded, creased areas of the thighs. Discard the used paper towel. Fully dry chicken is critical for achieving a crisp, non-soggy exterior in the air fryer, as excess surface moisture will steam instead of crisp.
Step 1
step1:Pat Chicken Thighs Dry
2

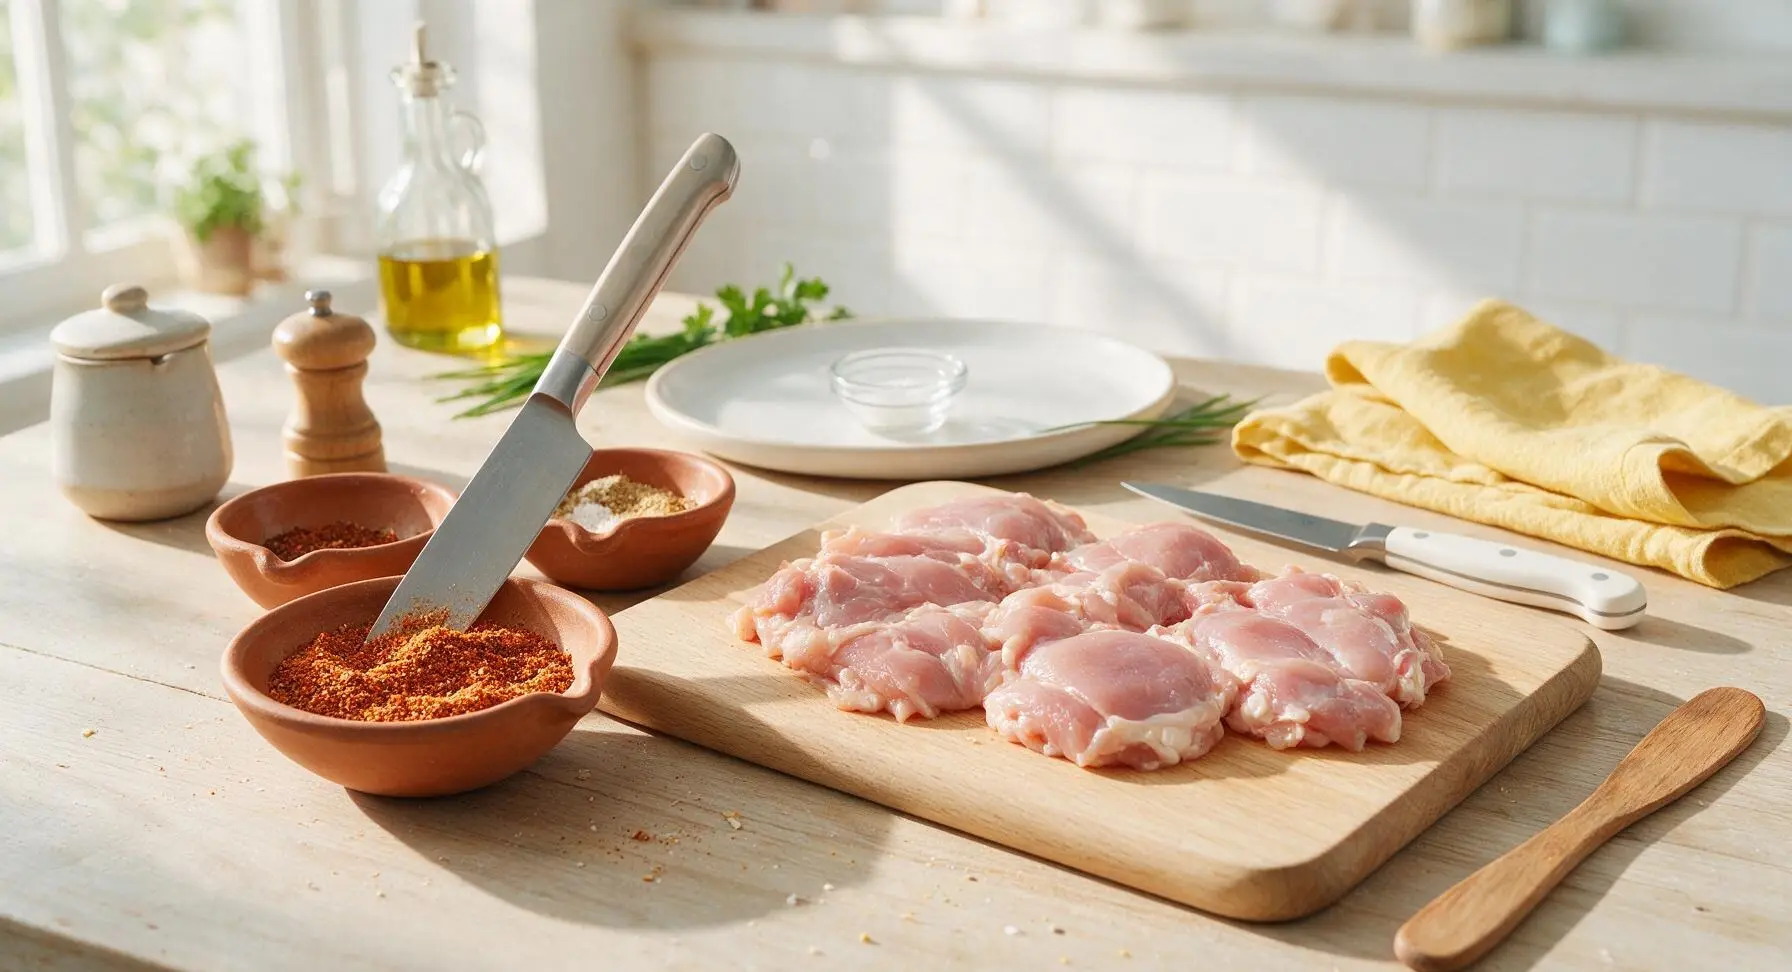
Mix Seasoning Blend

In the front terracotta pinch bowl, combine 1 teaspoon smoked paprika, 1 teaspoon garlic powder, ½ teaspoon onion powder, ¾ teaspoon kosher salt, and ½ teaspoon freshly ground black pepper. Stir the spices with the tip of the chef knife to blend evenly, until no single spice forms separate clumps and the blend is a uniform warm reddish-brown.
Step 2
step2:Mix Seasoning Blend
3

Toss Chicken with Oil

Drizzle 1 tablespoon of extra-virgin olive oil evenly over the dry chicken thighs on the cutting board. Use clean hands to rub the oil over every surface of each thigh, ensuring a thin, full coverage with no dry patches left. The thin oil layer helps the seasoning adhere evenly and promotes even browning during cooking.
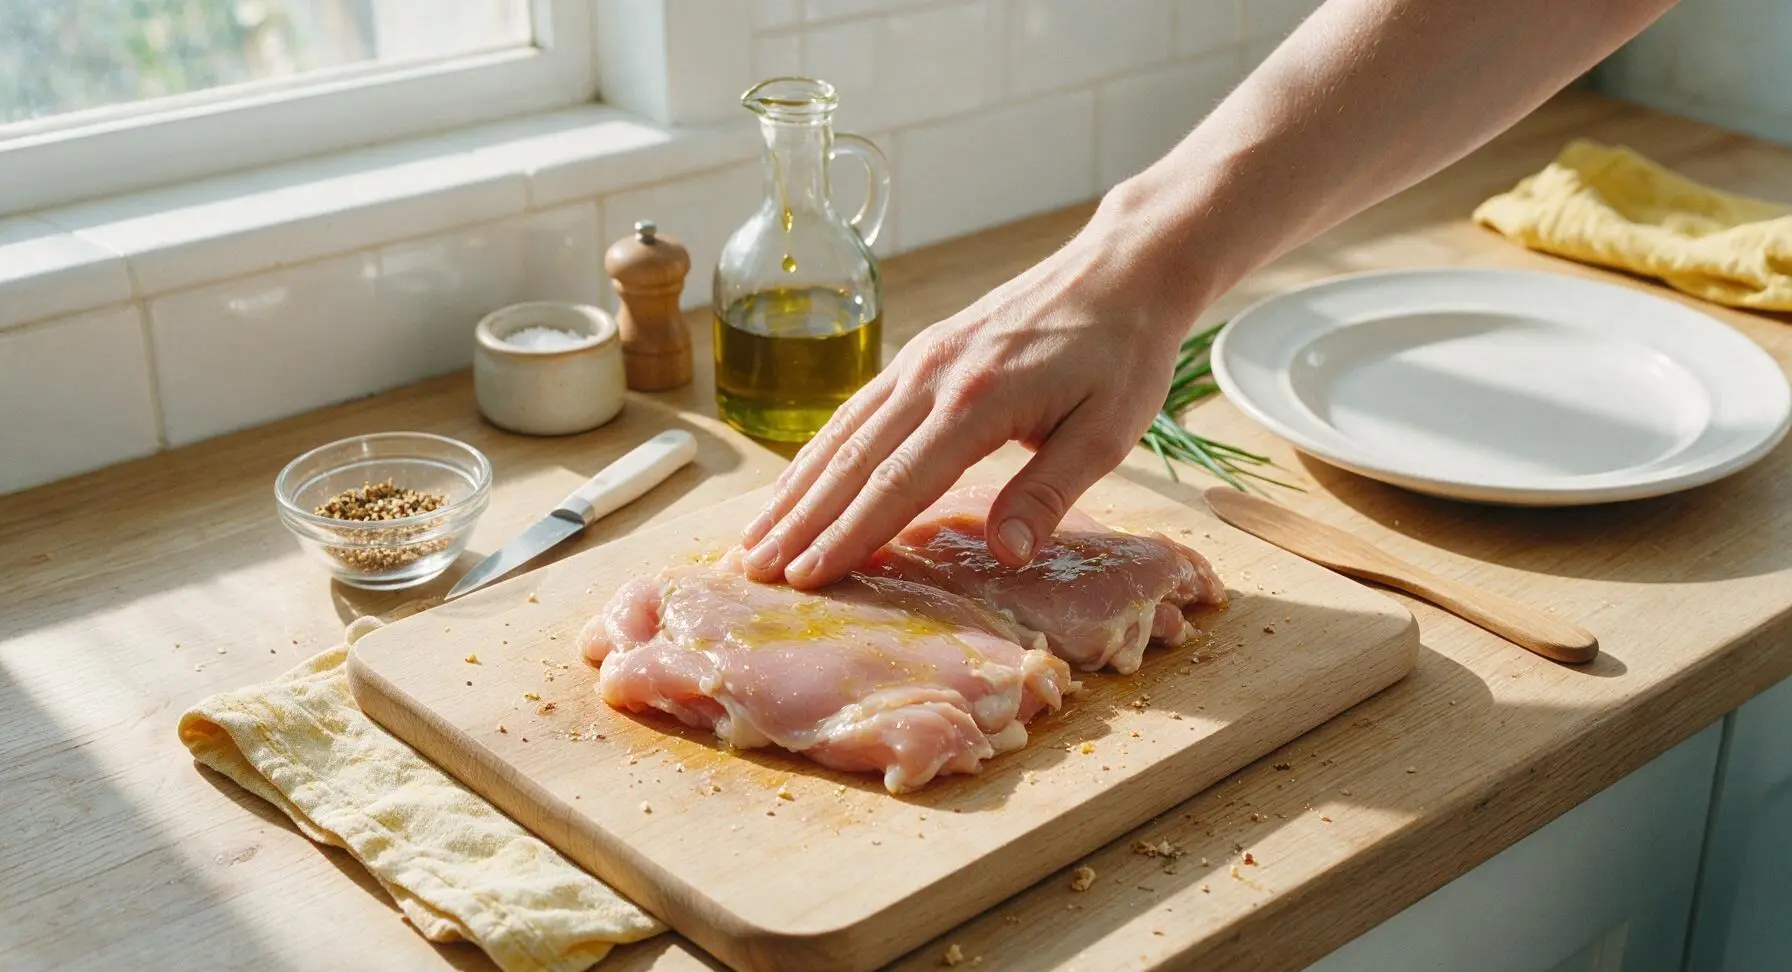
Step 3
step3:Toss Chicken with Oil
4

Apply Spice Rub

Sprinkle the mixed seasoning blend evenly over all sides of the oiled chicken thighs, using your fingers to gently press the spices into the meat surface so they adhere fully. Every part of the chicken should have a light, even coating of spice, with no large bare spots or thick clumps of seasoning.
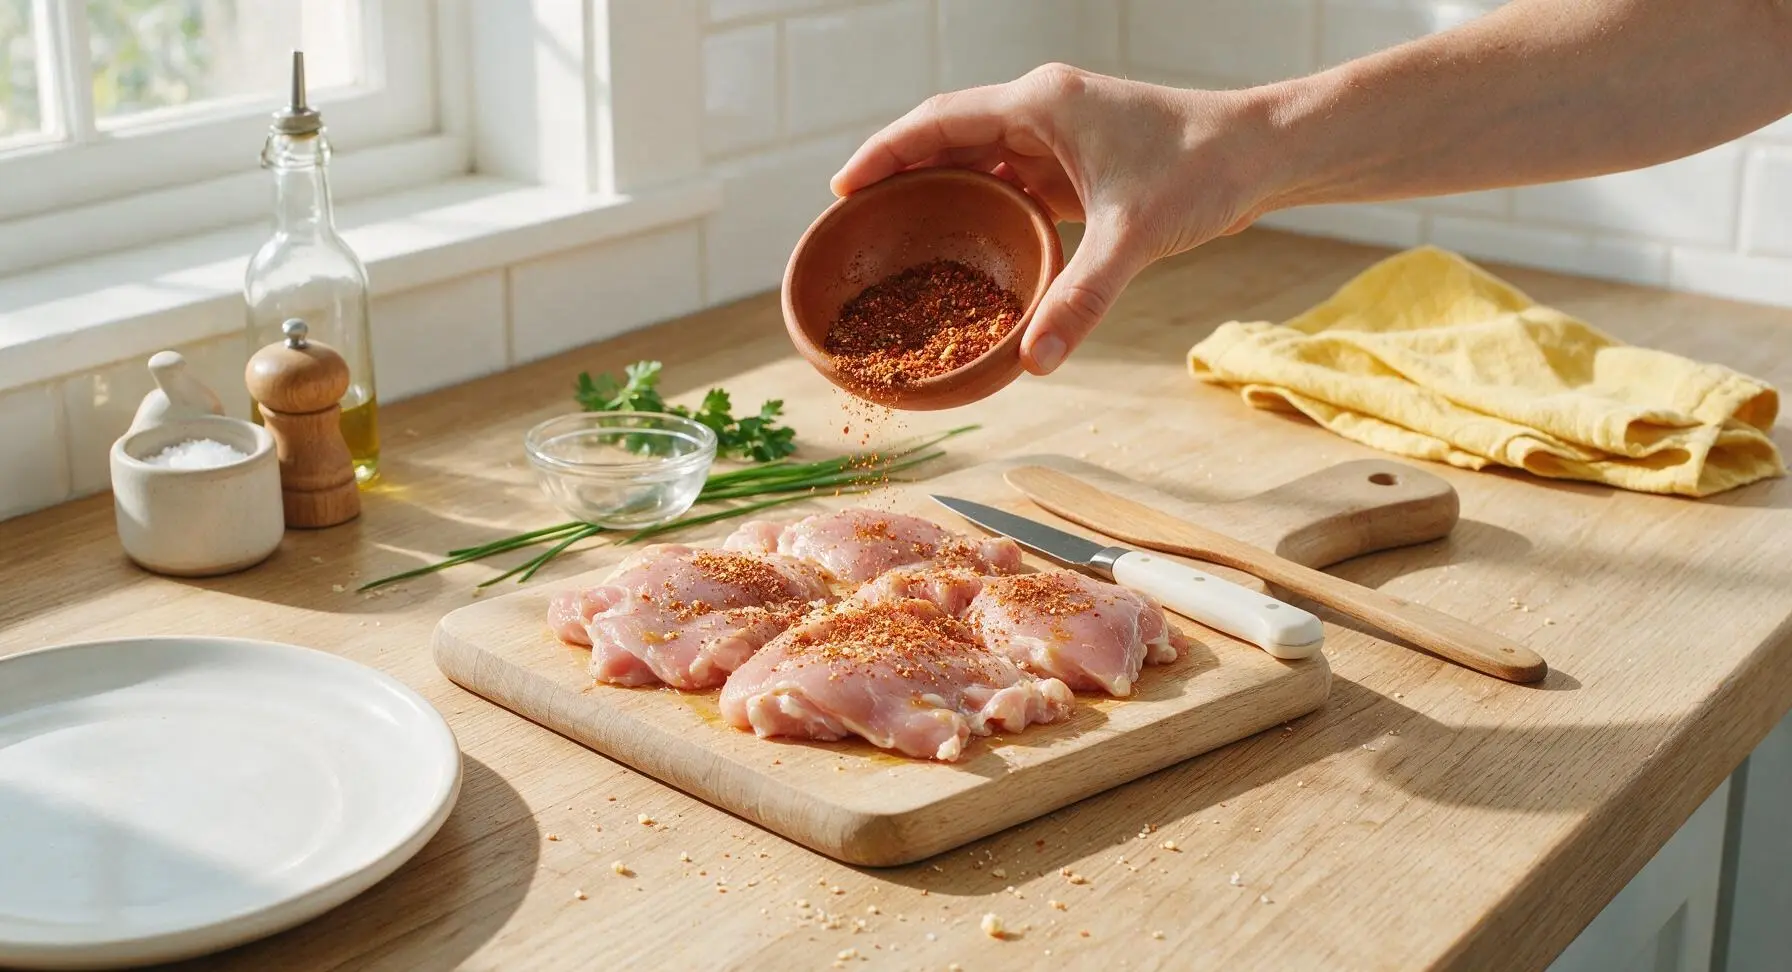
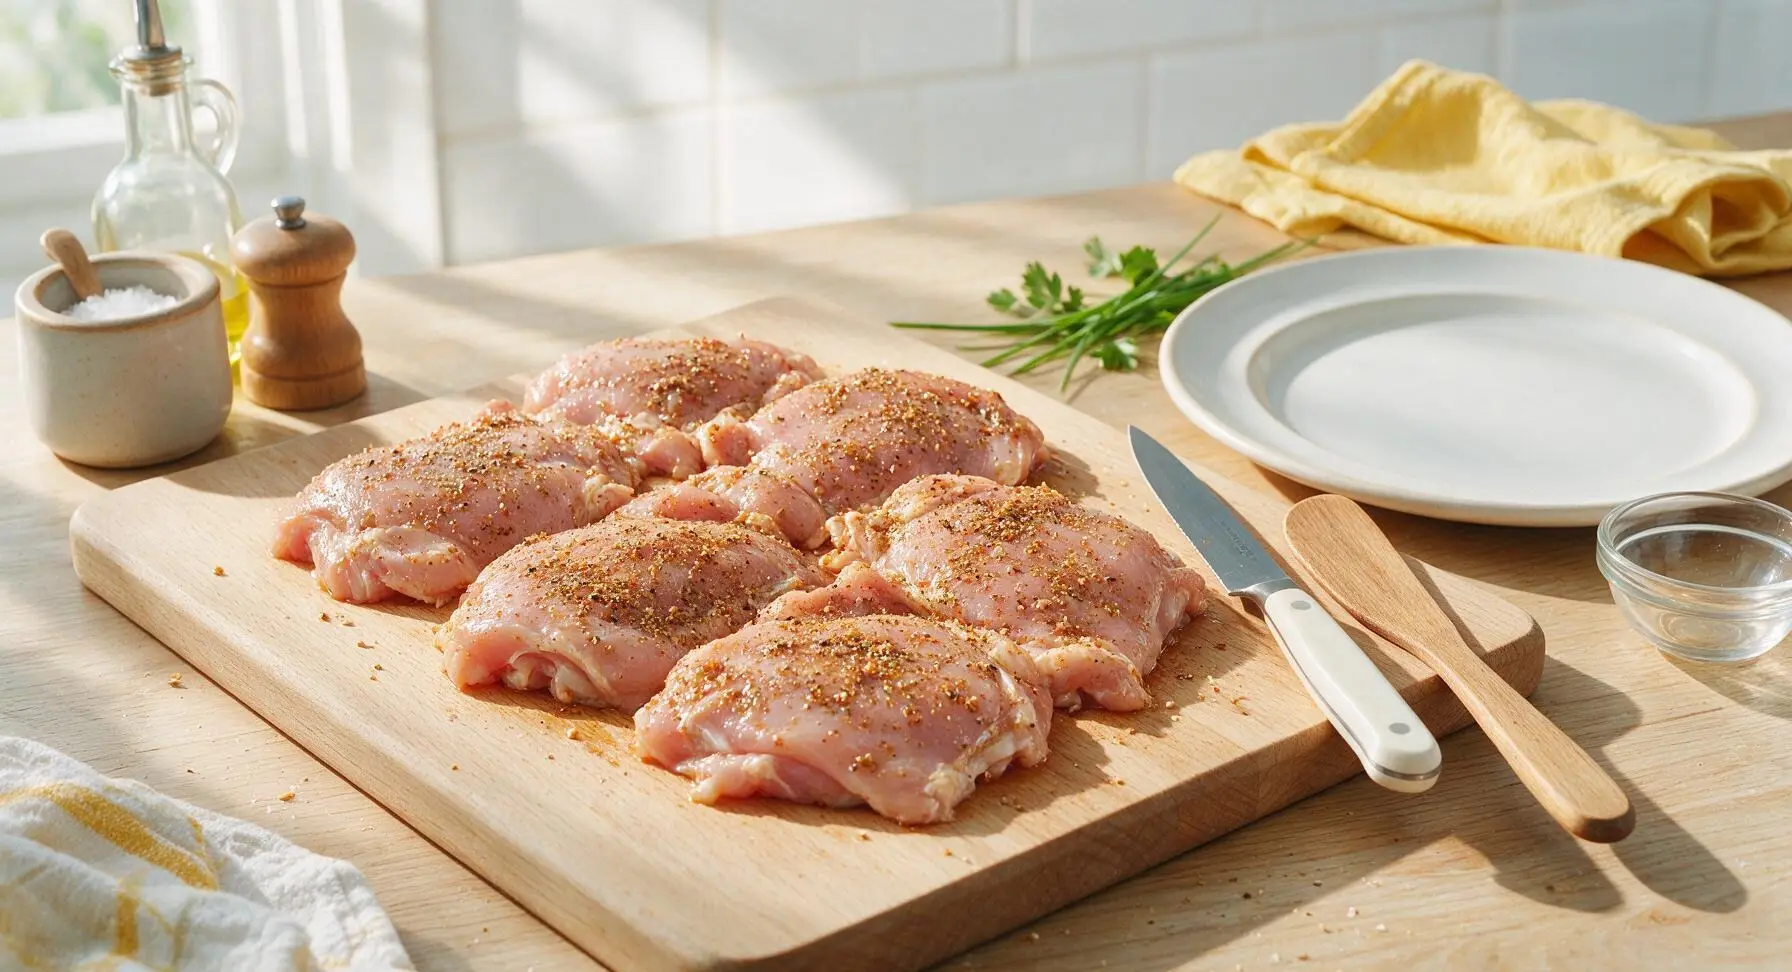
Step 4
step4:Apply Spice Rub
Step 4
step4:Apply Spice Rub
5

Preheat Air Fryer

Slide the basket of the matte black air fryer fully closed, and set the temperature to 400°F (200°C). Preheat for 3 minutes. Preheating ensures the chicken starts cooking immediately on contact with the hot basket, preventing sticking and boosting exterior crispness.
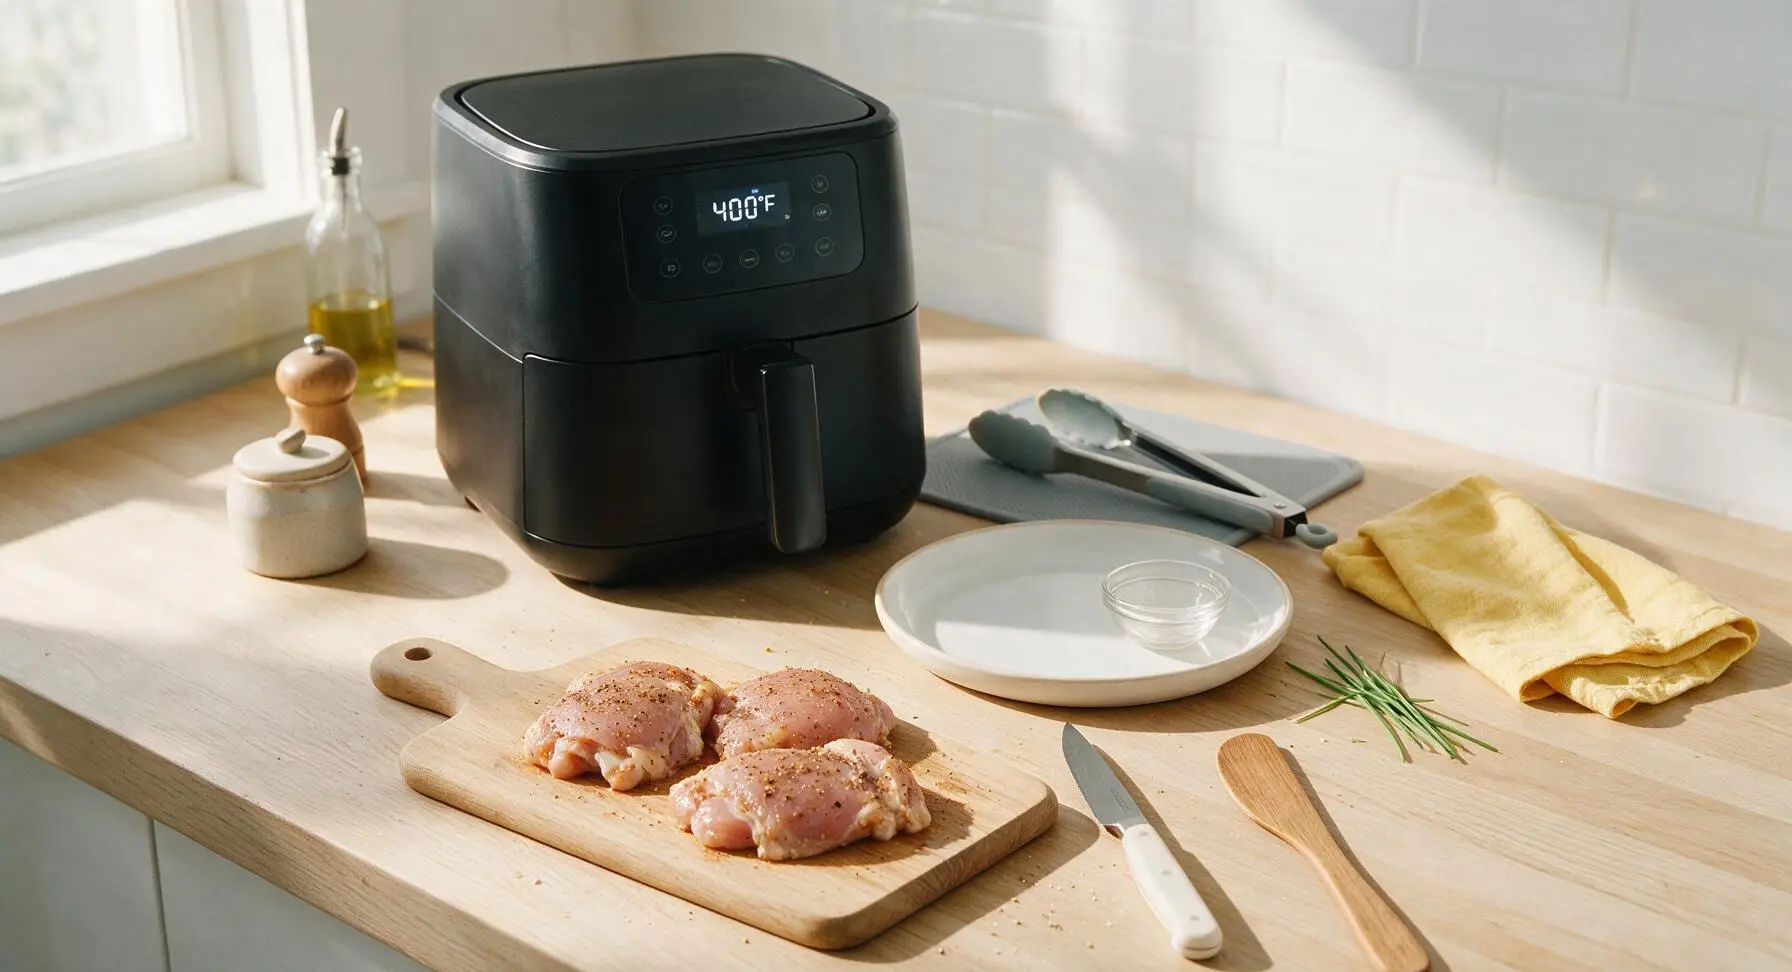
Step 5
step5:Preheat Air Fryer
6

Load Air Fryer Basket

Once preheated, pull the air fryer basket out carefully. Use the silicone-tipped tongs to arrange the seasoned chicken thighs in a single layer in the basket, leaving ½-inch gaps between each piece to allow unobstructed hot air circulation. Do not stack the thighs, as this will cause steaming instead of crisping.
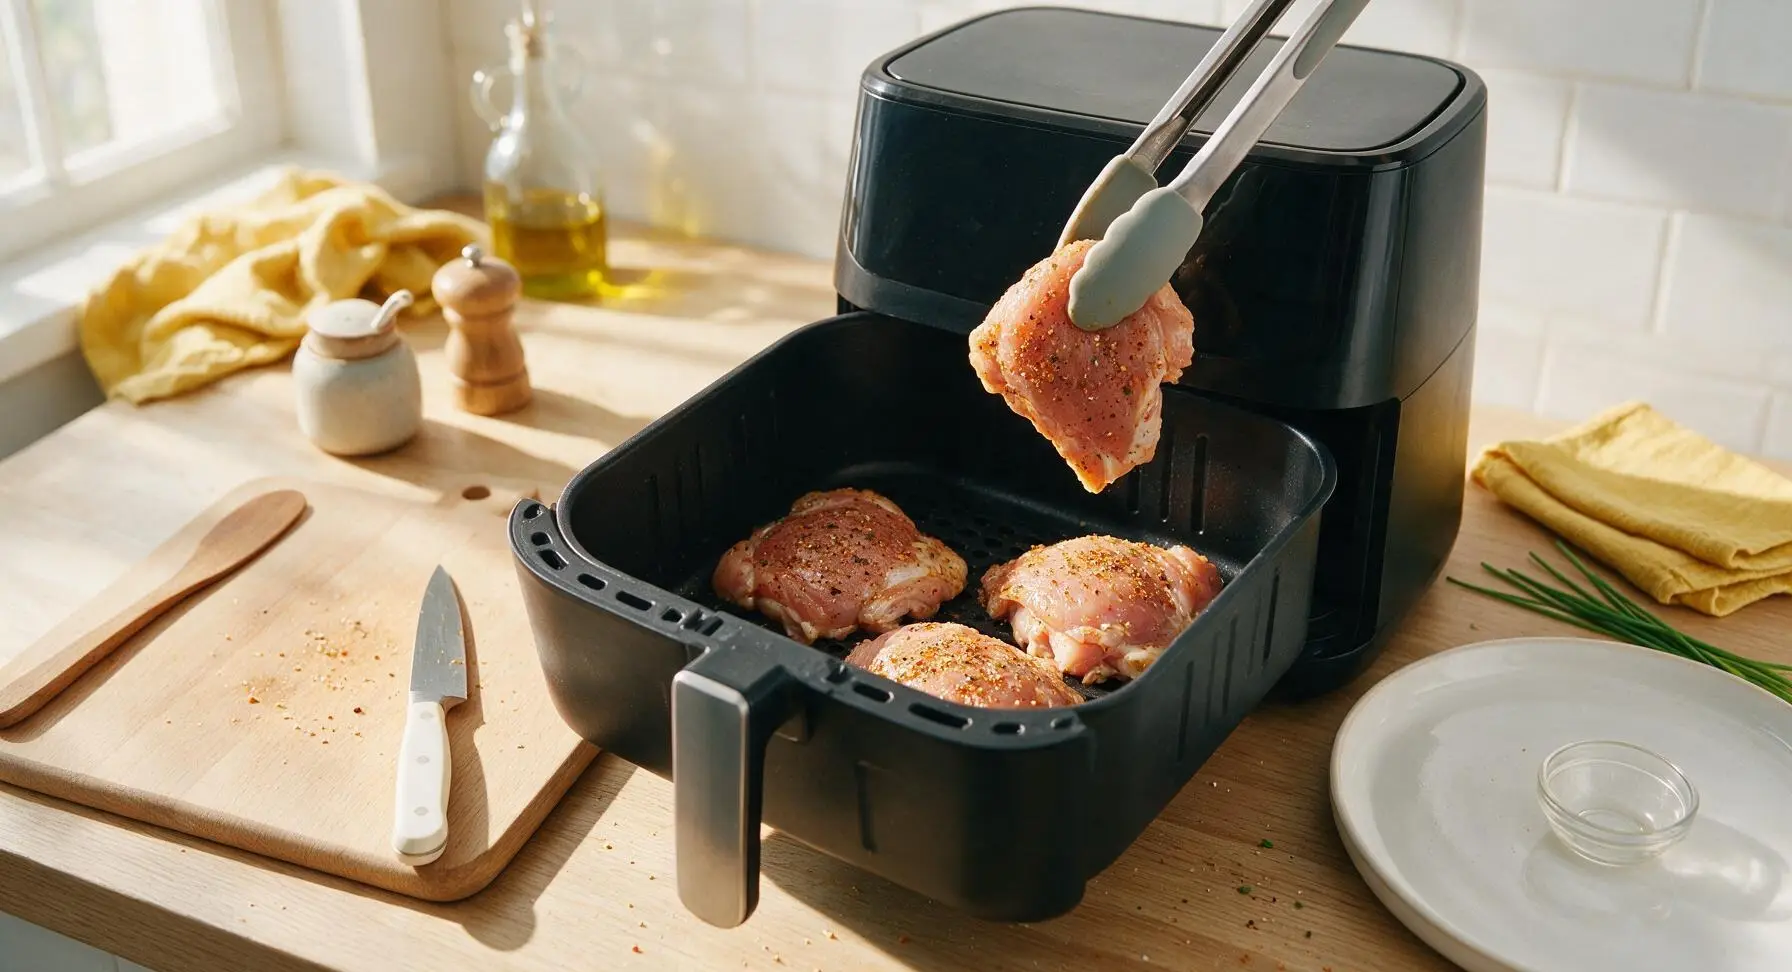
Step 6
step6:Load Air Fryer Basket
7

Air Fry Chicken Thighs

Slide the basket back into the air fryer, and cook at 400°F (200°C) for 15 minutes to reach a total cook time of 18 minutes including preheat. There is no need to flip the thighs if your air fryer has strong top-down air circulation; for models with weaker fans, flip the thighs at the 10-minute mark using the tongs. The chicken is done when it reaches an internal temperature of 165°F (74°C) at the thickest part, and the exterior is deep golden with crisp, slightly browned edges.
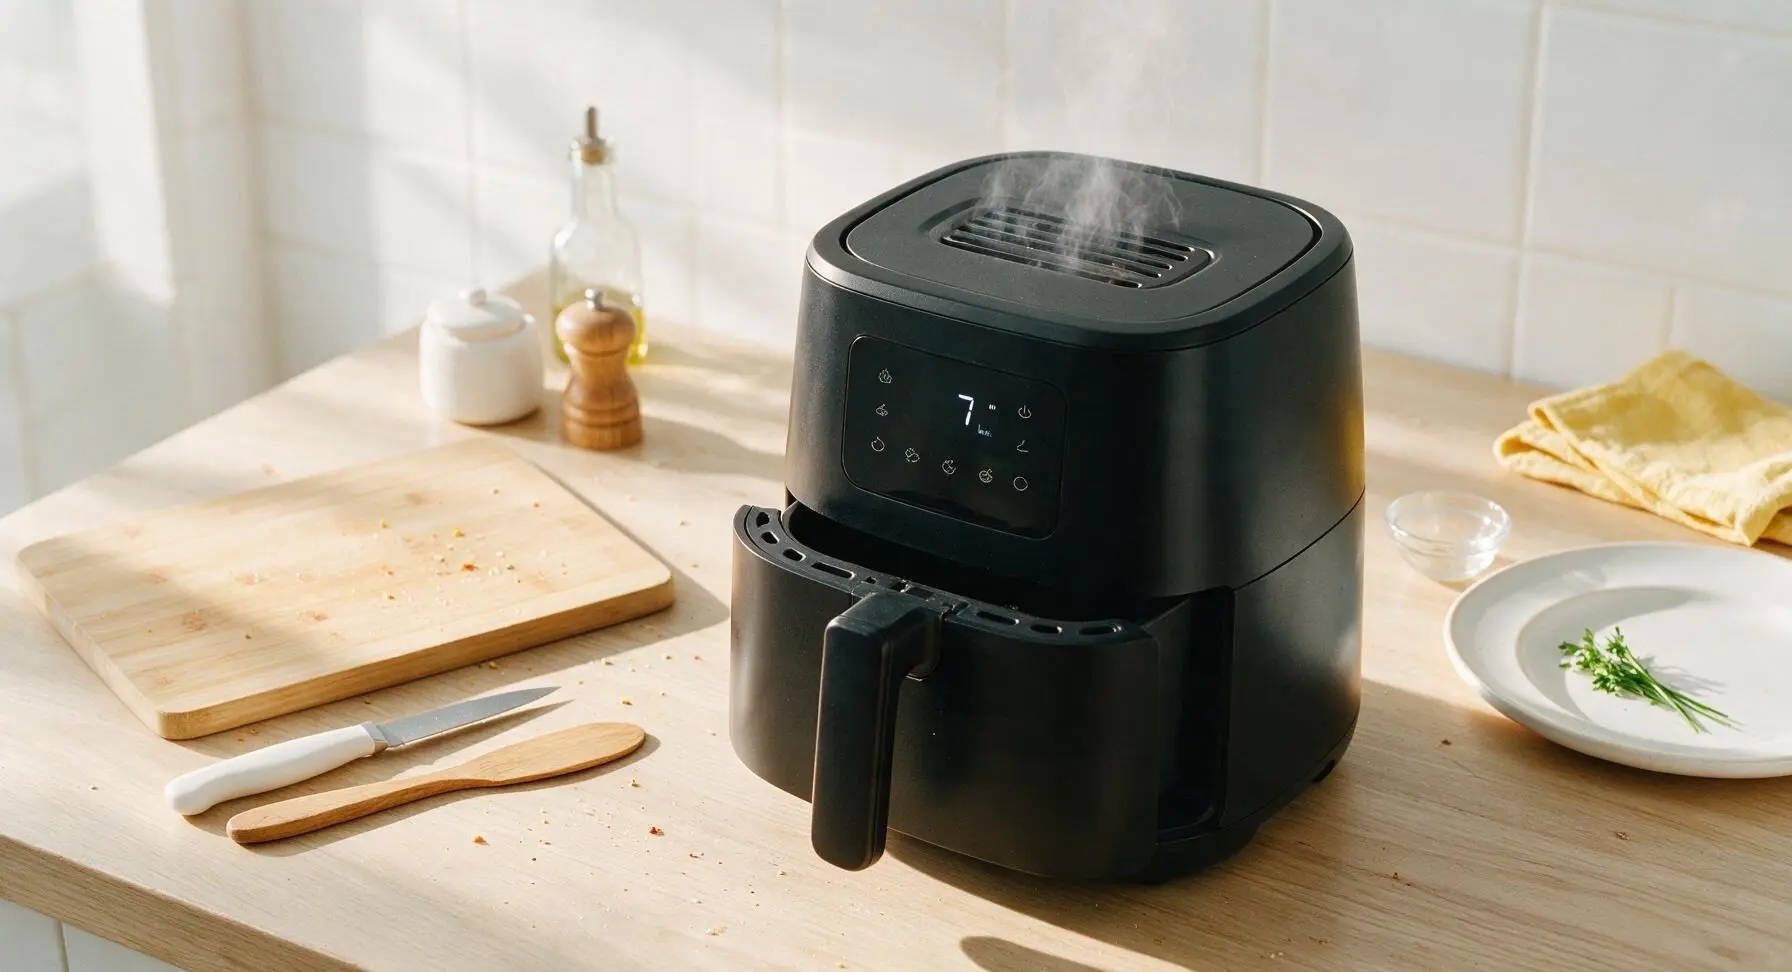
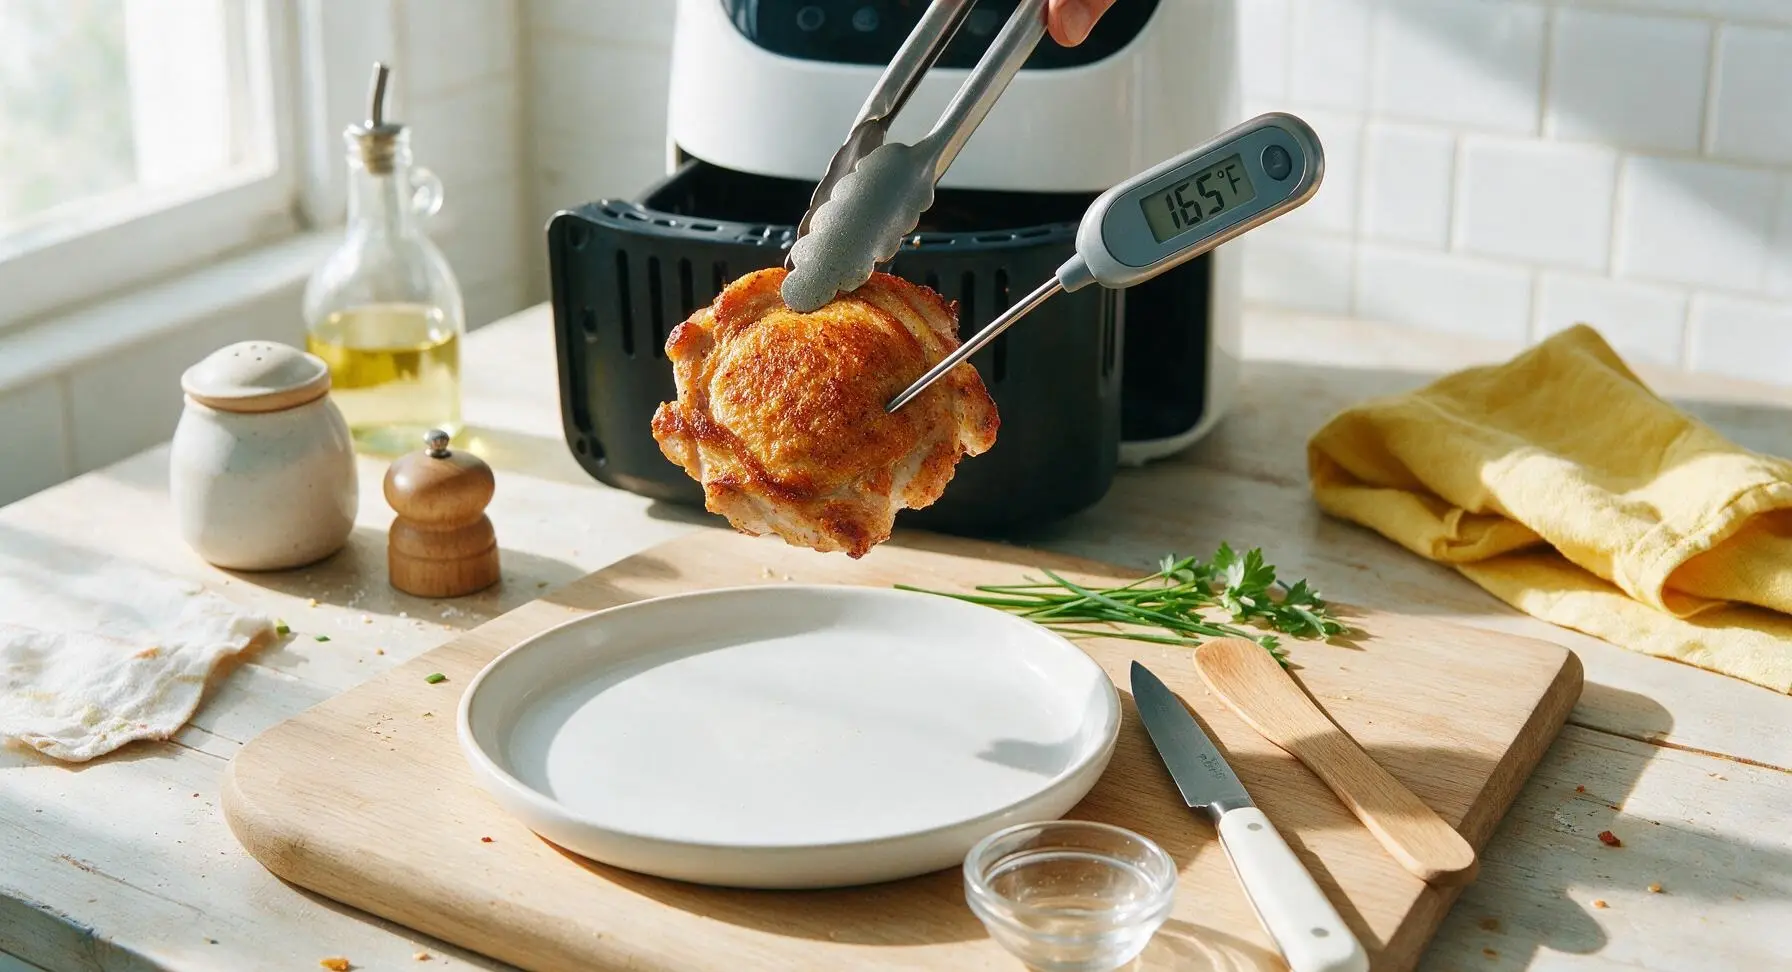
Step 7
step7:Air Fry Chicken Thighs
Step 7
step7:Air Fry Chicken Thighs
8

Rest and Plate Chicken

Use the tongs to transfer the cooked chicken thighs from the air fryer basket to the matte cream stoneware dinner plate. Let the chicken rest for 3 minutes to allow juices to redistribute through the meat, then sprinkle with 1 tablespoon chopped fresh flat-leaf parsley and serve with a lemon wedge on the side.
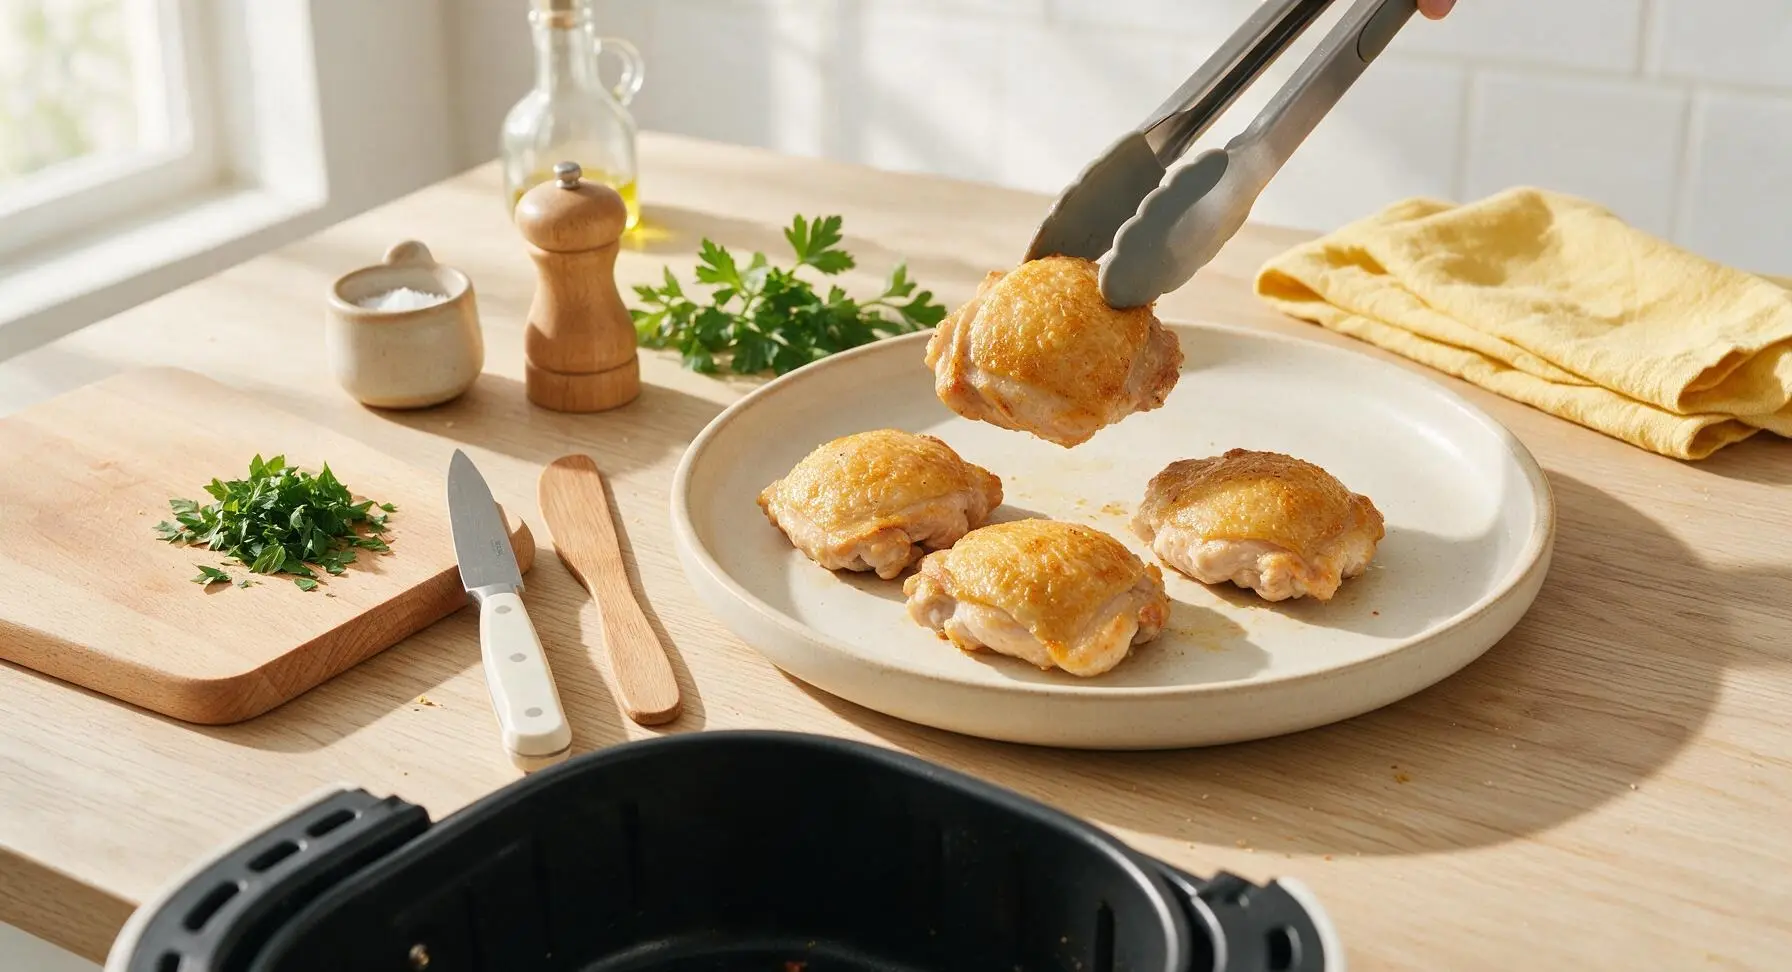
Step 8
step8:Rest and Plate Chicken

Tips

1.Avoid overcrowding the air fryer basket: arrange thighs in a single layer with ½-inch gaps between them to let hot air circulate fully, creating crisp edges instead of soggy, steamed chicken. If cooking for more than 4 people, cook in two batches rather than stacking pieces.
2.Patting chicken completely dry with paper towels is non-negotiable, even for skinless cuts: excess surface moisture will turn to steam in the air fryer, leaving you with a soft, rubbery exterior instead of the satisfying crisp, browned edge this recipe delivers.
3.Always let the chicken rest for 3 full minutes after cooking: cutting into it immediately will cause all the hot, savory juices to run out onto the plate, leaving the meat dry. Resting lets the muscle fibers relax and reabsorb moisture for juicier, more flavorful bites.


✨ You May Also Like

Main Course
🍜 United Kingdom

A showstopping classic of tender seared beef, savory mushroom duxelles, and crisp prosciutto wrapped in flaky golden puff pastry, baked to juicy perfection.

⏱️ 2 hours 1Main Course ★ 4.7
Main Course
🍜 India

Tender charred marinated chicken simmered in a rich, spiced creamy tomato sauce, this iconic Anglo-Indian curry pairs perfectly with basmati rice or warm naan.

⏱️ 50 minuteMain Course ★ 4.6
Main Course
🍜 Thailand

Classic tangy, sweet, and savory Thai stir-fried rice noodles with shrimp, tofu, and crunchy garnishes, balancing all five core Thai flavor profiles.

⏱️ 30 minuteMain Course ★ 4.5
Main Course
🍜 United Kingdom

Crispy golden beer-battered cod and fluffy double-fried chips, served with tangy tartar sauce and malt vinegar: the timeless, beloved British pub comfort classic.

⏱️ 45 minuteMain Course ★ 4.7
Main Course
🍜 Mexico

Smoky, chile-marinated pork tacos with caramelized pineapple, fresh cilantro, and lime: a beloved classic Mexican street food perfect for casual summer gatherings.

⏱️ 1 hour 45Main Course ★ 4.8
Main Course
🍜 United States

Crunchy Fritos corn chips layered with savory beef chili and melted cheddar, topped with cool, zesty fixings for a beloved, cozy Tex-Mex comfort food.

⏱️ 35 minuteMain Course ★ 4.8

chicken thigh air fryer boneless skinless:Frequently Asked Questions

1.Why do my boneless skinless air fryer chicken thighs come out dry? ▾
Dry chicken usually stems from overcooking, overcrowding the basket, or skipping the light oil coating. Always cook to a 165°F internal temp at the thickest point, leave ½ inch of space between thighs, and toss with a thin layer of olive oil to lock in moisture and build crisp edges.
2.What temperature should I set my air fryer for this recipe? ▾
Stick to 400°F for the best balance of juicy interior and crisp, golden edges. This high heat quickly sears the outside of the thighs to trap natural juices, without slowly leaching moisture out the way lower, longer cook times often do. A quick 2-minute preheat is all you need.
3.How long do boneless skinless chicken thighs take to cook in the air fryer? ▾
At 400°F, most standard 4 to 6 ounce boneless skinless thighs take 12 to 15 minutes total, flipping halfway through cook time. Always verify doneness with an instant-read thermometer stuck into the thickest part, aiming for 165°F for food safety without overcooking.
4.Do I need to preheat my air fryer for these chicken thighs? ▾
You don’t need a full 10-minute preheat, but a quick 2-minute preheat helps edges crisp evenly the second the chicken hits the basket. If you skip preheating entirely, just add 2 to 3 minutes to your total cook time and check internal temp a minute early to avoid overcooking.
5.Can I stack chicken thighs in the air fryer basket? ▾
Never stack thighs if you want even cooking and crisp edges—stacking traps steam between pieces, leading to soggy, unevenly cooked chicken. Leave at least ½ inch of space between each thigh, cook in batches for smaller air fryers, and keep finished batches tented with foil to stay warm.
6.Do I really need to use olive oil for this recipe? ▾
That thin layer of olive oil does two key jobs: it helps spices stick evenly to the chicken, and it builds that crisp, golden outer edge instead of a dry, powdery spice coating. If you don’t have olive oil, swap in avocado oil or melted ghee as a high-smoke-point alternative.
7.Can I use chicken breasts instead of thighs for this recipe? ▾
You can swap in boneless skinless chicken breasts, but note that breasts are far leaner and dry out much faster. Cut breasts to 1-inch thick uniform pieces, reduce cook time to 10 to 12 minutes at 400°F, and pull them as soon as they hit 165°F to avoid tough, dry results.
8.How do I get spices to stick to skinless chicken thighs? ▾
First, pat the chicken completely dry with paper towels before adding any oil or spices—surface moisture keeps spices from adhering well. Toss dried thighs with the thin coat of olive oil first, then sprinkle on seasonings and toss again to create an even, clingy spice coating.
9.Can I add other seasonings besides the base smoked paprika, garlic powder, and salt? ▾
Absolutely! That base seasoning blend is totally customizable. Add a pinch of cayenne for heat, dried oregano for herby depth, onion powder, a sprinkle of parmesan for savoriness, or a light dusting of brown sugar for a sweet-smoky crust that caramelizes beautifully.
10.Should I flip the chicken thighs halfway through cooking? ▾
Yes, flipping the thighs at the 6 to 7 minute mark ensures both sides get evenly crisp and cook at the same rate. If you leave them on one side the whole time, the side touching the basket will get overly dark, while the top will stay softer and cook slightly slower.
11.How do I know the chicken is done without a meat thermometer? ▾
While an instant-read thermometer is the most reliable method, you can check doneness by cutting into the thickest part of the largest thigh: juices should run completely clear with no pink tinge, and the meat should be fully opaque with no raw, translucent pink spots in the center.
12.Can I marinate these chicken thighs before air frying? ▾
You can marinate them for 30 minutes up to 4 hours in the fridge for extra flavor—just pat off excess wet marinade before air frying to avoid steaming instead of crisping. Skip heavily sugared marinades, as high air fryer heat will burn sugar quickly before the chicken cooks through.
13.Why are the edges of my chicken thighs coming out burnt? ▾
Burnt edges usually mean your temperature is too high, your seasonings have added sugar that’s caramelizing too fast, or thighs are too close to the air fryer’s top heating element. Stick to 400°F, go light on sugary rubs, and use the lowest rack position if your model has adjustable racks.
14.How do I keep these chicken thighs juicy for meal prep? ▾
To keep meal-prepped thighs juicy, pull them from the air fryer as soon as they hit 165°F, let them cool completely at room temp for 20 minutes, then store in an airtight container in the fridge for up to 4 days. Reheat at 350°F for 3 to 4 minutes in the air fryer to avoid drying them out.
15.I have a small, compact air fryer—how do I adjust the recipe? ▾
For 2 to 3 quart compact air fryers, cook 2 to 3 thighs at a time in batches to avoid overcrowding. You won’t need to adjust the temperature, but smaller thighs may cook 1 to 2 minutes faster, so start checking internal temp at the 10 minute mark to avoid overcooking.
16.Can I use frozen boneless skinless chicken thighs for this recipe? ▾
You can cook frozen thighs without thawing, but adjust cook time to 22 to 25 minutes at 380°F, flipping every 7 minutes, until they hit 165°F internal. Pat off any excess ice frost before cooking, and add oil and seasonings halfway through for the best, crispiest results.
17.What should I serve with these air fryer chicken thighs? ▾
These versatile thighs pair perfectly with quick weeknight sides like roasted veggies, air fryer potato wedges, rice pilaf, green salads, buttered pasta, or coleslaw. You can also slice them up to add to grain bowls, wraps, salads, or tacos for an easy, high-protein meal boost.
18.How can I get crispier chicken thighs if mine turn out soggy? ▾
Soggy thighs usually come from excess surface moisture or overcrowding. For extra crisp, pat thighs completely dry before oiling, spritz with a tiny extra bit of oil right before flipping, and leave space for airflow between pieces. If under-crisped, pop them back for 2 minutes at 400°F.
19.Can I adapt this recipe for bone-in, skin-on chicken thighs? ▾
You can easily adapt this method for bone-in skin-on thighs, but adjust cook time to 18 to 22 minutes at 400°F, flipping halfway, until internal temp hits 165°F. Pat the skin completely dry before seasoning, and finish skin-side up to keep that crispy, golden skin texture.
20.How long can I store leftover cooked chicken thighs? ▾
Store fully cooled leftover thighs in a sealed airtight container in the fridge for up to 4 days, or wrap tightly and freeze for up to 3 months. Thaw frozen leftovers in the fridge overnight before reheating at 350°F in the air fryer for 3 to 4 minutes to retain that juicy, tender texture.

Comments (10)

2 days ago

OMG these came out SO juicy! I was convinced boneless skinless thighs would turn out dry in the air fryer but this recipe is a total game changer. Threw together a quick side of roasted broccoli and it was the perfect weeknight dinner for me and my partner. 10/10 will be making this on repeat for meal prep too!

1 week ago

My kids loved it! I was scrambling last night for something quick to make before soccer practice and this only took 18 minutes total? Are you kidding? No weird ingredients, no fancy steps, even my picky 7 year old asked for seconds. Only note: I added a little extra garlic powder because we are total garlic fiends in this house.

6 days ago

So glad this was a hit for your family on a busy soccer practice night! Extra garlic powder is always a fantastic call — I do that half the time when I’m making these for my own weeknight crew too.

3 days ago

Wait, quick question — do I need to spray the air fryer basket with oil first? I’ve had chicken stick so bad to my basket in the past and I’m tired of scrubbing it for 20 minutes after dinner. Also, can I use frozen thighs for this or do they have to be thawed first?

2 days ago

I gave my basket a super light spritz of olive oil spray before adding the chicken and had zero sticking! I haven’t tried frozen thighs yet but I’d guess you need to add a few minutes of cook time — definitely check the internal temp to be safe, no one wants undercooked chicken.

2 days ago

Great questions! A light spritz of oil on the basket does help prevent sticking, though if your air fryer basket is really well-seasoned you might be fine without it. For frozen boneless skinless thighs, add 7-9 minutes of cook time and make sure the internal temp hits 165°F before serving!

5 days ago

Made these for a potluck last weekend and people were begging me for the recipe! I cubed them up after cooking and tossed them in a little buffalo sauce to serve on sliders, and they were the first thing gone from the table. So easy to scale up for a crowd too, I did two batches in my 6 quart air fryer and it was no sweat.

2 weeks ago

These are perfect for my high protein meal prep! I make a batch every Sunday to throw in salads, wraps, and grain bowls all week. Only thing is my first batch came out a little less juicy than I hoped — I think I overcrowded the basket, oops. Second batch I did in a single layer and it was chef’s kiss.

1 week ago

That’s such a perfect meal prep use for these! You’re totally right about not overcrowding the basket — good air circulation is key to getting that juicy interior and nice subtle crisp on the outside. So glad your second batch turned out chef’s kiss!

yesterday

Y’all, I cannot believe how simple and flavorful this is! I’ve been buying the pre-marinated chicken thighs from the grocery store for ages but this dry rub is so much better, no weird added sugars or preservatives. I used smoked paprika instead of regular and it gave the best little smoky kick.

12 hours ago

The smoked paprika swap sounds insane! Do you think this same rub would work on bone-in thighs too, or would I have to adjust the cook time a ton?

10 hours ago

Love the smoked paprika swap — that’s one of my all-time favorite variations for this recipe! For bone-in thighs, just add 5-7 minutes of cook time and confirm the internal temp is 165°F, the rub works absolutely perfectly for them too.

30 minutes ago

Made these in my tiny air fryer in my RV last night and they turned out perfect! No fancy equipment needed, just a quick mix of spices and 18 minutes, zero cleanup hassle. Way better than the sad frozen chicken patties I used to eat on road trips. Will be a staple on all my camping trips from now on.

5 minutes ago

Okay I’ll admit it, I used to think air fryer chicken was always dry and rubbery. My roommate made this recipe last night and I was shocked how juicy it was! I ate two thighs straight off the rack before we even got the sides on the plate. Who knew? I’m definitely making this for my date night this weekend, hope I don’t mess it up lmao.

just now

You’ve so got this! I made this for my anniversary dinner last month and my partner thought I slaved over it for hours, it’s so low-effort but tastes totally fancy. Pro tip: squeeze a little fresh lemon over the top right when it comes out of the air fryer, it elevates it so much!

2 hours ago

Wait has anyone tried marinating these for a few hours before cooking? I usually marinate my chicken thighs in a little soy sauce and honey, would that mess up the air fryer cook time? I don’t want the honey to burn before the chicken is done.

1 hour ago

I marinated mine in teriyaki (which has honey and soy!) for 2 hours last week and it turned out perfect! I just blotted the excess marinade off a little before putting them in the basket so it didn’t drip and burn, cooked for the full 18 minutes with no issues.

45 minutes ago

Marinating is such a fun way to switch up the flavor! As Sara mentioned, just pat off any excess wet marinade before cooking to prevent burning or excess smoke, and you won’t need to adjust the cook time at all. Honey garlic is one of my go-to marinade swaps for this recipe too!

just now

This is so perfect for my tiny college dorm air fryer! Super cheap ingredients, no fancy skills needed, way better than dropping $15 on takeout every night. I seasoned mine with a little cajun seasoning instead of the base rub because that’s all I had in my dorm pantry and it slapped.

just now

Love the cajun seasoning swap! This recipe is super flexible, so whatever seasonings you have hanging around in your pantry will work great. So stoked this is helping you skip the takeout and make easy, tasty meals in your dorm — that’s exactly what easy, approachable recipes are for!



